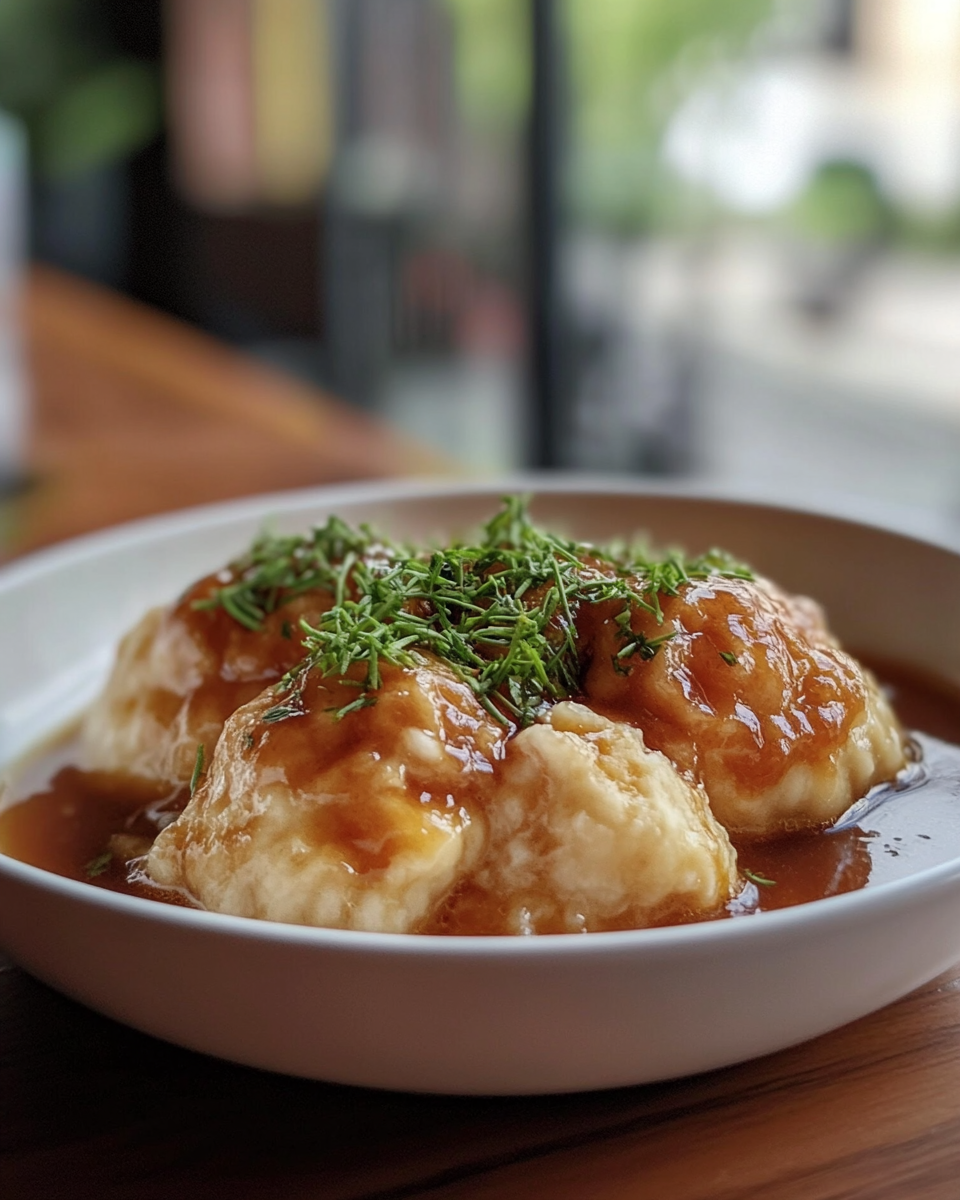
Homemade Chicken and Dumplings: A Comfort Food Classic

Homemade chicken and dumplings, creamy chicken dumpling soup, Southern comfort food, easy chicken and dumplings, one-pot chicken recipes

Chicken and Dumplings: A Timeless Comfort Food Classic

Chicken and Dumplings is a beloved dish that has stood the test of time, known for its hearty, creamy texture and tender dumplings. Perfect for cold evenings or family gatherings, this dish is the epitome of comfort food.


Why Chicken and Dumplings Are the Ultimate Comfort Dish

Chicken and dumplings are more than a meal—they’re a tradition passed down through generations. The dish’s creamy base, tender chicken, and fluffy dumplings provide warmth and nostalgia in every bite.

For expert tips on crafting chicken dishes, explore The Art of Dumpling Making for guidance on creating tender, flavorful dumplings.


Ingredients for Chicken and Dumplings

Core Ingredients:

  • Chicken: Bone-in or boneless chicken thighs for rich flavor.
  • Dumplings: Made with flour, baking powder, and milk for a light texture.
  • Vegetables: Carrots, celery, and onions as aromatic and textural complements.
  • Chicken Broth: Homemade or store-bought for the soup base.
  • Cream: Optional for added richness.

Optional Add-ins:

  • Garlic or thyme for depth of flavor.
  • Parsley for a fresh garnish.

For the perfect broth, see Homemade Chicken Stock Guide for tips on building flavor from scratch.


How to Make Chicken and Dumplings

Ingredients:

  • 1 pound chicken thighs
  • 2 cups chicken broth
  • 1 cup diced carrots
  • 1 cup diced celery
  • 1 onion, chopped
  • 1 cup flour
  • 1 teaspoon baking powder
  • ½ cup milk

Instructions:

  1. Prepare the Chicken: Cook chicken in a large pot until tender. Shred and set aside.
  2. Sauté Vegetables: In the same pot, sauté onions, carrots, and celery until softened.
  3. Make the Broth: Add chicken broth and bring to a simmer.
  4. Prepare Dumplings: Combine flour, baking powder, and milk to form a soft dough.
  5. Cook the Dumplings: Drop spoonfuls of dough into the simmering broth. Cover and cook until dumplings are fluffy.
  6. Combine and Serve: Stir shredded chicken back into the pot. Adjust seasoning to taste.

For gluten-free dumpling options, explore Gluten-Free Dumpling Alternatives.


Creative Variations of Chicken and Dumplings

1. Low-Carb Chicken and Dumplings

  • Use cauliflower gnocchi or almond flour dumplings for a keto-friendly twist.

2. Vegetarian Dumpling Soup

  • Substitute chicken with jackfruit or tofu, and use vegetable broth for a plant-based alternative.

3. Spicy Chicken and Dumplings

  • Add diced jalapeños or a pinch of cayenne to the broth for a spicy kick.

Serving and Storage Tips

  • Pairing Suggestions: Serve with cornbread or a side of roasted green beans.
  • Storage Tips: Store in an airtight container for up to three days. Reheat gently to preserve texture.
  • Freezing Instructions: Freeze without dumplings for up to three months. Add fresh dumplings when reheating.

FAQs About Chicken and Dumplings

What type of chicken works best?

Chicken thighs provide the most flavor and tenderness, but chicken breasts are a leaner option.

Can I make chicken and dumplings ahead of time?

Yes, prepare the broth and chicken in advance, then add dumplings fresh before serving.

How do I keep dumplings from falling apart?

Ensure the broth is simmering (not boiling) when adding dumplings, and do not stir excessively.

Are there dairy-free options for creamy chicken and dumplings?

Use coconut milk or almond milk instead of cream for a dairy-free alternative.

How long does chicken and dumplings last in the fridge?

Properly stored, it can last up to three days.


Suggested Internal Links for Enhanced Navigation


Conclusion

Chicken and Dumplings are a testament to the power of simple, wholesome ingredients coming together to create something extraordinary. Whether you stick to tradition or add a modern twist, this dish is guaranteed to bring warmth and comfort to your table.
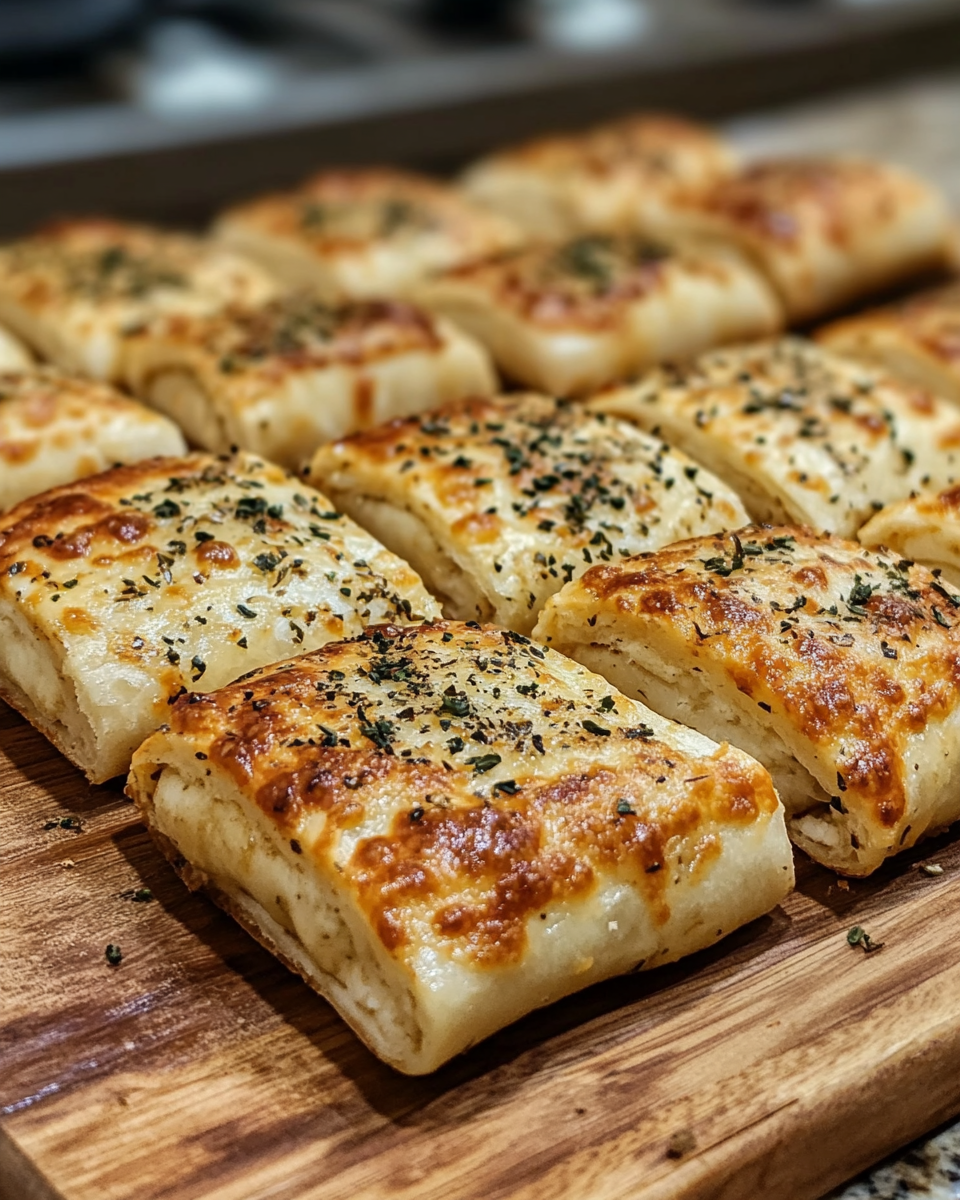
Easy Ranch Roll Ups: A Quick and Delicious Party Appetizer

Cream cheese roll ups, tortilla wrap appetizers, easy ranch wraps, party roll up snacks, quick appetizer recipes

Ranch Roll Ups: A Quick and Delicious Appetizer for Any Occasion

Ranch Roll Ups are a crowd-pleasing snack or appetizer perfect for parties, potlucks, or family gatherings. These easy-to-make roll-ups combine creamy ranch flavors with a variety of customizable fillings, all wrapped in a soft tortilla.


Why Ranch Roll Ups Are the Ideal Appetizer

Ranch Roll Ups are loved for their convenience, versatility, and taste. Whether you’re preparing a quick snack or planning for a special event, these roll-ups can be customized to suit your preferences. They’re also great as a make-ahead option, staying fresh and flavorful in the fridge.

For tips on creative tortilla recipes, check out Tortilla Wrap Ideas, which offers exciting ways to elevate your wraps.


Ingredients for Ranch Roll Ups

Core Ingredients:

  • Flour Tortillas: Soft and pliable, perfect for wrapping.
  • Cream Cheese: The creamy base for the filling.
  • Ranch Seasoning Mix: Adds the signature ranch flavor.

Optional Add-Ins:

  • Shredded cheddar cheese for extra richness.
  • Diced vegetables like bell peppers, carrots, or cucumbers.
  • Proteins like grilled chicken, turkey, or ham for a heartier version.

For additional inspiration, explore Homemade Ranch Mix Guide to learn how to make your seasoning mix from scratch.


How to Make Ranch Roll Ups

Ingredients:

  • 4 large flour tortillas
  • 8 ounces cream cheese, softened
  • 1 packet ranch seasoning mix
  • Optional fillings: diced vegetables, shredded cheese, deli meats

Instructions:

  1. Prepare the Filling: In a bowl, mix softened cream cheese with ranch seasoning until smooth.
  2. Add Fillings: Spread the mixture evenly over each tortilla. Layer with optional ingredients like veggies or meats.
  3. Roll and Chill: Roll up the tortillas tightly and wrap in plastic wrap. Chill for at least 1 hour.
  4. Slice and Serve: Cut into bite-sized pieces and arrange on a platter.

For storage tips, visit Storing Appetizers for Freshness, which provides techniques for maintaining flavor and texture.


Creative Variations for Ranch Roll Ups

Vegetarian Ranch Roll Ups:

  • Substitute meats with spinach, roasted red peppers, and shredded carrots for a vibrant, plant-based option.

Spicy Ranch Roll Ups:

  • Add diced jalapeños or a splash of hot sauce to the cream cheese mixture for a spicy kick.

Protein-Packed Roll Ups:

  • Include grilled chicken strips, turkey slices, or crumbled bacon for a protein-rich snack.

Serving Suggestions

  • Dipping Options: Serve with additional ranch dressing, salsa, or sour cream.
  • Presentation: Arrange roll-ups in a circular pattern on a platter, garnished with parsley for added color.
  • On-the-Go Snacks: Pack in a sealed container for lunchboxes or picnics.

FAQs About Ranch Roll Ups

Can Ranch Roll Ups be made ahead of time?

Yes, they can be prepared up to 24 hours in advance. Store in the fridge, wrapped in plastic wrap, to maintain freshness.

What is the best tortilla for roll-ups?

Soft flour tortillas are the most pliable and easiest to roll without cracking.

How do I prevent my roll-ups from getting soggy?

Ensure any added vegetables are patted dry before assembling.

Are there gluten-free options?

Yes, use gluten-free tortillas to make these roll-ups suitable for those with dietary restrictions.

Can I freeze Ranch Roll Ups?

It’s not recommended, as the texture of the cream cheese filling may change after freezing.


Suggested Internal Links


Conclusion

Ranch Roll Ups are a versatile and delicious addition to any meal plan. With their customizable fillings and irresistible ranch flavor, they’re sure to be a hit with both kids and adults. Whether you’re hosting a party, preparing a snack, or looking for a quick lunch idea, these roll-ups are an easy and satisfying choice.

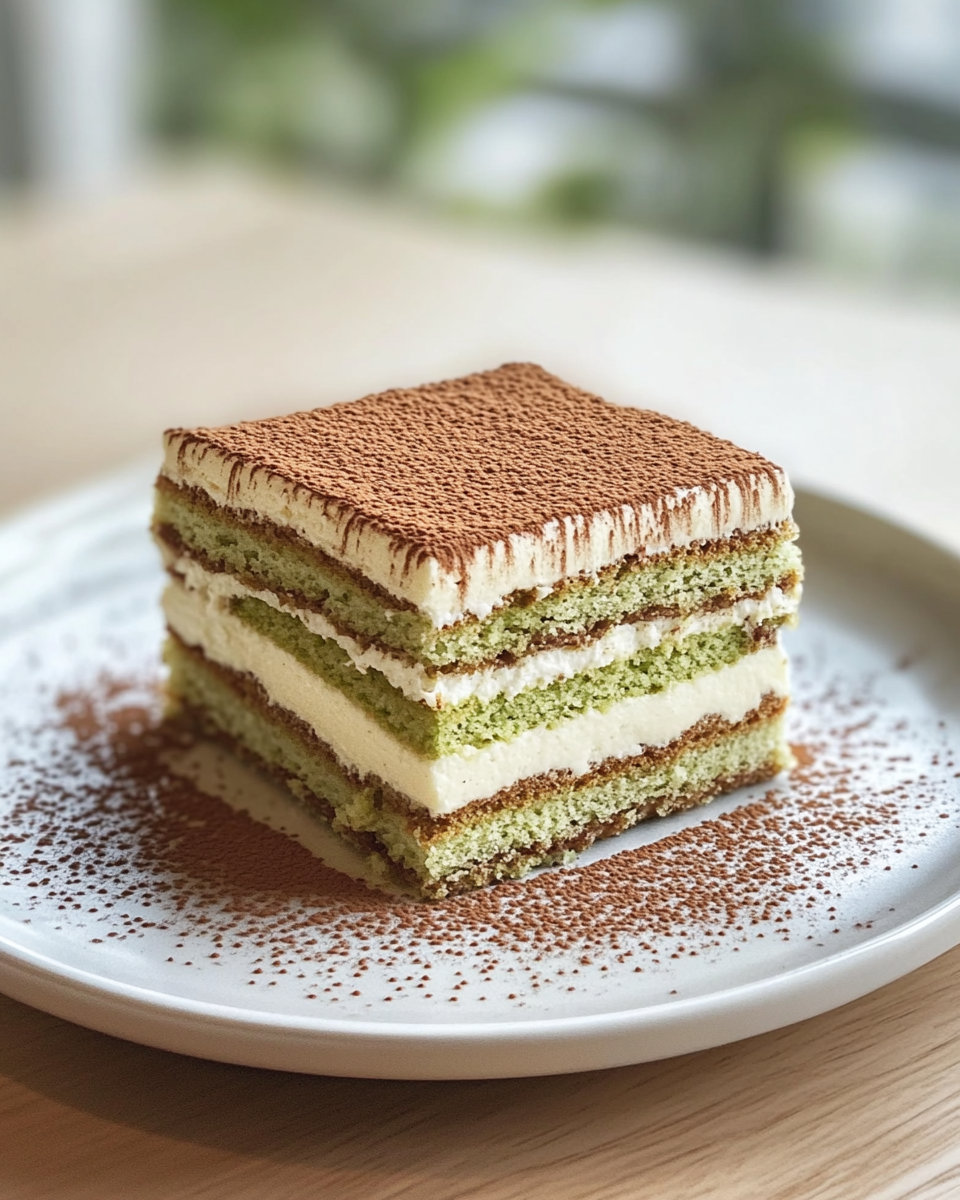
Matcha Tiramisu Delight: A Perfect Fusion of Japanese and Italian Flavors

Green tea tiramisu, matcha dessert recipe, Japanese tiramisu, creamy matcha tiramisu, matcha-infused tiramisu

Matcha Tiramisu Delight: The Perfect Fusion of Flavors

Matcha Tiramisu Delight is a sophisticated twist on a classic Italian dessert, blending the vibrant flavors of matcha with the creamy richness of tiramisu. This fusion dessert has captivated the hearts of tea enthusiasts and dessert lovers alike.


Why Matcha Tiramisu is the Perfect Dessert Fusion

The rich, earthy flavor of matcha pairs beautifully with the creamy mascarpone layers of tiramisu. This dessert not only delivers a unique taste but also boasts a visually striking appearance with its bright green hues.

For a deeper dive into matcha as an ingredient, explore Understanding Matcha Grades for Desserts, where you’ll learn how to choose the best matcha for recipes.


Ingredients for Matcha Tiramisu Delight

Core Ingredients:

  • Matcha Powder: High-quality ceremonial grade for vibrant color and taste.
  • Mascarpone Cheese: Essential for the creamy layers.
  • Ladyfingers: Soaked in a matcha mixture for texture.
  • Egg Yolks and Sugar: For the classic tiramisu cream.

Optional Add-ins:

  • Vanilla extract for enhanced flavor.
  • A touch of liqueur like sake or rum for depth.

For more inspiration on dessert layering techniques, check out Tiramisu Layering Techniques.


How to Make Matcha Tiramisu

Ingredients:

  • 2 tablespoons matcha powder
  • 1 cup hot water (for matcha soak)
  • 12 ladyfingers
  • 4 egg yolks
  • ½ cup sugar
  • 8 ounces mascarpone cheese
  • 1 cup heavy cream

Instructions:

  1. Prepare Matcha Mixture: Whisk matcha powder with hot water to form a smooth liquid. Allow to cool.
  2. Make Cream Layers: Beat egg yolks with sugar until pale. Fold in mascarpone cheese and whipped heavy cream.
  3. Assemble the Layers: Dip ladyfingers in matcha mixture and layer with cream in a dish. Repeat until full.
  4. Dust with Matcha: Finish with a generous dusting of matcha powder on top.
  5. Chill and Serve: Refrigerate for at least 4 hours before serving.

Creative Variations of Matcha Tiramisu

  • Vegan Matcha Tiramisu: Use plant-based mascarpone and whipped coconut cream.
  • Low-Sugar Version: Substitute sugar with a low-calorie sweetener like stevia.
  • Matcha Berry Tiramisu: Add a layer of fresh strawberries or raspberries for a fruity twist.

Explore creative dessert fusions like these in Creative Ways to Use Matcha in Baking.


Serving and Storage Tips

  • Garnish Ideas: Top with white chocolate shavings or edible flowers for an elegant presentation.
  • Pairing Suggestions: Serve with green tea or sake for a harmonious flavor experience.
  • Storage Tips: Keep refrigerated for up to 3 days to maintain freshness.

FAQs About Matcha Tiramisu Delight

Can I use culinary-grade matcha for tiramisu?

While possible, ceremonial-grade matcha ensures better flavor and color.

How long does it take to prepare matcha tiramisu?

Preparation takes about 30 minutes, plus 4 hours of chilling time.

Can I freeze matcha tiramisu?

Yes, but it’s best enjoyed fresh to preserve the creamy texture.

What can I use as a substitute for mascarpone?

Cream cheese or a mix of cream and ricotta can work in a pinch.

How do I prevent matcha from clumping in the cream?

Sift the matcha powder before mixing, and use a whisk to ensure smooth incorporation.


Suggested Internal Links for Enhanced Navigation


Conclusion

Matcha Tiramisu Delight is a modern fusion that marries the elegance of matcha with the creamy decadence of tiramisu. Whether you’re serving it at a dinner party or indulging in a personal treat, this dessert is sure to impress with its unique flavor and striking presentation.

Crispy Funnel Cake Sticks: A Sweet Carnival Treat Made at Home

Funnel cake recipe, homemade funnel cake sticks, crispy carnival desserts, fried dessert sticks, fairground treats at home

Crispy Funnel Cake Sticks: A Fun and Sweet Carnival Treat

Crispy Funnel Cake Sticks bring the joy of carnival snacks into the comfort of your home. These crunchy, sweet treats are perfect for dipping and sharing, making them a hit at parties, fairs, or casual family gatherings.


Why Funnel Cake Sticks Are Perfect for Any Occasion

Funnel cake sticks are a twist on the traditional funnel cake, offering a portable and shareable version of the fairground classic. The smaller size ensures an even crispiness, perfect for dipping into chocolate, caramel, or fruit sauces.

For tips on creating perfect fried desserts, visit Best Tips for Frying Desserts. This guide covers techniques for achieving the ideal crisp texture.


Ingredients for Crispy Funnel Cake Sticks

Core Ingredients:

  • All-Purpose Flour: The foundation of the batter.
  • Milk: Adds richness and helps bind the ingredients.
  • Eggs: Provides structure and fluffiness.
  • Baking Powder: Ensures the sticks puff up perfectly.
  • Sugar: Adds sweetness to the batter.

Optional Add-Ins:

  • Vanilla extract for extra flavor.
  • A pinch of cinnamon for a spiced twist.

Check out our recipe for County Fair Funnel Cakes for more batter inspiration.


How to Make Funnel Cake Sticks

Ingredients:

  • 1 ½ cups all-purpose flour
  • 1 teaspoon baking powder
  • 2 tablespoons sugar
  • 1 cup milk
  • 1 large egg
  • Oil for frying

Instructions:

  1. Prepare the Batter: In a mixing bowl, whisk together the dry ingredients. In a separate bowl, mix the wet ingredients, then combine.
  2. Heat the Oil: Heat oil in a deep pan to 375°F.
  3. Pipe the Sticks: Transfer batter to a piping bag with a round tip. Pipe sticks directly into the hot oil.
  4. Fry to Perfection: Fry until golden brown, about 2-3 minutes per side.
  5. Dust and Serve: Remove and drain on paper towels. Dust with powdered sugar before serving.

For more frying tips, explore Recreating Carnival Treats.


Creative Variations

Sweet Options:

  • Chocolate-Dipped Funnel Cake Sticks: Dip in melted chocolate and sprinkle with crushed nuts.
  • Cinnamon-Sugar Coating: Toss the sticks in a mixture of cinnamon and sugar immediately after frying.

Savory Options:

  • Cheddar and Herb Sticks: Add grated cheese and herbs to the batter for a savory twist.
  • Spicy Sticks: Sprinkle with chili powder and serve with a spicy dipping sauce.

For more innovative dessert ideas, see Ultimate Dessert Dipping Sauces.


Serving and Storage Tips

  • Pairing Ideas: Serve with chocolate sauce, caramel, or fruit dips.
  • Presentation: Arrange sticks in a tall glass or basket for easy grabbing.
  • Storage: Store leftovers in an airtight container. Reheat in an oven for a crisp texture.

FAQs About Funnel Cake Sticks

Can I bake funnel cake sticks instead of frying?

Yes, pipe the batter onto a parchment-lined baking sheet and bake at 400°F for 10-12 minutes.

How do I keep funnel cake sticks crispy?

Serve immediately or keep them warm in an oven at 200°F until ready to eat.

Can I freeze funnel cake sticks?

Yes, freeze in an airtight container and reheat in an oven or air fryer.

What oil is best for frying?

Neutral oils like vegetable or canola oil are ideal for frying.

Are there gluten-free options for funnel cake sticks?

Yes, substitute all-purpose flour with gluten-free flour blends.


Suggested Internal Links for Enhanced Navigation


Conclusion

Crispy Funnel Cake Sticks are a delightful way to enjoy a fairground classic at home. Whether sweetened with powdered sugar or dipped in chocolate, these sticks are sure to be a hit with kids and adults alike. Experiment with flavors, pair them with creative dips, and savor this simple yet indulgent treat.

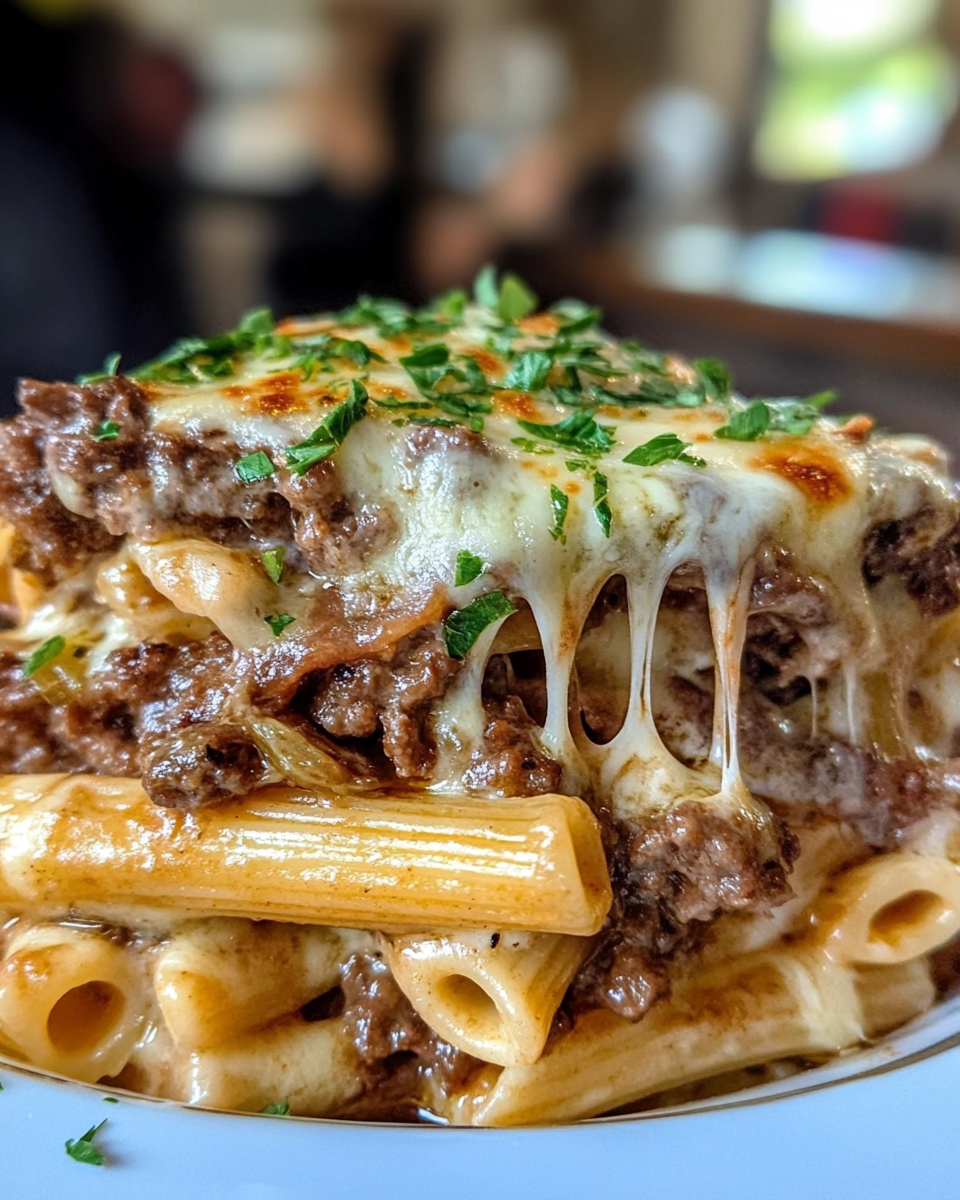
Philly Cheesesteak Pasta: A Creamy, Cheesy Comfort Food Delight

Cheesesteak pasta recipe, creamy Philly pasta, beef and cheese pasta, cheesy steak pasta, comfort food pasta recipe

Philly Cheesesteak Pasta: A Comforting Fusion of Flavors

Philly Cheesesteak Pasta combines the savory essence of the iconic sandwich with the comfort of creamy pasta. This hearty dish is perfect for weeknight dinners or potluck gatherings, delivering a rich medley of beef, peppers, onions, and melted cheese.


Why You’ll Love Philly Cheesesteak Pasta

This dish brings together the best of two worlds: the bold flavors of Philly cheesesteak and the satisfying comfort of pasta. Its creamy, cheesy sauce coats every bite, while tender beef and sautéed vegetables add depth.

For more inspiration on fusion dishes, check out Slow Cooker Magic: Crockpot Baked Ziti, a unique twist on classic pasta recipes.


Ingredients for Philly Cheesesteak Pasta

Core Ingredients:

  • Beef: Thinly sliced steak or ground beef for a hearty base.
  • Pasta: Penne, rigatoni, or your favorite short pasta.
  • Bell Peppers and Onions: Essential for the cheesesteak flavor.
  • Cheese: Provolone or mozzarella for gooey goodness.
  • Cream or Milk: Creates a luscious sauce.

Optional Add-ins:

  • Mushrooms for earthy notes.
  • Red pepper flakes for a spicy kick.
  • Garlic for an aromatic touch.

To learn how to maximize flavor in pasta dishes, explore Ultimate Pasta Salad: A Symphony of Flavors in Every Bite.


Step-by-Step Recipe for Philly Cheesesteak Pasta

Ingredients:

  • 1 pound beef (steak strips or ground)
  • 12 ounces pasta
  • 1 large onion, sliced
  • 2 bell peppers, sliced
  • 1 cup shredded provolone cheese
  • ½ cup cream or milk
  • 2 tablespoons olive oil
  • Salt and pepper to taste

Instructions:

  1. Cook the Pasta: Boil pasta until al dente. Reserve 1 cup of pasta water.
  2. Sauté Vegetables: Heat olive oil in a skillet. Add onions and bell peppers, cooking until softened.
  3. Cook the Beef: In the same skillet, sear the beef until browned.
  4. Make the Sauce: Stir in cream, pasta water, and half the cheese. Simmer until thickened.
  5. Combine and Serve: Toss the pasta with the sauce, beef, and vegetables. Top with remaining cheese and serve hot.

For additional tips on balancing flavors, visit Perfect Ribeye Steak Recipe: Master the Art of Steak Cooking.


Variations to Try

1. Chicken Cheesesteak Pasta

  • Substitute chicken for beef for a lighter version.

2. Spicy Cheesesteak Pasta

  • Add diced jalapeños or a dash of hot sauce to the sauce.

3. Vegetarian Option

  • Use plant-based protein or extra vegetables like zucchini and mushrooms.

Serving Suggestions

  • Garnish with fresh parsley or grated parmesan.
  • Pair with garlic bread or a green salad for a complete meal.
  • Serve in individual bowls with extra cheese on the side for customization.

FAQs About Philly Cheesesteak Pasta

What type of pasta works best?

Short pastas like penne or rigatoni hold the sauce well.

Can I make this dish ahead of time?

Yes, but store the sauce and pasta separately to maintain texture.

How long does it stay fresh?

Refrigerate in an airtight container for up to 3 days.

Can I freeze Philly Cheesesteak Pasta?

Yes, freeze without the cheese topping for up to 2 months. Reheat with added cheese.

What cheese substitutes work well?

Mozzarella, cheddar, or even a blend of cheeses can work.


Suggested Internal Links for Enhanced Navigation


Conclusion

Philly Cheesesteak Pasta is a delightful fusion that’s sure to please the entire family. With its creamy sauce, tender beef, and melty cheese, this dish is a comforting favorite for any occasion. Customize it with variations to suit your taste, and enjoy a hearty meal that’s ready in no time.