Lemon Ricotta Pancakes with Fresh Berries

Lemon Ricotta Pancakes with Fresh Berries

There’s something undeniably magical about waking up to a stack of fluffy, citrus-kissed pancakes. These Lemon Ricotta Pancakes with Fresh Berries are the kind of breakfast that turns an ordinary morning into something extraordinary. The delicate tang of lemon, the creamy richness of ricotta, and the burst of juicy berries create a symphony of flavors that will make you want to linger at the table just a little longer. Whether you’re hosting a weekend brunch or treating yourself to a leisurely breakfast, this recipe is a guaranteed crowd-pleaser.

Why You’ll Love This Recipe

If you’re still on the fence about whether to make these pancakes, let me give you a few reasons why they deserve a spot on your breakfast table.

  • Light and Fluffy Texture: The ricotta cheese adds a luxurious creaminess while keeping the pancakes tender and airy, making each bite melt in your mouth.
  • Bright, Zesty Flavor: Fresh lemon zest and juice infuse the batter with a refreshing citrus note that balances the richness of the ricotta.
  • Versatile and Customizable: Top them with any seasonal berries or even a drizzle of honey for a personalized touch.
  • Perfect for Special Occasions: These pancakes feel indulgent enough for celebrations like Mother’s Day or Easter brunch but are simple enough for lazy Sundays.
  • Nutrient-Packed: Ricotta adds protein, and fresh berries bring antioxidants, making this a breakfast that’s as wholesome as it is delicious.

Ingredients Breakdown

Every ingredient in this recipe plays a crucial role in creating the perfect pancake. Here’s why each one matters:

  • Ricotta Cheese: The star of the show, ricotta keeps the pancakes moist and adds a subtle creaminess without weighing them down.
  • Fresh Lemon Zest and Juice: These provide a vibrant citrus aroma and tangy brightness that cuts through the richness.
  • Buttermilk: Its acidity reacts with the baking soda, ensuring the pancakes rise beautifully and stay tender.
  • Eggs: They bind the batter while adding structure and a slight richness.
  • All-Purpose Flour: The foundation of the batter, giving the pancakes their structure.
  • Baking Powder and Baking Soda: These leavening agents work together to create a light, airy texture.
  • Fresh Berries (such as blueberries, raspberries, or strawberries): They add a juicy, sweet-tart contrast to the pancakes.
  • Maple Syrup or Honey: A drizzle of natural sweetness ties everything together.

How to Make Lemon Ricotta Pancakes with Fresh Berries

Follow these steps for perfect pancakes every time:

  1. Prepare the Dry Ingredients: In a large bowl, whisk together the flour, sugar, baking powder, baking soda, and a pinch of salt. This ensures even distribution of leavening agents for consistent fluffiness.
  2. Mix the Wet Ingredients: In another bowl, combine the ricotta, buttermilk, eggs, lemon zest, and lemon juice. Whisk until smooth but avoid overmixing to keep the batter light.
  3. Combine Wet and Dry Ingredients: Gently fold the wet mixture into the dry ingredients until just combined. A few lumps are okay—overmixing leads to dense pancakes.
  4. Heat the Griddle or Pan: Preheat a non-stick skillet or griddle over medium-low heat. A properly heated surface ensures even cooking without burning.
  5. Cook the Pancakes: Lightly grease the pan with butter or oil. Pour ¼ cup of batter for each pancake. Sprinkle a few fresh berries onto each pancake as they cook. When bubbles form on the surface (about 2-3 minutes), flip and cook for another 1-2 minutes until golden.
  6. Serve Warm: Stack the pancakes, top with more fresh berries, and drizzle with maple syrup or honey.

Pro Tips for the Best Results

  • Use Full-Fat Ricotta: It provides the best texture and flavor. Low-fat versions can make the pancakes dry.
  • Don’t Overmix the Batter: A few lumps are fine. Overworking the batter develops gluten, resulting in tough pancakes.
  • Control the Heat: Cooking on medium-low ensures the pancakes cook through without burning on the outside.
  • Keep Pancakes Warm: Place cooked pancakes on a baking sheet in a 200°F oven while you finish the batch.
  • Add Berries Strategically: Pressing a few berries into the batter as it cooks prevents them from sinking to the bottom.

Variations and Substitutions

This recipe is wonderfully adaptable to different tastes and dietary needs:

  • Gluten-Free: Swap all-purpose flour for a gluten-free blend. Almond flour also works but may require extra moisture.
  • Dairy-Free: Use coconut ricotta and almond milk mixed with a teaspoon of vinegar instead of buttermilk.
  • Extra Protein: Add a scoop of vanilla or unflavored protein powder to the dry ingredients.
  • Different Citrus: Try orange or lime zest for a unique twist.
  • Berry Alternatives: Use sautéed apples, caramelized bananas, or even dark chocolate chips instead of berries.

What to Serve With It

These pancakes are delicious on their own, but pairing them with the right sides can elevate your meal:

  • Whipped Cream or Yogurt: A dollop of lightly sweetened whipped cream or Greek yogurt adds creaminess.
  • Crispy Bacon or Sausage: The salty-sweet contrast is irresistible.
  • Fresh Fruit Salad: A mix of seasonal fruits complements the citrus notes.
  • Hot Coffee or Tea: A warm drink balances the bright flavors.
  • Lemon Curd: For an extra citrus kick, serve with a spoonful of homemade lemon curd.

How to Store and Reheat

If you have leftovers (which is rare!), here’s how to keep them fresh:

  • Refrigeration: Store cooled pancakes in an airtight container with parchment paper between layers. They’ll keep for up to 3 days.
  • Freezing: Freeze pancakes in a single layer on a baking sheet before transferring to a freezer bag. They’ll last up to 2 months.
  • Reheating: Warm refrigerated pancakes in the microwave for 20-30 seconds. For frozen, toast them in a toaster or bake at 350°F for 5-7 minutes until heated through.

Frequently Asked Questions (FAQs)

Can I make the batter ahead of time?
It’s best to cook the pancakes immediately after mixing the batter. Letting it sit can cause the leavening agents to lose their effectiveness, resulting in flatter pancakes.

Why are my pancakes dense?
Overmixing the batter or using too much ricotta can lead to dense pancakes. Measure ingredients carefully and mix just until combined.

Can I use frozen berries?
Yes, but thaw and pat them dry first to prevent excess moisture from making the pancakes soggy.

What if I don’t have buttermilk?
Make a quick substitute by adding 1 tablespoon of lemon juice or vinegar to 1 cup of milk and letting it sit for 5 minutes.

Can I make these pancakes vegan?
Yes! Use dairy-free ricotta, flax eggs (1 tbsp ground flaxseed + 3 tbsp water per egg), and plant-based milk with vinegar for buttermilk.

Final Thoughts

There’s a reason these Lemon Ricotta Pancakes with Fresh Berries have become a staple in my kitchen—they’re effortlessly elegant yet comforting, and they never fail to impress. Whether you’re serving them to guests or savoring them slowly with a cup of coffee, they’re a reminder that the best mornings start with something made with love. So go ahead, whip up a batch, and let the bright flavors of lemon and berries turn your breakfast into a celebration.

Print
clock clock iconcutlery cutlery iconflag flag iconfolder folder iconinstagram instagram iconpinterest pinterest iconfacebook facebook iconprint print iconsquares squares iconheart heart iconheart solid heart solid icon

Lemon Ricotta Pancakes with Fresh Berries

  • Author: Chef Emily Carter

Description

Fluffy, citrus-infused ricotta pancakes topped with a vibrant mix of fresh berries and a drizzle of maple syrup. Perfect for a luxurious weekend brunch!


Ingredients

Scale

For the Crust:

  • For the pancakes:
  • 1 cup all-purpose flour
  • 2 tablespoons granulated sugar
  • 1 teaspoon baking powder
  • 1/2 teaspoon baking soda
  • 1/4 teaspoon salt
  • 1 cup ricotta cheese
  • 2 large eggs
  • 1/2 cup milk
  • Zest of 1 lemon
  • 2 tablespoons fresh lemon juice
  • 1 teaspoon vanilla extract
  • For serving:
  • 1 cup mixed fresh berries (strawberries, blueberries, raspberries)
  • Maple syrup, to taste
  • Powdered sugar, for dusting (optional)
  • Fresh mint leaves, for garnish (optional)

Instructions

1. Prepare the Crust:

  1. 1. In a large bowl, whisk together flour, sugar, baking powder, baking soda, and salt.
  2. 2. In another bowl, mix ricotta, eggs, milk, lemon zest, lemon juice, and vanilla until smooth.
  3. 3. Gently fold the wet ingredients into the dry ingredients until just combined (do not overmix).
  4. 4. Heat a non-stick skillet or griddle over medium heat and lightly grease with butter or oil.
  5. 5. Pour 1/4 cup batter per pancake onto the skillet. Cook until bubbles form on the surface (about 2-3 minutes), then flip and cook until golden (1-2 minutes more).
  6. 6. Serve warm topped with fresh berries, a drizzle of maple syrup, and optional powdered sugar or mint.

Notes

For extra fluffiness, let the batter rest for 5-10 minutes before cooking. Substitute buttermilk for milk if desired. Leftover pancakes freeze well for up to 1 month.

Peach Basil Iced Tea

Peach Basil Iced Tea

There’s something undeniably refreshing about a glass of iced tea on a warm summer afternoon. But when you infuse it with the sweetness of ripe peaches and the aromatic freshness of basil, it transforms into something extraordinary. This Peach Basil Iced Tea is the perfect balance of fruity, herbal, and subtly sweet—a drink that feels both indulgent and light. Whether you’re hosting a backyard gathering or simply treating yourself to a moment of relaxation, this recipe is a must-try.

Why You’ll Love This Recipe

First, let’s talk about why this Peach Basil Iced Tea deserves a spot in your summer rotation.

  • Bursting with Fresh Flavors – The natural sweetness of peaches pairs beautifully with the earthy, slightly peppery notes of fresh basil, creating a layered and sophisticated taste.
  • Effortless to Make – No fancy equipment or complicated steps are needed. Just a few simple ingredients and a little patience while the flavors meld.
  • Versatile for Any Occasion – Serve it at brunch, a picnic, or as a mocktail (or cocktail, if you’re feeling fancy). It’s a crowd-pleaser for all ages.
  • Healthier Than Store-Bought – Skip the artificial sweeteners and preservatives. This homemade version lets you control the sweetness and quality of ingredients.
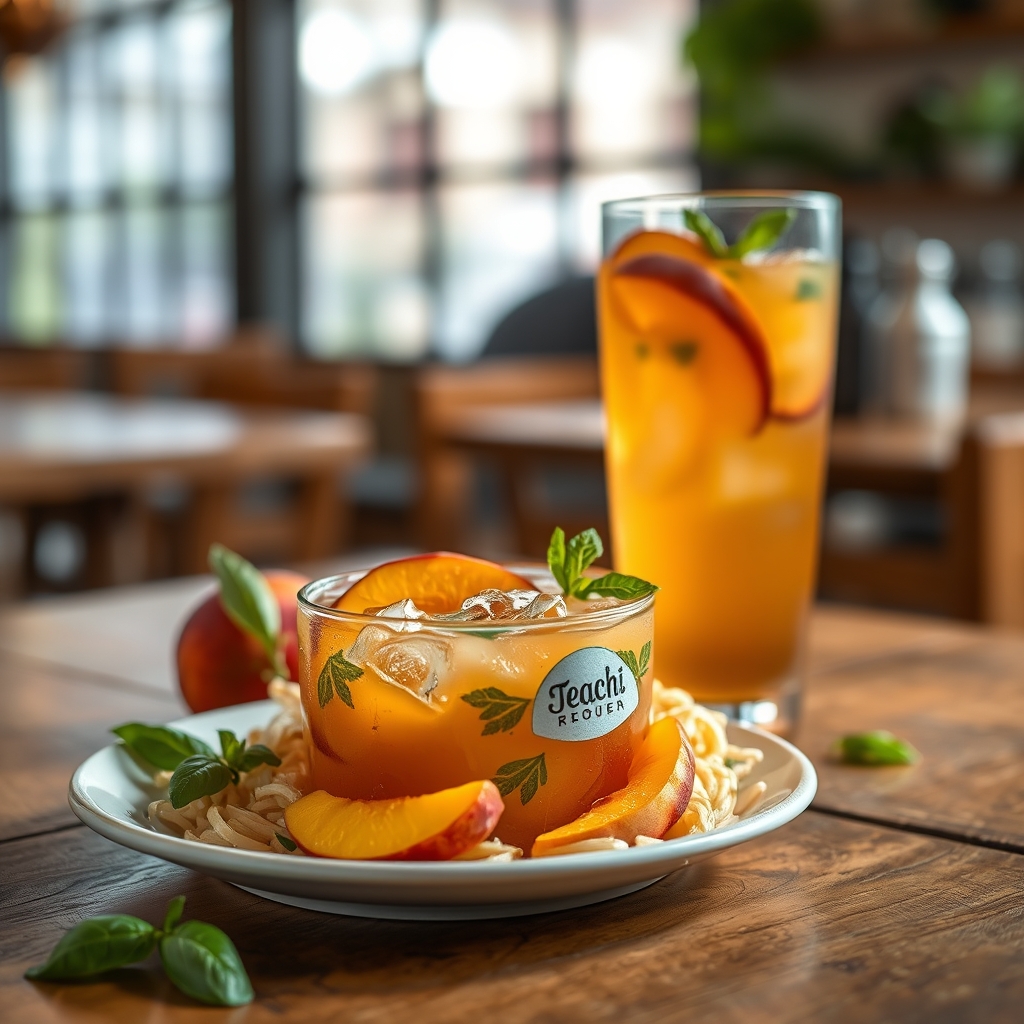
  • Visually Stunning – The golden hue of the tea with flecks of green basil and peach slices makes it as beautiful as it is delicious.

Ingredients Breakdown

Every great recipe starts with quality ingredients. Here’s what you’ll need and why each one matters:

  • Black Tea Bags – The base of this iced tea. Black tea provides a robust flavor that stands up to the sweetness of peaches. Assam or Ceylon work particularly well.
  • Fresh Peaches – Ripe, juicy peaches are essential. They add natural sweetness and a summery aroma. If peaches aren’t in season, frozen peaches can work in a pinch.
  • Fresh Basil Leaves – Basil brings an unexpected but delightful herbal note that elevates the tea from ordinary to extraordinary.
  • Honey or Simple Syrup – For a touch of sweetness. Honey adds depth, while simple syrup blends seamlessly if you prefer a cleaner sweetness.
  • Lemon Juice – A splash brightens the flavors and balances the sweetness.
  • Water – Filtered water ensures the cleanest taste.
  • Ice – Essential for serving chilled.

How to Make Peach Basil Iced Tea

Now, let’s dive into the step-by-step process to craft this refreshing beverage.

  1. Brew the Tea – In a large heatproof pitcher, steep the black tea bags in 4 cups of hot water for 5-7 minutes. Remove the tea bags and let the tea cool to room temperature.
  2. Prepare the Peach-Basil Infusion – In a small saucepan, combine 1 cup of water, sliced peaches, and a handful of basil leaves. Bring to a gentle simmer, then reduce heat and let it steep for 10 minutes. Strain the mixture, pressing the peaches to extract all the juice.
  3. Sweeten to Taste – Stir honey or simple syrup into the warm peach-basil infusion until dissolved. Adjust sweetness based on preference.
  4. Combine and Chill – Pour the peach-basil mixture into the cooled tea. Add lemon juice and stir well. Refrigerate for at least 2 hours to let the flavors meld.
  5. Serve Over Ice – Fill glasses with ice, pour the tea, and garnish with fresh peach slices and basil leaves for a beautiful presentation.

Pro Tips for the Best Results

  • Use Ripe Peaches – The sweeter and juicier the peaches, the more flavorful your tea will be.
  • Don’t Over-Steep the Tea – Over-steeping can make the tea bitter. Stick to 5-7 minutes for black tea.
  • Muddle the Basil – Lightly bruising the basil leaves before steeping helps release their essential oils for a more pronounced flavor.
  • Chill Thoroughly – The flavors develop best when the tea has time to rest in the fridge. Overnight is ideal.
  • Adjust Sweetness Later – If serving to guests, offer honey or syrup on the side so everyone can sweeten to their liking.

Variations and Substitutions

This recipe is wonderfully adaptable. Here are some ways to make it your own:

  • Tea Variations – Swap black tea for green tea or white tea for a lighter, more delicate flavor.
  • Sweetener Alternatives – Agave nectar or maple syrup can replace honey for a vegan option.
  • Herb Swaps – Try mint or thyme instead of basil for a different herbal twist.
  • Sparkling Version – Top with sparkling water for a fizzy, refreshing finish.
  • Spiked Option – Add a splash of bourbon or vodka for an adult-friendly cocktail.

What to Serve With It

This Peach Basil Iced Tea pairs beautifully with a variety of dishes:

  • Summer Salads – Think grilled peach and arugula salad or a classic Caprese.
  • Light Sandwiches – Cucumber tea sandwiches or chicken salad croissants.
  • Grilled Meats – The sweetness complements barbecue chicken or glazed pork tenderloin.
  • Desserts – Serve alongside lemon bars, peach cobbler, or shortbread cookies.

How to Store and Reheat

This tea is best enjoyed fresh but can be stored for later:

  • Refrigeration – Keep in a sealed pitcher for up to 3 days. The flavors may intensify over time.
  • Freezing – Freeze into ice cubes for future use. Drop them into iced tea to chill without diluting.
  • Reheating – Not applicable, as this is a cold drink. If you prefer it less chilled, let it sit at room temperature for 10 minutes before serving.

Frequently Asked Questions (FAQs)

Can I use canned peaches instead of fresh?
Yes, but opt for peaches in juice rather than syrup to avoid excessive sweetness. Drain and rinse them before using.

How do I make this tea caffeine-free?
Simply substitute the black tea with caffeine-free herbal tea, such as rooibos or chamomile.

Can I make a large batch for a party?
Absolutely! Double or triple the recipe, but keep the peach-basil infusion separate until serving to maintain freshness.

Why is my tea cloudy?
Cloudiness can happen if the tea is over-steeped or if hard water is used. Using filtered water and proper steeping time helps.

Can I use dried basil?
Fresh basil is recommended for the best flavor, but in a pinch, use 1 teaspoon of dried basil per cup of water.

Final Thoughts

There’s a reason Peach Basil Iced Tea feels like a little luxury in a glass—it’s the perfect harmony of summer’s best flavors. Whether you’re sipping it slowly on a porch swing or serving it to friends at a garden party, this drink is sure to impress. Once you try it, you’ll find yourself making it again and again, tweaking it to suit your mood or the season. So go ahead, brew a batch, and toast to the simple joys of homemade refreshment.

Print
clock clock iconcutlery cutlery iconflag flag iconfolder folder iconinstagram instagram iconpinterest pinterest iconfacebook facebook iconprint print iconsquares squares iconheart heart iconheart solid heart solid icon

Peach Basil Iced Tea

  • Author: Tea Enthusiast

Description

A refreshing summer drink combining sweet peaches, aromatic basil, and black tea for a perfectly balanced iced beverage.


Ingredients

Scale

For the Crust:

  • For the tea base:
  • 4 cups water
  • 4 black tea bags
  • For the peach syrup:
  • 2 large ripe peaches, pitted and diced
  • 1/2 cup granulated sugar
  • 1/2 cup water
  • For assembly:
  • 1/4 cup fresh basil leaves, torn
  • 2 cups ice cubes
  • 1 peach, thinly sliced for garnish
  • 4 fresh basil sprigs for garnish

Instructions

1. Prepare the Crust:

  1. 1. Brew the tea: Bring 4 cups water to a boil. Remove from heat, add tea bags, and steep for 5 minutes. Discard bags and let cool completely.
  2. 2. Make peach syrup: Combine diced peaches, sugar, and 1/2 cup water in a saucepan. Simmer for 10 minutes until peaches soften. Strain through a fine mesh sieve, pressing solids to extract maximum flavor. Let syrup cool.
  3. 3. Assemble: In a pitcher, combine cooled tea, peach syrup, and torn basil leaves. Stir well and refrigerate for 1 hour to infuse flavors.
  4. 4. Serve: Fill glasses with ice, pour tea over, and garnish with peach slices and basil sprigs.

Notes

For a stronger basil flavor, muddle leaves before adding to pitcher. Adjust sweetness by adding more or less peach syrup. Can be stored refrigerated for up to 3 days.

Fresh Herb Pasta Primavera

Fresh Herb Pasta Primavera

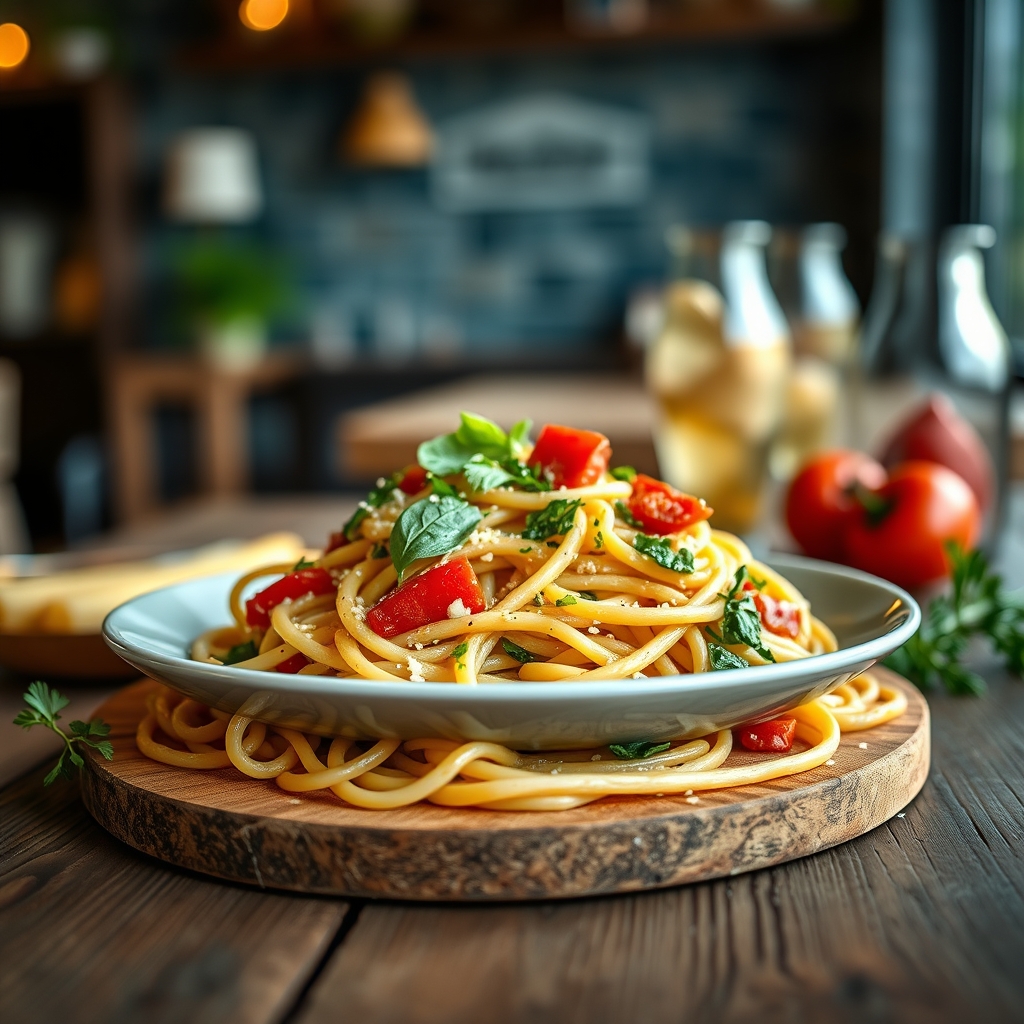
There’s something undeniably magical about a dish that bursts with the vibrant flavors of fresh herbs and seasonal vegetables. Fresh Herb Pasta Primavera is one of those recipes that feels like a celebration of spring and summer, no matter the time of year. It’s light yet satisfying, packed with garden-fresh ingredients, and comes together in under 30 minutes—making it perfect for weeknight dinners or impromptu gatherings. Whether you’re a pasta lover or simply looking for a way to incorporate more vegetables into your meals, this dish is a must-try.

Why You’ll Love This Recipe

If you’re still on the fence about whether to make this Fresh Herb Pasta Primavera, let me give you a few reasons why it’s about to become a staple in your kitchen.

  • Bursting with Freshness: The combination of tender-crisp vegetables and aromatic herbs creates a dish that tastes like sunshine on a plate.
  • Quick and Easy: With minimal prep and cook time, this recipe is ideal for busy evenings when you want something delicious without the fuss.
  • Versatile and Customizable: Swap in whatever vegetables or herbs you have on hand—this dish adapts beautifully to seasonal produce.
  • Light Yet Satisfying: Unlike heavy cream-based pasta dishes, this version keeps things bright and fresh while still being deeply flavorful.
  • Crowd-Pleasing: Whether you’re serving picky eaters or food enthusiasts, this pasta primavera is universally loved.

Ingredients Breakdown

Every great dish starts with quality ingredients, and Fresh Herb Pasta Primavera is no exception. Here’s what you’ll need and why each component matters.

  • Pasta: Linguine or fettuccine works best, as their broad surfaces hold onto the sauce and herbs beautifully. For a gluten-free option, try chickpea or brown rice pasta.
  • Fresh Vegetables: Bell peppers, zucchini, cherry tomatoes, and asparagus are classic choices, but feel free to mix in seasonal favorites like snap peas or spinach.
  • Garlic and Shallots: These aromatics form the flavor base, adding depth and a subtle sweetness to the dish.
  • Fresh Herbs: Basil, parsley, and thyme bring brightness and complexity. Using fresh herbs is non-negotiable—they make all the difference.
  • Olive Oil and Butter: A combination of both creates a rich, silky sauce that lightly coats the pasta without overpowering the vegetables.
  • Parmesan Cheese: Freshly grated Parmesan adds a salty, umami kick that ties everything together.
  • Lemon Zest and Juice: A hint of citrus lifts the flavors and balances the richness of the cheese and butter.

How to Make Fresh Herb Pasta Primavera

Now that you’ve gathered your ingredients, let’s walk through the steps to create this vibrant dish.

  1. Cook the Pasta: Bring a large pot of salted water to a boil and cook the pasta until al dente. Reserve about a cup of pasta water before draining—this starchy liquid will help create a silky sauce later.
  2. Sauté the Aromatics: In a large skillet, heat olive oil over medium heat. Add minced garlic and shallots, cooking until fragrant and translucent, about 2 minutes.
  3. Add the Vegetables: Toss in your chopped vegetables, starting with the ones that take longer to cook (like bell peppers and asparagus). After a few minutes, add quicker-cooking veggies like zucchini and cherry tomatoes.
  4. Deglaze and Season: Splash in a bit of the reserved pasta water to loosen any browned bits from the pan. Season with salt, pepper, and a pinch of red pepper flakes for a subtle kick.
  5. Combine with Pasta: Add the drained pasta to the skillet along with a knob of butter, tossing everything together. If the mixture seems dry, drizzle in more pasta water until the sauce clings to the noodles.
  6. Finish with Herbs and Cheese: Remove from heat and stir in the fresh herbs, lemon zest, and a generous handful of Parmesan. Give it one final toss and serve immediately.

Pro Tips for the Best Results

Want to take your Fresh Herb Pasta Primavera to the next level? Here are a few insider secrets.

  • Don’t Overcook the Vegetables: They should retain a slight crunch for texture contrast against the tender pasta.
  • Use High-Quality Olive Oil: Since this dish relies on simple ingredients, a good olive oil makes a noticeable difference in flavor.
  • Add Protein: For a heartier meal, toss in grilled chicken, shrimp, or white beans.
  • Toast the Garlic: Let the garlic turn golden (but not brown) for a deeper, nuttier flavor.
  • Grate Your Own Cheese: Pre-grated Parmesan often contains anti-caking agents that can make the sauce grainy.

Variations and Substitutions

One of the best things about pasta primavera is its adaptability. Here are some ways to make it your own.

  • Vegetarian/Vegan: Skip the butter and Parmesan, using nutritional yeast or vegan cheese instead.
  • Low-Carb: Swap the pasta for spiralized zucchini or spaghetti squash.
  • Extra Creamy: Stir in a splash of heavy cream or coconut milk for a richer sauce.
  • Herb Variations: Try mint, tarragon, or chives for a different flavor profile.
  • Seasonal Twists: In fall, add roasted butternut squash; in winter, try kale and mushrooms.

What to Serve With It

While this dish is satisfying on its own, here are a few pairing ideas to round out the meal.

  • Garlic Bread: A crusty loaf brushed with garlic butter is always a hit.
  • Light Salad: A simple arugula salad with lemon vinaigrette complements the pasta beautifully.
  • White Wine: A crisp Sauvignon Blanc or Pinot Grigio enhances the fresh herb flavors.
  • Grilled Protein: Serve alongside lemon-herb grilled chicken or salmon for a complete dinner.

How to Store and Reheat

Leftovers? No problem. Here’s how to keep your pasta primavera tasting fresh.

  • Refrigeration: Store in an airtight container for up to 3 days. The vegetables may soften slightly, but the flavors will still be delicious.
  • Freezing: Freezing isn’t recommended, as the vegetables can become mushy upon thawing.
  • Reheating: Warm in a skillet over low heat with a splash of water or broth to revive the sauce. Avoid microwaving, which can make the pasta rubbery.

Frequently Asked Questions (FAQs)

Let’s tackle some common questions about making Fresh Herb Pasta Primavera.

Can I use dried herbs instead of fresh?
While dried herbs can work in a pinch, fresh herbs are essential for the vibrant flavor this dish is known for. If you must substitute, use one-third the amount of dried herbs.

What if I don’t have all the vegetables listed?
No worries! Use what you have—even just two or three vegetables will still yield a tasty dish. The key is to balance textures and colors.

How do I prevent the pasta from sticking together?
Stir the pasta occasionally while cooking, and toss it with a bit of olive oil after draining if you’re not adding it to the skillet right away.

Can I make this ahead of time?
It’s best served fresh, but you can prep the vegetables and herbs in advance to speed up cooking time.

Is this dish kid-friendly?
Absolutely! For picky eaters, try milder vegetables like carrots or peas, and let them sprinkle extra cheese on top.

Final Thoughts

Fresh Herb Pasta Primavera is more than just a meal—it’s a celebration of simple, wholesome ingredients coming together in perfect harmony. Whether you’re cooking for yourself, your family, or guests, this dish is sure to impress with its vibrant colors and irresistible flavors. So grab your favorite pasta pot, a handful of fresh herbs, and let’s bring a little taste of the Italian countryside to your table tonight. Happy cooking!

Print
clock clock iconcutlery cutlery iconflag flag iconfolder folder iconinstagram instagram iconpinterest pinterest iconfacebook facebook iconprint print iconsquares squares iconheart heart iconheart solid heart solid icon

Fresh Herb Pasta Primavera

  • Author: Chef Maria Bennett

Description

A vibrant spring pasta dish loaded with fresh seasonal vegetables and tossed in a light herb-infused olive oil sauce. Perfect for a quick weeknight dinner or elegant entertaining.


Ingredients

Scale

For the Crust:

  • For pasta:
  • 12 oz fettuccine or linguine pasta
  • 2 tbsp kosher salt (for pasta water)
  • For vegetables:
  • 1 cup asparagus, cut into 1-inch pieces
  • 1 cup cherry tomatoes, halved
  • 1 medium zucchini, julienned
  • 1/2 cup frozen peas
  • 1 small red bell pepper, thinly sliced
  • For sauce:
  • 1/3 cup extra virgin olive oil
  • 3 cloves garlic, minced
  • 1/4 cup fresh basil, chopped
  • 2 tbsp fresh parsley, chopped
  • 1 tbsp fresh thyme leaves
  • 1 tsp lemon zest
  • For finishing:
  • 1/2 cup grated parmesan cheese
  • 1/4 tsp red pepper flakes
  • Salt and black pepper to taste

Instructions

1. Prepare the Crust:

  1. 1. Bring a large pot of water to boil with 2 tbsp salt. Cook pasta according to package directions until al dente, reserving 1/2 cup pasta water before draining.
  2. 2. While pasta cooks, heat 1 tbsp olive oil in a large skillet over medium-high heat. Add asparagus and bell pepper, sautéing for 3 minutes.
  3. 3. Add zucchini and peas, cooking for 2 more minutes until vegetables are crisp-tender. Transfer to a bowl and set aside.
  4. 4. In the same skillet, combine remaining olive oil and garlic over low heat. Cook gently for 1 minute until fragrant but not browned.
  5. 5. Remove from heat and stir in all fresh herbs, lemon zest, red pepper flakes, and cherry tomatoes.
  6. 6. Add drained pasta to the skillet along with cooked vegetables. Toss well, adding reserved pasta water 1 tbsp at a time as needed to create a light sauce.
  7. 7. Season with salt and black pepper to taste. Serve immediately topped with parmesan cheese.

Notes

For vegan version, omit parmesan or use nutritional yeast. Vegetables can be substituted based on season – try adding mushrooms in fall or artichokes in summer. Leftovers keep refrigerated for up to 2 days.

Strawberry Rhubarb Crisp

Strawberry Rhubarb Crisp

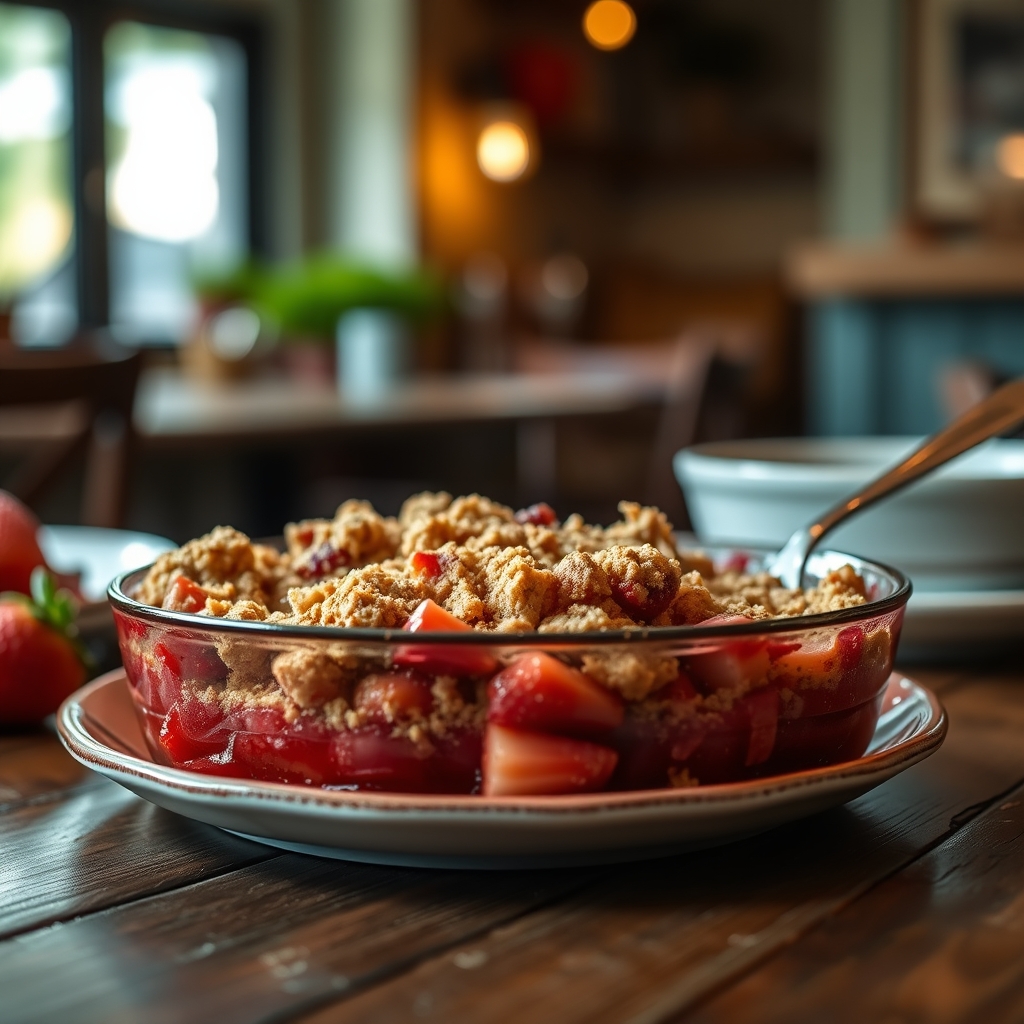
There’s something undeniably comforting about the marriage of sweet strawberries and tangy rhubarb, baked beneath a golden, buttery crisp topping. This Strawberry Rhubarb Crisp is a celebration of seasonal produce, transforming humble ingredients into a dessert that’s both rustic and elegant. Whether you’re serving it at a summer gathering or simply indulging on a quiet evening, this recipe is a timeless classic that never fails to delight. Let’s dive into why this dessert deserves a spot in your baking repertoire.

Why You’ll Love This Recipe

First, the combination of strawberries and rhubarb is a match made in dessert heaven. The natural sweetness of strawberries balances the tartness of rhubarb, creating a harmonious filling that’s vibrant and flavorful.

Second, the crisp topping is irresistibly crunchy and buttery, with just the right amount of cinnamon and oats for warmth and texture. It’s the perfect contrast to the soft, juicy fruit beneath.

Third, this recipe is incredibly forgiving. Unlike fussy pies or tarts, a crisp is meant to be rustic—no need for perfect lattice work or precise crimping. It’s a dessert that welcomes improvisation.

Fourth, it’s versatile. Serve it warm with vanilla ice cream for a decadent treat, or enjoy it at room temperature for breakfast (because fruit is involved, right?).

Finally, it’s a crowd-pleaser. Whether you’re hosting a dinner party or bringing dessert to a potluck, this Strawberry Rhubarb Crisp is guaranteed to earn compliments.

Ingredients Breakdown

Understanding the ingredients is key to making the best Strawberry Rhubarb Crisp. Here’s what you’ll need and why each component matters:

For the Filling:

  • Fresh strawberries – Their natural sweetness offsets the tartness of rhubarb. Look for ripe, fragrant berries for the best flavor.
  • Rhubarb – The star of the show, rhubarb adds a bright, tangy note. Be sure to trim off any leaves, as they’re toxic.
  • Granulated sugar – Balances the tartness and helps the fruit release its juices.
  • Cornstarch – Thickens the filling, preventing it from being too watery.
  • Vanilla extract – Enhances the overall flavor with warmth and depth.
  • Lemon zest – A touch of citrus brightens the filling and adds complexity.

For the Crisp Topping:

  • All-purpose flour – Forms the base of the topping, providing structure.
  • Old-fashioned oats – Adds a hearty, chewy texture.
  • Brown sugar – Brings caramel-like sweetness and moisture.
  • Cinnamon – A warm spice that complements the fruit beautifully.
  • Cold butter – The key to a crumbly, crisp topping. Don’t substitute with melted butter.
  • Salt – Just a pinch to balance the sweetness.

How to Make Strawberry Rhubarb Crisp

Follow these steps for a foolproof Strawberry Rhubarb Crisp every time:

Step 1: Prep the Fruit

Start by washing and hulling the strawberries, then slice them into halves or quarters, depending on their size. Trim the rhubarb stalks and cut them into ½-inch pieces. Toss the fruit with sugar, cornstarch, vanilla, and lemon zest in a large bowl. Let it sit for 10 minutes to macerate—this helps draw out the juices.

Step 2: Make the Crisp Topping

In a separate bowl, whisk together the flour, oats, brown sugar, cinnamon, and salt. Cut the cold butter into small cubes and work it into the dry ingredients using your fingers or a pastry cutter until the mixture resembles coarse crumbs. Some larger clumps are fine—they’ll create extra crispy bits.

Step 3: Assemble and Bake

Preheat your oven to 375°F. Transfer the fruit mixture to a greased baking dish (a 9×9-inch or similar size works well). Sprinkle the crisp topping evenly over the fruit, covering it completely. Bake for 35–40 minutes, or until the topping is golden brown and the filling is bubbly around the edges.

Step 4: Cool Slightly Before Serving

Let the crisp rest for 10–15 minutes after baking. This allows the filling to thicken slightly, making it easier to serve.

Pro Tips for the Best Results

For an extra-crispy topping, use a mix of old-fashioned and quick oats. The quick oats will help bind the topping, while the old-fashioned oats add texture.

If your rhubarb is particularly tart, increase the sugar in the filling by a tablespoon or two. Taste the fruit mixture before baking and adjust as needed.

For deeper flavor, brown the butter before adding it to the crisp topping. Let it cool slightly so it doesn’t melt the dry ingredients.

If the topping starts to brown too quickly during baking, loosely tent the dish with aluminum foil to prevent burning.

Variations and Substitutions

For a gluten-free version, swap the all-purpose flour with a 1:1 gluten-free blend and use certified gluten-free oats.

Add a handful of chopped nuts (like almonds or pecans) to the crisp topping for extra crunch.

Swap half the strawberries for raspberries or blackberries for a mixed berry twist.

If fresh rhubarb isn’t available, frozen rhubarb works well—just thaw and drain it before using.

What to Serve With It

This Strawberry Rhubarb Crisp is delicious on its own, but a scoop of vanilla ice cream or a dollop of whipped cream takes it to the next level. For a lighter option, try Greek yogurt or crème fraîche.

Pair it with a cup of Earl Grey tea or a glass of dessert wine like Moscato for a sophisticated touch.

How to Store and Reheat

Leftovers can be covered and stored in the refrigerator for up to 3 days. To reheat, place individual portions in the microwave for 30–45 seconds or warm the entire dish in a 350°F oven for 10–15 minutes.

For longer storage, freeze the unbaked crisp topping and fruit mixture separately. When ready to bake, thaw the fruit, assemble, and bake as directed, adding a few extra minutes if needed.

Frequently Asked Questions (FAQs)

Can I use frozen fruit instead of fresh?

Yes, frozen strawberries and rhubarb can be used. Thaw and drain them well to avoid excess liquid in the filling.

Why is my crisp topping soggy?

Sogginess usually happens if the butter was too warm or the crisp wasn’t baked long enough. Make sure your butter is cold and bake until the topping is deeply golden.

Can I make this ahead of time?

Absolutely. Assemble the crisp up to a day in advance, cover, and refrigerate. Bake just before serving, adding a few extra minutes if needed.

Is rhubarb necessary, or can I skip it?

Rhubarb adds a signature tang, but if you can’t find it, increase the strawberries and add a splash of lemon juice for acidity.

Can I use a different sweetener?

Maple syrup or honey can replace granulated sugar, but adjust the amount to taste and reduce other liquids slightly.

Final Thoughts

This Strawberry Rhubarb Crisp is more than just a dessert—it’s a celebration of seasonal flavors and simple, heartfelt baking. Whether you’re sharing it with loved ones or savoring it solo, each bite is a reminder of how delightful uncomplicated desserts can be. So grab your baking dish, embrace the mess, and let the aroma of strawberries and rhubarb fill your kitchen. Happy baking!

Print
clock clock iconcutlery cutlery iconflag flag iconfolder folder iconinstagram instagram iconpinterest pinterest iconfacebook facebook iconprint print iconsquares squares iconheart heart iconheart solid heart solid icon

Strawberry Rhubarb Crisp

  • Author: Baking Enthusiast

Description

A classic summer dessert featuring the perfect balance of sweet strawberries and tart rhubarb, topped with a buttery oat crisp topping. Easy to make and always a crowd-pleaser!


Ingredients

Scale

For the Crust:

  • For the fruit filling:
  • 3 cups fresh strawberries, hulled and quartered
  • 3 cups fresh rhubarb, chopped into 1/2-inch pieces
  • 1/2 cup granulated sugar
  • 2 tablespoons cornstarch
  • 1 tablespoon lemon juice
  • 1 teaspoon vanilla extract
  • For the crisp topping:
  • 1 cup old-fashioned rolled oats
  • 3/4 cup all-purpose flour
  • 1/2 cup packed light brown sugar
  • 1/2 teaspoon ground cinnamon
  • 1/4 teaspoon salt
  • 1/2 cup unsalted butter, melted

Instructions

1. Prepare the Crust:

  1. Preheat oven to 375°F (190°C). Lightly grease a 9-inch square baking dish.
  2. Make the filling: In a large bowl, combine strawberries, rhubarb, sugar, cornstarch, lemon juice, and vanilla. Toss gently until evenly coated.
  3. Transfer filling to prepared baking dish, spreading into an even layer.
  4. Make the topping: In a medium bowl, mix oats, flour, brown sugar, cinnamon, and salt. Pour melted butter over mixture and stir until crumbly.
  5. Sprinkle topping evenly over fruit mixture.
  6. Bake for 35-40 minutes until topping is golden brown and fruit is bubbling.
  7. Let cool for at least 15 minutes before serving. Best served warm with vanilla ice cream.

Notes

For a deeper flavor, let the crisp sit for 1 hour after baking before serving. Leftovers can be refrigerated for up to 3 days. Rhubarb leaves are toxic – use only the stalks.

Spring Vegetable Quiche

Spring Vegetable Quiche

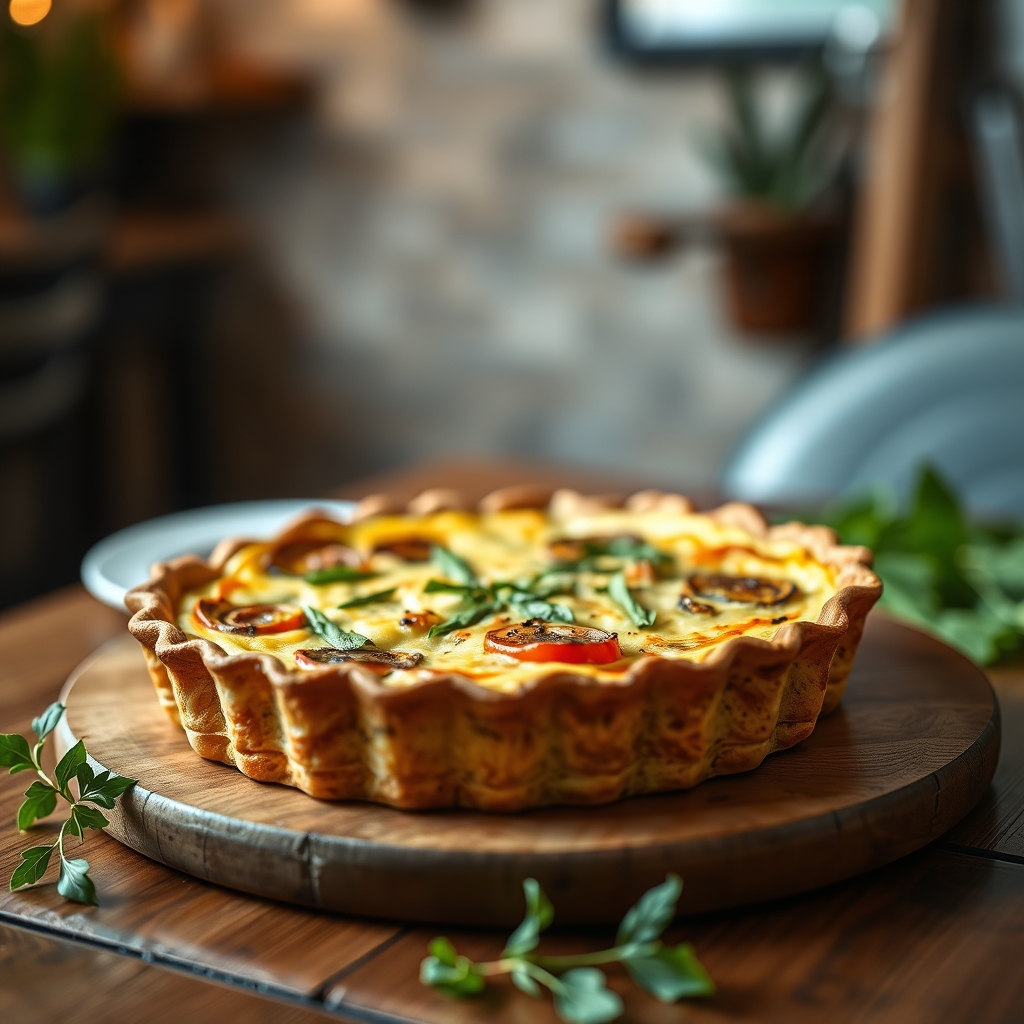
There’s something undeniably magical about a perfectly baked quiche—especially one that celebrates the vibrant flavors of spring. This Spring Vegetable Quiche is a celebration of fresh produce, creamy custard, and a buttery, flaky crust. Whether you’re hosting a brunch, packing a picnic, or simply treating yourself to a wholesome meal, this recipe is a must-try. Let’s dive into why this dish is so special and how you can make it at home.

Why You’ll Love This Recipe

First, let’s talk about why this Spring Vegetable Quiche deserves a spot in your recipe rotation.

  • Seasonal Freshness: Packed with asparagus, peas, and leeks, this quiche captures the essence of spring in every bite. The vegetables are tender, sweet, and bursting with flavor.
  • Versatile and Crowd-Pleasing: Whether served warm or at room temperature, this quiche is perfect for any occasion—brunch, lunch, or even a light dinner. It’s a guaranteed hit with family and friends.
  • Make-Ahead Friendly: Quiche is one of those dishes that tastes just as good (if not better) the next day. Bake it ahead of time and reheat for a stress-free meal.
  • Balanced and Wholesome: With a golden crust, creamy egg filling, and nutrient-rich vegetables, this dish strikes the perfect balance between indulgence and nourishment.
  • Easy to Customize: Don’t have asparagus? Swap in spinach. Prefer a gluten-free version? Use your favorite alternative crust. The possibilities are endless.

Ingredients Breakdown

Understanding the role of each ingredient will help you make the best possible quiche. Here’s what you’ll need:

  • Pie Crust: A buttery, flaky crust is the foundation. You can use store-bought for convenience or make your own from scratch.
  • Eggs: The backbone of the custard, providing structure and richness.
  • Heavy Cream: Adds a luxurious creaminess to the filling. For a lighter version, half-and-half or whole milk works too.
  • Cheese: Gruyère or sharp cheddar brings a nutty, savory depth. Cheese also helps bind the filling.
  • Asparagus: Thin stalks work best—they cook quickly and stay tender.
  • Peas: Fresh or frozen, they add pops of sweetness and color.
  • Leeks: Milder than onions, leeks lend a delicate oniony flavor without overpowering the dish.
  • Fresh Herbs: Chives or parsley brighten the flavors and add a fresh finish.
  • Salt and Pepper: Essential for seasoning. A pinch of nutmeg can also enhance the custard.

How to Make Spring Vegetable Quiche

Now, let’s walk through the steps to create this beautiful dish.

  1. Preheat and Prep: Preheat your oven to 375°F. If using a homemade crust, blind-bake it for 10 minutes to prevent sogginess. For store-bought, follow package instructions.
  2. Sauté the Vegetables: In a skillet, cook the leeks in butter until soft. Add asparagus and peas, sautéing just until bright green. Season with salt and pepper.
  3. Whisk the Custard: In a bowl, whisk eggs, cream, salt, pepper, and a pinch of nutmeg until smooth.
  4. Layer the Fillings: Sprinkle half the cheese over the crust. Spread the sautéed vegetables evenly, then pour the custard over the top. Finish with the remaining cheese.
  5. Bake to Perfection: Bake for 35-40 minutes, until the center is set and the top is golden. Let it rest for 10 minutes before slicing.

Pro Tips for the Best Results

  • Blind-Bake the Crust: To avoid a soggy bottom, prick the crust with a fork and bake it for 10 minutes before adding the filling.
  • Don’t Overcook the Veggies: They should be just tender before going into the quiche, as they’ll continue cooking in the oven.
  • Room-Temperature Ingredients: Let eggs and cream sit out for 20 minutes before mixing for a smoother custard.
  • Test for Doneness: The quiche is ready when the center jiggles slightly but isn’t liquidy. A knife inserted should come out clean.

Variations and Substitutions

This recipe is wonderfully adaptable. Here are some ideas to make it your own:

  • Vegetable Swaps: Try spinach, mushrooms, or zucchini in place of asparagus or peas.
  • Cheese Alternatives: Feta, goat cheese, or Swiss can replace Gruyère for a different flavor profile.
  • Gluten-Free: Use a gluten-free pie crust or a crustless version by greasing the pan well and pouring the filling directly in.
  • Protein Boost: Add cooked bacon, ham, or smoked salmon for a heartier quiche.

What to Serve With It

This Spring Vegetable Quiche pairs beautifully with:

  • A crisp green salad with a lemony vinaigrette.
  • Fresh fruit like strawberries or melon for a sweet contrast.
  • A warm croissant or crusty bread for extra comfort.
  • A glass of sparkling wine or iced herbal tea for a brunch-worthy touch.

How to Store and Reheat

Leftovers? No problem. Here’s how to keep your quiche tasting fresh:

  • Refrigeration: Store cooled quiche in an airtight container for up to 3 days.
  • Freezing: Wrap slices tightly in plastic and foil, then freeze for up to 2 months. Thaw overnight in the fridge before reheating.
  • Reheating: Warm slices in a 350°F oven for 10-15 minutes or microwave for 1-2 minutes. The oven method keeps the crust crisp.

Frequently Asked Questions (FAQs)

Can I make this quiche ahead of time?
Absolutely! Bake it a day in advance, let it cool, and refrigerate. Reheat before serving.

Can I use frozen vegetables?
Yes, but thaw and drain them well to avoid excess moisture in the filling.

Why is my quiche watery?
This usually happens if the vegetables release too much liquid. Sauté them first to remove excess moisture.

Can I make this crustless?
Definitely. Grease your pie dish well and pour the filling directly in. Bake as usual.

What’s the best way to slice quiche cleanly?
Use a sharp knife dipped in hot water and wipe it between cuts for neat slices.

Final Thoughts

This Spring Vegetable Quiche is more than just a recipe—it’s a celebration of seasonal flavors and simple, satisfying cooking. Whether you’re sharing it with loved ones or savoring it solo, each bite is a reminder of how delicious fresh ingredients can be. So go ahead, preheat that oven, and let the aroma of buttery crust and spring veggies fill your kitchen. Happy cooking!

Print
clock clock iconcutlery cutlery iconflag flag iconfolder folder iconinstagram instagram iconpinterest pinterest iconfacebook facebook iconprint print iconsquares squares iconheart heart iconheart solid heart solid icon

Spring Vegetable Quiche

  • Author: The Seasonal Chef

Description

A light and flavorful quiche packed with fresh spring vegetables like asparagus, peas, and leeks in a creamy egg custard, baked in a flaky homemade crust. Perfect for brunch or a light dinner.


Ingredients

Scale

For the Crust:

  • For the crust:
  • 1 1/4 cups all-purpose flour
  • 1/2 teaspoon salt
  • 1/2 cup unsalted butter (cold, cubed)
  • 34 tablespoons ice water
  • For the filling:
  • 1 tablespoon olive oil
  • 1 leek (white and light green parts only, thinly sliced)
  • 1 cup asparagus (trimmed and cut into 1-inch pieces)
  • 1/2 cup fresh peas
  • 4 large eggs
  • 1 cup heavy cream
  • 1/2 cup whole milk
  • 1/2 teaspoon salt
  • 1/4 teaspoon black pepper
  • 1/4 teaspoon nutmeg
  • 1 cup shredded Gruyère cheese

Instructions

1. Prepare the Crust:

  1. 1. Make the crust: In a food processor, pulse flour and salt. Add cold butter and pulse until mixture resembles coarse crumbs.
  2. 2. Add ice water 1 tablespoon at a time until dough comes together. Form into a disk, wrap in plastic, and chill for 1 hour.
  3. 3. Preheat oven to 375°F (190°C). Roll out dough and fit into a 9-inch pie dish. Crimp edges and prick bottom with a fork.
  4. 4. Line with parchment and pie weights, then blind bake for 15 minutes. Remove weights and bake 5 more minutes. Cool slightly.
  5. 5. Prepare filling: Heat oil in a skillet. Sauté leeks for 3 minutes, then add asparagus and peas. Cook 2 more minutes. Let cool.
  6. 6. Whisk eggs, cream, milk, salt, pepper, and nutmeg in a bowl. Stir in cooked vegetables.
  7. 7. Sprinkle half the cheese in the crust. Pour in egg mixture, then top with remaining cheese.
  8. 8. Bake 35-40 minutes until set and golden. Let rest 10 minutes before slicing.

Notes

• Substitute frozen peas if fresh aren’t available. • For a richer quiche, use all cream instead of milk. • Quiche can be made 1 day ahead and reheated.