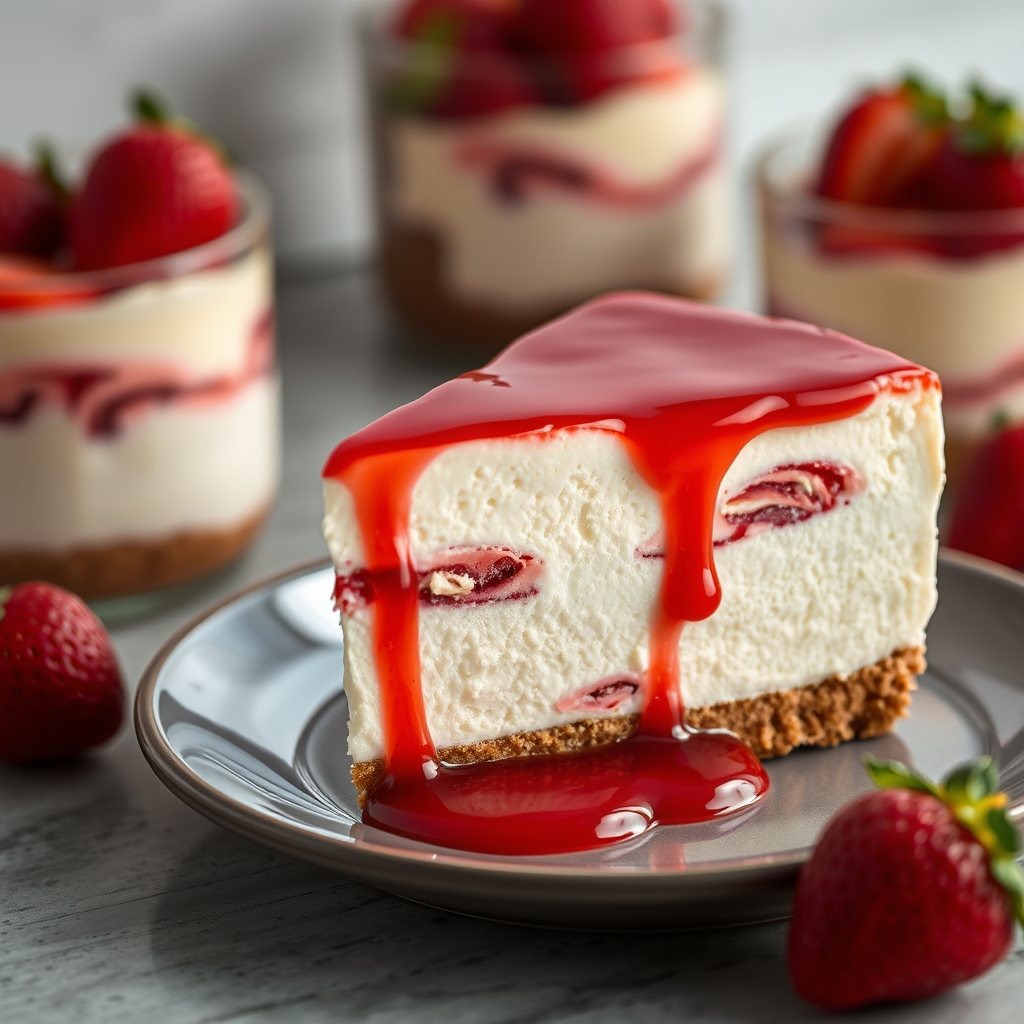
Healthy Strawberry Shortcake Protein Jars
Hello, dear friends! As the days grow longer and the air fills with the sweet promise of summer, I find myself dreaming of strawberries. There’s something so magical about biting into a ripe, juicy strawberry – it transports me back to sun-drenched afternoons in the garden, hunting for the perfect berry with grass-stained knees and a heart full of joy.
Today, I’m excited to share a recipe that captures all that summer delight in a single, delightful bite: Healthy Strawberry Shortcake Protein Jars. These little jars of happiness are not only delicious but also packed with protein, making them a perfect treat for any time of day. Whether you’re enjoying them as a post-workout snack or a guilt-free dessert, these jars are sure to bring a smile to your face.
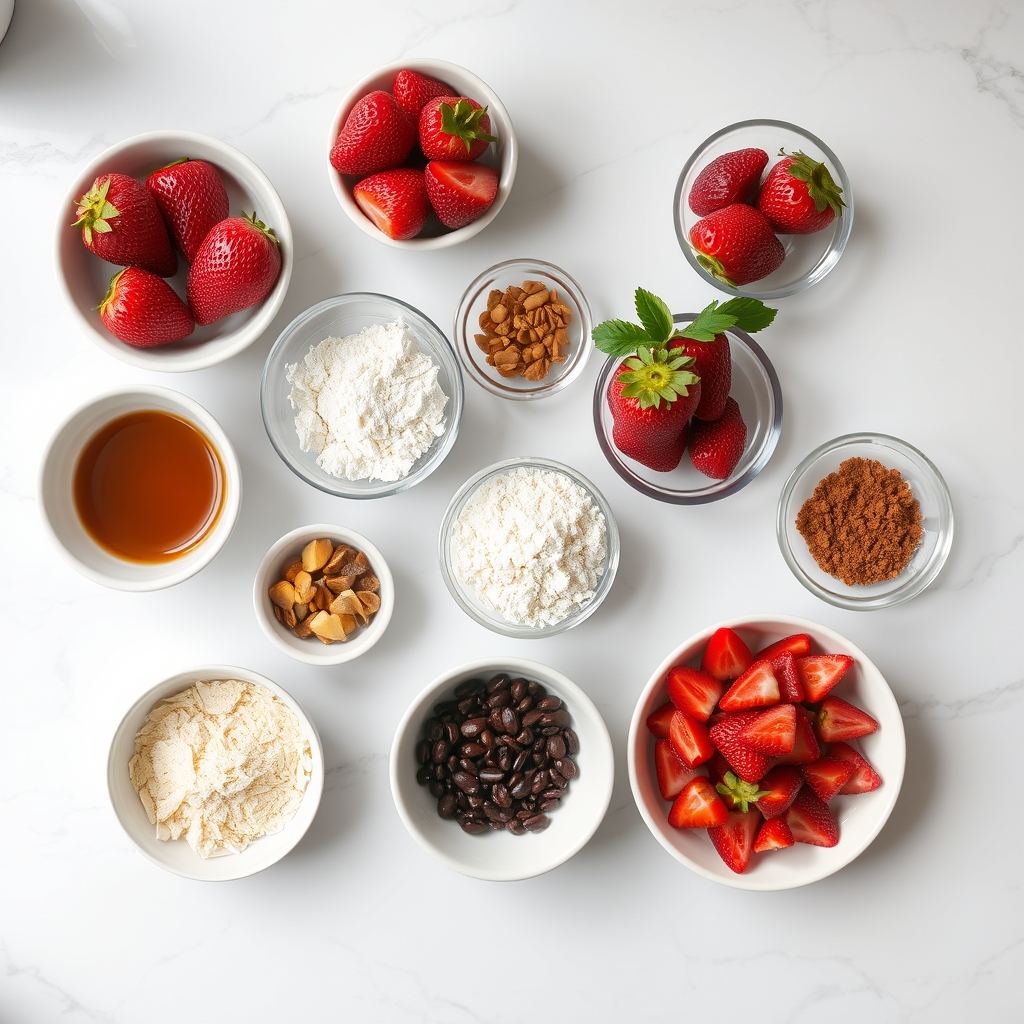
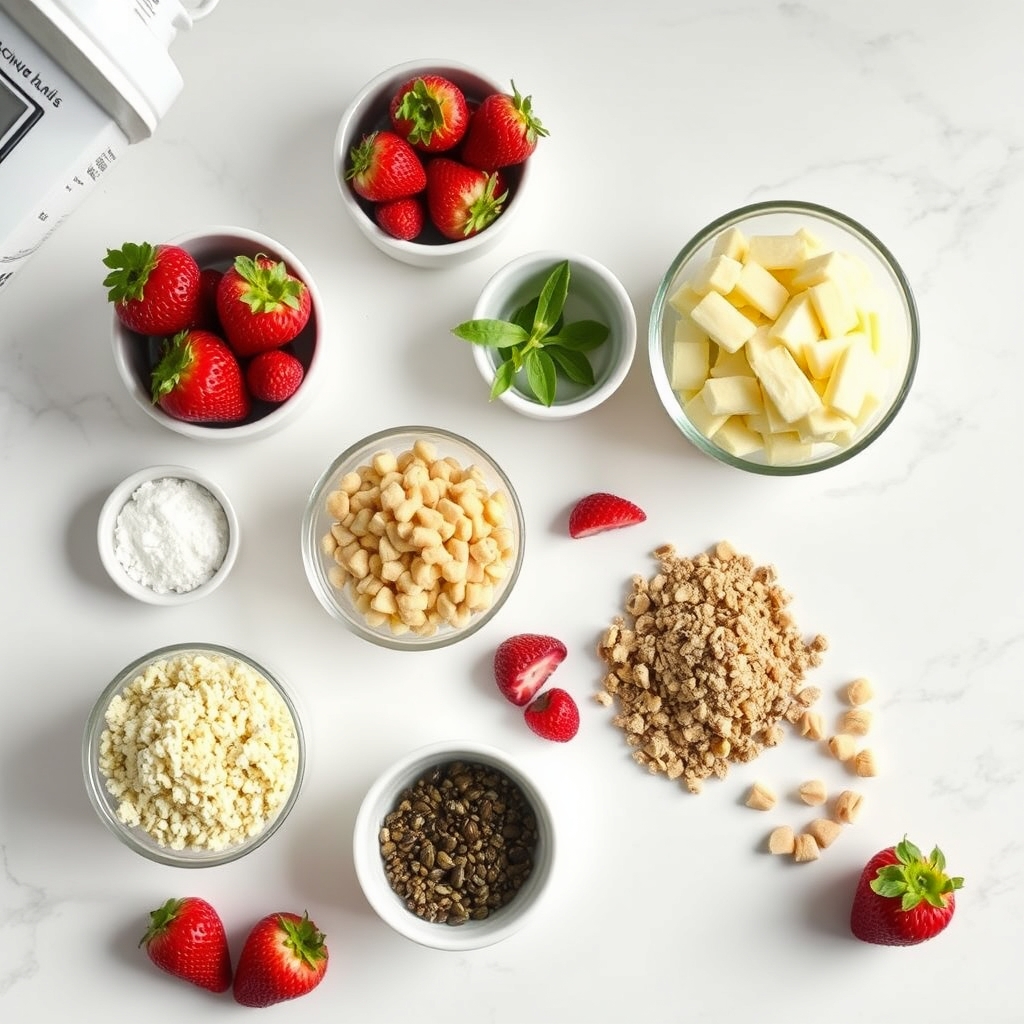
Ingredients You’ll Need
- 1 cup of fresh strawberries – The star of our show! Choose the ripest, reddest berries you can find for the best flavor. If you’re lucky enough to pick your own, even better!
- 1 cup of Greek yogurt – This gives our jars a creamy, tangy base while adding a lovely protein boost.
- 1/2 cup of granola – For that delightful crunch. Choose your favorite kind, or make your own if you’re feeling adventurous!
- 2 tablespoons of honey – A touch of natural sweetness to complement the tangy yogurt. Feel free to adjust to taste.
- 1 teaspoon of vanilla extract – This little addition rounds out the flavors beautifully, giving a warm, comforting aroma.
- 1 scoop of vanilla protein powder – Optional, but it turns this dessert into a powerful protein-packed snack.
- A pinch of salt – It may be tiny, but it enhances all the other flavors in the most wonderful way.
Let’s Make Some Magic!
Now that we have our ingredients ready, let’s dive into creating these delightful jars. Remember, cooking is as much about the journey as it is about the destination, so take your time and enjoy the process!
- Wash and Chop the Strawberries: Begin by giving your strawberries a good rinse under cool water. Once they’re clean, hull them and slice them into bite-sized pieces. As you work, savor their sweet scent – it’s like a preview of the deliciousness to come!
- Prepare the Yogurt Mixture: In a medium-sized bowl, mix the Greek yogurt, honey, vanilla extract, and protein powder (if using). Stir until everything is well combined and smooth. Taste a little to see if it needs more honey or vanilla to suit your palate.
- Layer the Ingredients: Take a clean, clear jar and start layering. Begin with a spoonful of the yogurt mixture, followed by a layer of granola, and then a generous helping of strawberries. Repeat the layers until the jar is filled to your liking.
- Top it Off: Finish with a final dollop of yogurt and a sprinkle of granola. Maybe even add a whole strawberry on top for that extra special touch.
Stay tuned for the next steps where we’ll talk about the best ways to store and serve these beautiful strawberry shortcake jars!
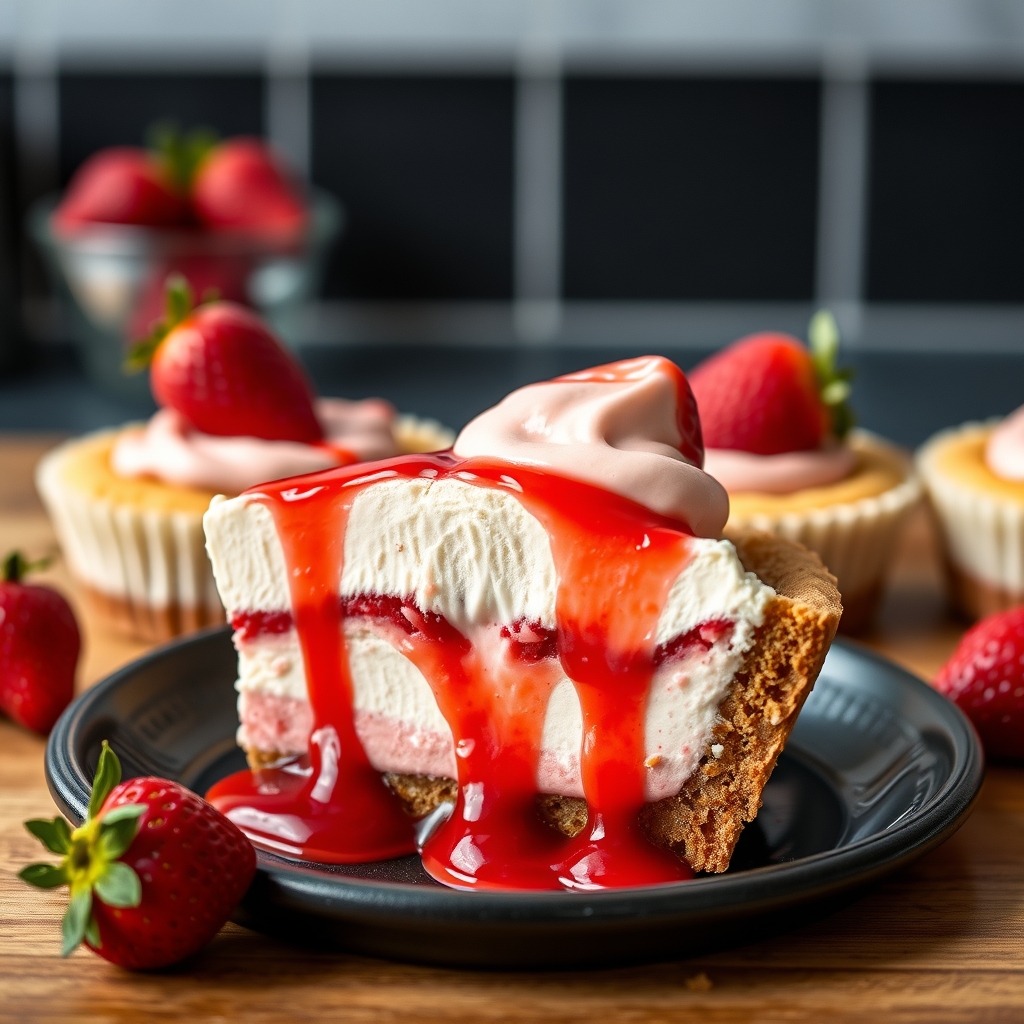
Healthy Strawberry Shortcake Protein Jars
Hello, lovely readers! I’m so thrilled to continue sharing my passion for creating delicious, wholesome recipes with you. Today, we’re diving into a delightful treat that brings together the sweet, sun-kissed flavors of strawberries with the satisfying protein punch that keeps you energized throughout the day. Let’s explore these Healthy Strawberry Shortcake Protein Jars, an easy-to-make delight that’s perfect for any time you need a nutritious snack or dessert!
Pro Tips for Perfect Protein Jars
- Choose fresh strawberries: For the best flavor, use ripe, organic strawberries. Their natural sweetness and vibrant color will make your protein jars irresistible.
- Layer thoughtfully: When assembling your jars, layer the ingredients carefully. Start with the crunch, followed by creamy layers, and finish with juicy berries on top.
- Let it sit: If time allows, let your jars sit in the refrigerator for a few hours to let the flavors meld together. This makes every spoonful a burst of deliciousness!
Variations and Substitutions
While strawberries are the star of this recipe, feel free to get creative! Here are some variations:
- Berry Swap: Try blueberries, blackberries, or raspberries for a different flavor profile.
- Yogurt Alternatives: Use Greek yogurt for extra creaminess or opt for almond or coconut yogurt for a dairy-free version.
- Protein Powder: Vanilla protein powder works wonders, but chocolate or strawberry flavors can add a fun twist.
What to Serve It With
These protein jars are a delightful standalone treat, but if you’re in the mood to indulge further:
- Pair with a cup of herbal tea for a soothing afternoon snack.
- Serve alongside a platter of mixed nuts for a hearty breakfast.
- Enjoy with a side of whole grain crackers for a balanced snack option.
Storage and Reheating Guidance
Store your protein jars in airtight containers or mason jars in the refrigerator. They’ll stay fresh for up to 3 days. If you find the crunch has softened, simply add a fresh sprinkle of granola or nuts just before serving to restore that delightful texture.
FAQ
Can I make these protein jars vegan?
Absolutely! Use a plant-based protein powder, and swap the yogurt with a non-dairy alternative like almond or soy yogurt. They’ll taste just as delicious!
How can I make this recipe gluten-free?
Ensure all your ingredients, especially the granola, are certified gluten-free. Most health food stores offer a variety of gluten-free granola options.
Can I prepare these jars in advance?
Yes, these are perfect for meal prep. Assemble them up to two days in advance and store them in the fridge. Just wait to add any additional toppings until right before serving to keep them fresh and crunchy.
A Warm, Encouraging Final Note
Thank you for joining me on this delightful culinary journey. I hope these Healthy Strawberry Shortcake Protein Jars bring as much joy to your table as they do to mine. Remember, the kitchen is a place of creativity, love, and nourishment. Don’t be afraid to experiment and make these recipes your own. Until next time, happy cooking and savor every bite!

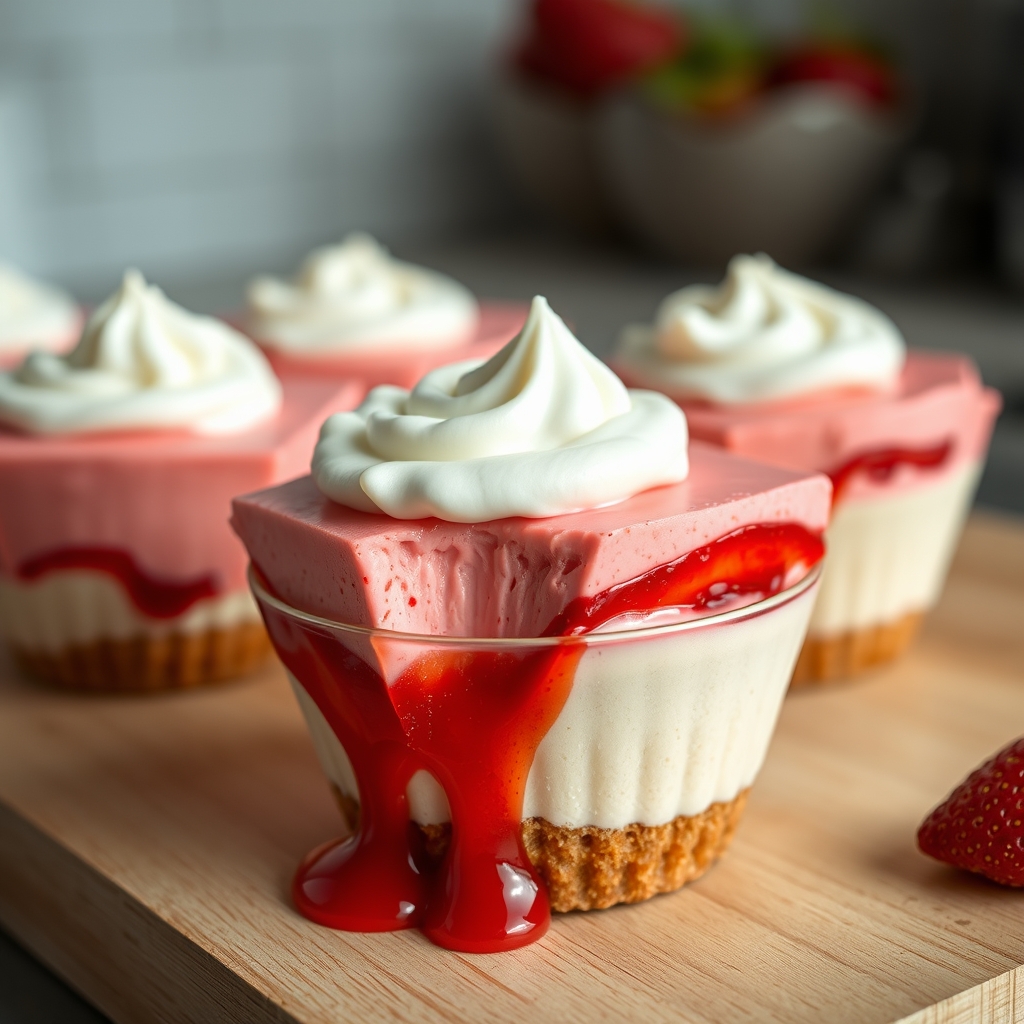
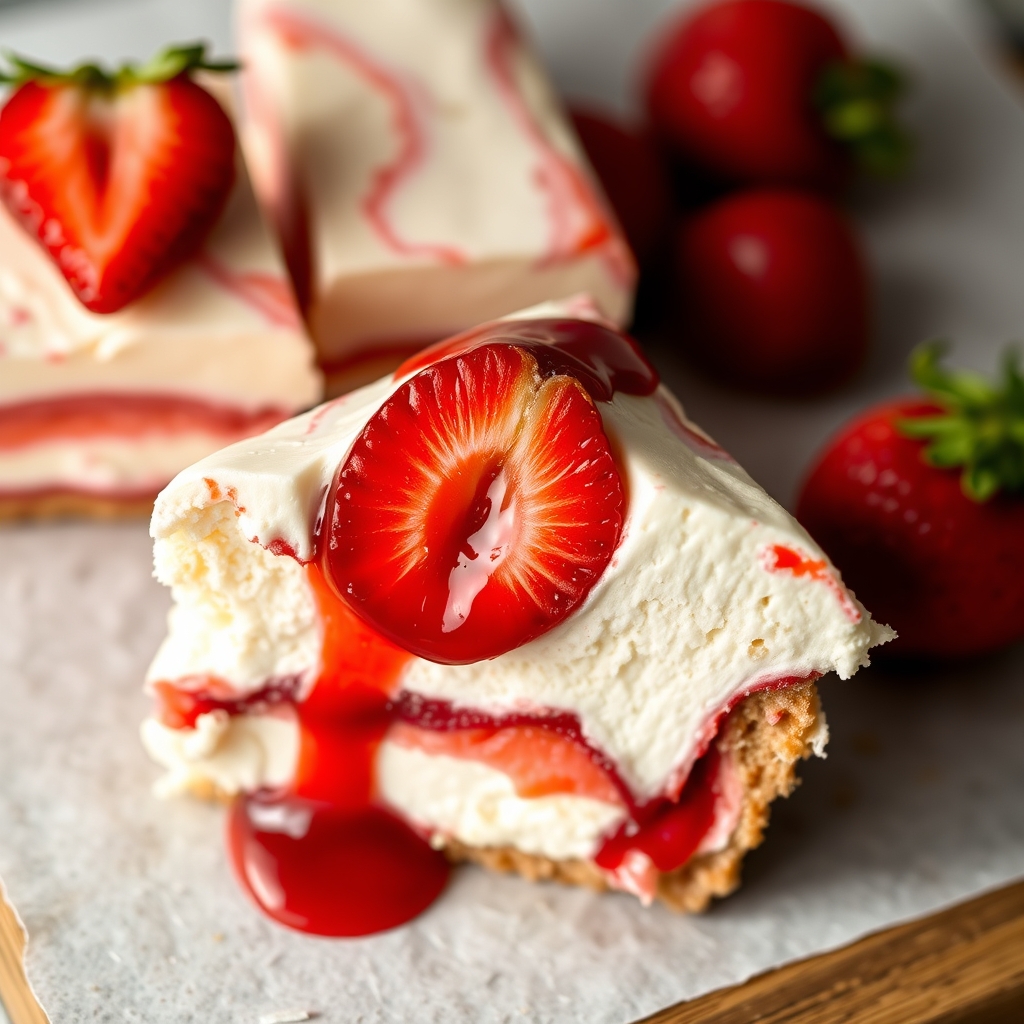
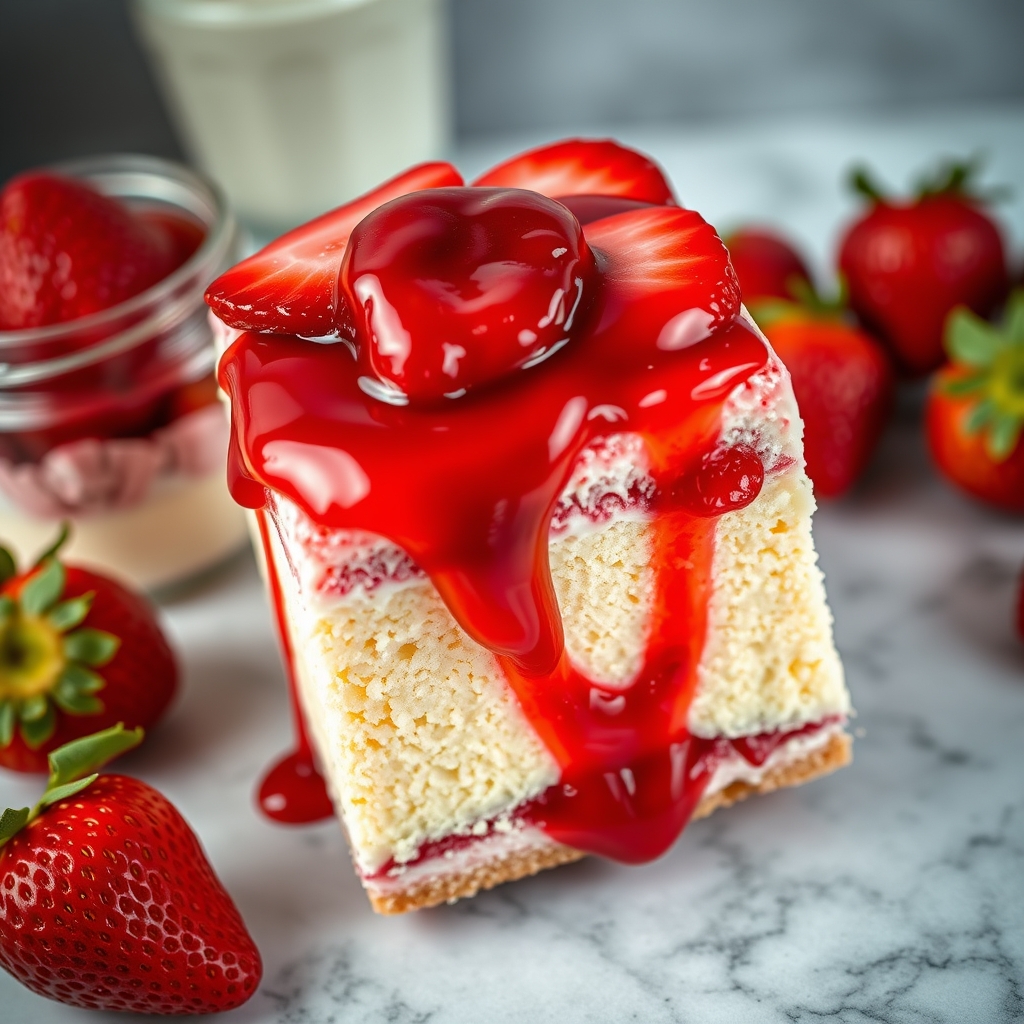
Healthy Strawberry Shortcake Protein Jars
Description
These Healthy Strawberry Shortcake Protein Jars are a delicious and nutritious twist on a classic dessert, perfect for breakfast or a post-workout treat. Packed with protein and fresh strawberries, they offer a guilt-free indulgence that you can enjoy anytime!
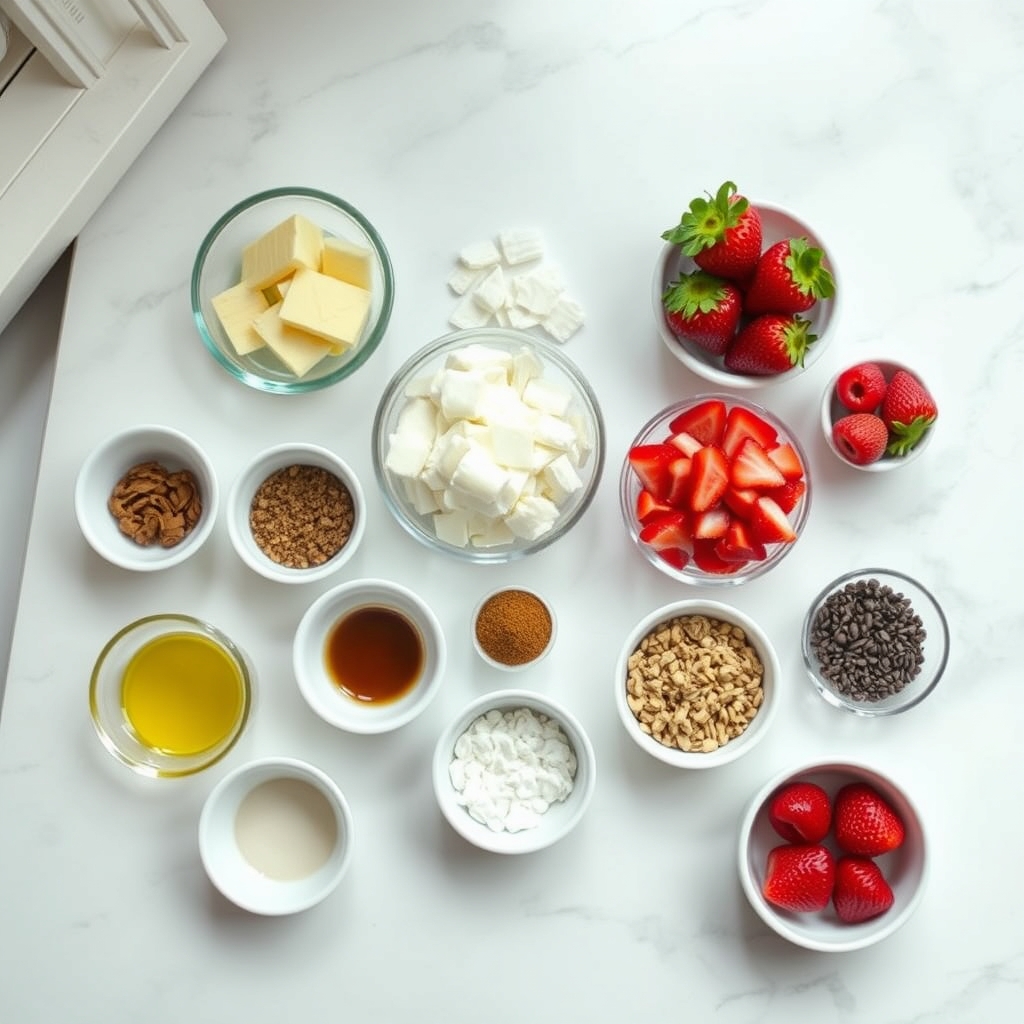
Ingredients
For the Crust:
- For the Protein Cake:
- 1 cup almond flour
- 1/2 cup vanilla protein powder
- 1/4 cup coconut sugar
- 1 teaspoon baking powder
- 1/4 teaspoon salt
- 3/4 cup unsweetened almond milk
- 1 teaspoon vanilla extract
- For the Strawberry Layer:
- 2 cups fresh strawberries, hulled and sliced
- 1 tablespoon honey or maple syrup
- 1 teaspoon lemon juice
- For the Whipped Greek Yogurt:
- 1 cup plain Greek yogurt
- 1 tablespoon honey or maple syrup
- 1 teaspoon vanilla extract
Instructions
1. Prepare the Crust:
- Preheat your oven to 350°F (175°C) and line an 8×8 inch baking pan with parchment paper.
- In a medium bowl, whisk together almond flour, protein powder, coconut sugar, baking powder, and salt.
- Add almond milk and vanilla extract to the dry ingredients, stirring until just combined.
- Pour the batter into the prepared baking pan and smooth the top with a spatula.
- Bake for 20-25 minutes, or until a toothpick inserted into the center comes out clean. Allow the cake to cool completely.
- While the cake is cooling, prepare the strawberry layer by combining sliced strawberries, honey, and lemon juice in a medium bowl. Toss gently and set aside.
- For the whipped Greek yogurt, whisk together Greek yogurt, honey, and vanilla extract in a small bowl until smooth and creamy.
- Once the cake has cooled, cut it into small cubes.
- In glass jars or cups, layer the ingredients starting with a layer of protein cake cubes, followed by a layer of the strawberry mixture, and then a layer of whipped Greek yogurt.
- Repeat the layers until the jars are full, finishing with a topping of strawberries.
- Chill the jars in the refrigerator for at least 30 minutes before serving to allow the flavors to meld.
Notes
Feel free to substitute the almond flour with oat flour for a different texture. You can also use other berries like blueberries or raspberries for a variation.