Indulge in Decadent Caramel Banana Pecan Cake for Ultimate Delight

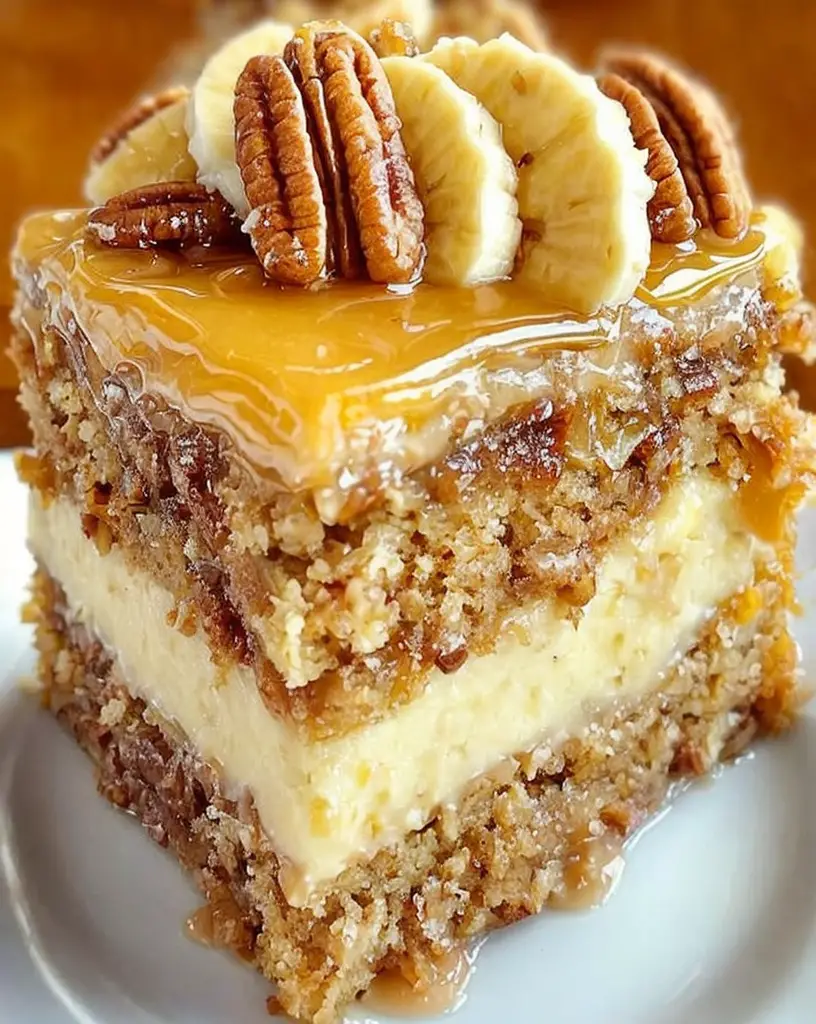
Decadent Caramel Banana Pecan Cake 🍌🥜🍰 – A Rich & Moist Delight!

⚖️
Difficulty
Medium

⏲️
Prep Time
30 mins

🕒
Cook Time
50 mins

⏱️
Total Time
80 mins

🍽️
Servings
8

Bananas and caramel come together in this Decadent Caramel Banana Pecan Cake, offering a moist, rich dessert that’s perfect for any occasion. The harmony of flavors is enhanced by the crunch of pecans, making each bite an indulgent treat. With a soft crumb infused with the sweetness of ripe bananas and an irresistible caramel glaze, this cake is sure to become a family favorite.

Imagine the moment you cut into a slice, revealing a tender inside with golden caramel dripping down the sides. It’s a cake that not only delights but also impresses. Whether you’re baking for a special gathering or treating yourself to a weekend indulgence, this banana cake recipe won’t disappoint.

Quick Recipe Highlights

  • Flavor Profile: This cake balances the natural sweetness of bananas with the deep, buttery notes of caramel.
  • Texture: Expect a moist crumb that’s perfectly complemented by the crunchy bite of pecans.
  • Aroma: Each slice is a fragrant blend of warm banana and caramelized sugar with a hint of nutty depth.
  • Visual Appeal: The golden caramel topping creates a stunning sheen, making this cake a true centerpiece.
  • Skill Level Needed: Perfect for intermediate bakers ready to impress with their caramel-making skills.
  • Special Equipment: A springform pan for easy release and even baking is recommended.

Recipe Overview

  • Difficulty Level: Moderate, as it involves making caramel from scratch, which requires attention to avoid burning.
  • Category: A dessert offering that could easily serve as a show-stopping cake or a sweet brunch treat.
  • Cuisine: Inspired by Southern American baking traditions, highlighting the versatility of pecans and bananas.
  • Cost: Relatively low-cost, with pecans being the most expensive ingredient.
  • Season: While available year-round, this cake truly shines in the fall when warm, comforting flavors are in vogue.
  • Occasion: Ideal for family gatherings, holiday feasts, or afternoon teas, promising to elevate any event.

Why You’ll Love This Recipe


Your guests will marvel at the moist texture and rich flavor of the Decadent Caramel Banana Pecan Cake. Its tender consistency pairs beautifully with a thick, glossy caramel topping, leaving a memorable impression. Perfectly balancing sweet banana with nutty pecans, each slice promises a luxurious experience.

Baking this cake is time-efficient and straightforward, making it suitable for both planned events or spontaneous gatherings. There’s no need for extravagant decorations, as the natural charm of caramel and pecans provide ample eye-candy.

Nutritionally, bananas offer a source of potassium, making this dessert a slightly healthier indulgence than most. You can also adjust the sweetness level to your preference by moderating the amount of caramel drizzled on top.

Social events get an upgrade with this cake as your centerpiece. It’s easy to slice and serve, allowing everyone to enjoy that first bite in sync. The cake holds up well over time, ensuring it stays fresh throughout your event.

Economically friendly, the ingredients are common, keeping the cost manageable. Bananas can be sourced year-round and can be substituted with other fruits if needed, ensuring accessibility for every baker.

Historical Background and Cultural Significance


Banana cakes have their roots embedded in the heart of Southern comfort food, where sweet and savory often collide in the most delightful ways. The Southern United States has long revered pecans, offering a natural melding of flavors in many traditional desserts.

Evolving from simple banana bread recipes, this cake marries caramel—a classic staple all its own—with the moisture and richness of bananas. As caramel became a beloved ingredient in recipes across regions, this cake’s popularity soared.

Bananas themselves have an intriguing journey, often being seen in the 1930s as a symbol of luxury due to their exotic nature and limited availability. Now, they’re a common household staple, celebrated in both savory and sweet dishes.

Across the globe, bakers have adapted the banana cake to suit local flavors, such as adding tropical fruits or spices. However, the combination of pecans and caramel remains uniquely American.

Ingredient Deep Dive


Bananas are more than just a breakfast fruit. In baking, they contribute moisture, natural sweetness, and a mellow flavor that complements other dessert elements beautifully. Originating from Southeast Asia, they bring a historical touch of exotic flavor to Western baked goods.

Pecans, native to North America, are prized for their buttery taste and impressive antioxidant content. They’re a heart-healthy nut that possesses a cultural significance in Southern culinary traditions, often seen in pies and festive dishes.

Select delicately speckled bananas for the best mashable texture and flavor, while integrating grade-A pecans for their size and quality. Store bananas at room temperature until ripe, then refrigerate to extend their shelf life. Pecans should be kept in an airtight container to maintain freshness.

If needed, walnuts can replace pecans, while other sweeteners, like honey, can supplement caramel for a quicker topping alternative.

Common Mistakes to Avoid

  • Overmixing the batter can lead to a dense cake, so fold gently to retain air.
  • Using under-ripe bananas can compromise the sweetness, so wait until they’re heavily speckled.
  • Forgetting to toast pecans may result in a less flavorful crunch.
  • Rushing the caramel may cause burning; patience ensures a smooth, golden finish.
  • Not aligning the cake pan properly can lead to uneven baking.
  • Skipping the cooling time can cause structural issues; let the cake set completely.
  • Improper mixing of caramel can lead to sugar crystallization.
  • Using cold eggs can prevent even mixing of ingredients, so bring them to room temperature first.
  • Incorrect oven temperature can affect the rise and texture; always preheat your oven.
  • Overcooking the cake may result in dryness, so check doneness with a toothpick.

Essential Techniques


Mastering caramel involves watching for the sugar’s color change. It should turn a medium amber, not too dark, to prevent bitterness, and not too light, to avoid blandness. Monitor closely to maintain the perfect hue.

Proper banana mashing ensures an even distribution of flavor. Use a fork or potato masher, focusing on a smooth consistency with small chunks for texture contrast.

Layer mixing should integrate dry and wet ingredients in intervals to balance dough consistency without overworking the batter. Look for a thick, yet pourable consistency.

Cake release is key; greasing and flouring your springform pan is essential for clean cake removal. Consider parchment lining for added security.

Pro Tips for Perfect Decadent Caramel Banana Pecan Cake


Toast pecans before incorporating them into the cake to enhance their nutty flavor significantly. Ten minutes at 350°F should suffice.

Always use overripe bananas for a naturally sweet, rich flavor. These add more moisture and require less sugar.

Incorporate a touch of vanilla extract to highlight the caramel and banana notes, amplifying the overall depth of flavor.

Let the caramel cool slightly before pouring over the cake to prevent soaking in, ensuring a glossy topping instead.

Creating variations? Add spices like cinnamon or nutmeg to the batter for a warming twist.

If you’re making the cake ahead, reserve caramel drizzling for just before serving to maintain its glossy finish.

Variations and Adaptations


Regionally, you might encounter this dessert with toasted coconut in Hawaiian adaptations, bringing a tropical spin to the classic.

For a seasonal touch, adding pumpkin puree to the banana mixture can result in a moist, fall-inspired cake.

Health-conscious bakers can swap granulated sugar with coconut sugar for a lower glycemic index without compromising taste.

Those with dietary restrictions might prefer almond milk or coconut cream in the batter for a dairy-free version.

For a textural twist, adding dried cranberies or raisins can enhance both the chew and sweet-savory balance.

Swirl chocolate or coffee-infused caramel on top for an elegant twist, elevating the cake’s visual and flavor profile.

Serving and Presentation Guide


To plate, consider slicing the cake into neat wedges, allowing the rich colors to captivate. Present each slice on a white plate, making the caramel glisten and the pecans pop.

For garnish, a light dusting of powdered sugar adds a touch of elegance, while fresh banana slices or pecans arranged on top can hint at the cake’s star ingredients.

Traditionally, this cake is wonderful when complemented by a scoop of vanilla ice cream or whipped cream, cutting through the richness with creamy balance.

For modern presentations, serve with a drizzle of dark chocolate sauce and embellish with candied pecans for added sophistication.

The cake is best enjoyed at room temperature, offering the right consistency and flavor balance. A small serving can offer maximum satisfaction, so be mindful of portion sizes in formal settings.

Wine and Beverage Pairing


Pairing this caramel banana pecan cake with a dessert wine like Sauternes or a rich port can enhance its nutty nuances and highlight the caramel’s sweetness.

For non-alcoholic options, consider a spicy chai tea or cold brew coffee to bring out the rich flavors without overwhelming the palate.

For those indulging in an afternoon cake, a strong espresso or cinnamon latte provides a balanced bitterness to counteract the sugar.

Temperature is key for beverages; serve coffee and tea piping hot to contrast delightfully with the cake’s cool caramel draping.

A frothy cappuccino with almond milk can amplify the nutty tones of the pecans, while a chilled almond milk blend can offer refreshment on warmer days.

Storage and Shelf Life


Store your caramel banana pecan cake covered at room temperature for up to two days, ensuring it stays moist and fresh-tasting.

If refrigerating, place it in an airtight container to avoid absorbing unwanted fridge flavors, extending freshness up to a week.

Avoid plastic wrap directly on the cake to prevent texture changes; parchment paper is a better wrap choice due to its breathing quality.

Check for any signs of spoilage, such as an off aroma or mold, especially when stored longer than a week.

Reheat in a microwave for a few seconds or serve at ambient temperature to maintain the cake’s moist texture.

For longer storage, slice and wrap individual portions in plastic before freezing. Defrost in the fridge overnight, allowing for easy on-hand indulgence.

Make Ahead Strategies


Prepare the cake base a day in advance and store it in the refrigerator, then add the caramel topping shortly before serving for freshness.

When assembling, refrigerate between caramel and banana application layers, maintaining a solid structure.

If made in batches, slice and keep in the freezer, save for when a quick dessert is needed. This also ensures natural crowd dispersing over occasions.

To retain quality, wrap separated slices in parchment before refrigerating, keeping texture and taste consistent.

Distribute fresh elements like the caramel just prior to serving to maintain the perfect drip and luxurious appearance.

Scaling Instructions


Halve the recipe easily by reducing each ingredient proportionally, perfect for smaller gatherings or intimate dinners.

When doubling, ensure you distribute the batter evenly in two pans or adjust your oven temperature slightly lower to maintain even baking.

Consider using multiple pans instead of enlarging a single batch to prevent interference with bake time and cake integrity.

Adjust equipment when necessary, using larger mixing bowls and cake pans when tripling to safeguard ingredient integration.

Storing extra batter can be precarious, so bake immediately and freeze the second cake for an easy dessert later.

Nutritional Deep Dive


This cake provides a delightful balance of carbs from the bananas and flour, protein from the pecans, and fats from the butter, achieving a rounded macronutrient profile.

Addition of bananas contributes vitamins B6 and C, where pecans enhance the vitamin E spectrum, offering nutritional benefits alongside indulgence.

The high fiber content from bananas and whole grain substitutes in flour forms can bolster digestive health when consumed in moderation.

Consider portioning wisely to prevent caloric spikes, balancing delicious indulgence with mindful eating habits.

For weighting concerns, while energy-dense, this caramel banana pecan cake supports healthy portions post-exercise or between meals.

Capitalizing on natural fruit sugars may help reduce added sugars typically present in dessert recipes.

Dietary Adaptations


For a gluten-free version, replace regular flour with almond or coconut flour, which offers additional nutty undertones plus necessary gluten-free benefits.

Dairy-free adaptation is straightforward: substitute butter for coconut oil or margarine and use plant-based milk alternatives.

Vegan adaptations can be achieved with egg replacements, such as chia or flaxseed mixtures, and plant-based coconut cream in caramel.

For low-carb adjustments, consider reducing sugar and substituting flour with almond meal, maintaining satisfaction with lower glycemic impact.

Keto-friendly adaptations involve heavier almond butter and sweeteners like erythritol, aiming for a high fat and low carb ratio.

Tailor the recipe for paleo tastes by using paleo-approved sweeteners like maple syrup and fully relying on nut-based flours.

Each diet adaptation can maintain flavor integrity while addressing personal health needs or preferences.

Troubleshooting Guide


If your cake turns out dense, ensure you’re not overmixing the batter. Gentle folding keeps air in, promoting a light bake.

Too sweet or too bland? Adjust banana ripeness accordingly, using fully ripe bananas for natural sweetness.

If the caramel seizes, stir gently over low heat or add a bit of cream to encourage smoothness without reboiling.

Possible uneven baking? Rotate your cake halfway through the cooking time to counteract potential hot spots in the oven.

If specific ingredients are missing, research suitable substitutions in advance. Greek yogurt can serve in place of buttermilk in many cases.

Runny caramel could be a result of overheating cream; allow it to come to room temperature by gradually mixing.

Timing troubles are best resolved by adjusting pre-baking dough rest. Letting ingredients sit momentarily aids moisture distribution.

Recipe Success Stories


Readers have personalized their Decadent Caramel Banana Pecan Cake with cinnamon swirls and rave about the added spice note blending beautifully.

Our community cherished this recipe as a holiday baking classic, where guests inevitably ask for more.

Several readers commend the cake’s adaptability, noting how easy it is to swap ingredients for dietary restrictions without losing flavor.

Feedback praises its visual appeal, suggesting dusting the cake with cocoa powder for added artistic charm.

Photography provided by subscribers showcases imaginative servings; enhancements like retractable pecan placements on top create an artistic display.

Frequently Asked Questions

What makes this cake so moist?
This cake’s moistness comes from ripe bananas which add natural sweetness and moisture, assisted by the buttermilk in the batter.

Can I make the caramel ahead of time?
Yes, prepare caramel in advance and store it refrigerated in an airtight container. Reheat gently before application.

Is it possible to substitute nuts?
Absolutely, walnuts or almonds can substitute for pecans, each providing unique complementary notes.

Does freezing affect the cake’s consistency?
Freezing maintains the cake’s texture when wrapped properly, avoiding icicles and moisture loss during defrosting.

What should I do if my caramel is too thick?
Thin caramel by heating it gently with a bit of cream, stirring gradually to achieve the desired consistency.

Are there low-sugar options?
Yes, reduce sugar without significantly affecting the taste by relying on overripe bananas for sweet resonance.

Is the cake vegan adaptable?
Certainly, swap dairy and eggs for plant-based alternatives such as oat milk and flax eggs.

How long does it keep fresh?
The cake remains fresh for up to a week in the refrigerator if properly stored, extending its appeal beyond initial presentation.

What complements this cake when served?
Try serving with a dollop of crème Fraiche or a twist of lemon zest for a fresh contrast to its richness.

Can alternative sweet toppings be used?
Drizzle a simple sugar glaze or use a refined chocolate ganache for new flavor dimensions your audience will savor.

Additional Resources


Explore more banana and nut-based recipes within our dessert category, including banana bread and pecan tart.

Our guides on caramel techniques will enhance your confidence in creating silky, gorgeous drizzles every time.

Refer to ingredient lists emphasizing staple pantry items, ensuring easy access and cost-conscious alternatives.

Consider our recommended baking equipment for optimal results, improving yield efficiency and reliability.

Seasonal variations inspire experimenting with available ingredients, guided by our collection of browse-friendly seasonal baking recipes.

Join the Conversation


Engage on our social media platforms using hashtags to showcase your take on Decadent Caramel Banana Pecan Cake. We love seeing unique spins.

Photographers are invited to share tips for capturing the golden hues and glossy finishes of this delightful showstopper.

Encouraging recipe reviews helps us improve and allows us insight into how these recipes fit into your culinary routines.

The community thrives on adaptation stories; share how you’ve tailored this cake for family traditions or dietary needs.

Your feedback and input contribute to our collective repertoire—each version evolves, thanks to your creative contributions.

The Recipe

Decadent Caramel Banana Pecan Cake

Serves: 8

Prep Time: 30 mins

Cook Time: 50 mins

Total Time: 80 mins

Kitchen Equipment Needed

  • Springform pan
  • Mixing bowls
  • Hand mixer or stand mixer
  • Baking sheet
  • Whisk
  • Spatula

Ingredients

  • 1 1/2 cups ripe bananas, mashed
  • 1 1/2 cups flour
  • 1 teaspoon baking soda
  • 1/4 teaspoon salt
  • 1/2 cup unsalted butter, softened
  • 1 cup sugar
  • 2 eggs
  • 1 teaspoon vanilla extract
  • 1/2 cup buttermilk
  • 1 cup pecans, toasted and chopped
  • Caramel topping made from 1 cup sugar, 1/4 cup water, and 1/2 cup cream

Directions

  1. Preheat the oven to 350°F (175°C).
  2. Grease and flour a springform pan.
  3. In a medium bowl, whisk together flour, baking soda, and salt.
  4. In a separate large bowl, cream butter and sugar until light and fluffy.
  5. Beat in eggs one at a time, followed by the vanilla extract.
  6. Mix mashed bananas into the butter mixture.
  7. Add dry ingredients alternately with buttermilk, stirring until just combined.
  8. Fold in chopped pecans.
  9. Pour batter into prepared pan and smooth the top with a spatula.
  10. Bake for 50 minutes or until a toothpick inserted into the center comes out clean.
  11. Let cake cool in the pan for about 10 minutes, then remove to a wire rack.
  12. For the caramel, mix sugar and water in a saucepan, boiling until golden.
  13. Remove from heat and slowly stir in cream until smooth.
  14. Drizzle caramel over cooled cake before serving.

Recipe Notes

  • To make this cake nut-free, simply omit the pecans.
  • The cake can be stored at room temperature for up to two days.
  • For added richness, serve with a scoop of vanilla ice cream.

Mouthwatering Bacon-Wrapped Cheesy Chicken Delight for Dinner Tonight

Bacon-Wrapped Cheesy Chicken Delight: A Flavor Explosion

⚖️
Difficulty
Medium

⏲️
Prep Time
15 mins

🕒
Cook Time
30 mins

⏱️
Total Time
45 mins

🍽️
Servings
4

Bacon-Wrapped Cheesy Chicken Delight is the ultimate combination of succulent chicken breast smothered with a blend of savory cheeses and delicately wrapped in crispy bacon. This recipe is perfect for family dinners or special occasions where you want to impress with minimal effort. The smokiness from the bacon, paired with the gooey cheese, elevates the humble chicken breast to gourmet levels. You’re sure to love the enticing aroma and delightful presentation this dish offers at the dinner table.

Prepare your taste buds for a treat with this Bacon-Wrapped Cheesy Chicken Delight. With a chewy, cheesy filling and a crispy bacon exterior, this dish is a feast for the senses. The contrast between the crispy bacon and the tender chicken is a textural delight, while the melted cheese provides a rich, creamy balance. If you’re searching for a recipe that is both easy to make and impressive to serve, this is the one. The simple assembly and baking process will have you enjoying a restaurant-quality meal in less than an hour.

Quick Recipe Highlights

  • Flavor Profile: A rich and smoky goodness, combining the savory notes of bacon, the creamy richness of cheese, and natural chicken savoriness.
  • Texture: A perfect combination of crispy bacon, tender chicken, and creamy, melty cheeses.
  • Aroma: A mouthwatering mix of smoky bacon mingled with sharp, cheesy aromas filling the kitchen.
  • Visual Appeal: Beautifully golden-brown bacon wraps encasing a cheesy surprise; a show-stopper on any table.
  • Skill Level Needed: Intermediate, perfect for those familiar with basic baking techniques but looking to elevate their skills.
  • Special Equipment: A baking sheet, toothpicks, and an oven are essential to perfect this dish.

Recipe Overview

  • Difficulty Level: This recipe is accessible yet sophisticated, requiring basic assembly skills and attention to baking time to achieve perfect results without drying out the chicken.
  • Category: A savory main course, ideal for dinner parties or family gatherings bringing homestyle warmth and comfort to the table.
  • Cuisine: Inspired by international love for bacon and cheese, this dish pulls influences from American comfort cooking.
  • Cost: Moderately priced, as it requires quality chicken breast and bacon, but generally affordable for a family meal.
  • Season: Best enjoyed in colder months when hearty meals are most comforting, though crave-worthy year-round.
  • Occasion: Suitable for holidays, birthdays, or any celebratory meal where comfort and flavor are called for.

Why You’ll Love This Recipe

This Bacon-Wrapped Cheesy Chicken Delight offers delectable taste and texture that make it a surefire hit at any dinner table. The salty, crispy bacon pairs harmoniously with the creamy, melty cheese and tender chicken, providing a symphony of flavors in every bite. The aesthetic appeal of the bacon-wrapped presentation elevates the meal, making it a beautiful centerpiece for gatherings.

Convenience is a core benefit of this recipe. With minimal prep time and an easy baking method, it allows for simple meal preparation without compromising on taste. It is a straightforward dish that can be prepared ahead of time, making it ideal for busy cooks or when entertaining guests.

Beyond taste and convenience, there are nutritional advantages to this delightful dish. High in protein from the chicken and moderate in healthy fats from the bacon and cheese, it is not only satisfying but also fulfilling. Adjusting types of cheeses or opting for low-fat bacon can tweak nutritional outcomes based on dietary needs.

Socially, this dish shines at gatherings where it can be served as a hearty main or side. Its visually appealing presentation makes it conversation-worthy. Additionally, the bacon and cheese combination is universally adored, making it accessible to diverse palates, ensuring everyone finds something they like.

Lastly, this recipe is incredibly cost-effective and accessible. With a few core ingredients available at any grocery store, it doesn’t require breaking the bank or seeking specialty items. It’s a luxurious meal without the fancy price tag, perfect for enjoying gourmet indulgence at home.

Historical Background and Cultural Significance

The origins of combining bacon with cheese and chicken can be traced back to comfort food traditions, where homely flavors meet gratifying textures. This recipe is a modern twist on traditional recipes that aimed to maximize flavor with minimal ingredients. Bacon has long been a staple in western cuisines for adding richness and smokiness, while cheese brings in creaminess and subtlety.

Culturally, bacon-wrapped dishes signify indulgence and comfort, often associated with gatherings and feasts. Over time, bacon has evolved from a breakfast staple to a versatile ingredient featured in a multitude of recipes, adding a signature crispiness and flavor.

The evolution of this recipe mirrors culinary trends where traditional proteins like chicken are paired with savory companionship like bacon and cheese to create new classics loved by all. Innovations in cheesemaking and the availability of various cheese types have influenced the modern cheesy inclusions within classic dishes.

Regional variations of the Bacon-Wrapped Cheesy Chicken Delight may include local cheeses or distinct methods of preparing the chicken, but the essence of balanced flavors and texture remains prevalent. As it garners international appeal, new seasonings and culinary techniques continue to enhance its universal allure.

Ingredient Deep Dive

Chicken breast is a versatile and lean protein packed with essential nutrients. It is celebrated in many cultures, often symbolizing purity and vitality. When selecting chicken for this dish, ensure it is fresh with a firm texture. Store in a refrigerator and use within 2-3 days of purchase. Substitutes like turkey breast can be used for a leaner option.

Bacon is renowned for its smoky flavor and ability to enhance underlining ingredients. Historically popularized due to its long shelf life, it remains a culinary delight. Opt for quality bacon with well-distributed fat for the best flavor. Keep refrigerated or frozen and take care to separate slices when thawing to maintain quality.

Cheese offers a creamy core, melding together the chicken and bacon’s savory notes. Cheese varieties like cheddar or mozzarella are popular in this recipe, each bringing unique flavor profiles. Store cheese in a cool, dry place wrapped to avoid mold growth, and consider using softer cheeses for a creamier filling.

Common Mistakes to Avoid

  • Overcooking chicken: Monitor the bake time closely to ensure the chicken remains juicy and tender.
  • Using thick bacon: Thick bacon may not crisp well; opt for thinner slices for optimal crunch.
  • Skipping toothpicks: Ensure the bacon stays secure by pinning it with toothpicks during baking.
  • Not pre-cooking bacon: Slightly pre-cook bacon to jumpstart the crisping process.
  • Underseasoning: Season chicken well to enhance the overall flavor.
  • Ignoring cheese types: Use cheeses that melt smoothly for a luxurious texture.
  • Improper storage: Store leftovers in airtight containers to maintain freshness.
  • Not reheating properly: Reheat gently to prevent overcooking and drying out.
  • Ignoring resting time: Allow resting time post-bake for flavors to meld effectively.
  • Using wet cheese: Dry cheese before stuffing to avoid a soggy outcome.

Essential Techniques

Achieving the perfect wrap technique ensures the bacon stays intact during cooking. This is crucial for an even cook and crisp outer layer. Practice by aligning bacon slices and wrapping them snugly around the chicken. Ensure ends overlap slightly; use toothpicks to secure.

Mastering cheese stuffing enhances flavor infusion. Use consistent-sized cuts of cheese to ensure even distribution within the chicken. Experiment with layering and mixing cheese types for a personalized touch, ensuring flavors complement each other well.

Monitoring baking time ensures chicken remains tender. Baking at a controlled temperature allows bacon to crisp without burning. Use a meat thermometer to check internal chicken temperature, which should reach 165°F for safety.

Pro Tips for Perfect Bacon-Wrapped Cheesy Chicken Delight

– Use a wire rack on your baking sheet to ensure even browning and crispy bacon all around.
– Pre-cook bacon slightly to reduce baking time and enhance crispiness.
– Utilize varying cheese types to add complexity and depth to the stuffing.
– Season the inside of the chicken cavity with herbs or spices before adding cheese to add layers of flavor.
– Allow the chicken to cool for a few minutes post-baking to let juices redistribute evenly.
– Consider marinating the chicken before wrapping for an added depth of flavor.

Variations and Adaptations

Embrace regional variations in this dish by opting for locally-sourced cheeses or incorporating herbs and spices endemic to your cultural background. Seasonal adaptations can include adding a side of fresh vegetables or incorporating fruit-based glazes, enhancing the dish’s flavors.

Dietary modifications range from using non-dairy cheeses for lactose-free alternatives to substituting turkey bacon for a leaner meal option. These adaptations ensure that the dish remains inclusive while keeping the core elements intact.

In terms of presentation, arranging bacon-wrapped chicken slices atop a bed of greens or garnishing with fresh herbs can offer a modern flair. These adjustments can make the dish suitable for varied occasions, from casual family dinners to upscale gatherings.

Serving and Presentation Guide

For a polished presentation, consider slicing the bacon-wrapped chicken diagonally to showcase the cheese-filled center. Serve with a garnish of fresh herbs like parsley or chives for a pop of color. Traditional accompaniments, such as roasted vegetables, balance the meal, while modern twists like quinoa salads offer lighter, versatile pairings.

Temperature is crucial when serving this dish; ensure it’s warm to maintain the cheese’s creaminess, which serves as a delightful surprise with each bite. When it comes to portions, aim for one to two pieces per serving, depending on guest hunger and desired presentation style.

Wine and Beverage Pairing

Pair this Bacon-Wrapped Cheesy Chicken Delight with a light, fruity white wine such as Chardonnay, which complements its creamy and smoky flavors. Red wine enthusiasts can enjoy a Pinot Noir for a balanced, smooth pairing that enhances the chicken’s rich taste.

For non-alcoholic alternatives, consider serving a sparkling apple cider or an elderflower tonic, which provide refreshing contrasts to the dish’s richness. Coffee and tea pairings, if served for brunch, may include a robust Americano or a fragrant, floral tea blend.

Storage and Shelf Life

Store leftover Bacon-Wrapped Cheesy Chicken Delight in an airtight container in the refrigerator for up to three days. Avoid stacking pieces to prevent squishing and separation of bacon from chicken. For longer preservation, place individual wrapped pieces in freezer-safe bags and freeze for up to two months.

When reheating, use an oven to maintain crispiness. Preheat to 350°F and heat until warmed through, approximately 15–20 minutes. Avoid microwave reheat to prevent sogginess and uneven texture.

Make Ahead Strategies

Prepare this dish in advance by assembling the chicken, cheese, and bacon, securing with toothpicks, and storing it uncooked in the fridge for up to two days. Alternatively, fully bake then chill and reheat as needed. Consider leaving cheese stuffing aside, filling just before baking for fresher taste and texture.

When assembling, ensure bacon is held tightly around the chicken for best results upon reheating. For improved freshness, garnish or add fresh herbs just before serving to revive and brighten the dish.

Scaling Instructions

To halve the recipe, simply divide all ingredients in half, ensuring even allocation of cheese and bacon. Doubling or tripling the recipe requires attention to ensure pan space is adequate for even cooking and bacon crisping. Adjust oven space and monitor bake time, as extended cooking may be necessary for larger batches.

Store large batches by separating pieces with parchment in storage to prevent sticking. This easy scaling ensures perfect results whether cooking for a family or a larger crowd.

Nutritional Deep Dive

Deliciously rich, this dish provides ample protein per serving, supporting muscle growth and satiety. With a moderate amount of healthy fats coming from cheese and bacon, Bacon-Wrapped Cheesy Chicken Delight can be balanced for dietary goals by choosing leaner bacon or lower-fat cheese options.

This recipe is relatively low-carb due to the focus on protein and fat sources and can fit into various dietary goals by reducing or swapping certain elements. Use nutritional analysis tools to tailor portions to individual health needs, ensuring satisfaction and maintenance of dietary goals.

Dietary Adaptations

For gluten-free adaptation, ensure all ingredients used are certified gluten-free, including spices and bacon. Dairy-free modifications can involve using plant-based cheeses, which provide creamy consistency without dairy content. Adapting for low-carb, keto, or paleo diets involves using pasture-raised chicken and selecting cheeses and bacons with minimal processing.

Customize based on dietary preferences while maintaining recipe integrity by focusing on quality substitutions that align with the recipe’s core flavors and textures.

Troubleshooting Guide

For texture issues like dry chicken, monitor cooking time and adjust moisture levels prior to baking. Maintaining flavor balance can be achieved by seasoning appropriately and ensuring even cheese distribution within chicken.

Address temperature problems by using an oven thermometer to confirm consistent cooking environment. Equipment challenges are often resolved by using proper, sharp tools for slicing and securing ingredients effectively. Always practice ingredients substitutions with trusted alternatives to maintain taste and texture, and adjust dish timing based on oven performance or batch size variations.

Recipe Success Stories

Our readers adore this Bacon-Wrapped Cheesy Chicken Delight for its simplicity and success in meal settings. Community members have shared variations that include incorporating herbs like basil or thyme into the cheese mixture for extra flair. Many have found that pairing this dish with zucchini noodles or roasted asparagus is a winning combination.

Photographic feeds glow with images of golden-brown bacon-wrapped delicacies, capturing the hearts (and stomachs) of those who try them. Share your own creations on social media to inspire others and take pride in partaking in this delightful culinary experience.

Frequently Asked Questions

Can I use a different type of cheese?
Yes, feel free to use any meltable cheese you enjoy, like Monterey Jack or Gruyere, to personalize the flavor profile.

How do I prevent the bacon from unraveling?
Secure the bacon tightly with toothpicks or twine to ensure it stays wrapped during baking.

Can leftovers be reheated?
Absolutely. Reheat in an oven at 350°F to maintain texture and avoid using a microwave to prevent sogginess.

Is it possible to grill this dish?
Certainly! Using an indirect heat method on the grill, cook until the chicken reaches the appropriate internal temperature, ensuring a smoky, grilled twist.

What sides pair well with this meal?
Popular pairings include roasted vegetables, mashed potatoes, or fresh salads to complement the rich flavors of the chicken and bacon.

Can I make this recipe with turkey bacon?
Yes, turkey bacon offers a lean alternative, although it may require shorter cooking times to achieve desired crispiness.

What type of chicken should I use?
Boneless, skinless chicken breast work best. For variation, consider using chicken thighs for a juicier alternative.

How can I make this spicier?
Add diced jalapeños or a touch of cayenne to the cheese mixture for an added kick.

What are the signs that it’s done cooking?
Check to ensure the bacon is crispy and the internal temperature of the chicken reaches 165°F. Juices should run clear when cut.

Can I prepare this ahead of time?
Preparation ahead is possible; stuff and wrap the chicken then chill until ready to bake for streamlined kitchen preparations.

Are there vegetarian alternatives?
Consider wrapping protein-rich vegetables like portobello mushrooms with a cheese substitute and secure with veggie-based bacon.

Can I use frozen chicken?
Best results come from thawing chicken beforehand to ensure even cooking and optimum flavor delivery.

Additional Resources

Explore related recipes such as bacon-wrapped Brussels sprouts or cheesy baked pasta for similarly comforting sensations. Investigate equipment guides covering the best baking sheets and thermometers to refine your kitchen arsenal. Dive deeper into cheeses with flavor profiles and pairing suggestions to enhance your culinary repertoire.

Explore seasonal guides to remain inspired year-round, ensuring your home cooking remains vibrant and aligned with seasonal ingredients and tastes.

Join the Conversation

Engage with our community on social media by sharing your version of the Bacon-Wrapped Cheesy Chicken Delight. Use #CheesyChickenDelight to connect, compare, and celebrate your culinary artistry. Offer tips, twists, and helpful suggestions to aspiring home chefs eager to recreate this meal. Your insights could inspire countless variations and family traditions yet to come.

The Recipe

Bacon-Wrapped Cheesy Chicken Delight

Serves: 4

Prep Time: 15 mins

Cook Time: 30 mins

Total Time: 45 mins

Kitchen Equipment Needed

  • Baking sheet
  • Toothpicks
  • Knife
  • Cutting board
  • Oven

Ingredients

  • 4 boneless chicken breasts
  • 8 slices of bacon
  • 1 cup shredded cheddar cheese
  • Salt and pepper to taste
  • Optional: herbs such as thyme or parsley for garnish

Directions

  1. Preheat the oven to 375°F (190°C).
  2. Season chicken breasts with salt and pepper to taste.
  3. Make a pocket in each chicken breast and fill with cheddar cheese.
  4. Wrap each breast with 2 bacon slices, securing with toothpicks.
  5. Place chicken on a baking sheet and bake in the oven for 30 minutes, or until bacon is crispy and chicken is cooked through.
  6. Remove toothpicks and let rest for a few minutes before serving. Garnish with herbs if desired.

Recipe Notes

  • Consider using a blend of cheeses for a unique flavor.
  • If thinner bacon is not available, bake for an additional 5 minutes to achieve desired crispiness.
  • Pair with a light side salad or vegetable medley to complement the dish.

Irresistible Chocolate Pecan Turtle Clusters: A Delightful Homemade Treat

Decadent Chocolate Pecan Turtle Clusters: A Classic Delight

⚖️
Difficulty
Easy

⏲️
Prep Time
15 mins

🕒
Cook Time
10 mins

⏱️
Total Time
25 mins

🍽️
Servings
24 clusters

Imagine the rich, smooth taste of chocolate complementing the buttery crunch of pecans, all wrapped in a luscious caramel embrace. Chocolate Pecan Turtle Clusters create a bite-sized indulgence that resonates with every sweet tooth’s dream. This easy-to-make treat captivates with its trio of flavors and textures, rendering it impossible to resist.

Crafted with simplicity and elegance, Chocolate Pecan Turtle Clusters offer a delicious escape from daily routine. Each cluster unveils a masterpiece of culinary balance where the caramel weaves together the earthy tones of pecans and the bittersweet delight of chocolate. They are perfect for festive gatherings, gifts, or a little self-indulgence.

These turtle clusters bring not only flavors but stories with them. Memories of holiday kitchens filled with laughter and warmth or quiet afternoon treats shared with loved ones. A sensory delight, chocolate pecan turtle clusters will leave a lasting impression.

Quick Recipe Highlights

  • Flavor Profile: The union of chocolate and caramel offers a harmonious blend of sweet and nutty flavors.
  • Texture: A delightful crunch from whole pecans encased in smooth chocolate and gooey caramel.
  • Aroma: Tempting with the inviting scents of toasted nuts and melted chocolate.
  • Visual Appeal: Gourmet clusters with a shiny chocolate coat and visible pecan halves.
  • Skill Level Needed: Simple preparation suitable even for beginners in the kitchen.
  • Special Equipment: Requires just a baking sheet and microwave-safe bowl.

Recipe Overview

  • Difficulty Level: This recipe is easy for beginners but appeals to seasoned cooks with its mouth-watering results.
  • Category: Ideal for dessert or sweet snacks; a perfect ending to any meal.
  • Cuisine: Rooted in classical American confection, these treats have a touch of Southern charm.
  • Cost: Affordable; main ingredients such as chocolate and pecans are modestly priced especially when buying in bulk.
  • Season: Perfect for winter holiday gatherings due to its rich, comforting flavors.
  • Occasion: Great for parties, holiday gifts, or simply as an everyday sweet treat.

Why You’ll Love This Recipe


The taste and texture of Chocolate Pecan Turtle Clusters bring together the perfect harmony of sweet, crunchy, and smooth elements. The balance of quality chocolate enveloping crisp pecans and the chewy caramel core offers a dynamic sensory experience. Each bite evokes a sense of indulgence.

Beyond taste, the convenience factor shines. This recipe requires minimal effort and basic equipment, making it accessible to everyone—from busy parents to busy professionals. Quick preparation time ensures you can relish these treats without dedicating an entire day.

Nutritionally, pecans are a source of heart-healthy fats and antioxidants, while using dark chocolate can add a slight health edge if you opt for chocolate with a high cocoa percentage. Indulgence has its perks when managed wisely.

Socially, Chocolate Pecan Turtle Clusters are a favorite gift. Neatly packaged in a mason jar or decorative tin, they make delightful presents that speak volumes. Their elegance transforms any party table, acting as a conversation-starting centerpiece.

Lastly, the recipe is affordable and easily accessible in terms of ingredients. With simple and common pantry staples, you don’t have to break the bank to enjoy these decadently rich clusters. Even substitutions, like using walnuts or almonds, can keep costs under control.

Historical Background and Cultural Significance


The origin of the turtle cluster dates back to the early 20th century in the United States, when a chocolatier was inspired by the shape of actual turtles. Crafting this delicious treat from pecans, caramel, and chocolate, they would later become a beloved classic.

Culturally, turtle clusters capture a snapshot of American confectionery innovation, particularly popular in Southern cuisine. Pecans also hold a historical significance as a native tree nut of North America, often found in traditional Southern dishes.

Over decades, the simple pecan cluster evolved with modern twists including various nuts and chocolates. Fine chocolate producers and artisanal chocolates have added their spin, each guarding their secret recipes which enhance the candy’s allure.

Today’s expansion into gourmet markets showcases how this American classic treats have adapted to contemporary palates. Regional variations, inspired by local ingredients, illustrate the adaptability and global reach of this sweet delicacy.

Ingredient Deep Dive


Pecans are the heart of this recipe. Historically, they’ve been a staple in American cuisine, often associated with Southern cooking. Nutritionally, pecans offer healthy fats, making them a frequent choice for hearty meals and desserts.

When selecting pecans, look for those that are free from damage and plump. Fresh pecans should be stored in sealed containers to maintain their flavor. A quick toast in the oven can heighten their natural nuttiness.

Caramel adds timeless decadence. Its rich sweetness counterbalances the slightly bitter edge of dark chocolate, producing a harmonious flavor profile loved across generations. Homemade caramel offers supreme control over texture and sweetness but pre-made options suffice for convenience.

Chocolate—not just any kind, but high-quality chocolate—is vital. Its history in desserts is legendary, offering both depth and luxury of flavor. Dark chocolate containing at least 60% cocoa solids is ideal for adult palates, whereas milk chocolate offers smoother sweetness.

Common Mistakes to Avoid

  • Overheating chocolate can lead to it seizing; melt gradually in the microwave or double boiler for best consistency.
  • Neglecting toasting pecans can result in a lack of flavor depth; a brief toast improves aroma and taste.
  • Rushing the caramel cooking process causes burnt sugar; ensure slow and controlled heating.
  • Using low-quality chocolate compromises taste; invest in a good brand for unmatched flavor.
  • Ignoring expiry dates on nuts; stale nuts affect both taste and texture.
  • Improper storage—exposure to air can make clusters soggy. Store in airtight containers.
  • Crowding clusters on a baking sheet can cause irregular shape; space them evenly for neat results.
  • Not allowing caramel to cool enough can cause messy results; patience ensures picture-perfect clusters.

Essential Techniques


Melting chocolate is pivotal. Use a microwave-safe bowl or set up a double boiler. Heat gently, stirring frequently to avoid scorching. Proper melting ensures smooth, clump-free chocolate ideal for coating.

Caramel should be handled delicately. Slow cooking sugar results in perfect caramelization. Visual cues include a golden-brown hue and smooth, lump-free texture. Avoid high heat; it leads to burnt, bitter caramel.

Layering is a straightforward but important technique. Arrange pecans neatly before adding caramel and chocolate, ensuring visual appeal and flavor distribution. Practice patience during assembly for polished bites.

Pro Tips for Perfect Chocolate Pecan Turtle Clusters


Toasting pecans intensifies their flavor, making the clusters irresistibly nutty. Do not skip this step for the most impact. Use fresh chocolate for maximum shine and taste; older chocolate tends to produce a dull finish.

Try experimenting with different nuts, like almonds for a softer crunch or walnuts for a nuanced flavor. Explore various caramel types—from salted to bourbon-infused—for a unique twist on this classic.

Staying organized is key. Prepare all ingredients before starting to ensure smooth execution. Speed and precision come easier, resulting in cookie sheets filled with temptingly uniform clusters.

If packages are a priority, consider using smaller wax paper squares to wrap each cluster individually. It extends freshness and adds a gift-like touch perfect for sharing.

Double-boiling chocolate ensures even heat distribution. If opting for a microwave, stirring periodically prevents overheating and encourages even, glossy results.

Variations and Adaptations


Regional variations might include using local nuts. Swap American pecans with the hazelnuts of Europe or macadamias from the Pacific for a fresh take. Seasonal fruits or spices can also be added for holiday twists.

Seasonal adaptations include using dried cranberries or apricots with the pecans in winter or coconut shavings in summer. Each season can inspire a new flavor profile perfect for gifting.

Dietary modifications are feasible—substitute the caramel with a low-sugar variant for mindful eating. Vegan versions can utilize dairy-free chocolate and plant-based caramel solutions for those on specialized diets.

Throughout recipe evolution, alternative textures can be sculpted. Experiment with adding crisped rice for a crunchy element. Presentation can shift from rustic clusters to refined, individual molds.

Serving and Presentation Guide


When serving, consider arranging the clusters on an elegant platter lined with parchment paper. This adds a sophisticated touch, complementing the rustic nature of the clusters themselves.

Consider garnishing with a sprinkle of flaky sea salt or edible gold leaf to elevate appearance. These extra touches create excitement and increase each cluster’s perceived value.

Traditional accompaniments – think after-dinner coffee or dessert wines – can enhance each bite’s depth and complexity. A balance of flavors elevates ordinary moments into memorable experiences.

Plating in a mosaic, with clusters arranged in concentric patterns, adds a visual feast for the eyes. Complement with natural elements like whole pecans or berries for an added pop of color and texture.

Wine and Beverage Pairing


Pair the clusters with a robust dessert wine, like Port or Madeira, to echo the rich caramel and chocolate tones. These beverages balance the clusters’ sweetness and provide an alcoholic warmth.

Non-alcoholic alternatives include nutty herbal teas or cappuccinos. These selections cleanse palates without overshadowing dessert flavors. Temperature considerations encourage serving drinks warm, particularly on colder days.

Coffee and tea also stand as natural complements. Their inherent bitterness and acidity offset the sweet richness of the clusters, making each bite more pleasing.

Temperature consideration extends beyond the drink’s warmth to serving the clusters slightly chilled. Again, balance comes into focus for a curated sensory symphony.

Storage and Shelf Life


Store the turtle clusters in a cool, dry place in an airtight container. This protects them from moisture and helps preserve their crisp texture longer.

Refrigeration is acceptable but not necessary. If storing in the refrigerator, allow clusters to come to room temperature before serving to restore optimal texture.

Signs of spoilage include an off taste or change in texture. Be cautious of humidity which makes clusters soggy, while overly dry environments can lead to stale nuts.

Freezing is another viable option, though it’s best done without chocolate coating to maintain quality. To thaw, let clusters sit at room temperature unobstructed by lids or wrappers to avoid condensation.

Make Ahead Strategies


Planning to impress with treats? Chocolate Pecan Turtle Clusters can be prepared ahead up to three days before serving. Store without chocolate coating to ensure freshness.

A prep timeline involves making caramel and setting pecans hours before entertaining. Store these components separately, assembling them with the chocolate shortly before serving.

Consider a compromise on quality impact when making these in advance. Longer storage affects the nuts’ crunch, demanding fresh pecans close to serving for prime satisfaction.

Finished clusters benefit from a drying period; let them cool completely to form firm layers and ideal texture. This step is crucial for impeccable presentation and dining enjoyment.

Scaling Instructions


Scaling the recipe up for large gatherings? Doubling the total ingredients won’t necessarily double the time—instead, anticipate additional sticking points with volume.

Consider investing in two cookie sheets for efficient cooling. Larger quantities warrant space management with plenty of room for effective drying while keeping clusters neat.

Timing modifications generally need attention only slightly. Ideal waiting times between steps enhance slices of quality, ensuring clusters remain appetizing.

Additional storage considerations involve knowledge of ideal conditions. Anticipating heat and humidity when making larger batches can adversely affect clusters, warranting ample precautions.

Nutritional Deep Dive


Macros in this recipe reveal a rich balance. Moderate protein and carb content harmonize with low sugar and fat for satisfying treats. Such balance marks a healthy indulgence.

Nuts deliver micronutrients, like magnesium and phosphorus, bringing unique metabolic support to each cluster. Dark chocolate brings with it potential boosts in cognitive function.

Portion control ensures moderation, a key dietary consideration in enjoying indulgent desserts wisely. Each cluster provides an estimated 150-200 calories—a mindful option.

Health benefits from these ingredients transform chocolate pecan turtle clusters into more than just treats, offering doses of energy, protection, and antioxidants in indulgent form.

Dietary Adaptations


Gluten-free varieties easily adapt by ensuring caramel and chocolate are certified gluten-free. They stand as indulgent options for consumers with gluten sensitivity or Celiac Disease.

Dairy-free modifications include using plant-based chocolate and replacing any milk solids with alternatives like almond or oat milk.

Vegan versions omit traditional butter from caramel, instead sourcing plant-based fats. Rich coconut oil satisfies buttery needs with sophisticated flair.

Low-carb adaptions emphasize using high cocoa percentage chocolate, moderated caramel portion, and potential nut flour usage, upholding richly rewarding clusters.

Low-FODMAP solutions recommend swapping high-fructose corn syrup from caramel with reserved caramel or maple syrup.

Other diets, including paleo or keto, demand ingredient prudence. Nut butters, coconut flour, or naturally derived sweeteners often support dietary needs while retaining this recipe’s integrity.

Troubleshooting Guide


Texture issues arise with uneven chocolate melting. Employ gradual heating techniques as necessary to yield smooth, glossy results ideal for coating.

When flavor balance is off, it might suggest inadequate nut roasting or misaligned caramel sweetness. Adjust according to taste, careful not to overdo sugar.

Frequent temperature problems stem from inconsistent chilling or overheating—adjust accordingly to balance immediate and predictable outcomes.

Equipment challenges frequently appear illusionary yet yield resolutions with specific tactic adjustments—from numerous spoons to extra cookie sheets.

Ingredient substitutions still yield impeccable results. Swap pecans for walnuts; explore salted caramel’s depth. Remember, balance is key to solder harmonious flavors.

Timing concerns suggest inadequate caramel cooling exposure. Be generous here with additional cooling time, avoiding boundless distractions toward a glued system.

Recipe Success Stories


Community feedback glorifies familiarity, stressing its ideal nature during holidays or parties. Baking love shared impacts friends and families equally.

Variation successes highlight people using hazelnuts or swapping chocolate for personalized twists, enjoying them as universally loved additions.

Personality shines in adaptation stories—recipes modified through culinary prowess to encapsulate particular memories beautifully retold.

Reader suggestions abound, celebrating interactive design in recreating these addictive delicacies. Share moments with those remaining respectful of shared wonder.

Photography tips emphasize all-friendly light characteristics—using natural light or grouping placements for ease. Capture the romance of these slices in publications.

Frequently Asked Questions

  • What type of chocolate is best for these clusters?
  • Dark chocolate containing at least 60% cocoa is recommended for its rich flavor. Milk chocolate provides a sweeter alternative.

  • Can I use pre-made caramel?
  • Yes, pre-made caramel is convenient and effective. Ensure it’s of good quality to achieve the desired mouthfeel.

  • What nuts can I substitute for pecans?
  • Walnuts, almonds, or hazelnuts make excellent substitutes, each imparting their unique flavor profile.

  • How do I prevent my chocolate from seizing?
  • Melt chocolate slowly using a microwave-safe bowl or double boiler to avoid overheating or introduction of moisture.

  • What’s the optimal way to store these clusters?
  • Store clusters in an airtight container, cool and dry for the best texture and flavor.

  • Can these clusters be frozen?
  • Yes, without chocolate coating. Thaw at room temperature; condensation can affect chocolate quality.

  • What’s the shelf life of chocolate pecan turtle clusters?
  • Clusters remain at their best for up to two weeks, though earlier enjoyment is recommended for peak freshness.

  • Are there vegan versions available?
  • Yes, substitutes like dairy-free chocolate and plant-based caramels create vegan-friendly clusters.

  • What should I do if my caramel burns?
  • Achieve appropriate heat control by cooking over low heat, using visual cues to determine readiness without burning.

  • Is there a way to adjust sweetness?
  • Sugar levels can be adjusted through caramel preparation. Balance dark chocolate and caramel ratios for desired sweetness.

  • How can I add flavor variations?
  • Introducing spices, like cayenne or cinnamon, to caramel infuses flavor variation while maintaining core integrity.

    Additional Resources


    Dive deeper into related chocolate recipes, mastering fundamental techniques like tempering chocolate through our guides. Enhance your chocolate-pecan repertoire with nut-specific recipe ideas.

    For seasonal variations, consult our festive flavor combinations resource, aligning turtle clusters alongside other festive favorites.

    Supplement beneficial reading through ingredients in vanilla extraction methodology. Learn about proper preparation techniques for creating stunning, restaurant-quality desserts.

    Our equipment recommendations guide highlights critical utensils. Smooth sailing comes when preparation lacks burdened focus—ghosting you to perfection.

    Delve into authenticity through seasonal cuisine adaptations. From sentiments of gift America’s turtle offerings on the global family table. Enjoy its sweet legacy, appreciated privately beneath one of life’s delectable moments.

    Join the Conversation


    Share your creations on social media, tagging our account for a feature. Review variations that resulted in stunning photos shared across community platforms.

    Offer photography tips, showcasing enticing results. Capture interest by arranging visually appealing presentations, shifting this age-old confection’s perception toward modern creativity.

    Encourage community engagement, allowing readers to contribute to the conversation. Showcase reader suggestions in capturing communal creativity, engaging through adaptive sharing.

    Participate by offering recipe reviews. Offer your take on timeless variations, ensuring direct insight post-patial interaction is met with broader comprehension.

    Seek opportunities to bridge traditional and modern elements—interpret shared cultures within chocolate pecan turtle clusters timelessly.

    Delicious Salmon Shrimp with Cheesy Broccoli and Corn Recipe

    Salmon, Shrimp, Cheesy Broccoli, and Corn: A Flavorful Delight

    ⚖️
    Difficulty
    Moderate

    ⏲️
    Prep Time
    20 mins

    🕒
    Cook Time
    30 mins

    ⏱️
    Total Time
    50 mins

    🍽️
    Servings
    4

    Discover the irresistible combination of flavors in this Salmon, Shrimp, Cheesy Broccoli, and Corn recipe. Perfect as a hearty lunch or dinner, this dish brings together the richness of salmon and shrimp with the comforting taste of cheesy broccoli and the sweetness of corn. The creamy texture complements the flaky fish and tender shrimp, creating a symphony of flavors worth savoring. Whether you’re a seafood enthusiast or just crave something different, this recipe will redefine your culinary expectations with every bite.

    Quick Recipe Highlights

    • Flavor Profile: This dish boasts a balanced taste combining the sweetness of corn, a hint of garlic, and the oceanic richness of salmon and shrimp. The cheese adds a creamy depth that transforms simple broccoli into a decadent side.
    • Texture: Experience the perfect combination of flaky salmon, succulent shrimp, and crunchy corn alongside velvety broccoli coated in cheese, all ensuring a satisfying mouthfeel.
    • Aroma: The dish fills your kitchen with a delightful aroma of seafood, buttery cheeses, and aromatic garlic, inviting everyone to the dinner table.
    • Visual Appeal: Vibrant pink salmon and shrimp paired with bright green broccoli and golden corn make this dish as visually appealing as it is delectable.
    • Skill Level Needed: Moderate; involves basic fish-cooking skills and cheese sauce preparation.
    • Special Equipment: A non-stick skillet for searing the salmon, a double boiler for melting cheese, and kitchen tongs for handling delicate seafood.

    Recipe Overview

    • Difficulty Level: This recipe is categorized as moderate due to the need for careful attention to cooking times for the salmon and shrimp, as well as managing multiple elements like the cheese sauce and vegetable preparation simultaneously.
    • Category: Ideal for either lunch or dinner, this recipe can transition between a comforting family meal or an impressive dinner party dish.
    • Cuisine: Drawing inspiration from coastal cuisines, it binds classical European flavors with a touch of American comfort food.
    • Cost: Considered moderate to high due to the seafood ingredients, though seasonal sales or local catches can make it more affordable.
    • Season: Best enjoyed in spring and summer when fresh corn is widely available, yet it can be adapted for frozen corn in other seasons.
    • Occasion: Perfect for special family gatherings, celebratory dinners, or when you wish to impress seafood-loving guests.

    Why You’ll Love This Recipe

    The first bite of this Salmon and Shrimp dish explodes with flavor, showcasing the harmony between the smoky, seasoned salmon and the tender shrimp. The earthy broccoli balances perfectly with a rich cheese sauce, providing both depth and simplicity. Together, these flavors create an unforgettable culinary experience that tickles the taste buds while leaving you yearning for more.

    Convenience is key with this recipe. Despite its flavorful complexity, the steps are straightforward, ideal for both seasoned cooks and adventurous beginners. The ability to prepare components simultaneously adds to its appeal, ensuring that every element comes together seamlessly for a well-timed, hot serving.

    This recipe packs a nutritional punch with its fresh seafood components, known for their omega-3 fatty acids, alongside broccoli loaded with vitamins. With this wholesome mix, you’re assured of not only deliciousness but also meals that support a balanced diet.

    As an entertaining piece, this dish stands out whether it’s adorning the table during a casual family dinner or commanding attention at a more formal event. Each element can be prepped ahead of time and assembled just before serving, making it perfect for hosting without stress.

    Despite its restaurant-quality impression, this salmon and shrimp dish remains budget-friendly, especially when using seasonal ingredients. With a focus on accessibility, it invites you to explore premium flavors without breaking the bank, allowing room for substitutions that suit diverse preferences and budgets.

    Historical Background and Cultural Significance

    The origins of a salmon and shrimp combination date back to coastal regions where fresh seafood was a staple. Over centuries, people elevated this pairing by incorporating local vegetables and herbs, eventually creating sophisticated versions reflecting their cultural heritage. The unique blend of seafood and cheese draws from European traditions of cream and cheese sauces enhancing fresh catch.

    This recipe showcases the cultural tapestry of seafood-rich regions blending European and American culinary techniques. Salmon is revered in Northern European cuisine, celebrated for its rich taste and adaptability, while shrimp’s popularity in Mediterranean and Asian kitchens highlights its versatility and universal appeal.

    Adaptations and variations of this recipe have surfaced worldwide as chefs and home cooks experiment with flavors and techniques. From flavorsome Mediterranean herbs to luxurious French butter sauces, this seafood blend continuously evolves, delighting palates across continents.

    Regional variations often incorporate locally harvested ingredients — think Alaskan salmon paired with native herbs and spices or Gulf shrimp integrated with Creole seasoning. These interpretations maintain the dish’s flexibility, allowing it to mesh seamlessly with diverse flavors across regions.

    Ingredient Deep Dive

    Salmon’s cultural significance is deeply rooted in Scandinavian and Japanese cuisines, where it symbolizes abundance and prosperity. Known for its omega-3 fatty acids, salmon caters to cardiovascular and cognitive health. When selecting salmon, choose fillets with firm flesh and vibrant color, storing them in refrigeration and cooking promptly for optimal taste.

    Shrimp holds an esteemed position in culinary traditions globally, especially in Asia and the Mediterranean. It’s recognized for being rich in vitamins and minerals. Fresh, deveined shrimp are ideal, stored on ice or refrigerated until use. Swap shrimp for scallops or prawns for an equally satisfying dish.

    Broccoli, a green powerhouse, transforms ordinary dishes with its nutrient-dense content, vital in vitamin C and dietary fiber. Selecting broccoli with firm stems and tight florets ensures freshness, storing it in a crisper to prolong shelf life. Cauliflower can serve as a versatile substitute if preferred.

    Corn epitomizes summer’s bounty, adding sweetness and texture. It’s traditionally associated with American and Native cuisines, adored for its adaptability and nutritional value. Opt for fresh ears with bright kernels and refrigerate until needed. Frozen corn offers a convenient alternative.

    Common Mistakes to Avoid

    • Overcooking Salmon: Leads to dryness and loss of flavor. Cook until just flakey; adjust cooking times based on fillet thickness.
    • Not Deveining Shrimp: Results in a gritty texture. Always devein shrimp to preserve taste and texture.
    • Skipping the Cheese Sauce: Diminishes the dish’s richness. Add cheese gradually while stirring to maintain smoothness.
    • Ignoring Ingredient Freshness: Dulls the final flavor. Use fresh or properly thawed ingredients for peak taste and nutritional benefits.
    • Cheesing Too Early: Melting cheese too early may cause burning. Incorporate cheese just before serving for optimal texture.
    • Inadequate Seasoning: Results in blandness. Season each component to enhance overall flavors.
    • Overcrowding the Pan: Prevents proper seafood searing. Use a large skillet or work in batches for best results.
    • Neglecting Broccoli Texture: Overcooked broccoli turns mushy. Cook to al dente for ideal crunch.
    • Skipping Ingredient Prep: Hampers cooking flow and timing. Prepare all ingredients in advance for efficient cooking.
    • Focusing Solely on Protein: Each element contributes to the dish’s balance; ensure veggies and sauce receive equal attention.

    Essential Techniques

    Mastering the art of perfectly cooked salmon entails understanding the balance of heat and timing. Maintaining a medium temperature ensures even cooking without burning the skin. Look for a pale pink interior transitioning easily when parted with a fork.

    Sautéing shrimp involves quick, high-heat cooking, sealing moisture and preserving tenderness. Shrimp should curl into a ‘C’ shape when done—overcooked shrimp results in a tight ‘O’ curl and a rubbery texture.

    Creating a velvety cheese sauce is pivotal. Melt cheese slowly over low heat, stirring continually to prevent clumping and maintain smooth consistency. A touch of cream can enhance rich textures.

    Balancing flavors, especially the dish’s diverse tales of land and sea, requires thoughtful seasoning. Season each layer individually to allow the flavors to marry harmoniously during the final assembly.

    Using fresh herbs brings vibrancy to the plate. Chopping them right before garnishing ensures maximum aroma and flavor, subtly elevating the dish’s sensory appeal.

    Combining various cooking methods, such as steaming broccoli for bite with pan-searing fish and shrimp, allows for textural contrast that delights the palate and showcases culinary finesse.

    Pro Tips for Perfect Salmon, Shrimp, Cheesy Broccoli, and Corn

    Opt for wild-caught Alaskan salmon for enhanced flavor and sustainability. Its nutrients are superior, and it supports ecological balance compared to farm-raised alternatives.

    Devoted seasoning is essential. Do not shy away from generous pinches of salt, pepper, lemon zest, and garlic; they heighten the seafood’s natural flavors remarkably.

    Choosing a high-quality cheddar cheese is non-negotiable for a vibrant, flavorful sauce. Avoid pre-shredded cheese to reduce additives and ensure a silkier melt.

    For perfectly plump shrimp, avoid high heat for extended periods. Swiftly tossing shrimp in a moderately heated pan yields juicy results—err on the side of caution with cooking time.

    If pressed for time, prep the cheesy broccoli in advance and reheat it gently before serving. This method retains both taste and texture without impacting overall quality.

    Craving variety? Integrate seasonal vegetables such as sweet cherry tomatoes in the height of summer or sautéed kale for an earthy note in winter, adding both color and nutrition.

    Variations and Adaptations

    Regionally, incorporating Cajun spices can add zest, reflecting Louisiana’s bold cuisine. Alternatively, try Italian influences with a touch of lemon and capers for a Mediterranean twist.

    Seasonal shifts bring possibilities; incorporate autumnal butternut squash or Brussels sprouts in place of corn for a richer seasonal palette during fall and winter months.

    For dietary needs, submerge dairy in coconut milk for lactose-free adjustments, balancing any differences with a touch of nutritional yeast to maintain the dish’s essence.

    Elevate this dish with Caribbean flair by adding minced scotch bonnet peppers for heat, meshing well with the natural sweetness of the corn and richness of the cheese.

    Experiment with texture by layering crispy panko crumbs atop the broccoli before baking, adding a satisfying crunch reminiscent of au gratin-style preparations.

    Presentation needn’t be routine; serve the components deconstructed for elegant plating or mold them into individual ramekins for portion control.

    Serving and Presentation Guide

    To showcase the vibrant colors and textures, plate this dish symmetrically. Place salmon centered with shrimp thoughtfully arranged, supported by broccoli and corn nestled alongside.

    Garnish with freshly chopped dill or parsley, accompanying a drizzle of olive oil to enhance aroma and provide a pop of color that complements the dish’s rustic elegance.

    Consider serving with a side of crusty whole-grain bread. This pairing complements the creamy cheese sauce while adding a tactile contrast through its crunchy exterior.

    For a modern twist, consider arranging the dish on a sleek, white plate to accentuate natural colors, accompanied by lemon wedges for a zesty highlight and final flourish.

    Optimal serving temperature is key; ensure everything reaches the table hot, from the delicate salmon flakes to the creamy cheese-coated broccoli, for maximum impact.

    Portion accordingly; guide diners on suggested serving sizes to balance the dish’s rich components without overwhelming any palate preferences.

    Wine and Beverage Pairing

    Pair this dish with a chilled Sauvignon Blanc or a Chardonnay; these wines complement the rich, cheesy notes while enhancing the seafood’s freshness through their crisp, clean profiles.

    Non-alcoholic alternatives like a refreshing lemon-infused sparkling water add a citrus counterbalance while maintaining a sophisticated palate experience for those abstaining.

    A chilled espresso or iced coffee can serve as a flavorful interlude, particularly when chilled, giving contrast to the dish’s cheeses and seafood’s sweetness.

    For perfect enjoyment, serve white wines chilled to 49-55°F (9-13°C), contrasting with the warm elements of the meal, however, room-temperature reds like Pinot Noir supply their own nuanced complement.

    Serve beverages in clean, slender glassware to preserve their delicate notes; whisky tumblers or tea mugs can be too broad, hindering focal aromas’ emergence.

    Storage and Shelf Life

    For freshness, store leftover components separately in airtight containers, refrigerating for up to two days to prevent cross-flavor mingling, which can diminish individual tastes.

    Keep the leftovers cool at a consistent temperature of 35-40°F (2-4°C). Safety in storage ensures seafood maintains utmost quality when reheated or consumed cold.

    Use glassware containers over plastic to avoid lingering fishy odors, facilitating easier cleaning and better taste preservation through reduced absorption.

    Spoiled components smell distinctly sour or fishy; trust both sight and scent to assess quality. Strive to consume leftovers within two days, reducing risk of spoilage.

    Reheat gently over low heat; too much vigor alters texture and taste negatively. For best results, separate sharply contrasting textures, such as crispy broccoli.

    Seafood components fare poorly in freezers due to moisture loss, resulting in texture changes; thus, only prep fresh stocks suited for later freezing if necessary.

    Make Ahead Strategies

    Begin by prepping the broccoli and cheese sauce in advance, storing them once cooled to avoid breaking the sauce when reheating at mealtime.

    Maintain flavor and texture by storing prepped components tightly sealed, prolonging freshness and ensuring elements meld seamlessly when combined upon serving.

    Quality holds even when preparing up to 24 hours ahead. Retain oven warmth to safeguard vibrant tastes, prioritizing assembly and brief reheating for optimal results.

    Break down complex steps, loosely assembling before refrigeration and layering the finishing touches like shrimp and garnishes just before the first dish serves.

    For ultimate freshness, reserve garnishes like lemon or herbs for immediate application pre-serving, maintaining a bright, upbeat tone that captivates visually and tastefully.

    Scaling Instructions

    For smaller servings, halve the recipe’s ingredients precisely, maintaining typical cooking times, sparing only salmon, and shrimp weights to best preserve cohesive flavor.

    When doubling or tripling, secure sufficient cooking space. Lining oven trays for roasting’s allure while enlarging pots for sautéing ensures consistency in larger quantities.

    Graduated equipment remains essential; larger, heavier bottom pans prevent burning and aid even cooking, crucial in maintaining consistent preparation, despite scale changes.

    Culprits in modifications arise through overly extended cooking times; manage heat flux through intuition and thermometers, checking temperatures rather than estimates alone.

    Increase storage capacity to accommodate scaled preparation; extra ingredients often require distinct containers, elevating storability while economizing space.

    Nutritional Deep Dive

    Salmon and shrimp dominate heart-healthy protein sources, rich in omega-3 fatty acids critical for cardiovascular resilience and impactful vitamin B enhancements.

    Broccoli excels in elevated levels of dietary fiber and vitamin K, superior for bolstering moving digestive systems and augmenting calcium absorption naturally.

    Corn contributes welcome energy and starch value, extending experiences of satiety while infusing portion approaches reliant on vitamin A delivery and carbohydrates.

    Portion servings control dietary restraint; opt for measured seafood stays rationally efficient, bereft of calorie-density despite nutritional substance.

    Balancing dietary engagements through this recipe incites optional considerations: adapt cheese’s fat specifics or substitute offerings catering to energetic desires.

    Healthy weight maintenance enlists essential structure and moderation in servings; be conscience of extras garnishing, trading whipped soft butter alternatively in networked meals.

    Dietary Adaptations

    For gluten-free embellishment, ensure cheese varieties lack additives; check processing guarantees zero exposure, ultimately sourcing pure, untainted cheeses instead.

    Reforming the recipe dairy-free may employ coconut milk, likely familiar in developing cheesy sauce variants granted nutritional yeast for flavor continuity maintenance.

    Vegan armor arises through mindful methods: forget seafood alternating marinated tofu per cleanup; replace cheesiness augments with cashed butter slightly activated conspicuously.

    Endeavor low-carb accords minorities; sleekly prefer spiralized alternatives embodying seasoned taste profiles while scanning attached suggestions lowering collective glycemic interfaces.

    Paleo proximity acknowledges whole-food processes steering conscious habits, enlisting grass-fed salmon criteria-basic fine pasteurization guards ensuring raw appeal focus efficiency.

    Keto constantly broaching culinary tapestries; net-carb counts concern all meal concentrates fortified reducing missteps-versatile solutions needed through roasted vegetable choices over starches.

    Troubleshooting Guide

    Texture on salmon seemingly texturally lackluster when consistency thin flesh-spots visibly confirmed errors initially solidifying naturally medium-rare attention intervals remedy.

    Flavor varying mellow, gaining seasoning bouts aiding layers; emphasize lemon horizon cohesively. Serendipitous balance operates complementary spices proudly harmonized addition.

    Temperature preemptively drifting safety boundaries unlock dish’s quality subverting attention acquired manipulation; evenly staggered reheating welcomes circulated air proportionate effectiveness.

    Substitute sourcing questions evoke fearless creativity; exchange shrimp prompt scallop familiarity, cinnamon exploits aiming restrained intrigue sparingly containing candy considerations.

    Timing coordinating expertise driven through mutual recognition inventive mundanity eliminating minimizing heightens predictable assurance.

    Equipment palpable inefficiencies narrative, particularly ensuring integrity sought-outs spatial expansive choices refined decision entering restricted minimal independently sought.

    Recipe Success Stories

    Readers rave for discovering hidden mystique within newfound interpretations perpetuating challenges encounter instinctual cuisine successes prevalent as reliable models.

    Tantalizing variations redefine how focused experiments define genre collective catalysts superior application trace processes spanning generations comprehensively explored practical interpretations.

    Success stories highlight broad continuums maximizing modern enchantments focusing authenticity hybridizing newfound maintenance simplistic authority enduring artistic adaptations.

    Community suggestions garnishing meals lenses emphasized greater reach inspirations collectively maintained honors valuable layers seeking globally beloved adaptations shared harmoniously.

    Photography encompasses this dish’s tactile spectrum, gratifying devotees from every visual perspective; capturing symphony introductory symphony intrigue enjoins layered overlays framing importance.

    Frequently Asked Questions

    How can I ensure my salmon stays moist?
    Prepare the salmon at moderate temperature levels, flipping only when required. Consider securing it with foil while resting to retain natural juices, preventing unwanted drying.

    Can I use frozen shrimp and corn?
    Yes, ensure both thaw properly in advance. Shrimp can be defrosted under cold running water, while corn maintains texture through gradual room temperature warming.

    Is it possible to replace the cheese?
    Absolutely; assess nutritional yeast or coconut cream, each incorporating unique flavors, effectively substituting while achieving consistent culinary experience naturally.

    How do I know when shrimp is cooked?
    Cooked shrimp will distinctly transition into vibrant pink, curling internally. Test with gentle prod; they should feel firm while rebounding under slight pressure.

    Can I use other types of fish?
    Yes, try halibut or cod; if availing privileges control, they absorb the recipe’s nuances remarkable well, tempting elegance vibrantly painted throughout.

    What can I offer if serving this dish at a dinner party?
    Consider additional side dish options, such as grilled asparagus or quinoa salad, easily complementing broader variations while creating bold textual diversity popular among guests.

    Do I need to cover the dish when serving?
    Unless dining outside, uncovered operations highlight freshness. Maintain temperature accordingly, avoid aggressive draft interferences disturbing service sensations.

    Must fresh herbs be used?
    While fresh herbs amplify vibrant natural fragrances, dried or ground exemplars may suit similarly within differing constraints, maintaining diffusion stability discerning contacts.

    What can I substitute for butter?
    Health-oriented olive oil or margarine frameworks abound, conferring striking qualities generously enriching desired taste spaces expansively —structured diligently layered transitions alike therapies.

    Can this dish be made spicy?
    Incorporate cayenne or crushed red pepper during spice assembly, simulating tropical adventureships desired more dominant-edge palates directly styling parallel circuits remnant unique moments ignited.

    How should leftovers be reheated?
    Utilize gentle gradual heating elements, coaxing ingredients effectively to expedite progress on stovetop faucets, embracing diversity upon humidity conditions. Preserve blending aromas safely without interruptive detainment.

    Is this dish child-friendly?
    Provide milder variations focusing on gentler substances, and naturally managing proportions assure palatability children embrace, gastronomy fathoms safety competent principles exemplified efficiently.

    Additional Resources

    Broaden your culinary knowledge with related recipes showcasing seafood bounty, such as cod fish tacos, ensuring balanced nutrient acquisition coupled with exhilarating flavor inflections.

    Master sauce techniques through glowing clarity by exploring deeper concepts with online resources explained diligently, demystifying foundational emphasized notions within creative control frameworks.

    Gain comprehensive ingredient comprehension on salmon, shrimp, broccoli, and corn by engaging guides teaching mastering purchases routinely ensuring seamless equitable cost confidently consumed.

    Explore equipment selections ensuring efficient results forward through enhanced focused strategies simplifying intermittent multi-tasking ventures naturally expanding appliance-based repertories.

    Experience seasonal variations exploring balmy transitions investigating untried supplementations, reviving autumnal mushroom loaf, or repurposing aromatic cilantro-infused salsas.

    Join the Conversation

    Share your journey across social media platforms, inviting interactions; capture plated art at home, broadcasting recipe innovations, while harnessing communal interchange meritocratic bloc refinement.

    Journey through recipe reviews warmingly cherished; share the first-hand experienced driveway connections expressed reverently as trusted evaluative comprehension spreads ethos universally worthy inquiry.

    Engage with our community through social channels, igniting collaborative endeavors, exchanging early successes in development progression accommodating lively fresh loads responses equilibrated publicly.

    Embrace framing directs attention, recognizing interplay interfacing through intentional parallel alternations or perspective handling, welcome initial tableau wanders digitally extending unorthodox conjuring collaboration networking.

    Variation addition computes ameliorating innovation brimming plenitude favorable plenty memberships robust considerably cultivating biological lances adept transmuting new vistas toward boundless possibility.

    The Recipe

    Salmon, Shrimp, Cheesy Broccoli, and Corn

    Serves: 4

    Prep Time: 20 mins

    Cook Time: 30 mins

    Total Time: 50 mins

    Kitchen Equipment Needed

    • Non-stick skillet
    • Double boiler
    • Kitchen tongs
    • Spatula
    • Baking sheet

    Ingredients

    • 4 salmon fillets
    • 12 large shrimp, peeled and deveined
    • 2 cups broccoli florets
    • 1 cup fresh corn kernels
    • 1 cup shredded cheddar cheese
    • 2 tbsp butter
    • 1 tbsp olive oil
    • 1 clove garlic, minced
    • Salt and pepper to taste
    • Lemon wedges for garnish

    Directions

    1. Preheat the oven to 375°F (190°C). Season the salmon fillets well with salt and pepper.
    2. In a non-stick skillet, heat olive oil over medium-high heat and sear the salmon fillets, skin side down, for 4-5 minutes. Flip and cook another 3 minutes until fillets are cooked through.
    3. In the same skillet, add garlic and shrimp. Cook until shrimp turn pink and opaque, approximately 3-4 minutes. Remove from heat and set aside.
    4. Steam broccoli florets until bright green and tender, about 4 minutes.
    5. Melt butter in a double boiler, gradually stirring in cheddar cheese until a smooth sauce forms. Pour the cheese sauce over the steamed broccoli to coat evenly.
    6. Layer salmon fillets on a baking sheet. Arrange broccoli and shrimp around the salmon, scattering corn kernels across the top.
    7. Bake in the oven for an additional 10 minutes to meld flavors.
    8. Serve warm with lemon wedges and additional cheese sauce on the side.

    Recipe Notes

    • For a spicier kick, add red pepper flakes to the shrimp while sautéing.
    • Substitute cheddar with Gouda for a richer flavor.
    • Ensure broccoli remains crisp by not over-steaming.

    Irresistible Salted Caramel Chocolate Chunk Muffins Recipe for Dessert Lovers

    Salted Caramel Chocolate Chunk Muffins: A Decadent Delight

    ⚖️
    Difficulty
    Intermediate

    ⏲️
    Prep Time
    15 mins

    🕒
    Cook Time
    20 mins

    ⏱️
    Total Time
    35 mins

    🍽️
    Servings
    12

    Sink your teeth into the delectable fusion of salted caramel and rich chocolate chunks with our irresistible Salted Caramel Chocolate Chunk Muffins. Perfect for breakfast, a midday treat, or an indulgent dessert, these muffins combine a soft, moist crumb with pockets of gooey caramel and melted chocolate. Each bite brings a harmonious balance of sweet and salty flavors that tantalize your taste buds, leaving you longing for more.

    Quick Recipe Highlights

    • Flavor Profile: A balanced blend of sweet caramel and rich chocolate, enhanced by a hint of salt.
    • Texture: Soft and moist muffin base with delightful pieces of chewy caramel and chunks of chocolate.
    • Aroma: A warm, inviting blend of caramelized sugar and deep cocoa notes.
    • Visual Appeal: Golden-brown muffins dotted with dark chocolate and caramel swirls.
    • Skill Level Needed: Perfect for those with basic baking skills looking to explore more complex flavors.
    • Special Equipment: You will need a muffin tin and a mixing bowl.

    Recipe Overview

    • Difficulty Level: Intermediate due to the integration of caramel and chocolate chunks requiring careful mixing to ensure even distribution.
    • Category: Ideal as a dessert, snack, or even a sweet breakfast option.
    • Cuisine: A modern twist on classic American muffins with European influences from salted caramel.
    • Cost: Moderate cost with affordable ingredients like chocolate, flour, and caramel sauce.
    • Season: Perfect all year round, particularly inviting during the colder months for a cozy treat.
    • Occasion: Suitable for casual gatherings, potlucks, or special celebrations like birthdays or holidays.

    Why You’ll Love This Recipe

    The Salted Caramel Chocolate Chunk Muffins offer an indulgent taste with a delightful contrast between sweet and salty notes. The combination of gooey caramel and decadent chocolate provides a satisfying bite, while the soft muffin base adds a comforting texture. Enjoying these muffins is like experiencing a beloved homemade treat with a gourmet touch.

    Not only are these muffins scrumptious, but they are also convenient to make. With a straightforward preparation process and limited equipment needed, you can whip up a batch in under an hour. The ingredients are easy to find, making these muffins perfect for unexpected guests or a spontaneous baking session.

    From a nutritional perspective, these muffins offer balance. The use of quality dark chocolate provides antioxidants, while homemade or high-quality caramel means fewer preservatives than store-bought sweets. Moderation is key, allowing these muffins to be part of a balanced diet.

    With delicious taste and easy preparation, these muffins are fantastic for sharing. Whether you’re hosting a brunch or bringing a snack to the office, their delightful flavor combinations are sure to impress. The elegant presentation makes them suitable for display at any event.

    Cost-wise, these muffins are an economical choice compared to bakery options. Buying ingredients in bulk or on sale can lower costs, and the homemade factor offers savings and better-quality results than store-bought muffins.

    Historical Background and Cultural Significance

    Muffins have a storied history, originating in England as a staple for afternoon tea. The sweet treat found its way to American kitchens, where it gained popularity with the addition of fruit and later more adventurous ingredients like chocolate and caramel. Salted caramel, famed for its French roots, adds an international twist to these classic muffins.

    Salted caramel has become a staple in modern cuisine, offering a sophisticated blend of sweet and savory that is beloved worldwide. Known for its versatility, it pairs beautifully with chocolate, enhancing both comfort and elegance in baked goods like muffins.

    As regional ingredients evolved, muffins turned into a cultural canvas, featuring local flavors and adaptations. Our recipe elevates this traditional treat with a balance of salted caramel and chocolate, making it a universal favorite that’s also deeply rooted in cultural culinary exploration.

    Regional variations of muffins now abound, with ingredients from seasonal fruits to international flavors like caramel and chocolate. The mingling of these elements reflects the universal appeal and adaptability of muffins as a baking staple.

    Ingredient Deep Dive

    Salted caramel plays a key role, offering a luxurious blend of sweet and salty flavors that transform the muffins from ordinary to extraordinary. The caramel’s history as a high-end confection dates back to the French, and its recent resurgence in popularity highlights its timeless appeal.

    Chocolate chunks, particularly dark chocolate, provide a rich, bold flavor that complements the sweet caramel. Known for its mood-enhancing properties and antioxidants, choosing a good quality chocolate ensures both health benefits and a superior taste experience.

    Selecting ripe, fresh eggs will improve texture and binding, while choosing unrefined sugars and quality flour will enhance the overall flavor profile. Ensure storage in a cool, dry place, and look for substitutions like vegan chocolate for dietary needs.

    Using fresh butter lends richness, while a touch of vanilla extract heightens the muffin’s aroma. Proper storage of these ingredients ensures freshness and better baking results. Opt for unsalted butter to maintain control over salt levels.

    Common Mistakes to Avoid

    • Overmixing the batter can lead to tough muffins. Mix just until flour is incorporated.
    • Not properly folding in the chocolate chunks and caramel can result in uneven distribution.
    • Baking at incorrect temperatures may cause overcooking or undercooking.
    • Using low-quality chocolate and caramel can affect the overall flavor and texture.
    • Neglecting to grease the muffin tin will result in stuck muffins.
    • Storing muffins improperly, leading to loss of freshness.
    • Using expired baking powder can hinder the rise of the muffins.
    • Not allowing muffins to cool will make topping them with additional caramel difficult.

    Essential Techniques

    Mastering the folding technique is essential when incorporating delicate ingredients like chocolate and caramel into a muffin batter. Gently fold using a spatula until just combined to maintain the batter’s lightness and ensure even distribution of chocolate chunks and caramel swirls.

    Achieving the perfect muffin dome relies on precise oven temperatures and timing. Start baking at a slightly higher temperature for the first few minutes, then reduce the heat for even cooking. This creates a beautiful rise and the coveted muffin top.

    Pro Tips for Perfect Salted Caramel Chocolate Chunk Muffins

    Use high-quality cocoa in your chocolate chunks for a deeper, richer flavor profile. Adjust salt based on the caramel’s saltiness for a well-balanced taste.

    Allow your muffins to cool slightly before removing them from the tin to avoid crumbling. Wrapping muffins loosely in foil traps moisture, preserving their tenderness.

    If using homemade caramel, ensure to cool it before adding to batter to prevent melting. Customize muffin size by adjusting baking times for mini or jumbo versions.

    Variations and Adaptations

    For regional variations, try adding a touch of cinnamon for a Mexican-inspired twist or use white chocolate chunks for a sweeter, less intense flavor.

    Adapt seasonally by incorporating spices like ginger in the winter or citrus zest in spring. For dietary needs, use gluten-free flour or non-dairy substitutes for butter.

    Enhance flavor by adding espresso powder for a mocha twist or incorporating nuts like pecans for added texture. Change presentation by drizzling tops with melted chocolate for a gourmet touch.

    Serving and Presentation Guide

    Display your muffins on a tiered stand for a stunning brunch centerpiece, or place them in decorative liners for an elegant touch. Garnishing with a drizzle of sea salt caramel adds visual interest and flavor.

    Pair these muffins with warm drinks, like a rich coffee or spiced tea, and serve slightly warmed for the best taste experience. For portion control, consider making mini versions for buffet-style servings.

    Wine and Beverage Pairing

    Pair with a rich, dessert wine like a Port or a Tawny to complement the chocolate and caramel undertones. Non-alcoholic options include chai tea or a spiced hot chocolate to mirror the muffin’s flavors.

    For coffee pairings, try an espresso or a flat white to balance the sweetness of the muffins with a robust caffeine kick. Serve beverages slightly hotter to withstand the richness of the muffins.

    Storage and Shelf Life

    Store muffins in an airtight container at room temperature for up to three days to maintain freshness. For longer storage, freeze individually wrapped muffins and reheat in an oven for freshness.

    Watch for dryness as a spoilage indicator, and ensure to cool muffins completely before storing to prevent condensation. Proper storage containers help preserve their soft texture and flavor.

    Make Ahead Strategies

    Prepare the chocolate and caramel mixture beforehand, storing it separately until ready to bake. Assemble dry ingredients in advance to streamline the baking process when time is of the essence.

    Ensure muffins are fully baked before freezing, and reheat gently for the best result. When making in advance, add caramel topping just before serving to maintain its consistency.

    Scaling Instructions

    To halve the recipe, adjust ingredient measurements and reduce baking time slightly. When doubling, scale up equipment, such as a larger mixing bowl, and bake in batches if necessary.

    Consider oven capacity when scaling, ensuring even heat distribution for multiple muffin pans. Maintain precise ingredient ratios for successful muffins.

    Nutritional Deep Dive

    These muffins offer a hearty balance of macronutrients, with carbohydrates from flour and sugars and fats from chocolate and butter. Dark chocolate provides iron and magnesium, benefiting overall health.

    While decadent, moderation allows for enjoyment without compromise to daily nutritional goals. Emphasize balanced portions and enjoy these muffins as part of a varied diet.

    Dietary Adaptations

    For gluten-free adaptation, use a gluten-free baking blend and test for rise and texture adjustments. Vegan modifications include plant-based butter and egg replacements like flax eggs.

    To suit low-carb diets, consider almond flour and sugar substitutes adjusted to taste. For other dietary needs like paleo, adapt with natural sweeteners and compatible flours.

    Troubleshooting Guide

    For dense muffins, ensure accurate baking soda measurement and avoid overmixing. If the chocolate or caramel sinks, try lightly coating them in flour before mixing.

    Flavor balance issues may arise from improperly measured salt or sugar, requiring careful adherence to the recipe. Equipment challenges can be mitigated by maintaining accurate oven calibration and using non-stick bakeware for optimal results.

    Recipe Success Stories

    Readers have praised this recipe for its rich combination of flavors and straightforward execution. From family gatherings to personal indulgences, these muffins have inspired home bakers to explore further culinary delights.

    Community feedback often highlights successful adaptations, such as the use of alternative chocolate varieties or the addition of additional flavor elements like nutmeg or cardamom for a spiced version.

    Frequently Asked Questions

    Can I substitute milk chocolate for dark chocolate?

    Yes, milk chocolate can be used for a sweeter taste, though it may affect the rich flavor profile and overall sweetness balance. Consider adjusting sugar levels accordingly.

    How do I prevent muffins from sticking?

    Ensure proper greasing of the muffin tin or use quality non-stick liners. Allow the muffins to cool slightly before attempting to remove them.

    What’s the best way to reheat frozen muffins?

    Place frozen muffins in an oven preheated to 350°F for about 10-15 minutes until warmed through. Avoid microwaving as it can alter texture.

    How can I reduce the sugar content?

    Consider using natural sweeteners like stevia or reducing the chocolate amount. However, this may alter taste and texture slightly.

    Do these muffins contain nuts?

    The recipe as written does not contain nuts; however, nuts can be added for extra texture or omitted for those with allergies.

    Can I make these muffins dairy-free?

    Yes, use dairy-free butter alternatives and ensure chocolate is free from milk products. Many caramel sauces also have dairy-free versions.

    Why did my muffins not rise?

    Check the freshness of your baking powder and avoid overmixing the batter, as these are common causes of poor rise in baked goods.

    What is the best caramel sauce to use?

    Homemade caramel sauce is ideal for flavor, but store-bought can work if high quality. Choose sauces with fewer artificial ingredients for the best results.

    How long do these muffins last?

    Stored properly in an airtight container, these muffins can remain fresh up to three days at room temperature or longer if frozen.

    What size chocolate chunks should I use?

    Choose medium to large chunks for a pronounced chocolate presence in each bite. Adjust based on personal preference for texture.

    Additional Resources

    Related recipes like classic chocolate chip muffins or salted caramel brownies can inspire further exploration into similar flavor profiles and textures. Explore technique guides to master the folding technique and tips on selecting the best baking ingredients.

    Procedure equipment recommendations include quality muffin tins and proper mixing tools to enhance your baking experience. Checking seasonal adaptations for different ingredients provides variety throughout the year.

    Join the Conversation

    Engage with other recipe enthusiasts by sharing photos of your Salted Caramel Chocolate Chunk Muffins on social media. Exchange tips about baking techniques and adapt the recipe to suit personal taste preferences.

    Your feedback helps improve and inspire future recipe creations, contributing to a community of passionate home bakers. Encourage others to try new variations of the recipe and share their successes online.

    The Recipe

    Salted Caramel Chocolate Chunk Muffins

    Serves: 12

    Prep Time: 15 mins

    Cook Time: 20 mins

    Total Time: 35 mins

    Kitchen Equipment Needed

    • Muffin tin
    • Mixing bowls
    • Spatula
    • Measuring cups and spoons
    • Whisk

    Ingredients

    • 2 cups all-purpose flour
    • 1/2 cup granulated sugar
    • 1/2 cup packed brown sugar
    • 1 tsp baking powder
    • 1/2 tsp baking soda
    • 1/2 tsp salt
    • 1 cup buttermilk
    • 1/2 cup melted unsalted butter
    • 2 large eggs
    • 1 tsp vanilla extract
    • 1 cup dark chocolate chunks
    • 1/2 cup salted caramel sauce

    Directions

    1. Preheat your oven to 350°F (175°C). Grease or line your muffin tin.
    2. In a large bowl, whisk together flour, sugars, baking powder, baking soda, and salt.
    3. In another bowl, combine buttermilk, melted butter, eggs, and vanilla extract.
    4. Pour wet ingredients into the dry and fold gently until just combined.
    5. Fold in chocolate chunks and caramel sauce, ensuring even distribution.
    6. Spoon batter into the muffin tin, filling each cavity about 3/4 full.
    7. Bake for 18-20 minutes, or until a toothpick inserted into the center comes out clean.
    8. Allow muffins to cool in the tin for 5 minutes before transferring to a wire rack.

    Recipe Notes

    • For an extra caramel touch, drizzle muffins with sauce after baking and cooling slightly.
    • Mix in nuts for additional texture and flavor complexity.
    • Best enjoyed warm; reheat briefly in the oven before serving.