Spice Up Your Lunch with Jalapeño Cheddar Grilled Cheese Recipe

Jalapeño Cheddar Grilled Cheese: A Spicy Twist on a Classic

⚖️
Difficulty
Easy

⏲️
Prep Time
10 mins

🕒
Cook Time
15 mins

⏱️
Total Time
25 mins

🍽️
Servings
2

There’s nothing quite like a perfectly made grilled cheese sandwich, with its gooey center and crispy edges. But when you add a few slices of jalapeño and a generous amount of cheddar, this everyday comfort food transforms into a Jalapeño Cheddar Grilled Cheese masterpiece that tantalizes your taste buds. This spicy variation captures the classic essence of grilled cheese while introducing bold new flavors that elevate the dish. Perfect for weekday lunches or cozy dinner nights, this sandwich is simple to assemble and captures both heat and cheesy bliss in each bite.

The Jalapeño Cheddar Grilled Cheese is a must-try for those who appreciate the fine art of spicy food. The jalapeños deliver a kick of heat that is beautifully complemented by the rich, creamy texture of melted cheddar cheese. Moreover, the contrast between the crunchy bread and the soft cheese creates an inviting experience for any grilled cheese enthusiast. Whether you’re gathering with friends or looking for a delightful meal for yourself, this recipe promises to be both fun to make and delicious to devour.

Quick Recipe Highlights

  • Flavor Profile: This sandwich features a harmonious blend of spicy jalapeños and tangy cheddar cheese, creating a delightful mix of flavors that are both savory and slightly fiery.
  • Texture: The outer layer of perfectly toasted bread provides a satisfying crunch, while the melted cheddar cheese is creamy and luscious, harmonizing the textures.
  • Aroma: The smell of toasted bread mingled with jalapeños and melted cheese conjures warmth and comfort, making it hard to resist.
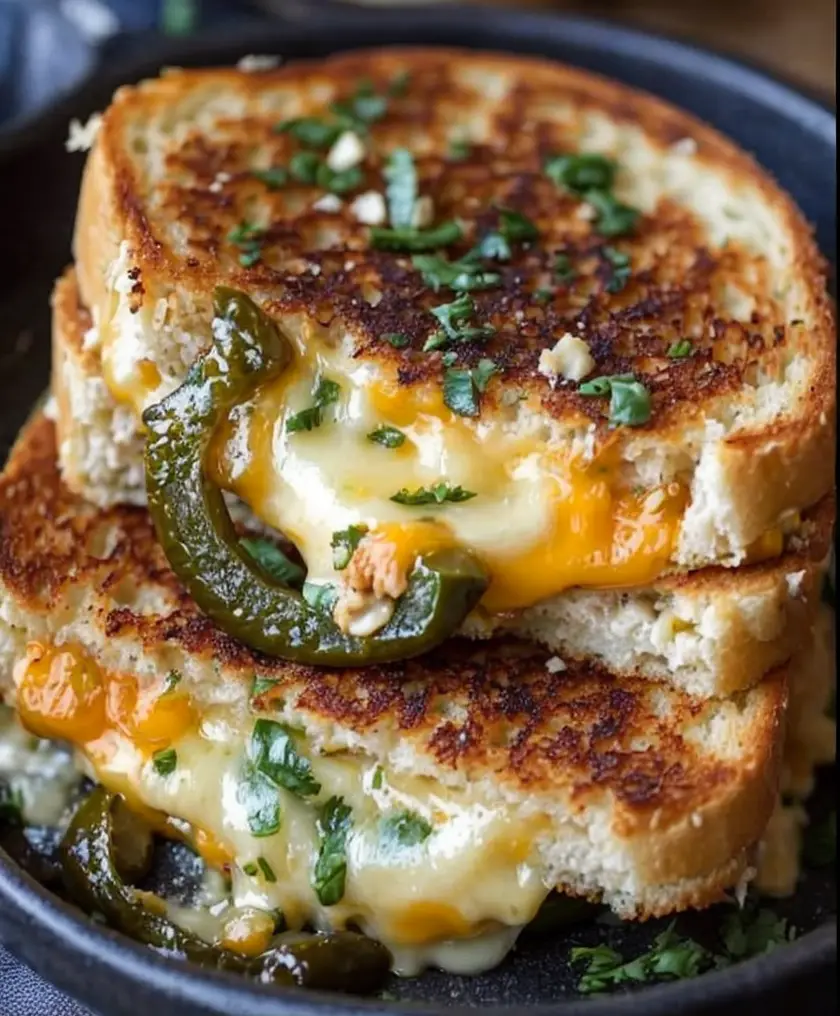
  • Visual Appeal: The vibrant green specks of jalapeños against the golden, buttery bread make for a visually tempting dish that’s sure to please.
  • Skill Level Needed: With basic cooking skills, anyone can master this recipe by following simple steps, making it accessible for novice cooks.
  • Special Equipment: A good non-stick skillet or a griddle and a spatula are essential tools for achieving the perfect toast and ensuring everything melds together seamlessly.

Recipe Overview

  • Difficulty Level: This recipe is rated as easy due to its straightforward technique of assembling ingredients and toasting them until golden brown. It is a perfect choice for beginners who wish to advance their culinary skills without an extensive cook time.
  • Category: Ideal for quick lunches or casual dinners, this grilled cheese fits perfectly within the sandwich category bestowed with an exciting twist.
  • Cuisine: While inherently American in its roots, this version introduces a Southwest twist with the addition of jalapeños, bringing a touch of Tex-Mex flavor to a timeless favorite.
  • Cost: This recipe is budget-friendly, with simple ingredients like bread, cheese, and jalapeños being inexpensive yet effective in delivering bold flavors.
  • Season: Best enjoyed year-round, especially in colder months when warmth and comfort meals are appreciated. Perfect for indoor dining or enjoying by the fireplace.
  • Occasion: Suitable for informal gatherings, casual lunches, or as a delightful mid-week meal. It’s versatile enough for a quick snack yet satisfying for a full meal.

Why You’ll Love This Recipe
Grilled cheese sandwiches are the food of comfort and nostalgia, but introducing a fiery element like jalapeño offers an adventurous departure from the norm. This Jalapeño Cheddar Grilled Cheese brings together the allure of a classic with a modern twist that spices up your meal times. You’ll love this recipe for the way it blends bold flavors with a texture that satisfies both crunchy and chewy cravings. It’s a sensory feast with aromatic jalapeños that shine against the smoothness of molten cheddar.

Convenience is another strong point; the preparation requires minimal effort, and it comes together quickly, making it a convenient option for any day of the week. Perfect for when you need a meal ready in a flash that doesn’t compromise on taste or satisfaction. Additionally, this dish can accommodate various sides or be enjoyed on its own. With a handful of ingredients and simplicity in technique, it is ideal for those pressed for time but eager to enjoy a homemade meal.

Nutritionally, this grilled cheese offers a balance of fats, proteins, and carbohydrates. The cheddar cheese provides a good source of calcium and protein, while jalapeños add a dose of vitamin C. Rather than being just a cheese sandwich, this combination provides vital nutrients and tasty delight in each slice. For those mindful of dietary intake, full-fat cheese may be substituted with a reduced-fat version without losing its flavor integrity.

Socially, this Jalapeño Cheddar Grilled Cheese is a hit at casual gatherings, requiring little time for preparation while making a big impression. Whether it’s a weekend brunch or game night, its universal appeal to spice-loving guests makes it an ideal accompaniment for social interactions. Consider pairing this grilled cheese with a spicy dip or serving alongside a cool beverage to offer a balanced flavor profile that guests will appreciate.

Finally, this recipe excels in its cost-effectiveness. With just a few inexpensive ingredients, you can create a gourmet feel at home without the price tag. Accessibility to ingredients is straightforward, and most are staple pantry items, ensuring you won’t need to hunt down specialty components. In a culinary world where flavors compete, this recipe delivers on taste and economy, leaving both your palate and pocketbook pleased.

Historical Background and Cultural Significance
Grilled cheese has a rich history dating back to World War II, where it became a popular ration meal due to its simple components and filling nature. Combining melted cheese and bread has always equaled culinary comfort, and its evolution has seen many variations over the years. Jalapeño-infused versions highlight the ever-growing love for spice and the creativity that home cooks and chefs alike infuse into traditional recipes.

Its cultural significance lies in both its everyday occurrence in American kitchens and its place in the hearts of those who love uncomplicated yet deeply enjoyable meals. A staple in diners, cafeterias, and homes across the country, the grilled cheese offers familiarity with room for experimentation, making it a bond-builder over shared meals. The combination with jalapeños also nods to the blending of culinary traditions, enhancing the depth of flavor while respecting its roots.

Over time, grilled cheese sandwiches have moved beyond just cheddar and white bread to incorporate global ingredients, reflecting society’s broader palates and innovative cooking styles. With the inclusion of jalapeños, the sandwich not only acquires added taste dimensions but connects people through shared culinary explorations. As our world continues to mesh culturally, dishes like this demonstrate how traditional comfort foods can adapt and thrive in new flavorful landscapes.

Regional variations proliferate as local ingredients and preferences shape unique versions. While in the American Southwest, jalapeños are a celebrated addition due to their readiness and cultural fusion, in other regions, one might find a pepperjack cheese or other elements reflecting local tastes. Despite these differences, at its core, a Jalapeño Cheddar Grilled Cheese remains a testament to culinary adaptability and the timeless appeal of melted cheese on toast.

Ingredient Deep Dive

Cheddar Cheese: Cheddar’s origins trace back to Somerset, England, providing a cheese that ranges from mild to sharp, catering to various palates. Its rich and creamy texture, along with a slightly tangy flavor, makes it a go-to for melted dishes. Cheddar is rich in calcium, essential for bone health, and contributes protein to the dish.

When choosing cheddar, opt for a block version and grate it yourself for better meltability. Store tightly wrapped in the fridge, and before it hardens, freeze any unused parts for prolonged freshness. Substitute options include gouda or mozzarella for varying flavors without compromising the dish’s integrity.

Jalapeños: Originating from Mexico, jalapeños are widely used in spice-centric cuisines. Their mild to moderate heat level is perfect for introductory spice in dishes, providing capsaicin which is known for its metabolism-boosting properties. Opt for firm, unblemished jalapeños with deep color during selection. Store in the fridge for up to a week or slice and freeze for longer shelf life. If heat isn’t desired, consider substituting with bell peppers for similar crunch sans spice.

Bread: A universal staple, the bread used in grilled cheese typically ranges from sourdough to white, providing the perfect vessel for grilling and cheese stuffing. Bread contributes carbohydrates and fibers to this meal, balancing the nutritional profile. Select a sturdy loaf that can withstand the pressure of grilling without falling apart. Storing in a cool, dry place ensures it remains fresh longer. As a variation, whole grain or seed bread can add texture and slightly nutty tones to the dish.

Common Mistakes to Avoid

  • Not preheating the pan: Ensure the skillet is hot enough before placing the sandwich to attain a crispy outside without the risk of sogginess.
  • Choosing overly thick bread: Overly thick slices may hinder cheese melting, leading to an imbalanced sandwich.
  • Using too little cheese: Don’t shy away from a generous cheese layer to ensure oozy goodness.
  • Overloading with jalapeños: Balance is crucial; too many jalapeños can overpower the cheese, so moderate usage is key.
  • Skipping buttering the bread: Spread butter evenly on the outside for optimal crunch and flavor.
  • Cooking on high heat: Lower to medium heat assures cheese melts properly while bread achieves toasty perfection.
  • Not grating cheese: Pre-sliced cheeses may not melt as well; opt for grating for best results.
  • Impatience: Let the sandwich rest a moment off the heat for cheese to settle and flavors meld together.

Essential Techniques
Grating Cheese: Grate cheese for a more even melt that integrates well with other ingredients. Grated cheese covers the sandwich uniformly, ensuring rapid meld during cooking.

Balancing Heat: Adjust heat levels to moderate during cooking to avoid burning the outer layer while ensuring adequate internal warmth. Conquer patience while flipping to achieve a golden-brown, crunchy exterior.

Pre-Heating: Blackening at inopportune timings can spoil flavors. Preheat your skillet sufficiently to start with a good sear on contact, forming the perfect toast hue and beautiful crusting for your sandwich.

Pro Tips for Perfect Jalapeño Cheddar Grilled Cheese
1. Use a shredder blade to create fine cheese crumbs, which melt more evenly and quickly.
2. Add a lid for a few moments mid-cook to trap heat, aiding cheese melt securely without increasing stove heat.
3. Sprinkle bread with Parmesan before grilling for a savory crust.
4. Consider adding a slice of tomato or avocado post-toast for added freshness and dimension.
5. Allow resting post-cooking to unify flavors and avoid chasing cheese off your plate.
6. If dairy-rich cheddar is too rich, swap for an aged variety to mitigate fat content while enhancing flavor.
7. Butter bravely: Your bread deserves hearty coverage for the crunchiest result possible.
8. Test jalapeño slices for spice intensity beforehand to gauge the right balance for personal taste.

Variations and Adaptations

Regional Variations: Incorporate pepper jack cheese or Monterey jack for a different take on spiced cheese. The jalapeño can be replaced with poblano peppers for less heat but more charred flavor.

Seasonal Adaptations: In colder months, add a splash of hot sauce for warming spice or pair with a seasonal soup. In warmer weather, pair with fresh lime juice or light spinach.

Dietary Modifications: For a gluten-free version, opt for gluten-free bread varieties and check labels on cheeses for any gluten cross-contamination processes.

Flavor Variations: Consider adding a smokey element with smoked cheddar or bacon to enhance the natural grilled notes. Fold in slices of roasted poblano or red pepper for added complexity.

Texture Modifications: For a softer texture, use a panini press, compressing the sandwich while grilling. Alternatively, use different breads for unique crust yields.

Presentation Alternatives: Cut in diagonal halves for a triangular presentation or serve as mini squares as finger food for parties.

Serving and Presentation Guide
Plating Techniques: Arrange on a rustic wooden board for a homey feel, enhancing the sandwich’s artisanal nature. Use colorful plates to highlight the golden shades of grill marks.

Garnishing Ideas: Garnish with fresh herbs like cilantro or parsley for a touch of color and aroma. A drizzle of balsamic glaze can add aesthetic appeal and a hint of sweetness.

Traditional Accompaniments: Serve alongside classic tomato soup or a light mixed green salad to balance flavors and textures.

Modern Serving Suggestions: Pair with chopped pickles or charred corn as a complementary side, ensuring each bite enhances the main dish’s enjoyment.

Temperature Considerations: Serve warm, ensuring the cheese remains gooey. Room temperature sandwiches may lose textural appeal.

Portion Control Tips: For smaller appetites, serve as half sandwiches with lighter side courses to avoid excess fullness.

Wine and Beverage Pairing

Wine Pairings: For a classic match, serve with a Chardonnay that balances the cheese’s creaminess and jalapeño’s spice, offering a smooth palate experience.

Non-Alcoholic Alternatives: Consider lime-infused iced tea or sparkling water with a lemon wedge to refresh and contrast flavorful heat.

Coffee/Tea Pairings: For brunch settings, pair with a chamomile or green tea; their calm flavors work well against the cheese’s richness.

Temperature Considerations: Chill beverages to balance the sandwich’s warm offering, enhancing the sensory variety at mealtime.

Serving Suggestions: Coordinate glassware and pour just prior to serving for optimal tasting alignment.

Storage and Shelf Life
Storage Methods: Wrap tightly in plastic wrap or foil, then place in an airtight container to keep fresh for up to two days in the fridge.

Temperature Requirements: Maintain refrigeration at consistent temperatures to prevent spoilage from cheese warmer than 32-40°F.

Container Recommendations: Use glass containers for better airtight seals, preserving flavor and texture.

Signs of Spoilage: Discoloration in lactate fats or a sour smell can indicate spoilage; discard the sandwich if these arise.

Reheating Instructions: Warm gently on a skillet or in an oven to restore freshness. A short microwave zap can yield gooey re-melted cheese.

Freezing Guidelines: Freeze prepared sandwiches before grilling to extend life, cooking directly from frozen without thawing for convenience.

Make Ahead Strategies
Prep Timeline: Prepare components up to a day in advance, keeping bread and cheese separate until grilling time to maintain freshness.

Storage Between Steps: Store pre-assembled sandwiches with parchment paper in between if sandwich stacking is required in the fridge to prevent them from sticking.

Quality Impact Assessment: Cheese may absorb more bread moisture if pre-stored in assembled form; aim for sameday assembly for quality assurance.

Assembly Tips: Pre-assemble with precision to ensure cheese evenness throughout, avoiding sandwich lopsidedness during grilling.

Reheating Guidelines: Employ a stovetop reheat, utilizing moderate heat and slow warming to refresh the crisp-to-soft texture ratio.

Fresh Element Additions: Add fresh herbs or raw vegetables post-heat to reinstate refreshing textures and flavors if reheated.

Scaling Instructions
Halving the Recipe: For single servings, cut ingredient proportions in half, maintaining balance of spice and cheese relative to bread slice size.

Doubling or Tripling: Scale gracefully with parallel adjustments to seasoning balance; thicker cuts of jalapeño may accompany increased cheese volume.

Equipment Adjustments: Larger skillet/griddle assists increased volume; consider batch cooking for extreme multiples.

Timing Modifications: If scaled, initial heat absorbance may require marginal additional cook time; be vigilant to avoid burning.

Storage Considerations: Large batches should still be assembled just within need unless whole batch intentions call for single-day consumption.

Nutritional Deep Dive
Macro Breakdown: Each serving approximately consists of 400 calories, with a balanced mix of carbohydrates, fats, and proteins.

Micronutrient Analysis: Rich in calcium from cheese, distribution toward daily calcium needs can prove advantageous while moderated by accompanying fresh side servings.

Health Benefits: Calcium supports bone health, while jalapeños can contribute to potential metabolism boost benefits.

Dietary Considerations: Moderation is key within a balanced diet, ensuring components align with personal dietary specifications when adapted specifically.

Portion Analysis: Maintaining portion control relative to pairing dishes can ensure the meal remains within desired caloric boundaries.

Weight Management Tips: Monitor cheese type for lower-fat varieties to tailor an ideal calorie count without losing cheesy allure.

Dietary Adaptations

Gluten-Free: Substitute standard bread for gluten-free, ensuring all preparation surfaces are sanitized and celiac-friendly processes are observed.

Dairy-Free: Use dairy-free cheese options, especially nut-based cheeses, to maintain desired melted texture while serving lactose intolerant or dairy-free individuals.

Vegan: Dairy-free vegan cheese coupled with plant-based butter affords preparation for those following vegan diets without compromise.

Low-Carb: Utilize low-carb bread options, integrating cheese varieties that align with low-sugar protocols contributing to meal classification.

Keto: Align bread and cheese choices favoring keto specifications, allowing incorporation of higher-fat dairy within declared dependencies.

Paleo: Adapting paleo options may involve using paleo cheese alternatives coupled with almond-based bread variants.

Low-FODMAP: Monitor cheese and bread types for low-FODMAP specifications, considering advisability across dietary contexts with detailed observations.

Other Specific Diets: Tailor ingredient selection for specialized diets ensuring cross-compliance with nutritional restrictions or enhancements.

Troubleshooting Guide

Texture Issues: If cheese is insufficiently melted, ensure fine grating and appropriate pan coverage when heating to enhance outcomes.

Flavor Balance: To moderate spice, slice jalapeños thinner and adjust the number of slices used; additional cheese or alternative peppers soothe spice levels.

Temperature Problems: Measure stove temperature ensuring compatibility as excessive outputs may compromise outcomes with under-cooked interior.

Equipment Challenges: For non-stick limitations, additional butter assures easy flipping without charring edges or stickiness under heat.

Ingredient Substitutions: Reviewing cheese meltability ensures proper selections conducive to desired finished melting standards.
Timing Concerns: Over-cooking cheese results in hard, crispy cheese edges rather than gooeyness; maintain diligent checks during cooking to negate timing misalignments.

Recipe Success Stories
Bringing classic grilled cheese into a gourmet light, this inventive pairing captived audiences and reader storyboards featuring experiences involving party canapés to loud picnics. With creative reader adaptations echoing variations and successes like the introduction of caramelized onions or smoky paprika chips, each unique input testifies to Jalapeño Cheddar Grilled Cheese’s versatile acclaim. With photo guidance from shared culinary chronicles to visual revelations, all engage seamlessly in the recipe narrative, showcasing its impact beyond the blog’s own storytelling.

Frequently Asked Questions

Can I make this sandwich ahead of time?
Yes, you can assemble the sandwich and store it in the refrigerator. When ready to serve, cook on a skillet until golden brown and the cheese melts perfectly.

How spicy is the sandwich?
The level of spice depends on the quantity of jalapeños. Adjust according to your heat preference, with more slices increasing spice levels.

What’s the best bread to use?
A sturdy bread with a good crumb, such as sourdough or ciabatta, is ideal. It holds together well and crisps nicely on the grill.

Can I add other ingredients?
Absolutely! Ingredients such as tomatoes, bacon, or avocado could make delicious additions without overpowering the existing flavors.

Is there a low-calorie version?
Use low-fat cheese and light bread to reduce calorie content, keeping jalapeños intact for flavor without adding additional calories.

What’s the best substitute for cheddar?
Gouda or mozzarella can be excellent alternatives, offering creamy textures that pair well with jalapeños.

How do I prevent soggy bread?
Ensure your skillet is properly preheated and your bread is lightly buttered for a perfect, crisp exterior.

Can it be made in a toaster oven?
Yes, assemble as directed and use a toaster oven set at medium heat for uniformly golden results.

What should the cooking temperature be?
Medium heat is ideal for achieving a good balance between a melty inside and crisp outside without burning the bread.

How do I slice jalapeños evenly?
A mandolin ensures consistency in thickness, offering even heat distribution across bites, or use a sharp knife for more control.

What can I pair this with for balance?
A fresh salad or bowl of tomato soup accommodates the sandwich nicely, offering a light accompaniment without overwhelming flavors.

Is grilled cheese healthy?
Moderation is key; when enjoyed alongside nutritious sides, it can form part of a balanced diet. Opt for whole-grain bread and low-fat cheese for a healthier version.

Additional Resources
For those fascinated by the art of grilled cheese, delve into our array of related recipes, such as the classic tomato-basil grilled cheese combination, balancing creaminess with light garden freshness. Explore further technique guides that offer kitchen navigation pointers, especially effective for grilled sandwiches. Supplement ingredient notes with firsthand culinary expressions alongside exciting seasonal variations designed to fit evolving culinary seasons.

Join the Conversation
Engage with us on social media platforms featuring your own Jalapeño Cheddar Grilled Cheese takes, enjoying community-driven discourse around inventive variations. Share your photography and hashtag our feed, enriching collective creativity. Write reviews and adaptations extending your voice and witness how small variations can infuse unique depth into versatile classics. Engage personally through shared moments, making dining an experience beyond mere consumption through uniting gastronomy around a shared table.

The Recipe

Jalapeño Cheddar Grilled Cheese

Serves: 2

Prep Time: 10 mins

Cook Time: 15 mins

Total Time: 25 mins

Kitchen Equipment Needed

  • Non-stick skillet or griddle
  • Spatula
  • Grater
  • Knife
  • Cutting board

Ingredients

  • 4 slices of bread (sourdough or choice)
  • 1 cup cheddar cheese, grated
  • 2 jalapeños, sliced thinly
  • 2 tbsp butter

Directions

  1. Preheat the skillet over medium heat.
  2. Butter one side of each slice of bread generously.
  3. Place two slices, buttered side down, on the skillet.
  4. Evenly spread grated cheddar over each slice.
  5. Layer jalapeño slices atop the cheese.
  6. Top with remaining bread slices, buttered side up.
  7. Cook until bottom slice is golden brown, about 3-4 minutes.
  8. Carefully flip, cooking the other side until similarly golden and cheese melted.
  9. Remove from heat and let cool slightly before serving.

Recipe Notes

  • Adjust jalapeño levels according to spice preference.
  • Try adding bacon or other cheeses for additional layers of flavor.
  • Serve with tomato soup for a classic pairing.

Indulgent Snickers Reese’s Cookie Dough Ice Cream Recipe Delight

Snickers & Reese’s Cookie Dough Ice Cream Extravaganza: A Sweet Delight

⚖️
Difficulty
Easy

⏲️
Prep Time
20 mins

🕒
Cook Time
0 mins

⏱️
Total Time
20 mins + chilling

🍽️
Servings
8

Dive into the indulgence of the Snickers & Reese’s Cookie Dough Ice Cream Extravaganza, a dessert designed for those who seek the ultimate sweet experience. Imagine the delightful crunch of Snickers and the smooth, nutty goodness of Reese’s, combined with creamy cookie dough ice cream. This extravaganza is where chocolate meets caramel, peanuts, and that irresistible cookie dough taste, providing a symphony of flavors and textures in every bite.

Whether you are hosting a summer party or simply treating yourself on a lazy weekend, this ice cream extravaganza is your go-to dessert for instant happiness. The melding of chocolate and caramel with decadent peanut butter is a treat that promises to captivate your taste buds and transport you to dessert heaven.

Quick Recipe Highlights

  • Flavor Profile: This Snickers & Reese’s Cookie Dough Ice Cream blends chocolate with nutty, caramel sweetness, creating a balance that is both rich and satisfying.
  • Texture: Experience a harmony of creamy and crunchy with smooth ice cream, gooey cookie dough pockets, and the crispness of Snickers and Reese’s pieces.
  • Aroma: The inviting scents of chocolate and peanut butter waft through the air, mingling with subtle notes of vanilla and caramel.
  • Visual Appeal: This ice cream dazzles with swirls of chocolate, caramel ripples, and colorful candy pieces dotted throughout.
  • Skill Level Needed: Designed for all skill levels; even novice cooks can create this delightful dessert with minimal effort.
  • Special Equipment: An ice cream maker enhances the recipe, but it’s not required for a delicious outcome.

Recipe Overview

  • Difficulty Level: This easy recipe requires no baking or advanced culinary skills, making it accessible to anyone wanting a fun and delicious treat.
  • Category: Perfect for dessert or a sweet snack when cravings hit hard.
  • Cuisine: A delightful fusion of classic American candy flavors with modern ice cream innovation.
  • Cost: Relatively inexpensive, considering the gourmet feel, with all ingredients available at your local supermarket.
  • Season: Best enjoyed in the warmer months of spring and summer, but a treat that can delight year-round.
  • Occasion: Ideal for birthday parties, family gatherings, or simply as a delightful end to a special meal.

Why You’ll Love This Recipe


Indulge in the rich taste and varied textures of this unique ice cream creation that combines beloved candy bar flavors with creamy cookie dough. Not only is it a taste sensation, but preparing it at home offers you the freedom to tweak and perfect the balance of flavors to your liking.

Convenience is a key highlight here; with minimal prep time and no baking involved, this dessert is ready in a flash, allowing more time to enjoy with your guests or family. Using store-bought candy cuts down on time, but still delivers a homemade touch due to the custom blend of ingredients.

Nutritionally, while this treat is decadent, featuring proteins from peanuts and some fiber from cookie dough, you can easily adjust ingredients for dietary preferences or needs, like opting for sugar-free versions or lighter options.

This dessert is not just about savoring flavors; it’s also about bringing people together. Share laughter and smiles over a bowl of this ice cream—a guaranteed conversation starter and crowd-pleaser that surprises and delights.

Finally, its cost-effectiveness makes it a great choice for entertaining. Store brands and bulk ingredients ensure that the Snickers & Reese’s Cookie Dough Ice Cream Extravaganza remains budget-friendly, making it easy to enjoy without breaking the bank.

Historical Background and Cultural Significance


The Snickers & Reese’s Cookie Dough Ice Cream Extravaganza is a celebration of America’s love for candy bars and indulgent desserts. Rooted in the history of ice cream consumption, which gained huge popularity in the United States during the 20th century, this dessert continues a tradition of elevating simple ingredients into decadent treats.

Culturally, candy bars like Snickers and Reese’s encapsulate the American spirit of ingenuity and indulgence. The combination of these two iconic chocolates in an ice cream format pays homage to their longstanding place in the hearts of candy lovers everywhere.

As the recipe evolved, several regional variations emerged, influenced by local ingredient availability and flavor preferences. Some iterations feature added cookies or brownies, while others play up the caramel flavor for additional depth and sweetness.

Regional adaptations often see the inclusion of locally loved candies or even homemade versions of Snickers and Reese’s, showcasing the versatility and adaptability of this beloved dessert.

Ingredient Deep Dive


Snickers: The iconic Snickers bar has a rich history, originating in the 1930s, and represents a blend of chocolate, nougat, caramel, and peanuts. These elements not only add texture but also bring essential nutrients like fiber and plant-based protein. When selecting, look for freshness and intact bars for best integration into the ice cream.

Reese’s: Known for its pronounced peanut butter flavor, Reese’s provides a creamy and nutty profile to the dessert. Born out of a marriage between peanuts and chocolate, Reese’s cups have ensured a lasting cultural impact. For optimal use, store them in a cool, dark place to maintain texture and flavor.

Cookie Dough: This playful addition is beloved for its soft texture and sweet taste, playing into nostalgia for many who snuck bites of cookie batter. The dough’s versatility means gluten-free or vegan options can be seamlessly swapped without affecting the recipe outcome.

Ice Cream Base: The luscious vanilla base allows the rich blend of candy pieces to shine, serving as a perfect backdrop. Choosing high-quality vanilla extract enhances the overall flavor profile, while storing the base at the right temperature ensures a creamy consistency.

Chocolate Chips: Adding chocolate chips reinforces the chocolate theme. Opt for semi-sweet or dark chocolate options for a balanced flavor that complements the sweetness of Snickers and Reese’s.

Common Mistakes to Avoid

  • Overloading with candy pieces can make mixing challenging and affect texture. Balance is key.
  • Too much melted ice cream refreezing can lead to ice crystals that disrupt the creamy texture.
  • Chopping candy too finely may cause it to melt into the ice cream, losing desired chunks.
  • Skipping chilling the mixture can lead to uneven freezing and a grainy texture.
  • Using low-fat alternatives might result in less creamy ice cream. Fat content aids smoothness.
  • Not tasting along the way could lead to flavor imbalance. Always taste as you go!
  • Improper storage can lead to freezer burn or off flavors; always seal tightly.
  • Consulting store-bought or low-quality cookie dough might compromise taste. Opt for homemade or reputable brands.

Essential Techniques


The blending of your ingredients is paramount. Achieving a homogeneous mix ensures that every bite delivers a balanced taste of chocolate, caramel, and peanuts. Master this by chopping candies uniformly and adding them gradually into the ice cream base.

Maintaining the creaminess of your ice cream involves carefully managing temperature throughout the process. Ensure your freezer is set correctly and allow ample time for the ice cream to firm up without interruptions.

For the best flavor extraction, allow your ice cream base to partially freeze before folding in the candies. This prevents them from sinking and ensures even distribution as the base firms up.

Pro Tips for Perfect Snickers & Reese’s Cookie Dough Ice Cream Extravaganza


For extra flavor depth, consider adding a pinch of sea salt to your ice cream base. This enhances the caramel notes and balances the sweetness.

Try lightly toasting the peanuts before adding, for added crunch and a richer, nuttier taste.

Let your ice cream sit at room temperature for a few minutes before serving. This will make scooping easier and enhance the creaminess.

Experiment with layering. Pour half your ice cream base into the container, add candy pieces, then top with the rest for a dynamic texture contrast.

Always chill your mixing bowl and equipment before use. Cold tools help prevent premature melting during mixing.

Be patient during freezing. Rushing the process can lead to a compromise in texture and flavor development.

Variations and Adaptations


In regional variations, try using local candies or flavors to suit your taste buds. Opt for seasonal adaptions like pumpkin spice cookie dough in fall or peppermint in winter.

For dietary modifications, consider dairy-free ice cream bases made from coconut or almond milk, and gluten-free cookie dough options for inclusivity without sacrificing taste.

Play with flavor variations by adding a swirl of chocolate fudge or caramel sauce to intensify richness.

For lighter textures, experiment by adding whipped cream during preparation, and for presentation, consider serving in waffle cones or chocolate bowls for added flair.

Serving and Presentation Guide


To elevate your presentation, scoop the ice cream into a chilled glass dessert bowl, garnishing with extra candy pieces or a drizzle of caramel.

Consider pairing with traditional accompaniments like biscuits or wafers for contrasting crunch.

Serve cold, but not frozen solid, for optimal texture and taste. Achieving this can mean serving immediately out of the freezer or allowing a slight thaw period.

For portion control, use a small scoop and offer multiple smaller servings, allowing guests to indulge at their own pace while appreciating the full flavor.

Wine and Beverage Pairing


Pair your delightful ice cream with a sweet dessert wine such as a late harvest Riesling or Muscat to enhance the flavors without overpowering them.

For non-alcoholic options, consider serving with creamy hot chocolate or an iced coffee that complements the iced textures and rich flavors.

Temperature plays a key role in pairing; ensure your beverage is well-chilled or suitably warm to balance the chilled dessert.

Storage and Shelf Life


Store your ice cream in an airtight container to prevent freezer burn. Opt for shallow containers, as these allow for more even temperature control and quicker freezing.

Keep your dessert in the coldest part of the freezer, ideally at a consistent 0°F (-18°C). Avoid frequent temperature changes to maintain texture quality.

Check for signs of spoilage such as a sour smell or crystal formation. If reheating is necessary, place the container in a bowl of warm water for a few minutes.

Leftover ice cream can be piped into molds and refrozen for creative popsicles, offering fun shapes and convenient serving options.

Make Ahead Strategies


Prepare your ice cream base a day in advance to allow flavors to fully develop in cold storage.

Store chopped candy pieces in separate containers and fold them into the ice cream just before the final freeze for freshest results.

For a seamless serving experience, pre-scoop into party cups and return to the freezer, ensuring minimal service time during events.

Throughout, maintain quality by avoiding prolonged exposure to air or moisture; seal tightly between steps.

Scaling Instructions


To halve the recipe, simply adjust ingredients proportionally, ensuring precision to balance flavors.

When doubling or tripling, consider kitchen equipment capacity, opt for multiple containers if necessary, and adjust freezing times due to increased volume.

For larger batches, keep in mind potential freezer space requirements and consider investing in deeper storage options.

Timing adjustments might be needed, with careful attention paid to mixing and folding for consistency.

Nutritional Deep Dive


This dessert, though indulgent, provides a balanced macronutrient profile of carbohydrates, fats, and proteins from both dairy and candy.

Caramel, chocolate, and peanuts contribute micronutrients like calcium, magnesium, and essential fatty acids, albeit consumed in moderation for a healthier treat.

Consider portion size mindful of calorific content, while exploring healthier substitutes like reduced sugar options for lighter indulgence.

The satisfaction from this dessert can support dietary balance when shared among guests, mindful of daily intake recommendations.

Dietary Adaptations


For a gluten-free version, use gluten-free cookie dough and ensure no cross-contact with flour in your kitchen.

Dairy-free can be achieved using almond or soy-based ice cream alternatives, with taste adjustments as needed.

Nut allergies can be managed by replacing Reese’s with nut-free chocolate options and opting for seed butter alternatives.

A vegan adaptation is accessible through plant-based cookie dough, dairy substitutes, and ensuring all chocolate ingredients meet vegan criteria.

Troubleshooting Guide


If texture becomes too icy, increase the cream content for a smoother feel. If lacking flavor balance, adjust sweeteners or increase vanilla.

Incorrect temperature can lead to melting issues; always maintain a well-chilled environment and avoid overhandling during preparation.

For equipment challenges, use a sturdy mixing bowl and a reliable freezer setting to ensure even results.

Timing concerns arise mostly during mixing; patience and proper technique help avoid rushed textures.

Adapt ingredient substitutions for diet, taking care not to disrupt the flavor balance with overwhelming changes.

Recipe Success Stories


Community feedback highlights the recipe’s adaptability and the happiness it brings to various occasions. Variations included local brand adjustments and décor-inspired presentations.

Local adaptations have inspired both culinary creativity and discoveries of new flavor pairings, showcasing the dynamic and evolving nature of this recipe.

Photography tips from readers recommend capturing the vibrant colors of candy pieces against the creamy backdrop, focusing on close-ups for visual appeal.

Reader suggestions have led to beautiful innovations, such as themed ice cream bars and seasonal flavor twists, enriching the original concept.

Frequently Asked Questions

Q: Can I use a different type of candy?

A: Certainly! Feel free to experiment with your favorite candies. Just be mindful of the sweetness and texture they bring to the ice cream.

Q: How do I prevent the ice cream from becoming too hard?

A: Allow the ice cream to soften slightly before serving. You can also add a tablespoon of alcohol like vodka to the base to maintain softness.

Q: Is an ice cream maker necessary?

A: While it isn’t mandatory, an ice cream maker ensures a smoother texture and even freezing, offering a professional touch.

Q: Can I reduce the sugar content?

A: Yes, opt for sugar-free or reduced sugar candy alternatives, and consider adjusting the base sweetness to your liking.

Q: What’s the best way to store leftovers?

A: Store leftovers in a tightly sealed, shallow container to retain flavor and avoid freezer burn, placed in the coldest part of the freezer.

Additional Resources


Explore related recipes like Chocolate Fudge Brownie Ice Cream for more decadent delights, or delve into ingredient insights with our guide to perfect homemade cookie dough.

For inspiration on techniques, check our step-by-step ice cream making tutorials, ideal for mastering creamy textures.

Consider our equipment guide for insights into the best ice cream makers, ensuring you achieve perfect results every time.

Seasonal variations are explored in our summer dessert guide, providing ideas for using fresh summer fruits in ice cream recipes, offering natural sweetness and acidity.

Join the Conversation


Join us on social media to share your ice cream creations. Use #IceCreamExtravaganza for a chance to be featured. Discover photography tips for capturing stunning dessert shots, ideal for sharing your delicious results with the community.

Leave a comment or review after trying this recipe, sharing your thoughts, adaptations, or any questions with our community of dessert enthusiasts and home bakers alike.

The Recipe

Snickers & Reese’s Cookie Dough Ice Cream Extravaganza

Serves: 8

Prep Time: 20 mins

Cook Time: 0 mins

Total Time: 20 mins + chilling

Kitchen Equipment Needed

  • Mixing bowls
  • Spatula
  • Chopping board
  • Knife
  • Airtight container
  • Optional: Ice cream maker

Ingredients

  • 1 cup heavy cream
  • 1 cup whole milk
  • 1/2 cup sugar
  • 1 tsp vanilla extract
  • 1 cup chopped Snickers bars
  • 1 cup chopped Reese’s cups
  • 1 cup edible cookie dough
  • 1/2 cup chocolate chips

Directions

  1. In a large bowl, mix the heavy cream, whole milk, sugar, and vanilla extract until well combined.
  2. If using an ice cream maker, pour the mixture into the machine and churn according to manufacturer’s instructions.
  3. While the base churns, chop Snickers bars, Reese’s cups, and prepare the cookie dough.
  4. Fold in the chopped candy bars, cookies dough, and chocolate chips into the churned ice cream, ensuring even distribution.
  5. Transfer the mixture into an airtight container and freeze for at least 4 hours or until firm.
  6. Before serving, let the ice cream sit at room temperature for a few minutes for easier scooping.

Recipe Notes

  • Feel free to substitute with different candies based on preference.
  • Ensure cookie dough is specifically labeled as “edible” for safety, due to raw ingredients.
  • For a thicker consistency, reduce milk quantities appropriately.

Irresistible Strawberry Crunch Cheesecake Bites Recipe for Dessert Lovers

Strawberry Crunch Cheesecake Bites: A Delightful Indulgence

⚖️
Difficulty
Medium

⏲️
Prep Time
30 mins

🕒
Cook Time
15 mins

⏱️
Total Time
45 mins

🍽️
Servings
12

Strawberry Crunch Cheesecake Bites bring together the fresh brightness of strawberries with the creamy richness of cheesecake, all wrapped up in a bite-sized delight. Perfect for summer gatherings, these cheesecake bites are light, refreshing, and irresistibly delicious. The sweet and tangy notes of strawberry jam blend seamlessly with the buttery crumble, creating a dessert that’s both indulgent and memorable. Whether you’re looking to charm guests or simply treat yourself, these bites are a must-try.

Immersed in a golden crust and crowned with a crumbly streusel, every Strawberry Crunch Cheesecake Bite is a burst of flavor. With their simple preparation and stunning appearance, they effortlessly bridge the gap between casual and gourmet. The vibrant pop of red from the strawberries is as visually striking as it is tantalizing to the palate.

Quick Recipe Highlights

  • Flavor Profile: A delightful blend of sweet, creamy cheesecake and juicy, tangy strawberries.
  • Texture: Creamy cheesecake paired with a crunchy top and a smooth fruity center.
  • Aroma: Inviting scent of baked pastries with a hint of strawberry freshness.
  • Visual Appeal: Bright red strawberry topping paired with a golden, crunchy crust.
  • Skill Level Needed: Basic baking skills with a focus on assembling layers neatly.
  • Special Equipment: Mini muffin tin, food processor, and hand mixer recommended.

Recipe Overview

  • Difficulty Level: This medium-difficulty recipe requires patience when layering and a gentle hand when assembling the base and filling.
  • Category: Serves as a delightful dessert, perfect for any festive occasion or casual afternoon treat.
  • Cuisine: A modern take on classic cheesecake, highlighting the fresh fruity flavors typical of contemporary American treats.
  • Cost: Relatively inexpensive, with most ingredients being pantry staples and strawberries being the primary fresh component.
  • Season: Ideally enjoyed in spring and summer, when strawberries are at their peak sweetness.
  • Occasion: Perfect for afternoon teas, bridal showers, and summer picnics, offering both elegance and ease of serving.

Why You’ll Love This Recipe


From the first bite, Strawberry Crunch Cheesecake Bites captivate with their layered textures and sublime flavors. The creamy, velvety cheesecake balances beautifully with the sweet-tart strawberries. This recipe is a canvas for sensory delight, with contrasts that are both complex and harmonious.

For those who love to entertain, these bites are a dream. Easy to prepare in advance, they enable you to focus on enjoying the occasion. You can savor the rich textures and vibrant flavors while your guests marvel at their delightful presentation. They are conveniently portioned for mess-free enjoyment.

Nutritiously, while these bites are a treat, they incorporate strawberries—a source of vitamin C and antioxidants—making them a relatively lighter choice for indulgence. The inherent portion control of bite-sized treats also aids in avoiding overindulgence while still savoring luxurious flavors.

Serving these cheesecake bites can uplift any gathering, offering a touch of joy and indulgence. They can easily be adapted to fit different themes or tastes, making them a versatile choice for any host. Additionally, their visual appeal makes them a picture-perfect offering.

Affordability and ease of preparation mean that you can indulge without stretching your budget. Many of the ingredients are pantry staples, and the preparation only requires minimal equipment. This accessibility makes these treats attainable and truly rewarding.

Historical Background and Cultural Significance


Cheesecake itself boasts a rich history, evolving from ancient Greek roots as a savory dish into the luxurious sweet versions known today. It traversed multiple cultures, with each leaving its unique mark—Italian ricotta cheesecakes, New York’s creamy style, and beyond. This evolution highlights the cultural importance of transforming simple ingredients into beloved classics.

Over time, as refrigeration became widespread, the creamy, cold cheesecake style became increasingly popular in North America. The tradition of incorporating fresh, seasonal fruits with cheesecake echoes historical practices, as early versions often included natural sweeteners and decorations.

Modern variations, like the Strawberry Crunch Cheesecake Bites, draw on both the storied past and today’s culinary advancements. They reflect a cultural appreciation for classic flavors combined with a modern approach to presentation and serving size, making them a staple in both traditional and contemporary kitchens.

Regional variations abound, with flavors and methods differing across continents. In the U.S., it’s not uncommon to find local fruits used in cheesecake creations, inspired perhaps by a bounty of country fairs and summer markets, each region showcasing its specialty crop in a new dessert form.

Ingredient Deep Dive


Cheesecake Crust: This essential component provides the foundational texture and flavor, often utilizing graham crackers for their nostalgic taste and reliable crunch. This staple in American pies retains its status for versatility, easily adapted with nuts or spices for depth.

The richness of cream cheese forms the heart of any cheesecake, offering both creamy texture and tangy taste. Originating from the development of fresh cheeses in the 19th century, this key ingredient remains unchanged, a testament to its perfect balance and durability.

Strawberries serve as the star, chosen both for their vivid hue and sweet, refreshing taste. Seasonally celebrated, they’re packed with vitamins, turning this dessert into a joyous nod to summer’s bounty. Selecting ripe, fragrant berries ensures the best outcome in both taste and appearance.

Sweeteners like granulated sugar play a dual role—enhancing the inherent sweetness of the strawberries while balancing the tang of cream cheese. Use sparingly to ensure the natural profiles shine without being overpowered, maintaining an ideal equilibrium.

Even the addition of vanilla extract merits attention—this nuanced flavor brings warmth and complexity, subtly elevating the other flavors without dominating them. Use pure extract to truly make the delicate balance of cheesecake layers shine.

Common Mistakes to Avoid

  • Overmixing the cheesecake batter can lead to a dense texture. Mix just until combined to maintain airiness.
  • Failing to properly chill the bites can result in difficulty removing them from the tin. Allow adequate cooling time.
  • Using unripe strawberries will provide lesser flavor impact. Always select ripe and fragrant berries.
  • Not pressing the crumb base firmly enough may cause crumbling. Use moderate pressure for a solid foundation.
  • Skipping the parchment liners could lead to difficult removal and presentation issues. Prepare the tin with liners.
  • Ignoring ingredient temperatures can affect texture and flavor balance. Ensure cream cheese is softened before use.
  • Underestimating the baking time may yield under-set centers. Use a toothpick to test readiness before removing from oven.
  • Adding too much sugar may overshadow the fruit’s natural sweetness. Stick to recommended quantities for balance.

Essential Techniques


Perfecting the crust involves achieving the right degree of firmness. Pressing the crumbs with an even, firm hand ensures a stable base without becoming too compacted, a common pitfall. Watch for slight browning as an indicator of doneness, providing a necessary crispness.

Proper cheesecake batter mixing is vital. Overblending can introduce excess air, leading to cracking. Use a gentle, consistent folding motion to combine ingredients smoothly, focusing on a creamy consistency without overworking.

Monitoring baking time prevents overcooking. Keep a close eye on the toaster oven and use visual cues, such as a faint browning on the edges and a slight jiggle in the center, to perfect doneness and texture.

Using a food processor helps achieve uniform consistency when making the crust, avoiding larger chunks which can disrupt the bite-sized format. This tool, though not mandatory, greatly enhances outcome precision.

Refrigeration time is key. Allowing at least two hours, preferably overnight, facilitates setting and enhances the melding of flavors. Rushing this last step can compromise both texture and flavor profile.

Pro Tips for Perfect Strawberry Crunch Cheesecake Bites


Ensure cream cheese is at room temperature for easy blending and smooth texture. Cold cream cheese will clump and negatively affect the cheesecake’s final consistency.

Use parchment liners in the mini muffin tin to help with effortless removal and maintain neat presentation. This avoids frustration and enhances appeal.

Select strawberries based on color and scent. The redder and more fragrant they are, the better they will taste in the final product, and this also boosts visual quality.

Craft the perfect crumb using equal parts melted butter and crushed crackers or cookies, ensuring just enough moisture to hold together without becoming greasy.

Chill fully before slicing or serving. This step is essential; it allows the cheesecake to firm up sufficiently and develop its signature creamy texture.

Consider experimenting with extracts—almond or lemon can offer unique undertones that highlight the freshness of strawberries, personalizing your bites with subtle twists.

Variations and Adaptations


Regional adaptations can include replacing strawberries with other local fruits such as raspberries or blackberries for a different flavor profile. Each berry offers unique sweetness and acidity, which can inspire whole new flavor experiences.

To fit seasonal themes, consider topping each bite with a dollop of whipped cream flavored with spices like cinnamon or nutmeg in colder months, adding warmth and complexity to the base flavors.

Dietary modifications might involve substituting standard graham crackers with gluten-free alternatives, keeping the crust’s essential roles while accommodating gluten sensitivities.

Experiment with different flavors by incorporating citrus zest into the cheesecake batter, or swirl in chocolate or caramel for a rich, decadent variation.

Textural modifications can be achieved through crust variations—experiment with adding chopped nuts for additional crunch or seeded jams for a unique mouthfeel.

When considering presentation alternatives, play with slicing for unique serving options—carve each bite into halves or quarters for a more sophisticated offering, enhancing your guests’ tasting experience.

Serving and Presentation Guide


Opt for simple yet elegant plating techniques. Arrange the bites on a porcelain platter to highlight their colorful strawberry top, keeping them visually appealing.

For garnishing, consider a drizzle of white chocolate or a sprinkle of powdered sugar, enhancing the visual flair without overpowering the primary flavors.

Traditionally, these bites can be served with additional strawberries on the side, offering guests a chance to explore complementary textures.

Embrace modern serving suggestions like placing each bite in a cupcake liner, enhancing both hygiene and convenience, especially for buffet-style service.

Mind temperature by serving these bites chilled, preserving their creamy consistency and ensuring optimal flavor delivery in each bite.

For portion control, pre-plate single servings with small dessert forks, subtly guiding your guests to appropriate portions and enhancing your event’s flow.

Wine and Beverage Pairing


For wine pairings, a chilled glass of Prosecco or Moscato complements the sweetness of the bites, offering a crisp counterpoint to the creamy base.

Non-alcoholic alternatives include a refreshing strawberry lemonade or lightly spiced iced tea, both enhancing the fruity undertones without overwhelming subtler notes.

For larger gatherings, consider coffee or tea pairings—lightly brewed green tea offers a cleansing contrast, while silky, rich coffee accentuates the dessert’s sweetness.

Serve beverages at optimal temperatures to maximize their pairing effectiveness—ensure wines are lightly chilled, and teas are at a palatable warmth to enhance each bite.

Strong emphasis on enjoying each drink alongside the desserts lies in prompt, considerate serving understood through attentive hospitality and insight into guest preferences.

Storage and Shelf Life


Store these bites in an airtight container in the refrigerator, ensuring prolonged freshness and ideally maintaining their texture for up to five days.

Maintain the refrigerator temperature consistently around 35-40°F to prevent any spoilage or flavor degradation, ensuring every bite retains its intended notes.

Appropriate container selection, such as shallow, lined in a single layer or with parchment to separate layers, prevents smudging and damage to the bites’ appearance.

Look for signs of spoilage, such as discoloration or off odors, and discard any affected pieces, prioritizing safety and quality in your kitchen.

For reheating or serving, allowing these bites to sit at room temperature for 10 minutes lets flavors and consistency stabilize, optimizing your dessert experience.

Strong guidelines emphasize avoiding freezing, as this can alter both texture and quality, diminishing the tasting experience when thawed from frozen.

Make Ahead Strategies


Consider a make-ahead strategy by preparing and chilling the bites a day before, saving valuable time on the day of your event.

Store components separately until the final stages—prepare the crust and filling and assemble prior to serving, maintaining a fresh and appealing presentation.

Assess and plan your prep timeline around chilling stages, allowing the cheesecake sufficient time to set while keeping work manageable and enjoyable.

Enhance quality by acting on assembly tips, like uniformly distributing strawberries across each bite, ensuring every portion receives the intended flavor mix.

Utilize controlled stages for reheating slightly chilled bites to enhance flavor experience, mindful of not over-servicing a fresh dessert soundly engineered for enjoyment.

Conclude with fresh additions such as delicate herbs or edible flowers to embolden the visual promise of your dessert, surprising guests with unexpected flourishes.

Scaling Instructions


Scaling down by halving the recipe is easily achieved by adjusting ingredient quantities without altering equipment needs or preparation techniques and recipes.

Doubling or tripling can call for larger or additional mini muffin tins but poses few challenges, given each batch can be managed and assembled similarly.

Equipment adjustments like additional muffin pans or expanded workspace may facilitate production when scaling up, ensuring smooth handling of increased portions.

Timing modifications should calculate additional chill stages, ensuring optimal result achievement while remaining flexible with space and timing demands.

Storage considerations for larger batches rely on coordinating setups like multiple trays and extra containers to maintain organized freshness.

Every scaling maneuver reflects back on a well-devised plan; execute confidently from your close understanding of both recipes and guest demands.

Nutritional Deep Dive


Explore the macro breakdown: cream cheese provides fats for satiety, strawberries offer carbohydrates, and eggs and dairy contribute proteins, creating a balanced dessert choice.

Micronutrient analysis highlights vitamin C from strawberries, calcium from cream cheese and dairy, and essential minerals like phosphorus within the ingredient list, providing nutritional bonuses.

Dessert’s health benefits arise from its combination of indulgence with natural fruit, allowing a treat that’s less sugar-laden than comparable choices when proportioned adequately.

Portion analysis shows effective weight management through bite-sized servings, aiding conscious enjoyment for you or hosting guests.

Strategize dietary considerations around knowing your guests or personal preferences, always opting towards mindfulness in serving suggestion preparation.

Greater insight into balanced offerings enhances your cooking grasp, nuanced by empathy in your dessert creation outreach for those in your circle.

Dietary Adaptations


Adapting to a gluten-free diet might involve swapping regular graham biscuits with similarly flavored gluten-free varieties, keeping all texture highlight opportunities intact.

For dairy-free renditions, explore vegan cream cheese options and dairy-free yogurt, upkeeping the essential creamy base without loss of cheesecake’s iconic texture.

Vegan adaptations could involve exploring aquafaba as egg replacement, incorporating plant-based margarine so that key traits within the bites remain effortlessly embodied.

Consider a low-carb approach by swapping traditional sweetness with alternatives, staying ahead on your sweetness game while maintaining favored flavor outcomes.

Keto-style explorations can pivot on coconut flour crusts or syrups like monk fruit’s unique, versatile profile, broadening your reach in creative dessert interpretations.

True emphasis on dietary respect enhances welcoming dessert exchanges, branching into thoughtful adaptations that reflect evolving desires and joys.

Troubleshooting Guide


Texture issues, such as crust disintegration, often root in poor compacting of crust elements. Ensure good pressure when forming each base.

Flavor imbalances might stem from either over- or underuse of sugar. Measure accurately and taste test along the process, aiming to keep prominent elements clear.

Temperature problems can emerge if the cheesecake sets unevenly, always chilling evenly and tweaking times for consistent internal firmness.

Equipment challenges often lie in lack of liners resulting in stuck bites. Plan ahead and line each tin cavity smartly, avoiding a frustrating experience.

Ingredient substitutions like instant whip cream best replaced with a slightly higher ratio for plant-based thickeners to maintain needed fluff characteristics.

Timing concerns reflect improper scheduling or chilling, but stricter date plan adherence and step-by-step readiness sees avoiding this pitfall first.

Recipe Success Stories


Engage with community feedback, celebrating reinterpretations or adjustments to recipe structures based on shared ingredient finds—a robust platform of global flavor play.

Variation successes convey reader triumphs bringing flavor additions or replacements into joyous reviews, ensnaring newfound celebrations shared through digital reach.

Adaptation stories arise, often born from needing dairy-free solutions, allowing gratifying tales of cookbook diversions and empathy-adhering outcome explorations.

Reader suggestions amplify recipe integrity, noting alternate preparation pathways that reframe once-static protocols into dynamic soul-infused dessert chronicles still adapting.

Real photography tips emerge from visual storytellers—akin to you—offering garnishing, lighting, and framing cues, with each serving moment seamlessly encapsulated and reposted.

Frequently Asked Questions

Q: Can I prepare these bites in advance?
A: Absolutely! You can make them a day ahead; just ensure they are kept chilled until ready to serve.

Q: What if I don’t have mini muffin tins?

A: You can use a standard muffin tin but adjust baking times accordingly and be prepared for larger-sized portions.

Q: Can I freeze these cheesecake bites?

A: Freezing is not recommended as it might alter the cheesecake’s creamy consistency and flavor balance.

Q: How can I make these bites less sweet?

A: Reduce the sugar quantity in both the batter and crust slightly for milder sweetness.

Q: What’s the best way to soften cream cheese?


A: Leave it at room temperature for about 30 minutes before use, or microwave on low in short bursts if in a rush.

Q: Could I use frozen strawberries?
A: Fresh strawberries are best for this recipe due to their vibrant flavor and texture.

Q: What can I use instead of Graham crackers?

A: Digestive biscuits or Oreos work well as alternatives, providing diverse flavor morphs suitable within crust offerings.

Q: Is there a particular type of vanilla extract best used?


A: Pure vanilla extract provides a more robust flavor, ensuring your bites carry authentic underlying warmth.

Q: Can these bites be colored differently?
A: Using natural food coloring or alternative jams allows diverse color ideas without altering the essential recipe’s core joys.

Q: Might dehydration affect strawberry flavor?
A: Pay heed to strawberry freshness, keeping refrigerated until needed thereby preventing dehydrating exposure, ensuring vibrant results remain intact.

Additional Resources


Explore our related recipes highlighting quick dessert fixes that charm, ideal companions when Strawberries bridge other seasonal confections.

Dive into technique-specific guides on crust making and filling techniques, perfect for refining your entrance into cheesecake innovation realms.

Maximize daily cooking successes validated from closely sourced, up-to-date ingredient information, broadening how different components heighten shared dishes.

Equipment recommendations reflect ideal results matched through controlled measurements and impactful cooking routines.

Seasonal recipe variations speak to colorful gardener palettes noted in fruit placements conveniently accessible around your basin.

Through knowledge, practical or experiential gleaned, passions lead styling’s true discoveries—holding more than taste alone satisfied.

Join the Conversation


Connect to broader dessert narratives across social media platforms. Classic recipes like these excite followers globally, recalling fond memories or sharing heartfelt inspiration.

Photography skills enhance your depicted baking tales, with style tips unlocked via pointed garnishing endeavors that neat frames joy onlookers visualize alongside you.

See enduring recipes celebrated through enthusiastic reviews, where communal engagement arises from each shared bite’s loving admiration.

Online forums offer a venue for recipe variations, where insights capture collective creativity portrayed genuinely and widely expressed.

Within a vibrant shared community, your experiences grow through supportive engagement—friends aligned in discovering joy across ever-stretching favorite flavor pursuits.

The Recipe

Strawberry Crunch Cheesecake Bites

Serves: 12

Prep Time: 30 mins

Cook Time: 15 mins

Total Time: 45 mins

Kitchen Equipment Needed

  • Mini muffin tin
  • Food processor
  • Hand mixer
  • Parchment liners
  • Mixing bowls

Ingredients

  • 1 cup graham crackers, crushed
  • 1/3 cup butter, melted
  • 2 tablespoons sugar
  • 1 package (8 oz) cream cheese, softened
  • 1/4 cup sugar
  • 1 teaspoon vanilla extract
  • 1 egg
  • 1/2 cup strawberry jam
  • Fresh strawberries for topping

Directions

  1. Preheat your oven to 350°F (175°C) and line a mini muffin tin with parchment liners.
  2. In a food processor, combine crushed graham crackers, melted butter, and sugar until well mixed.
  3. Press about a tablespoon of the crumb mixture into each muffin cup, firmly pressing into the base.
  4. In a mixing bowl, beat softened cream cheese with sugar and vanilla until smooth.
  5. Stir in the egg and mix until just combined. Do not overmix to keep the texture light.
  6. Spoon cream cheese mixture evenly over the crumb bases in each muffin cup.
  7. Bake in the preheated oven for 10-15 minutes, or until the centers are set. Let cool completely.
  8. Spoon a small amount of strawberry jam over each cheesecake. Top with a fresh strawberry slice.
  9. Chill bites in the refrigerator for at least 2 hours before serving for best results.

Recipe Notes

  • For a citrus twist, add zest of one lemon to the cream cheese mixture.
  • Ensure cream cheese is at room temperature for optimal mixing results.
  • Store bites in an airtight container in the fridge for up to five days.

Delicious Parmesan Crusted Salmon Recipe for a Quick Gourmet Meal

Parmesan Crusted Salmon: A Flavorful Delight for Any Occasion

⚖️
Difficulty
Easy

⏲️
Prep Time
10 mins

🕒
Cook Time
20 mins

⏱️
Total Time
30 mins

🍽️
Servings
4

Dive into a sensory feast with this delectable Parmesan Crusted Salmon recipe, a true crowd-pleaser that tantalizes the palate with its rich flavors and crunchy texture. Combining the perfect blend of seasoned breadcrumbs and freshly grated parmesan, this dish elevates simple salmon fillets into a gourmet dinner masterpiece. Paired with the aromatic allure of fresh herbs, the result is a symphony of taste that promises to satisfy.

Strong yet subtle, Parmesan Crusted Salmon is a comforting dish, perfect for those who relish both flavor and simplicity. In under 30 minutes, you can transform ordinary ingredients into an exceptional meal that’s perfect for busy weeknights or an impressive dinner party entrée.

Quick Recipe Highlights

  • Flavor Profile: This dish combines the savory richness of parmesan cheese with the mild sweetness of salmon for an irresistible taste.
  • Texture: Delight in the contrast between the crispy crust and the tender, flaky salmon fillet.
  • Aroma: Enjoy the mouthwatering aroma of freshly grated parmesan mingling with herbs and baked salmon.
  • Visual Appeal: A golden-brown crust atop a delicately pink salmon fillet creates a feast for the eyes.
  • Skill Level Needed: Even beginners can nail this recipe, as it requires only basic baking skills and a few straightforward steps.
  • Special Equipment: All you need is a baking sheet and a grater for the parmesan cheese.

Recipe Overview

  • Difficulty Level: Its straightforward preparation makes this an easy yet satisfying dish suitable for all home cooks.
  • Category: This salmon recipe fits seamlessly into the seafood, dinner, or healthy eating categories.
  • Cuisine: Drawing from Italian influences, it pairs well with Mediterranean side dishes, emphasizing fresh and natural flavors.
  • Cost: With salmon and parmesan as the main costs, this dish is an affordable luxury.
  • Season: Perfect year-round, its hearty warmth is suited for winter, while the lightness complements summer meals.
  • Occasion: Ideal for weeknight dinners or festive occasions, its elegance will enhance any meal setting.

Why You’ll Love This Recipe


The taste and texture of Parmesan Crusted Salmon offer a fantastic culinary experience. The joyful crunch of the parmesan coating provides a perfect textural counterpart to the juicy salmon within. It’s a delightful dish that leaves a lasting impression on the taste buds, ensuring it becomes a staple in your meal planning.

Convenience is a significant benefit; this recipe requires minimal preparation and uses simple, readily available ingredients. It’s a practical choice for those nights when you crave something delicious without the hassle of a complicated dish.

Parmesan Crusted Salmon isn’t just about flavor; it’s also rich in nutrients. Salmon is an excellent source of omega-3 fatty acids and high-quality protein, while parmesan offers a boost of calcium and vitamin D, making this recipe both delicious and nutritious.

Apart from being an inviting main course, this recipe offers social value, making it perfect for entertaining guests. It elevates any gathering with its gourmet appearance and delightful flavors, sparking conversations and leaving guests impressed.

This dish is accessible, economical, and requires minimal ingredients to achieve maximum impact. The unique combination of affordability and flavor means you can enjoy a restaurant-quality meal without leaving home.

Historical Background and Cultural Significance


The origin of Parmesan Crusted Salmon is rooted in the rich culinary traditions of the Mediterranean, where fresh ingredients and simple cooking techniques create high-quality, flavorful foods. This dish embodies Italian cuisine, known for integrating parmesan into a variety of meals, highlighting its versatility and deep savory notes.

Over time, the recipe has grown in popularity across global kitchens, adapting to local tastes while retaining its key elements. Its success at bridging simplicity and flavor mirrors cultural exchanges, celebrating the melding of culinary techniques and regional ingredients.

The Parmesan Crusted Salmon recipe represents a modern reinterpretation of traditional parmesan and seafood pairings. Such evolution demonstrates food’s ability to transform, adapting to contemporary palates without losing its essence.

Today, this dish enjoys regional variants, each lending its unique twist, whether it’s incorporating local herbs or accompanying sauces. These variations ensure that while the foundation remains consistent, there’s room for creative expression in its preparation and presentation.

Ingredient Deep Dive


Parmesan cheese, with its origins in Italy dating back to the Middle Ages, symbolizes quality and authenticity. Known for its deep, nutty flavor, it adds complexity to various dishes. Its nutritional benefits include high calcium and protein content, promoting bone health and muscle repair.

Selection is crucial for premium parmesan; look for a well-aged cheese with a firm rind. Store in an airtight container to prevent moisture loss. If unavailable, Asiago or Pecorino Romano can be suitable substitutes.

Salmon, celebrated for its health benefits and culinary flexibility, offers rich omega-3 fats vital for heart health. Choose firm, bright fillets with a fresh sea aroma and store in the coldest part of your fridge to maintain freshness. Trout or cod can serve as alternatives if salmon is not an option.

Common Mistakes to Avoid

  • Neglecting to preheat the oven can result in uneven cooking, leading to an undercooked center or a soggy crust.
  • Using low-quality parmesan may not achieve the desired depth of flavor, compromising the dish’s integrity.
  • Overcrowding the baking sheet can trap moisture, softening the crust instead of allowing it to crisp up.
  • Skipping the breadcrumb mixture’s preparation leads to a bland topping; seasoning is essential for balance.
  • Using wet salmon fillets can dilute the crust ingredients—pat them dry before applying the mixture.
  • Not using parchment paper might cause the fish to stick to the baking sheet, disrupting presentation.
  • Baking salmon beyond its optimal time results in dryness; keep a close watch to maintain juiciness.
  • Forgetting to grate parmesan fresh often leads to pre-grated cheese with additives affecting texture.
  • Ignoring resting time can make the crust fall apart when serving; allow the salmon to sit briefly post-cooking.
  • Rushing the process without proper preparation impacts the final flavor profile and presentation.

Essential Techniques


A critical step in perfecting Parmesan Crusted Salmon is evenly coating the fillet with the breadcrumb mixture. This requires diligent application to ensure every inch of the salmon is covered. Tamping down the mixture lightly with your fingers secures it in place, ensuring a consistent texture post-baking.

Proper oven calibration is indispensable for achieving a crispy crust. Preheating ensures that the salmon cooks evenly throughout. A visual cue of a crisp, golden-brown exterior signals it’s ready, while remaining vigilant ensures you don’t overcook the fish.

Fresh parmesan must be used for grating. This technique ensures optimal flavor and melts more uniformly, integrating seamlessly with the breadcrumbs. Opt for a fine grater to achieve a delicate texture that coats the salmon well.

Pro Tips for Perfect Parmesan Crusted Salmon


For the best results, purchase wild-caught salmon, which tends to have a richer flavor and firmer texture than farmed varieties. This quality enhances the overall taste profile of the dish.

Include fresh herbs like dill or parsley in the breadcrumb mixture; they add aromatic depth and complement the salmon’s natural flavors. These herbs also provide a vibrant, green hue, enhancing visual appeal.

When seasoning, consider lemon zest to the mix to impart a fresh, citrus note, balancing the richness of the cheese and fish. This subtle addition brightens the dish, creating a well-rounded flavor.

Allow your salmon to sit at room temperature for 10-15 minutes before cooking. This step promotes even heat distribution throughout the fish during baking, ensuring perfectly cooked fillets.

Utilize a baking rack over a lined sheet. This lifts the salmon, allowing air to circulate, which crisps the crust uniformly and prevents sticking to the pan.

Finally, let the salmon rest for a couple of minutes post-baking. This resting period solidifies the crust, making it easier to serve without breaking apart.

Variations and Adaptations


Regional variations offer exciting possibilities. Introduce Asian elements by incorporating miso paste into the crust mixture for umami complexity. This version honors the original recipe while exploring new flavor dimensions.

Seasonal adaptations include adding spring vegetables as a bedding for the salmon before baking, creating a one-pan meal that celebrates the season’s freshness and reduces cleanup.

For dietary alterations, swap out regular breadcrumbs for almond flour or crushed nuts, making the recipe gluten-free while adding a subtle nutty flavor and distinct texture contrast.

To adapt to personal preferences, consider different flavor infusions such as garlic or paprika, enhancing the dish’s depth. This flexibility allows for creativity without straying too far from the core concept.

Texture modifications can involve doubling the breadcrumb mixture for an extra-crunchy exterior, appealing to those who love a hearty bite with each forkful.

For presentation, serve atop a vibrant, pureed base like sweet potato or pea puree, adding a color dimension and enhancing the dish’s visual appeal, perfect for formal dinners.

Serving and Presentation Guide


Opt for an oval white plate to showcase the salmon prominently. Its vivid colors contrast beautifully against the neutral plate palette, making it stand out visually.

Garnish with a sprig of fresh herbs or a slice of lemon for an elegant, simple finish. This not only adds appeal but also acts as a quick refresher when paired with the dish.

Serve traditionally with steamed greens or new potatoes, invoking a classic pairing that’s light yet fulfilling, complementing the rich flavors of the salmon perfectly.

Modernize with a side of quinoa salad infused with cranberries and nuts, offering textural contrast and adding layers of flavor and nutrition.

Consider serving at a slightly warmer than room temperature, as this highlights the flavors more starkly and ensures the juicy succulence of the fillet is appreciated.

To control portions and maintain the dish’s integrity, consider pre-slicing the salmon into individual servings before baking, ensuring equal distribution and maintaining the crust’s adherence.

Wine and Beverage Pairing


A crisp Chardonnay complements Parmesan Crusted Salmon superbly, its rich flavors and oak nuances pairing beautifully with the parmesan’s nuttiness. This choice enhances the dish without overwhelming the palate.

For a non-alcoholic option, iced green tea with a hint of citrus delivers a refreshing balance, cutting through the oiliness of the salmon while introducing slight acidity and sweet herbal notes.

Consider white coffee or cinnamon-spiced black tea as a post-meal treat, aligning with the salmon’s light finish and providing a soothing palate cleanser.

When serving wine, refrigeration is key; keep it chilled but not overly cold to highlight the grape’s nuances. Serve in wide-brimmed glasses to enhance tasting.

Sparkling water with lemon is an excellent accompaniment, offering a palate-refresher and contrast to the dish’s richness, ensuring each bite remains exciting.

Storage and Shelf Life


Store leftover Parmesan Crusted Salmon in an airtight container within the refrigerator to maintain freshness for up to three days. This containment prevents the crust from absorbing moisture and ensures the core remains flavorful.

Optimal storage is achieved by placing the dish on the top shelf, ensuring the container rests on a stable surface to avoid disturbances that could affect the crust’s integrity.

Monitor for signs of spoilage, such as an off-odor or a change in color and texture. In these instances, it’s best to discard to ensure health safety.

Reheat gently in the oven at a low temperature to rejuvenate the salmon without drying it out. This gentle reheating method preserves the delicate flavors and textures.

For longer preservation, wrap individual portions in foil and freeze for up to one month. This method keeps the crust intact and prevents ice crystal formation.

Make Ahead Strategies


Prepare and assemble the breadcrumb mixture a day ahead, storing it in an airtight container to save time and concentrate on the more active cooking components later.

Cook up to step three of the recipe, then cover and refrigerate the salmon overnight, allowing flavors to meld. This step makes preparation stress-free on the day of serving.

Maintaining quality involves ensuring the salmon is stored properly during these steps. Use fresh, covered containers to prevent any unwanted moisture impact.

When reheating, avoid microwaves; opt for ovens to retain the desired texture and moisture levels, ensuring a satisfying dining experience.

Add fresh elements like herbs or lemon slices just before serving to elevate the dish and introduce freshness, masking any day-old impurities in flavor.

Scaling Instructions


Halving the recipe is straightforward; reduce ingredient quantities proportionally while maintaining the cooking time, ensuring the texture and flavor remain consistent.

For doubling the recipe, use a larger sheet pan or two smaller ones to prevent overcrowding, allowing the crust to crisp evenly. Adjust cooking time slightly, but monitor to prevent overcooking.

Equipment adjustments might involve using an extra-wide grater for the parmesan to facilitate prep time when scaling up the recipe size.

Consider timing modifications when scaling, with more salmon fillets possibly extending cooking time slightly. Always check with a fork for doneness.

Preserving storage considerations involves portioning leftovers into individual servings, making it more convenient to reheat and ensure even distribution of the crust ingredients.

Nutritional Deep Dive


Parmesan Crusted Salmon offers a well-rounded macronutrient profile, balancing healthy fats, protein, and low carbohydrates, catering to a wholesome diet plan.

Micronutrient analysis reveals valuable contributions from salmon, including vitamin B12, D, and selenium, coupled with parmesan’s calcium and phosphorus, supporting strong bones and robust immune function.

Sourcing high-quality salmon ensures optimal omega-3 content, supporting cardiovascular health, while parmesan’s active cultures promote gut health and digestion.

Although flavorsome, portion control is crucial due to the high-calorie density, ensuring a healthy balance within dietary limits while savoring this rich dish in moderation.

For weight management, couple servings with low-calorie, high-nutrient sides like leafy salads to offset the caloric intake without sacrificing freshness and fullness.

Dietary Adaptations


Gluten-free diners can enjoy this by substituting regular breadcrumbs with gluten-free options or finely ground nuts, ensuring a satisfying crunch without the wheat content.

Dairy-free adaptations involve omitting parmesan and using nutritional yeast as a savory alternative, maintaining the recipe’s inherent flavor without allergic components.

For a vegan twist, replace salmon with marinated tofu fillets, adjusting cooking times to accommodate for different textures, and utilize plant-based cheese for the crust.

Low-carb enthusiasts will appreciate using almond or coconut flour in the crust, reducing carbohydrate content while enhancing flavor complexity.

Keto adherents can relax as salmon naturally aligns with ketogenic macronutrient ratios, but ensure adherence with crust modifications mentioned in low-carb adaptations.

Those following Paleo principles can mimic the dish by focusing on the fresh, natural components and utilizing paleo-approved ingredients for a flavorful journey aligned with their dietary philosophy.

Troubleshooting Guide


For texture issues like soggy crusts, confirm your oven calibration and ensure preheating is completed. This simple check can drastically improve outcome consistency.

If flavor balance skew towards the milder side, ensure adequate seasoning of the breadcrumb mixture; fresh herbs and lemon zest can amplify complexity and satisfaction.

Temperature problems arise from imbalanced baking duration; use a meat thermometer to guarantee internal salmon temperature aligns with safe and tasty standards.

Equipment challenges include ensuring pans or baking sheets are reliable, elevating your salmon if necessary for even cooking and efficient heat circulation.

To accommodate ingredient substitutions, consider alternative spices or nuts that maintain the envisioned flavor profile while catering to dietary specifics.

Address timing concerns by adhering strictly to suggested timelines; frequent observations play a key role in adapting to individual oven performance intricacies.

Recipe Success Stories


Community feedback lauds the Parmesan Crusted Salmon for its “perfect blend of flavors and textures,” with many commenting on its simplicity and impressive presentation.

Variations have seen successful incorporation of regional spices, with chili flakes or rosemary gracing versions that cater to cultural preferences, opening avenues for culinary exploration.

Adaptation stories abound, showcasing the dish’s flexibility; from festive gatherings to intimate brunches, its adaptability ensures satisfaction and praise across occasions.

Reader suggestions often praise the addition of vine-ripe tomatoes alongside the salmon, adding a sweet contrast and enhancing plate vibrancy and taste complexity.

Photography tips to highlight the dish’s beauty include using natural light to accentuate the crust’s sheen, emphasizing colors with strategically placed garnishes, creating visual interest.

Frequently Asked Questions

Q: Can I use frozen salmon fillets for this recipe?
A: Yes, but ensure they are fully thawed and patted dry to avoid excess moisture which can affect the crust texture.

Q: What is a good substitute for parmesan cheese?
A: You can use Pecorino Romano for a similar flavor or nutritional yeast for a dairy-free alternative while retaining savory notes.

Q: Will using whole-grain breadcrumbs alter the result?
A: Whole-grain breadcrumbs will add a nuttier taste and slightly denser texture, but are a healthy swap for regular breadcrumbs.

Q: How do I prevent the crust from falling off during serving?
A: Allow the salmon to rest for a few minutes post-baking, which helps firm the crust and aids in smooth transfer to plates.

Q: How can I add more flavor to the crust?
A: Mix in herbs like dill or oregano, along with garlic powder or lemon zest, to deepen the flavor without overpowering the salmon.

Q: Is it essential to line the baking sheet with parchment paper?
A: While not mandatory, parchment prevents sticking and makes cleanup easier.

Q: Can I prepare the crust mixture in advance?
A: Yes, prepping it a day ahead and storing it in an airtight container is an excellent way to streamline cooking on busy days.

Q: Will reheating affect the dish’s quality?
A: Reheating in the oven at a low temperature preserves quality, though slightly less crisp than fresh from the oven, the flavor remains rich.

Q: How do I know when the salmon is perfectly cooked?
A: Check for an internal temperature of 145°F; just pressing gently for flakiness indicates doneness too.

Q: What can I serve alongside for a full meal?
A: Pair with steamed vegetables or a light salad to complement and balance the dish’s rich flavors.

Q: Does using fresh parmesan make a big difference?
A: Indeed, fresh parmesan infuses the crust with superior flavor and meltability, vital for achieving a luxurious finish.

Q: How long can leftovers be stored in the refrigerator?
A: Stored properly in an airtight container, leftovers can last up to three days for optimal freshness.

Additional Resources


Explore related recipes like Lemon Herb Salmon for another simple yet flavorful seafood option—perfect if you’re seeking variety while sticking to easy, wholesome meals.

Technique guides offer additional insights, particularly in honing fish-baking skills that extend beyond this recipe to enhance overall culinary repertoire.

Dive into ingredient information detailing parmesan’s historical background and nutritional profile, informing choices that align with health goals.

Explore equipment recommendations for efficient kitchen organization, ensuring you have the right tools to support successful meal preparations across culinary endeavors.

Seasonal variations spotlight the freedom in adapting staple dishes to reflect seasonal produce, allowing conscious, flavor-driven meal adaptations.

Join the Conversation


Share your experiences with Parmesan Crusted Salmon on social media, tagging me for a chance to feature your creation, fostering a community that celebrates culinary exploration.

Photography tips focus on capturing the dish’s essence; play with angles and light to express your personal style and highlight technique effectiveness.

Leave a recipe review sharing your unique twist or how this dish fits your family dinner repertoire, helping others incorporate it into their homes.

Engage with a community of food enthusiasts by swapping adaptations; your feedback adds value, contributing to a collective bank of culinary knowledge.

View recipe variations others have tried and liked—this interchange leads to new ideas and inspiration, enriching the joy of cooking shared at home or with guests.

The Recipe

Parmesan Crusted Salmon

Serves: 4

Prep Time: 10 mins

Cook Time: 20 mins

Total Time: 30 mins

Kitchen Equipment Needed

  • Baking sheet
  • Parchment paper
  • Grater
  • Meat thermometer

Ingredients

  • 4 salmon fillets
  • 1 cup freshly grated parmesan cheese
  • 1/2 cup breadcrumbs
  • 2 tablespoons olive oil
  • 1 tablespoon lemon zest
  • 1 tablespoon finely chopped fresh parsley
  • Salt and pepper to taste

Directions

  1. Preheat your oven to 400°F (200°C) and line a baking sheet with parchment paper.
  2. In a small bowl, combine grated parmesan, breadcrumbs, lemon zest, parsley, salt, and pepper. Mix well.
  3. Place salmon fillets on the prepared baking sheet and brush lightly with olive oil on top.
  4. Evenly distribute the parmesan mixture over each fillet, pressing down gently to adhere properly.
  5. Bake in the preheated oven for 15-20 minutes, or until the crust is golden brown and the salmon is cooked through.
  6. Allow the salmon to rest for 3-4 minutes before serving for the best texture and flavor.

Recipe Notes

  • For an added kick, consider mixing in a pinch of cayenne pepper with the parmesan mixture.
  • If a deeper crust is desired, consider using panko breadcrumbs for extra crunch and texture.
  • Lemon wedges make an excellent garnish, complementing the dish with a fresh zing.

Irresistible Heavenly Cinnamon Sugar Cream Muffins for Sweet Mornings

Heavenly Cinnamon Sugar Cream Muffins: Sweet Delight for Every Occasion

⚖️
Difficulty
Easy

⏲️
Prep Time
15 mins

🕒
Cook Time
18 mins

⏱️
Total Time
33 mins

🍽️
Servings
12 muffins

There’s something magical about the aroma of freshly baked muffins wafting through your home, especially when it involves the comforting scent of cinnamon sugar. Introducing our Heavenly Cinnamon Sugar Cream Muffins, a perfect blend of soft, fluffy texture and rich, buttery flavor. These muffins are ideal for breakfast, a delightful snack, or a sweet treat to impress your guests. The secret lies in the luxurious cream that adds a moist, tender crumb, enriched by a generous dusting of cinnamon sugar for a touch of warmth and spice.

Strongly embracing the sweet and spicy notes, these cinnamon sugar cream muffins promise to become a family favorite. Every bite offers a harmonious combination of tastes, with the lush, velvety cream balancing the bright cinnamon. This exquisite recipe is not only about taste but also about awakening the senses—bringing warmth and joy with every mouthful. Whether served hot out of the oven or cooled to perfection, these muffins are a testament to the beauty of simple, home-baked goods.

Quick Recipe Highlights

  • Flavor Profile: Each bite combines the classic, warm sweetness of cinnamon with a subtle hint of vanilla, creating a muffin that’s rich in flavor yet delicately balanced.
  • Texture: Expect a muffin that is soft and moist inside with a slightly crispy, sugary top for a contrast that will delight your taste buds.
  • Aroma: Cinnamon and vanilla together bring an irresistible and inviting aroma, reminiscent of cozy kitchens and home-baked goodness.
  • Visual Appeal: Lightly golden with a sugary top, these muffins look as tempting as they taste, perfect for any occasion.
  • Skill Level Needed: This recipe is straightforward, perfect for beginners or anyone looking for a quick but satisfying baking project.
  • Special Equipment: A standard muffin tin and a mixing bowl are all you need, making this recipe accessible to every home baker.

Recipe Overview

  • Difficulty Level: Designed with simplicity in mind, these muffins require no special techniques or equipment, making them easy enough for anyone to master on their first try.
  • Category: Ideal for a breakfast treat, afternoon snack, or a sweet addition to any party spread.
  • Cuisine: Rooted in American baking traditions, this recipe pays homage to the classic flavors of cinnamon and sugar.
  • Cost: Budget-friendly ingredients make this an economical choice for a quick and indulgent homemade snack.
  • Season: While perfect year-round, the warming spices make these muffins especially popular during the cooler fall and winter months.
  • Occasion: Perfect for any occasion from casual family gatherings to more formal brunches and everything in between.

Why You’ll Love This Recipe

Heavenly Cinnamon Sugar Cream Muffins are a delightful combination of creamy richness and spicy sweetness, making them a staple for any sweet tooth. Their unique texture—a moist, tender crumb accented by a sugary crust—creates a satisfying contrast that elevates the simple pleasure of a muffin. The convenience of this recipe is unparalleled; minimal prep time and common pantry ingredients mean you can whip these up whenever the craving strikes. Not only are they quick to prepare, but they also bring the nutritional benefits of cinnamon, known for its antioxidant properties.

The social value of these muffins cannot be understated. Whether served at a brunch, as an after-school snack, or a friendly gift, they are sure to be remembered and appreciated. The cost-effectiveness of the ingredients ensures that anyone can enjoy the luxury of home baking without breaking the bank. With such accessibility, these muffins invite everyone to experience a homemade treat that combines the feeling of warmth with the elegance of subtle flavors.

Historical Background and Cultural Significance

The origin of cinnamon sugar treats can be traced back to ancient times, where spices were valued commodities and incorporated into many traditional dishes. Over the years, muffins themselves have evolved as a form of quick bread, gaining popularity in American kitchens for their convenience and versatility. Cinnamon, with its sweet yet spicy profile, has remained a cherished flavor, celebrated across cultures for its rich history and its ability to symbolize warmth and comfort.

These Heavenly Cinnamon Sugar Cream Muffins are the modern result of centuries of culinary evolution. As regional traditions mingled, the recipe adapted, integrating local ingredients and preferences, yet the essence—the beloved blend of cinnamon and sugar—remained a constant. Each variation, from different types of cream to unique spice ratios, reflects the rich tapestry of regional influences that have shaped this timeless treat.

Ingredient Deep Dive

Flour is the foundation of any muffin recipe, providing structure and substance. Opt for all-purpose flour to achieve a light and airy crumb, though whole wheat can add a nutritious twist. Cinnamon, known for its exotic origins and health benefits, brings warmth and sweetness, balancing out the richness of the cream. Fresh cinnamon delivers the best flavor—ground at home if possible.

Cream plays a crucial role in these muffins, offering moisture and a subtle sweetness. Choose heavy cream for the richest texture, or experiment with light cream or even plant-based alternatives to suit dietary needs. Proper storage is key; use an airtight container to keep all ingredients fresh and potent until ready to bake. Substitutions such as almond milk can offer a lactose-free alternative without compromising flavor or texture.

Common Mistakes to Avoid

  • Improperly measuring ingredients can drastically alter the outcome—always use precise measurements for best results.
  • Overmixing the batter leads to dense muffins; mix just until combined to maintain a fluffy texture.
  • Skipping the cream or using low-fat versions can diminish the muffin’s moistness—use full-fat options for best results.
  • Not preheating the oven can affect the rise and texture—always ensure your oven is fully warm when you begin baking.
  • Using stale cinnamon can mute the muffins’ flavor—opt for fresh spices for maximum aroma and taste.
  • Underbaking or overbaking can ruin texture—keep a close eye on baking times and use a toothpick test for doneness.
  • Filling muffin tins inconsistently may lead to uneven baking—use a scoop to ensure even portions.
  • Forgetting to grease the muffin tin, even when using liners, can result in stuck pastries—always grease for easy removal.

Essential Techniques

Achieving the perfect muffin involves mastering a few key techniques. Creaming the sugar and butter introduces air into the batter, which is essential for creating a light and fluffy texture. Be gentle when folding in the flour to avoid gluten development, which leads to a denser crumb. Recognize the visual cues—a smooth batter and a golden, puffed top—that indicate a successful bake.

Timing is equally crucial; removing the muffins from the oven at just the right moment is vital to preventing dryness. Let them cool briefly in the pan before transferring to a wire rack to prevent sogginess from steam. These steps, while simple, elevate your muffins from good to irresistible, ensuring they come out perfectly every time.

Pro Tips for Perfect Heavenly Cinnamon Sugar Cream Muffins

Invest in quality cinnamon for the best flavor outcome; Saigon or Ceylon varieties are highly recommended for their unique profiles. Always bring your cream to room temperature to ensure it incorporates smoothly into the batter. For an extra flavor boost, consider adding a pinch of nutmeg or a splash of vanilla extract.

Don’t rush the cooling process; allowing the muffins to sit for a few minutes after baking helps the flavors meld together harmoniously. Customize to your taste by adjusting the ratio of cinnamon to sugar in the topping. Finally, serve them warm to enjoy the full spectrum of textural contrast and aroma.

Variations and Adaptations

Heavenly Cinnamon Sugar Cream Muffins can be adapted to suit any palate or dietary need. Explore regional variations by adding nuts or dried fruits commonly found in different cuisines. Seasonal adaptations, like incorporating fresh berries or pumpkin puree, offer a delightful twist. For a dietary modification, experiment with gluten-free flours or dairy-free cream alternatives.

Enhance flavor by experimenting with spices—cardamom or ginger can add an exotic touch, while adjusting the sugar levels can cater to those who prefer a less sweet option. Presentation is key; consider mini muffins or loaves for variety or add a decorative icing drizzle for visual flair. No matter the adaptation, these muffins remain a delightful centerpiece for any occasion.

Serving and Presentation Guide

When it comes to serving, consider the occasion and desired impression. For an elegant touch, present these muffins on a tiered stand, perhaps garnished with a cinnamon stick for décor. Pair with a dollop of whipped cream or a sprinkle of confectioner’s sugar for added appeal.

Traditionally enjoyed warm, these muffins are wonderfully complemented by honey or a fruit compote on the side. While the classic rustic look is appealing, modern presentations using individual ramekins or decorative paper wraps can add an extra layer of sophistication. Achieving balance in portion sizes ensures that each serving is satisfying yet not overly indulgent.

Wine and Beverage Pairing

To elevate your muffin experience, pair them with a light and fruity wine, such as a Moscato or a semi-sweet Riesling, which complements the cinnamon’s warmth. Non-alcoholic alternatives such as apple cider or a rich chai tea can offer a comforting and aromatic pairing, enhancing the spices’ depth.

For coffee lovers, a medium roast with cinnamon or vanilla notes pairs beautifully, while those who prefer tea might opt for a cinnamon-infused black tea for cohesive flavor profiling. Temperature matters; both the muffins and beverages should be served fresh and at their optimal warmth for the fullest flavor experience.

Storage and Shelf Life

Proper storage ensures these muffins remain fresh and delicious for up to five days. Store them in an airtight container at room temperature, away from direct sunlight to prevent drying out. For longer storage, these muffins freeze exceptionally well—simply wrap them individually in plastic wrap and place in a freezer bag, where they can last for up to three months.

When ready to eat, reheating them gently in the oven or toaster oven will bring back their freshly baked aroma and texture. Watch for signs of spoilage, such as an off smell or change in moisture level, to ensure you’re always enjoying them at their best.

Make Ahead Strategies

Preparing these muffins in advance can be a game-changer for busy weeks and special occasions. Mix your dry ingredients ahead of time and store them in a sealed container. You can prepare the batter the night before—ensure it’s in a sealed bowl in the refrigerator for freshness.

Assemble and fill the muffin tins when you’re ready to bake, guaranteeing fresh-from-the-oven enjoyment that minimizes hassle. If pre-baking, allow them to cool fully before sealing for storage, maintaining their texture and taste. Reheat them gently just before serving for that fresh-baked experience.

Scaling Instructions

This recipe can be easily scaled to suit your needs, whether baking for a crowd or a cozy family brunch. To halve the recipe, simply divide all ingredient quantities by two and adjust baking time slightly, checking regularly for doneness.

Doubling or tripling is also feasible; use larger mixing bowls and ensure uniform mixture distribution to maintain even baking across larger batches. Consider freezer space if preparing in advance, as larger quantities require more storage. Adjust equipment as necessary to accommodate more volume, like using larger or additional muffin pans.

Nutritional Deep Dive

A standard batch of these muffins provides a balance of macronutrients with a focus on carbohydrates and fats from the flour and cream. Rich in cinnamon, they offer antioxidant benefits, while incorporating whole ingredients keeps the recipe relatively natural.

Mindful portion management enables you to indulge without overwhelming calorie intake, and small adjustments—like using less sugar or substituting some of the cream with lower-fat alternatives—can fine-tune the muffins’ nutritional profile to fit specific dietary goals. The presence of fiber and essential vitamins offers a wholesome treat that satisfies both taste and health considerations.

Dietary Adaptations

These muffins can easily adapt to various dietary needs without sacrificing flavor. A gluten-free version can use almond or coconut flour, though adjusting liquid ratios may be necessary. To make them dairy-free, substitute the cream with coconut milk or a nut-based alternative, which provides creaminess without lactose.

For a vegan adaptation, replace eggs with flax or chia egg substitutes, ensuring the mixture remains moist and cohesive. Low-carb versions can incorporate almond and coconut flours alongside sugar alternatives like stevia. Each modification maintains the muffin’s essence while allowing diverse diets to enjoy the indulgence.

Troubleshooting Guide

Achieving perfect muffins might sometimes require addressing common issues. If the texture is too dense, check your mixing method; folding gently preserves air bubbles. Flavor imbalances can often be adjusted by revisiting your spice measurements, ensuring freshness and adequate amounts.

Temperature plays a crucial role; ensure consistent oven heat to avoid uneven cooking or burning. When working without all traditional ingredients, substitutions must be balanced—consider ratios carefully to maintain the muffin’s core properties. Accurate timing is key to prevent overbaking, which leads to dryness.

Recipe Success Stories

Our community has embraced these muffins wholeheartedly, with countless stories of successful adaptations and creative presentations. One reader transformed the traditional muffin into a loaf cake, adorned with a cinnamon glaze, creating an adaptable treat fit for various celebrations. Others have experimented with adding fruits like blueberries or dried cranberries, enhancing the muffins’ natural sweetness.

Readers have shared their experiences of serving these muffins at events, garnering compliments and requests for the recipe! Vibrant photos showcasing personalized touches, such as drizzles or dustings, reflect the versatility and joy these muffins bring to bakers and their loved ones alike.

Frequently Asked Questions

Can I make these muffins ahead of time? Yes, they can be prepared a day in advance, stored in an airtight container to retain their freshness, and gently reheated before serving.

How do I store these muffins? Keep them in a sealed container at room temperature for up to five days, or freeze for longer storage.

What can I substitute for cream? Alternatives like coconut milk or a nut-based cream work well, though slight flavor differences may occur.

Are these muffins gluten-free adaptable? Certainly, using almond or coconut flour with adjusted liquid ratios can create a gluten-free version.

What spices can I add for variation? Nutmeg, ginger, or cardamom make excellent companions to cinnamon, providing a nuanced flavor profile.

Can I make mini muffins? Absolutely, reduce the baking time and use mini muffin tins for smaller portions or variation.

How can I prevent dryness? Avoid overbaking and ensure your wet ingredients, like cream, are full-fat for optimal moisture.

What should I do if my muffins sink? This can result from overmixing or underbaking; ensure proper mixing techniques and check oven temperature consistency.

Is there a low-sugar version? Reduce the sugar by half or use a sugar substitute, adjusting for any sweetness variation.

Can I add nuts? Certainly, chopped walnuts or pecans can enhance texture and flavor.

What type of flour is best? All-purpose flour is recommended for a light crumb, though whole wheat can be used for a denser muffin.

Do I need to line the muffin tin? While not necessary, liners make cleanup easier and prevent sticking.

Additional Resources

Explore similar recipes that complement the flavors and textures of these muffins, such as cinnamon rolls or spiced quick breads. Delve into technique guides that focus on mastering spice ratios and the art of creaming. Ingredient information sources can provide insights into the benefits of spices like cinnamon and vanilla.

Consider equipment recommendations that suit muffin baking, including high-quality pans and scoops for even portioning. Seasonal variations can inspire recipe adaptations with the changing climates and available ingredients, keeping the baking experience fresh and exciting.

Join the Conversation

Your engagement in the culinary community not only enhances your own cooking skills but also fosters a rich dialogue among fellow enthusiasts. Share your muffin photography tips on social media, invite feedback, and unravel new ideas on how to adapt this recipe to match seasonal ingredients or personal preferences.

Encourage fellow bakers to share their experiences with these muffins in the comments section. Sharing reviews enhances community knowledge and provides opportunities for budding bakers to experiment and innovate with confidence. Plus, exploring variations can lead to delightful new discoveries within the world of baking.

The Recipe

Heavenly Cinnamon Sugar Cream Muffins

Serves: 12 muffins

Prep Time: 15 mins

Cook Time: 18 mins

Total Time: 33 mins

Kitchen Equipment Needed

  • Muffin tin
  • Mixing bowl
  • Whisk
  • Measuring cups and spoons
  • Oven

Ingredients

  • 2 cups all-purpose flour
  • 1 cup granulated sugar
  • 2 teaspoons baking powder
  • 1/2 teaspoon baking soda
  • 1/2 teaspoon salt
  • 1 cup heavy cream
  • 2 large eggs
  • 1/4 cup unsalted butter, melted
  • 2 teaspoons vanilla extract
  • 2 teaspoons ground cinnamon
  • 1/4 cup brown sugar, for topping

Directions

  1. Preheat your oven to 375°F (190°C) and prepare a muffin tin with liners.
  2. In a large mixing bowl, whisk together the flour, granulated sugar, baking powder, baking soda, and salt.
  3. In a separate bowl, combine the heavy cream, eggs, melted butter, and vanilla extract, mixing well.
  4. Pour the wet ingredients into the dry ingredients and gently fold until just combined, being careful not to overmix.
  5. Divide the batter evenly among the muffin tin cups.
  6. In a small bowl, mix the ground cinnamon with the brown sugar, then sprinkle generously over the top of each muffin.
  7. Bake for 18 minutes or until a toothpick inserted into the center of a muffin comes out clean.
  8. Allow the muffins to cool in the tin for 5 minutes before transferring them to a wire rack to cool completely.

Recipe Notes

  • For added depth of flavor, mix a teaspoon of nutmeg into the batter.
  • For a heartier muffin, substitute half of the flour with whole wheat flour.
  • If desired, drizzle with a simple glaze made from powdered sugar and milk once cool.