Indulge in Irresistible Heavenly Banana Cake with Cream Cheese Frosting

Heavenly Banana Cake with Cream Cheese Frosting: A Tempting Delight

⚖️
Difficulty
Medium

⏲️
Prep Time
20 mins

🕒
Cook Time
45 mins

⏱️
Total Time
65 mins

🍽️
Servings
12

Imagine a cake bursting with the natural sweetness of ripe bananas, topped with a luxurious layer of cream cheese frosting. This heavenly banana cake offers a moist, tender crumb that perfectly balances the rich and tangy frosting. It’s the kind of dessert that brings comfort and joy with every bite. Whether you’re a seasoned baker or a newbie in the kitchen, this banana cake promises impressive results that are sure to delight any crowd.

Indulging in a slice of banana cake with cream cheese frosting is like a warm hug. Its inviting aroma fills the kitchen as it bakes, creating an atmosphere of anticipation. This cake is perfect for gatherings and special occasions, offering a nostalgic taste reminiscent of family dinners and holiday celebrations.

Quick Recipe Highlights

  • Flavor Profile: This cake combines the sweet and fruity essence of bananas with a creamy, tangy frosting.
  • Texture: Expect a soft, moist crumb contrast with smooth, luscious cream cheese frosting.
  • Aroma: The comforting scent of baked bananas mingles with the rich aroma of cream cheese.
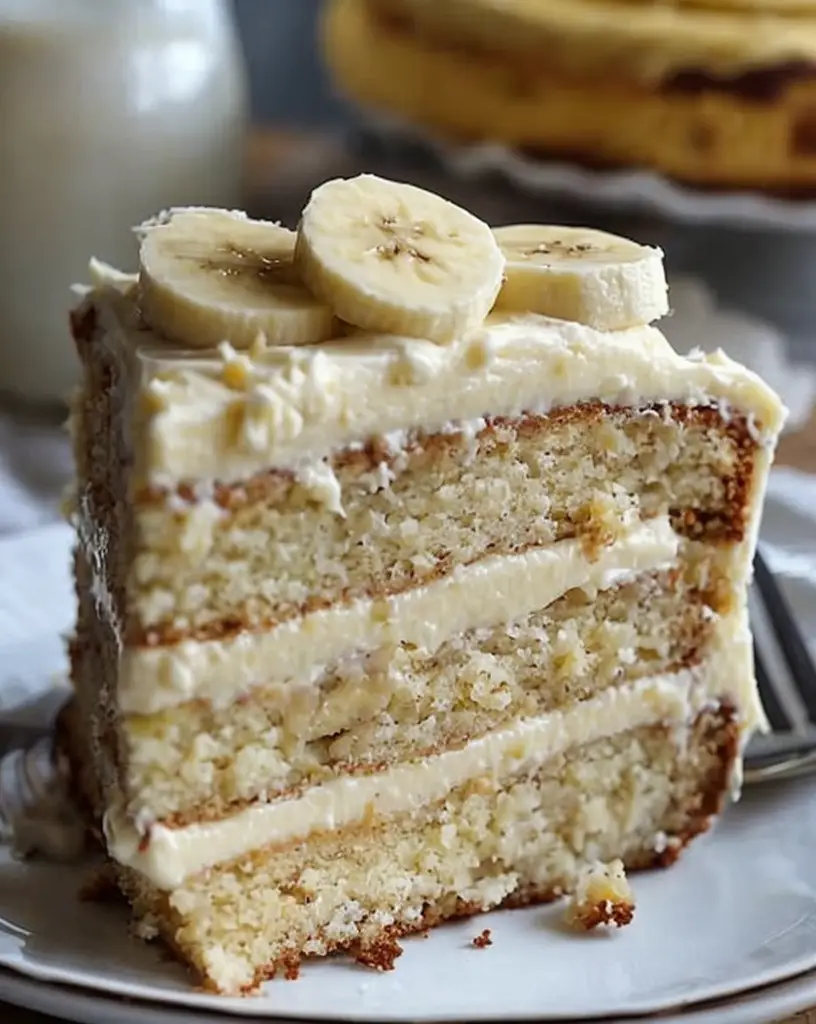
  • Visual Appeal: Light golden hues adorned with a snowy-white topping make this cake a centerpiece.
  • Skill Level Needed: A medium-level recipe requiring basic baking techniques.
  • Special Equipment: Requires standard baking tools and a mixer for the frosting.

Recipe Overview

  • Difficulty Level: Medium difficulty due to the need for precise ingredient measurements and baking timing.
  • Category: Best served as a dessert or a sweet treat at any meal.
  • Cuisine: This cake has Western influences, deeply rooted in American baking traditions.
  • Cost: Cost-effective, using pantry staples and ripe bananas.
  • Season: Best enjoyed year-round, whenever bananas are available.
  • Occasion: Perfect for birthdays, family gatherings, or holiday feasts.

Why You’ll Love This Recipe


This banana cake is all about taste and texture. The first bite reveals a moist and tender crumb, highlighting the natural sweetness of ripe bananas. Topped with creamy and tangy cream cheese frosting, the flavors meld beautifully, creating a harmonious balance that comforts the soul and excites the palate.

Convenience is another reason to love this recipe. The preparation involves basic baking skills, making it accessible for home bakers. With simple steps and common ingredients, you’ll have this cake ready in just over an hour, yet the taste promises complexity that feels gourmet and sophisticated.

Nutritionally, bananas offer natural sugars and potassium, and while this cake is a treat, it does incorporate a serving of fruit. For those looking to indulge while sneaking in a bit of nutrition, it’s a sweet compromise.

This cake shines at social gatherings. It’s not just a dessert; it’s a conversation starter. Its inviting aroma draws people in, creating a focal point for shared enjoyment and nostalgic discussions about favorite homemade treats.

Finally, it’s budget-friendly and relies on affordable ingredients typically found in most kitchens. This accessibility makes it a perfect choice when looking to impress without breaking the bank, ensuring the Heavenly Banana Cake maintains its place in your repertoire of beloved, go-to recipes.

Historical Background and Cultural Significance


Banana cake has humble beginnings, finding its roots in the frugal days of the Great Depression when resourceful home cooks sought to use every element of their groceries, including overripe bananas. This cake became a way to transform otherwise overlooked ingredients into something delicious and worthwhile.

Culturally, banana cake symbolizes comfort and home, often passed down through generations as a cherished family recipe. It is well-celebrated in various forms across the United States and beyond, each version holding a story of adaptation and love.

The recipe for banana cake has evolved over time, with modern versions including a variety of nuts, spices, or flavorings. The cream cheese frosting, while not original, has become a popular addition for its creamy, tangy counterpoint to the cake’s sweetness.

Regional variations can be seen across the globe. In the Caribbean, hints of rum or coconut may be included, adding a tropical flair. In Asian cuisines, you might find Japanese versions that add matcha or red bean paste for a unique twist on familiar flavors.

Ingredient Deep Dive


Bananas play a critical role in the cake and their history as a domesticated fruit reflects their importance in global cuisine. Once considered exotic, bananas are now a staple in many households worldwide. Their unique ability to act as a natural sweetener, while also providing moisture and flavor, makes them ideal for baking.

Nutritionally, bananas are rich in potassium and have significant dietary fiber, offering health benefits alongside their delicious taste. To select the perfect banana for baking, look for heavily speckled or fully brown bananas to ensure maximum sweetness and ease of mashing. Store bananas at room temperature for faster ripening or refrigerate to slow the process. Should you need a substitute, applesauce or pear puree can act as worthy alternatives for moisture.

The cream cheese frosting relies heavily on its main ingredient, cream cheese, which adds a tangy creaminess unmatched by other frostings. Serving as a balancing act to the sweet banana base, it ensures each slice is an experience of both complex and harmonious flavors.

When selecting cream cheese, opt for full-fat versions for the richest taste. Storage should be in the refrigerator, ensuring freshness and flavor integrity. Should a dairy-free option be necessary, vegan cream cheese can work, although it may alter the texture slightly.

Common Mistakes to Avoid

  • Using under-ripe bananas can result in a drier, less flavorful cake. Ensure your bananas are fully ripe.
  • Over-mixing the batter can lead to a dense cake. Mix until just combined to preserve a light crumb.
  • Neglecting to properly preheat your oven can lead to uneven baking.
  • Using cold cream cheese can make frosting lumpy. Ensure it’s at room temperature before mixing.
  • Omitting the use of baking powder can prevent the cake from rising properly.
  • Failing to line or grease the baking pan can cause the cake to stick and break apart.
  • Ignoring cooling time for the cake before frosting can cause the frosting to melt.
  • Storing in an airtight container is vital to maintain cake freshness.

Essential Techniques


One technique essential to mastering this cake is the proper mashing of bananas. Bananas should be mashed until smooth but with tiny chunks to provide flavor bursts throughout the cake. Over-mashing can result in an overly dense texture, while under-mashing may cause inconsistent sweetness.

Blending cream cheese frosting to the right consistency is another key technique. A smooth, spreadable consistency enhances the cake’s texture. Avoid over-beating that can cause the frosting to split and become watery. Look for a creamy and slightly thicker texture as a sign of success.

Correctly creaming the butter and sugar is critical for achieving a light, airy cake texture. This process incorporates air, helping the cake rise during baking and resulting in a tender crumb. Visual cues for success include a pale, fluffy mixture.

Pro Tips for Perfect Heavenly Banana Cake


Gradually add powdered sugar to the cream cheese for smoother frosting. This helps avoid clumping and ensures an even distribution.

Always sift flour and baking powder to avoid clumps in your cake batter and achieve a smooth, even texture.

Incorporate spices like cinnamon or nutmeg for an added depth of flavor compatible with bananas.

For even baking, ensure your batter is evenly spread in the pan and tap it gently on the counter to remove air pockets.

Opt for high-quality vanilla extract to enhance the overall flavor profile of both the cake and the frosting.

If possible, bake the cake a day in advance and frost it once cooled for more pronounced flavors as they meld together.

Variations and Adaptations


Regional variations can be explored by adding tropical flavors like shredded coconut or passion fruit in the frosting. For a mellow flavor variation, incorporate cinnamon or even chocolate chips into the batter.

Seasonal adaptations might include adding chopped walnuts or pecans for an autumnal touch, or using fresh summer fruits for a vibrant presentation.

Dietary modifications can easily be made by using gluten-free flour blends or dairy-free cream cheese to cater to dietary restrictions without sacrificing taste.

For texture modifications, pureed bananas can be swapped for chunky mashed bananas for a different texture profile. Alternatively, fold in nuts or dried fruits for added bite.

For presentation alternatives, decorate with sliced bananas or edible flowers to provide visual interest and added flavors.

Serving and Presentation Guide


For flawless plating, use a cake stand to elevate the Heavenly Banana Cake with Cream Cheese Frosting, allowing guests to admire its layers and texture. Add garnish with a light dusting of cinnamon atop the frosting, or consider slices of fresh banana strategically placed along with the frosting’s edge for a touch of vibrancy.

Traditional accompaniments like fresh-brewed coffee or tea pair beautifully with the cake’s flavors. Modern serving suggestions might include a drizzle of caramel or chocolate syrup for an extra indulgence.

Be mindful of temperature — serving this cake slightly chilled helps maintain the structure of the frosting, especially in warmer climates, while ensuring portion sizes are generous enough to enjoy the complex layers of texture and flavor in each bite.

Wine and Beverage Pairing


Pair this cake with a late harvest Riesling or a Moscato to complement its sweetness with delicate floral and fruity notes. Non-alcoholic alternative options include chai tea, whose cinnamon and spice flavors beautifully contrast with the cream cheese frosting.

For coffee enthusiasts, a freshly brewed French roast coffee provides a robust balance with the sweet richness of the cake.

Sparkling water with a splash of lemon or lime offers a light, refreshing palate cleanser, ensuring that each bite of Heavenly Banana Cake remains as delightful as the first.

Storage and Shelf Life


Proper storage is key to maintaining freshness. Store the banana cake in an airtight container and refrigerate it for up to five days.

Beware of leaving the cake at room temperature for too long, particularly in warm conditions, to prevent frosting from spoiling.

For freezing, wrap individual slices in plastic wrap before placing them in a freezer-safe container.

To reheat, allow frozen slices to thaw in the fridge overnight. You can then gently warm in the microwave for a fresh-out-of-the-oven feel, mindful of avoiding overheating which could melt the frosting.

Make Ahead Strategies


Consider making the cake layers in advance and freezing them until needed. Bake, cool, and wrap them tightly in plastic before freezing. When ready to serve, prepare the fresh cream cheese frosting and assemble the cake for that just-made taste.

Storage between steps is essential for maintaining freshness without sacrificing flavor — cover anything pre-made to avoid it drying out.

Assessing quality impact is crucial, so ensure the cake is not overly moist from freezing which might affect texture. Adding a fresh pear or apple slice to the container can help preserve moisture during storage.

Scaling Instructions


To halve the recipe, simply divide each ingredient quantity by two, being mindful of adjusting baking times since smaller cakes bake faster. Doubling or tripling the recipe is easy but requires a larger mixing bowl and possibly a stand mixer for ease.

With larger batches, ensure the baking pans you use provide enough room for batter expansion to prevent overflow. Timing will have to be adjusted — keep an eye and check frequently for a clean toothpick indicating doneness.

Even when scaling, ensure the cooled cake is moist and retains its fluffy crumb before assembly — use of consistent measuring tools is key to success.

Nutritional Deep Dive


Heavenly Banana Cake delivers a lovely balance of macronutrients and can fit into a variety of diets when consumed in moderation. Bananas contribute natural sugars and dietary fiber, key for digestive health.

Micronutrients, including potassium and vitamins B6 and C, are present in the cake. While it’s a sweet treat, it’s worth noting the health benefits from its fruit content.

Those watching their diet should focus on portion control, enjoying a slice as part of a balanced lifestyle. This includes noting the caloric consumption relative to daily activity levels and incorporating weight management practices accordingly.

Dietary Adaptations


To create a gluten-free version, simply substitute gluten-free flour blend in place of regular flour. Ensure it also includes a binding agent like xanthan gum, which helps mimic gluten’s elasticity.
A dairy-free version can use vegan cream cheese and margarine in the frosting, while using almond or coconut milk within the batter as needed.
For a low-carb adaptation, consider using sugar alternatives suitable for baking, understanding this might alter the cake structure and flavor slightly.

Troubleshooting Guide


To resolve texture issues, ensure you’re not over-mixing the batter, as this can create a dense cake. Use a light hand with ingredients and proper folding as instructed.

Balancing flavors might involve adjusting the sugar-to-banana ratio, for those preferring less sweetness, reducing sugars can help achieve this.

If you encounter temperature problems leading to raw centers, ensure the oven is evenly calibrated or consider reducing cake layers to promote quicker, balanced cooking.

Ingredient substitutions, especially in response to dietary restrictions, should focus on one-to-one replacements, remaining mindful they must fulfill similar roles in the recipe.
Timing concerns guide successful baking, try covering cake with foil if it’s browning too quickly, giving it more time to rise and finish inside without burning.

Recipe Success Stories


Many readers have used this banana cake recipe as a base for imaginative variations, incorporating ingredients that celebrate their regional tastes.

A community-favorite adaptation includes the addition of cocoa powder for a chocolate-banana hybrid delight, with several successfully integrating lavish layers of coarsely chopped nuts for texture.

Photography tips shared by successful home bakers reveal using natural daylight to achieve the cake’s best visual representation.

This recipe continues to inspire creative presentations and embellishments, from multi-tiered creations to personalized decorations echoing memorable events.

Frequently Asked Questions

Can I use frozen bananas for this cake?
Yes, just ensure they are thawed and drained before mashing to maintain correct moisture balance.

How long will this cake last?
Properly stored, this cake can last about five days in the refrigerator or up to three months when frozen.

Can I make this cake without eggs?
Yes, consider using flax eggs or a commercial egg replacer available in stores for similar binding.

How do I know when the cake is done?
Insert a toothpick into the center; it should come out clean, or with only a few moist crumbs.

What can I do if I don’t have cream cheese?
Substituting with Greek yogurt or a coconut cream base can create a similar creamy topping.

Additional Resources


Explore similar recipes including banana bread or muffins for variations on this banana-inspired theme.

Find more on technique guides for cake baking basics, ensuring even beginners feel comfortable in trying their hand at this recipe.

Deep dives into ingredient qualities, and how subtle changes in brand or origin can influence final taste, are also available.

Essential equipment recommendations, from best mixers to pan choices, can help streamline your baking process.

Join the Conversation


We encourage community feedback through shared photos, comments, and ratings to hear how this cake has brought smiles to your table.

By using social media, join others in sharing your own adaptations or stunning cake presentations.

Engage with like-minded bakers in creating personal spins or learning from shared successes, continuing the conversation about our beloved Heavenly Banana Cake.

The Recipe

Heavenly Banana Cake with Cream Cheese Frosting

Serves: 12

Prep Time: 20 mins

Cook Time: 45 mins

Total Time: 65 mins

Kitchen Equipment Needed

  • Mixing bowls
  • Electric mixer
  • 9×13-inch baking pan
  • Spatula
  • Measuring cups and spoons
  • Cooling rack

Ingredients

  • 3 ripe bananas, mashed
  • 1/2 cup unsalted butter, softened
  • 1 cup granulated sugar
  • 2 large eggs
  • 1 tsp vanilla extract
  • 1 1/2 cups all-purpose flour
  • 1 tsp baking soda
  • Pinch of salt
  • 1/2 cup sour cream
  • 1/2 cup chopped walnuts (optional)
  • For Frosting:
  • 8 oz cream cheese, softened
  • 1/4 cup unsalted butter, softened
  • 2 cups powdered sugar
  • 1 tsp vanilla extract

Directions

  1. Preheat oven to 350°F (175°C). Grease and flour a 9×13-inch baking pan.
  2. In a large bowl, cream together the butter and sugar until light and fluffy. Beat in the eggs, one at a time, then stir in the vanilla and mashed bananas.
  3. In another bowl, whisk together the flour, baking soda, and salt. Add to the banana mixture alternately with sour cream. Stir in walnuts if using. Pour batter into prepared pan.
  4. Bake in preheated oven for 45 minutes, until a toothpick inserted into the center of the cake comes out clean.
  5. For the frosting, beat cream cheese and butter until smooth. Gradually beat in powdered sugar and vanilla until creamy. Spread over cooled cake.
  6. Refrigerate until serving. Store leftovers refrigerated.

Recipe Notes

  • Make sure the cream cheese is at room temperature for the best frosting texture.
  • The cake can be made a day in advance for flavors to develop.
  • Add a splash of lemon juice to the frosting for a tangy twist.

Irresistible Cherry Cheesecake Fluff: A Quick and Easy Dessert

Delectable Cherry Cheesecake Fluff: A Sweet and Creamy Delight

⚖️
Difficulty
Easy

⏲️
Prep Time
15 mins

🕒
Cook Time
0 mins

⏱️
Total Time
15 mins

🍽️
Servings
6

Indulge yourself in the captivating taste of our Delectable Cherry Cheesecake Fluff, a luscious and velvety dessert that perfectly balances sweetness with a hint of tang. This no-bake treat brings the classic flavors of cheesecake into a fluffy, creamy concoction that’s irresistibly light yet satisfyingly rich. Perfect for any occasion, this cherry-infused delight will have your taste buds begging for more.

Our Cherry Cheesecake Fluff combines the heartwarming flavors of fresh cherries with the creamy goodness of cheesecake, creating a truly divine dessert experience. Whether you’re savoring it solo or sharing with friends and family, each spoonful promises a melt-in-your-mouth experience that is both sophisticated and comforting. Remember, there’s no oven required, making it an effortless delight to whip up!

Achieve the ultimate in dessert euphoria with our Cherry Cheesecake Fluff, a sensational creation that embraces both time-honored cheesecake traditions and the ease of modern dessert preparation. It’s a gorgeous centerpiece for casual gatherings or a luxurious close to a dinner party, leaving everyone in awe of its irresistible charm and sumptuous taste.

Quick Recipe Highlights

  • Flavor Profile: The cherry cheesecake fluff boasts a sweet, creamy flavor with subtle cherry notes that provide a delightful tanginess.
  • Texture: Experience a light and airy texture that dissolves beautifully on the palate, reminiscent of whipped cream mixed with cheesecake richness.
  • Aroma: Invoking the fragrance of fresh cherries and creamy cheesecake, it’s irresistible from the moment you stir the ingredients together.
  • Visual Appeal: The vibrant red of the cherries contrasts beautifully with the creamy white fluff, offering a delightful visual feast perfect for any dessert table.
  • Skill Level Needed: Ideal for novice cooks and seasoned chefs alike, requiring minimal culinary skill for maximum impact.
  • Special Equipment: You’ll need only basic kitchen tools, emphasizing ease of preparation without specialized appliances.

Recipe Overview

  • Difficulty Level: This recipe is classified as easy due to the simplicity of the mixing process and the absence of any cooking or baking stages.
  • Category: It’s a versatile dessert that fits snugly into categories like no-bake delights, fruit desserts, and cheesecake-inspired creations.
  • Cuisine: While inspired by cheesecake traditions, this fluff embraces a modern twist on classic American desserts.
  • Cost: Expect this recipe to be budget-friendly, given the few ingredients required and their common availability.
  • Season: We recommend crafting this fluff during cherry season to enhance the freshness, but frozen cherries work beautifully year-round.
  • Occasion: Perfect for casual get-togethers, family desserts, or festive occasions like potlucks and summer barbecues.

Why You’ll Love This Recipe


Relish the scrumptious taste and texture that the Cherry Cheesecake Fluff delivers with every mouthful. The creamy base paired with juicy, tangy cherries ensures a balanced flavor that is both refreshing and indulgent. Its light and fluffy consistency provide a delightful contrast to traditional heavy desserts, making it an appealing choice for any event.

The convenience of this dessert cannot be overstated. With no baking involved, the preparation time is minimal, making it a quick and easy recipe to assemble even at the last minute. All you need is a mixing bowl, a whisk, and your ingredients. This versatility makes it a fantastic go-to dessert when you need something delicious in a pinch.

Moreover, the Cherry Cheesecake Fluff offers various nutritional benefits, especially when using fresh or frozen cherries that are rich in vitamins and antioxidants. It serves as a lower-calorie option to traditional cheesecake, and you can adjust sugar levels to suit your dietary preferences.

Perfect for entertaining, this dessert is a crowd-pleaser that caters to a range of tastes and preferences. Its adaptability means it can be part of a casual meal or the star attraction of a dinner party. Guests will appreciate the lightness after a hearty meal, offering a refreshing end to the evening.

Furthermore, the cost-effectiveness of this recipe is a significant attraction. Most of the ingredients are staples you might already have, and cherries are readily available without breaking the bank, ensuring a delicious yet economical option.

Historical Background and Cultural Significance


The origins of cherry desserts date back centuries, with cherries being a popular component in lush pies and tarts across Europe. The cherry was first domesticated in regions of Asia Minor, eventually making its way to Greek and Roman cuisine. This eventually led to its incorporation into cheesecakes, a dessert variant beloved since ancient times.

Cheesecake itself has an illustrious history, with roots tracing back to ancient Greece. Over time, its evolution saw the emergence of various regional adaptations, culminating in the modern, indulgent cheesecakes we cherish today. The simplicity of the Cherry Cheesecake Fluff pays homage to these ancestral recipes, embracing flavors our ancestors would recognize.

As cheesecake grew in popularity across different cultures, innovations emerged, such as incorporating fresh fruits like cherries. Regional influences saw the adaptation of recipes to suit local flavors, particularly in the United States where cheesecake became synonymous with creamy, sweet indulgence.

Throughout its evolution, the Cherry Cheesecake Fluff remains a testament to versatility, simplicity, and flavor. It offers a fusion of traditional cherry desserts with modern, quick preparation methods, appealing to contemporary lifestyles while respecting culinary tradition.

Ingredient Deep Dive


Cherries hold a culturally rich history, originating from the fertile regions around the Black Sea. Their vibrant taste and rich red hue have made them a prized fruit in numerous cultures. Nutritionally, cherries are a powerhouse, loaded with antioxidants and anti-inflammatory properties, contributing to overall health and wellbeing.

Selecting the perfect cherries involves seeking out firm, plump fruits with a dark red color. Storing them properly in the fridge will help maintain their freshness, extending their shelf life. If fresh cherries aren’t available, frozen cherries serve as an excellent substitute with similar flavor retention.

Cream cheese, a hallmark of cheesecake recipes, has its origins in the United States. Known for its smooth, creamy texture, it adds richness to our fluff. Selecting full-fat varieties will offer the best flavor and texture, but light versions work if you’re seeking a lower-calorie option. Stored in a cool place, it can last a few weeks unopened.

Heavy whipping cream enriches the fluff, elevating the airy texture. Look for cream with a minimum 36% fat content for optimal results. Storage is easy, as long as it remains refrigerated until use, ensuring it stays fresh and ready to whip when you’re ready to make the dessert.

Common Mistakes to Avoid

  • Over-beating the cream: This can lead to butter formation instead of smooth fluff; keep a close eye during whipping for soft peaks.
  • Using low-fat cream cheese: This can affect the texture; opt for full-fat for a creamier consistency.
  • Skipping the chilling: Allow enough chill time for the flavors to meld and for the fluff to set up correctly.
  • Relying solely on artificial cherries: Fresh or frozen cherries bring a vibrant natural taste that canned cherries may not match.
  • Improper folding: Be gentle when incorporating ingredients to maintain the light texture of the fluff.
  • Neglecting to taste: Always taste for sweetness levels, adjusting sugar to fit your palate.
  • Inadequate cherry preparation: Ensure cherries are pitted to avoid any unpleasant surprises in texture or flavor.
  • Ignoring ingredient temperature: Keep cream cheese softened to aid in smoother mixing and avoid lumps.

Essential Techniques


Whipping cream to the right consistency is crucial, as it forms the base structure for your fluff. Start with chilled cream and use a cold vessel, whipping slowly at first before increasing speed to achieve soft peaks. Avoid over-whipping, which results in a dense texture rather than a light, airy finish.

Folding ingredients gently is vital to retain volume and creaminess. Utilize a broad spatula to fold from the outside towards the center, rotating your bowl gradually to achieve an even mix. This technique ensures the fluff remains light and uniform, without deflating the whipped components.

Proper cherry preparation enhances the overall quality of the fluff. Pitting cherries thoroughly prevents unpleasant bites. If using fresh cherries, ensure they’re rinsed well. For frozen cherries, thaw completely, draining excess moisture which can affect texture.

Pro Tips for Perfect Delectable Cherry Cheesecake Fluff


– Maintain cooler temperatures during preparation for optimal cream consistency, avoiding warm environments that can deflate your whipped mix.
– Balance cherry and sugar ratios according to tartness. Taste as you mix, adding sugar gradually for a bespoke sweetness level.
– To enhance cherry flavor, consider incorporating a touch of almond extract; a traditional companion to cherry dishes for a richer taste.
– Utilize the smallest cherries for garnishing before serving, preserving the prettiest pieces for delightful visual appeal.
– Achieve a smooth mixture by ensuring cream cheese is at room temperature before blending, avoiding pocket lumps in the final fluff.
– If transporting, keep refrigerated until ready to serve, maintaining texture integrity for best enjoyment.
– For added depth, sprinkle a hint of cinnamon into the cream mixture, highlighting the natural cherry aroma.

Variations and Adaptations


Regional variations offer an exciting twist to the traditional Cherry Cheesecake Fluff. Try incorporating local fruits alongside cherries, such as raspberries or blueberries, for a mixed berry version that beautifully complements the original flavors.

Seasonal adaptations can be easily integrated. During winter months, consider a spiced version with cardamom and nutmeg, adapting the fluff to suit cooler weather. In summer, a lemon zest infusion brightens the flavors, embracing a more refreshing profile.

Dietary modifications are also feasible. For a vegan version, substitute cream cheese and whipping cream with plant-based alternatives like coconut cream or almond cream cheese, maintaining the fluff’s texture while fitting dietary needs.

Introduce varied flavors through simple additions like vanilla or almond extracts, altering the underlying tone and creating an entirely new experience without extensive recipe changes. Additionally, a drizzle of dark chocolate transforms the fluff into a decadent delight.

For different textures, you might consider adding crushed graham crackers, offering a cheesecake crust experience within the fluff itself. Alternatively, incorporating chopped nuts or dried fruits adds unique dimensions to the smooth and airy base.

Presentation alternatives can elevate your dessert further. Serve in individual mason jars for convenient personal portions or layer it in a trifle dish for an impressive shared centerpiece that’s both elegant and inviting.

Serving and Presentation Guide


Effective plating techniques can heighten the enjoyment of Cherry Cheesecake Fluff. Opt for clear glassware to showcase the beautiful contrast between airy fluff and the reddish brilliance of the cherries, adding a visual aesthetic to your presentation.

Garnish with fresh cherries and a sprig of mint for color and aroma, highlighting its freshness before indulging. Additional options include a light dusting of powdered sugar for an elegant snowy effect that complements the fluff’s creamy texture.

Traditionally, the fluff pairs superbly with simple shortbread or graham crackers on the side, offering textural contrast to each creamy spoonful. For a contemporary touch, consider serving alongside thin almond biscotti or toasted coconut chips.

For optimal experience, serve the fluff slightly chilled to maintain its structure without hardening. This allows flavors to fully integrate while offering a cooling sensation on the palate, enhancing the cherry notes.

Portion control ensures enjoyment without unnecessary overindulgence. Allocate ½ cup servings per guest, a decadently rich amount that satisfies while avoiding excess. Embrace the fluff’s lightness, fostering a satisfying yet refined conclusion to meals.

Wine and Beverage Pairing


Perfect wine pairings for Cherry Cheesecake Fluff enhance its creamy fruitiness without overshadowing. Look to sweet, lightly effervescent wines like Moscato or a sparkling Rosé, which complement the fluff’s flavors while cleansing the palate.

Non-alcoholic alternatives abound, such as cherry-infused sparkling water or a cold ginger tea, delivering refreshing contrasts that enhance cherry notes while quenching thirst. Experiment with flavored kombuchas for an elevated pairing experience.

Consider coffee and tea pairings when serving the fluff post-dinner. A robust French roast coffee offers richness, while a gentle chamomile tea cleanses between bites. Both options offer balance and depth without detracting from the fluff’s sweet nature.

Temperature considerations dictate that both your beverage selection and the fluff should be cool to maintain unity. Chill successfully to mirror the dessert’s refreshment, whether your choice is wine or a non-alcoholic counterpart.

Serving suggestions encourage creativity. Present wines in delicate flutes or rustic goblets for a personalized touch. Alternatively, offer tea, complete with thin lemon slices for a traditional alternative, accentuating the fluff’s tangy notes.

Storage and Shelf Life


Practical storage methods ensure your Cherry Cheesecake Fluff remains fresh and delicious over time. Store securely in an airtight container, occupying the coldest part of your fridge to prolong shelf life and preserve flavor.

Temperature requirements are straightforward, as the fluff thrives in a chilled environment. Aim for storage at 35-40°F to inhibit bacterial growth while maintaining its fluffy texture and optimal taste over several days.

Select suitable containers for freshness. Opt for glass with tight-fitting lids, helping retain moisture and aromatic notes without exposure to air. Avoid mixing flavors in the refrigerator that could alter the dessert’s well-balanced composition.

Signs of spoilage include any sour aroma, discoloration, or weeping of liquid from the fluff, indicating that it might be past its prime. When in doubt, sampling a small amount will quickly reveal any off-flavors or changes in texture.

Reheating isn’t usually necessary, as the dessert is served cold. However, if overly firm, allow the fluff to sit at room temperature briefly but avoid letting it warm excessively, which could impact its structure.

When freezing, use airtight freezer-safe containers, leaving some headspace as expansion might occur. Thaw overnight in the refrigerator rather than at room temperature, allowing the fluff to reacclimate to ideal serving texture.

Make Ahead Strategies


Implement efficient make-ahead strategies to streamline preparation while maintaining flavor. Consider assembling fluff ingredients up to three days in advance, melding flavors over time without compromising texture.

Ensure secure storage between preparation steps to uphold freshness. Utilize cling film or airtight lids over your fluff base, preventing air exposure and maintaining moisture levels during chilling.

Assess quality impact carefully; the no-bake nature of this dessert ensures flavor harmonization without worrying about staleness due to the rich cream base preserving cherries’ integrity over extended cold storage.

For streamlined assembly, prepare components like whipped cream and blended cherries separately. Just before serving, fold them together for the freshest presentation with optimal texture and visual appeal.

Reheating guidelines aren’t applicable given the cold serving nature of this dessert, but if components require slight warming beforehand, ensure gentle, indirect heat to preserve the fluff’s delicacy.

When adding final touches, such as garnishes or layering elements like graham crackers, execute just before serving. This avoids sogginess and elevates freshness, ensuring each bite combines visual and flavor elements harmoniously.

Scaling Instructions


Scaling the recipe to meet more extensive crowd demands or intimate dining adjustments maintains the same exceptional quality. For halving, simply reduce ingredient quantities proportionally without altering the essential preparation steps.

Doubling or tripling the recipe involves similar proportionate ingredient increases. Pay particular attention to mixing vessels’ size to facilitate easy ingredient incorporation, retaining fluff’s airiness and volume with each batch addition.

Equipment adjustments, such as using larger bowls for whipped cream or more durable mixers for extended preparation, guarantee you’re efficiently managing both time and material resources during the expanded process.

Timing modifications depend on scaling needs. Bigger batches might slightly extend preparation due to ingredient volumes but shouldn’t necessitate structural timeline changes. Monitor assembly sophistication to ensure ultimate fluffiness is maintained.

Storage considerations must align with scaled servings. Utilize additional or larger storage containers to segregate portions individually, maintaining safety and freshness across multiple servings and ensuring accessibility when needed.

Nutritional Deep Dive


The Cherry Cheesecake Fluff offers a well-balanced macro breakdown, typically high in fats due to the cream cheese and whipping cream, while remaining relatively low in carbohydrates and proteins.

Micronutrients from the cherries add valuable vitamins like Vitamin C and antioxidants, improving overall health. This, combined with healthy fats, offers a balanced diet component when enjoyed in moderation.

Health benefits from cherries include anti-inflammatory properties and antioxidant activity, supporting organ health and fighting free radicals. Including small portions as part of a balanced diet can contribute to heart health and chronic condition prevention.

Dietary considerations involve managing portion sizes to maximize satiety without excessive caloric intake. By ensuring controlled consumption, the fluff can fit various diets where compatible, offering rich flavor in moderate amounts.

Serving portions around ½ cup provide vital portion information, avoiding excessive calorie influx while still enjoying the luxurious taste and texture. Dress up smaller servings with added accompaniments like fruits or nuts for variety.

Weight management tips encourage mindful indulgence. Serve over long periods involved in social dining settings, balancing intake seamlessly with other lifestyle components and dietary plans, ensuring satisfaction without overindulgence.

Dietary Adaptations


Opt for gluten-free alternatives by ensuring all ingredients used are certified as gluten-free. Most components, like cream, cherries, and sugar, will naturally not contain gluten, but double-check sources for mixes or flavorings used.

Dairy-free adjustments can be made using plant-based substitutes such as coconut cream and almond-based cream cheese, retaining the original fluff’s light texture while accommodating lactose intolerances or vegan preferences.

To craft a vegan version, employ plant-based whipping creams combined with alternative sweeteners and cherries, creating an accessible dessert for food values that avoid animal products. The result is equally charming and flavorful.

Low-carb options work by minimizing added sugar or utilizing natural sweeteners like Stevia or Erythritol, focusing on the cream base predominantly, resulting in reduced carbohydrates for compatible low-carb diets.

Achieve keto compatibility by adapting sugars and carbohydrate-heavy ingredients to fit within the diet parameters. Modify necessary elements to embrace fats without sacrificing texture or overall appeal.

Paleo adaptations emphasize more natural sweetening methods, staying clear of processed sugars. Incorporate honey or maple syrup for flavors that adhere to paleo’s natural and unprocessed parameters while keeping cherries a central feature.

For those adhering to a Low-FODMAP diet, reduce the amount of sweeteners or opt for alternatives that align with FODMAP guidelines, preserving primary taste essences aligned with dietary directives.

Troubleshooting Guide


Should you encounter texture issues where the fluff isn’t adequately setting, ensure whipping cream achieves soft peaks before folding. If problems persist, refrigerate briefly, allowing natural thickness through chilling.

Flavor balance concerns might arise from incorrect sugar calibration. Always taste incrementally, integrating cherries gradually and adjusting sweetness levels accordingly to suit individual preferences and flavor affinity.

Temperature problems are alleviated by consistent chilling. If serving cold, allowing gradual warm-up can resolve firmness, presenting the fluff optimally without undesired rigidity.

Equipment challenges often arise from inadequate mixing tools; prioritize robust mixers to maximize air incorporation into the fluff, helping maintain the desired airy texture.

Ingredient substitutions, particularly with sweeteners or cherries, can impact overall taste; ensure alternatives offer similar qualities to the origin, maintaining the dish’s integrity and overall profile.

Timing concerns resolve through proper preparation arrangement, especially prior to serving. Cooling and blending at controlled intervals ensures a balanced and well-prepared dish, suitable for intended presentations.

Recipe Success Stories


Throughout community interactions, we’ve seen enthusiastic responses to this Cherry Cheesecake Fluff. Readers have shared innovations and adaptations, incorporating other berries for diverse fruity outcomes or smaller pudding cups for convenient servings.

Variation successes applaud the flexibility of the base ingredients. Adjusting cherry mixtures or extraction levels results in new flavor profiles aligning with preferences without sacrificing the classic fluffy traits of the original dessert.

Many have shared adaptation stories for dietary constraints, highlighting ease in converting the fluff into allergen-friendly desserts while retaining key elements like creaminess and rich cherry flavors.

Reader suggestions often propose elements of texture integration, like mixing in small chocolate chips or chopped nuts for added crunch, enhancing each spoonful with layered experiences beyond smoothness alone.

Photography tips complete these success stories, with readers illustrating the fluff beautifully, integrating garnishes or arrangement techniques that elevate presentations effectively, captivating attention through simple visual enhancements.

Frequently Asked Questions

Can I use other fruits instead of cherries?
Yes, you can substitute cherries with other berries like blueberries or raspberries. Ensure they are similarly prepared to keep textures consistent across variations.

How do I ensure the fluff stays light and airy?
Whipping cream to soft peaks is vital. Avoid over-mixing once ingredients combine, gently folding for an airy texture that withstands serving and storage.

Is it possible to prepare this dessert a day in advance?
Yes, preparation a day ahead enhances flavors. Store securely in the fridge, cover to prevent air exposure, and serve chilled for peak enjoyment.

What alternatives can be used instead of sugar for a healthier option?
Natural sweeteners like Stevia or honey offer viable sugar replacements, adjusting quantities to taste without impacting texture negatively.

Should I thaw frozen cherries before using?
Thawing frozen cherries is recommended to remove extra moisture and ensuring optimal flavor integration. Drain well for best results.

Can I double the recipe easily?
Doubling is straightforward, but ensure adequate mixing bowl size and chilling space to accommodate increased volume without compromising quality.

What happens if the cream cheese isn’t softened?
Cold cream cheese results in uneven texture and difficult blending. Always allow it to reach room temperature before mixing for a creamy consistency.

What’s the ideal serving dish for personal portions?
Clear glassware or small dessert cups make ideal single servings, showcasing the fluff’s attractive layers and ease in portion control.

Is it necessary to refrigerate leftover fluff?
Refrigeration maintains freshness and prolongs shelf life. Store leftovers in airtight conditions to avoid drying or absorption of other odors.

Can this be frozen for later enjoyment?
Freezing is possible using airtight containers. Thaw slowly in the refrigerator to preserve texture and flavor for future delight.

Additional Resources


Explore related recipes to expand your dessert repertoire, embracing dishes complementing the consumption style seen in Cherry Cheesecake Fluff. Discover technique guides for perfectly whipping creams, enhancing skills in achieving key dessert textures.

Gain ingredient insights, refining selection and storage strategies, and broadening flavor profiles within differing contexts. Equipment recommendations follow, ensuring you’re ready to venture into other culinary creations with appropriate tools at hand.

Embrace seasonal variations of this recipe, particularly through ingredient substitutions that align with market availability, offering comprehensive coverage of showcasing fruits’ full potential matched by practical preparation tips.

Join the Conversation


Encourage social media engagement by inviting readers to share their versions and adaptations of Cherry Cheesecake Fluff, enhancing community connection and diversifying perspectives on recipe success.

Share photography tips to spotlight skills in capturing dessert beauty across platforms, generating enthusiastic responses and inspiration in presenting this delightful treat innovatively.

Welcome recipe reviews that explore this dessert’s versatility, providing insights into categorical placement and enhancements that elevate experience beyond expectations, fueling ongoing dialogue.

Emphasize community engagement by showcasing shared variations and personal touches, building a repository of insights and collaborative knowledge beneficial to both novice cooks and seasoned gourmand enthusiasts.

Champion the inclusion of recipe variations within these discussions, supporting individuals’ confidence when exploring alternatives, guaranteeing flair and creativity in every attempt at this luscious dessert.

Savory Parmesan Garlic Beef Cheeseburger Lasagna Recipe Delight

Parmesan Garlic Beef Cheeseburger Lasagna: A Flavorful Fusion

⚖️
Difficulty
Moderate

⏲️
Prep Time
30 mins

🕒
Cook Time
60 mins

⏱️
Total Time
90 mins

🍽️
Servings
8

Embark on a culinary adventure with our Parmesan Garlic Beef Cheeseburger Lasagna! Combining the hearty essence of a classic beef cheeseburger with the comforting layers of lasagna, this dish is a testament to flavorful innovations. Each bite presents a cascade of gooey cheese, savory beef, and aromatic garlic, solely crafted to delight your taste buds.

The Parmesan Garlic Beef Cheeseburger Lasagna isn’t just about blending flavors; it’s about creating an experience. The savory beef layer mingles with rich tomato sauce and fragrant roasted garlic, while shredded Parmesan adds a sharp, irresistible finish. The combination honors both beloved classic flavors and the creativity needed to bring them together.

Unique and wholly satisfying, this lasagna reinterpretation is perfect for gatherings or family dinners when you want to impress without spending the entire day in the kitchen. Let’s dive in and discover the glory of this innovative, flavor-packed masterpiece.

Quick Recipe Highlights

  • Flavor Profile: Enjoy the savory fusion of beefy cheeseburger flavors elevated by aromatic garlic and nutty Parmesan.
  • Texture: Relish the perfect balance of melty cheese, juicy beef layers, and tender pasta.
  • Aroma: The dish is highlighted by rich, roasted garlic notes blended with a symphony of cheese and fresh herbs.
  • Visual Appeal: Gleaming layers of cheese and sauce, with a golden-brown gratin top, make this lasagna an eye-catching centerpiece.
  • Skill Level Needed: Moderate cooking skills required, focusing on sauce preparation and proper layering techniques.
  • Special Equipment: Use a deep baking dish, spatula, and whisk to achieve restaurant-quality lasagna results.

Recipe Overview

  • Difficulty Level: This recipe’s moderate complexity stems from its layering process and the balance of beef to cheese ratio, requiring attention to detail.
  • Category: Perfect for main dishes, this lasagna adds a gourmet twist to traditional comfort food.
  • Cuisine: A beautiful blend of Italian and American cuisines, melding the essence of homemade lasagna with cheeseburger deliciousness.
  • Cost: Expect moderate costs due to quality cheeses and beef, but it’s worth the indulgence given its flavorful richness.
  • Season: Ideal for all-year cooking due to its versatility but pairs especially well in colder months as a hearty dish.
  • Occasion: Perfect for family dinners, potlucks, or whenever you’re looking to serve a comforting, indulgent meal.

Why You’ll Love This Recipe


Indulge your senses with the divine taste and texture of Parmesan Garlic Beef Cheeseburger Lasagna. This dish presents a savory profile that combines beefy richness with aromatic garlic-infused cheese that will have you reaching for seconds. Each forkful brings a satisfying blend of flavors—creating a dish that is both familiar and excitingly new.

Convenience is key with this lasagna, offering impressive results without hours in the kitchen. The process is simplified by preparing everything in advance, leaving you time to enjoy your meal without stress. The layers bake into perfection, making it ideal for meal prep or creating impressive leftovers.

Not only delicious, this recipe also delivers nutritional benefits from high-quality protein sources like beef and cheese, alongside garlic’s health-boosting compounds. Serve alongside a fresh salad to balance the meal, providing both indulgence and balanced nutrition.

Sharing is caring, and this lasagna is a crowd-pleaser. Whether you’re hosting a dinner party or catering a casual gathering, its universal appeal ensures everyone’s delight. Its comforting nature invites guests to relish the combination of beloved flavors with a gourmet twist.

Cost-effectiveness stands out when you consider the flavor explosion and multiple servings this recipe provides. With affordable ingredients easily available at your local market, enjoy gourmet flavors without hitting the fine-dining price bracket.

Historical Background and Cultural Significance


This recipe has an intriguing origin story: It starts with the lasagna, a beloved dish with origins in Ancient Greece and Rome, evolving over centuries into the iconic Italian staple known today. Known for its comforting layers and hearty fillings, lasagna continues to win hearts worldwide with its adaptability.

Part of the cultural importance comes from lasagna’s role in bringing people together over shared meals. Its variations across Italy and beyond highlight regional culinary diversity while offering a cozy, unified dining experience. This version taps into that tradition by adding a modern twist with cheeseburger motifs.

Evolution plays a role as lasagna reached American shores, adapting to local tastes and culinary trends. The cheeseburger variation is a testament to food fusion, combining Italy’s beloved pasta dish with America’s obsession with the humble burger—creating a dish rich in history and flavor.

Regional variations abound, from seafood-infused coastal versions to meat-focused inland mixes, but the Parmesan Garlic Beef Cheeseburger Lasagna holds its ground as a delicious invention, reflecting a balance between tradition and novelty while packing a flavorful punch.

Ingredient Deep Dive


Let’s take a closer look at Parmesan cheese, a critical component in this recipe. A staple of Italian cuisine, Parmesan offers a tangy depth that transforms the dish’s savory profile. It’s aged for months, developing umami-rich flavors essential to culinary excellence.

Nutritionally, Parmesan is a powerful source of calcium, contributing to bone health and low in lactose, making it suitable for many dietary needs. Its substantial protein content also makes it an effective addition to muscle-building diets.

When selecting Parmesan, always opt for authentic Parmigiano-Reggiano, known for its superior taste and quality. Choose cheese based on the pattern on its rind and its consistent, natural color, ensuring freshness and quality in your dish.

Store Parmesan wrapped in wax paper inside an airtight container in the fridge. Grate as needed, extending its shelf life and maintaining flavor. If unavailable, Pecorino Romano is a fantastic substitute while preserving the dish’s essence.

Common Mistakes to Avoid

  • Overcooking the pasta: Cook until al dente to prevent mushy textures in your lasagna layers.
  • Using too much tomato sauce: Excess liquid creates a soggy final dish, so balance your sauce quantities carefully.
  • Adding cold cheese: Ensure your cheese reaches room temperature for even melting throughout the lasagna.
  • Not seasoning adequately: Every layer needs seasoning to enhance the depth of flavors.
  • Layering unevenly: Achieve proportional layers for consistent baking and a uniform bite.
  • Skipping the resting period: Allow the lasagna to set after baking before serving for cleaner slices and flavors maturation.
  • Not using foil while baking: Cover for the first half of baking to prevent drying while allowing the cheese on top to golden later.
  • Rushing preparation steps: Take your time layering meticulously, ensuring that each step contributes to the harmonious final dish.

Essential Techniques


Master the art of sauteing beef by breaking it up evenly as it cooks, creating a crumbly, well-browned base ideal for layering in lasagna. This ensures the beef stays tender and flavorful, imparting rich juiciness to the overall dish.

Cheese layering is crucial in this recipe, ensuring even distribution between the beefy, saucy layers. Shred cheese just before use to preserve its creamy texture upon melting, elevating the experience of each forkful.

Layering lasagna is a critical technique. Begin with sauce, followed by pasta, beef, cheese, and repeat, ending with cheese to encourage a crisply browned top crust. Intermittent checks during baking ensure the perfect timing to remove foil and finish the dish.

Perfect your garlic preparation technique by roasting whole bulbs or mincing and gently sautéing for incorporation into sauces. This releases its rich aroma and sweetness, balancing naturally with savory components like beef and cheese.

Pro Tips for Perfect Parmesan Garlic Beef Cheeseburger Lasagna


Under-salting pasta water is a common oversight; proper seasoning allows your lasagna pasta layers to pop with flavor. Use abundant salted water to boil the pasta for the best impact.

To prevent sticking, pre-grease your baking dish lightly with olive oil or use parchment paper. This ensures smooth serving and flawless slices when presenting your lasagna masterpiece.

Use a mix of mozzarella alongside Parmesan for added creaminess in your cheese layers, providing an even melt and flavor with the lasagna’s comforting components.

Let the lasagna cool extensively before cutting. This minor detail maintains presentation aesthetics, ensuring each serving holds its form and showcases the beautiful layer contrasts.

Balance acidity with a pinch of sugar if tomatoes are particularly tangy. It rounds out flavors for a harmonious tomato sauce, appealing to all palates.

Prepare ahead by assembling the lasagna a day in advance. Refrigeration encourages mingling of flavors, developing a richer taste profile before that delightful serving experience.

Variations and Adaptations


Regionally, explore adding pancetta to enhance the dish’s Italian authenticity further, introducing pleasant smokiness to the mix, which pairs beautifully with beef and Parmesan.

Adapt this recipe for seasonal enjoyment by including fresh garden vegetables in summer, like zucchini slices or eggplant, adding a new texture and flavor profile to the lasagna.

Modify for dietary needs using gluten-free pasta and dairy-free cheese alternatives. Flavor accents of garlic and quality beef ensure maintaining robustness and depth minus the gluten or dairy.

Spice it up with jalapeños or red pepper flakes, adding heated notes to contrast the savory and cheesy layers, creating a bolder lasagna experience.

Experiment with texture by swapping traditional lasagna noodles for thin layers of potato or using different cheese textures, such as ricotta for contrast.

Presentation alternatives include preparing individual-sized ramekin portions for personalized servings—a modern twist on the lasagna classic, perfect for dinner parties.

Serving and Presentation Guide


Plating techniques elevate your lasagna’s appeal. Serve slices on contrastive colored dinnerware to accentuate its vibrant layers, adding visual sophistication.

Garnish with a sprinkle of freshly chopped parsley or basil leaves, introducing iconic Italian colors and flavors to every slice and enticing the dining experience further.

Traditional pairings provide authenticity. Serve with a side of Caesar salad or garlic bread for a complementary dining journey, uniting various textures and flavors.

For modern presentation, serve with balsamic-glazed roasted vegetables, juxtaposed against the savory beef lasagna’s richness, creating a balanced meal.

Always consider temperature: Lasagna should be piping hot with cooled salad or chilled wine to contrast, delighting the palate with diverse sensations.

Practice portion control by using measured slices for portion consistency and fair serving distribution, harmonizing plate arrangements stylishly.

Wine and Beverage Pairing


A robust red wine is a perfect partner, offering a harmonious balance to the lasagna’s rich, savory notes. Consider a Chianti or Cabernet Sauvignon for body and depth.

Non-alcoholic alternatives complement nicely with a bubbly, non-alcoholic spritzer with citrus tones or a well-brewed iced herbal tea, balancing cheese richness.

Coffee or tea can pair surprisingly well—opt for a strong Italian brew or an earthy black tea, blending beautifully with the layers’ complex flavors when serving post-feast.

Temperature consistency is key. Chilled whites and rosés meant for balance and freshness, entwining harmoniously with the lasagna’s garlic fragrance.

Serve wine or beverages in appropriate glassware to highlight color and aroma, enhancing the overall consumption experience in your lasagna meal celebration.

Storage and Shelf Life


To store successfully, cool the lasagna entirely before transferring it to airtight containers. Refrigeration keeps flavors linked and quality intact for up to 3-5 days.

Optimum storage requires a covered dish to prevent moisture loss and flavor leaks. Specialized lasagna storage sets with tight-lid mechanisms are ideal options.

Watch for signs of spoilage, such as discoloration, sour smell, or texture changes. Properly rejecting these slices ensures a quality dining experience.

When reheating, opt for thorough heating throughout. Preheat ovens for uniform distribution, or use microwave-safe high settings for convenience while maintaining texture.

Freezing extends shelf life up to three months. Thaw overnight in the fridge before heating, preserving quality while ensuring even warming and freshness driven satisfaction.

Make Ahead Strategies


Planning is essential. Assemble the lasagna a day before serving, conserving efforts for day-of activities while securing maximum flavor development.

Store prepared components, like browned beef or tomato sauce, separately in sealed containers in the fridge, retaining freshness and saving preparation time.

Achieve quality consistency through layered assembly while monitoring layering pressure incites secure bake outcomes. Relaxation is vital for unhindered meal delight.

When reheating, remove from fridge to approximate room temperature before entering ovens—maintaining texture integrity and ensuring even blissful heating endeavors.

For freshness, introduce village-crisp salads or crusty warm bread alongside, creating a completed meal from contrasting yet complementary dishes.

Scaling Instructions


Halving this lasagna recipe is simple. Use smaller baking ware and fewer ingredients proportionally, preserving flavors and presentation consistency without loss.

Doubling the recipe requires larger cooking tools and baking pans, accounting for increased ingredient volumes and achieving uniform results across servings.

Adjust cook times minimally; continued attention aids completion optimization in timing dynamics, ensuring even cheese melting and complete sauce absorption.

Consider spacious refrigeration solutions for excess servings or advance provisions upon scaling, aligning storage strategies with diverse consumption needs.

Nutritional Deep Dive


An exploration of nutrition reveals this dish’s macro: High protein beef, rich in meaty goodness; compatible cheese intensifies flavors, achieving desired balance.

Micronutrients—garlic’s allicin empowers immune function while carefully seasoned tomatoes introduce antioxidants, nourishing body and palate symbiotically.

Foster health achieved through balanced flavors, enjoying moderation mindfulness intertwined with savor longevity. Complement with greens for equilibrium unlocks.

Mind portion, ensuring weight management aids practice. Restatement keeps servings steady for mindful healthalties achievable with joyful regularity.

Dietary Adaptations


Modify the recipe for gluten-free needs using gluten-free pasta variations, offering excellent achievement while reserving taste-centered delight intact.

Dairy-free options abound through plant-based cheese replacements. Maintain harmony in flavors, experiencing comprehensive enjoyment within accommodating boundaries.

Vegan adaptations require plant substitutes for cheese, establishing novel interpretations, celebrating taste through creatively non-meatened artistic richness.

Low-carb transitions flow with full veggie swap, embracing health-centric assembly; substantial creative adaptability shines through alternative arrangements.

Keto guided exploration uses zucchini noodles for reduced-carbohydrate intake; beef’s quality liberates irresistible taste satisfaction within ketogenic realms.

Troubleshooting Guide


Texture concerns resolve through proper pasta preparation. Cook to al dente avoids mush, while thorough layering solidifies dish singular interpretations.

Achieve flavor balance through nuanced seasoning practices; assure every layer’s evenness. Adjust sweetness against tangy with subtle sugar applications.

Temperature issues arise due to overheating. Assess evenly distributed warmth across oven racks, offering the top-heat finish for visual golden-browned effects.

Overcome challenges with subpar equipment substitution with sturdy staples, encouraging quality through reliable culinary machinery attainment.

Innovate further through ingredient adaptation. Assess compatible replacements across varied constraints, ensuring an opportunistic dynamic meets challenges faced.

Recipe Success Stories


Culinary communities share exuberance in exploration. Engaging couples undertake creative endeavors, delighting in distinctive successes magnificently.

Readers play with substitutions, rejoicing in uniquely crafted blends, empowering originality while nurturing shared experiences within this beloved creation.

Further adaptation fostered surprise reveals—chefs recraft aesthetics through insightful techniques, discovering versatile reinvention opportunities joyously.

Accumulate tips from photography enthusiasts capturing colorful contrast; highlight hidden aspects illuminating iconic layers appetizingly.

Feedback fosters collective appreciation—culminating unspoken community ties thriving over shared culinary experimentations rewarding excellence.

Frequently Asked Questions

1. Can I use store-bought cheese sauce instead of homemade? For convenience, store-bought options suffice while personalizing enhancements drive custom flavor elevation.

2. How do I make it spicier? Integrate crushed pepper or jalapeño slices amongst layers, orchestrating heat emotively while maintaining balanced excellence.

3. Can this lasagna be made vegetarian? Certainly! Swap beef with hearty vegetables, lending robust depth through zucchini or mushrooms achieving desired vibrant flavors.

4. Should I let it cool before cutting? Yes, allow deliberate cooling, ensuring stabilized slices into charmingly maintained presentations.

5. Can I freeze leftovers effectively? Absolutely! Wrapping tightly for lengthy preservation, safeguard subsequent savor best experienced through methodical reheating.

6. What tomatoes should I use for the sauce? Choose ripe, flavorful options like Roma or canned crushed tomatoes—fostering consistent taste lavishly aligning superior joy.

7. Is there a way to cut fat content? Utilize lean beef alternatives and reduced-fat cheese ensuring preferred calorie shedding while preserving nuanced flavors.

8. Will more garlic spoil flavors? Increased incorporation adventures towards aromatic extravagance; moderation assists while guarding against overpowerment.

9. What is the best way to layer lasagna evenly? Practice orchestrated precision, striking balance across every component, cultivating harmonious results through careful alignment.

10. Can mozzarella be skipped altogether? While optional, mozzarella enriches gooey consistency; Parmesan yields lone vibrancy, sustaining a flavorful transition.

Additional Resources


Discover related recipes that extend joy beyond lasagna, enriching varied influences capturing culinary imagination collectively inspiring fulfillment.

Guides divulge integral techniques for strategic excellence. Mastery of customs ushers artistic skill emergence while transcending gastronomic limitations triumphantly.

Ingredient exploration unveils versatile application sanctity—unearthing unexpected combination realms fostering endless experiential delight and integration.

Equipment acumen ensures proficient practice, investing in trusted kitchens sets supporting proficient execution transcending traditional boundaries magnificently.

Adaptation encourages reinterpretation for unexamined fruition, seasonal variations harmonizing sought authenticities plus propelled artistry accomplished.

Join the Conversation


Join the social media collective excitedly sharing creativity. Dish out surprises while welcoming inspiring cohort conversations that invigorate experiences.

Capture lasagna’s luscious appeal through photography, articulating lusciousness; preparing visual masterpieces heralds attentions contributing captivating showcases.

Reviews foster communal bond cultivation—welcoming myriad appreciations expanding enthusiasm tapping exhilarating shared explorations exuberantly.

Engage community dynamics, learning vibrant adaptations redefining flavor endeavors informed by innovative disparities relishing inclusive collectivities.

Reflect on rich diversities, offering value through visual storytelling disseminating culinary transformations realized beyond typical expectations cheerfully.

The Recipe

Parmesan Garlic Beef Cheeseburger Lasagna

Serves: 8

Prep Time: 30 mins

Cook Time: 60 mins

Total Time: 90 mins

Kitchen Equipment Needed

  • Large skillet
  • Deep baking dish
  • Whisk
  • Spatula
  • Aluminum foil

Ingredients

  • 12 lasagna noodles
  • 1 pound ground beef
  • 2 cups marinara sauce
  • 1 cup shredded mozzarella cheese
  • 1/2 cup grated Parmesan cheese
  • 3 cloves garlic, minced
  • 1 tablespoon olive oil
  • Salt and pepper to taste

Directions

  1. Preheat the oven to 375°F (190°C). Cook the lasagna noodles according to package instructions. Drain and set aside.
  2. In a large skillet over medium heat, add olive oil and sauté garlic until fragrant. Add ground beef, season with salt and pepper, and cook until browned. Drain excess fat.
  3. Stir in the marinara sauce with the beef and allow to simmer for 5 minutes.
  4. In a deep baking dish, spread a thin layer of meat sauce. Place a layer of lasagna noodles over it, then add more meat sauce, mozzarella, and Parmesan cheese. Repeat layers ending with cheese.
  5. Cover the dish with aluminum foil and bake for 30 minutes.
  6. Remove foil and bake for an additional 15 minutes until the cheese is golden brown and bubbly.
  7. Allow the lasagna to rest for at least 10 minutes before slicing and serving. Garnish with more Parmesan cheese, if desired.

Recipe Notes

  • Feel free to add layers of sautéed mushrooms or bell peppers for extra flavor and nutrition.
  • For a spicier version, incorporate red pepper flakes into the beef sauce.

Irresistibly Crispy Philly Cheesesteak Egg Rolls with Melty Cheese

Crispy, Cheesy Philly Cheesesteak Egg Rolls: An Irresistible Flavor Fusion

⚖️
Difficulty
Medium

⏲️
Prep Time
20 mins

🕒
Cook Time
25 mins

⏱️
Total Time
45 mins

🍽️
Servings
8

Philly cheesesteak egg rolls are a delightful culinary creation blending the savory flavors of a classic Philly cheesesteak with the satisfying crunch of an egg roll wrapper. With tender strips of beef, gooey cheese, and the perfect balance of onions and peppers, each bite is an explosion of rich flavors encased in a crispy, golden shell. Whether you’re craving an inventive appetizer for your next party or a comforting snack to satisfy your tastebuds, these egg rolls are sure to impress.

The magic of this recipe lies in its seamless combination of textures and flavors. The egg roll’s outer shell is exquisitely crispy, offering a satisfying crunch that complements the hearty steak filling inside. The cheese melts perfectly, creating a luscious gooeyness that binds the filling together. The aroma is simply enticing, with savory notes wafting through the kitchen as they cook, bringing a sense of warmth and comfort to your home. Beyond its fantastic flavor and texture, this recipe is the epitome of ease, making it accessible to home cooks of various skill levels.

Quick Recipe Highlights

  • Flavor Profile: Savory and rich with the distinctive taste of beef and cheese, accented by mild sweetness from caramelized onions and bell peppers.
  • Texture: Crispy exterior paired with a soft, juicy interior full of melty cheese and tender steak pieces.
  • Aroma: Mouthwatering aromas from sautéed beef, cheese, and vegetables that fill your kitchen with comforting warmth.
  • Visual Appeal: Golden brown egg roll shells encasing colorful, cheesy filling make for an inviting presentation.
  • Skill Level Needed: Intermediate skills are beneficial for assembling and frying the egg rolls to golden perfection.
  • Special Equipment: Requires a deep fryer or heavy-duty skillet for frying, and sharp knives for slicing and chopping.

Recipe Overview

  • Difficulty Level: While not overly complicated, this recipe requires attention to detail when it comes to frying and assembling the egg rolls for the best results.
  • Category: Perfect as an appetizer, snack, or party finger food, these egg rolls are versatile for a range of dining occasions.
  • Cuisine: Inspired by American cuisine with a Chinese twist, bringing Philly flavors to a unique format.
  • Cost: Affordable ingredients, primarily involving cheese, steak, and vegetables, making it a cost-effective indulgence.
  • Season: Best enjoyed year-round, but particularly comforting in colder months when longing for warm, hearty foods.
  • Occasion: Ideal for game days, parties, or simple family gatherings where fun and flavorful foods are appreciated.

Why You’ll Love This Recipe

This recipe is an explosion of taste and texture that will captivate any food lover. The contrast between the crunchy egg roll wrapper and the creamy cheese-filled center creates a delightful bite every time. These crispy, cheesy Philly cheesesteak egg rolls are the perfect way to channel your love for two cuisines in one easy-to-eat package.

Preparation is straightforward, requiring only basic chopping and frying skills, making it a convenient choice for busy weeknights or impressing guests without spending hours in the kitchen. Plus, the ingredients are readily accessible in most local grocery stores, ensuring you can whip these up with minimal hassle.

Besides being utterly delicious, this recipe offers the indulgence of classic comfort foods with controlled portion sizes, making each roll a satisfying and reasonable treat. Perfect for social settings, these egg rolls can spark conversation and please a crowd, offering a fun twist on traditional party offerings. They’re also easy on the wallet, combining high-impact flavors with budget-friendly components.

Historical Background and Cultural Significance

The idea of merging Philly cheesesteaks and egg rolls is a testament to culinary innovation, blending beloved American and Asian flavors. Originating in Philadelphia, the classic cheesesteak sandwich is a cultural icon known for its hearty simplicity and flavorful satisfaction. This dish honors that famed taste while introducing a Chinese-American element through the egg roll, popular in American-Chinese cuisine for its crispy, fried appeal.

Over time, creative cooks sought to combine these comforting staples, resulting in unique fusion dishes like this one. Philly cheesesteak egg rolls first emerged in American kitchens, bringing excitement to traditional palettes by combining the hearty sandwich with an iconic appetizer format. Their popularity has since spread far beyond their regional roots, embracing a nationwide audience eager for inventive culinary experiences.

With each iteration, these egg rolls have adapted to local tastes and preferences, reflecting the diverse flavor profiles found across the country. This fusion symbolizes America’s rich tapestry of cultures, drawing from various culinary traditions to create harmony in diversity on the plate.

Ingredient Deep Dive

For a successful dish, high-quality beef is crucial. Authentic Philly cheesesteaks use ribeye steak for its rich flavor and tenderness, making it an ideal choice in this recipe. It’s rich in protein and essential vitamins, providing a savory, nutritious core to our egg roll filling.

Cheese, particularly mild provolone or American cheese, brings creaminess and a distinct taste to the egg roll. While conforming to personal preferences, these cheeses melt well and provide richness without overpowering other flavors.

When it comes to vegetables, onions and bell peppers are classic additions. Onions bring natural sweetness and aromatic depth, while peppers add a slight crunch and a hint of sweetness. Both are nutritious, adding fiber, vitamins, and minerals to the dish.

The choice of wrapper is equally important. Traditional egg roll wrappers become deliciously crispy when fried, providing the perfect contrast to the juicy filling inside.

Common Mistakes to Avoid

  • Overfilling the wrappers can lead to bursting during frying, so adhere to suggested portions.
  • Ensure oil is at proper temperature before frying to achieve that perfect golden brown crust.
  • Insufficient draining can leave rolls greasy, so allow them to rest on absorbent paper post-frying.
  • Be cautious not to overcook the steak, preserving its tenderness inside the roll.
  • Cut vegetables uniformly to ensure even cooking and consistent texture distribution.
  • Avoid skipping cheese as it binds the ingredients, preventing filling from spilling out.
  • Ensure egg roll edges are well-sealed with egg wash or water to avoid leakage.
  • Do not overcrowd the fryer, as it will affect cooking temperature and the final result.

Essential Techniques

The art of frying is crucial for this recipe’s success. Proper oil temperature is vital in achieving an evenly golden and crispy exterior. Keep a thermometer handy to maintain the temperature around 350°F.

Learning to roll with the right tightness will ensure that each egg roll holds its shape without breaking during frying. Pay attention to sealing edges using water or egg wash to prevent undesired leaks.

Correctly cooking the steak to medium ensures tenderness and maximum flavor, making each bite more enjoyable. The beef should be sliced thinly against the grain for optimum texture and chew.

Pro Tips for Perfect Crispy, Cheesy Philly Cheesesteak Egg Rolls

Opt for high-smoke point oils like vegetable or canola for frying to achieve that desired crispness. Allow the filling to cool slightly before assembling to improve handing and reduce sogginess from steam.

Always squeeze air out of rolls before sealing them to prevent bursting during frying. When adding cheese, slightly fold over edges to ensure minimal spillage into the oil.

To boost flavor, season the filling generously before wrapping, considering that some flavors become muted during frying. Freeze prepared rolls on a baking sheet prior to frying to ensure a neat shape and even cooking.

Variations and Adaptations

Integrate regional variations by experimenting with cheeses like cheddar for a bolder, tangy twist or swap in hot peppers for a spicy kick.

Connect with seasonal produce by incorporating vegetables like mushrooms in winter or adding fresh corn in summer for additional texture and flavor contrasts.

Adapt the recipe to dietary needs with gluten-free wrappers and dairy-free cheeses, making it inclusive without missing out on essential flavor profiles.

For a more filling meal, serve rolls atop a bed of fresh greens, enhancing nutritional value while maintaining focus on the zesty flavor combination.

Serving and Presentation Guide

Present your Philly cheesesteak egg rolls on a rustic wooden board for an appealing visual contrast, accompanied by ramekins of dipping sauces like spicy ketchup or cheese dip to amplify flavors.

Consider garnishing with chopped fresh herbs or sesame seeds for added color interest and a hint of earthy freshness. Allow plenty of room between rolls to spotlight individual presentation and provide easy serving access for guests.

Pair with sides like coleslaw or a light salad to balance their richness, picking elements that enhance the bold flavors at play while contributing to an overall vibrant platter.

Wine and Beverage Pairing

Pair with a bold red wine such as cabernet sauvignon to complement the rich, beefy flavors found within each roll’s filling.

Offer non-alcoholic options like sparkling water with a twist of lemon for a refreshing palate cleanser between bites, or try iced tea for its gentle sweetness.

For coffee lovers, a smooth, medium-bodied brew with earthy tones can offer an unexpected but delightful pairing that enhances the cheesesteak notes.

Storage and Shelf Life

For best results, store uncooked egg rolls in a zipper-sealed bag in the refrigerator for up to two days to preserve freshness, ensuring separation with parchment to prevent sticking.

When refrigerating leftovers, place them in a container to prevent moisture loss, and reheat in an oven or air fryer to regain crispiness.

Avoid freezing already cooked rolls to maintain texture but freezing raw rolls is perfect for future convenience and indulgence.

Make Ahead Strategies

To streamline your cooking process, prepare the filling in advance and refrigerate it until final assembly, simplifying your on-the-day tasks.

Emphasize freshness by frying rolls just before serving and topping with chopped scallions or peppers at the last moment for added vibrancy.

Complete all prep work a day before serving to save time and minimize cleanup, while preserving the dish’s original flavors and enticing textures.

Scaling Instructions

For half the quantity, adjust quantities proportionately, retaining richness by balancing cheese and meat ratios carefully.

If scaling up, consider frying in batches to ensure consistent cooking and crispiness, and monitor temperature closely between cycles.

Remember to position frying baskets carefully to avoid overcrowding, which leads to undesirable sogginess and cooling of oil.

Ensure proper cooling space for larger batch processing, utilizing racks or drying stations to streamline timing when serving.

Nutritional Deep Dive

These egg rolls boast a balanced blend of proteins, fats, and carbohydrates, ensuring satisfaction through diversity and rich taste.

A typical serving offers valuable nutrients essential for energy, growth, and maintenance, providing wholesome delight with every bite.

They provide invaluable dietary fibers from vegetables included in the filling while adding vitamins that support core immune functions.

Careful portion control can be leveraged to align with weight management objectives without overconsumption risk yet maintaining full flavor indulgence.

Dietary Adaptations

To satisfy gluten-free needs, explore gluten-free wrappers available on the market, maintaining versatility and accessibility for everyone to enjoy.

For dairy-free eating, substitute standard cheese with nutritious vegan-friendly options widely available at grocery stores, ensuring melted silkiness stays part of your dining experience.

Low-carb pathways can be achieved with alternative wrappers or indulging moderation, allowing this renowned dish to sustain—and excite—within varied diets.

Engage with these thoughtful adaptations to relish within any restrictions encountered while staying true to the spirit of these delectable egg rolls.

Troubleshooting Guide

If rolls are too oily, ensure the oil is always at the correct temperature or allow sufficient post-frying drain time.

For uneven-thickness filling, carefully chop meat and vegetables uniformly, resulting in consistent cooking throughout.

Uneven frying levels can improve by maintaining enough space between egg rolls during cooking, ensuring they aren’t touching.

Should fillings spill during wrapping, verify all ingredients are pre-cooked and set before assembling rolls tightly using wet seals.

Recipe Success Stories

Our readers have shared numerous stories of community dining experiences vastly improved by including these rolls, perfectly suited for parties or relaxed gatherings.

Numerous variations have successfully resulted in intriguing adaptations, demonstrating the versatility of this recipe to suit different taste preferences across diverse audiences.

Readers delighted with its appeal have suggested serving ideas, inventive pairings, and shared photographs celebrating stunning presentations, offering tips and inspiration for others to replicate seamlessly.

Amplify your experience by following their innovations or adding individual twists that redefine cherished culinary experiences within your own circle.

Frequently Asked Questions

Q: Can I use a different type of cheese?
A: Yes, you can substitute with your favorite cheese, though melting cheeses like provolone, mozzarella, or gouda work best for maintaining structure and gooey goodness.

Q: Are there vegetarian alternatives for the beef?
A: Definitely! Replace steak with portobello mushrooms or grilled eggplant for a harmonious flavor match, offering equally satisfying textures in your egg rolls.

Q: What’s the best way to reheat leftovers?
A: Use an oven or air fryer for reheating, ensuring rolls regain their crispy exterior while retaining warmth and flavor within.

Q: Can these be baked instead of fried?
A: Indeed, baking provides a healthier alternative; brush rolls with oil lightly and bake at 400°F, rotating for even crispness.

Q: Is it possible to pre-cook egg rolls before an event?
A: Absolutely! Prepare and fry rolls beforehand, storing them in the refrigerator. Simply reheat using recommended techniques before serving.

Q: How do I keep the rolls from coming undone?
A: Properly wet edges when sealing, and ensure enough air is expelled during rolling to prevent filling from expanding in the fryer.

Q: Can this recipe be frozen after cooking?
A: It’s advisable to freeze uncooked rolls to maintain freshness. Thawing and frying them fresh ensures optimal texture and flavor.

Q: How do I optimize seasoning in this dish?
A: Taste and adjust filling flavor during creation; consider adding herbs or spices like garlic powder, ensuring savory satisfaction.

Q: Are air fryers effective for cooking these egg rolls?
A: Indeed, air fryers provide excellent results, using minimal oil for crisp, satisfying rolls with easier cleanup and faster preparation.

Q: Can I prepare the filling a day in advance?
A: Absolutely, preparing and resting your filling develop robust flavors, streamlining assembly with added efficiency on serving days.

Q: What should I serve with them?
A: Complement with dips like salsa, cheese dip, or tangy sauces, and pair with sides like crisp salad greens or roasted vegetable medleys.

Q: How do I ensure my rolls have even cooking?
A: Monitor oil temperature consistently, ensuring saturation isn’t excessive; use medium-large frying bowls to promote comprehensive, uniform cooking pursuit.

Additional Resources

Explore handcrafted guides on effective frying techniques, ensuring your culinary prowess achieves crisp perfection. Discover tips on sourcing quality Asian ingredients and maximizing flavor depths when preparing this fusion classic.

Develop your skills further by exploring companion recipes such as traditional egg rolls or Philly cheesesteak sandwiches, expanding on fundamental dishes in your repertoire.

Utilize engaging equipment reviews focused on frying aids or tips for delightful plating and presentation enhancement, ensuring you confidently execute every step with finesse.

Join the Conversation

We invite you to share your thoughts, adaptations, or creativity displayed with these egg rolls across community channels, sparking dialogue and sparking inspiration. Immerse yourself deeper into food photography techniques to capture stunning visuals of your culinary creations, enhancing social media presence.

Engage with this recipe by leaving reviews, offering feedback, and contributing further improvements for others to enjoy, encouraging a collaborative culinary journey.

For those desiring personal touches, explore community discussions centering around suggested pairings, plating ideas, and diverse, adaptable techniques to attain even greater heights within the subject of culinary innovation.

The Recipe

Crispy, Cheesy Philly Cheesesteak Egg Rolls

Serves: 8

Prep Time: 20 mins

Cook Time: 25 mins

Total Time: 45 mins

Kitchen Equipment Needed

  • Deep fryer or heavy-duty skillet
  • Sharp knife
  • Cutting board
  • Slotted spoon
  • Paper towels
  • Tongs

Ingredients

  • 1 lb ribeye steak, thinly sliced
  • 1 cup shredded provolone cheese
  • 1 bell pepper, thinly sliced
  • 1 onion, thinly sliced
  • 1 pack of egg roll wrappers
  • Salt and pepper, to taste
  • Oil for frying
  • 1 egg, beaten (for sealing)

Directions

  1. Heat oil in a skillet, add steak slices, bell peppers, and onions, sautéing until veggies are tender and steak is cooked.
  2. Season the filling with salt and pepper, then cool slightly before stirring in the shredded cheese until melted.
  3. Lay an egg roll wrapper on a clean surface. Place 2 tablespoons of filling in the center.
  4. Brush wrapper edges with beaten egg, fold in sides, then roll up tightly to enclose filling.
  5. Heat oil in a deep fryer to 350°F. Fry rolls in batches until golden brown and crispy, about 2-3 minutes per roll.
  6. Remove with a slotted spoon, drain on paper towels to remove excess oil before serving.

Recipe Notes

  • Substitute beef with mushroom for a vegetarian version.
  • Achieve more vibrant flavor by adding hot sauce to the filling.
  • For extra crispiness, consider double frying the rolls.

Indulge in a Raspberry Pistachio Cheesecake for Every Occasion

Celebrate Your Special Moments with Our Raspberry Pistachio Cheesecake

⚖️
Difficulty
Intermediate

⏲️
Prep Time
30 mins

🕒
Cook Time
60 mins

⏱️
Total Time
90 mins

🍽️
Servings
8

Indulge your senses in the decadence of our Raspberry Pistachio Cheesecake. This exquisite dessert harmoniously blends the tangy burst of raspberries with the rich, nutty goodness of pistachios, encapsulated in a creamy, velvety cheesecake. Perfect for birthdays, anniversaries, or any celebratory occasion, this cake promises to be a show-stopping centerpiece that will delight your guests, leaving them craving for more. The balance of flavors and textures makes it a memorable dessert worth savoring.

Quick Recipe Highlights

  • Flavor Profile: This cheesecake is a delightful symphony of tangy raspberries contrasted with the naturally sweet, earthy flavor of pistachios, making each bite a gourmet experience.
  • Texture: Enjoy the creamy, rich texture of cheesecake against the slightly crunchy bite of pistachio, perfectly complemented by a luscious raspberry swirl.
  • Aroma: A beautiful medley of nutty pistachios and fresh, fragrant raspberries will tantalize your senses from the moment the dessert is sliced.
  • Visual Appeal: With its stunning green and red layers, accented by vibrant raspberry swirls, this cheesecake is as much a feast for the eyes as it is for the palate.
  • Skill Level Needed: While this recipe demands a moderate level of expertise, it rewards with a bakery-quality finish that impresses and satisfies.
  • Special Equipment: A springform pan and a food processor are essential tools in achieving the perfect crust and seamless blending of ingredients.

Recipe Overview

  • Difficulty Level: This recipe is categorized as intermediate due to its multiple steps and precise baking techniques, yet it remains accessible to anyone with a passion for baking.
  • Category: Positioned in the dessert category, this cheesecake is an ideal choice when you need a stunning sweet treat for luxurious dinners or celebrations.
  • Cuisine: Combining elements from both European and Middle Eastern cuisines, this dessert introduces a fusion of flavors highlighting the versatility of cheesecake.
  • Cost: With pistachios and fresh raspberries, this decadent dessert involves a moderate cost but guarantees high-end flavor satisfaction.
  • Season: Best enjoyed in spring and summer when raspberries are freshest and most flavorful, though it remains a year-round favorite with frozen substitutes.
  • Occasion: Reserve this cheesecake for weddings, holiday gatherings, or anniversaries where its opulent look and taste enhance the celebratory mood.

Why You’ll Love This Recipe


Taste and texture are at the heart of this Raspberry Pistachio Cheesecake’s appeal. Each slice offers a luxurious mouthfeel, where the smooth, creamy cheesecake is contrasted by the nuanced crunch of pistachios. The sweet-tart raspberries add a touch of bright flavor that cuts through the richness, making it a harmonious blend that your palate will appreciate.

Convenience is also a highlight, as the cheesecake can be prepared in sections ahead of time, easing the stress of last-minute preparations. With the use of a water bath technique, the baking process ensures an irresistibly creamy texture without cracking, even for novice bakers.

Nutritionally, this dessert offers a delightful indulgence with healthful aspects, as pistachios are full of heart-healthy fats and proteins, while raspberries provide antioxidants. Serving this dessert is not only a treat for taste buds but also provides some nutritional benefits.

The social aspect is inherent in its presentation; one can’t help but be impressed by the visual allure of the cheesecake, making it a conversational centerpiece when entertaining guests. Each slice served generates interest and compliments, making your event memorable.

Cost-effectiveness adds to the charm of this recipe. Considering the sophisticated flavor profile it offers, the ingredients are relatively accessible, and economical in bulk, allowing for indulgence without financial strain.

Historical Background and Cultural Significance


The ubiquity of cheesecakes dates back to ancient times when it was said that the Greeks served them to their Olympic athletes. As a beloved dessert across the globe, it has gone through numerous adaptations and renditions based on regional ingredient availability and preferences.

Culturally, the combination of raspberry and pistachio caters to a variety of taste buds, capturing the essence of European desserts’ elegance and the rich, heartfelt tradition of Middle Eastern sweets. It serves as a symbol of culinary globalization, marrying diverse flavor profiles.

Over time, the recipe has evolved to include varying cheesecake bases, from graham cracker to almond meal, each iteration bringing a unique character to the dessert. Modern innovations have led to the introduction of whimsical adaptations like this raspberry pistachio version, broadening the cheesecake’s appeal.

Regionally, you’ll find variations that incorporate local fruits and nuts, emphasizing the adaptability of cheesecake to incorporate seasonal and cultural ingredients. This enables food enthusiasts to explore and create a version that speaks uniquely to their taste while preserving the dessert’s classic roots.

Ingredient Deep Dive


Raspberries, rich in antioxidants, not only deliver a vibrant color but also provide the tartness needed to balance the cheesecake’s sweet creaminess. Choosing the freshest berries results in superior taste, while frozen can work in off-seasons. Store them dry in the fridge for longevity.

Pistachios, treasured in both savory and sweet dishes, offer a distinct buttery flavor with a hint of sweetness. Beyond culinary delight, they prose heart-healthy benefits due to their monounsaturated fat content. Opt for unsalted to maintain control over the dessert’s overall flavor profile.

Cream cheese is the pillar of any cheesecake, delivering the luscious texture that defines this dessert. Look for full-fat versions to achieve the richness this recipe demands. Storing cream cheese properly and bringing it to room temperature before use prevents lumps.

Graham crackers serve as the traditional base, providing a sweet, crumbly foundation. Alternatively, try digestive biscuits for a touch of malt flavor. Pulse them into crumbs for an even crust, combining with melted butter until it achieves the desired consistency.

Common Mistakes to Avoid

  • Overmixing the batter can introduce air bubbles, resulting in a cracked surface post-bake.
  • Skipping the water bath may cause uneven baking, leading to a dry center or burnt edges.
  • Using cold ingredients leads to a lumpy batter; room temperature is ideal for smooth mixing.
  • Undercooking the pistachio crust can lead to sogginess; ensure a firm base by monitoring baking time.
  • Neglecting the cooling process may cause the cheesecake to collapse; gradual temperature reduction is key.
  • Substituting low-fat cream cheese changes texture, making it less creamy and more rubbery.
  • Forgetting to strain raspberry sauce leads to a seed-filled experience, detracting from overall taste.
  • Inadequate chilling time before serving can result in a soft, less-structured cheesecake slice.

Essential Techniques


A crucial step in cheesecake success is mastering the water bath technique. This method prevents cracking by ensuring even baking, as the surrounding water maintains a consistent temperature around the cheesecake. Wrap the springform pan securely in foil to prevent water seepage.

Properly folding whipped cream into the batter is another technique to perfect for a light, airy texture. Use a gentle hand, slowly folding, ensuring the whipped cream maintains its volume without deflating. The result? An elegantly smooth and luscious consistency.

Pro Tips for Perfect Raspberry Pistachio Cheesecake


Toast pistachios before incorporating them into your crust for a heightened flavor profile that enhances their natural nutty undertone.

Combine lemon zest into the cheesecake batter for an extra depth of taste that complements the raspberry’s tartness subtly and beautifully.

Use a high-speed blender to purée raspberries for a silky-smooth sauce that integrates seamlessly into the cheesecake filling or for drizzling atop each slice.

Allow the cheesecake to cool slowly in the oven with the door slightly ajar for an hour before transferring it to the refrigerator. This prevents cracking by minimizing the sudden change in temperature.

Presentation is key, so garnish with whole raspberries and crushed pistachios just before serving to create a visually striking effect that tastes as good as it looks.

When slicing, a warm knife ensures clean cuts; run it under hot water, then dry before each incision to maintain a polished presentation without cheesecake sticking.

Variations and Adaptations


For a regional twist, incorporate rosewater into the raspberry layer to infuse Middle Eastern floral notes, enhancing the pistachio’s presence for a richer profile.

Adapt this dessert seasonally by substituting the raspberries with lingonberries for a Nordic approach, lending more bite and tartness to the creamy backdrop.

Create a dietary-friendly version by opting for gluten-free graham crackers in the crust and ensuring all other ingredients are cross-contamination free.

Amplify flavor in the cheesecake by swirling in a fresh raspberry reduction instead of whole berries, allowing for a more integrated, concentrated taste.

Modify the texture by employing smooth ricotta in combination with cream cheese for a lighter, fluffier result that has a slightly different mouthfeel, catering to diverse preferences.

Give your dessert a modern flair by crafting miniature cheesecakes in ramekins, allowing for personalized servings that highlight the dish’s exquisite presentation.

Serving and Presentation Guide


Artful plating is pivotal in boosting a cheesecake’s appeal. Consider serving slices on contrasting dark plates, where the vibrant raspberry and pistachio colors truly stand out.

Garnish extravagantly with a scattering of whole raspberries and a sprinkle of powdered sugar for a snow-kissed effect, adding a sophisticated touch to each slice.

Accompany with a dollop of whipped cream or a scoop of vanilla bean ice cream, complementing the cheesecake’s richness with a light, airy contrast.

Experiment with temperature by serving the cheesecake slightly chilled for a firmer slice or allow it to sit out briefly for a creamier texture that envelops each forkful.

Maintain portion control by utilizing a ring mold to serve consistent, beautifully edged portions that speak to fine dining aesthetics during your gathering.

Add a personal touch with edible flowers like violets for whimsical garnishing that infuses natural elements into the presentation, enticing guests visually and gastronomically.

Wine and Beverage Pairing


For wine lovers, pair this opulent cheesecake with a sweet Moscato or a sparkling Rosé, complementing its fruity, nutty complexity harmoniously.

Non-alcoholic alternatives like a chilled raspberry herbal tea or an elderflower cordial can match the refreshing notes, offering layers of floral and berry flavors.

If coffee is your preference, an espresso or a lightly sweetened American coffee balances the richness of the cheesecake with its naturally bold, bitter profile.

Consider balanced temperature when serving; for example, a cold Moscato accentuates the creamy coolness of the cheesecake, enhancing the tasting experience.

Opt for serving suggestions that align with dessert wines in smaller glasses, allowing guests to enjoy the complementary pairing in a refined, tasteful manner.

Storage and Shelf Life


Store the cheesecake in its springform pan, wrapped tightly in plastic wrap to maintain freshness and prevent the absorption of external odors in the refrigerator.

Kept chilled, the cheesecake can last up to five days, providing ample opportunity to savor leftovers while maintaining quality.

When seeking to extend shelf life, consider freezing. Wrap slices individually in parchment before sealing in an airtight container or freezer bag.

Recognize spoilage signs such as off smells or visible changes in color or texture. When reheating, a brief stay in the microwave restores the desired consistency.

Freezing guidelines suggest doing so only after the cheesecake is thoroughly chilled, as sudden temperature shifts may alter its texture.

Make Ahead Strategies


To streamline preparation, crust and filling can be made ahead separately, stored in the fridge overnight, and assembled just before baking.

Between steps, ensure stored components remain covered and refrigerated to maintain optimal freshness, avoiding moisture loss, or flavor degradation.

Assess the cheesecake’s quality when preparing in advance, as it benefits from a chilling period, allowing flavors to marry and achieve ideal consistency.

During assembly, focus on layering neatly to preserve the aesthetic quality that draws admiration, especially for the intricate raspberry swirls.

Follow rehearsing guidelines carefully to achieve the desired textured outcome, considering brief thawing for frozen portions before serving.

Supplement fresh elements such as raspberries or garnish only when ready to serve, as this ensures they remain vibrant and fresh.

Scaling Instructions


To halve this recipe, adjust all ingredient quantities proportionally and consider using a smaller pan to ensure even baking without compromising texture.

Doubling involves meticulous attention to measurements, as overfilling can lead to baking inconsistencies; a larger baking pan or multiple pans may be required.

Equipment adjustments might include utilizing additional mixing bowls or larger food processor capacity to manage increased ingredient quantities efficiently.

When considering cooking times, closely monitor for doneness signs, as larger cakes may require longer baking; adjust based on the achieved golden color and texture.

Storage considerations include ensuring scaled portions fit within available container space and remain organized for easy access and freshness maintenance.

Nutritional Deep Dive


This Raspberry Pistachio Cheesecake offers a balanced macro breakdown providing carbohydrates from the crust, proteins from nuts, and fats from the cream cheese.

Micronutrient analysis highlights significant contributions from raspberries’ vitamin C and pistachios’ potassium and B6 content.

Health benefits include cardiovascular support from pistachios and antioxidant properties of raspberries, contributing to a wholesome dessert profile.

Dietary considerations cater to indulgence, mindful of portion control and caloric intake, especially when cheesecake is part of a balanced meal plan.

Portion analysis advises keeping slice sizes moderate, as the cheesecake is rich, ensuring enjoyment without overwhelm.

For weight management tips, pair a reduced slice with fresh fruit or include as part of a calorie-calculated meal plan.

Dietary Adaptations


For a gluten-free alternative, choose gluten-free graham crackers and double-check all other ingredients and substitute accordingly.

Dairy-free modifications may involve substituting traditional cream cheese with a cashew-based equivalent or coconut cream for an innovative touch.

Create a vegan version by exploring vegan cream cheese and plant-based butter alternatives, maintaining deliciousness with ethical consciousness.

Adjust to a low-carb dessert diet by using almond flour for the crust and employing sugar substitutes carefully within baking requirements.

Ensure all ingredients align with a keto lifestyle by integrating higher fat substitutes and sweeteners like erythritol within compositions.

Modify to fit a paleo-friendly diet by integrating almond meal crusts and natural sweeteners, ensuring the cheesecake aligns with your nutritional goals.

Satisfy a low-FODMAP dietary need by ensuring each ingredient remains compliant with personal guidelines, focusing on ingredient quality and safety.

Troubleshooting Guide


Address texture issues by ensuring accurate measurements and proper incorporation of wet and dry elements to achieve desired creaminess.

Balance flavors by tasting raspberry reduction for sweetness or tartness adjusting with sugar or lemon juice as necessary.

Combat temperature problems by preheating ovens fully and using reliable thermometers for accuracy throughout the baking process.

Overcome equipment challenges where substitutions for springform pans might involve lined cake tins with proper containment of batter.

Navigate ingredient substitutions with care, focusing on maintaining texture and flavor as closely as possible when accommodating dietary needs.

Timing concerns can be rectified by setting timers at key intervals, ensuring baking is not interrupted prematurely or allowed excessive cooking.

Recipe Success Stories


Join our community of food lovers who have collectively experienced the joy of this Raspberry Pistachio Cheesecake. Each rendition brought a unique twist, from swapping raspberries for blueberries to celebrating a national holiday.

Readers have shared their adaptations, with many highlighting the smooth, creamy consistency achieved through careful attention to mixing techniques and ingredient handling.

Variations have included additions such as mascarpone for extra richness or crumb bases utilizing seasonal shortbreads for those wanting a bespoke flavor.

Photographs from our culinary enthusiasts capture brilliant colors, showcasing individual flair in garnishing through sliced pistachios and twisting raspberry sauces.

Experimentation suggestions have ranged from integrating a hint of cardamom for a warm, spicy balanced note to utilizing walnut crusts for a softer bite.

Frequently Asked Questions

Can I freeze Raspberry Pistachio Cheesecake?

Freezing is possible and recommended for preserving your cheesecake. Wrap slices individually to maintain quality, especially for long-term storage.

How do I avoid a cracked cheesecake top?

Employ the water bath method, ensuring even baking and avoiding overmixing air into the batter, as air bubbles trapped are often culprits of cracks.

What are some eggless options?

Explore alternatives like silken tofu, agar-agar, or flax eggs to replace traditional eggs while maintaining the integrity and texture of your bake.

What if my crust is soggy?

Baking your crust long enough and cooling it thoroughly before adding filling assists in firming its structure, reducing soggy results.

How can I make the cake denser?

Increase cheese content or reduce whipped elements in the batter for a firmer, richer texture that keeps shape more rigidly.

Are there nut-free crust options?

Try a classic graham cracker base or use cookie alternatives that exclude nuts to cater to specific dietary requirements or allergies.

Best way to swirl raspberry sauce?

Spoon sauce onto the cheesecake and use a knife or skewer to create intricate swirls gently, preventing complete inclusion for visible aesthetics.

Is a bain-marie necessary?

While not essential, it’s strongly recommended to produce a cheesecake with a smooth, crack-free finish due to uniform cooking temperatures.

How long to refrigerate before serving?

Post-bake, chill your cheesecake for a minimum of four hours, overnight refrigeration ensures it’s completely set for optimal serving presentation.

What if I over-whipped my batter?

If your batter’s whipped excessively, gentle folding can incorporate it back into manageable consistency, reducing any unwanted airiness.

Can I opt for a flavored crust?

Absolutely, experiment with flavored digestive or chocolate biscuits that complement your cheesecake filling, enriching the overall dessert experience.

How adaptable is this cheesecake recipe?

It’s highly flexible, promoting ingredient exchanges and substitutions within maintaining structure, supporting numerous dietary guidelines easily.

Additional Resources


Peruse our curated selection of related recipes that complement your Raspberry Pistachio Cheesecake artistry, offering synergistic ingredients and topping inspirations.

Delve into comprehensive technique guides, focusing on essential cheesecake-making skills such as perfecting water baths and preserving fresh fruits.

Explore ingredient information, highlighting the optimal selection and pairing of raspberries and pistachios, securing your bakery-inspired cheesecake results.

Access equipment recommendations ensuring central kitchen tools — from springform pans to blenders — enhance your capacity for creative explorations.

Consider seasonal variations and adaptations, helping harness the bounties of nature throughout the year for your cheesecake creations.

Join the Conversation


Engage with our community by sharing your Raspberry Pistachio Cheesecake endeavors through social media platforms such as Instagram or Facebook, catching and sharing your masterpiece with like-minded foodies.

Deliver exquisite photography with tips on effective plating captured through your lens, making your meticulous creation look as tantalizing as it tastes.

Offer insightful recipe reviews and reflections, documenting your cheesecake adventure step-by-step to inspire readers considering a similar culinary venture.

Encourage community engagement through feedback or alternative recommendations, fostering discussions highlighting common improvements or shared culinary knowledge.

Explore personalized recipe variations, fostering diverse interpretations that continue evolving beyond initial conceptions, contributing to rich culinary heritage.

The Recipe

Raspberry Pistachio Cheesecake

Serves: 8

Prep Time: 30 mins

Cook Time: 60 mins

Total Time: 90 mins

Kitchen Equipment Needed

  • 9-inch springform pan
  • Food processor
  • Mixing bowls
  • Hand mixer
  • Measuring cups and spoons
  • Rubber spatula
  • Bain-marie setup (large enough baking dish for the water bath)

Ingredients

  • 1 1/2 cups graham cracker crumbs
  • 1/2 cup unsalted pistachios, toasted
  • 1/3 cup melted butter
  • 24 oz cream cheese, softened
  • 1 cup sugar
  • 3 large eggs
  • 1 tsp vanilla extract
  • 1 cup fresh raspberries
  • 2 tbsp lemon juice
  • 1/4 cup confectioner’s sugar for raspberry sauce
  • Additional pistachios and raspberries for garnish

Directions

  1. Preheat your oven to 325°F (160°C). Wrap the outside of a 9-inch springform pan with aluminum foil to prevent water seepage.
  2. In a food processor, pulse graham cracker crumbs and toasted pistachios until fine. Add melted butter and pulse until combined.
  3. Press the crust mixture evenly into the bottom of the prepared springform pan. Bake for 10 minutes and let it cool.
  4. In a large bowl, beat the cream cheese and sugar together until smooth. Incorporate eggs one at a time, mixing until just blended, then stir in vanilla extract.
  5. Pour half the batter over the cooled crust. Swirl in some of the raspberry sauce made by blending raspberries, lemon juice, and confectioner’s sugar until smooth.
  6. Top with remaining batter and additional raspberry swirls. Place the pan into a bain-marie and bake for 50-60 minutes or until the center is set.
  7. Once baked, turn off the oven and let the cake cool in the oven with the door ajar for one hour to prevent cracks. Refrigerate for at least four hours or overnight.
  8. When ready to serve, top with extra raspberries and chopped pistachios. Slice with a warm knife for clean presentation.

Recipe Notes

  • Substitute graham crackers with digestive biscuits if preferred.
  • Ensure raspberries are well blended for smoother swirls.
  • Chilling thoroughly enhances flavor melding and texture solidification.
  • Adjust lemon juice to balance desired tartness in raspberry sauce.