No Flour! Carrot Cake Muffins (Spring Remix)

No Flour! Carrot Cake Muffins (Spring Remix)

Spring is in the air, and what better way to celebrate the season than with a batch of light, fluffy, and naturally sweet No Flour Carrot Cake Muffins? These muffins are a delightful twist on the classic carrot cake, but without the heaviness of traditional flour. Perfect for breakfast, brunch, or an afternoon snack, these muffins are packed with wholesome ingredients and a burst of springtime flavors. Whether you’re gluten-free, health-conscious, or just looking for a delicious treat, this recipe is sure to become a staple in your kitchen.

Why You’ll Love This Recipe

There are so many reasons to fall head over heels for these No Flour Carrot Cake Muffins. Here are just a few:

  • Gluten-Free Goodness: Made without a speck of flour, these muffins are naturally gluten-free, making them a fantastic option for those with dietary restrictions or anyone looking to reduce their gluten intake.
  • Nutrient-Packed: Loaded with grated carrots, almond flour, and warm spices, these muffins are as nutritious as they are delicious. They’re a great way to sneak in some veggies without sacrificing flavor.
  • Perfectly Moist and Fluffy: Thanks to the combination of almond flour and eggs, these muffins have a tender crumb and a melt-in-your-mouth texture that rivals traditional carrot cake.
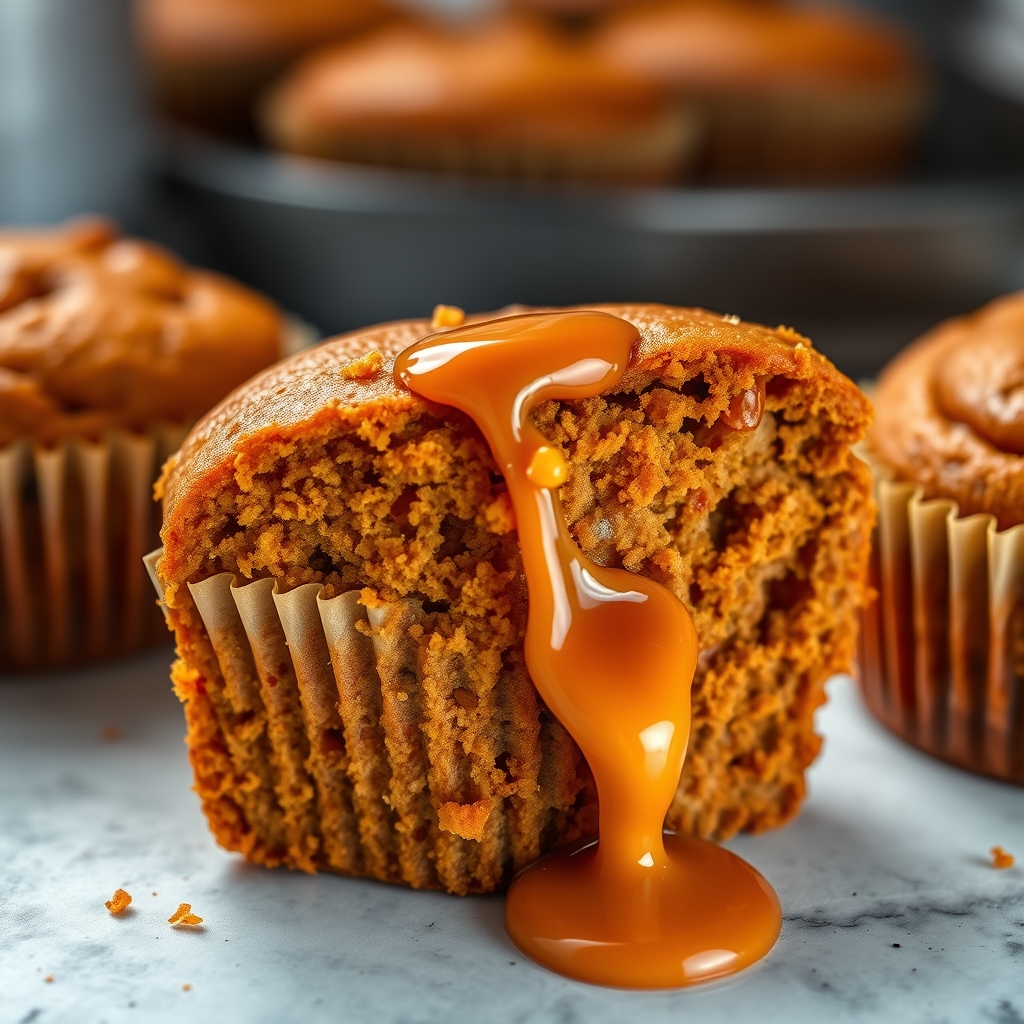
  • Spring-Inspired Flavors: With a hint of cinnamon, nutmeg, and a touch of orange zest, these muffins taste like spring in every bite. The optional cream cheese drizzle adds a decadent finish.
  • Easy to Make: No complicated steps or hard-to-find ingredients here. This recipe comes together in just one bowl and bakes up in under 25 minutes.

Ingredients Breakdown

Let’s take a closer look at the key ingredients in these No Flour Carrot Cake Muffins and why they work so well together:

  • Almond Flour: The star of the show, almond flour replaces traditional wheat flour, adding a nutty richness and keeping the muffins gluten-free. It also provides healthy fats and protein.
  • Grated Carrots: Freshly grated carrots add natural sweetness, moisture, and a vibrant color. They’re also packed with beta-carotene and fiber.
  • Eggs: Eggs act as the binding agent, giving the muffins structure and a light, airy texture.
  • Maple Syrup or Honey: These natural sweeteners add depth of flavor without refined sugar. They also help keep the muffins moist.
  • Cinnamon and Nutmeg: These warm spices bring that classic carrot cake flavor, making each bite cozy and aromatic.
  • Orange Zest: A little zest brightens up the muffins, adding a fresh, citrusy note that pairs beautifully with the carrots.
  • Optional Cream Cheese Drizzle: For a touch of indulgence, a simple cream cheese glaze adds a creamy, tangy contrast to the sweet muffins.

How to Make No Flour! Carrot Cake Muffins (Spring Remix)

Ready to bake? Follow these simple steps for the best No Flour Carrot Cake Muffins:

  1. Prep the Oven and Muffin Tin: Preheat your oven to 350°F and line a muffin tin with parchment liners or lightly grease the cups to prevent sticking.
  2. Mix the Wet Ingredients: In a large bowl, whisk together the eggs, maple syrup (or honey), melted coconut oil, and vanilla extract until smooth and well combined.
  3. Add the Dry Ingredients: Gently fold in the almond flour, cinnamon, nutmeg, baking soda, and salt. Stir until just combined—overmixing can make the muffins dense.
  4. Fold in the Carrots and Orange Zest: Add the freshly grated carrots and orange zest, mixing until evenly distributed throughout the batter.
  5. Portion the Batter: Divide the batter evenly among the muffin cups, filling each about three-quarters full. This ensures they rise beautifully without overflowing.
  6. Bake to Perfection: Bake for 20-22 minutes, or until a toothpick inserted into the center comes out clean. Let the muffins cool in the tin for 5 minutes before transferring to a wire rack.
  7. Optional Cream Cheese Drizzle: If desired, whisk together softened cream cheese, a splash of milk, and a drizzle of honey until smooth. Drizzle over the cooled muffins for an extra special touch.

Pro Tips for the Best Results

  • Use Freshly Grated Carrots: Pre-shredded carrots can be dry and lack flavor. For the best texture and sweetness, grate your own carrots just before mixing.
  • Don’t Overmix the Batter: Almond flour can become dense if overworked. Stir just until the ingredients are combined for light, fluffy muffins.
  • Let Them Cool: These muffins are delicate when warm. Allowing them to cool for at least 10 minutes helps them set and makes them easier to handle.
  • Toast the Almond Flour: For an extra nutty flavor, lightly toast the almond flour in a dry skillet over low heat for 2-3 minutes before using. Let it cool before adding to the batter.

Variations and Substitutions

This recipe is wonderfully adaptable. Here are a few ways to make it your own:

  • Add Nuts or Seeds: Stir in chopped walnuts, pecans, or sunflower seeds for added crunch and protein.
  • Dairy-Free Option: Replace the cream cheese drizzle with a coconut milk glaze by mixing coconut cream with a touch of maple syrup.
  • Spice It Up: Add a pinch of ginger or cardamom for a more complex spice profile.
  • Chocolate Lovers: Fold in dark chocolate chips for a decadent twist.

What to Serve With It

These muffins are delightful on their own, but they also pair beautifully with:

  • A hot cup of chai tea or freshly brewed coffee for a cozy morning treat.
  • A dollop of Greek yogurt and fresh berries for a balanced breakfast.
  • A scoop of vanilla ice cream for a simple yet elegant dessert.

How to Store and Reheat

To keep your No Flour Carrot Cake Muffins fresh:

  • Room Temperature: Store in an airtight container for up to 2 days.
  • Refrigerator: For longer storage, refrigerate for up to 5 days.
  • Freezer: Wrap individually and freeze for up to 3 months. Thaw at room temperature or warm in the microwave for 15-20 seconds.
  • Reheating: For best results, warm muffins in a 300°F oven for 5-7 minutes to restore their freshness.

Frequently Asked Questions (FAQs)

Can I use coconut flour instead of almond flour?
No, coconut flour absorbs much more liquid and requires a different ratio of ingredients. Stick with almond flour for this recipe.

Can I make these muffins vegan?
You can try substituting flax eggs (1 tbsp ground flaxseed + 3 tbsp water per egg) and using a plant-based sweetener, but the texture may vary.

Why are my muffins sinking in the middle?
This can happen if the muffins are underbaked or if the batter was overmixed. Ensure your oven is fully preheated and check for doneness with a toothpick.

Can I add pineapple or raisins?
Absolutely! Drained crushed pineapple or plump raisins can add extra sweetness and texture. Just be mindful of excess moisture.

Final Thoughts

These No Flour Carrot Cake Muffins are a celebration of spring’s fresh flavors and wholesome ingredients. Whether you’re serving them at a brunch gathering, packing them for a picnic, or enjoying one with your morning coffee, they’re sure to bring a smile to your face. The best part? You can feel good about indulging in a treat that’s as nourishing as it is delicious. So grab your mixing bowl and let’s bake a batch—springtime never tasted so good!

Print
clock clock iconcutlery cutlery iconflag flag iconfolder folder iconinstagram instagram iconpinterest pinterest iconfacebook facebook iconprint print iconsquares squares iconheart heart iconheart solid heart solid icon

No Flour! Carrot Cake Muffins (Spring Remix)

  • Author: Baking with Nature

Description

These moist and fluffy carrot cake muffins are made without any flour, making them a perfect gluten-free treat for spring. Packed with grated carrots, warm spices, and a hint of citrus, they’re a healthier twist on classic carrot cake.


Ingredients

Scale

For the Crust:

  • For the muffins:
  • 2 cups almond flour
  • 1/2 cup coconut sugar
  • 1 tsp baking soda
  • 1 tsp ground cinnamon
  • 1/2 tsp ground nutmeg
  • 1/4 tsp ground ginger
  • 1/4 tsp salt
  • 3 large eggs
  • 1/4 cup melted coconut oil
  • 1 tsp vanilla extract
  • 1 tbsp orange zest
  • 1 1/2 cups finely grated carrots
  • For the topping (optional):
  • 1/4 cup chopped walnuts
  • 1 tbsp maple syrup
  • 1/2 tsp cinnamon

Instructions

1. Prepare the Crust:

  1. Preheat oven to 350°F (175°C) and line a muffin tin with paper liners.
  2. In a large bowl, whisk together almond flour, coconut sugar, baking soda, cinnamon, nutmeg, ginger, and salt.
  3. In another bowl, beat eggs, then mix in melted coconut oil, vanilla extract, and orange zest.
  4. Add wet ingredients to dry ingredients and stir until just combined.
  5. Fold in grated carrots until evenly distributed.
  6. Divide batter evenly among muffin cups, filling each about 3/4 full.
  7. If using topping, mix walnuts, maple syrup, and cinnamon in a small bowl, then sprinkle over muffins.
  8. Bake for 20-25 minutes until golden and a toothpick comes out clean.
  9. Cool in pan for 5 minutes, then transfer to a wire rack to cool completely.

Notes

For extra moisture, add 1/4 cup crushed pineapple (drained). Store in an airtight container for up to 3 days or freeze for longer storage. These taste even better the next day as flavors develop!

Low Carb Lemon Meringue Cups

Low Carb Lemon Meringue Cups

If you’re craving something sweet, tangy, and utterly indulgent without the carb overload, these Low Carb Lemon Meringue Cups are about to become your new favorite dessert. Imagine a velvety lemon curd nestled in a delicate almond flour crust, topped with a cloud-like meringue that’s lightly toasted to perfection. This recipe is a game-changer for anyone following a low carb or keto lifestyle—or simply looking for a lighter, guilt-free treat that doesn’t skimp on flavor.

Why You’ll Love This Recipe

First, let’s talk about why these Low Carb Lemon Meringue Cups deserve a spot in your dessert rotation. Here are just a few reasons:

  • Perfect balance of sweet and tangy – The bright citrusy lemon curd contrasts beautifully with the lightly sweetened meringue, creating a harmonious bite every time.
  • Low carb and keto-friendly – Made with almond flour and sugar substitutes, these cups let you enjoy a classic dessert without the carb-heavy consequences.
  • Elegant yet easy to make – These individual servings look impressive but come together with simple techniques, making them ideal for entertaining or a special weeknight treat.
  • Customizable to your taste – Adjust the sweetness, swap in different citrus, or experiment with nut-free crust alternatives—this recipe is wonderfully adaptable.
  • No baking expertise required – Even if you’re new to meringue or pastry-making, the step-by-step instructions ensure success.

Ingredients Breakdown

Understanding the role of each ingredient helps you master this recipe and make informed substitutions if needed. Here’s what you’ll need:

For the Crust:

  • Almond flour – A low carb staple that provides a nutty, tender base. Blanched almond flour works best for a finer texture.
  • Butter – Adds richness and helps bind the crust. Use unsalted for better control over flavor.
  • Erythritol or monk fruit sweetener – Keeps the crust low carb while adding subtle sweetness.
  • Vanilla extract – A hint of warmth to complement the lemon.
  • Salt – Balances the sweetness and enhances overall flavor.

For the Lemon Curd:

  • Fresh lemon juice and zest – The star of the show! Freshly squeezed juice and zest ensure vibrant, natural flavor.
  • Egg yolks – Thickens the curd into a luscious, creamy consistency.
  • Butter – Adds silkiness and rounds out the tartness.
  • Low carb sweetener – Adjust to taste, keeping the curd sugar-free.

For the Meringue:

  • Egg whites – The foundation of any good meringue, whipped to stiff peaks for structure.
  • Cream of tartar – Stabilizes the egg whites for a foolproof meringue.
  • Low carb sweetener – Dissolves easily to sweeten without graininess.

How to Make Low Carb Lemon Meringue Cups

Now, let’s walk through the process step by step. Don’t worry—it’s easier than you think!

Step 1: Prepare the Crust

Preheat your oven to 350°F. In a mixing bowl, combine almond flour, melted butter, sweetener, vanilla, and salt until a crumbly dough forms. Press the mixture firmly into the bottom of lined muffin tins or small ramekins. Bake for 10-12 minutes until lightly golden. Let cool while you prepare the filling.

Step 2: Make the Lemon Curd

In a saucepan over low heat, whisk together lemon juice, zest, egg yolks, and sweetener. Stir constantly until the mixture thickens enough to coat the back of a spoon. Remove from heat and whisk in butter, one piece at a time, until smooth. Strain through a fine-mesh sieve for an ultra-silky texture, then divide among the cooled crusts.

Step 3: Whip the Meringue

Using a clean, grease-free bowl, beat egg whites and cream of tartar until soft peaks form. Gradually add sweetener, continuing to beat until stiff, glossy peaks form. Spoon or pipe the meringue onto the lemon curd, making sure to seal the edges to prevent weeping.

Step 4: Toast the Meringue

Use a kitchen torch to lightly brown the meringue, or broil in the oven for 1-2 minutes (watch closely to avoid burning). Chill for at least 30 minutes before serving to set the layers.

Pro Tips for the Best Results

  • Room temperature eggs are key – Cold egg whites won’t whip as well, so let them sit out for 30 minutes before making meringue.
  • Prevent a soggy crust – Ensure the crust is fully cooled before adding the lemon curd to maintain texture.
  • Strain the curd – This removes any cooked egg bits and zest for a perfectly smooth filling.
  • Seal the meringue – Press it right to the edges of the cup to lock in the curd and prevent separation.
  • Chill before serving – This helps the layers set and makes for cleaner slices.

Variations and Substitutions

This recipe is wonderfully adaptable. Here are some ideas to mix it up:

  • Coconut flour crust – Replace almond flour with coconut flour (use 1/3 the amount, as it’s more absorbent) for a nut-free option.
  • Lime or orange curd – Swap lemons for other citrus fruits to change the flavor profile.
  • Dairy-free version – Use coconut oil instead of butter in both the crust and curd.
  • Add herbs – A sprinkle of thyme or basil in the crust adds a sophisticated twist.
  • Mini cheesecake hybrid – Blend cream cheese into the lemon curd for a richer, denser filling.

What to Serve With It

While these cups are delightful on their own, here are a few pairing ideas:

  • Fresh berries – Raspberries or blueberries add a pop of color and extra freshness.
  • Whipped coconut cream – A dollop on the side enhances richness without added carbs.
  • Herbal tea or coffee – A warm cup of Earl Grey or black coffee balances the dessert’s sweetness.
  • Vanilla bean ice cream – For a non-low carb option, serve with a scoop of high-quality vanilla ice cream.

How to Store and Reheat

These cups are best enjoyed fresh but can be stored for later:

  • Refrigeration – Keep covered in the fridge for up to 3 days. The meringue may soften slightly but will still taste great.
  • Freezing – Freeze without the meringue for up to 1 month. Thaw in the fridge, then add fresh meringue and torch before serving.
  • Reheating – Not recommended, as the meringue will deflate. Enjoy chilled or at room temperature.

Frequently Asked Questions (FAQs)

Can I make these ahead of time?

Yes! Prepare the crust and curd up to 2 days in advance, then add the meringue and torch just before serving.

Why did my meringue weep?

Weeping occurs if the meringue isn’t sealed to the edges or if the curd is too warm when topped. Ensure both layers are cool, and always seal the meringue tightly.

Can I use bottled lemon juice?

Fresh is best for flavor, but bottled juice works in a pinch. Just add an extra teaspoon of zest for brightness.

Is there a nut-free crust alternative?

Try sunflower seed flour or a blend of coconut flour and flaxseed meal for a nut-free version.

Can I skip the sweetener?

The sweetener is essential for balancing the tartness, but you can reduce the amount slightly if preferred.

Final Thoughts

There’s something magical about the combination of tart lemon, buttery crust, and airy meringue—especially when it fits into a low carb lifestyle. These Lemon Meringue Cups prove that you don’t have to sacrifice flavor for health-conscious choices. Whether you’re serving them at a dinner party or savoring one as an afternoon pick-me-up, they’re sure to impress. So grab your whisk, embrace the zesty goodness, and enjoy every bite of this delightful dessert!

Print
clock clock iconcutlery cutlery iconflag flag iconfolder folder iconinstagram instagram iconpinterest pinterest iconfacebook facebook iconprint print iconsquares squares iconheart heart iconheart solid heart solid icon

Low Carb Lemon Meringue Cups

  • Author: Healthy Dessert Enthusiast

Description

A delightful low-carb twist on classic lemon meringue pie, served in individual cups for perfect portion control. The tangy lemon curd pairs perfectly with the light, fluffy meringue topping.


Ingredients

Scale

For the Crust:

  • For the lemon curd:
  • 4 large egg yolks
  • 1/2 cup fresh lemon juice
  • 1 tbsp lemon zest
  • 1/2 cup granulated erythritol
  • 1/4 cup butter, cubed
  • For the meringue:
  • 4 large egg whites
  • 1/4 tsp cream of tartar
  • 1/3 cup granulated erythritol
  • 1/2 tsp vanilla extract
  • For garnish:
  • 1 tsp lemon zest

Instructions

1. Prepare the Crust:

  1. 1. Make the lemon curd: In a heatproof bowl, whisk together egg yolks, lemon juice, zest, and erythritol.
  2. 2. Place bowl over a saucepan of simmering water (double boiler). Cook, stirring constantly, until mixture thickens (about 10 minutes).
  3. 3. Remove from heat and whisk in butter one cube at a time until fully incorporated. Strain through a fine mesh sieve and let cool.
  4. 4. Make the meringue: In a clean bowl, beat egg whites and cream of tartar until soft peaks form.
  5. 5. Gradually add erythritol and vanilla, beating until stiff, glossy peaks form.
  6. 6. Assemble: Divide cooled lemon curd among 6 small cups or ramekins. Top with meringue, creating peaks with a spoon.
  7. 7. Optional: Brown meringue with a kitchen torch or under broiler for 1-2 minutes.
  8. 8. Garnish with lemon zest and serve immediately or refrigerate up to 2 hours.

Notes

For best results, ensure all utensils are grease-free when making meringue. The lemon curd will thicken further as it cools. These are best eaten the same day as the meringue may weep if stored too long.

Flourless Almond Berry Tart

Flourless Almond Berry Tart

There’s something undeniably magical about a dessert that’s both elegant and effortless. This Flourless Almond Berry Tart is exactly that—a showstopper that requires no fancy techniques or hard-to-find ingredients. Whether you’re catering to gluten-free guests or simply craving a dessert that’s rich in flavor yet light in texture, this tart is a dream come true. Imagine a buttery almond crust cradling a velvety almond filling, all topped with a vibrant medley of fresh berries. It’s a dessert that feels indulgent yet wholesome, perfect for everything from casual weeknight treats to special occasions.

Why You’ll Love This Recipe

This Flourless Almond Berry Tart is more than just a dessert—it’s a celebration of simplicity and flavor. Here’s why it’s bound to become a favorite in your recipe collection:

  • Gluten-Free Without Compromise: The almond flour base delivers a tender, crumbly crust that rivals any traditional tart shell, making it a fantastic option for gluten-sensitive friends and family.
  • Naturally Nutty and Rich: Almonds bring a depth of flavor and a delicate texture that pairs beautifully with the tartness of fresh berries, creating a balanced bite every time.
  • Quick and Easy Assembly: Unlike fussy pastries, this tart comes together with minimal effort—no rolling pins or chilling required for the crust.
  • Versatile for Any Occasion: Serve it at brunch, as an afternoon treat with tea, or as the grand finale to a dinner party. It’s adaptable to any season by swapping berries for whatever’s fresh.
  • Healthy Indulgence: Packed with protein from almond flour and antioxidants from berries, this tart feels like a treat you can feel good about.

Ingredients Breakdown

Every ingredient in this Flourless Almond Berry Tart plays a crucial role in creating its irresistible texture and flavor. Here’s what you’ll need and why:

  • Almond Flour: The star of the show, almond flour replaces traditional wheat flour, giving the crust a nutty richness and a delicate crumb. It’s also packed with protein and healthy fats.
  • Butter or Coconut Oil: For a buttery flavor and crisp texture, butter is ideal. For a dairy-free version, coconut oil works just as well while adding a subtle tropical note.
  • Eggs: They bind the crust and filling together, ensuring the tart holds its shape while adding moisture.
  • Honey or Maple Syrup: These natural sweeteners keep the dessert refined-sugar-free while complementing the almonds’ earthy taste.
  • Vanilla Extract: A splash enhances the almond flavor and adds warmth to the filling.
  • Fresh Berries: Strawberries, raspberries, blueberries, or blackberries provide a juicy, tangy contrast to the sweet almond base. Use a mix for color and flavor variety.

How to Make Flourless Almond Berry Tart

Follow these simple steps to create a stunning Flourless Almond Berry Tart that’s as beautiful as it is delicious:

  1. Prepare the Crust: In a bowl, combine almond flour, melted butter (or coconut oil), and a pinch of salt. Press the mixture firmly into a tart pan, ensuring an even layer on the bottom and sides. Bake at 350°F for 10-12 minutes until lightly golden.
  2. Make the Filling: Whisk together eggs, honey (or maple syrup), vanilla extract, and a touch of almond extract if you love extra nutty flavor. Pour this mixture over the pre-baked crust.
  3. Bake Again: Return the tart to the oven for 15-20 minutes, or until the filling is set and slightly puffed at the edges.
  4. Add the Berries: Let the tart cool completely before arranging fresh berries on top. For a glossy finish, brush the berries with a thin layer of warmed apricot jam.
  5. Serve: Slice and enjoy at room temperature or chilled. A dollop of whipped cream or a sprinkle of powdered sugar adds a lovely finishing touch.

Pro Tips for the Best Results

  • Toast Your Almond Flour: For an even deeper flavor, lightly toast the almond flour in a dry skillet before mixing it into the crust. Just be sure to let it cool first.
  • Prevent Soggy Crust: If your berries are very juicy, pat them dry with a paper towel before placing them on the tart to avoid excess moisture.
  • Room Temperature Eggs: Using eggs at room temperature helps the filling blend smoothly and bake evenly.
  • Chill for Clean Slices: For picture-perfect servings, refrigerate the tart for an hour before slicing. This firms up the filling for neat edges.

Variations and Substitutions

This Flourless Almond Berry Tart is wonderfully adaptable. Here are some creative twists to try:

  • Citrus Zest: Add a teaspoon of lemon or orange zest to the filling for a bright, aromatic lift.
  • Chocolate Drizzle: Melt dark chocolate and drizzle it over the berries for a decadent touch.
  • Dairy-Free: Use coconut oil instead of butter, and ensure your chocolate (if using) is dairy-free.
  • Nut-Free Option: Replace almond flour with sunflower seed flour for a similar texture without nuts.
  • Seasonal Fruits: Swap berries for sliced peaches in summer, pears in fall, or even a spiced apple compote in winter.

What to Serve With It

This tart is delightful on its own, but pairing it with the right accompaniments can elevate the experience:

  • Whipped Cream or Coconut Cream: A cloud of lightly sweetened cream balances the tartness of the berries.
  • Vanilla Ice Cream: Serve a warm slice with a scoop of vanilla ice cream for a contrast in temperatures.
  • Herbal Tea or Coffee: A cup of chamomile tea or espresso complements the nutty flavors beautifully.
  • Sparkling Wine: For a celebratory touch, pair with Prosecco or a crisp rosé.

How to Store and Reheat

To keep your Flourless Almond Berry Tart fresh:

  • Refrigeration: Store covered in the fridge for up to 3 days. The crust may soften slightly, but the flavors will meld beautifully.
  • Freezing: Freeze individual slices wrapped in parchment and foil for up to 1 month. Thaw in the fridge overnight.
  • Reheating: For a warm tart, place slices in a 300°F oven for 5-10 minutes. Avoid microwaving, as it can make the crust soggy.

Frequently Asked Questions (FAQs)

Can I use frozen berries instead of fresh?
Yes, but thaw and drain them thoroughly to prevent excess liquid from making the tart soggy. Pat them dry before arranging.

Do I need a tart pan with a removable bottom?
While it makes serving easier, you can use a regular pie dish. Just line it with parchment paper for easy lifting.

Can I make this tart ahead of time?
Absolutely! Bake the crust and filling a day ahead, then add the berries just before serving to keep them fresh.

Is almond meal the same as almond flour?
Almond flour is finer, yielding a smoother crust. Almond meal works in a pinch but may result in a slightly grainier texture.

How do I prevent the filling from cracking?
Avoid overbaking. Remove the tart when the edges are set but the center still has a slight jiggle—it will firm up as it cools.

Final Thoughts

This Flourless Almond Berry Tart is proof that the simplest desserts often leave the biggest impression. Whether you’re new to gluten-free baking or a seasoned pro, this recipe is a keeper—for its ease, versatility, and downright deliciousness. The next time you’re craving something sweet, skip the complicated pastries and let the natural flavors of almonds and berries shine. Trust me, one bite and you’ll be hooked. Happy baking!

Print
clock clock iconcutlery cutlery iconflag flag iconfolder folder iconinstagram instagram iconpinterest pinterest iconfacebook facebook iconprint print iconsquares squares iconheart heart iconheart solid heart solid icon

Flourless Almond Berry Tart

  • Author: Baking Enthusiast

Description

A naturally gluten-free tart with a rich almond base topped with fresh berries. Perfect for a light dessert or brunch treat.


Ingredients

Scale

For the Crust:

  • For the crust:
  • 2 cups almond flour
  • 1/4 cup coconut sugar
  • 1/4 teaspoon sea salt
  • 1/4 cup melted coconut oil
  • 1 large egg
  • 1 teaspoon vanilla extract
  • For the filling:
  • 1 1/2 cups mixed fresh berries (strawberries, blueberries, raspberries)
  • 2 tablespoons honey
  • 1 tablespoon lemon juice
  • 1 teaspoon arrowroot powder
  • For garnish:
  • 1/4 cup sliced almonds
  • Powdered sugar (optional)

Instructions

1. Prepare the Crust:

  1. Preheat oven to 350°F (175°C). Grease a 9-inch tart pan with removable bottom.
  2. Make the crust: In a bowl, mix almond flour, coconut sugar, and salt. Add melted coconut oil, egg, and vanilla. Stir until dough forms.
  3. Press dough evenly into prepared pan, building up the sides. Prick bottom with fork and bake for 12-15 minutes until golden. Cool slightly.
  4. Prepare filling: In saucepan over medium heat, combine berries, honey, lemon juice, and arrowroot. Cook 5-7 minutes until berries break down and mixture thickens.
  5. Spread filling over crust. Sprinkle with sliced almonds.
  6. Bake for another 10 minutes. Cool completely before removing from pan.
  7. Dust with powdered sugar if desired before serving.

Notes

Can substitute maple syrup for honey. Store leftovers refrigerated for up to 3 days. Tart crust can be made 1 day ahead.

Low Carb Key Lime Pie

Low Carb Key Lime Pie

There’s something undeniably magical about a perfectly tangy, creamy key lime pie—especially when it fits into a low carb lifestyle. This dessert is a refreshing escape from the ordinary, offering that signature citrusy zing without the sugar overload. Whether you’re following a keto diet, watching your carb intake, or simply craving a lighter version of this classic treat, this low carb key lime pie delivers on flavor, texture, and satisfaction. Let’s dive into why this recipe is a must-try and how you can make it effortlessly at home.

Why You’ll Love This Recipe

First, let’s talk about why this low carb key lime pie deserves a spot in your dessert rotation. Here are a few compelling reasons:

  • Incredibly creamy and tangy—The filling strikes the perfect balance between rich and refreshing, with just the right amount of lime to wake up your taste buds.
  • No-bake convenience—Skip the oven and let the fridge do the work. This pie comes together with minimal effort, making it ideal for busy days or last-minute gatherings.
  • Guilt-free indulgence—Made with wholesome, low carb ingredients, this dessert lets you enjoy a slice (or two) without derailing your dietary goals.
  • Crowd-pleasing versatility—Whether you’re serving keto friends or traditional dessert lovers, this pie is universally loved.
  • Perfect for any occasion—From summer barbecues to holiday dinners, this pie fits right in, offering a bright, fresh finish to any meal.

Ingredients Breakdown

Every great recipe starts with quality ingredients, and this low carb key lime pie is no exception. Here’s what you’ll need and why each component matters:

  • Almond flour—The base of the crust, almond flour provides a nutty, buttery texture without the carbs of traditional graham crackers.
  • Butter—Helps bind the crust together while adding richness. Opt for unsalted butter to control the sodium level.
  • Erythritol or monk fruit sweetener—A keto-friendly sweetener that keeps the pie low in sugar while delivering just the right amount of sweetness.
  • Cream cheese—Adds structure and creaminess to the filling, ensuring a smooth, velvety consistency.
  • Heavy whipping cream—Whipped to soft peaks, it lightens the filling and gives the pie its airy texture.
  • Key lime juice—The star of the show! Freshly squeezed is best for that vibrant, authentic flavor. If key limes are hard to find, regular lime juice works too.
  • Lime zest—Enhances the citrus aroma and adds a pop of freshness to every bite.
  • Gelatin or xanthan gum—Helps stabilize the filling, ensuring it sets perfectly without becoming too dense.

How to Make Low Carb Key Lime Pie

Now, let’s walk through the step-by-step process of creating this dreamy dessert. Follow these instructions for foolproof results every time.

Step 1: Prepare the Crust

Start by making the crust. In a medium bowl, combine almond flour, melted butter, and your choice of low carb sweetener. Mix until the ingredients resemble wet sand. Press this mixture firmly into the bottom and up the sides of a 9-inch pie dish. Use the back of a spoon or a flat-bottomed glass to smooth it out evenly. Place the crust in the freezer for about 15 minutes to set while you prepare the filling.

Step 2: Make the Filling

In a large mixing bowl, beat the cream cheese until smooth and creamy. Add the sweetener, lime juice, and lime zest, blending until fully incorporated. In a separate bowl, whip the heavy cream until soft peaks form. Gently fold the whipped cream into the cream cheese mixture, being careful not to deflate the airiness. If using gelatin or xanthan gum, sprinkle it in now and mix well to avoid clumps.

Step 3: Assemble the Pie

Retrieve the crust from the freezer and pour the filling into it. Use a spatula to spread it evenly, ensuring it reaches all edges. Tap the pie dish lightly on the counter to remove any air bubbles.

Step 4: Chill and Set

Place the pie in the refrigerator for at least 4 hours, though overnight is ideal for the best texture. The filling will firm up, making it easy to slice when serving.

Step 5: Garnish and Serve

Before serving, garnish with additional lime zest or a dollop of whipped cream if desired. Slice with a sharp knife dipped in warm water for clean edges.

Pro Tips for the Best Results

Want to take your low carb key lime pie to the next level? Here are some expert-approved tips:

  • Use fresh lime juice—Bottled lime juice can taste flat compared to freshly squeezed. The extra effort is worth it.
  • Chill your mixing bowl—For the fluffiest whipped cream, place your bowl and beaters in the freezer for 10 minutes before whipping.
  • Toast the almond flour—For a deeper flavor, lightly toast the almond flour in a dry skillet before making the crust.
  • Add a pinch of salt—A tiny amount of salt in the crust enhances the overall flavor profile.
  • Let it set properly—Resist the urge to cut into the pie too soon. A fully chilled pie holds its shape beautifully.

Variations and Substitutions

This recipe is wonderfully adaptable. Here are some ways to customize it:

  • Coconut crust—Swap almond flour for unsweetened shredded coconut for a tropical twist.
  • Dairy-free option—Use coconut cream instead of heavy whipping cream and a dairy-free cream cheese alternative.
  • Lemon variation—Replace key lime juice with lemon juice for a different citrus profile.
  • Chocolate drizzle—Melt sugar-free chocolate and drizzle over the top for an elegant finish.
  • Berry topping—Serve with fresh raspberries or strawberries for added color and flavor.

What to Serve With It

This low carb key lime pie shines on its own, but pairing it with complementary flavors can elevate the experience. Consider these serving ideas:

  • A cup of hot herbal tea or black coffee balances the pie’s sweetness.
  • Fresh mint leaves add a refreshing contrast when used as a garnish.
  • A scoop of sugar-free vanilla ice cream creates a delightful contrast in textures.
  • For a brunch spread, serve alongside a fruit salad with low carb berries.

How to Store and Reheat

Proper storage ensures your pie stays fresh and delicious:

  • Refrigeration—Cover the pie with plastic wrap or store in an airtight container for up to 5 days.
  • Freezing—Wrap individual slices tightly in plastic and freeze for up to 2 months. Thaw in the fridge before serving.
  • Reheating—Not necessary, but if the crust softens, a quick 5-minute bake at 350°F can restore its crispness.

Frequently Asked Questions (FAQs)

Here are answers to some common questions about this recipe:

Can I use regular limes instead of key limes?

Absolutely. While key limes have a distinct flavor, regular limes work well and are more readily available.

Is this pie keto-friendly?

Yes, when made with the recommended ingredients, this pie fits perfectly into a keto diet.

Can I make this pie without a crust?

Certainly. Simply pour the filling into individual ramekins for a crustless version.

Why is my filling not setting?

This could be due to insufficient chilling time or not enough stabilizer. Ensure you refrigerate for at least 4 hours and use gelatin or xanthan gum as directed.

Can I use a different sweetener?

Yes, any granulated low carb sweetener like stevia or allulose can be substituted in equal amounts.

Final Thoughts

This low carb key lime pie is proof that you don’t have to sacrifice flavor for health-conscious choices. With its creamy filling, buttery crust, and vibrant citrus notes, it’s a dessert that satisfies cravings while keeping carbs in check. Whether you’re new to low carb baking or a seasoned pro, this recipe is a keeper. So go ahead—whip it up, share it with loved ones, and savor every bite. After all, good food is meant to be enjoyed, and this pie is no exception.

Print
clock clock iconcutlery cutlery iconflag flag iconfolder folder iconinstagram instagram iconpinterest pinterest iconfacebook facebook iconprint print iconsquares squares iconheart heart iconheart solid heart solid icon

Low Carb Key Lime Pie

  • Author: Healthy Dessert Lover

Description

A creamy and tangy low-carb key lime pie with a buttery almond flour crust. Perfect for those watching their sugar intake but still craving a refreshing dessert.


Ingredients

Scale

For the Crust:

  • For the crust:
  • 1 1/2 cups almond flour
  • 1/4 cup powdered erythritol
  • 1/4 cup melted butter
  • 1/2 teaspoon vanilla extract
  • For the filling:
  • 1 cup fresh key lime juice (about 1520 key limes)
  • 1 tablespoon key lime zest
  • 4 large egg yolks
  • 1/2 cup powdered erythritol
  • 1/2 cup heavy cream
  • 1/2 cup sour cream
  • 1 teaspoon vanilla extract
  • 1/4 teaspoon salt
  • For garnish (optional):
  • Whipped cream
  • Lime slices

Instructions

1. Prepare the Crust:

  1. Preheat oven to 350°F (175°C).
  2. Make the crust: In a bowl, mix almond flour, erythritol, melted butter, and vanilla extract until combined.
  3. Press the mixture firmly into a 9-inch pie dish, covering the bottom and sides evenly.
  4. Bake the crust for 10-12 minutes until lightly golden. Remove and let cool.
  5. Make the filling: In a large bowl, whisk together key lime juice, zest, egg yolks, erythritol, heavy cream, sour cream, vanilla, and salt until smooth.
  6. Pour the filling into the cooled crust.
  7. Bake for 15-20 minutes until the center is set but slightly jiggly.
  8. Let cool completely, then refrigerate for at least 4 hours or overnight.
  9. Garnish with whipped cream and lime slices before serving (optional).

Notes

For a dairy-free version, substitute butter with coconut oil and heavy cream/sour cream with coconut cream. Store leftovers in the fridge for up to 5 days.

No Oatmeal! Strawberry Cheesecake Bites

No Oatmeal! Strawberry Cheesecake Bites

If you’re looking for a dessert that’s creamy, fruity, and bite-sized without the heaviness of traditional cheesecake, these No Oatmeal! Strawberry Cheesecake Bites are your answer. Perfect for parties, afternoon tea, or a sweet treat after dinner, these little delights combine the richness of cheesecake with the freshness of strawberries—all without a single oat in sight. Whether you’re avoiding oatmeal or simply craving something different, this recipe is a must-try.

Why You’ll Love This Recipe

There are countless reasons to fall in love with these strawberry cheesecake bites, but here are just a few:

  • No-Bake Convenience: Skip the oven and avoid the hassle of baking. These bites come together quickly with minimal effort.
  • Perfect Portion Control: Indulge in a single bite or a few without the guilt of a full slice of cheesecake.
  • Vibrant Flavor: The combination of tangy cream cheese and sweet strawberries creates a balanced, refreshing taste.
  • Great for Entertaining: These bites look elegant on a dessert platter and are always a hit at gatherings.
  • Customizable: Swap strawberries for other fruits or adjust sweetness to suit your preference.

Ingredients Breakdown

Understanding each ingredient helps you appreciate how they come together to create these irresistible bites.

  • Graham Cracker Crumbs: The base of these bites provides a buttery, slightly sweet crunch. If you prefer a gluten-free option, almond flour or gluten-free crackers work well.
  • Cream Cheese: The star of the show, cream cheese gives these bites their signature rich and creamy texture. Use full-fat for the best results.
  • Powdered Sugar: Dissolves easily into the filling, ensuring a smooth consistency without graininess.
  • Vanilla Extract: Enhances the overall flavor with its warm, aromatic notes.
  • Fresh Strawberries: Brings a juicy, natural sweetness and a pop of color. You can also use strawberry preserves for extra intensity.
  • Heavy Cream: Whipped to soft peaks, it lightens the filling and adds a fluffy texture.

How to Make No Oatmeal! Strawberry Cheesecake Bites

Follow these simple steps to create your own batch of delicious strawberry cheesecake bites.

  1. Prepare the Crust: Mix graham cracker crumbs with melted butter until the mixture resembles wet sand. Press a small spoonful into the bottom of each mini muffin liner or silicone mold.
  2. Make the Filling: In a large bowl, beat softened cream cheese until smooth. Add powdered sugar and vanilla, mixing until fully incorporated.
  3. Whip the Cream: In a separate bowl, whip heavy cream to soft peaks. Gently fold the whipped cream into the cream cheese mixture to keep it light and airy.
  4. Layer the Strawberries: Dice fresh strawberries into small pieces and fold half into the filling. Reserve the rest for topping.
  5. Assemble: Spoon the filling over the crust in each liner. Top with remaining strawberry pieces.
  6. Chill: Refrigerate for at least 2 hours (or overnight) to let the bites set.

Pro Tips for the Best Results

  • For a smoother filling, ensure the cream cheese is at room temperature before mixing.
  • If your strawberries are too tart, toss them with a teaspoon of sugar before adding them to the filling.
  • Use a piping bag to neatly fill the molds for a polished presentation.
  • For a firmer bite, freeze them for 30 minutes before serving.

Variations and Substitutions

This recipe is wonderfully adaptable. Here are some tasty twists:

  • Different Fruits: Swap strawberries for raspberries, blueberries, or even mango for a tropical twist.
  • Chocolate Lovers: Add mini chocolate chips to the filling or drizzle melted chocolate on top.
  • Nutty Crust: Replace graham crackers with crushed vanilla wafers or shortbread for a richer base.
  • Dairy-Free: Use vegan cream cheese and coconut cream instead of heavy cream.

What to Serve With It

These bites are fantastic on their own, but they also pair beautifully with:

  • A cup of hot tea or coffee for a sophisticated afternoon treat.
  • A scoop of vanilla ice cream for an indulgent dessert.
  • A drizzle of caramel or chocolate sauce for extra decadence.
  • Fresh mint leaves for a refreshing garnish.

How to Store and Reheat

These cheesecake bites are best enjoyed chilled, but here’s how to keep them fresh:

  • Refrigeration: Store in an airtight container for up to 4 days.
  • Freezing: Place them on a tray to freeze individually before transferring to a freezer-safe bag. They’ll keep for up to 2 months. Thaw in the fridge before serving.
  • Reheating: Not necessary—serve cold for the best texture.

Frequently Asked Questions (FAQs)

Can I use frozen strawberries?
Yes, but thaw and drain them well to avoid excess moisture in the filling.

Can I make these without a muffin tin?
Absolutely! Use silicone molds or simply shape them into small balls and roll in graham cracker crumbs.

How far in advance can I prepare these?
They hold up well for 2-3 days in the fridge, making them perfect for meal prep.

Can I use Greek yogurt instead of cream cheese?
While it will change the texture, Greek yogurt can be used for a lighter, tangier version.

Why no oatmeal in this recipe?
This recipe skips oatmeal to focus on a classic graham cracker crust, but feel free to experiment with oats if desired.

Final Thoughts

These No Oatmeal! Strawberry Cheesecake Bites are proof that great things come in small packages. Whether you’re hosting a party or just treating yourself, they’re a delightful way to enjoy the flavors of cheesecake without the fuss. The creamy filling, buttery crust, and juicy strawberries make every bite irresistible. Give them a try—I promise they’ll become a staple in your dessert rotation.

Print
clock clock iconcutlery cutlery iconflag flag iconfolder folder iconinstagram instagram iconpinterest pinterest iconfacebook facebook iconprint print iconsquares squares iconheart heart iconheart solid heart solid icon

No Oatmeal! Strawberry Cheesecake Bites

  • Author: Dessert Lover

Description

These delightful no-bake strawberry cheesecake bites are a perfect healthy treat with no oats involved! Creamy, fruity, and packed with protein, they make a great snack or dessert.


Ingredients

Scale

For the Crust:

  • For the crust:
  • 1 cup almond flour
  • 2 tbsp coconut oil (melted)
  • 1 tbsp maple syrup
  • 1/4 tsp vanilla extract
  • Pinch of salt
  • For the cheesecake filling:
  • 1 cup cashews (soaked overnight)
  • 1/2 cup Greek yogurt
  • 3 tbsp honey or maple syrup
  • 1 tsp vanilla extract
  • 1/4 cup coconut cream
  • 1 tbsp lemon juice
  • For the strawberry topping:
  • 1 cup fresh strawberries (chopped)
  • 1 tbsp chia seeds
  • 1 tsp honey (optional)

Instructions

1. Prepare the Crust:

  1. 1. Prepare the crust: In a bowl, mix almond flour, melted coconut oil, maple syrup, vanilla extract, and salt until well combined.
  2. 2. Press the mixture firmly into a lined mini muffin tin or silicone molds to form small crusts. Freeze for 15 minutes.
  3. 3. Make the filling: Drain soaked cashews and blend with Greek yogurt, honey, vanilla, coconut cream, and lemon juice until smooth and creamy.
  4. 4. Spoon the cheesecake filling over the chilled crusts, smoothing the tops. Freeze for another 30 minutes.
  5. 5. Prepare the strawberry topping: Mix chopped strawberries, chia seeds, and honey (if using) in a small bowl. Let sit for 10 minutes to thicken.
  6. 6. Top each cheesecake bite with a spoonful of strawberry mixture.
  7. 7. Chill in the refrigerator for at least 1 hour before serving. Store leftovers in the fridge.

Notes

For a nut-free version, substitute almond flour with sunflower seed flour and cashews with sunflower seeds (soaked). Adjust sweetness to taste.