Delicious Baked Turkey Meatballs in a Lemon Garlic Butter Sauce

Baked Turkey Meatballs with Lemon Garlic Butter Sauce: A Delicious and Healthy Meal

⚖️
Difficulty
Easy

⏲️
Prep Time
15 mins

🕒
Cook Time
25 mins

⏱️
Total Time
40 mins

🍽️
Servings
4

Satisfy your taste buds with these delicious and healthy baked turkey meatballs in lemon garlic butter sauce. Perfect for a weeknight dinner or a special occasion, this dish combines succulent turkey with an aromatic, tangy sauce that you won’t be able to resist. The fresh flavors of garlic and lemon blend seamlessly with the richness of butter to create a sauce that enhances the mild taste of the turkey meatballs perfectly.

Freshly baked turkey meatballs offer not only a healthier alternative to their beef counterpart but also bring a light and juicy texture to your meal. The tangy lemon garlic butter sauce is the hero of this recipe, infusing each bite with a burst of flavor that lingers on the palate. Whether served as a main course or appetizer, these meatballs are sure to impress your family and friends.

Quick Recipe Highlights

  • Flavor Profile: The recipe offers a succulent blend of savory turkey meatballs with a bright and zesty lemon garlic butter sauce.
  • Texture: These turkey meatballs are tender and juicy, enveloped in a smooth, velvety sauce.
  • Aroma: The aromatic notes of garlic and lemon waft through the air, inviting anticipation with each step of the recipe.
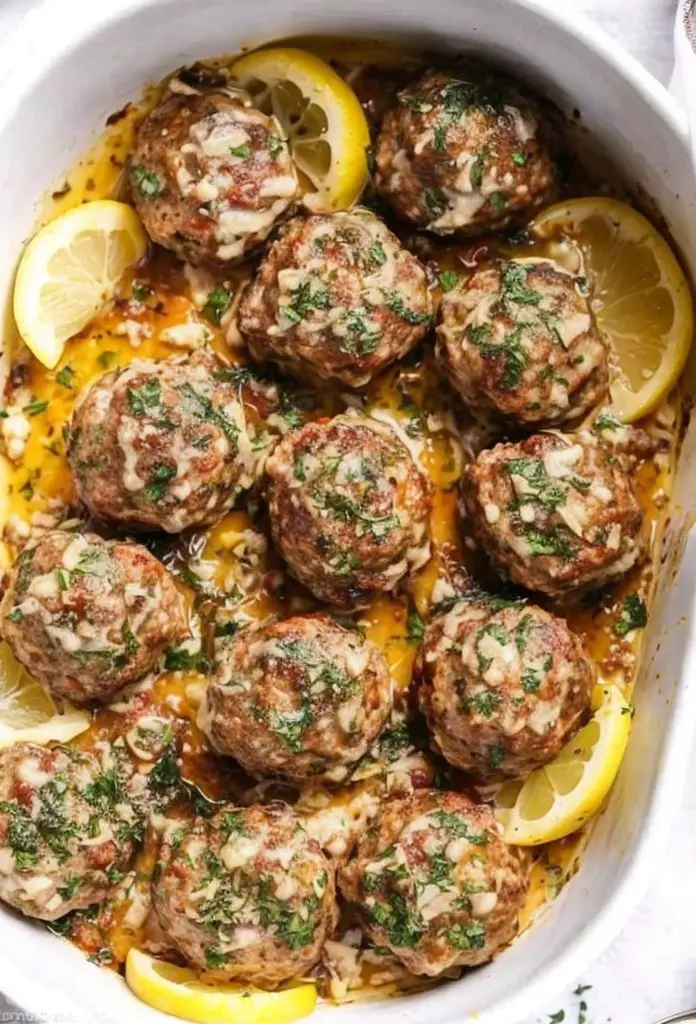
  • Visual Appeal: The golden-brown meatballs topped with a shimmering butter sauce make for an appetizing presentation.
  • Skill Level Needed: This recipe is straightforward, requiring elementary cooking skills suitable for beginners.
  • Special Equipment: No specialized equipment is needed beyond a baking tray and a mixing bowl.

Recipe Overview

  • Difficulty Level: This recipe is designed for ease, involving basic cooking methods and straightforward steps to follow.
  • Category: It falls under the comfort food category, perfect for dinner or an appetizer.
  • Cuisine: With roots in various international kitchens, this recipe has a versatile culinary appeal, embodying flavors from Mediterranean cuisine.
  • Cost: Budget-friendly, with primary ingredients like ground turkey and standard pantry items keeping costs low.
  • Season: Ideal for all seasons but especially delightful in spring and summer due to the refreshing lemony undertones.
  • Occasion: Suitable for family dinners, potlucks, or as appetizers for gatherings and celebrations.

Why You’ll Love This Recipe

Indulge in the taste and texture that make these baked turkey meatballs a household favorite. The tender consistency of ground turkey coupled with the creamy lemon garlic butter sauce delivers satisfaction in every bite. This dish’s taste appeal lies in the umami richness of the sauce offset by the bright notes of citrus, resulting in a balanced and delectable meal that keeps you coming back for more.

Convenience comes as a major advantage of this recipe. With a total time under an hour, this dish makes a quick and easy dinner option. The use of the oven eliminates the need for constant monitoring, allowing you to focus on other tasks while the meatballs bake to perfection.

Health-conscious individuals will appreciate the nutritional benefits. Ground turkey is a lean, protein-rich alternative to other meats, while the moderate use of butter finds balance through the addition of lemon juice, offering vitamin C and refreshing flavor.

Turkey meatballs in lemon garlic butter sauce lend themselves well to entertaining. They can be served in smaller portions for hors d’oeuvres or in larger quantities as a main meal, making them versatile for various social settings. Their visual appeal is enhanced by the bright, shiny glaze of the sauce, impressing guests well beyond just taste.

Cost-effectiveness and accessibility also play a role in why this recipe is a must-try. Using common ingredients found in most households, it keeps shopping minimal and expenses in check, while delivering a gourmet feel without the hefty price tag associated with dining out.

Historical Background and Cultural Significance

The turkey meatball’s origin story ties into the broader history of meatballs, which have found a place in many cultures worldwide. While Italian and Swedish meatballs often steal the spotlight, incorporating turkey into this classic dish is a nod to healthier, contemporary cooking trends.

Culturally, the use of turkey signifies a common choice in North America, especially in the United States, where it is a staple during festive occasions like Thanksgiving. This recipe showcases another way to enjoy the healthiness of turkey beyond traditional roasted preparations.

The evolution of the turkey meatball has been influenced by the increased focus on low-fat diets and the desire for flavorful, satisfying meals that don’t compromise nutritional goals. The addition of lemon garlic butter sauce adds a modern twist to traditional preparations by infusing it with Mediterranean flavors.

Regional variations have seen spices and herbs unique to different areas incorporated into the basic turkey meatball recipe. Whether it’s Italian herbs, Middle Eastern spices, or Asian soy sauce, these meatballs provide a canvas for combining global tastes with local favorites.

Ingredient Deep Dive

Ground turkey, the star ingredient, is leaner than most ground meats and is praised for its low fat content. Its history in American cuisine is rich, especially in substitutions for red meat. When selecting ground turkey, opt for fresh rather than frozen, and choose those with lower fat content for better flavor and cooking results. Store turkey in airtight packaging in the refrigerator and consume within two days or freeze directly if not used immediately. A great substitute for ground turkey can be ground chicken or lean beef, keeping texture and flavor close to the intended profile.

Lemon juice acts as a natural tenderizer and flavor enhancer, bringing brightness and acidity that cut through the richness of the butter. Lemons originated in Asia and have traveled well, becoming key ingredients in cuisines worldwide. When buying lemons, choose those that feel heavy for their size, indicating juiciness. Store them in the refrigerator crisper drawer for best preservation. Lime juice may substitute in a pinch, although it offers a slightly more aromatic sweetness.

Common Mistakes to Avoid

  • Over-mixing the meatball blend can lead to dense meatballs, so combine ingredients until just mixed.
  • Skipping the cooling phase for cooked turkey can create dry meatballs as juices are not retained.
  • Using frozen turkey without allowing proper thawing time can lead to uneven cooking.
  • Not properly seasoning the meat can result in bland meatballs, so ensure to add seasonings generously.
  • Baking at incorrect temperatures can lead to undercooked or overcooked turkey meatballs. Keep an eye on them during cooking.
  • Forgetting to taste and adjust the seasoning of the sauce can miss out on balanced flavors.
  • Overcooking the meatballs leads to dryness; use a kitchen timer to maintain accurate cooking times.
  • Adding the sauce too early can cause it to separate or become overly reduced; introduce it towards the end of cooking.
  • Failing to whisk butter into the sauce properly may result in an oily rather than creamy consistency.
  • Neglecting to rest the meatballs before serving can cause a spill of juices essential for optimal taste.

Essential Techniques

Mixing the meatball ingredients requires a light touch to maintain tender texture—a critical technique for success. Over-mixing can compact the proteins, making meatballs tough. Use your hands gently or a spatula until the ingredients just come together. Visual cues include a uniform mixture without visible streaks of egg or breadcrumbs, indicating readiness for forming meatballs.

Whisking the butter into the lemon garlic sauce is another crucial step. It emulsifies into a smooth finish, creating a glossy, rich sauce. Common pitfalls to avoid include adding butter in one go, which can split the sauce. Introduce it gradually, whisking continuously over low heat to prevent separation. A successful technique shows a thick and cohesive sauce without any oily separation on the surface.

Pro Tips for Perfect Baked Turkey Meatballs with Lemon Garlic Butter Sauce

1. Enhance flavors by marinating turkey in spices and herbs ahead of time, ensuring a deeply rooted taste in every bite.
2. Keep meatballs uniformly sized using a scoop to ensure even cooking and avoid underdone centers.
3. Add a pinch of sugar to balance citrus acidity and elevate the overall sauce profile.
4. Infuse the breadcrumb mixture with grated parmesan for an extra depth of umami.
5. For a subtle kick, incorporate red pepper flakes or cayenne into the sauce.
6. Use fresh herbs like basil or parsley to garnish, providing a vibrant pop of flavor and color.

Variations and Adaptations

These meatballs lend themselves beautifully to regional variations, with Italian-inspired versions utilizing oregano and basil, while a twist of cumin and coriander brings out Middle Eastern influences. Seasonal adaptations can be achieved by switching fresh herbs with dry ones for a warmer winter alternative. Dietary modifications are feasible with gluten-free breadcrumbs or a dairy-free sauce using olive oil in place of butter while maintaining most of the intended taste and texture. Scale the flavors by adding smoky paprika or zest from other citrus fruits like lime or orange for exciting variations, while texture can be modified with the addition of finely chopped vegetables such as zucchini to the meatball mixture for more moisture. Presentation alternatives include serving the meatballs over a bed of rice, in a sandwich, or paired with roasted vegetables for a complete meal.

Serving and Presentation Guide

For exceptional plating, place the meatballs neatly in a shallow dish, pooling the lemon garlic butter sauce around them to highlight the glossy glaze against the tender meat. Sprinkle fresh herbs like parsley or chives as a garnish, adding a splash of color and freshness. Traditional accompaniments include rustic bread for dipping, or a light arugula and Parmesan salad to offset the richness of the sauce. Modern serving suggestions encourage individual portions in bowls paired with zoodles or standout appetizers with toothpicks in each meatball for easy serving. Maintain the optimal serving temperature with warmed plates and portion appropriately to prevent overcrowding, preserving the dish’s elegant look and texture.

Wine and Beverage Pairing

Pairing baked turkey meatballs with wine elevates the dining experience. A crisp Sauvignon Blanc or a light Pinot Grigio complements the lemony sauce, while a medium-bodied red like Pinot Noir provides enough depth without overwhelming the dish. Non-alcoholic alternatives include herbal iced tea or a lemon-infused sparkling water to keep flavors aligned. Keep beverages chilled and serve in appropriate glassware to enhance the overall visual and sensory experience. An unsweetened aromatic coffee can balance richness, providing a lingering palate cleanse to pair seamlessly with this flavorful dish.

Storage and Shelf Life

To store leftovers or prep in advance, place the cooled meatballs in an airtight glass or BPA-free plastic container, separating layers with parchment paper to avoid sticking. Refrigerate within two hours of cooking to maintain freshness for up to three days. For freezing, place the meatballs on a baking sheet to freeze individually before transferring to airtight bags, keeping them for up to two months. Check for spoilage through changes in appearance or smell before reheating. Reheat gently in the oven at 180°C (350°F) to preserve moisture without drying, and avoid using a microwave to prevent rubbery textures.

Make Ahead Strategies

Maximize convenience by preparing elements of this recipe in advance. Prepare turkey meatballs a day ahead and store uncooked in the refrigerator or fully bake them prior, cooling before refrigerating. The lemon garlic butter sauce can also be made early; just reheat gently while whisking before serving. Store each component separately, combining them fresh during meal assembly for ultimate texture and taste. When reheating, careful monitoring preserves quality, while finishing with freshly squeezed lemon and herbs ensures vibrant flavor and appearance.

Scaling Instructions

Scaling this recipe for larger gatherings is simple. Doubling or tripling the ingredients naturally adjusts cooking times slightly, necessitating the use of multiple baking trays or consecutive batches. Ensure adequate spacing if baking simultaneously to avoid steaming. Equipment adjustments may include larger mixing bowls or replacement of smaller utensils with those fit for larger quantities. Storage needs increase, so clear refrigerator space for cooked meatballs and sauces. Timing modifications involve staggered entries into the oven to manage doneness accurately. Halving the recipe similarly decreases effort, maintaining all ratios perfectly for an intimate dining occasion while keeping consistent quality and taste.

Nutritional Deep Dive

This recipe offers a macro breakdown with high protein content from turkey and moderate fats from butter, while restrictive in carbohydrate intake, aligning well with low-carb diets. Micronutrients like vitamin C from lemons and essential minerals found in garlic add to its healthful profile. Its portion analysis supports weight management by providing hearty servings that satisfy hunger without excessive calorie intake. Health benefits extend with lean proteins promoting muscle maintenance and metabolic function, supported by essential amino acids from turkey. Dietary considerations encourage mindful consumption, with a focus on balanced meal components and controlled portion sizes.

Dietary Adaptations

For gluten-free needs, replace regular breadcrumbs with a GF-certified variety or almond meal. Dairy-free swaps involve substituting butter with olive or avocado oil in the sauce, optimizing flavor. A vegan adaptation calls for a plant-based protein option, such as lentil or chickpea mixtures, paired with vegetable broth for the sauce base. Low-carb goals align with minimizing breadcrumb quantities, emphasizing turkey’s natural content. For keto dieters, maintain healthy fat levels with increased butter use while omitting any sugar. Paleo adherents thrive from using clean-seasoned turkey, whole food ingredients, and fresh herbs. Low-FODMAP adjustments can include lactose-free butter and avoiding garlic or onion powder replacements, keeping the focus on gut-friendly meal renderings. Adaptations foster inclusivity and centered eating, adhering to numerous dietary needs seamlessly and deliciously.

Troubleshooting Guide

Address texture issues by evaluating meat mixtures before cooking; overly dense meatballs can originate from over-mixing, requiring adjustments in handling. Flavor balance might necessitate more seasonings, with tasting key to identifying missing elements. Temperature problems should involve checking oven accuracy, using an oven thermometer to enhance control. Equipment challenges include maintaining sharp knives and non-stick baking surfaces for ease of preparation and cooking. Ingredient substitutions should adapt by leveraging similar textures and tastes, such as light meats or veggie bases. Timing concerns refer to ensuring meatballs are adequately, yet not overly, baked, testing via thermometer for internal temperature. Addressing these areas ensures successful outcomes every time, maintaining delicious results consistently.

Recipe Success Stories

Enthusiastic community feedback has highlighted the universal appreciation of this recipe’s flavors and ease of preparation. Variations like adding Parmesan or using chicken have led to successful reinterpretations, expanding its culinary landscape. Reader suggestions involve garnishing with toasted breadcrumbs for added texture, or incorporating zest blends for intricate depths. Culinary photography tips list creating structured shots by showcasing vibrant garnishes creatively. This dish’s adaptability forms the gateway to culinary exploration, allowing personal touches and inspiration from community experiences to shape its journey further.

Frequently Asked Questions

  • Can I substitute turkey with chicken? Absolutely! Ground chicken offers a similar, slightly superior moisture retention when cooked.
  • How do I prevent meatball dryness? Avoid over-cooking and rest for five minutes to reabsorb juices before serving.
  • What makes the sauce separate? Ensure butter is whisked gradually and consistently to emulsify well with other liquids.
  • Are gluten-free breadcrumbs recommended? Yes, GF breadcrumbs are excellent; almond meal is an alternative for added crustiness.
  • How long do leftovers last? Refrigerated leftovers stay fresh for up to three days post preparation.
  • Can lemon be substituted with lime? Lime provides a unique but suitable twist, altering the profile slightly.
  • Is there a vegetarian alternative? Swap turkey with lentils or chickpea formulations for non-meat adaptations.
  • Where can I find quality turkey? Source via trusted butchers or reputable grocery chains, ensuring premium purchase value.
  • Will using unsalted butter change results? Skip extra salt if using salted butter, but adjust taste accordingly.
  • What’s the best serving size? Cater to main course portions or appetizer offerings, ideal for any social occasion.

Additional Resources

Discover additional recipes complementing this meal, such as side dishes like garlic parmesan mashed potatoes or vibrant green salads balancing hearty meatball brightness. Access technique guides illustrating effective meatball forming and sauce whisking, creating digital learning portals. Expand ingredient understanding with informational pieces on turkey’s nutrition, lemon’s benefits, and butter’s emulsification properties, aiding recipe mastery. Equipment recommendations facilitate ease of preparation—invest in quality tools facilitating better bite enjoyment through attentive kitchen management. Seasonal variations drive creativity year-round, inspired project directions branching from this foundational recipe. Rich details ignite culinary drafts, evolving traditional foundations into boldly spectacular presentations.

Join the Conversation

Engage by sharing personalized outcomes of baked turkey meatballs on social media, tagging thematic content experiences. Offer internet advice capturing completed recipe beauty through creative photography—provide angles incorporating each dish’s allure. Submit detailed reviews reflecting journey and immersion in the recipe, inducing community curiosity. Enable further adaptations driven by reader comments encouraging change acceptance. Capture the heart of baking experiences and connection opportunities by navigating recipe enhancements collaboratively. Smile in each savory success participant nuance celebrated through digital bonds.

The Recipe

Baked Turkey Meatballs with Lemon Garlic Butter Sauce

Serves: 4

Prep Time: 15 mins

Cook Time: 25 mins

Total Time: 40 mins

Kitchen Equipment Needed

  • Baking tray
  • Mixing bowl
  • Oven
  • Saucepan
  • Whisk
  • Measuring cups and spoons

Ingredients

  • 1 lb ground turkey
  • 1 egg
  • ½ cup breadcrumbs
  • 2 cloves garlic, minced
  • 1 tablespoon fresh parsley, chopped
  • 1 teaspoon salt
  • ½ teaspoon black pepper
  • 2 tablespoons butter
  • Juice of 1 lemon
  • ¼ cup chicken broth

Directions

  1. Preheat oven to 400°F (200°C). Line a baking tray with parchment paper.
  2. Combine ground turkey, egg, breadcrumbs, garlic, parsley, salt, and pepper in a mixing bowl.
  3. Shape the mixture into small meatballs and place on the prepared tray.
  4. Bake in the oven for 20-25 minutes, or until cooked through.
  5. While meatballs are baking, melt butter in a saucepan over medium heat. Add lemon juice and chicken broth, whisking until combined.
  6. Simmer for several minutes until slightly thickened. Set aside.
  7. Remove meatballs from oven and drizzle with lemon garlic butter sauce before serving.

Recipe Notes

  • For an extra herbaceous touch, add more fresh parsley to garnish.
  • Adjust lemon juice to taste for a less or more intense citrus flavor.
  • Substitute ground chicken if preferred.

Irresistible Rotel Cream Cheese Sausage Balls for Any Occasion

Rotel Cream Cheese Sausage Balls: A Spicy Twist on a Classic Appetizer

⚖️
Difficulty
Easy

⏲️
Prep Time
15 mins

🕒
Cook Time
25 mins

⏱️
Total Time
40 mins

🍽️
Servings
24 balls

Kick your appetizer game up a notch with these irresistible Rotel Cream Cheese Sausage Balls. Combining the creaminess of cheese, the savory depth of sausage, and the fiery zest from Rotel tomatoes, this recipe will have your taste buds dancing with delight. Perfect for any gathering, these sausage balls boast a flavor that will keep guests coming back for more. With their tantalizing aroma and satisfying texture, they are not only a crowd-pleaser but also easy to whip up.

Quick Recipe Highlights

  • Flavor Profile: Savory with a hint of spice from Rotel tomatoes, balanced by the creaminess of cheese and robust sausage notes.
  • Texture: These sausage balls are tender on the inside with a slight crispy exterior, making them incredibly satisfying to bite into.
  • Aroma: A mouthwatering blend of spiced sausage and cheesy goodness fills the kitchen, enticing everyone nearby.
  • Visual Appeal: Their golden-brown exterior and hints of red from the Rotel make these sausage balls visually appetizing.
  • Skill Level Needed: This recipe is easy to prepare, requiring just basic mixing and baking skills, making it accessible to novice and experienced cooks alike.
  • Special Equipment: Only a baking sheet and mixing bowl are needed, keeping preparation simple and convenient.

Recipe Overview

  • Difficulty Level: Rated as easy, this recipe involves straightforward steps that even a beginner can master, ensuring success with minimal effort.
  • Category: Perfect as an appetizer or snack, these sausage balls fit seamlessly into any casual dining occasion.
  • Cuisine: This dish blends classic American appetizer traditions with a Tex-Mex influence, courtesy of the Rotel addition.
  • Cost: Affordable and budget-friendly, the recipe uses readily available ingredients, keeping your grocery bill minimal.
  • Season: Enjoy these sausage balls year-round, but they truly shine during game days and holiday gatherings when hearty snacks are a must.
  • Occasion: Ideal for parties, potlucks, or as a game-day snack, they provide a flavorful bite-sized treat for any event.

Why You’ll Love This Recipe


The taste and texture of these Rotel Cream Cheese Sausage Balls are unique and addictive. The combination of spicy, savory, and creamy elements ensures every bite is full of flavor. These sausage balls are incredibly convenient, requiring minimal prep and hands-on time, making them perfect for busy days. Packed with protein and satisfying flavors, they offer nutritional balance as an appetizer or snack. They are perfect for social gatherings, simplifying preparation while delivering gourmet-level taste. Cost-effective ingredients keep this dish budget-friendly, without compromising taste or quality.

Historical Background and Cultural Significance


The sausage ball has humble beginnings and is a staple at Southern gatherings. Traditionally composed of sausage and biscuit mix, this version incorporates Rotel tomatoes and cream cheese, adding a modern twist. These ingredients infuse the dish with a Tex-Mex flair, paying homage to regional culinary mashups common in American cooking. Over time, sausage balls have transcended their Southern roots to become a favorite across the U.S., loved for their simplicity and satisfying nature. Each region brings its twist, be it through spices or textures, adding unique local flavor to a cherished classic.

Ingredient Deep Dive


**Sausage**: A key element in these sausage balls, sausage contributes richness, umami, and depth. Opt for quality ground sausage to ensure flavorful results. Stored in the fridge, sausage should be consumed soon after purchase for best freshness. In need of a substitute, consider ground turkey with seasoning to maintain flavor integrity.

**Rotel Tomatoes**: These tomatoes feature diced chilies, offering both sweetness and heat. They bring Mexican influence into American dishes and are recognized for their versatility. Store unopened cans in a cool place; once opened, refrigerate and consume within a few days. For alternatives, use diced tomatoes with separately added green chilies.

Common Mistakes to Avoid

  • Overmixing: Can result in a dense texture, so mix just until combined.
  • Skipping draining Rotel: Excess moisture affects texture, so ensure thorough draining.
  • Using low-fat cream cheese: Can alter texture; aim for full-fat versions ensuring creaminess.
  • Underbaking: Negatively impacts flavor and safety. Bake until golden brown and set.
  • Preheating oven: Essential for ensuring even cooking and prevent underbaking.
  • Size consistency: Maintain uniform size for even cooking.
  • Baking pan crowding: Avoid to ensure proper airflow during cooking.
  • Ingredient substitutions: Changing ingredients ad-hoc can affect flavor balance.

Essential Techniques


Mixing Technique: The key to tender sausage balls lies in gentle mixing. Overworking the mixture can lead to dense, compact balls. To master this technique, gently fold the ingredients together until just combined. Visual cues of success include a well-incorporated, yet cohesive mixture that is easy to shape.

Pro Tips for Perfect Rotel Cream Cheese Sausage Balls


For best results, chill the mixture briefly before shaping the balls to prevent sticking and facilitate easier handling. If you’re short on time, freezing the balls for a few minutes before baking helps them hold their shape. Use an ice cream scoop for uniformly sized sausage balls, ensuring even cooking. Ensure Rotel tomatoes are thoroughly drained to avoid excess moisture which impacts texture. Balance the sausage’s saltiness by using the right amount of cheese to complement flavors without overpowering.

Variations and Adaptations


Regional Variations: Incorporate local spices such as cayenne or jalapeños for a spicier kick. For a seasonal twist, consider pumpkin spice as an autumnal flavor enhancement. Adapt to dietary needs by using gluten-free flour mixes.

Serving and Presentation Guide


For a classic presentation, serve these sausage balls on a platter garnished with fresh herbs. Offer dipping sauces such as spicy mayo or ranch to enhance flavor profiles. Temperature-wise, they maintain their appeal whether served warm or at room temperature, ensuring they remain a crowd favorite at any event.

Wine and Beverage Pairing


Pair these flavorful morsels with a crisp Chardonnay or a lighter Pinot Noir, which complements their savory profile. For non-alcoholic options, consider citrus-infused iced tea or a lemony mocktail. Balance the dish’s spiciness with chilled drinks to refresh the palate.

Storage and Shelf Life


Once prepared, store the sausage balls in an airtight container in the refrigerator for up to 3 days. For longer shelf life, freeze them, ensuring proper wrapping to avoid freezer burn. Proper reheating in an oven ensures they retain their crispness and flavor.

Make Ahead Strategies


Prepare and freeze the sausage balls before baking. Having them ready for baking saves time on event days. Plan your prep, allowing adequate thawing time if frozen, to guarantee fresh-tasting bites when serving.

Scaling Instructions


This recipe easily adapts for larger gatherings or smaller servings. Adjust seasoning proportions mildly to maintain flavor balance when altering quantities. Doubling or halving the recipe keeps the essence intact while ensuring sufficient servings.

Nutritional Deep Dive

Each serving offers a balance of macro and micronutrients. Sausage provides protein and fats, while Rotel adds a layer of vitamins from tomatoes. Mind portion sizes to manage caloric intake effectively.

Dietary Adaptations


For gluten-free options, replace flour with a suitable mix. Dairy-free versions can use vegan cheese, while keto adaptations could opt for almond flour in place of traditional flour. Customize this versatile recipe to fit various dietary needs, ensuring inclusivity at gatherings.

Troubleshooting Guide


If the mixture seems too wet, consider adding additional flour or cheese to balance moisture content. Adjust seasoning levels to tackle flavor imbalances. Ensure consistent baking temperature to avoid texture issues and ensure perfectly cooked sausage balls.

Recipe Success Stories


Our community loves this recipe for its flexibility and flavor! Many rave about their adaptations, from jalapeño versions to cheese-infused variations. Share your success stories, too, showcasing plating ideas or serving suggestions.

Frequently Asked Questions

Can I make these sausage balls ahead of time?
Yes, prepare and freeze before baking. When ready to serve, bake directly from frozen, adding a few extra minutes to the cooking time.

What’s the best way to reheat these sausage balls?
Reheat in the oven to restore their crispiness. Place them on a baking sheet and warm at 350°F for about 10 minutes.

Additional Resources


Explore related appetizer recipes for more inspiration. Our technique guides provide insights into mixing and baking to elevate your culinary skills. Dive into the world of Tex-Mex cooking, uncovering the nuances and flavors of this blend of cuisines.

Join the Conversation


Share your creations on social media using our hashtag to join the community. Engage with others by sharing your plating and adaptation ideas. Your feedback helps us refine and develop exciting new recipes.

The Recipe

Rotel Cream Cheese Sausage Balls

Serves: 24 balls

Prep Time: 15 mins

Cook Time: 25 mins

Total Time: 40 mins

Kitchen Equipment Needed

  • Mixing bowl
  • Baking sheet
  • Ice cream scoop or tablespoon
  • Parchment paper

Ingredients

  • 1 pound ground sausage
  • 8 ounces cream cheese, softened
  • 1 can (10 oz) Rotel tomatoes, drained
  • 2 cups Bisquick or similar baking mix
  • 1 cup shredded cheddar cheese

Directions

  1. Preheat your oven to 375°F (190°C) and line a baking sheet with parchment paper.
  2. In a large mixing bowl, combine the sausage, cream cheese, drained Rotel, baking mix, and shredded cheddar cheese.
  3. Mix until well combined but be careful not to overmix.
  4. Using an ice cream scoop or tablespoon, portion the mixture into balls and place them on the prepared baking sheet.
  5. Bake for 25 minutes or until the sausage balls are golden brown and cooked through.
  6. Remove from the oven and let cool slightly before serving.

Recipe Notes

  • For a spicier option, consider adding chopped jalapeños to the mixture.
  • If you prefer a milder flavor, use mild sausage instead of spicy.

The Best Ultimate Patty Melt Recipe with Delicious Secret Sauce

Ultimate Patty Melt with Secret Sauce: The Perfect Comfort Food

⚖️
Difficulty
Medium

⏲️
Prep Time
15 mins

🕒
Cook Time
20 mins

⏱️
Total Time
35 mins

🍽️
Servings
4

The Ultimate Patty Melt with Secret Sauce is a timeless classic that combines the savory goodness of a perfectly seasoned burger patty with the delightful crunch and flavor of toasted bread. Enhanced with a tantalizing secret sauce, this patty melt offers a taste explosion in every bite. Whether you’re crafting it for a family meal or a special treat for yourself, this recipe promises to tickle your taste buds with its rich, balanced flavors layered between golden-crisp bread.

With each bite, you’re greeted by the mouthwatering combination of juicy beef, gooey melted cheese, and caramelized onions. The Ultimate Patty Melt is not just a sandwich; it’s an experience of taste and texture that brings warmth and comfort. From its crispy exterior to the melt-in-your-mouth interior, this dish is about savoring the simple yet exquisite joy of classic comfort food, elevated with a creative twist.

Taking its cues from diner favorites, this patty melt does more than just satisfy hunger. It creates a sensory journey with its aromatic allure and visually pleasing presentation. The secret sauce, a pivotal element in elevating the dish, adds a layer of flavor that heightens the overall gastronomic experience. Gather around the table to enjoy this versatile dish, excellent for any casual gathering or light lunch.

Quick Recipe Highlights

  • Flavor Profile: Juicy, savory beef patty with hints of tangy secret sauce and the richness of melted cheese.
  • Texture: A delightful contrast of crispy toasted bread with the tender beef and creamy sauce.
  • Aroma: Enticing blend of seared beef, toasted bread, and sweet caramelized onions.
  • Visual Appeal: Layers of golden brown bread, melted cheese, and the vibrant secret sauce create an inviting look.
  • Skill Level Needed: Intermediate cooking skills, primarily involving pan-searing and sandwich assembly.
  • Special Equipment: Large skillet or griddle for even cooking and a spatula for flipping.

Recipe Overview

  • Difficulty Level: Though some steps involve timing and heat control, the process is straightforward with clear instructions.
  • Category: Perfect for lunch or dinner, this patty melt bridges the gap between hearty meal and quick bite.
  • Cuisine: Rooted in American diner traditions, showcasing comfort food at its best.
  • Cost: Economical, using common pantry and fridge staples to create a high-quality meal.
  • Season: Best enjoyed year-round, with relatable flavors that suit any weather or occasion.
  • Occasion: Fit for casual dining, movie nights, and cozy weekend suppers with family.

Why You’ll Love This Recipe


The Ultimate Patty Melt with Secret Sauce captures the essence of what makes comfort food so universally loved. The delightful blend of a juicy, seasoned patty, melted cheese, and a unique secret sauce creates a harmonious balance of savoriness and slight tang. Each ingredient complements the other, resulting in a scrumptious sandwich that leaves you eagerly anticipating each subsequent bite.

Convenience is a key attraction to this recipe. It’s designed for straightforward preparation, offering step-by-step guidance that ensures success even for intermediate cooks. The readily available ingredients mean you can whip up this delicacy without a last-minute dash to the store. It’s an ideal choice for busy weekdays or when you want to make something satisfying without the fuss.

Nutritional benefits come naturally with quality, wholesome ingredients. Using lean ground beef, whole-grain bread, and fresh vegetables provides nourishment alongside satisfaction. This patty melt serves as a balanced meal that you can feel good about, blending protein, carbs, and vitamins essential for a well-rounded diet.

Social gatherings become all the more enjoyable with a dish like the patty melt. Its universal appeal makes it a hit among varied palates, promoting enjoyable shared experiences. When friends and family gather, this recipe sparks happiness and satisfied smiles around the dining table, often becoming the star of backyard barbecues and casual get-togethers.

Finally, the cost-effectiveness of this recipe cannot be overstated. By using simple, cost-efficient ingredients, it allows anyone to experience restaurant-quality flavors at home without breaking the bank. The homemade aspect adds a layer of warmth and authenticity, making this patty melt not just a meal but a genuine culinary delight.

Historical Background and Cultural Significance


Originating in classic American diners, the patty melt is a vitally significant dish in the realm of satisfying sandwiches. Emerging in the mid-20th century as a variation on traditional hamburgers, it quickly gained popularity due to its rich, flavorsome layers. The interplay of savory beef, thick cheese slices, and caramelized onions tucked between pieces of toasted bread redefined on-the-go meals with gourmet flair.

Culturally, the patty melt epitomizes the American love for convenience blended with indulgence. As diners became a staple across the United States, this dish signified a shift in food culture where hearty meals could be enjoyed quickly without sacrificing quality. The patty melt’s simplicity and rich flavor profile made it an instant favorite, sustaining its relevance through generations.

The evolution of the patty melt saw innovations both small and large, as chefs and home cooks alike experimented with new ingredients and techniques. Variants began incorporating diverse cheeses from Swiss to cheddar, while bread choices expanded to match emerging dietary preferences. Despite these adaptations, the core of the recipe—juicy patty, gooey cheese, and crispy bread—remained unchanged, preserving its authentic essence.

Regionally, you’ll find the patty melt with subtle tweaks tailored to local tastes. Southern versions might incorporate a hint of spice, while others add bacon or mushrooms for an elevated experience. Such regional variations only enhance the patty melt’s universal appeal, making it a favorite across different states and food traditions.

Ingredient Deep Dive

Beef Patty: Central to the patty melt is the beef patty, which hails from the rich tradition of hamburgers. The choice of quality ground beef defines the juiciness and flavor you experience. Leveraging beef’s natural savors, selecting an 80/20 meat-to-fat ratio results in a satisfying taste and texture. Garden-variety beef might suffice for some, but sourcing local, grass-fed options elevates the patty melt to new heights. Storage involves basic refrigeration, ensuring freshness and flavor integrity. For those seeking dietary alternatives, turkey or plant-based patties present a viable yet delicious option.

Cheese: A quintessential patty melt emphasizes melted mild or sharp cheeses, creating the hallmark gooey texture every bite promises. With origins as a ubiquitous food additive herculean in its global popularity, cheese selection becomes vital for that umami hit. Swiss cheese, noted for its nutty, smooth melt, complements beef well, while cheddar introduces a sharper bite. Check freshness with a firm yet flexible touch and protect against molding with airtight storage. Substitutes like mozzarella or pepper jack provide a fresh twist, showcasing cheese’s adaptability across culinary borders.

Common Mistakes to Avoid

  • Overcooking the patty leads to dryness, losing that vital juicy texture.
  • Neglecting to toast the bread for the proper duration affects crispness.
  • Using low heat when melting cheese causes uneven melt and unappealing texture.
  • Skipping the secret sauce diminishes the depth of flavor.
  • Choosing low-fat meats results in a bland, dry patty.
  • Using pre-shredded cheese may not melt as smoothly as sliced.
  • Burnt onions lack the sweet, caramelized flavor needed.
  • Improper meat seasoning affects overall taste balance.

Essential Techniques


Cooking the perfect beef patty requires understanding high heat sizzling and proper flipping techniques. Two to three minutes per side at medium-high heat ensures juicy doneness. Keys to mastery include waiting until the patty naturally releases from the pan before flipping, avoiding disruption in searing the crust. Visually, a crusty golden brown surface signals success.

Melting cheese evenly without burning the bread involves technique finesse. Controlled heat at low-medium range allows cheese time to gradually soften without overshadowing with sponge-like bread. Covering the pan briefly can create a steamy environment that enhances the melt. Remaining vigilant to avoid charred edges defines technique discipline.

Creating caramelized onions requires patient stirring and low heat, allowing sugars to slowly release and oxidize into hearty sweetness. Stirring periodically prevents browning too quickly, helping achieve a soft, rich brown color as visual cues of completion. Serve promptly or refrigerate in airtight containers for later use, maintaining crisp vitality.

Pro Tips for Perfect Patty Melt


Allow patties to rest for a few minutes post-cooking; residual heat finishes protein structures without sacrificing juiciness. This rest period optimizes flavor and texture distribution within the patty.

Use thick-cut bakery bread for a substantial, luxurious crunch that doesn’t dissolve under juicy fillings or toppings. Sourdough and rye hold their structure beautifully, complimenting the melt’s inherent richness.

For the secret sauce, blend mayonnaise, ketchup, and pickle relish along with a pinch of paprika and Worcestershire sauce. Adjust seasoning to taste, introducing personal flair into the deliciously balanced tangy sweetness.

Always opt for freshly grated cheese over pre-sliced alternatives; this step enhances melting efficiency with less processed cheese maintaining its structural integrity better during heating.

Consider buttering the outside of the bread for a golden crust, using a mix of butter and mayonnaise to evenly spread and enhance browning.

Test meat seasonings using small cooked blobs before cooking full patties, allowing taste adjustment and ensuring flavor confidence in batches.

Variations and Adaptations


Regional variations include the Southern patty melt with pepper jack cheese and jalapeños for added heat, complemented by a pickle slaw side for tangy freshness. Explore changing sautéed onions with grilled bell peppers for a vegetable-forward version with added sweetness and char.

Seasonal adaptations encourage farm-to-table freshness with grilled tomato slices or fresh herb additions for summer appeal. Incorporate seasonal greens or arugula to lift the flavors into refreshing territory.

Dietary modifications accommodate gluten-free demands by trading traditional bread for gluten-conscious counterparts without compromising sandwich integrity. Likewise, plant-based ‘meat’ patties and vegan cheese facilitate cruelty-free exploration of flavors and textures.

For additional texture play, crunch aficionados can incorporate crushed tortilla chips or fried onion rings within the layers, introducing both a flavor and textural contrast inspiring further gastronomic curiosity.

Presentation alternatives flourish by cutting the patty melt into quarters, unfolding various plating styles for aesthetic and convenient dining, suitable for parties or illusion-based portion control.

Prepared as sliders or mini-melts, these variations address social gatherings with limited utensil capabilities, marrying elegance with practicality through small, tasty portions perfect for finger food events.

Serving and Presentation Guide


When it comes to serving the ultimate patty melt, a few thoughtful touches can elevate its presentation. Consider plating techniques that highlight its rustic yet refined nature. Place the sandwich diagonally on a simple, understated platter to emphasize its layers. For garnishing, a sprig of fresh parsley or a couple of gherkins offer a pop of color that’s both visually and tastefully appealing.

Traditional accompaniments like crispy French fries or a lightly-dressed green salad provide complementary textures and flavors while ensuring the meal feels complete. Modern serving suggestions include pairing the patty melt with sweet potato fries or a cole slaw, balancing its savory richness with sweet and tangy elements.

Temperature considerations are essential for maximized flavor and mouthfeel. Ensure the sandwich is served hot, allowing the cheese to maintain its desirable melted state. Warmed plates can also assist in keeping your creation at the optimal temperature throughout dining.

Portion control tips can include slicing each patty melt into halves, or even quarters, for consume-as-you-please convenience. This approach not only makes it easier to enjoy the sandwich with clean fingers but also introduces an inviting, share-friendly option perfect for gatherings.

Wine and Beverage Pairing


For the discerning palate, pairing your patty melt with the right wine can elevate the dining experience. Opt for a medium-bodied red, such as a Merlot or a Zinfandel, which complements the savory notes of the burger while balancing its richness with fruity undertones.

Non-alcoholic alternatives like a cold, craft root beer or a sparkling lemonade provide refreshing counterpoints to the patty melt’s indulgent flavor, aiding in flavor contrast and palate cleansing between bites. These drinks also add a touch of nostalgia reminiscent of classic diner fare.

If you lean towards caffeinated options, a lightly brewed iced tea with a hint of lemon, or even an espresso shot afterwards, can enhance the meal. The tea’s tannins cleanse the palate, while the coffee offers a delightful post-meal aroma.

Temperature considerations are crucial; ensure red wines are slightly cool but not chilled, while whites remain crisp and cold. Refreshing drinks like iced teas or lemonades should be served over ice, enhancing their cooling properties against the heat of the meal.

Serving suggestions recommend pairing each beverage with a dedicated glass, adding a touch of elegance to the casual comfort food setting. Provide chilled glasses for whites or root beers, while stout, wide-bottomed glasses work beautifully for reds.

Storage and Shelf Life


Leftovers of the ultimate patty melt demand careful storage to preserve their quality. Wrap remaining sandwiches tightly in aluminum foil to maintain moisture and flavor. Refrigerated properly, the melt can last up to two days, although it’s best consumed freshly made for the ideal texture.

Temperature requirements remain at standard fridge settings, approximately 40°F, to prevent spoilage. For those who intend to freeze the sandwiches, it’s recommended to do so before adding fresh vegetables or dressings, minimizing texture changes during thaw.

Container recommendations lean towards airtight systems that prevent off-odors in the fridge from altering the sandwich’s flavors. Tupperware or Ziploc bags offer suitable alternatives if aluminum isn’t available.

Signs of spoilage include off-smells or discoloration, particularly in cheese or bun textures. Should these present, it’s safest to discard rather than consume. For reheating, remove foil and utilize a toaster oven, allowing even heating without sogginess typically associated with microwave use.

Freezing guidelines caution against overextending storage time beyond a month, as flavors may dull and the bread’s structure can suffer. Thawing overnight in the fridge maintains food safety and prepares the sandwich for easy reheating the following day.

Make Ahead Strategies


When planning to serve the ultimate patty melt for a gathering, advance preparation can be a lifesaver. Divide the recipe into manageable stages for efficiency. You can shape the patties and prepare the secret sauce up to a day ahead, storing both in the fridge.

The bun or bread can be pre-buttered and stored in a cool place, ready for assembly and toasting when required. Caramelized onions, a crucial component for depth of flavor, can also be made ahead, encapsulating them in airtight containers once cooled.

Assembly tips include creating an assembly line, with components readily accessible for swift structuring of the melts. Begin with toasting bread and simultaneously cooking patties for a seamless handover to completion.

Reheating guidelines prior to serving suggest a swift toast for the sandwich exterior on a medium heat, ensuring cheese melts appropriately without reheating the entire piece excessively. Completing sauces or fresh elements immediately before serving maintains vibrancy in flavor.

Fresh element additions, such as garden-fresh slices of tomato or crispy lettuce, add a layer of freshness that contrasts beautifully with the warm, savory patty melt. Encourage diners to tailor sandwiches with these optional extras, promoting interactive enrichment.

Scaling Instructions


Scaling the ultimate patty melt recipe is straightforward whether you’re halving or doubling it. To halve the recipe, simply adjust ingredient quantities by 50%. Consider using a smaller skillet to maintain cooking efficiency and prevent overcrowding, which could hinder proper patty searing.

Doubling or tripling involves multiplying all ingredients accordingly, taking care to use a larger pan or cook in batches to ensure optimal heat distribution while preserving patty texture. Equipment adjustments for increased serving sizes might include a larger spatula and broader serving platters.

Timing modifications require monitoring to prevent recipe timings from lengthening unnecessarily due to broader item volumes. Consistent flame management and multiple pans, if available, aid in retaining efficiency.

Storage considerations for scaled-up recipes necessitate adequate reserve of airtight containers for post-cooking refrigeration or freezing. Label leftover patties and separate by parchment paper to prevent adhesion when stored in bulk.

Nutritional Deep Dive


The heavenly indulgence of the patty melt doesn’t sacrifice nutritional benefits. The macro breakdown highlights a balanced mix of proteins from beef, carbohydrates from the bread, and fats from both meat and cheese. Each serving offers ample energy, fitting well within a daily balanced diet.

Micronutrient analysis shows moderate levels of vital vitamins and minerals, including calcium from cheese and essential iron from beef. Whole-grain bread choices amplify fiber intake, supporting digestive health benefits.

Health benefits relate to its inclusion of quality proteins and potential manipulation of fatty acid profiles through ingredient tweaking. Consider leaner meat cuts or grass-fed options for elevated omega-3 levels and reduced saturated fats.

Dietary considerations enjoy adaptability, whether addressing gluten sensitivities or reduced-fat preferences. Swapping for lean turkey patties or whole grain gluten-free bread yields comparable nutrition outputs with adjusted macronutrient allocations.

Portion analysis recommends servings to complement lifestyle demands, particularly for individuals following calorie-conscious plans. Measuring serving sizes literally provides insight into maintaining a balanced energy-contributing meal.

Weight management tips encourage complementing patty melt consumption with high-fiber, low-calorie sides like salads or steamed vegetables, optimizing satiety while preventing overindulgence.

Dietary Adaptations


Gluten-free: Opting for gluten-free bread satisfies those with sensitivities without compromising the appeal of this classic comfort food. Ingredient scrutiny ensures cross-contamination doesn’t affect the dining experience inconveniently.

Dairy-free: Substitute non-dairy cheese and margarine alternatives into the bridge’s formula. Brands with melting capabilities ensure the patty melt retains its textural allure, while reaching dairy-adverse diners.

Vegan: A complete dietary shift includes plant-based patties constructed from black beans or chickpeas, paired with vegan cheese and mayonnaise sauces. Emphasis on spice and seasoning helps maintain flavorful authenticity.

Low-carb: Bread reduction or substitution with cauliflower rounds or portobello caps addresses carbohydrate considerations judiciously. Resulting combinations retain satisfying engagement without unnecessary carb surges.

Keto: Ideal strategies focus on breadless melts, served open and garnished with cheese and sauce. Ground beef or turkey patties bolster protein concentrations that naturally align with keto dietary structures.

Paleo: Drawing from paleo principles may involve innovative bun substitutes, like lettuce wraps or sweet potato rounds, ensuring meal satisfaction adheres to paleolithic dietary tenets.

Low-FODMAP: Tricky ingredients like onions and garlic can be replaced or omitted, keeping focus on FODMAP-friendly inputs to combat digestive distress while offering similar flavor resonances.

Other specific diets: For cuisine-centered explorations, deploying starters like patty melt tapas or fusion melts accommodates cultural flavor meshing, delivering diverse culinary waves without diet infringement.

Troubleshooting Guide


Texture issues sometimes arise due to overcooked or compressed patties. Juiciness disappears with excess handling; shape patties lightly and space them properly on the skillet to allow even cooking free from interference.

Flavor balance pivots on seasoning accuracy. Salt and spices generally need fine-tuning pre-cooking. Taste-testing seasoned blobs ensures flavors meld harmoniously and support the secret sauce superbly.

Temperature problems relate to pan control; too high risks burning the bread before cheese melts. Moderate heat management through testing and maintaining desired pan warmth defines optimized preparation.

Equipment challenges cover skillet temperatures and uncooperative flipping. Nonstick pans help avert sticking, and flat spatulas provide dependable control during flipping maneuvers.

Ingredient substitutions, such as cheese changes, impact consistent mouthfeel or flavor; alternative curd choices should mirror initial recipe melt preferences. Trial different cheeses pre-entire recipe builds for insight.

Timing concerns unravel due to meal or side integration difficulties. Misalignment encourages cold patty melts; sequence ingredient preparation so that kitchen dynamics conclude similarly to dining satisfaction.

Recipe Success Stories


Community feedback consistently appreciates creative takes on the ultimate patty melt, revealing positive transformations and joyous meal-sharing outcomes. Social media conversations highlight imaginative alterations, with readers lauding others’ adaptability inspirations.

Variation successes continuously arise, frequenting Instagram or bloggers who’ve intertwined local fare influences seamlessly with the original patty melt blueprint. These experiments amplify diverse culinary intersections where classic American meets new-age flavor circles.

Adaptation stories bring about humor and authenticity, with some suggesting homegrown twists resulting from Summer vegetable overloads or forgotten pantry staples, proving yield to creative growth through happy accidents.

Reader suggestions further enrich collective enjoyment, proffering ingredient recommendations or equipment novelties taken from their daily trials. Participants identify reasonings for adjusting seasonings or temperature orderings to meet or even outstrip expectations.

Photography tips explicitly shared include in-depth lighting guides that showcase the patty melt in its best possible light. Artful framing and presentation yield appreciation in both visual and culinary artistry, demonstrating how care in appearance marries ultimate taste satisfaction.

Frequently Asked Questions

Q: Can I make the secret sauce ahead of time?
A: Yes, the secret sauce components can be mixed a day ahead. Store in an airtight container in the refrigerator to meld flavors. Stir before use for consistency.

Q: What bread do you recommend for a patty melt?
A: Rye and sourdough offer robust support and flavor. Choose slices thick enough to withstand press without overwhelming the palate.

Q: Can patties be prepared in advance?
A: Form patties a day in advance, seasoning with salt and allowing flavors to develop. Refrigerate, separating layers with parchment paper for easy use.

Q: What ingredients are critical for the secret sauce?
A: The sauce’s essence hinges on a blend of mayo, ketchup, and relish. Worcestershire sauce, garlic powder, and a dash of paprika enhance balance.

Q: How can I introduce a spice kick to the patty melt?
A: Spicy cheese such as pepper jack or a dollop of Sriracha within the secret sauce infuses heat without overwhelming primary flavor layers.

Q: Is it possible to create a vegetarian patty melt?
A: Absolutely! Swap beef patties for chickpea or black bean varieties. Consider eggplant slices or portobello mushrooms as alternate filling bases.

Q: Can I use pre-shredded cheese?
A: While feasible, pre-shredded cheese melts differently due to coatings, possibly altering texture. Prefer bags labeled as intended for melting.

Q: How can leftover patty melts be reheated?
A: For an even heat, utilize an oven or toaster oven. Set at moderate temperatures assures anaerobic heating without sogginess.

Q: What oils best complement grilling?
A: Neutral oils with high smoke points, such as canola or vegetable, minimize flavor duplication and enhance patty searing.

Q: Is it possible to include additional toppings?
A: Certainly. Items like roasted red peppers, pickles, or avocado enhance texture, harmonizing with the patty melt’s overall flavor tapestry.

Q: Should onions always be caramelized?
A: Although caramelization deepens flavor, raw onions add crunch. Choose variation based on desired culinary experience to target flavor layers.

Q: What side dishes complement the patty melt best?
A: Accompaniments vary from crispy fries to a fresh salad, balancing rich flavors of the melt with palate-cleansing textures. Complementary slaws reaffirmed appreciation.

Additional Resources


Explore related recipes taking inspiration from other American classics, like the Philly cheesesteak or Reuben sandwich, to expand your culinary repertoire. Each offers unique interpretations of meat and cheese crowned creations inviting further comparisons and taste voyages.

Technique guides on mastering griddle craft, including searing and sautéing, broaden kitchen skill sets, fostering deep dives beyond purely patty melts into diverse food avenues without intimidation.

Ingredient information charts offer matching suggestions or alternatives for common substitute preferences, such as plant-based or nutritional boosts, perpetuating access to excellent outcomes without limitations.

Equipment recommendations transcend simplicity with griddle pans or skillets diced for modern kitchens or smaller infrastructures fulfilling ease of movement and efficiency within constrained spaces.

Seasonal variations beside those encouraged through extra vegetables collectively uplift experience awareness. The patty melt, despite commonality, exhibits variant flexibilities inviting broader interaction across broader spectrums.

Join the Conversation


Share your patty melt adaptations or successes on social media, invigorating the food-loving community with individual triumphs or discoveries. #PattyMeltAdventure unites fellow enthusiasts under delicious pursuits harnessing cooking passion collectively.

Photography tips elevate aesthetic accomplishment, inviting compliments with simple adjustments akin to natural lighting during midday or contrasting backgrounds favorably offset sandwich vivacity.

Recipe reviews showcase effectiveness, where personal ratings alongside ingredient adaptability equate to storytelling within plates beneath coherent blasted melts, preserving communal cheeriness indelibly integrated.

Community engagement enlivens ideas from tasting panels or unexpected rejoinders aiming to quench culinary thirst through impromptu, helpful foody banter, thereby sowing collective spirited pursuits.

Recipe variations posted online or shared via networking exemplify creativity within limits steering culinary evolution infinitely. Express enjoyment or derive suggestions on platforms challenging initial presumptions before transforming into gastronomic success shares.

The Recipe

Ultimate Patty Melt with Secret Sauce

Serves: 4

Prep Time: 15 mins

Cook Time: 20 mins

Total Time: 35 mins

Kitchen Equipment Needed

  • Large skillet or griddle
  • Spatula
  • Mixing bowls
  • Knife
  • Cutting board

Ingredients

  • 1 pound ground beef (80/20 blend)
  • 8 slices rye or sourdough bread
  • 4 slices Swiss cheese
  • 2 large onions, sliced thinly
  • 4 tablespoons unsalted butter
  • Salt and pepper to taste
  • Secret Sauce:
    • 1/2 cup mayonnaise
    • 2 tablespoons ketchup
    • 1 tablespoon pickle relish
    • 1/2 teaspoon Worcestershire sauce
    • 1/4 teaspoon garlic powder
    • Paprika to taste

Directions

  1. In a skillet over medium heat, melt 1 tablespoon of butter. Add sliced onions, cooking slowly until caramelized. Set aside.
  2. In a mixing bowl, combine all secret sauce ingredients. Mix until smooth and reserve for later use.
  3. Season ground beef with salt and pepper, forming into four equal patties. Heat skillet over medium-high, adding patties to sear 3–4 minutes per side until cooked through. Remove and set on a plate.
  4. Butter outside of each bread slice lightly. Assemble sandwiches with secret sauce, beef patties, cheese, and caramelized onions between bread.
  5. Using a clean skillet over medium heat, toast sandwiches until golden brown and cheese is melted. Serve immediately.

Recipe Notes

  • Substitute cheddar or provolone cheese for variation.
  • Use gluten-free bread for dietary adaptations.
  • Add a dash of hot sauce to the secret sauce for spice lovers.

Tasty Tater Tot Mini Cheeseburger Bites Perfect for Any Party

Tater Tot Mini Cheeseburger Bites: The Perfect Snack for Any Occasion

⚖️
Difficulty
Easy

⏲️
Prep Time
15 mins

🕒
Cook Time
25 mins

⏱️
Total Time
40 mins

🍽️
Servings
20 bites

Dive into the ultimate comfort food experience with our Tater Tot Mini Cheeseburger Bites. This delightful and fun recipe combines the crispy, golden goodness of tater tots with the classic flavors of a cheeseburger. Perfect as an appetizer or a snack, these bites are a hit at both game day parties and casual family gatherings. Easy to make and even easier to eat, they offer a playful twist on a much-loved favorite.

These mini bites pack all the flavors of a cheeseburger into a single, delicious mouthful. Imagine the savory blend of ground beef, sharp cheddar cheese, and a hint of pickles, all wrapped up in a crunchy tot. As they bake, the cheese melts perfectly, while the tots crisp to perfection, leaving you with a snack that’s hard to resist. Children and adults alike can’t get enough of these Tater Tot Mini Cheeseburger Bites, making them a great choice for any event.

The aroma alone is enough to draw everyone into the kitchen, with the tantalizing scent of beef and cheese wafting through the air. Their visual appeal is undeniable as well, with a golden hue and neatly topped cheese and garnish making them as eye-catching as they are tasty. Plus, with straightforward steps and accessible ingredients, this recipe is a wonderful introduction to cooking that satisfies both novices and seasoned chefs alike.

Quick Recipe Highlights

  • Flavor Profile: These bites provide a savory blend of seasoned beef and melted cheddar cheese, complemented by the crispiness and mild saltiness of the tater tots.
  • Texture: The combination of juicy beef with gooey cheese and crunchy outer layers creates a satisfying contrast that pleases the palate with every bite.
  • Aroma: Expect an enticing mix of meaty, cheesy aromas with a hint of grilled delight as these bites bake to perfection.
  • Visual Appeal: Perfectly golden and neatly topped with your favorite garnishes, these bites are as appetizing to the eyes as they are to the stomach.
  • Skill Level Needed: Simple steps and minimal cooking expertise required make this an easy recipe for beginners or a quick fix for experienced cooks.
  • Special Equipment: A muffin tin helps hold these bites together perfectly, ensuring even cooking and presentation.

Recipe Overview

  • Difficulty Level: Chosen as an easy-level recipe due to straightforward ingredients and basic cooking techniques that require minimal preparation.
  • Category: This dish falls under the snacks and appetizers category, great for parties, game days, or casual snack time.
  • Cuisine: Rooted in American cuisine, this recipe draws inspiration from classic diner-style cheeseburgers and combines it with the universal love for tater tots.
  • Cost: Affordable and accessible ingredients make this a budget-friendly recipe without compromising on flavor, with most components found at any grocery store.
  • Season: While great year-round, these bites shine in colder months when comfort food reigns supreme but remain a hit at summer BBQs, too.
  • Occasion: Ideal for social gatherings such as parties, potlucks, and family gatherings where finger foods are beloved for their convenience and appeal.

Why You’ll Love This Recipe


The taste and texture of Tater Tot Mini Cheeseburger Bites are simply irresistible. The crispy exterior of the tater tots pairs exceptionally well with the savory filling of seasoned beef and melted cheese, creating a multi-dimensional flavor profile in a single bite. Whether you enjoy them dipped in ketchup, topped with a slice of gherkin, or simply as they are, each bite promises delightful flavors reminiscent of a classic burger experience.

Convenience is another reason to love this recipe. These bites require a short list of ingredients and minimal preparation time, making them an excellent choice when you’re short on time but need a dish that will impress. With just a few steps, you can prepare a crowd-pleasing appetizer that leaves a lasting impression on your guests.

Nutritionally, while indulgent, these bites can be balanced with nutrient-rich sides such as fresh salads or vegetable platters. Using lean beef and opting for reduced-fat cheese can cut down on calories while still retaining the richness that makes this snack delightful. It’s all about balance and enjoying this comfort food as part of a varied diet.

These mini bites are perfect for social gatherings, encouraging interaction as guests enjoy these handheld delights. They make an excellent conversation starter and can be customized with various toppings to cater to diverse tastes, making them ideal for events where you want to bring people together through food.

Lastly, their cost-effectiveness and accessibility are undeniable. With ingredients you likely already have in your pantry or freezer, these bites offer incredible value for money. Serving a crowd without breaking the bank has never been so deliciously easy, making these a flexible option for any host.

Historical Background and Cultural Significance


The origin of the cheeseburger can be traced back to the early 20th century in the United States, embodying the country’s penchant for innovation and convenience in cuisine. The Tater Tot, on the other hand, was an ingenious creation by the Ore-Ida company in the 1950s as a way to use leftover potato pieces. Combining these two elements preserves an essential piece of American culinary history while offering a nostalgic trip down memory lane for many.

Culturally, cheeseburgers have become a symbol of American fast food, representing everything from casual dining to backyard barbecues. The Tater Tot’s iconic status in diners and school cafeterias underscores its place in American hearts. Together, in mini bite form, they create a dish that resonates with cultural comfort and familiarity.

As recipes have evolved, so too has this combination dish. It’s come to symbolize not just a blend of classic flavors but also a creative take on serving comfort food in a more refined, bite-sized package. It’s a testament to the playful nature of American cuisine to bring together beloved snacks in new and innovative ways.

Regional variations have emerged, with additions like spicy jalapenos in the Southwest or tangy BBQ sauce in the South. These adaptations allow for cultural nuances to be introduced into this quintessential American snack, showcasing regional preferences and flavors within a national favorite.

Ingredient Deep Dive


Ground beef, the heart of these bites, is more than just a flavorful protein component. Its cultural significance stretches across cultures and cuisines, often representing the versatility and adaptability of beef as a staple ingredient. In this recipe, ground beef brings the traditional flavors of cheeseburgers, enriched by simple seasoning to highlight its natural umami traits.

Nutritionally, ground beef is a source of essential nutrients like protein, vitamin B12, and iron. When choosing beef, opt for lean cuts to reduce saturated fats, enhancing the healthiness of these bites without sacrificing the beef’s juicy texture. Look for bright red color and fresh smell when selecting, and keep it refrigerated or frozen to maintain quality until ready for use.

Those unable to consume beef can substitute with ground turkey or plant-based meat alternatives, which also pair well with the cheesy, tater tot component of the recipe. These options provide versatility for adapting this dish to different dietary preferences or needs without detriment to taste.

The cheddar cheese adds a tangy sharpness and creamy melt that ties the flavors together. Its cultural relevance dates back to the cheese-making processes of old England, and it’s cherished worldwide for its distinct flavor profile. Keeping cheddar cheese wrapped in wax paper or airtight packaging helps preserve its freshness and extends its shelf life in your refrigerator.

Common Mistakes to Avoid

  • Overcooking the beef can lead to dryness. Ensure you cook it just until it’s no longer pink for a juicier bite.
  • Spreading the tater tots too densely in the muffin tin can prevent them from crisping properly; make sure each tot is nestled lightly.
  • Not allowing tots to cool slightly before removing can lead to breaking apart; patience ensures they maintain shape.
  • Forgetting to drain excess fat from the ground beef mixture can make the bites greasy. A quick drain keeps them light.
  • Using low-quality cheese can result in an underwhelming flavor and poor melting. Opt for a sharp cheddar for the best results.
  • Not seasoning the beef enough can lead to a bland filling. A touch of salt and pepper brings out the beef’s full flavor.
  • Skipping the garnishes can lose visual appeal and contrasting flavors; they are crucial for presentation and taste balance.
  • Overbaking risks burning the tots, so monitor the oven to achieve the perfect golden brown hue.
  • Using a mini muffin tin rather than a regular one can lead to overflow; ensure correct tin size for this recipe’s quantity.
  • Failing to preheat the oven may result in uneven cooking, so always ensure the oven is at the right temperature before baking.

Essential Techniques


The first key technique is properly seasoning the beef. This step is essential to build the savory foundation of your bites. Balance your seasoning carefully; too little can result in blandness, while too much can overwhelm the natural beef flavor. Taste and adjust as needed to ensure a harmonious blend of salt, pepper, and your chosen spices.

Mastering the art of arranging tater tots is vital. By ensuring each tot is touching but not overcrowded, you allow for even baking and optimal crispiness. Visual clues such as evenly spaced, golden browned tots indicate you’re achieving that delightful crunch, which is a signature feature of the dish.

Pay attention to cheese placement, as it’s critical for both flavor and appearance. Placing cheese on top during the last five minutes of baking allows for a beautifully melted, golden topping without burning. Keep an eye out for bubbling, lightly browned cheese for the perfect finish.

Another important technique is allowing the bites to cool slightly before removing from the tin. This patience prevents them from coming apart, maintaining their intended shape for both aesthetic and practical consumption purposes.

Finally, garnishing with fresh herbs or pickles adds a burst of freshness and cuts through the richness. This simple technique elevates the overall taste and provides a visually appealing finish that enhances presentation.

Pro Tips for Perfect Tater Tot Mini Cheeseburger Bites


To ensure your bites are evenly baked, consider rotating your muffin tin halfway through the cooking time. This helps promote uniform heat distribution, especially in older ovens, which can have hot spots.

Use high-quality sharp cheddar cheese for a punchy flavor that stands out amidst the other ingredients. Its robust taste complements the beefiness and adds a desirable creamy texture upon melting.

Let your cooked beef mixture cool slightly before adding any fresh ingredients like onions or herbs to prevent wilting or overcooking, preserving their texture and freshness.

Consider experimenting with seasoning—small amounts of garlic or onion powder can add depth without overpowering the other flavors and are worth trying for a personalized touch.

If you fancy a smoky edge, try adding a hint of smoked paprika or finely chopped cooked bacon to the beef mixture for another layer of flavor that elevates these bites.

For spicy variations, incorporate chopped jalapenos or a dash of hot sauce to the beef mix. This technique adds a fiery kick for those who enjoy a little heat in their bites.

Always let the bites rest at room temperature for a minute before serving—this brief pause helps lock in juices and enhances flavor absorption for a tastier bite.

Lastly, prepare a simple dipping sauce by mixing mayonnaise, ketchup, and a pinch of smoked paprika. Serving alongside adds an additional layer of flavor and allows guests to customize their bites.

Variations and Adaptations


Regional variations of this recipe are abundant. For instance, adding jalapenos and pepper jack cheese gives a Southwestern twist, while incorporating garlic and parsley with mozzarella takes inspiration from Italian cuisine, offering different flavors while keeping the concept intact.

This recipe shines with seasonal adaptations. During summer, fresh herbs like basil or chives add a garden-fresh taste, while in fall, a sprinkle of nutmeg in the beef mixture gives a warm, cozy flavor, perfectly aligning with the season’s comfort food trend.

Dietary modifications are simple with this recipe. Swap traditional tater tots with cauliflower tots for a lower-carb or gluten-free option, and use plant-based meat and cheese substitutes to craft a delicious vegan alternative that maintains the essence of the dish.

Enhancing flavor can be as simple as choosing alternative cheeses- blue cheese or feta can introduce bold, unique flavors to the bites, providing new palates an adventurous twist on the classic combination.

Modify texture by adding crunchy bacon bits to the cheese mixture, offering a delightful crunch within the gooey core. This provides additional layers of texture that guests will find intriguing.

Presentation alternatives such as skewering them or serving on a platter alongside colorful dipping sauces allow these bites to stand out as an impressive centerpiece on any party table.

Serving and Presentation Guide


Creative plating can transform how these bites are perceived. Consider stacking them pyramid-style, surrounded by vibrant dipping sauces, drawing eyes to a centerpiece meant for sharing.

Garnishing with chopped green onions or freshly chopped parsley adds a pop of color. Fresh herbs not only enhance appearance but deliver an aromatic element that entices guests further.

Traditionally, these bites pair well with dipping sauces. Options range from classic ketchup to sophisticated aioli, offering a variety of flavor enhancements aligning perfectly with the dish’s versatility.

If modern is your vibe, try skewering each bite with a toothpick topped with a pickle slice. This creates individual serve portions and adds a visual accent that encourages diners to explore in a familiar yet styled way.

Optimal temperature plays a role in presentation too—serve these bites slightly warm to ensure they are at their most enjoyable texture and flavor profile when consumed.

Mindful portion control is key for parties. Estimate about 3-4 bites per guest, ensuring all have an opportunity to indulge in this treat and allowing for more balanced dining offerings.

Wine and Beverage Pairing


Pairing wines such as a light, fruity Pinot Noir or a crisp Chardonnay complements the rich, cheesy flavors and savory beef of the bites. Their acidity cuts through the richness, creating a balanced tasting experience.

Non-alcoholic alternatives are equally enjoyable, such as a chilled iced tea or sparkling water with a hint of lime. These refreshing options cleanse the palate while providing a non-committal complement to the bites.

Coffee, with its bold flavors, surprisingly pairs well too, particularly an iced coffee version that provides a refreshing caffeine boost while accentuating the beef’s umami tones.

Ensure that drinks are served slightly chilled, especially the wine, whose optimal temperature range enhances both flavor and mouthfeel, aligning well with the warmth of the cheeseburger bites.

Serve larger parties with a drink station featuring beverage pairings that allow guests to pick and choose, reflecting their preferences and enhancing the social aspect of the feast.

Storage and Shelf Life


Storing leftover mini cheeseburger bites is easy. Allow them to cool completely before placing in an airtight container, keeping them fresh in the fridge for up to 3 days, extending their enjoyment beyond the initial serving.

Temperature plays a crucial role in maintaining freshness. Keep the fridge at a consistent 35-40°F to prevent spoilage or texture decline, ensuring their flavors remain robust over time.

Opt for resealable plastic bags or stackable containers to save space. Keeping bites in a single layer helps preserve their shape and crispiness, prompting them to last longer when stored correctly.

Signs of spoilage include a noticeable sour smell or slimy texture. If any doubt arises, err on the side of caution, preferring freshness and safety over potential health risks.

Reheat in a 350°F oven for 5-7 minutes for best results, which ensures thorough warming without sacrificing their original texture. Microwaving, though convenient, may lead to sogginess and is less recommended.

Freezing is a viable option, too. Flash-freeze them on a baking sheet before transferring to plastic bags, and they’ll keep for up to 2 months—perfect for last-minute cravings or unexpected guests.

Make Ahead Strategies


The option to prepare these bites ahead of time significantly enhances their convenience. Precook the beef filling the day before, which allows flavors to meld even further overnight and streamline the assembly process.

Store the beef separately in the fridge and assemble the tots fresh for optimal results. This division prevents unwelcome sogginess between moist fillings and crispy tops, preserving their signature texture.

Assessing quality impacts is crucial when prepping ahead. The flavor generally deepens but retaining crispiness is vital, making it prudent to bake the tots fresh, even if the filling is prepared ahead.

Assembling the bites directly before baking is recommended to capture the contrasting textures. Quick assembly follows easily once ingredients are prepped, maintaining freshness and flavor.

Reheat thoroughly before serving for maximum taste and texture benefits. If prepared in advance, ensure they’re fully warmed in the oven before setting out for guests to devour.

Adding fresh elements upon serving, such as garnishes or dipping sauces, keeps these bites as tasty and appealing as their freshly-made counterparts, ensuring they’re suitable across multiple settings.

Scaling Instructions


Scaling recipes up or down is a snap with these bites. Need to halve the recipe for a smaller crowd? Halve each ingredient and adjust cooking methods slightly, using a smaller baking sheet and muffin tin.

For larger gatherings, consider doubling or tripling the recipe. Be mindful of not overcrowding the muffin tins, which might require multiple batches to ensure even cooking.

Equipment-wise, larger or additional muffin tins are necessary when multiplying recipes. Maintain a focus on uniformity to guarantee each bite cooks evenly, regardless of increased quantities.

Timing modifications come into play with scaling. Be sure to check multiple batches for doneness, potentially rotating tins in the oven to account for different baking conditions.

Increased quantities benefit from mindful storage. Use separate containers for each multiplied portion to facilitate warming, serving, and subsequent storage, ensuring longevity and flavor.

Nutritional Deep Dive


These bites offer a moderate balance of macros with protein-rich beef and limited carbs from the tater tots. On average, a serving provides a fulfilling amount of protein and fats important for energy.

Micronutrient-wise, beef offers essential vitamins and minerals, including B vitamins and iron, supporting metabolic functions. The cheese also supplies calcium, crucial for bone health.

Health benefits include satiety from balanced macronutrients, aiding in portion control and preventing overeating when part of a balanced plate. Swapping ingredients to align with dietary goals offers additional benefits.

Dietary considerations factor prominently. By selecting lean beef cuts and lower-fat cheese, reduce calorie density while retaining flavor and texture qualities that make this dish a favorite.

Avoid over-indulging in these bites by incorporating fresh, vegetable-based accompaniments that balance out richer properties, fostering a mindful approach to consumption.

Weight management tips include the importance of moderation, focusing on portion control without eliminating favorite foods. These bites fit into any balanced diet when enjoyed responsibly.

Dietary Adaptations


For a gluten-free adaptation, replace traditional tater tots with gluten-free alternatives or make homemade versions using mashed vegetables and gluten-free flour.

For dairy-free options, swap cheddar cheese with a dairy-free cheese alternative or sprinkle nutritional yeast over the top for that cheesy flavor without the dairy content.

Vegan adaptations remain an option. Use plant-based ground meat substitutes or crumbled tofu for textural similarities; pair with vegan cheese to make this recipe entirely plant-based.

To lower carb content, select cauliflower tots or other vegetable-based tots, ensuring that vegetable flavors align well with the beefy filling, enhancing low-carb dining experiences.

Keto adaptations are only a small change away. Emphasize high-fat cheeses and serve over a bed of zucchini or eggplants to maintain macros while reducing carbs without sacrificing tastiness.

Paleo followers can swap tater tots with sweet potato rounds and use whole foods, like processed coconut oil in place of traditional oils, to complement ingredient choices.

Low-FODMAP adjustments could include using low-FODMAP vegetables within the filling or ensuring FODMAP-free spices, catering to those with sensitive GI environments.

Incorporating these dietary adjustments ensures that everyone can enjoy the delightful flavors of Tater Tot Mini Cheeseburger Bites, regardless of specific nutritional needs or lifestyle choices.

Troubleshooting Guide


Texture issues can arise if tots become soggy. Re-evaluate their density in the tray or consider flash freezing them before baking for extra crispiness.

Flavor balance is crucial to great bites. If you experience blandness, experiment with bolder seasoning or different cheese varieties to spark more punch.

Temperature problems often occur if oven heat is inconsistent, leading to uneven cooking. Ensure the oven is consistently preheated and rotate tins when necessary to maintain balance.

Equipment challenges include mismatched muffin tins. Maintain use of uniform size and materials to produce consistent results across multiple batches.

Ingredient substitutions offer flexibility but require careful consideration. If substituting suffer expectation setbacks, closely evaluate ingredient nutrition profiles for suitability.

Timing concerns typically revolve around overbaking. Stay diligent about times and review tots visually or using a thermometer for temperature benchmarks as cooking progresses.

Recipe Success Stories


Community feedback has poured in for these bites, with many readers praising their flavor and texture as an undeniable hit at family gatherings. Delight has spread from taste buds to shared stories about meal successes.

Variations prove popular—one reader successfully added jalapenos and Monterey Jack cheese for a spicier rendition, yielding rave reviews from a backyard BBQ party.

Adaptation stories inspire, as readers have ventured into vegan alternatives using textured vegetable proteins, delighting those pursuing plant-based lifestyles with nostalgic cheeseburger flavors.

Photography tips shared by readers include artful platter arrangements that nicely frame these bites in holiday spreads, attracting attention to presentation and enhancing photographic appeal.

Shared reader reviews have highlighted time and time again their satisfaction not only with the ingredients and cooking techniques but with sharing eye-catching photos online, celebrating both cooking and eating!

Frequently Asked Questions

Can I make these cheeseburger bites vegetarian?

Yes, substitute ground beef with a plant-based protein like crumbled tofu or a beef substitute for a vegetarian-friendly snack that maintains deliciousness.

What toppings work best with these bites?

Popular toppings include sour cream, pickles, or ketchup, but feel free to get creative, such as with spicy sriracha or tangy BBQ sauces for extra flair.

Can the recipe be doubled?

Absolutely! Doubling is simple, just ensure you account for equipment capacity and maintain proper proportions to ensure uniformity across increased portion sizes.

Can I freeze these after cooking?

Yes. Allow bites to cool completely before freezing in an airtight container, perfect for storing up to two months with minimal quality loss.

Why are my tater tots soggy?

Soggy tots may be due to overcrowding in the tray or lack of proper preheating. Space tots evenly and confirm the oven is set to the correct temp before baking.

What’s the best cheese substitution?

Try mozzarella or Monterey Jack for softer melting and mild flavors, while feta or blue cheese can add more pungent, adventurous tastes if desired.

How can I reheat these bites?

Reheat in a preheated 350°F oven for 5-7 minutes to restore moisture and warmth. This method maintains a crisper texture compared to microwave reheating.

Are there low-carb alternatives?

Certainly! Substitute cauliflower tots or other vegetable-based alternatives for traditional tater tots to lower carb content while preserving texture.

Can these be made in advance for a party?

Yes, assemble and chill in the fridge, then bake immediately before serving to ensure freshness and warmth for guests.

How can I make these bites spicy?

Incorporate chopped jalapenos into the meat mixture or sprinkle with cayenne pepper for added heat that enlivens each bite.

What do I do if my bites fall apart?

Ensure tots and fillings are properly cooled and rested before assembly, as hastily attempting release may compromise structural integrity.

Are there vegan adaptations?

Use vegan ground substitutes and plant-based cheeses within this recipe to craft a fully vegan dish without losing flavor integrity.

Additional Resources


For those newly exploring tater tots, a guide to homemade versions can expand culinary horizons while providing a hands-on approach to appreciating this fantastic filled bite concept.

Embrace different techniques in creating seasoned beef ragu or homemade cheese slices, elevating comfort food experiences and diversifying knowledge within cheeseburger adaptations.

Investigate the benefits of investing in non-stick muffin tins or oil basting techniques that improve both baking performance and utensil care, enhancing ongoing recipe exploration.

Learn changing seasonal adaptations that refine BBQ menus or child-friendly snack ideations with activity tips involving culinary crafts that involve youngsters in the kitchen.

Explore different wine pairings from grape varietals to vintage selections, revealing beverages that uniquely match these bites’ rich flavors on diverse occasions.

Join the Conversation


Engage with our community by sharing your own recipe takes on social media, tag us to be featured in our community successes post, and celebrate culinary creativity!

Photography tips encourage you to adapt light exposure and creative angles in plating and image capturing; reach out for further guidance or showcase your images.

Celebrate readers’ adjusted recipes with new suggestions foldered every week. Encourage culinary exploration and savor the mutual rewarding experiences.

Community engagement isn’t just about making food; consider story sharing or recipe adaptations. Creativity and expertise thrive with insight shared among culinarians.

Variation exploration is encouraged and welcomed across our network. Learn from others or offer personal innovation for transformation of traditional foundations into new favorites.

The Recipe

Tater Tot Mini Cheeseburger Bites

Serves: 20 bites

Prep Time: 15 mins

Cook Time: 25 mins

Total Time: 40 mins

Kitchen Equipment Needed

  • Muffin tin
  • Mixing bowls
  • Baking sheet
  • Spatula
  • Oven mitts

Ingredients

  • 1 lb ground beef
  • 1 packet (32 oz) tater tots
  • 1 cup cheddar cheese, shredded
  • 1 small onion, diced
  • Salt and pepper to taste
  • Optional: pickles, ketchup, or preferred toppings

Directions

  1. Preheat your oven to 400°F (200°C).
  2. In a skillet over medium heat, cook the ground beef and diced onion until the beef is browned. Season with salt and pepper.
  3. Drain excess fat and set aside to cool slightly.
  4. Arrange tater tots in a single layer on a baking sheet and bake for 10 minutes to lightly crisp.
  5. Line the bottom of a muffin tin with the semi-crisp tater tots, using a few per cup.
  6. Spoon beef mixture over each tot-lined cup, and sprinkle shredded cheddar on top.
  7. Bake in the oven for an additional 15 minutes or until cheese is melted and tater tots are fully crispy.
  8. Allow bites to cool slightly before removing from the tin. Serve with pickles or your choice of topping.

Recipe Notes

  • Use lean ground beef for healthier bites.
  • Add jalapenos to the beef mixture for a spicier option.
  • Top with fresh herbs before serving for added freshness.

Irresistible Lemon Blueberry Cheesecake Recipe for a Perfect Dessert

Lemon Blueberry Cheesecake Recipe: A Summery Delight

⚖️
Difficulty
Medium

⏲️
Prep Time
30 mins

🕒
Cook Time
60 mins

⏱️
Total Time
90 mins

🍽️
Servings
8

Indulge in the luscious harmony of tangy lemons and sweet blueberries with this exquisite Lemon Blueberry Cheesecake. Perfect for summer gatherings or as a delightful treat anytime, this cheesecake captivates both the heart and palate with its refreshing flavor profile and creamy texture. As you bring together the zesty hits of lemon with the natural sweetness of ripe blueberries, you’ll find a perfect dessert balance that pleases all.

From the moment you take your first bite, you are greeted with a vibrant burst of citrus that dances on your taste buds, complemented by the subtle sweetness of the blueberries woven into the rich, creamy cheesecake base. Not only does this cheesecake offer an explosion of flavors, but it also presents a visually stunning creation with blueberries scattered like jewels across the vibrant lemon hue.

Whether you’re a seasoned baker or a beginner looking to impress, this recipe will guide you effortlessly through the process to create a masterpiece that embodies summery sweetness and indulgent creaminess.

Quick Recipe Highlights

  • Flavor Profile: Experience a balanced duet of tangy lemon and sweet blueberry flavors merging into a creamy cheesecake that will dance on your palate.
  • Texture: Delight in a decadent, smooth texture interrupted occasionally by bursts of fresh blueberries that add a wonderful mouthfeel contrast.
  • Aroma: Enjoy the inviting aroma of freshly grated lemon zest and a sweet scent of blueberries rising with every slice.
  • Visual Appeal: A striking presentation featuring a creamy, golden yellow base dotted with vibrant blueberries and topped with a gleaming blueberry compote.
  • Skill Level Needed: Suitable for intermediate bakers who are familiar with basic cheesecake techniques like water baths and cooling phases.
  • Special Equipment: Requires a springform pan, baking sheet, and electric mixer for best results.

Recipe Overview

  • Difficulty Level: Given its water bath baking technique and careful cooling steps, this cheesecake is rated medium, demanding some familiarity with cheesecake crafting.
  • Category: Perfect for dessert and special occasions, this cheesecake stands out as a centerpiece at any meal.
  • Cuisine: This recipe takes its inspiration from American dessert traditions, influenced by classical European techniques ensuring a rich, decadent outcome.
  • Cost: Prepare this dessert using budget-friendly ingredients like cream cheese and seasonal blueberries, balancing costs without sacrificing elegance.
  • Season: Ideally suited to be enjoyed in summer when blueberries are at their peak and lemons are readily available.
  • Occasion: Be it a family gathering, holiday celebration, or romantic dinner, this dessert is versatile enough to grace any occasion with finesse.

Why You’ll Love This Recipe

Indulge in the unique interplay of sweet and tart flavors, where the freshness of lemons meets the warmth of blueberries. The taste lingers on the palate beautifully, leaving a lasting impression. This Lemon Blueberry Cheesecake offers a sensory experience with each slice, from its creamy texture to the intricate layers of flavor.

Not only is this cheesecake a delight to taste, but it also proves convenient to prepare, with simple steps that allow for great results. The recipe is structured to enable preparations in phases, making it manageable for anyone with a busy schedule.

From a nutritional standpoint, this cheesecake incorporates the goodness of fresh fruits, providing a slight boost of vitamins alongside the indulgent creamy base. While it’s a dessert first and foremost, it’s a choice that offers a little more than just sweetness.

In social settings, this cheesecake garners admiration not only for its taste but also for its presentation. It’s a dessert that encourages sharing and creates a centerpiece for conversation, memories, and moments of enjoyment.

Moreover, the accessibility of ingredients and ease of preparation promote this recipe as a cost-effective way to enjoy a high-quality dessert experience at home without the need for complex or expensive components.

Historical Background and Cultural Significance

Tracing its lineage through time, cheesecake is a dessert revered across cultures, each adding its unique touch. Originating in ancient Greece, variations of cheesecake spread throughout Europe, evolving with regional tastes and available ingredients.

As it traveled, the essential qualities of cheesecake were maintained—creamy textures mingled with subtle sweetness. In American cuisine, the introduction of cream cheese and seasonal fruits, such as lemon and blueberries, created a uniquely refreshing variation capturing the essence of its cultural melting pot.

With its deep roots, the Lemon Blueberry Cheesecake showcases how traditional methods meet modern flavors, representing a connection across time and geography while celebrating diverse culinary heritages.

Across regions, variations echo local tastes; some may incorporate berry purees or zest variations, showing the recipe’s adaptability while honoring authentic cheesecake charm.

Ingredient Deep Dive

The starring ingredient, lemon, is not just known for its vibrant flavor but also rich cultural relevance—an essential in countless global cuisines. Returning vigor to dishes with its zest, lemons stand as symbols of freshness and health.

Bursting with vitamin C, lemons offer nutritional benefits, supporting immune health and digestive functions. Selecting bright, firm lemons ensures maximum juice yield and zest, stored in cool, dry conditions for longevity.

In cases where lemons aren’t at hand, lime can substitute, though the flavor profile slightly shifts, bringing a distinct tartness of its own.

Blueberries carry historical significance as one of North America’s native fruits, cherished for their sweet yet tart flavor profile. Rich in antioxidants, blueberries promote heart health and provide vital vitamins.

Select firm, deep-colored blueberries for the best blend of sweetness and tartness. Should fresh blueberries be unavailable, frozen blueberries work as a viable substitute, although they may alter the cheesecake’s structure slightly when baked, requiring vigilant handling.

Common Mistakes to Avoid

  • Not using a water bath: Ensuring smooth, crack-free cheesecake requires the gentle, even heat provided by a water bath during baking.
  • Overmixing the batter: Avoid incorporating too much air when mixing to prevent fluffiness that can lead to sinking.
  • Inadequate cooling time: Allow ample cooling duration to prevent structural collapse or cracking when cutting.
  • Immediate fridge storage: Cool the cheesecake gradually at room temperature outside the oven before refrigeration, maintaining its velvety texture.
  • Skipping the lemon zest: Omitting zest loses the depth of flavor, reducing the vibrant notes that characterize the recipe.
  • Using low-fat cream cheese: For authentic texture and flavor, full-fat cream cheese is essential, as lower-fat versions may compromise richness.
  • Incorrect blueberry preparation: Thoroughly wash and dry blueberries to prevent excess moisture compromising the cheesecake’s consistency.
  • Rushing the blueberry compote: Allowing enough simmering time is crucial to thicken and concentrate flavors adequately.

Essential Techniques

Perfecting the water bath technique is crucial for preventing cracks and promoting consistent texture in cheesecake baking. By placing your springform pan within a larger dish filled with hot water, you create an insulation barrier, ensuring even cooking, controlled temperature, and gentle setting of the cheesecake’s luscious creaminess.

Master the art of zesting for deep flavor. Utilize a microfiber zester or grater, gently grazing the lemon surface just enough to release vibrant oils without delving into the bitter pith beneath. Visual cues brighten zest aplomb without overpowering the mix.

Finally, achieving the perfect blueberry compote demands patience. As berries simmer, watch for the mixture bubbling steadily, reducing into a thick, syrupy consistency revealing ripeness through glossy textures and robust favors.

Pro Tips for Perfect Lemon Blueberry Cheesecake

1. **Room temperature ingredients**: Maintaining cream cheese, eggs, and other ingredients at room temperature enhances smoothness in the finished batter.
2. **Grease the pan lightly**: Easy separation upon cooling is key to avoid damaging delicate edges and surfaces.
3. **Leak-proof your springform pan**: Use double layers of aluminum foil securely around the pan to prevent water intrusion during the water bath.
4. **Open the oven door slowly**: A sudden introduction of cooler air may cause the cheesecake to crack or deflate.
5. **Taste test ahead**: Use fresh zest and fruit; sample their sweetness and acidity to balance elements within your batter beforehand.
6. **Gradual cooling**: Allow the cheesecake to adjust to room ambient temperature before refrigerated storage for finishing stability and flavor setting.

Variations and Adaptations

Regional variations, like the uplifting use of Meyer lemons and adaptions using lime, can offer an alternative citrus dimension. Experiment with integrating seasonal berries such as raspberries or blackberries for a different fruity twist.

Dietary modifications like gluten-free alternatives inspire creativity. Incorporate almond or coconut flour in the crust for a rich, nutty base. Vegan adaptations might seem challenging, but using cashew-based filling alternatives or other dairy-free cream cheeses brings the dream of animal-product-free variants to life.

Flaunt a presentation alternative with single-serving cups or individually sliced bars for easily crafted personal touches. Let each creation captivate visually, promoting unique spins on presentation.

Serving and Presentation Guide

Engage plating artistry with precise cuts, careful arrangement stacked cascading layers of alternating cheesecake and compote, crowned by a zest flourish for enhanced flair. Garnish with swirling sugar dust or candied peels adding sparkle, contrasting splendid elements underneath visually.

Traditional accompaniments, like simple vanilla whipped cream or lemon sorbet, elevate texture balance beyond natural sweetness, emphasizing delicate flavors. Alternatively, offer modern twists showcasing savory complements—nutty brochettes or crisp water crackers metaphorically speaking elegance.

Typically served cool, approximate an optimal climate temperature for maximum enjoyment. Allow room for ambiance to nurture celebratory notions while controlling portions efficiently past hungry goers.

Wine and Beverage Pairing

Pair lemon blueberry goodness with a crisp, light-bodied Riesling or Moscato to dance alongside fruit-forward notes without diminishing cheese’s creamy sweetness. The acidity of a Sauvignon Blanc might surprise, cutting through the richness with refreshing prowess.

Non-alcoholic options honor traditional tea pairings, a gentle green tea complementing citrus tang, or enhance custom mocktails blending citrus infusions for limitless combinations.

Temperature and quantity balanced preferences unify beverage harmony with culinary mastery, inviting a serenade of satisfied sips.

Storage and Shelf Life

Engage best storage practices by enwrapping cool-to-touch cheesecake in cling film for a pristine hermetic seal, preventing exterior air encroachment while refrigerated. A three-to-four day shelf life keeps freshness intact if maintained under optimal conditions.

Careful container elevation reduces contact with moisture or contaminants, sustaining stable texture over extended periods. Watch for any visible disfiguration or decline suggesting spoilage onset.

Freezing allows enjoyable future grazing by refining slices or shape in portioned segments, anticipating controlled thaw times adjusted accordingly for preserved appeal.

Make Ahead Strategies

Effortlessly split preparation maneuver prognosis, advancing through crust crafting and batter stages prior with downtime benefits. Storage allows an enduring lead with next-step advancements, ensuring attention remains upon presentation finales when desired without time-intensive pressure.

Quality retention bears monitoring vigilance—ensure crisp components—maintain integrity for eventual composition.

Incorporating fresh zest or seasonal adjustments just preceding service embellishes prior creation, stimulating veritable freshness; don’t hesitate to reinvigorate as necessary before ultimate reveal climax.

Scaling Instructions

Experimentation beckons comfortably with halves, doubles, and triples in secure chef-proof formulations. Maintain originality and scaling consistency via thought leadership engineering keen on protective structuring techniques.

Prosper great expansion, harness kitchenware and timing calibration proficiently asserting accuracy.

More accurate holds balanced aspect of refrigeration, storage, effective encasement—not unintentionally altering culinary experience by dimensioning discrepancies—motivating driven satisfaction.

Nutritional Deep Dive

Noteworthy macro proportions under healthy scrutiny spotlight energy macronutrients, including proteins, fats, and nourishing carbs, inviting dietary refinement affirming choice harmony.

Inspiring micronutrient benefits offer delightful persuasion through select vitamin availability and essential mineral presence, promoting well-manicured balance in a sweetly decadent coverall portrait.

Amid hosting serving spacings, wise management encourages pragmatic realization animating celebration indulgent holistically even if minimal segmenting.

Considering idealized consumption physiology encourages mindful rations essentially portioned allowance expectations present desirable pleasurable spine over excess.

Dietary Adaptations

Gluten-free lovers rejoice with alternative crusts slightly amplifying nut flavors. Eliminate dairy limitations through almond milk and tofu base explorations recapturing dairy-free, velvety cheesecakes.

The vegan sphere calls inspiration in combining cashew and coconut creations ascending non-renounced rival quality upon finished complexes revealing inevitable crossover brilliance.

Submit low-carb ketogenic wonders amplified through substituted sweet or nutty alternatives fostering sophisticated profiles.

Strong paleo efforts transform heritage cheesy triumphs supporting delicate specialty diets, uncovering groundbreaking wisdom showcasing underestimated epicureans revolutionizing assumptions.

Multiple within boundaries evaluate safe, respective personal preference choices contributing universally.

Troubleshooting Guide

Texture issues require focus on impeccable ingredient blends harmonizing slowly, applying structural anticipation gentle pastry rotation.

Flavor balance finds symmetrical resonance through consistent odor sampling and reseasoning if necessary to calibrate profiles bounds mutually welcoming and ascending aroma.

Temperature difficulties secure overlapping thermal measures during preparation resolving ideal dependability translating into reliable baking occur demonstrably even reception.

Equipment mechanics expand backup contingencies, ensuring access, repairing or substituting tools cogently before progressing.

Ingredient fixations demand adept navigation converting attainable geographical supply scarcities homologously adventuring appealing suggestion transformation undertaking.

Timing concerns emphasize experiential deduction careful extension assessment within multiple cycles experiencing assurance induces experiential product continuity.

Recipe Success Stories

Community feedback echoes harmoniously, resonating through shared candor depicting positive engagement attributes cherished lovingly led by culinary ambassadors.

Narrations unfold guiding personalized expression, situating cheesecake as a friendship conduit unifying participant applause recount; occasional transformative adaptation narratives flourish.

Aspiring enthusiasts rejuvenate through inspired versions, daring spectacular combinations reflecting originality acknowledging established sweet success.

Reader stimulus, visual mastery garners additional zest, elevating atmosphere reconstructively reviving cheesecake narratives actively portrayed within thriving culinary opportunity sphere.

Frequently Asked Questions

Q: Can I substitute fresh blueberries with frozen ones?
A: Yes, frozen blueberries can be used as an alternative, but they may release more moisture during baking, which could slightly alter the cheesecake’s texture. Opt for a careful thawing and drying process.

Q: Is the cheesecake best served chilled or at room temperature?
A: For optimal taste and texture, serve the cheesecake thoroughly chilled as it enhances both the creaminess and balance of the tangy lemon and sweet blueberry flavors.

Q: How do I prevent the cheesecake from cracking?
A: Ensure an even water bath around the springform pan and avoid overmixing the batter. Gradual cooling after baking is crucial to avoiding structural cracks.

Q: How far in advance can I make the cheesecake?
A: You can make the cheesecake up to two days in advance. Just ensure it’s well-covered in the refrigerator and garnish fresh toppings closer to serving.

Q: What’s the best way to store leftover cheesecake?
A: For best preservation, store leftovers in an airtight container in the fridge for up to three days, or freeze slices wrapped aptly for longer storage.

Q: Can I use other fruits in this recipe?
A: Absolutely, similar berry alternatives like raspberries or blackberries are apt substitutions. Adjust sweetness slightly to match changes.

Q: What causes my cheesecake’s edges to darken excessively?
A: Try lowering oven temperature slightly and monitor towards the end of baking to prevent over-browning. Foiling the top can help regulate excessive browning.

Q: How necessary is the use of a springform pan?
A: A springform pan helps ensure easy release, maintaining the cheesecake’s shape. If not available, use a deep dish, but line it well for extraction.

Q: Can I add a crust to the top of the cheesecake?
A: Typically cheesecakes feature toppings rather than crusts to create textural interest. However, a decorative crumb topping could provide an appealing finish.

Q: How can I make the cheesecake more lemony?
A: Amp up lemon presence with extra zest or a small inclusion of lemon juice, carefully balancing acidity within flavor context needed.

Q: Are there low-sugar options for this recipe?
A: Swap regular sugar with a low-carb sweetener while closely monitoring measurements to ensure ideal sweetness and consistency.

Q: What is the best side pair for this cheesecake?
A: Complement this cheesecake with a citrus-infused tea or delicate herbal tea, enhancing the refreshed feel of the dessert with nourishing leisure.

Additional Resources

Engage further curiosity with companion recipes pursuing accompaniments enhancing shared table alongside cheesecake offerings. Investigate technique guides solidifying acquaintance proficiency, heightening skills transformed smart creativity.

Dive into extensive ingredient background exploration or thorough enumeration essentials delving into equipment array, revamping stations adeptly for capacity improvement.

Seasonal modules inspire seasonal creativity in the kitchen, promoting whole experimentation challenging expectations honestly rewarding personal growth.

Join the Conversation

Express creatively through diverse social media forums offering encouragement to share cheesecake accolades, capturing photographic, stylized snapshots evolving beyond homemade traditions.

Encourage community orchestration extending warmth through shared trials and monumental alterations. Solicit feedback or share reader remixes contributing reciprocally to joyful expansion collectively illustrated.

Revel in mutual investment signifying recipe delight alongside prospective recreations, seeking spirited encouragement vaulting cheesecake into universal culinary appreciation.

The Recipe

Lemon Blueberry Cheesecake

Serves: 8

Prep Time: 30 mins

Cook Time: 60 mins

Total Time: 90 mins

Kitchen Equipment Needed

  • Springform pan
  • Mixing bowls
  • Electric mixer
  • Baking sheet
  • Spatula
  • Microplane zester
  • Aluminum foil
  • Measuring cups and spoons

Ingredients

  • 1 ½ cups graham cracker crumbs
  • ½ cup unsalted butter, melted
  • 3 tablespoons sugar
  • 3 packages (8 oz each) cream cheese, softened
  • 1 cup sugar
  • 3 large eggs
  • 1 tablespoon lemon zest
  • 2 tablespoons lemon juice
  • 1 teaspoon vanilla extract
  • 1 ½ cups fresh blueberries
  • ¼ cup blueberry preserves

Directions

  1. Preheat the oven to 325°F (160°C). Combine graham cracker crumbs, melted butter, and 3 tablespoons of sugar in a bowl. Press onto the bottom of a 9-inch springform pan. Bake for 10 minutes, then cool.
  2. In a large bowl, beat cream cheese and 1 cup sugar until smooth. Add eggs one at a time, blending well after each addition. Mix in lemon zest, juice, and vanilla extract.
  3. Gently fold in 1 cup blueberries. Pour cream cheese mixture over the crust.
  4. Place the cheesecake in a preheated water bath. Bake for 50–60 minutes until the center is almost set.
  5. Cool in the oven with the door ajar for 1 hour. Refrigerate for at least 4 hours or overnight.
  6. In a small saucepan, melt blueberry preserves over low heat; stir in remaining blueberries. Pour over cheesecake before serving.

Recipe Notes

  • Ensure cream cheese is fully softened to avoid lumps in the batter.
  • Wrap the springform pan with aluminum foil to prevent water from seeping in from the water bath.
  • Adjust sugar according to the sweetness of the blueberries if desired.