Irresistible Snickers Cheesecake Pie Recipe for Indulgent Dessert Lovers

Decadent Snickers Cheesecake Pie: A Sweet Indulgence

⚖️
Difficulty
Medium

⏲️
Prep Time
20 mins

🕒
Cook Time
40 mins

⏱️
Total Time
60 mins

🍽️
Servings
8 slices

Satisfy your sweet tooth with our utterly Decadent Snickers Cheesecake Pie, a recipe that combines the creamy richness of cheesecake with the irresistible flavors of a Snickers bar. This delightful dessert blends a crunchy chocolate crust, a luscious cheesecake filling, and a rich caramel topping, making it a truly show-stopping treat. Perfect for any occasion, this cheesecake pie will impress your family and friends with its decadent taste and enticing presentation.

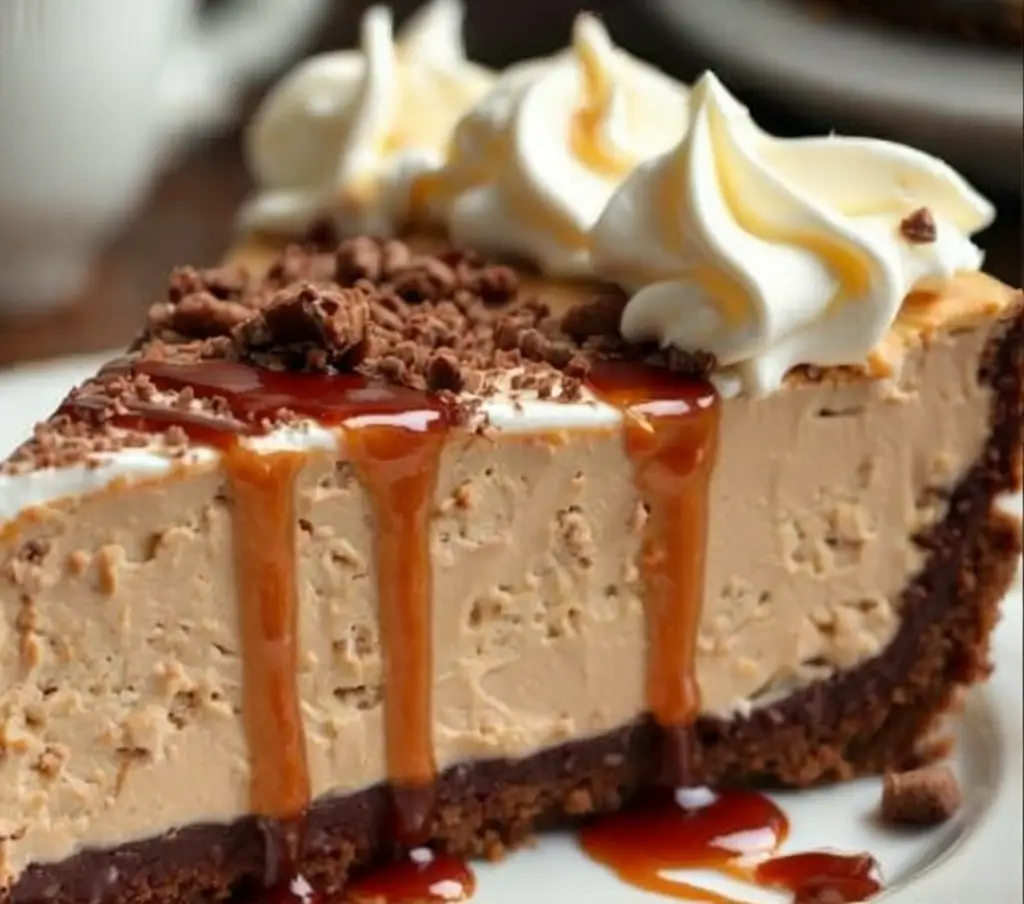
Prepare to be mesmerized by the sensory experience of indulging in a slice of this creamy delight. The smooth, velvety texture of the cheesecake, combined with the crispness of the chocolate crust and the gooey caramel layer, creates a perfect balance of flavors and mouthfeel. Each bite offers a burst of sweet and salty notes, thanks to the addition of chopped Snickers bars. The aroma of melted chocolate and caramel will fill your kitchen, making the anticipation hard to resist.

Quick Recipe Highlights

  • Flavor Profile: A perfect harmony of sweetness from caramel, chocolate richness, and a hint of nuttiness from peanuts.
  • Texture: Creamy and smooth cheesecake filling with a crunchy chocolate base and gooey caramel top.
  • Aroma: An intoxicating scent of chocolate and caramel that will fill your kitchen space.
  • Visual Appeal: A beautifully layered dessert that’s as pleasing to the eye as it is to the palate.
  • Skill Level Needed: Medium, with steps involving some baking techniques that require attention to detail.
  • Special Equipment: Springform pan, food processor, electric mixer.

Recipe Overview

  • Difficulty Level: Medium. The recipe involves creating a layered dessert, which requires precision but is achievable even for a determined beginner.
  • Category: This pie falls under desserts and sweet treats, perfect for after-dinner indulgence.
  • Cuisine: A modern American twist that blends classic cheesecake with popular candy bar flavors.
  • Cost: Moderately priced, as it involves purchasing specific branded chocolate bars and cream cheese.
  • Season: An all-season favorite, this dessert is great for any time of year.
  • Occasion: An ideal choice for celebrations, casual get-togethers, and even as a festive holiday dessert.

Why You’ll Love This Recipe
The Decadent Snickers Cheesecake Pie is not just a visual delight but a treat to all senses. Taste-wise, it captures the essence of a Snickers bar while taking it to a new level with the creamy cheesecake layer. The texture is perfectly balanced, with a base that provides a satisfying crunch against the creamy filling and smooth caramel. Its preparation might seem sophisticated, but fear not, as this recipe is designed for convenience with step-by-step instructions that make the process enjoyable.

Nutritionally, this dessert offers a balance of indulgence with some nutritional elements from the peanuts and cheese, permitting you a guilt-free treat in moderate servings. This pie is also a great centerpiece for social gatherings and entertaining, sure to prompt compliments and conversations. Finally, it’s cost-effective due to its ability to serve a crowd, making it an accessible choice for bakers of all levels.

Historical Background and Cultural Significance
Originating from the classic American culinary tradition of blending candies and baked goods, this cheesecake pie integrates the beloved taste of Snickers. Candy-infused desserts have long been a staple in modern American cuisine, seen as a way to elevate traditional recipes with an innovative twist. Over time, this recipe evolved to become a cherished treat, with numerous adaptations appearing in cookbooks and online culinary platforms.

The cultural impact of this recipe can be traced back to America’s love for candy bars and cheesecakes, representing a blend of comfort and indulgence in one dish. Regional variations might incorporate local sweets or adaptations to the crust using native grains. Overall, the Decadent Snickers Cheesecake Pie maintains its status as a beloved, decadent treat in both professional kitchens and home bakeries.

Ingredient Deep Dive
The primary ingredient in this tantalizing dessert is, of course, the Snickers bars. Known for their rich combination of peanuts, caramel, and nougat coated in milk chocolate, Snickers bars are a staple in American candy culture. They add not only flavor but also texture, with their nutty, chewy consistency contributing to the overall experience of the pie. When selecting these bars, ensure they are fresh and stored in a cool environment to maintain their quality.

Complementing the Snickers bars is the cream cheese, providing the creamy base of the cheesecake filling. Opt for full-fat cream cheese for optimal richness, and allow it to come to room temperature before using to facilitate smooth mixing. For storage, keep unopened cream cheese refrigerated and sealed to prevent spoilage. If you’re looking for substitutes, Neufchatel cheese can offer a lower-fat alternative with a slightly tangy flavor.

Common Mistakes to Avoid

  • Using cold cream cheese. Always let it reach room temperature to ensure a smooth, lump-free filling.
  • Overmixing the batter, which can lead to a dense cheesecake. Mix just until ingredients are combined.
  • Skipping the water bath can cause cracks in the cheesecake. This step ensures even cooking.
  • Not chilling the pie adequately. Allow sufficient time to set for the best texture.
  • Cutting into the cheesecake too soon. Wait for the recommended chill time for clean, neat slices.
  • Using a dull knife, which can ruin presentation. Always use a sharp knife for slicing.
  • Forgetting to cover and store leftovers properly, which can cause drying out or absorption of fridge odors.
  • Over-baking the crust, which can become too hard. Follow the recommended baking times closely.

Essential Techniques
Achieving the perfect cheesecake texture involves several key techniques. One critical method is the use of a water bath, which prevents the cheesecake from drying out or cracking. The gentle, moist heat evenly cooks the cheesecake, maintaining its smooth and luscious texture. It’s essential to tightly wrap the springform pan in foil to prevent water from seeping in.

Mastering the art of mixing is another crucial skill. Avoid overbeating the cream cheese and eggs, which can incorporate too much air and result in a crumbly or cracked cheesecake. Mix just until combined for the best texture. When baking, keep an eye on visual cues; a slight jiggle in the center of the cheesecake indicates it’s perfectly cooked.

Pro Tips for Perfect Decadent Snickers Cheesecake Pie
Ensure all ingredients are at room temperature for easier blending and a smoother batter.
Invest in a high-quality springform pan to avoid leaks and ensure easy removal of the cheesecake.
Don’t rush the cooling process; allow the cheesecake to cool at room temperature before refrigerating overnight.
Use a sharp knife warmed under hot water for clean slicing of the cheesecake.
Add decorative swirls of caramel or chocolate sauce for an eye-catching presentation.
Consider adding a sprinkle of sea salt on top for a deliciously contrasting flavor.
Variations and Adaptations
Regional variations might see the use of local brands of chocolate or adaptations in the crust. Incorporating seasonal ingredients such as pumpkin spice in fall can offer a delightful twist. Dietary modifications can be made by using gluten-free cookie crumbs for the crust or dairy-free cream cheese alternatives for those with special diets.

For flavor variations, consider adding a splash of vanilla extract or swapping Snickers with other favorite candy bars. Texture modifications can include adding extra peanuts for more crunch or a layer of marshmallow fluff for an added gooey dimension. Presentation alternatives might embrace individual-sized mini cheesecakes for personal servings.

Serving and Presentation Guide
When it comes to presenting your Snickers Cheesecake Pie, garnishing is key. Consider a drizzle of warm caramel or chocolate sauce over each slice for an added layer of visual appeal. For garnishing ideas, sprinkle chopped peanuts or chocolate shavings as a finishing touch. Serve the slices on dessert plates that complement the pie’s rich colors, emphasizing its decadent layers.

Provide a clean slice to each guest, ensuring just the right portion size to savor its rich flavors without overwhelming. Temperatures play an important role; serve the cheesecake chilled for the best texture and taste experience. Engage guests with modern serving suggestions, perhaps coupling the dessert with a small scoop of vanilla ice cream or a dollop of whipped cream.

Wine and Beverage Pairing
Pair this delightful cheesecake pie with a dessert wine like a rich, nutty port or a slightly acidic Riesling that cuts through the sweetness. For non-alcoholic alternatives, consider a caramel-infused latte or a simple cold brew coffee to balance the rich flavors. For a lighter option, a fragrant peppermint tea could complement the dessert’s sweetness while aiding digestion.

When serving wine, be sure to chill white wines slightly before serving, while a room-temp port will emphasize its deep, lingering aromas. Proper portioning of drink pairings can also enhance and not overpower the delicate balance of flavors in the dessert.

Storage and Shelf Life
To store your Snickers Cheesecake Pie, wrap it tightly in plastic wrap or aluminum foil and refrigerate for up to five days. Keep the temperature consistent, ideally below 40°F, to maintain freshness. For longer storage, freezing is an option; simply wrap the cheesecake tightly, then place in a freezer-safe container. When ready to serve, thaw slowly in the refrigerator.

Be mindful of signs of spoilage such as off-smells or discoloration in the cheesecake. If reheating is necessary, do so gently using a warm water bath to maintain the texture. Always encourage serving the pie fresh to preserve its creamy consistency and overall dish integrity.

Make Ahead Strategies
To streamline your preparation process, consider making each layer of the cheesecake pie separately in advance. Start by preparing the crust and refrigerating it, allowing it to set firm. The filling can be mixed and added a day prior, ensuring all flavors meld beautifully overnight. Ensure quality is maintained by wrapping securely and chilling at all stages.

Reheating is seldom needed with this recipe; however, if necessary, use a gentle water bath to gradually warm the cheesecake to serving temperature. Adding fresh elements like caramel topping just before serving enhances the presentation and taste experience.

Scaling Instructions
This recipe can be halved for a smaller serving size, perfect for a more intimate gathering. Use smaller pans and adjust baking times by reducing by approximately one-third. Doubling the recipe for a larger group is achievable with the use of larger equipment and increased ingredient quantities, ensuring baking times are extended by 10-15 minutes. Always consider storage space for scaled-up versions and maintain careful attention to mixing to preserve the cheesecake texture.

Nutritional Deep Dive
The nutritional aspects of this cheesecake pie can be examined through its rich macronutrient content, primarily from fats and sugars. The nuts provide beneficial micronutrients such as magnesium and vitamin E. Consumed in moderation, this dessert offers a permissible indulgence with protein from the cream cheese offering some balance. Be aware of portion sizes, as this is a calorie-dense dessert, and consider sharing it as a celebration or occasional treat.

Dietary Adaptations
For those seeking dietary adaptations, accommodate gluten-free needs by using gluten-free cookie crumbs in the crust. Dairy-free modifications can involve using coconut cream cheese alternatives for the filling, although this may alter texture slightly. Those adhering to a low-carb lifestyle can opt for sugar substitutes and nut-based crusts to reduce carbohydrates, fitting within keto or Paleo guidelines. Allergens such as peanuts can be substituted with other nuts or omitted according to dietary requirements.

Troubleshooting Guide
Should your cheesecake experience texture issues like dryness or cracking, consider increasing moisture through a water bath or adjusting baking times. Balance any overly sweet flavors by choosing unsweetened cream ingredients or incorporating pinch salt. Monitor temperatures closely to avoid undercooking or overcooking; aim for a slight jiggle with firmness at the edges.

If equipment challenges arise, utilize food processors for efficient ingredient blending or use a manual mixer where electric options aren’t available. Timing concerns can be mitigated by preparing ingredients and tools ahead of time, ensuring you’ll complete steps with precision.

Recipe Success Stories
Many cooks have shared their positive experiences with our Decadent Snickers Cheesecake Pie, noting the delight it brings to family gatherings and celebrations. Photographic efforts have been complemented with inventive presentation styles across social media platforms, reinforcing its visual appeal. Readers have successfully adapted the recipe to personal tastes, often attributing their fondness to the versatile, crowd-pleasing nature of this dessert.

Frequently Asked Questions

How can I prevent my cheesecake from cracking?
Ensure a water bath is used to create an even cooking environment and avoid overbeating the filling.

Can I use a different candy bar?
Absolutely, feel free to substitute with your favorite bar, keeping in mind the balance of sweetness and texture changes.

What’s the best way to slice the cheesecake pie?
Use a hot, sharp knife, cleaning between each slice for the cleanest cuts.

How do I store the cheesecake once it’s made?
Store in an airtight container or wrap tightly in plastic, kept in the refrigerator.

Can this recipe be made gluten-free?
Yes, use gluten-free cookies for the crust to accommodate dietary needs.

What should I do if my crust is too hard?
Be cautious not to overbake; use less pressure when pressing the crust into the pan next time.

How long can this cheesecake be stored?
Properly stored, it can last up to five days refrigerated or a month in the freezer.

Is it possible to freeze this pie?
Yes, wrap in foil or plastic, then place in a freezer-safe bag or container.

Will using low-fat cream cheese affect the texture?
It may result in a less creamy texture; full-fat is recommended for the best results.

Can I make this in a regular pie pan?
A springform pan is recommended for easy release, but adjustments might work for a regular pie pan with careful monitoring.

Can I prepare this recipe ahead time?
Yes, prepare each step as described in the make-ahead strategies to save time without compromising quality.

Additional Resources
Explore our related desserts for more sweet inspirations, like the Chocolate Drizzle Cheesecake or Caramel Delight Bars. Gain technique insights through our cheesecake baking guides. Learn about ingredient substitutions and equipment setups to elevate your baking skills. Seasonal adaptations and presentation ideas abound in our culinary blog, where creativity meets delicious results.

Join the Conversation
Share your slice of our Decadent Snickers Cheesecake Pie on social media, tagging us with your unique variations or photogenic success shots. We’re eager to hear your reviews and personal touches added to this recipe! Engage with our community by commenting on others’ culinary attempts, making suggestions, and sharing tips for an ongoing exchange of baking wisdom.

The Recipe

Decadent Snickers Cheesecake Pie

Serves: 8 slices

Prep Time: 20 mins

Cook Time: 40 mins

Total Time: 60 mins

Kitchen Equipment Needed

  • Springform pan
  • Food processor
  • Electric mixer
  • Baking sheet

Ingredients

  • 1 1/2 cups chocolate cookie crumbs
  • 2 tbsp sugar
  • 6 tbsp melted butter
  • 24 oz cream cheese, softened
  • 1 cup sugar
  • 1 tsp vanilla extract
  • 3 large eggs
  • 1 cup chopped Snickers bars
  • 1/2 cup caramel sauce
  • 1/4 cup chopped peanuts (optional)

Directions

  1. Preheat the oven to 350°F (175°C). Wrap a springform pan in foil to prevent leaks.
  2. Combine cookie crumbs, sugar, and melted butter, pressing into the bottom of the pan to form the crust. Bake for 10 minutes and let cool.
  3. Beat cream cheese until smooth, then add sugar and vanilla. Mix until combined.
  4. Add eggs one at a time, mixing gently to incorporate. Fold in chopped Snickers bars.
  5. Pour the filling over the crust and smooth the top. Place the pan in a water bath in the oven.
  6. Bake for 35-40 minutes until the center is slightly jiggly but set around the edges.
  7. Remove from oven and cool at room temperature. Refrigerate at least 4 hours or overnight.
  8. Before serving, drizzle the top with caramel sauce and sprinkle with chopped peanuts if desired.

Recipe Notes

  • Ensure cream cheese is softened for smoother mixing.
  • For an extra garnish, consider adding chocolate shavings on top of the caramel.
  • Experiment with different candy bars for variety in flavor.

Indulge in Decadence with the Best Dark Chocolate Mousse Cake Recipe

Dark Chocolate Mousse Cake: An Indulgent Delight

⚖️
Difficulty
Intermediate

⏲️
Prep Time
30 mins

🕒
Cook Time
45 mins

⏱️
Total Time
75 mins

🍽️
Servings
8

Unveil the rich depths of chocolate with this Dark Chocolate Mousse Cake, a dessert that promises luxury with each bite. Enveloped in a velvety mousse and resting on a feather-light sponge, this cake is a symphony for the senses. Every bite unravels layers of indulgent dark chocolate with a smooth, creamy texture that effortlessly melts in your mouth. This cake is more than a dessert; it is an experience—a conclusion to a dinner party or a special treat just because.

Imagine the delight of your guests as you serve this cake, its rich aroma filling the room, heralding the pure pleasure that’s about to be enjoyed. The balance of bittersweet dark chocolate and the airy mousse creates a harmonious blend, satisfying the chocolate lovers and traditional dessert enthusiasts alike.

For those who love to entertain, this Dark Chocolate Mousse Cake offers an exquisite presentation that transforms a simple meal into a memorable event. The contrast of the smooth mousse against the cake’s backdrop offers an elegant look that is sure to impress. And with the bonus of making it ahead, hosting becomes less stressful, allowing you to enjoy the occasion as much as your guests.

Quick Recipe Highlights

  • Flavor Profile: The cake boasts an intricate combination of bittersweet chocolate, enriched with a hint of vanilla that forms a luxurious, irresistible flavor.
  • Texture: A delightful blend of smooth mousse paired with a soft sponge provides a melt-in-your-mouth sensation.
  • Aroma: Rich and comforting, the chocolate aroma is heightened with hints of fresh vanilla.
  • Visual Appeal: Dark and decadent, with glossy mousse layers and a sponge base.
  • Skill Level Needed: Ideal for those with intermediate baking skills, requiring careful temperatures and folding techniques.
  • Special Equipment: A springform pan and a stand mixer are essential to achieve the perfect mousse texture.

Recipe Overview

  • Difficulty Level: This dessert is moderately challenging, tailored for bakers who are comfortable with multi-step processes and precise techniques like folding and tempering.
  • Category: This luscious dessert falls into the category of celebration cakes, perfect for birthdays and other milestones.
  • Cuisine: While rooted in French patisserie traditions, this cake enjoys global appreciation for its classic mousse preparation.
  • Cost: A sophisticated yet cost-effective choice, the primary expense is quality dark chocolate.
  • Season: Best served in cooler weather for optimal storage, yet elegant enough for holiday gatherings all year round.
  • Occasion: Recommended for celebratory dinners, anniversary parties, or any gathering where a show-stopping dessert is in order.

Why You’ll Love This Recipe


First and foremost is the extraordinary taste and texture combination this cake provides. The deep, luxurious taste of dark chocolate is complemented by the lightness of the mousse, creating a balance that is both indulgent and satisfying. The smoothness of the mousse contrasts beautifully with the fluffy sponge base, offering a multi-textured bite that keeps every forkful exciting.

In terms of convenience, prepping the mousse and sponge ahead of time relieves much of the day-of preparation stress. The cake can be stored in the refrigerator, making it an excellent choice for those planning ahead for events or gatherings.

Nutritionally, while the Dark Chocolate Mousse Cake is a treat, using quality ingredients like real dark chocolate offers benefits such as antioxidants. Dark chocolate, when enjoyed in moderation, can be a richer source of flavonoids than other types of desserts.

As a socially engaging dessert, this cake creates a perfect centerpiece to any dinner conversation. Paired with the right beverages, such as a rich red wine or a full-bodied coffee, it elevates the dining experience and encourages longer post-dinner conversations.

Lastly, from a cost perspective, creating a homemade Dark Chocolate Mousse Cake offers a more economical choice compared to purchasing a bakery cake of similar sophistication. You can choose the chocolate to suit your budget or dietary preferences while also controlling the quality and freshness of the cake.

Historical Background and Cultural Significance


Dark chocolate mousse cakes trace their roots back to the illustrious French culinary tradition. Mousse, deriving from the French word for ‘foam,’ was a culinary innovation that combined airy textures with rich, intense flavors, typically served in high-end patisseries.

Over the years, this dessert became synonymous with elegance and sophistication, associated with fine dining and special occasions. Its ability to adapt to different interpretations—whether a straightforward mousse or a layered cake version—demonstrates its versatility within the culinary world.

The evolution from simple chocolate mousse to intricate mousse cakes reflects broader trends in baking and dessert presentation. As techniques improved and the global palate became more open to rich desserts, the mousse cake rose in prominence for its ability to impress while satisfying cravings.

Depending on the country or region, variations might include infusions of liquors, the addition of fruits, or even layered with other desserts like brownies or biscuits. Each variation lends its own cultural spin while keeping the essence of the original mousse concept intact.

Ingredient Deep Dive


Dark chocolate is the star of this recipe, celebrated not only for its intense flavor but also its rich history. Originating from the cacao bean, dark chocolate has been crafted and consumed since ancient civilizations such as the Aztecs and Mayans, who valued it both for currency and cuisine.

Nutritionally, dark chocolate is known for its heart-health benefits, linked to its content of flavonoids, which are compounds with antioxidant properties. Look for chocolate with at least 70% cacao for maximum health benefits while maintaining that luxurious taste.

When selecting chocolate, consider the brand’s reputation and the source of the cacao beans for a balance of ethical and quality consumption. Store chocolate in a cool, dry place away from sunlight to maintain its texture and flavor over time.

Eggs provide the mousse with structure and richness. They should be as fresh as possible for whip height and consistency. A room-temperature egg helps achieve the best incorporation texture for a smoother mousse.

Incorporating vanilla adds a nuanced layer of sweetness to balance the chocolate, transforming the aroma and flavor profile of the cake. Pure vanilla extract is preferred over imitation for a more natural taste.

Common Mistakes to Avoid

  • Overbeating the cream can lead to a dense and grainy mousse. Aim for soft peaks to maintain its light and airy texture.
  • Failing to temper the chocolate properly can result in the chocolate seizing. Melt chocolate over a gentle simmer using the double boiler method.
  • Not using room-temperature eggs will lead to an uneven mixture, which impacts the final mousse texture.
  • Ignoring recommended folding techniques can deflate the mousse, ruining its light texture. Always fold with a gentle hand.
  • Rushing the cooling process might cause moisture in the cake, leading to a soggy base. Always allow ample time for cooling.
  • Improperly lining the baking pan could result in a stuck base. Use parchment paper for best removal results.
  • Using low-quality chocolate can compromise both flavor and texture, so choose your chocolate wisely for the best results.
  • Serve at the wrong temperature. Ensure the cake is slightly chilled for slicing and presentation.
  • Too much moisture in storage can impact the texture. Keep sealed to avoid air and moisture exposure in the refrigerator.
  • Failure to balance flavor by omitting salt, which spikes sweetness and enhances overall taste. Always include a pinch.

Essential Techniques


One of the most essential techniques in crafting this cake is mastering the art of folding. Folding is crucial to incorporate air without deflating your mixture, particularly when combining whipped cream with melted chocolate. The secret lies in using a wide spatula and gentle, rotating motions that cut down the mixture while turning the bowl.

Tempering chocolate is another key technique. This involves slowly melting the chocolate to ensure a shiny finish and proper texture when cooled. Always use a double boiler to carefully control the temperature, preventing it from overheating and seizing.

Knowing when egg whites form soft peaks is crucial. When whipping egg whites, the process should stop when peaks form that slightly tip over without drooping. Hitting this stage correctly provides the right structure to mousse, contributing to its lightness.

Lastly, meticulous line and bake techniques ensure even cooking. Line cake pans with parchment to prevent sticking, and test doneness with a toothpick method—insert into the cake and look for a few moist crumbs but no batter residue.

Pro Tips for Perfect Dark Chocolate Mousse Cake


Choose a high-quality chocolate with 70-85% cacao for the richest flavor. Its intense bitterness will balance beautifully with the creaminess of the mousse and sweetness of sugar.

For an airy mousse, ensure all utensils used for whipping cream or meringues are cold. This helps stabilize the peaks and maintain their fluffiness.

Incorporating a tablespoon of espresso can enhance the chocolate flavor, adding depth without affecting the overall taste.

Use unsalted butter, which allows better control over the cake’s saltiness and improves the texture by preventing excess salt crystals from altering structure.

To achieve a clean slice when serving, dip your knife in hot water, cleaning it between each cut for perfect presentation without smudged layers.

Patience is key—never rush the chilling steps. Allow the mousse and cake to set fully to maintain its structure when slicing and serving.

Experiment with subtle garnishes such as fresh berries or a sprinkle of sea salt to enhance both visual appeal and flavor profile.

A small amount of gelatin can be used to stabilize the mousse for easier serving, especially in warmer climates or if planning to transport the cake.

Variations and Adaptations


Regional variations can enhance your cake uniquely. For instance, Italian versions might incorporate mascarpone cheese into the mousse for a creamier texture, adding an Italiano flair to your cake.

Seasonal adaptations can include the addition of fruits. Fresh raspberries in summer or candied oranges in winter provide freshness or warmth, complementing the chocolate.

For dietary modifications, consider a gluten-free cake base by substituting almond flour for regular flour, retaining structure with added moisture from Greek yogurt.

Playing with flavor variations might include infusions of liqueurs such as Grand Marnier for a citrus boost or a dash of bourbon for a caramel-like depth.

Texture modifications can involve a crunchy layer, such as crushed almonds, between the sponge and mousse for delightful bites with contrast.

In terms of presentation, experiment with a dome shape for a modern edge or layer in a trifle glass for individual servings that showcase the beautiful layers.

Serving and Presentation Guide


To create a stunning presentation, consider plating slices with artistic zigzagging of chocolate sauce across the plate. This anchors the dessert aesthetically while adding extra depth.

Garnishing with a small mint sprig or edible flowers creates a pop of color against the deep chocolate hues, offering a refreshing visual and taste finish.

Consider classic pairings such as serving with a side of crème anglaise or fresh berry coulis, adding a creamy or fruity element to brighten the dish further.

For a current twist, you can present the mousse cake with shards of caramel for a modern, artistic flair or dust with a light snowfall of cocoa powder for elegance.

Temperature plays a crucial role. Serve slightly chilled for better texture while allowing the chocolate aroma to bloom as it warms gently on the plate.

Portion control is critical due to the richness of the cake. Small slices encourage savoring the dessert’s flavors and prevent overwhelming the palate.

Wine and Beverage Pairing


Rich red wines such as a mature Cabernet Sauvignon or a Port can elegantly complement the cake’s chocolate notes, their tannins balancing the richness.

For non-alcoholic options, a chilled, spiced chai tea offers warmth and spice that align effortlessly with the chocolate, enhancing the dessert experience.

Pairing with coffee, particularly espresso or an Americano, can amplify the cake’s sweetness while cleaning the palate between bites, perfect for dessert lovers.

Temperature considerations are vital—serve wines slightly chilled but not cold, around 60°F, and hot beverages above 160°F to pair perfectly with the cake.

For serving suggestions, ensure glasses are polished, and aromatic beverages are prepared just before serving to maximize aroma and freshness.

Storage and Shelf Life


Store the cake covered in the refrigerator to maintain the mousse’s consistency and prevent drying. It’s best consumed within 3 days for maximum freshness.

Ideal storage involves placing it inside an airtight cake container or wrapping it tightly with plastic wrap to avoid air exposure and potential flavor absorption from other foods.

Signs of spoilage include any noticeable off smells or water pooling, which means the mousse has lost its integrity and should not be consumed.

Reheating isn’t recommended due to the cake’s delicate mousse, which can melt. Instead, let it sit at room temperature for about 20 minutes before serving.

Freezing guidelines suggest wrapping individual slices in cling film and then placing them in a freezer bag, allowing easy thawing and portion control while preserving flavor.

Make Ahead Strategies


The entire cake can be prepared a day ahead to allow flavors to meld and the mousse to firm up, ensuring clean slicing and proper presentation.

During prep, it’s crucial to separate stages—bake the sponge base first, allow it to cool completely, then layer with mousse to prevent melting and structure loss.

Quality assessment of any make-ahead dessert focuses on texture; if mousse softens too much, gelatin may be incorporated to stabilize future batches.

Assemble the cake directly on the serving dish to minimize movement and maximize presentation structure, reducing the risk of damage during transfer.

If forehead cooling, remove the cake about 30 minutes before serving to allow flavors to develop fully but without sacrificing overall shape.

Integrating fresh elements like berries or additional garnishes should occur right before serving to maintain vibrancy and preserve their immediate taste impact.

Scaling Instructions


When halving, carefully adjust egg quantities, using a yolk or whites calculator to ensure even distribution throughout the mousse and sponge.

For doubling or tripling, ensure equipment such as mixers or bowls are large enough to handle increased volumes, preventing mixing overruns and spillage.

Timing changes only slightly as the volume of the batter increases. Monitor the cooking time towards the end as larger quantities may bake less evenly.

Consider staggered baking times for multiple layers if doubling or tripling and investing in additional pans to maintain steady oven temperatures.

Storage needs evolve with scaling; sealed portions individually help retain freshness, preventing the entire batch from being exposed each serving.

Nutritional Deep Dive


The macro breakdown for this cake highlights its carbohydrate and fat content, driven by refined sugars and cocoa butter from dark chocolate.

Micronutrients in dark chocolate, including iron, magnesium, and zinc, contribute to essential trace elements in diets with moderation.

Health benefits include potential mood-boosting properties due to serotonin regulation from specific compounds in chocolate.

Dietary considerations should align with moderation, balancing this rich dessert with lighter meals or physical activity to offset caloric intake.

Analyze portion sizes to understand nutritional impact; typically, a slice should be small, complemented with light accompaniment for balance.

Mindful consumption reflects weight management goals, recognizing indulgence with simultaneous appreciation of nutritional content and size.

Dietary Adaptations

For gluten-intolerant individuals, create a gluten-free cake by substituting almond flour or gluten-free baking blend for traditional flour without losing moisture.

Dairy-free versions are achievable by replacing heavy cream with coconut cream, providing a similar texture and subtle tropical flavor for the mousse.

Vegan adaptations require substituting eggs for aquafaba or commercial egg replacer, maintaining leavening with chemical agents for structure in the sponge.

Low-carb indices are maintained by using erythritol or stevia for sweetening while maintaining texture integrity with moisture-rich ingredients like Greek yogurt.

Keto followers might enjoy this treat by using almond flour exclusively and increasing nut milk ratios for a lower-carb profile, maintaining rich satisfaction.

Paleo enthusiasts can adapt with organic or raw dark chocolate and nut butter blends, aligning with dietary guidelines while still indulging properly.

For those following low-FODMAP, limiting portions and choosing modified ingredients like lactose-free milk alternative ensures comfort and enjoyment of the cake.

Troubleshooting Guide

Should the mousse appear grainy, it’s often because of overheating chocolate or improperly folded ingredients. Double-check chocolate melting on low heat.

For correcting flavor imbalances, a pinch of salt or teaspoon of strong brewed coffee offsets major sweetness issues without altering original flavor too much.

Temperature concerns arise; ensure ingredients like eggs are room temperature, which impacts mixing and combination stages, affecting final cake texture.

When equipment challenges occur, manual mixing techniques may substitute a stand mixer with bonus muscle work— cautiously and with capability awareness.

Ingredient substitutions need gradual introduction through batch testing, ensuring the primary structure of the cake isn’t altered adversely for texture, flavor, or bake-ability.

Timing concerns usually pertain to chocolate solidifying—it sets quickly. Always plan assembly with all elements ready, preventing seizes or unplanned setting.

Recipe Success Stories

From community input, incredible successes with this recipe often tout the incredible blend of chocolate richness and mousse lightness—perfect for family celebrations.

Adaptation stories reveal adding local ingredients such as cherry extracts or almond touches, complementing the natural flavor union of the cake imaginatively.

Reader suggestions spark further creativity; integrating crusts or additional layers underscores the versatile, iterative journey of a trusted dessert base.

Photography tips involve enhancing color contrast through plate selection—deep reds or royal blues, which visually converse with dark chocolate shades eloquently.

Encouraging culinary exploration, successes translate the core principles of this mousse cake into broader baking worlds through cake swaps or cross-region collaboration.

Frequently Asked Questions

Can I make this cake without a mixer? Yes, while a mixer eases preparation, use a whisk or manual hand beater for incorporating air. Patience matters.

Is it okay to use milk chocolate? Substitute with increased sweetness caution. Consider reducing sugar content to balance the less intense flavor of milk chocolate.

Can this be made nut-free? Absolutely, simply ensure chocolate brand is nut-free certified, and adhere to original flour without almond substitutions affecting texture.

Do I need to use gelatin in mousse? Not strictly; it’s beneficial for structural integrity but can be omitted with correct chilling time assurance.

Can it be customized with fruit layers? Fruit layers like raspberry puree can be included between mousse and sponge layers to enhance flavor dynamics.

What is the best way to store leftovers? In an airtight container, refrigerated, consuming within three days for best texture retention and freshness.

Why did my sponge collapse? Rapid cooling or unchecked folding often contributes. Ensuring a gradual cooling regime prevents structural impact.

Can this be two-tone chocolate? By splitting mousse and incorporating white chocolate variants, you achieve a dazzling two-tone effect driven by contrasting chocolate.

Are there nut-free chocolate brands suitable? Yes, several brands offer nut-free assurance, designed for dietary adherence without chocolate limitation fears.

How can I enhance mousse flavor? Adding orange zest or chili powder provides innovative taste layers, refreshing the traditional flavor anchor of chocolate mousse.

Additional Resources


For more gourmet indulgences, explore additional recipes like classic tarte au chocolat, offering technique mastery and merger of global ingredient inspirations.

Technique guides provide insight into tempering chocolate confidently, presenting step-by-step visual and textual expansions to mirror professional techniques.

Ingredient information highlights sourcing premium cocoa-backed products, ensuring informed buying decisions reflecting both budget and quality centerpiece goals.

Equipment recommendations showcase brands known for reliability and durability, providing knowledge to equip avid bakers with constant quality assurance on the countertop.

Seasonal variations are explored through blogs or culinary sites focusing on festive adaptations, granting awareness of traditional alignment with current innovative spins.

Join the Conversation


Get involved by joining our social media platforms to share your own Dark Chocolate Mousse Cake experiences, whether triumphs or experimental iterations.

Experiment with photography, using natural light and employing contrast principles to capture your cake exquisitely, showcasing baking prowess effectively.

Sharing recipe reviews fosters a collaborative community where bakers can refine approaches or recommend alternate methods enhancing the community knowledge pool.

Community engagement fans creative exploration, generating discussion about favorite ingredient substitutions or serving suggestions, enhancing collective creativity.

Encouraging recipe variations nurtures evolution, diversifying the legacy of the Dark Chocolate Mousse Cake by inviting individual perspectives into broad context interpretations.

The Recipe

Dark Chocolate Mousse Cake

Serves: 8

Prep Time: 30 mins

Cook Time: 45 mins

Total Time: 75 mins

Kitchen Equipment Needed

  • 9-inch springform pan
  • Stand mixer or hand mixer
  • Double boiler or heatproof bowl
  • Spatula
  • Parchment paper

Ingredients

  • 1 cup heavy cream
  • 8 oz dark chocolate (70% cacao)
  • 6 large eggs, separated
  • 1/2 cup granulated sugar
  • 1/4 teaspoon salt
  • 1 teaspoon vanilla extract

Directions

  1. Preheat oven to 350°F (175°C) and line the bottom of a springform pan with parchment paper.
  2. Melt the dark chocolate using a double boiler method. Allow it to cool slightly.
  3. In a stand mixer, whip egg whites until soft peaks form. Gradually add half the sugar, beating until stiff peaks form.
  4. In another bowl, beat egg yolks with remaining sugar until pale and thick. Incorporate melted chocolate, then gently fold in egg whites.
  5. Pour mixture into prepared pan and bake for 20 minutes or until a skewer inserted comes out clean. Let cool completely.
  6. For the mousse, whip heavy cream to soft peaks and fold in melted, cooled chocolate, followed by folded egg whites until fully combined.
  7. Spread mousse over cooled cake layer and refrigerate for at least 4 hours or overnight to set.

Recipe Notes

  • For added texture, consider sprinkling a tablespoon of cocoa nibs over the mousse before serving.
  • Serve with a dollop of whipped cream or fresh berries for additional contrast.

Decadent Chocolate and Praline Yule Log Recipe for Festive Delights

Chocolate & Praline Yule Log: A Decadent Holiday Delight

⚖️
Difficulty
Intermediate

⏲️
Prep Time
45 mins

🕒
Cook Time
30 mins

⏱️
Total Time
1 hr 15 mins

🍽️
Servings
8

The Chocolate & Praline Yule Log is a festive gourmet dessert that captures the essence of the holiday season. This luxurious dessert combines the rich, velvety taste of chocolate with the irresistible crunch of praline. Crafted into a beautiful roulade reminiscent of a traditional yule log, this dessert is perfect for Christmas celebrations or any wintertime gathering. Whether you’re an experienced baker or a kitchen novice, you’ll find joy in creating this masterpiece.

Quick Recipe Highlights

  • Flavor Profile: This yule log offers a harmonious blend of deep chocolate richness and sweet, nutty praline, making each bite a perfect balance of flavors.
  • Texture: Enjoy the contrast of a soft, moist chocolate sponge with a creamy filling and the crunchy surprise of praline pieces.
  • Aroma: The log fills your home with the inviting scent of cocoa mingled with subtle hints of toasted nuts, evoking cozy winter nights.
  • Visual Appeal: The Chocolate & Praline Yule Log is visually stunning with its smooth chocolate glaze and decorative elements like chocolate shavings or gold dust.
  • Skill Level Needed: Requires intermediate baking skills, including rolling a sponge cake and preparing a praline filling.
  • Special Equipment: Use a jelly roll pan and a reliable mixer to ensure perfect consistency in your sponge and filling.

Recipe Overview

  • Difficulty Level: Intermediate, involving multiple steps like sponge preparation, praline making, and rolling, which requires some baking experience.
  • Category: Dessert is perfect for festive occasions and impressive dinner party finales.
  • Cuisine: This recipe is rooted in European holiday traditions, particularly French patisserie.
  • Cost: Moderate; main ingredients include chocolate, cream, and nuts, which are affordable yet luxurious.
  • Season: Best enjoyed during winter as a centerpiece for holiday celebrations.
  • Occasion: Ideal for Christmas, New Year’s celebrations, or any occasion that demands a show-stopping dessert.

Why You’ll Love This Recipe


The Chocolate & Praline Yule Log is a decadent treat that melts in your mouth, offering a medley of textures and flavors with every forkful. Not only does it satisfy chocolate cravings, but it also captivates with the surprise of praline crunch, making it a hit among dessert enthusiasts.

Preparing this log ahead of time allows you to enjoy the festivities without stress. The components can be made in advance for easy assembly on party day. This convenience also helps the flavors meld beautifully overnight, resulting in a richer taste.

Rich in flavor but crafted to be lighter, it remains a delightful indulgence without excessive guilt. The use of high-quality cocoa and nuts brings nutritional benefits like antioxidants and healthy fats, adding to its appeal.

Not only does it satisfy sweet cravings, but the yule log also serves as a centerpiece on festive tables, drawing viewers to its elegance and adding to the celebratory atmosphere. Its impressive presentation makes it a conversation starter at any gathering.

Despite its fancy appearance, the ingredients are largely accessible and affordable, ensuring that anyone can create this masterpiece without breaking the bank or relying on obscure items.

Historical Background and Cultural Significance


Originating from the European Yule tradition, the yule log began as a substantial wooden log burned on the hearth during Christmas, symbolizing the return of the light. Culinary interpretations started in the late Middle Ages when elaborate desserts became a key part of celebrations.

The yule log cake, or “Bûche de Noël,” evolved over centuries, incorporating local flavors and techniques. In France, it became a staple Christmas dessert, with variations emerging in different regions based on available ingredients and local customs.

Modern yule logs now span cultures globally, each offering unique takes on the classic. Some incorporate tropical flavors in warmer climates, while others integrate traditional spices for a comforting winter experience. Regardless of the variation, the foundational theme of warmth and celebration remains intact.

Regional adaptations continue to proliferate, showcasing culinary creativity worldwide. Each iteration reflects both local tastes and universal holiday joy, making the yule log an enduring and beloved dessert.

Ingredient Deep Dive


**Chocolate**: Chocolate is the star ingredient, with a rich history dating back to ancient civilizations like the Aztecs and Mayans. Its journey from a bitter beverage to a sweetened delicacy mirrors cultural amalgamations that reflect trade and exploration. Opt for high-quality dark chocolate, as it provides antioxidants and richer flavors.

Once purchased, store chocolate in a cool, dark place to maintain its aroma and prevent blooming. If necessary, substitute semisweet chocolate while adjusting sugar levels to maintain balance.

**Praline**: A beloved candy with French roots, praline introduces a nutty sweetness to the dessert. Not only does it enhance flavor, but it also adds a delightful crunch, creating a textural contrast with the creamy filling. Rich with heart-healthy fats and minerals like magnesium, pecans or hazelnuts are preferred choices.

Select fresh nuts, and store them in a sealed container to prolong freshness. In case of allergies, sunflower seeds offer a nut-free alternative to maintain texture.

Common Mistakes to Avoid

  • Overbaking the sponge can result in a dry log, making rolling difficult. Monitor closely and remove from the oven as soon as it’s firm to the touch.
  • Failing to roll the cake while warm can lead to cracks. Use a damp towel to assist in rolling and avoid tears.
  • Skipping a cool fill time prevents flavors from melding. Complete filling preparation early and chill as needed before spreading.
  • Omitting praline from the cream may lead to a flavorless filling. Incorporate nuts for texture and taste enhancement.
  • Not sifting cocoa powder leads to a lumpy batter. Sift all dry ingredients before mixing to ensure a smooth texture.
  • Rolling too tightly may squeeze out filling, so maintain gentle yet firm pressure to achieve a perfect roll.
  • Forgetting to temper chocolate glaze can cause a dull finish. Gently melt and cool chocolate to achieve a shiny coating.
  • Rushing the assembly can lead to a messy presentation. Allocate time for a methodical approach to each step.
  • Not using a serrated knife for slicing can result in crumble. A gentle sawing motion preserves the integrity of the log.
  • Ignoring serving temperature affects taste and texture. Serve slightly chilled but not frozen to capture the best flavors.

Essential Techniques


Mastering the art of the sponge cake is paramount, as its flexibility directly impacts the final product. An even batter spread ensures uniformity during baking, preventing uneven cooking. Whipping eggs and sugar to the ribbon stage is crucial for incorporating air, providing the necessary rise without leavening agents.

The careful mixing of delicate ingredients prevents deflation. Fold flour gently with a spatula to preserve aeration. Lastly, practice rolling techniques with a dry towel before attempting with the cake. Look for tight spirals without breaking, ensuring a visually impressive final log.

Pro Tips for Perfect Chocolate & Praline Yule Log

  • Always line the baking tray with parchment paper; this prevents sticking and aids in even cooking.
  • Use room temperature ingredients throughout to ensure proper emulsification and texture in the cake batter.
  • For maximum flavor, roast nuts before grinding to enhance their natural sweetness and oils.
  • Take time tempering chocolate for the glaze—ratios matter as improper temperatures will affect its shine and snap.
  • If cracks form during rolling, use a bit of whipped cream to join the cake back together.
  • Refrigerate the rolled cake before applying glaze to help shapes set and make coating easier.
  • Brush a thin syrup layer over the sponge before filling to increase moisture and flavor profiles.

Variations and Adaptations


Adjust recipes for diverse palates—consider using chestnut or almond paste in lieu of traditional praline for holiday twists. Sub out traditional buttercream with vegan or dairy-free alternatives to welcome different dietary needs while maintaining creamy experiences.

In warmer seasons, replace chocolate glaze with fruit coulis or lemon curds. For those favoring a lighter texture, opt for mousse instead of buttercream, and for visual variety, dust with snowy powdered sugar for a classic winter look.

Serving and Presentation Guide


For traditional aesthetics, cover with frostings or meringue mushrooms to mimic a forest scene. Explore modern plating by presenting deconstructed elements, where each component shines individually on a plate. Garnish with accent berries or mint leaves, adding vibrancy to chocolate tones.

Ideal serving is slightly chilled, enhancing flavors without firming the texture, ensuring every portion retains its moist clarity. Match serving size with visual cuts, ensuring each guest receives a defined section of the log, identical in symmetrical design.

Wine and Beverage Pairing


Commend this sweet chocolate log with a complementing sweet wine, such as a late harvest Riesling or rich port. For non-alcoholic, choose sparkling water with a twist of citrus to cleanse the palate.

Pair with aromatic teas like Earl Grey or spicy chai, each maintaining the core flavor’s essence while diversifying the palate experience. Consider serving wines slightly chilled—a key to enriching the dessert’s flavor exposure.

Storage and Shelf Life


Preserve the yule log by wrapping it tightly in cling film, securing freshness up to three days refrigerated. Maintain cool environments to prevent butter from softening excessively, while ensuring airtight containment to ward off fridge odors permeation.

Gauge spoilage by observing changes in color or texture—dull surfaces or hardened filling indicate time to discard. Reheating is inadvisable, given consistency shifts, yet selectively prepare fresh glaze the day before presentations.

Make Ahead Strategies


Divide preparation across timeframes—build sponge cakes ahead, seal well, and store frozen. Allow time for thawing before advancing to filling and assembly. Integrating these processes reduces pre-party stress and maintains high quality.

Fillings maintain optimal consistency when refrigerated for service day usage, avoiding last-minute rushes in kitchen environments. Assemble day before needed and glaze just prior to display, contrasting fresh shine against non-glazed options.

Scaling Instructions


Adjust ingredient ratios proportionally when using larger baking trays. Identifying precise baking times relative to quantity ensures consistent results—bigger batches may necessitate multiple batch baking for process integrity.

Evaluate mixer capacity when doubling or tripling ingredient volumes, ensuring task division or sequential processes for effective blend harmony. While halving requires careful measurement, minimal recipes yield maximum structural success.

Nutritional Deep Dive


A Chocolate & Praline Yule Log offers an energy-dense delight showcasing a macro profile with carbohydrates, fats, and proteins, significant for festive indulgences. Dark chocolate offers flavonoids, serving antioxidant purposes, while nut inclusions grant fiber additions.

Aware of portion control, audiences consume with informed caloric intake, balancing festive moments with broader dietary motives.

Dietary Adaptations


Pursue gluten-free versions using almond or coconut flour as alternatives to standard cake flour. Substitute dairy buttercream with coconut cream base, ensuring vegan adaptations marry taste integrity and spectacular presentation.

Carb-conscious paths align through sugar replacements such as stevia or monk fruit extract, yielding keto-friendly desserts retaining expected flavors sans excessive sugars.

Troubleshooting Guide


Address texture issues by analyzing over-baked signs or under-whipped cream causes, ensuring light cakes and consistent fillings. Perceive flavor balance through ingredient combinations, incorporating syrups or sauces sparingly.

Investigate temperature concerns often arising in oven management or whipped elements, which demand close monitoring during transformations.

Recipe Success Stories


Many home bakers rave about their replication of this festive favorite, transforming customary yule logs into personalized creations. Community insights suggest alternative nut applications further elevating taste spectrums.

Through sharing family photos and hosting online engagement, the recipe gains popularity, each iteration embraced by scenic displays of culinary prowess.

Frequently Asked Questions

What is the best method to prevent the yule log from cracking during the roll?
Ensuring the sponge is moist and rolling immediately while warm with even pressure generally prevents cracks.

Can I freeze the yule log after assembly?
Yes, freeze the entire log wrapped in cling film. Thaw slowly to room temperature before serving to maintain quality.

May I use milk chocolate instead of dark chocolate for a milder taste?
Milk chocolate substitutions are acceptable, adjusting sugar quantities accordingly to prevent excessive sweetness.

What if I don’t have a jelly roll pan?
Utilize any flat rectangular pan with an edge, minding batter depth to ensure appropriate baking.

Will substituting ingredients affect bake times?
Ingredient swaps, especially sugar or flour types, may alter flavors and textures, warranting cautious monitoring.

How can I make the yule log appear more festive?
Incorporate decor elements like holly leaves or fruit accents; they’re visually compelling and edible.

Why is my filling lumpy?
Lumps could result from inconsistent mixing or ingredient temperature differences; ensure homogeneity during preparation.

What if I have leftover praline?
Leftover praline stores well in airtight containers; use in additional desserts or as an ice cream topping.

I don’t like nuts, any alternative suggestions?
Swap nuts with seeds offering similar crunch or explore textured chocolates, each providing unique palate experiences.

Is there an ideal time frame for serving after preparation?
Serve logs slightly chilled, within 24 hours post-assembly, to achieve the freshest impression.

Additional Resources


Discover related chocolate dessert inspirations across similar culinary blogs, learning advanced Italian or Swiss rolling techniques. Unearth step-by-step visual guides, aiding intricate assembly understanding, or seek equipment insights showcasing ideal baking tools.

Explore seasonal ingredient variations offering insight into adapting favorite flavors to local produce and customs, extending inspiration to diverse festive tables worldwide.

Join the Conversation


Engage with fellow bakers online, sharing creations under hashtag #YuleLogCreations and tag fellow enthusiasts to start discussions on flavor variations and dietary adaptations.

Capture photographic angles which emphasize texture contrasts, or explore creative ways of incorporating hidden designs within servings—transparent slices hiding hidden beauty, warranting a proud feature on media platforms.

The Recipe

Chocolate & Praline Yule Log

Serves: 8

Prep Time: 45 mins

Cook Time: 30 mins

Total Time: 1 hr 15 mins

Kitchen Equipment Needed

  • Jelly roll pan
  • Stand or hand mixer
  • Offset spatula
  • Large mixing bowl
  • Parchment paper

Ingredients

  • 200g dark chocolate, chopped
  • 5 large eggs
  • 100g granulated sugar
  • 50g flour
  • 25g unsweetened cocoa powder
  • 300ml heavy cream
  • 100g praline, crushed
  • Butter for greasing

Directions

  1. Preheat your oven to 180°C (350°F). Grease the jelly roll pan and line it with parchment paper.
  2. Melt the chocolate in a heatproof bowl over simmering water. Allow it to cool slightly.
  3. Separate eggs, beating yolks with half the sugar until pale. Incorporate melted chocolate.
  4. Whip egg whites with remaining sugar until stiff peaks form, carefully folding into the chocolate mixture.
  5. Gently sift and fold in the flour and cocoa until just combined. Pour batter into the prepared pan.
  6. Bake for 10-12 minutes until just set. Allow to cool for a minute and roll gently with parchment paper. Unroll after cooling.
  7. Whip cream until soft peaks form; mix in crushed praline. Spread over unrolled sponge and re-roll tightly.
  8. Chill rolled log for at least 1 hour, then glaze with remaining melted chocolate for a glossy finish.
  9. Serve chilled, slicing with a serrated knife for neat pieces.

Recipe Notes

  • Store leftovers in the fridge in an airtight container.
  • Substitute hazelnuts or almonds for praline if preferred.
  • Use gold dust or chocolate shavings for added decoration.

Irresistible Sausage Cream Cheese Crescents: Easy Appetizer Recipe to Try

Sausage Cream Cheese Crescents: A Savory Delight for Any Occasion

⚖️
Difficulty
Easy

⏲️
Prep Time
10 mins

🕒
Cook Time
15 mins

⏱️
Total Time
25 mins

🍽️
Servings
8

Elevate your appetizer game with these irresistible Sausage Cream Cheese Crescents. Perfectly flaky crescents encase a savory mixture of sausage and cream cheese, creating a flavor profile that is both comforting and alluring. Whether you’re hosting a party or looking for a quick snack, these crescents promise to impress with their delightful combination of textures and tastes.

The simplicity of preparing Sausage Cream Cheese Crescents is matched only by the complexity of flavors achieved. The crisp and golden pastry offers a satisfying crunch that complements the creamy and savory filling. As the aroma of baked crescent rolls fills your kitchen, you’ll anticipate the moment these mouthwatering bites are ready to enjoy. Ideal for brunches, potlucks, or as a stand-alone treat, these crescents are bound to become a household favorite.

With a prep time of just 10 minutes, you can whip up these delectable treats in a flash. The filling offers a balance between the creamy texture of the cheese and the robust flavor of sausage, making every bite a delight. As you make your way through this easy-to-follow recipe, you’ll find the process delightfully straightforward, allowing even novice cooks the satisfaction of crafting something truly special.

Quick Recipe Highlights

  • Flavor Profile: These crescents boast a rich, savory blend reminiscent of classic comfort food, with hints of pepper and garlic from the sausage.
  • Texture: The contrast between the flaky, buttery crescent pastry and the creamy, soft filling creates an irresistible balance in every bite.
  • Aroma: As they bake, the crescents release a mouthwatering aroma of browned sausage and savory herbs, enticing anyone nearby.
  • Visual Appeal: A golden brown hue and a neatly sealed edge make these pastries as inviting to the eyes as they are to taste.
  • Skill Level Needed: Accessible to cooks of all levels, requiring only basic techniques for assembly and baking.
  • Special Equipment: No special equipment needed, just a baking sheet and your trusted oven.

Recipe Overview

  • Difficulty Level: Easy — this recipe is ideal for beginners with straightforward steps that promise a high reward for minimal effort.
  • Category: Perfect for appetizers, snacks, or brunch bites, fitting seamlessly into various mealtime settings.
  • Cuisine: Influenced by Western culinary traditions, highlighting classic homestyle flavors with a modern twist.
  • Cost: Budget-friendly, utilizing minimal and accessible ingredients without sacrificing taste or quality.
  • Season: Enjoy year-round, though their warm, hearty flavors are especially comforting during fall and winter.
  • Occasion: Perfect for casual gatherings, holiday parties, or as a tasty companion to a family meal.

Why You’ll Love This Recipe


Experience the exquisite taste and texture of Sausage Cream Cheese Crescents, where the seamless blend of flaky pastry and savory filling creates a delightful culinary experience. The rich flavor of sausage intertwined with the creamy cheese ensures that each bite is full of satisfaction. Ideal for those who appreciate bold flavors delivered in a delicately wrapped package, these crescents will quickly find a place in your regular recipe rotation.

Aside from their phenomenal taste, these crescents boast exceptional convenience. With minimal prep and cook times, they are perfect for impromptu gatherings or last-minute treats. The straightforward preparation means you can focus on other aspects of your hosting duties or simply relax while the crescents bake to perfection. Their ease of preparation allows even the busiest home chefs a chance to create something special in the kitchen.

Nutritionally, Sausage Cream Cheese Crescents offer a balance of protein, fats, and carbohydrates. They provide a satisfying option for those seeking a hearty snack or a touch of indulgence during mealtime. While they may not be the centerpiece of a calorie-conscious meal plan, they serve as a welcome treat that supports a balanced dietary approach when enjoyed in moderation.

These crescents are a showstopper in social settings, drawing praise and requests for the recipe from guests of all ages. Their approachable and familiar flavors bring people together, making them a staple at holiday gatherings, family reunions, and neighborhood potlucks. The joy of sharing these delicious crescents extends beyond the taste, contributing to the creation of memorable moments with loved ones.

The cost-effectiveness and accessibility of this recipe make it a go-to choice for anyone looking to deliver high-quality flavor without breaking the bank. With readily available ingredients that are both affordable and easy to source, Sausage Cream Cheese Crescents prove that you don’t need to spend a fortune to enjoy gourmet-style snacks at home. This recipe’s simplicity ensures that fantastic taste is always within reach.

Historical Background and Cultural Significance


Sausage Cream Cheese Crescents are a modern take on classic pastries that combine the best of savory and creamy flavors. Originating from the marriage of breakfast sausage and the versatile crescent roll, these crescents symbolize the fusion of convenience and gourmet taste in contemporary cuisine. Their popularity has soared as ease of preparation meets universal flavor appeal.

These crescents carry cultural significance in their adaptability to various culinary traditions. While they are firmly rooted in Western cooking, reflecting a penchant for hearty and comforting flavors, their simplicity allows for infinite adjustments influenced by global spices and seasonings. As more home chefs experiment with fillings, the dish continues to evolve and gain cultural layers.

The crescent roll itself, a staple in many households, has historical roots in Europe, where similar types of dough have been used for ages. Over time, the convenience and uniformity of canned crescent dough broadened its reach, making it a common element in American kitchens and enabling recipes like Sausage Cream Cheese Crescents to thrive and be enjoyed widely.

Today, regional variations of this recipe exist, with each area putting a unique twist on the original. Whether it’s adding regional chiles for heat or incorporating local cheeses for flavor nuances, these modifications celebrate diversity while preserving the core idea of offering a delicious and satisfying snack. Such adaptability only enhances the crescents’ appeal, fostering a rich tapestry of culinary interpretations.

Ingredient Deep Dive


The sausage is a key player in this recipe, providing robust flavor and protein. Historically used as a preservation method, sausage offers cultural significance rooted in various cuisines worldwide. Select high-quality sausage with a balance of spices for the best result. Store any unused sausage in a sealed container in the refrigerator for up to a week or freeze for extended freshness. If needed, consider using ground turkey or chicken as a leaner substitution option.

Cream cheese contributes to the dish’s signature creaminess and richness. Originating in the United States, cream cheese has become a versatile ingredient in both sweet and savory recipes. It’s an excellent source of calcium and can be found in full-fat and reduced-fat versions to suit dietary preferences. Keep cream cheese refrigerated and use it within a week of opening to maintain its texture and flavor. For a dairy-free alternative, try using a plant-based cream cheese.

Crescent dough is the foundation of this recipe, offering a buttery, flaky texture that envelops the savory filling. The convenience of pre-packaged dough streamlines preparation while consistently delivering a delicious result. Always check the expiration date before using, store in the refrigerator, and use soon after purchase for optimal freshness and performance. Puff pastry or pie dough can serve as a viable substitution with slight texture variations.

Common Mistakes to Avoid

  • Overstuffing the crescent dough can lead to messy assembly and leakage during baking. Be sure to measure the filling for even distribution.
  • Failing to pre-cook the sausage can result in a greasy filling and uneven cooking. Always brown the sausage before combining with cream cheese.
  • Not sealing the edges properly can cause the crescents to open up during baking. Use a gentle pinch to secure them tightly.
  • Using cold crescent dough can make it difficult to shape and fill. Allow it to reach room temperature for easier handling.
  • Baking at incorrect temperatures can affect texture and doneness. Follow specified oven settings for best results.
  • Skipping the baking sheet lining can cause sticking issues. Use parchment paper or a silicone mat for easy release.
  • Overbaking will yield a dry pastry. Keep an eye on color and remove when golden brown.
  • Underestimating cooling time can lead to a runny filling. Allow crescents to set before serving for optimal texture.

Essential Techniques


Browning the sausage is vital for developing deep flavor and preventing grease accumulation in the final dish. Ensure a medium-high heat to encourage even cooking and reduce the sausage’s fat content before mixing with cream cheese. Pay attention to changes in color and texture, sign when the sausage is fully cooked and ready for the next step.

Proper dough handling requires room temperature to prevent tears and facilitate shaping. If refrigerated, leave the dough out for 10-15 minutes before using. Carefully unroll crescent sections and handle gently to maintain structural integrity. Avoid over-stretching during assembly to preserve the characteristic flaky layers.

Mastering the art of crescent wrapping can transform your presentation. Begin by placing the filling at the wider end, rolling towards the point while tucking the sides occasionally. Such techniques prevent overflow and create a clean, professional appearance. Deliberate rolling ensures uniform browning and texture in the oven.

Pro Tips for Perfect Sausage Cream Cheese Crescents


Pre-heating your oven ensures consistent results and reduces the risk of undercooked pastries. Keep an oven thermometer handy to verify accurate temperatures and adjust as necessary.

Opt for high-quality sausage and cream cheese to elevate the overall flavor profile. Experiment with seasoned or spiced sausages to introduce new dimensions to the classic recipe.

A light egg wash before baking can enhance the crescents’ aesthetic with a glossy finish. Brush onto each crescent for a bakery-worthy look.

For a touch of freshness, sprinkle the inside with chopped herbs, such as parsley or chives, before wrapping. This addition provides a subtle burst of flavor with every bite.

Double this recipe and freeze the extras for future gatherings or quick snacks. Allow for complete cooling before freezing to maintain texture and taste integrity.

Experiment with additional fillings once comfortable with the base recipe. Spinach, sun-dried tomatoes, or caramelized onions can add depth and variety.

Variations and Adaptations


Regional variations of Sausage Cream Cheese Crescents abound, reflecting local tastes and available ingredients. In the Southern US, some incorporate jalapeño or hot sauce for a spicy kick, while the Pacific Northwest often sees the addition of smoked salmon for a tangy twist.

Seasonal adaptations allow the recipe to shine year-round. During autumn, incorporate pumpkin puree and spices like nutmeg for a festive touch, or add cranberry sauce during the holiday season for a sweet contrast to the savory filling.

Those following a low-carb or gluten-free diet can use almond flour-based wraps or low-carb crescent dough alternatives to enjoy a guilt-free version of these delightful treats.

Experiment with different cheese varieties to alter the flavor and add richness. Sharp cheddar, Gouda, or brie can transform the filling’s taste profile, accommodating your preferences or available cheeses.

For a smoother texture, sauté the cream cheese and sausage filling before using to meld flavors together further and achieve a creamier consistency.

Presentation alternatives include shaping the dough into small braids or pinwheels for an intricate appearance. These methods can fit more filling into smaller portions or simply add a unique finish to your display.

Serving and Presentation Guide


Elevate your Sausage Cream Cheese Crescents with artful plating techniques. Arrange them in a circular pattern or pyramid stack on a platter, adorned with fresh herbs for a pop of color.

Garnishing is key to enhancing visual appeal and flavor. Add a sprinkle of flaked sea salt or cracked pepper before baking for added depth, or top with freshly grated Parmesan for an irresistible, savory crust.

Traditional accompaniments like a side of spicy mustard or creamy ranch dip can enhance the dish’s complexity and provide delightful contrasts.

For a modern serving idea, pair these crescents with a chilled charcuterie board or a selection of pickled vegetables to introduce layers of texture and flavor.

Temperatures play a crucial role in serving. Allow the crescents to cool slightly before serving for best texture, and offer warm from the oven when possible to preserve their signature flakiness.

Mind portion control by slicing larger crescents into smaller bites, ensuring guests can enjoy their flavors without feeling overwhelmed – a perfect option for party settings.

Wine and Beverage Pairing


Choose a crisp white wine, such as Sauvignon Blanc or Chardonnay, to balance the crescents’ rich, savory flavors with refreshing acidity and notes of citrus.

Non-alcoholic alternatives, like a sparkling water with a hint of lime or a crafted iced tea, can complement the crescents’ complex flavors and provide a clean finish to each bite.

For brunch settings, pairing these savory pastries with a robust tea, such as Earl Grey or English Breakfast, offers balanced tannins and warmth that enhance the dish.

Consider the temperature of your beverages: a chilled wine or iced drink can provide needed contrast, while a hot beverage offers comfort with each sip.

Serve beverages in attractive glasses or cups to elevate the presentation, encouraging guests to indulge in both the crescents and their accompanying drinks holistically.

Storage and Shelf Life


To store leftovers, allow the Sausage Cream Cheese Crescents to cool completely before wrapping individually in plastic wrap or placing in an airtight container. Refrigerated crescents should be consumed within three days to preserve their texture and flavor.

Microwave or bake in a preheated oven at 350°F (175°C) for 5-7 minutes to reheat, taking care to check for even warming throughout to avoid soggy crescents.

Freezing offers a longer storage solution. Arrange cooled crescents in a single layer on a baking sheet and freeze until solid before transferring into a freezer-safe bag. Label and date for proper tracking. They can be frozen for up to three months.

To identify spoilage, look for changes in color, distorted shapes, or unpleasant odors. If any of these signs are present, discard to ensure safety and quality when serving.

For best results when serving frozen crescents, bake directly from frozen in a preheated oven until warmed through, adding several minutes to cooking times as needed.

Make Ahead Strategies


Preparing Sausage Cream Cheese Crescents ahead of time can save valuable moments during entertaining. As a versatile dish, it fits well into various timelines without compromising quality or flavor.

Complete the assembly process the night before baking, storing wrapped crescents on a parchment-lined baking sheet covered securely with plastic wrap. Refrigerate overnight, ensuring they are fresh and ready to bake the next day.

Storing between steps is key to maintaining freshness. For partially cooked crescents, allow them to cool to room temperature before wrapping and continuing with refrigeration, an excellent choice for larger batches.

Assessing freshness and quality is simple when noting consistency of texture and aroma. Adjust storage practices if issues arise to ensure a satisfying, tasty final product every time.

When reheating, consider using a toaster oven, which offers even, quick heating without sacrificing the crescents’ signature flakiness and inner warmth.

For added freshness, garnish with personally selected herbs or sauces immediately before serving, giving each bite an aromatic and colorful finish.

Scaling Instructions


Scaling down or up with this recipe is straightforward, but adjustments for ingredient measurements and kitchen equipment should be considered to maintain quality and taste.

Halving the recipe allows you to maintain portion control and minimize potential waste. Downgrade ingredient quantities proportionally, ensuring that filling measurements remain balanced to avoid overly stuffed or underfilled crescents.

When doubling or tripling, ensure you have adequate baking sheets and spacing between pastries to promote even cooking and prevent overcrowding in the oven, which may result in underbaked crescents.

Additional cooking time may be required for larger batches, but avoid leaving them unattended for too long in the oven. Keep an eye on browning and adjust according to your desired level of crispiness.

For storage after scaling, consider individual wrapping if scaling up and make use of your freezer for long-term preservation, labeling batches clearly to track storage conditions and freshness effectively.

Nutritional Deep Dive


Sausage Cream Cheese Crescents provide a complex and satisfying macronutrient profile, with moderate carbohydrates from the crescent dough, proteins from the sausage, and fats from the cream cheese creating a balanced snack option.

A closer look at the micronutrients reveals marginally beneficial vitamins and minerals, such as calcium from the cheese and iron from the sausage, contributing positively to a moderate, nutritious diet.

With a mindful attitude, the indulgence in this dish provides an opportunity to include healthful moderation into your eating pattern, adhering to dietary goals with strategically planned portions and served alongside fresh vegetables.

Keeping an eye on portions enables weight management and the ability to savor each small pastry’s bold flavors without overextending daily intakes. Consider pairing with light salads or fruits to craft a well-rounded meal experience.

A savory treat can be enjoyed in moderation without derailing dietary objectives. Balancing protein-rich snacks and variety at mealtimes can support weight management goals positively.

Dietary Adaptations


For a gluten-free version, substitute the crescent dough with gluten-free pastry available in select grocery stores or create your own using almond flour and baking staples. Keep in mind the textural changes this introduces.

To tailor this recipe to a dairy-free diet, swap cream cheese for a plant-based alternative such as cashew or almond-based cheese to maintain the creamy consistency found in the original dish while being kind to dietary needs.

For a vegan alternative, utilize plant-based sausage and cheese substitutes found in health food stores. Innovations in plant-based cooking have expanded the options to create comparable results in flavor and texture.

A low-carb and keto-friendly version could see the use of finely ground low-carb dough shaped and crisped similarly, offering a continued savory indulgence with mindful carb management.

Paleo variations may forgo the crescent dough itself, transforming the filling into baked or sautéed cups to maintain the robust flavoring with creative presentation delivery methods.

With dietary considerations specific to low-FODMAP positives, select certified low-FODMAP ingredients or make precise adjustments toward savory, balanced flavors on individual digestive comfort levels.

Troubleshooting Guide


Enhance crescent texture through parity of filling and dough, avoiding overstuffing or thin dough that may compromise structural integrity once baked. Controlled portioning at each preparation stage guarantees even final results.

Actively balance flavors by tasting components before combining, ensuring no overpowering single element. Sausage type, seasoning, and additional fillings can greatly impact flavor profiles.

Correct temperature issues with oven calibration, ensuring accurate and evenly distributed heat through an oven thermometer placement. This will improve reliable cook times and overall outcome.

Overcome common equipment challenges with the right baking sheet and lining materials, such as parchment or silicone mats, crucial for effortless result execution and easy release of crisply finished pastries.

Incorporate practical ingredient substitutions through understanding flavor relationships, allowing for seamless transitions of widely fundamental components into each substitution’s specific best-suited recipes.

Optimizing timing concern responses with proper pre-bake organization and cooling assurances guarantees cohesive preparation and serving, offering flexibility and relaxation within kitchen adventures.

Recipe Success Stories


Our community of home chefs widely applauds this recipe, sharing their satisfying experiences and creative variations that have graced many meal occasions with fantastic results. Their shared enthusiasm speaks to its universal appeal.

Some highlight their adaptation success stories, incorporating new herbs like thyme or rosemary and substituting bulk purchase cheeses in place of cream cheese — effortlessly transforming the recipe to suit unique taste preferences.

Readers often share culinary tips, favoring silken dough lining on baking sheets to deter unnecessary kitchen mess, encouraging new participants to follow in rewarding finish placements.

Photography enthusiasts love the opportunity for sophisticated plating captures, ensuring eye-catching social shares and enticing viewers to recreate their presentations while enjoying the depths of handcrafted flavor.

Join the conversation: discuss your unique crescents, review shared suggestions, and embrace the evolution of this timeless recipe as it enriches mealtime with fulfillment and tasty journeys.

Frequently Asked Questions

Can I use vegetarian sausage for the filling?

Absolutely! Feel free to substitute vegetarian sausage to accommodate dietary preferences. Plant-based sausages offer great flavor alternatives without compromising savory appeal.

Is it possible to prepare the crescents with a different type of cheese?

Yes, experimenting with various cheeses such as cheddar, feta, or gruyere can enhance or transform flavor profiles, letting your creativity shine with alternative indulgences.

How can I ensure the crescents remain fresh when stored?

Complete cooling before storing is crucial, using airtight methods such as wrapping or containers to retain quality and prevent staleness over extended refrigerator conditions.

What methods achieve the best reheating results?

Reheat in the oven to reclaim pastry crispness and creamy filling warmth, enjoying similar initial cooked textural contrasts best below—microwave or flash-heat efficiency.

Are there any condiments that pair uniquely with the crescents?

Try offerings like spicy jalapeño jelly, honey mustard, or garlic aioli, adding flavor depth and complementing textures through any curated sauce inclinations.

What’s the best way to keep them warm for serving?

Keep crescents warmed through use of lidded ceramic or stoneware dishes, promoting balanced heat retention and offering delightful warm satisfaction upon serving guests.

What seasoning enhancements can I incorporate for additional flavor?

Consider including garlic powder, red pepper flakes, or dried herbs to sustain personal palates and invigorate the senses during the bustling preparation and baking moments.

How can I achieve better sealing of the crescent dough?

Gently press edges with fingertips or utilize a fork for additional crimping measure. Ingredients’ fullness and containment station are key to achievable perfection once sealed.

Is it possible to make this recipe gluten-free?

Yes, utilizing gluten-free pastry or dough options allows for accommodating dietary preferences without compromising on great flavor experiences when consumed freshly baked.

Do the crescents need to be thawed before baking if frozen?

No, you’ll achieve outstanding results baking directly from frozen. Adjust timing and bake at suggested temperatures until achieving that delightful golden brown outcome.

Additional Resources


Explore related recipes such as Mini Beef Wellingtons or Cheddar and Chive Biscuits, delivering complementary culinary experiences not far from the satisfying crescents at their best.

Improved technique guides offer tips for recognizing critical dough stages and evenly browning, supporting your ongoing kitchen journey toward flavor consistency persistence.

Access ingredient information, encouraging diligent selection and matching components harmoniously within categories, building expansive flavor evaluations and celebratory success alongside recipe execution.

Enhanced equipment recommendations further perfect presentation and practicality, creating multifunctional setups for easy promotion of inspired food. Rediscover specialized culinary ranges and demands.

Regional and seasonal variations bring widespread appeal through timeless crescents’ pathways, expressing joy and culinary depth by demonstrating their vast versatility through multiple horizons.

Join the Conversation


Share your unique Sausage Cream Cheese Crescent creations on social media using #SausageCreamCheeseCrescents, encouraging others to join the conversation and showcase their masterpieces.

Photography tips abound online to guide you in capturing the beauty and complexity of crafted crescents. Consider natural light for skin tones and hues, capturing an appealing, inviting glow.

Pen reviews and posts communicating your experiences with family, friends, or among culinary enthusiasts, fostering an actively engaged community through educational exchanges and inspired cooking.

Participate in community engagement efforts by suggesting regional swaps or alternatives, share your delightful modifications and anecdotal successes with culinary-minded peers.

Celebrate diversity among the recipe’s variations, further enriching shared culinary perspectives and encouraging robust, creative explorations of this globally inspired culinary mainstay.

The Recipe

Sausage Cream Cheese Crescents

Serves: 8

Prep Time: 10 mins

Cook Time: 15 mins

Total Time: 25 mins

Kitchen Equipment Needed

  • Baking sheet
  • Mixing bowl
  • Medium skillet
  • Wooden spoon
  • Parchment paper

Ingredients

  • 1 package (8 oz) cream cheese, softened
  • 1 pound sausage
  • 2 cans crescent roll dough (8 rolls in each)
  • Salt and pepper to taste

Directions

  1. Preheat your oven to 375°F (190°C) and line a baking sheet with parchment paper.
  2. In a medium skillet, cook the sausage over medium heat until browned and fully cooked. Drain any excess fat.
  3. In a mixing bowl, combine the cooked sausage with softened cream cheese. Mix until well combined. Add salt and pepper to taste.
  4. Unroll the crescent dough and place a small spoonful of the sausage mixture at the wide end of each triangle.
  5. Roll the dough, starting at the wide end, and tuck the ends in to completely enclose the filling.
  6. Place each roll onto the prepared baking sheet.
  7. Bake in the preheated oven for 12-15 minutes, or until the crescent rolls are golden brown.
  8. Allow to cool slightly before serving to ensure the filling is set.

Recipe Notes

  • Try adding chopped green onions or herbs to the sausage mixture for added flavor.
  • Consider varying the level of spice by selecting your preferred sausage type.

Delightful Pineapple Christmas Balls: A Festive Holiday Treat Recipe

Pineapple Christmas Balls: A Sweet Taste of Holiday Magic

⚖️
Difficulty
Easy

⏲️
Prep Time
30 mins

🕒
Cook Time
0 mins

⏱️
Total Time
30 mins

🍽️
Servings
24 balls

Bring a touch of tropical sweetness to your holiday celebrations with these delightful Pineapple Christmas Balls. This no-bake recipe combines the juicy essence of pineapple with the warm holiday spirit, resulting in a treat that’s both delicious and visually stunning. Perfect for festive gatherings, these pineapple-filled treats are guaranteed to impress your guests.

The combination of crushed pineapple and coconut creates a mouthwatering blend of sweet and tangy flavors. These Pineapple Christmas Balls are not just a treat; they’re an experience of indulgent delights that melt in your mouth. As you bite into these heavenly morsels, you’ll be enchanted by the soft yet robust texture and tantalizing aroma.

Quick Recipe Highlights

  • Flavor Profile: Sweet and tangy with a tropical twist that dances on your palate.
  • Texture: Soft and chewy with a delightful crunch from the coconut coating.
  • Aroma: Inviting notes of pineapple mingled with the rich scent of coconut.
  • Visual Appeal: Golden balls adorned with snowy flakes of coconut, perfect for the season.
  • Skill Level Needed: Ideal for beginners and experienced cooks alike. Easy enough to involve the whole family.
  • Special Equipment: Only basic kitchen tools are required, making it accessible to everyone.

Recipe Overview

  • Difficulty Level: These Pineapple Christmas Balls are easy to make, requiring no baking skills. Simply mix the ingredients and form the balls! Perfect for people who want a quick yet impressive dessert.
  • Category: Desserts and snacks; ideal for holiday tables, potlucks, and party platters.
  • Cuisine: While modern and versatile, it draws upon tropical influences, making it suitable year-round with a festive twist.
  • Cost: Affordable, with most ingredients readily available and budget-friendly.
  • Season: Best enjoyed in winter holidays but can bring tropical cheer any time of the year.
  • Occasion: Perfect for Christmas, New Year gatherings, or any festive celebration.

Why You’ll Love This Recipe

These Pineapple Christmas Balls are the epitome of dreamy holiday sweets. With a luscious balance of sweet and tangy, they offer a refreshing detour from typical holiday fare, ensuring they’re a standout at any gathering. The delectable texture—soft and chewy—will satisfy all your dessert cravings while providing an evocative, melt-in-your-mouth experience.

Despite being incredibly easy to prepare, this recipe delivers a notable flavor profile, reinforcing the joy of quick, no-bake desserts. No prolonged prep time here; simply mix, roll, and enjoy! It’s a stress-free baking endeavor, perfect for last-minute holiday plans or when time is limited.

From a nutritional perspective, these balls provide a decent source of fiber thanks to the pineapple and coconut, with potential to fit various diets depending on adaptations. They also serve as excellent snacks for maintaining energy levels throughout the day.

Socially, sharing these delightful Pineapple Christmas Balls elevates any party or gathering, letting you shine as the host with the perfect treat. With such visually appealing, flavor-packed desserts, you’ll inspire colorful conversations and shared joy among guests.

Lastly, these treats are cost-effective, leveraging ingredients that are both economical and readily accessible. You won’t need to break the bank to create a dish that’s memorable and revered, ticking all boxes for holiday catering.

Historical Background and Cultural Significance

Pineapple desserts have long been cherished across many cultures due to the fruit’s exotic allure and significance in symbolizing warmth and hospitality. Pineapples first arrived in Europe in the 15th century, becoming synonymous with luxury and celebration.

In many tropical regions, the pineapple holds cultural importance not only as a delicious fruit but also as a representation of welcoming and good cheer. This symbolism makes its integration into holiday traditions a meaningful culinary exploration, transcending geographical barriers to become a part of Western festive diets.

Over time, variations of pineapple-based desserts have emerged, each offering unique regional flair. In this recipe, the amalgamation of influences results in treats that are versatile and befitting any celebratory table.

While Pineapple Christmas Balls are a modern innovation, they echo a longstanding tradition of featuring this privileged ingredient amongst seasonal recipes. From the Caribbean to Southeast Asia, pineapple continues to bring joyous notes to holiday feasts.

Ingredient Deep Dive

Pineapple is naturally rich in vitamin C and antioxidants, contributing to its reputation as a health-friendly ingredient. It supports immunity and offers digestive benefits, around which many traditional medicinal beliefs are centered. Choose fresh, unsweetened pineapple for maximum natural sweetness and nutritional value.

Coconut, used both in and as a coating for these balls, brings a depth of flavor and texture, alongside its healthy fats and fiber. This ingredient has traveled through many global dishes, serving as a culinary cornerstone where tropical flair is desired. Long shelf life and versatility make it a pantry staple.

Common Mistakes to Avoid

  • Using sweetened pineapple, which may result in overly sweet balls—fresh, unsweetened is best.
  • Skipping the chill step—this helps the balls to firm up properly.
  • Over-mixing the dough, leading to a less firm texture.
  • Using coconut flakes only sparingly—coating them fully enhances texture and adhesion.
  • Inadequate stirring before forming ensures inconsistent flavor distribution.
  • Failing to drain canned pineapple can lead to sticky, unroll-able dough.
  • Rolling balls too large; smaller sizes are easier to manage for flavor and serving size.
  • Assuming sweetness automatically balances—taste to adjust before forming balls.
  • Storing in a warm place; refrigeration maintains structure and taste integrity.
  • Serving straight from the fridge without thawing; allows flavors to meld and soften.

Essential Techniques

Mixing the ingredients thoroughly is critical for consistent flavor distribution. Be sure to incorporate the pineapple and coconut evenly to avoid varying taste spots. Chill the mixture adequately before rolling to allow it to firm, making shaping easier and the balls more uniform.

Pro Tips for Perfect Pineapple Christmas Balls

For the best results, select ripe, fresh pineapple whenever possible. It provides natural sweetness and a richer flavor profile as opposed to canned varieties. Practice patience during the chilling phase; a well-chilled mixture will roll more cohesively and yield the most appealing results.

Variations and Adaptations

For those who appreciate a nutty twist, consider adding finely crushed pecans or walnuts to the mixture for an extra layer of flavor and crunch. To cater to dietary restrictions, substitute regular condensed milk with a vegan alternative, or use sugar substitutes to lower the glycemic index.

Serving and Presentation Guide

These Pineapple Christmas Balls present beautifully on a rustic wooden board or colorful winter-themed platter, surrounded by sprigs of evergreen or adorned with holly. Since these are no-bake, ensure they are presented slightly chilled, allowing the tropical flavors to shine through.

Wine and Beverage Pairing

For a complementary indulgence, pair these treats with a vibrant Prosecco or a sweet Riesling—both echo the tropical notes beautifully. Non-alcoholic alternatives such as sparkling water flavored with cranberry can cut through the sweetness, offering a refreshing counterpoint.

Storage and Shelf Life

Store Pineapple Christmas Balls in an airtight container in the refrigerator to keep them fresh and maintain their tender texture. They are best consumed within a week. If you wish to extend their shelf life, these can also be frozen, allowing you to enjoy them later by simply thawing as desired.

Make Ahead Strategies

To ensure maximum freshness, you can prepare the mixture a day or two in advance, storing it in the fridge before rolling. Assemble closer to serving for optimal texture. This approach is ideal for those who appreciate efficient holiday prep.

Scaling Instructions

This recipe can be easily scaled for larger gatherings. Adjust accordingly, ensuring you have a sizable mixing bowl and sufficient cooling space for larger batches. Reducing or increasing ingredient quantities should proportionally maintain the recipe’s harmony.

Nutritional Deep Dive

Enjoying a Pineapple Christmas Ball gives you a small boost of energy with balanced carbohydrates and fats. They serve as an ideal holiday treat, offering a tasty dose of fiber and vitamins that complement the season’s indulgence. Make sure portions align with your dietary goals and caloric intake.

Dietary Adaptations

For a gluten-free alternative, these balls are inherently accommodating, needing only gluten-free chocolate or coconut products if extra ingredients are added. Dairy-free versions can be accomplished by selecting appropriate substitutes for condensed milk, ensuring celiac or lactose-intolerant guests are also served.

Troubleshooting Guide

If you experience difficulty in rolling, try adjusting the chill time or quantity of dry ingredients. Sticky dough is often resolved by additional coconut. Should flavor come across as flat, consider experimenting with a zest of lime or a pinch of salt to enhance the tropical nuances.

Recipe Success Stories

Many have shared stories of crafting these tropical treats, adapting them for different celebratory events, and discovering new favorite additions like dried cherries or cranberries for visual pop. Reader feedback often highlights their simplicity blended with surprising flavor, making them a consistent winner.

Frequently Asked Questions

What can I use if I can’t find fresh pineapple?
You can use canned pineapple, just ensure it’s unsweetened and thoroughly drained to avoid excess moisture impacting the dough consistency.

Can I prepare these without coconut?
Yes, you can either substitute it with finely crushed nuts or oats, or increase the quantity of crushed pineapple for texture adjustment.

How do these taste if made vegan?
Vegan adaptions retain the delicious tropical flavors, particularly when using quality alternative milks like coconut or almond condensed milk.

Is almond milk a suitable replacement?
While almond milk is excellent in creamy desserts, condensed versions ensure the mixture maintains its structure, so focus on condensed options.

What’s the best way to store them for picnics?
Use a cooler or insulated container to transport if warmth is an issue; otherwise, pack them in airtight layers to preserve freshness on-the-go.

Can I add alcohol to the mix?
Yes, consider a touch of rum or Cointreau added cautiously to the mixture for adult-themed versions—just enough to layer, not overpower.

Is it possible to add chocolate?
Absolutely. Finely chop dark chocolate, blend it within the dough or dip the finished balls partially, garnishing with coconut for flair.

Are there nut-free versions?
You can create a nut-safe rendition, simply focusing on other delightful mix-ins like dried fruit or extra coconut for balance and variety.

Should these be cold or room temperature?
Serve them slightly chilled or cooler side of room temperature; this maintains their integrity while allowing flavors to truly stand out.

How to upscale presentation for formal dinners?
Consider adding a decorative drizzle of white chocolate or a sprinkle of edible gold dust to elevate their presentation for more formal settings.

Additional Resources

For more festive no-bake options, explore our collection of tropical dessert recipes to discover lighter, vibrant alternatives that bring cheer to your winter gatherings. Dive into ingredient spotlights or watch video tutorials for guidance on rolling techniques and ingredient variations.

Join the Conversation

We invite you to join our thriving community of dessert lovers. Share your own variations, capture your creations in stunning photography, and discuss adaptations and experiences across social media platforms to inspire and engage with others.

The Recipe

Pineapple Christmas Balls

Serves: 24 balls

Prep Time: 30 mins

Cook Time: 0 mins

Total Time: 30 mins

Kitchen Equipment Needed

  • Mixing bowls
  • Spoon for mixing
  • Baking sheet or plate
  • Knife or zesting tool (if incorporating zest)

Ingredients

  • 1 cup crushed pineapple, drained
  • 2 cups shredded coconut (unsweetened)
  • 1/2 cup condensed milk (or vegan alternative)
  • Optional: zest of 1 lime

Directions

  1. In a large mixing bowl, combine drained pineapple, 1 cup of coconut, and condensed milk. Stir until fully integrated.
  2. For added zest, mix in lime zest thoroughly.
  3. Chill the mixture in the refrigerator for approximately 15-20 minutes.
  4. Once chilled, use a spoon to scoop small amounts and roll into balls, around 1 inch in diameter.
  5. Roll the formed balls in the remaining coconut to fully coat.
  6. Placing on a baking sheet or plate, refrigerate the balls for another 10 minutes to firm.
  7. Serve directly from the fridge or slightly warmed at room temp for best flavor depth.

Recipe Notes

  • Adjust sweetness by experimenting with different fruit ratios or meal type substitutes.
  • Consider variations like rolling them in powdered nuts or seeds for alternative coatings.