Irresistible Chocolate Roll Cake Recipe: A Sweet Delight

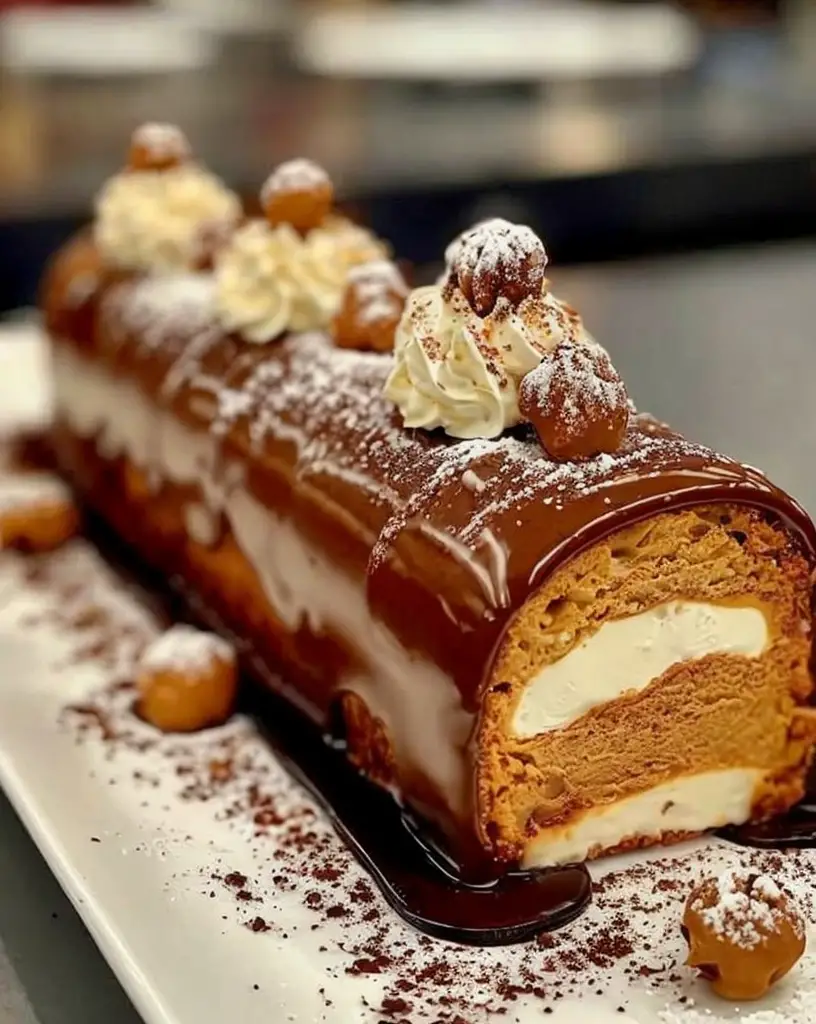
Decadent Chocolate Roll Cake: A Sweet Delight for Every Occasion

⚖️
Difficulty
Intermediate

⏲️
Prep Time
30 mins

🕒
Cook Time
20 mins

⏱️
Total Time
50 mins

🍽️
Servings
8-10

Experience pure joy with this indulgent Chocolate Roll Cake that’s perfect for any celebration. This delightful dessert is characterized by a rich chocolate sponge rolled with a creamy filling, promising a symphony of flavors with each bite. Imagine a soft, spongy roll cake that melts in your mouth, leaving a velvety chocolate aftertaste. The combination of bittersweet chocolate and sweet cream creates a balanced flavor profile that is nothing short of heavenly. Moreover, its beautiful swirl makes it a showstopper at any gathering.

Quick Recipe Highlights

  • Flavor Profile: The Chocolate Roll Cake offers a delightful balance between rich cocoa and light buttercream, resulting in a sweet yet subtle chocolate experience.
  • Texture: Expect a soft and spongy cake layer enveloping a rich, creamy filling, creating a perfect harmony of moist and fluffy textures.
  • Aroma: Enjoy the inviting aroma of freshly baked chocolate combining with a hint of vanilla from the whipped cream.
  • Visual Appeal: The elegant spiral of chocolate cake brilliantly contrasts against the lighter cream filling, making it as visually appealing as it is delicious.
  • Skill Level Needed: Ideal for those with moderate baking experience; mastering the cake’s rolling technique is crucial for success.
  • Special Equipment: You’ll need a jelly roll pan, parchment paper, and a cooling rack to create this masterpiece.

Recipe Overview

  • Difficulty Level: The recipe requires intermediate skills; while the steps are straightforward, precision is key for rolling the cake without cracks.
  • Category: This chocolate roll cake fits perfectly into the dessert category, making it an ideal sweet treat for festive occasions.
  • Cuisine: Rooted in European culinary traditions, this dessert has been adapted worldwide with various delicious twists.
  • Cost: Expect moderate costs, with quality chocolate being the primary expense, but it’s well worth the investment for the premium taste.
  • Season: Perfect for any season, but notably popular during festive months and winter, as chocolate provides comfort and warmth.
  • Occasion: An impressive choice for birthdays, anniversaries, or holiday celebrations, cherished for its classic taste and attractive presentation.

Why You’ll Love This Recipe


Taste and texture combine in an irresistible duo to make this Chocolate Roll Cake a standout. With every bite, you’ll enjoy the soft, spongy cake complemented by the rich, velvety cream filling. The flavor is neither too sweet nor too bitter, striking the perfect balance that appeals to both chocoholics and moderate dessert lovers.

Beyond taste, the Chocolate Roll Cake offers a blend of convenience and customizability. Though it requires some precision, the preparation process is rewarding and allows for creative touches to personalize the taste—such as adding a hint of coffee or a splash of rum to the filling.

Nutritionally, the Chocolate Roll Cake offers a range of ingredients like cocoa, providing antioxidants, and moderate servings of butter and sugar, allowing indulgence without guilt. Substituting with dairy-free or sugar-free options further enhances its adaptability for various diets without sacrificing flavor.

Socially, this cake serves as a conversation starter. Its appealing swirl and luscious filling invite admiration and inquiry, making it ideal for entertaining. It’s delightful to see your guests relishing each slice while complimenting the craftsmanship involved in creating such a showstopper.

Finally, the Chocolate Roll Cake remains an accessible dessert option for those desiring elegance without excessive expense. With common pantry ingredients combined with good quality chocolate, this cake can be put together without breaking the bank, summing up deliciousness and affordability in one.

Historical Background and Cultural Significance


The Chocolate Roll Cake, with its European roots, traces back to Swiss rolls crafted in the late 1800s. Known initially as “jelly rolls,” these cakes evolved from the simpler sponge cakes inspired by British baking traditions but featured innovative filling and rolling techniques.

Culturally, this cake enjoys popularity across the globe, with numerous variations appearing in countries like Switzerland and Austria. Its evolution reflects a passion for chocolatier finesse, representing an indulgence paired with sophisticated baking artistry.

Many regions add unique touches, including mascarpone or fruit jams, to traditional recipes. These adaptations show the cake’s resonance among culinary enthusiasts worldwide, with roll cakes becoming synonymous with festive cheer.

Local spins include the Japanese “chiffon roll,” lighter and airier, and the American chocolate log with decorative icing. These variations highlight not only regional palates but also innovative culinary approaches, making the Chocolate Roll Cake a beloved global phenomenon.

Ingredient Deep Dive


Examining the main ingredient, chocolate, reveals its rich history and significance. Chocolate originates from Mesoamerica, where it was revered as a sacred gift and used in both culinary and ceremonial contexts. Today, fine chocolate is celebrated for its complex flavors, determined by cocoa bean quality and processing techniques.

Nutritionally, chocolate offers antioxidants and mood-enhancing properties linked to its flavonoid content. When selecting chocolate, opt for a high cocoa percentage for intense flavor and minimal additives. Store chocolate in a cool, dry place to prevent blooming and ensure freshness.

Flour also plays a key role in the cake’s structure, specifically all-purpose flour which provides just the right gluten content for a tender crumb. Ensure you use fresh flour, stored in an airtight container to maintain its quality for this recipe.

Common Mistakes to Avoid

  • Overmixing the batter leads to a dense texture; gently fold until just combined for the best results.
  • Incorrect oven temperature can result in uneven baking; use an oven thermometer to ensure accuracy.
  • Skipping parchment paper is risky; it helps release the cake smoothly from the pan, preventing sticking.
  • Rolling while hot or too cold can cause cracks; roll while warm utilizing a damp towel to support the shape.
  • Inadequate cooling time can result in a soggy texture; allow the rolled cake proper rest to firm the layers.
  • Underbeating the cream filling may leave it loose; whip to soft peaks for perfect consistency.
  • Filling spread too thin can compromise the flavor; ensure an even layer for balanced bite in every slice.
  • Lack of refrigeration time affects setting; chilling stabilizes the cake, making it easier to slice neatly.

Essential Techniques


Mastering the roll technique is crucial for a flawless Chocolate Roll Cake. This involves carefully flipping the sponge onto a sugared towel, peeling off the parchment, and rolling it briskly with the towel to encourage shape memory. Allow it to cool in this rolled state to set the structure before unrolling and adding filling.

When whipping the cream, avoid over-whipping, which can create butter. Look for soft peaks as a visual cue for perfection. If flavors are to be infused, such as vanilla or liquor, incorporate them towards the end of the whipping process to preserve texture.

Pro Tips for Perfect Chocolate Roll Cake


Achieve a smooth roll by using stable parchment paper larger than the pan to facilitate easy lifting. While rolling, employ an even hand for a neat spiral effect, and allow the cake to cool enough before applying filling to prevent melting.

When spreading filling, start at one end, leaving a small border to account for spreading as you roll. Use quality, high-fat chocolate for best flavor, and refrigerate overnight for ideal sliceability and maintained freshness.

For a seamless finish, trim edges for evenness and dust with cocoa powder or confectioners’ sugar as a decorative touch. If slicing unevenly, dip the knife in hot water and wipe dry to cut cleanly without smearing filling.

Variations and Adaptations


The versatility of a Chocolate Roll Cake allows for creative regional variations. Enhance it with salted caramel or fruit jams for a unique spin. Seasonal berries, like raspberries or strawberries, can be added to the filling during summer for a fresh, zesty contrast.

For a dietary adaptation, use gluten-free flour and whipped coconut cream for a dairy-free option without compromising taste. Keto enthusiasts may replace sugar with erythritol and almond flour to lower carbs while preserving texture.

Presentation can vary from classic, dusted with cocoa, to lavish chocolate ganache coats or intricate patterns using chocolate molds. Known for its flexibility, this cake can suit both traditional and modern tastes alike.

Serving and Presentation Guide


Present the Chocolate Roll Cake with finesse by placing it on a decorative platter. Garnish with shavings of dark chocolate or edible gold flakes for a luxurious touch. For a berry-infused version, consider placing fresh berries and mint leaves on top for a pop of color.

Adopt traditional accompaniments like a rich vanilla custard or contrast with the tang of a berry coulis. Ensure the cake is served chilled but not too cold to preserve its luscious texture, allowing it to warm slightly to room temperature.

For portion control, slice with a sharp serrated knife, offering nice even rounds that reveal the cake’s iconic swirl, pleasing both the eyes and palate.

Wine and Beverage Pairing


Pair your Chocolate Roll Cake with a robust port or rich dessert wine such as a late-harvest Zinfandel; these enhance the chocolate’s depth and complement the creamy filling. Non-alcoholic options include hot chocolate or aromatic spiced chai, each offering warmth and variety.

Consider freshly brewed espresso to balance the sweetness, providing a delightful contrast. When serving, ensure wines are slightly chilled, and non-alcoholic options are served warm to heighten sensorial enjoyment.

Storage and Shelf Life


Store the Chocolate Roll Cake in an airtight container to maintain its moisture. Keep refrigerated but allow it to rest at room temperature for about 10 minutes before serving for optimum flavor and texture. Check for any discoloration or off smells as signs of spoilage.

Should you wish to freeze leftovers, wrap tightly in plastic followed by foil to avoid freezer burn. Defrost overnight in the fridge, rather than at room temperature, to ensure the integrity of the cake remains intact.

Make Ahead Strategies


For effortless entertaining, prepare the cake a day in advance. Make the sponge and roll with the towel; then let it rest vertically in the fridge. This cools the cake while maintaining shape, ready to unroll and fill.

Once filled and rolled, storing it wrapped in plastic will ensure freshness. For last-minute touch-ups, keep reserved fillings to pipe as garnish post-defrosting, ensuring the final presentation is as fresh as the pre-prepared cake.

Scaling Instructions


When halving the recipe, use a proportionally smaller pan to maintain the sponge layer’s thickness and adjust baking times accordingly. Doubling necessitates larger baking equipment and possibly adjusting the oven rack to accommodate heat distribution.

Consider freezer space if multiple cakes are made, as preserving them in ideal conditions ensures enjoyment remains top-notch. Adjust delays in cooling to allow each rolled cake ample time to stabilize, ensuring consistent quality regardless of batch size.

Nutritional Deep Dive


This Chocolate Roll Cake presents a nutritious balance, with cocoa offering antioxidants and moderate sugars contributing energy. While high in fats from cream, portion control can help maintain a balanced dessert option.

Emphasizing a fiber-rich filling by adding fruits can enhance the cake’s nutritional profile. Each slice should maintain a healthy indulgence, offering a micro and macronutrient balance as part of a mindful diet.

Dietary Adaptations


For gluten-free adaptations, use a trusted substitute blend that provides elasticity comparable to standard flour. Substitute dairy creams with plant-based alternatives like coconut or almond cream for a delicious dairy-free version.

Consider paleo options by replacing traditional sugars with natural sweeteners like honey or maple syrup, enhancing both flavor and nutritional profile while adhering to dietary preferences.

Troubleshooting Guide


If texture issues arise, consider adjusting the baking time or temperature; underbaking can result in collapsible cakes, while overbaking leads to dryness. For flavor imbalances, enhance with extracts or zests to adjust sweetness.

Temperature problems during cream whipping can be remedied by chilling tools beforehand. Should equipment challenges present themselves, consider multi-use tools like a food processor to simplify ingredient preparation, ensuring a smooth process.

Recipe Success Stories


Our community loves the flexibility of this Chocolate Roll Cake. One reader adapted it with matcha cream for a unique twist, while another used it as a base for a festive Yule log, complete with meringue mushrooms and chocolate bark.

Successful adaptations include berry variants for summer picnics and a non-dairy version that retains rich, chocolatey decadence. Readers suggest capturing the cake’s curve when photographing, enhancing its visual allure with lighting to bring out its glossy finish.

Frequently Asked Questions

Q: Can I use dark chocolate instead of milk chocolate for the roll cake?
A: Absolutely! Dark chocolate will lend a more intense flavor, which complements the sweetness of the cream filling beautifully.

Q: What can I use instead of cream in the filling if lactose intolerant?
A: Coconut cream is an excellent substitute, providing a similar consistency with a slight coconut undertone that pairs well with chocolate.

Q: How do I prevent the cake from cracking?
A: Roll the cake while still slightly warm with a damp towel to avoid cracks caused by dryness or brittleness.

Q: What’s the best way to store the cake if made ahead of time?
A: Wrap tightly in plastic film and keep refrigerated. It can last up to three days while maintaining its flavor and texture.

Q: Can I freeze the Chocolate Roll Cake?
A: Yes, ensure it’s tightly wrapped. Defrost in the fridge to preserve the cake’s quality.

Q: What’s a good alternative to parchment paper for rolling?
A: A silicone baking mat can work, though parchment ensures easy handling.

Q: How can I add a coffee flavor to the cake?
A: Try adding a teaspoon of instant coffee powder to the batter for a subtle mocha twist.

Q: Should I ice the cake after rolling?
A: It’s not necessary, but an extra layer of ganache or glaze can elevate both taste and presentation.

Q: Can I use icing sugar instead of granulated in the cake batter?
A: Icing sugar can alter the texture; use granulated for best structural results.

Q: How do I keep the filling from spilling out during rolling?
A: Ensure an even spread, keeping a small border to prevent overflow when rolled.

Additional Resources

Explore our other chocolate recipes, including tips for mastering the art of sponge cakes and understanding the nuanced flavors of various chocolatiers. Gain insight into equipment must-haves and learn about seasonal ingredients that pair well, ensuring your next baking project is both successful and satisfying.

Join the Conversation


Engage with us on social media, share your Chocolate Roll Cake creations, and rate the recipe. Discover variations through our community, swap tips, and inspire others. Tag us in your posts to showcase how unique your roll cake can be, paving the way for a lively baking discussion.

The Recipe

Chocolate Roll Cake

Serves: 8-10

Prep Time: 30 mins

Cook Time: 20 mins

Total Time: 50 mins

Kitchen Equipment Needed

  • Jelly roll pan
  • Parchment paper
  • Cooling rack
  • Flexible spatula
  • Stand or hand mixer

Ingredients

  • ¾ cup all-purpose flour
  • ¼ cup unsweetened cocoa powder
  • 1 tsp baking powder
  • 4 large eggs
  • ¾ cup granulated sugar
  • 2 tbsp melted butter
  • 1 cup heavy cream
  • 2 tbsp powdered sugar
  • 1 tsp vanilla extract

Directions

  1. Preheat your oven to 350°F (175°C) and line a jelly roll pan with parchment paper.
  2. Sift together flour, cocoa powder, and baking powder in a bowl.
  3. In a separate bowl, beat the eggs and granulated sugar until light and fluffy.
  4. Gently fold the dry ingredients into the egg mixture, then stir in melted butter.
  5. Spread batter evenly into the prepared pan, smoothing the top.
  6. Bake for 10-12 minutes or until the cake springs back when touched.
  7. Once baked, immediately invert onto a clean, sugared towel, peel away parchment, and roll up with the towel.
  8. Allow to cool completely, then unroll and spread with whipped cream filling.
  9. Roll the cake back up and refrigerate for at least 30 minutes before serving.

Recipe Notes

  • For a richer filling, incorporate a tablespoon of cocoa powder into the whipped cream.
  • Use fresh berries for a springtime twist.
  • Chill the mixing bowl and beaters before whipping cream for best results.

Deliciously Crispy Balsamic-Thyme Potato Torte Recipe for Your Table

Crispy Balsamic-Thyme Potato Torte: A Gourmet Delight

⚖️
Difficulty
Medium

⏲️
Prep Time
20 mins

🕒
Cook Time
45 mins

⏱️
Total Time
65 mins

🍽️
Servings
6-8

There is nothing quite like the savory aroma that fills your home when you bake a Crispy Balsamic-Thyme Potato Torte. This dish combines the earthy taste of fresh thyme with the tangy sweetness of balsamic glaze, enveloped in the texture of thinly-sliced potatoes. A Crispy Balsamic-Thyme Potato Torte is more than just a meal; it’s an exquisite dance of flavors and textures that is sure to captivate both your senses and your taste buds. The irresistible appeal of this torte makes it a crowd-pleaser for both family dinners and festive gatherings.

Quick Recipe Highlights

  • Flavor Profile: The combination of balsamic vinegar and thyme offers a robust, tangy flavor that’s complemented by the savory richness of potatoes and cheese.
  • Texture: Experience a satisfying crunch on the outside with a soft, creamy interior – the perfect balance of crispiness and tenderness.
  • Aroma: The smell of thyme mingled with the sweet vinegar wafts through the air, instantly whetting the appetite.
  • Visual Appeal: Golden-browned edges with layers of potatoes create an eye-catching pattern, making it a beautiful addition to any dinner table.
  • Skill Level Needed: Moderately experienced cooks will excel, requiring basic knife skills and attention to detail during layering.
  • Special Equipment: A mandolin for uniform slicing is highly recommended for this recipe to achieve even layers.

Recipe Overview

  • Difficulty Level: The torte is considered medium in difficulty due to the precise slicing and careful layering required to achieve the desired crispness and look.
  • Category: This is a versatile side dish that pairs well with roasted meats, adding sophistication to casual and formal meals alike.
  • Cuisine: With roots in French cooking, the torte draws influence from classic European culinary traditions.
  • Cost: Budget-friendly, mainly requiring pantry staples like potatoes and vinegar with some fresh herbs. Expect moderate costs for quality ingredients.
  • Season: Best enjoyed during fall and winter, when heartier dishes are welcomed and thyme is in its peak season.
  • Occasion: Perfect for holiday dinners, potlucks, or any occasion that calls for an elegant and comforting side dish.

Why You’ll Love This Recipe

The taste and texture of this Crispy Balsamic-Thyme Potato Torte are nothing short of extraordinary. The rich layers of potatoes, brushed with balsamic glaze, create a symphony of savory and sweet, while the thyme infuses herbaceous notes throughout. The variance in texture—from the crispy, golden exterior to the soft layers beneath—delivers a delightful mouthfeel that enhances every bite.

Convenience accompanies this recipe, as the ingredients are common pantry items, and the preparation allows for flexibility with a make-ahead option. This entails assembling the torte in advance and baking it just before serving, saving time without compromising quality.

Nutritionally, potatoes are low in calories and high in fiber, providing a healthy base, while thyme adds antioxidants without excess calories. This makes the dish not only delicious but also a sensible choice for weight-conscious diners and those looking to increase dietary fiber intake.

Serving this dish at social gatherings will surely make an impression. The presentation alone is bound to attract compliments, while the flavor fosters lively conversation at the table. The torte serves as an entry point to culinary sophistication, enhancing any meal without imposing elitism.

Cost-effectiveness is another reason to cherish this torte. Utilizing humble yet flavorful ingredients, it fills the gap between simplicity and luxury, especially when you allow seasonal produce to guide your ingredient choices. This accessibility ensures that anyone can attempt and perfect the recipe.

Historical Background and Cultural Significance

Potato tortes have deep roots in French culinary history, linked closely to dishes like gratins and galettes, where thin slices of potato are arranged or layered. French cuisine has traditionally embraced potatoes, celebrating their versatility and marrying them with various herbs, cheeses, and aromatic components to create hearty side dishes.

The cultural importance of such dishes is evident, as they’ve become staples in both home and professional kitchens across the world. They serve as a testament to the appreciation of simplicity made elegant through technique and pairing, a concept well-practiced in French cooking.

Over time, the recipe has evolved to include a variety of add-ons, such as different cheeses, vegetables, and spices, enriching the layers and complexity of flavor. Such adaptations are a reflection of modern culinary creativity, offering a canvas for chefs and home cooks alike.

Regional variations show the torte’s pliability; in Italy, you might find similar creations seasoned with rosemary and pecorino, while in northern climates, variations add smoked fish or meats for added depth. This diversity showcases the recipe’s adaptability to local flavors and preferences.

Ingredient Deep Dive

Potatoes are the hero of this dish, with a history rooted in global cultivation. Originating from the Andes, these tubers made their way to Europe in the 16th century, quickly becoming a staple for their versatile nature and nutritional benefits, including vitamin C, potassium, and dietary fiber.

To select the best potatoes, look for firm, smooth skins without blemishes or sprouting eyes. Varieties like Yukon Golds or Russets are ideal for this recipe due to their waxy yet starchy qualities, which hold shape and create crispy edges when cooked properly.

When storing potatoes, keep them in a cool, dark place to prevent sprouting and extend shelf life. Avoid refrigeration, as it can negatively impact their texture and flavor. A paper bag or ventilated basket works best for storage.

Should you need to substitute, sweet potatoes or other root vegetables like parsnips or celeriac can provide an innovative twist, altering flavor and color dramatically, while maintaining the structural integrity of the torte.

Common Mistakes to Avoid

  • Not slicing potatoes uniformly, which leads to uneven cooking and texture inconsistencies. Use a mandolin for precision.
  • Overloading thyme or balsamic vinegar, which can overpower the dish’s balance. Measure carefully to maintain harmony.
  • Skipping the step of preheating your oven, which affects the torte’s ability to crisp properly at the start of cooking.
  • Forgetting to season each layer of potatoes, resulting in a dish that’s lacking in depth and character.
  • Using wet potatoes, causing steaming instead of crisping. Pat them dry thoroughly before assembling.
  • Removing the torte from the oven too soon, which prevents the full development of golden edges and robust flavors.
  • Disregarding resting time after cooking, leading to structural collapse and messy slicing.
  • Underestimating the required fat for cooking, such as butter or oil, which ensures layers don’t stick to the baking dish.

Essential Techniques

Mastering the thin slicing of potatoes is critical for the success of this torte. Thin, even slices ensure uniform cooking, which allows for a consistent bite across the dish. A mandolin is indispensable here, offering precision beyond what a knife can easily achieve.

Layering the potatoes with finesse is another vital step. Each layer should be slightly overlapped, creating both a barrier that traps steam, helping in the cooking process, and a visually appealing pattern once the torte is finished.

The incorporation of balsamic vinegar during assembly yields an unusual touch of sweetness, counterbalanced by the savory thyme. It takes practice to gauge the right amount of vinegar to use, balancing flavor without making the potatoes soggy.

Golden-browning is the final technique to master, achieved by ensuring the oven is fully preheated. Keep a close eye during baking, and use the middle rack of the oven for optimal heat distribution, ensuring all surfaces achieve a homogeneous crispy finish.

Pro Tips for Perfect Crispy Balsamic-Thyme Potato Torte


– Always stabilize your mandolin by using the hand guard for safety and consistent slicing.
– Season each potato layer lightly but consistently to avoid a bland middle and an over-seasoned top.
– Use clarified butter to avoid the milk solids burning, which can add unwanted bitterness to the edges.
– Allow the torte to cool slightly before slicing, which helps maintain build integrity and presentation.
– A sprinkle of fresh thyme post-bake can revive the herbaceous note while offering a vibrant color contrast.
– Consider a final glaze of balsamic reduction to add a glossy finish and an extra hint of sweetness.
– Opt for Yukon Gold potatoes for their buttery flavor and ability to hold shape during cooking.
– Line your baking dish with parchment paper to facilitate easy removal and serving.

Variations and Adaptations

Regional interpretations of this torte embrace various ingredients signature to local palates. Try adding Italian Parmesan or Pecorino to the layers for a richer, umami punch, or incorporate Spanish chorizo for a spicy kick that’s certain to make the dish pop.

Seasonal adaptations allow for a constant evolution of flavors. Incorporate zucchini slices or summer squash during warm months for a lighter feel, or add roasted root vegetables in winter to enhance the earthy taste along with the potatoes.

Dietary modifications can also be made effortlessly. Replace butter with a high-quality olive oil to create a heart-healthy, dairy-free version; alternatively, substitute potatoes with lower-carb options such as cauliflower for a dish that aligns with keto guidelines.

Experimenting with fresh herbs can yield different dimensions. Consider rosemary in place of thyme for a more pronounced piney flavor, or basil in the summer for a softer herbal hint that complements tomatoes if using them as an additional ingredient.

For a shift in texture, incorporate crushed nuts like walnuts or pecans between layers, inserting crunch to the dish and intensifying nutty flavors that harmonize well with balsamic.

The visual presentation can easily shift from a rustic torte to scalloped baker’s delight by altering the arrangement style. Explore distinguishing patterns or use ring molds instead of a baking dish for individual servings that impress.

Serving and Presentation Guide

Plating this Crispy Balsamic-Thyme Potato Torte calls for elegance. Once cooled slightly, slice it into neat portions revealing its elegant, layered interior. Each slice should be carefully lifted using a wide spatula to maintain structure and presentation.

Garnishing with a dollop of creme fraiche or a sprinkle of fresh herbs such as parsley or cilantro can add a refreshing contrast, visually and in taste. The vibrant color contrast is visually appealing and adds a layer of flavor complexity.

Traditional accompaniments might include roasted meats or a leafy green salad, whose freshness helps balance the density of the torte. These pairings create a more complete dining experience and ensure varied flavors for a more rounded palate engagement.

Modern serving suggestions could involve positioning individual tartlets on arugula drizzled with light vinaigrette, which introduces a peppery note to the meal, or serving with a side of roasted cherry tomatoes for added color and acidity.

Temperature considerations are crucial; serve the torte warm to maintain its crispy texture, enhancing mouthfeel and ensuring its flavors are at their most vibrant.

Portion control tips include ensuring slices are not too thick, maintaining elegance, avoiding overwhelming servings and preserving room for accompaniments in a balanced meal.

Wine and Beverage Pairing

When considering wine pairings, look towards a full-bodied Chardonnay with notes of oak and butter to complement the richness of the torte. The complexity of such a wine echoes the balsamic’s sweetness and thyme’s earthiness beautifully.

For non-alcoholic choices, a sparkling water infused with lemon or lime can offer a refreshing palate cleanse between bites, enhancing the dining experience without overpowering the flavors presented.

Should the occasion call for coffee or tea, consider a brewed light roast coffee or unsweetened iced green tea. Both options provide necessary bitterness and astringency to offset the potato’s starchy nature and balsamic’s sweetness.

Temperature is imperative in creating balance, with wines served slightly chilled to maintain their vibrancy and soft drinks cold to achieve their refreshing qualities. Avoid overly sweet pairings to maintain focus on the torte’s robust flavors.

For serving suggestions, consider glassware that matches the elegance of the meal—such as wide, bold wine glasses, which create a visual harmony and a sophisticated atmosphere.

Storage and Shelf Life

Storage of the torte should be in an airtight container to prevent moisture loss and preserve freshness. Consider slicing before storing to allow for easy access and portion control upon reheating.

Proper temperature maintenance is key; store it in the refrigerator only once cooled to ambient temperature to avoid condensation, which can negatively affect the texture. Consume within three days to fully enjoy the torte’s intended texture and taste.

Choose glass or BPA-free containers with secure lids for the safe storage of your torte. This choice ensures flavor retention and negates any risk of plastic taste leaching into the dish over time.

Signs of spoilage that necessitate disposal include an off smell, mold, or a noticeable change in texture, as these indicate compromised food safety and quality.

Reheating instructions for maintaining crispness include using an oven preheated to 375°F (190°C) and warming the slices on a baking sheet for roughly 10 minutes. Avoid microwave use to prevent sogginess.

When freezing, assemble the torte but avoid baking prior to freezing. Once you plan to serve, thaw overnight in the fridge, then bake fresh for best quality results. This ensures a crispy exterior and creamy interior as intended.

Make Ahead Strategies

Creating this Crispy Balsamic-Thyme Potato Torte in advance can save precious time on the day it is served. Assemble the torte completely, wrap tightly in plastic wrap, and refrigerate for up to 24 hours before baking.

Storage between assembly and baking is crucial; utilize airtight methods such as plastic wrap or covered dishes, which prevent any moisture escape and result in even cooking.

Monitor the quality impact with visual inspection prior to cooking; slight darkening of raw potato edges is normal and will not affect overall taste or texture post-baking.

During assembly, layer with intention, and use the time to ensure each slice is precise, so when it is baked you have a perfect creation. Completing the assembly beforehand allows you to concentrate on flavor-building without rushing.

When preparing for serving, reheating guidelines should be followed strictly to preserve quality. Bake off only when needed, allowing for a fresh, warm dish that boasts both flavor quantity and aesthetics.

Fresh element additions might include the thyme or a garnish post-bake to invigorate flavor lost during refrigeration and offer a visual refresh to pre-baked items.

Scaling Instructions

For halving the recipe, use a smaller baking dish to maintain the visual presentation and proportional cook time, ensuring even layers and crisp finishes remain consistent with the original.

Doubling or tripling this recipe requires a large baking dish or several smaller ones to allow for uniform heat distribution. Pre-slice all potatoes in advance, ensuring you maintain efficiency and consistency across the expanded serving size.

Equipment adjustments should consider thickness and edges—use mandolins with signified settings to distribute even slices across various thicknesses when altering recipe amounts.

Momentarily increase cooking time with larger dishes but finely monitor the golden hue and crispness to avoid overbake. Adjust as necessary based on slice thickness and oven type, frequently turning your dish to achieve even cooking.

Consider storage of leftovers with an eye towards accessibility; pre-divide into portions to avoid waste or spoilage, allowing for easy reheating whenever desired.

Nutritional Deep Dive

The torte primarily features carbohydrate-rich potatoes, offering a significant source of energy and serving as a perfect pairing to protein-heavy main dishes. The use of russet potatoes introduces a high potassium content that supports cardiovascular health.

Micronutrient analysis presents a range of elements from potassium to vitamin C, found especially in fresh potatoes, each contributing to overall well-being and offering antioxidant properties that help in cellular repair and maintenance.

Health benefits are numerous, particularly when potatoes are paired with healthy fats like olive oil, crucial for efficient vitamin uptake and maintaining skin health through its E vitamin content found naturally in chosen oils.

Dietary considerations include opting for Yukon Gold potatoes if aimed towards boosting iron absorption, beneficial for those with lower B12 levels or anemia, considering the dish’s ability to balance out macronutrient requirements.

Portion analysis identifies the balance between maintaining the health-forward aspects of the torte while savoring indulgence as a side dish; it’s proportionally serving 1/8th slice with your main course ensures you enjoy its fullness without overindulgence.

Weight management tips involve mindful eating: the natural satiety of potatoes coupled with moderate portion sizes can contribute to feeling full without consuming unnecessary calories or fats.

Dietary Adaptations

For a gluten-free variant, ensure any thickeners used in balsamic glaze or accompanying sauces are certified gluten-free, allowing those with gluten sensitivity to enjoy without concern.

Creating a dairy-free option requires subtle changes: swap butter for olive oil or dairy-free margarine, ensuring all dairy products align with individual dietary needs for seamless adaptation.

A vegan twist mandates removal of all animal-derived products, substituting cheeses with nut-based alternatives, and focusing carefully on fat sources to maintain exquisite flavors without any dairy.

For a low-carb alternative, switch the primary ingredient from potatoes to thinly sliced turnips or cauliflower layers, replicating texture without needing significant carbohydrate content.

The keto-friendly version requires assessing fat sources, ensuring optimal macro distribution. Consider full-fat dairy or avocado oil spray to achieve this balance without reducing taste.

Paleo enthusiasts can focus on quality fats and ensure potatoes are substituted with comparably structured yet compliant vegetables, crafting a parsnip-based rendition that appreciates ancient dietary principles.

The low-FODMAP version focuses on using non-starchy vegetables like Lebanese cucumbers or zucchinis in place of potatoes, steered by individual digestive tolerances aligned with FODMAP guidelines.

Troubleshooting Guide

Texture Issues: If the torte is too soft, ensure excess liquid from potatoes has been drained, and that all slices are dried before assembling to promote a crisp bake.

Flavor Balance: Overwhelming thyme or balsamic can dominate. Taste each layer raw and adjust seasoning before cooking, ensuring a balanced intensity.

Temperature Problems: Ensure avoidance of uneven cooking through middle rack placement and proper oven preheating. Increase initial bake temperature slightly if necessary.

Equipment Challenges: If slices are uneven, maintain consistency by sharpening your kitchen tools pre-prep, or use a safe, reliable mandolin for perfect thickness.

Ingredient Substitutions: For alternate vegetables, ensure cook time alignment remains, avoiding textural dissonance. Choose comparable moisture contents for consistent results.

Timing Concerns: Share time management constraints by preparing slices in advance or utilizing pre-sliced equivalents where applicable to reduce active cooking hours.

Recipe Success Stories

Community feedback shines a warm light on the accolades for this delightful dish. Users express joy in the aroma filling their kitchen, with layers showcasing sophistication in execution and taste.

Variations of thinly sliced beet add-ons have been praised for color contrast and a sweet earthiness they carry, enriching the layers and the inherent rustic charm.

Adaptation stories inspire, with readers suggesting cheese varieties such as Gruyere and Emmental for Swiss-based renditions that lend both flavor depth and a melting touch to the torte.

Photography tips alternately highlight lighting: natural daylight captures the crisp finish and layered brilliance ready for socials and gatherings, transforming a snapshot into a visual delight.

Frequently Asked Questions

1. Can I make this recipe ahead of time? Yes, you can assemble the torte a day in advance, refrigerate it, and bake fresh to ensure it remains crisp and delicious when served.
2. What type of potato is best for this torte? Opt for Yukon Gold or Russet potatoes, as both deliver a perfect balance of creaminess and structure, holding shape post-baking.
3. Is this dish freezer-friendly? You can freeze the assembled, unbaked torte. Bake straight from frozen, adjusting cute time accordingly, or thaw entirely in the fridge before cooking.
4. How do you ensure even crispiness? Use parchment lining in your baking dish and ensure thorough drying of potato slices prior to assembly to achieve even browning and crisping.
5. What can I serve alongside this dish? Pair with roast meats or a fresh, vibrant salad to balance the richness and offer a varied dining experience.
6. Can I substitute thyme for another herb? Absolutely. Rosemary and sage can both contribute unique flavor profiles, so don’t shy away from trying herb combinations.
7. Is it possible to make this dish vegan? Yes, replace any dairy-based ingredients such as butter or cheese with vegan alternatives to enjoy a completely plant-based torte.
8. What’s the ideal oven temperature for baking? Set your oven to 400°F (200°C) to achieve the crispy exterior and tender, flavorful layers inside.
9. How do I store leftovers? Store any leftovers in an airtight container in the refrigerator for up to three days, ensuring portions remain fresh and moist.
10. Can I use sweet potatoes instead? Certainly! Sweet potatoes will enhance the sweetness alongside balsamic, complementing the thyme beautifully for a wholesome taste.
11. How do I prevent the torte from sticking? Adequate greasing with butter or oil, alongside parchment lining, helps in easy removal post-baking, avoiding any sticking issues.
12. How can I include protein in this dish? Consider adding cooked meats such as bacon or ham between layers, or topping with a poached egg upon serving for an extra protein boost.

Additional Resources

For those keen on future endeavors, explore related recipes like potato gratins and dauphinoise for similarities and variations on this comforting staple. Each offers a unique exploration into potato cuisine that celebrates textures and innovation.

Technique guides emphasize mastering kitchen skills; improve upon present methods with slicing precision and balancing seasoning for flawlessly executed layers each time the torte is created.

Ingredient information offers additional learning opportunities with a specific spotlight on potatoes, allowing the reader to harness their aromatic and textural possibilities across various culinary applications.

Explore equipment recommendations, highlighting versatile kitchen tools like mandolins that transform not only this dish but also contribute to newfound efficiencies in prep for many meals to come.

Seasonal variations continue to engage through exploration choices directly impacted by time-of-year offerings, allowing each maker’s unique take on classic torte recipes to flourish, resonating with their own culinary style.

Join the Conversation

Sharing on social media platforms can transform this culinary exploration into a digital masterpiece. Use dedicated hashtags and connect within community groups, adding a personal take or creative spin to these variations.

Engage with photography tips shared by the community, allowing a deep dive into showcasing this elegant dish at its best. Consider natural light and golden hour ambiance to capture moments worthy of the dish’s flavorsome essence.

Leave recipe reviews embraced by team members to spark dialogue. Comments allow feedback realization and other readers to comprehend, explore, and engage different perspectives when preparing the dish.

Community engagement through forums allows real-time engagement, adaptation options, or alternative techniques. Each contribution serves as a ripple effect, inviting broader perspectives and flavors into this traditional concept.

Encourage users to experiment with recipe variations based on new available flavors, ensuring each kitchen experience becomes unique while remaining tied to the original, captivating recipe essence.

The Recipe

Crispy Balsamic-Thyme Potato Torte

Serves: 6-8

Prep Time: 20 mins

Cook Time: 45 mins

Total Time: 65 mins

Kitchen Equipment Needed

  • Mandolin slicer
  • Large mixing bowl
  • Baking dish (9-inch suitable)
  • Pastry brush
  • Aluminum foil

Ingredients

  • 3 lbs potatoes, thinly sliced
  • 2 tablespoons balsamic vinegar
  • 2 tablespoons olive oil
  • 1 tablespoon fresh thyme leaves
  • Salt and black pepper, to taste
  • 2 tablespoons butter, melted
  • Optional: Grated Parmesan cheese

Directions

  1. Preheat the oven to 400°F (200°C). Grease a baking dish with butter.
  2. Thinly slice potatoes using a mandolin or sharp knife and place them in a large mixing bowl.
  3. Add balsamic vinegar, olive oil, thyme, salt, and pepper. Mix gently to coat evenly.
  4. Layer potatoes in the baking dish, ensuring consistent overlap. Brush each layer lightly with melted butter.
  5. Cover with foil and bake for 25 minutes in the preheated oven.
  6. Remove foil and bake for an additional 20 minutes, or until golden brown and crispy.
  7. Optional: Sprinkle Parmesan cheese in the last 5 minutes of baking for an extra savory touch.
  8. Remove from the oven and let rest 10 minutes before slicing. Serve warm.

Recipe Notes

  • For a vegan alternative, replace butter with plant-based margarine and omit cheese.
  • Additions like caramelized onions or garlic can enhance the depth of flavors.
  • Select suitable potatoes, with waxy yet firm features for best results.

Deliciously Healthy Walnut Maple Roasted Sweet Potatoes Recipe

Walnut Maple Roasted Sweet Potatoes: A Perfect Fall Side Dish

⚖️
Difficulty
Easy

⏲️
Prep Time
15 mins

🕒
Cook Time
30 mins

⏱️
Total Time
45 mins

🍽️
Servings
4

Whether you’re gathering around the table for a holiday feast or enjoying a cozy meal at home, Walnut Maple Roasted Sweet Potatoes provide a tantalizing blend of flavors and textures. With their naturally sweet and nutty taste, these roasted sweet potatoes are a delightful side dish that pairs beautifully with a variety of main courses. The maple syrup adds a hint of caramel flavor, while the walnuts lend a satisfying crunch.

This recipe brings out the best of fall’s warm spices and earthy sweetness, promising to fill your home with inviting aromas. It’s an easy yet impressive dish that requires minimal effort, making it perfect for hectic weeknights or elaborate holiday spreads. The natural sweetness of the sweet potatoes is enhanced by the maple glaze, creating a comforting taste that resonates with the essence of home-cooked goodness.

Quick Recipe Highlights

  • Flavor Profile: The blend of sweet maple glaze with savory roasted sweet potatoes is amplified by a sprinkle of cinnamon and a hint of salt.
  • Texture: Experience the creamy inside of sweet potatoes contrasted beautifully with the crunchy walnuts.
  • Aroma: The kitchen fills with the inviting scent of caramelized maple and roasted aromas.
  • Visual Appeal: A vibrant mix of orange sweet potatoes adorned with golden-brown walnut pieces.
  • Skill Level Needed: Easy enough for beginners, as it involves basic chopping and roasting techniques.
  • Special Equipment: A sturdy baking sheet ensures even roasting.

Recipe Overview

  • Difficulty Level: This recipe is straightforward, involving basic preparation and roasting steps that require no advanced culinary skills.
  • Category: Ideal as a side dish, it complements main dishes from traditional roasts to vegan entrees.
  • Cuisine: This recipe captures the rustic charm of American comfort cuisine with a touch of maple syrup sweetness.
  • Cost: Budget-friendly, with ingredients costing around $10, it serves generously without burdening your wallet.
  • Season: Perfect for fall and winter when sweet potatoes are at their peak, offering warmth and comfort.
  • Occasion: Suitable for Thanksgiving, Christmas, or any comforting family dinner gathering.

Why You’ll Love This Recipe


The sweet and savory appeal of this dish is undeniable. The natural sweetness of the sweet potatoes, heightened by the maple glaze, tantalizes the taste buds while offering a healthy alternative to more indulgent desserts. The walnuts introduce an earthy note that perfectly complements the dish. Enjoy the convenience of this recipe; with just a few preparatory steps, you can have a delicious, nutritious side dish with minimal cleanup. Packed with vitamins A and C, this recipe offers health benefits that are hard to overlook.

This dish serves as a great conversational piece, ideal for family gatherings where food is central to celebration. The combination of warm spices and sweet glaze allows it to fit seamlessly into any menu, making it a flexible option for those hosting. Factor in its cost-effectiveness, and you have a recipe that’s as kind to your wallet as it is to your palate.

Ingredient Deep Dive


Sweet potatoes are a versatile vegetable celebrated for their natural sweetness and nutritional density, rich in fiber and vitamins. Choose firm, smooth-skinned sweet potatoes for the best results. Maple syrup is the star addition, offering a natural sweetness with a hint of smokiness often used in North American cuisine. Opt for pure maple syrup for a richer flavor compared to pancake syrup alternatives.

Walnuts add a crisp texture and depth of flavor while providing essential fats and proteins. Store walnuts in a cool, dry place to maintain their freshness. When selecting, opt for halves or pieces to enhance the dish’s visual appeal.

Common Mistakes to Avoid

  • Overcrowding the baking sheet can result in steaming instead of roasting. Ensure sweet potato pieces are in a single layer for even cooking.
  • Skipping the oil can lead to uneven browning and dry potatoes. A light coating helps achieve a golden finish.
  • Using low-quality maple syrup dulls the flavor. Stick to pure maple syrup for the best taste.
  • Misjudging bake time can lead to soggy or hard potatoes; monitor closely during the last few minutes.
  • Not stirring the walnuts in advance. To enhance flavor and texture, toast the walnuts slightly.
  • Underseasoning; a pinch of salt elevates the sweet and savory balance.
  • Cutting potatoes too small; aim for uniform pieces for even cooking.
  • Not preheating the oven results in uneven cooking. Start with a hot oven.

Essential Techniques


Properly chopping the sweet potatoes is crucial. Use a sharp knife to ensure clean cuts, aiming for uniformity for even roasting. Coating with oil and seasoning ensures every piece absorbs flavor and caramelizes correctly. Monitor the aromas during roasting; they can provide clues that your dish is nearing perfection without overbaking.

Pro Tips for Perfect Walnut Maple Roasted Sweet Potatoes


Utilize parchment paper to prevent sticking and make cleanup easier. Experiment with adding a pinch of cayenne or black pepper for a spicy contrast to the sweetness. Rotate the baking sheet halfway through roasting to ensure even heat distribution. For added caramelization, drizzle extra maple syrup in the last five minutes of roasting.

Variations and Adaptations


For a regional twist, add a sprinkle of crushed red pepper for a southern kick. Consider swapping walnuts for pecans, aligning closer with Southern U.S. flavors. Veganise by ensuring all ingredients adhere to plant-based standards, which this recipe naturally supports. For a festive twist, sprinkle with dried cranberries before serving.

Serving and Presentation Guide


Serve these sweet potatoes fresh out of the oven on a rustic platter for a home-style feel. Garnish with fresh herbs such as parsley or thyme for a pop of color. Pair with roasted meats or enjoy alone as a hearty snack. Ensure the serving temperature is warm to experience the full flavor spectrum.

Wine and Beverage Pairing


Pair this sweet and savory dish with a medium-bodied wine such as Pinot Noir, which complements the earthiness of the walnuts and the sweetness of the maple syrup. For non-alcoholic options, consider chai or spiced tea to enhance the warming spices.

Storage and Shelf Life


Store leftovers in an airtight container in the fridge for up to three days. Reheat in the oven at a low temperature to revive the texture and flavors. Avoid microwaving, which can lead to sogginess. If freezing, ensure the potatoes are completely cool before sealing in a freezer bag.

Make Ahead Strategies


Chop sweet potatoes and mix with oil and spices a day in advance, storing them in the fridge. When ready, simply toss with walnuts and maple syrup before roasting. Reheat in the oven to retain texture, adding fresh walnuts for a crunchy finish.

Scaling Instructions


To halve the recipe, simply reduce each ingredient proportionally, maintaining the same cooking time. For larger gatherings, doubling is easy, just ensure plates or racks are not overcrowded. Consider using multiple baking sheets to ensure even cooking.

The Recipe

Walnut Maple Roasted Sweet Potatoes

Serves: 4

Prep Time: 15 mins

Cook Time: 30 mins

Total Time: 45 mins

Kitchen Equipment Needed

  • Baking sheet
  • Parchment paper
  • Mixing bowl
  • Sharp knife
  • Cutting board

Ingredients

  • 3 large sweet potatoes, peeled and chopped
  • 2 tablespoons olive oil
  • 1/4 cup pure maple syrup
  • 1 teaspoon ground cinnamon
  • 1/2 cup walnuts, roughly chopped
  • Salt, to taste

Directions

  1. Preheat your oven to 375°F (190°C) and line a baking sheet with parchment paper.
  2. In a mixing bowl, toss chopped sweet potatoes with olive oil, maple syrup, cinnamon, and salt.
  3. Spread the sweet potatoes in a single layer on the prepared baking sheet.
  4. Roast in the preheated oven for 20 minutes.
  5. Add the walnuts to the baking sheet and toss to mix. Continue roasting for another 10 minutes.
  6. Remove from the oven and serve fresh, garnished with extra walnut pieces if desired.

Recipe Notes

  • For added flavor, sprinkle with a pinch of cayenne pepper before serving.
  • Substitute walnuts with pecans for a different twist.

Delicious Christmas Log Recipe with Rich Coffee Flavor

Tasty Christmas Log: Drop-to-the-Ground Coffee Delight

⚖️
Difficulty
Medium

⏲️
Prep Time
30 mins

🕒
Cook Time
45 mins

⏱️
Total Time
75 mins

🍽️
Servings
12

There’s nothing quite like the aroma of freshly brewed coffee mingling with the rich scent of chocolate during the festive season. Enter the Tasty Christmas Log with a drop-to-the-ground coffee twist—a delectable dessert that beautifully marries the bold, robust notes of coffee with the comforting sweetness of a classic yule log. This delightful recipe is the perfect go-to for coffee enthusiasts looking to bring a unique flavor dimension to their holiday table this year.

This Tasty Christmas Log is a true celebration of textures and tastes. With its creamy coffee-infused ganache and moist chocolate sponge, it promises a delightful contrast in every bite. Ideal for Christmas gatherings and holiday parties, it not only impresses with its flavors but also captivates the eyes with its rustic yet elegant appearance, adorned with festive decorations.

Quick Recipe Highlights

  • Flavor Profile: The log combines rich chocolate with bold coffee tones, creating a deep, layered taste that excites the palate.
  • Texture: Expect a soft, moist sponge paired with a velvety coffee ganache, offering a luscious mouthfeel.
  • Aroma: The fusion of chocolate and coffee creates a warm, inviting aroma that instantly evokes holiday cheer.
  • Visual Appeal: With its dark chocolate exterior and festive garnishes, this log looks as indulgent as it tastes.
  • Skill Level Needed: A medium difficulty level requires some baking experience, involving careful attention to baking and rolling techniques.
  • Special Equipment: You’ll need a baking sheet, parchment paper, and a kitchen thermometer for best results.

Recipe Overview

  • Difficulty Level: Medium difficulty involves steps that include creating and rolling a sponge cake, which demands precision and some baking finesse.
  • Category: This dessert falls under the holiday treats and special occasion dessert categories.
  • Cuisine: Inspired by traditional European yule logs, this recipe carries modern influences with the addition of coffee.
  • Cost: Moderate cost due to specialty ingredients like high-quality chocolate and coffee.
  • Season: Best enjoyed in the winter season, particularly during the Christmas holidays when warm flavors are cherished.
  • Occasion: Perfectly suited for holiday feasts, winter parties, and festive gatherings.

Why You’ll Love This Recipe

This Tasty Christmas Log is a showstopper in both taste and appearance. The fusion of rich chocolate and coffee flavors delivers a delightful complexity that chocolate lovers and coffee aficionados can both celebrate. The texture contrasts between the silky ganache and the airy sponge cake offer a satisfying bite with each forkful.

Convenience is another charm of this recipe. While it appears intricate, it can be made ahead to save time on the day of your gathering, letting you focus on other hosting duties. Despite its impressive look, the step-by-step instructions make preparation straightforward.

Nutritionally speaking, this recipe uses real, high-quality ingredients, promising a purer taste and fewer additives compared to store-bought yule logs. Chocolate in moderation delivers antioxidants, while coffee is known to enhance mood and alertness, making this dessert both a treat and a perk-me-up.

Socially, this log serves as an exciting addition to any holiday dessert spread. It garners oohs and ahhs not only for its taste but for its festive look. Guests will love capturing and sharing its beauty across their social platforms, making it a conversation starter.

Finally, its cost-effectiveness stems from its yield, serving up to 12 guests per log. This ensures you can treat a larger crowd without breaking the bank, enhancing accessibility to gourmet flavors at home.

Historical Background and Cultural Significance

The tradition of the yule log dates back centuries, rooting itself in the robust heritage of European festive celebrations. Once a wooden log burnt ceremoniously to mark the start of the winter solstice, it later evolved into a culinary symbol—the Bûche de Noël.

Culturally, this transformation symbolizes warmth, community, and celebration during the coldest months, bringing people together around shared meals and flavors. It transcends borders, carrying a universal significance of joy and the closing of another year’s cycle.

Over the years, the classic yule log recipe has undergone several evolutions, transforming from an ornate sponge cake to versions imitating the log’s natural appearance, often decorated with meringue mushrooms, fondant leaves, or simply a light dusting of powdered sugar.

This version, incorporating coffee, is a nod to modern culinary trends, blending beloved traditional elements with contemporary flavors. It reflects the growing influence of fusion cuisine, revealing a cultural shift towards embracing global tastes and innovations.

Ingredient Deep Dive

The star of this dessert is undoubtedly dark chocolate, which brings depth and richness to the yule log. Historically an indulgence reserved for the elite, chocolate is now a staple in desserts across the globe. To select the finest, opt for chocolate with a high cocoa content, ensuring a powerful, bittersweet profile that complements the coffee harmony. Keep it stored in cool, dry conditions to maintain its sheen and snap.

Coffee provides a complementary bitterness that enhances the chocolate’s flavor without overpowering it. When choosing coffee for this recipe, aim for freshly ground beans from a reputable source to ensure robust, full-bodied notes. Properly store your coffee in an airtight container away from light and heat to preserve its aroma.

Common Mistakes to Avoid

  • Overbaking the sponge can result in a dry texture. Keep a close eye on it and use a toothpick test for doneness.
  • Skipping the coffee cooling step can curdle the ganache, resulting in a lumpy texture.
  • Rolling the cake while cold can cause it to crack. Roll it warm for that perfect shape.
  • Using low-quality chocolate compromises both taste and texture, so invest in the best you can afford.
  • Not aligning the icing sugar evenly can result in a blotched appearance, so use a sifter for dusting.
  • Improperly wrapped logs during chilling may lose moisture, so ensure tight wrapping with plastic.
  • Cutting the log immediately upon chilling can lead to cracks, allow it to reach room temperature first.
  • Misjudging the ganache consistency—ensure it’s thick yet spreadable for an even cover.
  • Overdecorating can overshadow the coffee chocolate flavor, so aim for balance in every decorative detail.
  • Neglecting to test coffee strength beforehand may lead to overpowering bitterness.

Essential Techniques

The art of rolling sponge cakes is a critical skill for achieving a flawless log shape. Mastery involves practicing the technique of folding parchment paper and rolling it while the sponge is still warm, as the flexibility prevents cracking. Keep your pressure even as you roll, and practice patience and precision for consistent results.

Tempering the ganache correctly ensures a glossy, smooth finish. Heat the ingredients gently in a bowl over simmering water, stirring continuously to achieve an emulsified texture. Look for gloss and teardrop-like drips as a sign it’s ready for use without oil separation or dull surface issues.

Pro Tips for Perfect Tasty Christmas Log

Begin with a clean, smooth surface for rolling your sponge to prevent unwanted tears or breaks.

When preparing the ganache, add a pinch of salt midway through melting to deepen the chocolate flavor.

Always chill your bowl and beaters if whipping cream—this aids in achieving the perfect stiff peaks for texture.

Allow ganache to cool properly before spreading to avoid melting sponges.

Decorate with restraint—minimal embellishments maintain a sophisticated look while letting core elements shine.

If new to rolling, practice on parchment paper with a test run before tackling your sponge.

Consider a serrated knife for neat, clean cuts—a critical detail for picture-perfect slices revealing the roll’s signature spiral.

Variations and Adaptations

Regional variations may include the infusion of different liqueurs like Grand Marnier or Bourbon for a unique flavor profile.

Incorporate seasonal elements by adding orange zest or dried cranberries during the winter months for a festive flair.

For a vegan twist, replace dairy with plant-based alternatives, keeping flavors intact while accommodating dietary needs.

Elevate the classic coffee notes with espresso powder or by adding a hazelnut twist for a richer palette.

Add textural contrast by including a thin caramel or nut layer inside before rolling, offering delightful surprises in every slice.

Adapt presentation for modern elegance by serving in proportioned slices, topped with minimal garnish.

Serving and Presentation Guide

To present your Tasty Christmas Log, arrange it on a platter with a carpet of shaved chocolate curls, enhancing the coffee theme. Add a light dusting of cocoa powder for an elegant touch.

For traditional flair, adorn with meringue mushrooms and sugared cranberries, striking a balance between rustic and chic. At serving, warm mugs of coffee pair beautifully, reinforcing the central flavor theme. Remember to allow slices to rest briefly at room temperature for optimal serving temperature and texture.

Proper portion control ensures each guest experiences the perfect balance of ganache to cake, so slice with deliberate, equal cuts using a warm, clean knife.

Wine and Beverage Pairing

Pair this log with a rich Cabernet Sauvignon for wine lovers, as its tannins complement the chocolate’s depth without overpowering the coffee notes.

For non-alcoholic options, a creamy latte or spiced cinnamon coffee enhances its chocolaty undertones beautifully.

If tea is your preference, an Earl Grey with a hint of bergamot offers an aromatic floral contrast.

Serve coffee hot to maintain the dessert’s warmth, enriching the dining experience on cool winter evenings.

Storage and Shelf Life

To store your Tasty Christmas Log, wrap it tightly in plastic wrap and refrigerate to maintain its moisture. Store at a consistent cool temperature, ensuring flavors remain vibrant.

Choose airtight containers for additional protection against fridge odors. Check for signs of spoilage, such as mold or off-odors, before serving if stored for extended periods.

Reheat slices gently at room temperature, avoiding microwaves to prevent ganache separation.

If you plan to freeze, wrap in layers of foil and plastic, then defrost in the fridge overnight for best texture retention.

Make Ahead Strategies

Prepare your sponge and ganache in advance, storing separately until assembly day for convenience and quality preservation.

Resting your ganache overnight enhances flavor development, providing a sturdier consistency on the assembly day.

Craft your log a day ahead to deepen flavors without cake drying out—perfect for busy holiday schedules.

Introduce fresh elements like rosemary sprigs or mint leaves on the serving day for a vibrant, aromatic touch.

Reheat slices individually if serving in thick portions, maintaining the ganache’s consistent appeal and ensuring a fresh taste.

Scaling Instructions

For smaller gatherings, halve the recipe to maintain the same quality and richness while avoiding potential waste.

To double or triple, ensure extensive workspace to accommodate increased ingredient quantities and expanded baking materials.

Monitor bake time adjustments closely; larger quantities may require a slight time extension, ensuring sponges remain moist and tender.

Balance freezer storage, adjusting space and strategy to accommodate batch sizes, maintaining freshness with appropriate packaging.

Nutritional Deep Dive

A single serving of this log provides a well-rounded macro-nutrient profile, with a delicate balance of fats, proteins, and carbohydrates.

Chocolate is a renowned source of antioxidants, providing heart-healthy flavonoids.

This dessert also contributes a number of essential micronutrients, particularly from the coffee and chocolate.

Portion awareness ensures indulgence with mindfulness, aligning with healthy dietary intimacy.

For weight management, consider smaller serving portions, integrating the log as a rare, special treat amidst a balanced diet.

Dietary Adaptations

Create a gluten-free version by substituting traditional flour with almond flour, preserving its signature taste and texture.

Dairy-free alterations can include coconut cream and plant-based margarine, ensuring sensitivity accommodations without compromise.

A vegan log adopts egg substitutes and dairy-free chocolates, presenting a flawless taste for plant-based diners.

Lower carbohydrate enthusiasts can decrease sugar, opting for gentler sweeteners to balance blood sugar responses.

The keto twist amplifies gain by using almond flour and stevia, operating harmoniously with low-carb guidelines.

Integrate paleo and low-FODMAP adaptations seamlessly through calculated ingredient adjustments, reinforcing inclusivity.

Troubleshooting Guide

Should your log lack the desired texture, revisit sponge mixing durations—overwhipping results in dryness, while underwhipping leads to moisture imbalances.

For flavor discrepancies, evaluate coffee strength—excessively robust brews may usurp chocolate’s subtler notes.

Temperature inconsistencies often derive from oven calibration errors, impacting bake quality; consider investing in an oven thermometer.

Combat equipment shortages by exploring thrift shop or rental options, curtailing full-on purchases while quickly addressing gaps.

Ingredient substitutions may alter outcomes drastically—test alternatives in miniature batches beforehand to preserve excellence.

Timing lapses can lead to undue staleness; structure preparation schedules in alignment with serving deadlines for optimum freshness.

Recipe Success Stories

Readers consistently report astonishingly positive feedback from gatherings, highlighting the visual allure and taste delight among guests.

One variation success story featured an apricot jam layer within the sponge, adding a fruity punch that guests adored.

Adaptation tales include a peanut butter twist, where peanut butter chips and swirls elevated a traditional approach to newfound heights.

Photography advice encourages focusing on garnishing details and optimal lighting, capturing the log’s essence beautifully.

Reader suggestions often advocate for serving with whipped cream dollops or espresso shots, intensifying the coffee aspect magnificently.

Frequently Asked Questions

Can I prepare this recipe without coffee?
Yes, you can replace coffee with warm water and achieve a classic chocolate log flavor without losing any texture elements.

How do I prevent the cake from cracking?
Roll the cake while it’s warm and use parchment paper to guide the roll gently without applying excess pressure.

What chocolate should I use?
Aim for a high-quality dark chocolate with at least 70% cocoa to fully capture the rich, bittersweet profile.

Can I freeze the assembled log?
Absolutely, wrap tightly in foil and freezer-safe plastic. Thaw in the fridge overnight when ready to serve for best results.

What if I can’t access espresso powder?
Substitute with strong brewed coffee reduction for similar depth and richness, ensuring you reduce water content accordingly.

How long can this log be stored?
Properly stored in the fridge, it maintains quality for up to a week, improving flavor during the first few days of resting.

How do I fix a grainy ganache?
Gently reheat it over a double boiler, whisking continuously, then allow to cool slowly, correcting separation issues.

What garnishes best suit this log?
Explore sugared rosemary, chocolate curls, and edible gold dust for an elegant, festive touch while celebrating yuletide colors.

Can I use milk chocolate?
While possible, it alters the balance between chocolate and coffee, producing a log with a sweeter edge; dark chocolate remains recommended.

Are there non-alcoholic beverage pairings?
Warm hazelnut milk lattes or chai teas complement this log beautifully, enhancing its complexity without overtaking its star flavors.

Additional Resources

Delve into our collection of holiday dessert recipes, featuring similarly indulgent flavors like peppermint bark and spiced nut brittle.

Our technique guides offer in-depth insights into sponge rolling and ganache crafting, empowering bakers at all stages with confidence.

Ingredient information highlights the origins and uses of premium baking chocolates, ensuring informed purchasing decisions.

Explore equipment recommendations that cater to novice and expert bakers, facilitating the quest for better baking setups.

Seasonal variations unlock creative liberties, inspiring exciting flavor combinations that align with each cold-weathered festivity.

Join the Conversation

Engage with our community by sharing your own Tasty Christmas Log photos on social media, using our dedicated hashtag for broader visibility.

Receive photography tips from specialized posts guiding lighting and angles for eye-catching culinary captures.

Intrigued by diverse takes? Leave a review detailing your variant, inspiring others while contributing to the shared culinary tapestry.

Explore community engagement through Q&A channels where fellow bakers exchange experiences, offering support and suggestions.

Let your alterations shine—every nuanced twist signifies creative expressions deserving recognition within our enthusiastic food-loving community.

The Recipe

Tasty Christmas Log: Drop-to-the-Ground Coffee Delight

Serves: 12

Prep Time: 30 mins

Cook Time: 45 mins

Total Time: 75 mins

Kitchen Equipment Needed

  • Mixing bowls
  • Baking sheet
  • Whisk
  • Spatula
  • Kitchen thermometer
  • Baking parchment
  • Cooling rack

Ingredients

  • 200g dark chocolate
  • 5 large eggs
  • 150g caster sugar
  • 2 tbsp strong brewed coffee, cooled
  • 150ml double cream
  • 1 tsp vanilla extract
  • 30g cocoa powder, sifted
  • Pinch of salt

Directions

  1. Preheat oven to 180°C (350°F). Line a baking sheet with parchment paper.
  2. Melt chocolate over a double boiler, then let cool.
  3. In a large bowl, whisk eggs and 100g caster sugar until thick and pale.
  4. Gently fold in cooled chocolate, coffee, and vanilla, followed by sifted cocoa powder and salt.
  5. Pour batter onto prepared baking sheet, smoothing with a spatula. Bake for 15 minutes.
  6. Remove from oven, cool slightly, then invert onto a clean sheet of parchment to roll the cake gently.
  7. Prepare ganache by heating cream to just below boiling, then pour over remaining chocolate and whisk until smooth.
  8. Unroll cake carefully, spread ganache evenly, and roll back tightly.
  9. Chill in refrigeration until set.
  10. Trim ends, dust with icing sugar, and decorate before serving.

Recipe Notes

  • For added flavor, infuse ganache with your favorite spirit.
  • Decorate with roasted coffee beans for an added aromatic touch.
  • This log can be made 1 day in advance, allowing flavors to deepen before serving.

Delicious Chicken Stuffed Crescent Rolls for a Perfect Dinner Recipe

Chicken Stuffed Crescent Rolls: A Delightful Twist on Comfort Food

⚖️
Difficulty
Easy

⏲️
Prep Time
10 mins

🕒
Cook Time
20 mins

⏱️
Total Time
30 mins

🍽️
Servings
8

Picture this: golden, flaky crescent rolls oozing with a savory chicken filling that melts in your mouth. Our Chicken Stuffed Crescent Rolls are the perfect combination of convenience and gourmet taste, making them a go-to recipe for weeknight dinners or quick party snacks. Packed with protein-rich chicken and creamy flavors, these crescent rolls are as heartwarming as they are delicious. Give in to the temptation of this delightful dish that captivates both children and adults alike.

The first bite of a Chicken Stuffed Crescent Roll is like a warm hug on a cold day. The buttery texture of the pastry gives way to a tender, flavorful chicken filling that boasts rich aromas of spices and herbs. As you savor each mouthful, the contrast of flaky dough and creamy filling offers a satisfying balance of taste and texture. These delightful bites are incredibly easy to make yet deliver a gourmet experience that feels like a culinary triumph every time.

Quick Recipe Highlights

  • Flavor Profile: This recipe features a blend of savory chicken, creamy cheese, and subtle spices that create a complex yet comforting taste.
  • Texture: Expect a delightful contrast between the airy, flaky crescent rolls and the smooth, creamy chicken filling.
  • Aroma: The alluring scent of baking dough combined with the fragrant aromas of spices and herbs fills the air, making mouths water.
  • Visual Appeal: The golden brown crust of the crescent rolls envelops the creamy filling, creating an enticing dish that’s both appealing and appetizing.
  • Skill Level Needed: With straightforward steps and minimal prep work, this recipe is beginner-friendly, requiring only basic cooking skills.
  • Special Equipment: A baking sheet and mixing bowl are essential, making this recipe accessible to nearly any home cook.

Recipe Overview

  • Difficulty Level: This easy recipe is perfect for novice cooks, as it involves simple preparation steps and no complicated techniques, making it ideal for a stress-free cooking experience.
  • Category: Chicken Stuffed Crescent Rolls fall into the appetizer or main dish category, depending on how many you serve per person.
  • Cuisine: This recipe is a modern take on comfort food, blending elements of American home cooking with creative presentation.
  • Cost: Relatively inexpensive, this recipe utilizes affordable ingredients, making it budget-friendly for family meals or gatherings.
  • Season: Perfect for any season, this versatile dish can be enjoyed year-round, with its warming quality being especially comforting during colder months.
  • Occasion: Ideal for casual weeknight dinners, parties, and potlucks, Chicken Stuffed Crescent Rolls are crowd-pleasers that fit various occasions.

Why You’ll Love This Recipe


Dive into the world of taste and texture with our Chicken Stuffed Crescent Rolls. Each bite offers a heavenly combination that strikes the perfect balance between flaky, tender crescent dough and creamy, savory chicken filling. You’ll love how the subtle spices enhance the natural flavors without overpowering them, making these rolls a delightful indulgence for your taste buds.

Convenience is key with this recipe. With a prep time of just 10 minutes, you’ll have more time to relax and enjoy your meal. The step-by-step instructions ensure easy assembly, and in no time, your kitchen will be filled with the enticing aroma of freshly baked crescent rolls. Plus, they’re easily portable, making them a great option for lunches or picnics.

Nutritionally, Chicken Stuffed Crescent Rolls are a well-rounded choice. The protein-packed chicken offers essential nutrients while the controlled portion sizes keep the meal balanced. Pairing with a fresh salad or vegetable side dish turns this dish into a nutritional powerhouse.

When it comes to entertaining, these rolls are a hit. Their warm, inviting appearance and delicious flavor make them perfect for sharing with friends and family. Whether you’re hosting a casual gathering or an elegant affair, Chicken Stuffed Crescent Rolls are sure to impress your guests.

Cost-effectiveness is another reason to embrace this recipe. Using pantry staples and readily available ingredients, you can create a delicious dish without breaking the bank. Its affordability makes it an excellent option for feeding larger groups or meal prepping.

Historical Background and Cultural Significance


The origin of the crescent roll dates back to ancient times, where similar bread-like creations were enjoyed by civilizations across Europe and the Middle East. Over centuries, local adaptations have shaped them into the flaky pastries we adore today. Marrying this versatile bread with chicken filling is a modern innovation that celebrates culinary creativity.

Culturally, the crescent roll stands as a symbol of unity and hospitality. In many cultures, sharing bread is a gesture of goodwill and friendship. Our Chicken Stuffed Crescent Rolls continue this tradition, bringing people together around the dining table.

As culinary trends evolved, chefs began experimenting with fillings and flavors, giving birth to stuffed pastries. The fusion of chicken and crescent rolls is a testament to the adaptability of classic recipes in contemporary cuisine.

Across the globe, regional variations of stuffed breads are enjoyed, each showcasing distinct spices and fillings unique to their cultural heritage. Whether savory or sweet, these pastries embody the richness of culinary traditions and the endless possibilities of flavor.

Ingredient Deep Dive


The star ingredient, chicken, boasts a storied history as a dietary staple across many cultures. A lean and versatile protein, chicken is celebrated for its adaptability in various dishes around the world. Its mild flavor serves as a perfect canvas for an array of spices and herbs.

Nutritionally, chicken is a high-quality source of protein, essential amino acids, and B vitamins, making it an excellent choice for a balanced diet. When selecting chicken, freshness is key, so look for firm, pale flesh with minimal odor. Store it in a refrigerator below 40°F and use within 1-2 days for optimal freshness.

Common Mistakes to Avoid

  • Overfilling the dough can lead to bursting during baking, so use the recommended measurements.
  • Not sealing the edges properly will allow the filling to spill out, resulting in a messier dish.
  • Underestimating cook time may lead to doughy centers, so ensure rolls are golden brown.
  • Skipping preheating the oven can alter cooking times and result in uneven baking.
  • Using cold ingredients directly may extend cooking times, so allow them to come to room temperature first.
  • Ignoring the use of parchment paper can lead to sticking, so ensure the baking sheet is lined.
  • Not allowing the crescent rolls to cool slightly before serving can cause burns from hot filling.
  • Overwhelming flavor with too many spices can mask the natural taste of the chicken.

Essential Techniques


Mastering the art of rolling the crescent dough is crucial for achieving the perfect chicken stuffed roll. Start by unrolling the crescent dough triangles and lay them flat on a clean surface. Place a spoonful of filling at the widest end of each triangle, being careful not to overfill. Roll the triangle from the wide end towards the tip, tucking in the corners to encase the filling securely.

Pay attention to sealing edges properly. Use your fingers to gently pinch the dough together at all seams, ensuring the filling stays inside as it bakes. This technique prevents any unwanted leaks and gives each roll a pristine appearance.

The visual cue of a perfectly baked crescent roll is its golden hue. You’ll know they’re done when they have a uniform color and visibly puffed appearance. Watching for this cue will help you avoid doughy centers and ensure even cooking throughout.

Pro Tips for Perfect Chicken Stuffed Crescent Rolls


Using room temperature ingredients can improve texture and flavor, as they mix more evenly and produce a better rise in the dough. Incorporate a brush of melted butter on top before baking for added richness and golden color.

Experiment with spices to match your taste. Garlic powder, onion powder, or a dash of cayenne pepper can enhance the flavor profile while keeping the stuffing balanced. Consider adding finely chopped herbs like chives or parsley for a fresh burst of flavor.

If preparing in advance, assemble the rolls fully and store them in the refrigerator for up to a day before baking. This will save you time while ensuring the filling has time to meld with the dough.

For a twist, include shredded cheese in the filling mixture for gooey delight, using varieties like cheddar or mozzarella for added taste. Lastly, avoid overpacking your baking sheet, allowing adequate space between rolls to expand during baking.

Variations and Adaptations


For regional variations, add seasonings local to your area, such as using cumin and paprika for a Southwestern twist or curry powder for a hint of Indian cuisine. Each adaption brings its own unique spin to the classic.

To adapt to the seasons, try incorporating seasonal vegetables into the filling. In summer, fresh tomatoes and basil give a fresh edge, while winter invites cooked squash or sweet potatoes for hearty warmth.

Dietary modifications can make these crescent rolls accessible to more dietary needs. Substitute regular crescent dough for gluten-free alternatives for those with gluten sensitivities, or use plant-based chicken for a vegan version.

The flavor can be varied by adding different sauces or dips. Consider a tangy barbecue sauce mixed with chicken for a smoky profile, or a buffalo sauce for those craving a spicy kick.

In terms of texture, try adding chopped walnuts or sunflower seeds for added crunch, complementing the creamy filling. Cheese lovers can increase cheese content for extra meltdown in every bite.

Presentation alternatives allow for creative serving methods. Arrange rolls in a spiral pattern, sprinkle with poppy seeds or sesame seeds for visual interest, or use mini crescent dough for bite-sized appetizers perfect for party platters.

Serving and Presentation Guide


Present Chicken Stuffed Crescent Rolls on a large serving platter with vibrant garnish such as fresh herbs or sliced cherry tomatoes to enhance their visual appeal. Plating on bed of greens can add a sophisticated touch and is easy to implement.

For garnishing, consider delicate sprigs of cilantro or a light dusting of paprika for color contrast. Traditional accompaniments can include a marinara or ranch dipping sauce to balance the richness of the rolls.

Modern serving suggestions are ideal for quick gatherings, using ramekins with assorted dips for guests to enjoy. Ensure rolls are served slightly warm for optimal flavor release, considering a gentle reheat if prepared in advance.

Temperature considerations mean keeping the rolls at their best—crisp yet tender. Avoid reheating excessively in the oven, which can dry out the filling. Simply a warm oven or quick microwave blast suffices.

Portion control tips suggest two rolls per person as a main meal, allowing plenty of room for side dishes while maintaining a balanced meal.

Wine and Beverage Pairing


For a delightful wine pairing, consider a crisp white such as a Sauvignon Blanc or a lightly oaked Chardonnay, which complements the creamy chicken filling. The freshness of white wine accents the lightness of the crescent rolls uniquely.

Non-alcoholic alternatives might include sparkling water with citrus infusions or a mild herbal tea, adding refreshing notes to each bite. These options cleanse the palate between rich, savory flavors.

When considering sweet indulgences, lightly brewed iced coffee or a citrusy Earl Grey tea pairs harmoniously, offering diverse aromas to tantalize your taste.

Temperature considerations mean chilled beverages offer a refreshing contrast, particularly when enjoyed alongside the warm stuffed rolls. Aim for a drinkable temperature that enchants not overwhelms the senses.

Ensure beverages are served in ample glasses, adding class to any meal. Encourage experimentation within your preferences, highlighting flavors that you enjoy most.

Storage and Shelf Life


Storage methods focus on sealing freshness within the crescent rolls. Store them in airtight containers at room temperature for a day or in the fridge for up to three days, allowing retention of moisture and flavor.

Temperature requirements involve keeping rolls below 40°F to prevent spoilage, particularly in warmer climates. Avoid excess moisture within containers, as this can result in sogginess.

Container recommendations suggest sturdy Tupperware with secure lids, ensuring minimal air exposure. Line containers with parchment paper to prevent sticking and aid in easy retrieval.

Signs of spoilage include any unexpected odors or discoloration. If in doubt, discard to avoid risks of consumption.

Reheating instructions are simple: warm rolls in a preheated oven at 350°F for 5-7 minutes, or until heated through. Use a microwave with caution to prevent altering texture.

Freezing guidelines are effective too, with rolls frozen separately on a baking sheet before storage, preventing them from sticking together. Thaw completely before reheating for best results.

Make Ahead Strategies


Planning is key! Prepare the chicken filling a day in advance to let flavors meld together beautifully. Store the mixture, ensuring tight-fitting lids to avoid air contamination.

When assembling rolls early, tightly wrap and place them in the fridge, preserving texture and flavor integrity. Preheat oven and bake when ready, promising a fresh, irresistible aroma.

Quality impacts as flavor develops over time, enriching the taste for day-to-day enjoyment. Ensure crispness by reheating in the oven, avoiding microwave reheat where possible.

Assembly tips include rolling ahead and carefully sealing edges, maintaining focus on each fold to prevent leakages. Plan for quick access and assembly during busy dinner times.

Reheating guidelines stress using a warm oven for consistent flavor and quality. For added freshness, sprinkle chopped green herbs or diced scallions post reheating.

Fresh element additions can heighten dining experience. Try adding colorful tomato salsa for a touch of brightness or hot pepper flakes for those who prefer heat.

Scaling Instructions


Halving the recipe involves proportionately dividing every ingredient, ensuring consistency in flavor and bake time. Recommended when serving smaller groups or testing the recipe.

Doubling or tripling notes involve additional baking sheets or staggered cooking times, as crowding in an oven can affect quality and consistency. Proper spacing ensures optimal cooking.

Equipment adjustments are minimal, focused on adequate space and tray availability. Larger production may benefit from larger mixing bowls for filling preparation.

Timing modifications are key for large-scale baking ventures. Consider longer bake time when working with full trays: monitor throughout for golden perfection.

Storage considerations focus on maintaining freshly baked status. Store in airtight containers, being mindful of stacked items, and using cooling racks to avoid stale bottoms.

Nutritional Deep Dive


Each Chicken Stuffed Crescent Roll combines nutrition with indulgence. The macro breakdown includes balanced proteins from lean chicken, providing necessary amino acids for body health.

Micronutrient analysis highlights B vitamins and minerals found in chicken, prosperous for energy production, and immune system support.

Health benefits incorporate the sustained energy chicken provides along with benefits of portion control achieved through individualized rolls. Choices support weight management without deprivation.

Dietary considerations reflect complete protein availability, important for muscle growth and repair, central to a healthy diet.

Portion analysis displays moderated calorie counts, with typical servings contributing favorably to daily intake recommendations.

Weight management tips suggest complementing rolls with substantial salads or vegetables to curate fulfilling, nourishing meals rich in fiber.

Dietary Adaptations


Craft gluten-free crescents by utilizing alternative dough, ensuring the same satisfaction level. Embrace a gluten-free lifestyle without missing out on delightful experiences.

Dairy-free version swaps traditional ingredients with plant-based fillings. Use nutritional yeast in place of cheese, enhancing taste without sacrificing richness.

For vegan cravings, exchange chicken for chickpeas or tofu, aligning with individual lifestyle commitments while maintaining flavorful delight.

Low-carb offering swaps crescent rolls for similarly shaped veggies like zucchini, offering tenderness achieved without carb concerns. Wraps provide delightful juiciness with fewer carbs.

Keto enthusiasts thrive with almond or coconut flour alternatives, balancing fat needs within a keto diet without compromising taste or texture.

Paleo devotees adore the possibilities of creating grain-free concoction variants, presenting newfound culinary adventures with traditional health principles.

Low-FODMAP focus leads to choices aligning with dietary restrictions, leaving space for breathability and comfort through essential adaptation.

Troubleshooting Guide


Texture issues may involve undercooked rolls. Ensure even cooking by spreading crescent shapes evenly during baking steps, turning trays if needed for uniformity.

Flavor balance requires seasoning keenly, avoiding salt excess or underseasoning. Taste during stages to properly calibrate your palate’s preferred result.

Temperature problems in baking demands preheated alignment. Allow ovens to reach the correct temperature before baking commenced, giving even, reliable outcomes.

Equipment challenges often mean ensuring the right tool for the job. Firm rolling pins, reliable baking sheets, and parchment paper create unity in cooking efforts.

Ingredient substitutions invite creativity over constraint, offering varied components with equal purpose for personalized delight.

Timing concerns center on preparation stages. Assemble crescents efficiently to align rolling targets, mimicking desired timing management essential for desired quality.

Recipe Success Stories


Community feedback shines as praise gathers online! Families boast about creating heartwarming moments focused around stuffing and enriching rolls, bonding amid shared joy.

Variation successes showcase ingenious experiments combining eclectic flavors and regional favorites, respecting heritage dishes with brave, fusing adaptability.

Adaptation stories enable new culinary epiphanies from readers altering original approaches, embracing transformative potential and heartfelt, joyful creativity.

Reader suggestions enrich diversity and invite greater conversation. Tips flow forth, granting fresh features and enhancements to a continually evolving classic recipe.

Photography tips emphasize lighting, embracing character-defining textures and rich hues. Capture iconic rolling transitions using angles maximizing aesthetic charm.

Frequently Asked Questions

What can I use instead of crescent rolls? You can use puff pastry or homemade dough for similar results. Just be mindful of adjustments in baking times and thickness to match desired texture.

How do I prevent the filling from leaking? Ensuring proper sealing by pinching pastry tightly at seams and avoiding overstuffing minimizes the risk of leaks. Chow down with confidence!

Can I cook these in an air fryer? Yes, air frying maintains crispness. Adjust temperature to 350°F and time to about 10 minutes, checking halfway to ensure even cooking.

Are these freezer-friendly? Yes, freeze assembled rolls before baking for up to three months. Bake from frozen, adjusting time to guarantee even bake throughout.

What sides pair well with this dish? Pair delightful rolls with crisp salad offerings or chilled vegetables, crafting balanced, enriching meals ideal for an eclectic dining experience.

Can I add extra spices? Certainly! Customize with spices like cumin or curry powder for personalization. Taste frequently to ensure desired flavor profile remains intact.

Is there a low-sodium version? Yes, utilizing reduced-sodium products maintains enjoyment without excess salt. Explore spices that heighten flavor convention without compromising health considerations.

How can I make these vegetarian? Replace chicken with sautéed mushrooms, broccoli, or even black beans for vibrant, vegetarian allure. Diverse vegetable presence ensures satisfying, memorable bites.

Can I prepare these in advance? Absolutely! Fill and fold ahead of serving time. Refrigerate fully assembled until needed, bake as instructed for freshly aromatic results.

How do I reheat leftovers without drying them? Gently reheat in a warm oven, adding time to guarantee consistency. Microwave use should be monitored for brief intervals only to remain juicy and moist.

Additional Resources


Explore related recipes such as spinach-filled pastries or savory pockets that both enhance your crescent adventures with diverse ingredient explorations and taste experimentation.

Technique guides discussing puff pastry creation furnish expansion opportunities, offering foundational knowledge for those willing to create homogenous layers at home.

Ingredient information dives into fresh alternatives. Consider using local produce when feasible, pivoting traditional boundaries into new flavor horizons.

Equipment recommendations lead you towards nonstick essentials, including silicone mats and rolling pins, cementing success within advanced endeavors preparing multitudes of crescents.

Seasonal variations emphasize ongoing creativity tailored for specific harvesting periods. Collect flavor profiles to suit changing desires throughout continuous evolution efforts.

Join the Conversation


Enhance your culinary journey by sharing photos and variations on social media platforms. Tag us to showcase your mouthwatering creations hard at work in the kitchen.

Consider photography tips by adjusting lighting and using props to add character to your plated crescent rolls, capturing their essence on camera.

Provide recipe reviews online, letting fellow enthusiasts know how you adjusted or adored the flavors. Realize contribution roles when documenting shared experiences.

Engagement within the broader community fosters opportunities to collaborate in recipe customization, inclusion of creative methods, and fostering deep love within this unique eating adventure.

Delight in tasteful experimentation, retaining elements of beloved origin while pursuing vibrant transformation preferencial. Adjust natural beauty to better personal comfort.

The Recipe

Chicken Stuffed Crescent Rolls

Serves: 8

Prep Time: 10 mins

Cook Time: 20 mins

Total Time: 30 mins

Kitchen Equipment Needed

  • Baking sheet
  • Mixing bowl
  • Rolling pin (optional)
  • Parchment paper

Ingredients

  • 1 can crescent roll dough
  • 1 cup cooked shredded chicken
  • 4 ounces cream cheese, softened
  • 1/2 teaspoon garlic powder
  • 1/2 teaspoon onion powder
  • Salt and pepper to taste
  • 1/4 cup shredded cheddar cheese

Directions

  1. Preheat your oven to 375°F (190°C) and line a baking sheet with parchment paper.
  2. In a mixing bowl, combine shredded chicken, cream cheese, garlic powder, onion powder, salt, and pepper. Mix until all ingredients are well incorporated.
  3. Unroll the crescent dough and separate it into individual triangles on a flat surface.
  4. Place about a tablespoon of chicken mixture onto the wide end of each triangle.
  5. Sprinkle a little shredded cheddar cheese over the chicken mixture.
  6. Roll the dough starting from the wide end toward the point, encasing the chicken mixture securely.
  7. Place each roll onto the prepared baking sheet, leaving space between them.
  8. Bake in the preheated oven for 15-18 minutes, or until golden brown.
  9. Allow to cool for a few minutes before serving warm.

Recipe Notes

  • Feel free to add extra spices or herbs that you enjoy to customize the filling.
  • Store any leftovers in an airtight container in the refrigerator and reheat in the oven.