Irresistible Christmas Gooey Butter Cookies Recipe for Holiday Cheer

Christmas Gooey Butter Cookies: A Festive Delight for Your Holiday Gatherings

⚖️
Difficulty
Moderate

⏲️
Prep Time
20 mins

🕒
Cook Time
15 mins

⏱️
Total Time
35 mins

🍽️
Servings
24 cookies

Celebrate the yuletide season with these delightful Christmas Gooey Butter Cookies 🎄✨. Perfectly soft and filled with festive charm, this recipe is a must-have for your holiday baking list. The gooey center melts in your mouth, while the sugar-dusted exterior adds a light, sweet crunch. Whether you’re hosting a Christmas party or enjoying a quiet holiday evening by the fireplace, these cookies bring warmth and joy to any occasion.

The holidays are all about indulgence and cheer. Imagine the sweet aroma of butter and vanilla wafting through your home, evoking memories of festive gatherings. These Christmas Gooey Butter Cookies are not just treats but a joyful experience, bringing families together to share smiles and sweet moments. Their compelling flavor and soft texture make them a crowd favorite, perfect for gifting or simply for leisurely enjoyment.

Creating these gooey butter cookies is an exercise in artistry. From carefully measuring the ingredients to achieving the perfect dough consistency, each step is infused with love and attention to detail. Baking these cookies is a delightful way to spend a winter afternoon, filling your kitchen with warmth and the cheerful spirit of the holiday season.

Quick Recipe Highlights

  • Flavor Profile: A heavenly blend of buttery richness, vanilla essence, with a delicate sweetness that perfectly captures the essence of Christmas.
  • Texture: Soft and chewy on the inside with a light, delicate crispness on the outside, making each bite an indulgent experience.
  • Aroma: Infused with the inviting scent of butter and vanilla, these cookies fill the room with a comforting holiday fragrance.
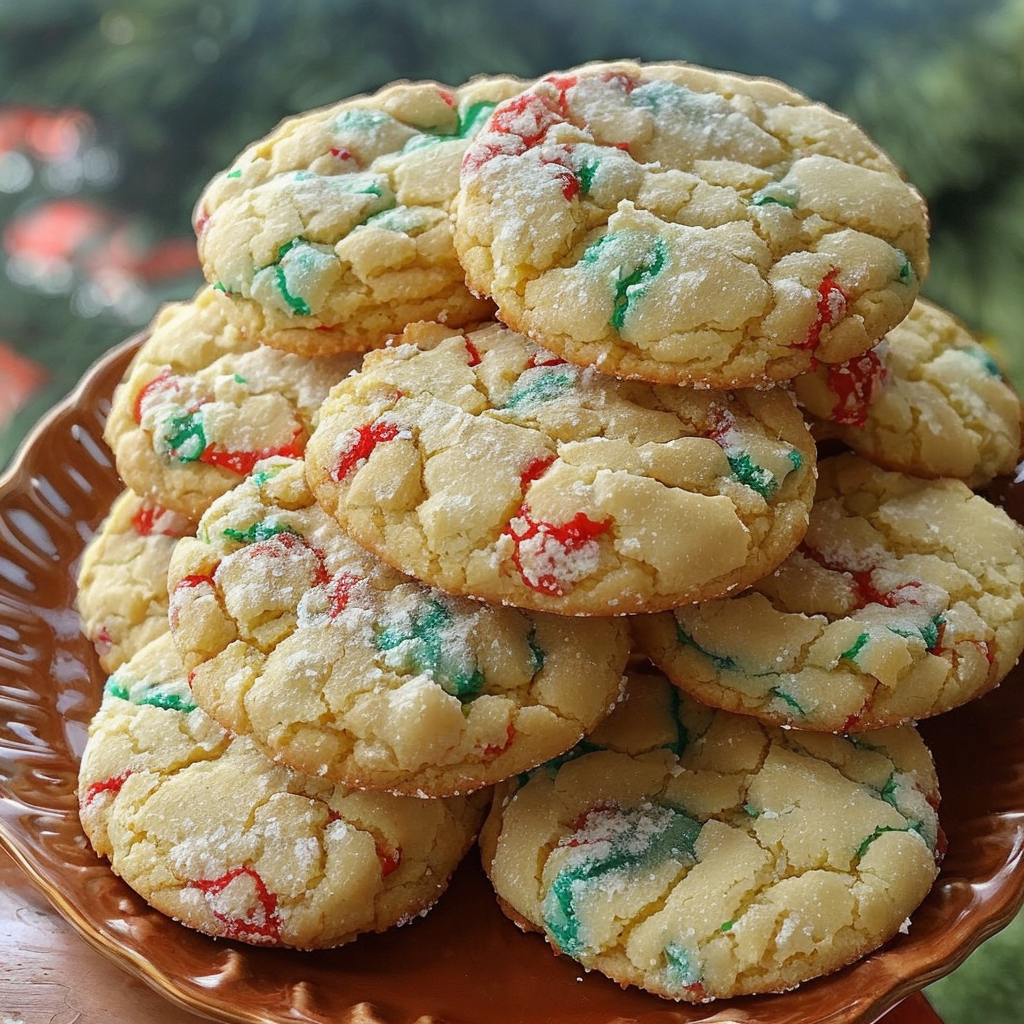
  • Visual Appeal: Dusted with powdered sugar, they boast an elegant and festive look, perfect to grace any holiday dessert table.
  • Skill Level Needed: Basic baking skills required, with a focus on achieving the right dough consistency for perfect gooey centers.
  • Special Equipment: No special tools needed—standard baking sheets, a mixing bowl, and a whisk/spatula suffice.

Recipe Overview

  • Difficulty Level: Moderate. While the steps are straightforward, achieving the perfect gooey center requires some finesse and proper timing.
  • Category: Desserts and baked goods. A classic and timeless choice fitting perfectly into festive celebrations.
  • Cuisine: American, with a touch of traditional holiday baking influences that lend warmth and cheer to the season.
  • Cost: Economical. Made from simple ingredients like butter, eggs, and vanilla, keeping holiday budgets intact while delivering delicious results.
  • Season: Best enjoyed during the winter holiday season when the warmth of home-baked goods adds comfort to the chilly weather.
  • Occasion: Ideal for Christmas parties, family gatherings, cookie swaps, or as a delightful holiday gift.

Why You’ll Love This Recipe


The Christmas Gooey Butter Cookies offer an unbeatable combination of flavor and texture that will captivate your taste buds. These cookies deliver a wonderful contrast of a slightly crisp exterior with a buttery, tender middle that melts away on your tongue. The balance of sweetness and the subtle notes of vanilla create a harmonious, joyous taste that is festive and satisfying.

Convenience is key during the holiday hustle, and this recipe doesn’t disappoint. Preparation is straightforward, taking only about 20 minutes, and the ingredients are common pantry staples. This means you can swiftly create a batch for unexpected guests or impromptu family baking sessions, ensuring that smiles and seasonal delights are never far away.

Not only are these cookies delicious, but they also offer a bit of a nutritional break from the often heavier holiday fare. Made with wholesome ingredients like eggs and butter, they provide a satisfying indulgence that pairs perfectly with a balanced diet. Plus, with no artificial flavors or additives, you can enjoy a natural treat filled with pure, heartfelt flavor.

These butter cookies are a hit at social gatherings, easily making new friends and family favorites alike. Their charming presentation and scrumptious taste make them the perfect icebreaker or conversation starter, helping you create memories and celebrate togetherness. They’re equally enjoyed by all ages, bridging generations through the shared love of good food.

Cost-effectiveness and accessibility play major roles in the recipe’s appeal. Using simple, cost-effective ingredients, these cookies provide a high yield that’s perfect for holiday celebrations or gift-giving without breaking the bank. Easily accessible at any grocery store, you won’t need to hunt for exotic ingredients—just simple baking magic.

Historical Background and Cultural Significance


The origins of the gooey butter cookie can be traced back to the early 20th century, a time when bakers invented gooey butter cake by happy accident. The legend goes that a St. Louis baker inadvertently mixed up ingredient proportions, leading to a rich and luscious cake—a story as heartwarming as the baked good itself. The gooey butter cookie, as an adaptation of the famous cake, carries a piece of this storied tradition.

This recipe holds a cherished spot in American holiday traditions, encompassing the spirit of creativity and resourcefulness typical of many American dessert stories. The magic of turning humble ingredients into a delectable treat symbolizes the innovation and warmth the season brings, reflected in the cookie’s widespread adoption at festive occasions.

Over the decades, these cookies have evolved from regional specialties to beloved holiday treats found across varying traditions and cultural celebrations. The transformation from a simple buttery treat to a holiday staple showcases the recipe’s versatility, adapting to diverse tastes and preferences while maintaining its rich, indulgent roots.

Across regions, variations have flourished, with each culture imparting its charm into the recipe. From including spices like cinnamon or nutmeg to adding chocolate chips or nuts, the gooey butter cookie adapts beautifully, highlighting the sweet alchemy of shared culinary heritage and personal creativity.

Ingredient Deep Dive


Butter forms the cornerstone of this cookie, historically a symbol of richness and luxury in culinary arts. Its pivotal role in baking cannot be overstated, as butter is responsible for imparting flavor, moisture, and the characteristic melt-in-mouth quality these cookies are famous for. When selecting butter, opt for unsalted, as it allows for better control over the final product’s flavor profile.

Eggs lend structure and solidity to our gooey center while also adding richness and tenderness. An essential component in binding ingredients together, eggs also contribute to the cookie’s signature gooey texture. When buying, choose fresh eggs for optimal results, and ensure they’re at room temperature before mixing to encourage even baking.

Vanilla extract infuses the dough with aromatic warmth and depth. This ingredient functions as a classic enhancer of sweet treats, activating the senses to deepen flavor intensity without overpowering other ingredients. When selecting vanilla, consider pure extract rather than imitation for a more profound, authentic taste that enriches your cookies.

Common Mistakes to Avoid

  • Not softening the butter properly may lead to uneven mixing, so be sure to leave it at room temperature.
  • Over-baking these cookies can turn the soft centers into dry, crumbly disappointments. Aim for a delicate golden hue as a visual cue for doneness.
  • Incorrectly measuring flour can impact texture dramatically. Use the spoon and level method to ensure precision.
  • Skipping room temperature eggs might lead to denser dough; they should blend smoothly with other ingredients.
  • Forgetting to chill the dough will result in spread-out cookies. Refrigerate for the specified time for perfect shapes.
  • Using cold ingredients can prevent your cookies from achieving the desired gooey texture, so gather your ingredients and let them ambiently warm.
  • Skipping preheating the oven can lead to uneven baking, affecting texture. Preheat thoroughly for consistent results.
  • Neglecting parchment paper can cause cookies to stick or burn. Always line baking sheets to ensure easy release.
  • Ignoring cooling times can result in breakage. Allow cookies to set on trays for a few minutes before transferring to racks.
  • Rushing the mixing process leads to inconsistent dough, so take your time and ensure all ingredients combine evenly.

Essential Techniques


Proper butter creaming is critical for achieving the signature light texture. This technique incorporates air into the batter, resulting in a dough that’s fluffy and airy. Mastering this requires room temperature butter and careful patience when beating—look for a pale, creamy consistency.

Accurate dough chilling stabilizes the butter, ensuring cookies don’t spread too thinly. This step is essential for maintaining structure, giving your cookies their iconic height and girth. Staying patient during this chilling process is vital for professional-looking results.

Measuring precisely is paramount for consistency. Baking is a science, and even small deviations can drastically alter textures and outcomes. Investing in a scale or using measured cups for dry and wet ingredients helps achieve balance and ensures each batch’s success.

Pro Tips for Perfect Christmas Gooey Butter Cookies


For enhanced flavor, try browning the butter slightly before incorporating. This adds a nutty, caramelized dimension that’s subtly delicious.

Incorporate a pinch of citrus zest, such as lemon or orange, to add a refreshing twist that complements the vanilla profile beautifully.

Ensure even spacing on the baking tray to allow for optimal air circulation, promoting even baking and heat distribution.

Experiment with adding a surprise ingredient like a sea salt sprinkle on top to enhance contrasts and surprise the palate with delightful undertones.

For a festive touch, lightly dust with edible glitter after cooling. This adds visual appeal and a sparkling charm to holiday presentations.

For an ultra-gooey center, slightly underbake the cookies and allow them to rest outside the oven. The residual heat will continue cooking without toughening them.

Variations and Adaptations


Regional variations might include spices, such as cinnamon or nutmeg, reflecting localized tastes. Adding dried fruits like cranberries or cherries gives a tart counterpoint to the buttery sweetness.

Seasonal adaptations invite flavor additions appropriate to the time of year. During the fall, consider incorporating pumpkin puree and spices for a warm, autumnal twist.

Dietary modifications can include using gluten-free flour blends for celiac-friendly enjoyment or substituting dairy butter with plant-based alternatives for vegan-friendly versions.

Flavor variations like adding chocolate chips or dark cocoa powder bring a deeper, richer taste to the cookies, perfect for chocoholics seeking their next fix.

Texture modifications might include adding finely chopped nuts or shredded coconut to introduce pleasant bites and interesting mouthfeels, elevating the cookie’s dimension.

Presentation alternatives could involve shaping cookies into festive designs or using colored sugar for decoration, making them visually appealing gifts in decorative tins or boxes.

Serving and Presentation Guide


When it comes to plating, consider using rustic wooden boards that contrast beautifully with the white powdered sugar finish. This natural backdrop enhances the cookies’ homemade, artisanal charm.

A fresh mint leaf or sprig of rosemary can serve as delightful garnishes, giving a pop of color that echoes festive greenery and bringing aromatic freshness into the presentation scene.

Traditionally, these cookies pair well with a warm beverage like hot cocoa or mulled wine, enhancing the holiday warmth and culinary harmony.

For modern, chic servings, consider pairing cookies with fruit preserves or dulce de leche for dipping, offering guests interactive indulgence in flavor exploration.

Ideally served slightly warm, just out of the oven or after a few minutes of cooling, these gooey butter cookies satisfy the desire for comfort and warmth on a wintery day.

Be mindful of portion control, especially if serving alongside rich desserts, ensuring guests get to savor each cookie’s flavors without overpowering their palates.

Wine and Beverage Pairing


Pair these delightful cookies with a light and aromatic white wine such as a Riesling, which complements the cookie’s buttery texture and vanilla notes beautifully.

For those avoiding alcohol, a rich, spiced chai or a cinnamon-infused apple cider offers perfect pairs, enhancing the cookie’s warm, festive character.

Coffee aficionados might consider an espresso or a creamy latte, which cuts through the butteriness while harmoniously balancing flavors.

Temperature considerations are paramount in drink pairing, where warmer beverages highlight the gooey texture, and chilled, sweet wines enhance flavor contrasts.

Presentation in matched drinkware—imagine matching your wine glasses with your festive table settings or pairing your cup and saucer set with any stylish plate for chic gatherings.

Storage and Shelf Life


Once baked, store these cookies in an airtight container lined with parchment paper, separating layers to preserve their delicate shapes and textures.

Ideally, keep them in a cool, dry place, as excessive moisture or heat can negatively impact the gooey interior, leading to dry outcomes.

Plastic or glass containers that provide a firm seal offer the best environment, prolonging freshness and preventing a stale texture.

Watch for signs of spoilage, such as an off smell or visible mold, indicating the need for disposal. Always recommend storing freshly baked cookies separately from older batches.

If needed, reheat slightly under a gentle oven or microwave heat to regain the freshly-baked warmth, ensuring residual heat doesn’t alter textures.

Freezing your dough is a great alternative. Pre-scoop and freeze individual cookies on sheets. Once solid, store them in freezer bags for longer-lasting use.

Make Ahead Strategies


For busy holiday preparations, consider making the dough ahead and storing it in the refrigerator for up to a few days before baking, letting it come to room temperature prior to use.

Between steps, use the dough-chilling phases to organize your workspace or prepare accompaniments, keeping the process efficient and seamless.

Mindfully storing between baking sessions ensures flavors and textures remain consistent, allowing you to bake fresh, delicious treats even under time pressures.

Ensure quality by closely monitoring baking times and adjusting quickly to changes in dough behavior, like spreading or browning.

Reassemble baked cookies by stacking them neatly in airtight containers, readying them for gifting or storage without compromising their dainty elegance.

For extra freshness, consider adding a seal or bag clip to prevent air exchange, further extending your cookies’ shelf life until they’re savored.

Scaling Instructions


To halve the recipe, simply divide all ingredient measurements by two, keeping baking time consistent but watching closely for any variations in batch texture or spread.

Doubling or tripling is straightforward, maintaining balance across all ingredients ensures consistent texture, while ensuring your kitchen gear accommodates larger volumes without cramping.

Be sure to adjust mix and oven space accordingly, allowing for adequate surface area and airflow when baking in batches to maintain consistent cooking across expanded amounts.

Storage after scaling should remain diligent, observing freshness cues closely as increased batches may demand additional or rotated stock to prevent staleness.

Equipment adjustments include acquiring larger mixing bowls or added baking sheets to handle scaled-up volumes efficiently without introducing process delays.

Timing may require tweaks when handling bigger batches—integrate shorter chopping breaks to retain spontaneity despite process lengthening.

Nutritional Deep Dive


The Christmas Gooey Butter Cookies offer a moderate caloric intake that’s gentle enough to indulge within seasonal tidbits while retaining balanced energy throughout holiday activities.

Each cookie provides a respectable macro breakdown between carbohydrates, fats, and proteins, with proportionate servings supporting responsible enjoyment of these treats.

Micronutrient analysis points to potential iron and vitamin A presence from key ingredients, supporting essential body functions amidst holiday cheer.

The cookies present various health benefits—consumed mindfully, they provide necessary fats and carbohydrates for energy without excessive intake, promoting a balanced holiday diet.

Portion control considerations can prevent excessive snacking, encouraging measured consumption that can easily harmonize with meals and other desserts.

Maintaining a consciousness of these cookies’ delightful contribution to holiday weight management can be simple, focusing enjoyment within the lively season’s ensemble of joyful foods.

Dietary Adaptations


For gluten-free adaptations, substitute regular flour for a gluten-free blend, ensuring flexibility and enjoyment across dietary boundaries without compromising flavor.

Opt for dairy-free recipes by incorporating plant-based spreads and milks, maintaining soft and buttery characteristics suitable for those with lactose concerns.

Vegan versions are equally gratifying, using egg replacers, plant-based butters, and thoughtful ingredient adjustments to deliver texture and gourmet flavor.

Low-carb adherents can enjoy adaptations by employing alternative sweeteners, like erythritol, and almond flour, providing nutrition without carbohydrate compromise.

Keto-friendly cookies emerge with the use of specially formulated flours or sugars, like coconut oil or monk fruit, delivering sumptuousness within dietary allowance.

Paleo dieters have flexible embraces with these cookies when utilizing grain-free flours and select sugar substitutes, maintaining flavor integrity with ease.

Low-FODMAP sufferers can enjoy alteration with modified dairy and sweetening options, offering gentle stomach experiences without compromising joy in taste.

Other specific diets see manageable conversions where flavor satisfaction aligns beautifully with varying allowance and nutritional focus, crossing boundaries graciously.

Troubleshooting Guide


For texture issues where cookies become too dense, reassess butter and sugar incorporation, guaranteeing thorough air penetration in creaming stages to avoid heavy outcomes.

Say ingredients aren’t mixing, resulting in uneven cookies—check ingredient freshness and ensure stable room temperature conditions for more balanced dough results.

With flavor balance concerns adding up, revisit ingredient potency—test extract strengths and control subtle palate influences through measured addition, refining experience.

Temperature troubles resulting in spongey cookies may call for oven recalibration, ensuring dial accuracy to suit equipment-specific demands.

Equipment issues like uneven baking surfaces should prompt review or reinvestment, aligning tool quality with baking expectations and ensuring unimpaired enjoyment.

Guard against incorrect ingredients seen in frugal use or replacements, diligently verifying recipe demands prior to commencement to ensure ingredient harmony.

Handling timing adjustments where cookies harden involves gentle reheats or moisture additions, refining results without formidable consumption impacts.

Recipe Success Stories


Many community members have revamped these festive delights by tweaking underlying spices, sharing successes of cinnamon and nutmeg introductions during the holiday haywire.

Impressive variation tales abound, featuring users rolling cookies in festive colored sugar, yielding visually stunning batches that spark festive brightness on platters.

Adaptation stories reveal various vegan efforts, creatively employing egg replacer and coconut-derived substitutes to authenticate plant-based indulgence.

Reader suggestions lean toward convention-breaking through distributed glaze toppings or nut presence within, crafting wholly unified cookies featuring warmth-inspiring enhancements.

Photography guides compiled through keen eye-sharing illuminate tips for festive arts, elucidating light techniques or prop tips to elevate cookie elegance.

Frequently Asked Questions

Q: Can I freeze the cookie dough?
A: Yes, you can freeze cookie dough for up to three months. After rolling into balls, flash freeze them on a tray, then transfer to a zip-lock bag for preservation.

Q: What type of butter is best?
A: Always aim for unsalted butter to allow full flavor control. Pure butter offers rich moisture and flavor, but for variations, plant-based options are feasible.

Q: Can this dough be used for other cookies?
A: While designed for gooey butter cookies, this base can be adapted into diverse shapes or slight allergen-free provisions—catering flexibility is an asset.

Q: Should I use a mixer or whisk by hand?
A: A mixer ensures even blending especially during butter creaming processes; however, hand whisking can suffice, promoting creativity, control, and tradition.

Q: Are there flavor substitutes for vanilla?
A: Almond or peppermint extracts provide unique alternatives should vanilla substitution arise, adding additional character to festive cookies.

Q: Can I add food coloring?
A: Certainly! Adding a few drops to the dough provides vibrant hues, but aim for natural coloring solutions if possible, minimizing adverse chemical taste influences.

Q: Why does chilling matter?
A: Chilling stabilizes fats in dough, preserving structure from excessive spreading at heat introduction and retaining the signature round cookie appearance.

Q: How do I achieve consistent sizing?
A: A kitchen scale or scoop aids precise dough measurement, unifying sizes for thorough and consistent baking durations, averting uneven results.

Q: What’s the best way to present these cookies?
A: Rustic platters or seasonal tins provide beautiful homes for your cookies, promoting both freshness retention and aesthetic harmony for displays or gifts.

Q: How do I ensure softness over time?
A: An apple slice in your cookie storage container can effectively maintain moisture levels within, combating stale tendencies and retaining gooey essence.

Additional Resources


For related recipes, explore other holiday favorites such as gingerbread and snickerdoodles, extending your festive repertoire with complementary sweet treats.

Technique guides help hone baking skills, useful for mastering butter creaming or dough chilling, pivotal for perfecting clarity within your cookies’ dough dynamics.

Ingredient insights emphasize understanding butter’s many uses, breaking down its influences within baked goods and guiding choices under varying needs.

Equipment endorsements outline top baking pan choices or silicone mats, crucial for uniform heat distribution and optimal release when encountering obstacles.

Seasonal variations illuminate festive opportunities for clearer favor pathways, hinting at pumpkin spice indulgence or citrus vibrancy for expanded enjoyment.

Join the Conversation


Engage on social media platforms, sharing moments captured during festive cookie baking sessions, using hashtags for increased visibility and connectivity to fellow peers.

Photography advice encourages creative perspectives, lighting arrangements, and plating techniques to enhance visual potential and draw attention.

Recipe reviews uncover user experiences, adjustments, and unforeseen insights, creating authentic discussions regarding this recipe’s success and impact.

Community engagements invite sharing personal interpretations yielding interesting adaptations or prompts further kitchen exploration sparking culinary delights worldwide.

Trace possible recipe variants expanding styles and hosting innovative viewpoints or collating responses in digital spaces, promoting growth and inspiration cross-culturally.

The Recipe

Christmas Gooey Butter Cookies 🎄✨

Serves: 24 cookies

Prep Time: 20 mins

Cook Time: 15 mins

Total Time: 35 mins

Kitchen Equipment Needed

  • Mixing bowls
  • Baking sheets
  • Parchment paper
  • Electric mixer or hand whisk
  • Measuring cups and spoons

Ingredients

  • 1/2 cup unsalted butter, softened
  • 1/4 teaspoon vanilla extract
  • 1 egg
  • 1 teaspoon baking powder
  • 1/4 teaspoon salt
  • 1 cup powdered sugar
  • 1 3/4 cups all-purpose flour
  • Additional powdered sugar for rolling

Directions

  1. Preheat your oven to 350°F (175°C) and line your baking sheets with parchment paper.
  2. In a mixing bowl, cream the softened butter and vanilla extract together until light and fluffy.
  3. Beat in the egg until well incorporated.
  4. In another bowl, whisk the baking powder, salt, powdered sugar, and flour.
  5. Gradually add the dry ingredients to the creamed mixture, mixing until just combined.
  6. Chill the dough for approximately 30 minutes to firm up slightly.
  7. Form dough into 1-inch balls and roll in powdered sugar before placing them onto prepared baking sheets.
  8. Bake for 10 to 12 minutes, allowing the cookies to look puffed and the edges to barely brown.
  9. Let cool on the tray for a few minutes before transferring to a wire rack to cool completely.

Recipe Notes

  • Substitute unsalted margarine for a dairy-free alternative.
  • Experiment with different extracts like almond or peppermint for a unique flavor variation.
  • Store cookies in an airtight container to maintain freshness for up to one week.

Elevate Your Dishes with Homemade Italian Compound Butter Recipe

Italian Compound Butter Recipe: Elevate Your Culinary Creations with Flavor

⚖️
Difficulty
Easy

⏲️
Prep Time
10 mins

🕒
Cook Time
5 mins

⏱️
Total Time
15 mins

🍽️
Servings
8

Transform your dishes with the flavor-packed Italian Compound Butter. This delightful creation combines the rich creaminess of butter with aromatic herbs and tomatoes, elevating any meal effortlessly. Whether you’re a seasoned chef or a kitchen novice, this compound butter recipe adds gourmet flair to your culinary repertoire. Infused with the essence of Italy, it pairs perfectly with bread, pasta, or grilled meats, bringing authentic Italian indulgence to every bite.

With its vivid colors and robust flavors, Italian Compound Butter is as versatile as it is delicious. Imagine a smooth blend of creamy butter enriched with sun-dried tomatoes, fresh basil, and a hint of garlic, creating a sensory experience that sings with the taste of Italy. The result is not only visually appealing but also a feast for the palate, where each bite bursts with vibrant flavors and a luscious mouthfeel.

Quick Recipe Highlights

  • Flavor Profile: Indulgent and herby with the zesty brightness of sun-dried tomatoes, balanced by the creamy richness of butter and aromatic herbs.
  • Texture: Smooth and luscious, with small bites of tomatoes providing a delightful contrast within the creamy base.
  • Aroma: A fragrant blend of garlic and herbs, reminiscent of a rustic Italian kitchen, enhancing the senses.
  • Visual Appeal: The vibrant reds and greens against the buttery base make it as appetizing to the eyes as to the taste buds.
  • Skill Level Needed: Beginners can easily master this recipe with minimal preparation and cooking steps.
  • Special Equipment: A food processor or blender is recommended for combining ingredients smoothly, ensuring a perfect blend.

Recipe Overview

  • Difficulty Level: Easy enough for novice cooks, yet provides results that impress with its gourmet appearance and complex flavors.
  • Category: This versatile butter fits into several categories, including appetizers, sides, and toppings, enhancing various dishes from breakfast to dinner.
  • Cuisine: Inspired by Italian culinary traditions, it harnesses classical Mediterranean flavors, bringing authentic tastes from Italy’s rich gastronomy.
  • Cost: Economical and accessible, using readily available herbs and pantry staples, making it a budget-friendly flavor enhancer.
  • Season: Best in the summer and spring when fresh basil and herbs are abundant, but enjoyable any time of year with store-bought ingredients.
  • Occasion: Perfect for entertaining, from casual get-togethers to elegant dinners, enhancing any meal effortlessly with its sophisticated flavor.

Why You’ll Love This Recipe


The taste and texture appeal of Italian Compound Butter are simply irresistible. The rich and creamy base of butter combined with fresh, vibrant herbs creates a symphony of flavors that dance on your palate. Every slice of bread, dollop on pasta, or melt over grilled vegetables transforms into a gastronomic delight, offering a taste of Italy in every bite.

Convenience is another reason this recipe will win you over. With minimal prep and cook time, it seamlessly fits into busy schedules while lending a gourmet accent to any meal. Once prepared, you can store it for days and use it to bring a new dimension to your favorite dishes, making meal preparation a breeze.

Nutritionally, the fresh herbs and tomatoes offer a burst of antioxidants and vitamins, making this butter not only a flavor staple but also a beneficial addition to your diet. The addition of high-quality butter provides beneficial fats when enjoyed in moderation, complementing a balanced diet.

Socially, this Italian Compound Butter can enhance your recipe collection, making you the star of any gathering. Spread it over a fresh baguette, accompany a cheese platter, or elevate a cooked steak—your guests will savor every mouthful and undoubtedly ask for the recipe, making you the culinary hero of the day.

Cost-effectiveness goes hand in hand with its accessibility. You can prepare a generous amount without breaking the bank, as most ingredients are affordable and found in regular supermarkets. This butter allows you to enhance everyday meals without stretching your budget, making gourmet accessible to all.

Historical Background and Cultural Significance


The origin of compound butter dates back centuries, where it was created as a way to infuse plain butter with flavors ranging from sweet to savory, enhancing its versatility. In Italy, the use of herbs and sun-dried tomatoes combines old-world preservatives with fresh ingredients, resulting in a taste that mirrors the country’s love for bold yet balanced dishes.

Cultural importance is ingrained in the Italian culinary heritage, where compound butter is used to add depth and interest to simple dishes. Its ability to transform a meal with minimal effort speaks to the Italian philosophy of quality over quantity, emphasizing flavor and authenticity.

Over the years, the evolution of the recipe has seen variations, with chefs and home cooks alike experimenting with different herbs and spices to suit local palates. Yet, the essence remains the same, a tribute to the harmonious blend of Italy’s rich ingredient legacy.

Regional variations within Italy might lean toward different herb combinations, such as incorporating rosemary in the north or oregano in the south, reflecting the diverse landscapes and cultures of the country. Each variation brings its unique twist while retaining the core elements that define this beloved culinary treasure.

Ingredient Deep Dive

For each main ingredient like sun-dried tomatoes and fresh basil, we delve into its cultural significance and history. Sun-dried tomatoes have roots in Southern Italy, where their intense flavor and long shelf life were highly valued. Nutritionally, they are packed with antioxidants like lycopene, offering health benefits alongside their robust taste.

Selecting sun-dried tomatoes involves choosing bright, pliable ones with a rich scent. They can be stored in airtight containers to maintain their freshness. If unavailable, you can substitute with tomato paste for a different consistency or roasted red peppers as an alternative for added flavor depth.

Fresh basil, the iconic herb of Italian cuisine, is revered for its sweet and peppery taste. Rich in vitamins A and K, it contributes to the nutritional value of this compound butter. When selecting basil, choose vibrant green leaves free from wilting. To store, wrap in damp paper towels inside a plastic bag in the refrigerator or freeze for long-term preservation. If you run out, fresh spinach leaves can serve as a mild substitute, though they lack basil’s distinct aroma.

Common Mistakes to Avoid

  • Overmixing the butter can lead to a greasy texture. Ensure ingredients are mixed until just combined to preserve creaminess.
  • Using cold butter can make incorporation challenging. Allow it to sit at room temperature to soften for easier blending.
  • Neglecting to season the butter can lead to a bland end result. A pinch of salt enhances the overall flavors significantly.
  • Failing to dry sun-dried tomatoes properly can introduce unwanted moisture, affecting the consistency.
  • Not using fresh basil may reduce the aroma and flavor profile. Opt for fresh herbs whenever possible.
  • Storing the butter uncovered will lead to flavor absorption from the fridge. Always wrap it or use airtight containers.
  • Skipping spreading tests on bread or toast means missing out on texture adjustments. Test and tweak as necessary.
  • Adding too much garlic can overpower subtle flavors. Use it sparingly to keep balance.
  • Not labeling the storage date can lead to unknowingly using butter past its prime when stored long-term.
  • Using unsalted butter without adjusting for salt can result in an underseasoned end product. Adjust seasoning accordingly.

Essential Techniques


Mastering the art of Italian Compound Butter involves understanding key techniques like perfecting the blend of ingredients. Importance lies in achieving a smooth and uniform mixture that ensures each herb, tomato, and butter adequately infuses its essence.

To master this, use a high-quality food processor or blender, carefully pulsing to prevent overmixing. Common pitfalls include over-processing, which leads to a loss of desired texture. Mixing should showcase a balance between creamy butter and discernible pieces of herbs and tomatoes.

Visual cues for success include a uniform coloration throughout the butter and visible yet small pieces of herbs and tomatoes, ensuring each bite has a perfect balance of flavor and texture.

Pro Tips for Perfect Italian Compound Butter


1. Experiment with your herb mix. Parsley or chives add a fresh twist while maintaining the Italian essence.
2. Always use room temperature butter for a smoother blending experience, preventing clumps.
3. Incorporate lemon zest for an added pop of freshness that complements the herb profile.
4. For a touch of heat, add a pinch of red pepper flakes to spice up your compound butter.
5. Test spreading on bread before storing, allowing for last-minute seasoning adjustments.
6. Seal thoroughly in plastic wrap before refrigerating to maintain peak flavor and texture.
7. When serving, allow butter to reach room temperature for optimal spreadability and taste.
8. Pair with crusty bread as an appetizer or melt atop steamed vegetables for sophisticated dining.

Variations and Adaptations


Regional variations offer delightful twists. Northern Italian versions might include cheese like Parmigiano-Reggiano for added richness. Meanwhile, in southern Italy, you might find versions incorporating olives, reflecting local ingredients that add unique flair.

For seasonal adaptations, consider incorporating winter herbs like sage or thyme during cooler months, keeping it fresh and relevant year-round. For summer, focus on vibrant herbs like cilantro for a brighter taste.

Dietary modifications can cater to diverse needs. To make it dairy-free, use a plant-based butter substitute without losing the luxurious texture. Vegan versions might incorporate nutritional yeast for a cheesy flavor without animal products.

Explore flavor variations by introducing spices such as paprika for smokiness or cumin for an earthy depth. Each spice infusion offers a new perspective on this classic recipe.

Texture modifications can be achieved by folding in nuts like toasted pine nuts for crunch or using whipped butter for a lighter consistency.

Presentation alternatives include rolling the butter into logs for slicing, creating elegant disks perfect for upscale dinner parties or casual brunches, impressing visually and gastronomically.

Serving and Presentation Guide


Plating techniques for Italian Compound Butter can visually enhance its appeal. Consider shaping the butter with molds or using a piping bag for decorative designs, adding an elegant touch to your table setting.

Garnishing ideas like sprinkling fresh herbs atop or incorporating edible flowers add color and sophistication, complementing its rustic yet polished charm.

Traditional accompaniments include crusty Italian bread or fresh pasta, providing familiar and comforting pairings. For a modern twist, serve as a topping for grilled steak or roasted vegetables, elevating everyday dishes to extraordinary.

Temperature considerations suggest serving at room temperature to ensure optimal spreadability and enjoyment, allowing the flavors to unfurl fully.

Portion control tips advocate small servings, letting it enhance rather than overwhelm dishes, ensuring a balanced and flavorful experience every time.

Wine and Beverage Pairing


Wine pairings elevate the Italian Compound Butter experience. Pair with a crisp Pinot Grigio or a rich Chianti to complement and enrich its flavors, highlighting the herbal and tomato notes.

For non-alcoholic alternatives, a sparkling water with a hint of lemon or lime offers a refreshing counterbalance to the butter’s richness, cleansing the palate between bites.

Consider coffee or tea pairings for breakfast indulgence; a bold espresso or herbal tea enhances its flavor profile, offering a comforting start or end to your meal.

Temperature considerations remain important here; room temperature butter melds beautifully with your choice of beverage, allowing a harmonious taste experience.

Serving suggestions include offering butter alongside an array of beverages, allowing guests to explore and discover their preferred pairing, adding another layer to the dining adventure.

Storage and Shelf Life


Proper storage of Italian Compound Butter prolongs its freshness and flavor. Store in the refrigerator wrapped in plastic wrap or parchment paper, ensuring no air contact, which could lead to spoilage.

Temperature requirements suggest keeping it below 40°F (4°C), maintaining its creaminess and flavor intensity. For short-term storage, airtight containers are recommended.

Container recommendations include glass jars or porcelain butter dishes, providing protection from odors and temperature fluctuations in the fridge.

Recognize signs of spoilage such as discoloration or off-putting odors, indicating it has surpassed its shelf life. Always err on the side of caution to maintain safety.

For reheating, allow to reach room temperature naturally. Avoid microwaving to preserve texture and flavor integrity. Freezing guidelines involve wrapping tightly in plastic wrap before placing in an airtight bag, extending its life up to six months.

Make Ahead Strategies


Making Italian Compound Butter ahead of time ensures you’re always prepared for any occasion. A prep timeline involves gathering and preparing ingredients, softening butter, and blending shortly before intended use.

Storage between steps is key. Keep chopped herbs and diced tomatoes refrigerated until blending to maintain freshness.

An assessment of quality impact shows that as flavors meld, nuances deepen, offering a more robust taste over time.

Assembly tips include using a silicone spatula for precise blending; keep in mind its delicate ingredients require gentle handling.

Reheating guidelines prioritize natural thawing, preserving the texture and flavor layers achieved during blending.

Fresh element additions just before serving, like a sprinkle of fresh herbs, highlight its freshness, ensuring it remains visually and gustatorily appealing.

Scaling Instructions


Scaling the recipe to suit your needs is straightforward. For halving, simply divide ingredient quantities by two while maintaining flavor ratios, ensuring balance across all elements.

Doubling or tripling necessitates similar adjustments: multiplying ingredient amounts proportionally and perhaps using larger mixing equipment to accommodate volume increases.

Timing modifications may include additional blending time, contingent upon volume.

Storage considerations scale similarly; ensure enough space in refrigeration or freezing areas, and use appropriately sized containers to prevent crushing or compression during storage.

Nutritional Deep Dive


Italian Compound Butter’s nutritional profile offers balance within its indulgence. Macro breakdown reveals fats as the primary component, complemented by carbs and proteins from its ingredients.

Micronutrient analysis highlights vitamins E and K from the butter, while sun-dried tomatoes contribute vitamins C and A, enhancing the health value.

Health benefits include antioxidants from tomatoes and heart-healthy fats from butter, which can be part of a balanced diet when enjoyed with moderation.

Dietary considerations provide for dairy adjustments or reduced-calorie versions by using substitutes without compromising experience.

Portion analysis underscores the need for moderation, transforming even small servings into large flavor rewards.

Weight management tips involve balanced servings; use sparingly to enhance, not overpower.

Dietary Adaptations

Gluten-free adaptation is naturally achieved since no gluten ingredients are used, allowing safe enjoyment for those with sensitivities.

Dairy-free adaptation employs plant-based butter alternatives, available in most grocers, ensuring creamy textures without dairy.

Vegan versions also leverage these alternatives, achieving rich flavors without animal products; add nutritional yeast for additional umami notes.

Low-carb and keto modifications naturally occur given its naturally low carbohydrate content, suiting those dietary approaches seamlessly.

Paleo followers enjoy it with grass-fed butter options, aligning it neatly with nutritional philosophies.

Low-FODMAP adjustments require careful consideration of tomato and garlic quantities to suit dietary guidelines, allowing enjoyment within restriction limits.

Troubleshooting Guide


Texture issues can arise from overmixing, leading to separation. Pulse blending and room temperature butter remedy these, preserving desired consistency.

Flavor balance concerns stem from overuse of garlic or under-seasoning. Adjust herbs and salt gently to realign taste profiles.

Temperature problems can occur if butter isn’t stored properly. Ensure correct refrigeration to maintain freshness and spreadability.

Equipment challenges often arise from inadequate blending tools. Invest in a high-quality processor or blender for optimal results.

Ingredient substitutions sometimes fail to offer parity. Consider flavor pairing and substitution guides when replacing ingredients like herbs or tomatoes.

Timing concerns revolve around pre-presentation thawing; proper planning mitigates these, ensuring smooth implementation.

Recipe Success Stories


Our community members have embraced Italian Compound Butter, sharing glowing feedback and celebratory successes. From spreading on freshly baked baguettes to topping sizzling steaks, readers report transformative culinary experiences that elevate everyday meals into gourmet dining.

Variation successes include incorporating roasted peppers for smokiness or adding truffle oil for luxury indulgence. Adaptation stories showcase creativity, with readers swapping herbs or intensifying flavor profiles according to mood and occasion.

Reader suggestions enhance the recipe with practical tips, such as using mold shapes for butter presentation or adding hints of lemon zest for added brightness.

Photography tips emphasize visual allure, encouraging shared experiences through wonderfully captured meals. The butter’s vibrant hues and textures make it a striking visual addition to any serving.

Frequently Asked Questions

Q: Can I use salted butter instead?
A: While unsalted butter is preferred to control flavor, salted can be used with seasoning adjustments to avoid overpowering the end taste.

Q: What’s the best way to soften butter?
A: Allow butter to sit at room temperature for an hour or use a low microwave setting briefly, taking care not to melt it.

Q: Is it freezer-friendly?
A: Absolutely. Wrap tightly before freezing, and enjoy defrosted butter within six months for optimal flavor and texture.

Q: How long does it remain fresh?
A: In the refrigerator, it lasts up to two weeks when stored properly, keeping flavors vibrant and delicious.

Q: Can I use dried herbs instead?
A: Dried herbs lack the same fresh vibrancy but can substitute in smaller quantities. Adjust seasonally as needed to compensate for potency differences.

Q: What other dishes can it enhance?
A: Beyond bread, this butter enriches pasta, vegetables, grilled meats, eggs, and as a sandwich spread, offering versatile applications.

Q: How do I prevent it from absorbing fridge odors?
A: Seal tightly in plastic wrap or use airtight containers, ensuring protection and maintaining singular, intended flavors.

Q: Could I use a hand mixer instead?
A: A hand mixer is less effective for achieving the desired smooth texture. A food processor is recommended for best results.

Q: Can children help make this recipe?
A: Absolutely! With supervision, kids can contribute by measuring and mixing ingredients, making it a fun and educational kitchen activity.

Q: Are there any allergens I should be aware of?
A: Be cautious of potential dairy allergies; substitute accordingly and check ingredient labels if customizing with nuts or alternative ingredients.

Additional Resources


For those passionate about exploring beyond Italian Compound Butter, related recipes and culinary guides offer inspiration. Discover variations on classical compound butters, like those infused with garlic chives and lemon dill, broadening your flavor horizons.

Technique guides empower you to make the most of Italian ingredients, understanding application and balance within various culinary contexts for optimal results.

Ingredient information spans origins and uses, from aromatic herbs to juicy tomatoes, offering a comprehensive understanding of flavors that define these masterpieces.

Equipment recommendations ensure you’re equipped for success, from processors to knives, providing efficiency and precision in preparation.

Seasonal variations bring extra dimensions to your cooking, exploring how diverse climates can influence ingredient availability and flavor profile adaptations, encouraging creativity year-round.

Join the Conversation


We invite you to share your Italian Compound Butter experiences across social media, tantalizing taste buds and inspiring others through stunning imagery and delightful culinary stories.

Photography tips help capture the vibrant, rich colors of your creations, showcasing them at their best and inspiring potential future culinary artists.

Recipe reviews reveal accolades and constructive thoughts, continually evolving the recipe’s journey as it passes from kitchen to kitchen, inspiring new innovation with each iteration.

Community engagement builds bridges, fostering a shared love of cooking and culinary discovery as readers share personal variations, successes, and real-world adaptations that can then inspire others.

Finally, explore and experiment with recipe variations, pushing boundaries and creating new sensations, grounding yourself in the teachings of an Italian culinary cornerstone, the humble yet wondrous compound butter.

The Recipe

Italian Compound Butter

Serves: 8

Prep Time: 10 mins

Cook Time: 5 mins

Total Time: 15 mins

Kitchen Equipment Needed

  • Food processor or blender
  • Spoon or spatula for mixing
  • Plastic wrap or airtight container for storage

Ingredients

  • 1 cup unsalted butter, softened
  • 1/2 cup sun-dried tomatoes, finely chopped
  • 1/4 cup fresh basil leaves, chopped
  • 2 cloves garlic, minced
  • Salt and pepper to taste

Directions

  1. Add softened butter, chopped sun-dried tomatoes, fresh basil, and minced garlic to a food processor.
  2. Pulse until ingredients are thoroughly combined and smooth.
  3. Season with salt and pepper to taste, pulsing briefly to incorporate.
  4. Spoon mixture onto plastic wrap or parchment paper. Shape into a log or desired form.
  5. Wrap tightly and refrigerate for at least one hour or until firm.
  6. Slice and serve at room temperature with bread, pasta, or vegetables.

Recipe Notes

  • If the mixture is too soft, chill in the refrigerator before shaping.
  • Experiment with different herbs for a unique twist.
  • This compound butter can be frozen for up to 6 months.

Deliciously Easy Cheesy Chicken Fritters with Garlic Aioli Dip

Cheesy Chicken Fritters with Garlic Aioli Dip: A Savory Delight

⚖️
Difficulty
Easy

⏲️
Prep Time
15 mins

🕒
Cook Time
20 mins

⏱️
Total Time
35 mins

🍽️
Servings
4

The Cheesy Chicken Fritters with Garlic Aioli Dip is a meal that will leave your taste buds yearning for more. Combining succulent chicken with gooey cheese, these fritters offer a delightful contrast between their crispy exterior and tender interior. Perfectly paired with a rich and flavorful garlic aioli dip, this dish becomes irresistible at first bite. Whether you are looking to impress guests at a dinner party or simply want a comforting snack, these fritters deliver on all fronts.

Imagine biting into these fritters; they surprise you with the supple melt of cheese mingling with finely seasoned chicken. The garlic aioli, creamy with a hint of tang, elevates every mouthful. The preparation is simple, yet the flavors are complex enough to intrigue any food enthusiast. Bring a sense of indulgence to your table with this exquisite blend of tastes that echoes both simplicity and sophistication.

Crafted to perfection, the Cheesy Chicken Fritters are not only delicious but easy to make, making them an ideal recipe for any culinary skill level. The aromatics of garlic and herbs entice your senses, promising a meal that is both delectable and nourishing.

Quick Recipe Highlights

  • Flavor Profile: The fritters boast a savory chicken base, enriched with the creamy depth of cheese, complemented by the zesty garlic aioli.
  • Texture: Crispy on the outside, moist and tender on the inside, these fritters offer a satisfying bite contrasted by the creamy, smooth dip.
  • Aroma: The combination of garlic and herbs provides an enticing aroma that’s both warm and inviting.
  • Visual Appeal: Golden-brown fritters with specks of herbs and a smooth, ivory-like dip create a visually appealing dish.
  • Skill Level Needed: Basic preparation and cooking techniques make this dish accessible to beginners and enjoyable for experienced cooks.
  • Special Equipment: A non-stick skillet and a mixing bowl are essential to bring these fritters to life.

Recipe Overview

  • Difficulty Level: Designed for ease, this recipe requires minimal culinary skills while still delivering impressive results. With straightforward steps, it is an entry-level recipe for home chefs seeking to expand their repertoire.
  • Category: Versatile enough to serve as a main dish, appetizer, or snack, these fritters adapt well to any meal part.
  • Cuisine: Drawing inspiration from American comfort food, this recipe adds a gourmet twist with its savory, cheesy goodness.
  • Cost: Economical and satisfying, the ingredients for these fritters fit within a modest budget, yet yield restaurant-quality flavor.
  • Season: Best enjoyed year-round, but particularly comforting in cooler weather when warm and hearty meals are most welcome.
  • Occasion: Ideal for casual gatherings, movie nights, or solo indulgence, these fritters cater to both relaxed and celebratory moments.

Why You’ll Love This Recipe

You will fall in love with these cheesy chicken fritters for their exquisite taste and texture. The combination of juicy chicken and stretchy melted cheese creates a delightful fusion of flavors that captivates your taste buds. Each fritter serves as a perfect morsel, harmoniously rigged with the robust zing of garlic aioli. Serve them piping hot and witness the elation they bring at each wonderful bite.

The convenience and simplicity of preparation make this recipe a lifesaver in the kitchen. Requiring only a few staple ingredients, these fritters come together quickly. This means you can enjoy a delectable homemade dish without spending hours over the stove. From a quick evening meal to a delightful lunchbox option, these fritters fit the bill effortlessly.

Aside from their pleasing flavors, these fritters offer nutritional benefits from chicken as a lean protein source, combined with the calcium and vitamins in cheese. The garlic aioli infuses additional health-enhancing properties, making this dish a nourishing meal that satisfies as much as it delights.

Perfect for socializing, these fritters act as a delightful conversation starter at gatherings. Their delectable profile pairs swimmingly with various dishes, sparking culinary admiration and joyful discussion. Your friends and family will marvel at your ability to provide such a wintry wonder, seated elegantly next to a lavish aioli centerpiece.

From a financial standpoint, these fritters are a cost-effective solution to entertaining. They require affordable, accessible ingredients without compromising on flavor and quality. Preparing these fritters allows you to create something special using common pantry items, offering an impressive return on any budget.

Historical Background and Cultural Significance

The origins of chicken fritters trace back to the traditional European fritter culture, where various fillings were enveloped in batter and fried. Initially popular in ancient Roman cuisine, this preparation technique spread across continents, eventually becoming cherished globally. While each nation evolved its version, the comforting idea of chicken fritters remained consistent.

In the culinary landscape, fritters hold a prestigious place, bridging cultures and cuisines while promoting the ingenious use of available ingredients. American cuisine embraced these delightful golden bites wholeheartedly, infusing native techniques and flavors to create a legacy dish. The evolution of chicken fritters showcases innovation and culinary elegance woven into every bite.

Regionally, the adaptation of chicken fritters saw creative transformations, reflecting local tastes and available resources. From Mediterranean herbs to Asian spices, diverse iterations emerged, each worthy of culinary accolade. This adaptability ensures that the heart of chicken fritters beats in every corner of the world, a dish cherished and enjoyed alike.

The cultural relevance of chicken fritters extends beyond their taste appeal. These fritters symbolize food unification, a testament to the art of merging cultural identities through cuisine. Over time, chicken fritters emerged not only as a dish but as a practice of flavor sharing and culinary harmony.

Ingredient Deep Dive

Chicken, the centerpiece of this recipe, boasts a fascinating cultural and nutritional legacy. Generally regarded as a staple across many global cuisines, chicken is both versatile and nutritious, providing families with a lean protein source essential for muscle health and body repair. When purchasing chicken for these fritters, choose high-quality, fresh meat, ensuring the flavor and health benefits enhance your dish.

Store chicken properly—ideally wrapped in the coldest area of your refrigerator for up to two days, or longer when frozen, to preserve freshness. Always consider substituting thighs for breasts if a juicier texture is desired. With its unmistakable taste and adaptability, chicken shines brightly as the fritter’s star.

The inclusion of cheese serves as an ode to culinary opulence, transcending the recipe’s simplicity. Rich in calcium, cheese not only flavors the fritters but enhances their nutritional profile, promoting bone and dental health. When selecting cheese, opt for varieties with melt-worthy textures, such as mozzarella or cheddar, both capable of delivering cheesy satisfaction.

Store cheese in an airtight container in the refrigerator, updating storage methods to suit hard or soft varieties. Mozzarella, known for its mild flavor, seamlessly complements any seasoning. Substitution possibilities include stretches of provolone or mild gouda, adding meager twists to this already exciting dish.

Common Mistakes to Avoid

  • Using chicken that’s not fully thawed can lead to uneven cooking. Ensure your chicken is completely defrosted for best results.
  • Over-mixing the batter risks a rubbery fritter. Mix just until combined to maintain a tender texture.
  • Cooking on too high a heat results in browned exteriors with raw insides. Maintain moderate heat for even frying.
  • Neglecting to drain cooked fritters is a mistake, resulting in a greasy dish. Let them sit on paper towels post-frying to remove excess oil.
  • Skipping ingredient quality dilutes flavor. Use fresh herbs and quality cheese to ensure taste excellence.
  • Overcrowding the pan reduces heat and leads to soggy fritters. Fry in batches for optimal crunch.
  • Under-seasoning affects flavor depth. Don’t shy away from salt and pepper to enhance the chicken’s natural savoriness.
  • Neglecting the aioli diminishes the dish’s flavor. Be sure to prepare and serve the dip to enhance dining enjoyment.

Essential Techniques

One fundamental technique for these fritters is achieving the right batter consistency. This creates a bind that holds the fritters together while ensuring a delightful mouthfeel. Proper batter mixing prevents dense pockets and ensures a crisp, uniform finish. Mastering this technique with finesse results in fritters that are tender within but boast golden, satisfying crusts.

Frying technique is equally crucial, impacting the fritters’ texture and appearance. Consider the appropriate frying temperature, around 350°F (175°C), which offers a perfect balance for cooking the chicken through while imparting that mouthwatering, golden-brown hue. Pay attention to the oil’s sizzle for an auditory cue of the correct heat levels.

Pro Tips for Perfect Cheesy Chicken Fritters

Achieve perfect fritters by ensuring your batter isn’t overly thick, striking a harmonious balance with just enough moisture to bind without drowning the texture. For added flair, spice the batter with herbs like parsley or chives to enhance flavors and presentation.

Utilize a cookie scoop when portioning the batter into the skillet, guaranteeing evenly-sized fritters that cook uniformly. This simple swap ensures consistency in both texture and taste, presenting you with perfectly cooked bites.

Consider lightly toasting the fritters on a baking sheet after frying for an even crispier finish. This examination allows the crust to firm up and any excessive oil to dissipate, resulting in better-tasting, light fritters that remain pleasingly tender.

For a smoother aioli, finely mince garlic and allow it to sit in a drizzle of lemon juice. The acid will soften the garlic’s bite, resulting in a creamy, sophisticated dip that pairs effortlessly with the fritters’ warmth and flavor.

Don’t sidestep pairing these fritters with a vibrant salad or tangy pickles. The juxtaposition of crunchy vegetables with cheesy meat delights the palate, creating balance and a wholesome dining experience.

Opt for a blend of cheeses to heighten flavor complexity. Try combining sharp cheddar with mild mozzarella for bold umami anchored by mellow creaminess. This blend surprises with depth that will delight your fritter-loving guests.

Enhance the batter with a dash of smoked paprika or chili flakes for a subtle fiery undertone. This addition introduces an unexpected yet welcome layer of heat, turning your fritters into a dynamic, flavor-packed experience.

Variations and Adaptations

For regional shifts, incorporate Mediterranean spices such as thyme or oregano, adding herbal nuances that harmonize perfectly with the foundational chicken and cheese. This versatile profile transcends global taste sensibilities, offering universal appeal.

Seasonal adaptations are where garlic blossoms can replace garlic cloves in the aioli during spring, if available. This substitution lends a milder, softer flavor that harmonizes with the innate crispness of fritters when warmer months call for subtler flavors.

Dietary modifications provide ample opportunity for your culinary creativity. Swap regular cheese with a dairy-free alternative, ensuring those with lactose intolerance savor in indulgence without reservation. Additionally, replace breadcrumbs with gluten-free panko to accommodate a wider range of dietary requirements.

The flavor-infused experiment doesn’t stop here, try enriching the dish with a handful of sautéed onions or sun-dried tomatoes for a fresh take on this classic rendition. These variations demonstrate infinite possibility, each adapting to personal taste or dietary needs seamlessly.

For an engaging texture, adjust the cheese-to-chicken ratio. Amp up the cheesiness for a gooey interior or favor chicken for a slightly firmer bite, tailoring fritters to personal preference and occasion need.

Change your fritter presentation by transforming them into sandwich fillings or sliders. Nestle between toasted buns with a vibrant slaw for an invigorating meal awakening the taste buds. Presentation stretches beyond mere plating, into ways you share and enjoy the recipe itself.

Serving and Presentation Guide

When serving Cheesy Chicken Fritters, consider plating them stacked, as their gold-brown hues create an eye-catching display. Garnish the plate with freshly chopped herbs, like parsley or chives, to enrich the color contrast and amplify the aroma.

Traditional accompaniments can lift a homely meal to new heights. Opt for coleslaw or roasted vegetables to complement and accentuate the fritters’ rich content and creamy dip. Temperature and portions are key; serve fritters hot for full flavor and crunch while managing serving size so each diner enjoys ample taste and enjoyment.

For a modern touch, employ slate or wooden boards for presentation, enhancing rustic charm while maximizing contrast between the fritters and garlic aioli dip. Match color palettes with the warmly browned fritters, inviting diners to appreciate both the culinary and visual craft.

Opt for diverse shapes when serving at gatherings. Transform fritters into bite-sized pieces, more suited to cocktail parties or informal settings, allowing guests easy access to these delicious morsels. Portion control is essential; small sizes yield delight without overwhelming.

Temperature considerations are vital—ensure fritters do not cool too quickly, reheating to maintain optimal warmth. Cover with foil while waiting to serve, as cooler fritters can lose much of their textural allure.

Wine and Beverage Pairing

Select a crisp white wine, such as a zesty Sauvignon Blanc, to pair with these cheesy chicken fritters. The acidity of the wine matches well with the richness of the cheese, creating a balanced pairing that complements the entire dish.

For those preferring non-alcoholic alternatives, sparkling water or a citrus-infused green tea can refresh and cleanse the palate, heightening the enjoyment of the garlic-infused fritters. The carbonation or citrus kick invigorates, bringing out lighter elements within the dish.

A gentle vanilla-infused black tea pairs delicately with the fritters, offering warmth and depth without overwhelming. The subtle creaminess harmonizes beautifully with the fritters’ seasoned chicken and garlic aioli profile.

Evaluate temperature considerations with precision; chilling beverages sufficiently allows the contrast to enhance the dining experience. Lukewarm alternatives may fail to deliver the desired harmonious sensations when paired alongside fritters.

Serve beverages in chilled glasses to maintain an even, refreshing temperature that enhances the meal’s sensory journey from start to finish. Opt for garnishes like lemon wedges or mint sprigs to bring out the culinary flair within both the beverage and the fritters alike.

Storage and Shelf Life

Proper storage is essential for extending the shelf life of these delectable cheesy chicken fritters. Allow them to cool completely before placing in airtight containers or resealable bags. Refrigerate them for up to three days to maintain flavor and texture.

Temperature requirements depend on freshness goals; refrigerated fritters should be kept at temperatures below 40°F (4°C) to ensure safety and quality. When reheating, ensure internal temperatures rise above 165°F (75°C) for optimal taste and food safety.

Containers should be airtight to preserve fritter crispness while preventing absorbing external odors. Store garlic aioli dip separately to retain the robust flavor and creamy texture separate from the fritters’ profile.

Keep an eye on signs of spoilage—changes in aroma, texture, or color are warning signals to discard fritters past their prime. Always reheating involves preheating the oven to 350°F and placing fritters on a baking sheet till heated through, reviving their crispy, warm allure.

Freezing guidelines require initial cooling and layering fritters between parchment paper within a freezer-safe container for future enjoyment. Remember to thaw completely before reheating using the methods above, extending shelf life while minimizing waste.

Make Ahead Strategies

This recipe accommodates make-ahead strategies, focusing on an organized prep timeline that ensures optimal flavor retention. Prepare the batter in advance, covering and refrigerating for up to 24 hours, saving valuable time and effort when you’re ready to cook.

Storage between steps aids efficiency—assemble batter and refrigerate, then shape and cook when ready to consume. The quality impact assessment remains high if the batter is stored correctly and mixed just before shaping and frying.

Assembly tips ensure even cooking; scoop uniform portions for predictable frying results. For the aioli, combine ingredients and refrigerate in a jar, allowing flavors to meld brilliantly before serving alongside warm fritters.

Reheat the fritters in a preheated oven as needed, maintaining crispness and savor while recreating that freshly cooked appeal. This strategy fosters minimal preparation efforts while maximizing flavor delivery right to the plate.

Add freshly chopped herbs and a splash of lemon to the aioli dip just before serving, providing brightness to the pre-prepared ingredients. This fresh element addition ensures your fritters maintain gourmet appeal even when made ahead.

Scaling Instructions

Adapting this recipe to suit varying serving needs is straightforward. Halving the recipe involves precision in adjusting ingredient quantities while maintaining the original proportions to retain the depth of flavor and ideal texture.

Doubling or tripling requires careful consideration of equipment capacity, as larger batches demand additional cooking space or staggered preparation. Regularly evaluate pan sizes and cookware when scaling up, ensuring consistent, even fritter results.

Timing modifications may become necessary; monitoring for desired golden brown exterior color becomes a simple yet effective indicator of doneness. Check internal fritter temperatures to verify thorough cooking throughout.

When preparing large amounts, consider storage aspects to preserve quality. Utilize segmented containers with dividers to separate portions, ensuring freshness and minimizing cross-flavor contamination.

Nutritional Deep Dive

The nutrient profile of these cheesy chicken fritters is robust, offering a favorable macro breakdown with protein-rich chicken, cheese-derived fats, and minimal carbs present within traditional breadcrumbs. This combination provides a balanced meal suitable for many diets.

Micronutrient analysis highlights the inclusion of vitamins B6 and B12, courtesy of chicken, and calcium-rich cheese adding invaluable nutritional supplements to your dietary intake. Garlic adds further health benefits, boasting anti-inflammatory properties.

With health benefits extending to weight management, these fritters deliver nutritional satisfaction in each bite. Carefully portioned and savored, they cater to caloric-conscious dining without sacrificing flavor.

Portion analysis aids weight considerations—diligent serving control ensures an enjoyable yet balanced dining experience. Mindfully approach meal portions to savor fritters while upholding nutritional optimization.

Dietary Adaptations

For gluten-free adaptations, substitute breadcrumbs with gluten-free panko or crushed rice cereal to maintain the fritter’s binding function without compromising flavor.

Dairy-free options encompass replacing cheese with a quality plant-based alternative, preserving creaminess and flavor presence while adhering to dietary constraints. Vegan cheese offers delicious, melt-worthy textures complementary to fritters.

Low-carb adaptations are achievable through replacing breadcrumbs with almond flour, reducing carbs yet maintaining flavor presentation. These considerations ensure your fritters cater to various carbohydrate-conscious lifestyles.

For keto adaptations, the almond flour substitution option prevails, enhancing keto-friendly profiles catering to distinct dietary preferences. Achieve an encompassing, flavorful fritter experience adhering to keto guidelines.

Paleo versions thrive with almond flour and coconut-based cheese alternatives, welcoming a paleo-friendly shift without flavor loss.

Low-FODMAP modifications tailor ingredient choices, minimizing FODMAP-intense foods while sustaining fritter delight. Consider alternatives like garlic-infused olive oil for the aioli to preserve flavor without accompanying FODMAP risks.

Adapting to other specific diets becomes seamless with ingredient consideration, accommodating personal taste or dietary preference. Options abound, ensuring these fritters fit into your life’s culinary needs effortlessly.

Troubleshooting Guide

Ensure ingredients are mixed evenly to maintain texture, as imbalanced ingredients can yield fritters lacking ideal consistency. Aim for a uniform mixture that distributes flavors and texture consistently.

For flavor balance, adjust seasoning levels to suit personal taste profiles. This approach guarantees a personalized fritter experience without sacrificing quality or dish integrity.

Tackle temperature problems by monitoring oil/frying temperature closely to prevent external charring before internal cooking completes. Use a thermometer to maintain precise frying conditions, avoiding inconsistently cooked fritters.

Resolve equipment challenges by selecting non-stick, appropriately sized skillets for even frying. Overcrowding leads to uneven cooking, so use multiple pans or batches to ensure consistency.

Adapt ingredient substitutions through trial and error, paying attention to substitution impacts on taste or texture profiles. Opt for similar consistencies, flavors, or nutritional benefits to maintain dish familiarity.

Address timing concerns by organizing available cooking tools and setting a pre-determined assembly method. Avoid rushing the frying stage, as consistent heat exposure is crucial for optimal fritter creation.

Recipe Success Stories

Community feedback highlights the recipe’s ability to bring joy across kitchens worldwide, creating moments of shared flavor enjoyment and cooking triumph. Readers celebrated adaptation successes that preserved signature flavors while fitting individual tastes.

Variations have emerged from these fritters—international spices or diverse cheese blends have charmed cooks and tasters alike. Reader suggestions have driven culinary innovation, enriching this fritter’s legacy through collective experimentation.

Photography tips suggest capturing fritters’ textures, focusing on their golden-brown crusts with contrasting dips to visualize their crisp quality. This photographic approach complements the fritters visually, communicating flavor appeal masterfully.

Frequently Asked Questions

Q: Can I bake rather than fry the fritters?

A: Yes, you can bake them by placing fritters on a parchment-lined baking sheet and baking at 400°F (200°C) for approximately 20 minutes. Flip midway for even browning.

Q: What type of cheese works best?

A: Mozzarella or cheddar are popular choices for their melting capabilities and flavors, but feel free to experiment with others.

Q: How can I make the aioli spicier?

A: Add a pinch of cayenne pepper or finely minced jalapeño to the aioli for a spicy kick.

Q: Are these fritters suitable for freezing?

A: Absolutely. Place cooled fritters between parchment and freeze in an airtight container. Reheat directly from frozen for crispy results.

Q: Can I substitute the garlic in aioli?

A: Garlic-infused oil can work as a milder substitute, maintaining essence without overpowering the dip.

Q: Is whole-grain or multigrain bread an option?

A: Yes, using whole grain or multigrain breadcrumbs can enhance nutritional content while creating a denser crumb profile.

Q: How to prevent fritters from crumbling?

A: Ensure you’ve used enough binding elements such as eggs and flour. Press gently while cooking for firmer fritters.

Q: What’s the best way to reheat leftovers?

A: Use an oven set to 350°F (175°C) to gently reheat the fritters, preserving their crispness while warming through.

Q: Can I prepare the batter ahead?

A: Yes, prepared batter stored in the fridge overnight can simplify next-day cooking without sacrificing quality.

Q: How can I reduce preparation time?

A: Use pre-grated cheese or pre-cooked chicken to streamline the preparation process and cut back on prep time.

Additional Resources

Discover related recipes that complement your fritter creations, including herb-infused dips or a refreshing seasonal salad to balance the meal’s hearty profile.

Explore technique guides focused on frying mastery or batter preparations, offering insights into techniques that elevate fritter textures and taste appeal.

Stay informed on ingredient information updates, from seasonal produce cycles to cheese pairing options to optimize and enhance your fry-up repertoire.

Recommendations for essential kitchen equipment used in fritter preparation ensure seamless cooking execution. Consider investing in quality non-stick pans or precise thermometers to heighten culinary proficiency.

Explore seasonal variations to extend this recipe’s desirability further. Fresh herbs or in-season cheeses enhance your culinary palette and cooking experience with each creation.

Join the Conversation

Engage in online communities by sharing your Cheesy Chicken Fritters creations through social media platforms, exchanging ideas with like-minded culinary enthusiasts worldwide.

Share photography tips, capturing vibrant, eye-catching fritter images to inspire community members expressing flavor through lens mastery.

Provide recipe reviews, enhancing community balance with your valuable input. Share mastery secrets and insights, amplifying communal cooking confidence.

Encourage creative recipe variations adapted to personal tastes or dietary needs. Exchange successful experimental insights and engage mutually with a passion for fritter fervor.

Create meaningful culinary dialogue, strengthening global food journeys through shared inspiration, collaborative exploration, and collective culinary ambition all centered around fantastic fritters.

The Recipe

Cheesy Chicken Fritters with Garlic Aioli Dip

Serves: 4

Prep Time: 15 mins

Cook Time: 20 mins

Total Time: 35 mins

Kitchen Equipment Needed

  • Non-stick skillet
  • Mixing bowls
  • Knife
  • Measuring cups
  • Whisk

Ingredients

  • 2 cups cooked chicken, shredded
  • 1 cup cheese, shredded (mozzarella or cheddar)
  • 2 eggs
  • 1/4 cup fresh parsley, chopped
  • 1/3 cup flour
  • 1/2 cup breadcrumbs
  • Salt and pepper to taste
  • 1/3 cup mayonnaise
  • 2 garlic cloves, minced
  • 1 tablespoon lemon juice

Directions

  1. In a large bowl, combine chicken, cheese, eggs, parsley, flour, and breadcrumbs. Season with salt and pepper.
  2. Mix thoroughly until well combined and form into small patties.
  3. Heat a non-stick skillet over medium heat and cook fritters for 3-4 minutes per side or until golden brown and cooked through.
  4. In a separate bowl, whisk together mayonnaise, minced garlic, and lemon juice to create the aioli dip.
  5. Serve the fritters warm, accompanied by the garlic aioli dip.

Recipe Notes

  • For added flavor, include herbs such as rosemary or thyme in the batter.
  • Adjust salt and pepper per taste preference; a smoky paprika can enhance the fritters’ flavor dimension.

Savor Irresistible Crispy Coconut Chicken with Homemade Bang Bang Sauce

Crispy Coconut Chicken with Bang Bang Sauce: An Irresistible Delight

⚖️
Difficulty
Medium

⏲️
Prep Time
20 mins

🕒
Cook Time
25 mins

⏱️
Total Time
45 mins

🍽️
Servings
4

Imagine biting into a piece of chicken that’s succulent on the inside and perfectly crispy on the outside. This Crispy Coconut Chicken with Bang Bang Sauce is a culinary experience that brings both textures and flavors together in a blissful union. The rich coconut coating provides a delightful crunch, harmonizing beautifully with the sweet and spicy Bang Bang Sauce.

The distinct flavor profile of the Crispy Coconut Chicken paired with the Bang Bang Sauce makes this dish unforgettable. Each bite is a journey through layers of savory, sweet, and spicy tastes that awaken the palate. If you’re a fan of texture, the crunchy exterior provides a perfect contrast to the juicy chicken, ensuring every mouthful is uniquely satisfying. The sauce adds a fragrant note that elevates the dish, making it a sure-fire hit at any dining occasion.

Quick Recipe Highlights

  • Flavor Profile: The dish combines the sweetness of coconut with the tangy, spicy notes of the Bang Bang Sauce, creating a harmonious balance of flavors.
  • Texture: Expect a delightful crunch from the coconut crust, offering a satisfying contrast to the tender, juicy chicken inside.
  • Aroma: The fragrant coconut and spicy aromas of the Bang Bang Sauce enhance the sensory experience.
  • Visual Appeal: Golden-brown crispy chicken drizzled with vibrant sauce creates a visually enticing plate.
  • Skill Level Needed: Requires intermediate cooking skills, such as frying and sauce preparation.
  • Special Equipment: A deep-fryer or a heavy skillet for perfect frying results.

Recipe Overview

  • Difficulty Level: Rated as medium due to the need for frying and careful sauce preparation to achieve the right consistency and flavor balance.
  • Category: A delectable main course, ideal for dinners and gatherings.
  • Cuisine: Drawing influence from Asian and American comfort food traditions, this dish integrates global flavors seamlessly.
  • Cost: Affordable, with ingredients available at most supermarkets, making it accessible for home cooks.
  • Season: Ideal for summer gatherings, but enjoyable year-round thanks to its tropical coconut element.
  • Occasion: Perfect for family dinners, casual gatherings, or as a standout dish at a party.

Why You’ll Love This Recipe

The flavors of crispy coconut chicken are a delightful treat for your palate, combining the tropical sweetness of coconut with the spicy kick from the Bang Bang Sauce. The interplay of textures is nothing short of delightful — the soft, juicy chicken contrasted with the crunch of the coconut makes each bite an experience.

Preparation is straightforward, and with a few tips, you can achieve a restaurant-quality dish at home. The simple combination of ingredients makes it easy to prepare, with the coconut crust ensuring the chicken remains moist and flavorful during cooking.

Nutritionally, this dish offers a balance of protein and healthy fat from the coconut, and it can be easily modified to suit dietary needs or preferences. The sauce can be made lighter by adjusting the mayonnaise component, or thickened for a richer taste.

Socially, Crispy Coconut Chicken with Bang Bang Sauce is sure to be a talking point at your next dinner party. Its exotic flavors and vibrant presentation make it a dish that not only fills the belly but also creates a memorable dining experience. This recipe is cost-effective, using common pantry staples and accessible proteins, making it an excellent choice for both entertaining and family meals.

Historical Background and Cultural Significance

The concept of crispy coated chicken is a global phenomenon with roots in various culinary traditions. The addition of coconut is a nod to tropical cuisines, where coconut is a staple ingredient. It’s a reflection of culinary ingenuity, combining textures and flavors.

Culturally, combining the crispy texture with a bold sauce like Bang Bang aligns with trends in contemporary Asian-American fusion cuisine. This style celebrates bringing diverse flavors and textures together to create innovative dishes that delight and surprise.

Over time, the recipe has adapted to incorporate diverse flavor profiles, creating endless possibilities for personalization while keeping the core components intact. The coconut remains a consistent feature, echoing both historical and modern culinary values.

Regional variations have emerged, showcasing local spices and sauces adapted to different palates, making this dish a great base for experimentation and flavor exploration around the world.

Ingredient Deep Dive

Chicken: Historically a versatile protein for many cultures, chicken remains a favorite due to its adaptability and mild flavor. Nutritionally, it’s a lean source of protein and vitamins. Choose fresh, free-range chicken for the best taste. Keep it refrigerated and use within a couple of days for maximum freshness. For substitutions, tofu or cauliflower can provide a plant-based alternative.

Coconut: Widely celebrated in tropical cuisines, coconut offers a naturally sweet and nutty flavor. It’s rich in fiber and healthy fats, providing a satiating crunch when toasted. Store desiccated coconut in a cool, dry place to prevent spoilage, or freeze for longer shelf life. Try panko breadcrumbs as an alternative for a lighter texture.

Bang Bang Sauce: Known for its signature creamy and spicy profile, this sauce embodies influences from Asian culinary traditions. It typically combines mayonnaise, chili sauce, and sweet chili components. For a healthier spin, replace mayonnaise with Greek yogurt. Balance the flavors for a sauce that complements, rather than overpowers, the coconut chicken.

Common Mistakes to Avoid

  • Over-frying the chicken can lead to a dry texture; ensure oil temperature is controlled.
  • Not patting the chicken dry before coating can result in a soggy crust.
  • Using cold chicken can lead to uneven cooking; allow it to come to room temperature.
  • Skipping seasoning the coconut layer will lead to a bland flavor profile.
  • Thick coating can prevent the chicken from crisping; apply an even layer.
  • Overcrowding the frying pan will lower oil temperature, preventing crisping.
  • Using low heat can make the chicken greasy as it absorbs more oil.
  • Not resting cooked chicken on a wire rack will cause loss of crispness.
  • Forgetting to taste and adjust the Bang Bang Sauce can result in imbalance.
  • Skipping resting labeled as such will affect how the flavors meld and taste.

Essential Techniques

Frying Technique: Achieving the perfect crunch requires maintaining the oil at an optimal temperature. Aim for 350°F to ensure crispy results without overcooking the chicken. Avoid common pitfalls like overcrowding the pan, which drops oil temperature and results in uneven frying. Visual cues for success include a golden-brown color and consistency in crust texture.

Sauce Preparation: The essence of Bang Bang Sauce lies in its balance of spicy and sweet. To master it, adjust the spice level to preference while aiming for a smooth consistency. Be cautious of the mayonnaise-to-chili ratio, adjusting as needed until achieving your desired flavor profile.

Pro Tips for Perfect Crispy Coconut Chicken

Let the chicken rest after frying to allow the juices to redistribute, enhancing moisture. Ensure the oil reaches the right frying temperature before you start to avoid absorbing excess oil. Toast the coconut lightly before applying; this helps in releasing its oils and heightening flavor. Use a thermometer for precise temperature control when frying. Drizzle the sauce sparingly to prevent the chicken from going soggy — serve extra on the side. For added crispy texture, double-coat by first dipping in flour, then egg, finished with coconut.

Variations and Adaptations

Regional variations might include the use of local spices in the coating, such as cardamom or turmeric, enhancing the dish’s cultural authenticity. Seasonal adaptations can be achieved by using fresh coconut in summer, lending a different sweetness. For dietary modifications, substitute chicken with tofu to create a vegan variant, while retaining the sauce’s spicy profile with plant-based yogurt. Add lime zest to the coating for a zesty twist on the flavor. Texturally, incorporating crushed nuts like almonds can add another dimension. For presentation alternatives, serve the chicken sliced on a bed of greens for a vibrant, refreshing dish.

Serving and Presentation Guide

For plating, arrange chicken pieces in a fanned-out design for visual impact, allowing the coatings’ golden hue to shine. Garnish with fresh cilantro and a sprinkle of toasted sesame seeds for added texture and aroma. Traditional accompaniments like jasmine rice enhance the dish’s aromatic profile, while servings of fresh sliced cucumbers add crunch and freshness. Serve at room temperature to preserve the crispiness. Consider portion control by slicing the chicken into strips, facilitating sharing and individual servings.

Wine and Beverage Pairing

Pair this dish with a crisp Riesling, whose sweet notes complement the coconut and balance the sauce’s spice. For non-alcoholic options, a chilled herbal iced tea or a zesty lemonade can refresh the palate. Lightly chilled coffee or jasmine tea can highlight the coconut’s nuttiness. Serve beverages cold to cleanse the palate between bites, enhancing the overall flavor experience. Experiment with drink serving in stemware to elevate presentation dynamics.

Storage and Shelf Life

Store leftovers in an airtight container in the refrigerator for up to three days. Your chicken will retain its quality when stored properly without sauce applied. Signs of spoilage include an off smell or slimy texture—discard if present. Reheat in an oven at low temperatures to restore crispness without overdrying. For freezing, place separated layers with parchment paper, reheat thoroughly to crisp again.

Make Ahead Strategies

Prepare the components and store separately: the sauce can be refrigerated, and the chicken can be breaded a day in advance. Reserve frying for just before serving to maintain crispiness, as fried chicken will lose its crunch if stored cooked. Assemble all elements just before meal time for optimal freshness and taste.

Scaling Instructions

This recipe scales easily: halve for a smaller gathering, retaining ingredient ratios for balance. Double or triple quantities to cater to larger parties, adjusting fryer capacity and time spent frying accordingly. Store excess cooked chicken without sauce for best longevity. Keep an eye on ingredient availability to ensure no wastage when preparing on a larger scale.

Nutritional Deep Dive

With a balance of macro-nutrients, this dish offers a good mix of protein from chicken and fats from coconut. Additional vitamins and minerals contribute to its nutritional profile, including vitamin C from sauce ingredients. For a well-balanced meal, add a side of vegetables to meet dietary fiber needs. Meticulously monitor portion size to maintain nutritional benefits without excess calorie intake.

Dietary Adaptations

Ensure gluten-free variations by using gluten-free flour in the coating mix. For a dairy-free version, substitute any dairy-based ingredients with alternatives like almond or oat milk. Vegan adaptations are achievable by replacing chicken with a meaty vegetable or protein substitute, and adjusting the sauce recipe to ensure no animal-based ingredients are used. Opt for low-carb ingredients in the coating to suit ketogenic preferences, while still maintaining flavor integrity. Paleo enthusiasts can replace fried elements with oven-baked solutions using coconut oil for healthy fats.

Troubleshooting Guide

If the texture is not crispy, consider using less batter coating or controlling frying temperature more precisely. Balance flavors by adjusting spice levels in the sauce to taste, bearing in mind desired heat. Temperature discrepancies are unforgiving: use a reliable thermometer for frying accuracy. Equipment challenges can be managed by testing prior to use, ensuring familiarity with all steps. Ingredient substitutions should still respect flavor interaction, choosing alternatives that harmonize within the dish’s overall flavor profile.

Recipe Success Stories

Readers across the globe celebrate this Crispy Coconut Chicken recipe, praising its adaptability and memorable taste. Community feedback often highlights variations such as additional spices or complementary side dishes. Adaptation stories frequently feature home-grown ingredients for a personal touch. Readers love sharing photos of their creations, and have generously offered new serving or sauce style suggestions.

Frequently Asked Questions

1. Can I substitute the chicken with another protein? Yes, tofu or cauliflower make excellent vegetarian substitutes without compromising flavor or texture.
2. How can I prevent the coconut coating from falling off? Ensure that the chicken is dry before coating and press the coconut mix firmly onto the surface to adhere properly.
3. What’s the best oil for frying? Use an oil with a high smoke point, such as canola or vegetable oil, for even frying results.
4. Can I make the dish ahead of time? Yes, prepare components separately and assemble just prior to serving for best results.
5. How do I adjust the sauce’s spice level? Modify the amounts of chili sauce or add chili flakes incrementally to meet desired heat preferences.
6. What’s the best way to store leftovers? Refrigerate in an airtight container and reheat gently in the oven to restore crispiness without overcooking.
7. Can I bake the chicken instead of frying? Yes, baking is an option—coat generously with cooking spray and bake until crispy for a lighter version.
8. Is there a gluten-free option? Indeed, replace flour in the coating with a gluten-free alternative like rice flour to cater to dietary needs.
9. Can I use fresh coconut? Fresh coconut is a great seasonal variation for a different texture and taste experience.
10. What can I serve with this dish? Serve alongside aromatic rice or a fresh salad to complement the spices and enhance the meal.

Additional Resources

For further exploration, check out related recipes such as coconut shrimp or sticky glazed chicken for similar flavor profiles. Technique guides on frying and sauce creation can further enhance culinary skills. Learn more about key ingredients like coconut for insight into versatile uses and benefits. Recommended equipment lists, including thermometers and fryers, are available for optimized cooking. Consider seasonal variations featuring fresh produce for a more bespoke dining experience.

Join the Conversation

We’d love to see your own takes on Crispy Coconut Chicken with Bang Bang Sauce—share your creations with us on social media. Tag your posts with #CoconutChickenLove and join a community of food enthusiasts sharing tips and experiences. Review the recipe and suggest any creative adaptations or serving suggestions you discover. Engage with fellow cooks, share insight, and celebrate the joy of homemade meals together.

The Recipe

Crispy Coconut Chicken with Bang Bang Sauce

Serves: 4

Prep Time: 20 mins

Cook Time: 25 mins

Total Time: 45 mins

Kitchen Equipment Needed

  • Deep-fryer or large heavy skillet
  • Mixing bowls
  • Tongs
  • Meat thermometer

Ingredients

  • 4 boneless, skinless chicken breasts
  • 1 cup all-purpose flour
  • 2 eggs, beaten
  • 1 cup shredded coconut
  • 1 cup panko breadcrumbs
  • Salt and pepper to taste

Directions

  1. Preheat oil in deep-fryer or skillet to 350°F.
  2. Season chicken with salt and pepper. Dredge in flour, dip in eggs, and coat with a mixture of coconut and breadcrumbs.
  3. Fry the coated chicken until golden brown and cooked through, about 6-8 minutes depending on thickness.
  4. Drain the chicken on a wire rack to maintain crispiness.
  5. While the chicken rests, prepare the Bang Bang Sauce by combining equal parts mayonnaise, sweet chili sauce, and a dash of sriracha for heat.
  6. Serve the chicken drizzled with sauce and additional sauce on the side for dipping.

Recipe Notes

  • Ensure oil is at the correct temperature before frying for the best results.
  • The Bang Bang Sauce can be adjusted to personal taste with spice levels.
  • Consider baking for a healthier alternative.

Deliciously Decadent German Black Forest Swiss Roll Recipe

German Black Forest Swiss Roll: A Decadent Delight

⚖️
Difficulty
Medium

⏲️
Prep Time
30 mins

🕒
Cook Time
15 mins

⏱️
Total Time
45 mins

🍽️
Servings
8

Indulge in the rich and flavorful experience of a German Black Forest Swiss Roll, a dessert that marries the bold taste of dark chocolate with the sweet and tangy notes of cherries. This scrumptious treat is perfect for any occasion, bringing a touch of European elegance to your dessert table. Whether you’re sharing it with family or savoring a slice alone, the German Black Forest Swiss Roll offers a delightful blend of textures and flavors that will leave you longing for more.

Experience the joy of creating this German specialty right in your kitchen. The moist chocolate sponge cake, paired with luscious whipped cream and an indulgent cherry filling, offers a well-balanced harmony of sweetness and richness. This delectable roll is not just a feast for the taste buds, but a visual masterpiece, with its striking layers and intricate design. Every bite is a testament to its traditional roots, yet its appeal is timeless, making it a favorite across generations.

If you’re seeking to expand your baking repertoire, the German Black Forest Swiss Roll is an excellent choice. While it may seem complex, with careful attention to each step, even novice bakers can achieve success. With its impressive appearance and irresistible flavor, this dessert is a guaranteed crowd-pleaser. So, why wait? Embrace the art of German baking and surprise your loved ones with this exquisite Swiss Roll.

Quick Recipe Highlights

  • Flavor Profile: The German Black Forest Swiss Roll features a deep, chocolatey base that perfectly complements the sweet and tart cherry filling, creating a harmonious balance of flavors.
  • Texture: Experience a delightful contrast between the soft, sponge-like cake and the smooth, creamy whipped cream filling, accented by the juicy burst of cherries.
  • Aroma: The enticing scent of dark chocolate mingles with the sweet, fruity fragrance of cherries, enveloping your senses in a delightful aroma.
  • Visual Appeal: With its striking layers of rich chocolate, vivid cherries, and whipped cream, this roll is a showstopper, offering an elegant and inviting presentation.
  • Skill Level Needed: Mastery of rolling techniques and careful timing is essential, but with practice, even aspiring bakers can achieve perfection.
  • Special Equipment: A jelly roll pan and parchment paper are essential for creating the perfect Swiss Roll, ensuring even baking and easy rolling.

Recipe Overview

  • Difficulty Level: Choosing a medium difficulty level is apt, as it involves multiple steps, including creating the batter, precise baking, and skillful rolling. However, with attention and patience, the process is quite manageable.
  • Category: This recipe falls under the dessert category, offering a sweet finish to meals and an indulgent treat during tea time or festive celebrations.
  • Cuisine: Rooted in traditional German cuisine, this roll is inspired by the well-loved Black Forest cake, a staple in German confectionery known for its distinct taste and rich heritage.
  • Cost: The components include common pantry items and a few special ingredients like cherries, making it moderately priced and accessible, particularly when cherries are in season.
  • Season: Ideal for late spring through summer when cherries are at their peak, yet perfect for colder months when a rich, comforting dessert is desired.
  • Occasion: The German Black Forest Swiss Roll suits a variety of occasions, from festive gatherings and birthdays to casual family dinners or as a special weekend treat.

Why You’ll Love This Recipe

Delight in the exquisite taste and texture of the German Black Forest Swiss Roll, where each bite offers a perfect harmony of rich chocolate and tangy cherries. The complex layers of flavors meld together seamlessly, creating a dessert that is both indulgent and satisfying. The velvety whipped cream enhances the experience, ensuring a smooth and luxurious mouthfeel that is hard to resist. Whether you’re treating yourself or impressing guests, this recipe’s flavor profile is sure to captivate.

In terms of convenience, the Swiss roll is surprisingly straightforward to prepare once you master the rolling technique. With a total preparation and cooking time of under an hour, it offers a quick turnaround for a dessert of its caliber. The use of accessible ingredients makes it a feasible option for any home cook looking to try their hand at something special without significant hassle or stress.

For those conscious of nutritional balance, this dessert provides moderate indulgence. While it is indeed a treat, the inclusion of fresh cherries offers a dose of vitamins and antioxidants. Meanwhile, the use of dark chocolate can bring some health benefits, like improved heart health when enjoyed in moderation, making it not just a tasty choice but a smart one as well.

Bring joy to your social gatherings with this crowd-pleaser. Its universal appeal to both young and old makes it an excellent choice for social events, ensuring smiles and satisfied palates. The German Black Forest Swiss Roll becomes more than just a dish—it’s a centerpiece that sparks conversation and creates memories during holidays and family occasions.

From a cost perspective, this delicacy is quite economical, leveraging a few staple ingredients from your pantry with some special additions. When cherries are in peak season, the cost-effectiveness increases, giving you more dessert for your dollar. Its affordability combined with its rich taste makes it a favorite for both budget-conscious bakers and those seeking luxurious flavors.

Historical Background and Cultural Significance

The origins of the German Black Forest Swiss Roll draw from the renowned Black Forest cake, named for the Black Forest region in Germany. While precise historical accounts vary, the roll’s development was a natural evolution, adapting the cake into a more portable and visually striking dessert. This specific adaptation of rolling the cake to encase its fillings added a new dimension to enjoying traditional flavors, widely embraced across Europe by the late 19th century.

Culturally, the Black Forest is a region steeped in rich folklore and tradition, lending its name to one of the most beloved desserts worldwide—Schwarzwälder Kirschtorte. The Swiss roll version, while a less formal interpretation, carries its own significance as a testament to German baking ingenuity. It’s a means of sharing intricate flavors in a modern, convenient form, appreciated at both everyday tables and grand celebrations.

Over the years, the German Black Forest Swiss Roll has seen numerous adaptations, reflecting changes in culinary tastes and ingredient availability. Originally prepared with the region’s iconic Kirschwasser, a cherry brandy, the roll now often opts for more accessible cherry fillings and whipped cream to cater to broader palates. These changes illustrate the global influence and adaptation of German culinary traditions.

Regional variations of the Swiss roll also capture unique interpretations, from added chocolate shavings and cherry juice to whiskey-infused cream or alternate fruit fillings, demonstrating its flexibility and enduring popularity. Each version honors the essence of the Black Forest while allowing for personalization, ensuring its place in the culinary spotlight worldwide.

Ingredient Deep Dive

Cherries, the heart of this Swiss roll, are more than just a flavorful addition; they hold cultural significance as a symbol of prosperity and friendship in many traditions. Historically cherished in European cuisines, cherries offer vibrant color and a burst of sweetness in this dessert. Beyond aesthetics, they are packed with antioxidants, vitamins, and numerous health benefits such as reducing inflammation and promoting heart health.

When selecting cherries for your German Black Forest Swiss Roll, fresh, plump, deep red ones with shiny skins are best, providing the most intense flavor and visual appeal. If fresh are unavailable, frozen or canned cherries can serve as suitable alternatives. Store fresh cherries in the refrigerator and consume them within a few days for maximum flavor. For substitutions, consider using other tart fruits like raspberries or plum slices for a new twist.

The central ingredient, chocolate, offers more than its recognizable richness—it is woven into the fabric of culinary history, symbolizing decadence and celebration. In addition to delivering a deep, satisfying taste, quality dark chocolate also contributes to health benefits like antioxidant properties and mood enhancement. Choosing a chocolate of at least 70% cocoa ensures a robust flavor and a bittersweet balance essential for this dessert.

Preserve your chocolate’s quality by storing it in a cool, dry place away from sunlight, rather than the refrigerator, which can cause it to develop a white film and affect texture. If substitutions are necessary, quality cocoa powder combined with a touch of melted butter can mimic chocolate’s richness in the cake, ensuring the Swiss roll maintains its signature, delicious character.

Common Mistakes to Avoid

  • Overbaking the sponge results in a dry cake and cracks when rolling. Keep a watchful eye on it and remove once it springs back to touch.
  • Skipping the parchment paper can lead to the cake sticking and tearing. Ensure you line the pan well before pouring in the batter.
  • Filling the roll while the cake is hot may cause the cream to melt. Let the sponge cool slightly before spreading your fillings.
  • Using low-quality chocolate reduces the dessert’s richness. Opt for high-quality dark chocolate for authentic flavor.
  • Rolling the cake too tightly might squeeze out the cream, leaving an uneven filling. Roll gently and evenly for best results.
  • Overloading on filling makes it difficult to roll and can cause tearing. Spread a moderate, even layer.
  • Failing to whip the cream to the right consistency can result in a runny filling. Beat until stiff peaks form for structure.
  • Neglecting to dust the surface with cocoa powder can result in a sticky, unattractive finish. Lightly dust before serving for presentation.
  • Ignoring temperature when storing may cause the roll to dry out. Wrap well and refrigerate, consuming within two days.
  • Not following precise measurements can unbalance flavors. Stick to the precise weights and measures for a successful bake.

Essential Techniques

The technique of rolling the cake is vital for a successful presentation and even filling distribution. This step requires finesse and patience. Start by using a clean, lightly sugared kitchen towel, and gently guide the sponge into its roll while it’s still slightly warm to prevent cracking. Watch for signs of tearing and adjust your pressure to maintain an even roll. Mastery of this skill ensures a stunning final product every time.

Chocolate ganache as a finish provides a velvety texture and rich taste that enhances the dessert. Creating ganache involves carefully melting chocolate with cream to a smooth consistency. Keep heat low and steady to prevent burning the chocolate, stirring constantly to blend both ingredients seamlessly. Ganache adds an extra layer of sophistication, turning your Swiss roll into a lavish masterpiece.

Whipping cream to the perfect consistency is crucial for the lightness of the filling. Start with cold cream and chill the mixing bowl and beaters for best results. Beat on medium speed, watching for soft peaks to firm up into a stable consistency. Avoid over-whipping to prevent a grainy texture; stop once stiff peaks form, offering the ideal blend of stability and smoothness.

Using fresh cherries provides the brightest flavor, but preparing them is key. Properly washing, pitting, and slicing your cherries ensures they integrate beautifully into the roll without overwhelming the batter. Incorporate them evenly throughout the filling mixture to maintain a consistent taste and texture across each slice of your Swiss roll.

Pro Tips for Perfect German Black Forest Swiss Roll

Bring your eggs to room temperature before starting your batter. Room temperature eggs will mix more smoothly, allowing for a more even sponge texture that is vital for rolling.

For extra cherry flavor, consider soaking fresh cherries in a little Kirsch or cherry juice before incorporation. This infusion deepens the flavor profile, enhancing the signature taste of this dessert.

Prepare your jelly roll pan by lining it with parchment paper, allowing an extra overhang on the sides. This approach ensures a seamless release of the sponge, reducing frustration and improving results.

Gently fold the flour into your sponge mixture, taking care not to overmix. Preserving the airiness of the batter is crucial for achieving a light and fluffy cake, which rolls easily and without cracking.

If time allows, chill the roll briefly after filling it. This helps the cream set, making slicing and serving much neater while maintaining the roll’s structural integrity.

A light dusting of powdered sugar or cocoa atop adds a touch of elegance and prevents sticking when covering your finished roll with plastic wrap for storage.

Offer a contrast in your whipped cream by adding a hint of vanilla or a spoonful of cherry juice. These subtle accent flavors can elevate the complexity and delight of each bite, impressing even the most discerning palates.

While cherries are essential, you can introduce chopped chocolate pieces within the filling for a unique twist on texture, offering both a visual surprise and a flavor enhancement.

Variations and Adaptations

Explore regional variations by swapping in sour cherries or adding a splash of Kirsch to intensify the German origins of the dish. Each substitution alters the flavor profile slightly, allowing for broad customization while remaining true to the roll’s roots. You might even discover a new favorite flavor combination in the process.

For a seasonal adaptation, consider using raspberries or strawberries in place of cherries during late summer or early autumn. These fruits bring a uniquely fresh sweetness while complementing the chocolate base, offering a vibrant and refreshing palate change.

To modify the recipe for dietary needs, experiment with gluten-free flours or use a dairy-free cream alternative for the filling. These changes ensure everyone can enjoy the dessert, regardless of dietary restrictions, while maintaining its renowned taste and appeal.

Add an exotic twist by incorporating cardamom or cinnamon into the chocolate sponge. These spices introduce warmth and complexity, making the Swiss Roll uniquely your own while preserving its essential decadent nature.

Texture modifications can be made by adding layers of crunchy nuts or a light drizzle of syrup atop the roll before serving. These alterations not only enhance texture but also add a visual flair, transforming the dessert into a showpiece suitable for photo-worthy presentations.

Serve your Swiss Roll with fresh berries or mint leaves as garnish to elevate the presentation. For a modern twist, slice the roll into mini portions for individual servings, perfect for elegant tea parties or intimate gatherings, offering a touch of class and finesse to your table settings.

Serving and Presentation Guide

Use a sharp serrated knife to slice the roll cleanly, revealing the layers within that are sure to impress. Present each slice on a distinct dessert plate, lightly dusted with cocoa or confectioner’s sugar, to accentuate the roll’s rich tones.

Garnish the plate with whole cherries, a drizzle of chocolate or cherry sauce, and a sprig of mint to enhance visual appeal and provide balance in flavors. These additions also give the dessert a refined look, elevating even the simplest setting.

For traditional accompaniments, offer a dollop of fresh whipped cream or a scoop of vanilla ice cream beside each slice. Their mildness pairs perfectly with the intense flavors of the roll, enhancing the overall tasting experience without overshadowing the Swiss Roll’s natural richness.

Contemporary serving suggestions include layering your roll slices over a bed of fruit coulis or yogurt, offering a new dimension of flavor while encouraging diners to explore new combinations.

Consider the temperature of the roll when serving; slightly chilled maintains its shape, while allowing the flavors to mingle as they warm on the tongue. This balance is essential for showcasing the roll’s contrast between rich and tart components.

For portion control tips, make sure to offer modest slice sizes, as the intense flavors and rich components can easily satisfy even the most substantial sweet tooth in small quantities. This approach helps manage indulgences while allowing guests to savor every bite.

Wine and Beverage Pairing

A classic wine pairing with the German Black Forest Swiss Roll is a late harvest Riesling. The wine’s sweet and slightly acidic profile complements the rich chocolate, enhancing the cherries’ natural tartness, creating a harmonious dining experience.

For non-alcoholic alternatives, serve with a freshly prepared cherry or raspberry iced tea. These beverages mirror the Swiss Roll’s fruity elements, providing a refreshing counterpoint to its richness without overpowering your palate.

Coffee is a classic companion to chocolate desserts. Pair with a robust, medium-roast coffee to highlight the roll’s depth, or offer a delicate, floral tea for a lighter refreshment that won’t compete with the bold flavors.

Serve beer such as a cherry lambic for an unconventional choice. Its tartness plays well with the roll’s cherry filling, engaging your tastebuds in an unexpected yet delightful way, appealing to adventurous diners.

Temperature considerations are key to enhancing these beverage pairings. Serve cold drinks lightly chilled, retaining their refreshing qualities, while offering coffee and teas freshly brewed and piping hot to contrast the dessert’s subtle sweetness.

For additional serving suggestions, keep glass garnishes subtle, such as a simple lemon twist or a sugared rim, to enhance without distracting from the drinks’ natural qualities and the Swiss Roll’s indulgent flavors.

Storage and Shelf Life

Proper storage ensures your Swiss Roll remains fresh and delicious over a couple of days. After serving, wrap the roll tightly with plastic wrap or store in an airtight container to prevent drying out, maintaining its moisture and freshness.

Refrigerate the dessert promptly, ensuring a consistent cool temperature of about 36 to 40°F (2 to 4°C) to extend its lifespan. While refrigeration is essential, avoid storage in areas of the fridge subject to drastic temperature changes, like the door.

For optimal storage conditions, use containers that are just slightly larger than the roll to prevent excessive air exposure, helping maintain the dessert’s moisture level and ensuring flavors remain intact.

Signs of spoilage include an off-smell, stale texture, or any visible mold growth, at which point the roll should be discarded for safety reasons, preventing consumption of spoiled food.

Reheating is typically unnecessary, as the roll is ideally enjoyed at room temperature or slightly chilled. However, if considering warming parts like the chocolate dressing before serving, do so gently over a bain-marie to prevent overheating.

While freezing may not be the best option due to potential changes in the texture of the whipped cream, if necessary, freeze slices individually wrapped and consume within a couple of weeks for best results.

Make Ahead Strategies

Creating portions of this dessert ahead of time improves time management and ensures focus during final assembly. Prepare your sponge cake and freeze, wrapped securely in parchment and plastic wrap for extended storage up to a month ahead of the event.

During the prep timeline, assemble your whipped cream and cherry filling a day in advance, chilling in airtight containers. This prep maintains their freshness and ensures a streamlined process on the day of assembly.

Between steps, particularly once filled and rolled, chilling the dessert briefly allows the flavors to meld and firm up, while reducing the risk of runny cream or uneven slices during serving.

Assess the potential quality impact of storage by sampling small test portions after refrigeration, adjusting your techniques or ingredient proportions as needed for subsequent creations to ensure the best possible outcome.

When assembling, ensure a gentle hand is used when rolling, capitalizing on the pre-chilled status of the components to facilitate smooth movement and prevent tearing during the process.

Finally, add fresh elements like garnishes immediately before serving to enhance presentation and provide a burst of flavor, ensuring the final result pleases both the eyes and mouth.

Scaling Instructions

When halving the recipe, adjust ingredient measurements proportionally, ensuring harmony between the reduced component parts for consistent taste and texture. Embrace smaller pans for baking to maintain sponge thickness suitable for rolling.

Doubling or tripling the recipe is straightforward by maintaining ingredient ratios, though one should ensure the use of a larger mixing bowl and sufficient larger baking trays to handle increased batter volumes without spillage.

Avoid overcrowding the oven, adjusting equipment placement for even heat distribution across multiple Swiss Rolls, and slightly extending baking time to accommodate temperature core variations in larger cakes.

Timing modifications are crucial; longer cooling times may be necessary for larger batches, while assembly should still follow within a tight framework, preventing melting or mishaps during rollout.

Scaling considerations also focus on storage space, with multiple rolls requiring adequate chilling room or containers to ensure all portions maintain freshness and structure before the time of serving.

If the expansion is for a grand event or catering, consider preparing batch components like whipped cream or cherry garnish in advance to streamline the process and ensure efficient assembly and presentation.

Nutritional Deep Dive

A macro breakdown analysis of the German Black Forest Swiss Roll highlights the balance between carbohydrates from sugar and flour, fats from cream, and proteins from eggs, creating a well-rounded indulgence.

In terms of micronutrient contribution, the cherries provide a wealth of vitamins A and C alongside antioxidants, complemented by the presence of iron and magnesium from quality dark chocolate.

With health benefits in mind, responsible enjoyment is encouraged, given its diverse ingredients that can contribute to improved mood, cardiovascular health, and reduced inflammation effects due to antioxidant content in moderation.

Dietary considerations suggest moderation; as such, portions should be reasonable to enjoy the flavors without excess calorie intake. A combination of smaller serving size and savoring each bite ensures satisfaction with less consumption.

For a more thorough portion analysis, smaller slices offer a guilt-free way to indulge in this delicious German treat, balancing pleasure and dietary control while still presenting an attractive, popular offering.

In weight management contexts, consider servings as shared indulgences, promoting social engagement and shared responsibility, reducing the temptation to consume in isolation, helping manage caloric intake effectively.

Dietary Adaptations

For a gluten-free adaptation, substitute traditional wheat flour with a high-quality gluten-free blend. Ensure it includes xanthan gum or similar thickeners to replicate the sponge texture required for successful rolling.

Achieving a dairy-free version involves replacing whipped cream with a coconut-based or other plant-based alternative, carefully chosen to retain the Swiss Roll’s signature creaminess without compromising on flavor or presentation.

Opting for a vegan variation would require plant-based egg substitutes such as aquafaba or flaxseeds, alongside vegan chocolate and cream alternatives to maintain flavor integrity without utilizing animal products.

Low-carb modifications can be made by experimenting with sugar replacements like erythritol and low-carb flour substitutions such as almond flour, effectively reducing carbohydrate content without sacrificing taste.

For sophisticated keto adjustments, apply a combination of nut flours and stevia to cater seamlessly to specific dietary needs, enabling keto-practicing guests to indulge in this tempting treat guilt-free.

Similarly, Paleo enthusiasts can enjoy a version aligned with their diet using raw chocolate, almond flour, and honey for sweetening, transforming it into a naturally sourced, diet-compatible indulgence.

Those following a low-FODMAP diet can replace cherries with a low-FODMAP fruit like kiwi for a safe substitution, ensuring the Swiss Roll remains an accessible and delicious option for everyone.

Consider any other specific dietary accommodations by closely analyzing ingredient compatibility before implementation to ensure successful taste preservation and dietary suitability.

Troubleshooting Guide

Address texture issues in sponge by reviewing mixing technique—overmixing or underbaking leads to undesirable results. Achieve fluffy consistency by gentle folding and precise baking times.

Balance flavor by ensuring proper cherry distribution and chocolate enhancement. Taste test fillings beforehand to adjust sweetness levels perfectly, keeping an eye on proportions for ideal taste harmony.

Combat temperature problems by maintaining consistent oven heat and preheating thoroughly. Consider using an oven thermometer for accurate monitoring and reliable baking results to prevent undercooking.

Overcome equipment challenges by ensuring the right size tools, such as pans and mixing bowls, to match recipe volume. This preparation prevents unnecessary spills or failed bakes due to overcrowding.

Ingredient substitutions should focus on maintaining texture and flavor balance, choosing alternatives with similar properties and hydration levels to preserve the Swiss Roll’s known quality characteristics.

Solve timing concerns by accurately tracking all stages; use timers or apps for reminders equivalent to task durations, thereby ensuring successful completion of steps without rushing or delay.

Recipe Success Stories

Community feedback highlights the German Black Forest Swiss Roll as a stunning centerpiece at both intimate celebrations and grand gatherings, winning accolades for taste presentation, and adding a gourmet touch to events.

Discover variation successes as bakers worldwide iterate with local fruits or infusions, sharing stories of how they made the recipe their own. These shared adaptations encourage creativity and cross-cultural flavor explorations.

Adaptation stories often include heartfelt accounts of ingredient swaps related to allergy accommodations or cultural influences, enhancing the Swiss Roll’s universal appeal while embracing individual dietary needs.

Reader suggestions introduce delightful innovations like personalized cream flavors or expanded layers, ushering in fresh perspectives on presentation and composition while maintaining traditional recipe integrity.

Photography tips range from lighting advice to innovative plating techniques, inspiring fellow bloggers or Instagram enthusiasts to document gorgeous creations, showcasing the Swiss Roll’s aesthetic potential beautifully.

Frequently Asked Questions

Can I make this Swiss Roll a day ahead? Yes, preparing the roll a day before serving can enhance flavors; simply store it wrapped in the fridge, allowing the sponge to absorb some cream moisture for perfect texture.

What cherries work best for this recipe? Fresh sour cherries are traditional but sweet or dark cherries can also yield excellent results. Adjustments in sugar may be necessary to balance sweetness levels.

What is the shelf life of a Swiss Roll? Ideally, consume within 2-3 days. Proper storage in airtight conditions and consistent refrigeration preserve its freshness and flavor during this timeframe.

Can I use canned cherries? Absolutely, ensure they are well-drained before use to avoid excess moisture in the roll. This ensures the roll maintains its stiffness and doesn’t become soggy.

How do I prevent my roll from cracking? Roll the sponge while slightly warm using parchment for guidance. If cooled, a brief microwave inner softening step can aid in gentle formation without breaks.

What alternatives to sugar can I use? For alternatives, consider using honey, agave syrup, or sugar-free substitutes like erythritol or stevia, adjusting liquid ingredients if necessary to maintain balance.

Can I add liquor to the roll? Definitely, liquors like Kirsch or brandy can be infused into cream or cherries for added depth. Limit the quantity to preserve firmness and avoid overpowering flavors.

Are there any low-fat options? Opting for a lighter filling cream or even skipping the ganache top layer can reduce caloric content while still yielding a delicious, lower-fat dessert to enjoy.

How do I slice it cleanly? Use a serrated knife and slow, steady cutting motions for neat portions. Consider chilling first before serving for easier slicing without squishing the roll down.

What if I don’t have a jelly roll pan? Substitute with a shallow baking pan of similar dimensions. Adjust baking time accordingly to compensate for differences in sponge thickness.

Additional Resources

Explore related recipes such as Black Forest Cake, Chocolate Eclairs, or Tiramisu Swiss Rolls to expand your dessert repertoire while indulging in chocolatey delights reminiscent of the Swiss Roll experience.

Dive into technique guides detailing cake rolling or whipped cream stabilizing methods, offering detailed insights for mastering skills critical to Swiss Roll creation and ensuring professional-looking results.

Enhance your ingredient information with guides on chocolate selection or cherry variety specifics, assisting in choosing the best components for every dessert endeavor, adding depth to your culinary knowledge.

Consider equipment recommendations noting high-quality pans or specialized utensils integral to successful baking, spotlighting tools worthy of investment for passionate home bakers building proficiency.

Embrace seasonal variations by investigating ingredient adaptions for each time of year, helping keep your baking fresh and relevant regardless of the season and making your dessert suitable year-round.

Join the Conversation

Share your baking triumphs and variations on social media platforms, inviting discussion and enthusiasm from fellow dessert lovers eager to exchange stories and celebrate shared successes in the kitchen.

Utilize photography tips to capture your Swiss Roll from its best angle, using natural light and creative backgrounds to showcase its charm, appealing to both Instagram users and blog photographers.

Offer recipe reviews and contribute your suggestions within online communities, helping refine baking techniques and introduce new perspectives that contribute to the collective fine-tuning of Swiss Roll artistry.

Engage in community forums or baking groups where you can share advice, gain insights, and enjoy camaraderie with fellow enthusiasts across the globe, fostering a sense of belonging and shared passion.

Transform your experiences into clear, approachable guidance that inspires others to start their own baking journey, encouraging positive interaction through culinary exploration and creativity.

The Recipe

German Black Forest Swiss Roll

Serves: 8

Prep Time: 30 mins

Cook Time: 15 mins

Total Time: 45 mins

Kitchen Equipment Needed

  • Jelly roll pan
  • Parchment paper
  • Sieve
  • Mixing bowls
  • Serrated knife
  • Whisk or electric mixer

Ingredients

  • 6 large eggs, room temperature
  • 1 cup granulated sugar
  • 1 cup all-purpose flour
  • 1/3 cup cocoa powder
  • 1 tsp baking powder
  • 1/4 cup butter, melted
  • 1 tsp vanilla extract
  • 2 cups heavy whipping cream
  • 1 cup pitted cherries or cherry pie filling
  • 1/2 cup cherry preserves
  • 1/4 cup Kirsch or cherry liqueur (optional)

Directions

  1. Preheat the oven to 375°F (190°C). Line the jelly roll pan with parchment paper.
  2. In a large bowl, beat the eggs and sugar together until light and fluffy.
  3. Sift flour, cocoa powder, and baking powder together, then fold into the egg mixture.
  4. Add melted butter and vanilla extract, mixing gently to integrate evenly without deflating the batter.
  5. Spread the batter evenly in the prepared pan. Bake for 12-15 minutes or until it springs back to touch.
  6. Cool slightly, then turn out onto a sugared kitchen towel, peeling away the parchment. Roll up gently with the towel.
  7. For the filling, whip the cream to stiff peaks, folding in cherries, preserves, and Kirsch if using.
  8. Unroll the cooled sponge, spread the cream mixture over, and roll back up without the towel this time.
  9. Chill in the fridge for at least an hour before serving. Dust with cocoa or powdered sugar before slicing.

Recipe Notes

  • If you do not wish to use Kirsch, enhance the filling with cherry juice or omit entirely.
  • Ensure cherries are well-drained to prevent excess moisture from compromising the roll’s integrity.