Irresistible Chicken Fried Steak Recipe with Creamy Country Gravy

Chicken Fried Steak with Country Gravy: A Southern Comfort Classic

⚖️
Difficulty
Moderate

⏲️
Prep Time
25 mins

🕒
Cook Time
30 mins

⏱️
Total Time
55 mins

🍽️
Servings
4

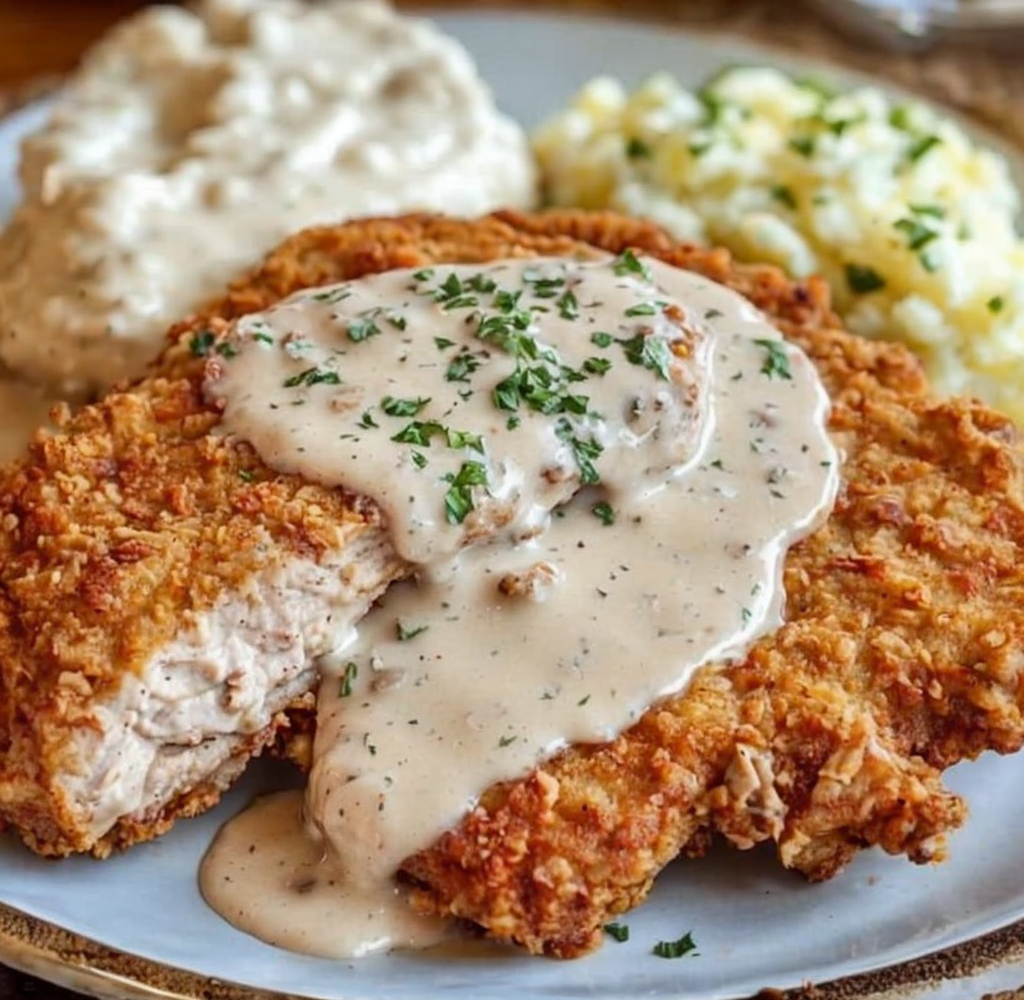
Indulge in the crisp, comforting delight of Chicken Fried Steak with Country Gravy, a staple in Southern cuisine that promises to bring a taste of home-cooked warmth to your table. This classic dish features tenderized beef steak, dredged in a flavorful seasoning mix and fried to golden perfection. Bathed in smooth, savory country gravy, each bite offers a delightful blend of crispy textures and rich flavors. Perfect for a hearty meal, this Southern delicacy continues to charm with its tantalizing aroma and comforting taste.

Quick Recipe Highlights

  • Flavor Profile: A harmonious blend of savory richness and peppery spice.
  • Texture: Crispy coating with a tender, juicy interior.
  • Aroma: A nostalgic mix of fried goodness and creamy, buttery warmth.
  • Visual Appeal: Golden-brown crust with creamy white gravy draped gracefully over.
  • Skill Level Needed: Moderate, requiring attention to breading and frying techniques.
  • Special Equipment: A heavy-bottomed skillet for even frying.

Recipe Overview

  • Difficulty Level: Moderately challenging due to the sequential process of frying and gravy preparation.
  • Category: Main Course, capturing the essence of comfort food.
  • Cuisine: Deeply entrenched in Southern culinary tradition, renowned for its indulgence and simplicity.
  • Cost: Economical, utilizing affordable cuts of beef and readily available pantry staples.
  • Season: Perfect year-round, providing warmth in winter and nostalgia in summer.
  • Occasion: Ideal for family gatherings, comforting Sunday meals, or a casual dinner.

Why You’ll Love This Recipe


Chicken Fried Steak with Country Gravy captivates with its irresistible combination of taste and texture. The steak offers a satisfying crunch that gives way to soft, juicy meat, accentuated by a creamy gravy that sings with rich flavors. Convenience is another appealing aspect; while preparation requires some effort, the steps are straightforward, making it feasible for home cooks. From a nutritional standpoint, this dish provides protein and can be balanced with sides like steamed vegetables.

For social occasions, this meal shines as a centerpiece at family dinners, encouraging conversation and comfort around the table. Economically, the recipe is budget-friendly, making use of simple ingredients that don’t break the bank. These factors, combined with the timeless appeal of a Southern classic, ensure that Chicken Fried Steak with Country Gravy remains a cherished meal for generations.

Historical Background and Cultural Significance


Chicken Fried Steak with Country Gravy originated in the Southern United States, with roots tracing back to German and Austrian immigrants who brought recipes for wiener schnitzel. The dish gained popularity during the early 20th century, particularly in Texas, where it became a symbol of Southern hospitality and comfort food excellence. Its evolution reflects the region’s agricultural heritage, emphasizing staple ingredients like beef and dairy.

Culturally, chicken fried steak is celebrated for its ability to bring people together over hearty, satisfying fare. Its variations, such as serving styles and regional gravy recipes, showcase the diversity of Southern cooking practices. Over time, it has influenced other American dishes, contributing to the rich tapestry of the nation’s culinary landscape.

Ingredient Deep Dive


Beef Steak is the heart of this dish, echoing the cattle-raising traditions of the American South. Rich in protein and iron, it’s essential to choose a tenderized cut like cube steak. Selection focuses on a good balance of marbling for flavor without excessive fat. Store chilled, using air-tight packaging to maintain freshness and avoid contamination. Should you need an alternative, consider using pork cutlets or even chicken for a lighter texture.

The Bread Coating, combining flour, seasoning, and sometimes cracker crumbs, is crucial for achieving the desired crispy exterior. It flourishes with its role in flavoring the meat and ensuring that the breading adheres correctly during frying. Store flour in a cool, dry place, and if gluten is an issue, opt for gluten-free mixes or cornmeal. Season generously for a full-bodied taste that complements the savory steak.

Common Mistakes to Avoid

  • Improper Meat Tenderizing: Failing to sufficiently tenderize the beef can lead to tough texture.
  • Overcrowding the Pan: Crowding results in uneven cooking and soggy breading.
  • Incorrect Oil Temperature: Not maintaining hot enough oil can cause greasy food.
  • Poorly Seasoned Breading: Insufficient seasoning results in blandness.
  • Skipping Resting Time: Not letting the finished steak rest leads to loss of moisture.
  • Over-thickening Gravy: Adding too much flour to the gravy makes it overly thick and pasty.
  • Insufficient Dredging: Skipping a second dredging reduces the crispy coating.
  • Inadequate Gravy Stirring: Lazy stirring can result in lumps.

Essential Techniques


Proper Bread Dredging ensures a crispy outer layer. Coat each steak first in flour, then egg wash, followed by a final flour dip, pressing down slightly to ensure adherence. Mastering breading is about keeping one hand dry and one wet to maintain cleanliness and efficiency.

Achieving Perfect Gravy is paramount; start by making a roux with equal parts flour and fat before slowly whisking in milk. Watch for the desired thickness, introducing milk gradually and stirring continuously to avoid lumps. The finishing touch is a seasoning balance of salt, pepper, and optional herbs for enhanced flavor.

Pro Tips for Perfect Chicken Fried Steak


To maximize flavor, season both the flour and egg mixture with salt and pepper. Let breaded steak sit for a few minutes before frying to lock in the coating. Use a heavy skillet to maintain consistent frying temperature. Always check oil heat using a thermometer for precision. Make gravy directly in the skillet used for frying to capture residual flavors, and set a wire rack over a baking sheet to drain excess oil for a non-greasy result.

Variations and Adaptations


Southern regions bring their flair to Chicken Fried Steak by varying the spices used in the coating, such as cayenne for heat in Texas. Seasonal twists can involve using buttermilk for a tangy batter or experimenting with different gravies like white or brown, based on personal preference or regional influences.

For dietary needs, a gluten-free version can be crafted using gluten-free flour and breadcrumbs, while a dairy-free alternative swaps traditional milk for plant-based options. Play with different flavor enhancements, such as smoked paprika or garlic powder, to offer unique taste experiences. For a lighter version, consider baking the steak rather than frying, adjusting cooking times accordingly.

Serving and Presentation Guide


Serve Chicken Fried Steak with traditional sides like mashed potatoes and green beans for an authentic Southern experience. The dish shines when presented on large platters, allowing the steak to be the focal point. Garnish with fresh chopped parsley for a pop of color, and consider offering gravy in a separate dish, inviting guests to pour as desired. Ensure it is served hot for optimal flavor and texture appeal.

Wine and Beverage Pairing


Pair this indulgent dish with a light-bodied red wine such as Pinot Noir, whose fruity notes complement the savory flavors. Non-alcoholic options like sweet iced tea or lemonade add a refreshing contrast. If preferred, a cup of strong coffee provides a perfect ending to this rich meal. Presentation counts, so always serve wines slightly chilled, with iced drinks poured over large cubes to maintain chill without dilution.

Storage and Shelf Life


Store any leftover Chicken Fried Steak in an airtight container to maintain its flavor. Refrigerate for up to three days to ensure safety, allowing the gravy to remain separate until reheating to preserve texture. Reheat steak in an oven set to 350°F until warmed through, maintaining its crispness. Avoid freezing as the breading can become unappetizingly soggy upon thawing.

Make Ahead Strategies


Prepare this dish by breading the steak a few hours in advance, allowing time for the coating to adhere properly. Store breaded steak covered in the refrigerator, separating layers with parchment paper to avoid sticking. This helps streamline mealtime preparation, ensuring a quicker cook time and reducing stress. Prepare gravy just prior to serving to maintain its smooth, creamy consistency.

Scaling Instructions


Adjust this recipe for larger crowds by doubling ingredients, ensuring each steak has ample space for frying without crowding the pan. Larger groups may benefit from a dual-batch cook strategy, supporting adequate heat retention. For smaller portions, consider halving the recipe while maintaining careful seasoning balance. When scaling, keep prepared parts fresh and warm, heating additional batches consistently between servings to maintain quality.

Nutritional Deep Dive


Chicken Fried Steak provides a robust mix of proteins and minerals, key in energy provision and muscle repair. Its higher fat content necessitates moderation, making it ideal as an occasional treat. Balanced with other nutritious components such as vegetables, it offers a hearty yet nourishing meal. Adjustments using leaner cuts of meat or reduced-fat dairy in the gravy produce a slightly lighter dish without compromising on taste.

Dietary Adaptations


Create a gluten-free option using certified gluten-free flour and breadcrumbs, maintaining crispy texture. For a dairy-free choice, opt for plant-based milk in both soaking and gravy, ensuring full-bodied flavor remains intact. To accommodate low-carb or keto diets, replace traditional flour with almond flour and seek heavy cream-based gravies. Vegans might enjoy a similar preparation using seitan or tofu, promising a cruelty-free indulgence.

Troubleshooting Guide


Address texture issues by ensuring adequate meat tenderizing; tougher cuts need extra care. Balance flavors by seasoning breading and gravy effectively, while cracked breading indicates insufficient adherence – remedy by pressing flour mix thoroughly into meat. Temperature matters, influencing frying success, so verify oil heat beforehand. Equipment challenges are solvable using heavy skillets to retain heat and an instant-read thermometer for accurate oil checks.

Recipe Success Stories


Our readers shared delightful experiences recreating this Chicken Fried Steak, with feedback highlighting its authentic Southern flavor and welcoming aroma. Many enjoyed experimenting with seasoning blends, leading to unique takes on a classic favorite. Photos submitted by our community capture the vibrant, appealing nature of their efforts, celebrating homemade comfort food’s power to evoke memorable dining moments.

Frequently Asked Questions

Q: Can I use another type of meat?
A: Yes, pork or chicken cutlets serve as excellent substitutes, offering different but complementary textures and flavors.

Q: How can I keep the breading from falling off?
A: Ensure the meat is dry before breading, and allow it to rest post-breading to firm up before frying.

Q: Is butter suitable for frying?
A: While butter adds flavor, it can burn easily, so a neutral oil with high smoke point, like canola, is preferred.

Q: Can this be cooked in an air fryer?
A: Yes, an air fryer provides a healthier, less oily alternative; adjust times as needed for consistent doneness.

Q: How do I vary the gravy flavor?
A: Incorporate herbs like thyme or smoked paprika for depth, or simmer with onions for sweetness.

Q: What’s the best way to reheat leftovers?
A: Use an oven or air fryer for the steak to return crispness, and gently warm the gravy on the stovetop.

Additional Resources


Explore related Southern cuisine with recipes like Buttermilk Biscuits or Collard Greens, providing complementary sides that further enhance the meal experience. For technique mastering, consider breading tutorials or frying workshops available online. Books detailing Southern culinary history provide insightful context, enriching your appreciation for this beloved dish.

Join the Conversation


Share your Chicken Fried Steak creations on social media, tagging us for a chance to be featured! Contributors often exchange variations and adaptations, offering fresh takes on a time-honored favorite. Engage with fellow cooks through comments or forums to exchange tips and stories, building community through love of cooking and shared culinary journeys.

The Recipe

Chicken Fried Steak with Country Gravy

Serves: 4

Prep Time: 25 mins

Cook Time: 30 mins

Total Time: 55 mins

Kitchen Equipment Needed

  • Heavy-bottomed skillet
  • Meat tenderizer
  • Tongs
  • Whisk
  • Wire rack

Ingredients

  • 4 beef cube steaks
  • 2 cups all-purpose flour
  • 2 teaspoons salt
  • 1 teaspoon black pepper
  • 1 teaspoon paprika
  • 2 large eggs
  • 1 cup whole milk
  • Vegetable oil for frying
  • 1/4 cup butter
  • 1/4 cup all-purpose flour (for gravy)
  • 2 cups whole milk (for gravy)
  • Salt and pepper to taste (for gravy)

Directions

  1. Pound steaks to 1/4 inch thickness with a meat tenderizer.
  2. Whisk together flour, salt, pepper, and paprika in a shallow dish.
  3. In another dish, beat eggs with 1 cup of milk.
  4. Dip each steak in flour mixture, then egg mixture, and back into flour, pressing to adhere.
  5. Heat oil in a skillet over medium-high heat. Fry steaks until golden brown, about 3-4 minutes per side.
  6. Remove steaks, draining on a wire rack.
  7. In the same skillet, melt butter. Whisk in 1/4 cup flour, stirring for 1-2 minutes.
  8. Gradually add 2 cups milk, whisking continuously until thickened. Season gravy with salt and pepper.
  9. Serve steaks with a generous pour of country gravy on top.

Recipe Notes

  • Feel free to adjust spices in the coating to your taste preference.
  • Gravy can be flavored with fresh herbs like thyme or parsley for added aroma and taste.

Irresistible Raspberry Swirl Shortbread Cookies for an Ideal Dessert

Raspberry Swirl Shortbread Cookies Recipe: A Delightful Dessert Idea

⚖️
Difficulty
Moderate

⏲️
Prep Time
30 mins

🕒
Cook Time
20 mins

⏱️
Total Time
50 mins

🍽️
Servings
24 cookies

Indulge in the delightful world of homemade Raspberry Swirl Shortbread Cookies, a perfect dessert recipe that will captivate your taste buds with its delightful flavor and texture. These cookies are a harmonious blend of buttery shortbread and tangy raspberry swirl, making them the ideal treat for any occasion. With a vibrant color and a divine aroma, they offer an inviting presentation that’s hard to resist.

Crafting Raspberry Swirl Shortbread Cookies is a rewarding experience. The process involves creating a sweet symphony between flaky shortbread and rich raspberry jam, swirled together to form a delicate and flavorful cookie. Each bite offers a perfect balance of sweetness and tartness, enhanced by the melt-in-your-mouth texture of the shortbread. These cookies are not only delicious but also a fun baking project that can be enjoyed by bakers of all skill levels. With minimal equipment required and easy steps to follow, you’ll have a batch of delightful cookies ready to enjoy in no time.

Quick Recipe Highlights

  • Flavor Profile: Enjoy the sweet, buttery taste of shortbread combined with a tangy raspberry swirl for a perfect balance of flavors.
  • Texture: Each cookie offers a tender, melt-in-your-mouth texture, complemented by the slight chewiness of the raspberry swirl.
  • Aroma: The baking process fills your kitchen with a warm, buttery fragrance paired with berry notes.
  • Visual Appeal: Beautiful, marbled appearance with contrasting red raspberry against pale shortbread, adding elegance to any dessert platter.
  • Skill Level Needed: Moderate – requires basic baking techniques, including dough rolling and raspberry swirling.
  • Special Equipment: You’ll need a rolling pin, a baking sheet, and parchment paper to achieve perfect results.

Recipe Overview

  • Difficulty Level: This recipe is moderately challenging, ideal for those with some baking experience. The key is mastering the rolling and swirling technique to ensure even distribution of raspberry throughout the shortbread.
  • Category: These cookies fall into the dessert category, perfect for tea time, afternoon snacks, or festive gatherings.
  • Cuisine: The Raspberry Swirl Shortbread Cookies are a blend of classic shortbread—a nod to Scottish culinary traditions—infused with a fruity twist, offering a modern take on a timeless classic.
  • Cost: Making these cookies is quite economical, requiring simple pantry staples and seasonal raspberries, making it a cost-effective homemade treat.
  • Season: While these cookies can be enjoyed year-round, they’re particularly delightful in spring and summer when raspberries are in their prime.
  • Occasion: Perfect for any occasion, such as birthdays, holidays, or casual gatherings where dessert is a must-have.

Why You’ll Love This Recipe

Biting into a freshly baked Raspberry Swirl Shortbread Cookie, prepare to delight your senses with an unparalleled taste experience. The buttery richness of the shortbread is elegantly balanced by the tartness of raspberry jam, creating a dance of flavors on your palate. The soft, crumbly texture further enhances this experience, offering a satisfying end to every bite.

Beyond its taste, the convenience of the recipe makes it a must-try. The preparation is relatively quick, allowing you to enjoy homemade cookies without spending hours in the kitchen. Ingredients are straightforward, often readily available, keeping the process free from complication. This makes Raspberry Swirl Shortbread Cookies an ideal choice for last-minute dessert ideas or when you’re craving homemade goodness without any fuss.

Not only satisfying your sweet tooth, these cookies also bring a hint of indulgence to any occasion. Sharing them at gatherings can turn any event into a memorable experience, thanks to the enticing aroma and irresistible flavor. Whether paired with a cup of tea or enjoyed solo, these cookies promise a delightful treat for any dessert table.

From a nutritional standpoint, these cookies offer a moderate indulgence. While sweet and buttery, they lack the excessive calories and additives found in store-bought options, allowing for a guilt-free enjoyment. You can also tailor them to fit dietary preferences by experimenting with alternative flours or sugar substitutes.

Finally, Raspberry Swirl Shortbread Cookies stand out due to their accessibility. The ingredients are budget-friendly, and the process does not require advanced baking skills, making the final product surprisingly achievable for any home baker. Whether you’re preparing for a special occasion or craving simple elegance, these cookies present an affordable and delectable option.

Historical Background and Cultural Significance

The Raspberry Swirl Shortbread Cookie is an evolution of the classic shortbread, a traditional treat with centuries of history. Originating from Scotland, shortbread was historically associated with celebrations and special occasions due to its buttery richness. Baked using simple ingredients like butter, sugar, and flour, it has been a staple in many households, treasured for its elegant simplicity.

Incorporating raspberries into this classic recipe adds not only color and flavor but also connects it to a broader culinary tradition. Raspberries, often considered the jewels of the berry family, have been cultivated for their vibrant color and delicate taste across Europe. The combination of raspberry with shortbread reflects the integration of modern flavors into timeless classics, showcasing how recipes can evolve while maintaining their roots.

Across different cultures, the basic concept of shortbread has been adapted to include various flavorings and ingredients. The addition of raspberry not only adds a sweet-tart flavor but highlights a synergy between tradition and contemporary baking trends. This adaptation also opens up variations, encouraging bakers to experiment with other fruits and flavors to personalize their sweet creations.

Regional variations have given rise to a multitude of shortbread styles, from thick, crumbly Scottish versions to thinner, crispier interpretations. The addition of raspberry swirl is a testament to the ongoing evolution of this beloved treat, ensuring it remains a favorite in homes and at celebrations worldwide.

Ingredient Deep Dive

Butter is the cornerstone of any shortbread recipe, offering both flavor and texture. In baking history, butter has symbolized richness and quality, making it the ideal choice for celebrations. Opt for unsalted high-quality butter to allow better control over the recipe’s salt content and to enhance the natural flavors of the ingredients.

Meanwhile, the tangy raspberry swirl offers both color and flavor. Raspberries are rich in vitamin C and dietary fiber, providing both health benefits and a burst of flavor. When selecting raspberries, look for ones that are deep in color and free from blemishes. Stored properly, they can last several days in the fridge, but it is always recommended to use fresh raspberries quickly to maintain their flavor and nutritional qualities.

Could these ingredients be substituted? Certainly. Vegan bakers might consider using plant-based margarine instead of butter, keeping the same creaminess while catering to dietary preferences. For those looking to cut down on sugar, using a natural sweetener can be a suitable alternative, though texture and flavor might vary slightly.

Common Mistakes to Avoid

  • Inaccurate measuring: Always measure your ingredients precisely, especially flour, to avoid dry or dense cookies.
  • Using cold butter: Ensure the butter is softened to room temperature before beating to achieve a smooth dough.
  • Overworking the dough: Mix just until ingredients are combined to prevent the cookies from becoming tough.
  • Skipping chilling time: Let the dough chill as directed to help the cookies maintain shape and achieve a perfect texture.
  • Uneven rolling: Roll the dough evenly to ensure consistent baking, preventing some cookies from burning while others remain underbaked.
  • Insufficient raspberry swirl: Distribute the raspberry evenly for a balanced flavor in every bite.
  • Improper storage: Store cookies in an airtight container to keep them fresh and prevent them from becoming stale.
  • Baking at incorrect temperature: Ensure your oven is properly preheated to the right temperature for even baking.
  • Neglecting to line the baking sheet: Use parchment paper to minimize sticking and promote even baking.
  • Skipping the cooling time: Allow cookies to cool completely to achieve the ideal texture and allow flavors to meld.

Essential Techniques

To achieve the perfect Raspberry Swirl Shortbread Cookies, mastering the art of swirling is crucial. This technique ensures an even distribution of raspberry throughout the dough, providing a consistent taste in every bite. Begin by carefully spooning raspberry jam onto the rolled-out dough and then use a spatula to gently swirl it, being careful not to overmix and macerate the raspberry.

Rolling the dough evenly is another critical technique. Uneven dough can lead to inconsistent baking, resulting in some cookies burning while others are underbaked. Use a rolling pin and work from the center outward, applying even pressure for a uniform thickness. Visual cues like smooth edges and a consistent thickness can guide you toward successful rolling.

Pro Tips for Perfect Raspberry Swirl Shortbread Cookies

For an extraordinary batch of Raspberry Swirl Shortbread Cookies, here are some expert tips. First, ensure your butter is softened but not melted. This will contribute to a silky dough that’s easy to work with. If your kitchen tends to be warm, chilling the dough for 15-20 minutes before rolling can help prevent it from becoming too sticky.

When swirling the raspberry, be gentle. Overmixing can lead to an unappealing muddy appearance instead of clear, distinct swirls. Less is more – just a few strategic directional swirls can create a visually appealing pattern and ensure balanced flavor distribution.

Consider enhancing your dough with a hint of lemon zest. This elevates the raspberry’s natural tartness, adding an extra layer of depth and brightness to your cookies. It complements the butteriness without overpowering, offering a rounded flavor profile.

If you find that your cookies are browning too quickly in the oven, try using a double baking sheet or reduce the oven temperature slightly. Different ovens may have slight variability in heat distribution, and this adjustment can help achieve a more even bake.

Finally, allow your cookies to cool completely before moving them to storage. This ensures that they retain their texture, avoiding any sweating or moisture accumulation that could lead to soggy cookies.

Variations and Adaptations

Raspberry Swirl Shortbread Cookies offer endless possibilities for creative adaptations. For a regional twist, consider adding a touch of almond extract to mimic the flavor profile of Linzer cookies, a classic European treat.

During winter, adapt the recipe by incorporating cinnamon or nutmeg into the shortbread dough for a warm spice infusion that complements holiday flavors. In spring, try swapping out raspberry for fresh seasonal strawberries or blueberries for a new flavor profile.

For dietary adjustments, gluten-free flour can substitute regular flour without compromising on texture. Vegan options are also possible using coconut oil or plant-based margarine in place of butter.

For different flavor variations, try experimenting with different fruit jams, such as apricot or blackberry. These variations not only change the flavor but provide a different color appeal, adding to the visual allure of your dessert platter.

To present these cookies elegantly, cut the dough into different shapes using cookie cutters. Consider heart shapes on Valentine’s Day or leaves in autumn, pairing the seasonal theme with a complementary flavor if desired.

Serving and Presentation Guide

To present Raspberry Swirl Shortbread Cookies in an appealing manner, consider arranging them on a beautiful platter lined with doilies or parchment paper. This not only adds a touch of elegance but highlights the vibrant colors of the swirl.

Garnishing ideas might include a sprinkle of powdered sugar to mimic a dusting of snow, especially during holiday seasons. Fresh raspberries or small edible flowers can also add a touch of sophistication and color contrast.

Traditional accompaniments could include a hot cup of tea or coffee, enhancing the warm, buttery flavors. For a modern twist, serve alongside a light, fruity sorbet for a refreshing balance.

These cookies should be served at room temperature to fully appreciate their texture and aroma. If stored in the fridge, allow time for them to acclimatize before serving.

Portion control tips: These cookies are rich in flavor, so serving them in small batches can ensure they are savored and not overwhelming. Small decorative plates or tiered stands can offer structured portions while enhancing presentation.

Wine and Beverage Pairing

Pairing Raspberry Swirl Shortbread Cookies with the right beverage enhances their delightful taste. A crisp sparkling wine or a light rosé complements the cookies’ buttery and fruity notes, adding a touch of sophistication to your serving.

Non-alcoholic alternatives such as a chilled herbal tea or a subtly sweet berry-infused iced tea work well, echoing the raspberry flavors without overpowering the palate.

For a cozy pairing, a warm cup of Earl Grey tea brings out the buttery richness and mimics the cookie’s aroma, providing a harmonious balance. Coffee, particularly a mild roast, can also be an excellent match, providing a contrasting bitter note to the sweetness of the cookies.

Serve both wines and teas slightly chilled or at room temperature to ensure no flavor is lost, offering a refreshing contrast to the rich cookies.

Storage and Shelf Life

Store Raspberry Swirl Shortbread Cookies in an airtight container to maintain their freshness, keeping them at room temperature for up to one week. Ensure the container is tightly sealed to prevent moisture and air ingress, which could lead to staleness.

Keep the cookies away from direct sunlight and heat sources, which can cause the jam to become sticky and the shortbread to soften prematurely. If the climate is particularly humid or warm, consider refrigeration, but remember to bring the cookies to room temperature before serving for optimal texture.

Signs of spoilage include a change in texture, such as excessive softness or crumbliness, and any off odors or flavors indicate they are no longer fresh. For longer storage, you can freeze these cookies in layers separated by parchment paper, maintaining their integrity for up to three months.

When reheating frozen cookies, thaw them at room temperature and consider a quick oven flash at a low temperature to refresh the texture, careful not to overbake.

Make Ahead Strategies

To get a head start on your shortbread cookie baking, consider preparing the dough in advance. The dough can be wrapped tightly in plastic wrap and stored in the fridge for up to three days, allowing flavors to develop further.

Alternatively, you can freeze the dough, shaped into a log for easy slicing, and bring it to the fridge a day before baking to thaw gradually. This strategy allows you to always have cookie dough ready when the mood strikes or for unexpected guests.

Keep already baked cookies in an airtight container, and they will stay fresh for a longer period. If planning a party, bake the cookies a day or two beforehand and store them as per the guidelines, making the serving day a breeze.

For assembly tips, swirling the raspberry while the dough is rolled directly onto parchment paper makes transferring to a baking sheet seamless. Consider freezing the sheet of assembled dough before cutting for a sharp, clean edge on your cookies.

Scaling Instructions

When halving the recipe, it’s crucial to carefully measure the ingredients to maintain the perfect balance of texture and flavor. This might involve adjusting cooking equipment, like using a smaller baking sheet to accommodate the reduced dough.

Doubling or tripling the recipe requires careful attention to oven space and potentially adjusting cooking time since more cookies on fewer sheets might impact airflow and heat distribution. In these scenarios, bake in batches if needed.

With increased dough quantities, invest in scaling up your mixing equipment. Larger mixing bowls or stand mixers can facilitate easier mixing without overworking the dough.

Storage considerations should also be taken into account. With larger quantities, storing all cookies in one container might not be feasible; separate them into different containers to avoid damage.

Nutritional Deep Dive

One of the appealing aspects of Raspberry Swirl Shortbread Cookies is their balanced nutritional profile. While they are a treat, they do feature macronutrients such as fats from the butter, contributing to satiety and a satisfying texture.

Micronutrients are present in the natural sugars and vitamins from the raspberry jam, delivering a hint of sweetness with fewer processed sugars than store-bought options.

The shortbread base is rich in carbohydrates, providing energy without excessive calories, particularly when portioned correctly. Awareness of portion size ensures these cookies remain a delightful treat without contributing excessively to caloric intake.

For those conscious of weight management, enjoying these cookies as part of a balanced diet allows for indulgence without guilt. Use them as occasional treats or rewards, ensuring they fit within daily caloric goals.

Dietary Adaptations

For a gluten-free version of Raspberry Swirl Shortbread Cookies, replace regular flour with a gluten-free flour blend, ensuring it includes a binder like xanthan gum to maintain the dough’s structure.

To create a dairy-free option, substitute butter with a plant-based alternative, maintaining the smooth, rich texture without dairy components.

For vegan adaptations, replace both butter and any egg wash (if used) with vegan-friendly alternatives, creating a cookie that adheres to vegan dietary restrictions without losing its buttery essence.

Low-carb enthusiasts might opt for almond flour instead of traditional flour. This adds a nutty undertone and reduces carbohydrate content, aligning the cookies with diet preferences.

To align with keto diets, adjust the sweetener to a keto-friendly option such as erythritol or stevia, maintaining the sweetness without impacting insulin levels.

If following a paleo diet, use alternative flours like coconut flour and natural sweeteners like honey to craft a cookie that’s both delicious and diet-approved.

Troubleshooting Guide

For texture issues, such as cookies that are too hard, ensure the dough isn’t overworked and bake at the correct temperature. Hard cookies can result from too much flour or butter content.

Flavor balance is crucial. If your cookies are too sweet, adjust the amount of sugar or select tart raspberries to balance sweetness with a hint of acidity.

Temperature problems can arise if your oven runs hot or cold. An oven thermometer can help gauge true internal temperature, adjusting your baking time accordingly.

If equipment challenges arise, such as lack of a rolling pin, use a clean, cylindrical object like a wine bottle to achieve even dough rolling.

Ingredient substitutions occasionally lead to varied results. Trial and error, with small batches, can aid in finding the perfect substitute that maintains the cookie’s integrity.

When timing concerns lead to underbaked cookies, increase baking time in small increments, watching for golden edges and a firm texture.

Recipe Success Stories

Our community of bakers has fallen in love with Raspberry Swirl Shortbread Cookies, with readers sharing stories of success and joy after trying this delightful recipe. From holiday deserts to after-school treats, these cookies have been embraced as a timeless favorite across ages.

Variations have seen success, with our community suggesting using different berry jams and even incorporating chocolate swirls for a richer taste. Each adaptation highlights the versatility and broad appeal of this recipe.

Some adventurous bakers have shared their photography tips, ensuring their cookies not only delight in taste but offer stunning visual presentations worthy of any social media platform.

Reader suggestions have contributed to the ongoing evolution of this recipe, bringing fresh ideas and adventurous twits, demonstrating the infinite possibilities offered by this classic treat.

Frequently Asked Questions

Can I use frozen raspberries?
Yes, you can use frozen raspberries. Just make sure to thaw and mash them before swirling into the cookie dough.

How should I store these cookies if I make them ahead?
Store them in an airtight container at room temperature for up to a week. For longer storage, consider freezing them.

What is the best way to soften butter for the dough?
Leave the butter at room temperature for about 30 minutes beforehand or gently microwave with defrost settings.

How can I ensure the cookies remain crispy after baking?
Ensure they cool completely before storing in a moisture-free environment, such as an airtight container with a silica gel packet inside.

Is it possible to make these cookies without sugar?
Yes, using natural sweeteners like stevia or monk fruit could work as alternatives to traditional sugars.

Can I use a different fruit jam?
Absolutely! Strawberry, blueberry, and apricot all work well, allowing for experimentation with flavor profiles year-round.

What should I do if my dough is too sticky?
Chill the dough, as cold temperatures firm up butter, reducing stickiness. Lightly dust flour if necessary to manage consistency.

How do I prevent the jam from leaking out during baking?
Ensure even spreading and avoid overfilling, maintaining a thin layer to prevent overflow.

Can I adjust the recipe for vegan and gluten-free diets simultaneously?
Yes, replace both flour and butter with gluten-free and vegan alternatives, keeping consistency with the recipe’s original proportions in mind.

What’s the best way to serve these cookies at a party?
Display on a decorative plate with a small bowl of berries in the center, offering a fresh and colorful presentation that invites guests.

Additional Resources

Explore more recipes that pair beautifully with Raspberry Swirl Shortbread Cookies, such as light citrus desserts or creamy chocolate confections, offering a balanced dessert platter with a plethora of flavors.

Get acquainted with technique guides that further refine your baking skills, such as dough rolling and balancing flavors, enhancing each aspect of your baking process for future creations.

Ingredient information is key; understanding the uniqueness of raspberries, quality butter, and alternative flours can elevate your cookies while ensuring their alignment with dietary preferences.

For equipment recommendations, learning about the best baking sheets, mixing bowls, and storage container options aids in efficient preparation and maintaining fresh results.

Survey seasonal variations, allowing your cookies to retain relevance throughout the year with fruit swaps and spice additions, making them a perennial favorite.

Join the Conversation

Share your own experience with Raspberry Swirl Shortbread Cookies on social media and inspire fellow bakers with your creations. Use a dedicated hashtag, showcase your unique presentation, and connect with a community that shares your passion for home baking.

Photography tips: Capture the beauty of these cookies with natural lighting and creative close-ups, focusing on the swirling patterns and texture for engaging imagery.

Leave a review and share your insights and adaptations, contributing to a burgeoning community of bakers eager to learn and experiment with this versatile recipe.

Engage with fellow enthusiasts and broaden your culinary skills by exchanging ideas and experiences, fostering a supportive network of creativity and culinary delight.

The Recipe

Raspberry Swirl Shortbread Cookies

Serves: 24 cookies

Prep Time: 30 mins

Cook Time: 20 mins

Total Time: 50 mins

Kitchen Equipment Needed

  • Rolling pin
  • Baking sheet
  • Parchment paper
  • Mixing bowls
  • Spatula
  • Measuring cups and spoons

Ingredients

  • 1 cup unsalted butter, softened
  • 2/3 cup sugar
  • 1/2 teaspoon vanilla extract
  • 2 cups all-purpose flour
  • 1/4 teaspoon salt
  • 1/3 cup raspberry jam

Directions

  1. Preheat your oven to 350°F (175°C) and line baking sheets with parchment paper.
  2. In a large bowl, beat the softened butter and sugar until light and fluffy. Add vanilla extract and mix well.
  3. In another bowl, sift together the flour and salt. Gradually add this mixture to the butter mixture, combining thoroughly to form a soft dough.
  4. Roll the dough onto a lightly floured surface into a 1/4-inch thick rectangle.
  5. Spread raspberry jam evenly over the dough, then gently roll it up into a log, refrigerating for at least 30 minutes.
  6. Slice the chilled log into even rounds and place onto prepared baking sheets. Bake for 15-20 minutes or until edges are golden.
  7. Allow cookies to cool on a wire rack before serving.

Recipe Notes

  • For extra flavor, add a teaspoon of lemon zest to the dough.
  • To prevent the dough from sticking, ensure surfaces are well-floured.
  • Experiment with different jams such as apricot or blackberry for variation.

Chocolate Crinkle Cookies: A Classic Holiday Favorite

chocolate crackle cookies, holiday crinkle cookies, cocoa crinkle cookies, festive chocolate cookies, easy crinkle cookie recipe

Chocolate Crinkle Cookies: Fudgy, Festive, and Irresistible


Introduction

Chocolate Crinkle Cookies are a timeless favorite for their crackled exterior, rich cocoa flavor, and soft, chewy texture. These cookies not only add visual appeal to holiday spreads but also cater to all chocolate lovers with their intense taste and satisfying crunch. Pair them with hot cocoa or milk for a cozy treat during the festive season.

For more baking inspirations, explore recipes like Salted Caramel Rice Krispie Treats or Easy Apple Hand Pies for a sweet ending to any meal.


Why Chocolate Crinkle Cookies are a Holiday Staple

Visual Appeal

  • The powdered sugar coating creates a striking cracked pattern during baking.
  • Perfect addition to cookie platters for their festive look.

Versatile Flavor

  • Classic cocoa-based flavor with room for variations like mint, orange, or espresso.
  • Balanced sweetness makes them universally loved.

Enhance your dessert game by trying other classic recipes like Kentucky Butter Cake.


Ingredients You’ll Need

Core Ingredients

  • Cocoa Powder: For rich chocolate flavor.
  • Granulated Sugar: Sweetens and helps create the crackle effect.
  • Eggs: Bind the dough and provide structure.
  • Flour: Forms the cookie base.

Optional Additions

  • Espresso powder for a deeper chocolate profile.
  • Vanilla extract for added aroma.
  • Chocolate chips for extra indulgence.

Coating

  • Powdered Sugar: For the signature crackled look.
  • Granulated sugar as an optional pre-coat for texture.

Step-by-Step Recipe for Chocolate Crinkle Cookies

1. Mixing the Dough

  • Combine cocoa powder, sugar, and oil in a bowl.
  • Mix until smooth, then add eggs one at a time.

2. Preparing the Dry Ingredients

  • Whisk together flour, baking powder, and a pinch of salt.
  • Gradually mix dry ingredients into the wet mixture.

3. Chilling

  • Cover the dough and refrigerate for at least 2 hours (or overnight) to firm up.

4. Rolling and Coating

  • Shape chilled dough into 1-inch balls.
  • Roll balls generously in powdered sugar.

5. Baking

  • Arrange cookies on a lined baking sheet.
  • Bake at 350°F (175°C) for 10–12 minutes or until set.

Troubleshooting Common Mistakes

  • Flat Cookies: Chill dough thoroughly to prevent spreading.
  • Lack of Cracks: Ensure enough powdered sugar coating for the signature look.
  • Dry Texture: Avoid overbaking to retain the fudgy interior.

Flavor Variations

1. Mint Chocolate Crinkle Cookies

  • Add a few drops of peppermint extract for a refreshing twist.

2. Double Chocolate Crinkle Cookies

  • Mix in chocolate chips or chunks for added richness.

3. Orange Chocolate Crinkle Cookies

  • Zest an orange and add it to the dough for a citrusy touch.

Pair these variations with festive sides like Homemade Eggnog.


FAQs About Chocolate Crinkle Cookies

1. Can I Freeze Chocolate Crinkle Cookie Dough?

Yes, roll the dough into balls, freeze on a baking sheet, then transfer to a container for up to 3 months.

2. Why Didn’t My Cookies Crinkle?

Ensure the dough is cold and coated in enough powdered sugar before baking.

3. How Long Can These Cookies Be Stored?

Store in an airtight container at room temperature for up to a week.


Expert Baking Tips

  • Always chill the dough to enhance the crackle effect.
  • Use high-quality cocoa powder for a richer flavor.
  • For extra sweetness, coat the dough in granulated sugar before powdered sugar.

Internal Linking Opportunities


Conclusion

Chocolate Crinkle Cookies are more than just a dessert—they’re a festive tradition that brings warmth and joy to any gathering. With their iconic appearance and delectable flavor, they deserve a spot in every holiday celebration. Explore other baking inspirations on ExoRecipes to make your celebrations extra special!

Irresistible Herb-Crusted Beef Tenderloin: A Gourmet Dinner Delight

Herb-Crusted Beef Tenderloin: A Gourmet Delight for Every Occasion

⚖️
Difficulty
Intermediate

⏲️
Prep Time
20 mins

🕒
Cook Time
30 mins

⏱️
Total Time
50 mins

🍽️
Servings
6

Indulge in the succulent flavors of an Herb-Crusted Beef Tenderloin, a truly magnificent dish that will leave your guests in awe. With its tender texture, intoxicating aroma, and herbaceous crust, this beef tenderloin recipe is designed to deliver a memorable culinary experience. The main keyword, Herb-Crusted Beef Tenderloin, is at the heart of this dish, offering a fine balance between elegance and robust flavors. Perfect for a special occasion or a delightful dinner party, every bite is infused with the earthy goodness of fresh herbs and the savory satisfaction of a perfectly cooked beef tenderloin.

Quick Recipe Highlights

  • Flavor Profile: Experience a rich, savory taste with an earthy herb crust balanced by the succulent, juicy beef.
  • Texture: Delight in a tender and juicy interior wrapped in a perfectly crisp herb crust.
  • Aroma: The fresh fragrance of rosemary, thyme, and garlic infuses the air with an irresistibly mouthwatering aroma.
  • Visual Appeal: This dish boasts a beautiful crust, with vibrant greens from fresh herbs adding a pop of color to the succulent beef.
  • Skill Level Needed: While intermediate skills are required, the recipe is straightforward with detailed steps.
  • Special Equipment: A roasting pan with a rack and a meat thermometer ensure perfectly cooked beef.

Recipe Overview

  • Difficulty Level: An intermediate task, the herb crust requires focusing on balance and even coating.
  • Category: This entree shines as a centerpiece for dinners that demand a touch of culinary magnificence.
  • Cuisine: Rooted in European culinary traditions, it’s influenced by French and Italian techniques.
  • Cost: This is a slightly higher-end recipe due to beef tenderloin’s premium cut, but worth the splurge.
  • Season: Ideal for winter or holiday gatherings when rich, warm meals are most appreciated.
  • Occasion: Perfect for festive celebrations, intimate dinners, or gourmet gatherings.

Why You’ll Love This Recipe


The Herb-Crusted Beef Tenderloin stands out with its exquisite flavors and textures. The crust provides a vibrant, aromatic crunch that complements the tender, juicy meat, offering an unforgettable taste experience. Convenience is key, as the preparation is straightforward despite its gourmet outcome. Nutritionally, beef tenderloin is a high-protein dish with essential nutrients like iron and vitamin B12. This recipe also shines socially, offering a stunning presentation sure to impress guests. While the initial cost may be notable, the luxury and satisfaction this dish brings to the table make it a cost-effective delight for special occasions, especially when considering the high-end restaurant experience it delivers at home.

Historical Background and Cultural Significance


Beef tenderloin boasts a storied history rooted in European culinary traditions, known for its tenderness and flavor. Historically, the dish has been a prized element of fine dining, revered in French cuisine as part of refined meals. Over time, it has remained a gourmet staple, with herb-crusted variations adding a sophisticated touch. The cultural significance lies in its association with celebration and culinary mastery, making it a popular choice for festive occasions across the globe. Regional variations have emerged, with each enhancing the beef’s natural flavor with a unique herb blend, reflecting local tastes and traditions.

Ingredient Deep Dive


Start with premium beef tenderloin, a cut revered for its tenderness and mild flavor. Historically, it has been a centerpiece in many classic dishes across European tables, signifying sophistication. Nutritionally, it is a rich source of protein, with essential vitamins and minerals. When choosing beef, look for marbling to ensure taste. Store in the coldest part of your refrigerator, and consume within 3-5 days for optimal freshness. If necessary, it can be substituted with other tender cuts like filet mignon. Complementing the beef is a blend of fresh herbs, such as rosemary and thyme, which enhance flavor and aroma. These herbs carry traditional uses in Mediterranean cuisine and are known for their antioxidant properties. Opt for fresh over dried for a robust flavor, and store them in a refrigerator wrapped in a damp paper towel. Dry herbs as a substitution result in more concentrated flavors, so adjust accordingly.

Common Mistakes to Avoid

  • Not allowing beef to come to room temperature before cooking, which can result in uneven cooking.
  • Skipping meat rest time post-cooking causes juices to escape, leading to dryness.
  • Over-coating with herbs may overpower the beef’s natural flavor.
  • Under-seasoning the beef leads to a bland taste; balance is crucial.
  • Cooking at too high a temperature risks burning the crust.
  • Using low-quality herbs diminishes the flavor profile significantly.
  • Not using a meat thermometer can lead to overcooked or undercooked beef.
  • Cutting the beef immediately after cooking causes the juices to run out.

Essential Techniques


A key technique is achieving the perfect herb crust. The balance of herbs is essential, with even coating ensuring a flavorful bite. To master this, pack the herbs firmly onto the beef after applying a thin layer of mustard or oil, which acts as a binder. Avoid common pitfalls by not oversoaking the herbs in oil, ensuring instead that they are barely moistened for optimal adhesion. Visual cues for success include even herb coverage and a vibrant green color without burning.

Pro Tips for Perfect Herb-Crusted Beef Tenderloin


Surround the beef with a layer of plastic wrap when applying the herb crust to maintain hygiene and evenness. Invest in a high-quality meat thermometer to monitor internal temperature accurately. To boost flavor, marinate the beef in olive oil and minced garlic overnight. Preheat your oven fully before inserting the beef to ensure a perfect sear. Control salt levels by initially under-seasoning, then adjusting after tasting the cooked beef. After cooking, let your beef rest on a warm platter under loose foil to distribute the juices. Finally, use a mixture of different herbs for a multi-dimensional flavor profile, balancing strong and mild herbs.

Variations and Adaptations


Explore regional variations like incorporating Provençal herbs for a French twist or using basil and oregano for an Italian influence. Seasonal adaptations include adding lemon zest in summer for freshness. For dietary modifications, substitute with a plant-based beef alternative, adjusting cook time accordingly. Expand flavor horizons by experimenting with different spices within the crust, like cumin for warmth or smoked paprika for depth. Enhance texture with a nut crust made from finely chopped almonds or walnuts for added crunch. Presentation can be elevated by serving on a bed of fresh greens or garnishing with edible flowers.

Serving and Presentation Guide


Highlight this dish’s presentation by slicing in front of your guests for a dramatic effect, showcasing the juicy interior against the crusty exterior. Use garnishes such as fresh sprigs of herbs or pink peppercorns for color contrast. Traditional accompaniments include roasted vegetables or a creamy potato side. Modernize with a dressed arugula salad or a light balsamic glaze. Serve immediately from the oven slice by slice for perfect warmth, and manage portions considering the richness of the dish, allowing for plenty of accompaniments to balance the meal.

Wine and Beverage Pairing


Pair Herb-Crusted Beef Tenderloin with a bold red wine, such as a full-bodied Cabernet Sauvignon, to complement the rich beef flavors. For non-alcoholic options, a robust black tea or sparkling grape juice offers a similar depth. If coffee is preferred, a rich espresso further enhances the dish’s aroma. Ensure wines are served at controlled room temperature, and consider serving chilled non-alcoholic alternatives for a refreshing contrast. For best results, discuss varietals with a knowledgeable wine merchant to match personal preferences with the beef’s savory notes.

Storage and Shelf Life


After cooking, store the beef tenderloin in an airtight container in the refrigerator, where it will remain fresh for up to three days. Maintain a consistent refrigerator temperature to ensure safe storage. Use glass or BPA-free plastic containers to prevent flavor absorption. Be mindful of spoilage signs, such as off-smells or discoloration, and discard if any signs are present. Reheat gently in a low oven to retain moisture without overcooking. For longer storage, wrap tightly in foil or freezer paper before placing in a freezer-safe bag; frozen, it remains good for up to three months.

Make Ahead Strategies


To get ahead, prepare the herb crust and apply it to the beef tenderloin up to one day in advance, storing it covered in the refrigerator. This allows for easy assembly day-of, retaining moisture and flavor. Time management, such as initiating accompaniment prep during beef cooking, can further streamline your process. Assess any quality impact by conducting a small taste test beforehand if possible, which allows for flavor tweaks. Reheat slowly in an oven to preserve texture, and add fresh herbs or a squeeze of lemon before serving for a freshly prepared feel.

Scaling Instructions


When halving the recipe, reduce the size of the beef tenderloin while maintaining the same herb coating proportions to ensure rich flavor. Double or triple portions for larger gatherings by purchasing multiple beef tenderloins instead of increasing size, preserving cook time integrity. Adjust your roasting pan size and use multiple thermometers to monitor internal temperatures consistently. Timing modifications, such as staggered timers, ensure even cooking across all cuts. Consider storage and reheating logistics to maintain perfect presentation and texture when preparing large quantities.

Nutritional Deep Dive


Herb-Crusted Beef Tenderloin offers a powerhouse of nutrition, boasting a balance of macros with high protein levels crucial for muscle maintenance. Packed with micronutrients, beef tenderloin is a source of iron, zinc, and vitamin B12, supporting overall health. Dietary considerations point to its low-carbohydrate nature, suitable for protein-rich diets. Portion control is critical given its rich flavor and caloric density. Leveraging these nutrients, this dish fits a balanced diet when served with ample vegetables. Weight-conscious diners may enjoy smaller portions while savoring the profound flavors this beef tenderloin provides.

Dietary Adaptations


For gluten-free needs, ensure sauces and condiments used in seasoning contain no wheat derivatives. A dairy-free adjustment replaces any butter in the recipe with olive oil, maintaining health benefits while respecting dietary needs. Vegan adaptations are achievable with plant-based beef alternatives and a mix of flavor-forward herbs and spices to enrich taste. For low-carb and keto preferences, eliminate any traditionally served starches and focus on leafy green side dishes. Paleo adjustments involve using coconut oil instead of traditional fats, enhancing the natural herb flavors.

Troubleshooting Guide


If your beef lacks the desired tenderness, ensure proper internal temperatures are reached without overcooking. For balancing overpowering herb mixtures, strip back the intensity by reducing strong herbs like rosemary. Combat uneven cooking by resting the beef after searing, reducing internal temperature variance. When equipment is challenging, such as thermometers becoming inaccurate, test for doneness by slicing slightly to check the interior color. Substitute missing ingredients by creatively altering the herb crust with available alternatives like dried powders. Timing concerns can be addressed by practicing patience, particularly with the critical resting period after roasting to lock in juices.

Recipe Success Stories


Content inspiration from community feedback has shown that variations, such as integrating walnuts into the crust, have been praised for achieving delightful added crunch. Reader suggestions, like pairing it with a robust chimichurri sauce, have elevated the dish’s complexity. Community members have taken pride in adaptive stories shared online, using local herbs for unique twists while ensuring the foundational aspects remain consistent. Photography tips from those who have successfully captured this dish highlight using natural light to accentuate the rich tones of the meat against the bright, green crust.

Frequently Asked Questions

Can I prepare the beef tenderloin ahead of time?

Yes, the beef can be pre-crusted and stored in the refrigerator up to a day before cooking. Assemble just before roasting for maximum freshness.

How do I ensure an even herb crust?

Use a thin layer of mustard or olive oil as a base to adhere herbs perfectly, pressing them gently but firmly into place for even coverage.

What side dishes complement this tenderloin?

Roasted root vegetables or a fresh mixed salad with a tangy vinaigrette pair beautifully, providing balance to the rich flavors of the beef.

How can I prevent the beef from drying out?

Allow the beef to rest under loose foil after cooking. This step is critical for redistributing juices and preserving moisture.

Can I use dried herbs instead of fresh?

While fresh herbs are preferred for their robust flavor, dried herbs can be used in smaller quantities, recognizing their stronger concentration.

What temperature should the beef reach for doneness?

For medium-rare, aim for an internal temperature of 135°F before resting. Resting raises temperature slightly, achieving perfect doneness.

Is this recipe suitable for a large gathering?

Absolutely, multiply the recipe for larger portions and monitor each piece with separate thermometers for accurate cooking across all tenderloins.

Can leftovers be reheated successfully?

Leftovers can be gently reheated in a low-temperature oven to maintain tenderness without overcooking, ideally to just warm through.

What type of mustard is best for this recipe?

Dijon mustard adds a refined flavor profile without overpowering the herbs and beef, serving as an excellent base in the herb crust.

How to add more flavor to the beef?

For additional depth, consider marinating the beef overnight in olive oil, garlic, and a hint of lemon juice before applying the herb crust.

Additional Resources


Explore related recipes, such as a classic beef Wellington or herbed lamb roast, all fit for similar elegant dining occasions. Technique guides on perfecting searing and roasting ensure your beef tenderloin shines in presentation and taste. Dive into ingredient information such as herb selection to deepen culinary knowledge for home cooking refinements. Equipment recommendations, particularly for quality thermometers and roasting pans, complete the culinary toolkit needed for success. Finally, seasonal variations offer insights into adapting this tenderloin recipe to fit different dietary and flavor preferences throughout the year.

Join the Conversation


We encourage readers to share their Herb-Crusted Beef Tenderloin experiences on social media, connecting with a community of culinary enthusiasts. Use photography tips to capture your dish in natural light and tag #HerbCrustedTenderloin for a chance to be featured. Rate the recipe and share reviews to help others achieve the perfect tenderloin. Engage in discussions around recipe variations and learn from others’ adaptations. We look forward to your contributions to our culinary journey!

The Recipe

Herb-Crusted Beef Tenderloin

Serves: 6

Prep Time: 20 mins

Cook Time: 30 mins

Total Time: 50 mins

Kitchen Equipment Needed

  • Roasting pan with rack
  • Meat thermometer
  • Mixing bowl
  • Sharp knife
  • Baking sheet

Ingredients

  • 3-pound beef tenderloin, trimmed
  • 2 tablespoons olive oil
  • 1/4 cup Dijon mustard
  • 2 teaspoons kosher salt
  • 1 teaspoon black pepper
  • 2 cloves garlic, minced
  • 1/4 cup fresh rosemary, finely chopped
  • 1/4 cup fresh thyme, finely chopped
  • 1/4 cup fresh parsley, finely chopped

Directions

  1. Preheat your oven to 425°F (220°C).
  2. Pat the beef tenderloin with paper towels until dry. Rub with olive oil and season with salt and pepper.
  3. Mix herbs and minced garlic in a bowl. Spread the Dijon mustard over the beef, coating evenly. Press the herb mixture over the mustard, adhering it to the beef.
  4. Place the beef on a roasting rack in a roasting pan.
  5. Roast in the preheated oven for 30 minutes or until the internal temperature reaches 135°F for medium-rare.
  6. Remove from the oven and let rest under foil for 10-15 minutes before slicing.
  7. Slice and serve warm, garnished with additional fresh herbs if desired.

Recipe Notes

  • Substitute different herbs like basil or tarragon for a flavor twist.
  • For well-done beef, roast to an internal temperature of 150°F.
  • Pair with a red wine reduction sauce for an elevated dining experience.

Irresistible Crispy Parmesan Artichoke Hearts Recipe for Perfect Appetizers

Crispy Parmesan Artichoke Hearts: The Ultimate Appetizer Delight

⚖️
Difficulty
Easy

⏲️
Prep Time
15 mins

🕒
Cook Time
20 mins

⏱️
Total Time
35 mins

🍽️
Servings
4

Crispy Parmesan Artichoke Hearts make a stellar appetizer that excites your palate with each bite. These savory mouthfuls are perfect for gatherings, offering a perfected mixture of textures and flavors. The golden-brown crust, crafted from the delicate blend of Parmesan and bread crumbs, encases the tender richness of artichoke hearts, creating an irresistible treat. Whether you’re hosting a dinner party or preparing a snack for yourself, these artichoke hearts promise an enjoyable culinary adventure.

Quick Recipe Highlights

  • Flavor Profile: Celebrates the tangy artichoke with a savory Parmesan base.
  • Texture: Crispy exterior with a soft, tender center ensures a delightful contrast.
  • Aroma: Aromatic notes of Parmesan cheese enhance the herbal hints from artichokes.
  • Visual Appeal: Golden crust with a vibrant green interior captures the eye.
  • Skill Level Needed: Perfect for beginners, needing basic kitchen skills.
  • Special Equipment: A baking sheet and oven are essentials for perfect results.

Recipe Overview

  • Difficulty Level: This recipe is straightforward, requiring minimal culinary expertise. Most steps are intuitive, and the artichokes are easy to handle.
  • Category: Ideal as an appetizer or a side dish, these crispy gems are versatile in any meal scenario.
  • Cuisine: This dish showcases Artisan Mediterranean influences, encompassing a rustic yet sophisticated palate typical of Italian traditions.
  • Cost: Affordable, using accessible ingredients like canned artichokes and Parmesan to create a budget-friendly gourmet snack.
  • Season: Perfect year-round appetizer, with heightened enjoyment during spring and summer when artichoke season is at its peak.
  • Occasion: Suitable for both casual gatherings and upscale dinners, impressing guests with its flavor profile.

Why You’ll Love This Recipe


Diving into these Crispy Parmesan Artichoke Hearts, the first thing that captivates is the harmonious blend of flavors and textures. The sharpness of Parmesan melds effortlessly with the subtle bitterness of artichoke, creating a taste that is both comforting and sophisticated. These artichoke hearts are perfect for those who appreciate culinary simplicity with gourmet outcomes.

When it comes to convenience, this recipe shines as an exceptionally manageable dish to prepare. With a few easy steps, this recipe suits anyone who prefers quick preparation without sacrificing taste. Its simplicity doesn’t complicate your kitchen routine; instead, it complements it by offering a delightful go-to recipe.

Nutritionally, artichokes are a powerhouse, providing a wealth of fiber, vitamins C and K, folate, and antioxidants. Coupled with the protein boost from Parmesan cheese, this dish is both a treat and a boost to your dietary routine. Balancing indulgence with health benefits makes it an invaluable addition to your cooking repertoire.

Socially, these crispy artichoke hearts are perfect for gatherings, fostering an atmosphere of sharing and enjoyment. Their bite-sized form makes them easy to serve and enjoy in social settings, sparking conversation through flavor. Whether hosting brunch or an evening soirée, these bites adapt to any social event.

Cost-effectiveness and accessibility also play significant roles in the recipe’s appeal. The ingredients are not only affordable but widely available, enabling anyone to craft this dish without hassle. Even when on a tight budget, this recipe provides a luxurious experience that doesn’t stress your wallet.

Historical Background and Cultural Significance


The artichoke has a rich history rooted in the Mediterranean, where it originated and has been cultivated for centuries. Initially revered by the Romans and Greeks, artichokes were valued for their aphrodisiac properties and medicinal uses. This culinary gem made its way to Europe, becoming a staple in French and Italian kitchens.

Culturally, artichokes symbolize abundance and love in Mediterranean communities. Their blooming flower represents prosperity, which made them a popular offering at festivals. Over time, artichokes have become embedded in the cultural fabric of Mediterranean diets, celebrated for their vibrant flavor and adaptability.

The evolution of artichoke recipes speaks to the versatility of this vegetable. From raw preparations in Italian salads to roasted forms in Provencal cuisine, artichokes have been adapted to various culinary expressions. Each preparation maintains an homage to its origins while exploring creative culinary pathways.

Regionally, artichoke hearts take on unique flavors and preparations. In Spain, they might be paired with Jamon Serrano. In Sicily, stuffed with regional cheeses and herbs. Such variations showcase its adaptability, celebrating local culinary traditions while honoring artichokes’ deep-rooted history.

Ingredient Deep Dive


The artichoke heart is the star ingredient, revered for its deep history and culinary flexibility. Its tender profile is complemented by its subtle earthy flavor, making it a versatile ingredient. In Mediterranean cuisines, artichokes have been front-runners due to their ability to deliver bursts of freshness to dishes, celebrated for their rich heritage.

From a nutritional standpoint, artichokes present a range of benefits. They are high in fiber, aiding digestion, and contain notable antioxidants that contribute to overall health. Artichokes also offer a good dose of vitamin C, contributing to a robust immune system. This balance makes them a health-conscious ingredient, without compromising on taste.

When selecting artichokes, look for a vibrant green with tightly packed leaves ensuring freshness. If purchasing canned variety, choose those that are stored in brine for a robust flavor profile. Store fresh artichokes in a cool, dry place or refrigerate for tinned varieties to maintain their quality.

For substitutions, artichoke bottoms offer a thicker, heartier texture for those preferring a denser bite. Alternatively, hearts of palm can mimic their texture while providing a unique take on flavor, offering an innovative twist on the traditional preparation.

Parmesan cheese enriches the dish with its unmistakable umami punch. The aged notes of Parmesan create a rich, nutty backdrop ideal for pairing with artichokes. For those seeking alternatives, Pecorino Romano provides a similar sharpness while Grana Padano delivers a slightly milder experience.

Common Mistakes to Avoid

  • Not drying artichokes thoroughly before coating. Excess moisture can hinder the breadcrumb’s adherence, leading to a less crispy finish.
  • Skipping the use of egg wash, which acts as a binding agent, ensuring breadcrumbs and Parmesan stick to the artichokes effectively.
  • Overcrowding the baking sheet. This prevents even browning, resulting in soggy rather than crispy artichokes.
  • Using stale breadcrumbs. Fresh breadcrumbs provide a richer texture, ensuring optimal crispiness.
  • Under-seasoning. Artichokes crave a sprinkle of salt to enhance their natural flavor; be generous yet measured with your seasoning.
  • Ignoring preheating the oven. A hot oven is essential for achieving that crispy, golden crust.
  • Cooking without flipping. To ensure even browning, turn artichokes halfway through the bake.
  • Neglecting fresh Parmesan. Pre-grated varieties don’t melt as well, affecting texture and flavor.
  • Not letting artichokes cool slightly before serving. They’re best enjoyed when cooled a little as the flavors meld better together.

Essential Techniques


Mastering the coating process is key to ensuring your Crispy Parmesan Artichoke Hearts turn out perfect. The egg wash facilitates the adherence of breadcrumbs and cheese. Ensuring each artichoke heart is thoroughly coated results in an even crust, necessary for that satisfying crunch. Practicing precision during this phase can overcome any coating challenges.

The baking process itself is pivotal to achieving the desired texture. High, even heat crisps up the breadcrumbs while cooking the artichokes through. Monitoring the baking process carefully allows you to adjust if artichokes aren’t crisping evenly. Once mastered, this skill ensures every batch is consistently golden and mouth-watering.

Pro Tips for Perfect Crispy Parmesan Artichoke Hearts


Start by allowing canned artichokes to drip dry in a colander for a few minutes to remove excess moisture. Pat them down with paper towels thoroughly, giving the coating the best shot at adhering well.

Use a mixture of olive oil and melted butter to grease the baking sheet. This adds an extra layer of flavor infusion while promoting an even bake for the artichokes.

Incorporate finely chopped fresh herbs like parsley or thyme directly into the breadcrumb mixture for a hint of earthiness that accentuates the artichokes’ flavor profile.

For added crunch, toast the breadcrumbs lightly in a pan before adding them to the coating mix. This guarantees they stay crispy after baking.

Remember to flip the artichokes halfway through the baking time. This technique ensures both sides achieve a beautiful, even golden-brown color.

Experiment with different cheeses like Asiago or Romano to tinker with the flavor intensity, providing a unique twist on the traditional Parmesan crust.

Variations and Adaptations


Depending on your taste preferences, regional variations of this recipe can bring new life to traditional artichoke hearts. Mediterranean-style uses sun-dried tomato bits mixed with the breadcrumbs to add a tangy depth.

Adapting this dish seasonally involves pairing artichokes with seasonal herbs, such as rosemary in winter months or basil in the summer. These herbs respectively complement and contrast the earthy tones of the artichokes.

For a dietary change, gluten-free breadcrumbs can be seamlessly substituted, while the dish retains its textural integrity. Vegan adaptations utilize nutritional yeast instead of Parmesan, delivering umami richness without the dairy.

If you’re after flavor exploration, try adding chili flakes to kick-start the palate. This modification enlivens each bite with warmth, perfectly balancing the richness of the Parmesan.

For a texture play, dip each artichoke heart into a finely ground nut powder, such as almonds, alongside the breadcrumbs. This provides a nutty crunch that complements the creamy artichoke interior.

Presentation can be enhanced using microgreens as a garnish. Their peppery flavor and vibrant color serve as a stunning visual contrast to the golden artichoke hearts.

Serving and Presentation Guide


When it comes to plating these artichoke hearts, less is more. Arrange them on a broad plate, giving each piece space to breathe and showcasing their golden finish. This minimalist approach allows the artichokes’ crispness to remain the focal point.

For an added layer of presentation, consider garnishing with freshly grated lemon zest. The brightness and color invigorate the visual appeal, making the artichokes irresistible on sight.

Traditional accompaniments such as aioli or a simple marinara sauce can complement the artichoke hearts beautifully. Offer these dips in small bowls beside your serving plate for easy access and an enhanced experience.

Modern serving suggestions may include pairing with a zingy citrus salad, creating a refreshing counterbalance to the richness of the baked artichokes. This lively complement underscores the versatility of artichoke hearts.

Temperature matters; artichoke hearts are best served slightly warm. Allow them to cool for 5 minutes post-baking to let flavors meld, achieving a delectable balance of toasted exterior and succulent interior.

Consider portioning a few hearts per serving, as their richness means a little goes a long way. This control allows for enjoyment without overwhelming, ensuring they remain a delicate appetizer rather than a heavy starter.

Wine and Beverage Pairing


The moderate bitterness and nutty profile of these artichoke hearts pair wonderfully with a crisp white wine such as Sauvignon Blanc. Its acidity cuts through the richness, cleansing the palate and complementing the flavor intensity.

Non-alcoholic alternatives such as sparkling water infused with lemon or cucumber provide a refreshing backdrop that doesn’t overshadow the artichoke hearts’ complexity. These beverages keep your palate engaged without overpowering the subtle notes.

Coffee or tea is generally not a tradition pairing, but if you’re inclined, a light Pu-erh tea may serve as an exotic sip option that doesn’t detract. Its understated earthiness marries well with the artichokes.

Temperature considerations, especially in beverages, play a role in enhancing the enjoyment. Ensure that wines are adequately chilled, while non-alcoholic drinks maintain a refreshing coolness, sustaining the appetite for the next delightful bite.

Serve wine in clear glassware to emphasize clarity, matching the sophisticated elegance the dish delivers. Similarly, non-alcoholic choices in tumbler glasses provide aesthetic cohesion to your presentation.

Storage and Shelf Life


Crispy Parmesan Artichoke Hearts are best enjoyed fresh but can be kept for short-term storage if needed. Place leftovers in an airtight container to maintain as much crispness as possible.

Refrigerate your artichoke hearts if storing for up to three days. Proper containment is essential to prevent the dish from absorbing surrounding odors in the fridge.

When reheating, employ a low-temperature oven to gently warm the hearts without compromising the crispy exterior. Avoid microwaving, as it can lead to soggy results.

Check for signs of spoilage before consumption such as off smells or slime formation. Such signs indicate they should not be eaten.

Freezing isn’t recommended due to textural changes resulting in a less desirable consistency upon thawing.

Repurpose any leftovers by chopping and incorporating into salads or pasta dishes; their savory profile enriches these dishes without needing a full re-bake.

Make Ahead Strategies


Venturing into make-ahead preparations for this recipe enriches the experience of stress-free hosting. Consider coating your artichokes in advance, refrigerating them until baking time. This practice lets you focus on other elements of your meal.

Store coated artichokes between layers of parchment paper. This arrangement preserves the integrity of the coating and prevents clumping or weakening.

Assess the quality impact and ensure to employ a reheating method that retains texture. Always test bake a few pieces to determine the optimal timing and temperature settings.

If assembling in advance, remember to refresh flavors with a squeeze of fresh lemon juice post-bake. This step revitalizes stored components, infusing brightness back into the artichoke hearts.

Keep fresh elements like herbs or garnishes stored separately until serving. This ensures they maintain their vibrancy and texture without wilting or over blending with stored components.

Scaling Instructions


For smaller gatherings, halving the recipe allows for a more manageable yield without excessive leftovers. Adjust seasoning quantities accordingly to maintain flavor balance amidst reduced volume.

Doubling or tripling the recipe requires careful monitoring of brewing times to ensure all artichokes retain their desired crispy texture. Larger batches may necessitate additional baking sheets and staggered baking rounds.

Consider adapting cooking equipment for larger batches, using commercial-sized ovens or convection settings for efficiency and even heat distribution.

Increased ingredient volume translates to adjustments in prep times. When scaling, allow for additional slicing, drying, and coating time, ensuring consistent quality across greater yields.

Factoring storage needs becomes critical when scaling up. Evaluate whether storage capacity can accommodate renewed quantities, ensuring freshness is never compromised.

Nutritional Deep Dive


These Crispy Parmesan Artichoke Hearts boast a remarkable macro blend, balancing carbohydrates from breadcrumbs and protein from cheese. This profile supports energy needs while maintaining finish and taste.

Micronutrient contributions from artichokes include significant levels of magnesium, iron, and folate, vital to various bodily functions, including immune support and heart health. Incorporating this dish means indulging in health benefits along with enjoyment.

From a health standpoint, this recipe provides a harmonized approach to eating well without guilt. With a moderate portion size, it fits well within dietary goals without excess.

Pay attention to portion control as the richness benefits from sensible servings. This balance ensures satisfaction without overindulgence, aligning with nutritional wisdom.

Maintaining the fiber intake from artichokes supported with cheese-induced vitamins offers a well-rounded dietary inclusion. Consider this dish an easy inclusion for boosting daily nutrient profiles.

Dietary Adaptations


Transforming these artichoke hearts into gluten-free delights is simple. Substitute traditional breadcrumbs with a gluten-free alternative, adjusting flavors to taste, while still achieving a desired crispness.

For a dairy-free version, swap Parmesan with a nutritional yeast mix that maintains umami richness without dairy content, delivering compassionate comfort aligned with plant-based values.

A vegan adaptation requires swapping both cheese and egg wash. Use aquafaba as a binding substitute and nutritional yeast to replicate flavor, creating a fully plant-based variation.

Low-carb adherences may consider reducing breadcrumbs and focusing on a more cheese-inclusive coating for a satisfying crust, ensuring the recipe aligns with carbohydrate-focused dietary plans.

Should you follow the keto or paleo approach, almond flour can replace breadcrumbs. The nutty flavor complements artichokes while adhering to dietary principles. Adjust seasoning to tailor your savory palate.

In pursuing a Low-FODMAP solution, consider removing ingredients that destabilize the balance. Monitor individual ingredient impacts, borrowing supportive alternatives that retain quality diet adherence without sacrificing taste.

Troubleshooting Guide


Dealing with texture issues begins with monitoring coating adherence. Ensure artichokes are patted dry and coated thoroughly. This consistency before baking solves most texture pitfalls.

To achieve balanced flavor, focus on proper seasoning application. Taste before finalizing serving, modifying additives to suit desired profiles.

If encountering temperature problems, particularly uneven baking, adjust rack placement and rotate pans to resolve these challenges, ensuring thoroughness.

Equipment surprises are resolved through planning. Preheat your ovens, double-check baking sheets, and ensure your oven thermometer provides accurate temperatures.

Ay ingredient shortages, think about substitutions that maintain balance without losing the essence of the original recipe. Mindful swaps retain integrity without disruption.

Timing concerns emerge when aligning all steps. Monitor preparation sequences and arrange processes sequentially for smooth execution, minimizing stress over timing deviations.

Recipe Success Stories


Our community feedback reveals delightful creative adaptations. One user described adding truffle oil, offering a luxurious depth of flavor to the crispy artichokes, while another incorporated a spicy twist using cayenne.

Variation successes also highlight potential for exploration. A reader mentioned replacing Parmesan with Manchego, inspiring engaging culinary innovation across borders demonstrated in their photos.

Adaptation stories paint a vivid picture of possibility, illustrating the endless opportunity for customization while grounded in the original recipe, turning it into unique personal expressions.

Reader suggestions encompassed garnishing with a squeeze of lime, opening up refreshing avenues to infuse brightness into the flavor profile, an inspiring tip captured beautifully.

For a photography tip, natural lighting brings out the vibrancy in colors and textures, best showcasing both ingredients’ quality and cooking skills. Enthusiasts find beauty in abundance already present in the recipe.

Frequently Asked Questions

Can I use fresh artichokes instead of canned ones?

Yes, fresh artichokes can be used. However, they require additional preparation steps like steaming or boiling before coating. The canned version offers convenience but using fresh provides a distinct flavor for those inclined.

What alternatives exist for Parmesan cheese?

Pecorino Romano and Asiago can be used instead of Parmesan. For a dairy-free choice, nutritional yeast offers a savory alternative that maintains umami depth typical of Parmesan.

How can I keep the exterior crispy?

Use a high heat setting and ensure even spacing on the baking tray. A thin yet complete coating layer also helps achieve the desirable crispness, turning halfway through baking locks in texture.

Do artichokes require pre-cooking?

When using canned artichokes, pre-cooking isn’t necessary, as they are pre-cooked. If you’re using fresh ones, steaming or boiling until tender is necessary before proceeding with the recipe.

Can I store leftovers, and how should I reheat them?

Yes, leftovers can be stored in an airtight container in the fridge. Reheat in a low-temp oven to keep them crispy rather than microwaving, ensuring texture is preserved in every bite.

Is it possible to fry instead of bake?

Yes, frying ensures crispiness but results in a different mouthfeel and may alter the calorie count significantly. Baking offers a healthier option, reducing fat content without sacrificing flavor.

How do I prevent breadcrumbs from becoming soggy?

Dry the artichokes thoroughly before coating. Avoiding overcoating and ensuring proper bake time maintains breadcrumb crispness. Use pre-toasting techniques for breadcrumbs to secure better results.

What dipping sauces pair well with artichoke hearts?

Aioli or marinara sauce complements the savory notes. Lemon-thyme yogurt dip pairs well, offering zesty contrast, or explore green chutney to introduce a burst of herbal flavors while serving.

Can frozen artichokes be used?

Frozen artichokes can be employed, but ensure they are completely thawed and patted dry to avert excessive moisture, which affects crispness. Adjust baking time as needed for flavor depth.

How can I add a spicy twist?

Incorporate chili flakes into the breadcrumb-Parmesan mixture for a subtle heat. Alternatively, a spicy dipping sauce can provide a burst of spice without altering the artichokes themselves.

Additional Resources


For more related recipes, explore our additional compilation of Mediterranean appetizers. You’ll find an array of artichoke recipes that further illuminate the breadth of this versatile vegetable.

Technique guides brim with clarity, offering insights into essential kitchen strategies. Here, practice the art of breadcrumbing, as our step-by-step processes yield efficiency and excellence.

Ingredient information articles amplify knowledge, delving into the nutritional virtues of the humble artichoke while celebrating cheese varieties that dazzle in such pairings.

Equipment recommendations provide clarity on essential kitchen gadgets, noting which tools elevate the cooking experience with ease.

Seasonal variations inspire bouts of culinary creativity. Discover how artichoke embraces seasonal produce, influencing preparations while celebrating fresh availability.

Join the Conversation


Our community flourishes through shared culinary experiences. Connect with us on social media, tagging posts and sharing photos. Engage through commentary; we love celebrating recipe achievements.

Photography tips from our experts inspire creativity in capturing the beauty of artichoke creations. Focus on natural light to bring colors and textures to life, engaging viewers with authentic vibrancy.

Recipe reviews and adaptations drive discussion, supporting passionate culinary explorations. Your feedback excites our community, while inspiring continued recipe-tasting journeys.