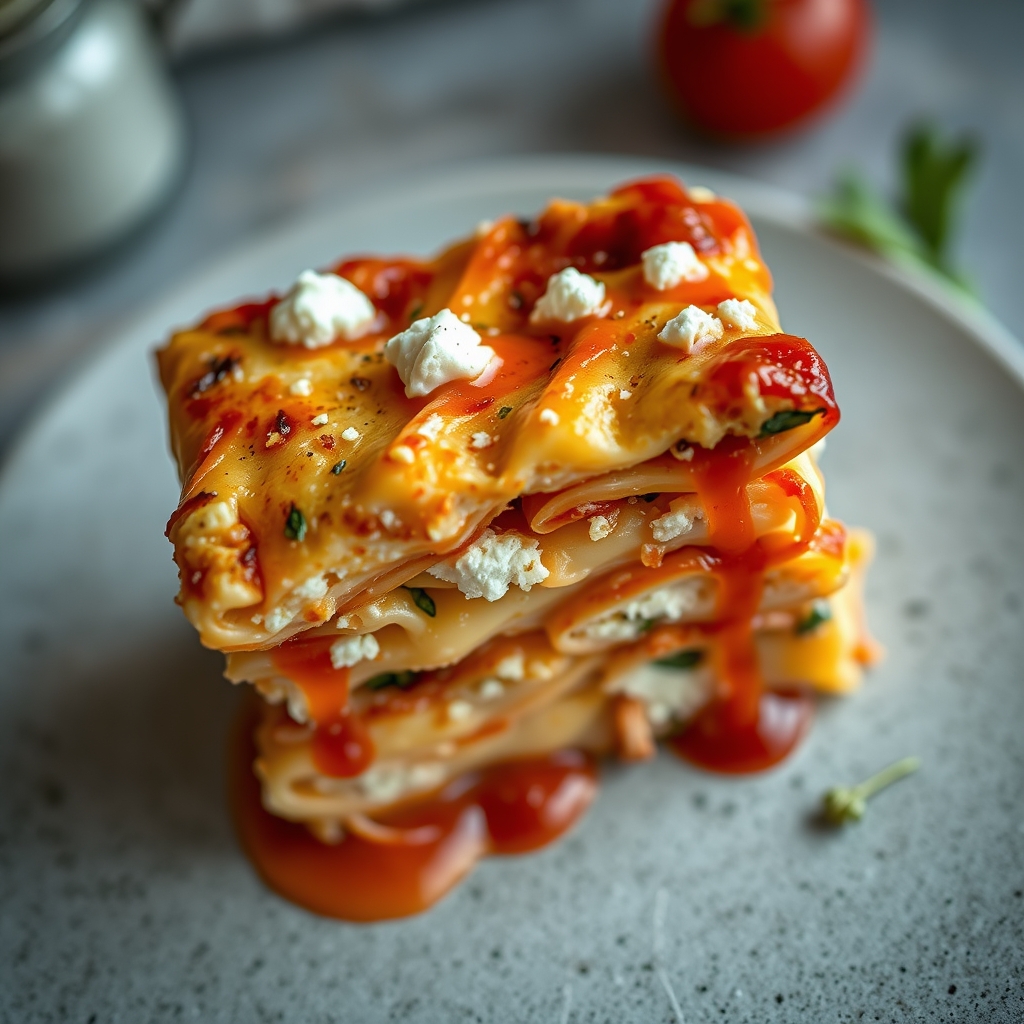
Spicy Salmon Sushi Bake

Spicy Salmon Sushi Bake

If you love sushi but dread the hassle of rolling it, this Spicy Salmon Sushi Bake is about to become your new favorite dish. Imagine all the vibrant flavors of spicy salmon sushi layered into a warm, comforting casserole that’s perfect for sharing. Whether you’re hosting a dinner party or craving a cozy night in, this recipe delivers big on taste with minimal effort. Let’s dive into why this dish is a must-try and how you can make it effortlessly at home.

Why You’ll Love This Recipe

First, let’s talk about why this Spicy Salmon Sushi Bake deserves a spot in your recipe rotation. Here are just a few reasons it’s a winner:

  • Effortless Elegance: No sushi-rolling skills required. This bake captures the essence of sushi without the meticulous assembly.
  • Bold, Addictive Flavors: The combination of spicy mayo, tender salmon, and creamy rice creates a harmony of textures and tastes that’s downright irresistible.
  • Perfect for Sharing: Ideal for potlucks or family dinners, this dish is designed to feed a crowd while still feeling special.
  • Customizable Heat: Adjust the spice level to your liking, making it kid-friendly or extra fiery with just a tweak.
  • Meal Prep Friendly: Leftovers taste just as delicious the next day, making it a great make-ahead option.

Ingredients Breakdown

Every great dish starts with quality ingredients. Here’s what you’ll need and why each component matters:

  • Sushi Rice: The foundation of the dish. Its sticky texture holds everything together. Short-grain rice works best.
  • Fresh Salmon: Opt for sushi-grade salmon for safety and the best flavor. It’s lightly baked, keeping it tender.
  • Spicy Mayo: A mix of mayonnaise and sriracha adds creaminess and heat. Kewpie mayo is a game-changer if available.
  • Rice Vinegar & Sugar: These season the rice, giving it that signature sushi tang.
  • Nori Sheets: Crumbled or layered, they add that essential oceanic crunch.
  • Green Onions & Sesame Seeds: For freshness and a nutty finish.

How to Make Spicy Salmon Sushi Bake

Now, let’s walk through the steps to create this mouthwatering dish:

  1. Prepare the Rice: Rinse 2 cups of sushi rice until the water runs clear. Cook according to package instructions. While hot, gently fold in a mix of 3 tbsp rice vinegar, 1 tbsp sugar, and 1 tsp salt. Let it cool slightly.
  2. Season the Salmon: Cut 1 lb of salmon into small cubes. Toss with 2 tbsp spicy mayo (adjust sriracha to taste) and a pinch of salt.
  3. Layer the Bake: Spread the rice evenly in a greased baking dish. Top with the salmon mixture, then drizzle with more spicy mayo.
  4. Bake to Perfection: Bake at 375°F for 12-15 minutes, just until the salmon is cooked through but still tender.
  5. Garnish & Serve: Sprinkle with crumbled nori, sliced green onions, and sesame seeds. Serve with soy sauce and extra spicy mayo on the side.

Pro Tips for the Best Results

  • Don’t Overcook the Salmon: It will continue cooking slightly after removal from the oven, so aim for slightly underdone.
  • Use Warm Rice: It spreads more easily and melds better with the other ingredients.
  • Toast the Nori: A quick pass over an open flame enhances its flavor.
  • Let It Rest: Allow the bake to sit for 5 minutes before serving to let flavors settle.

Variations and Substitutions

This recipe is wonderfully adaptable. Here are some ideas to mix it up:

  • Protein Swap: Try cooked crab, shrimp, or even tofu for a vegetarian twist.
  • Veggie Boost: Add diced avocado, cucumber, or pickled radish for extra crunch.
  • Low-Carb Option: Substitute cauliflower rice for a lighter version.
  • Extra Umami: A dash of furikake seasoning or tobiko (flying fish roe) elevates the dish.

What to Serve With It

Round out your meal with these complementary sides:

  • Miso Soup: A classic pairing that balances the richness.
  • Edamame: Lightly salted for a simple, healthy side.
  • Asian Slaw: A crisp, vinegary salad cuts through the creaminess.
  • Green Tea or Sake: For an authentic touch.

How to Store and Reheat

Leftovers? Here’s how to keep them tasting fresh:

  • Refrigeration: Store in an airtight container for up to 2 days.
  • Reheating: Warm in the oven at 300°F for 10 minutes to preserve texture. Avoid microwaving, which can make rice gummy.
  • Freezing: Not recommended, as the rice and salmon texture will suffer.

Frequently Asked Questions (FAQs)

Can I use canned salmon?
While possible, fresh salmon offers superior texture and flavor. If using canned, drain well and mix with mayo to mimic the consistency.

Is sushi-grade salmon necessary?
Yes, for food safety. If unavailable, you can briefly sear the salmon before cubing it.

Can I make this ahead?
Assemble the bake up to 4 hours in advance and refrigerate. Add 5 extra minutes to baking time if chilled.

How spicy is this dish?
It’s customizable! Start with 1 tbsp sriracha in the mayo and adjust to taste.

Final Thoughts

This Spicy Salmon Sushi Bake is proof that comfort food can be elegant and easy. It’s a dish that invites experimentation, so don’t hesitate to make it your own. Serve it family-style with chopsticks and let everyone dig in—it’s meant to be shared joyfully. Whether you’re a sushi novice or a seasoned pro, this bake is sure to impress. Happy cooking!

Print
clock clock iconcutlery cutlery iconflag flag iconfolder folder iconinstagram instagram iconpinterest pinterest iconfacebook facebook iconprint print iconsquares squares iconheart heart iconheart solid heart solid icon

Spicy Salmon Sushi Bake

  • Author: Chef Akira Tanaka

Description

A deconstructed sushi casserole with layers of seasoned rice, spicy salmon, and creamy toppings, baked to perfection for an easy yet impressive dish.


Ingredients

Scale

For the Crust:

  • For Sushi Rice:
  • 2 cups sushi rice
  • 2.5 cups water
  • 1/4 cup rice vinegar
  • 2 tbsp sugar
  • 1 tsp salt
  • For Spicy Salmon:
  • 1 lb fresh salmon, diced
  • 3 tbsp mayonnaise
  • 2 tbsp sriracha
  • 1 tbsp soy sauce
  • 1 tsp sesame oil
  • 1 tsp grated ginger
  • For Toppings:
  • 1/2 cup Japanese mayonnaise
  • 1/4 cup chopped green onions
  • 2 tbsp tobiko (flying fish roe)
  • 1 tbsp sesame seeds
  • 1 nori sheet, shredded

Instructions

1. Prepare the Crust:

  1. 1. Rinse sushi rice until water runs clear. Cook with water in rice cooker or pot.
  2. 2. Mix rice vinegar, sugar, and salt. Fold into warm rice and let cool.
  3. 3. Combine salmon with mayo, sriracha, soy sauce, sesame oil, and ginger.
  4. 4. Press rice into greased 9×9 baking dish. Layer spicy salmon mixture on top.
  5. 5. Bake at 375°F (190°C) for 15 minutes until salmon is just cooked.
  6. 6. Drizzle with Japanese mayo, then top with green onions, tobiko, sesame seeds, and nori.
  7. 7. Serve warm with soy sauce and extra sriracha on the side.

Notes

For best results, use sushi-grade salmon. Leftovers keep refrigerated for 2 days. Reheat gently to avoid drying out the fish.

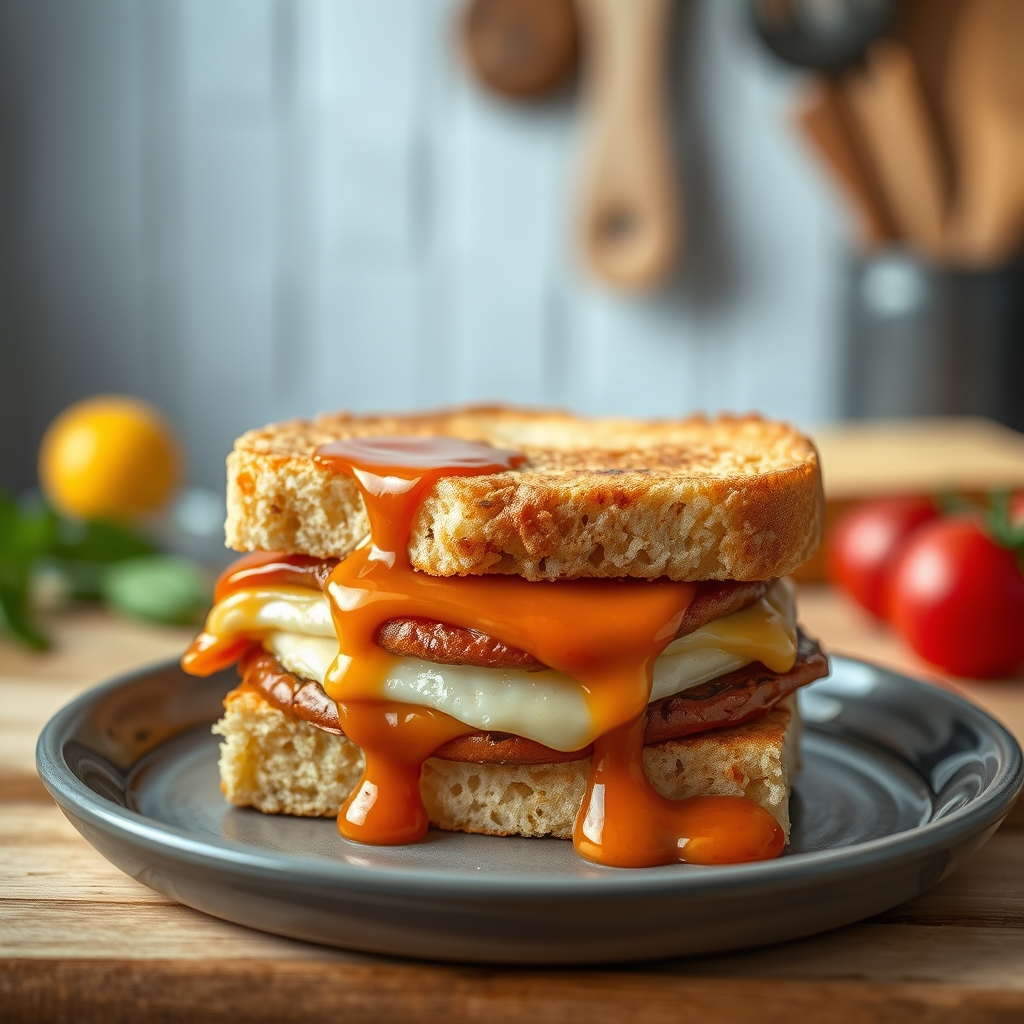
Cloud Bread Breakfast Sandwich

Cloud Bread Breakfast Sandwich

There’s something undeniably magical about starting your day with a breakfast that feels light as air yet satisfyingly hearty. Enter the Cloud Bread Breakfast Sandwich—a fluffy, low-carb twist on the classic morning staple that’s taking the culinary world by storm. Whether you’re gluten-free, keto-friendly, or simply craving a breakfast that’s as Instagram-worthy as it is delicious, this recipe is about to become your new go-to. Let’s dive into why this dish is a game-changer and how you can master it in your own kitchen.

Why You’ll Love This Recipe

First things first—why should you make this cloud bread breakfast sandwich? Here are just a few reasons:

  • Light and Fluffy Texture: Unlike traditional bread, cloud bread is made with whipped egg whites, giving it an airy, almost melt-in-your-mouth quality that’s irresistibly tender.
  • Low-Carb and Gluten-Free: Perfect for those watching their carb intake or avoiding gluten, this sandwich swaps out grains for protein-rich eggs and cream cheese.
  • Endlessly Customizable: From savory bacon and eggs to creamy avocado and smoked salmon, you can tailor your fillings to suit any craving.
  • Quick to Make: With just a handful of ingredients and minimal prep time, this recipe is ideal for busy mornings when you want something special without the fuss.
  • Visually Stunning: The pillowy cloud bread layers make this sandwich look like it came straight from a gourmet café—yet it’s surprisingly simple to recreate at home.

Ingredients Breakdown

Let’s take a closer look at the key ingredients that make this cloud bread breakfast sandwich so unique:

  • Eggs: The star of the show. Separated into yolks and whites, they create the structure and lift needed for that signature cloud-like texture.
  • Cream Cheese: Adds richness and helps stabilize the whipped egg whites while keeping the bread moist.
  • Cream of Tartar: A pinch of this magic powder ensures your egg whites whip up stiff and hold their shape during baking.
  • Fillings of Choice: Think crispy bacon, scrambled eggs, avocado, cheese, or even smoked salmon—the possibilities are endless.
  • Seasonings: A dash of salt, pepper, or herbs like chives or dill can elevate the flavor profile of both the bread and fillings.

How to Make Cloud Bread Breakfast Sandwich

Ready to whip up your own cloud bread masterpiece? Follow these steps for a flawless result:

  1. Preheat and Prep: Start by preheating your oven to 300°F (150°C) and lining a baking sheet with parchment paper.
  2. Whip the Egg Whites: In a clean, dry bowl, beat the egg whites with cream of tartar until stiff peaks form. This is the key to achieving that airy texture.
  3. Mix the Yolks: In a separate bowl, blend the egg yolks with softened cream cheese until smooth. Gently fold this mixture into the whipped whites to maintain volume.
  4. Shape and Bake: Spoon the batter onto the baking sheet in even rounds, then bake for 25-30 minutes until golden and set. Let them cool slightly—they’ll firm up as they rest.
  5. Assemble the Sandwich: Layer your favorite fillings between two cloud bread rounds. For a classic twist, try scrambled eggs, crispy bacon, and a slice of cheddar.

Pro Tip: For extra flavor, toast the cloud bread lightly in a skillet before assembling—it adds a delightful crispness to the edges.

Pro Tips for the Best Results

Want to take your cloud bread breakfast sandwich to the next level? Keep these expert tips in mind:

  • Ensure your mixing bowl and beaters are completely grease-free before whipping the egg whites—any residue can prevent them from reaching stiff peaks.
  • Fold the yolk mixture into the whites gently and gradually to avoid deflating the batter.
  • For uniform rounds, use a piping bag or the back of a spoon to shape the cloud bread before baking.
  • Let the cloud bread cool completely before assembling to prevent sogginess.
  • Add a sprinkle of everything bagel seasoning or grated Parmesan to the batter for an extra flavor boost.

Variations and Substitutions

One of the best things about this recipe is its versatility. Here are some delicious ways to mix it up:

  • Dairy-Free: Swap cream cheese for coconut cream or a dairy-free alternative.
  • Sweet Version: Add a touch of honey or vanilla to the batter and fill with whipped cream and berries for a dessert-like treat.
  • Vegetarian: Skip the bacon and load up with sautéed mushrooms, spinach, and feta.
  • Spicy Kick: Add a dash of hot sauce or sliced jalapeños to the fillings for a fiery twist.
  • Mediterranean Style: Layer with hummus, cucumber, and roasted red peppers for a fresh, vibrant take.

What to Serve With It

While this cloud bread breakfast sandwich is satisfying on its own, pairing it with the right sides can turn it into a full-blown feast. Consider:

  • A crisp green salad with a tangy vinaigrette to balance the richness.
  • Fresh fruit like berries or sliced melon for a refreshing contrast.
  • A steaming cup of coffee or herbal tea to complete the morning ritual.
  • For brunch, serve alongside roasted potatoes or a cheesy hash brown casserole.

How to Store and Reheat

Cloud bread is best enjoyed fresh, but if you have leftovers, here’s how to keep them tasting great:

  • Storage: Keep unfilled cloud bread in an airtight container at room temperature for up to 2 days or refrigerate for up to 5 days.
  • Freezing: Freeze individual bread rounds separated by parchment paper for up to a month. Thaw at room temperature before using.
  • Reheating: Warm assembled sandwiches in a toaster oven or skillet for a few minutes to revive the texture. Avoid microwaving, as it can make the bread soggy.

Frequently Asked Questions (FAQs)

Can I make cloud bread ahead of time?
Absolutely! Bake the cloud bread rounds in advance and store them as directed. Assemble the sandwiches just before serving to maintain freshness.

Why did my cloud bread deflate?
This usually happens if the egg whites weren’t whipped to stiff peaks or if the batter was overmixed. Be gentle when folding and bake immediately after preparing the batter.

Is cloud bread keto-friendly?
Yes! With minimal carbs and high protein, it’s a fantastic option for keto and low-carb diets.

Can I use a substitute for cream of tartar?
If you don’t have cream of tartar, a small amount of lemon juice or white vinegar can help stabilize the egg whites.

How do I prevent my cloud bread from sticking?
Parchment paper is essential—avoid greasing the pan, as oil can interfere with the bread’s ability to rise properly.

Final Thoughts

There you have it—a breakfast sandwich that’s as dreamy as its name suggests. Whether you’re looking for a healthier alternative to traditional bread or simply want to impress your family with a visually stunning meal, this cloud bread breakfast sandwich delivers on all fronts. Don’t be afraid to get creative with fillings and flavors—after all, the best recipes are the ones you make your own. Happy cooking, and may your mornings be as light and fluffy as your cloud bread!

Print
clock clock iconcutlery cutlery iconflag flag iconfolder folder iconinstagram instagram iconpinterest pinterest iconfacebook facebook iconprint print iconsquares squares iconheart heart iconheart solid heart solid icon

Cloud Bread Breakfast Sandwich

  • Author: Chef Jamie

Description

A light and fluffy cloud bread sandwich filled with scrambled eggs, crispy bacon, and melted cheese. Perfect for a low-carb breakfast or brunch.


Ingredients

Scale

For the Crust:

  • For the Cloud Bread:
  • 3 large eggs, separated
  • 3 tablespoons cream cheese, softened
  • 1/4 teaspoon cream of tartar
  • 1/4 teaspoon salt
  • For the Filling:
  • 2 large eggs
  • 2 slices bacon, cooked crispy
  • 1 slice cheddar cheese
  • 1 tablespoon butter
  • Salt and pepper to taste
  • Optional:
  • 1 tablespoon chives, chopped (for garnish)

Instructions

1. Prepare the Crust:

  1. 1. Preheat oven to 300°F (150°C) and line a baking sheet with parchment paper.
  2. 2. For the cloud bread: In a large bowl, beat egg whites with cream of tartar until stiff peaks form.
  3. 3. In another bowl, mix egg yolks, cream cheese, and salt until smooth.
  4. 4. Gently fold the yolk mixture into the egg whites until just combined.
  5. 5. Spoon the mixture into 4 equal rounds on the baking sheet and bake for 25-30 minutes until golden. Let cool.
  6. 6. For the filling: Melt butter in a pan over medium heat. Scramble the eggs until soft and set aside.
  7. 7. Assemble the sandwich: Place scrambled eggs on one cloud bread slice, top with bacon and cheese, then cover with another slice.
  8. 8. Optional: Garnish with chopped chives before serving.

Notes

For crispier cloud bread, bake for an additional 5 minutes. Store leftovers in an airtight container for up to 2 days.

Air Fryer Pickles

Air Fryer Pickles

There’s something undeniably addictive about crispy, tangy pickles—especially when they’re golden and crunchy straight from the air fryer. Whether you’re hosting a game-day gathering, craving a satisfying snack, or just looking for a fun way to jazz up your appetizer spread, air fryer pickles are a must-try. This recipe delivers all the flavor of deep-fried pickles without the mess or excess oil, making them a healthier yet equally indulgent alternative. Let’s dive into why these pickles are about to become your new favorite snack.

Why You’ll Love This Recipe

First, let’s talk about why air fryer pickles deserve a spot in your recipe rotation. Here are just a few reasons you’ll fall in love with them:

  • Crunchy perfection without deep-frying: The air fryer delivers that irresistible crispy texture without submerging the pickles in oil, making them lighter but just as satisfying.
  • Quick and easy: From prep to plate, this recipe takes less than 15 minutes, making it perfect for last-minute cravings or unexpected guests.
  • Versatile crowd-pleaser: Whether served as an appetizer, snack, or side, these pickles disappear fast at parties and family gatherings.
  • Customizable flavors: Play with different seasonings, dipping sauces, or even pickle varieties to create your perfect bite.
  • Kid-friendly fun: Even picky eaters love the tangy, crunchy combo, making these a hit with all ages.

Ingredients Breakdown

Great recipes start with great ingredients. Here’s what you’ll need and why each component matters:

  • Dill pickle chips: Opt for pre-sliced pickles for convenience, or slice whole dill pickles into 1/4-inch rounds. The tangy brine keeps the pickles flavorful while the air fryer crisps the coating.
  • All-purpose flour: Forms the base of the breading, helping the egg wash adhere and creating a light, crispy layer.
  • Eggs: Acts as the glue for the breadcrumbs, ensuring they stick evenly to each pickle slice.
  • Panko breadcrumbs: Delivers an extra-crunchy texture compared to regular breadcrumbs. For a gluten-free option, use crushed pork rinds or gluten-free panko.
  • Seasonings: A blend of garlic powder, paprika, salt, and black pepper enhances the flavor. Feel free to add cayenne for heat or Italian seasoning for an herby twist.
  • Cooking spray: A light spritz helps the breading crisp up beautifully in the air fryer.

How to Make Air Fryer Pickles

Ready to make the crispiest, most addictive pickles of your life? Follow these simple steps:

  1. Prep the pickles: Drain the pickle chips and pat them dry thoroughly with paper towels. Excess moisture is the enemy of crispiness, so take your time here.
  2. Set up your breading station: In three shallow bowls, place the flour in the first, beaten eggs in the second, and panko mixed with seasonings in the third.
  3. Bread the pickles: Dredge each pickle slice in flour, shaking off excess. Dip into the egg, letting any excess drip off, then press into the panko mixture, coating evenly. Place on a plate.
  4. Preheat the air fryer: Set your air fryer to 400°F for 3 minutes. This ensures even cooking and maximum crispiness.
  5. Arrange in the air fryer: Lightly spray the basket with oil, then place the breaded pickles in a single layer, ensuring they don’t overlap. Spritz the tops lightly with oil.
  6. Air fry: Cook for 6-8 minutes, flipping halfway through, until golden brown and crispy. Work in batches if needed.
  7. Serve immediately: Enjoy hot with your favorite dipping sauce.

Pro Tips for the Best Results

Want restaurant-quality air fryer pickles every time? Keep these expert tips in mind:

  • Dry those pickles: The more moisture you remove before breading, the crispier the result. Let them sit on paper towels for 10 extra minutes if you have time.
  • Double-coat for extra crunch: For an even thicker crust, repeat the egg and breadcrumb step after the first coating.
  • Don’t overcrowd the basket: Air circulation is key. Leave space between pickles to ensure even browning.
  • Use a rack: If your air fryer has a rack, elevate the pickles for crispiness on all sides.
  • Season the flour: Add a pinch of salt and pepper to the flour for extra flavor in every layer.

Variations and Substitutions

This recipe is endlessly adaptable. Here are some delicious ways to mix it up:

  • Spicy version: Add 1/2 teaspoon cayenne or chili powder to the breadcrumbs, or use spicy dill pickles.
  • Zesty ranch: Mix 1 tablespoon ranch seasoning into the panko for a herby kick.
  • Gluten-free: Swap all-purpose flour for almond flour and use gluten-free panko.
  • Keto-friendly: Replace breadcrumbs with crushed pork rinds or almond flour mixed with grated Parmesan.
  • Sweet and spicy: Use bread and butter pickles and add a touch of brown sugar to the breading.

What to Serve With It

Air fryer pickles shine as part of a larger spread. Try pairing them with:

  • Dipping sauces: Classic ranch, spicy sriracha mayo, cool tzatziki, or smoky barbecue sauce.
  • Burgers and sandwiches: Serve alongside juicy burgers, fried chicken sandwiches, or pulled pork sliders.
  • Salads: Balance the richness with a crisp wedge salad or tangy coleslaw.
  • Beer or cocktails: A cold lager, zesty margarita, or even a pickleback shot for the adventurous.

How to Store and Reheat

While best enjoyed fresh, leftovers can be salvaged with these methods:

  • Refrigeration: Store in an airtight container for up to 2 days. Note: The coating will soften.
  • Reheating: Revive crispiness by air frying at 375°F for 2-3 minutes. Avoid the microwave.
  • Freezing: Not recommended, as the texture will suffer significantly upon thawing.

Frequently Asked Questions (FAQs)

Let’s tackle some common questions about air fryer pickles:

Can I use pickle spears instead of chips?
Absolutely! Adjust cooking time to 8-10 minutes, flipping halfway, since spears are thicker.

Why are my pickles soggy?
This usually happens if the pickles aren’t dried well before breading or if the air fryer is overcrowded. Patience with prep is key.

Can I make these oil-free?
Yes, but the coating won’t brown as much. For oil-free cooking, use a perforated parchment liner.

What’s the best air fryer temperature for pickles?
400°F is ideal—hot enough to crisp quickly without burning the coating.

Can I prepare these ahead of time?
You can bread the pickles and refrigerate them for up to 2 hours before air frying, but cook them just before serving.

Final Thoughts

Air fryer pickles are proof that great snacks don’t have to be complicated or unhealthy. With their irresistible crunch, tangy bite, and endless customization options, they’re bound to become a staple in your kitchen. Whether you’re serving them at your next gathering or treating yourself to a solo snack attack, this recipe delivers satisfaction in every bite. So fire up that air fryer—your new favorite pickle obsession starts now.

Print
clock clock iconcutlery cutlery iconflag flag iconfolder folder iconinstagram instagram iconpinterest pinterest iconfacebook facebook iconprint print iconsquares squares iconheart heart iconheart solid heart solid icon

Air Fryer Pickles

  • Author: Home Chef

Description

Crispy, tangy air fryer pickles are the perfect snack or appetizer. These crunchy bites are coated in a seasoned breading and cooked to perfection in the air fryer for a healthier alternative to deep-fried pickles.


Ingredients

Scale

For the Crust:

  • For the pickles:
  • 1 jar (16 oz) dill pickle slices, drained and patted dry
  • For the coating:
  • 1/2 cup all-purpose flour
  • 2 large eggs, beaten
  • 1/2 cup panko breadcrumbs
  • 1/2 cup cornmeal
  • 1 tsp garlic powder
  • 1 tsp paprika
  • 1/2 tsp salt
  • 1/4 tsp black pepper
  • For serving:
  • 1/2 cup ranch dressing
  • 1/2 tsp cayenne pepper (optional)

Instructions

1. Prepare the Crust:

  1. Preheat the air fryer to 400°F (200°C) for 5 minutes.
  2. Set up a breading station with three shallow bowls: one with flour, one with beaten eggs, and one with a mixture of panko, cornmeal, garlic powder, paprika, salt, and pepper.
  3. Dredge each pickle slice in flour, shaking off excess. Dip in egg, then coat in the breadcrumb mixture, pressing gently to adhere.
  4. Place breaded pickles in a single layer in the air fryer basket, ensuring they don’t overlap. Lightly spray with cooking oil.
  5. Air fry for 8-10 minutes, flipping halfway, until golden and crispy.
  6. Repeat with remaining pickles in batches.
  7. Mix ranch dressing with cayenne pepper (if using) for dipping. Serve immediately.

Notes

For extra crispiness, let breaded pickles rest for 5 minutes before air frying. Store leftovers in an airtight container (reheat in air fryer for best texture).

Cottage Cheese Ice Cream

Cottage Cheese Ice Cream

If you’re looking for a creamy, protein-packed dessert that satisfies your sweet tooth without the guilt, cottage cheese ice cream is about to become your new obsession. This unexpected twist on traditional ice cream is surprisingly rich, velvety, and packed with wholesome ingredients. Whether you’re a health-conscious foodie or just someone who loves a good frozen treat, this recipe delivers on flavor and texture while keeping things light and nutritious. Let’s dive into why this cottage cheese ice cream deserves a spot in your dessert rotation.

Why You’ll Love This Recipe

First, let’s talk about what makes this cottage cheese ice cream so special. Here are just a few reasons why you’ll fall in love with this recipe:

  • High-protein indulgence – Unlike traditional ice cream, this version packs a protein punch thanks to cottage cheese, making it a smarter choice for dessert or even a post-workout treat.
  • Creamy without the heaviness – The texture is luxuriously smooth, but because cottage cheese is naturally lower in fat than heavy cream, it feels lighter on the palate.
  • Customizable flavors – Whether you love classic vanilla, rich chocolate, or fruity swirls, this base recipe adapts beautifully to endless flavor variations.
  • No ice cream maker needed – Skip the fancy equipment—this recipe comes together with just a blender and freezer, making it accessible for anyone.
  • Gut-friendly option – Cottage cheese contains probiotics, which can support digestion, making this a dessert you can feel good about.

Ingredients Breakdown

One of the best things about this cottage cheese ice cream is its simple, wholesome ingredient list. Here’s what you’ll need and why each component matters:

  • Cottage cheese – The star of the show. Opt for full-fat or low-fat depending on your preference, but make sure it’s smooth and creamy for the best texture.
  • Sweetener – Honey, maple syrup, or powdered sugar work beautifully. These dissolve easily and balance the slight tang of the cottage cheese.
  • Vanilla extract – A must for depth of flavor. Pure vanilla extract enhances the overall taste without overpowering the delicate dairy notes.
  • Milk or cream – A splash helps achieve the perfect consistency. Use dairy or a plant-based alternative like almond or oat milk.
  • Pinch of salt – Don’t skip this! Salt enhances sweetness and rounds out the flavors.

How to Make Cottage Cheese Ice Cream

Ready to whip up this dreamy dessert? Follow these simple steps for foolproof cottage cheese ice cream:

  1. Blend the cottage cheese – Add the cottage cheese to a high-speed blender and blend until completely smooth. This step is crucial for avoiding graininess.
  2. Add sweetener and flavorings – Pour in your choice of sweetener, vanilla extract, and a pinch of salt. Blend again until fully incorporated.
  3. Adjust consistency – If the mixture seems too thick, add a splash of milk or cream and blend until silky.
  4. Chill the mixture – Transfer the blended mixture to a freezer-safe container and let it chill in the freezer for about 1 hour before blending again. This prevents ice crystals from forming.
  5. Freeze until firm – After the initial chill, give it one more quick blend, then freeze for at least 4 hours or until firm.
  6. Scoop and enjoy – Let the ice cream sit at room temperature for a few minutes before scooping for the creamiest texture.

Pro Tips for the Best Results

Want to take your cottage cheese ice cream to the next level? Try these expert-approved tricks:

  • Use room-temperature cottage cheese – This helps it blend more smoothly, preventing lumps.
  • Add a splash of lemon juice – A tiny bit brightens the flavors and balances the sweetness.
  • Fold in mix-ins after blending – Chocolate chips, crushed cookies, or fresh fruit add fun texture.
  • Line your container with parchment – This makes it easier to remove the ice cream in one piece if you’re freezing it in a loaf pan.
  • Blend in stages – If your blender struggles, stop and scrape down the sides to ensure everything gets fully incorporated.

Variations and Substitutions

The beauty of this recipe is how adaptable it is. Here are some delicious ways to switch it up:

  • Chocolate lovers – Add 2 tablespoons of cocoa powder or melted dark chocolate to the blender.
  • Berry swirl – Swirl in homemade strawberry or raspberry puree before freezing.
  • Peanut butter cup – Mix in peanut butter and chopped chocolate for a decadent twist.
  • Dairy-free option – Use lactose-free cottage cheese or blend silken tofu with a bit of coconut cream.
  • Mocha madness – Stir in a shot of espresso or strong coffee for a caffeine kick.

What to Serve With It

Cottage cheese ice cream is delightful on its own, but pairing it with the right accompaniments can make it even more special. Try these serving ideas:

  • Fresh fruit compote – Warm berries or caramelized peaches add a lovely contrast.
  • Crunchy toppings – Toasted nuts, granola, or crushed waffle cones provide texture.
  • Drizzle of goodness – Chocolate sauce, caramel, or honey elevate the presentation.
  • With a warm dessert – Serve alongside apple crisp or a brownie for a hot-and-cold dessert experience.
  • As a breakfast treat – Top with granola and sliced bananas for a protein-rich morning indulgence.

How to Store and Reheat

Proper storage keeps your cottage cheese ice cream tasting fresh and creamy:

  • Freezing – Store in an airtight container with parchment pressed directly on the surface to prevent freezer burn.
  • Thawing – Let it sit at room temperature for 5-10 minutes before scooping for the best texture.
  • Long-term storage – Consume within 2 weeks for optimal flavor, though it’s so delicious, it probably won’t last that long.
  • No reheating needed – Since this is a frozen dessert, simply let it soften slightly before serving.

Frequently Asked Questions (FAQs)

Here are answers to some common questions about cottage cheese ice cream:

Can I use flavored cottage cheese?

While you can, it’s best to start with plain cottage cheese and add your own flavors. Pre-flavored varieties often contain added sugars and artificial ingredients that might alter the texture.

Why is my ice cream icy instead of creamy?

This usually happens if the mixture wasn’t blended smoothly enough or if it froze too quickly. Make sure to blend thoroughly and consider adding a tablespoon of alcohol (like vodka) to help prevent iciness.

Can I make this without a blender?

A food processor works too, but a blender gives the smoothest results. If you must mix by hand, press the cottage cheese through a fine mesh sieve first to eliminate lumps.

Is this recipe keto-friendly?

Yes! Simply use a keto-approved sweetener like erythritol and full-fat cottage cheese to keep it low-carb.

Can I double the recipe?

Absolutely. Just make sure your blender can handle the larger volume, or blend in batches.

Final Thoughts

Cottage cheese ice cream proves that healthy desserts don’t have to be boring. With its rich texture, customizable flavors, and protein-packed goodness, it’s a treat you can enjoy any day of the week. Whether you serve it at a summer barbecue, as an after-dinner delight, or even as a sneaky breakfast option, this recipe is sure to impress. The next time a sweet craving hits, skip the store-bought pints and whip up this homemade version instead—your taste buds (and your body) will thank you.

Print
clock clock iconcutlery cutlery iconflag flag iconfolder folder iconinstagram instagram iconpinterest pinterest iconfacebook facebook iconprint print iconsquares squares iconheart heart iconheart solid heart solid icon

Cottage Cheese Ice Cream

  • Author: Healthy Dessert Lover

Description

A creamy, high-protein ice cream made with cottage cheese for a guilt-free dessert that’s both delicious and nutritious.


Ingredients

Scale

For the Crust:

  • For the Ice Cream Base:
  • 2 cups cottage cheese (full-fat for creaminess)
  • 1/4 cup honey or maple syrup
  • 1 tsp vanilla extract
  • 1/2 cup milk (any type)
  • For Optional Mix-ins:
  • 1/2 cup fresh berries (strawberries, blueberries, etc.)
  • 2 tbsp dark chocolate chips
  • 1 tbsp nut butter (peanut or almond)

Instructions

1. Prepare the Crust:

  1. 1. Add cottage cheese, honey/maple syrup, vanilla extract, and milk to a blender.
  2. 2. Blend until completely smooth, scraping down the sides as needed.
  3. 3. Pour the mixture into a freezer-safe container.
  4. 4. If using mix-ins, gently fold them in now.
  5. 5. Freeze for at least 4 hours or until firm.
  6. 6. Let sit at room temperature for 5-10 minutes before scooping.

Notes

For a smoother texture, blend the cottage cheese alone first before adding other ingredients. Adjust sweetness to taste. Store in an airtight container for up to 2 weeks.

Baked Feta Pasta

Baked Feta Pasta

If you’re looking for a dish that’s creamy, tangy, and bursting with Mediterranean flavors, this baked feta pasta is your answer. This recipe took the internet by storm for good reason—it’s simple, delicious, and requires minimal effort for maximum flavor. Whether you’re cooking for a weeknight dinner or entertaining guests, this dish is a guaranteed crowd-pleaser. Let’s dive into why this recipe is so special and how you can make it perfectly every time.

Why You’ll Love This Recipe

There’s a reason baked feta pasta became a viral sensation. Here’s why you’ll adore it:

  • Effortless Elegance – With just a handful of ingredients and one baking dish, this recipe delivers restaurant-quality flavor without the fuss.
  • Creamy and Tangy Perfection – The feta cheese melts into a luscious, velvety sauce that clings to every strand of pasta, balanced by sweet roasted cherry tomatoes.
  • Versatile and Customizable – Whether you prefer gluten-free pasta, extra herbs, or a spicy kick, this dish adapts to your tastes effortlessly.
  • Perfect for Any Occasion – It’s equally suited for a cozy night in or a dinner party centerpiece.
  • Minimal Cleanup – Since everything bakes together in one pan, you’ll spend less time washing dishes and more time enjoying your meal.

Ingredients Breakdown

Every ingredient in this baked feta pasta plays a crucial role in creating its signature taste and texture:

  • Block of Feta Cheese – The star of the dish. A high-quality Greek feta ensures a rich, tangy flavor that melts beautifully.
  • Cherry Tomatoes – Their natural sweetness intensifies as they roast, creating a jammy, caramelized sauce.
  • Olive Oil – Use extra-virgin for the best flavor. It helps roast the tomatoes and feta while adding a silky richness.
  • Garlic – Thinly sliced or minced, it infuses the oil with aromatic depth.
  • Pasta – Penne, rigatoni, or fusilli work best, as their shapes hold the sauce well.
  • Fresh Basil or Oregano – Adds a bright, herbal finish that complements the creamy feta.
  • Red Pepper Flakes (Optional) – For a subtle heat that balances the dish.

How to Make Baked Feta Pasta

Follow these simple steps for a foolproof baked feta pasta:

  1. Preheat Your Oven – Set it to 400°F (200°C) to ensure even roasting.
  2. Prepare the Baking Dish – In a large oven-safe dish, scatter cherry tomatoes and garlic. Drizzle generously with olive oil and season with salt, black pepper, and red pepper flakes if using.
  3. Add the Feta – Place the block of feta in the center of the tomatoes, ensuring it’s nestled among them. Drizzle a bit more olive oil over the cheese.
  4. Roast – Bake for 25-30 minutes until the tomatoes burst and the feta turns golden and soft.
  5. Cook the Pasta – While the dish bakes, boil your pasta until al dente. Reserve a cup of pasta water before draining.
  6. Combine Everything – Once the tomatoes and feta are roasted, use a fork to mash them together into a creamy sauce. Toss in the cooked pasta, adding reserved pasta water as needed to loosen the sauce.
  7. Finish with Herbs – Stir in fresh basil or oregano for a pop of freshness.

Pro Tips for the Best Results

  • Use Full-Fat Feta – Low-fat versions won’t melt as smoothly or deliver the same richness.
  • Don’t Skip Pasta Water – The starchy liquid helps bind the sauce to the pasta.
  • Roast Until Bubbly – Let the tomatoes and feta caramelize fully for maximum flavor.
  • Add Lemon Zest – A little zest brightens the dish beautifully.
  • Try Different Tomatoes – Sun-dried tomatoes or heirloom cherry tomatoes add unique twists.

Variations and Substitutions

This recipe is wonderfully adaptable:

  • Gluten-Free – Use your favorite gluten-free pasta.
  • Vegan – Swap feta for a dairy-free alternative and add nutritional yeast for a cheesy flavor.
  • Protein Boost – Stir in grilled chicken, shrimp, or white beans.
  • Extra Veggies – Add roasted bell peppers, spinach, or zucchini.
  • Herb Variations – Thyme, rosemary, or parsley can replace basil.

What to Serve With It

Pair your baked feta pasta with:

  • A crisp green salad with lemon vinaigrette.
  • Garlic bread or crusty baguette for soaking up the sauce.
  • A light white wine like Sauvignon Blanc or Pinot Grigio.
  • Grilled vegetables for a heartier meal.

How to Store and Reheat

Leftovers keep well for up to 3 days in the fridge. Store in an airtight container. To reheat:

  • Stovetop – Warm gently in a pan with a splash of water or olive oil to revive the sauce.
  • Microwave – Heat in 30-second intervals, stirring in between.
  • Freezing – While possible, the texture may change slightly. Thaw overnight in the fridge before reheating.

Frequently Asked Questions (FAQs)

Can I use crumbled feta instead of a block?
A block works best because it melts evenly. Crumbled feta can dry out and won’t create the same creamy sauce.

What if I don’t have cherry tomatoes?
Grape tomatoes work well, or you can dice larger tomatoes—just adjust roasting time as needed.

Can I make this ahead of time?
You can roast the tomatoes and feta in advance, then combine with freshly cooked pasta when ready to serve.

Is this dish too salty?
Feta is naturally salty, so avoid adding extra salt until after tasting the final dish.

Can I add meat to this pasta?
Absolutely! Cooked sausage, bacon, or pancetta make delicious additions.

Final Thoughts

Baked feta pasta is more than just a trend—it’s a testament to how simple ingredients can create something extraordinary. Whether you’re a seasoned cook or a beginner, this dish is sure to impress. The creamy, tangy sauce paired with sweet roasted tomatoes is a match made in heaven. So grab your baking dish, preheat that oven, and get ready to fall in love with every bite. Don’t forget to share your creation—it’s too good not to pass along!

Print
clock clock iconcutlery cutlery iconflag flag iconfolder folder iconinstagram instagram iconpinterest pinterest iconfacebook facebook iconprint print iconsquares squares iconheart heart iconheart solid heart solid icon

Baked Feta Pasta

  • Author: Jane Doe

Description

A creamy and tangy pasta dish made with baked feta cheese, cherry tomatoes, and fresh herbs. This viral recipe is simple yet incredibly flavorful, perfect for a quick weeknight dinner.


Ingredients

Scale

For the Crust:

  • For the pasta:
  • 8 oz (225g) pasta (penne or fusilli recommended)
  • For the sauce:
  • 8 oz (225g) block of feta cheese
  • 2 cups (300g) cherry tomatoes
  • 3 cloves garlic, minced
  • 1/4 cup (60ml) olive oil
  • 1/2 tsp red pepper flakes (optional)
  • Salt and black pepper to taste
  • For garnish:
  • Fresh basil leaves, chopped
  • 1/2 tsp dried oregano

Instructions

1. Prepare the Crust:

  1. Preheat oven to 400°F (200°C).
  2. In a baking dish, place the feta block in the center and surround it with cherry tomatoes.
  3. Drizzle olive oil over the feta and tomatoes, then sprinkle minced garlic, red pepper flakes, salt, and black pepper.
  4. Bake for 30 minutes until the tomatoes burst and the feta turns golden.
  5. Meanwhile, cook pasta according to package instructions. Reserve 1/2 cup of pasta water before draining.
  6. Remove baking dish from oven. Mash the feta and tomatoes together with a fork until creamy.
  7. Add the cooked pasta and toss to coat. If needed, add reserved pasta water to loosen the sauce.
  8. Garnish with fresh basil and oregano before serving.

Notes

For extra flavor, add roasted garlic or sun-dried tomatoes. Vegetarian-friendly as-is, but can be topped with grilled chicken or shrimp for added protein.