Spicy Cajun Chicken and Shrimp Alfredo: A Quick Dinner Delight

Cajun Chicken and Shrimp Alfredo Recipe 🍝 – Easy Dinner Idea 🍴

⚖️
Difficulty
Medium

⏲️
Prep Time
15 mins

🕒
Cook Time
30 mins

⏱️
Total Time
45 mins

🍽️
Servings
4

Indulge in the ultimate comfort food experience with this Cajun Chicken and Shrimp Alfredo recipe. Combining succulent chunks of seasoned chicken and juicy shrimp with creamy, rich Alfredo sauce, this dish is perfect for a cozy dinner at home. The spice of Cajun seasoning beautifully complements the velvety Alfredo, creating a burst of flavor that’s both hearty and satisfying. Whether it’s a family meal or a special occasion, this easy dinner idea brings a taste of restaurant-quality pasta right to your table.

Experience the magic of flavors as bold Cajun spices meet smooth, creamy Alfredo sauce. Each bite is a delicious dance of textures—from the tender chicken and shrimp to the luxurious, silky pasta coating. The fusion of these distinct elements leads to a memorable culinary experience that will leave everyone craving for more. This Cajun Chicken and Shrimp Alfredo recipe is not just a meal; it’s an occasion in itself.

Quick Recipe Highlights

  • Flavor Profile: Expect a harmonious blend of spicy and creamy, with a hint of garlic and herbs.
  • Texture: Enjoy tender and juicy proteins with perfectly cooked pasta swimming in a luscious sauce.
  • Aroma: Smell the inviting mix of garlic, spices, and cheese as it fills your kitchen.
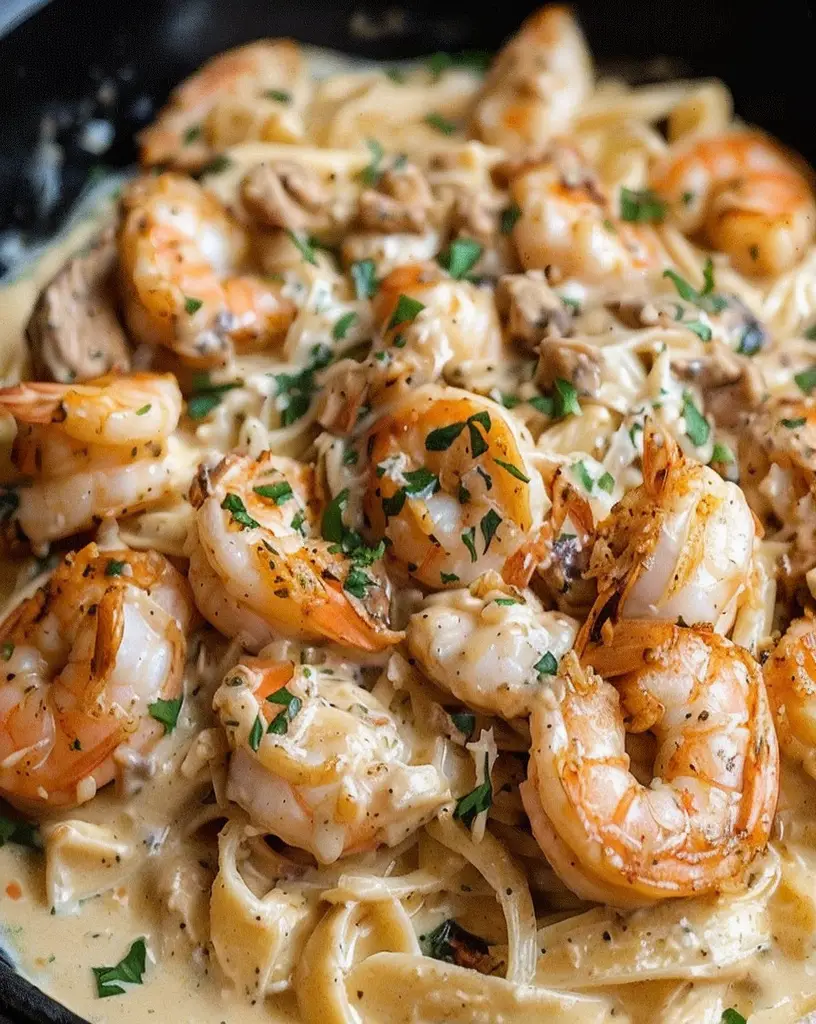
  • Visual Appeal: A vibrant mélange of golden-brown chicken, shrimp, and fresh parsley garnishes on a creamy pasta backdrop.
  • Skill Level Needed: Moderate skills required, mainly for timing and sequence management in cooking proteins and sauce simultaneously.
  • Special Equipment: Basic kitchenware like a pot, skillet, and strainer; optional use of a microplane for fresh parmesan.

Recipe Overview

  • Difficulty Level: Considered medium due to the need for multitasking between sauces and proteins but straightforward with prep done right.
  • Category: This recipe falls under main course and pasta categories, ideal for hearty dinners.
  • Cuisine: A satisfying fusion of Italian and Cajun cuisines, bringing creamy Alfredo together with spicy Southern flavors.
  • Cost: Relatively affordable, with chicken, shrimp, and cheese being the main cost factors balanced by pantry staples.
  • Season: Perfect year-round, although its warmth and spices suit colder months beautifully.
  • Occasion: Excellent choice for family dinners, date nights, and dinner parties where you aim to impress.

Why You’ll Love This Recipe


The Cajun Chicken and Shrimp Alfredo recipe stands out due to its unique taste and texture appeal. The spicy Cajun seasoning and creamy Alfredo sauce create a perfect contrast, resulting in a dish that’s both flavorful and comforting. The juicy shrimp and tender chicken add protein that complements the creamy pasta, making each bite a delightful experience.

Convenience is another big plus of this recipe. With a total cooking time of just 45 minutes, it’s an easy dinner idea perfect for busy weeknights. Preparation can be streamlined with simple ingredients and minimal cooking techniques, ensuring you can enjoy a delicious homemade meal without much hassle.

Nutritional advantages lie in its balance of protein from chicken and shrimp, along with carbs from pasta. While it’s rich, using fresh ingredients and controlled portions makes this recipe a relatively healthy indulgence. You can customize it further by adjusting the cream or opting for whole-grain pasta.

In terms of social and entertaining value, this dish garners compliments for its restaurant-style quality and impressive flavors. Whether it’s family night or Friday friends gathering, this recipe brings the wow factor to the dining table, encouraging interaction and enjoyment.

Cost-effectiveness and accessibility make it accessible for most shopping budgets, using a combination of pantry goods and fresh items like chicken and seafood. No need for exotic ingredients; its appeal lies in the quality and cooking techniques that enhance the flavors of everyday items.

Historical Background and Cultural Significance


Cajun cuisine has its roots in Southern Louisiana, influenced by French, African, and Spanish culinary traditions. This recipe takes inspiration from traditional Cajun cooking, which emphasizes bold spices and rich flavors, and combines it with Italian pasta culture, known for its creamy and cheesy bases.

The cultural importance of blending Cajun and Italian influences shines through in this recipe, illustrating the dynamic nature of American cuisine where diverse flavors come together. Such recipes showcase the adaptability of Cajun spices with globally loved dishes like Alfredo pasta.

Evolution of the recipe reflects modern palates that seek the thrill of fusion dishes. While traditional Cajun and Italian recipes stand robustly on their own, combining them creates a new culinary experience that satisfies multi-ethnic flavor cravings.

Regional variations might involve swapping shrimp for other seafood like crawfish or using different pasta types. Across regions, the basic principle remains: a spicy and creamy blend that unites contrasting textures and flavors into one harmonious dish.

Ingredient Deep Dive


Chicken is the star protein, offering culinary versatility and broad appeal. In southern cooking, chicken is often used as a base for flavor-rich meals. It absorbs Cajun spices well, enhancing both taste and aroma. Choose boneless, skinless chicken breast for the best texture in this recipe.

Nutritionally, chicken provides lean protein and essential minerals like selenium, known for supporting thyroid health and metabolism. It’s a staple protein choice due to its low-fat content and high vitamin B6 levels, crucial for heart health and energy metabolism.

Storage recommendations suggest raw chicken should be kept refrigerated or frozen, ideally consumed within two days of purchase when fresh. Opt for airtight containers or butcher paper for freezing to prevent freezer burn. For leftover cooked chicken, store it for up to four days in the refrigerator.

Substitution options can include boneless thighs for richer flavor or turkey breast for a leaner alternative. Ensure that any substitute follows appropriate cooking time adjustments for optimal tenderness.

Common Mistakes to Avoid

  • Overcooking the chicken can result in a dry texture. Ensure you sear the chicken until golden brown but not fully cooked, allowing it to finish in the sauce.
  • Using under-seasoned shrimp can dull the flavor profile. Marinate shrimp adequately with spices to match the dish’s bold taste.
  • Failing to properly time pasta cooking leads to soggy noodles; cook it al dente for the perfect bite.
  • Adding cream too quickly can cause it to break; instead, slowly incorporate it into your sauce for a smooth consistency.
  • Overuse of oil may result in a greasy dish, which can overshadow intended aromas and spices.
  • Not letting proteins rest before cutting leads to moisture loss; allow the chicken and shrimp to sit for a few minutes.
  • Ignoring garnish details limits visual appeal; fresh parsley or a sprinkle of parmesan can elevate presentation.
  • Using pre-made sauce negates custom flavor depth; making fresh Alfredo ensures tailored seasoning balance.

Essential Techniques


Mastering the searing technique is crucial here for that perfect crust on both chicken and shrimp. It creates complex flavors through the Maillard reaction, enhancing overall taste. Pat proteins dry to encourage browning, and avoid overcrowding the pan to prevent steaming.

Creating the creamy Alfredo sauce requires patience; continuous stirring and gradual heat prevent cream from curdling. Monitoring temperature helps maintain the sauce’s luxurious texture. Aim for silky smoothness as garlic and parmesan mingle with cream.

Cooking pasta properly means achieving an al dente texture, ensuring a perfect bite that stands firm against rich sauces. Stir pasta occasionally to prevent sticking, and avoid rinsing post-cooking to keep the surface starches, promoting sauce adhesion.

Visual cues include sauce thickening and pasta’s firm texture. The creamy sauce should cling to the spoon without being runny, indicating it’s ready. Practice makes perfect, so keep an eye on these subtle changes to gauge readiness.

Pro Tips for Perfect Cajun Chicken and Shrimp Alfredo


Use a combination of olive oil and butter to sauté, providing a rich, nutty background flavor while preventing burning due to butter’s lower smoke point. This combo sets the foundation for deep flavors in both chicken and shrimp.

Deglaze your pan with a splash of white wine before adding cream to incorporate fond, which consists of browned, flavorful bits left from searing. This step adds depth to your Alfredo sauce, heightening the dish’s overall taste.

Always reserve some pasta water when draining; this starchy water can adjust sauce consistency later if needed. It integrates seamlessly, providing perfect sauce coverage without adding extra cream.

Use high-quality parmesan for an authentic Alfredo touch. Freshly grated parmesan offers unmatched flavor and texture, avoiding the graininess of pre-grated varieties often treated with anti-caking agents.

Enhance Cajun seasoning with smoked paprika for an added layer of complexity and subtle smokiness, elevating the dish’s flavor profile beyond basics.

Balance out rich flavors with fresh herbs like parsley or basil. Use a sprinkle as garnish to cut through the creamy richness, adding color and freshness to the plating.

Variations and Adaptations


Regional variations could include incorporating Andouille sausage for an extra layer of Cajun flavor, offering a smokier and spicier kick. In coastal regions, opting for local fish can provide a fresh twist.

Seasonal adaptations involve using vegetables like asparagus or cherry tomatoes during spring for added brightness or substituting dairy-free cream alternatives during animal product scarcity.

For dietary modifications, gluten-free pasta varieties work efficiently without compromising texture, offering those sensitive to gluten a delicious alternative. Choose rice or chickpea-based pasta for best results.

Flavor adaptations are limitless; tweak spices to your preference by increasing cayenne for heat or incorporating lemon zest for a citrusy note that complements the seafood.

Texture modifications come through choosing different pasta shapes. Rigatoni or fusilli hold sauce well, while spaghettini offers a lighter texture contrast, allowing customization based on desired mouthfeel.

Presentation alternatives aim at layering pasta, sauce, and proteins almost lasagna-style for a dramatic reveal, or side-serving components for interactive meal assembly at the table.

Serving and Presentation Guide


Plating techniques often utilize wide bowls to emphasize pasta’s curvatures and sauce draping overtop, creating a natural focal point for other ingredients like chicken and shrimp.

Garnishing ideas include finely chopped parsley sprinkles or parmesan shavings, adding an elegant touch by providing vibrant color and contrasting textures on a creamy surface.

Traditional accompaniments recommended include garlic bread or a simple green salad, their crispiness and freshness balancing the richness and creaminess of the main dish.

Modern serving suggestions might explore nesting the pasta in individual bowls for controlled portions, designed to showcase carefully curated colors and textures with garnishes positioned strategically.

Temperature considerations highlight serving the pasta hot, ensuring the saucy coating remains luscious and enticing while avoiding dilution or separation, crucial for Alfredo.

Portion control tips focus on measuring pasta and proteins beforehand to maintain balance in servings, preventing any ingredient from overshadowing the others, thus preserving flavor harmony.

Wine and Beverage Pairing


Wine pairings suggest a crisp Chardonnay or Sauvignon Blanc for their acidity, which cuts through the sauce’s creaminess while enhancing the garlic and parmesan notes.

Non-alcoholic alternatives include sparkling water with a splash of lemon or lime, providing a refreshing cleanse between bites, highlighting the seasoning and texture interplay.

Coffee/tea pairing is unnecessary but could explore light green teas for their subtlety and palate-clearing properties, if served afterward.

Temperature considerations encourage chilled beverages to contrast the warm pasta, offering a refreshing balance especially during warmer weather.

Serving suggestions recommend ensuring wines or beverages are freshly chilled to maintain optimal flavor infusion, making them complement the rich notes of the Cajun Alfredo.

Storage and Shelf Life


Proper storage methods involve airtight containers for any leftovers, prolonging life by minimizing air exposure which can lead to spoilage or texture deterioration.

Temperature requirements guide keeping the dish refrigerated, as this helps maintain optimal freshness and safety, ideally consumed within 3-4 days post-cooking.

Container recommendations include using glass containers, which not only track freshness visually through transparency but guard against odor transfer, preserving dish purity.

Signs of spoilage often manifest in unpleasant odor changes or texture shifts, such as excessive separation in sauces or protein dryness, signaling the dish is no longer good for consumption.

Reheating instructions favor gentle warming in a skillet over low heat, adding a splash of milk if the sauce thickened due to chilling, ensuring even heat distribution without overcooking proteins.

Freezing guidelines should be conservative due to cream sauces which can undergo undesirable texture changes—if necessary, freeze separately from pasta to mitigate this.

Make Ahead Strategies


Make-ahead strategies involve prepping components like chopped vegetables, peeled shrimp, and spice mixtures up to two days earlier, reducing final day workload.

Storage between steps like sauce preparation ahead of time can streamline the cooking process on busy days, justifying its status as a quick easy dinner idea when planned correctly.

Quality impact assessment views advanced prepping for this dish as beneficial, maintaining flavor integrity while easing time-intensive tasks closer to serving.

Assembly tips encourage staging materials efficiently and considering individual servings for optimal presentation and speed during final assembly at mealtime.

Reheating guidelines favor low-heat methods to prevent chalky pasta or rubbery proteins. Keep backups such as cream on hand for texture refresh if needed.

Fresh element additions like herbs or grated cheese should be saved for just before serving, ensuring the freshest garnish touch and complementing reheated components.

Scaling Instructions


Scaling instructions are handy for adapting to different group sizes; doubling ingredients is straightforward but ensure sufficient pot size and staggered protein cooking for large batch results.

Halving recipes still hold proportional integrity; adjust pan sizes to maintain proper browning and simmering depth important for sauces and proteins.

Doubling or tripling requires careful attention to seasoning adjustments; taste tests are crucial for maintaining undercurrent notes like cayenne or garlic amidst increased volumes.

Equipment adjustments often involve more substantial skillets or extra pasta pots, allowing space for varied elements ensuring even and consistent cooking.

Timing modifications may mean staggered starts for proteins to avoid overcrowding or ingredient sequencing ensuring all elements are ready concurrently.

Storage considerations emphasize storing separate portions for large batches ensuring freshness and easy meal retrieval during post-production periods.

Nutritional Deep Dive


Nutritional deep dive highlights the recipe’s balance between protein, fat, and carbohydrates. chicken and shrimp provide lean protein, while cream and parmesan contribute to the flavorful fat content.

Micronutrient analysis offers insights into vitamins and minerals like B12 and selenium from shrimp, with calcium inputs provided by parmesan cheese, supporting bone health and energy metabolism.

Health benefits align with moderate fat intake, emphasizing portion sizes and ingredient choice like low-sodium broth or light cream to reduce sodium and saturated fats intake if desired.

Dietary considerations encourage awareness of Alfredo’s rich nature, aligning it with indulgent days or balanced with lighter meals in subsequent days.

Portion analysis demonstrates crucial balance, ensuring energy needs meet culinary satisfaction without excess, recognizing the importance of earning hearty dishes their rightful place within a holistic diet.

Weight management tips incorporate mindful pasta serving sizes while focusing on protein distribution within the dish, allowing flavorful enjoyment aligned with nutritional goals.

Dietary Adaptations


Gluten-free adaptations effortlessly utilize alternative pasta types like corn or quinoa-based options, avoiding gluten without sacrificing cooking quality or texture.

Dairy-free versions utilize plant cream substitutions and nutritional yeast for that umami cheesy essence, offering satisfying Alfredo flavors for those avoiding dairy.

Vegan approaches can transform proteins into tofu or plant-based alternatives, coupled with cashew cream sauces which replicate richness while remaining animal product-free.

Low-carb adaptations focus on vegetable noodles like zucchini zoodle options for a lighter yet equally delicious version of a traditionally carb-rich dish.

Keto-friendly variations prioritize high-fat components like cream and skip pasta, embracing veggie noodle alternatives maintaining this lifestyle’s fat-oriented approach.

Paleo diets find solace in chicken and shrimp while substituting traditional Alfredo components with nuts like macadamia for base textures aligning with Paleo ideals.

Low-FODMAP accommodations involve garlic-infused oils and gluten-free pasta adjustments, aligning with sensitive digestive needs still thrilled by Cajun Alfredo’s flavors.

Specific diets can always find refuge in simple component swaps or portions control, maintaining diet adherence without forfeiting flavor.

Troubleshooting Guide


Texture issues, such as grainy Alfredo sauce, often stem from overheating cream; ensure gradual temperature increases and constant stirring when whisking cheese.

Flavor balance discrepancies, like blandness, may result from inadequate seasoning amounts; consider increasing Cajun spices and salt levels as needed for desired depth.

Temperature problems, especially rubbery shrimp, may arise from overcooking; monitor cooking time carefully and remove proteins once just done.

Equipment challenges like small pans or crowded cooking spaces hinder proper searing; use adequate sizes ensuring proteins can brown effectively thus developing key flavors.

Ingredient substitutions demand testing given differences in moisture content or heat resistance, affecting overall cooking times necessary for consistency and desired outcomes.

Timing concerns seek resolution through detaching prep from production timing, verifying mise-en-place before cook commencement, guaranteeing seamless kitchen operations.

Recipe Success Stories


Community feedback highlights consistent success with recommended tweaks such as varied cheese applications or alternative spice experimentation for personalized preferences.

Variation successes feature intriguing results with novel protein combinations like smoked sausage or blackened fish – expanding typical expectations creatively.

Adaptation stories relate how diets like veganism embraced alterations maintaining Cajun Alfredo’s beloved flavor platform without compromise on lifestyle commitments.

Reader suggestions often lead to exploration like pasta shape shifts enhancing texture variety, producing remarkable impressions achieved through minor adjustments.

Photography tips emerge to catalyze culinary visual engagements – employ color contrasts and vibrant garnishes to elevate visually appealing captures for all to enjoy.

Frequently Asked Questions

Can I make this recipe ahead of time?

Yes, you can prep the sauce and proteins separately and combine them just before serving to ensure freshness and texture integrity.

What type of pasta is recommended?

Fettuccine is traditional for Alfredo, but penne or linguine can also work well, providing sturdy textures that hold the sauce effectively.

Is this recipe suitable for kids?

Yes, adjust the spiciness by reducing Cajun seasoning for milder tastes, making it a family-friendly choice adaptable to all ages.

How can I reduce the calorie content?

Replace heavy cream with a lighter version or use half-and-half, manage portion sizes and increase the vegetable content for added bulk.

Can I use frozen shrimp?

Yes, thaw them completely and pat dry before using to ensure a superb sear and prevent water release during cooking, which would affect texture.

What’s a good substitute for cream?

Coconut milk or cashew cream can act as substitutes for a dairy-free version, altering the base subtly but effectively retaining Alfredo creaminess.

What should I do if my sauce breaks?

Whisk vigorously off heat with a splash of warm water or cream, stabilizing the mixture to restore smoothness and maintain cohesiveness.

Are there vegan variations for this recipe?

Absolutely, substitute dairy and proteins with plant-friendly options like tofu and almond milk-based sauce, ensuring compatibility with dietary preferences.

How long can leftovers be stored?

Properly refrigerated in airtight containers, keep leftovers fresh for up to 3-4 days, ensuring they maintain flavor and quality upon reheating.

Can I add vegetables to this recipe?

Definitely, incorporating vegetables such as spinach, bell peppers, or zucchini aligns with taste and texture profiles while boosting nutritional intake.

What’s the best way to reheat this dish?

Reheat gradually on the stovetop over low heat, adding a touch of milk if needed to return the sauce’s creamy consistency while avoiding protein overcooking.

What goes well with Cajun Chicken and Shrimp Alfredo?

Pair with garlic bread, a light green salad, or even a refreshing fruit salad to complement the rich flavors presented by this dish.

Additional Resources


Explore related recipes like classic Alfredo variations or spicy Cajun jambalaya, uncovering new dimensions of flavor and culinary challenges.

Technique guides focusing on mastering roux preparation, whisking techniques, or protein searing offer valuable insights for elevating kitchen skills.

Ingredient information delves into detailed analyses and spotlight features on local or seasonal items surrounding the Cajun Chicken and Shrimp Alfredo ensemble, enriching culinary understanding.

Equipment recommendations include worthy investments for sustaining cooking enjoyment, from multifunctional cookware pieces to cutting-edge kitchen tools enhancing recipe executions.

Seasonal variations provide inspiration for ingredient rotations, ensuring adaptability in varying climates or harvest periods, celebrating sustainable and locally-sourced cooking.

Join the Conversation


Engage with us on social media platforms where community exchanges bring fresh insights, sharing proud culinary outcomes, swaps, or story-rich recipe journeys with fellow enthusiasts.

Offer photography tips that accentuate recipe appeal through favorable lighting, composition strategy, and creative angle selection, enticing wider audience reach with visual allure.

Share personal recipe reviews and highlight journeys, enabling learning opportunities from variations attempted and experiences shared, fostering dialogue and mutual growth.

Nurture community engagement via user-submitted ideas, expanding recipe explorations, and experimenting with proposed modifications that resonate positively within shared spaces.

Express love for flavors through hashtag participation, connecting global enthusiasts collaborating over shared Cajun Chicken and Shrimp Alfredo experiences.

The Recipe

Cajun Chicken and Shrimp Alfredo

Serves: 4

Prep Time: 15 mins

Cook Time: 30 mins

Total Time: 45 mins

Kitchen Equipment Needed

  • Large skillet
  • Pot for boiling pasta
  • Knife and cutting board
  • Grater for fresh parmesan

Ingredients

  • 2 boneless, skinless chicken breasts
  • 1 pound shrimp, peeled and deveined
  • 2 tablespoons Cajun seasoning
  • 3 tablespoons olive oil
  • 1 cup heavy cream
  • 1 cup grated parmesan cheese
  • 3 cloves garlic, minced
  • 12 ounces fettuccine pasta
  • Salt and pepper to taste
  • Fresh parsley, chopped for garnish

Directions

  1. Cook the fettuccine pasta according to package instructions until al dente. Drain and set aside.
  2. Season the chicken breasts with Cajun spice, salt, and pepper.
  3. Heat olive oil in a skillet over medium heat. Add the chicken and cook until golden brown and cooked through. Remove and set aside.
  4. In the same skillet, add shrimp and cook until pink and opaque. Remove and set aside.
  5. Add minced garlic to the skillet, sauté until fragrant. Pour in heavy cream, stirring constantly.
  6. Reduce the heat and stir in the parmesan cheese until the sauce is smooth and creamy.
  7. Return the chicken and shrimp to the skillet to reheat and coat with sauce.
  8. Toss pasta with the sauce until well-coated. Serve with chopped parsley sprinkled on top.

Recipe Notes

  • Marinate shrimp with lemon juice before seasoning for additional zing.
  • If the sauce thickens too much, thin it out with reserved pasta water.

Southern Style Loaded Mashed Potato Cakes: A Comfort Food Classic

mashed potato cakes, loaded potato patties, cheesy potato cakes, Southern potato recipes, crispy potato cakes

Southern Style Loaded Mashed Potato Cakes: A Classic Comfort Dish

Southern Style Loaded Mashed Potato Cakes are a heartwarming combination of crispy exteriors and creamy, savory interiors. Packed with comforting ingredients like mashed potatoes, cheese, bacon, and green onions, this dish epitomizes Southern comfort food. Whether you serve them as an appetizer, side dish, or even a main course, these potato cakes are sure to please any crowd.

For more hearty recipes, check out our guide to Crockpot Potato Soup with Hashbrowns for another comforting way to use potatoes. Or, if you’re looking for more appetizers, try our Spinach Pepperoni Bread, a perfect pairing with these cakes.


Why You’ll Love Southern Style Loaded Mashed Potato Cakes

These Southern Style Loaded Mashed Potato Cakes offer:

  • Incredible Flavor: A blend of cheddar cheese, smoky bacon, and green onions adds rich, savory notes.
  • Versatility: Serve them with eggs for breakfast, pair them with meat for dinner, or enjoy them as a snack.
  • Crowd Appeal: Easy to make and even easier to devour, these cakes are always a hit at gatherings.

Enhance your experience by pairing this dish with our Garlic Steak & Potato Foil Packets for a complete meal idea.


Ingredients You’ll Need

  • 2 cups mashed potatoes (leftover works best)
  • 1 cup shredded cheddar cheese
  • 4 slices cooked bacon, crumbled
  • 2 green onions, thinly sliced
  • 1 large egg
  • 1/4 cup all-purpose flour (plus more as needed)
  • 1/2 teaspoon garlic powder
  • Salt and pepper, to taste
  • Cooking oil, for frying

For additional Southern-inspired recipes, explore Kentucky Butter Cake for a sweet finale to your meal.


How to Make Southern Style Loaded Mashed Potato Cakes

1. Prepare the Ingredients

  • In a large mixing bowl, combine the mashed potatoes, cheese, bacon, and green onions.
  • Add the egg, flour, garlic powder, salt, and pepper, mixing until well-combined.

2. Shape the Potato Cakes

  • Form the mixture into small patties, approximately 2-3 inches in diameter.
  • Place the patties on a parchment-lined baking sheet and refrigerate for 20 minutes to firm up.

3. Cook to Crispy Perfection

  • Heat a skillet over medium heat and add a thin layer of oil.
  • Fry the patties in batches, cooking for 3-4 minutes per side until golden brown and crispy.

4. Serve and Enjoy

  • Garnish with sour cream, additional green onions, or even a sprinkle of paprika for added flavor.

Pro Tips for Perfect Potato Cakes

  • Use Stiff Mashed Potatoes: Leftovers are ideal because they are firmer and easier to shape.
  • Chill the Mixture: Refrigerating the patties before frying helps them hold their shape.
  • Don’t Overcrowd the Pan: Fry in batches to maintain even cooking and prevent sticking.

Serving Suggestions

Pair your Loaded Mashed Potato Cakes with:

  • Dipping Sauces: Sour cream, ranch dressing, or spicy sriracha mayo.
  • Salads: A fresh garden salad for a lighter pairing.
  • Grilled Meats: These cakes make a perfect side dish for grilled chicken or steak.

For more serving ideas, explore our collection of Southern Style Recipes.


FAQs About Southern Style Loaded Mashed Potato Cakes

1. Can I bake these instead of frying?

Yes! Preheat your oven to 400°F (200°C) and bake the patties on a greased baking sheet for 20 minutes, flipping halfway through.

2. What can I use as a cheese substitute?

You can use Monterey Jack, mozzarella, or a dairy-free cheese alternative.

3. Can I freeze these for later?

Absolutely! Freeze the patties on a baking sheet until solid, then transfer to a freezer-safe bag. Reheat in the oven or skillet.


Nutritional Information

Per Serving (Approx. 2 Cakes):

  • Calories: 220
  • Protein: 8g
  • Carbohydrates: 20g
  • Fat: 12g

Explore More Delicious Recipes


Final Thoughts

Southern Style Loaded Mashed Potato Cakes are a celebration of comfort and flavor, offering a versatile dish perfect for any occasion. Whether you’re using leftovers creatively or making a batch for a dinner party, these cakes will always steal the spotlight.

For more comfort food inspiration, don’t miss our Slow Cooker Beef Stew—another hearty dish to warm your soul!

Bakery-Style Pistachio Muffins Made Easy: A Delicious Recipe

Easy Bakery-Style Pistachio Muffins: The Perfect Homemade Treat

⚖️
Difficulty
Easy

⏲️
Prep Time
15 mins

🕒
Cook Time
20 mins

⏱️
Total Time
35 mins

🍽️
Servings
12 muffins

Baking delicious pistachio muffins at home has never been easier with our Easy Bakery-Style Pistachio Muffins recipe. These delightfully nutty and moist muffins are perfect for a quick breakfast or an indulgent afternoon snack. Infused with the rich, buttery flavor of pistachios, these muffins will fill your kitchen with an irresistible aroma that beckons everyone to gather around. Imagine biting into a fresh muffin with a crisp top and a fluffy center, each mouthful rich with the delightful crunch of pistachios.

These bakery-style pistachio muffins are a breeze to make, even for novice bakers. The simple ingredients and straightforward method ensure that everyone can enjoy freshly baked goodies at home. Perfect for weekend baking with family or as a gift for friends, these muffins capture the essence of cozy, homemade treats while bringing a touch of gourmet flair to your table. With their wonderful texture and rich flavor profile, they are bound to become a household favorite.

Quick Recipe Highlights

  • Flavor Profile: A delightful blend of nutty pistachios and a hint of sweetness balanced perfectly.
  • Texture: Soft and fluffy with a slightly crispy top, complemented by crunchy pistachio pieces.
  • Aroma: A warm, nutty scent filled with notes of toasted pistachios and sweet vanilla.
  • Visual Appeal: Vibrant green speckles of pistachios within a golden-brown muffin base make these visually stunning.
  • Skill Level Needed: Suitable for all skills due to the simple instructions and readily available ingredients.
  • Special Equipment: Requires just basic baking tools like a muffin tin and an electric mixer.

Recipe Overview

  • Difficulty Level: These pistachio muffins are rated easy, given their simple preparation and basic ingredients. A relaxing bake for beginners, they make for a rewarding starting point in baking.
  • Category: Ideal for breakfast or dessert, these muffins can also act as a delightful snack option.
  • Cuisine: With a touch of Middle Eastern culinary tradition, pistachios add a nutty, sophisticated flavor common in Mediterranean and Middle Eastern desserts.
  • Cost: This recipe is budget-friendly, with common pantry ingredients supplemented by pistachios, which can be sourced economically in bulk.
  • Season: A year-round favorite, though perfectly suited for spring and autumn when nutty flavors feel most comforting.
  • Occasion: Perfect for brunches, holidays, family gatherings, or as a thoughtful homemade gift.

Why You’ll Love This Recipe


The flavors of these bakery-style pistachio muffins are undeniably appealing, combining the subtle sweetness of vanilla with the rich, nutty essence of pistachios. The texture is sublime — the muffins rise beautifully, with a tender crumb and a slightly crisp exterior that gives way to a moist interior. Preparation is a breeze because you only need basic kitchen tools, and the entire process, from mixing to baking, takes just over half an hour.

Convenience is another benefit — these muffins come together with minimal fuss, and you can store them easily for a few days without losing freshness. Nutritionally, they offer a decent amount of protein and fiber from the pistachios, making them a more wholesome choice than traditional sugary muffins.

For those who entertain, these muffins are perfect for anything from brunch gatherings to elegant high teas. They’re also delightfully portable, making them a great choice for picnics or as a snack on the go. Cost-effective and requiring no specialized or hard-to-find ingredients, these muffins provide bakery-level satisfaction at a fraction of the price.

Historical Background and Cultural Significance


Pistachios have a rich history, believed to originate in the Middle East thousands of years ago. They were considered a symbol of wealth and prosperity, often enjoyed by royalty. Over the centuries, pistachios became integral to various culinary traditions, from Middle Eastern sweets to Indian desserts.

Incorporating pistachios into baked goods like muffins not only highlights their versatility but also celebrates their unique flavor, which stands out beautifully. Muffins, originally introduced as convenient, portion-sized bakery items, complement the pistachio’s robust profile, creating a delicious fusion.

Regional variations of pistachio baked goods exist, each with its twist. Some add cardamom or rosewater for a more authentic Middle Eastern taste. Exploring these variations can open up a world of flavors and styles, each reflecting rich cultural heritages.

Ingredient Deep Dive


Pistachios: These vibrant nuts have been celebrated in cuisines around the globe, prized for their unique flavor and rich nutritional profile. They are a good source of healthy fats, protein, and fiber. When selecting pistachios, opt for unsalted varieties to control the recipe’s sodium content. Store them in a cool, dry place or freeze them to retain freshness.

Flour: A crucial base for muffins, choose all-purpose flour for a tender crumb. For a healthier alternative, consider substituting half with whole wheat flour. Store flour in an airtight container in a cool space to prevent oxidation and spoilage.

Vanilla Extract: This ingredient enhances sweetness without overpowering flavor, grounding the nutty notes of the pistachios. Pure vanilla offers the best quality and should be stored at room temperature in a dark cupboard to maintain its aroma.

Common Mistakes to Avoid

  • Overmixing Batter: Stir just until combined to avoid tough muffins.
  • Using Stale Nuts: Ensure pistachios are fresh to avoid a bitter aftertaste.
  • Skipping Room Temperature Ingredients: Use them for better texture and mixing.
  • Improper Measuring: Measure ingredients accurately to ensure proper consistency.
  • Ignoring Oven Temperature: Preheat and calibrate your oven for even baking.
  • Filling Muffin Cups Incorrectly: Fill to 2/3 full to account for rising.
  • Opening Oven Door During Baking: Resist to preserve heat and allow even rising.
  • Forgetting to Cool: Let muffins rest to finish cooking internally.

Essential Techniques


Sifting the dry ingredients is crucially important to create airy muffins, removing lumps, and evenly distributing leavening agents like baking soda or powder. To master this, sift flour and powders through a fine mesh sieve to incorporate air and fluff the texture.

Batter folding prevents gluten overdevelopment, maintaining muffin softness. Using a spatula, fold gently from bowl edges to center, lifting batter underneath, ensuring even ingredient distribution without overworking.

Pro Tips for Perfect Easy Bakery-Style Pistachio Muffins


Maintain ingredient freshness — especially for nuts and flour — to keep flavors vibrant. For added aroma, lightly toast pistachios before incorporating them into the batter. Balance sweetness by adjusting sugar levels based on personal taste preference. Use muffin liners for easy removal and presentation or grease tins well if you opt-out. Experiment with mix-ins like chocolate chips or dried cranberries to diversify each batch’s flavor profile.

Variations and Adaptations


Incorporate additional ingredients based on regional influences — add cardamom for a Middle Eastern touch, or citrus zest for brightness. Seasonally adapt with berries in summer or cranberries in winter for a festive twist. For a vegan version, use non-dairy milk and flaxseed meal instead of eggs. You can present them as mini muffins: simply adjust the baking time to ensure they bake through without burning.

Serving and Presentation Guide


To showcase your bakery-style pistachio muffins, consider serving them on a wooden platter with a garnish of chopped pistachios. A light dusting of powdered sugar adds a professional touch, while a splash of color like a side of fresh berries can enhance presentation. Serve warm to highlight the texture, offering them with cream cheese or a dollop of jam to contrast the muffin’s nutty flavor. Adjust size for portion control or add decorations but serve a room temperature for optimal enjoyment.

Wine and Beverage Pairing


Pair your muffins with a light, fruity wine like a Moscato for a delightful afternoon tea treat. For non-alcoholic options, a refreshing glass of iced green tea complements the nutty aroma, while a creamy cappuccino adds warmth for a cozy breakfast. Ensure both are served at suitable temperatures to accentuate flavors without overpowering the muffin’s nuances. Present beverages in elegant serving glasses to match your muffins’ bakeshop aesthetic.

Storage and Shelf Life


To store pistachio muffins, use airtight containers to keep them fresh for three days at room temperature. Refrigeration extends freshness slightly but may alter texture. Muffins freeze well — wrap individually in plastic, then place in a freezer bag. Thaw at room temperature before gently reheating them in an oven with a sprinkle of water to avoid drying out.

Make Ahead Strategies


Prepare pistachio muffin batter in advance, storing it chilled and covered for up to 24 hours. Alternatively, consider baking the night before and storing muffins in an airtight container once cooled. Incorporating freshly chopped pistachios just before baking preserves their flavor and crunch. When reheating, sprinkle with a dash of water and briefly heat in a pre-warmed oven to regain freshness without sacrificing moisture or texture.

Scaling Instructions


To halve the recipe for small batches, use precise measurements for consistent results. For large gatherings, double or triple the recipe, ensuring your mixing bowl and baking sheets can accommodate increased quantities. Adjust baking times slightly as larger muffins require longer cooking. Increase cooling rack space to allow room for additional muffins, preserving them beautifully as they cool, one of the secrets to professional-quality baked goods.

Nutritional Deep Dive


The pistachio muffins blend carbohydrates and proteins for sustained energy, while fat from nuts adds satiety. Pistachios boost magnesium and potassium levels, contributing to essential bodily functions. Consider portion sizing when indulging — half a muffin may suffice for mindful calorie consumption. For lower-calorie variants, cut sugar portions or replace oil with applesauce, transforming it for those with dietary restrictions.

Dietary Adaptations


For a gluten-free option, substitute all-purpose flour with a gluten-free blend while maintaining texture and fluffiness. Implement dairy-free variations with almond or soy milk replacements. Vegans will appreciate plant-based butter instead of regular butter, alongside flax eggs for binding. Modify sugars for low-carb or keto requirements using sweeteners like stevia. Implement historical ingredients like almond flour for paleo adherence, enhancing the muffins’ flavor depth.

Troubleshooting Guide


Address common texture issues by adjusting flour ratios to refine crumb consistency. If flavors are unbalanced, enhance sweetness or acidity with sugar or citrus zest. For temperature evenness, use a reliable oven thermometer to calibrate. Equipment mismatches arise with batters in mixers—use portable hand mixers instead. Substituting ingredients may affect flavor — reassess spices or mix-ins to retain quality. Finally, adjust baking time by trial testing before committing to batch production.

Recipe Success Stories


Community feedback repeatedly highlights the ease and delicious result of this pistachio muffin recipe. Experimentation with additions like white chocolate chips or coconut shavings has yielded successful new favorites. Readers consistently note the impressive bakery-quality achieved, even by those new to baking. Their posts and photographs illustrate diverse serving styles, adding to the recipe’s appeal and establishing it as a staple on breakfast tables and dessert trays alike.

Frequently Asked Questions

Can I use salted pistachios? It’s best to use unsalted pistachios to control the muffin’s saltiness. If using salted nuts, consider adjusting the added salt in the recipe.
How do I store leftover pistachios? Keep them in an airtight container in a cool, dark place or freeze them to maintain freshness.
What if I don’t have muffin liners? Simply grease your muffin tins well with oil or butter to prevent sticking.
Can these muffins be made without a mixer? Yes, you can mix by hand; just ensure all ingredients are combined thoroughly.
Are there dairy-free options for this recipe? Substitute dairy milk with almond or oat milk and butter with a plant-based alternative.
How do I know when the muffins are done? Muffins are done when a toothpick inserted in the center comes out clean.
Can I use other nuts instead? Absolutely, almonds or walnuts provide a tasty alternative.
How do I ensure a smooth batter? Combine dry and wet ingredients until just mixed to prevent lumps.
How can I prevent dry muffins? Avoid overbaking and ensure accurate ingredient measuring.
What’s the best way to freeze muffins? Wrap individually in plastic wrap, place in a freezer bag, and store for up to three months.

Additional Resources


For those interested in further baking ventures, explore our related recipes like almond biscotti or hazelnut cake, each with a unique twist. Enhance techniques with guides that delve into baking science, while ingredient explorations offer insights into choosing the perfect produce. Equipment endorsements help perfect your baking setup for professional results. This pistachio muffin recipe can evolve seasonally, adapting flavors and ingredients to align with climate and mood changes, ensuring year-round enjoyment.

Join the Conversation


Share your pistachio muffin creations on social media and tag us to join fellow enthusiasts in showcasing this scrumptious bake. Photography tips enhance presentation — focus on lighting and composition for alluring shots. Leave a recipe review and explore reader variations, adding your twist to enhance flavor or presentation. Engage with our community by sharing your unique adaptations and experiences using our forum, where creativity in baking knows no bounds.

The Recipe

Easy Bakery-Style Pistachio Muffins

Serves: 12 muffins

Prep Time: 15 mins

Cook Time: 20 mins

Total Time: 35 mins

Kitchen Equipment Needed

  • Muffin Tin
  • Electric Mixer
  • Mixing Bowls
  • Spatula
  • Sieve
  • Measuring Cups and Spoons

Ingredients

  • 1 cup all-purpose flour
  • 1/2 teaspoon baking powder
  • 1/4 teaspoon baking soda
  • 1/2 cup unsalted butter, melted
  • 2/3 cup granulated sugar
  • 2 large eggs
  • 1 teaspoon vanilla extract
  • 1/2 cup milk
  • 1 cup pistachios, shelled and chopped
  • Pinch of salt

Directions

  1. Preheat your oven to 350°F (180°C) and line a muffin tin with paper liners or grease well.
  2. In a bowl, sift together the flour, baking powder, and baking soda. Set aside.
  3. In another large bowl, beat the melted butter and sugar until creamy.
  4. Add eggs one at a time, mixing well after each addition.
  5. Stir in vanilla extract.
  6. Alternately add the flour mixture and milk to the butter mix, beginning and ending with the flour.
  7. Gently fold in the chopped pistachios.
  8. Divide batter among muffin cups, filling each 2/3 full.
  9. Bake for 18-20 minutes or until a toothpick inserted comes out clean.
  10. Allow muffins to cool in the pan for 5 minutes before transferring to a wire rack.

Recipe Notes

  • For a nut-free version, omit pistachios or replace with a fruit substitute.
  • Experiment with flavor by adding citrus zest or spices.

Irresistible Mozzarella Cheesesteak Stromboli: A Delicious Twist on a Classic

Mozzarella Cheesesteak Stromboli: A Savory Delight

⚖️
Difficulty
Medium

⏲️
Prep Time
20 mins

🕒
Cook Time
25 mins

⏱️
Total Time
45 mins

🍽️
Servings
4

Dive into the rich, savory flavors of the Mozzarella Cheesesteak Stromboli. This delicious recipe combines the goodness of a classic cheesesteak and wraps it in a warm, flaky breading that is both satisfying and comforting. With its perfect blend of mozzarella cheese and tender beef, this stromboli embodies the essence of comfort food. The Mozzarella Cheesesteak Stromboli is perfect for family dinners and gatherings.

Quick Recipe Highlights

  • Flavor Profile: A delightful combination of cheesy goodness with the savory taste of beef, highlighted by spices and herbs.
  • Texture: A crispy exterior envelops a warm, gooey center that melts in your mouth.
  • Aroma: Tempting notes of melted cheese and spices fill the air, enticing your senses.
  • Visual Appeal: A golden brown, flaky crust with oozing cheese peeping through the scored edges.
  • Skill Level Needed: Medium; requires some experience in dough handling and rolling techniques.
  • Special Equipment: A baking sheet and sharp knife for scoring the dough.

Recipe Overview

  • Difficulty Level: The recipe is moderately difficult, primarily due to dough preparation and filling distribution. It requires an intermediate understanding of baking and rolling.
  • Category: Perfect as a main dish or appetizer for gatherings.
  • Cuisine: This fusion dish combines traditional Italian-style stromboli with the iconic American cheesesteak.
  • Cost: The recipe is budget-friendly, reliant on basic ingredients like mozzarella, beef, and dough.
  • Season: Ideal for all year round, especially comforting in colder months when warm, hearty meals are desired.
  • Occasion: Great for family dinners, game nights, or casual get-togethers with friends.

Why You’ll Love This Recipe


Mozzarella Cheesesteak Stromboli is a crowd-pleaser, marrying rich taste with a pleasing texture. The melted mozzarella and tender beef provide indulgent satisfaction in every bite. The crispy crust adds a delightful contrast, making each serving a complete sensory experience. Its convenience lies in its straightforward preparation; the stromboli is easy to assemble and bake, making it a perfect option for busy weeknights. Nutritionally, it offers a hearty source of protein and calcium, essential for growth and maintenance of bones and muscles.

Socially, this dish is fantastic for entertaining. It serves well as an appetizer that can be casually enjoyed at parties. Its budget-friendly ingredients make it accessible for all. Cost-effectiveness is furthered by the use of readily available supermarket items, making it a hassle-free culinary endeavor for any home cook.

Historical Background and Cultural Significance


The stromboli originates from Italian-American culinary traditions. Its name derives from the Italian word for an island, known for its volcanic features, which metaphorically relate to the molten cheese and rich fillings encased within the dough. Cultural importance lies in its representation of Italian immigration influences on American cuisine. Over time, it evolved from traditional recipes, adapting to local tastes and ingredient availability.

Regionally, variations of stromboli reflect diverse flavor profiles, such as incorporating local cheeses and meats. These adaptations showcase the versatility and enduring appeal of this beloved dish, which continues to delight generations of food enthusiasts.

Ingredient Deep Dive

**Mozzarella Cheese**: A staple in Italian cuisine, mozzarella is renowned for its melting qualities, traditional in pizzas and other baked dishes. Rich in calcium and protein, it supports bone health. Choose fresh, quality mozzarella for the best flavor. Store in a refrigerator and use within a week of purchase. Substitute with smoked mozzarella for a unique twist.

**Beef**: Central to the cheesesteak experience, beef adds depth and richness. Opt for cuts like sirloin for optimal tenderness and flavor. It provides essential nutrients like iron and zinc. Store raw meat in the coldest part of the fridge and consume it within a few days of purchase. Substitutions include chicken or plant-based alternatives for dietary preferences.

Common Mistakes to Avoid

  • Overfilling: Avoid stuffing the stromboli excessively to prevent bursting during baking.
  • Under-baking: Ensure a fully baked crust to achieve the desired crispy texture.
  • Improper sealing: Securely pinch dough edges to contain the fillings.
  • Skipping resting: Let dough rest before rolling for easier handling.
  • Uneven filling distribution: Spread evenly to ensure balanced bites.
  • Overcooking beef: Cook just until tender to avoid toughness.
  • Excessive seasoning: Balance flavors without overwhelming the dish.
  • Direct refrigeration: Let stromboli cool before refrigerating to prevent sogginess.

Essential Techniques

**Dough Rolling**: Mastering dough rolling is crucial for a uniform stromboli. Ensure to apply even pressure and avoid tearing. Roll to the recommended thickness for the perfect bake.

**Filling Preparation**: Precise cutting of beef and cheese ensures optimal filling distribution within the stromboli. It enhances flavor uniformity in every bite.

Pro Tips for Perfect Mozzarella Cheesesteak Stromboli

– Use a pastry brush to apply an egg wash over the dough for a superior golden finish.
– Allow cooked beef to cool slightly before adding it to the dough, preventing premature melting of cheese.
– Score the stromboli top carefully to allow steam to escape and prevent bursting.
– Experiment with herbs like oregano and basil in the cheese mix for additional depth.
– Avoid over-kneading the dough to maintain a light, airy texture.
– Let the stromboli cool for a few minutes post-baking, making slicing clean and easier.

Variations and Adaptations

**Regional Variations**: In the northeastern US, variations might incorporate local cheeses or spicy peppers for added heat.

**Seasonal Adaptations**: Incorporate seasonal vegetables like bell peppers or mushrooms to complement traditional fillings.

**Dietary Modifications**: Substitute with gluten-free dough for those with dietary sensitivities, ensuring cross-contamination prevention.

Serving and Presentation Guide

Serve the Mozzarella Cheesesteak Stromboli sliced, revealing its luscious layers. Pair with a fresh salad for contrast or classic marinara sauce on the side for dipping. Presentation on a wooden board adds a rustic touch, enhancing the dining experience. Consider room temperature or slightly warm servings for optimal flavor release.

Wine and Beverage Pairing

Pairing this stromboli with a robust red wine like Cabernet Sauvignon complements its rich flavors. For non-alcoholic options, a sparkling water with lemon provides a refreshing contrast. Consider serving beverages slightly chilled to balance the warmth of the dish.

Storage and Shelf Life

Store leftovers in an airtight container in the refrigerator for up to 3 days. Reheat in a preheated oven to maintain the crispy texture, avoiding microwaves to prevent sogginess. For longer storage, consider freezing portions and reheating directly from frozen.

Make Ahead Strategies

Prepare the dough and cook the fillings in advance, storing them separately. Assemble shortly before baking for an efficient meal prep solution without compromising quality. Reheat leftovers with a fresh herb garnish for a revitalized taste.

Scaling Instructions

For larger gatherings, double the recipe ingredients, ensuring to adjust bake time accordingly. Utilize multiple baking sheets to avoid overcrowding and allow even heat distribution. Consider preparation in batches, maintaining an optimal workflow.

Nutritional Deep Dive

The Mozzarella Cheesesteak Stromboli provides substantial protein, essential for muscle health. Its calcium-rich cheese supports bone strength. Pair with vegetables to offset caloric intake, promoting a balanced meal. Mindful portioning aids weight management.

Dietary Adaptations

Create a dairy-free version using vegan cheese alternatives. Gluten-free flour can accommodate those with intolerances. Adjust the filling with plant-based beef for a vegan adaptation, ensuring meticulous seasoning to replicate flavors.

Troubleshooting Guide

If the crust is too pale, increase bake time slightly for a crispier finish. Ensure fillings are pre-cooked to prevent release of excess moisture that can lead to a soggy bottom. In case of dryness, reduce oven temperature for a better bake.

Recipe Success Stories

Our readers rave about the Mozzarella Cheesesteak Stromboli’s crowd-pleasing comfort. Many return to the recipe with personal tweaks like adding spicy condiments. Submit your variations and photos for a chance to be featured.

Frequently Asked Questions

Can I use pre-made dough? Absolutely, store-bought dough can save time without compromising on taste.

How do I avoid the bottom becoming soggy? Ensure fillings are not overly juicy and pre-bake the stromboli on a wire rack for airflow.

What can I do if I don’t have mozzarella? Use provolone or cheddar as a substitution for a slightly different flavor.

Can this recipe be made vegetarian? Swap beef for sautéed vegetables like mushrooms or zucchini for a vegetarian twist.

How do I reheat leftovers? Reheat in the oven for optimal texture or use a toaster oven for smaller portions.

Additional Resources

Explore related recipes like Italian Calzones or Philly-style sandwiches for more culinary adventures. Our technique guides provide essential tips on dough handling for perfect results every time.

Join the Conversation

Share your ramen hacks and photos with us on social media. Engage with fellow readers to exchange ideas and feedback. Our community thrives on social interaction, enhancing everyone’s cooking experience.

The Recipe

Mozzarella Cheesesteak Stromboli

Serves: 4

Prep Time: 20 mins

Cook Time: 25 mins

Total Time: 45 mins

Kitchen Equipment Needed

  • Baking sheet
  • Sharp knife
  • Rolling pin
  • Pastry brush

Ingredients

  • 1 lb pizza dough
  • 1 cup shredded mozzarella cheese
  • 1/2 lb thinly sliced beef, cooked
  • 1 bell pepper, sliced
  • 1 onion, sliced
  • 1 tbsp olive oil
  • Salt and pepper to taste
  • 1 egg, beaten (for egg wash)

Directions

  1. Preheat your oven to 375°F (190°C).
  2. In a skillet, sauté onions and peppers in olive oil until soft. Season with salt and pepper.
  3. Roll out pizza dough into a rectangle on a floured surface.
  4. Layer cooked beef, sautéed vegetables, and mozzarella cheese evenly over the dough, leaving room at the edges.
  5. Carefully roll the dough over the filling into a log shape. Pinch the seams to seal.
  6. Transfer to a baking sheet, make slits on the top, and apply an egg wash.
  7. Bake for 25 minutes or until golden brown.
  8. Allow to cool for a few minutes before slicing and serving.

Recipe Notes

  • Substitute mozzarella with your cheese of choice for a different flavor profile.
  • Add a dash of hot sauce to the filling for an extra kick.

Master the Art of Chicken Cordon Bleu: A Timeless Classic Recipe

stuffed chicken breast recipe, classic chicken dish, breaded chicken with ham and cheese, gourmet chicken recipes, French-inspired chicken recipes

A Brief History of Chicken Cordon Bleu

Origins and Evolution

The term Cordon Bleu is derived from the French phrase for “blue ribbon,” a symbol of excellence. Although the dish has French roots, its modern iteration as breaded, stuffed chicken has connections to Swiss cuisine, particularly schnitzel. The blend of flavors and textures in Chicken Cordon Bleu has made it a global favorite.

Discover the health benefits of white meat to understand why chicken is a popular protein choice for this dish.


Ingredients and Tools You’ll Need

Essential Ingredients

  • Chicken Breasts: Boneless and skinless, ideal for flattening.
  • Ham: Choose a thinly sliced variety like Black Forest or prosciutto.
  • Cheese: Swiss cheese is traditional, but Gruyère or mozzarella work well too.
  • Breadcrumbs: Panko for a crunchier texture or regular breadcrumbs for a classic finish.
  • Spices and Herbs: Garlic powder, paprika, parsley, salt, and pepper.
  • Eggs and Flour: For dredging and ensuring the coating adheres.

Tools

  • Meat mallet or rolling pin
  • Toothpicks or kitchen twine
  • Baking sheet or skillet

Step-by-Step Recipe for Chicken Cordon Bleu

Preparing the Chicken (400 Words)

  1. Flatten the chicken breasts to even thickness using a meat mallet.
  2. Season both sides with salt, pepper, and garlic powder.

Assembling the Rolls (500 Words)

  1. Lay a slice of ham and cheese on each flattened chicken breast.
  2. Roll tightly, securing with toothpicks.

Coating the Chicken (400 Words)

  1. Dredge each roll in flour, dip in beaten eggs, and coat with breadcrumbs.
  2. Double-coat for extra crispiness.

Cooking Methods (500 Words)

  • Baking: Preheat the oven to 375°F and bake for 25-30 minutes.
  • Frying: Heat oil in a skillet and fry until golden brown.
  • Air Fryer: Cook at 370°F for 20-25 minutes for a healthier option.

Making the Sauce (300 Words)

A creamy Dijon mustard sauce complements the dish perfectly:

  • Combine butter, Dijon mustard, heavy cream, and a splash of white wine.
  • Simmer until thickened.

Variations of Chicken Cordon Bleu

  • Keto-Friendly: Use almond flour and omit breadcrumbs.
  • Vegetarian: Replace chicken with eggplant slices.
  • Modern Fusion: Add spinach or sun-dried tomatoes for a twist.

For a related recipe, try Savory Chicken Cordon Bleu Meatloaf to enjoy these flavors in a hearty loaf format.


Perfect Pairings and Serving Suggestions

  • Side Dishes: Serve with creamy mashed potatoes or roasted vegetables.
  • Wine Pairing: A Chardonnay or light Pinot Noir complements the richness of the dish.

For additional inspiration, explore The Best Potato Salad in the World as a versatile side dish option.


FAQs About Chicken Cordon Bleu

What is Chicken Cordon Bleu?

Chicken Cordon Bleu is a dish consisting of breaded chicken stuffed with ham and cheese.

Can it Be Made Ahead of Time?

Yes, you can assemble the rolls and refrigerate them for up to 24 hours before cooking.

How Do You Prevent Cheese from Leaking?

Seal the edges tightly and secure with toothpicks.


Nutritional Benefits

This dish is a protein-packed meal, with chicken offering essential amino acids and cheese providing calcium. By opting for baking instead of frying, you can reduce the calorie content while retaining the dish’s rich flavor.


Internal Linking Opportunities


Conclusion

Chicken Cordon Bleu combines the elegance of French cuisine with universal appeal. Its crispy exterior, savory filling, and creamy sauce make it a standout dish for any occasion. By experimenting with variations and pairing it with complementary sides, you can make this classic recipe your own.

For more tips and recipes, explore Perfect Ribeye Steak Recipe.