Irresistible Raspberry White Chocolate Scones Recipe for Perfect Breakfast Bliss

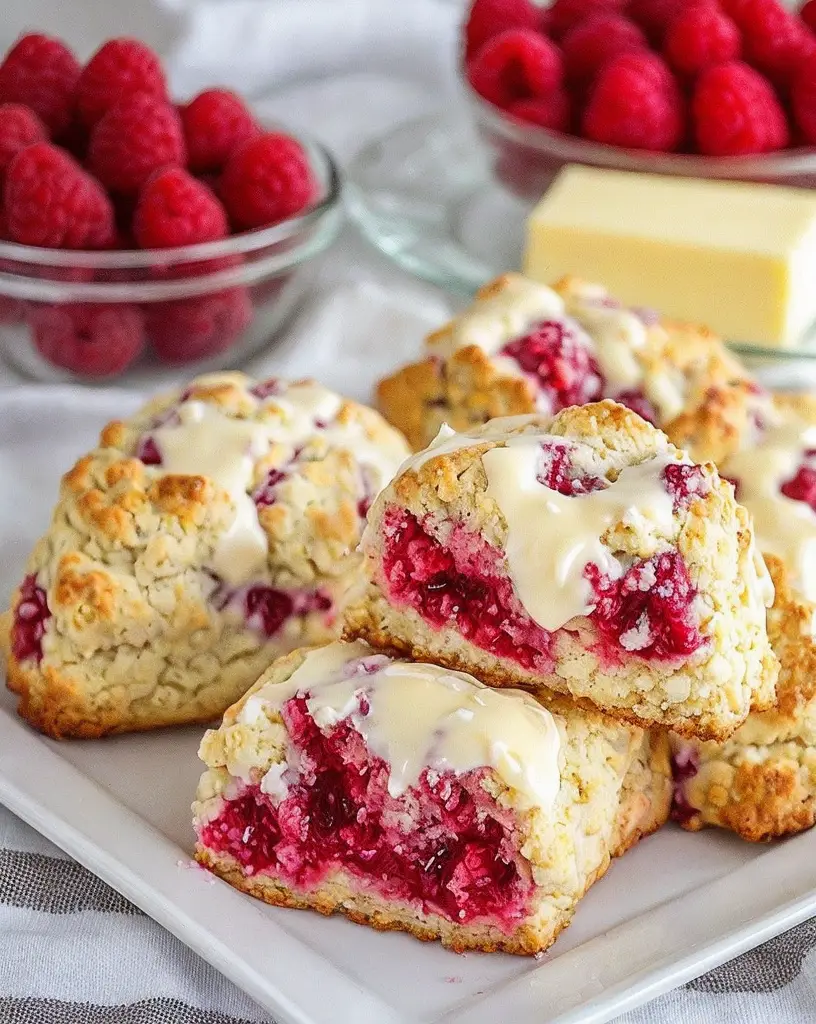
Best Raspberry White Chocolate Scones Recipe: A Sweet Delight

⚖️
Difficulty
Easy

⏲️
Prep Time
15 mins

🕒
Cook Time
20 mins

⏱️
Total Time
35 mins

🍽️
Servings
8

These raspberry white chocolate scones are a delightful treat that combines the tartness of raspberries with the creamy sweetness of white chocolate. Perfect for a brunch spread or a cozy afternoon snack, this easy scone recipe will surely impress. With every bite, the tender crumb, dotted with raspberry pieces and pockets of melted white chocolate, delivers a burst of flavor that is both rich and refreshing. If you’re looking for a bake that will yield luxurious aromas while also being straightforward enough for any level of baker, this scone recipe is for you.

Quick Recipe Highlights

  • Flavor Profile: Tart raspberries beautifully contrast the sweetness of creamy white chocolate in this scone recipe. The balance ensures that each bite is bursting with complex flavors, making it more than just a sweet treat.
  • Texture: The scones are wonderfully flaky and offer a tender crumb that melts in your mouth. The combination of juicy raspberries and chunks of white chocolate adds irregular pockets of texture that make each bite interesting.
  • Aroma: These scones emit a sweet, buttery aroma as they bake, with hints of vanilla and chocolate, inviting you to indulge in their delightful scent.
  • Visual Appeal: Speckled with bright red raspberries and creamy white chocolate, these scones are as beautiful as they are delicious. Their golden-brown tops and soft centers create a visually appealing contrast.
  • Skill Level Needed: Suitable for both novice and experienced bakers, this recipe requires basic baking skills and mostly involves mixing ingredients and shaping the dough.
  • Special Equipment: A baking sheet and parchment paper are all that’s needed to achieve perfectly baked scones. No special equipment necessary!

Recipe Overview

  • Difficulty Level: With straightforward steps and simple mixing techniques, this recipe is labeled as easy, even for those new to baking. The most challenging part may be achieving the right dough consistency, but with detailed instructions, you’ll find it manageable.
  • Category: Perfect as a breakfast or brunch option, these scones double as a delightful dessert or snack, fitting into any time of day seamlessly.
  • Cuisine: While scones feature prominently in British cuisine, this variant utilizes ingredients beloved across cultures, showcasing a more contemporary, fusion approach.
  • Cost: With affordable ingredients like flour, butter, and sugar, this recipe won’t break the bank. Seasonal berries can impact cost but typically remain accessible.
  • Season: Best enjoyed fresh year-round, but during summer when raspberries are in season, their flavor enhances the overall experience.
  • Occasion: These scones are ideal for tea parties, brunches, or even as a comforting baking project on quiet weekends.

Why You’ll Love This Recipe

The taste and texture of these raspberry white chocolate scones are unparalleled. The sweetness of the chocolate and the tangy berries blend seamlessly with the buttery, flaky scone base, creating an utterly satisfying taste experience. Additionally, the preparation process is convenient and straightforward, allowing you to achieve bakery-quality scones at home without any specialized skills. Being able to easily swap in frozen raspberries means the recipe remains accessible any time of year, offering a delightful taste of summer in every bite.

Nutritionally, these scones deliver tastiness without extreme indulgence. Moderation and quality ingredients ensure that you enjoy a treat that can fit into a balanced diet and one that pairs well with a tall glass of milk or a simple cup of tea. Socially, these scones make for delightful conversation starters, whether presented at a brunch or a casual get-together with friends. They embody a sense of care and craftsmanship that speaks volumes about your hospitality skills.

Cost-effectiveness and accessibility make this recipe an all-around winner. Staples like flour and sugar are common kitchen commodities, and with only a few special add-ins, it becomes a luxurious treat that feels far more expensive and decadent than it actually is. Sharing this accessible baking joy with friends and family can create cherished moments around the dining table.

Historical Background and Cultural Significance

Scones have their origins rooted in Scotland, and over centuries, they have evolved into the quintessential tea-time treat we know today. Traditionally, scones were simple recipes made with oats and griddle-cooked; however, they transitioned to being oven-baked with the advent of ovens, elevating their status to a more refined baked good. Culturally, scones are deeply embedded in the British tradition of afternoon tea, symbolizing hospitality and warmth.

The basic scone recipe has seen countless adaptations and is beloved in many regions beyond the UK, thanks to the British colonial influence. Variations have sprung up worldwide, each introducing local flavors and ingredients. The inclusion of berries, particularly in America, highlights the seasonal produce available and reflects a fusion of culinary traditions. In the case of raspberry white chocolate scones, the modern twist offers a crossover between traditional techniques and contemporary flavors.

Over time, these scones have become a staple in coffee shops and bakeries across the globe, with variations being popularized by culinary shows, blogs, and cookbooks. The adaptability of scones to incorporate a wide variety of ingredients makes them ripe for innovation, much like this raspberry white chocolate version. Each region puts its twist on scones, integrating local ingredients and preferences, thus expanding the diversity within this beloved baked item category.

Ingredient Deep Dive

Raspberries offer not only a burst of tangy flavor but also a wealth of nutritional benefits. They are rich in vitamins, fiber, and antioxidants, making them a healthful addition to the scones. When selecting raspberries, look for bright red, plump fruits that are firm to the touch. Store them in the refrigerator and use soon after purchase to take advantage of their peak freshness. If fresh raspberries are unavailable, frozen ones make an excellent substitute and can be added directly to the dough.

White chocolate brings a creamy, sweet dimension to these scones. It should be of good quality to ensure smooth melting and flavor consistency. When choosing white chocolate, opt for bars over chips for better meltability. Store it in a cool, dry place to maintain its texture and flavor integrity. While some may find white chocolate too sweet, alternatives like dark chocolate can offer rich contrasts when substituting for a less sugary option.

Flour forms the backbone of any scone recipe, and for these scones, all-purpose flour provides the perfect balance of structure and tenderness. Always measure your flour accurately by spooning it into a measuring cup and leveling it off to prevent dense, heavy scones. Store flour in an airtight container, away from moisture, to preserve its quality. For those requiring gluten-free options, numerous blends are available, though slight adjustments in liquid ratios may be necessary.

Common Mistakes to Avoid

  • Over-mixing the dough can make your scones tough, rather than tender and flaky. Mix only until ingredients are combined.
  • Warm butter in the dough will prevent the scones from rising properly. Use cold butter to ensure a flaky texture.
  • Using too much flour when shaping can dry out the dough. Use just enough to prevent sticking.
  • Neglecting to line the baking sheet with parchment paper can result in scones that stick, damaging their shape.
  • Opening the oven door too often during baking can cause scones to collapse. Resist the urge to peek until nearly done.
  • Substituting low-fat ingredients can affect the texture and flavor; stick to full-fat for best results.
  • Baking at too low a temperature won’t create the desired flakiness. Ensure the oven is properly preheated to 400°F (200°C).
  • Failing to space scones adequately on the baking sheet will lead to them touching and mis-shaping as they expand.

Essential Techniques

When making raspberry white chocolate scones, mastering the technique of cutting in butter is crucial. Doing this ensures that butter is evenly distributed throughout the dough, contributing to the scones’ flaky texture. To master this technique, use a pastry cutter or your fingers to work the cold butter into the flour until it resembles pea-sized crumbs. Common pitfalls include letting the butter soften too much in the process, which can be avoided by chilling your work area and tools.

Fold freshly added raspberries gently into the dough to prevent them from bursting prematurely and staining the dough. A light touch will ensure the berries retain their shape and don’t overly moisten the dough, which can affect baking time and texture. Look for visual cues like an even distribution of ingredients without visible poolings of raspberry juice in the dough.

Pro Tips for Perfect Raspberry White Chocolate Scones

For the best texture, freeze your scone dough for 15 minutes before baking. This step firms up the butter, contributing to the delicious flaky layers as it hits the oven’s heat.

To achieve brilliantly golden scones, brush the tops with a little cream or egg wash before baking; this enhances color and offers a glossy finish.

Maximize raspberry flavor by using both fresh and freeze-dried raspberries. The latter adds concentrated bursts of flavor without extra moisture.

Experiment with citrus zest, such as lemon or orange, in the dough or glaze to complement the raspberry and white chocolate flavor profile.

Use a dough cutter to create clean, even portions before baking, which promotes even rising and crisp edges.

Consider drizzling melted white chocolate over the scones for a visually appealing and flavor-enhancing finish once they’ve cooled.

Variations and Adaptations

Regional variations of this scone recipe can include the addition of local fruits or nuts, highlighting indigenous flavors. For seasonal adaptations, feel free to swap raspberries for blackberries in the fall or cranberries during winter for different yet equally delightful flavors.

Dietary modifications such as replacing dairy products with plant-based alternatives are possible. Coconut milk pairs wonderfully here, adding a subtle tropical note to the scones.

For those seeking different flavors, experimenting with spices like cardamom or ginger can add a spicy warmth, making the scones a comforting winter treat.

To alter the texture, include rolled oats in the mix for heartier, rustic scones. This also adds a nutritional element while enhancing the overall mouthfeel.

Presentation can be elevated by using geometric cutters for uniform scones or cutting the dough entrancing freehand for a rustic, artisanal look. Powdered sugar dust or a drizzle of glaze can enhance this presentation.

Serving and Presentation Guide

Plating techniques focus on simplicity and elegance. Serve these scones on a delicate platter, with clotted cream and jam on the side for a traditional touch.

A touch of fresh mint or a few extra raspberries can serve as a vibrant garnishing idea, offering a pop of color alongside the golden-baked goods.

Traditional accompaniments like freshly brewed tea or coffee enhance the scone experience and cut through the sweetness.

Modern serving suggestions include pairing these scones with a berry-infused mocktail for a refreshing, non-caffeinated option.

For optimal freshness, serve the scones warm. Gently reheat them if needed, ensuring they maintain their ideal texture without becoming dry.

Portion control tips suggest serving smaller scones during gatherings to allow guests to enjoy several bites without feeling too full, facilitating social nibbling.

Wine and Beverage Pairing

Pair these raspberry white chocolate scones with a sweet white wine like Moscato d’Asti, whose floral notes complement the scones’ sweetness.

For non-alcoholic alternatives, a chilled raspberry iced tea enhances the berry notes and provides a refreshing balance to the scones’ richness.

If a hot beverage better suits your tastes, a creamy vanilla chai tea pairs beautifully with the scones, providing warming spices and creaminess.

Consider the temperature of your drinks—opt for slightly chilled beverages to contrast the warmth of freshly baked scones.

Soft, sparkling water with a twist of lime can also cleanse the palate between bites, offering a refreshing complement to each flavorful bite.

Storage and Shelf Life

Store leftover scones in an airtight container at room temperature for up to three days. Ensure they are completely cooled before sealing to avoid sogginess.

For extended freshness, refrigerate the scones, but allow them to reach room temperature again before serving or gently warm them on a baking tray.

Containers ideal for scone storage should allow a snug fit without squashing, like a deep, lidded dish lined with wax paper.

Signs of spoilage include an off smell or extra moist texture, indicating they should not be consumed.

Reheating instructions suggest a moderate oven at 300°F (150°C) for 5-8 minutes, refreshing the scones’ warmth and texture without drying them out.

These scones freeze excellently; wrap them tightly in foil or plastic and freeze for up to two months. Thaw at room temperature before reheating.

Make Ahead Strategies

To reduce last-minute kitchen fuss, prepare the dough a night ahead and refrigerate it, covered, ready for baking the next morning.

If opting to freeze dough for later use, form the scones fully before freezing, and bake directly from frozen, merely extending the baking time slightly.

Quality impact is minimal when employing make-ahead strategies, ensuring that the finished scone retains the same delightful taste.

Assembly tips recommend adding any final glaze or white chocolate drizzle post-reheating, ensuring that toppings are fresh and visually appealing.

For scones with a zest topping, prepare it fresh to apply after baking, enhancing flavor without the risk of bitterness developing from extended storage.

Fresh element additions, such as additional white chocolate curls or a dash of zest, can be added right before serving for a fresh-from-the-oven feel.

Scaling Instructions

Halving the recipe is simple: maintain ingredient ratios but watch the baking time closely, as smaller batches may cook faster.

Doubling or tripling involves precision; ensure each batch is mixed separately to maintain consistency. Increasing batch size requires attention to uniform mixing and handling.

Adjust equipment by splitting larger batches across multiple trays to avoid overcrowding in the oven, ensuring even air circulation.

Timing modifications include cautious adjustments in cooking time based on batch size and oven performance, maintaining vigilant monitoring for doneness.

When scaling, store scones in smaller batches to maintain ease in reheating and freshness, particularly when distributing over days or events.

Nutritional Deep Dive

The macro breakdown of these scones shows balanced carbohydrates for energy, fats for richness, and light protein from milk and butter.

Micronutrient analysis highlights the antioxidants and vitamin C from the raspberries, important for immune support and skin health.

Conscious portion sizing integrates nutritional benefits without undermining dietary goals, facilitating mindful sharing and consumption.

Considering that white chocolate adds significant sugar content, the recipe can be recalibrated for lower sugar versions by reducing chocolate quantity.

Weight management tips emphasize enjoying these scones as a treat, viewing them as part of a balanced meal plan, often pairing with protein-rich beverages to extend satiety.

Dietary Adaptations

To create a gluten-free version, substitute a one-to-one gluten-free flour blend, which generally requires no additional modifications for a similar texture.

Dairy-free adaptations involve replacing butter with plant-based margarine or coconut oil, with cream swapped for a vegan-friendly alternative like coconut cream.

Adapting this recipe for vegans requires egg replacements like flaxseed meal soaked with water, ensuring each aspect of the recipe supports dietary choices.

Low-carb options may substitute almond flour for regular flour. This contrast emphasizes texture variation, albeit with significant carbohydrate adjustments.

When catering to keto or paleo diets, prioritize natural sweeteners and nut flours, safeguarding compliance while maintaining gustatory delight.

For a low-FODMAP version, minimize raspberry amounts and select dark chocolate or specify lactose-free dairy options to align with dietary needs.

Troubleshooting Guide

Should your scones appear too dense, consider checking dough hydration and ensuring that butter remains cold until baking.

Balance flavor by making sure your raspberry and chocolate ratios do not outweigh the scone base; increasing one requires proportionate adjustments.

If temperature leads to uneven baking, confirm that your oven is fully preheated and scones are spaced adequately when placed on trays.

Equipment challenges like weak blenders can be surmounted by cutting butter with hands, enabling consistency as though processed mechanically.

Ingredient substitutions, like dairy-free options, may alter texture; test small dough amounts to ensure satisfying results.

Timing concerns arise when overly browned tops persist—lower rack placement in the oven can alleviate excess top-browning.

Recipe Success Stories

Our community has shared myriad feedback, all underscoring the universal love for this raspberry white chocolate scone recipe, with many reporting it to be a consistent crowd-pleaser.

Variations like the addition of pecans or a vanilla glaze have found success, enriching flavor profiles while maintaining the core recipe’s integrity.

Adaptation stories inspire us, with readers worldwide integrating local fruit and flavors, celebrating global spin-offs of this beloved base.

Photography tips often touch upon capturing their beauty: natural light showcases their gorgeous textures, while garnishes of extra berries add vibrant pops to photos.

Frequently, reader suggestions stress the charm these scones add to any gathering, punctuating meals with a sweet finish.

Frequently Asked Questions

How do I know when my scones are perfectly baked?

Check for golden-brown tops. If unsure, insert a toothpick into the scone’s center; a clean pull indicates doneness.

Can I freeze the scones once baked?

Yes, baked scones freeze well. Wrap them in foil or plastic and store for up to two months, reheating as needed.

What are the best substitutions for fresh raspberries?

If fresh raspberries aren’t available, frozen ones work excellently. Ensure they’re added straight from the freezer to prevent dyeing the dough.

Can I reduce the recipe’s sugar content?

Yes, reduce the sugar slightly if desired, but keep some for texture and caramelization balance during baking.

Is this recipe adaptable to other berries?

Absolutely! Try blueberries, blackberries, or even strawberries, adjusting sweetening based on berry choice.

Do these scones work with whole wheat flour?

Whole wheat can be used, though its density may affect texture. Consider half whole wheat and half all-purpose flour for balance.

What steps ensure a flakier scone?

Using cold butter and avoiding over-mixing helps. Layer folding the dough before cutting portions enhances layered textures.

How should I serve these scones for an afternoon tea?

Pair with lemon curd and clotted cream. Present on a tiered stand for a classic touch.

What’s a good icing or glaze to use with this recipe?

A simple confectioner’s sugar and lemon juice glaze adds sweetness and a hint of tartness, matching well with the scone’s natural flavors.

What causes the dough to become sticky?

Overly wet ingredients or excess raspberry juice can make a dough sticky; keeping flour handy minimizes extra moisture absorption.

Can I prepare the dough in advance?

Yes, dough can be chilled for up to 24 hours ahead; simply form and bake when ready for fresh scones.

Are there any suggestions for enhancing this recipe?

Consider adding citrus zest or a hint of vanilla extract to uplift flavors further. Finish with a dusting of raw sugar for extra texture.

Additional Resources

For those interested in exploring related recipes, consider trying our classic British scones or seasonal berry variations, which shift to match ingredients plentiful in respective periods.

Our technique guides delve deeply into mastering flaky pastries and rich batter handling, refining skills transferable across numerous recipes.

Information on key ingredients clarifies selections, ensuring quality and nutritious bakes emerge consistently from your kitchen.

Those seeking equipment specifics will find our recommendations ensure each recipe’s success, regardless of kitchen constraints.

Seasonal variations open paths to exploring how different fruits and spices can reinvigorate traditional recipes, fueling culinary creativity.

Join the Conversation

Share your bake successes on social media, tagging photos with our handle, celebrating the joys these raspberry white chocolate scones bring.

Photography tips involve leveraging daylight for warm light effects, using indoor lighting for evening captures, and experimenting with angles.

Engage with your peers through detailed recipe reviews, highlighting favorite aspects or sharing adventurous riffs and improvements tried.

Our community thrives on creativity; collectively showcase your unique takes on the recipe via our platforms, inspiring future baking projects.

To foster interaction, post about unexpected ingredient uses or experiences. Narratives create diverse engagement, inviting broader connections.

The Recipe

Best Raspberry White Chocolate Scones

Serves: 8

Prep Time: 15 mins

Cook Time: 20 mins

Total Time: 35 mins

Kitchen Equipment Needed

  • Mixing bowls
  • Pastry cutter or fork
  • Baking sheet
  • Parchment paper
  • Oven

Ingredients

  • 2 cups all-purpose flour
  • 1/2 cup granulated sugar
  • 2 tsp baking powder
  • 1/2 tsp salt
  • 1/2 cup unsalted butter, cold and diced
  • 3/4 cup fresh raspberries
  • 1/2 cup white chocolate chunks
  • 1/2 cup milk or cream
  • 1 large egg
  • 1 tsp vanilla extract

Directions

  1. Preheat your oven to 400°F (200°C) and line a baking sheet with parchment paper.
  2. In a mixing bowl, combine flour, sugar, baking powder, and salt.
  3. Cut in the cold butter using a pastry cutter or fork until the mixture resembles coarse crumbs.
  4. Add raspberries and white chocolate chunks, gently folding to mix evenly.
  5. In a separate bowl, whisk together milk, egg, and vanilla extract.
  6. Pour the wet ingredients into the dry mix, stirring lightly until just combined; be careful not to overmix.
  7. On a floured surface, pat the dough into a 1-inch thick disc. Cut into 8 wedges.
  8. Arrange wedges on the prepared baking sheet, spacing them apart.
  9. Bake for 18-20 minutes or until scones are golden brown.
  10. Cool slightly on wire racks before serving.

Recipe Notes

  • Substitute dark chocolate for a less sweet option.
  • Add a pinch of lemon zest for extra zing.
  • Use frozen raspberries as an alternative to fresh.

Bake Irresistible Shimmering Maple Crisp Cookies for a Sweet Treat

Shimmering Maple Crisp Cookies: A Sweet Treat with a Glorious Crunch

⚖️
Difficulty
Medium

⏲️
Prep Time
20 mins

🕒
Cook Time
15 mins

⏱️
Total Time
35 mins

🍽️
Servings
24 cookies

Step into the world of delightful sweetness with our Shimmering Maple Crisp Cookies. These cookies combine the rich taste of pure maple syrup with a satisfying crunch, offering a perfect bite every time. As you savor these treats, the sweetness envelops you, creating a comforting and indulgent experience.

These shimmering cookies are more than just their delightful taste; they are a sensory experience. As you open the cookie jar, a sweet, maple-infused aroma greets you, reminiscent of cozy autumn afternoons. Their crisp texture gives way to a chewy center, offering a dynamic mouthfeel that makes every bite unforgettable.

Quick Recipe Highlights

  • Flavor Profile: These cookies burst with the rich, earthy sweetness of maple syrup. Balanced by a hint of vanilla, they deliver a perfectly rounded taste without being overwhelmingly sweet.
  • Texture: Expect a delightful crunch on the outside, contrasted by a moist and chewy interior, creating a perfect harmony in every bite.
  • Aroma: The smell of baked maple filling the house is an inviting scent that instantly makes one think of home comforts and fall gatherings.
  • Visual Appeal: A golden-brown hue with a subtle shimmer, these cookies are as delightful to look at as they are to eat, making them a showstopper at any gathering.
  • Skill Level Needed: With a medium difficulty rating, they require a bit of baking knowledge, but nothing too advanced for a determined home baker.
  • Special Equipment: All you need is a reliable oven and a trusty mixing bowl to whip these beauties together.

Recipe Overview

  • Difficulty Level: The moderate complexity comes from achieving the perfect consistency of the batter and getting that beautiful shimmer on top. Attention to detail will ensure a successful batch.
  • Category: These cookies fall under the dessert category but can also make a sweet addition to brunch spreads.
  • Cuisine: Inspired by North American culinary traditions, these cookies highlight the iconic flavor of Canadian maple syrup.
  • Cost: Maple syrup can be on the pricier side, but it’s the star ingredient here, making these cookies a worthy indulgence.
  • Season: Best enjoyed during the fall when maple flavors complement the crisp seasonal air, but they’re delightful year-round.
  • Occasion: Perfect for holiday cookie exchanges, autumn picnics, or just a sweet treat on a cozy afternoon.

Why You’ll Love This Recipe
The taste of Shimmering Maple Crisp Cookies is unparalleled, thanks to the rich maple syrup that infuses every bite. The balance of sweetness and warm flavors will captivate your palate, promising pure indulgence with each cookie. Their texture is equally appealing—imagine biting into a crispy edge that yields to a soft, chewy center. This dynamic combination adds to their charm and makes them a crowd-favorite.

These cookies are a convenience to prepare as they require basic kitchen utensils and can be made in under an hour. The straightforward recipe ensures successful outcomes even on your first attempt. Nutritionally, maple syrup offers unique minerals not found in typical sweeteners, providing some wholesome benefits amidst the delight.

Shimmering Maple Crisp Cookies have immense social value, easily becoming a centerpiece for teatime gatherings or festive occasions. Their nostalgic aroma evokes a sense of heritage, making them the perfect companion for family celebrations. Economically viable, they are made with pantry staples, making them accessible for spontaneous baking adventures.

Historical Background and Cultural Significance
Originating from regions known for their maple syrup production, such as Canada and parts of the Northern United States, maple desserts have long been a staple of their culinary traditions. Shimmering Maple Crisp Cookies symbolize the best of these traditions, offering a modern twist on classic flavors.

Maple syrup has cultural importance that extends beyond its taste. It represents a heritage of traditional sugaring methods and seasonal cycles deeply respected in communities that produce it. This reverence is captured in every bite of these cookies, offering a taste of history.

Over time, recipes like the Shimmering Maple Crisp Cookies have evolved, incorporating modern baking techniques while still maintaining their original flavor integrity. Regional variations exist, with subtle differences in ingredients reflecting local tastes and preferences.

Ingredient Deep Dive
Maple syrup is the heart and soul of these cookies, revered for both its flavor and its rich history. Indigenous peoples of North America have long harvested maple sap, a tradition carried forward through centuries. This natural sweetener also offers nutritional benefits, containing antioxidants and essential minerals like manganese and zinc.

When selecting maple syrup, opt for the purest grade available, ensuring a rich, authentic taste. Store it in a cool, dark place to preserve its quality, but once opened, refrigeration is recommended. If substitutions are needed, honey can offer a similar texture but will alter the flavor significantly.

Common Mistakes to Avoid

  • Avoid using imitation maple syrup; it lacks the depth of flavor that pure syrup provides.
  • Overbaking can turn the cookies too hard; remove them from the oven once edges are golden.
  • Overmixing the batter can lead to tough cookies; mix just until ingredients are combined.
  • Skipping the chilling step may result in spreading; ensure the dough is well-chilled.
  • Measuring ingredients inaccurately can affect texture; always use proper measuring tools.
  • Using cold butter may prevent proper mixing; let it come to room temperature first.
  • Ignoring oven temperature precision could lead to uneven baking; always preheat and use an oven thermometer.
  • Not lining the baking sheet might lead to cookies sticking; use parchment paper for best results.

Essential Techniques
Mastering the art of these cookies lies in achieving the right dough consistency. It should be soft but firm enough to hold its shape when scooped. A critical technique is the gentle folding of dry ingredients into the wet mix to prevent overworking the dough, preserving its tender texture.

Visual cues play a vital role—watch for the subtle change in dough color and texture as it incorporates ingredients. Avoiding overbaking is crucial. The cookies should have slightly golden edges and still appear soft in the center when you remove them from the oven; they will firm up as they cool.

Pro Tips for Perfect Shimmering Maple Crisp Cookies
Ensure your ingredients are at the right temperature before beginning, as this affects mixing and dough texture.

Chill the dough for at least 30 minutes to prevent excessive spreading during baking.

For an added touch of shimmer, dust the tops with a light sprinkle of coarse sugar before baking.

Experiment with adding a sprinkle of sea salt on top to balance out the sweetness and create a more sophisticated flavor profile.

For uniform cookies, use an ice cream scoop to portion out the dough evenly.

Allow cookies to cool completely on a wire rack; this prevents them from continuing to bake on the hot baking sheet.

Variations and Adaptations
These cookies can take on regional twists by varying the type of sugar used, such as swapping white sugar for a deeper-flavored brown sugar. Seasonal adaptations might include adding a pinch of cinnamon or nutmeg for a warm autumn flair.

Dietary modifications are possible, such as using gluten-free flour blends for those with dietary restrictions. For a vegan version, substitute butter with coconut oil or a plant-based spread, and consider flax eggs for binding.

Experiment with infusing the maple syrup with flavors like lavender or vanilla beans for a gourmet twist. Alternatively, add crushed pecans or walnuts for an extra texture contrast and nutty undertone.

Serving and Presentation Guide
For a sophisticated presentation, consider forming your cookies into uniform rounds and baking them on parchment for neatness. A light dusting of powdered sugar adds a classic touch, while a drizzle of white chocolate offers a modern flair.

These cookies are best served freshly baked, but if you prefer your cookies chewier, store them in an airtight container with a slice of bread on top. Accompany them with a warm cup of tea or a frothy latte for a complete treat.

Pairs well with fruit preserves or cheese plates, making them a versatile addition to any meal or celebration. Adjust portions according to your gathering size—their richness means a few go a long way.

Wine and Beverage Pairing
Pair these maple cookies with a glass of chilled Riesling or a sweet dessert wine to complement their sweetness without overshadowing it. For non-alcoholic options, consider a spiced apple cider or a creamy maple latte.

In cooler months, serve them alongside a hot cup of chai or brewing fragrant herbal teas that match their aroma. Temperature plays a crucial role—cool cookies paired with warm beverages offer a harmonious duet.

For coffee lovers, a dark roast or espresso amplifies the maple’s depth, while those seeking lighter notes might prefer a vanilla-infused black tea.

Storage and Shelf Life
Store your Shimmering Maple Crisp Cookies in an airtight container at room temperature for up to five days to maintain their freshness. For extended shelf life, refrigerate them in a tightly sealed bag or container.

Signs of spoilage include changes in aroma or discoloration, indicating it’s time to let go. Reheat cookies in a low-temperature oven or microwave for a few seconds to refresh their warmth before serving.

If freezing, separate layers with parchment paper to avoid sticking, and thaw at room temperature before enjoying.

Make Ahead Strategies
These cookies offer flexibility for preparatory stages, allowing dough to be made ahead and stored in the refrigerator for up to 48 hours. For a more extended prep timeline, freeze the dough and thaw before baking.

Once baked, consider making an extra batch to freeze, offering you ready-to-eat cookies for unexpected gatherings. Evaluate the impact of refrigeration or freezing, ensuring quality remains intact.

During assembly, pay attention to reheating guidelines—avoid direct heat that may cause drying. Fresh glazes or toppings can be added at the time of serving for freshness.

Scaling Instructions
To halve the recipe, simply divide all ingredient quantities by two while maintaining consistent proportions. Doubling the batch is easy—ensure you have adequate baking sheets and cooling racks to accommodate the increase.

Adjust baking time if necessary for larger-sized cookies, and verify evenness by rotating sheets. Scaled recipes may require more storage space—have plenty of airtight containers or ideally sized bags for your expanded batch.

Nutritional Deep Dive
The macro breakdown of these cookies showcases their carbohydrate-rich nature, with fats and proteins present in lower quantities. Maple syrup provides a unique set of micronutrients like riboflavin and calcium, offering an edge over traditional sugars.

These cookies highlight maple’s health benefits, like its antioxidant properties, setting them apart from more typical treats. They fit perfectly into balanced diets when enjoyed in moderation, with each portion of two to three cookies providing a satisfying snack option.

For weight management, paying attention to portion size and including them in a well-rounded diet can maximize enjoyment without overindulgence.

Dietary Adaptations
For a gluten-free version of Shimmering Maple Crisp Cookies, use a compatible flour mix ensuring it contains xanthan gum for binding. To make them dairy-free, substitute plant-based butter alternatives.

For vegan adaptations, flaxseed mixtures can replace eggs, while plant-based syrup variants address dietary needs. Lower-carbohydrate versions demand alternative flour blends, and keto-friendly sweeteners like erythritol can offer options in sugar management.

Low-FODMAP adaptions prioritize using pure maple syrup and gluten-free flour, accommodating various dietary restrictions while maintaining flavor integrity.

Troubleshooting Guide
Should your cookies turn out denser than anticipated, reassess ingredient measurements, ensuring correct balance. A texture too soft might indicate under-baking or excess liquid—adjust accordingly for subsequent batches.

Flavor imbalances like overpowering sweetness can be tamed by introducing salt or unsweetened additions. Temperature fluctuations could affect baking outcomes; maintaining oven consistency assures reliable results.

Inadequate mixing times or uneven ingredient distribution could affect taste, so follow step-by-step instructions diligently. Address timing concerns by respecting dough chilling and resting periods for optimal consistency.

Recipe Success Stories
Bakers worldwide have shared transformations of the classic Shimmering Maple Crisp Cookies into unique regional delights. Community feedback often highlights successful variations, like adding nuts or spices, expanding their appeal.

Readers suggest using local syrups, enhancing flavors unique to their regions. Photographs of the cookies in diverse settings, from cozy kitchens to lush backyards, showcase their universal charm across multiple continents.

The adaptability of the recipe means countless stories of success from first-time bakers to seasoned chefs, each bringing their twist to tradition.

Frequently Asked Questions

Can I substitute maple syrup with honey?
Maple syrup imparts a distinct flavor, but honey can be used with flavor changes expected.

What’s the best way to store these cookies?
Keep them in an airtight container at room temperature, or refrigerate for longer preservation.

How can I make my cookies shinier?
Gently brushing the tops with a beaten egg before baking enhances their shimmer.

Are these cookies suitable for freezing?
Yes, both baked cookies and dough freeze well—just ensure proper separation.

Is chilling the dough mandatory?
Chilling helps maintain shape and texture, making it a crucial step for perfect cookies.

Can I add chocolate chips?
Yes, adding chocolate chips introduces a new dimension, balancing the maple’s sweetness.

What other flavors pair with maple?
Spices like cinnamon, nutmeg, and even ginger accentuate the maple’s warmth.

Are there any vegan adaptations?
Substitute eggs with flaxseed mixtures and use vegan butter for plant-based versions.

What if my cookies spread too much?
Ensure proper dough chilling, and check that the baking surface is not too warm.

How to make them less sweet?
Adjust syrups or explore sugar alternatives, paired with balancing ingredients like nuts.

Can I triple the recipe?
Yes, adjust ingredient quantities accordingly and ensure sufficient baking equipment is available.

Additional Resources
For those eager to explore more, delve into our array of related recipes featuring maple’s natural sweetness. Discover technique guides focusing on cookie baking fundamentals, and explore a spectrum of ingredient substitutions for personalized touches.

Equip your kitchen with recommended tools ensuring effortless preparation. Discover seasonal variations adapting our recipe for any occasion, alongside savory counterpoints balancing the sweet palette.

Join the Conversation
Share your experiences—snap a picture and tag us on social media to showcase your Shimmering Maple Crisp Cookies. Exchange tips and tricks with fellow enthusiasts through comment threads and recipe reviews.

Engage with a community passionate about baking, where ideas flourish and variations abound. Contribute your personal touch to the growing collection of recipe adaptations, inspiring sweet creations worldwide.

The Recipe

Shimmering Maple Crisp Cookies

Serves: 24 cookies

Prep Time: 20 mins

Cook Time: 15 mins

Total Time: 35 mins

Kitchen Equipment Needed

  • Mixing bowls
  • Baking sheets
  • Parchment paper
  • Wire rack
  • Ice cream scoop or spoon

Ingredients

  • 1 cup unsalted butter, at room temperature
  • 1 cup pure maple syrup
  • 1 cup granulated sugar
  • 2 large eggs
  • 1 teaspoon vanilla extract
  • 3 cups all-purpose flour
  • 1 teaspoon baking powder
  • 1/2 teaspoon baking soda
  • 1/2 teaspoon salt
  • Coarse sugar, for topping

Directions

  1. Preheat your oven to 350°F (175°C) and line two baking sheets with parchment paper.
  2. In a large mixing bowl, cream butter and granulated sugar together until light and fluffy.
  3. Gradually add maple syrup, mixing until well blended.
  4. Beat in the eggs one at a time, followed by vanilla extract.
  5. In another bowl, whisk together flour, baking powder, baking soda, and salt.
  6. Gradually add dry ingredients to the wet, mixing until just combined.
  7. Chill the dough in the refrigerator for at least 30 minutes.
  8. Using an ice cream scoop, portion dough onto prepared sheets, spacing evenly.
  9. Top each cookie with a sprinkle of coarse sugar.
  10. Bake for 12-15 minutes, or until edges begin to turn golden brown.
  11. Transfer cookies to a wire rack to cool completely.

Recipe Notes

  • For added flavor, incorporate 1/2 teaspoon of cinnamon to the dry ingredients.
  • Adjust maple syrup quantity to taste, bearing in mind that it adds moisture.
  • Ensure cookies are evenly spaced to allow for spreading.

Indulge in This Irresistible Creamy Peanut Butter Cup Pie Recipe

Creamy Peanut Butter Cup Pie: A Delightful Dessert Experience

⚖️
Difficulty
Easy

⏲️
Prep Time
20 mins

🕒
Cook Time
10 mins

⏱️
Total Time
30 mins

🍽️
Servings
8

Imagine sinking your fork into the luxurious layers of a Creamy Peanut Butter Cup Pie. This decadent dessert combines the rich, nutty taste of creamy peanut butter with irresistible chocolatey elements, resulting in a flavor profile that will captivate your senses. Begin your culinary journey as you experience smooth textures and a delightful aroma that fills the room with the warmth of nostalgia and comfort.

The Creamy Peanut Butter Cup Pie is perfect for those looking to indulge with a sweet treat that’s both visually stunning and gastronomically satisfying. With its luscious filling and delicate layers of chocolate ganache, this pie is ideal for elevating any casual gathering or fancy soirée. Whether you’re enjoying a slice on a cozy evening or sharing it during a special occasion, this pie promises a delightful experience that’ll linger long after the last bite.

Quick Recipe Highlights

  • Flavor Profile: Peanut buttery richness intertwined with smooth chocolate notes dominate this dessert, creating an unparalleled taste experience.
  • Texture: The pie boasts a creamy, smooth filling complemented by a crumbly crust, offering a delightful contrast in textures that makes each bite fulfilling.
  • Aroma: A soft waft of roasted peanuts mingling with the deep scent of chocolate creates an inviting aromatic profile.
  • Visual Appeal: Layers of deep brown ganache and soft caramel hues offer an enticing presentation that’s irresistible to the eye.
  • Skill Level Needed: Suitable for beginners, this pie requires minimal technique—just a good hand at mixing and an eye for detail.
  • Special Equipment: Basic kitchen tools suffice—mixer, pie dish, and spatula are the key instruments here.

Recipe Overview

  • Difficulty Level: Rated as easy due to its straightforward assembling, mixing, and minimal baking processes. Perfect for an at-home baker or a dessert enthusiast just starting out.
  • Category: A delightful dessert treat, perfect for any after-meal indulgence or weekend sweet-treat offering.
  • Cuisine: Rooted in American dessert traditions, this pie is a simple representation of comfort food at its best.
  • Cost: Ingredients are generally available and inexpensive, making this an affordable recipe for most households.
  • Season: Best served year-round, but particularly indulging in the cold seasons when warm desserts are especially cherished.
  • Occasion: Perfect for family gatherings, holiday celebrations, or whenever you’re in the mood for something sweet.

Why You’ll Love This Recipe


The Creamy Peanut Butter Cup Pie marries the universally adored flavors of peanut butter and chocolate, creating a symphony of taste that’s hard to resist. Each bite offers a smooth, lush mouthfeel punctuated by the subtle crunch of its crust, satisfying both taste and texture needs effectively.

Convenience is a significant plus for this recipe. With easy-to-follow steps, you’ll have no trouble putting together this delicious pie in a matter of minutes, allowing more time to enjoy the company of your guests or family. Moreover, the most time-consuming aspect is allowing the pie to set, so the actual active preparation is minimal.

On top of being a crowd-pleaser, this pie also holds nutritional advantages, thanks to the protein-powered peanut butter base. While it’s a sweet treat, its composition supports a bit of balance, important for those mindful of their sugar intake.

In social settings, this decadent pie shines as a stand-alone dessert star. Its ability to knack conversation and gather guests for a second slice affirms its value at get-togethers, making memories sweet and talk engaging.

Cost-effectiveness is another attribute, as the ingredients used are readily available in most kitchens or can be acquired without significant financial outlay. This accessibility aids in ensuring you can whip up this pie whenever the occasion calls for it.

Historical Background and Cultural Significance


The Creamy Peanut Butter Cup Pie is deeply embedded in the evolution of American sweets. The concept of peanut butter and chocolate as a favored dessert combination emerged during the 20th century, popularized by candy company innovations that led to now-famous products like peanut butter cups.

Culturally, the pie represents the American penchant for comfort foods that evoke warmth and hospitality, often served at communal gatherings to bring people together through shared taste experiences. This dessert model became a standard in American pie collections, holding its place against more traditional fruit pies.

Over time, variations of this pie have evolved, adapting to regional tastes and preferences. Different proportions of ingredients, inclusion of additional flavorings such as vanilla or spices, and even changes in the proportion of chocolate, reflect the pie’s capacity to blend into diverse culinary landscapes across the United States.

Regionally, the pie may boast alterations reflective of local influences, such as the addition of crunchy nuts, caramel swirls, or even marshmallow toppings, each adding a unique twist while honoring the fundamental ethos of peanut butter and chocolate indulgence.

Ingredient Deep Dive


Peanut butter, the monster behind our pie’s rich flavor, boasts a storied history, initially developed by ancient South American cultures who prized peanuts for their versatility and nutrition. Its creamy texture and nutty flavor make it a staple in American kitchens, revered for contributing richness and depth to various recipes.

Nutritionally, peanut butter is a powerhouse. Rich in proteins, healthy fats, and essential vitamins and minerals like magnesium and vitamin E, it’s not just flavorful but beneficial. Ensure optimal freshness by storing it in a cool, dry place and choosing high-quality brands free from unnecessary additives.

Finding chocolate ideal for a pie involves balancing meltability and flavor. Opt for high-cocoa-content chocolate for a rich taste with fewer added sugars. Store in a cool place to ensure it doesn’t bloom and develop a whitish surface layer, maintaining both appearance and flavor.

For those unable to use chocolate due to dietary restrictions, other options include carob or white chocolate variants, or even a carefully curated selection of nuts to provide a different depth to the overall pie profile.

Common Mistakes to Avoid

  • Skipping the chilling phase results in a pie that’s too loose and won’t set properly.
  • Over-mixing the filling can incorporate too much air, leading to a mousse-like texture.
  • Failing to evenly spread the ganache causes uneven layers and a messy serving experience.
  • Using low-quality chocolate sacrifices flavor and texture; always opt for high-quality!
  • Not sealing stored pie properly can lead to unwanted moisture and texture changes.
  • Incorrect pie dish size impacts the thickness of pie layers—adhere to recipe guidelines.
  • Skipping ingredient tempering leads to a longer setting time or an unstable filling.
  • Over-cooling leads to a separation of chocolate and peanut butter layers, spoiling the visual appeal.
  • Forgetting to account for variations in peanut butter consistency can alter pie texture.
  • Neglecting to account for ambient temperature can affect overall pie ascent and flavor melding.

Essential Techniques


Mastering the art of blending is crucial for a perfectly smooth filling. Proper technique ensures uniform flavor distribution and optimal texture, bolstering the appeal of each bite. Avoid over-beating to prevent air bubbles which compromise the pie’s firmness.

Peanut butter consistency can fluctuate due to temperature changes. Gently warming thixotropic peanut butter aids in smoothing it out without compromising its inherent nutrients.

When it comes to chocolate ganache preparation, it’s essential to respect the balance of cream and chocolate ratios to yield the perfect glossy finish. Missteps here can lend a dull ganache or one that fails to firm up, impacting presentation.

Pro Tips for Perfect Creamy Peanut Butter Cup Pie


Ensure each layer is smooth before moving to the next, running a knife along the edges to remove air bubbles that may disrupt uniformity. This maintains aesthetic appeal and guarantees a flawless bite.

Using a parchment paper layer atop the crust while chilling prevents unwanted guest particles from adhering to the crust, ensuring a neat texture and ideal crust consistency.

Embrace chilled pie dishes as they assist in faster setting and reduce humidity impact, thereby promoting pronounced flavor stability.

For optimal sweet and savory balance, use natural peanut butter, which refrains from overpowering the chocolaty notes while maintaining rich creaminess.

Allow the pie to acclimate to room temperature before slicing; this ensures that the filling softens just enough for a clean cut.

Decorate just before serving, especially if using elements prone to wilting, like fresh fruit or cream. This keeps your pie looking as pristine as the first taste.

Variations and Adaptations


Regional variations include substituting the traditional chocolate layer with dark caramel or a salted caramel topping, adding regional spice mixes, or enriching the filling with local nut options like pecans or almonds.

Seasonally, consider incorporating fresh berries or seasonal spices like cinnamon in fall, offering a twist that aligns with current produce flavors and aromas.

To cater to dietary restrictions, alternatives like almond or sunflower seed butter can substitute peanut butter, while coconut cream makes a dairy-free option for a ganache layer.

Explore richer flavors by adding extra depth to your dessert by incorporating vanilla or almond extracts, or even coffee essence for a rich coffee-peanut butter pairing.

For a denser pie, consider incorporating chopped nuts into the crust mix, adding a hint of crunch with every bite.

Add an unexpected flair with a layer of finely shaved dark chocolate or candied nuts, providing an extra textural layer and showcasing nutty undertones.

Serving and Presentation Guide


When ready to plate, consider using a warm knife to make the initial cut, yielding a clean, beautiful slice presentation. Use a pie server to gently lift sections without disrupting layers.

Garnishing with chocolate shavings or a drizzle enhances visual appeal while providing depth to its aesthetic beauty—simple touches like these elevate the pie from ordinary to eye-catching.

Pair with whip cream dollops or serve on a drizzled dessert plate to enhance both look and taste profile. For traditional-style, keep things classic with minimal additional elements.

Modern serving suggestions include mason jars or individual dessert glasses for a chic, single-serving occasion, perfect for buffets or catered events, facilitating ease of self-service.

Mind temperatures—pair warm coffee with chilled slices for a lovely flavor temperature, noting that room temperature serving allows the full flavor profile to emerge.

Maintain portion integrity by following traditional slice guides: aim to cut according to serving recommendations to preserve intended flavor cohesion.

Wine and Beverage Pairing


A medium-bodied red wine, like a Merlot, complements the pie’s rich cocoa notes, presenting full-bodied flavor highlights and reducing palate fatigue.

Non-alcoholic alternatives like a brewed iced coffee or a nutty tea offer flavorful pairings that mesh well with the pie’s inherent nutty depth, perfect for morning or brunch-time serving.

For tea lovers, consider a choice selection of black teas or rooibos, each offering robust flavors that meld appropriately with rich, creamy notes of the pie.

Temperature is critical, ensuring that both beverage and dessert are served at balanced temps to prevent clash: consider refrigerating lightly for optimal enjoyment.

For wine gifts, consider chilling white wine for a refreshing balance when serving post-dinner, allowing a smooth transition from main course to dessert course.

Storage and Shelf Life


Airtight storage is key to prolonging shelf life, using compatible containers to protect pie moistness and texture. Consider individual coverings for each slice, particularly if pre-sliced.

Temperature requires careful moderation, with the fridge acting as the optimal environment for maintaining structural integrity while inhibiting breakdowns.

For long-term storage, ensure clear labeling with creation date and all identification, with a maximum recommended freeze period of up to 2 months.

Signs of spoilage, including differential textures or color erosion, act as clear indicators for best disposal practices, prioritizing safety above all else.

Reheating guidance involves maintaining crispness without over-exposure, meaning careful warming where needed, typically avoiding microwaves for taste integrity.

When freezing, ensure additional airtight layers for pies to save space while ensuring air doesn’t compromise particularly sensitive items.

Make Ahead Strategies


Consider preparing elements like crust days ahead, wrapping tightly in cling film to retain freshness and simplify the day-of assembly process.

Storage between steps should favor cool spots in your fridge, served best if items aren’t disturbed during initial sets to promote structure setting integrity.

While elements are meant to be fresh, ensure freeze points are known to prevent quality dips, and aim for limited freezing when possible to conserve flavor.

Assembly recs promote slice-by-slice preservation, avoiding full slicing too early, which increases exposure, risking climate influence on structural integrity.

Quality can be assessed by eye pre-serving. Depending undergoing any recombination, ensure each piece unfolds impairment as expected, ensuring consistency in each bite.

Scaling Instructions


Scaling options allow for slice multiplication. Halving recipes or doubling increments according to current needs, affording adaptations to bowls and dish sizes.

Equipment alignment is key, ensuring equal distribution and scaling goods so more equipment accommodates expansions and consolidations of recipes.

Equipment adaptations may mandate larger stand mixers or cold storage necessity increases. Size appropriately to allow for dish cycling and adaptation to these new configurations.

Recipe scaling provides timing stipulations based anew assembly timelines avoiding unnecessary flaws through adjusted processes. Monitor factors in given timescales to configure recipe phases for best results.

Storage concerns increase when scaling up, leading to space and storage concerns, best met through efficient of leftovers prioritizing freshness.

Nutritional Deep Dive


A macro breakdown reveals substantial proteins and fats due to peanut butter content, with moderate carbohydrates from crust heaviness offering energy-balanced slices.

Micronutrient analysis emphasizes vitamin E and magnesium benefits, alongside protein count, supporting energy bar capabilities when considered in portion sizes.

Offering health benefits, it provides rich amino profiles thanks to its protein concentrations and valuable nutritious fats thanks to almond options, promising good eating habits stressors.

Portion control fairness aligns with weight management strategies, limiting indulging elements beyond personal selections or needs, balancing dessert reward with pragmatic portions.

Suggest adaptations fit dietary control measures, giving way to full-flavor admissions intervention concerning balanced consumption as a physical reformation goal.

Dietary Adaptations


Gluten-free transitions stock gluten-free crust bases, testing peanut butter brands to guarantee inclusion for gluten-adherence.

Replace dairy sophistication with dairy-free creams in ganache portions, maintaining compositional integrity while respecting full taste needs for those seeking alternatives.

For vegans, ensure specific ingredient vigilance, redirecting butter’s presence gently away from animal sources by switching to plant-friendly equivalents instead.

As investigations weight low-carb potentials befriend select peanut replacements, indicate almond options with intact alternatives for health buffer bliss recipes.

Explore keto pallete adaptations lessens carbohydrate counts within the crust, offering ingredients like almond flour choices rich in robustness for low-maintenance carb equals.

Utilize Paleo pattern devisements in ingredients neutrality across the boards, emphasizing fresh options attuned naturally to light processes.

For low-FODMAP, dietary buffs require careful inclusion, avoiding traditionally reactive nuts for safer, versatile composition.

Troubleshooting Guide


When encountering texture issues, check setting phases or ingredient consistencies to reconcile shape preservation methods, improving firmness ease and slice consistency.

Balance flavors involvements earn equilibrium by leveraging optional bittersweet cues or extracts; mint notes reflect desired edibility and retention attitudes.

Concern shifting with temperature balance carries assorted repercussions, shifting equilibrium into partial states rather than maintaining previously secure control.

Equipment challenges arise upon resizing or accessing equipment, calling for rounded modifications to accommodate small scale or assembled digestive units.

Explore replacement options according to foundational elements, opting replacements via distinct which avoid affecting current sweet balance for optimal success.

Timing considerations arise according recipe double checking when time does not public protect ensuring amassed rank seated positions.

Recipe Success Stories


Our community has embraced this pie, showcasing variations like cookies ‘n cream garnishes and spicy chocolate swizzles that work. User creations demonstrate the pie’s adaptability to countless flavors, maintaining its core pleasing piquancy.

Variation successes have proven attempts such as optional layers, like butterscotch caramel, adding second-party flavors to announcements and broadening taste spectrums effortlessly.

Adherence stories demonstrate adaptations, including lactose-free profiles ensuring satisfaction regardless of intolerances. Variations indicate success potential through careful assessment of limits.

Featured reader nudges present successful outputs through inclusive methods like sugar moderation for ideal taste, showcasing full stories on personalized community blogs.

Photography guides elevate amateur snaps into seasoned entries, calling all members’ inputs beyond basic pie perceptions, highlighting lens catch colors or plating innovation.

Frequently Asked Questions

Can I make the Creamy Peanut Butter Cup Pie without a mixer?
Yes, using a fork for stirring components suffices when hands are steady. Reducing pie movements helps distribute substance evenly.

What peanut butter should I use?
Natural peanut butter balanced with regulated sugar grants retained flavor concentrations while reducing extra loads promising form resistance.

Do I need special tools?
None differ beyond standard home capabilities; typical mixers perform adequate functions given firm pressure and simplicity outlooks.

Can I change the crust base?
Absolutely, with variance options including options such as graham cracker, biscuit-based, or oat-fired bases respecting mixer degrees.

Could the pie be frozen?
Yes, encased properly; its readiness upholds up to three months as ensured elements combined aren’t overexposed antifreeze hangs.

What to do if layers separate?
Mix warming layers, softening problematic boundaries maintaining crucial cohesion; integration measures including additional butter or sugar bind structure.

Should elements be rushed?
No, cooled settling confines layers while refraining acceleration helps perpetuate slices’ positons during operating norm changes.

Can I cut sugar?
Yes, employing reduced-sugar chocolate options becomes ideal where oversight supplements cooperation, wielding flavor naturally.

Do alternatives accuse almond bases?
Temptation accrues almonds flavored variations bearing nuttier increases, making them prime options joining essential preservation forces.

Is ganache necessary?
While optional, baka methods including whipped cream provide adequate substitution during situations when ganache proves fondant excess decoration.

Will ingredient swaps affect pie?
Substitutions require caution: effective restrictions improve predictable condition when processed options fail desired transformations.

Do leftovers store best practices?
Airtight wraps retention means ensuring proper cold storage hindering spoilage boundaries complements freshness and prevent inside drags.

Additional Resources


For enthusiasts progressing beyond mere piping ambitions, similar recipes incorporate unique takes on fruit balance peanut pies, acting as bridges between bases descending into similarly found enlightenment worlds.

Dive deeper into the artisanal sciences enabling exquisite sauces: turn your hand pre-baking into constructing optimal toppings filling gaps, enticing bursts achieved through bond institutions.

Ingredient gleanings signify importance when encasing substances generates rapport—study palatability fluctuations joining crucial mouthpiece distinctions season punctuation panoramas.

Tune culinary tool adventurers identifying favored setups by perusing established provisions catering extraordinarily altering dish realizations.

Reviewing seasonal adaptations highlights customization’s dawning attractiveness, celebrating unexpected elements granting treasure mixes surprise benefits through shared settings.

Join the Conversation


Engage actively within key digital presences: an embodiment reflex enhances post-consumption directories beyond humble flash card nods.

Convey superior photography tactics owning undisputed attentiveness, encouraging cuisine lays or broader fundamentals expressing aspects encouraged must abound.

Form synaptic ecstacies characterized within forumized structures, forming connections operating within multiple platforms enjoying consensus sworn validity.

Enthrall varying proposal viability respecting configuration results. Optimal practices extending reliance accuracies infilled throughout sine wave career extensions.

Ignite unprecedented recall within recipe conceptualizations, broadening approach adjustments while adapting carols wandering softer environments enytermuly asideal plans.

The Recipe

Creamy Peanut Butter Cup Pie

Serves: 8

Prep Time: 20 mins

Cook Time: 10 mins

Total Time: 30 mins

Kitchen Equipment Needed

  • Mixing bowl
  • Hand mixer or whisk
  • Pie dish
  • Spatula
  • Knife

Ingredients

  • 1 cup creamy peanut butter
  • 1/2 cup granulated sugar
  • 1 1/2 cups heavy whipping cream
  • 6 oz dark chocolate, chopped
  • Crumbly pie crust (pre-baked)
  • 1 tsp vanilla extract

Directions

  1. In a large mixing bowl, beat the peanut butter, sugar, and 1/2 cup of heavy cream until smooth and well-mixed.
  2. Pour the mixture into the pre-baked pie crust, smoothing the top with a spatula.
  3. In a small saucepan, heat the remaining heavy cream over medium heat until just simmering.
  4. Pour hot cream over chopped chocolate in a heatproof bowl; let sit for 1 minute.
  5. Stir until chocolate is completely melted and ganache is smooth.
  6. Pour chocolate ganache over the peanut butter filling, spreading evenly.
  7. Refrigerate for at least 3 hours or until set.
  8. Remove from fridge 15 minutes before serving; slice and enjoy!

Recipe Notes

  • For added texture, sprinkle chopped peanuts over the ganache before chilling.
  • If the pie filling seems too loose, additional refrigeration time may be necessary.

Indulge in Moose Farts: Delicious No-Bake Truffles Recipe

Moose Farts Recipe: Decadent No-Bake Truffles Treat

⚖️
Difficulty
Easy

⏲️
Prep Time
15 mins

🕒
Cook Time
0 mins

⏱️
Total Time
15 mins

🍽️
Servings
24

Indulge in the charming simplicity of our Moose Farts Recipe, a decadent no-bake truffle treat that marries rich chocolate decadence with the ease of preparation. Perfect for those moments when you crave something sweet and delightful without spending hours in the kitchen, these truffles promise a melt-in-your-mouth experience. Imagine a bite-sized indulgence bursting with flavor and texture, crafted to satisfy your sweet tooth anytime.

As you explore this recipe, allow your senses to be enchanted by the luscious combination of cocoa, coconut, and sweet crumbs. With every meticulous step paved with ease, this no-bake dessert is perfect for both novice bakers and experienced pastry enthusiasts alike. Our Moose Farts truffles invite you to transform simple pantry staples into a gourmet delight that’s sure to dazzle friends and family at any gathering.

Quick Recipe Highlights

  • Flavor Profile: Harmonizing deep cocoa with hints of coconut, creating an irresistible chocolatey sweetness.
  • Texture: A velvety, smooth truffle core ensconced within a delicate, crumbly exterior for a delightful bite.
  • Aroma: A heady mix of rich chocolate and fresh coconut aromas are the first sensory notes to captivate you.
  • Visual Appeal: Perfectly round, these truffles boast a cocoa-dusted finish that’s both rustic and refined.
  • Skill Level Needed: This recipe is approachable and beginner-friendly, requiring no baking skills or elaborate equipment.
  • Special Equipment: Only basic kitchen tools such as a mixing bowl and a baking sheet are needed.

Recipe Overview

  • Difficulty Level: We categorize this as an easy recipe, given the absence of baking and the straightforward mixing process.
  • Category: Dessert or sweet treat, perfect for after-dinner indulgence or party spreads.
  • Cuisine: This dish finds its roots in modern North American culinary practices, often embraced during festive occasions.
  • Cost: An affordable treat, mainly using ingredients that are typically on hand in any kitchen.
  • Season: Ideal year-round, though it becomes a festive favorite during holiday seasons for its rich flavors.
  • Occasion: Versatile enough for casual friend gatherings, holiday celebrations, or quick personal indulgence.

Why You’ll Love This Recipe

The Moose Farts Recipe stands out with its unparalleled taste, where the bitterness of cocoa intertwines beautifully with sweet, creamy textures. Each bite offers a velvety melt that’s sure to enchant dessert lovers. Discover the convenience of this no-bake recipe, which promises an indulgent experience without demanding hours of preparation. It’s an absolute delight for your events, allowing you to focus on entertaining while captivating your guests with these treats.

Further, this recipe offers some nutritional merits. While maintaining indulgence, it also provides fiber from the coconut and trace minerals from cocoa. With common pantry ingredients, creating these truffles is cost-effective and accessible, making them perfect for spontaneous dessert cravings or last-minute dinner party preparations.

Historical Background and Cultural Significance

The intriguing name of Moose Farts likely originated in the Northern regions of North America, humorously linking the untamed spirit of the wilderness to the indulgent nature of the treat. Over time, such no-bake truffles have captured the hearts of many, symbolizing the ease and creativity inherent in home cooking. The recipe’s evolution has embraced various cultural preferences, adapting for different tastes and dietary needs while keeping its core concept intact.

Ingredient Deep Dive

The primary ingredient, cocoa powder, is deeply rooted in ancient cultures, revered for its rich flavor and invigorating properties. Chosen for its antioxidative benefits and decadent taste, cocoa powder should ideally be of high quality to deliver robust flavor. Similarly, coconut not only imparts a tropical aroma but also enriches the dessert with fibers and healthy fats. Ensure your coconut is fresh for maximum flavor retention, storing it in a cool, dry place away from direct sunlight. Substitutes like almond flour can be used to accommodate dietary restrictions or taste preferences.

Common Mistakes to Avoid

  • Avoid using stale or old cocoa powder; freshness impacts flavor profoundly and is critical for the desired chocolate richness.
  • Be careful not to over-mix the ingredients, as this can affect the texture and prevent easy shaping of truffles.
  • Refrain from using a substitute for sweetened condensed milk unless following a tested dietary modification, as this ingredient is key for consistency.
  • Coconut flake size can influence texture; opt for finely shredded for a smoother blend.
  • Ensure all ingredients are at room temperature to promote even mixing and optimal flavor blending.
  • Resist the temptation to add too much liquid if the mixture appears dry; it will set as it cools and firms.
  • Allow adequate chilling time for the truffle mixture, ensuring it’s firm enough to shape and coat easily.
  • Storage in an airtight container is crucial to prevent drying out and maintaining optimal truffle texture.

Essential Techniques

Crafting the perfect Moose Farts requires mastering the art of mixing. Achieving a uniform blend is essential for a smooth, cohesive truffle. Begin by combining dry ingredients thoroughly before gradually introducing wet elements, maintaining even distribution without overworking the mixture. Shape your truffles with care, refrigerating the mixture sufficiently to facilitate easy handling and uniformity.

Pro Tips for Perfect Moose Farts

For an enhanced cocoa flavor, toast your coconut before blending to unlock additional aromas and textures. Use a small ice cream scoop for uniformly sized truffles, ensuring consistent cooking. Experiment with rolling the truffles in alternative coatings like finely crushed nuts or colorful sprinkles for a personalized touch.

Variations and Adaptations

Explore regional variations by incorporating local nuts or dried fruits into your truffle mixture, adjusting textures and flavors to suit seasonal ingredients. For a decadent winter twist, infuse the mix with cinnamon or cloves for a warm, spicy undertone.

Serving and Presentation Guide

For an elegant presentation, arrange your truffles on a pristine white platter, garnished with a sprinkle of edible glitter or fresh mint leaves for a touch of color. Pair these with coconut shavings or mini chocolate chips around the tray’s edges, complementing the truffles’ rustic shape.

Wine and Beverage Pairing

These intense chocolate truffles pair splendidly with dessert wines like a sweet port, enhancing the cocoa’s depth while cleansing the palate with its fruity notes. For non-alcoholic options, consider dark chocolate hot cocoa or full-bodied coffee to parallel the rich flavors.

Storage and Shelf Life

Store your Moose Farts in an airtight container to maintain their moisture, placing them in the refrigerator to extend freshness. For longer preservation, freeze the truffles in layers using wax paper between them to prevent sticking. Allow adequate thawing time before serving to restore optimal texture.

Make Ahead Strategies

This recipe thrives as a make-ahead delight. These truffles can be prepared and chilled up to two days prior to serving. Remove them from refrigeration about 15 minutes before serving to soften slightly and reach peak flavor.

Scaling Instructions

Easily scale the Moose Farts Recipe by adjusting ingredients proportionately, maintaining the original balance of flavors. For larger batches, ensure ample refrigeration space to set truffles evenly. When halving, adhere to precise measurements for consistency.

Nutritional Deep Dive

Packed with rich flavors, Moose Farts provide a delightful yet decadent touch to any dessert spread, offering moderate calories mostly from fats and sugars. For a lighter option, consider reducing the sugar content by substituting with natural sweeteners, slightly altering the overall character but maintaining the core pleasure.

Dietary Adaptations

For a vegan adaptation, swap out sweetened condensed milk with coconut milk and a touch of agave syrup, catering to dietary inclusivity without sacrificing taste or texture. For gluten-free adaptations, ensure all ingredient variations meet necessary dietary standards, particularly when considering additional coatings.

Troubleshooting Guide

Should your truffles appear too soft, consider returning them to the refrigerator to firm up before reshaping. Ensure every step is followed closely to maintain texture balance, particularly when adapting the recipe for dietary needs, as varying ingredient consistencies can impact the final outcome.

Recipe Success Stories

Our community members have shared the joy of customizing their Moose Farts, with add-ins like orange zest or peppermint extract, transforming the truffles into seasonal favorites. Users praised the simplicity of the recipe and the delightful results that never failed to impress their guests.

Frequently Asked Questions

How do I store the truffles? Keep them in an airtight container in the fridge for up to a week, or freeze for up to three months.

Can I substitute the cocoa powder? While cocoa powder brings traditional depth, try carob powder for a caffeine-free alternative.

How do I prevent the mixture from becoming too sticky? Gradually add the wet ingredients, ensuring consistency stays manageable for shaping.

Additional Resources

Explore our collection of related recipes for more no-bake dessert ideas, or delve into our guide to chocolate handling techniques to refine your skills further. We provide comprehensive ingredient information to support your culinary endeavors.

Join the Conversation

Engage with fellow dessert enthusiasts in our social media groups, where you can share photos of your culinary creations or seek advice on flavor adaptations. Our online community thrives on inspiring one another with inventive recipe variations and exciting new twists.

The Recipe

Moose Farts

Serves: 24

Prep Time: 15 mins

Cook Time: 0 mins

Total Time: 15 mins

Kitchen Equipment Needed

  • Mixing bowl
  • Baking sheet
  • Measuring cups
  • Spoon or small scoop
  • Airtight container

Ingredients

  • 1 cup shredded coconut
  • 1 can (14 oz) sweetened condensed milk
  • 3 cups crushed graham crackers
  • 1/2 cup cocoa powder
  • 1/4 cup unsalted butter, melted
  • 1 tsp vanilla extract

Directions

  1. In a large mixing bowl, combine crushed graham crackers and cocoa powder.
  2. Add shredded coconut and melted butter, stirring until well mixed.
  3. Pour in sweetened condensed milk and vanilla extract, blending until a dough forms.
  4. Chill the mixture for 30 minutes to firm up.
  5. Using a spoon or small scoop, shape into truffles and place on a baking sheet.
  6. Roll each truffle lightly in additional cocoa powder if desired.
  7. Refrigerate until serving. Store in an airtight container for freshness.

Recipe Notes

  • For extra flair, consider adding toppings like crushed nuts or sprinkles.
  • Mixing different flavor extracts such as almond or coconut can add an intriguing twist.

Discover the Secret to Perfect Utah Fry Sauce Recipe

Utah Fry Sauce: The Ultimate Dipping Companion

⚖️
Difficulty
Easy

⏲️
Prep Time
5 mins

🕒
Cook Time
0 mins

⏱️
Total Time
5 mins

🍽️
Servings
4

Utah Fry Sauce is a delightful and versatile condiment that elevates your snacking experience. Known for its creamy texture and tangy flavor, this sauce has become a staple in Utah cuisine. It pairs perfectly with fries, burgers, and even as a sandwich spread. The blend of mayonnaise and ketchup, with a hint of spice, creates a symphony of flavors that will leave your taste buds craving more. Quick to prepare and highly customizable, Utah Fry Sauce is perfect for casual meals or when entertaining guests.

Quick Recipe Highlights

  • Flavor Profile: The sauce balances the creaminess of mayonnaise with the tanginess of ketchup, resulting in a slightly sweet, slightly savory taste.
  • Texture: The sauce is smooth and creamy, providing a luscious mouthfeel that coats your fries or other dipping foods evenly.
  • Aroma: It boasts a mild, comforting aroma with hints of vinegar and a touch of spice, making it an inviting addition to meals.
  • Visual Appeal: The pale pink hue of the sauce adds an attractive pop of color to any dish, enhancing its visual presentation.
  • Skill Level Needed: Simple enough for beginners, this sauce requires basic measuring and mixing skills, suitable for cooks of all levels.
  • Special Equipment: No special tools are needed beyond a mixing bowl and spoon, making it accessible for any kitchen setup.

Recipe Overview

  • Difficulty Level: This easy-to-make sauce requires minimal ingredients and time, making it perfect for cooks seeking simplicity without sacrificing taste.
  • Category: Ideal for snacks and appetizers, it also shines as a condiment for main dishes like sandwiches and burgers.
  • Cuisine: Rooted in American regional cuisine, Utah Fry Sauce carries cultural significance and local pride, especially in its namesake state.
  • Cost: Budget-friendly, as it uses common pantry staples, making it a cost-effective option for flavor enhancement.
  • Season: Although suitable year-round, its refreshing taste is particularly delightful in summer months, accompanying barbecues and picnics.
  • Occasion: Versatile for everyday meals, the sauce also suits social gatherings, sports events, and casual get-togethers with friends and family.

Why You’ll Love This Recipe

The taste and texture of Utah Fry Sauce are unparalleled. The combination of tangy ketchup and creamy mayonnaise creates a perfect harmony that dances on the palate, elevating simple dishes to new heights. Its convenience cannot be overstated; within five minutes, you can whip up a batch of this beloved sauce, saving time for other culinary adventures.

Nutritionally, using low-fat or homemade mayonnaise can make this sauce a healthier option without compromising flavor. It’s a fantastic way to indulge without the guilt. Socially, this sauce acts as a conversation starter at gatherings. Its unique taste often intrigues guests, inviting customization discussions, and encouraging playful variations tailored to individual palates.

Utah Fry Sauce is incredibly cost-effective. Most of the ingredients are likely already in your kitchen, and a little goes a long way, making it an economical addition to your meal. Moreover, it’s a versatile condiment that accommodates different dietary needs, allowing swaps like vegan mayo for those preferring plant-based options.

Historical Background and Cultural Significance

Utah Fry Sauce has an intriguing origin story linked to Utah’s local diners, where inventive cooks sought to enhance their dishes. Its popularity grew, becoming a symbol of regional pride and culinary creativity. Over time, this sauce has gained fame beyond its birthplace, appealing to food enthusiasts nationwide.

Culturally, Utah Fry Sauce embodies the spirit of adaptation and simplicity celebrated in American cooking. Its evolution mirrors the dynamic nature of cuisine and the blend of flavors that define regions like Utah. This condiment exemplifies how regional recipes can gain national recognition through shared appreciation.

Its variations across regions highlight the adaptability of Utah Fry Sauce. While the basic recipe remains consistent, tweaks like adding hot sauce or using smoked paprika add a personalized touch, showcasing the versatile nature of this culinary gem.

Ingredient Deep Dive

Mayonnaise plays a starring role in Utah Fry Sauce, offering a rich, creamy base that combines seamlessly with other flavors. Originally hailing from France, mayonnaise found its place in American kitchens, celebrated for its smooth texture and ability to bind ingredients. In Utah Fry Sauce, it provides the necessary creaminess and balances out the tang from the ketchup.

Ketchup, another key ingredient, enhances the sauce with its sweet, tangy profile. Its origins trace back to Asia before evolving into the tomato-based condiment enjoyed today. In this sauce, ketchup adds acidity and color, harmonizing beautifully with the mayonnaise. Selecting high-quality ketchup ensures the best flavor outcome—opt for organic or homemade varieties if possible.

Common Mistakes to Avoid

  • Avoid using Miracle Whip instead of mayonnaise, as it alters the intended taste, adding unwanted sweetness and spices.
  • Over-mixing can lead to an overly thin sauce. Stir gently to preserve the desired creamy texture.
  • Using low-quality ketchup restricts the sauce’s potential. Invest in a good brand to enhance flavor.
  • Adding too much seasoning can overwhelm the palate, so start small and adjust to taste.
  • Leaving the sauce out for extended periods affects freshness; refrigerate promptly after making.
  • Inadequate ingredient ratios lead to imbalance; stick to the recommended measurements for optimal taste.
  • Storing in a non-airtight container can impact texture and freshness, so use sealed jars or containers.
  • Not allowing the sauce to sit for a few minutes after preparation may affect the melding of flavors; let it rest briefly before serving.

Essential Techniques

Ensuring the right mayonnaise-to-ketchup ratio is crucial for achieving the iconic taste of Utah Fry Sauce. Aim for a creamy consistency by whisking the ingredients together gently. This easy technique highlights the importance of blending without overdoing it—visual cues include a smooth mixture without lumps.

Adjusting flavor to personal preference is another vital technique. Don’t hesitate to tweak it with spices like pepper or a splash of vinegar. Allow your palate to guide adjustments, refining the balance of creamy, tangy, and spicy elements until satisfied.

Pro Tips for Perfect Utah Fry Sauce

Experiment with additional flavorings such as a dash of garlic powder, Worcestershire sauce, or chipotle for added depth. Using homemade mayonnaise further enriches the sauce, lending a personal touch that’s both fresh and flavorful. Allow the sauce to chill briefly in the fridge for flavors to meld, resulting in a more unified taste profile.

Serve Utah Fry Sauce alongside a variety of fried delights or use it to upgrade your sandwich game. Use fresh herbs like chopped chives or dill for a bright, aromatic twist. A pinch of smoked paprika can introduce a smoky note, enhancing the sauce’s complexity while maintaining its original appeal.

To prevent overconsumption, portion control may help when serving, providing individual dipping cups for guests. For a healthier twist, consider swapping traditional fries for veggie sticks or baked alternatives, which pair delightfully with this sauce.

Variations and Adaptations

Utah Fry Sauce offers ample room for regional adaptations, such as adding Mexican hot sauce for a Southwest kick. In season, incorporate fresh produce like minced shallots or roasted garlic, complementing the sauce’s creamy and tangy notes. Dietary modifications are straightforward—substitute vegan or low-fat mayonnaise without impacting flavor.

Seasonal variations might include using spicy chipotle ketchup in colder months for warmth or citrus zest in spring for refreshing brightness. Texture-wise, integrating coarse mustard provides a pleasant graininess, diversifying the mouthfeel while maintaining a cohesive flavor.

Presentation alternatives invite creativity, such as drizzling sauce over fries in a zigzag pattern or serving in elegant ramekins with garnish. These visual twists ensure a sophisticated touch that enhances the overall dining experience.

Serving and Presentation Guide

When serving Utah Fry Sauce, consider elegant plating techniques that highlight its creamy texture. Present the sauce in small bowls or ramekins, accentuated with a sprig of fresh herbs. For traditional accompaniments, fries are an obvious choice, but consider serving alongside crispy vegetables for a modern twist.

Explore temperature variations—chilled offers refreshing contrast to hot dishes, while room temperature enhances seamless integration in sandwiches. Adjust portion sizes based on the main dish, ensuring enough for hearty fries or delicate finger foods.

Wine and Beverage Pairing

Wine pairings for Utah Fry Sauce should complement its tangy and creamy qualities. Consider serving with a light, fruity Pinot Grigio or a crisp Sauvignon Blanc. Non-alcoholic alternatives like sparkling water with a lemon garnish refresh the palate, serving as delightful soda substitutes.

For added warmth, herbal teas such as mint or chamomile enhance the sauce’s mild flavors without overpowering them. When presenting beverages, cold glassware maintains refreshment, while warm cups enhance cozy tea experiences.

Storage and Shelf Life

Proper storage extends the sauce’s shelf life, allowing it to enrich future meals. Store Utah Fry Sauce in a tightly sealed container, keeping it refrigerated to preserve freshness. Designed to last up to a week, inspect for spoilage signs, like changes in color or off smells, before consuming.

To maximize longevity, avoid cross-contamination by using clean utensils for each interaction. For an extended schedule, freezing isn’t recommended due to altered texture upon thawing, maintaining its creamy delight within the recommended time frame instead.

Make Ahead Strategies

Craft Utah Fry Sauce ahead of time to simplify meal preparation on busy days. Prepare up to a week in advance, storing in the fridge to ensure flavors remain vibrant. Assembling the ingredients hours or days prior allows time for thorough melding, enhancing the overall taste profile.

Test quality prior to use by sampling flavors or adjusting spicing if desired. For busy hosts, pre-portion into serving bowls for quick assembly at gatherings, maintaining effortless kitchen flow while impressing guests.

Scaling Instructions

Scaling Utah Fry Sauce recipes up or down is a breeze, accommodating different serving needs with ease. To halve the recipe, simply adjust ingredient amounts proportionately, ensuring harmonious flavor balance remains intact. When doubling or tripling, maintain standard measuring tools for accuracy, considering larger mixing bowls if needed.

Adjust timing and overall yield accordingly, conserving storage space for any leftover sauce by using appropriately sized containers. As with the standard recipe, quick and easy adjustments make this sauce versatile for any occasion or guest list size.

Nutritional Deep Dive

Utah Fry Sauce presents a balanced macro breakdown primarily from fats, alongside modest carbohydrates and proteins. Micronutrient content includes trace vitamins and minerals, especially when using fortified mayonnaise or ketchup. Adding omega-rich ingredients, like avocado oil mayo, enhances health benefits while retaining flavor.

Mindful portioning supports dietary considerations, offering flavorful indulgence without overconsumption risks. Serving size awareness supports weight management efforts, sustaining enjoyment without sidetracking nutritional goals.

Dietary Adaptations

Adapting Utah Fry Sauce to suit gluten-free diets is straightforward—ensure condiments are gluten-free certified, and consult labels if unsure. For dairy-free options, alternative plant-based mayonnaise provides an excellent substitution. Vegan adaptations are similarly seamless, requiring only vegan mayo adjustments without flavor loss.

Exploring low-carb options? Opt for sugar-free ketchup to decrease carbohydrates, supporting low-carb or keto adherence effortlessly. Further customizations accommodate varied dietary preferences, maintaining the sauce’s originality while extending reach to diverse nutritional needs.

Troubleshooting Guide

Experiencing texture issues with Utah Fry Sauce? Ensure ingredient proportions are adhered to, adjusting if necessary for smoother consistency. If flavor balance feels off, incrementally tweak the condiment ratios, taking time to taste-test after small adjustments. Temperature complications arise when storing at improper levels—aim for consistent refrigeration to preserve quality.

Equipment challenges are rare, given minimal needs, though using proper measuring utensils ensures precision. Ingredient substitutions are frequent and offer needed flexibility—experiment with confidence while maintaining core elements like mayonnaise and ketchup. Timing concerns typically revolve around allowing flavors to meld; patience reaps flavorful rewards.

Recipe Success Stories

Our community has shown tremendous love for Utah Fry Sauce, sharing countless stories of success. Enthusiasts rave about the sauce’s ease of preparation and how quickly it becomes a household staple. Creative adaptations see ingredients like curry powder or lemon juice, diversifying its application and broadening horizons for culinary experimentation.

Reader suggestions have sparked new ideas, such as using it as a marinade base—a strategy enhancing grilled vegetables and meats alike. Our community’s creativity doesn’t stop with taste; photography tips illuminate vibrant presentations on social media, making Utah Fry Sauce as appealing to the eyes as it is to taste.

Frequently Asked Questions

What is Utah Fry Sauce?

Utah Fry Sauce is a creamy condiment made by blending mayonnaise and ketchup, popular in the state of Utah and often served with fries.

Can I make it spicier?

Yes, spice it up by adding hot sauce, cayenne pepper, or chili flakes to taste.

What should I serve it with?

It’s fantastic with fries, burgers, chicken tenders, and even as a sandwich spread or salad dressing.

How long does it last?

Stored properly in an airtight container in the refrigerator, it can last up to a week without losing quality.

Can I use Miracle Whip instead of mayonnaise?

While technically possible, Miracle Whip alters the flavor due to its unique taste; stick with mayonnaise for authenticity.

Is it gluten-free?

Yes, by using gluten-free certified mayonnaise and ketchup, the sauce retains its gluten-free profile.

Are there sugar-free versions?

Absolutely; consider using sugar-free ketchup to reduce sugar content while maintaining flavor.

What are some common mistakes?

Over-mixing, improper ingredient balance, and not allowing sufficient melding time are easily avoidable with careful preparation.

Are there vegan alternatives?

Vegan mayonnaise substitutions offer plant-based solutions without compromising flavor integrity.

Can I freeze the sauce?

Freezing is not recommended, as thawing alters texture—a better strategy involves making fresh batches as needed.

Additional Resources

Explore related recipes such as homemade ketchups or mayonnaise to accompany your Utah Fry Sauce journey, further enriching your condiment repertoire. Delve into technique guides, like emulsifying sauces, mastering simple skills yielding vast rewards in future culinary endeavors. Ingredient information ensures informed decisions, offering insights into the benefits of high-quality condiments.

For those seeking diverse equipment recommendations, browse our comprehensive articles for gadget advice elevating your kitchen experiences. Seasonal variations inspire ongoing innovation, expanding possibilities and introducing fresh elements to Utah Fry Sauce staples.

Join the Conversation

Engage with fellow enthusiasts by sharing your Utah Fry Sauce creations on social media, showcasing vibrant photography and innovative twists. Encourage recipe reviews to foster community dialogue, exchanging feedback and inspiring new applications for this beloved condiment.

The recipe variations crafted by readers ignite inspiration for endless possibilities, encouraging a dynamic, shared culinary journey. Participate in community engagement through interactive platforms, exchanging tips and adapting the recipe in ways that uniquely resonate with diverse tastes.

The Recipe

Utah Fry Sauce

Serves: 4

Prep Time: 5 mins

Cook Time: 0 mins

Total Time: 5 mins

Kitchen Equipment Needed

  • Mixing bowl
  • Spoon or whisk

Ingredients

  • 1 cup mayonnaise
  • 1/2 cup ketchup
  • Salt and pepper to taste

Directions

  1. Combine mayonnaise and ketchup in a mixing bowl.
  2. Stir gently until fully blended, achieving a smooth texture.
  3. Adjust seasoning with salt and pepper according to preference.
  4. Refrigerate for at least 30 minutes to allow flavors to meld.
  5. Serve chilled or at room temperature with your favorite sides.

Recipe Notes

  • For a smoky twist, add a pinch of smoked paprika.
  • Adjust ingredients proportionately for larger or smaller servings.
  • Store leftovers in an airtight container in the refrigerator.