Delicious Ice Cream Tacos: A Cool Twist on Dessert Tacos

Ice Cream Tacos: A Fun and Sweet Delight

⚖️
Difficulty
Easy

⏲️
Prep Time
20 mins

🕒
Cook Time
10 mins

⏱️
Total Time
30 mins

🍽️
Servings
6

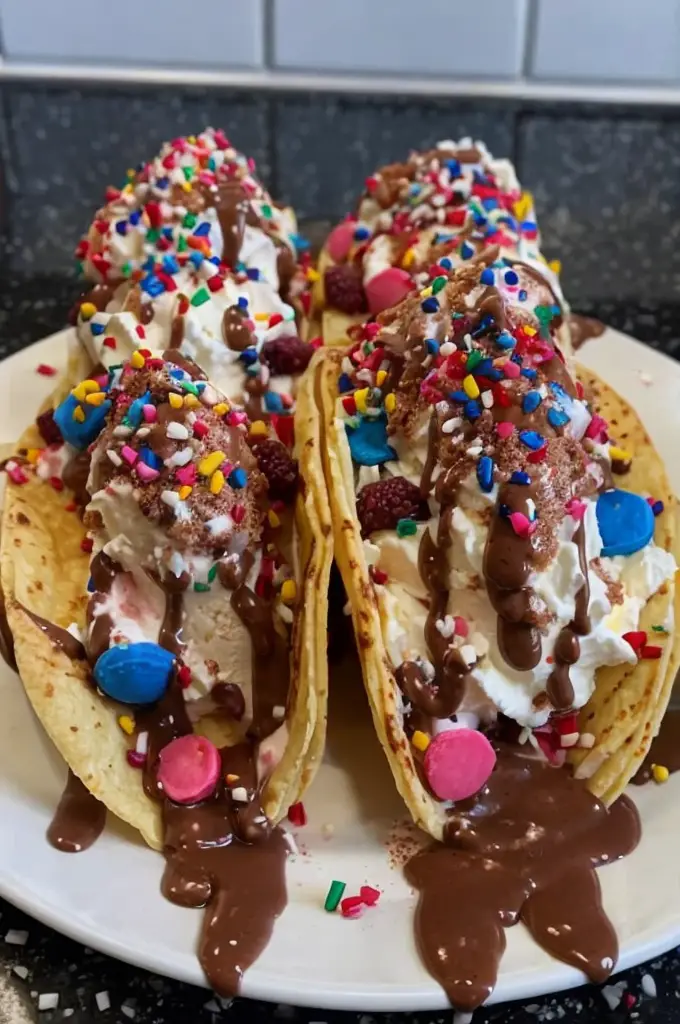
Turn your dessert into a fiesta with this delicious Ice Cream Tacos recipe. These sweet and crisp treats are not only a feast for the eyes but also a thrill for the taste buds. With tones of chocolate and vanilla encased in a crispy taco shell, this dessert offers an irresistible fusion of textures and flavors for any ice cream lover. Perfect for parties or a fun family treat, this Ice Cream Tacos recipe will have everyone raving.

Enjoy the delightful contrast of creamy, cold ice cream paired with warm, chocolate-dipped taco shells. Each bite unveils a lovely blend of smooth, rich vanilla ice cream and the satisfying crunch of the shell, drizzled with chocolate and garnished with your favorite toppings. Whether you’re throwing a party or craving a novel dessert, ice cream tacos are an excellent choice to impress your guests and indulge in something delightfully different.

Quick Recipe Highlights

  • Flavor Profile: Expect a perfect blend of sweet and creamy with the ice cream complemented by rich chocolate and crispy shells.
  • Texture: Savor the smooth, velvety ice cream balanced by the crunchy taco shell and chocolate drizzle.
  • Aroma: Enjoy the inviting aromas of vanilla mingling with chocolate, making the dessert even more irresistible.
  • Visual Appeal: The tacos are visually striking, promising a vibrant presentation with colorful toppings.
  • Skill Level Needed: Simple enough for anyone to make, requiring basic kitchen skills with a focus on dessert assembly.
  • Special Equipment: No special tools are needed, just a waffle maker or iron for shaping the tacos.

Recipe Overview

  • Difficulty Level: This recipe is rated as easy, making it ideal for beginners due to its straightforward assembly and minimal cooking steps.
  • Category: Dessert; perfect for those who love creative twists on traditional ice cream servings.
  • Cuisine: A playful fusion of Mexican and American desserts, combining the charm of tacos with the classic attributes of ice cream cones.
  • Cost: Relatively affordable, making use of common ingredients like waffle mix, ice cream, and chocolate for dipping.
  • Season: Best enjoyed in warmer months when cool desserts are not only refreshing but also a treat for summer gatherings.
  • Occasion: Suitable for birthdays, summer parties, or anytime dessert is called for something unique and fun.

Why You’ll Love This Recipe


The Ice Cream Tacos recipe combines the beloved flavors of vanilla and chocolate with the fun, innovative twist of serving them in a taco form. These tacos offer the perfect blend of creamy, cold ice cream with a satisfying, crunchy shell, making each bite a delightful experience. They’re not only delicious but also exceptionally versatile, allowing you to choose your favorite ice cream flavors and toppings.

Preparation is a breeze with this recipe. Basic ingredients like pre-made waffle mix and store-bought ice cream simplify the process, so you spend less time in the kitchen and more time savoring your creation. The ease of combining the ingredients ensures that even the novice cook can impress both themselves and their guests with this fun dessert.

Ice Cream Tacos allow you to indulge without the guilt. You can tailor them to fit your dietary preferences by choosing low-fat or vegan ice cream options. Toppings like fresh fruits provide added nutritional benefits while keeping the treat on the lighter side.

These tacos are not just a dish; they are an experience. They make for a perfect party dessert or a fun family night, where everyone can customize their taco to their liking. This recipe can effortlessly become the highlight of any event.

The cost-effectiveness of this recipe is impressive due to its reliance on staple grocery items. By choosing seasonal ingredients or buying in bulk, you can reduce the costs even further, making it a budget-friendly way to enjoy a gourmet dessert at home.

Historical Background and Cultural Significance


Ice Cream Tacos represent a fusion of cultural backgrounds, drawing from the Mexican tradition of tacos and the ubiquitous love for ice cream found globally. The concept likely evolved from the infinite possibilities of adapting popular foods to create innovative desserts that capture diverse cuisines in a single dish.

Originally, tacos were savory, crafted from corn tortillas and encompassing a variety of fillings. The idea of using them in a dessert form highlights culinary creativity, showing how classic forms can be reimagined to keep up with evolving food trends.

This dessert has gained momentum, especially in the United States, as a beloved treat, often featured at food festivals and markets where traditional and modern converge to excite the palate. The evolution of Ice Cream Tacos showcases how fun adaptations can bring cultures together through food.

Variations of Ice Cream Tacos can be found across different regions, with chefs and home cooks alike putting their spin on the classic, using locally available ingredients or tailoring to fit vegan or gluten-free preferences.

Ingredient Deep Dive


Waffle Mix: Waffle mix provides the foundation for the taco shell, offering a sweet and slightly savory base. Historically, waffles originated from the Middle Ages in Europe, and their versatility makes them perfect for this dessert adaptation. Choosing a high-quality mix ensures a crunchy shell, while storage in a cool, dry place maintains its freshness.

Ice Cream: The star of this recipe, ice cream adds creaminess and depth. It originated as a luxury treat and has become an accessible comfort food. Selecting premium brands results in a smoother texture, while storing at the optimal freezer temperature preserves its consistency. Feel free to explore flavors to adapt the tacos; from classic vanilla to bold coffee, the possibilities are endless.

Chocolate: Used for drizzling and dipping, the quality of chocolate can make or break the dessert. With a rich history dating back to the Aztecs, chocolate is adored worldwide for its depth of flavor. Properly stored, it maintains optimal melting qualities, enhancing both presentation and taste in your Ice Cream Tacos.

Common Mistakes to Avoid

  • Overfilling the shells can lead to a messy eating experience. Aim for a modest scoop of ice cream to avoid overflow.
  • Not allowing the shells to cool before filling; they must be fully cooled to maintain their shape and prevent wilting.
  • Using low-quality chocolate can lead to poor melting and aesthetic results, impacting the final presentation negatively.
  • Skipping the chilling step after assembly can result in melting, thus detracting from the overall enjoyment.
  • Neglecting to preheat the waffle iron can cause uneven cooking and undesirable texture in your taco shells.
  • Underestimating the hardening time for the chocolate drizzle which could lead to smudges and a less polished look.
  • Choosing ice cream that’s too soft. Opt for a firm texture to ensure a satisfying bite and prevent premature melting.
  • Forgoing parchment paper as a barrier between the tacos and refrigerator shelves can impact presentation adversely.

Essential Techniques


Making the perfect Ice Cream Tacos involves key techniques that enhance both aesthetics and taste:

Preheat your waffle iron and lightly oil its surface to ensure even cooking and prevent sticking. This creates a uniform shell crucial for the taco’s integrity and presentation.

When melting chocolate, do so gradually over a water bath or microwave on low heat. This prevents scorching and achieves a glossy finish that hardens well and clings to the shells effectively.

Ensure all assembly components like shell and melted chocolate are cooled before adding ice cream. This technique maintains structure and prevents premature melting.

Practice portion control with toppings. It’s crucial to ensure each ingredient complements without overwhelming the key flavors, balancing the final dish harmoniously.

Pro Tips for Perfect Ice Cream Tacos


Consider toasting nuts or coconut flakes for a richer flavor before using them as toppings. This enhances their natural taste while adding a crunchy element.

Allow enough time for the tacos to chill post-assembly for the best results. The cooling process ensures the dessert holds its shape and is enjoyable to eat.

Experimenting with flavored ice cream is encouraged but stay mindful of the shell’s sweetness, so the final product doesn’t become excessively sugary.

If hosting a gathering, set up an ice cream taco bar to let guests customize their desserts. This not only adds an interactive element but also accommodates varied dietary preferences.

Match the taco shells’ color to enhance visual appeal by experimenting with food coloring. Visually stunning shells add that extra wow factor to the presentation.

For an extra twist, add espresso powder or flavored extracts to the chocolate drizzle. This imparts a unique profile that can complement different ice cream flavors beautifully.

Variations and Adaptations


Try adapting the recipe seasonally by using pumpkin ice cream in fall or fresh fruit sorbets during summer. These modifications not only reflect the season but also add a refreshing change.

Dietary modifications can include using dairy-free ice cream or gluten-free waffle mix, thus catering to those with specific dietary requirements, broadening the dish’s appeal.

Experiment with flavor variations such as cinnamon-clove chocolate drizzle for a warm spice touch, bringing new dimensions to a classic formula while retaining the essence of the dish.

Texture can be altered by introducing crunchy elements like granola or crushed cereal into the topping, adding exciting contrast to the creamy, smooth base.

Presentation alternatives include serving the tacos individually in decorated cupcake wrappers, ensuring easy handling while boosting visual charm.

Serving and Presentation Guide


Plating these tacos individually on small patterned plates adds an elegant touch and elevates the visual appeal, making each serving special.

Garnish with edible flowers or mint leaves for a fresh burst of color, enhancing the dish’s vibrancy and creating a stunning visual effect.

Traditional accompaniments like a small shot of espresso or a drizzle of caramel sauce align with the dessert’s theme, enriching the gastronomic experience.

To serve modern, create a DIY taco station, allowing guests to assemble, customize, and a personal touch to their tacos, transforming dessert into a creative engagement.

Keeping their serving temperature consistent by using pre-chilled plates helps retain their refreshing texture and ensures each bite is as enticing as the first.

Ensure portion control by using smaller taco shells, allowing guests to indulge without overwhelming their palates, perfect for tasting multiple flavor combinations at a party.

Wine and Beverage Pairing


Pair these Ice Cream Tacos with a light sparkling wine such as Prosecco. Its effervescence complements the sweet and creamy elements without overpowering them.

For a non-alcoholic alternative, try a vibrant berry iced tea. The slight tartness cuts through the richness, refreshing the palate and enhancing the dessert’s flavors.

If you prefer coffee pairings, an iced coffee or cold brew with subtle chocolate notes can harmonize beautifully with the dessert, adding to the overall taste profile.

Consider the temperature of the beverages; chilled options are often preferable, replicating the refreshing feeling of the dessert itself, constructing a coordinated dining experience.

Strong black tea with a hint of vanilla could also serve as an excellent beverage suggestion, providing a comforting yet sophisticated background taste to the tacos.

Serving in elegant glassware corresponds with the visual appeal of the dessert, contributing an aesthetic charm that complements the playful presentation of Ice Cream Tacos.

Storage and Shelf Life


Store any leftover Ice Cream Tacos in an airtight container with parchment paper separating the layers to prevent sticking and maintain an appealing look.

Keep them frozen at a consistent freezing temperature, ideally at 0°F or lower, to preserve the ice cream integrity and shell crispness.

Significantly, avoid repeated thawing and refreezing, as this can compromise both texture and taste, leading to an undesirable icy flavor.

Check for signs of spoilage, such as excessive ice crystals or changes in smell, which indicate the tacos are no longer fit for consumption.

To enjoy reheated tacos, allow them to thaw slightly at room temperature for a few minutes, restoring the ice cream’s creamy texture without melting the shells.

If planning to freeze for longer durations, tightly wrap the shells separately before assembling to preserve freshness and avoid freezer burn.

Make Ahead Strategies


Ice Cream Tacos can be prepared in advance by making and assembling the shells only, storing them in the freezer until it’s time to fill them with ice cream.

Have the melted chocolate ready ahead of time by storing in a piping bag in the fridge, allowing for quick drizzling over ready-made tacos, adding a professional touch.

Preparation should follow a timeline where each step seamlessly transitions, minimizing inactive waiting periods, thereby maximizing efficiency and quality.

Between steps, proper storage of components in the freezer maintains their crispness, ensuring each element is at its best when it’s time to serve.

The assembly should be rapid to keep temperature fluctuations minimal, allowing the dessert to maintain its intended firmness and texture.

Before serving, consider adding freshly chopped seasonal fruits for an added brightness and freshness, balancing out the rich flavors with natural sweetness.

Scaling Instructions


To scale the Ice Cream Tacos recipe, carefully consider the timing and equipment adjustments required for larger batches, ensuring all shells have sufficient space in the waffle iron.

Halving the recipe requires proportionally adjusting the quantities of each ingredient, and careful attention to mixing techniques to preserve the desired results.

Doubling or tripling elevates the complexity, mandating larger equipment or multiple runs, which must not compromise the preparation steps or quality.

Adapt your temperatures and cook times slightly when scaling; this foresight helps prevent unintended texture changes, safeguarding the original charm of the dessert.

Ensure adequate storage space for scaled quantities, with organized airflow for even freezing, essential to keeping stores fresh and palatable.

Conduct a pre-scale test batch for unfamiliar recipes or significant scaling, allowing for fine-tuning before serving the final version to guests.

Nutritional Deep Dive


Understanding the nutritional profile of Ice Cream Tacos offers insights into balancing indulgence with health.

The macronutrient breakdown predominantly consists of carbohydrates from the waffle and ice cream, complemented by healthy fats, particularly from chocolate elements.

Micronutrient content can be elevated through select toppings, such as adding nuts for vitamin E and essential minerals, or berries for antioxidants.

Portion control addresses dietary considerations, ensuring reasonable serving sizes for mindful consumption without sacrificing flavor.

By customizing ice cream with lower sugar content, you can create a treat that aligns more favorably with dietary restrictions, accommodating diverse lifestyles.

Serve with nutritious sides or accompaniments like fresh fruit, enhancing both the balance and aesthetic appeal of the meal while supporting weight management goals.

Dietary Adaptations


For gluten-free adaptations, opt for certified gluten-free waffle mixes and toppings, crafting an inclusive dessert without compromising taste or integrity.

Dairy-free options are achievable by using plant-based ice cream and chocolate, maintaining the essence of the dish while accommodating lactose sensitivity.

To achieve a vegan version, select suitable substitutes across all parts of the recipe, from the waffle batter to garnishments, enjoying guilt-free Ice Cream Tacos.

Low-carb alterations involve using alternatives like almond flour for the shells and sugar-free chocolate, keeping this dessert in line with keto or diabetic lifestyles.

Paleo-friendly modifications are possible with natural sweeteners and coconut milk ice cream, reflecting this diet’s focus on unprocessed ingredients for well-being.

A low-FODMAP recipe transformation is attainable by selecting compatible ice cream options and carefully curating toppings that meet dietary guidelines.

Troubleshooting Guide


Ensure proper texture balance by keeping the ice cream firm before assembly but slightly soft enough for an easy scoop; this minimizes unnecessary melting during serving.

Balancing flavors involves a meticulous assortment of toppings that complement without overwhelming the ice cream base or chocolate drizzle, ensuring a harmonious outcome.

Manage temperature well by actively controlling freezer conditions and transport timing, maintaining optimal conditions from preparation to serving.

Overcome equipment challenges by researching ahead of time the effectiveness of waffle irons available, as well as being ready with substitutes like frying pans in a pinch.

For effective ingredient substitutions, consult reliable charts or substitution guides to ensure each backup choice preserves cumulative texture and taste.

Timing efficiencies are vital, achieved by setting up stations with all necessary components ready, reducing lag time between steps while maximizing the dessert’s overall appeal.

Recipe Success Stories


Ice Cream Tacos have been a hit at various community events, bringing smiles with their whimsical format, encouraging guests to indulge in a unique dessert experience.

Variations adapted by real-life cooks include adding a spicy kick with chili chocolate drizzle, illustrating the recipe’s versatility without altering core satisfaction.

Many readers have shared their adaptation successes by substituting traditional candies with healthier options, enjoying the tacos while aligning with personal nutrition goals.

Structured feedback from different forums highlights the accessibility of the ingredients, recommending the recipe to beginners looking to build confidence in creative desserts.

Through shared photography tips, community members have enhanced their presentations, learning from each other about how to capture the essence of Ice Cream Tacos.

Frequently Asked Questions

Q: Can the taco shells be made ahead of time?

A: Yes, you can make and freeze the taco shells ahead of time. Store them in an airtight container, interleaved with parchment paper to avoid sticking, maintaining freshness.

Q: What’s the best way to melt chocolate for the drizzle?

A: Melt chocolate gently using a double boiler method, gradually heating and stirring to prevent seizing and achieve a smooth, perfect consistency.

Q: Options for dairy-free ice cream?

A: Choose from almond, coconut, or soy-based varieties, now widely available, accommodating lactose intolerance while providing excellent flavor and texture.

Q: Any recommendations for low-sugar toppings?

A: Consider topping with nuts or small amounts of dark chocolate, known for their naturally lower sugar levels, offering healthful, delicious enhancements for the tacos.

Q: How do you prevent the shells from breaking?

A: Ensure even cooking in the waffle iron and allow complete cooling before assembly, maintaining structural integrity throughout the filling process.

Q: Alternatives if I don’t have a waffle iron?

A: Use a grill pan or even a non-stick frying pan, mimicking the texture and taste of traditional waffle-prepared shells through improvisation.

Q: What’s a good seasonal twist for fall?

A: Pumpkin spice ice cream offers an enticing autumnal spin, aligning flavors with the season’s character while offering something fresh and intriguing.

Q: Can I double the recipe effortlessly?

A: Yes, doubling is straightforward, just ensure you have adequate freezing space and preparation surfaces to accommodate the increased quantity without loss.

Q: What if my shells go soft too fast?

A: Keep them chilled rigorously during storage and avoid excess moisture exposure, thereby prolonging crispness from preparation through savouring.

Q: Any alcoholic pairing suggestions?

A: Champagne’s dry profile balances well with the dessert’s sweetness, offering sophistication and enhancing the tasting atmosphere through its crisp, refreshing flavor.

Additional Resources


Finding supplementary resources that enhance your Ice Cream Tacos experience adds another dimension to culinary exploration.

Look to related recipes like homemade waffle cones and ice cream making for a comprehensive understanding of foundational elements in this dish.

Consult technique guides on effective chocolate tempering for perfect drizzle and structural bonds.

Seek ingredient information, sourcing the best chocolate brands or waffle mixes available, optimizing both taste and texture.

For equipment advice, detailed reviews of the best waffle irons or chocolate melting tools direct new novices on a path of reliable, informed choices.

Explore seasonal variations through cooking blogs or channels focused on adapting classic recipes with trends, sustaining excitement in the kitchen year-round.

Join the Conversation


Engage with fellow ice cream taco enthusiasts on social media, sharing your creations and gathering inspiration for future endeavors. The community aspect adds collective support and idea sharing.

Experiment with photography styles, capturing the vibrant colors and inviting textures of your tacos to share visually captivating content with an eager audience.

Reviews of the recipe help bring awareness to others who may be considering embarking on crafting these sweet treats, reassuring them with honest experiences.

Engaging with a friendly cooking community allows for recipe variations, with experienced amateurs sharing tried and successful adaptations.

Join online forums for those keen on dessert innovation or niche foods, discovering motivational stories and practical advice linked to Ice Cream Tacos.

Delicious Southwest Grilled Chicken Wraps for a Flavorful Meal

Southwest Grilled Chicken Wraps: Flavor-Packed Delight

⚖️
Difficulty
Easy

⏲️
Prep Time
15 mins

🕒
Cook Time
10 mins

⏱️
Total Time
25 mins

🍽️
Servings
4

Indulge in the zestful flavors of the Southwest with our irresistible Southwest Grilled Chicken Wraps. These wraps are a harmony of smoky, grilled chicken combined with vibrant veggies and a creamy, spiced sauce. The combination of textures and tastes in every bite makes this wrap a culinary delight that you will want to prepare over and over. Perfect for a quick lunch or a relaxed dinner, this recipe is both satisfying and nutritionally balanced.

Quick Recipe Highlights

  • Flavor Profile: A delightful blend of smoky grilled chicken with zesty lime and a hint of cilantro, these wraps burst with Southwest flavors.
  • Texture: The contrast of tender chicken, crisp veggies, and soft wrap creates a satisfying mouthfeel.
  • Aroma: Enjoy the enticing aroma of grilled chicken and spice-laden sauce that awakens your senses.
  • Visual Appeal: A vibrant palette of green, red, and golden-brown makes these wraps visually stunning.
  • Skill Level Needed: Perfect for beginners, requiring only grilling and assembly skills.
  • Special Equipment: A grill or grill pan is essential to infuse the chicken with smoky notes.

Recipe Overview

  • Difficulty Level: This recipe is straightforward, involving basic grilling and wrap assembly, making it ideal for cooks of all skill levels.
  • Category: Best enjoyed as a main course, but can easily be adapted to a starter with smaller servings.
  • Cuisine: Inspired by Southwestern cuisine, known for vibrant spices and fresh ingredients.
  • Cost: Economical, with ingredients like chicken breast, vegetables, and tortillas.
  • Season: Ideal for any season, particularly summer when grilling is at its peak.
  • Occasion: Suitable for casual meals, picnics, or as a party dish with friends.

Why You’ll Love This Recipe


The combination of flavors and textures in these Southwest Grilled Chicken Wraps is truly irresistible. The grilled chicken imparts a smoky and savory depth, perfectly balanced by the freshness of crisp lettuce and tomatoes. A zesty lime dressing adds an invigorating tang that complements the spicy kick from the Southwest sauce. These wraps are easy to prepare, requiring minimal kitchen finesse, yet delivering a taste that rivals any restaurant dish.

Convenience is another highlight of this recipe. With just 15 minutes of prep time, you can have a satisfying meal ready in no time. The ingredients are simple and easily found in most pantries, allowing for quick assembly on busy days. This speedy preparation truly makes these wraps a favorite for weeknight dinners and last-minute gatherings.

On the nutritional front, these wraps are a great source of lean protein, vitamins, and healthy fats. Chicken is known for its high-protein, low-fat profile, while the veggies provide an array of vitamins and fiber. Opting for whole-grain wraps can further boost the nutritional value, making this a wholesome meal option.

Socially, these wraps are a hit in any gathering. Their vibrant colors and enticing aromas pique curiosity and appetite alike, often becoming the center of conversation. Whether in a family setting or a backyard BBQ, these wraps appeal to both adults and children, ensuring everyone gets a taste of Southwest charm.

Finally, the cost-effectiveness of this recipe cannot be overstated. Common, affordable ingredients like chicken, vegetables, and tortillas make this a budget-friendly option without compromising on taste. You don’t need to break the bank to enjoy a delicious and fulfilling meal, defining these wraps as both accessible and satisfying.

Historical Background and Cultural Significance


Southwestern cuisine is a fusion of Mexican and Native American culinary traditions, evolving over centuries in regions like New Mexico, Texas, and Arizona. The use of spices, grilled meats, and fresh produce is a testament to both the environmental conditions and cultural influences of these areas. Southwest Grilled Chicken Wraps embody this progression, capturing the essence of the cuisine’s rich and diverse history.

The cultural importance of Southwestern dishes extends to community and familial gatherings, where food is a central element. Meals often reflect a mix of Mexican spices and Native ingredients, creating a unique culinary heritage. These wraps reflect this tradition, offering a modern twist on classic Southwestern flavors that are both accessible and deeply rooted in cultural practices.

Over time, recipes like these wraps have evolved, accommodating modern timelines and tastes while preserving their core flavors. The inclusion of varied spices and fresh ingredients remains steadfast, but the introduction of convenience through simplified methods caters to contemporary lifestyles, making these wraps both traditional and innovative.

Regionally, variations of Southwest Grilled Chicken Wraps can be found, each exhibiting unique traits influenced by local tastes and ingredients. Whether it’s the addition of specific spices or alternative dressings, these wraps adapt well to regional preferences, showcasing their versatility and cultural adaptability.

Ingredient Deep Dive


Chicken breast serves as the primary protein of these wraps, valued for its tenderness and ability to absorb flavors during grilling. Historically, chicken is a staple in many cuisines due to its availability and versatility, making it an essential component of Southwestern cooking. When selecting chicken breasts, look for fresh, firm meat with minimal fat content to ensure a juicy result after grilling.

Avocados provide a creamy texture and a boost of healthy monounsaturated fats. They are historically significant in Mexican cuisine and widely used throughout the Southwest for their richness and health benefits. Opt for ripe avocados that yield slightly to pressure for the best texture in your wraps.

Tortillas are fundamental, serving as the wrap base that encapsulates flavors. Originating from indigenous North American peoples, tortillas have been a dietary staple for centuries. Choose whole wheat or corn tortillas for a healthier alternative, and store them in a cool, dry place to maintain freshness.

Common Mistakes to Avoid

  • Overcooking the chicken can result in a dry texture; ensure it’s grilled to an internal temperature of 165°F.
  • Skipping marinade time affects flavor depth; allow the chicken to marinate for at least 30 minutes.
  • Using underripe avocados will lack the creamy texture; ensure avocados are ripe before use.
  • Overfilling the wraps can make them difficult to roll; be mindful of portioning the ingredients.
  • Not letting the grilled chicken rest before slicing can result in juice loss; let it rest for 5 minutes.
  • Using cold tortillas can cause cracking; warm them slightly to enhance pliability.
  • Skimping on the sauce reduces flavor impact; ensure there’s enough to coat all ingredients.
  • Ignoring balance in flavors might lead to overpowering tastes; adjust lime and spice levels to taste.

Essential Techniques


Proper grilling is the cornerstone of this wrap’s flavor profile. Starting with a well-preheated grill ensures those much-coveted char marks and imparts a smoky taste essential to this dish’s identity. Mastery of this technique involves recognizing visual cues like the development of grill marks and the firmness of the chicken, indicating doneness.

Rolling wraps correctly ensures easy handling and prevents ingredient loss. Lay the tortilla flat, place the filling slightly off-center, and fold one side over the filling, followed by the sides, and roll until closed. Secure with a toothpick if necessary. Knowing when enough is just enough with fillings is key to achieving a wrap that is neat and easy to handle.

Pro Tips for Perfect Southwest Grilled Chicken Wraps


1. Marinate chicken ahead of time: Letting the chicken marinate overnight enhances the depth of flavor significantly.
2. Mind your grill temperature: A medium-high heat helps achieve perfect grill marks without burning.
3. Use a meat thermometer: Ensure the chicken reaches 165°F for optimal results.
4. Experiment with cheese: Incorporating Monterey Jack or Pepper Jack adds a delightful creamy dimension.
5. Toast your tortillas slightly: This step can add an extra layer of flavor and texture.
6. Rest the chicken: Allow resting before slicing to keep juices intact, enhancing the wrap’s overall flavor.
7. Customize heat levels: Adjust the spice in the sauce to cater to your heat preference.
8. Add fresh herbs: Sprinkle chopped cilantro or parsley for a burst of freshness.

Variations and Adaptations


Explore regional variations by adding beans or corn to your wraps, typical in many Southwestern styles. Seasonal adaptations might include incorporating roasted squash or grilled summer zucchini, providing a touch of earthiness and added nutrition. For a twist, try a Mediterranean flair by subbing tzatziki sauce and adding feta cheese instead of the traditional Southwest seasoning.

Adapting these wraps to dietary needs is straightforward. For gluten-free options, use corn tortillas or lettuce wraps. The vegan route replaces chicken with grilled tofu or portobello mushrooms, ensuring flavor and texture are preserved. Lime zest and additional herbs can brighten the flavor without the use of added fats.

Vary the wrap texture by opting for crispy tortillas through baking or light frying, contrasting the typical soft wraps. Presentation alternatives could involve cutting them into pinwheel-style bites for appetizer-serving in gatherings.

Serving and Presentation Guide


For an evocative presentation, plate the wraps sliced diagonally, showcasing their colorful filling. Garnish with sprigs of fresh cilantro or a slice of lime to accentuate the dish’s vibrant theme. Traditional accompaniments include a side of pico de gallo or a light corn salad, enhancing the Southwest experience. Modern suggestions feature serving with sweet potato fries or a light, tangy slaw to balance the dish’s hearty aspects.

Temperature-wise, these wraps are best served warm to maintain the creamy consistency of avocado and the tenderness of grilled chicken. Keep portions in check by considering one wrap per person, pairing it with flavorful sides for a well-rounded meal experience.

Wine and Beverage Pairing


Pairing these wraps with a light white wine like Sauvignon Blanc or a refreshing Rosé can balance their vivid flavors with crisp notes. Non-alcoholic alternatives include a zesty lemonade or an infused water with cucumber and mint. For a sharper twist, consider a margarita with a hint of jalapeño.

If coffee or tea is preferred, a smooth black tea or lightly roasted coffee can complement the roasted elements of the dish without overpowering. Ensure beverages are served chilled, offering a refreshing contrast to the warm, smoky wraps.

Storage and Shelf Life


Proper storage involves refrigerating leftover components separately in airtight containers for up to three days. Keep tortillas in a sealed bag to prevent drying out. Observe for any signs of spoilage, such as discoloration or off-odors, especially in avocados and chicken.

When reheating, use a grill or oven to rediscover the wraps’ original texture, ensuring internal temperatures are consistent without drying out ingredients. Freezing the prepared wraps is viable; wrap individually and store in a freezer-safe bag, reheating directly from frozen for best results.

Make Ahead Strategies


Prepare all components, such as marinades and sauces, a day prior to save time. Store them separately and only assemble the wraps when ready to serve. This strategy ensures freshness and quality, maintaining optimal texture and flavor throughout the meal.

In expectancy of delays, keep cooked chicken and sauce refrigerated and build the wraps just before serving to preserve their appealing texture. Remember to add any fresh elements like avocado at the last minute for peak freshness.

Scaling Instructions


When halving or doubling the recipe, adjust ingredient proportions accordingly but maintain consistent marinating and cooking temperatures. Monitor timing adjustments based on equipment scaling; larger batches might require longer grill time to ensure even cooking.

Consider storage space when scaling up, ensuring adequate container sizes for prepared components. Likewise, when doubling, ensure grill space accommodates a larger volume, preventing crowding and resultant steaming rather than grilling.

Nutritional Deep Dive


A closer look at macro-nutrients reveals a balance of carbohydrates from tortillas, protein from chicken, and healthy fats from avocado, yielding a fulfilling meal. With each serving providing essential vitamins like C and K from fresh vegetables, these wraps support strong immune functions and overall health.

Micronutrient analysis also emphasizes the wrap’s contribution to daily fiber intake, aiding in digestion and promoting satiety. Swapping to whole-grain tortillas increases fiber content, enhancing the dish’s nutritional profile. Offering moderate calories, these wraps support weight management and offer lasting energy.

Dietary Adaptations


For a gluten-free adaptation, use corn tortillas or large lettuce leaves to encapsulate the fillings without losing the handheld charm. Dairy-free enthusiasts can omit cheese or replace it with vegan alternatives, preserving the wrap’s creamy component ingenuity.

A vegan version switches chicken for seasoned tofu or a mix of mushrooms, while savory nutritional yeast enhances the flavor profile. Incorporate more legumes like black beans for extra fiber and plant-based protein, maintaining taste while accommodating dietary constraints.

Troubleshooting Guide


If the chicken appears dry, ensure to marinate longer to enhance moisture retention. Flavor imbalance can often be adjusted by adding lime or salt post-assembly to suit individual taste preferences. Avoid cooking on high flames that cause uneven texture or burnt spots, opting for medium heat for a consistent result.

When facing equipment challenges like grill access, indoor grill pans work efficiently, maintaining authenticity in each wrap. Ingredient substitutions such as using lettuce for tortillas are effective, provided the leaves are large and firm. Timing concerns are minimized when batch-preparing stages, ensuring prompt assembly.

Recipe Success Stories


Our community revels in sharing creative takes on Southwest Grilled Chicken Wraps, often involving seasonal vegetables or homemade tortillas. Feedback consistently highlights the recipe’s adaptability and vibrant flavors as central to its success. Many readers have enjoyed experimenting with spice levels and garnishes, tailoring the wraps to family preferences.

Success is also found in variation stories, where readers adapt ingredients to fit vegetarian or low-carb lifestyles while retaining the signature Southwest appeal. Some enthusiasts have shared visually stunning photography, contributing to a growing gallery of wrap adaptations that inspire creativity and celebration.

Frequently Asked Questions

Q: Can I prepare these wraps in advance?
A: Yes, you can pre-cook the chicken and refrigerate it. Assemble the wraps just before serving to retain freshness.

Q: What can I use if I don’t have a grill?
A: A grill pan or even a regular frying pan can work in a pinch, though a grill provides the best smoky flavor.

Q: Are these wraps freezer-friendly?
A: Yes, you can freeze the prepared wraps. Wrap them individually for best results and reheat as needed.

Q: What if I don’t have all the spices listed?
A: Feel free to use a premade Southwest seasoning blend as a convenient alternative.

Q: How can I make these wraps spicier?
A: Add finely chopped jalapeños or a dash of hot sauce to increase the heat level.

Q: What type of chicken works best?
A: Boneless, skinless chicken breast is ideal for its ease of cooking and lean profile.

Q: Can I use other meats?
A: Certainly! Grilled turkey or steak are excellent alternatives to chicken.

Q: What if my wrap tears?
A: Prevent tearing by slightly warming wraps before filling and avoid overstuffing.

Q: How do I keep the wraps from becoming soggy?
A: Add liquid ingredients, such as sauces, sparingly and right before serving to maintain texture.

Q: Are there low-carb alternatives?
A: Try using lettuce leaves or low-carb tortillas instead of traditional flour wraps.

Q: Can I omit the lime for less tanginess?
A: Yes, adjust lime juice to your taste preference, though it adds a refreshing zest.

Q: Is there a substitute for cilantro?
A: Parsley or basil can serve as alternatives to cilantro if you prefer a different herb profile.

Additional Resources


Explore our collection of related recipes, including variations on grilled wraps and Southwest-inspired dishes. Delve into our technique guides for grilling tips and tortilla handling, offering insights for perfect wraps every time. Ingredients such as fresh herbs and spices have dedicated resource pages, providing detailed selection and usage tips.

Our equipment recommendations guide also assists in choosing the right tools for optimum grilling and preparation results. Discover seasonal adaptations in our guides, sharing ways to incorporate this recipe year-round with freshness and flair.

Join the Conversation


Engage with us on social media by sharing your Southwest Grilled Chicken Wrap creation! Use our hashtag to connect with a vibrant community swapping tips and tricks. Leave a review or tweak the recipe to your liking; reader feedback often inspires new kitchen endeavors.

We welcome photography tips and invite fellow culinarians to showcase their plating creativity. Share your recipe variations or family stories surrounding this dish, becoming part of a larger dialogue celebrating flavor and community resilience.

The Recipe

Southwest Grilled Chicken Wraps

Serves: 4

Prep Time: 15 mins

Cook Time: 10 mins

Total Time: 25 mins

Kitchen Equipment Needed

  • Grill or Grill Pan
  • Mixing Bowls
  • Cutting Board
  • Chef’s Knife
  • Tongs

Ingredients

  • 4 boneless, skinless chicken breasts
  • 2 tablespoons olive oil
  • 1 tablespoon lime juice
  • 1 teaspoon ground cumin
  • 1 teaspoon paprika
  • 1/2 teaspoon garlic powder
  • Salt and pepper to taste
  • 4 whole wheat tortillas
  • 1 avocado, sliced
  • 1 cup shredded lettuce
  • 1 cup cherry tomatoes, halved
  • 1/2 cup Southwest sauce (store-bought or homemade)

Directions

  1. Preheat the grill to medium-high heat.
  2. In a mixing bowl, combine olive oil, lime juice, cumin, paprika, garlic powder, salt, and pepper. Add chicken and marinate for at least 30 minutes.
  3. Grill chicken for 5-7 minutes per side until cooked through. Let rest before slicing.
  4. Warm tortillas on the grill for 30 seconds on each side.
  5. Assemble wraps by layering sliced chicken, avocado, lettuce, and tomatoes, then drizzle with Southwest sauce.
  6. Wrap tightly, slice diagonally, and serve immediately.

Recipe Notes

  • Substitute Greek yogurt for a lighter Southwest sauce.
  • Experiment with cheese varieties for added depth.
  • Add corn or black beans for a texture variation.

Irresistible Homemade Apple Turnovers: A Simple and Delicious Recipe

Classic Apple Turnover Recipe: A Sweet, Flaky Delight

⚖️
Difficulty
Easy

⏲️
Prep Time
20 mins

🕒
Cook Time
25 mins

⏱️
Total Time
45 mins

🍽️
Servings
4

Imagine biting into a Classic Apple Turnover, freshly baked and just warm enough to melt the buttery pastry in your mouth. As you take that first bite, the combination of sweet, spiced apple filling and perfectly golden, flaky pastry recalls the cozy embrace of fall. The apples, caramelized to perfection, offer a delightful sweetness without overpowering the nuanced notes of cinnamon and nutmeg. This baguette-perfect treat is not only the star of cozy family gatherings but also an elegant addition to any brunch table. Whether enjoyed with a steaming cup of coffee or a frothy chai latte, these delectable turnovers promise to satisfy every craving.

Quick Recipe Highlights

  • Flavor Profile: The turnovers feature sweet, tart apples infused with warm spices, making each bite a delightful contrast of flavors.
  • Texture: Light, flaky pastry envelops a luscious, juicy filling that promises a satisfying crunch followed by a melt-in-your-mouth sensation.
  • Aroma: The irresistible aroma of baked apples and cinnamon creates a warming atmosphere reminiscent of home-baked goodness.
  • Visual Appeal: These turnovers boast a golden-brown crust and an inviting, rustic look that hints at the deliciousness within.
  • Skill Level Needed: This recipe is simple enough for beginners but offers opportunities for more experienced bakers to experiment with variations.
  • Special Equipment: You’ll need a pastry brush for egg wash and a baking sheet. A sharp knife will help in creating clean pastry cuts.

Recipe Overview

  • Difficulty Level: Rated easy to make, this recipe involves basic pastry skills and an oven. With our step-by-step instructions, even novice bakers can achieve bakery-level results.
  • Category: This dessert or sweet snack is perfect for casual tea parties, children’s lunchboxes, or simply as a delightful treat any time of day.
  • Cuisine: Originating in European cuisine, the apple turnover has become a beloved treat worldwide, celebrated for its straightforward yet delicious nature.
  • Cost: With accessible pantry ingredients like apples and spices and store-bought puff pastry, this recipe is budget-friendly and makes a batch perfect for feeding a crowd.
  • Season: While apple turnovers are a fall favorite, their fresh flavor is welcoming year-round, ideal for showcasing seasonal apple varieties.
  • Occasion: Ideal for breakfast, dessert, or afternoon tea, apple turnovers fit any occasion where comfort and taste are prized.

Why You’ll Love This Recipe


The taste and texture of this Classic Apple Turnover are sure to win you over from the first bite. The buttery, flaky pastry encases a perfectly sweet and spiced apple filling, harmonizing with your taste buds to deliver a heavenly experience. The turnovers’ appeal lies in their simplicity and the comforting emotions they evoke.

These turnovers are incredibly convenient to make. With minimal preparation, and using readily available ingredients, you can create these treats in under an hour. Whether preparing for an impromptu gathering or a planned event, these turnovers fit into any schedule with ease.

In terms of nutritional benefits, apples are the star of this recipe, providing a wealth of vitamins and dietary fiber. The spices, especially cinnamon, also offer antioxidants, completing a surprisingly healthy treat.

Apple turnovers are perfect for social gatherings and entertaining. Their elegant shape and delightful aroma make them an easy conversation starter and a favorite among guests. Practical enough for sharing, they add a touch of homemade love to any event.

Finally, this recipe is cost-effective and accessible. By selecting ingredients that are already staples in your pantry or easy to find at any grocery store, you can enjoy an elegant dessert without breaking the bank. The preparation process is straightforward, ensuring you achieve spectacular results every time.

Historical Background and Cultural Significance


The origin of apple turnovers can be traced back to European pastry traditions. These delightful treats began gaining popularity in France, where the idea of wrapping fruits in pastry was embraced. Over time, this concept evolved into the apple turnover we know and love today—an easy-to-make treat with universal appeal.

Culturally, apple turnovers hold a special place in the culinary traditions of many countries. Loved by families because of their simplicity, turnovers inspire nostalgia for childhood memories filled with cozy family kitchens and baking days.

The recipe has evolved over generations, encompassing new ingredients and techniques that reflect its widespread popularity. Adopted around the world, apple turnovers take different forms: from puff pastry variations to fillings of varied sweetness.

Globally, different regions have embraced the apple turnover, adding unique twists that reflect local ingredients and tastes. German bakeries might offer a variant with a hint of marzipan, while American versions may include a touch of caramel. These regional adaptations showcase the recipe’s adaptability and timeless appeal.

Ingredient Deep Dive


Apples, the primary ingredient, are not only a cultural icon but also a versatile fruit found in cuisines worldwide. An essential in many classic desserts, apples bring sweetness, tartness, and nutritional benefits, such as vitamins and fiber, making them a beloved staple.

When selecting apples, Aim for ones that maintain their structure upon cooking, like Granny Smith or Honeycrisp. These varieties ensure a firm filling that complements the flaky pastry. Store apples in a cool, dark place to extend their fresh flavor right before baking.

Spices are also pivotal—cinnamon and nutmeg elevate the turnover’s simple premise to aromatic perfection. Choose fresh spices for the most impact, and store them in a cool, dry place for optimal preservation. A pinch of allspice is a delightful option when seeking a flavor variation.

Puff pastry serves as the canvas for this recipe. The airy, flaky layers come to life with butter and heat. For a seamless experience, let the pastry thaw in the refrigerator before use, ensuring the right balance between pliability and firmness.

Common Mistakes to Avoid

  • Avoid using overly soft apples, as they may become mushy upon baking. Choose firmer varieties for a pleasant texture.
  • Ensure the puff pastry is adequately thawed before use; too cold and it may tear, while too warm and it will become sticky.
  • Don’t overfill your turnovers—this could cause leaks during baking. Opt for a spoonful of filling per turnover.
  • Avoid baking on parchment paper without ensuring adequate space between turnovers, preventing potential sticking.
  • Employ an egg wash. This golden glaze not only encourages browning but also adds a beautiful sheen to the pastries.
  • Resist the temptation to over-bake; remove them when golden brown to ensure a tender pastry crust.
  • Let turnovers cool slightly before serving for optimal flavor and ease of handling.
  • For flavor accuracy, use freshly grated nutmeg rather than pre-ground whenever possible.

Essential Techniques


An important technique in making apple turnovers lies in handling the puff pastry. Its delicate, multi-layered nature requires care. Before rolling it out, ensure it’s properly thawed to prevent cracking and to achieve an effortless rolling action.

Achieving the perfect apple filling involves cutting fruit to a uniform size. This ensures even cooking and a consistent texture. Cook the mix on medium heat to caramelize sugars and release the apples’ natural sweetness without burning.

Sealing the turnovers is another crucial step. Use a fork to press the edges firmly, creating a tight seal that preserves the filling’s moisture and prevents spills. This technique also adds a decorative touch.

Layering flavors is a thoughtful approach in this recipe. Mix spices thoroughly into sugar before coating apples, ensuring an even distribution of flavors throughout the filling. This minor step makes a big difference in taste.

Pro Tips for Perfect Apple Turnovers


For perfectly golden turnovers, use an equal mix of egg and water for your egg wash. This combination enhances browning and avoids shadows from uneven washes.

Score the top of each turnover gently with a sharp knife. This step not only releases steam during baking, preventing sogginess, but also creates an inviting, artisanal pattern.

Cool the turnovers fully on a wire rack post-baking. This spacing allows air to circulate, maintaining the pastry’s crisp integrity rather than steaming.

If time allows, prepare the filling a day in advance. Chilling the mixture enhances the melding of flavors, creating a more cohesive taste in every bite.

Make it a fall-themed indulgence by grating a bit of orange zest into the filling. This citrusy touch infuses brightness and complements the spices beautifully.

Achieve an expert-level finish by dusting the cooled pastries with powdered sugar or a drizzle of simple icing for added sweetness and presentation appeal.

Consider serving your turnovers with a side of dairy, such as a dollop of clotted cream or a scoop of rich ice cream. The cold, creamy texture accentuates the pastry’s warmth.

Variations and Adaptations


Regional variations can add both fun and flavor to this classic treat. In France, turnovers might include a sprinkle of almonds, while Middle Eastern variations may introduce a hint of cardamom, altering their cultural expression.

Seasonal adaptations bring forth freshness. In spring, consider adding finely chopped rhubarb to the filling for a tart twist. Summer’s bounty of berries can transform the traditional apple turnover into an exciting mixed fruit medley.

Dietary modifications are easily accommodated. For a vegan version, use a plant-based margarine over butter and a water and flour mixture for a wash instead of eggs.

Flavor variations can introduce warmth or zest. Add a touch of ginger for a warm spiciness, or lemon zest for brightness, personalizing taste to your liking.

Texture modifications may include leaving small apple chunks for added bite or introducing a sprinkle of oat crumble for a whimsical touch.

Presentation alternatives like forming them into bite-sized dumplings or braid tarts can appeal to creative bakers, turning traditional turnovers into stunning table centerpieces.

Serving and Presentation Guide


Elegant plating techniques can elevate your apple turnovers. Serve them on a wooden platter for rustic appeal or a white ceramic plate for a modern touch that highlights the golden hues of the pastries.

Garnishing ideas abound: think fresh mint leaves or a dusting of powdered sugar across the plate. Edible flowers like pansies can add a colorful pop and a touch of elegance.

Consider traditional accompaniments such as clotted cream or custard, enhancing the comfort dessert experience. Alternatively, offer modern pairings like a raspberry coulis for subtle tartness.

Temperature considerations dictate serving these pastries slightly warm. The butter re-melts into the dough, creating an almost ethereal pastry texture.

Portion control is expertly managed by pre-slicing the turnovers halfway for guests. This approach pleases those desiring smaller portions while maintaining a visually appealing presentation.

Wine and Beverage Pairing


Classic pairings such as a refreshing Reisling or a crisp Chardonnay beautifully complement the apple turnover’s sweetness and spice, undergoing a symphony of dessert and wine harmony.

For non-alcoholic alternatives, opt for apple cider. Its earthy flavors resonate with the turnovers’ core ingredients. Sparkling water with fruit essence can also bring a modern twist.

Coffee or tea pairings expand options—strong black coffee or a spiced chai amplify the turnover’s warm notes. Experiment with brewed mint or herbal teas for a refreshing take.

Temperature considerations suggest serving hot beverages to contrast the pastry’s warmth, highlighting its inviting taste and enhancing the overall gastronomic experience.

When serving, suggest a single turnover plated with accompanying beverage, showcasing the turnover as the star, complemented rather than overshadowed.

Storage and Shelf Life


Proper storage enhances your apple turnover’s freshness. Store baked turnovers in an airtight container at room temperature for up to two days, preserving their flavor and texture.

Refrigeration for up to five days offers extended freshness. If efficiency is priority, single-layer containers prevent stacking, negating smushed pastries.

Signs of spoilage include a softened, mushy texture or an off aroma. Always utilize these indicators to ensure quality is maintained.

Reheating instructions remind you to revive turnovers in a preheated oven at 350°F for 10 minutes or until warm, revitalizing their fresh-baked allure.

Freezing guidelines recommend pre-freezing uncooked turnovers on a baking sheet for a solid hour, before transferring them to freezer bags for future baking pleasure.

Make Ahead Strategies


Advance prep streamlines this already effortless recipe. Create and chill your filling a day prior to baking, merging flavors deeply, achieving beautifully cohesive bites.

Between steps, a humidity-controlled refrigerator preserves your pastry’s pliability, thwarting drying or sogginess while resting.

Quality impact assessments highlight the benefits of pre-chilling dough and filling, ensuring optimal structure and balanced flavors during baking.

Assembly tips, such as working with semi-cold dough, guard against over-stretching, preserving the turnovers’ artistic structure.

Reheating guidelines promise warmth with a 15-minute 350°F oven refresh, restoring crispness without sacrificing flavor.

Adding fresh elements, like a sprinkle of sugar or dusting of spices before reheating, revitalizes their inviting aromas.

Scaling Instructions


To half the recipe, proportionally decrease ingredients, simplifying kitchen management. This approach conserves both supplies and costs, boosting efficiency.

Doubling or tripling recipes requires attention to detailed dough measurements and scaling ratios. Expanded batches invite party preparations, reducing last-minute rush.

Larger recipes might necessitate equipment adjustments, ensuring all turnovers fit comfortably on baking sheets without crowding.

Timing modifications, including adjusting cook increments according to larger batches, safeguard thorough baking and perfect results.

Storage considerations help maintain freshness in larger amounts: layer turnovers single slope between parchment in airless containers.

Nutritional Deep Dive


A macro breakdown highlights these turnovers as moderate-calorie, carbohydrate-centric treats; sugars and fats contribute pleasing flavors and textures while moderate protein adds balance.

Micronutrient analysis underscores the health contributions from apples, offering vitamins C and K. Cinnamon lends antioxidants, enriching your snack.

Health benefits extend beyond vitamins. Events hosted with apple turnovers include guilt-free indulgence, given moderate serving sizes.

Dietary considerations weigh the turnover’s role within balanced diets, allowing space for lusciousness without sacrificing total wellness.

Portion analysis both quantifies consumption and maintains enjoyment without overwhelming, encouraging mindful, considerate eating.

Weight management tips advise cutting turnovers in half and savoring each morsel- enhancing the experience while aligning with dietary goals.

Dietary Adaptations


For gluten-free variations, substitute the puff pastry with gluten-free options available, ensuring the pastry retains its signature flakiness without allergens.

Dairy-free turnovers swap butter with plant-based alternatives, maintaining flavor. Coconut oil or vegan margarine creates a similar mouthfeel, preserving the richness.

Vegan adaptations, eliminating eggs with water-flour pastes, preserve the dough’s sheen, avoiding animal-based ingredients without compromising presentation.

Low-carb options focus on almond flour crust adaptations. Although differing from traditional, these versions remain true to flavor profiles.

Keto turnover options balance almond and coconut flours, reducing carbohydrates. Compensating for texture, these ingredients mimic traditional pastries.

Paleo treats blend almond meal with baked apples, free from processed ingredients, resonating primal dietary values with modern taste.

Low-FODMAP adjustments incorporate specific apple varieties like Pink Lady and Granny Smith, alongside tailored sweeteners like maple syrup.

Troubleshooting Guide


Texture issues may arise if puff pastry defrosts too quickly or unevenly. Store in the fridge until thawed uniformly for best results.

Correct flavor balance by adjusting spices to taste—incorporating zests or varying fillings ensures unique, authentic results.

Temperature problems like soggy base mean insufficient baking or overcrowding. Maintain turnover spacing and extend baking by brief intervals.

Equipment challenges, such as missing a pastry cutter, allow improvisation—using a sharp knife or pizza wheel delivers comparable results.

Ingredient substitutions enable versatility, preserving flavors by exchanging cinnamon for cardamom, or using pears instead of apples.

Timing concerns ensure consistent lengths when baking—a timer remains an invaluable ally, protecting against over or undercooked pastries.

Recipe Success Stories


Readers marveled at the apple turnover’s delightful pastry, adopting variations to suit personal tastes—boosting spices, or pairing with seasonal garnishes.

Community feedback sparks joyful experimentation, with caramel enthusiasts incorporating lightly salted drizzle atop turnovers for blissful sweet-salt encounters.

Variation successes emerged with savory adaptations like cheese and onion, changing perception of pastry possibilities, resulting in mind-opening culinary adventures.

Adaptation stories reflected well-received dietary alterations, allowing various health-conscious readers to indulge without altering nutritional compromises.

Photography tips welcomed creative mindfulness—styling with rustic plates and linen napkins, showcasing nature’s bounty, crafting drool-worthy Instagram posts.

Frequently Asked Questions

Q: Can I use fresh apple varieties I have on hand?

A: Absolutely, feel free to explore different apple types. Firmer apples like Granny Smith or Honeycrisp hold shape well during baking.

Q: Could I prepare turnovers a day in advance?

A: Yes! Turnovers freeze well or rest refrigerated ready to bake; enjoy convenience and time-saving preparation all at once.

Q: How can I ensure my turnovers stay flaky?

A: Chill turnovers before baking to maintain flour’s natural layering, sealing flavors within delightful flakiness.

Q: Are there alternatives for butter-sensitive diets?

A: Certainly, substitute dairy-free margarine or coconut oil for traditional butter while observing compatible dietary needs.

Q: Can I forgo spices if sensitive to flavor?

A: Feel free to embrace minimalism or adjust spices to gentler intensities, personalizing flavors means exploring your own culinary preferences.

Q: Is parchment necessary for baking?

A: Though not mandatory, parchment paper aids moisture control and prevents pastries sticking, enhancing enjoyable baking experiences.

Q: Can store-bought puff pastry be replaced with homemade?

A: Certainly! For ultimate freshness, preparing your own puff pastry is encouraged — it offers authentic, personalised pastry experiences.

Q: Should turnovers be frozen before or after baking?

A: While either approach is valid, fresh freezing before baking ensures delectably crisp results post-reheat without compromising base texture.

Q: What could replace cinnamon in this recipe?

A: Allspice, nutmeg, or vanilla can contribute similar warmth if cinnamon sensitivity exists—incorporate preferred flavors freely.

Q: Why might turnovers leak during baking?

A: Overfilling likely caused leakage; aim for moderate filling, sealing edges securely with egg wash, or water alternative.

Additional Resources


For further inspiration, explore related recipes like savory turnovers filled with cheese and spinach or Mediterranean-inspired lamb pastries—all promising to delight.

Technique guides online detail perfecting puff-pastry lamination, elevating the baking process to a higher level, equipping home chefs for culinary success.

Investigate ingredient information exploring spice varietals, educating on heat levels, pairings, and potential allergies, tailoring to individual palates.

Equipment recommendations included are informative sources guiding kitchen purchases, from basic utensils to specialized pastry brushes—aiding culinary creation.

Exploring seasonal variations introduces you to an incredible array of turnovers matching every time of year, celebrating available fresh produce deliciously.

Join the Conversation


Join a conversation with fellow bakers and enthusiasts alike. Share your apple turnover creations on social media using #AppleTurnoverDelight.

Experiment with photography tips—create beautiful setups and lighting to capture a warm, inviting scene perfect for sharing your apple turnover journey.

Review recipes online, contributing personal experiences that may inspire future confections, ensuring every bite is met with joy and indulgence.

Engage with the community through forums, swaps, and online meet-ups, gaining insights and sharing techniques while celebrating collective apple turnover achievements.

Explore endless recipe variations, appreciating how creativity and innovation in methods reflect individual tastes and heritage, weaving a rich, flavorful tapestry.

The Recipe

Classic Apple Turnovers

Serves: 4

Prep Time: 20 mins

Cook Time: 25 mins

Total Time: 45 mins

Kitchen Equipment Needed

  • Baking sheet
  • Parchment paper
  • Rolling pin
  • Sharp knife
  • Pastry brush

Ingredients

  • 1 puff pastry sheet, thawed
  • 2 medium tart apples, peeled and diced
  • 1/4 cup sugar
  • 1 tsp cinnamon
  • 1/2 tsp nutmeg
  • 1 tbsp lemon juice
  • 1 egg, beaten

Directions

  1. Preheat oven to 400°F (200°C) and line a baking sheet with parchment paper.
  2. In a medium bowl, combine diced apples with sugar, cinnamon, nutmeg, and lemon juice. Stir well and set aside.
  3. Roll out puff pastry on a lightly floured surface. Cut into 4 equal squares.
  4. Place a spoonful of apple mixture in the center of each square.
  5. Fold each square diagonally to form a triangle, pressing the edges with a fork to seal.
  6. Transfer turnovers to the prepared baking sheet. Brush the tops with beaten egg for glazing.
  7. Bake for 20-25 minutes, or until the turnovers are puffed and golden brown.
  8. Allow to cool slightly on a wire rack before serving.

Recipe Notes

  • Use firm apple varieties for the best texture.
  • The turnovers freeze well for up to 3 months—simply reheat before serving.
  • To customize, try adding raisins or chopped nuts to the filling.

Irresistible Shrimp in Cream Sauce: Quick Weeknight Dinner Recipe

Shrimp in Cream Sauce: A Luxurious Seafood Delight

⚖️
Difficulty
Medium

⏲️
Prep Time
15 mins

🕒
Cook Time
20 mins

⏱️
Total Time
35 mins

🍽️
Servings
4

Embark on a culinary journey with our exquisite Shrimp in Cream Sauce recipe, a dish that embodies elegance and flavor harmony. The main keyword, Shrimp in Cream Sauce, highlights the luxurious combination of tender shrimp enveloped in rich, creamy sauce. As you prepare this dish, expect a delightful interplay of textures that create an unforgettable dining experience. Ideal for a romantic dinner or an impressive meal for guests, this recipe promises to satisfy your taste buds and elevate your home-cooked meals to gourmet status.

Quick Recipe Highlights

  • Flavor Profile: The Shrimp in Cream Sauce is a delight of savory goodness, combining the seafood’s briny sweetness with a rich, buttery base. The infusion of garlic and herbs completes the umami experience.
  • Texture: The dish offers a delightful contrast with plump, juicy shrimp accompanied by a smooth, velvety sauce that clings to each bite effortlessly.
  • Aroma: The enticing aroma of sautéed garlic and shrimp fills your kitchen, further enhanced by fragrant herbs and the creamy richness of the sauce.
  • Visual Appeal: Golden shrimp lie elegantly atop a pale cream sauce, garnished with vibrant green herbs, making the dish as appealing to the eyes as it is to the palate.
  • Skill Level Needed: While some culinary skills are needed to perfect the sauce’s texture, the recipe remains accessible, making it suitable for intermediate cooks.
  • Special Equipment: To achieve the ideal sauce consistency, a good-quality non-stick skillet and a whisk are recommended for even cooking and mixing.

Recipe Overview

  • Difficulty Level: This Shrimp in Cream Sauce recipe is classified as medium difficulty. Although the dish requires attention to sauce consistency and timing for perfectly cooked shrimp, following the instructions makes it achievable for most home cooks.
  • Category: This dish falls into the category of main courses, ideal for seafood lovers and those seeking an elegant entrée.
  • Cuisine: The recipe draws inspiration from French cuisine, known for its emphasis on high-quality ingredients and delicate flavors, yet it incorporates contemporary touches that appeal to modern palates.
  • Cost: Preparing this dish is relatively cost-effective, as shrimp are often affordable and other ingredients like cream and herbs are commonly used pantry items.
  • Season: Best enjoyed year-round, this dish shines in spring and summer when fresh seafood is abundant, yet remains a cozy winter indulgence.
  • Occasion: Perfect for formal gatherings, date nights, or a weekend family dinner, it brings sophistication to any occasion.

Why You’ll Love This Recipe


The Shrimp in Cream Sauce is a perfect blend of luxury and comfort. The delightful mix of flavors makes it a taste sensation, featuring the sweetness of shrimp balanced with a creamy, garlic-infused sauce. Despite being indulgent, the dish is also practical to prepare, making it a convenient option for both seasoned cooks and adventurous beginners. It provides a balanced nutritional profile, rich in protein and low-carb, making it favorable for various dietary preferences. Additionally, its elegance makes it a social centerpiece, impressing guests and family alike without excessive expenses. Its versatility allows for easy ingredient swaps to suit individual tastes and dietary needs.

Historical Background and Cultural Significance


Shrimp in Cream Sauce finds its roots in the culinary traditions of French cuisine, highlighting the nation’s love affair with both shrimp and cream-based sauces. This combination has evolved, blending classic French culinary techniques with modern influences that cater to a broader audience. Known for its cultural significance, this dish connects the exquisite seafood offerings of coastal regions with the sophisticated flair of French gastronomy. Over time, regional variations have emerged, where local ingredients and spices have infused their distinctive twist into the classic dish while preserving its fundamental appeal.

Ingredient Deep Dive


Shrimp, the star ingredient of this dish, has a rich cultural history as a seafood delicacy, cherished for its succulent texture and sweet flavor. Known for its low-fat content and high protein value, shrimp contribute to a health-conscious meal without sacrificing taste. To select the best shrimp, opt for firm, fresh-smelling ones, and store them in the coldest part of your refrigerator. In case of unavailability, prawns or scallops can serve as a delicious substitute.

The creamy sauce, a blend of cream and aromatic elements, is crucial for achieving the dish’s luxurious texture. Cream adds richness, while ingredients like garlic, herbs, and broth balance the flavors. For those with dietary restrictions, coconut milk or cashew cream can be used as alternatives. Proper storage of the cream requires refrigeration to maintain its freshness.

Common Mistakes to Avoid

  • Overcooking shrimp: Ensure you cook shrimp just until opaque to prevent rubbery texture.
  • Curdling the sauce: Gradually incorporate cream at a low temperature to avoid separation.
  • Over-salting: Balance the seasoning carefully, as some shrimp may already be salted.
  • Uneven cooking: Cook shrimp in a single layer for uniform heat distribution.
  • Neglecting the sauce: Stir continuously while making the sauce to prevent burning and clumping.
  • Improper shrimp cleaning: Devein shrimp thoroughly to remove any grit.
  • Skipping aromatics: Do not omit garlic or herbs, as they contribute essential flavors.
  • Inadequate preparation: Have all ingredients ready before cooking to ensure smoothly timed steps.

Essential Techniques


Mastering the art of Shrimp in Cream Sauce involves a handful of essential techniques. Achieving the perfect sauce consistency is crucial; thus, maintaining low heat and continuous stirring while incorporating cream prevents curdling. Understanding the indicators of well-cooked shrimp, such as color change to opaque and a slight curl, will help you avoid overcooking. Lastly, learning herb infusion techniques enhances aromatic depth without overpowering the dish. By focusing on these elements, you ensure a restaurant-quality outcome.

Pro Tips for Perfect Shrimp in Cream Sauce


Employ these expert tips for the best results: For added depth, briefly sauté shrimp in garlic before finishing in the sauce. Incorporate a splash of white wine for acidity and complexity. Introduce fresh herbs at the end of cooking to maintain their vibrancy. Opt for freshly peeled shrimp for superior texture. Consider using homemade broth for the sauce to maximize flavor. Finally, always let the sauce rest for a couple of minutes before serving, allowing the ingredients to meld harmoniously.

Variations and Adaptations


Shrimp in Cream Sauce offers numerous variations to suit diverse tastes. Explore regional twists by incorporating local spices, giving the dish unique flair. In colder seasons, enrich the sauce with a hint of nutmeg for warmth, or opt for zestier flavors like lemon in summer. Dietary modifications can include using almond milk for a dairy-free version or substituting zucchini noodles for a low-carb alternative. Customize the presentation with vibrant garnishes like edible flowers or microgreens for a contemporary spin.

Serving and Presentation Guide


Serve Shrimp in Cream Sauce with a side of fluffy rice or al dente pasta to soak up the creamy goodness. For upscale presentation, arrange shrimp neatly on individual plates, drizzling sauce artfully. Garnish with freshly chopped herbs and lemon wedges for a pop of color. Traditionally, the dish pairs well with a simple green salad on the side. Consider serving it piping hot to highlight its rich aroma and maximize the sauce’s luscious mouthfeel.

Wine and Beverage Pairing


An elegant dish like Shrimp in Cream Sauce deserves a thoughtful beverage pairing. Crisp white wines, such as Sauvignon Blanc or Pinot Grigio, provide an acidic counterpoint to the dish’s richness, while a buttery Chardonnay harmonizes seamlessly. For non-drinkers, a citrus-infused sparkling water offers refreshing contrast. Even a light oolong tea complements the cream and herbs without overpowering the flavors, making it a versatile choice for varied preferences.

Storage and Shelf Life


Ensure optimal storage by placing leftovers in an airtight container and refrigerating them within two hours of cooking. Consume within three days to maintain quality, checking for any off smells as a spoilage indicator. To reheat, gently warm on low heat, stirring occasionally to preserve sauce consistency. Although not ideal for freezing due to potential texture changes, if necessary, freeze in portioned containers and thaw slowly in the refrigerator before reheating.

Make Ahead Strategies


Streamline your preparation by making the sauce up to a day in advance, storing it separately from the shrimp. When ready to serve, gently reheat and complete the dish with freshly cooked shrimp. This allows the flavors to develop and meld further. Additionally, prep ingredients such as garlic and herbs ahead, ensuring quick assembly. Consider adding a fresh squeeze of lemon for vibrancy when serving.

Scaling Instructions


Adapt Shrimp in Cream Sauce to your needs by scaling up or down. For larger gatherings, easily double or triple the recipe, ensuring you use a larger skillet to maintain even cooking. If halving, adjust seasoning meticulously, as even slight variations can impact flavor balance. Remember to proportionally adjust cooking times when increasing quantities, ensuring ample heat distribution for larger batches.

Nutritional Deep Dive


This dish boasts a balanced nutritional profile, rich in lean protein from shrimp while moderate in calories due to creamy elements. Variants like low-fat milk offer reduced caloric options without sacrificing flavor. Shrimp contributes vital minerals such as selenium and vitamin B12. Emphasizing portion control helps manage weight goals, ensuring an indulgent yet health-conscious culinary experience.

Dietary Adaptations


Catering to specific dietary needs is simple with this adaptable dish. For gluten-free modifications, ensure all products, especially broth and cream, are certified gluten-free. Dairy-free substitutions like coconut cream or almond milk maintain creaminess. While a vegan version is challenging given the shrimp base, tofu or tempeh offer plant-based alternatives. Adjust seasoning and spices to match personal preference while respecting dietary guidelines.

Troubleshooting Guide


Perfect every aspect of your dish with these solutions. Counteract a broken sauce by gently whisking in a splash of cream until smooth. Should the shrimp appear rubbery, use lower heat and shorter cooking times to retain tenderness. For unbalanced flavors, adjust acidity with a dash of lemon or a pinch of sugar. If using frozen shrimp, ensure thorough thawing and pat dry to prevent excess moisture diluting the sauce.

Recipe Success Stories


Join countless others in our recipe community who have embraced the Shrimp in Cream Sauce. One reader added sun-dried tomatoes for a tangy twist, while another replaced cream with soy milk for a dairy-free variant. Numerous adaptations showcase the dish’s versatility, proving its ability to inspire creativity in everyday cooks. Such experiences emphasize the recipe’s potential to become a cherished staple.

Frequently Asked Questions

Can I use frozen shrimp?
Yes, ensure they are fully thawed and patted dry before cooking to maintain texture and avoid diluting the sauce.

Is this dish suitable for lactose-intolerant individuals?
Dairy-free adaptations using coconut or almond milk can accommodate lactose intolerance while preserving creaminess.

How can I prevent the sauce from breaking?
Incorporate cream slowly over low heat, whisking continuously to maintain emulsion and prevent separation.

Can I make the dish ahead of time?
The sauce can be made a day ahead and combined with freshly cooked shrimp when ready to serve, enhancing flavor development.

What side dishes complement this recipe?
Rice, pasta, and fresh salads make excellent accompaniments, balancing the dish’s richness with contrasting textures.

How do I adjust the recipe for more servings?
Simply scale up ingredients proportionally, keeping an eye on the cooking vessel size and time adjustments to maintain even cooking.

Does this dish freeze well?
While freezing is not recommended due to potential texture changes, careful reheating after refrigeration preserves quality.

What varieties of wine pair well?
Crisp white wines like Sauvignon Blanc or buttery Chardonnay complement the flavors well without overpowering them.

What can I use instead of shrimp?
Prawns or tender scallops prove suitable swaps, maintaining the essence of the dish while catering to availability or preference.

Can I substitute herbs?
Yes, tailor herb selection to your liking, considering options like basil or tarragon for alternative flavor profiles while respecting the dish’s delicacy.

Additional Resources


Explore related culinary creations that reinforce your love for seafood delicacies. Visit our seafood technique guides for tips on perfecting other seafood recipes, ensuring every dish emerges with professional finesse. Discover resources on ingredient sourcing, equipping yourself with the best quality choices from reputable producers. Embrace seasonal variations, guaranteeing your dishes remain fresh and vibrant throughout the year.

Join the Conversation


We invite you to share your Shrimp in Cream Sauce endeavors on social media, cultivating a vibrant community of food enthusiasts eager to exchange inspiration. Provide feedback, explore others’ adaptations, and delight in reader-submitted photographs, showcasing the endless versatility of this beloved dish. Celebrate culinary creativity and legacy by engaging with fellow enthusiasts, fostering collaborative enjoyment, and elevating home cooking.

The Recipe

Shrimp in Cream Sauce

Serves: 4

Prep Time: 15 mins

Cook Time: 20 mins

Total Time: 35 mins

Kitchen Equipment Needed

  • Non-stick skillet
  • Whisk
  • Garlic press
  • Sharp knife
  • Measuring spoons and cups

Ingredients

  • 1 lb shrimp, peeled and deveined
  • 2 tablespoons butter
  • 2 cloves garlic, minced
  • 1 cup heavy cream
  • 1/4 cup chicken broth
  • Salt and pepper to taste
  • 1 tablespoon lemon juice
  • 2 tablespoons chopped parsley

Directions

  1. Heat a non-stick skillet over medium heat and add butter.
  2. Sauté shrimp until pink on both sides, about 4 minutes total. Remove and set aside.
  3. In the same skillet, add garlic and sauté until fragrant.
  4. Pour in chicken broth, scraping up any browned bits from the bottom of the pan.
  5. Stir in cream, and bring to a gentle simmer.
  6. Season with salt, pepper, and lemon juice.
  7. Return shrimp to skillet and coat with sauce. Cook for an additional 2 minutes.
  8. Remove from heat and stir in parsley.
  9. Serve immediately with your choice of side.

Recipe Notes

  • Add sun-dried tomatoes for a tangy variation.
  • The sauce can be adjusted with a splash of white wine for more depth.
  • For a thicker sauce, allow it to reduce slightly longer before adding shrimp back in.

“Dijon Mushroom Cream Chicken: A Delicious and Easy Dinner Recipe”

Dijon Mushroom Cream Chicken: A Comforting Delight

⚖️
Difficulty
Medium

⏲️
Prep Time
15 mins

🕒
Cook Time
30 mins

⏱️
Total Time
45 mins

🍽️
Servings
4

The Dijon Mushroom Cream Chicken is an exquisite dish that combines the earthy flavors of mushrooms with the tangy warmth of Dijon mustard and the creamy richness that binds them together perfectly. This recipe brings comfort to your dining table while delivering a gourmet experience right at home. Imagine tender chicken breasts bathed in a luxurious mushroom cream sauce, seasoned with a hint of garlic and thyme, perfect for any dinner party or cozy night in.

This cream chicken recipe doesn’t just serve up deliciousness; it’s also a testament to the beauty of simple yet elegant ingredients coming together to create an unforgettable meal. Whether you’re an experienced cook or a home chef looking to impress, this dish is a wonderful way to indulge in the rich flavors of rustic cuisine while incorporating contemporary zest.

Quick Recipe Highlights

  • Flavor Profile: Tangy Dijon mustard lends a sharpness that melds beautifully with the earthy mushrooms and creamy sauce.
  • Texture: The chicken is tender and juicy, complemented by a velvety sauce that has a slight thickness without being too heavy.
  • Aroma: A delightful waft of garlic, thyme, and sautéed mushrooms fills the kitchen, creating an enticing and savory smell.
  • Visual Appeal: The dish boasts a creamy beige sauce dotted with mushrooms and flecks of fresh herbs, showcased against the golden-seared chicken.
  • Skill Level Needed: Moderate—requires some finesse in creating the sauce and cooking the chicken to perfect juiciness.
  • Special Equipment: A sauté pan, whisk, and a sharp knife for slicing mushrooms and chicken.

Recipe Overview

  • Difficulty Level: While it calls for a few precise steps, such as sauce thickening and maintaining the right temperature, it’s manageable with basic cooking skills.
  • Category: Perfect as a main course for a lunch or dinner setting, especially suited for occasions where you want something slightly upscale yet hearty.
  • Cuisine: While rooted in classic French techniques, the recipe has a universal appeal due to simple ingredients easily found in many regions.
  • Cost: Moderate, given the quality mushrooms and Dijon mustard; however, can be managed with everyday kitchen staples.
  • Season: Best enjoyed in autumn or winter due to its rich nature, but also a treat any time you crave comfort.
  • Occasion: Ideal for family dinners, date nights, or entertaining guests, offering elegance without the need for a professional kitchen.

Why You’ll Love This Recipe


The Dijon Mushroom Cream Chicken is a deliciously versatile dish that promises a delightful taste and texture profile. The chicken’s juiciness is enhanced by the creamy, rich sauce, which provides a perfect balance to the earthiness of mushrooms and the pungent kick of Dijon mustard. Each bite delivers a symphony of flavors that stay with you long after the meal is over.

Convenience is king with this recipe, allowing for a satisfying meal without demanding much pre-planning. With just under an hour to prepare and cook, it fits seamlessly into a busy lifestyle. An ideal option for those quick weeknight dinners or impromptu gatherings where you need a reliable crowd-pleaser.

Nutritional benefits are not compromised in this creamy indulgence. With chicken as a lean protein source, mushrooms supplying vital vitamins, and controlled use of cream, it’s a dish that aligns with balanced eating goals without sacrificing flavor.

The social and entertaining value of this dish is elevated by its elegant presentation and gourmet taste, making every serving feel special. This recipe often becomes a conversation starter due to its delightful aroma and comforting yet sophisticated flavors, drawing people around the table.

Cost-effectiveness and accessibility are keys to its allure. Ingredients are commonly available, and the dish requires no extravagant outlay, making it both restaurant-quality in taste and budget-friendly for routine cooking.

Historical Background and Cultural Significance


The story of this Dijon Mushroom Cream Chicken is steeped in French culinary heritage, a homage to the robust flavor pairings that France is renowned for. The use of mustard in cooking trials bears historical significance, originating from Dijon, a region globally celebrated for its mustard production.

Culturally, mustard has been prized for centuries not only as a condiment but also for its ability to enhance and marry complementary flavors, a testament to French cooking’s ability to transform simple ingredients into complex and tasteful dishes. This recipe serves as a contemporary nod to these age-old traditions.

Over time, the dish has evolved, allowing for regional variations and personal customization. While initially confined to French kitchens, it has been embraced widely, making its way into homes and restaurants worldwide, adapting to local tastes and dietary preferences.

Regional adaptations include the inclusion of diverse mushrooms or substitutions with plant-based creams, mirroring dietary trends and regional preferences. The evolving nature of this dish is a testament to its timelessness and universal appeal, bridging culinary traditions across continents.

Ingredient Deep Dive

Chicken Breast: In many cuisines, chicken is a staple protein due to its versatility and nutritional profile. Lean, high in protein, and low in fat, chicken breast serves as the foundational canvas for this recipe’s flavors.

Mushrooms: Esteemed for their umami richness, mushrooms have long been a culinary gem. They’re a low-calorie source of fiber, protein, and antioxidants, adding depth to the creamy sauce. Opt for cremini or shiitake mushrooms for more intense flavors.

Dijon Mustard: With roots tracing back to Roman times, Dijon mustard is lauded for its pungency and smoothness. Stored in a cool place, it maintains its robust flavor profile for months. If out of Dijon, horseradish mustard can serve as a suitable substitute.

Heavy Cream: While adding luxurious richness, heavy cream provides essential calcium and saturated fats crucial for heart health in moderation. Use fresh cream for the best consistency; alternate with coconut cream for a dairy-free option.

Thyme: A quintessential herb in European cooking, thyme imparts subtle, earthy undertones. It’s best stored dried, as fresh sprigs may wilt quickly. If short on thyme, rosemary offers a complementary flavor alternative.

Common Mistakes to Avoid

  • Overcooking the Chicken: Lead to dryness; cook just until internal temps reach 165°F.
  • Curdling the Sauce: Gradually stir in cream; avoid high heat for a smooth finish.
  • Neglecting Mushroom Prep: Slice uniformly for even cooking; excess moisture should be avoided for a better sear.
  • Skimping on Seasoning: Properly salt each layer for a balanced dish.
  • Sacrificing Freshness: Use fresh herbs and check cream’s date for optimal taste.
  • Inadequate Deglazing: Sufficient deglazing ensures depth from browned bits.
  • Incorrect Pan Size: Use the correct pan to avoid overcrowding and achieve a good sear on the chicken.
  • Ignoring Rest Time: Allow chicken to rest after cooking to retain juices.

Essential Techniques


Mastering the sear on your chicken is crucial—this develops flavor through the Maillard reaction, providing a lovely crust. Ensure your pan is hot before the chicken hits and avoid moving it too soon to prevent sticking.

Creating the sauce requires patience and a steady hand; whisk gently to incorporate cream without boiling, which can lead to separation. The goal is a silken sauce that cohesively envelopes the chicken.

The art of deglazing takes practice but adds remarkable flavor. As you introduce liquids to hot caramelized bits, stir to lift these delicious morsels, forming the flavor base of your sauce.

Balancing the dish is critical. Begin with measured additions of mustard and taste frequently. Too little and the dish lacks dimension; too much, and it can overpower.

Pro Tips for Perfect Dijon Mushroom Cream Chicken


Toast your spices briefly before adding liquids to release their full aromas, enhancing the depth of the dish.

Always clean mushrooms with a damp cloth instead of rinsing, preserving their ability to absorb the cream sauce more effectively.

Brining chicken for an hour before cooking ensures it’s juicier, improving the final mouthfeel and flavor retention.

Consider adding a touch of white wine to deglaze; it pairs excellently with the Dijon and elevates the sauce profile.

Including a dash of lemon zest at the end can cut through the cream, adding brightness and contrast.

Present your dish on a pre-warmed plate to maintain temperature, keeping the sauce fluid and visually appealing.

Variations and Adaptations


Embed regional flair by swapping mushrooms for local varieties. In Italy, porcini brings a pronounced earthiness, while Japanese enoki adds delicate texture.

Adapting the recipe for summer, sprinkle fresh chives over the top for lightness, or introduce a squeeze of chilled lemon juice for freshness during the meal.

Catering to dietary needs can see dairy swaps with coconut cream or soy-based alternatives without losing the dish’s creamy allure.

For a hearty winter dish, incorporate root vegetables like parsnips or finishing with a touch of nutmeg for warmth.

Present on individual plates with a side salad for a more modern interpretation, adding pops of color and contrast.

Use butter lettuce cups for serving a lighter version, with the sauce acting as a creamy dressing, blending with chicken.

Serving and Presentation Guide


Plating should be an art—arrange chicken on a lipped plate, dribbling sauce over the top with mushrooms ornately placed around.

Garnish with fresh thyme sprigs or finely chopped parsley for contrast against creamy colors. Their freshness invigorates the plating visually and aromatically.

Accompany with herb-infused rice or garlic mashed potatoes for side texture contrast, delighting in the merging of flavors with each bite.

Modernize serving techniques by using a ring mold; it helps with consistent plating, dotted with sauce around the edge for finesse.

Serve warm immediately for best cream stability and flavor impact, focusing on portioning each element proportionately.

Wine and Beverage Pairing


A good Chardonnay or a supple Pinot Noir complements the creamy, rich flavors while cutting through with sufficient acidity.

For a non-alcoholic choice, opt for an elderflower tonic or lemon rosemary spritzer; their brightness counterbalances the sauce without overpowering.

Completing breakfast or brunch with a robust black tea offers an earthy pairing, supporting the dish with a pleasant tannic complement.

Serve wine and non-alcoholic options slightly chilled, allowing flavors to open up while complementing the dish’s warmth.

Storage and Shelf Life


Store leftovers in airtight containers, refrigerating promptly after cooling to preserve flavors. Best used within 2-3 days.

Use oven-safe glass or BPA-free plastic containers, which retain moisture without damaging the sauce integrity.

Ignoring spoilage indicators, such as sour smell or curdled sauce, can compromise taste; always assess freshness before serving.

Gently reheat in a saucepan over low heat, stirring until warmed through without reaching boiling point.

Freezing affects the sauce’s texture, but while feasible for short-term solutions, it’s best enjoyed fresh within its recommended timeframe.

Make Ahead Strategies


Preparing parts of the dish in advance, like slicing mushrooms or prepping chicken, cuts down cooking time significantly on the day of service.

Storage at each step involves careful sealing to avoid drying or unintended flavor transfer in the fridge.

Assembly is best tackled in stages; cook chicken and make the sauce separately if pressed for time, combining just before serving.

Reheating the entire dish in a low oven prevents breaking down its components, gently coaxing it back to serving temps.

Final fresh touches, like herbs, should always be added last minute for vibrancy and aroma.

Scaling Instructions


For smaller servings, halve ingredients proportionally, ensuring balance is maintained, and adjust seasoning to taste.

Doubling the recipe requires careful attention to pan size and heat distribution; evenly cooked chicken and sauce are crucial to success.

Equipment adjustments might need larger sauté pans or additional mixing bowls to accommodate increased quantities effectively.

Timing should be extended for larger batches, allowing each part to cook evenly without rush and avoiding crowding issues.

Storing any excess requires strategic packing, focusing on preserving sauce quality and preventing potential separation in storage.

Nutritional Deep Dive


The dish offers an excellent protein supply from chicken, balanced by the creamy sauce’s caloric content.

It’s rich in vitamins and minerals from mushrooms, like selenium, essential for protecting cells from damage.

A moderate portion keeps the meal nutrient-dense, supporting muscle repair and daily bodily functions while indulging in a hearty meal.

Balancing portion sizes prevents overconsumption while still allowing for enjoyment and satiety.

Promoting a balanced use of cream supports weight management; paired with high-fiber sides, it creates a full, nutrient-angled meal.

Dietary Adaptations


For a gluten-free version, ensure thickening agents like cornflour or arrowroot are used in place of wheat-based ingredients.

Create a dairy-free alternative by selecting coconut milk or cashew cream, yielding a different but equally luscious sauce.

Vegan swaps include replacing chicken with tofu or tempeh, adapting mustard for plant-based emulsification as its binding agent.

Dial down carbohydrates by accompanying dishes like cauliflower rice or spiralized zucchini.

Keto considerations could replace heavy cream with full-fat versions, maintaining dish depth while focusing on macro ratios.

Troubleshooting Guide


If sauce appears too runny, incorporate more thickening agents gradually, whisking vigorously to achieve desired body.

Off-balance flavors necessitate seasoning adjustments; adding salt or acidity can modify taste drastically in the right direction.

Temperature problems may indicate overcooking or incorrect settings; equip with a digital thermometer to improve accuracy.

Equipment challenges like pan sticking demand proper cookware use recommendations; non-stick surfaces can help balance.

Ingredient substitutions, such as unavailability, should be explored—cilantro could substitute thyme or similar consistent flavors.

Over-cooked chicken? Allow resting or make thinner gravy to partially rehydrate without masking flavors.

Recipe Success Stories


Readers share rave reviews of its ease and consistent results, claiming it’s become a staple that emulates professional culinary results.

Adaptive versions inspire, with combinations of different mushroom types yielding deeper umami flavors, increasing its audience and seasonal adaptability.

Featuring updated photography tips aids in visually capturing this dish’s inherent beauty—utilizing natural lighting and positioning for the best effect.

Community engagement surrounds recipe modifications, inspiring creativity far beyond the initial scope, such as inclusion in gourmet weekly meal kits.

Photography captures weren’t merely for show; plating allure was beneficial for presentations across several dinner parties, driving conversation.

Frequently Asked Questions

Q: Can I prepare the sauce ahead of time?
A: Yes, the sauce can be made ahead and stored in an airtight container in the fridge for up to two days. Reheat gently before serving.

Q: Is there a way to make this recipe spicier?
A: Absolutely! You can add a pinch of red pepper flakes or a dash of cayenne pepper to the sauce for a subtle heat.

Q: Can this dish be made entirely dairy-free?
A: Yes, substitute the heavy cream with coconut cream and use a vegan butter alternative for a dairy-free version.

Q: How can I ensure my sauce doesn’t split?
A: Avoid boiling the sauce; gently heat and whisk until the components have fully combined for a smooth result.

Q: What’s the best wine for cooking this dish?
A: A dry white wine, such as Chardonnay or Sauvignon Blanc, is ideal, though completely optional.

Q: Can I make this recipe in a slow cooker?
A: It’s possible with modifications; sear chicken first and then combine with sauce ingredients to slow cook until tender.

Q: How can I thicken the sauce without flour?
A: Use cornstarch or arrowroot mixed with a little water to create a slurry, adding it gradually to the sauce.

Q: Is substituting chicken thighs an option?
A: Yes, chicken thighs offer more flavor and moisture, requiring adjustments in cook time to maintain tenderness.

Q: Are there any specific side dishes that pair well?
A: Sides like mashed potatoes, wild rice, or steamed asparagus complement the rich flavors beautifully.

Q: Can I freeze the leftovers?
A: While possible, note that sauces containing cream may change in texture when thawed and reheated.

Additional Resources


Explore our other chicken recipes, curated for flavor consistency and versatility, providing ample ideas for any dining occasion.

Engage with video-guided techniques to elevate basic cooking methods, simplifying steps within Dijon Mushroom Cream Chicken preparations.

Gain ingredient insights, from sourcing the finest mushrooms in farmers’ markets to choosing sustainably reared poultry for healthier meals.

Seasonal inspiration thrives; discover recipes aligned with the same eclectic spirit, turning each season into a new dining adventure on your table.

Invest in the right equipment, with recommendations tailored to recipes ensuring each tool is fit for purpose, ensuring cooking pleasure.

Join the Conversation


Showcase your rendition on social platforms with #DijonMushroomCreamChicken, allowing others to appreciate and interact with your unique twist.

Photography aficionados are encouraged to share snaps, together with lighting tips, to capture the essence of gourmet dining atmospheres.

Recipe reviews foster growth; leave feedback, highlighting any adaptations you loved or potential improvements.

Community engagement through comments motivates continual recipe sharing, ensuring suggestions enrich future culinary undertakings.

Experimentation isn’t just encouraged—it’s essential. Share your variants and engage globally in a growing foodie community.

The Recipe

Dijon Mushroom Cream Chicken

Serves: 4

Prep Time: 15 mins

Cook Time: 30 mins

Total Time: 45 mins

Kitchen Equipment Needed

  • Sauté pan
  • Whisk
  • Sharp knife
  • Cutting board

Ingredients

  • 4 chicken breasts
  • 2 tablespoons olive oil
  • 1 cup mushrooms, sliced
  • 2 garlic cloves, minced
  • 1 cup heavy cream
  • 2 tablespoons Dijon mustard
  • 1 teaspoon thyme, dried or fresh
  • Salt and pepper to taste

Directions

  1. Heat olive oil in a sauté pan over medium heat. Add chicken breasts, seasoning with salt and pepper, and cook until golden and cooked through. Remove and set aside.
  2. In the same pan, add mushrooms and garlic, cooking until mushrooms are tender and fragrant.
  3. Reduce heat to low, whisk in cream and mustard, cooking until the sauce thickens slightly.
  4. Sprinkle thyme into the sauce, adjusting seasoning to taste.
  5. Return chicken to the pan, spooning sauce over the top. Simmer briefly before serving.

Recipe Notes

  • Experiment with different mushroom types for varied flavors.
  • Add a splash of white wine during cooking for depth.
  • Garnish with fresh parsley or chives for extra freshness.