Delicious Cheesy Baked Mostaccioli for a Quick Family Dinner

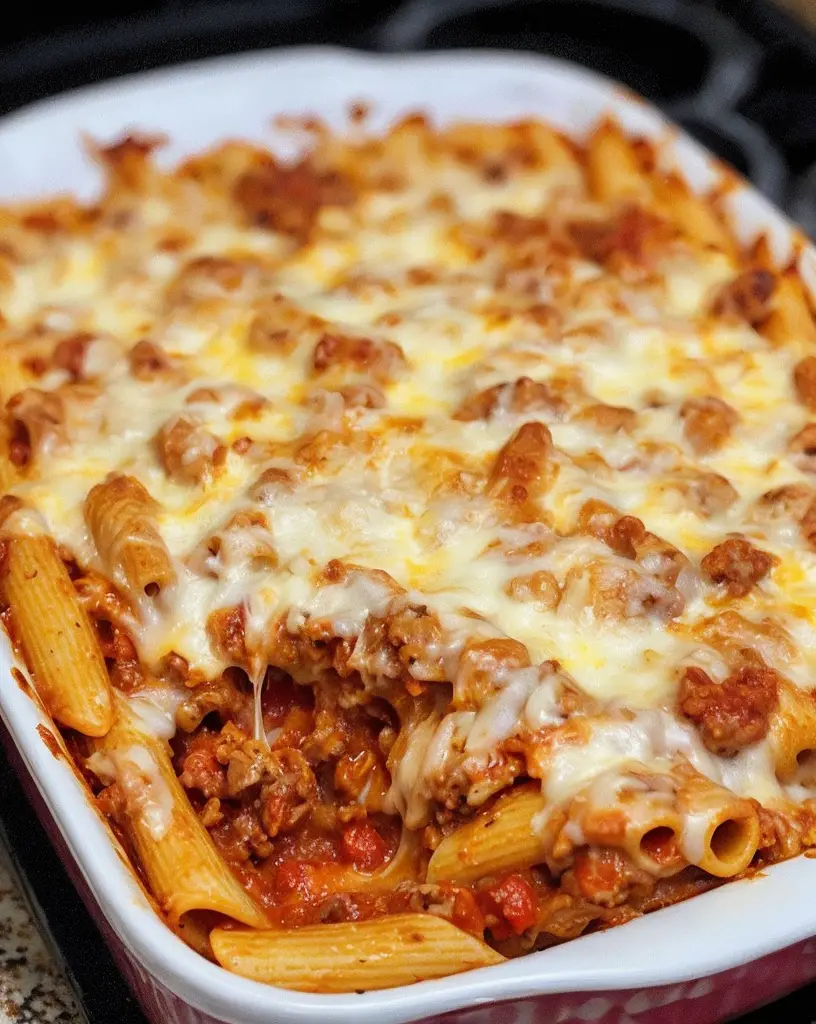
Cheesy Baked Mostaccioli Recipe: A Deliciously Simple Family Dinner

⚖️
Difficulty
Easy

⏲️
Prep Time
15 mins

🕒
Cook Time
40 mins

⏱️
Total Time
55 mins

🍽️
Servings
6

Welcome to our Cheesy Baked Mostaccioli Recipe—a perfect choice for an easy family dinner that guarantees smiles with every bite. This classic Italian dish incorporates perfectly cooked pasta, enveloped in a rich and savory tomato sauce, layered generously with melted cheese. It offers the kind of home-cooked comfort that everyone craves, especially on a chilly evening. The marriage of flavors between the tangy marinara and the creamy, gooey cheese creates a symphony in every mouthful.

The melted cheese not only adds a scrumptious texture that strings with every forkful, but it also beautifully complements the hearty and zesty sauce. This Cheesy Baked Mostaccioli recipe is not just about the delightful taste; it’s about creating warm and memorable moments with your loved ones, gathering around your family table to share a meal made from the heart.

Comfort food is always a hit, and this baked masterpiece is a testament to the incredible flavor depth that can be achieved with simple ingredients. The mostaccioli, true to its tradition, beautifully soaks up the sauce while maintaining its tender bite, making it a dish that’s as delicious to the senses as it is to the soul.

Quick Recipe Highlights

  • Flavor Profile: Experience a burst of umami with every bite, mingled with tangy tomato sauce and creamy melted cheese that rounds up the flavors perfectly.
  • Texture: Smooth bites of tender pasta topped with bubbling, golden-brown cheese create a satisfying contrast that makes each mouthful delightful.
  • Aroma: As the dish bakes, your kitchen will be filled with an enticing aroma of garlic, herbs, and roasted cheese that whets the appetite.
  • Visual Appeal: A feast for the eyes, this dish is beautifully golden with flecks of aromatic herbs, inviting you to dig in immediately.
  • Skill Level Needed: Easy enough for beginners, requiring basic cooking skills like sautéing and baking.
  • Special Equipment: A trusty baking dish and a stove will get you started on this culinary journey.

Recipe Overview

  • Difficulty Level: Perfect for beginners, this recipe makes culinary exploration enjoyable without overwhelming complexities.
  • Category: This dish fits firmly into the comfort food category, with its hearty and warming elements that cater to everyone’s craving for wholesome meals.
  • Cuisine: Rooted in Italian culinary tradition, this baked mostaccioli embraces the simplicity and rich flavors characteristic of the region’s beloved pasta dishes.
  • Cost: Economical, using pantry staples like pasta and tomato sauce, with cheese as the primary investment for a truly satisfying meal.
  • Season: While it shines in cooler months, its comforting nature makes it a year-round favorite for family dinners.
  • Occasion: Ideal for casual dinners, potlucks, or whenever you need a dish that brings people together with ease.

Why You’ll Love This Recipe

The Cheesy Baked Mostaccioli Recipe offers unparalleled taste and texture appeal. The fusion of creamy cheese and herb-infused tomato sauce envelops the pasta, creating a dish rich in flavor. Each bite reveals layers of textures from the soft pasta and granular, melted cheese, delivering comfort in every forkful. The textures and tastes come together to evoke feelings of warmth and satisfaction, making this recipe a stellar example of home-cooked delight.

Convenience is at the heart of this recipe. With a simple preparation process and common ingredients, it allows for effortless assembly. The recipe is designed with busy families in mind, making it a go-to choice for weeknight dinners that require minimal fuss in the kitchen, allowing you more time with loved ones.

From a nutritional standpoint, this recipe provides a balanced mix of carbohydrates, protein, and fat, offering energy, sustenance, and pleasure. It strikes just the right chord, making it a fulfilling meal that’s good for both body and soul. Additionally, it’s adaptable for various dietary needs, making it an inclusive meal for diverse family preferences.

Socially, this mostaccioli becomes a focal point at gatherings, encouraging conversations and laughter over shared plates of deliciousness. Its family-style serving adds to the dining experience, fostering communal dining that strengthens bonds and creates lasting memories. Its simplicity encourages creativity, allowing for personal touches and adaptations.

Affordability and accessibility are key benefits, as it uses budget-friendly ingredients, readily available at any grocery store. Its accessibility doesn’t compromise on taste, making it a perfect dish for those seeking deliciousness without breaking the bank. This recipe perfectly exemplifies that wonderful meals don’t always require expensive ingredients.

Historical Background and Cultural Significance

The origin of mostaccioli lies deeply rooted in Italy, where pasta is not just a dish but a staple of life and culture. Derived from ‘mostax’ meaning ‘mustache,’ the gently ribbed tubes resemble a small mustache themselves. Over the years, Italians have crafted an astonishing variety of pasta dishes, with baked variations seen as a prime way to bring out rich, savory flavors through layered ingredients.

Culturally, pasta dishes such as the Cheesy Baked Mostaccioli play a significant role in Italian cuisine, often representing family, tradition, and joy. It’s a dish that’s traditionally served during celebrations and large family gatherings, symbolizing unity and shared happiness. In Italy, this meal is a cherished part of weekly family dining, embodying a tradition that carries stories through generations.

Throughout its evolution, baked pasta has shown remarkable adaptability. Initially, simple pasta types served with basic tomato sauces, the evolution introduced cheeses and herbs, adding depth and enhancing the array of flavors present in today’s version. Innovations in cheese production and tomato cultivation have enriched its flavors further, cementing its place on dinner tables worldwide.

Regionally, variations in Italy see mostaccioli served with different complementary flavors and techniques. While Southern regions favor spicy tomatoes and robust cheeses, Northern recipes might incorporate softer cheese blends and a luxurious touch of cream, demonstrating the versatility and rich cultural influence behind the Cheesy Baked Mostaccioli.

Ingredient Deep Dive

– **Mostaccioli Pasta:** A tubular pasta, mostaccioli’s role is central, given its ability to soak up flavors while maintaining texture. Culturally significant in Italy’s pasta production history, it’s appreciated for its versatility and adaptability. Rich in carbohydrates, it provides the energy essential for everyday tasks. To select the best, seek brands renowned for using durum wheat, ensuring a chewy texture after cooking. Dry pasta should be stored in airtight containers at room temperature, while cooked varieties require refrigeration. In place of mostaccioli, penne or rigatoni can be substituted seamlessly.

– **Cheese:** Cheese is the heart of this dish, offering both creamy textures and enhanced flavors. Traditionally, mozzarella pairs best due to its melting properties, cultural significance, and affordability. Nutritionally, cheese contributes essential proteins and calcium, beneficial for bone health. Store cheese in wrapped parchment within a sealed container to retain moisture and aroma, preventing the adverse effects of molds. Both provolone and fontina serve as excellent substitutes, providing unique flavor twists while maintaining creamy consistencies.

– **Tomato Sauce:** Tomatoes, integral to Italian gastronomy, provide the foundational flavor. Opt for sauces with minimal preservatives to retain an authentic taste. These sauces are rich in lycopene, contributing to cardiovascular health, and their tangy notes elevate the cheese’s creamy hints. Unopened, canned sauce lasts up to a year, while homemade versions should be consumed within a week when refrigerated. In place of tomato-based sauces, consider cream or pesto alternatives to introduce variation.

Common Mistakes to Avoid

  • Undercooking the Pasta: Ensure pasta is slightly undercooked during boiling; it will continue cooking in the oven, soaking up more flavors as it bakes.
  • Skipping Cheese Shreds: Grate your own cheese to avoid additives found in pre-packaged variants, which can affect the recipe’s creaminess.
  • Neglecting Sauce Layering: Evenly layer sauce and pasta to ensure each bite is perfectly flavored and helps prevent dryness or clumpiness.
  • Overcrowding: Avoid overfilling your baking dish to ensure even cooking and prevent spillovers inside your oven.
  • Forgetting to Preheat: Preheating your oven is crucial for achieving a crispy, golden cheese top—a hallmark of baked dishes.
  • Using Low-Quality Pasta: Opt for quality brands to ensure firmness is retained after baking, preventing a mushy dish.
  • Inefficient Nesting: Properly nesting pasta within cheese layers guarantees consistent flavor and texture across dishes.
  • Discarding Broil Time: A quick broil enhances the cheesy topping, giving it that desirable crispy edge without burning.

Essential Techniques

– **Perfect Pasta Boiling:** Boiling pasta to an ideal chewy texture enhances the dish overall. Ensure water is at a rolling boil and liberally salted before adding pasta, cooking until just shy of ‘al dente.’ Pay attention to watery sauce, as pasta needs to soak up moisture while baking without becoming mushy.

– **Cheese Layering:** Master precise cheese layering for balanced flavor distribution. Begin with a modest amount of sauce directly over mostaccioli, topped with shredded cheese. This crucial step ensures full coverage, avoiding burnt or undercooked sections.

– **Baking to Perfection:** Proper baking contributes to flavor conversion and texture. Cover the dish initially to trap moisture before uncovering to brown cheese. Maintain mid-temperature settings, pivoting to broil to crisp the final layer, thus adding visual and textural depth.

Pro Tips for Perfect Cheesy Baked Mostaccioli

– Use a high-quality grated Parmesan cheese for added depth and a sharper flavor contrast without overpowering the dish.
– Incorporate fresh herbs, such as basil or parsley, to bring a fresh, aromatic dimension at both baking and garnish stages.
– Try a combination of mozzarella and sharp cheddar for a unique blend, offering both a gooey texture and satisfying sharpness.
– Prepare the sauce in advance, allowing flavors to meld, which enhances the dish’s overall intensity.
– Let the dish rest for five minutes post-baking to allow flavors to settle and make slicing easier.
– Experiment with adding cooked sausage or ground beef for meat lovers, elevating the dish’s protein content and heartiness.

Variations and Adaptations

Regional variations abound, with Southern versions incorporating spicy sausages or red pepper flakes for heat. Alternatively, Northern styles might be cream-based, featuring softer cheese blends. For seasonal adaptations, include squash or root vegetables in fall, ensuring heartiness, while spring might see peas or asparagus woven into the mix, adding freshness.

For dietary modifications, opt for gluten-free pasta variants, allowing those with sensitivities to enjoy the same culinary experience. Vegetarian adaptations easily replace meatful iterations, filling them with mushrooms or spinach, offering nutrient-dense alternatives without flavor compromise. Flavor varieties come from altering the sauce base; a basil pesto or creamy Alfredo provides a refreshing twist to the tomato anchors.

Texture modifications include baking with panko breadcrumbs sprinkled atop; their crunch contrasts delightfully with creamy cheese, adding layers of interest. Presentation exertions like serving individual ramekins provide an upscale, personalized dining experience, engaging visuals through unique serving pieces.

Serving and Presentation Guide

Consider portioning pasta into personal-sized cocottes for modern twists in presentation, guaranteeing each serve is both attractive and practical. Garnishing with fresh basil leaves or a light dusting of Parmesan adds a pop of color and flavor that’s visually appealing and fragrant. Traditional accompaniments include garlic bread or a crisp green salad, creating complementary contrasts to the warm, rich pasta.

Serving temperature matters; aim for the dish being hot out of the oven yet not scalding. Allowing brief rest periods enables flavors to settle, textures to firm, essential for neat and enjoyable portions. Control portion sizes by adhering to the mantra of quality over quantity, ensuring each served amount fits comfortably on dining plates, reflecting balance and sophistication.

Wine and Beverage Pairing

For wine aficionados, a pairing choice of medium-bodied Chianti, with its bright acidity and rustic tones, harmonizes beautifully with the creamy, tomato-rich mostaccioli. Alternatively, Burgundy wines offer subtle tannins and berry notes, complementing the zesty flavors within the dish. For non-alcoholic alternatives, sparkling water with a squeeze of lemon lifts the richness and refreshes the palate between bites.

If coffee is desired, reach for a light or medium roast for a post-meal pairing that resonates well, maintaining flavor integrity without overpowering subtle dish nuances. Hot beverages like tea should lean towards floral or citrus-infused varieties—Earl Grey or green melange balance with savory tones, suggesting complimentary warmth without conflicting acidity.

Storage and Shelf Life

Make use of airtight containers to prolong freshness in both refrigerated and frozen states, ensuring your baked they remain enjoyable beyond immediate consumption. Mostaccioli maintains quality for up to 3 days in the fridge, although freezing extends its lifecycle to three months—ideal for busy schedules. Be mindful of storing at consistent temperatures to avoid textural degradation.

Spoilage indicators include soured cream aroma or brittle cheese, cautioning against further consumption. For reheating, opt for oven use over microwaving for even heat distribution and to restore the dish’s original texture. Freezing considerations should include portion pastes, facilitating portion-friendly tunes out of storage, preventing waste or remainders.

Make Ahead Strategies

Prepare sauces a day in advance, letting them marry overnight for flavor integration. At assembly, chilled versions should be acclimated to room temperature, ensuring even cook time and texture when baking. Components should be layered, followed by refrigeration or freezing without the cheese, which should be saved for just before baking.

To reheat, consider lower, gentler oven temperatures to maintain moisture and tenderness through warming periods, resulting in crisp yet soft pasta servings. Adding fresh herbs post-reheating retains rustic freshness in taste and appearance. Maintaining component integrity improves both flavor and presentation when revisiting stored or pre-prepared dishes.

Scaling Instructions

For a smaller gathering, feel free to halve all measurements, adjusting your baking pieces both smaller in size and reduced in time, ensuring even heat coverage without burning. Doubling or tripling recipes lets the mostaccioli feed larger audiences, maintaining uniform techniques, but merely increasing your dish size accordingly with portions larger scales while keeping within regular ranges.

Recalculate time from prep to presentation to guarantee even familiarity retention and adjustment storage in multiples requires sorting with larger fridge and freezer spaces, already in advance required. Adapting equipment uses to scale changes should encompass baking sheets and dishes, limiting convoluted cook times and unreliable outcomes.

Nutritional Deep Dive

Delving into Cheesy Baked Mostaccioli reveals solid balance in macros—providing complex carbohydrates essential for energy, proteins facilitating muscle repair by the cheese component, and fats beneficial for brain function. Vitamins like A, C, and E emerge in the tomato used, promoting broader health benefits including immunity boosts and moderating digestive processes.

Portion control keeps calorie counts favorable, aiding weight management and dietary compliance. Consuming alongside fresh greens introduces fiber, increasing satiety while supporting nutrient diversity within meals. This culinary vision balances gourmet taste and responsible nutrition, showcasing diversity through culinary craftsmanship and thoughtfulness.

Dietary Adaptations

Embrace dietary needs with easy gluten-free pasta swaps, maintaining original dish integrity without triggering sensitivities. Dairy alternatives curated through plant-based cheeses ensure vegan inclusivity while protecting culinary depth and umami combinations. Low-carb or keto enthusiasts can modify with zoodles instead of traditional pasta, preserving enjoyment across dietary landscapes.

For paleo, substitute legumes in place of mostaccioli or explore tomato and walnut mixtures substituting typical sauces. Low-FODMAP requires onion and garlic replacements using infused oils or compatible alternative herbs. Others like egg-free variations exist, inviting discovery and exploration through ingredient choices that match lifestyle requirements without dish disparity.

Troubleshooting Guide

Texture issues arise from overcooked pasta or imbalanced wet-to-dry ratios; avoid by adhering to precise measures and cooking times. If flavors lack, consider seasoning escalation with herbs or spices during sauce prep. Inconsistent temperatures create uneven cook results; continuously monitor through dish center checks.

Prevent equipment challenges by maintaining tools readily accessible and properly functioning pre-initiation. Ingredient substitutions require scrutiny; wheat bran taste difference necessitates taste correction through complementary flavors. Timing concerns suggest setting paced efforts, tracking intervals to assure content cooking and cohesive entirety.

Recipe Success Stories

Turn to community feedback, sharing delightful variations and individualized dishes. Noteworthy reader suggestions include delightful spinach and ricotta versions, which introduce elements of surprise and texture refinement. Engaging in photography tips uplifts the visual component of culinary blogging, bringing light and experience for shared insights.

Explore adaptation stories detailed in commentaries across platforms where interaction bolsters both expectation and performance. Successes echo through innovation and community involvement, creating vibrant food experiences told through universal culinary language and community-driven enthusiasm towards legacy dishes remembered fondly for their reach.

Frequently Asked Questions

Q: Can I use a different kind of pasta?

A: Absolutely! While mostaccioli is traditionally used, penne, rigatoni, or even ziti work well. They retain a similar structure that ensures sauce captivation and preparation consistency.

Q: How do I make this gluten-free?

A: Substitute conventional pasta with certified gluten-free alternatives that maintain structure and adaptability without issuing flavor alterations, perfect for dietary sensitivities.

Q: What cheese substitutes work best?

A: While mozzarella or similar melts are optimal, vegan cheeses work well in preservation efforts ensuring consistent taste profiles while meeting dietary exclusions.

Q: How can I add meat?

A: Integrating cooked ground beef or sausage incrementally amidst sauce layers within preparation escalates proteins, pairing robust textures and rich flavors perfectly.

Q: Is this recipe freezer-friendly?

A: Yes, it freezes exceptionally well. Directions include air-tight serialized segmenting to contain freshness, lasting up to three months when correctly regulated.

Q: Can I use fresh tomatoes for sauce?

A: Fresh tomato variations require skinning and blending for consistency to maintain delicate herb balances, enriching natural tomato sweetness without undercooking them.

Q: Are there vegetarian options?

A: Certainly! Emphasizing rich vegetables like mushrooms or bell peppers expands layers and nutrition while respecting vegetarian inclinations simultaneously.

Q: How do I enhance the flavor?

A: Consider incorporating minced garlic, oregano sprigs, or basil leaves, respecting flavor principles towards enhancement and sustained culinary excellence.

Q: What happens if my pasta is overcooked?

A: Baking hardens subsequent steps, and less al dente outcomes enact firmer results when using tomato concentrates or textural binding ingredients balancing efforts.

Q: What size baking dish should I use?

A: Standard 9×13-inch dishes are suitably contained, ensuring efficient layered thickness and containment without overspill or compromised crust quality.

Q: Can I prep this dish in advance?

A: Absolutely! Follow make-ahead insights, allowing supervision without complexity. Storing safely before committal maintains consistency with reduction in aggregate preparation speeds.

Additional Resources

Explore additional recipes encompassing varied tomato bases or infused cheeses, creating diverse dinner options mirroring culinary depth. Delve into technique guides emphasizing boiling, broiling, and cooling improvements for proficiency. Ingredient glossaries explain historical and nutritional merits, empowering informed culinary manipulations.

Equipment recommendations enrich dining experiences, with emphasis on preservation, production, and apposite elements for thriving execution. Seasonal variations reflect shifts in produce and palate preferences, prompting adaptive transitions by season, this maintaining culinary reactivity throughout potential shifts, fortifying versatility.

Join the Conversation

Share your Cheesy Baked Mostaccioli creations on social media platforms, using the hashtag #CheesyMostaccioliMagic to connect with fellow enthusiasts. Engage in digital conversations about unique modifications and photography insights, developing dynamic ways to present dishes effectively. Your recipe reviews are invaluable, fostering growth and appreciation for pasta with diverse interpretations within culinary communities.

The community strengthens through sharing transformable suggestions and tangible stories, ensuring every Cheesy Baked Mostaccioli iteration is memorable, expanding familial ties and widening culinary expressions. Dive headlong into conversations, enabling you to create compelling narratives behind each delicious bite served, enhancing global kitchen and dining narratives.

The Recipe

Cheesy Baked Mostaccioli

Serves: 6

Prep Time: 15 mins

Cook Time: 40 mins

Total Time: 55 mins

Kitchen Equipment Needed

  • Large pot
  • Colander
  • Baking dish (9×13 inch)
  • Grater
  • Wooden spoon

Ingredients

  • 500g mostaccioli pasta
  • 2 cups marinara sauce
  • 1 1/2 cups shredded mozzarella cheese
  • 1/2 cup grated Parmesan cheese
  • 1 tablespoon olive oil
  • 1 teaspoon dried oregano
  • Salt and pepper to taste
  • Fresh basil leaves for garnish (optional)

Directions

  1. Preheat your oven to 375°F (190°C).
  2. Cook the mostaccioli in heavily salted boiling water until slightly undercooked, as it will continue cooking in the oven.
  3. Drain and transfer the pasta back into the pot. Stir in the olive oil to prevent sticking.
  4. Add the marinara sauce and mix until the pasta is thoroughly coated. Season with salt, pepper, and oregano.
  5. Transfer the pasta mixture to a 9×13 inch baking dish. Spread evenly.
  6. Top with mozzarella and Parmesan cheese, covering the pasta completely.
  7. Bake in the oven for 30 minutes or until the cheese is golden and bubbly.
  8. If desired, broil the top for 1-2 minutes to crisp the cheese further.
  9. Let the dish cool for 5 minutes. Garnish with fresh basil if using, and serve hot.

Recipe Notes

  • For a meatier option, consider adding browned ground beef or sausage.
  • Leftovers keep well in the refrigerator for up to 3 days.
  • Freeze in single portions for easy future meals.

Irresistible Bacon Mac ‘n’ Cheese Burger Wrap Recipe Unveiled

Bacon Mac ‘n’ Cheese Burger Wrap: A Savory Delight Unveiled

⚖️
Difficulty
Medium

⏲️
Prep Time
30 mins

🕒
Cook Time
20 mins

⏱️
Total Time
50 mins

🍽️
Servings
4

A Bacon Mac ‘n’ Cheese Burger Wrap is the ultimate indulgence, combining the creamy comfort of mac ‘n’ cheese, the irresistible allure of bacon, and the hearty satisfaction of a burger. This wrap is a feast for your senses, delivering rich flavors and a variety of textures in every bite. Whether you are a die-hard cheese lover or a meat enthusiast, this dish promises to tantalize your taste buds and provide a satisfying meal experience.

With crispy bacon complementing gooey mac ‘n’ cheese, and a juicy beef patty all wrapped in a soft tortilla, this creation is bound to become a favorite in your household. It’s perfect for casual dining, weekend cookouts, or as a creative option for your next gathering. Not only does it tick all the boxes for comfort food lovers, but it also stands out for its unique presentation and fusion of flavors.

Quick Recipe Highlights

  • Flavor Profile: Decadent and savory with a perfect blend of cheesy goodness and smoky bacon undertones.
  • Texture: Creamy mac ‘n’ cheese with a crunchy bacon wrap around a juicy burger.
  • Aroma: Mouth-watering scent from sizzling bacon and melted cheese.
  • Visual Appeal: Golden-brown wrap filled with vibrant, creamy cheese and meat.
  • Skill Level Needed: Intermediate cooking skills required for multi-step preparation.
  • Special Equipment: A frying pan or grill pan for cooking the bacon and burger.

Recipe Overview

  • Difficulty Level: This recipe requires some intermediate cooking skills, particularly in handling multiple components like cooking pasta, bacon, and burger patties simultaneously.
  • Category: Ideal for lunch or dinner; could also work as a hearty brunch option.
  • Cuisine: A modern fusion drawing from American classic dishes like burgers and mac ‘n’ cheese.
  • Cost: Relatively affordable, with bacon, cheese, and beef being the main expenses.
  • Season: Best suited for any season due to its comforting ingredients.
  • Occasion: Perfect for casual dining, movie nights, and parties.

Why You’ll Love This Recipe

The Bacon Mac ‘n’ Cheese Burger Wrap offers an unforgettable taste and texture experience. The gooey, creamy consistency of the mac ‘n’ cheese contrasted with crispy bacon and the tenderness of the beef patty creates a harmonious blend of flavors. Each bite promises a burst of hearty satisfaction, perfect for indulging in a bit of comfort food.

The recipe’s convenience lies in its adaptability to various lifestyles and preferences. The preparation can be streamlined to suit your timing needs, and each component can be prepared ahead of time, allowing you to enjoy the dish without any last-minute rush. The simple ingredient list also contributes to its ease of preparation, making it accessible to both beginners and seasoned cooks.

Nutritionally, this dish provides a good balance of proteins and carbohydrates, offering energy and sustenance. The presence of lean beef, cheese, and tortillas ensures you’ll receive a decent amount of these macronutrients, which play a significant role in meal satisfaction and maintaining energy levels.

Socially, this wrap can be the star of any gathering, encouraging guests to savor the distinct combination of flavors in a fun, interactive eating experience. The straightforward portions make it easy for everyone to help themselves, fostering a communal dining atmosphere around a dish that pleases diverse palates.

Overall, the cost-effectiveness of the Bacon Mac ‘n’ Cheese Burger Wrap makes it an attractive choice. It’s a budget-friendly way to enjoy several culinary delights in one dish, with ingredients that are readily available and often found on grocery store specials.

Historical Background and Cultural Significance

While the Bacon Mac ‘n’ Cheese Burger Wrap is a modern culinary creation, the elements it combines hold deep-rooted historical significance. Mac ‘n’ cheese traces back to early comfort foods, cherished across cultures for its warmth and simplicity. Bacon, a globally beloved pork product, brings a smoky flavor used historically to enhance dishes.

Burgers are American classics, ubiquitous at diners and family BBQs. Their origin, credited to German immigrants, revolutionized quick meals worldwide. This wrap evolves the classic burger, revitalizing its relevance in today’s food culture while showcasing a blend of tradition and innovation.

As the culinary landscape evolves, recipes like this wrap emerge, representing experimentation and fusion of established food comforts. Adaptations of traditional dishes like these frequently offer new cultural relevance, acknowledging diverse palates and ingredients readily available in contemporary markets.

Regional variations include different protein types or sauces, suggesting ways in which local flavors influence the dish while maintaining the base elements of cheese, bacon, and burger. This reflects the culinary evolution driven by availability, technology, and taste preferences.

Ingredient Deep Dive

Bacon, beloved for its rich, smoky flavor, holds significant cultural value as a breakfast staple and flavor enhancer. Historically, bacon originated from preserving pork belly, a technique passed from ancient to modern cuisines. Nutritionally, bacon provides protein and fat, although moderation is key due to its sodium content.

Selection tips point to choosing bacon with a balance of meat and fat for optimal flavor. To store, refrigerate raw bacon until the expiration date, or freeze for longer conservation. If substituting, consider turkey bacon or plant-based alternatives for varied nutrition profiles.

Mac ‘n’ cheese requires a creamy blend of cheeses, which dates back to early European cooking techniques of blending pasta with sauces. Nutritionally, cheese offers calcium and protein, though high in calories. Select cheese based on melting quality, such as cheddar or a cheese blend for depth of flavor.

Store cheese wrapped in wax paper for longevity. Substitution can involve non-dairy cheese for those preferring lactose-free options, which preserve creaminess without dairy content.

Common Mistakes to Avoid

  • Overcooking pasta leads to mushy texture; aim for al dente for optimal mac ‘n’ cheese.
  • Skipping cheese sauce preparation results in uneven cheese melting.
  • Using excessively lean meat leads to a dry burger; maintain some fat content for juiciness.
  • Overcooking bacon can lead to burnt flavor; monitor closely for desired crispness.
  • Under-seasoning can result in bland taste; ensure adequate salt and pepper use.
  • Overstuffing the wrap may cause it to tear or fail to close.
  • Ignoring resting time for burgers can lead to dry texture when juices aren’t redistributed.
  • Rushing preparation leads to disjointed flavors; follow each step for cohesive taste.

Essential Techniques

Achieving perfect mac ‘n’ cheese begins with creating a smooth cheese sauce. It’s crucial to melt cheese over low heat, stirring constantly to avoid clumps. This guarantees a creamy consistency that evenly envelops the pasta, crucial for cohesive cheesy flavor in every bite.

Cooking bacon just right is another vital technique. Crisping without burning requires medium heat and consistent flipping, locking in smoke flavor while maintaining the characteristic crunch that contrasts the softer elements of the wrap.

For burgers, the right sear is essential. Heat the pan before adding patties, cooking each side without disturbing for a perfect crust. This caramelization seals in juices, adding a robust, textural component beneath the creamy and crispy layers.

Pro Tips for Perfect Bacon Mac ‘n’ Cheese Burger Wrap

For a juicy burger, let patties sit at room temperature for 10 minutes before cooking, and avoid pressing them with a spatula during cooking. This allows even cooking and prevents moisture loss, ensuring a succulent burger.

Enhance cheese sauce by adding a dash of mustard or garlic powder for a subtle kick. This extra flavor depth balances the creaminess and adds unexpected intrigue to each bite, complementing the bacon’s smokiness.

To prevent wrap splitting, warm tortillas slightly before filling. This adds pliability, making them less prone to tearing under the weight of the filling, especially when overstuffed.

Incorporate vegetables like caramelized onions or grilled peppers for added moisture and flavor. They complement the existing components, adding nutrients and depth without overpowering the primary ingredients.

Opt for freshly grated cheese over pre-shredded varieties to ensure quick and even melting. Pre-packaged options often contain additives that can impede smooth sauce formation, crucial for the wrap’s lush interior.

Toast the wrap briefly after assembling to merge flavors and add a slight crunch to the exterior. This finishing touch enhances the sensory experience, tying together the smoky, creamy, and savory notes.

Variations and Adaptations

Explore regional variations by integrating local cheeses into the mac ‘n’ cheese mix, adding distinct flavor profiles reflective of regional palates. European, Asian, or Mediterranean cheeses each provide unique flavor complexities while maintaining the dish’s foundational elements.

For seasonal adaptability, rotate vegetables like zucchini in the summer or squash in the fall for fresh, relevant additions. These vegetables introduce a crop-specific freshness that enhances the overall aromatic experience.

Consider dietary modifications such as gluten-free tortillas, dairy-free cheeses, or plant-based burger patties for inclusive adaptations that cater to various dietary preferences without sacrificing flavor.

Experiment with flavor variations by incorporating barbecue sauce or spicy sriracha into the wrap for a customized taste experience. This experimentation allows the wrap’s versatility to shine, catering to spicier or sweeter palates.

Texture modifications can involve changing burger patty types, such as using ground chicken or turkey for lighter options. This adds interest and opens the possibilities for meeting different dietary requirements.

For presentation, opt for a deconstructed version with components layered on a platter. This offers an elegant take, still satisfying the core dish elements while making an impression for formal dining situations.

Serving and Presentation Guide

Master plating techniques by slicing the wrap at an angle and displaying wrapped halves with the filling exposed. This shows off the cheese and bacon layers for added visual appeal, piquing interest at first glance.

Garnishing ideas include fresh herbs like parsley or chives for a pop of color against the golden-brown wrap, enhancing the dish’s aesthetic. These additions bring out the freshness while adding subtle aromatic contrast.

Traditional accompaniments such as coleslaw or a vinegar-based salad pair well with the rich flavors, providing a refreshing palate cleanser that complements the wrap’s indulgence.

For modern serving suggestions, accompany the wrap with crispy sweet potato fries or a tangy dipping sauce. This complete meal route emphasizes the wrap’s adaptability across casual or trendy dining scenes.

Temperature considerations encourage serving hot or warm to maintain cheese consistency and burger juiciness, ensuring guests experience the dish’s intended textures and flavors as designed.

Guide portion control by offering half-wrap servings in a buffet or as finger foods during parties, allowing guests to sample without filling up entirely on the wrap alone.

Wine and Beverage Pairing

Pair with robust red wines like Zinfandel or Malbec, enhancing the bacon’s smokiness and beef’s richness with their deep flavor profiles. These wines elevate the umami content, creating a harmonious taste experience.

Consider non-alcoholic alternatives such as sparkling water with citrus or a sharp ginger beer. These drinks cleanse the palate between bites, refreshing the flavor profile and preparing the palate for the next indulgence.

Coffee or tea pairings may seem unconventional, but a smoky black tea or espresso’s bitterness contrasts well, providing a unique depth that complements the wrap’s savory qualities.

For beverages, serve chilled to balance the warm, hearty nature of the wrap, enhancing the refreshing contrast that prolongs the eating experience and encourages pacing during meals.

Suggestions for future pairings include exploring local craft beers with malt-forward profiles that reflect regional brewing trends. They provide a complex yet complementary carbonation to the wrap’s creamy and crispy elements.

Storage and Shelf Life

Store components separately to preserve individual qualities; wrap tortillas, mac ‘n’ cheese, and patties in airtight containers. This separation helps each maintain texture integrity until ready for assembly and consumption.

Optimal storage temperature for the cooked components is in the fridge at 40°F or below. This temperature prevents spoilage and extends freshness for up to 2-3 days, ensuring quality upon reheating.

Utilize containers with sealing lids to prevent moisture loss, which may result in texture degradation like soggy tortillas or hardening of mac ‘n’ cheese. Tight seals are crucial for maintaining desired qualities.

Spoilage signs include off-odors, discolored mac ‘n’ cheese, or slimy bacon, indicating it’s time to discard. Always assess visually and olfactorily to determine freshness before consuming leftovers.

Reheating instructions involve using the oven for even warming, which helps revive intended textures. Wrapping tortillas in foil prevents drying out during the reheating process, preserving quality.

For freezing, consider individual components only, ensuring future reassembly steps don’t compromise any single ingredient’s characteristics.

Make Ahead Strategies

Strategically plan the prep timeline by cooking mac ‘n’ cheese a day prior, stored in the fridge until needed. This allows for quick wrap assembly on cooking day, minimizing day-of prep.

Store components in air-tight containers, convenient for when you need them. This allows you to focus on cooking tasks as they come, without worrying about overlap or degradation.

Assess the quality impact of assembling the wrap prior, which can lead to a slightly different texture. Instead, assemble when ready to serve for optimal freshness and warmth.

Whether prepped or made-to-order, assembly tips include keeping kinks in the wrap process minimal. This guarantees that each bite is as satisfying as the next, with a consistent flavor profile running through the wrap.

Reheating instructions involve moderate oven temperatures; avoid microwaving for better crunch-integrity. An oven provides a more gradual and even heat, resulting in preferable outcomes.

Adding fresh elements right before serving, such as diced tomatoes or freshly shredded lettuce, provides succulence that ties flavors together, making each wrap feel freshly made.

Scaling Instructions

Halving the recipe is straightforward by reducing ingredients proportionately—this method preserves the wrap’s intended taste balance without wasting unnecessary portions. It’s optimal for more intimate gatherings or meals for two.

Doubling or tripling requires larger cooking equipment, such as a wider skillet for bacon and multiple pots for faster cooking times and sync. Tools like these enhance efficiency and ensure quality.

Adjust timing by staggering the start of each component to accommodate larger volumes, preventing overcrowding in cooking implements which leads to uneven cook times or quality issues.

Consider storage when scaling; larger batches will require space. Implement strategies like stackable containers in deep freezers or adjust shelving arrangements to fit more efficiently.

Manage portions by pre-measuring wrap fillings for consistent taste. This ensures uniformity throughout servings, avoiding any imbalanced flavored outcomes, especially during large festivities.

Nutritional Deep Dive

A comprehensive macro breakdown reveals high protein content from beef and cheese, offering substantial energy from fats and carbohydrates in pasta and tortillas. This balance supports sustained nourishment throughout the day.

Micronutrient analysis highlights calcium from cheese and iron from beef, critical for bone health and oxygen transport. The mac ‘n’ cheese provides a surprising nutritional boost, often overlooked in comfort food.

Health benefits include satiety from protein-rich elements, preventing overeating. This complements a balanced diet by supplying essential macros without excess caloric inflation if moderated.

Portion analysis recommends half-wrap servings to reduce calorie intake, preserving the indulgence within balanced eating guidelines. Controlled enjoyment aids weight management while satisfying cravings.

Dietary considerations accommodate various restraints, with ingredient substitutions applicable for individual dietary preferences, ensuring each wrap maintains nutritional integrity.

Weight management tips advocate mindful eating practices like savoring each bite and hydrating before meals to enhance enjoyment without excess calorific indulgence.

Dietary Adaptations

For gluten-free adaptations, select tortillas made from alternative flours such as corn or rice. This maintains the wrap’s structure while catering to gluten sensitivities.

To create a dairy-free version, opt for cheese substitutes crafted from cashews or soy, maintaining a creamy texture and smoky flavor for a lactose-free indulgence that mirrors the original experience.

Vegan options involve plant-based patties and bacon substitutes, offering a compassionate twist without forsaking the wrap’s hearty and comforting essence, accommodating ethical eating choices.

Low-carb versions omit the tortilla, crafting the wrap into a bowl format, emphasizing nutrient density while minimizing carbohydrates for those adhering to keto or paleo diets.

For paleo adherents, focus on fresh, natural ingredients like lettuce wraps. This lightens the dish without losing flavor—a testament to adaptability within constrained dietary frameworks.

Low-FODMAP strategies adjust ingredient selections to tame digestive issues, incorporating lactose-free cheese and tortilla alterations designed to prevent irritability while inspiring delight.

Troubleshooting Guide

For texture issues like soggy wraps, ensure draining all mac ‘n’ cheese moisture prior to filling tortillas. This technique maintains dryness necessary for wrap stability and enjoyment.

Cure imbalance by adjusting seasoning increments throughout prep stages, maintaining consistent taste profiles across components, which is essential for flavor harmony in complex dishes.

Address temperature problems by pre-heating cooking surfaces, offering steady heat absorption to each element, preventing raw centers or burned exteriors in meats and wraps.

Equipment challenges resolve through adapting to available tools, like substituting grill pans for broiler sheets, enabling similar results with conventional kitchen implements.

Ingredient substitutions smooth over any component availability issues, preserving intended flavors through carefully chosen alternatives, such as turkey bacon for pork or cheddar for gouda.

Timing concerns mitigate with dedicated organization, arranging prep stages by cook times and simultaneous tasks, fostering seamless flow and superior dish quality above all.

Recipe Success Stories

Community feedback highlights inventive adaptations with flavorful twists that remained true to the original concept. Readers loved the freedom to personalize, and shared creative interpretations like including regional cheeses.

Successes in variation included introducing spice elements like jalapeños, proving that customization is where flavor magic lives for those willing to explore and adapt.

Adaptation stories showcased dairy-free alternatives gaining traction among plant-based lifestyle adherents. These shared stories broadening the dish’s reach emphasize its versatility and widespread appeal.

Reader suggestions involved adding vegetable components for nutritional enhancement without overpowering existing flavors, offering valuable insights into ingredient potential.

Photography tips amassed welcomed guidance, from user-submitted photos that captured vivid, irresistible portrayals of the dish in its numerous innovative presentations and variations.

Frequently Asked Questions

Can I use turkey bacon instead of pork bacon?

Yes, turkey bacon is an excellent alternative for those seeking lower fat content. It offers a similar smoky, savory flavor profile, though the texture might be slightly less crunchy.

How do I prevent the tortilla from tearing when wrapping?

Warm the tortillas briefly to enhance flexibility before filling. This pliability prevents tearing and allows easy wrapping, accommodating ample filling without damage.

Is it possible to make this dish vegetarian?

Certainly! Use plant-based patties and cheese substitutes to maintain the essence while catering to a vegetarian diet. This modification supports dietary preferences without sacrificing flavor.

What is the best cheese for mac ‘n’ cheese?

Cheddar is a classic choice, offering melting quality and flavor richness. A blend of cheeses like mozzarella, parmesan, or gouda accentuates the mac ‘n’ cheese complexity.

Can I make the mac ‘n’ cheese ahead of time?

Yes, preparing mac ‘n’ cheese ahead curtails day-of workload. Store refrigerated in airtight containers, ensuring freshness while freeing up time for final wrap assembly.

Will a grain-free tortilla work for this wrap?

Certainly, grain-free options like almond or coconut flour tortillas accommodate dietary needs while forming a suitable vessel for the wrap’s filling.

How do I achieve perfect burger doneness?

For desired doneness, monitor internal temperatures with a meat thermometer. Medium is 160°F, resting afterward redistributes juices, securing optimal outcomes.

Can I prepare the burger patties in advance?

Yes, shaping patties before cooking allows for easy, quick meal assembly. Store chilled until needed, preserving form and quality.

Should I let the burger rest before wrapping?

Definitely! Resting patties for a few minutes post-cooking ensures juices reabsorb, resulting in a moist, flavorful burger within your wrap.

How to store leftovers effectively?

Deconstruct components for separate storage solutions, maintaining texture integrity and flavor freshness for future reheating aligned with desired outcomes.

Is it possible to freeze the prepared wrap?

Freezing affects the wrap’s texture negatively, particularly dairy elements. Instead, freeze only individual components to retain desired qualities.

What if I want a spicier version?

Enhance heat by adding chopped jalapeños or a dollop of hot sauce into the mac ‘n’ cheese or alongside filling, allowing personal spiciness control.

Additional Resources

Explore related recipes offering twists on the classic mac ‘n’ cheese or burger concepts, expanding culinary horizons with varied ingredient combinations that inspire creativity.

Technique guides on perfecting essential cooking methods employed in this dish enhance skills through detailed, step-by-step walkthroughs promising mastery and meal success.

Gain insight into ingredient information, delving deeper into nutritional advantages and selection guides for cheese varieties and beef qualities that mirror this recipe’s components.

Equipment recommendations support optimal kitchen tool choices fitted for this recipe, fostering confidence and ease when creating each delectable portion of the wrap.

Seasonal variations prompt experimenting with components, reflecting current produce availability, enriching both nutritive value and sensory engagement with nature’s freshest gifts.

Join the Conversation

Engage in social media sharing by posting your unique wrap versions or adaptations, joining a global community reveling in shared culinary endeavors that spur excitement.

Photography tips for capturing the wrap’s vibrant allure include using natural light and garnishing with minimal but vivid additions, which highlight the wrap’s rich colors and textures.

Leave recipe reviews on your experience, sharing process satisfaction and personal tastes catered to, offering aid to peers exploring wrap possibilities while divulging suggested improvements.

Community engagement invites discussion on culinary twists, suggestions of new sidelines or techniques enhancing wrap composition and allowing continuous innovation exploration.

Share recipe variations online, joining forums or groups dedicated to gastronomic curiosity and adaptation success, broadening exposure to enthusiastic eaters worldwide who treasure creativity.

The Recipe

Bacon Mac ‘n’ Cheese Burger Wrap

Serves: 4

Prep Time: 30 mins

Cook Time: 20 mins

Total Time: 50 mins

Kitchen Equipment Needed

  • Frying pan or grill pan
  • Large pot
  • Mixing bowls
  • Cutting board
  • Knife
  • Spatula

Ingredients

  • 8 slices bacon
  • 1 lb ground beef
  • 1 1/2 cups macaroni pasta
  • 1 cup shredded cheddar cheese
  • 1/2 cup milk
  • 1 tbsp butter
  • Salt and pepper, to taste
  • 4 large tortillas

Directions

  1. Cook the macaroni pasta in a large pot according to the package instructions; drain and set aside.
  2. In a mixing bowl, combine ground beef with salt and pepper; form into four patties.
  3. Cook bacon in a frying pan until crispy; remove and drain on paper towels.
  4. In the same pan, cook burger patties to desired doneness; remove and set aside.
  5. Melt butter in a pot; add milk and cheese, stirring until a smooth, creamy sauce forms.
  6. Incorporate cooked macaroni into the cheese sauce, stirring to coat evenly.
  7. Assemble each wrap by layering mac ‘n’ cheese, burger patty, and bacon on a tortilla.
  8. Fold and wrap neatly; toast briefly in the pan for added texture.

Recipe Notes

  • Substitute cheddar with your favorite cheese blend for varied flavor.
  • For a spicier kick, add hot sauce to the mac ‘n’ cheese.

Elegant Ricotta and Spinach Quiche: Perfect Brunch Delight Recipe

Elegant Ricotta and Spinach Quiche: A Gourmet Delight

⚖️
Difficulty
Moderate

⏲️
Prep Time
20 mins

🕒
Cook Time
45 mins

⏱️
Total Time
65 mins

🍽️
Servings
8

Indulge in the sophisticated flavors of an Elegant Ricotta and Spinach Quiche, perfect for those moments when you desire something both savory and serene. This quiche marries the creamy texture of ricotta with the fresh, verdant notes of spinach, offering a delightful culinary experience. Whether you’re hosting a brunch or preparing a family dinner, this dish is guaranteed to impress with its exquisite flavors and classic elegance.

Our Ricotta and Spinach Quiche is a harmonious blend of textures and tastes, highlighted by its delicately crisp pastry crust and rich, creamy filling. The earthy spinach pairs beautifully with the subtly sweet ricotta, while hints of nutmeg add warmth and depth. This quiche is a celebration of flavor that makes every bite an event to savor.

Quick Recipe Highlights

  • Flavor Profile: The quiche combines the mild sweetness of ricotta with the earthy, slightly tangy spinach, rounded off with aromatic hints of nutmeg.
  • Texture: Enjoy a flaky pastry crust complementing the smooth, creamy filling for a perfect balance of textures in every bite.
  • Aroma: Expect delightful whiffs of freshly baked pastry paired with the inviting scent of nutmeg.
  • Visual Appeal: This quiche is a feast for the eyes with its golden crust and lush filling, dotted with vibrant green spinach.
  • Skill Level Needed: Moderately easy, requiring basic pastry skills and an understanding of custard preparation.
  • Special Equipment: A reliable tart pan and a food processor for perfect pastry consistency are recommended.

Recipe Overview

  • Difficulty Level: Considered moderate due to the pastry-making component and custard preparation, which require some prior cooking experience to master.
  • Category: Perfect for breakfast, brunch, or as a light dinner option, offering both taste and nutritional value.
  • Cuisine: Rooted in French culinary traditions, quiches are celebrated worldwide for their versatility and elegance.
  • Cost: Ingredients are generally affordable, with seasonal shopping tips provided to maximize freshness and value.
  • Season: Best enjoyed year-round, with its vibrant flavors ideal for spring and summer gatherings.
  • Occasion: This quiche shines at casual lunches, formal dinners, or as a charming addition to a brunch buffet.

Why You’ll Love This Recipe


Delight in the rich taste and texture of this Ricotta and Spinach Quiche, where every bite offers a pleasing combination of creamy filling and crisp crust. The ricotta adds a subtle sweetness that perfectly accents the spinach, while the seasoned egg custard binds everything into a coherent, delicious whole. Its versatility extends to both convenience and preparation, with the option to make the pastry ahead of time or use store-bought alternatives for speed.

Nutritionally, this dish is rich in protein, calcium, and iron, providing a wholesome meal option that aligns with a balanced diet. Socially, it caters well to both intimate gatherings and larger celebrations, offering a dish that’s easy to slice and serve, ensuring everyone gets to enjoy its delightful taste.

Remarkably cost-effective, this quiche leverages everyday ingredients to deliver a gourmet experience, with spinach and ricotta easily accessible in most grocery stores. Embrace the joy of culinary exploration with this recipe and join the ranks of those who’ve made it a mainstay in their cooking repertoire.

Historical Background and Cultural Significance


Quiches are traditionally rooted in French cuisine, where they were originally created as a classic savory tart filled with eggs and milk or cream. The iconic Quiche Lorraine is a cousin to this iteration, though our quiche diverges by highlighting the creamy cheese and spinach. Over time, quiches have transcended geographical boundaries to become a beloved dish worldwide.

Culturally, the quiche holds a revered place on breakfast tables, brunch buffets, and picnic spreads. It’s esteemed for its adaptability and the endless range of fillings one can use, making it a canvas for culinary creativity. Since its inception, the quiche has evolved into countless versions, reflecting the rich diversity of culinary traditions across various regions.

With the world’s increasing inclination toward health-conscious dishes, variations, including vegetarian takes like our Ricotta and Spinach Quiche, have gained popularity. These adaptations serve modern tastes while keeping the essential charm and appeal of the traditional quiche alive. As a crowd-pleaser and a staple for many cooks, the quiche continues to evolve into various forms to reflect contemporary palates.

Throughout regions and cultures, quiches have been celebrated with local ingredients that bring new dimensions to the dish while keeping its fundamental structure. This Ricotta and Spinach Quiche is a testimony to the timeless allure of blending cheese with greens, delivering succulent flavors that fit seamlessly into modern culinary traditions.

Ingredient Deep Dive


Our Ricotta and Spinach Quiche features ricotta as a primary ingredient, acclaimed for its creamy consistency and mild taste. Originating from Italy, ricotta is traditionally made from the whey left over after the production of other cheeses. Its simplicity and versatility have made it a popular choice in both savory and sweet recipes across many cuisines.

Nutritionally, ricotta is rich in protein and calcium, supporting bone health and muscular strength. When selecting ricotta, look for a product with minimal additives and a fresher, more natural taste. Store ricotta cheese in a tightly sealed container in the refrigerator and consume within a week of opening to preserve its freshness.

Spinach, the superfood powerhouse of our quiche, dates back to ancient Persia and is widely used in cuisines around the globe. Packed with vitamins A, C, and K, as well as iron and fiber, it offers numerous health benefits. Opt for fresh, vibrant leaves to ensure flavor and nutritional integrity. If fresh spinach isn’t available, frozen spinach can be a suitable substitute, though it should be thoroughly drained to avoid excess moisture in the quiche.

Common Mistakes to Avoid

  • Over-filling the quiche: This common mistake can lead to spillage or an undercooked center. Leave room for the filling to expand slightly.
  • Not pre-baking the crust: Blind baking ensures the crust stays crisp and doesn’t become soggy during the baking process.
  • Using too much spice: While seasoning is essential, overpowering the delicate flavors of ricotta and spinach can detract from the dish’s elegance.
  • Undercooking the spinach: Properly wilted spinach integrates better, especially when excess moisture is removed before adding it to the quiche filling.
  • Incorrect assembly: Pouring the custard over already filled crust helps distribute the ingredients evenly and ensures a consistent bake.
  • Skipping ingredient quality: Using fresh, high-quality eggs and dairy makes a significant difference in taste and texture.
  • Inadequate heat: Oven temperature should be precise. Too hot and the quiche will scorch, too cool and it may be runny.
  • Rushing the cooling: Allow the quiche to set before slicing to maintain its structure and presentation.

Essential Techniques


Blind baking the crust is a foundational technique for this quiche, ensuring that the pastry remains crisp. This method involves pre-baking the pastry shell before adding the filling, helping prevent the dreaded soggy bottom. Weight the pastry with baking beans to stop it from puffing up during this initial bake, making sure your oven temperature is precise for best results.

Properly wilting the spinach is crucial for flavor and texture. Remove excess water to prevent the quiche from becoming watery. Squeeze the spinach in a clean kitchen towel to eliminate moisture, then lightly sauté with garlic to enhance the spinach’s natural sweetness, ensuring it integrates seamlessly with the ricotta fill.

Balancing the custard requires precision with eggs and cream—a thick, velvety custard relies on just the right ratio. Over-beating the mixture can lead to bubbles and uneven texture, so gently whisk for a smooth pour. Attention to these core techniques ensures a successful and visually appealing quiche.

Pro Tips for Perfect Elegant Ricotta and Spinach Quiche


Try adding a sprinkle of parmesan cheese to the filling for an extra layer of umami, balancing the sweetness of the ricotta. Ensure that the pie crust is evenly rolled to avoid any uneven baking, leading to crispy edges and a perfect base to hold your delectable filling.

Always test your oven temperature before baking, as an inconsistent heat source can affect the overall bake. Invest in an oven thermometer to make sure all bakes are produced under optimal conditions. This attention to detail significantly enhances consistency and predictability in results.

Pre-chill your crust ingredients to maximize flakiness—cold butter and a splash of ice water create a beautiful laminated structure that bakes to golden perfection. When mixing the custard filling, avoid creating air bubbles by using gentle folding methods; this step ensures a creamy, dense, and appetizing interior.

Variations and Adaptations


For a seasonal twist, try adding asparagus or artichoke hearts in spring, leveraging their fresh flavors to heighten the overall taste profile of the quiche. In autumn, savory mushrooms and caramelized onions make an exciting substitution, adding deep, hearty flavors to the quiche. Experiment with herbs such as basil or dill to customize the aroma and find your perfect herb blend.

For dietary adaptations, a gluten-free crust can be used, made from almond flour or a combination of gluten-free grains. To create a lower-fat quiche, substitute some of the ricotta with cottage cheese or use skim milk instead of heavy cream. Vegans can employ firm tofu as a base, enhanced with nutritional yeast for cheesiness and turmeric for color, maintaining the quiche’s essence while adhering to dietary needs.

Serving and Presentation Guide


For a striking presentation, consider serving slices alongside a simple green salad with a tangy vinaigrette to cut through the richness of the quiche. Garnish the top with a sprinkle of fresh chives or a few microgreens right before serving to add a fresh, colorful touch. Traditional accompaniments could include a crusty baguette or warm rolls for a more substantial meal.

To create a modern look, use mini tart pans for individual servings; this visually appealing twist is perfect for buffet-style brunches or large gatherings. Pay attention to the temperature, as serving the quiche slightly warm brings out its creamy texture and richest flavors, ensuring it’s a true highlight of your meal.

Wine and Beverage Pairing


The rich and creamy nature of the quiche pairs excellently with a crisp white wine, such as a lightly oaked Chardonnay or a Pinot Gris, to enhance the meal’s depth. For a non-alcoholic alternative, consider serving a chilled herbal iced tea, preferably one with citrus notes to balance the quiche’s richness.

If enjoying with coffee, a freshly brewed medium roast with nutty undertones complements the dish’s flavors without overwhelming the palate, perfect for breakfast or brunch settings. Ensuring these beverages are served at optimal temperatures will elevate the overall dining experience, allowing the flavors to shine through.

Storage and Shelf Life


Store leftover quiche in an airtight container in the refrigerator for up to three days, ensuring the quality is maintained. It’s advisable to separate individual slices with parchment paper to prevent them from sticking together. Signs of spoilage may include an off-smell or noticeable change in texture, at which point the quiche should be discarded.

Reheating can be done in an oven set to 350°F (175°C) for about 15-20 minutes, restoring the crust’s crispness while warming the filling evenly. If freezing, consider cutting the quiche into slices and wrapping them individually for easy re-portioning and reheating convenience.

Make Ahead Strategies


Prepare and blind bake the crust up to a day in advance, storing it covered at room temperature. The filling can also be mixed ahead of time and kept in the refrigerator, separated from the crust. Before serving, reassemble and bake the quiche for convenient meal planning that aligns with your schedule while maintaining freshness and taste.

Assembly tips include preparing the filling in a large bowl the night before and allowing a brief period for the custard to come to room temperature before baking; this reduces baking time and ensures even cooking. Adding fresh elements, such as herbs or garnishes, post-bake keeps the presentation vibrant and appetizing.

Scaling Instructions


To halve the recipe, adjust ingredient quantities accordingly and consider using a smaller tart pan to maintain the quiche’s height and texture. Doubling the recipe might require multiple quiche pans instead of one larger pan to ensure even cooking. Ensure that your kitchen equipment can handle increased ingredient amounts, especially your food processor or mixer.

Timing modifications may be necessary; increase baking time slightly if making larger quiches to ensure the center sets properly. Stackable, airtight containers can be useful for storing multiple quiches and saving fridge space.

Nutritional Deep Dive


Each serving of this quiche offers a well-rounded macro breakdown, rich in proteins from both eggs and cheese. The inclusion of spinach contributes vitamins and minerals such as iron and potassium, supporting a healthy diet. Despite its rich taste, this quiche can fit into various dietary plans, especially when portioned mindfully.

For those focused on dietary considerations, offset the quiche’s calorie density with healthy sides like steamed vegetables or a citrus salad, contrasting to its richness. Its nutrient profile can play a role in weight management when accompanied by a balanced diet, offering both sustenance and flavor.

Dietary Adaptations


For a gluten-free adaptation, use a gluten-free flour mix for the crust, ensuring minimal impact on taste and texture. Dairy-free versions can be achieved by substituting ricotta and cream with soy or almond-based alternatives. For a vegan option, replace the ricotta with silken tofu blended with a bit of nutritional yeast, and replace eggs with an egg-replacer.

Low-carb or keto versions can opt for a crustless bake, omitting the pastry while retaining the integrity of the filling’s flavors. Paleo-friendly substitutions involve using almond-based crusts and coconut cream in place of dairy.

Strong

Troubleshooting Guide

Texture issues like soggy bottoms are often resolved by ensuring the crust is blind baked until golden. If the filling appears runny, check the egg to cream ratio and the baking time, ensuring an even, low oven temperature is maintained throughout. To address flavor balance, assess the level of key spices, ensuring nutmeg complements but doesn’t overpower.

Resolutions for equipment challenges might include replacing a missing tart pan with pie dishes or muffin trays for individual servings. If substitutions are necessary, ensure compatibility by choosing similar foods; for example, Swiss chard as a spinach replacement. Timing concerns are often tackled by tracking oven temperature consistency with an oven thermometer.

Recipe Success Stories

Our community members have shared significant success stories and adaptations of this recipe, highlighting its versatility and appeal across various gatherings. Many have noted the incorporation of local cheeses and vegetables as variations, achieving fresh twists while retaining the quiche’s essence.

Readers have suggested particular presentations, such as mini quiches or adapting the filling to fit phyllo cups for quick appetizers. Photography tips, like capturing the rustic layering of cheese and spinach, have helped many showcase the quiche’s beauty in social media posts, inspiring others to attempt this delightful dish.

Frequently Asked Questions

Can I use frozen spinach? Yes, frozen spinach works well. Ensure it’s thoroughly drained to avoid extra moisture in the filling.

What can I substitute for ricotta cheese? Cottage cheese or mascarpone can be used as a substitute but will alter the taste slightly.

How do I prevent a soggy crust? Blind baking counteracts a soggy crust – an essential step in quiche success.

Can this quiche be made ahead? Absolutely. The crust and filling can be prepared separately in advance and assembled before baking.

What if I don’t have a tart pan? A pie dish can be used, though the quiche may be slightly deeper than using a tart pan.

How do I know when the quiche is done? The filling should be set with a slight wobble in the center; it’ll firm as it cools.

Can I freeze this quiche? Yes, preferably as slices for convenience; it freezes and reheats well with minimal loss of texture.

How do I ensure even cooking? Place the quiche in the center of the oven, and ensure the oven is well-preheated before baking.

What’s the best way to reheat slices? Use an oven set to 350°F for the best texture, maintaining a crisp crust.

Can I add other vegetables? Certainly, just ensure they are pre-cooked to remove excess moisture.

What wine pairs best with this quiche? A crisp, light white wine like Pinot Grigio complements beautifully.

Additional Resources

Explore a range of related recipes like ‘Classic Quiche Lorraine’ or ‘Spinach and Feta Pie’ for more savory pastry variations. If perfecting crust techniques is your goal, look into guides on mastering shortcrust pastry. For those curious about ingredient substitutions, expand your knowledge with articles exploring alternative cheeses and their culinary impacts.

Equipment recommendations focus on high-quality nonstick tart pans and adjustable rolling pins for consistent crust thickness. Seasonal variation ideas are plentiful, with suggestions for holiday-themed quiches and fresh springtime variations that will invigorate your culinary creations.

Join the Conversation

Engage with us on social media platforms by sharing your quiche photographs and feedback. Offering a space for photography tips and recipe reviews, we encourage community engagement that inspires adaptations and new interpretations of traditional quiche recipes.

Our community thrives on shared experiences, be it adaptations, reader suggestions, or new flavor experiments. Your contributions make each dish unique and provide continuous inspiration for food enthusiasts everywhere.

The Recipe

Elegant Ricotta and Spinach Quiche

Serves: 8

Prep Time: 20 mins

Cook Time: 45 mins

Total Time: 65 mins

Kitchen Equipment Needed

  • Tart pan or pie dish
  • Rolling pin
  • Food processor
  • Oven thermometer
  • Mixing bowls

Ingredients

  • 1 and 1/2 cups all-purpose flour
  • 1/2 cup cold butter, cubed
  • 1/4 cup ice water
  • 1 cup ricotta cheese
  • 3/4 cup heavy cream
  • 3 large eggs
  • 2 cups fresh spinach, wilted and drained
  • 1/4 teaspoon nutmeg
  • Salt and pepper to taste

Directions

  1. Preheat your oven to 375°F (190°C).
  2. To make the crust, combine flour and butter in a food processor; pulse until a crumbly mixture forms.
  3. Add ice water gradually, pulsing until the dough begins to clump.
  4. Roll out the dough on a floured surface to fit your tart pan.
  5. Press dough into the pan, trim any excess, and prick the base with a fork.
  6. Blind bake the crust with weights for 10 minutes. Remove weights and bake for another 5 minutes. Let it cool.
  7. In a large bowl, mix ricotta, cream, eggs, nutmeg, salt, and pepper until smooth.
  8. Add spinach to the ricotta mixture, ensuring it is evenly distributed.
  9. Pour the filling into the pre-baked crust and smooth the top with a spatula.
  10. Bake in the preheated oven for 30 to 35 minutes, or until the filling is set and the top is golden.
  11. Allow the quiche to cool before slicing and serving.

Recipe Notes

  • For extra flavor, consider adding 1/4 cup of grated Parmesan cheese to the filling.
  • If using frozen spinach, ensure it is thawed and well-drained.
  • Customize the filling with seasonal vegetables or herbs of your choice.

Indulge in Irresistible Gourmet Thick Peanut Butter Cookies Delight

Gourmet Thick Peanut Butter Cookies: The Ultimate Chewy Delight

⚖️
Difficulty
Easy

⏲️
Prep Time
15 mins

🕒
Cook Time
12 mins

⏱️
Total Time
27 mins

🍽️
Servings
24 cookies

There’s nothing quite like the rich, nutty goodness of a perfectly baked gourmet thick peanut butter cookie. These cookies are the ultimate indulgence for those who crave a luscious blend of sweetness and a deep peanut flavor. With every bite, experience the satisfying chew and a nutty flair that is simply irresistible. These cookies make for a delightful treat that pairs well with a glass of warm milk or a steaming cup of coffee.

Imagine sinking your teeth into a thick cookie that’s both soft and slightly chewy, bursting with rich peanut butter taste. These thick peanut butter cookies are perfect for any occasion, whether you’re enjoying a quiet afternoon or hosting a fun get-together. The golden-brown cookies provide a beautiful contrast to the rich, creamy peanut butter flavor. Let’s dive into the delicious world of these gourmet treats, where every bite is a heavenly experience.

Quick Recipe Highlights

  • Flavor Profile: Expect a delightful balance of sweet and savory, with the robust taste of roasted peanuts shining through each cookie.
  • Texture: These cookies boast a thick and chewy texture, with just the right amount of crunch from the peanuts.
  • Aroma: As they bake, the kitchen fills with the toasty, nutty aroma of peanut butter, tempting you to sneak a taste before they’re even finished.
  • Visual Appeal: Golden brown and chunky, these cookies are visually as inviting as they are tasty, with a rustic homemade look.
  • Skill Level Needed: Easy – Great for bakers of all skill levels. The recipe requires basic measuring and mixing skills.
  • Special Equipment: A sturdy baking sheet and a cooling rack for the perfect cookie-making setup.

Recipe Overview

  • Difficulty Level: This recipe is easy, making it perfect for both novice bakers and experienced pros. The straightforward steps ensure success with minimal effort.
  • Category: These thick cookies fall comfortably into the dessert category but make for excellent snacks or gift treats too.
  • Cuisine: Rooted in American traditions, these cookies carry a nostalgic charm reminiscent of childhood kitchens across the USA.
  • Cost: Baking these gourmet treats is quite cost-effective, with most ingredients readily available at affordable prices.
  • Season: Perfect for year-round baking! They’re especially delightful during cooler months when cozy treats are most appreciated.
  • Occasion: From holiday gatherings to simple family weekends, these cookies fit seamlessly into any occasion, adding a sweet note of joy.

Why You’ll Love This Recipe


The gourmet thick peanut butter cookies are a dream come true for peanut butter lovers. The taste is an impeccable balance of sweet and savory, where the luscious peanut flavor takes center stage. Every bite offers a satisfying chewiness with pockets of crunchy peanuts that add excitement to the texture, making it a standout cookie experience.

Crafted for convenience, this recipe comes together quickly, allowing you to whip up a delicious batch in under half an hour. The ingredients are pantry staples, meaning you can indulge in these delicious cookies whenever the craving hits, with minimal preparation needed. It’s the perfect recipe to involve little ones in the kitchen, making baking a fun and engaging family activity.

Aside from their mouthwatering taste, these cookies offer notable nutritional benefits. Peanuts are a great source of protein and healthy fats, adding a nutritious element to your sweet treat. Enjoy the balance of decadent taste with wholesome nutrition that’s both satisfying and nourishing. These cookies provide an excellent way to sneak in some nutritional goodness while enjoying a delightful dessert.

The social and entertaining value of these cookies cannot be overstated. Whether shared at a party or included in a bake sale, these cookies are sure to be a hit. They’re versatile enough to fit any theme or occasion and bring a homey, comforting vibe to any gathering. Each cookie becomes a sweet offering of warmth and connection among friends and family.

Cost-effectiveness is another reason to love this recipe. With ingredients that are affordable and commonly found, there’s no need for fancy or expensive components. You can easily scale the recipe to feed a crowd, making these cookies a budget-friendly option for entertaining. With such simplicity and effectiveness, baking these gourmet cookies is a win-win for taste and cost!

Historical Background and Cultural Significance


The origin of peanut butter cookies can be traced back to the early 1900s in the United States, a byproduct of peanut farming advancements and the popularization of peanut butter as a health food. George Washington Carver, a pioneer in promoting peanut cultivation, is credited with creating numerous recipes that popularized peanuts, including variations of peanut-based cookies.

Culturally, peanut butter cookies have been a staple in American households, symbolizing comfort and tradition. They’ve become an integral part of holiday baking and childhood memories, often shared during special occasions and family gatherings. The love for these cookies transcends generations, maintaining their status as a beloved classic in the American culinary repertoire.

Over the years, the recipe has evolved to include variations and adaptations. Initially, recipes highlighted simple ingredients and minimal preparation steps. As culinary trends shifted, bakers introduced variations including add-ins like chocolate chips, oats, or spices, each twist bringing new dimensions to the traditional cookie.

Regional variations of peanut butter cookies reflect local tastes and ingredient availability. In some areas, these cookies may incorporate local nuts or sweeteners, enhancing their distinctive qualities while preserving the fundamental peanut taste. These adaptations continue to honor the cookie’s rich heritage while showcasing the creativity and adaptability of bakers around the world.

Ingredient Deep Dive


Peanut butter, the star ingredient of these cookies, carries a rich cultural significance. Originating from the Americas, peanuts were cultivated by indigenous people for centuries before spreading globally. Today, peanut butter enjoys a status as a versatile and beloved spread, a testament to its enduring popularity and adaptability in countless recipes.

Nutritionally, peanut butter is a powerhouse of essential nutrients, offering healthy fats, protein, and fiber. It’s a satisfying ingredient that imparts both flavor and nutrition, providing a sense of fullness and energy. When selecting peanut butter for baking, opt for creamy varieties without added sugars or preservatives to maximize flavor and purity.

Brown sugar, another key component, adds moisture and caramel-like depth to the cookies. Its molasses content elevates the chewiness while contributing to the golden color of the baked cookies. For optimal results, use fresh brown sugar to maintain the right texture and sweetness. Store it in an airtight container to prevent it from hardening or clumping.

In terms of substitutions, you can experiment with nut butters such as almond or cashew for a unique twist, though the classic peanut flavor is hard to beat. Consider nutritional alternatives for sweeteners, such as coconut sugar or honey, to adjust the recipe to dietary preferences, keeping the rich taste and wonderful textures intact.

Common Mistakes to Avoid

  • Avoid overbaking: These cookies should be removed from the oven when they are just golden brown on the edges, as they will continue to firm up on the baking sheet.
  • Using cold ingredients: Ensure that your butter and eggs are at room temperature for a well-mixed and cohesive dough.
  • Skipping the cooling stage: Allow cookies to cool on the baking sheet before transferring to a rack, as moving them too soon can lead to breakage.
  • Incorrect peanut butter type: Stick to creamy peanut butter without added oils or sugars, as natural versions can alter the texture and consistency.
  • Ignoring measurements: Baking is a science—be precise with your ingredients to ensure consistency in taste and texture.
  • Forgetting to adjust for altitude: If you live at a high altitude, consider adjusting baking times and temperatures to compensate for atmospheric differences.
  • Not rotating your pans: Rotate the baking sheets halfway through to ensure even baking and prevent uneven results.
  • Storing improperly: To keep the cookies fresh, store them in an airtight container at room temperature, preventing moisture loss and staling.

Essential Techniques


Creaming the butter and sugars successfully is key. This process introduces air into the batter, creating light and fluffy cookies. Use an electric mixer for consistency and cream for at least 3-5 minutes until the mixture is pale and fluffy. Be careful not to overmix, as this can result in denser cookies.

Mastering the art of measuring flour can significantly change the outcome of your baking. For accuracy, use the spoon and level method where you spoon flour into your measuring cup and level it off with a knife, keeping your cookies light and supple without being dense or heavy.

To ensure even baking, use a cookie scoop to portion out the dough. This ensures uniform size and shape, allowing the cookies to cook evenly and consistently. Invest in a quality scoop to make this task easier and more efficient, providing you with perfectly rounded cookies every time.

Visual cues are important for baking success. Know when your cookies are ready by observing their edges—look for a golden brown color and a slightly set center. If they appear too soft, they may need another minute of baking, but take caution not to overbake, as they will firm up as they cool.

Pro Tips for Perfect Gourmet Thick Peanut Butter Cookies


Ensure your peanut butter is at room temperature before adding to the mixture. This allows for easier incorporation into the dough and a smoother consistency, preventing any unwanted lumps or inconsistencies.

Chill the dough for at least an hour before baking. This helps to prevent spreading and gives the cookies a nice chewy texture. It also allows the flavors to meld, enhancing the overall taste of the cookies.

Experiment with adding chopped peanuts for additional texture. Not only does this amplify the peanut flavor, but it also adds a delightful crunch, making each bite more engaging and satisfying.

Try using a combination of white and brown sugar to get balanced sweetness and moisture. Brown sugar will add a depth of flavor, while white sugar helps in achieving the right spread during baking.

For a fun twist, consider drizzling melted chocolate over the cookies once cooled. This luxurious addition complements the peanut butter flavor and adds an attractive finish to each cookie.

Utilize parchment paper on baking sheets. This prevents sticking and helps with even baking, leading to cleaner cookies and easier cleanup – a winning scenario in any kitchen.

Variations and Adaptations


Regional variations can be expressed by using local versions of peanuts or nut butters, providing a unique taste while respecting regional ingredients. This could draw inspiration from various cultures, such as using cashew butter in regions where cashews are more popular.

Seasonal adaptations include introducing spices like cinnamon or nutmeg during fall or winter, offering additional warmth and depth to the cookies, making them a perfect treat for the festive season and cooler months.

Dietary modifications are easy with this recipe. To make vegan-friendly cookies, substitute the butter with a plant-based alternative and use a flaxseed egg in place of a traditional egg. This provides similar binding qualities while maintaining the desired texture.

Flavor variations are plentiful—consider adding vanilla extract or a touch of sea salt on top before baking for an elevated gourmet touch. Alternatively, add mini chocolate chips for a dash of indulgence.

For those who prefer a softer texture, decrease baking time slightly to maintain a gooey center, contrasting the firm outer edges. This results in a luscious, melt-in-the-mouth experience, reminiscent of a cookie dough bite.

Presentation alternatives can include pressing a fork lightly into the dough before baking for a classic crisscross pattern. This adds an element of visual interest while paying homage to traditional peanut butter cookie aesthetics.

Serving and Presentation Guide


For an elegant presentation, serve these cookies on a white platter lined with a decorative napkin. The contrast highlights the cookies’ golden hues and draws attention to their homemade charm, making them pop visually.

Garnishing with a sprinkle of powdered sugar or a drizzle of dark chocolate syrup adds sophistication, creating an elevated gourmet aesthetic that complements their rich flavor profile beautifully.

Traditional accompaniments include a glass of cold milk or a scoop of vanilla ice cream, providing a creamy counterbalance to the nutty, chewy richness of the cookies. These combinations enhance the overall dessert experience.

Modern serving suggestions incorporate a cookie tower or stack secured with a ribbon, an expression of casual elegance perfect for gifting or as a part of a dessert buffet.

Temperature considerations are crucial for enjoying these cookies at their best. They can be enjoyed warm from the oven for a soft and chewy bite or allowed to cool completely for a firmer texture, depending on personal preference.

Portion control tips involve pre-slicing portions into half-cookies for smaller bites suitable for light snacking or pairing with other treats, maintaining an element of indulgence without excess.

Wine and Beverage Pairing


Pair your gourmet thick peanut butter cookies with a light, fruity wine such as a Riesling or a subtly sweet Moscato. These wines emphasize the nutty aspects without overpowering the cookie’s natural sweet flavors.

For non-alcoholic options, consider a spiced chai latte or a creamy hot chocolate. The spices complement the warm, nutty flavors of the cookies, while the chocolate brings a delightful contrast, enhancing the whole experience.

If coffee or tea is your preference, a robust coffee with nutty undertones or a subtle black tea pairs well. These beverages provide a delightful balance, bringing out the cookie’s more intricate flavor notes while maintaining their own unique appeal.

Temperature plays an essential role in pairing success. Serve beverages slightly chilled or at room temperature to allow the cookie’s warmth to shine through, creating a harmonious gastronomic experience.

Ensure serving suggestions include inviting presentations, such as pairing cookies on a plate with a small taster glass of your chosen beverage or featuring assorted nuts as a garnish, enhancing the sensory and visual appeal.

Storage and Shelf Life


To maintain freshness, store these gourmet cookies in an airtight container at room temperature. They can last up to a week while retaining their chewiness and rich flavor. Avoid exposure to air to prevent them from becoming hard.

Optimal storage requires a cool, dry location away from direct sunlight, preserving their quality and preventing any degradation in taste or texture. Consider using parchment paper between cookie layers to prevent sticking and breakage.

Signs of spoilage include staling or hardness, indicating a loss of texture quality. Check for any change in odor or color, ensuring all ingredients maintain their intended freshness. Cookies can be refreshed briefly in the oven if needed.

Reheating instructions include a short warm-up in an oven set at a low temperature or a quick microwave pass, reviving their just-baked warmth and aroma, making them enjoyable at any preferred temperature.

Freezing guidelines recommend pre-freezing dough balls individually before transferring them to a ziplock bag, making future baking simple and convenient. When ready, bake directly from the freezer, adding a few extra minutes to cooking time.

Make Ahead Strategies


Plan your prep timeline to accommodate chilling the dough, an essential step for flavor development and structure. Have all ingredients and necessary tools ready to maximize efficiency and streamline the baking process.

Storage between steps involves wrapping chilled dough securely in plastic wrap or an airtight container, retaining its moisture and preventing any unwanted drying or contamination during fridge or freezetime.

Quality impact assessment ensures the integrity of your cookies remains high throughout preparation and storage. Use fresh ingredients and follow recipe instructions precisely for consistently excellent results.

Assembly tips include measuring and mixing all dry ingredients in advance for easy incorporation into wet ingredients, reducing prep stress and keeping tasks organized and manageable.

Reheating guidelines stress lightly warming cookies for fresh-baked allure. Cover with foil to retain moisture and prevent over-hardening, optimizing flavor and texture upon serving.

Fresh element additions like adding spices or nuts to dough before baking introduces a personalized touch, making the cookies uniquely yours and delightfully home-styled.

Scaling Instructions


When halving the recipe, adjust ingredient proportions carefully to maintain the original balance in taste and texture. Use precise measurements for best results, ensuring success regardless of batch size.

Doubling or tripling the recipe is perfect for larger gatherings. Ensure you have ample space and equipment to accommodate increased volume, such as larger mixing bowls and additional baking sheets.

Equipment adjustments may involve using multiple baking sheets or cooling racks to avoid overcrowding, enabling even baking and seamless transitions between batches.

Timing modifications might be necessary to accommodate varied batch sizes or oven capacities. Monitor cookies closely during additional batches to maintain quality and consistency throughout.

Storage considerations emphasize using airtight containers and separating layers with parchment paper when increasing batch sizes. This prevents sticking and breakage, extending shelf life effectively.

Nutritional Deep Dive


A macro breakdown reveals these cookies as a balanced treat. They contain carbohydrates for immediate energy, fats for sustained fuel, and proteins beneficial for body repair and maintenance.

Micronutrient analysis showcases notable contributions from peanuts, like vitamin E, niacin, and magnesium—essential elements for smooth digestion and cellular health, enriching the nutrition in each bite.

Health benefits extend beyond simple indulgence. Moderation promotes a balanced diet, and these cookies, enriched with peanut butter, offer satisfying fullness amidst their sweet, nutty delight.

Dietary considerations allow room for customization. Adjust sugar levels for reduced-calorie versions or explore additional fiber options with whole grain flour, aligning recipe output to nutritional goals.

Portion analysis suggests measured consumption for thoughtful enjoyment. Eat in moderation to balance dietary intake and fully appreciate the treat’s carefully curated flavors and textures.

Weight management tips underscore enjoying the cookies alongside varied meals, integrating them into a balanced diet to maintain nutritional harmony while satisfying sweet-tooth cravings.

Dietary Adaptations


For a gluten-free version, substitute traditional flour with gluten-free alternatives like almond or oat flour, ensuring similar texture and flavor while meeting dietary needs effectively.

A dairy-free adjustment involves using plant-based milk and butter varieties, such as coconut oil or almond milk, to maintain excellent taste and texture without animal-derived ingredients.

Vegan bakers can seamlessly replace egg content with flaxseed or chia seed substitutes, creating a cohesive dough that mimics the traditional version without compromising flavor or structure.

Low-carb adaptations recommend substituting sugar with sweeteners like stevia or erythritol, achieving guilt-free satisfaction while retaining the original appeal of these delightful cookies.

Keto adaptations involve exploring high-fat, low-carb alternatives. Using almond or coconut flour provides ample texture support, while stevia substitutes ensure compatibility with keto lifestyle preferences.

Paleo-friendly cookies can emerge using almond butter and date sugar, combining cherished peanut flavors with ingredient alignments that embody paleo dietary principles and maintain authenticity.

FODMAP adjustments hinge on using approved ingredients, like specific glucose substitutes, allowing cookies to adhere to dietary restrictions while remaining flavorful and enjoyable.

Troubleshooting Guide


Texture issues often arise from improper measurements or baking time adjustments. Ensure accurate ingredient proportions and remove from the oven when edges are golden to maintain chewiness.

Flavor balance relies on precise sugar and salt measurements. Taste adjustments stem from experimentation in sweetness or salty contrast, ensuring each bite resonates with desired complexity.

Temperature problems can lead to uneven baking or hardening. Observe oven settings and dough temperature before baking to guarantee accuracy and uniform results across every batch.

Equipment challenges include consideration of baking sheet materials or oven capacity, influencing bake quality and consistency. Adapt placements and sizes to suit your apparatus’s strengths.

Ingredient substitutions often necessitate trial and error. Experimenting with flour or nut butter varieties requires careful attention to liquidity levels and binding properties for successful adaptation.

Timing concerns underline efficient preparation and chilled dough. Plan adequate fridge time to prevent unintended spreading, achieving ideal cooking dynamics for structurally sound cookies.

Recipe Success Stories


Our community of bakers loves sharing success with these gourmet thick peanut butter cookies. Feedback often highlights family bonding time in the kitchen, with kids actively partaking in baking.

Variation successes include unique nut butter combinations and creative flavoring, from honey-drizzles to almond joy twists, showcasing readers’ enthusiasm in adapting the humble classic.

Adaptation stories reveal impressive skill in dietary changes, with vegan, keto, and gluten-free alternatives taking center stage. These variations underline the recipe’s flexibility and user-friendliness.

Reader suggestions prompt innovative interpretations of layering white chocolate or incorporating chia seeds for added benefits, a manifestation of collective creativity and resourcefulness.

Photography tips celebrate visual presentations. Readers pride in showcasing their cookies in dazzling formations and warm hues, capturing rustic appeal and personal achievements in baking.

Frequently Asked Questions

Q1: Can I use chunky peanut butter instead of creamy?
A: Yes, chunky peanut butter can add delightful texture and crunch. Just note that it will change the overall texture slightly, making the cookies a bit crumblier due to the extra nuts.

Q2: How should I store leftover cookies?
A: Store leftover cookies in an airtight container at room temperature for up to a week. Keep them away from direct sunlight to preserve freshness.

Q3: Can I freeze the cookie dough?
A: Absolutely! Freeze cookie dough scoops on a baking sheet, then transfer them to a zip-lock bag once solid. They can be baked directly from frozen, with an extra couple of minutes added to the bake time.

Q4: What alternatives can I use for eggs?
A: Substitute eggs with a flaxseed or chia seed “egg” by mixing 1 tablespoon of ground flaxseed or chia seeds with 2.5 tablespoons of water. Let it sit for a few minutes before adding to the dough.

Q5: How do I prevent my cookies from spreading too much?
A: Ensure your dough is well-chilled before baking, and use fresh baking soda. Both help maintain the cookie’s shape and thickness as they bake.

Q6: What can I add to enhance the flavor?
A: Adding a teaspoon of vanilla extract or a sprinkle of sea salt before baking can enhance flavor depth, balancing the cookie’s natural sweetness and nutty richness.

Q7: Can I bake these cookies on non-stick pans?
A: Yes, but line your pan with parchment paper for best results. This prevents cookies from over-browning and sticking, allowing consistent baking across batches.

Q8: How do I know when the cookies are done?
A: Look for lightly golden-brown edges with centers appearing slightly underbaked. They will continue to cook as they cool, achieving the perfect chewiness.

Q9: Is there a way to make these sugar-free?
A: Yes, you can substitute granulated sugar with sweetener options like stevia or erythritol, keeping an eye on altered consistencies that may arise.

Q10: Can I add chocolate chips?
A: Absolutely! Fold in a cup of your favorite chocolate chips to the dough after mixing. This yields a classic chocolate-peanut butter combination, enhancing cookie indulgence.

Q11: Why is my dough sticky?
A: Sticky dough can result from warm butter or excess mixing. Ensure accurate measuring and chill dough until slightly firm, making it easier to handle.

Q12: Can I make this dough ahead of time?
A: Yes, prepare the dough up to three days in advance, storing it in the refrigerator. Chilled dough enhances flavor development and eases preparation on baking day.

Additional Resources


For those eager to expand their baking repertoire, delve into related recipes such as classic chocolate chip cookies or vibrant oatmeal raisin creations, both embodying universal appeal.

Access comprehensive technique guides that cover essential baking principles, including the art of creaming, identifying stages of doneness, and understanding ingredient interactions for consistent results.

Explore in-depth ingredient information to broaden culinary knowledge, providing insights into the science of baking and the selection of best-fit ingredients, elevating your cookie-making skills.

Consider equipment recommendations that enhance baking success and ease, from non-stick parchment paper to essential measuring tools, each facilitating the creation of high-quality, successful cookies.

Embrace seasonal variations, incorporating regional influences or spice pairings, making your cookies endlessly adaptable. Celebrate a legacy of shared joy, reflected in every recipe variation and cultural nuance.

Join the Conversation


Dive into social media sharing to display your gourmet thick peanut butter cookie creations. Capture their golden, wholesome beauty amidst charming kitchen settings, inspiring fellow baking enthusiasts.

Celebrate photography tips to enhance cookie presentation on platforms like Pinterest or Instagram. Showcase fresh bakes in well-lit environments for truth in color and texture, making each cookie shine.

Encourage feedback and recipe reviews to fuel community growth. Your input can refine shared experience, spark new creativity, and support communal bonding over universally loved baked goods.

Explore community engagement turfs, discussing flavor experiments, resulting treats, and inventive takes on timeworn traditions—each interaction fostering connection and camaraderie.

Empower recipe variations among new bakers by sharing your culinary story. Nurture creative interpretations and inventive combinations as you celebrate each delightful culinary journey and expression of personal flair.

The Recipe

Gourmet Thick Peanut Butter Cookies

Serves: 24 cookies

Prep Time: 15 mins

Cook Time: 12 mins

Total Time: 27 mins

Kitchen Equipment Needed

  • Baking sheets
  • Cooling rack
  • Electric mixer
  • Mixing bowls
  • Cookie scoop
  • Measuring cups and spoons

Ingredients

  • 1 cup creamy peanut butter
  • 1 cup packed brown sugar
  • 1/2 cup granulated sugar
  • 1/2 cup unsalted butter, softened
  • 2 large eggs
  • 2 cups all-purpose flour
  • 1 teaspoon baking powder
  • 1/2 teaspoon baking soda
  • 1/4 teaspoon salt

Directions

  1. Preheat your oven to 350°F (175°C) and line baking sheets with parchment paper.
  2. In a large mixing bowl, cream together peanut butter, brown sugar, granulated sugar, and butter using an electric mixer until light and fluffy.
  3. Add eggs one at a time, beating well after each addition.
  4. In a separate bowl, whisk together flour, baking powder, baking soda, and salt. Gradually add the dry ingredients to the wet ingredients, mixing until combined.
  5. Chill the dough in the refrigerator for at least 30 minutes.
  6. Use a cookie scoop to portion dough onto prepared baking sheets, spacing 2 inches apart. Flatten slightly with the palm of your hand.
  7. Bake for 10 to 12 minutes or until the edges are golden brown.
  8. Let cookies cool on the baking sheets for 5 minutes before transferring them to a cooling rack to cool completely.

Recipe Notes

  • For extra flavorful cookies, consider adding a teaspoon of vanilla extract.
  • If the dough is too sticky to handle, chill longer as needed to firm up.
  • For crisscross patterns, press a fork into the dough balls before baking.

Refreshing Pineapple Strawberry Swirled Slushies for Summer Sipping

Pineapple Strawberry Swirled Slushies: A Refreshing Twist for Your Taste Buds

⚖️
Difficulty
Easy

⏲️
Prep Time
10 mins

🕒
Cook Time
0 mins

⏱️
Total Time
10 mins

🍽️
Servings
4

Pineapple Strawberry Swirled Slushies encapsulate the essence of summer in every sip. These refreshing and vibrant slushies are a perfect blend of sweet strawberries and tangy pineapple, offering a delightful cool-down on a sunny day. The layers create a visually appealing swirled effect that is both Instagram-worthy and irresistible to the taste buds, making it an ideal choice for all ages.

Quick Recipe Highlights

  • Flavor Profile: A lip-smacking mix of sweet, tangy, and slightly tart flavors.
  • Texture: Smooth with icy consistency, punctuated by juicy bits of fruit.
  • Aroma: Fresh tropical scents with a hint of berry sweetness.
  • Visual Appeal: A colorful and swirling blend, topped with vibrant fruit garnishes.
  • Skill Level Needed: Basic blending skills; an easy recipe perfect for beginners.
  • Special Equipment: A high-speed blender or food processor is all you need.

Recipe Overview

  • Difficulty Level: This recipe is easy, requiring just basic blending skills and quick preparation. It’s great for kids and adults alike, making it a fun kitchen project.
  • Category: Best categorized under drinks or desserts due to its sweet and refreshing characteristics.
  • Cuisine: Embodying global fruity flavors, it doesn’t adhere to a specific culinary tradition but reflects a universal appeal.
  • Cost: Relatively low-cost, utilizing common fruits and requiring minimal equipment.
  • Season: Best enjoyed during summer for its cooling properties, but delightful year-round.
  • Occasion: Perfect for outdoor picnics, beach outings, or as a simple mid-day refresher.

Why You’ll Love This Recipe

The Pineapple Strawberry Swirled Slushies offer a taste and texture combination that is truly a summer delight. With the juicy strawberries and tangy pineapples blended to perfection, each sip brings a refreshing burst of fruitiness that is hard to resist. Convenience is key, as you can prepare this delightful drink in just 10 minutes with minimal effort. Packed with vitamins, these slushies are a healthy choice for those looking for a guilt-free indulgence. Whether you’re hosting a summer party or just want a cool treat, these slushies are a social icebreaker, perfect for impressing friends or family. With affordable ingredients and easy preparation, this recipe is accessible to everyone, making it an excellent go-to treat.

Historical Background and Cultural Significance

The concept of slushies has its roots in ancient cultures where ice was gathered from mountain tops for cooling beverages. As trade expanded, the mixing of fruit juices with icy concoctions became popular across Europe and America. Slushies gained commercial popularity in the 20th century with the advent of convenience and fast-food culture. Over the years, these icy beverages have evolved, with pineapple and strawberry versions reflecting tropical influences in a globalized world. Regional variations, such as adding exotic spices or herbs, illustrate how cultures integrate local flavors into this universal treat.

Ingredient Deep Dive

Pineapples, recognized for their tropical sweetness and vibrant color, have a rich history dating back to South America. They are high in vitamin C and bromelain, aiding digestion. Choose ripe, firm pineapples with a sweet aroma for the best results, and store them in a cool, dry place until ready to use. Strawberries, another staple in summer recipes, are celebrated for their antioxidant properties and sweet juiciness. Opt for bright red, firm strawberries for maximum flavor and freshness. They should be stored in the refrigerator and consumed quickly to preserve their taste and texture.

Common Mistakes to Avoid

  • Overblending can lead to a liquidy consistency rather than a slushy one.
  • Using underripe fruit, which results in a less flavorful drink.
  • Forgetting to add sweeteners if the fruit is not sweet enough.
  • Not using frozen fruit, which is crucial for the perfect slushy texture.
  • Letting the slushy sit too long can cause the layers to melt together.
  • Not washing the fruit thoroughly, which may introduce impurities.
  • Missing garnishments, which add a pop of color and flavor.
  • Using a low-power blender unable to crush ice effectively.

Essential Techniques

To achieve the distinct swirled appearance, blend each fruit separately and layer them carefully. This technique ensures a beautiful presentation and a balanced taste profile. Mastering blending times helps create the ideal icy consistency. Avoid overprocessing to maintain those delightful icy crystals. Visual cues, such as a rich color and a slushy texture without lumps, are key indicators of success.

Pro Tips for Perfect Pineapple Strawberry Swirled Slushies

For an extra layer of flavor, freeze pieces of pineapple and strawberries before blending. This adds texture and enhances the fruitiness. If you’re making ahead, store the separate mixtures in the freezer and blend briefly before serving to refresh the texture. Adding a splash of coconut milk creates a creamy variation that complements the tropical flavors beautifully. Reserve a few slices of fruit to use as garnish, serving both as a decorative piece and an infusion of extra freshness. For a more adult version, consider a dash of rum for a tropical cocktail twist. If you’re feeling adventurous, mint leaves blended with strawberries can add a refreshing herby note.

Variations and Adaptations

Explore regional variations by incorporating local fruits like mango or passion fruit for an exotic twist. In cooler months, substitute frozen berries for a winter-friendly option. Adjust for dietary needs by using a sugar substitute for a low-sugar version. Experimenting with additional fruit juices can create unique flavor combinations. For a richer texture, consider blending in a few chunks of banana. As a presentation alternative, serve in hollowed-out pineapple halves for a true tropical experience.

Serving and Presentation Guide

For elegant presentation, serve in tall glasses to show the beautiful swirl effect. Garnish with a tropical fruit slice or a sprig of mint for an eye-catching finishing touch. Accompany with light, crispy snacks for a balanced flavor experience. Use chilled glasses to help maintain the slush’s consistency. Consider serving with colorful reusable straws to add a festive look while being eco-friendly. Ensure portions are even to appreciate the layered flavors fully.

Wine and Beverage Pairing

Pair these slushies with a light, bubbly prosecco to complement their fruity notes. For a non-alcoholic pairing, a glass of iced tea with citrus undertones works beautifully. Serve at icy-cold temperatures to keep the slushies refreshing throughout. If you prefer warm beverages, a mild green tea can cleanse the palate between sips, enhancing the cold treat’s impact. Serve in stylish beverage dispensers to allow guests to help themselves.

Storage and Shelf Life

Store prepared slushies in an airtight container in the freezer if not serving immediately. When storing, ensure the freezer is at a constant temperature to prevent ice crystals from forming. Use BPA-free containers to avoid any unwanted chemicals leaching into the slushies. Check for color changes or off-smells as spoilage signs, and stir well before reheating. For freezing, separate the pineapple and strawberry portions to maintain layers, thawing them slightly before the second blend.

Make Ahead Strategies

Prepare the fruit mixtures separately and freeze for up to a month. Blend again quickly before serving to maintain the slushy consistency. Separate containers prevent blending of flavors and colors, preserving the swirled effect. Partial assembly before serving can streamline the preparation process during events. Reheat partially frozen mixtures only until slushy, avoiding full melting and texture loss. Fresh garnishes should be added right before serving to maintain a vibrant appearance.

Scaling Instructions

To halve the recipe, simply use half the amount of fruit and ice but be mindful of maintaining the correct balance of flavor. Doubling or tripling the recipe requires extra attention to blending times and may necessitate multiple batches. Ensure you have enough freezer space for preparation steps when scaling. Timing modifications may include more preparation steps but should not significantly impact the final texture. Store extra servings separately to maintain optimal condition and layered presentation.

Nutritional Deep Dive

A typical serving of these slushies is low in calories, with significant contributions of vitamin C from strawberries and pineapples. They are also an excellent source of antioxidants, aiding in cellular health and hydration. With minimal added sugars, they fit well within many health-conscious diets. The portion analysis provides a satisfying treat without overindulgence. Balancing natural sugars with high-fiber fruits supports good digestion and energy levels. Weight management strategies include enjoying slushies as a refreshing snack or dessert alternative to higher-calorie options.

Dietary Adaptations

For gluten-free adjustments, ensure no gluten-containing additives in your chosen sweeteners. A dairy-free version is naturally achieved with no dairy content. Vegan adaptation involves using all plant-based ingredients, which aligns with the original recipe. A low-carb modification can include replacing pineapple with lower-carb fruits or using sugar substitutes. To fit a keto diet, carefully balance net carbs from fruit choices. Paleo followers can enjoy these slushies without changes, focusing on whole fruits and natural preparation. A low-FODMAP adaptation is possible by selecting appropriate fruits, such as reducing strawberry amounts.

Troubleshooting Guide

Texture issues may arise if the blender is not powerful enough; ensure ice and fruit are chopped finely before blending. Achieve flavor balance by tasting and adjusting sweetness if needed. Temperature problems may occur if the slushies sit out too long; keep them in the freezer until the last moment. Equipments like a suitable high-speed blender are key to achieving a perfect blend. Ingredient substitutions, like using frozen fruit, can maintain cool temperatures and enhance texture. Timing concerns can be managed by organizing steps efficiently and prepping materials beforehand.

Recipe Success Stories

Our community loves the Pineapple Strawberry Swirled Slushies, often experimenting with their own fruit combinations. One reader added mango, creating a tropical fusion that was a hit at family gatherings. Another variation included a shot of rum for a beach-themed cocktail, received warmly during summer parties. Photography enthusiasts shared tips on capturing the vibrant colors, suggesting natural light for the best results. This interactive community has also suggested adding a splash of lime juice for an extra zing, leading to a delicious tangy version.

Frequently Asked Questions

Q: Can I use any type of blender?

A: Yes, a high-speed blender works best to achieve a smooth texture, but with patience, other blenders can also be used.

Q: How can I make the slushies sweeter?

A: Adjust the sweetness by adding a little honey or agave syrup. Taste as you go to find the right balance for your palate.

Q: Can fresh fruit be used instead of frozen?

A: Yes, but you may need to add more ice for the right consistency.

Q: How do I store leftovers?

A: Store in airtight containers in the freezer. Blend briefly before serving again to achieve the slushy texture.

Q: What if I don’t like pineapple?

A: Substitute with another tropical fruit of your choice, such as mango or passion fruit, for a different flavor.

Q: Is this recipe suitable for children?

A: Absolutely! It’s a refreshing and healthy treat that children can enjoy under supervision.

Q: Can I add alcohol?

A: Yes, spirit like rum or vodka can be added for an adult twist; adjust to taste.

Q: What’s the best way to serve them at a party?

A: Serve in clear glasses to showcase the swirls, and consider adding fruit garnishes for vibrant presentation.

Q: How can I prevent the slushies from melting quickly?

A: Serve immediately after blending, using chilled glasses. Keep away from heat sources to retain their icy texture.

Additional Resources

Check out our other fruit-based slushy recipes for more refreshing ideas, including mango-coconut or berry blend variations. Explore guides on selecting the best kitchen blenders to enhance your smoothie-making skills. Familiarize yourself with seasonal fruit charts to get the freshest and most flavorful ingredients year-round. Consider investing in quality glassware to enhance presentation at gatherings and parties. Dive into our beverage pairing suggestions to broaden your entertaining repertoire.

Join the Conversation

Share your Pineapple Strawberry Swirled Slushies experiments on social media with our community. Our readers love seeing variations and adaptations, so tag us in your posts to join the fun. Join our recipe exchange forum for reviews and tips from fellow slushy enthusiasts. Experiment with photography techniques, such as lighting and angles, to capture your swirled creations beautifully. Engage with our community through comments and discussions, enhancing your kitchen adventure with shared knowledge and inspiration.

The Recipe

Pineapple Strawberry Swirled Slushies

Serves: 4

Prep Time: 10 mins

Cook Time: 0 mins

Total Time: 10 mins

Kitchen Equipment Needed

  • Blender
  • Measuring cups
  • Knife
  • Cutting board

Ingredients

  • 2 cups frozen strawberries
  • 2 cups frozen pineapple chunks
  • 1 cup ice
  • 1-2 tablespoons honey or agave syrup (optional, for sweetness)

Directions

  1. Add frozen strawberries and half of the ice to the blender. Blend until smooth and set aside.
  2. Rinse the blender and add frozen pineapple chunks with remaining ice. Blend until smooth.
  3. In tall glasses, alternate spooning layers of strawberry and pineapple mixtures to create a swirled effect.
  4. Adjust sweetness with honey or agave, if desired, and gently stir to combine flavors without losing the swirl.
  5. Garnish with a slice of pineapples or strawberries and serve immediately.

Recipe Notes

  • For a creamier texture, add a splash of coconut milk to the pineapple mixture.
  • Fresh fruits can be used but add extra ice to maintain the slushy consistency.
  • Experiment with different fruit combinations for unique flavor twists.