Irresistible Cowboy Butter Lobster Tails Perfect for Gourmet Grilling

Cowboy Butter Lobster Tails: A Flavorful Delight

⚖️
Difficulty
Moderate

⏲️
Prep Time
20 mins

🕒
Cook Time
15 mins

⏱️
Total Time
35 mins

🍽️
Servings
4

Dive into a culinary journey with Cowboy Butter Lobster Tails. This exquisite dish captures the essence of rich butter, aromatic herbs, and the sweet succulence of lobster meat. When combined, these elements create a gourmet experience that’s sure to impress any seafood lover. Perfect for special occasions, this dish highlights the marriage of bold flavors with a touch of elegance. Imagine the aroma of sizzling butter enveloping the tender lobster flesh, creating an unforgettable sensory experience.

Quick Recipe Highlights

Flavor Profile: The Cowboy Butter imparts a savory richness, complemented by a hint of citrus and fragrant herbs, elevating the sweet taste of lobster. The combination of butter and herbs like thyme and garlic creates a complex palate.

Texture: The tenderness of lobster tail contrasts beautifully with the smooth, velvety butter sauce. Each bite offers a luxurious mouthfeel, promising an indulgent dining experience.

Aroma: As the lobster tails cook, the air fills with the enticing aroma of melted butter and fresh herbs, inviting diners to the table. Garlic and citrus enhance this sensory appeal.

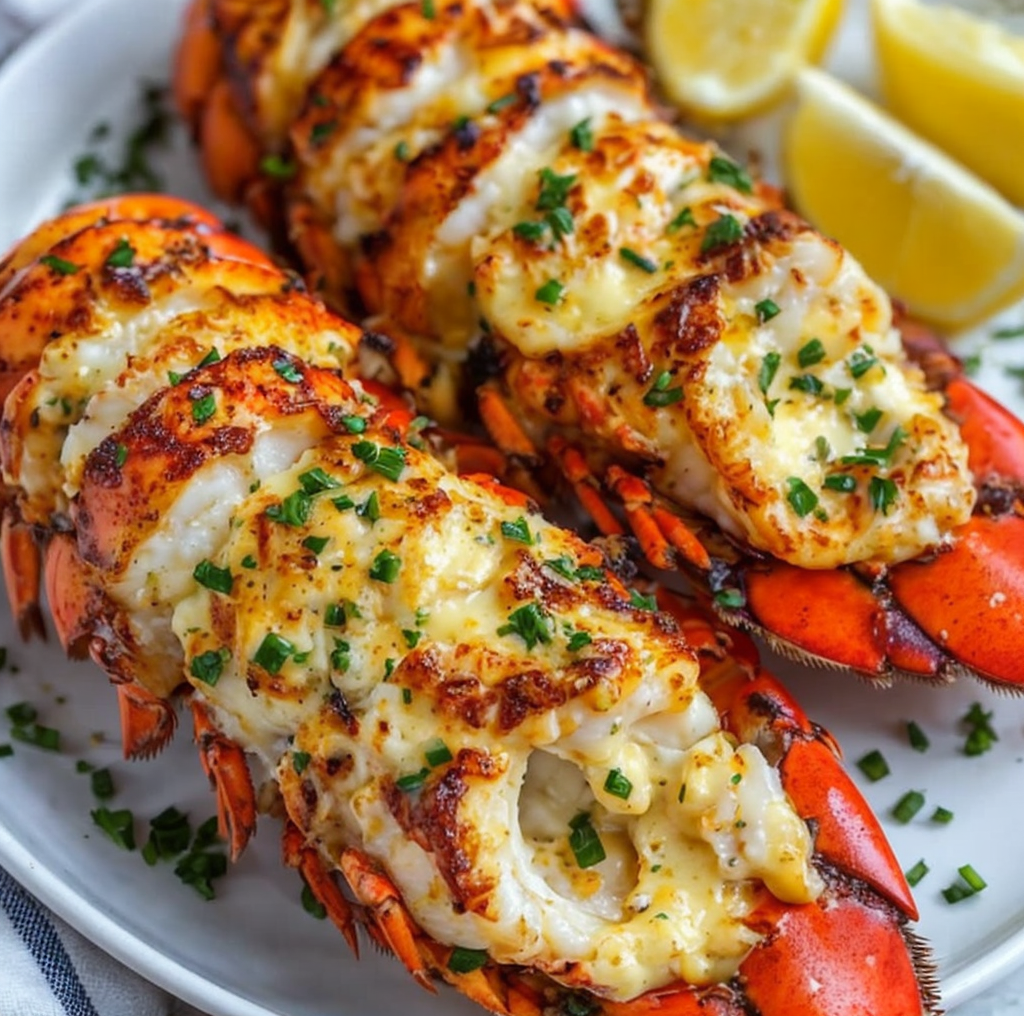
Visual Appeal: With vibrant red lobster shells and a luscious butter glaze, this dish is as pleasing to the eyes as it is to the palate. Garnishes of fresh herbs add a pop of color, ensuring a stunning plate presentation.

Skill Level Needed: While preparing lobster may seem daunting, with step-by-step guidance, even novice cooks can achieve success. The mastery lies in the butter sauce, a key element that ties the dish together.

Special Equipment: A sharp chef’s knife is essential for splitting the lobster tails, while a basting brush helps apply the butter evenly. A broiler or grill is useful to achieve the perfect cook on the lobster.

Recipe Overview

Difficulty Level: This recipe is classified as moderate because it involves shelling lobsters and perfecting the butter sauce texture. With practice, the steps become intuitive, proving rewarding for home chefs.

Category: Cowboy Butter Lobster Tails comfortably fits into dinner or lunch categories, especially for those looking to add a touch of sophistication to a meal.

Cuisine: Drawing inspiration from American seafood traditions, this dish incorporates flavors typical of Southern-style cowboy butter, which boasts a blend of spices and herbs.

Cost: As lobster is a premium ingredient, the dish leans toward the higher end in terms of cost. However, it stands as a luxurious treat worth every penny for seafood enthusiasts.

Season: Although excellent year-round, this dish shines during summer when fresh lobster is at its peak. Outdoor grilling adds a delightful char that complements the buttery sauce.

Occasion: Ideal for festive gatherings, romantic dinners, or upscale entertaining, Cowboy Butter Lobster Tails promise to leave a lasting impression on your guests.

Why You’ll Love This Recipe

The taste and texture of Cowboy Butter Lobster Tails are a gourmet revelation. The combination of succulent lobster with rich, savory butter enchants the palate, providing a luxurious dining experience that transcends the norm. Each mouthful reveals layers of flavor complexity that make this dish irresistibly delicious.

Convenience is a key feature of this recipe. With clear instructions and minimal prep work, you can effortlessly create a restaurant-quality meal in your own kitchen. The quick cook time means you’ll spend less time preparing and more time savoring the delightful flavors.

From a nutritional standpoint, lobster is a great source of lean protein and essential vitamins. Combined with the health benefits of garlic and herbs, this dish supports a balanced diet while still delivering indulgent flavors.

Socially, serving Cowboy Butter Lobster Tails at your next gathering elevates the occasion, offering your guests something unforgettable. This impressive dish not only pleases the palate but also sparks conversations around the dining table.

Despite its luxurious feel, this recipe is cost-effective compared to dining out. Enjoy a gourmet meal in the comfort of your home, using fresh ingredients that ensure quality and flavor at a fraction of restaurant prices.

Historical Background and Cultural Significance

Tracing the origins of Cowboy Butter Lobster Tails takes us to the heart of American culinary tradition. Cowboy butter, hailing from rustic Western kitchens, embodies robust, hearty flavors with a touch of spice, typically used for grilling meats. Its pairing with lobster is a perfect fusion of rustic charm and coastal elegance.

In the cultural landscape, lobster has long been associated with luxury. However, in the early United States, it was considered a food for the poor. Over time, lobster’s status soared, becoming synonymous with fine dining, a testament to its exquisite taste and texture.

The Cowboy Butter Lobster Tails recipe demonstrates evolution by bringing together regional elements in a harmonious blend. Traditionally, lobster prepared simply was favored, but integrating the boldness of cowboy butter marks a modern twist appreciated by adventurous palates.

Distinct regional variations of cowboy butter exist, featuring different herb blends and spice levels. Each adaptation tells a story of local influences, yet they all share a common goal: to enhance the main ingredient with the rich, buttery sauce.

Ingredient Deep Dive

Lobster Tails: As a culinary icon, lobster boasts a fascinating history. Once regarded as a humble food in colonial America, it is now celebrated for its tender and flavorful meat, a staple in gourmet seafood cuisine. Nutritionally, lobster offers valuable protein without excessive calories or fat, making it a delicious choice for health-conscious individuals.

Selecting lobster tails involves looking for firm shells and vibrant color; fresh tails should have a pleasing marine scent. When storing, keep them cold to preserve freshness, which is paramount for an authentic seafood experience. In cases when lobster is unavailable, large prawns or scallops offer a viable substitute, ensuring the dish remains indulgent.

Butter: Butter is more than a cooking fat; it is a vehicle for flavor infusion. With roots tracing back millennia, butter has been cherished worldwide for its creamy texture and unmatched taste. Opt for high-quality unsalted butter as the best base for creating flavorful sauces like cowboy butter.

Proper storage in a refrigerator ensures butter maintains its freshness and flavor, crucial for any recipe relying on its rich characteristics. For those avoiding dairy, plant-based butter offers a commendable alternative, adding a similar richness while accommodating dietary preferences.

Common Mistakes to Avoid

– Overcooking the lobster tail leads to tough, rubbery meat. It is crucial to monitor cooking times closely and pull tails from heat the moment they turn opaque.
– Skipping the buttery basting reduces the depth of flavor. Consistently apply cowboy butter during cooking to keep the tails moist and flavorful.
– Incorrectly slicing the lobster can cause an uneven cook. Ensure clean cuts using a sharp knife to split the shell for even heat distribution.
– Using salted butter may result in an overly salty dish. Start with unsalted butter, adding seasoning to taste to control salt levels.
– Ignoring presentation diminishes the visual impact. Arrange the lobster tails with garnished herbs for a professional touch that matches the dish’s taste.
– Cooking with frozen lobster tails without full defrosting can lead to uneven cooking. Properly thaw tails in advance for the best results.
– Underseasoning the cowboy butter fails to capture its essence. Adequate seasoning with herbs and spices is essential to achieve a robust flavor.
– Neglecting to rest the lobster post-cooking can lead to dryness. Allow a brief rest, enabling juices to settle and preserve moistness.

Essential Techniques

Mastering the art of butter basting elevates this recipe. Basting involves continuously brushing the tails with rich cowboy butter, ensuring each part of the lobster is imbued with luscious flavor. This technique helps maintain moisture, particularly when grilling or broiling at high temperatures.

Proper shelling and splitting of lobster tails ensure an even cook. Using a sharp knife, along with measured force, allows for a clean slice down the tail, exposing the meat while retaining the shell’s integrity. Visual cues for success include the exposed pink flesh and even distribution of cowboy butter.

Pro Tips for Perfect Cowboy Butter Lobster Tails

For a smoky twist, cook the lobster tails on a charcoal grill. The subtle smokiness adds a new layer of complexity, enhancing the dish’s bold flavors.
Experiment with different herbs and spices in your cowboy butter to discover unique flavor profiles. Variations with cilantro or paprika can offer delightful results.
Ensure your cowboy butter is prepared in advance, allowing the flavors to meld. This pre-preparation step ensures consistency and depth in taste.
Pair with fresh, zesty lemon wedges to brighten the flavors. This can counterbalance the richness of the butter and elevate the seafood notes.
Consider using clarified butter for a cleaner butter option that reduces milk solids and offers a clearer, more luxurious sauce.
For a touch of sweetness, add a subtle drizzle of honey into the cowboy butter. It layers in sweetness that complements the robust spices beautifully.

Variations and Adaptations

Regional adaptations might include integrating local spices within the cowboy butter. For example, adding chipotle peppers gives a Southwestern edge, while ginger can infuse an Asian twist.
Incorporate seasonal ingredients like spring asparagus or summer corn to embellish your plate, providing fresh contrast to the rich lobster.
Dietary modifications are achievable by substituting butter with coconut oil for a dairy-free version without compromising on richness.
Adjust the heat level to your liking by adding or omitting hot spices like cayenne pepper in your cowboy butter, allowing the flavor profile to match personal preference.
Texture can be manipulated by including toasted breadcrumbs atop the lobster for a crunchy counterpoint to the soft meat.
Explore presentation alternatives by serving the lobster atop a bed of mixed greens or alongside colorful vegetable medleys for an appealing visual aesthetic.

Serving and Presentation Guide

Proper plating elevates the dining experience. Consider arranging the lobster on a large platter, drizzled generously with remaining cowboy butter, and adorned with fresh herbs for color and aroma contrast.
Garnish with sprigs of parsley or cilantro for added freshness and visual appeal. This detail communicates attentiveness to presentation and flavor balance.
Traditional accompaniments such as boiled potatoes or steamed asparagus work seamlessly with the lobster’s rich flavors, aiding in a complete meal offering.
Modern serving suggestions include pairing with a light, fruity salad, providing a refreshing acidity to counterbalance the opulent butter.
Temperature is crucial; serve the lobster immediately after preparation to maintain the perfect texture and warmth, enhancing the overall palatability.
Portion control is key—offer a single lobster tail per serving to allow the indulgent flavors to shine without overwhelming the palate.

Wine and Beverage Pairing

A crisp white wine, such as a Chardonnay or Sauvignon Blanc, pairs superbly with Cowboy Butter Lobster Tails, enhancing the buttery notes while providing refreshing acidity.
For non-alcoholic alternatives, consider a chilled sparkling lemonade or citrus-infused iced tea, which complements the dish’s flavors while offering palate refreshment.
If you prefer coffee or tea offerings post-meal, a light herbal tea, such as chamomile or lemon balm, harmonizes well with the meal’s richness, aiding digestion.
Take note of temperature considerations: wine or beverages should be served chilled to match the dish’s lightness, improving the overall dining experience.
Serving suggestions involve using elegant glassware for beverages to heighten the sense of occasion and attention to detail.

Storage and Shelf Life

For optimal storage, keep leftover lobster tails tightly sealed in an airtight container within the fridge, extending freshness up to two days.
Adhere to temperature requirements, storing cooked lobster at 40°F or below to inhibit bacterial growth and maintain safety.
Utilize recommended glass or stainless steel containers to preserve the lobster’s flavor integrity, being mindful of odors from other foods.
Signs of spoilage, such as off-putting smells or slimy textures, should be checked before consumption; the pristine taste is essential.
For reheating, gently warm in a preheated oven at low temperatures to retain moisture without over-cooking, preserving the lobster’s delicate texture.
Freezing is discouraged for prepared lobster due to texture degradation; fresh preparation is best for maintaining quality.

Make Ahead Strategies

Begin your prep timeline by preparing cowboy butter a day ahead, allowing flavors to meld and simplifying on-the-day tasks without compromising the finished product.
Store completed butter in the fridge, ensuring it is at room temperature before applying to lobster for optimal coverage.
Quality impact when making ahead is minimal if the timing guidelines are followed, allowing for a balanced and efficient cooking process.
Assembly tips include pre-cutting the lobster tails and setting out tools to streamline efforts during cooking.
Reheat cowboy butter gently before use, avoiding separation. Small amounts added while heating help maintain texture.
Adding fresh elements like lemon slices right before serving infuses the dish with a vibrant citrus pop.

Scaling Instructions

When halving the recipe, maintain ingredient ratios to ensure the balance of flavors remains intact. Adjust seasoning levels to personal taste.
Doubling the recipe requires scaling up equipment like grilling racks or broiler trays, facilitating consistent cooking times despite increased volume.
Modify timing considerations to accommodate larger quantities, such as staggering cooks or adjusting heat sources for even cooking.
Constrain storage considerations to accommodate added portions by expanding using larger or multiple containers.
For parties, consider providing extra garnish and presentation enhancements, preserving visual appeal across increased servings.

Nutritional Deep Dive

Cowboy Butter Lobster Tails offer a balanced macro profile, with lean protein from lobster and rich fats from butter contributing to satiety and flavor finesse.
The dish benefits from micronutrients such as vitamin B12 and selenium, essential for maintaining energy and supporting immune function.
Due to its protein content, lobster provides a healthful alternative to heavier meats, satisfying dietary needs while offering premium taste experiences.
Dietary considerations should include awareness of butter’s calorie count, incorporating moderation into your meal plans for balanced consumption.
Portion analysis can shed light on personalized serving sizes, guiding weight management practices alongside thorough satisfaction of culinary cravings.

Dietary Adaptations

For gluten-free adaptations, ensure all spices and herbs used in cowboy butter are certified gluten-free, maintaining safety for those with sensitivities.
Explore dairy-free conversions by preparing the butter with alternatives like vegan spreads, achieving a similar richness without compromising dietary needs.
Lobster naturally fits within a low-carb or keto

Delicious Creamy Alfredo Mac and Cheese Recipe for Family Meals

Creamy Alfredo Mac and Cheese Recipe 🍝 Perfect for Family Meals ❤️

⚖️
Difficulty
Easy

⏲️
Prep Time
15 mins

🕒
Cook Time
25 mins

⏱️
Total Time
40 mins

🍽️
Servings
6

Who can resist a comforting, cheesy dish like Creamy Alfredo Mac and Cheese? This delightful recipe combines the classic taste of mac and cheese with a creamy Alfredo twist, making it perfect for family meals. The rich and savory sauce envelops every piece of tender macaroni, promising a mouth-watering experience that even the pickiest eaters will love. The blend of Parmesan and mozzarella cheese enhances the depth of flavors, making this mac and cheese recipe unforgettable.

Whether you’re hosting a dinner party or looking for a quick weekday meal, our Creamy Alfredo Mac and Cheese is a flexible delight that suits any occasion. Imagine the smiles on your family members’ faces as they dive into this cheesy, warm dish. The aroma that fills your kitchen will have everyone eagerly waiting at the table. It’s not just a meal; it’s a heartwarming culinary experience that brings loved ones together.

Strong ingredients like fresh garlic and a hint of nutmeg infuse this dish with sophisticated flavors that set it apart. While it carries a touch of gourmet flair, the preparation is easy enough for chefs of all skill levels. With this recipe, you’ll quickly become everyone’s favorite cook, as it offers the perfect balance of creamy texture and cheesy goodness that will linger in everyone’s memory.

Quick Recipe Highlights

  • Flavor Profile: A rich, cheesy blend with a balance of garlic’s sharpness and a hint of nutmeg.
  • Texture: A creamy sauce coating tender macaroni gives this dish a luxurious mouthfeel.
  • Aroma: The heavenly scent of melted cheese and fresh garlic will fill your kitchen.
  • Visual Appeal: Golden layers of melted mozzarella make an enticing and inviting dish.
  • Skill Level Needed: Suitable for any skill level, requiring simple stirring and baking techniques.
  • Special Equipment: An oven-safe dish and a medium saucepan are all you need.

Recipe Overview

  • Difficulty Level: This recipe is categorized as easy, perfect for beginners and busy home cooks. The steps involve basic cooking skills, requiring only simple mixing and baking.
  • Category: Comfort food; it falls perfectly under the category of pasta dishes suitable for dinner or a hearty lunch.
  • Cuisine: This dish takes inspiration from Italian-American culinary traditions, combining classic American mac and cheese with Italian Alfredo sauce influences.
  • Cost: Moderate; while cheese can be a bit pricey, the other ingredients are affordable, balancing overall costs.
  • Season: Ideal for colder winter months when hearty, warm meals are most appreciated.
  • Occasion: Great for family gatherings, casual dinners, or even as a holiday side dish.

Why You’ll Love This Creamy Alfredo Mac and Cheese Recipe

The creaminess of the Alfredo sauce takes your standard mac and cheese to new heights. The combination of Parmesan and mozzarella provides a cheesy richness that pairs perfectly with pasta. This recipe offers a delightful texture, blending smooth sauce with tender macaroni. Every bite melts in your mouth, offering cheesy goodness that’s impossible to beat.

Convenience is key, and this recipe delivers. It requires minimal hands-on time, allowing you to prepare other elements of a meal or simply relax while it bakes. The simple preparation makes it feasible for weeknights when time is of the essence. With easy-to-find ingredients, you’ll love the straightforward shopping list that doesn’t send you on a wild goose chase.

Nutritionally, this dish offers a good source of calcium and protein, thanks to the generous amounts of cheese. You can enhance its nutritional profile by adding vegetables like broccoli or peas. Even on its own, it serves as a comforting, satisfying meal that fills you up with wholesomeness.

One of the best parts of this recipe is its social and entertaining value. Shared with friends or family, this dish becomes the star of any gathering. Its universally loved flavors ensure it disappears quickly from the buffet table—prepare to see empty plates and happy smiles all around.

Cost-effectiveness makes this recipe a favorite for feeding a crowd. Basic, affordable ingredients like pasta, milk, and cheese come together to create a rich and impressive dish without stretching your budget too thin. It’s both pocket-friendly and luxurious—a rare combination that’s hard to resist.

Historical Background and Cultural Significance

Mac and cheese has a long-standing history with European roots, evolving over centuries from pasta and cheese casseroles that first appeared in medieval cookbooks. When paired with Alfredo—a creamy, buttery sauce thought to have originated in Rome in the early 20th century—this mac and cheese adaptation brings together iconic flavors from two culinary traditions.

The adaptation of Alfredo sauce into popular culture garnered attention through Italian restaurateur Alfredo di Lelio’s dish called “Fettuccine Alfredo,” which became famous among Hollywood elite and tourists. Over time, American tastes embraced and modified the concept, leading to modern recipes such as this mac and cheese iteration.

Culturally, mac and cheese represents comfort and nostalgia, akin to a warm embrace through food. Its evolution and adaptability have made it a beloved staple in homes across North America, and its pairing with Alfredo showcases how hybrid recipes can create new culinary experiences.

Regional variations abound, with adaptations featuring local cheeses or supplementary ingredients. From Southern barbecue infusions to spicy jalapeño and bacon versions, mac and cheese demonstrates incredible versatility and personalization, becoming a true canvas for expression.

Ingredient Deep Dive

**Parmesan Cheese**:
Parmesan adds an unmistakable umami element, deepening the mac and cheese’s flavor. Originating from Italy, this hard cheese is aged to develop its signature rich taste, and is key to traditional Alfredo sauce. Rich in calcium and phosphorus, Parmesan supports bone health and offers a strong flavor that allows for using smaller amounts effectively.

To select Parmesan, look for a firm texture with straw-colored tones. Store the cheese in the fridge, wrapped in parchment and sealed tight to maintain freshness and aroma. In a pinch, substitutes like Grana Padano or Pecorino Romano can provide similar depth.

**Mozzarella Cheese**:
Mozzarella is known for its melty texture and mild flavor, perfect for creating indulgent mac and cheese. While originally from Italy’s Campania region, modern mozzarella can be found worldwide, varying in water content and flavor. It’s higher in moisture compared to Parmesan, creating the gooey stretch people crave.

Select mozzarella based on your desired texture—from fresh to low-moisture varieties, which extend shelf life. Store it in a refrigerator, making sure to consume it quickly to limit moisture loss. Use Monterey Jack if you need a similar substitute, though you may lose some elasticity.

Common Mistakes to Avoid

  • Using pre-shredded cheese: This can contain anti-caking agents that affect melting. Grate your own for a smoother sauce.
  • Overcooking the pasta: Al dente texture is essential, as pasta continues to cook while baking.
  • Skipping the béchamel sauce: It acts as a base, binding the cheese and preventing graininess.
  • Ignoring seasoning: Balance with salt, pepper, and nutmeg to highlight flavors.
  • Forgetting to stir constantly: Avoid cheese clumping and ensure an even sauce texture by regular stirring.
  • Using wrong noodle shapes: Stick to shapes that capture sauce well, like macaroni or shells.
  • Neglecting to add a crispy topping like breadcrumbs: It adds texture contrast that enhances the mac and cheese.
  • Baking at too high a temperature: This risks drying out the mac and cheese—low and slow ensures creaminess.
  • Substituting milk with water: Always use full-fat dairy for creaminess, as water dilutes flavor and texture.
  • Not letting it rest: Allow the dish to sit for a few minutes post-bake for an optimal set texture.

Essential Techniques

**Building a Proper Béchamel**:
This technique is crucial as it forms the foundation of the cheese sauce. Achieve a silky texture by gradually adding milk to your butter-flour roux, ensuring smooth integration. Be wary of lumps by whisking continuously, and watch for a thick consistency that signals mixture readiness. Homemade béchamel lends a rich base that prevents the separated cheese texture.

**Proper Pasta Cooking**:
Undercooking pasta slightly is paramount since it continues softening as it bakes. This guarantees the macaroni absorbs just enough sauce without turning mushy. Pay attention to pasta when boiling; tasting is the best way to determine correct doneness.

**Creating a Crispy Topping**:
Achieving a delightful contrast of texture involves adding breadcrumbs or panko to the top of your mac and cheese. Toss them with melted butter before sprinkling over the dish, and then bake until golden. This transforms the dish’s final aesthetics while offering a satisfying crunch.

Pro Tips for Perfect Creamy Alfredo Mac and Cheese

Always use freshly grated cheese to avoid cellulose and other additives that hinder melting, resulting in a perfectly smooth sauce texture.

Do not omit the nutmeg—it might sound insignificant, but a pinch heightens and rounds out your dish’s flavor profile.

Bake the dish covered for the initial 20 minutes to trap moisture, removing the foil for the last 5 to 10 minutes to brown the top beautifully.

Infuse your roux with garlic and onion powder to add depth without overpowering the primary cheese flavors, subtly enriching the sauce.

Consider enhancing umami by adding a splash of soy sauce or miso to the béchamel during preparation for an intriguing layer of flavor sophistication.

For a slightly tangy twist, mix in a spoonful of cream cheese; it adds a dense richness that complements the Alfredo profile beautifully.

Reserve pasta water when draining—it’s a versatile starchy liquid that can adjust the sauce’s consistency subtly if required post-bake.

Edit the recipe’s mac-and-cheese perception by serving in ramekins or individual skillets for personalized portions that bring a touch of restaurant elegance to home dining.

Variations and Adaptations

Regional variations could include smoky bacon or crispy pancetta crumbles to deliver a savory depth characteristic of Southern barbecue influences. Adding a spicy kick with jalapeños or red pepper creates a version favored by those drawn to heat.

To adapt this dish for different seasons, incorporate vegetables like roasted butternut squash in autumn or fresh peas in spring, letting the recipe versatility shine through every quarter. Seasonal ingredients freshen the dish and introduce local produce flavors that captivate.

Dietary modifications are possible: substitute traditional dairy with plant-based milk and nutritional yeast for a vegan take, or gluten-free pasta guarantees everyone enjoys it.

For a flavor journey, use blue cheese for a tangy iteration, or truffle oil drizzle for indulgence worthy of gourmet acclaim. Swap cheddar for a smoky Gouda or even spicy pepper jack for heat-seeking aficionados.

If aiming for texture modifications, replace regular macaroni with shell pasta or cavatappi, known for catching sauce—a perfect solution for those desiring maximum gooeyness in every bite.

Presentation alternatives vary from single-serve oven dishes dotted with herbs to large family-style casserole platters. Imagine scattering crispy shallots or parsley over the mac for that Instagram-worthy touch.

Serving and Presentation Guide

Adopt simple yet effective plating techniques by ladling portions into gently warmed bowls before topping neatly with breadcrumbs or fresh herbs, providing an inviting warmth and eye-appeal.

Garnishing with freshly chopped chives changes the dish’s aromatic and visual landscapes, inviting diners with its bright green color contrast against golden cheese.

Traditionally, this creaminess pairs well with a side serving of simple salad dressed with lemon vinaigrette; it cuts the rich flavor and aligns with fresh, crisp complementarity.

Modern serving suggestions include individual ramekins or cast-iron skillets for personal elegance, transforming a communal dish into an intimate dining experience with presents modern flair.

Ensure portions are served hot to retain sauce melody and pasta warmth, delivering that cherished gooey softness alongside partner accompaniments that share the same dining temperature.

Portion control tips involve using scoop comparisons or measuring cups, maintaining consistency for calculated nutrition information per serving, and avoiding overindulgence pitfalls.

Wine and Beverage Pairing

A full-bodied Chardonnay or a glass of crisp Sauvignon Blanc lightly offsets the creamy richness, with wine’s acidity balancing every cheesy bite perfectly.

For non-alcoholic alternatives, serve chilled sparkling water with lemon or a citrus spritzed soda, providing a refreshing palate cleanse.

If pairing with coffee, opt for a medium roast; its mellow, nutty notes complement creaminess without overshadowing subtler sauce flavors.

Cool serving temperatures enhance cream sauce dishes, offering a stark contrast between warm pasta and refreshing drinks.

Suggest serving suggestions include using tall wine glasses to showcase color spectrum distinctions, enhancing experiential wine connections.

Storage and Shelf Life

Store leftovers in an airtight container placed in the fridge, maintaining freshness for up to three days post-preparation, labeling accordingly for swift identification.

Maintain optimal quality through refrigeration, typically at a steady 40°F (4°C) to safeguard against spoilage. Poise any longer preservation by transitioning to freeze-friendly solutions.

Sign of spoilage includes off smells or an uncertain surface film—notice any changes; these indicate unsuitable consumption.

Reheating instructions necessitate low-temperature oven warming for even cheese melt-in, while microwave reheating should embrace short, gentle bursts, allowing interval stirring for cream consistency retention.

Freezing guidelines suggest cool down before foil-wrap or bag usage, marking storage dates; encourage consumption within two months to savor flavor integrity intact.

Make Ahead Strategies

Offering a make-ahead timeline simplifies event management, encouraging the pasta to pre-cook before assembling, skipping the freeze until day-of preparation.

Store elements separately to avoid sogginess or premature combining of liquid components with pasta, retaining dish integrity for optimal presentation.

Assess the quality impact of making certain aspects like béchamel upfront, understanding potential sauce thickening alterations from starchy pasta water residue interaction.

Privacy for last-minute assembling involves pre-grated cheese and chopped ingredients readiness for successful execution under pressure, achieving seamless dining delivery.

Reheating guidelines stress timely, gentle heat diffusion to maintain original flavors, integrating culminating final touches like breadcrumbs post-warm-up for crisp texture enjoyment.

Add zestful, fresh elements like sprinkled herbs or arranged microgreens on the day, energizing the visuals and refreshing pre-prepared main dish coursing.

Scaling Instructions

Scaling the recipe accommodates various numbers by precisely doubling or tripling ingredient measurements while adjusting key elements like spices to taste.

Keep equipment sizing in perspective—larger casserole dishes or additional baking sheets might be required when expanding meal yields.

Modify cooking times accordingly, remaining vigilant of individual oven variances while ensuring an even cook-through, guaranteeing neither undercooked nor dry results.

Focus on storage shifts when considering larger portions—ensure appropriately large airtight containers or freezing solutions are accessible for post-meal conservation.

Embrace container guarantees for space management, particularly when halving does not capably support leftovers due to volume reductions.

\n
Ensure utensil adjustments for increased quantities, mindful of replacing whisks with significantly larger spatulas to support seamless béchamel sauce mastery.

Nutritional Deep Dive

The macro content in this dish primarily offers a higher carbohydrate and fat profile, due to the pasta and cheese compositions blending to deliver energy-dense nourishment.

Micronutrients like calcium, phosphorus, and vitamin A are present abundantly, positively supporting health through substantial amounts of cheese and milk.

Health benefits arise from the excellent bone-strengthening elements, attributed to ingredients delivering critical nutrition while enjoying a comforting meal.

Dietary considerations involve portion understanding; maintaining a balance between mac and cheese consumption and fresh vegetable pairings achieves optimal nutrient equilibrium.

Portion analyses further explore grain and dairy intake proportions, reflecting realistic caloric count for meal management during any health-conscious eating schedule.

For effective weight management, consider reaching for a single ladle scoop as serving guide, potentially opting for side salad alignment should dietary space require calorie shift arrangements.

Dietary Adaptations

For a gluten-free version, substitute pasta with non-gluten varieties such as rice flour or corn-based options, retaining sauce loyalty despite ingredient diversifications.

Dairy-free adaptations may involve utilizing plant-based milk like almond alongside nutrition yeast or vegan cheese alternatives, balancing authenticity with dietary restrictiveness.

Vegan needs likewise navigate creatively through dairy-free substitutions coupled with flavor-enhancing elements like nutritional yeast for cheese-like richness, omitting animal-derived additions relatively efficiently.

Low-carb considerations encompass zucchini noodles or cauliflower base to sustain mac and cheese identity while acknowledging carb constraints for keto-focused eaters.

Paleo enthusiasts transform servings with nut-based cheeses and grain-free pasta, engaging culinary creativity within recipe framework adaptable to historical tradition deviations.

Low-FODMAP customization embraces accommodating digestive sensitivities, subbing dairy with lactose-free variants, achieving similar sensations via equal-matched proportions.

Exploring further diet inclusionary avenues, experiment with ingredient swaps or reductions resonant with personalized taste yet appropriately addressed for recognized accumulative or limiting factors.

Troubleshooting Guide

For any texture issues, confirm sauce emergence balanced by thorough béchamel attention, acknowledging possible uneven pasta compatibility factors.

To resolve flavor balance dilemmas, consider seasoning alterations and cheese variety swap-outs, understanding potential operational tool impacts on desired culinary heights.

Should temperature problems occur, monitor regulatory conditions through thermometer checks, gauging suitability warmth capture meets internal distribution.

Address equipment challenges by evaluating size compensations relevant to adjusted quantities or altered integration layout changes for preparation finesse.

Ingredient swap errors merit examination; focus on complement previews, achieving congruent flavor-sector improvements amid desired substitution elements, facilitating enhanced continuities creation.

Address timing concerns with pre-planned oven engagement, embracing attention prioritization while considering existing vaunted estimates—always affording cushion margins for constraint mitigations.

Equipment tool missteps bolster heedings where feasible, understanding reshaping execution involves varying compatibility principles through diverse culinary pathways, maintaining steadfast attentiveness to uninterrupted completion achievement.

Recipe Success Stories

This recipe inspired countless families to revisit cherished mac and cheese experiences, their updates infusing personal elements that demonstrate lasting adaptation potential within home memories.

Community engagement stories stirred creativity, returning innovative transformations where endless customization created welcomed newness blossoming from original inclusivity comforts long celebrated.

Reader recipe variation successes extend concerted encouragement, igniting creative opportunities revealing endless inspiration resonances, resulting in a unified culinary community revelatory for all who partake.

Shared adaptation recommendations emerged championing conversions like seasonal swaps or dietary limitations that illuminate cherished cross-sphere connectivity.

Impromptu tips illustrated photography improvement investments for bloggers sharing irresistible dishes beyond narrative or print, capturing gastronomic imagination wreathing irresistible moments worth celebrating.

Frequently Asked Questions

Q: Can I pre-make the béchamel sauce for this dish?
A: Yes, you can make the béchamel sauce one or two days in advance. Store it in the refrigerator in an airtight container and reheat gently on the stove while stirring frequently to maintain its smooth consistency.

Q: How can I prevent my cheese from becoming grainy?
A: Avoid overheating the cheese by adding it slowly to the warm béchamel and stirring constantly. Using high-quality, freshly grated cheese rather than pre-packaged shreds will assist in achieving a smoother melt.

Q: What makes this mac and cheese “Alfredo”?
A: The addition of béchamel sauce along with Parmesan cheese creates an Alfredo-style sauce, lending the iconic creamy texture and rich cheese flavor associated with Alfredo dishes due to its similar ingredient profile.

Q: Is it possible to adapt this recipe for a slow cooker?
A: Yes, this recipe can be adapted for a slow cooker by precooking the pasta and béchamel before combining and transferring to slow cook. Adjust times and procedures specific to your appliance for consistent texture maintenance.

Q: What can I serve alongside Creamy Alfredo Mac and Cheese?
A: Consider a simple greens salad or steamed vegetables to accompany the richness of this dish. A light lemon vinaigrette complements the cheesiness wonderfully, delivering a contrast between creamy and refreshing palettes.

Q: Can I use other cheese varieties beyond mozzarella and Parmesan?
A: Certainly! Experiment with cheeses such as Gruyère, Asiago, or Fontina for alternate flavors. Ensure you choose cheese types that melt well and match your desired flavor profiles as you adapt the recipe considering technology limits.

Q: How long can I freeze leftovers for, and is it recommended?
A: Leftovers can be frozen for up to two months, but it’s recommended to serve them fresh to preserve optimal taste and texture. For best results, allow the baked mac and cheese to cool completely, then portion into freezer-safe containers with lids.

Q: What happens if the dish comes out too dry?
A: A dry dish usually indicates either overbaked pasta or insufficient sauce ratio. Correct by adjusting baking lengths or increasing béchamel proportions. Consider adding a bit of reserved pasta water to revive any separation but utilize sparingly.

Q: What is the best pasta shape to use?
A: Traditional elbow macaroni works wonderfully, although other cost-effective shapes like shell pasta or cavatappi also capture sauce excellently. Feel free to choose a shape based on preference while maintaining sauce engagement capacity.

Q: How do I prevent pasta from clumping?
A: Ensure pasta is cooked per package directions, considering constant stirring during hot water immersion. While cooling, adding a bit of olive oil keeps pasta from sticking before transitioning into your casserole composition matrix.

Q: Why is nutmeg important in this recipe?
A: Nutmeg adds a subtle spiced note that quietly supports the cheese profile without overpowering it, rounding the flavors and adding a gourmet touch that complements creamy components nicely.

Additional Resources

Seek similar recipes that explore alternate cheese combinations for macaroni and cheese enthusiasts, offering enriching options applicable to preferences favoring broader cheesery selections.

Discover further béchamel sauce creation guides for technical advice refinement in classic culinary know-how expansion, supporting adeptness versatility pursuits.

Ingredient explorations include profiles on cheese aging processes, dairy peculiarities, or cultivar distinctions for comprehensive knowledge building across everyday cooking aspects.

Delve into recommended equipment nuggets detailing non-stick casserole dish preferences or oven practices contributing towards everyday cooking brilliance.

Seasonal insight variations highlight ingredient rotation suitability within oven recipes, explaining best selections amid fresh component availability period determinations.

Join the Conversation

Engagement centerpiece activity around social media encompasses harness insights into post-served photography signifying blissfully shared visual components.

Launched feedback section offers direct recipe review opportunities where additional contributions welcome variety recognition mutually beneficial exchange orchestration.

Ingredient substitution tips provide field-tested options that readers could employ or adapt for personalizations captivating versatility or addressing dietary limitations directly.

Building communities around this Creamy Alfredo Mac and Cheese reflects the inbound dialogue echo celebrated flavor legacies fostered through unified, shared experiences.

Involve yourself by sharing successful endeavors through communication platforms, communicating innovative transformations balancing legacy iconography with newfound flavor interpretations.

The Recipe

Creamy Alfredo Mac and Cheese Recipe

Serves: 6

Prep Time: 15 mins

Cook Time: 25 mins

Total Time: 40 mins

Kitchen Equipment Needed

  • Medium saucepan
  • Oven-safe casserole dish
  • Whisk
  • Pasta pot
  • Cheese grater

Ingredients

  • 2 cups elbow macaroni
  • 2 tablespoons butter
  • 2 tablespoons flour
  • 2 cups milk
  • 1 cup grated Parmesan cheese
  • 1 cup shredded mozzarella cheese
  • 1/4 teaspoon ground nutmeg
  • Salt and pepper to taste
  • 1/2 cup breadcrumbs (optional)
  • 2 cloves garlic, minced

Directions

  1. Preheat your oven to 350°F (175°C).
  2. Cook macaroni according to package instructions until al dente. Drain and set aside.
  3. In a medium saucepan, melt butter over medium heat. Add garlic and sauté until fragrant.
  4. Stir in flour to form a roux and cook for 1 minute.
  5. Gradually whisk in milk, ensuring a smooth mixture, and cook until it thickens.
  6. Remove from heat, then stir in Parmesan and mozzarella cheese until melted and blended smoothly. Add nutmeg, salt, and pepper to taste.
  7. Combine the macaroni with the cheese sauce, mixing well to coat evenly.
  8. Pour mixture into a buttered casserole dish, then top with breadcrumbs if desired.
  9. Bake for 20-25 minutes or until bubbling and golden on top. Let sit for a few minutes before serving.

Recipe Notes

  • Feel free to add cooked bacon or peas for extra flavor and nutritional boost.
  • Swap gluten-free pasta for a gluten-free version.
  • Store leftovers in the refrigerator up to three days or freeze for up to two months.

Irresistible Pineapple Cowboy Candy Recipe: Sweet and Spicy Delight

Pineapple Cowboy Candy: A Sweet and Spicy Delight

⚖️
Difficulty
Medium

⏲️
Prep Time
20 mins

🕒
Cook Time
60 mins

⏱️
Total Time
80 mins

🍽️
Servings
10

Indulge your taste buds with our Pineapple Cowboy Candy, a tantalizing mix of sweetness from juicy pineapples and the fiery heat of jalapeños. This bold combination makes for an unforgettable flavor explosion, transcending traditional preserves with its vibrant mixture of zesty and sugary notes. Imagine the luxurious golden hue of caramelized pineapples harmonizing with the deep green of jalapeños, making it not only a treat for the palate but a visual delight.

Quick Recipe Highlights

  • Flavor Profile: The Pineapple Cowboy Candy is sweet with a hint of earthiness, thanks to the jalapeños, providing both a vibrant and mellow flavor.
  • Texture: The final product has a delightful chewiness, with the soft pineapple pieces mingling with the crunch of the peppers.
  • Aroma: Aromatic pineapple combined with the sharp, spicy fragrance of jalapeño peppers creates an intoxicating scent.
  • Visual Appeal: The striking contrast between the bright yellow pineapple and the dark green jalapeños is truly mesmerizing.
  • Skill Level Needed: Intermediate cooking skills are required as balancing the flavors and achieving the correct consistency are key.
  • Special Equipment: A large saucepan, sharp knife, and canning jars are essential to execute this recipe perfectly.

Recipe Overview

  • Difficulty Level: This recipe is categorized as medium due to its requirement for precise timing and attention during cooking to avoid burning.
  • Category: Pineapple Cowboy Candy serves both as a condiment and a sweet treat, excellent for enhancing meats or enjoyed solo.
  • Cuisine: Rooted in Southern U.S. culinary tradition, this recipe borrows from classic cowboy cooking, merging classic flavors with a tropical twist.
  • Cost: The ingredients are generally affordable, making this a budget-friendly treat with high yield relative to the price.
  • Season: Best made during summer when pineapples are at their finest and abundant, yet it can be preserved to enjoy all year long.
  • Occasion: Ideal for barbecues or picnics, this candy also excels as a unique gift or party favor for food enthusiasts.

Why You’ll Love This Recipe

The Pineapple Cowboy Candy offers an exciting culinary adventure with its perfect balance of sweetness and heat. The juicy pineapple provides a tropical sweetness that counteracts the spicy kick of jalapeños, creating a symphony of flavors with each bite. In terms of convenience, this recipe is relatively straightforward, allowing you to indulge your creativity without feeling overwhelmed. It brings robust nutritional advantages since pineapples are rich in vitamins, and jalapeños add a metabolic boost. This dish is also a fantastic conversation starter at social gatherings, as it offers a unique twist to traditional fare. Furthermore, its cost-effectiveness and accessibility make it possible to enjoy gourmet flavors without a hefty price tag.

Historical Background and Cultural Significance

Cowboy Candy hails from the Southern United States, traditionally used as a way to preserve the bounty of peppers and unlock flavors through pickling and candying methods. Cultural importance arises as this recipe embodies the inventive spirit of Southern cooks, known for their resourcefulness. Over the years, the addition of pineapple has nurtured its evolution, allowing its influence to stretch beyond its rustic roots, becoming a contemporary gourmet sensation. Regional variations across the Southern U.S. may dictate ingredient ratios, but the core essence of sweet-spicy interplay remains a cherished trademark.

Ingredient Deep Dive

Pineapple is not just a fruit but a symbol of hospitality, prized for its juicy sweetness and culinary versatility. From a nutritional standpoint, it’s low in calories but high in Vitamin C and antioxidants, contributing to health benefits. When selecting pineapples, choose ones that are golden-yellow and fragrant, with no soft spots. The storage of pineapples should be at room temperature or refrigerated once cut. Additions like canned pineapples can substitute fresh ones if needed, though the flavor might slightly differ.

The jalapeño pepper, integral to this recipe for its fiery heat, carries with it a rich legacy in Mexican cuisine. Known for its health benefits, jalapeños provide Vitamin C and capsaicin, which can aid metabolism. Choose firm, smooth peppers for freshness, ideally stored in the refrigerator to maintain their crispiness. If you prefer a milder dish, opting for a similar mild pepper or de-seeding can adjust the heat.

Common Mistakes to Avoid

  • Underestimating time: Ensure the cooking time allows flavors to meld without rushing the process.
  • Incorrect pineapple selection: Use ripe but firm pineapples to prevent mushiness.
  • Insufficient stirring: Regularly stir during cooking to avoid sticking and burning.
  • Over-spicing: Balance the heat with sweetness; adjust jalapeño amount to taste.
  • Improper canning: Follow canning guidelines to prevent spoilage.
  • Neglecting sterilization: Always sterilize jars to ensure food safety.
  • Incorrect storage: Store in a cool, dry place or refrigerate once opened.
  • Ignoring ingredient order: Add ingredients in the correct sequence for optimal flavor meld.

Essential Techniques

Mastering the technique of balancing sweetness and heat in this Pineapple Cowboy Candy recipe is crucial. This requires both patience and observation, ensuring the crispness of jalapeños is retained post-cooking while achieving a consistent syrupy coating on the pineapples. Equally important is safe canning practice to preserve the candy’s vibrancy and prevent spoilage. A keen eye on visual cues, such as the candy’s change in color to a golden hue and thickening syrup, will signal success.

Pro Tips for Perfect Pineapple Cowboy Candy

– Use gloves when handling jalapeños to avoid skin irritation from the capsaicin.
– Incorporate pineapple juice in the cooking liquid for extra depth of flavor.
– Taste your candy before canning to adjust sweetness or heat levels.
– Allow the candy to sit overnight for flavors to deepen before serving.
– Utilize any remaining syrup as a marinade or glaze for grilling.
– For added complexity, incorporate a dash of apple cider vinegar for tanginess.

Variations and Adaptations

Regional adaptations can include the use of chipotle peppers instead for a smoky twist. Seasonal variations involve adding elements like peaches or mangoes when they are in season. For those with dietary preferences, a sugar substitute can be employed for a low-sugar alternative, though the texture may vary slightly. Adjusting basil or mint as herbs can complement the tropical notes, offering a refreshing uplift.

Serving and Presentation Guide

To serve Pineapple Cowboy Candy, try elegant lone servings or as part of a cheeseboard. For plating, use contrasting colored bowls to enhance its visual appeal. Garnishing with sprigs of mint leaves adds both fragrance and color contrast. Accompany with crackers or fresh bread for delightful pairings, while maintaining its vibrancy by serving at room temperature.

Wine and Beverage Pairing

For a wine pairing, opt for a semi-sweet Riesling whose acidity complements the heat while echoing the candy’s sweetness. As a non-alcoholic alternative, sparkling water with a hint of lime offers a refreshing counterbalance. Consider tropical teas such as passion fruit or hibiscus for complementary flavors, serving chilled for extra refreshment.

Storage and Shelf Life

Store unopened jars in a cool, dark place to maintain quality. Once opened, refrigerate and consume within three weeks to enjoy its peak freshness. Containers should be airtight and sterile to prevent spoilage. Indications of spoilage include an off-odor or change in color. If freezing, use appropriate containers to maintain quality, and gently reheat for softened consistency when needed.

Make Ahead Strategies

This Pineapple Cowboy Candy can easily be made ahead, allowing flavors to develop and deepen. Prepare in large batches and preserve through canning, which can then be gradually consumed or distributed over time. Quality isn’t compromised over time with proper storage, ensuring a reliable treat at the ready for gatherings or gifts.

Scaling Instructions

Scaling the recipe involves proportionately increasing or decreasing ingredient amounts, ensuring the flavor balance remains consistent. Adjustments may require larger or additional pots when sizing up and attention to timing to prevent overflow or burning. Storage should always consider available space and consumption rate.

Nutritional Deep Dive

Rich in vitamins and low in fat, Pineapple Cowboy Candy provides a delightful dessert without the guilt. The macro breakdown includes carbohydrates from the sugar and natural fruit sugars, with a peppery kick that adds a negligible amount of protein and fat. Despite its sweetness, the candy remains a relatively low-calorie indulgence, superb for those monitoring weight.

Dietary Adaptations

The recipe lends itself well to gluten-free diets as its base ingredients are naturally celiac-friendly. For a vegan twist, ensure all sugar used is certified vegan. Low-carb enthusiasts might substitute some sugar with an erythritol blend, keeping the caloric intake in check without sacrificing flavor. Flexibility allows it to fit various dietary needs with ease.

Troubleshooting Guide

If encountering texture issues where the candy is too runny, extend cooking time to reduce liquid concentration. A lack of flavor balance can be counteracted by adjusting sugar or jalapeño levels. Temperature problems, such as burning, can be avoided with reduced heat settings. Should equipment challenges arise, alternative utensils like a slow cooker can benefit the process.

Recipe Success Stories

Community feedback praises the vibrant taste and versatile use of this Pineapple Cowboy Candy, providing anecdotes of gift-giving and party offerings. Variations abound, with jalapeños swapped for habaneros in some user adaptations, highlighting creativity. Photography tips include capturing the candy’s translucence in natural light for stunning results on social media.

Frequently Asked Questions

Is Pineapple Cowboy Candy spicy?

While it does have a kick from the jalapeños, sweetness from the pineapple balances the heat.

How long can it be stored?

Unopened, it can be stored for up to a year; once opened, refrigerate and consume within three weeks.

What is the best use for Pineapple Cowboy Candy?

It’s perfect as a topping for nachos, burger garnishes, or as a side for grilled meats.

Can this recipe be made sugar-free?

Yes, sugar substitutes like erythritol can be used, albeit with a different texture.

What fruits can be substituted for pineapple?

Pears or apples can be alternatives, providing different flavor profiles.

Are there alternative peppers if jalapeños are too spicy?

Use poblano peppers or bell peppers for a milder version.

How should spices be adjusted for a milder taste?

Reduce the amount of jalapeños and remove seeds to lower the heat level.

Is it essential to can the candy?

No, it can also be stored in the refrigerator if planning to consume within a short timeframe.

What pairs well with this candy besides meats?

Cream cheese and crackers make a delightful appetizer.

Can other spices be added?

Yes, cinnamon or clove adds unique warmth to the candy.

Additional Resources

Dive into related recipes like Fire-Roasted Jalapeño Salsa to explore more fiery flavor options. Equip yourself with guides on safe canning practices to prolong shelf-life. Gain further understanding of ingredient selection through fruit freshness tips, ensuring top-notch quality in execution.

Join the Conversation

Engage with a vibrant community by sharing your Pineapple Cowboy Candy experiences on social media; our hashtag encourages shared creativity and variations. Discover photography tips to capture its appealing aesthetics in mouthwatering images. Leave feedback or review to guide fellow enthusiasts in their cowboy candy journey, fostering a lively exchange of culinary ideas.

The Recipe

Pineapple Cowboy Candy

Serves: 10

Prep Time: 20 mins

Cook Time: 60 mins

Total Time: 80 mins

Kitchen Equipment Needed

  • Large saucepan
  • Sharp knife
  • Canning jars
  • Rubber gloves (for handling peppers)
  • Wooden spoon

Ingredients

  • 2 cups pineapple chunks
  • 1 cup sliced jalapeños
  • 2 cups granulated sugar
  • 1 cup apple cider vinegar
  • 1 tsp salt
  • 1/2 tsp turmeric

Directions

  1. Peel and slice the pineapple into chunks, ensuring that it is ripe.
  2. Wear gloves and slice the jalapeños, removing seeds if reduced heat is desired.
  3. In a large saucepan, combine sugar, apple cider vinegar, salt, and turmeric over medium heat until sugar dissolves.
  4. Add pineapple and jalapeños to the mixture and bring to a boil.
  5. Reduce heat and simmer for 60 minutes, stirring occasionally, until the liquid thickens to a syrup consistency.
  6. Spoon the mixture into sterilized canning jars, leaving 1/2 inch space from the top.
  7. Seal jars according to safe canning practices and cool at room temperature.

Recipe Notes

  • For a milder version, use de-seeded jalapeños.
  • Leftover syrup can enhance grilled dishes as a glaze.
  • If using canned pineapple, reduce the cooking time slightly.

Irresistibly Delicious Juicy Ribeye Steak Sandwich Recipe

Tremendous Juicy Ribeye Steak Sandwich: Mouthwatering Delight

⚖️
Difficulty
Medium

⏲️
Prep Time
15 mins

🕒
Cook Time
20 mins

⏱️
Total Time
35 mins

🍽️
Servings
4

Indulge in the delightful experience of a Tremendous Juicy Ribeye Steak Sandwich. This succulent creation transforms a classic ribeye into a flavor-packed sandwich that pleases both the eyes and the palate. With tender and juicy steak as the star, it permeates your senses with delectable aromas and a taste that promises to leave you craving more. Imagine biting into the rich, buttery ribeye enveloped in fresh, crusty bread with just the right crunch, offering a perfect contrast to the mouthwatering tenderness of the steak.

Ideal for steak lovers looking to enjoy a restaurant-quality meal at home, this ribeye steak sandwich provides the perfect balance of savory flavors and vibrant textures. The juicy steak combines with onions and peppers, bringing subtle sweetness and peppery warmth that elevates the whole experience. The softness of the cheese paired alongside melts perfectly atop the ribeye, ensuring every bite is a symphony of gourmet flavors and textures.

Quick Recipe Highlights

  • Flavor Profile: Juicy ribeye offers a rich, beefy essence complemented by sweet caramelized onions and spicy peppers.
  • Texture: Experience the juxtaposition of tender steak with crispy bread for a delightful mouthfeel.
  • Aroma: Savory and smoky notes from the ribeye are balanced beautifully with sweet onions and hints of melted cheese.
  • Visual Appeal: Vibrant colors from vegetables against golden bread make for an Instagram-worthy presentation.
  • Skill Level Needed: Intermediate skills needed for grilling steak to perfection and assembling the sandwich neatly.
  • Special Equipment: Grill or griddle pan for optimal cooking results and a sharp knife for precise slicing.

Recipe Overview

  • Difficulty Level: A medium difficulty level reflecting the need for attention to detail while grilling and assembling to capture all the sandwich’s flavors.
  • Category: Main course or brunch special, making it perfect for hearty meals that impress.
  • Cuisine: Rooted in American cuisine with influences from traditional steakhouse and barbecue cooking styles.
  • Cost: Moderate, with the ribeye as the primary investment, balanced by the affordability of other ingredients.
  • Season: Best enjoyed year-round but shines in spring and summer for outdoor grilling festivities.
  • Occasion: Perfect for family gatherings, cookouts, or casual dinner parties looking for a touch of elegance.

Why You’ll Love This Recipe


The Tremendous Juicy Ribeye Steak Sandwich is not just a feast for your appetite but also a true sensory delight. The rich flavor of the ribeye steak takes center stage, complemented by the gentle sweetness of caramelized onions. Every bite delivers an umami-packed punch with the subtle zest of peppers adding a slight hint of warmth. The satisfying crunch of the fresh bread pairs perfectly with the melted, creamy cheese, creating a texture that is both hearty and fulfilling.

This recipe offers convenience without sacrificing taste, making it a go-to option for weekend lunches or quick dinners. With straightforward preparation steps that cater to those intermediate in cooking skills, you can easily create a gourmet meal in your kitchen. The flexibility in ingredient choices also allows for a personalized touch, accommodating various dietary needs or preferences with ease.

Nutritionally, the sandwich is a balanced meal with protein from the ribeye and cheese, while the peppers and onions contribute fiber and essential vitamins. This makes it an ideal choice for a meal that keeps you energized and satisfied. It’s a powerhouse of nutrients presented in a delightfully delicious format.

Social events and entertaining are made better with this standout sandwich as it caters to the steak lovers and gourmet enthusiasts alike. Whether you’re hosting a casual dinner party or looking for a dish to share at a potluck, this ribeye steak sandwich offers an impressive presentation and flavor that makes it a crowd favorite.

Last but not least, the recipe is cost-effective. While ribeye is an investment, making your sandwiches at home significantly reduces dining costs. Additionally, by purchasing seasonal vegetables locally, you further enhance its accessibility and affordability without compromising on quality or taste.

Historical Background and Cultural Significance


The ribeye steak sandwich captures the heart of American culinary traditions, where beef often takes a central role at the table. Its origin can be traced back to the early 20th century when sandwiches became a popular format for combining various flavors with convenient handling. This particular version draws inspiration from traditional steakhouse cuisines while modernizing it for home cooking ease.

Culturally, the ribeye steak sandwich represents the fusion of comfort and sophistication. It reflects the ways Americans have embraced the simple sandwich structure to create high-end culinary experiences. As both casual and cosmopolitan, this dish reveals how versatile beef can be when approached with creativity and care.

Over the years, the ribeye steak sandwich has evolved, influenced by regional preferences and available local produce. In the west, you might find it with hints of Mexican spices, while the east coast might prefer it with sharper cheeses. This adaptability showcases the sandwich’s ability to transcend its origins while maintaining core flavor principles.

Regional variations highlight its popularity across the United States. Slow smoke cooking methods popular in southern regions impart smoky depth, while northern areas might lean towards employing bolder seasoning techniques. Each version echoes its birthplace, showcasing how diverse influences shape gastronomical perspectives across America.

Ingredient Deep Dive


Ribeye steak is the star of this sandwich, prized for its marbled richness and tender texture. Renowned for its melt-in-the-mouth quality, ribeye pays homage to the luxury of beef. Historically, ribeye has held a special place in culinary traditions, often regarded as one of the most flavorful cuts, favored by chefs and home cooks alike.

Nutritionally, ribeye offers a high protein count, essential amino acids, and healthy fats, making it an excellent choice for a well-rounded meal. When selecting ribeye, focus on marbling and freshness, opting for organic or grass-fed options for the maximum nutritional benefits and ethical considerations. Keep ribeye chilled until ready to use and consume ideally within two days of purchasing.

The selection of peppers and onions provides both a vibrant pop of color and a nutritional boost. High in vitamin C and fiber, bell peppers add sweetness that complements the savory meat. Onions, aside from their aromatic properties, are known for containing antioxidants that support heart health.

Peppers and onions should be crisp and flawless upon selection; storing them in a cool, dark place prolongs freshness. Slice thinly for even cooking and optimal sandwich distribution. If unavailable, ingredients can substitute with green onions or mild chili peppers to adjust spice levels as per preference.

Common Mistakes to Avoid

  • Overcooking the ribeye: Ensure your grill is preheated and the steak is brought to room temperature beforehand for even cooking.
  • Skipping resting time: Always let the steak rest before slicing, allowing juices to redistribute for a juicy bite.
  • Inconsistent slicing thickness: Slice ribeye into equal pieces for a balanced sandwich. Uniformity ensures even cooking and presentation.
  • Using stale bread: Ensure bread is fresh to maintain the right texture. A stale slice can detract from an otherwise sumptuous bite.
  • Cheese overpowering the steak: Use cheese sparingly so as not to mask the ribeye’s rich flavors.
  • Not aligning flavors: Properly season vegetables to harmonize with the steak, avoiding imbalanced flavor profiles.
  • Using old produce: Select fresh onions and peppers, as these offer peak flavor and nutritional benefits.
  • Forgoing sauce balance: Incorporate sauces sparingly to enhance rather than overshadow the sandwich’s natural flavors.
  • Cutting against the grain: Slice ribeye against the grain for maximum tenderness.
  • Under-melting cheese: Cheese should be well-melted to integrate seamlessly with the steak without being overly liquid.

Essential Techniques


Mastering the grill for ribeye requires understanding heat levels. High heat sears the outside while maintaining medium-rare inside, making temperature regulation crucial. Practice using a thermometer to achieve the perfect doneness; each ribeye thickness may slightly alter this timing.

Respect the resting phase to maintain juicy results. Resting allows flavors to set and juices to redistribute, ensuring every bite is succulent. Cover the steak with foil and allow it to rest for at least five minutes before slicing.

Onion caramelization is a technique ensuring sweetness. Cook onions slowly over medium heat, stirring often to avoid burning but drawing the natural sugars out for a deliciously sweet profile. This process is key to the depth of flavor within the sandwich.

Proper sandwich assembly ensures structural integrity. Layer intentionally, spreading sauces sparingly, and evenly distribute vegetables and steak pieces to provide an even burst of flavor with each bite. Start by smearing a thin layer of condiment onto the bread for maintaining moisture.

Always slice ribeye against the grain. This technique reduces muscle fibers’ length, making it easier to chew and further elevating its tenderness. Follow visual cues in the ribeye texture to guide your cuts for optimal results.

Pro Tips for Perfect Ribeye Steak Sandwich


For the juiciest results, try a reverse sear method, starting the ribeye at a lower temperature to cook through, then finish with a hot sear for the perfect crust. This method balances tenderness with flavor development.

Utilize compound butters for enhanced flavor. Infuse butter with garlic, herbs, and spices; apply over steak post-cooking for an aromatic overlay and added richness.

Don’t shy from grilling vegetables. Caramelizing peppers on the grill enhances their natural sweetness and imparts a mildly smoky taste that complements the ribeye’s deep flavors.

Look beyond classic sauces for additional touches. Options like balsamic glaze or mustard can elevate the sandwich with tangy notes, proving harmonious with the steak’s inherent richness.

Maximize presentation with mindful slicing. Cut sandwiches diagonally to showcase the filling layers, using fresh herbs as garnish for added visual appeal and aromatic depth.

Consider resting your steak at room temperature before grilling. Allowing it to reach room temperature promotes even cooking throughout the steak. This ensures the center warms without the outside overcooking.

Opt for freshly baked artisanal bread to amplify texture. A crispy crust juxtaposes beautifully with the tender steak, contributing to the sandwich’s multi-dimensional enjoyment. A well-toasted bun enhances the sandwich’s structural appeal and taste.

Variations and Adaptations


For a bold regional twist, consider implementing southwestern flavors by adding roasted chili peppers and a dash of chipotle sauce for a smoky, spicy variation that highlights the ribeye’s robust character.

Seasonal adaptations may include swapping out peppers for mushrooms in autumn for an earthy layer that aligns well with ribeye’s substantial depth, bringing a forest-like aroma and taste to the sandwich.

Those with dietary restrictions might explore replacing traditional bread with gluten-free alternatives or embracing the richness of a lettuce wrap for a low-carb choice, maintaining the steak as the prominent feature.

Flavor exploration is endless, from adding a hint of bourbon-infused barbecue sauce for heightened smokiness to utilizing truffle oil to impart an elevated umami punch, aligning with the steak’s intrinsic luxurious nature.

For texture modification, incorporate additional crispy elements. Thin fried onion rings provide extra contrast and an enjoyable crunch without overpowering the ribeye’s tender profile.

Presentation can be innovatively adapted. Think open-faced or piled-high gourmet styles, maximizing visual appeal and allowing guests to customize toppings for a personalized experience.

Serving and Presentation Guide


Carefully arrange the sliced ribeye atop a bed of arugula or spinach, enhancing color and lending a fresh, peppery bite contrasting the steak’s richness. The vivid greens add color and another flavor layer to the presentation.

Garnish with fresh herbs like parsley or a sprinkle of microgreens to convey sophistication and underline the sandwich’s gourmet elements. Their subtle aromas enrich the overall flavor profile.

Traditional accompaniments might include a side of golden fries or a refreshing salad. Each offers textural variety—one crispy, the other light and hydrating.

Modern serving suggestions extend to crafting mini versions for hors d’oeuvres at parties, making them even more accessible and bite-sized without losing character.

Serve slightly warm at room temperature, aiming to keep it from direct refrigerated cold, which dulls flavor. But avoid hot temperatures that could congeal cheese and dry the steak further.

For portion control, consider half sandwiches for lighter meals or pair with sides to maintain steadier meal balances, ensuring satisfaction without excess.

Wine and Beverage Pairing


When harmonizing with the delicious flavors of a ribeye steak sandwich, opt for a full-bodied red wine like Cabernet Sauvignon whose robust tannins can support the rich, fatty texture and elevate the meatiness.

Non-alcoholic alternatives can draw on the tartness and effervescence of a nicely chilled sparkling water with citrus wedges. Its refreshing quality cleanses the palate, brightening each bite anew.

For those who enjoy coffee or tea pairings, select a bold black tea or a rich dark roast coffee. Hinting at similar roasted notes, these beverages complement the steak’s depth beautifully.

Ensure wines are served at the recommended temperature to appreciate complete flavor profiles. Reds should be slightly cooler than room temperature to balance out tannins and acidity effectively.

Serving suggestions encourage a mix of glassware. Consider traditional red wine glasses or playful tumblers for non-wine options to maintain theme consistency yet infuse it with modern flair.

Storage and Shelf Life


To preserve the freshness of your ribeye steak sandwich, store it in an airtight container within the refrigerator, aiming to maintain the best condition by consuming within three to four days.

For optimum quality, keep refrigerated at temperatures below 40°F (4°C) to prevent bacterial growth while ensuring nothing else infuses unwanted flavors into your stored sandwich.

Consider separating elements if meal prepping ahead—keep steak and bread apart until assembling, preventing moisture from impacting bread texture over time.

Signs of spoilage will include off-putting smells, visible mold, or alterations in texture. Trust your senses; discard at any suggestion of these cues to maintain food safety.

Reheating instructions involve lightly warming the steak in a skillet over medium heat, aiming to revive while preserving its tenderness without further cooking it through entirely.

While freezing ribeye might normally be inconvenient, should the need arise, wrap steak separately with parchment paper, sealing it tightly to avoid freezer burn before utilizing it within three months.

Make Ahead Strategies


Start your prep the day before by marinating the ribeye overnight, heightening flavor as it permeates deep into the meat fibers. Schedule onion caramelization a day ahead too, letting flavors develop fully.

Consider storage between steps, ensuring all prep work elements—pre-cut vegetables, prepared sauces—are neatly contained using proper storage solutions, keeping refrigerated until usage.

Evaluate quality impact carefully. Freshly assembled sandwiches deliver optimal experiences concerning texture and taste. Pre-assembled sandwiches may compromise the bread’s crispness somewhat over prolonged fridges.

Assembly tips incorporate just-in-time strategies. Final assembly should happen prior to meal serving, preventing sogginess while maintaining a pleasurable eating experience.

Reheating guidelines demand caution. Only warm components to temperate so that they reach ideal serving warmth rather than fully reheating or cooking again, ensuring texture fidelity.

Add fresh elements post-reheating for enhanced vibrance, as these tend to fade after cold storage. Counterbalance refrigeration effects with the bright warmth of fresh garnishes or condiments.

Scaling Instructions


Scaling this sandwich recipe either down or up deserves attention to detail concerning texture and nutritional balance. When halving, precision is key, adjusting not just ingredient amounts but also retaining proportions.

Doubling or tripling calls for proportional increases in marinade rubs and sauces, ensuring each steak receives adequate coverage to maintain full flavor. Adjust cooking times accordingly when handling larger batches.

Equipment adjustments may include using larger grill surfaces or additional pots for simultaneous vegetable preparations. This balances timely execution with ingredient quality consistency across all scales.

Consider timing modifications for thicker or larger quantities; slightly revamping grilling schedules might be necessary to reach unity in doneness and temperature control across those extra inputs.

Storage considerations ought to extend matching containers to planned scale; opt for larger airtight solutions to prevent compromise on food safety and quality despite increased production.

Nutritional Deep Dive


Breaking it down, the ribeye steak sandwich offers a balanced macronutrient profile composed of a significant protein source complete with healthy fats integrating with essential amino acids, supporting muscle function.

Micronutrients contribute as well; vitamin-rich peppers add antioxidants alongside vitamins C and A. Onions bring potassium and B6, completing the sandwich’s overall nutrient framework.

Health benefits include protein sustainment for muscle growth and repair, paired with fiber from vegetables, facilitating digestive support while improving satiety for fewer cravings later.

By closely monitoring portion sizes, this dish can align with weight management goals, delivering nutrient-dense energy without overshooting calorie budgets.

Dietary considerations give focus to balance without excessive saturated fats beyond ribeye; utilizing whole grain buns amp up fiber intake substantively. Vegetarian alternatives through plant-based protein options explore new dietary frontiers.

Control complete meal impact by concentrating on generous greens pairings or lower-carb choices aligned with portion analysis efforts personally or client-centered.

Dietary Adaptations


For gluten-free requirements, explore bread substitute options ranging from gluten-free bakery choices to lettuce wraps, offering a crispy, low-calorie alternative to traditional buns while maintaining the essence of the sandwich.

When considering vegan or dairy-free adjustments, delve into plant-based cheeses, and consider tofu as a ribeye alternative, bringing a satisfying heartiness without compromising taste when marinated thoroughly.

Low-carb is attainable by whittling carbs through reduction or complete removal of bread, redesigning the meal into a hearty salad with steak topping, or utilizing cauliflower wraps as base adjustments.

Keto adherence is supported by retaining ribeye as the central piece while opting out of bread and incorporating high-fat cheeses or avocados to meet macro targets.

Paleo aligns effortlessly due to the steak’s prime position; ensure compatible fats, and vegetables comply with specific diet requirements—all naturals here need alignment only to sauce choices.

Low-FODMAP can align this recipe by modifying onion choices and utilizing alternatives like garlic-infused oils, achieving similar profiles through flavor integration while adhering to digestive sensitivities.

Explore further adaptations through ingredient substituting based on dietary restrictions; experiment with mushroom steaks or tempeh slices where versatility meets nuanced tastes efficiently.

Troubleshooting Guide


If texture issues arise, check your cooking timing and doneness. Measure accurately and carefully monitor meat resting periods post-cooking to ensure natural juices are retained.

Flavor imbalance can often be a result of uneven seasoning; reassess your seasoning distribution, considering how each component interacts harmoniously for a perfectly balanced bite.

Temperature problems might include the steak overheating or under-resting. Allow for sufficient time pre- and post-grill, confirming internal temperatures reflect optimal medium-rare preferences.

Overcoming equipment challenges begins with understanding your grill. Preheat it to maximum capacity to ensure even cooking. Alternatively, a cast iron skillet yields similar searing results for indoor preparation.

Ingredient substitutions can sometimes lead to unexpected outliers within the flavor profile. A consistent set of base ingredients helps maintain reputable, enjoyable results across attempts.

Timing concerns should also acknowledge pre-existing meal components; pre-preparing certain elements like sauces or vegetables alleviates last-minute pressures while preserving peak freshness.

Recipe Success Stories


Within our community, countless experiences echo consistent themes of admiration for the ribeye steak sandwich’s simplicity paired with culinary satisfaction. Reviews hail its ease of preparation married to explosive flavor.

Many have embraced regional variations, adding spices or specific representative components, sharing photos adorning social media feeds displaying personal twists on a classic favorite that resonates locally or personally.

Adaptation stories reveal a host of successes where diet-conscious approaches thrive; readers report recreations ranging from low-carb alternatives to inventive plant-based options cleverly impressing meat-free followers.

Engagement fosters an enthusiastic community; those who’ve shared culinary tips or presentation techniques often inspire new creative directions others eagerly follow or implement, contributing to vibrant cross-pollination.

Photography tips center around capturing sandwich layers’ salient qualities, shining light complementing steaks’ caramel crisscrosses while contrasting fresh rainbow vegetables with a pinch of balanced aesthetic.

Frequently Asked Questions

1. Can I use a different cut of steak for this sandwich?
Absolutely, though each cut will impart unique qualities; experiment with sirloin or strip steak for varying flavor profiles and textures.

2. How can I recreate this sandwich on a budget?
Consider identified savings by purchasing steak on sale or bulk, selecting seasonal vegetables at farmers’ markets, maximizing overall cost efficiency without sacrificing quality.

3. What cheese works best in this sandwich?
Opt for a mild cheese like provolone, ensuring it melds perfectly into the steak while adding gentle creaminess without overshadowing its robust profile.

4. Can I prep the sandwich components in advance?
Yes, marinate ribs and saute vegetables in advance; fully assemble sandwiches closer to serving for optimal texture and taste, avoiding bread becoming soggy.

5. How do I make it spicier?
Incorporate spicy peppers or a touch of hot sauce, adjusting to preference levels for additional heat within your culinary repertoire.

6. What are substitutive veggies I could consider?
Mushrooms or zucchini present earthy options paired with spinach; these veggies consistently complement the ribeye’s boldness, suited for digestion as well.

7. Is it required to grill or can it be baked?
While grilling offers authentic flavor results, a well-maintained skillet or broiler provides alternatives, replicating desired crispy exterior through radiant heat.

8. What’s the best bread type to use?
Crispy baguettes, ciabatta, or sourdough create excellent textural bases, yielding structures that retain fillings while offering nuanced flavor profiles.

9. What would improve flavor depth?
Experiment with compound butter or flavored oils as finishing touches that imbue complexity beyond standard preparations in gourmet directions.

10. Can this be a suitable meal during pregnancy?
Yes, with careful handling ensuring moderate consumption includes properly cooked steak conforming with balanced dietary preferences and doctor recommendations.

Additional Resources


Refer to related recipes for warm-weather grilling delights like kebabs or salad skewers, each celebrating summer’s bounty alongside similar grilled techniques.

Technique guides devoted to mastering the grill offer further expertise-building avenues, crucial for maximizing meat cooking methods delivering unparalleled taste experiences.

Ingredient information expands horizon awareness; explore farm-to-table guides, emphasizing seasonality’s value upon flavor elevation with sustainable sourcing practices.

Kitchen equipment recommendations ensure all necessary tools are accounted for; suggestions include sharpening grinders or grill maintenance tips assisting adventurous culinary enthusiasts.

Seasonal variations capitalize on regional produce – encouraging taste explorations that echo the environment, merging traditional methods with inspired turns; correlating kitchen creativity close to nature perpetuates development.

Join the Conversation


Share your ribeye steak sandwich photos and variations on social media using #RibeyeSandwichDelight to join our thriving community, celebrating culinary creativity bound by mutual inspiration.

Photography tips enhance captured experiences; focus on light reflections off golden bread crusts contrasting the sandwich’s inviting insides, effectively creating memorable visual impact.

Encourage recipe reviews detailing personal experiences reiterate each unique exploration into flavor landscapes – amplifying involved creation amongst peers motivating further skill refinement.

Community engagement fosters shared affection towards these culinary dalliances – feedback boosts collective knowledge while sparking newfound direction possibilities through entirely new contexts.

Reinvention of traditional elements inspires evolved recipes; expand participation with contests for new variants or easy challenges crossing conventional boundaries exemplifying novelty passionately.

The Recipe

Tremendous Juicy Ribeye Steak Sandwich

Serves: 4

Prep Time: 15 mins

Cook Time: 20 mins

Total Time: 35 mins

Kitchen Equipment Needed

  • Grill or Griddle Pan
  • Sharp Knife
  • Cutting Board
  • Spatula
  • Foil
  • Basting Brush

Ingredients

  • 1 lb ribeye steak
  • 4 slices provolone cheese
  • 4 ciabatta rolls, sliced
  • 1 large onion, thinly sliced
  • 2 bell peppers, sliced
  • 2 tbsp olive oil
  • Salt and pepper to taste
  • Favorite steak seasoning blend

Directions

  1. Preheat your grill or griddle to high heat. Rub the ribeye steak with olive oil and seasoning blend, allowing it to come to room temperature.
  2. Grill the ribeye for about 4-5 minutes on each side, or until desired doneness. Remove and let rest for at least 5 minutes, then slice thinly against the grain.
  3. Meanwhile, in a pan, sauté onions and bell peppers over medium heat until tender and caramelized. Season with salt and pepper to taste.
  4. Open ciabatta rolls and place slices of cheese on each half. Toast on the grill until cheese is melting.
  5. Layer with slices of ribeye and topped with onions and peppers. Close sandwiches and serve immediately.

Recipe Notes

  • For extra flavor, apply a light brush of garlic butter over rolls before toasting.
  • Adapt seasonings to accommodate regional or personal preferences.
  • Consider adding a layer of fresh arugula or spinach for added texture.

Irresistible Zucchini Bread Recipe for Moist and Flavorful Loaves

The Best Zucchini Bread: Moist and Flavorful Delight

⚖️
Difficulty
Easy

⏲️
Prep Time
15 mins

🕒
Cook Time
60 mins

⏱️
Total Time
75 mins

🍽️
Servings
8 slices

Imagine slicing into a warm, freshly baked loaf of the best zucchini bread that melts in your mouth with its moist, tender texture and the subtle nutty sweetness that lingers on your palate. This timeless treat blends the wholesome goodness of zucchini with aromatic cinnamon, creating a perfectly spiced bread that’s both comforting and satisfying. Whether you’re enjoying it for breakfast or a delightful afternoon snack, this zucchini bread is a delectable way to savor the end-of-summer bounty.

Zucchini bread is one of those enduringly popular baked goods that manages to make vegetables taste like a real treat. Not only is this bread a sneaky way to incorporate more vegetables into your diet, but it also offers versatility in its pairing options. You can top a slice with a dollop of whipped cream for a dessert-like experience or spread on cream cheese for a savory twist. As you bake, the enticing aroma of cinnamon and vanilla will fill your kitchen, making this a baking experience that truly engages all your senses.

Quick Recipe Highlights

  • Flavor Profile: A balanced blend of warm cinnamon and natural zucchini sweetness.
  • Texture: Moist and tender with a light crumb, perfect for slicing.
  • Aroma: Inviting scents of cinnamon, vanilla, and baked bread fill the air.
  • Visual Appeal: A golden-brown crust with flecks of bright green zucchini throughout.
  • Skill Level Needed: Beginner friendly with simple mixing techniques.
  • Special Equipment: A loaf pan and a grater for the zucchini.

Recipe Overview

  • Difficulty Level: A win for beginners, this recipe requires no special skills.
  • Category: Perfect as a quick bread or snack.
  • Cuisine: Rooted in American comfort baking traditions.
  • Cost: Budget-friendly, using common pantry ingredients.
  • Season: Best in late summer when zucchini is plentiful.
  • Occasion: Ideal for a cozy breakfast or a casual gathering treat.

Why You’ll Love This Recipe


The taste of this zucchini bread is simply irresistible. Each bite is a symphony of warm spices and subtle sweetness, thanks to the perfect blend of cinnamon, sugar, and vanilla. The texture is soft and moist, ensuring the bread stays fresh for days. Even better, the zucchini’s mild flavor adds moisture without overpowering the bread’s delightful taste.

When it comes to prep, the methods are straightforward, requiring basic mixing and grating skills. In just under an hour and a half, you can have a homemade treat freshly out of the oven. The quick prep and cooking time make it a convenient choice for those busy mornings or when you need to whip up a quick dessert.

Nutritionally, zucchini bread offers more than a sweet treat. Zucchini itself is a low-calorie, nutrient-rich vegetable filled with vitamins and fiber. Each slice provides a gentle dose of these nutrients without sacrificing flavor, making it a guilt-free indulgence.

Sharing this bread with friends and family enhances its appeal; it’s a lovely accompaniment to brunch or a wonderful way to welcome guests. Its ability to be dressed up or down with various toppings also adds to its versatility, ensuring there’s no wrong time to serve it.

Finally, using readily available ingredients like zucchini, cinnamon, and sugar makes this recipe both affordable and accessible. Whether you’re a seasoned baker or a novice, you won’t have to stretch your budget to enjoy this delicious zucchini bread.

The Recipe

The Best Zucchini Bread

Serves: 8 slices

Prep Time: 15 mins

Cook Time: 60 mins

Total Time: 75 mins

Kitchen Equipment Needed

  • Loaf pan
  • Grater
  • Mixing bowls
  • Whisk
  • Measuring cups and spoons

Ingredients

  • 1 ½ cups grated zucchini
  • 1 cup sugar
  • 1 large egg
  • 1/3 cup unsalted butter, melted
  • 1 ½ cups all-purpose flour
  • 1 teaspoon baking soda
  • 1 teaspoon ground cinnamon
  • 1/4 teaspoon baking powder
  • 1/2 teaspoon salt
  • 1 teaspoon vanilla extract

Directions

  1. Preheat your oven to 350°F (175°C) and grease a 9×5 inch loaf pan.
  2. In a medium bowl, combine sugar, egg, and melted butter. Whisk until smooth.
  3. Stir in the grated zucchini and vanilla extract.
  4. In another bowl, sift together flour, baking soda, cinnamon, baking powder, and salt.
  5. Gradually add the dry ingredients to the wet ingredients, mixing until just combined.
  6. Pour batter into the prepared loaf pan.
  7. Bake for 55-60 minutes, or until a toothpick inserted into the center comes out clean.
  8. Allow the bread to cool in the pan for 10 minutes, then transfer to a wire rack to cool completely.

Recipe Notes

  • Substitute brown sugar for a deeper flavor.
  • Add nuts or raisins for extra texture.