Delicious Garlic Butter Steak Bites with Cheesy Smashed Potatoes Recipe

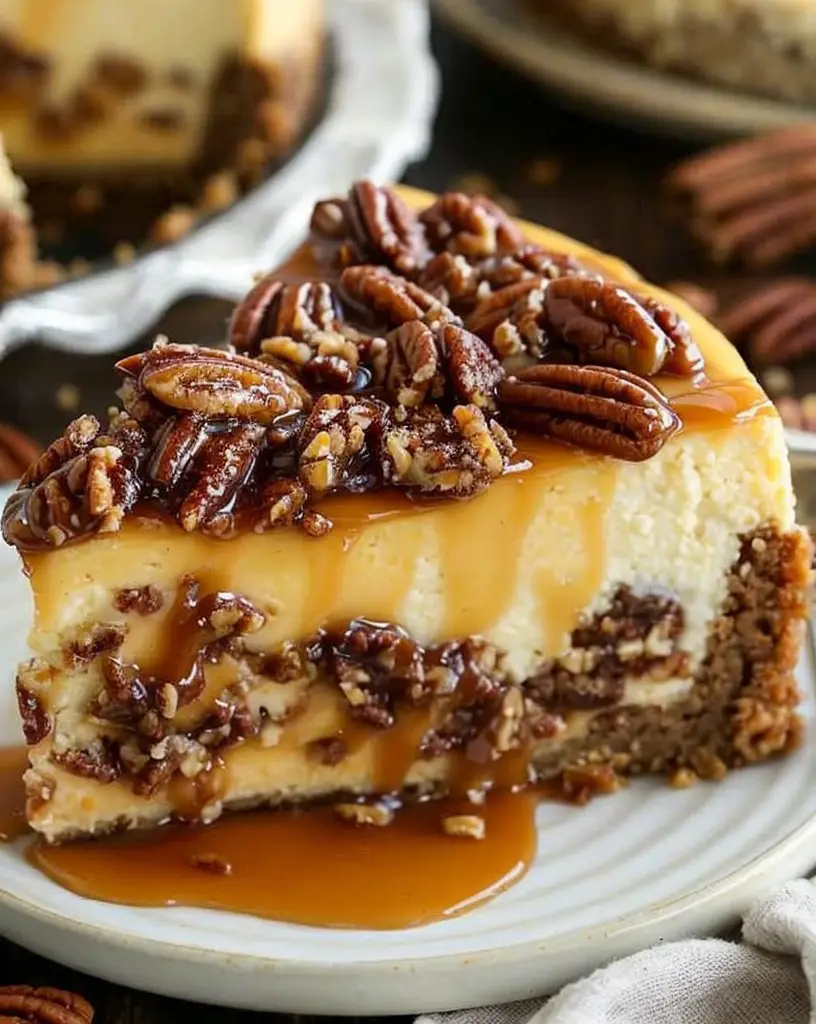
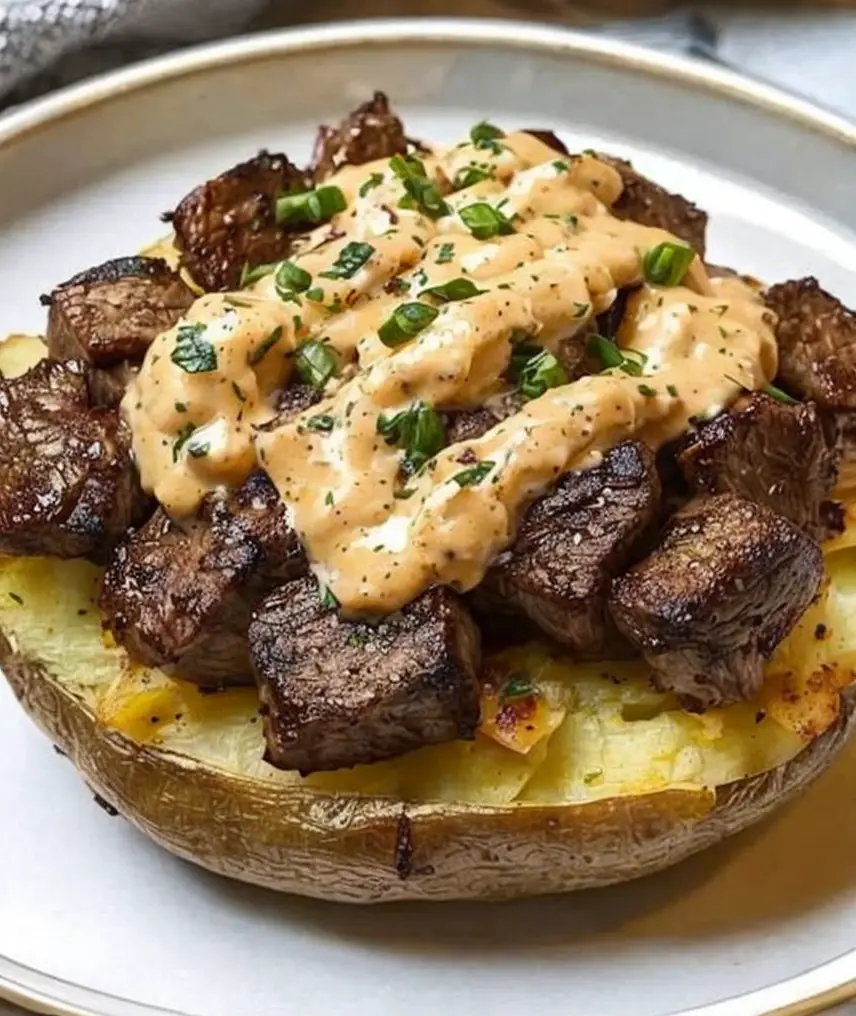
Garlic Butter Steak Bites and Cheesy Smashed Potatoes: A Delicious Combination

⚖️
Difficulty
Medium

⏲️
Prep Time
15 mins

🕒
Cook Time
25 mins

⏱️
Total Time
40 mins

🍽️
Servings
4

In this savory and satisfying dish, garlic butter steak bites are combined with creamy and indulgent cheesy smashed potatoes, delivering a meal that’s perfect for dinner or special occasions. This combination not only entices the palate but also captures the heart with its comforting flavors. The succulent steak, juicy and seared to perfection, pairs wonderfully with the rich cheesy potatoes, making it an instant family favorite.

Quick Recipe Highlights

  • Flavor Profile: The steak bursts with garlic buttery goodness, balanced by the creamy, cheesy potatoes that provide both richness and a touch of savory depth.
  • Texture: Enjoy tender, juicy steak bites juxtaposed with the creamy, velvety texture of the potatoes, each bite promising a different sensory experience.
  • Aroma: The inviting smell of melted garlic butter combined with roasted steak and earthy, cheesy potatoes fills the air, creating an irresistible atmosphere.
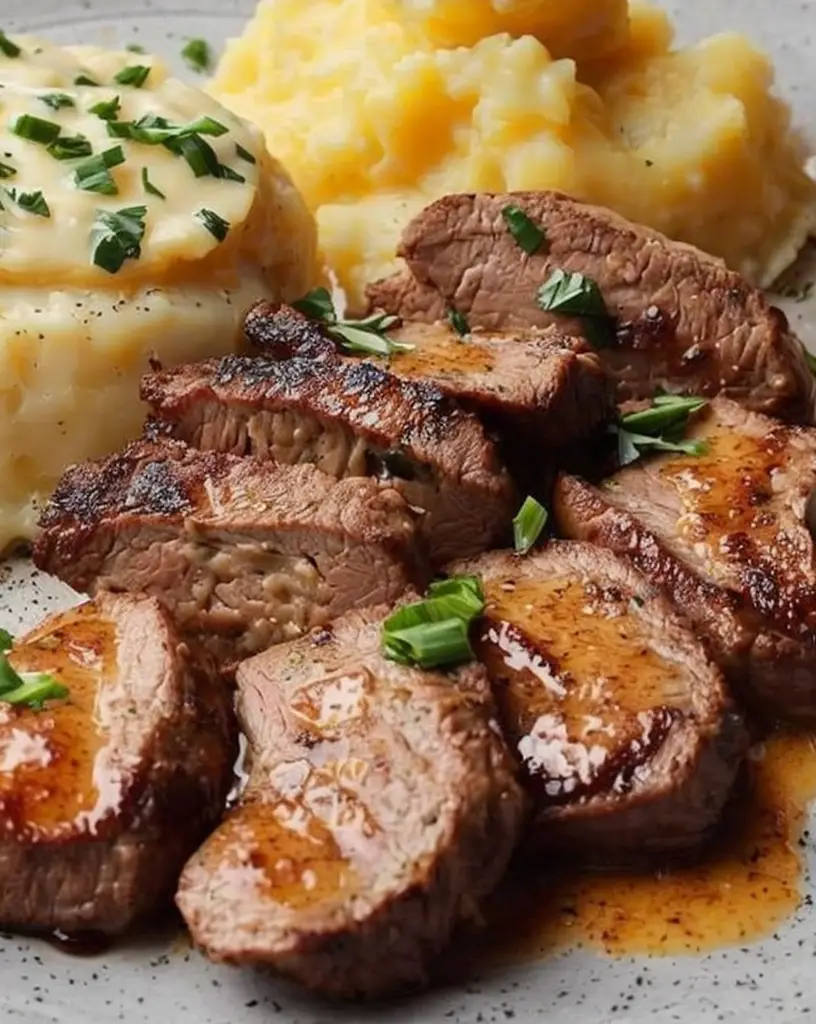
  • Visual Appeal: This dish features a spectrum of colors, from the golden crust on juicy steak to the creamy, golden hue of cheese-studded potatoes.
  • Skill Level Needed: Intermediate culinary skills are ideal as you need to master the sear and the perfect potato smash.
  • Special Equipment: A cast-iron skillet for the steak and a potato masher for the potatoes ensure optimal results.

Recipe Overview

  • Difficulty Level: The recipe sits at an intermediate level due to the precise cooking of the steak and achieving the texture of the cheesy potatoes. Mastering the steak sear elevates the flavors, while patience with the potatoes brings out their full richness.
  • Category: This dish is suited for dinner, family gatherings, or any occasion requiring a hearty and comforting meal.
  • Cuisine: Rooted in Western culinary traditions, this dish combines classic American diner flavors with a touch of French sophistication, thanks to the garlic butter.
  • Cost: Budget-friendly, the primary expense is the steak, but potatoes and cheese are cost-effective ingredients that make this meal both luxurious and accessible.
  • Season: While delicious year-round, it shines in the colder months, providing warmth and comfort on chilly days.
  • Occasion: Ideal for both casual family dinners and more formal gatherings, thanks to its robust yet refined combination of flavors.

Why You’ll Love This Recipe


The delectable combination of garlic butter steak bites and cheesy smashed potatoes appeals both in taste and texture. The juicy steak, perfectly seared, delivers mouthfuls of flavor complemented by the creamy and cheesy richness of the potatoes. Convenience is key in this recipe, with easy-to-follow steps that guarantee consistent results, making it an excellent choice for a weeknight dinner or weekend feast.

Nutritionally, this dish brings a well-rounded meal to the table. Steak offers a high-protein option, while potatoes provide carbs and essential vitamins. The moderate use of cheese adds flavor without overwhelming the dish with unnecessary calories, striking a beneficial balance between deliciousness and health.

Socially, its combination allows for a delightful shared experience, pairs wonderfully with a good wine or beer, and serves as a conversation starter, with its inviting aromas drawing people together. And regarding cost-effectiveness, the meal utilizes accessible, shelf-stable ingredients, ensuring it doesn’t break the budget while delivering a restaurant-quality experience at home.

Historical Background and Cultural Significance


The pairing of steak and potatoes has deep roots in Western cuisine, epitomizing comfort food for generations. This dynamic duo has been elevated from its humble origins through various influences, most notably the introduction of garlic butter, a staple ingredient in French cuisine that adds depth and sophistication. Over time, this dish has evolved, adapting to local tastes and seasonal ingredients.

Culturally, steak and potatoes represent the quintessential American meal, symbolizing abundance and hospitality. Its adaptation with garlic butter embodies an intersection of cultures, merging traditional American simplicity with French culinary flair. Today, this dish echoes the fusion found in modern gastronomy, where classic recipes are reinvented for contemporary palates.

Globally, variations of this dish exist, each region adapting it to their resources and flavor profiles. From spiced versions in South America to herb-laden variations in the Mediterranean, it demonstrates the universal appeal of steak and potatoes.

Ingredient Deep Dive


The main ingredient, steak, historically revered as a luxury item, provides the protein that gives this dish its robustness. It’s essential to select a tender cut such as ribeye or sirloin, which cooks beautifully in a high-heat skillet to render the meat flavorful and succulent. Proper storage involves refrigeration and using the steak within a few days to maintain its quality. Sealed packaging with minimal exposure to air extends its shelf life.

Potatoes, a staple across cuisines, contribute to this recipe’s comforting texture while providing a good source of carbohydrates and vital nutrients such as vitamin C and potassium. Select firm, unblemished potatoes that are best stored in a cool, dark place to avoid sprouting. The right choice of cheese, particularly sharp cheddar or a rich gouda, imparts the necessary flavor depth without overpowering the delicate balance with the steak.

Common Mistakes to Avoid

  • Overcooking the steak is a common mistake; aim for medium-rare to maintain juiciness and flavor.
  • Underseasoning the steak can result in a bland dish; be generous with salt and pepper.
  • Cooking steak on a cold skillet leads to uneven searing; ensure the skillet is fully pre-heated.
  • Over-mashing the potatoes can make them gummy; gently smash for a perfect texture.
  • Failing to drain the potatoes thoroughly may result in watery gravy.
  • Using too much butter overwhelms rather than enhances; balance flavors mindfully.
  • Forgetting to rest the steak after cooking can cause loss of juices; give it a few minutes to relax.
  • Neglecting to adjust oven temperature for altitude or oven type can affect cooking times.

Essential Techniques


Achieving the perfect steak sear is crucial in this recipe. Using high heat and a well-seasoned cast-iron skillet, create a crust by avoiding unnecessary movement of the steak during cooking. This allows for the Maillard reaction to occur, producing that flavorful golden brown exterior. Mastering this involves vigilance, listening for the sizzle, and using visual cues like edge browning.

Smashed potatoes require a delicate hand. After boiling until tender, allow them to steam dry briefly to remove excess moisture, before gently smashing to maintain texture. Uniformity in mashing ensures even cheese distribution without creating a paste.

Pro Tips for Perfect Garlic Butter Steak Bites and Cheesy Smashed Potatoes

Use a garlic press for a finer consistency, allowing the garlic to meld seamlessly with the butter, enhancing the steak’s flavor profile. Pat the steak dry before seasoning to improve the crust during cooking and maintain moisture within. Taste the cheesy potatoes before serving, adjusting for saltiness and cheesiness to your preference. Incorporate herbs like rosemary or thyme to add an aromatic dimension that elevates the dish. Allow the butter to brown slightly for a deeper nutty flavor that enriches the meat. Consider resting the potatoes before adding cheese to let flavors meld completely, resulting in a more cohesive taste.

Variations and Adaptations


Regional adaptations include utilizing locally available cuts of meat, while seasonal changes can involve incorporating vegetables such as green beans or asparagus during the spring. Dietary restrictions can be accommodated by choosing lactose-free cheese or a dairy-free butter alternative. For vegan variations, substitute steak with tofu or mushrooms and leverage nutritional yeast for that cheesy flavor without dairy. Enhance flavor by experimenting with various herb and spice combinations like paprika or curry for a global twist.

Serving and Presentation Guide


For an enticing presentation, spoon cheesy potatoes onto a large platter and arrange steak bites around them, garnishing with fresh herbs like parsley or chives. Experiment with height and movement, sculpting potatoes into appealing mounds, and use a drizzle of infused oil or balsamic glaze for visual and flavor contrast. Portion control is best achieved with individual plates presented family-style, encouraging shared enjoyment and engagement.

Wine and Beverage Pairing


Pair this dish with a full-bodied red wine such as a Cabernet Sauvignon or a Merlot, which complements the richness of the steak and the creaminess of the potatoes. Non-alcoholic options include a sparkling water infused with lemon or a robust kombucha for an acidic balance. Consider serving with a fresh-brewed herbal iced tea to cleanse the palate, ensuring all flavors shine.

Storage and Shelf Life

Store leftovers in airtight containers in the refrigerator, consuming within two days for best quality. Potatoes may be separated if reheating, to avoid overcooking steak bites during reheating. Use microwave-safe containers or gently reheat in an oven set to 350°F to retain the integrity of both steak and potatoes. Freezing is viable for the potatoes, but steak is best consumed fresh due to texture changes post-freezing.

Make Ahead Strategies


If preparing ahead, partially prepare the potatoes, boiling and cooling them before smashing later to save time. The steak can be marinated for added flavor, and garlic butter can be prepared in advance, infusing overnight for a richer taste. Avoid complete assembly until serving, preserving optimal freshness and avoiding any soggy textures.

Scaling Instructions


To scale the recipe, consider each serving and proportionally increase the ingredient quantities, adjusting cooking times where necessary, especially when using larger cuts or batches. Stagger the searing of steak to ensure consistent cooking and maintain tenderness across servings. Plan storage accordingly when preparing larger volumes, ensuring adequate refrigeration or cooling for hot dishes before sealing.

Nutritional Deep Dive


This dish provides a substantial macronutrient profile, rich in proteins from the steak and fats from both the steak and potatoes. The inclusion of garlic not only boosts flavor but contributes health benefits with its antioxidant properties. Balancing this dish within a broader meal plan involves considering portion sizes to keep caloric intake in check.

Dietary Adaptations


For a gluten-free version, ensure spices and pre-prepared products are certified gluten-free. Craft a dairy-free dish using plant-based butter alternatives and cheese, maintaining the flavors and textures needed for a satisfying meal. Adapt recipes to vegan needs by using boguer substitutes for meat, and leverage nutritional yeast to achieve cheese flavor layers.

Troubleshooting Guide


If encountering toughness in steak, ensure it is not overcooked; consider sous vide techniques for a more controlled outcome. To balance overpowering garlic, reduce quantities or switch to milder varieties. Equipment limitations like nonstick pans should be addressed with alternative cooking methods that sustain heat well. Timing adjustments across varied altitudes can also ensure consistent results.

Recipe Success Stories


Many readers praise the ease of following the recipe and achieving restaurant-level flavor at home. Some variations include incorporating spicy peppers or caramelized onions for added flavor dimensions. Photography tips often suggest focusing on the color contrast between the steak and potatoes for impactful food styling.

Frequently Asked Questions

Do I need a cast-iron skillet?
A traditional skillet can work, but cast-iron offers superior heat retention and creates a perfect sear.

How can I prevent garlic from burning?
Add garlic to the butter during the last minute of cooking to avoid burning and maintain flavor integrity.

What’s the best way to smash potatoes?
Use a masher or the back of a spoon for gentle pressure to maintain some texture.

Can I make this recipe dairy-free?
Yes, substitute butter and cheese with plant-based versions without sacrificing flavor.

How do you know when the steak bites are done?
Look for caramelization on edges and an internal temperature of 130°F for medium-rare.

Are there appropriate non-alcoholic pairings?
Sparkling water or iced tea complements well without overpowering the flavors.

Additional Resources


For further exploration, try recipes that complement garlic and potatoes, such as garlic-roasted vegetables or cheesy garlic bread. Explore equipment guides that highlight essential kitchen tools like effective steak knife sets or non-stick cookware. Engage with seasonal recipe adaptations that prepare this dish in line with available regional ingredients.

Join the Conversation


Join our community on social media where you can share your creations with the hashtag #SteakPotatoDelight. Connect with fellow readers, discuss recipe modifications, or share your presentation photos. Your feedback enriches the shared culinary experience, sparking ideas for new meal variations.

The Recipe

Garlic Butter Steak Bites and Cheesy Smashed Potatoes

Serves: 4

Prep Time: 15 mins

Cook Time: 25 mins

Total Time: 40 mins

Kitchen Equipment Needed

  • Cast-iron skillet
  • Potato masher
  • Medium saucepan
  • Garlic press
  • Meat thermometer

Ingredients

  • 1 pound steak, cut into small cubes
  • 4 tablespoons unsalted butter
  • 4 cloves garlic, minced
  • 2 pounds small potatoes
  • 1 cup shredded cheddar cheese
  • Salt and pepper to taste
  • Fresh parsley for garnish

Directions

  1. Boil the potatoes in salted water until tender, about 15 minutes. Drain and slightly smash them.
  2. In a cast-iron skillet, melt 2 tablespoons of butter over medium-high heat. Add steak cubes, season with salt and pepper, and sear until golden brown.
  3. Add garlic to the pan and cook briefly until fragrant. Remove the steak and set aside.
  4. In the same skillet, melt remaining butter, add potatoes, and sprinkle with cheese. Cover until cheese melts.
  5. Plate the cheesy potatoes, serving steak bites on top. Garnish with parsley and serve immediately.

Recipe Notes

  • For variation, add cooked bacon bits to the potatoes.
  • Shrimp can replace steak for a lighter option.
  • Feel free to season with your choice of spices, like paprika or rosemary.

Irresistible Pecan Caramel Cheesecake: The Perfect Easy Dessert Recipe

Pecan Caramel Cheesecake Recipe – Easy Dessert Idea

⚖️
Difficulty
Medium

⏲️
Prep Time
30 mins

🕒
Cook Time
60 mins

⏱️
Total Time
90 mins

🍽️
Servings
10

Indulge your senses with this delectable pecan caramel cheesecake recipe. This easy dessert idea is perfect for satisfying your sweet tooth with its creamy texture and rich flavors. Each bite combines the nutty goodness of pecans with a smooth caramel swirl, sitting beautifully atop a buttery crust. Your taste buds will experience a delightful symphony of flavors, making it a show-stopping dessert for any occasion.

The pecan caramel cheesecake is a true masterpiece that showcases a perfect blend of textures and flavors. Imagine the tangy cream cheese perfectly balancing the sweet caramel, while the toasted pecans add a delightful crunch. Whether you’re serving this as the grand finale to a dinner party or enjoying a cozy evening treat, this cheesecake promises to impress even the most discerning palates. Let this recipe become your go-to dessert for special gatherings or whenever you feel like indulging in something truly extraordinary.

Quick Recipe Highlights

  • Flavor Profile: Immerse in the harmonious blend of nutty pecan, creamy cheese, and luscious caramel sauce.
  • Texture: Experience the creamy and smooth cheesecake complemented by the crunchy pecan topping.
  • Aroma: Delight in the inviting aroma of toasted pecans and rich caramel.
  • Visual Appeal: Feast your eyes on the caramel drizzling over a golden-brown cheesecake laced with pecan pieces.
  • Skill Level Needed: A moderate understanding of baking techniques will yield impeccable results.
  • Special Equipment: Springform pan and a mixer are essential for achieving the perfect consistency.

Recipe Overview

  • Difficulty Level: This recipe is moderately challenging, giving you the satisfaction of creating a gourmet dessert at home.
  • Category: A perfect dessert to conclude any meal, fitting into the treat category.
  • Cuisine: A blend of classic American flavors influences the generous use of nuts and creamy textures.
  • Cost: With affordable and accessible ingredients, this sweet indulgence won’t break the bank.
  • Season: Ideal for fall and winter when comfort food takes center stage and nuts are in season.
  • Occasion: Perfect for holiday gatherings, dinner parties, or a cozy weekend treat.

Why You’ll Love This Recipe


This pecan caramel cheesecake is the epitome of taste and texture, offering a rich, creamy experience balanced by the nutty crunch of pecans. The caramel’s sweetness beautifully complements the tangy cream cheese base, creating an irresistible flavor combination. Whether you’re an accomplished baker or just starting, the step-by-step process demystifies cheesecake making, allowing you to impress with minimal effort.

Convenience and preparation benefits include the cheesecake’s ability to be made ahead, saving you time during busy hosting days. You can prepare this dessert in stages, letting it chill in the refrigerator until you’re ready to serve. Nutritionally, this cheesecake is more than just a sugar-laden treat; the pecans provide healthy fats and proteins, making the indulgence a bit more justifiable.

Moreover, there’s significant social and entertaining value in presenting a homemade dessert masterpiece. This cheesecake has proven to be a conversation starter at gatherings, enhancing the convivial atmosphere with its gourmet appeal. Cost-effectiveness and accessibility round out the reasons to love this recipe—its ingredients are readily available and budget-friendly, ensuring that this decadent dessert doesn’t strain your wallet.

Historical Background and Cultural Significance


Cheesecake has roots tracing back to ancient Greece, where it was considered a food fit for the gods. Over centuries, as it migrated to Europe and eventually North America, it evolved to incorporate local flavors, with Americans introducing the idea of cream cheese-based cheesecake. The pecan caramel version brings a regional twist from the Southern United States, celebrated for its rich, nut-based treats.

Pecans themselves hold a cultural significance in southern cuisine, representing warmth and hospitality. The caramel component complements the buttery, rich nature of the pecan, resulting in a traditional dessert that’s embraced widely during holiday gatherings and family events. This recipe has evolved from a traditional favorite into a modern gourmet dessert, often customized with additional touches like chocolate and varied nut crusts.

Across different regions, variations might include using other nut varieties like walnuts or almonds based on local availability, which subtly alters the taste profile. Such modifications highlight the adaptability of this recipe, reflecting the diverse culinary influences that have shaped the modern pecan caramel cheesecake.

Ingredient Deep Dive


Pecans are the star of this cheesecake, originating from hickory trees native to the southern United States. Their rich, buttery flavor makes them perfect for both sweet and savory dishes, lending a trademark nuttiness that’s hard to replicate. Pecans are an excellent source of healthy unsaturated fats, fiber, and several essential vitamins and minerals.

When selecting pecans, look for those that appear fresh and are kept in airtight containers to preserve their natural oils and prevent staleness. If whole pecans are unavailable, substitutes such as walnuts or almonds could add a unique twist, though they won’t fully replicate the pecans’ distinct flavor. For storage, pecans should be kept in a cool, dry place, ideally refrigerated or frozen, to maintain optimal freshness and flavor.

Cream cheese forms the base of the cheesecake, contributing a silky texture and a slight tang that balances the sweet caramel and nutty pecan. Originally created in America, cream cheese’s smooth consistency helps achieve that classic ultra-creamy cheesecake filling. Nutritionally, it provides calcium and protein, albeit with a fair share of calories and fat, which contribute to the cheesecake’s richness.

When choosing cream cheese, opt for full-fat varieties to ensure the best texture and flavor. Keep it refrigerated and bring to room temperature before blending, ensuring a smooth and lump-free mixture. Substitutions can include mascarpone for a softer texture or quark for a lighter version, although these will alter the final texture and flavor subtly.

Common Mistakes to Avoid

  • Skipping the water bath: It prevents the cheesecake from cracking by providing a gentle and even baking temperature.
  • Using cold ingredients: Ensure all components are at room temperature for a smooth mixture.
  • Overmixing the batter: This can introduce excess air, leading to a puffy and cracked cheesecake.
  • Baking at too high a temperature: Slow and steady wins the race, ensuring a smooth and even bake.
  • Forgetting to chill the cheesecake thoroughly: This step is crucial for the flavors to meld and for easy slicing.
  • Using low-quality pecans: Freshness is key to achieving the best nutty flavor.
  • Overcooking the caramel: This might result in a bitter taste, disrupting the sweet and creamy balance.
  • Insufficient cooling time: Allow ample cooling to avoid a gooey or runny center.

Essential Techniques


Making a pecan caramel cheesecake requires mastering a few key techniques to ensure success. The first is the water bath method, crucial for preventing cracks in the cheesecake. By placing the cheesecake pan in a larger pan filled with hot water, you create a moist baking environment that helps the cake cook evenly. Line the outside of the springform pan with foil to prevent water from seeping in.

Blending the cream cheese smoothly is vital; any lumps can affect the final texture. Use an electric mixer and ensure the cream cheese is at room temperature before starting. Visual cues include a silky batter with no visible chunks. Pay attention to the caramel sauce, which requires steady stirring over controlled heat to caramelize the sugar evenly without burning. A golden-brown hue indicates it’s ready.

Pro Tips for Perfect Pecan Caramel Cheesecake


Achieving a restaurant-quality pecan caramel cheesecake requires a few insider tips. Always toast the pecans before adding them to the cheesecake; it intensifies their flavor and adds a pleasing crunch. For the best crust, ensure you firmly press the graham cracker base into the springform pan to prevent any crumbly disasters.

When creating the caramel, patience is key—avoid stirring excessively once the sugar begins to melt to prevent crystallization. Instead, gently swirl the pan. After your cheesecake has baked and cooled, let it chill for a minimum of four hours or overnight for a firmer texture and easier slicing. Lastly, never skip running a knife around the edge after baking; it ensures a clean release from the pan, maintaining its beautiful shape.

Variations and Adaptations


Regional variations of pecan caramel cheesecake can be as diverse as the ingredients allow. For example, using macadamia nuts can add a Hawaiian twist, while substituting pecans with walnuts can infuse an Italian essence. Seasonal adaptations might include incorporating pumpkin puree for a fall-inspired version, adding a warm, spicy note with cinnamon and nutmeg.

Dietary modifications can make this dessert more inclusive—opt for dairy-free cream cheese and coconut milk caramel for a vegan version without sacrificing the creamy texture and rich flavor. Those following a keto diet might use almond flour for the crust and monk fruit sweetener to reduce carbs, transforming it into a low-carb treat.

Bold flavor variations could introduce elements like dark chocolate swirls or bourbon-infused caramel, providing an adult twist on the classic. Alterations in texture through different crust types or by adding a layer of chocolate ganache can further elevate this dessert experience.

Serving suggestions could focus on both traditional and modern presentations—consider topping each slice with candied pecans and a drizzle of additional caramel for extra flair. Accompaniments like vanilla bean ice cream or a spoonful of fresh whipped cream can enhance the dessert further, while modern plating might include serving individual portions in jars or ramekins for a chic twist.

Wine and Beverage Pairing


Pair your pecan caramel cheesecake with a robust dessert wine, such as a rich Tawny Port or a Sauternes, which complements the sweet caramel and nutty pecans. If wine isn’t your preference, consider pairing with a decaf espresso or a cup of rich, nut-flavored herbal tea, both of which provide a balancing bitterness and enhance the dessert’s sweet elements.

In cooler months, a cozy cup of spiced chai can also pair wonderfully, while a chilled vanilla almond milk or lightly sweetened cold-brew coffee might suit warm weather. Serving temperature is vital—ensuring drinks are chilled or hot as intended enhances the overall tasting experience.

Storage and Shelf Life


Proper storage of pecan caramel cheesecake allows you to enjoy this treat over several days. Once baked, allow the cheesecake to cool at room temperature before refrigerating in an airtight container, where it can remain fresh for up to five days. Always cover the surface with plastic wrap to prevent drying or absorbing fridge odors.

For extended storage, you may freeze individual slices, wrapped in plastic and placed in airtight bags, for up to two months. To serve, allow the slices to thaw in the refrigerator overnight. Signs of spoilage include discoloration, off odors, or a soggy crust. For reheating, particularly the caramel topping, a brief microwave interval can restore its liquid texture without compromising the cheesecake.

Make Ahead Strategies


To streamline preparation for events, consider prepping the components of your pecan caramel cheesecake in advance. You can make the crust and caramel one day and assemble the cheesecake, allowing for necessary chilling ahead of time. During each step, ensure all components are tightly covered and refrigerated.

The flavors tend to deepen after resting, adding more depth with make-ahead techniques. For assembly, having each element ready beforehand allows for a smooth process without last-minute rushes. When adding any fresh toppings or garnishes like whipped cream or additional pecans, apply these just before serving to maintain their freshness and texture.

Scaling Instructions


Whether you’re hosting a large party or an intimate gathering, scaling this recipe is straightforward. To halve the recipe, reduce each ingredient proportionally, and use a smaller springform pan to ensure constant baking proportions—timing adjustments may be necessary to prevent under or overbaking.

Doubling or tripling is equally possible with a large enough baking pan, though it may require extending the baking time. Ensure your oven has an even heat distribution, as larger cheesecakes can disrupt typical baking cycles. With increased quantities, consider spreading the batter across multiple pans for consistent results.

Nutritional Deep Dive


Understanding the nutritional properties of this pecan caramel cheesecake enhances informed indulgence. The macro breakdown includes significant proportions of fats and sugars, characteristic of decadent desserts. However, pecans introduce fiber and good fats, while cream cheese provides calcium and protein.

On the micronutrient front, expect contributions from nuts in terms of magnesium and potassium, alongside calcium from the dairy input, assisting with bone health. Consideration of portion sizes can aid weight management; smaller slices still offer robust flavor satisfaction without significant overconsumption.

Dietary Adaptations


Adapting your pecan caramel cheesecake for dietary needs is achievable without losing its essence. For gluten-free requirements, swap the graham cracker base for a nut and coconut blend. Ensure all fillings are naturally gluten-free, choosing verified products.

A dairy-free version can be crafted by using coconut-based cream cheese and milk alternatives. Vegan variations align with dairy-free measures, incorporating plant-based sweeteners and nuts. For those on a low-carb or keto diet, focus on using erythritol sweeteners and almond meal crust, reducing overall carbohydrate content.

Continuing to cater to specialized diets, those following a paleo regimen should seek unprocessed pecans and make homemade caramel using dates for sweetness. Always consider individual preferences and adjust ingredient brands or types accordingly.

Troubleshooting Guide


Facilitating troubleshooting for common issues can enhance your cheesecake experience. If the texture feels gritty, examine your cream cheese blending technique, ensuring it’s fully softened and integrated without over-whipping. For flavor balance concerns, adjust sugar levels in both filling and caramel, considering additional ingredients like vanilla for depth.

Temperature-related issues, such as a cracked top, may require verifying your oven’s accuracy with a thermometer. Equipment like a water bath adds insulation, stabilizing the cooking environment. When ingredients need substitutions, experiment first with small batches to confirm acceptable results without compromising the dish.

Timing concerns especially relate to baking, where underbaked cheesecakes feel overly soft. Ensure a jiggle test before cooling; the center should wobble slightly. Implement necessary adjustments in cooking or cooling times based on observations.

Recipe Success Stories


Hearing from those who’ve mastered the pecan caramel cheesecake boosts confidence and sparks creativity. Community feedback highlights adaptations such as integrating seasonal fruits or varying nut types. Reader suggestions validate experimenting with flavor nuances, inspiring bakers to tweak components like caramel bases.

In sharing photography tips, enthusiasts recommend natural lighting to fully capture the dessert’s color depth, garnished plates, and topping intricacies. Variation successes encourage follow-through on dietary changes or ingredient substitutions, fostering a supportive baking community.

Frequently Asked Questions

Can I use a pre-made crust?
Yes, a pre-made crust can save time; just ensure it’s high quality and fits the pan size.

What’s the best way to toast pecans?
Spread them onto a baking sheet and toast in the oven at 350°F for about 5-7 minutes, shaking occasionally.

Can I substitute pecans with another nut?
Walnuts or almonds can substitute pecans, although they impart a slightly different flavor.

How do I prevent cheesecake cracks?
Employing a water bath and avoiding overmixing helps prevent common cracking causes.

What kind of caramel should I use?
Opt for a homemade caramel sauce for the best control over sweetness and texture.

How long should I let it cool before serving?
After cooling at room temperature, refrigerate for at least four hours or overnight.

Can I add chocolate to this recipe?
Yes, swirling in melted chocolate before baking or adding a ganache layer enhances flavor depth.

What’s the best way to slice cheesecake?
Use a sharp knife, dipping in hot water between cuts for clean, precise slices.

How can I make this ahead for a party?
Assemble and bake the day before, then garnish just before serving for freshness.

Can I freeze leftovers?
Absolutely, wrap tightly in plastic to prevent frostbite, enjoying thawed portions as desired.

Is there a low-sugar version?
Substitute part of the sugar with erythritol or another sugar alternative, adjusting gradually.

What’s a good non-alcoholic pairing?
Herbal teas like chamomile or nutty rooibos add a fragrant complement to the cheesecake’s flavors.

Additional Resources


Explore related recipes that enhance your pastry repertoire, like triple chocolate cheesecake or lemon blueberry versions. Delve into technique guides to polish caramel-making or perfect water-bath methods. Ingredient insights assist with selecting the best nuts or high-quality cream cheese products.

Equipment recommendations target those ready to invest in top-notch tools like a quality springform pan or stand mixer, ensuring perfect cheesecakes every time. Further interest in seasonal variations inspires experiments beyond the pecan caramel classic, promoting creativity in the kitchen.

Join the Conversation


Engage with our community by sharing your cooking pictures on social media using #PecanCaramelCheesecake. Connect with fellow bakers for real-time feedback and tips. Review this recipe on our blog, outlining your personal experience or adjustments made.

Incorporate photography tips to present visually stunning creations, from plating to lighting, ensuring your desserts resonate with followers. Encourage variations to explore this culinary classic’s possibilities alongside fellow enthusiasts.

The Recipe

Pecan Caramel Cheesecake

Serves: 10

Prep Time: 30 mins

Cook Time: 60 mins

Total Time: 90 mins

Kitchen Equipment Needed

  • Springform pan
  • Electric mixer
  • Baking sheet
  • Mixing bowls
  • Knife

Ingredients

  • 1 cup of toasted pecans
  • 1/2 cup of granulated sugar
  • 1/2 cup of packed brown sugar
  • 3 packages (8 oz each) cream cheese, softened
  • 1 tablespoon of vanilla extract
  • 4 large eggs
  • 1/3 cup of heavy cream
  • 1 1/2 cups of graham cracker crumbs
  • 1/2 cup of melted butter
  • 1/4 teaspoon of salt

Directions

  1. Preheat the oven to 325°F (165°C). Line the outside of a springform pan with foil.
  2. Combine graham cracker crumbs, melted butter, and salt for the crust. Press firmly into the pan’s bottom.
  3. Beat softened cream cheese with granulated and brown sugar until smooth. Add vanilla.
  4. Add eggs one at a time, mixing well after each addition, followed by the heavy cream.
  5. Fold in half of the toasted pecans and pour the filling over the crust.
  6. Place cheesecake pan in a larger pan filled with hot water and bake for one hour, or until set.
  7. Cool the cheesecake at room temperature, then refrigerate for at least four hours.
  8. Top with remaining pecans and drizzle caramel sauce before serving.

Recipe Notes

  • For an added twist, consider adding 1/4 cup of bourbon to the caramel sauce.
  • Ensure all dairy products are at room temperature to prevent lumps in the batter.

Indulge in Deliciously Hearty Steak-Loaded Baked Potatoes Tonight

Steak-Loaded Baked Potatoes: A Delicious Twist on a Classic Dish

⚖️
Difficulty
Easy

⏲️
Prep Time
15 mins

🕒
Cook Time
1 hour

⏱️
Total Time
1 hour 15 mins

🍽️
Servings
4

Imagine sinking your teeth into a perfectly baked potato, delightfully crisp on the outside and soft on the inside, brimming with a succulent, juicy steak topping. These Steak-Loaded Baked Potatoes are a match made in culinary heaven, bringing together the hearty comfort of a classic baked potato with the gourmet touch of tender steak bites. This combination is sure to tantalize your taste buds with its robust flavors, making it a perfect dinner option for any occasion.

Are you tired of the usual potato toppings? Give your baked potatoes a makeover by loading them with pan-seared steak laced with butter, garlic, and herbs. The savory blend creates a delightful symphony of tastes, offering an incredible gastronomic experience whether you’re dining alone or with family and friends. The aromatic notes of rosemary and thyme waft through the kitchen, inviting everyone to gather around and indulge in this mouthwatering creation.

Quick Recipe Highlights

  • Flavor Profile: The rich, umami flavors of the steak complement the creamy potato flesh, amplified by the aromatic herbs and melted butter.
  • Texture: Crispy potato skins provide the perfect contrast to the tender, melt-in-the-mouth steak bites, resulting in a delightful medley of textures.
  • Aroma: Infused with garlic, rosemary, and thyme, the aroma is savory and earthy, instantly creating a warm and inviting atmosphere.
  • Visual Appeal: The rustic golden-brown crust of the baked potato, topped with luscious steak pieces, offers a visually striking presentation.
  • Skill Level Needed: With straightforward steps, this recipe is accessible for cooks of all skill levels, requiring basic chopping and searing techniques.
  • Special Equipment: Ensure you have a reliable oven and a good-quality skillet to perfect this recipe.

Recipe Overview

  • Difficulty Level: Designed with simplicity in mind, this recipe is labeled as easy, perfect for home cooks seeking a gourmet yet uncomplicated dish.
  • Category: These Steak-Loaded Baked Potatoes belong to both comfort food and gourmet dinner categories, bridging the gap magnificently.
  • Cuisine: Inspired by American cuisine with a gourmet twist, this dish incorporates elements typically associated with steakhouse dining.
  • Cost: Steak can be a pricier ingredient, but overall, this recipe is cost-effective, especially if you catch a good deal on potatoes and beef cuts.
  • Season: While enjoyable year-round, late fall and winter seasons enhance the cozy and hearty nature of this meal.
  • Occasion: Ideal for family dinners, casual gatherings, or a romantic night, its versatility makes it suitable for both everyday meals and special occasions.

Why You’ll Love This Recipe


The taste and texture appeal of Steak-Loaded Baked Potatoes is irresistibly mouthwatering. The combination of crispy, buttery baked potatoes loaded with succulent steak pieces is a divine pairing that hits all the right notes. Every forkful offers a burst of savory goodness where flavors and textures meld seamlessly, ensuring that every mouthful is a memorable experience.

From a convenience perspective, this recipe is a winner. With minimal preparation and straightforward cooking steps, you can easily whip up this gourmet delight on a weeknight. Plus, the components—potatoes and steak—are widely available year-round, making it a reliable option at any time.

Steak-Loaded Baked Potatoes also deliver a nutritional punch. High in protein and fiber, this dish provides energy to fuel an active lifestyle while keeping you fuller for longer. The addition of herbs and spices enhances not only the flavor but also the antioxidant profile, contributing to a healthy, balanced meal.

Perfect for social and entertaining value, this dish is sure to impress guests with its appealing presentation and robust flavors. Whether hosting a small gathering or an intimate dinner, these baked potatoes create a culinary centerpiece that encourages communal enjoyment.

Finally, considering the cost-effectiveness and accessibility, this recipe makes the most of affordable and commonly stocked ingredients. Investing in good-quality potatoes and a cut of steak that suits your budget can yield a meal that exemplifies luxury dining without breaking the bank.

Historical Background and Cultural Significance


The origin story of the loaded baked potato can be traced back to the advent of the modern steakhouse. It evolved from the simple act of providing a hearty starch alongside steak to help diners feel fully satisfied and content. Over time, the dish gained popularity, and people began to experiment with various toppings to enhance the steakhouse experience.

Steak-Loaded Baked Potatoes hold cultural importance particularly in the United States, where they are often associated with rustic, hearty meals served in family restaurants. They represent the joy of indulging in comfort food that marries quality ingredients with love and attention to delicious details.

As this recipe evolved, it spread beyond steakhouses and became a family favorite across the nation. The loaded concept transformed the baked potato into a standalone dish, allowing for endless creativity with accompaniments.

Regional variations abound, with different states adding their local flavors to the dish. In the South, you might find spicy jalapeños and cheddar, while the East Coast might favor a seafood spin with lobster. However, the luxurious steak version remains a timeless classic, loved across all borders.

Ingredient Deep Dive


Potatoes, the primary ingredient, have a rich cultural significance and history, originating in the Andes region. Not only are they a staple in many global diets, but they also offer exceptional nutritional benefits. Packed with essential vitamins and minerals, their high fiber content supports digestive health. When selecting, look for firm, blemish-free potatoes. Store them in a cool, dark place to extend their shelf life. For a delightful variation, sweet potatoes can be a nutritious substitute, offering natural sweetness.

Steak is the highlight here, offering a muscle-building punch of protein. Its juicy texture forms the heart of the dish. Historically a luxury in many cultures, steak brings an element of indulgence. Opt for cuts like ribeye or sirloin for balanced marbling and flavor. Proper storage in a refrigerator before use, wrapped in butcher paper, enhances freshness. Should beef be unavailable, chicken provides a leaner alternative without compromising on taste.

Common Mistakes to Avoid

  • Overcooking the potatoes can result in a dry texture instead of the desired fluffy interior. Bake until just tender to ensure optimum creaminess.
  • Failing to season the steak sufficiently is a common pitfall. Remember, salt and pepper are integral to maximizing flavor depth.
  • Neglecting to preheat the oven may cause uneven cooking, leaving parts of the potato underdone. Always ensure your oven reaches the full temperature before baking.
  • Slow-cooking the steak can lead to tough meat. Sear at a high temperature for optimal caramelization and tenderness.
  • Using cold steak straight from the fridge can hinder even cooking. Allow meat to reach room temperature before searing for the best results.
  • Skipping the butter may save calories, but it also detracts from both flavor and moisture. Consider it essential to achieving that melt-in-your-mouth effect.
  • Overcrowding the skillet can steam rather than sear the steak cubes. Give each piece ample room to achieve a crispy, golden crust.
  • Not letting the steak rest after cooking misses a vital step in keeping juices locked in, resulting in a dryer texture.

Essential Techniques


Baking the perfect potato relies on achieving a robust outer skin while ensuring the inner flesh remains fluffy. This requires a high oven temperature and ample time—pricking them with a fork beforehand allows steam to release, preventing explosions and ensuring thorough cooking. Look for a crispy skin as a visual cue of readiness.

Searing steak to achieve that coveted crust requires high heat on a well-preheated skillet. The Maillard reaction responsible for this browning enhances flavor through caramelization. Avoid frequent flipping and refrain from moving steak pieces during this process.

Rotating the baking sheet halfway through cooking potatoes ensures even baking, a critical step given variations in temperamental oven hotspots. This simple action prevents half your batch from turning out undercooked or unevenly browned.

Pro Tips for Perfect Steak-Loaded Baked Potatoes


For a flavor boost, add a dash of worcestershire sauce to the steak during cooking. It amplifies umami flavors and complements the meat’s rich profile. Let the potatoes cool slightly before cutting them open to avoid scorching your fingers. This pause also allows the starches to set, making for cleaner handling.

Reserve some fresh herbs until the end of the cooking process. Adding chives, parsley, or cilantro at the last moment can provide a refreshing contrast to the dish’s heavier flavor components. If pressed for time, pre-cooking your potatoes in the microwave before finishing them in the oven can shorten the waiting period significantly without compromising on texture.

Include a small dollop of sour cream atop the finished dish. Its creamy tang enhances and balances out the rich flavors found within the dish. Use an oven thermometer for accuracy, ensuring your baked potatoes achieve precise doneness.

Variations and Adaptations


Regional variations offer delightful twists, such as incorporating local ingredients like hatch green chilies for a Southwestern touch, or adding a hint of spicy sausage for Cajun-infused warmth. Consider seasonal adjustments such as integrating spring asparagus into the filling or switching to squash during fall.

Dietary modifications are straightforward—substitute steak with portobello mushrooms or jackfruit for a vegan approach without losing that satisfying, meaty texture. Customize flavor with different cheese varieties like blue cheese crumbles for tang or smoked gouda for depth.

Transform texture by mashing the potato’s insides and refilling the skins, achieving a twice-baked consistency. Presentation-wise, serve in a cast-iron skillet for a rustic flair or newly trend with crisply curated platters for family-style events.

Serving and Presentation Guide


Plating can elevate the entire dining experience. Consider slicing the potatoes open on a diagonal for an elegant presentation. Garnish with microgreens or edible flowers to add color and sophistication to your serving.

Garnishing ideas extend beyond typical herbs by featuring fried leeks or crispy shallots for added crunch and aroma. Traditional accompaniments, such as side salads or grilled vegetables, balance the meal, while more contemporary offerings like roasted cauliflower provide a modern touch.

Serve piping hot for deep enjoyment; however, cooling slightly before presentation can allow flavors to meld. Ensure portions are generous but manageable to maintain comfort and elegance at the dining table.

Wine and Beverage Pairing


For wine lovers, pair these Steak-Loaded Baked Potatoes with a bold Syrah or full-bodied Cabernet Sauvignon. The depth of a red wine accentuates the steak’s richness while balancing the potato’s creamy texture.

Non-alcoholic alternatives like apple cider or a robust iced tea offer complementary acidity and flavors without overwhelming the palate. If considering coffee pairings, a dark roast blends well as an after-dinner treat.

Temperature plays a quintessential role in beverage enjoyment—opt for slightly chilled reds or room-temperature whites to adequately complement the flavors in the dish. Serve your choice of beverage in appropriate glassware to round out the dining experience.

Storage and Shelf Life


Storage of leftovers should be in an airtight container to prevent moisture loss, which could affect texture and flavor. Ideally, consume within two to three days for optimal taste.

Keep refrigerated at consistent temperatures, avoiding the mixing of hot and cold air that could prompt spoilage. Utilize shallow containers to expedite cooling and help maintain freshness.

Be aware of signs of spoilage, such as off-odors or discoloration. In the case of reheating, consider doing so in the oven to revive crispness compared to microwave methods, which can render results soggy.

Make Ahead Strategies


Plan ahead by baking potatoes the night before and reheating them while prepping the other components. This can save considerable time, especially for hosting purposes.

Store steak and potato separately to maintain textural integrity. Potatoes can become gummy if stored with other moist ingredients. Quality impacts remain minimal with planned prep, allowing steps to be efficiently executed.

Add fresh elements like chopped scallions or cheese only at serving to retain vibrancy. Reheating the entire assembly in a hot oven for a brief time ensures uniform warmth without overcooking the individual parts.

Scaling Instructions


Halving the recipe is easy by reducing both ingredients and cooking time accordingly, ideal for smaller gatherings. Conversely, for larger parties, simply double your quantities and extend baking times slightly to accommodate volumes.

Consider using larger baking sheets or multiple ovens to maintain efficiency when scaling. Timing modifications might be necessary, typically increasing for larger batches and decreasing for halved portions to avoid overcooking.

Adapt storage considerations for larger quantities, opting for stackable containers to save space. Calculate serving amounts based on guests to ensure adequate portions are prepared.

Nutritional Deep Dive


These Steak-Loaded Baked Potatoes boast an excellent macro balance, offering protein from the steak complemented by carbohydrates and fiber from the potatoes. They are ideal for muscle recovery while providing satiety.

Micronutrient analysis highlights the rich vitamin C and B6 content of potatoes, alongside thyme and garlic’s antioxidant contributions. Health benefits include boosting immunity and supporting heart health through potassium and iron-rich cuts of beef.

Dietary considerations are prominent here; portion awareness aids in managing dietary intake effectively. Balance smaller portions with a nutrient-dense side salad for an overall well-rounded meal.

Dietary Adaptations


For gluten-free variations, ensure all purchased ingredients, especially spices, are certified gluten-free. This simple adaptation opens doors to wider consumption without sacrificing flavor.

Dairy-free needs are met by using plant-based butter or olive oil in lieu of traditional dairy. Vegan adaptations are effectively achieved through mushroom steak substitutes and plant-based cheese toppings.

Low-carb enthusiasts can enjoy this dish by replacing traditional potatoes with cauliflower alternatives without missing out on the satisfying experience. Creativity shines, allowing for adaptation to suit specific dietary preferences without loss of intent.

Troubleshooting Guide


When facing texture issues with potato skins, ensure thorough drying before baking; moisture may lead to flabbiness. If flavor balance feels off, adjust seasoning with herbs, sticking to taste and preference as your guide.

Temperature discrepancies, often due to unreliable ovens, can be resolved by utilizing an oven thermometer to ensure accuracy. If lacking proper equipment like a skillet, use a sturdy, high-walled pan to sear steak effectively.

Ingredient substitutions must be carefully considered to maintain integrity. Swap with an equivalent feature—for volume or flavor—to minimize impact. Timing concerns are addressed by mindful assembly, ensuring readiness aligns with cooking progress.

Recipe Success Stories


Community feedback has hailed this recipe as a staple for family dinners and entertaining due to its impressive flavors and eye-catching presentation. Many have shared personal successes with variations suited to local tastes and dietary needs.

Readers have discovered that experimenting with cheese types and additional spices yields unique tweaks that enhance the experience without straying from the original vision. Photography enthusiasts find the dish’s aesthetics make for captivating captures, showcasing the vibrant colors and textures.

Recipe adaptation stories abound, with individuals incorporating locally sourced ingredients or expanding the potato filling to incorporate additional vegetables. This flexibility allows a personal touch while retaining core elements.

Frequently Asked Questions

Can I use a different type of potato for this recipe?

Yes, you can substitute the classic russet potato with sweet potatoes or red/yellow potatoes. Keep in mind that texture and flavor will vary slightly with each type.

What is the best steak cut for this dish?

Ribeye and sirloin are popular choices due to their marbling and tenderness. However, flank and skirt steak can be suitable for a leaner option.

How can I make this dish vegan?

Replace the steak with portobello mushrooms for a meaty texture and substitute dairy items for plant-based options. Ensure all seasonings and toppings align with a vegan diet.

How long can leftovers be stored?

If stored in an airtight container in the fridge, leftovers can last up to three days, provided they are reheated thoroughly in an oven to ensure quality and safety.

Is this a kid-friendly dish?

While this recipe is rich and flavorful, it can be adapted for picky eaters by adjusting the level of spices and opting for milder steak cuts. Cheese and minimal herbs tend to appeal to children.

What drinks pair best with this meal?

A bold red wine like Cabernet Sauvignon enhances the beef flavors, while a chilled non-alcoholic cider offers a refreshing contrast.

Can I make this dish ahead of time?

Bake and prep potatoes and steak in advance, storing separately. Reheat and assemble just before serving to retain texture and freshness.

How can I ensure my steak is tender?

Properly sear over high heat and allow the steak to rest before slicing to maintain juiciness. Marinating overnight can also enhance tenderness.

Why are my potatoes taking longer to bake?

If using larger potatoes, they may require extra baking time. Consider raising oven temperature slightly or precooking in a microwave before oven completion.

Can I freeze this recipe for later use?

Baked potatoes can freeze well if wrapped individually, reheatable in the oven, though steaks should be freshly cooked to preserve flavor and texture.

Additional Resources


Diving into related recipes like other loaded potato variations can offer fresh ideas and inspirations. Technique guides for optimizing steak cooking render invaluable insights for perfecting your skills.

Explore ingredient information, especially for potatoes and steaks, to elevate your knowledge of their varieties and cooking properties. Equipment recommendations can ensure you’re always prepared with the right tools for the job, enhancing convenience and outcomes simultaneously.

Join the Conversation


We invite you to share your culinary attempts and successes on social media, inspiring others to try Steak-Loaded Baked Potatoes. Tag us and join a community of food enthusiasts sharing personal spins and interpretations.

Engage by leaving reviews and feedback, offering insights that help others perfect their craft. Capture your creations with photography tips from our community, where natural lighting and appealing angles can make your dish a visual masterpiece.

The Recipe

Steak-Loaded Baked Potatoes

Serves: 4

Prep Time: 15 mins

Cook Time: 1 hour

Total Time: 1 hour 15 mins

Kitchen Equipment Needed

  • Oven
  • Skillet
  • Knife
  • Cutting Board
  • Measuring Spoons

Ingredients

  • 4 large russet potatoes
  • 1 pound of steak (ribeye or sirloin)
  • 2 tablespoons olive oil
  • 1 teaspoon salt
  • 1 teaspoon black pepper
  • 4 tablespoons butter
  • 2 cloves garlic, minced
  • 1 teaspoon fresh thyme, chopped
  • 1 teaspoon fresh rosemary, chopped

Directions

  1. Preheat oven to 425°F (220°C).
  2. Scrub potatoes and pierce them with a fork several times. Bake directly on the oven rack for about 1 hour, until tender.
  3. Meanwhile, heat olive oil in a skillet over medium-high heat. Season steak cubes with salt and pepper.
  4. Sear steak cubes in the skillet, turning occasionally until browned and cooked to desired doneness. Remove from skillet.
  5. In the same skillet, melt butter and add garlic, thyme, and rosemary. Cook for 1 minute.
  6. Once potatoes are done, let them cool slightly and then slice each open lengthwise. Fluff insides with a fork.
  7. Top potatoes with steak pieces and drizzle with herbed butter from the skillet.

Recipe Notes

  • For a spicy kick, add a sprinkle of red pepper flakes to the steak during cooking.
  • Top with shredded cheese or sour cream for added richness.

Irresistible Southern Cheese Crackers: A Flavorful Snack Delight!

Southern Cheese Crackers Recipe: A Savory Delight

⚖️
Difficulty
Easy

⏲️
Prep Time
15 mins

🕒
Cook Time
20 mins

⏱️
Total Time
35 mins

🍽️
Servings
24 crackers

Welcome to a delectable Southern Cheese Crackers Recipe that will leave your taste buds craving more. Enhancing any gathering, these homemade cheese crackers are the epitome of rich flavors combined with a crispy texture. The magic of Southern cuisine comes alive with each bite, offering a savory, cheesy delight that’s perfect for both snacks and appetizers.

Imagine the warm, inviting aroma of fresh-baked cheese crackers filling your kitchen, promising a taste of Southern hospitality. This delightful recipe captures the essence of Southern charm through a blend of sharp cheese and buttery goodness, transforming simple ingredients into an irresistible treat. Whether you’re entertaining guests or enjoying a quiet evening at home, these homemade cheese crackers create moments of joy and culinary satisfaction.

Homemade crackers are uniquely rewarding as they combine simple pantry staples with individual creativity, providing the opportunity to customize flavors while maintaining an authentic Southern essence. Discover the satisfaction of crafting your own batch with our step-by-step guide, designed to simplify the process and elevate your snacking habits.

Quick Recipe Highlights

  • Flavor Profile: These Southern Cheese Crackers offer a robust cheddar flavor enhanced with a hint of spice, providing a savory kick that delights the palate.
  • Texture: Achieve a perfect balance of crispy edges with a tender middle, thanks to the even bake and quality cheese.
  • Aroma: The enticing scent of baked cheese mingled with subtle spices creates an olfactory experience that’s wholly inviting.
  • Visual Appeal: Golden brown and speckled with cheese, these crackers catch the eye and add elegance to any snack platter.
  • Skill Level Needed: With straightforward steps and basic techniques, this recipe is approachable for beginners yet satisfying for experienced cooks.
  • Special Equipment: You’ll need a food processor for mixing and a rolling pin for shaping—simple tools for exceptional results.

Recipe Overview

  • Difficulty Level: Rated easy because it requires basic mixing and rolling skills, perfect for novice bakers seeking garage success.
  • Category: Ideal as a snack or appetizer, these crackers complement a wide range of dips and accompanies.
  • Cuisine: Rooted in Southern traditions, capturing the region’s love for hearty, flavorful snacks.
  • Cost: With minimal ingredients and widespread availability, this recipe is cost-effective and utilizes pantry staples.
  • Season: Suitable year-round, offering a cozy comfort in winter and a light, crispy bite in summer.
  • Occasion: Perfect for parties, picnics, and family gatherings, providing a universally appealing option for all occasions.

Why You’ll Love This Recipe


The taste and texture of these Southern Cheese Crackers are unparalleled. The sharp cheddar cheese provides a depth of flavor, entwined with a subtle warmth from spices that make every nibble sensational. Imagine biting into the perfectly baked crackers, feeling a slightly crumbly exterior giving way to a cheesy, tender interior.

Convenience and preparation ease are real highlights of this recipe. With only a handful of readily available ingredients, preparing these cheese crackers is uncomplicated and straight to the point. Within an hour, you’ll have a batch of freshly baked crackers that taste as if a Southern chef made them.

Nutritionally, these crackers present a satisfying snack option, offering the fulfilling texture expected from a cracker with the protein and calcium benefits of real cheese. They are a delicious and wholesome alternative to processed snacks, bringing homemade goodness to your table.

These crackers offer a social and entertaining value, whether you host a game night or bring them to a potluck. Being handmade adds a layer of personal touch that resonates with guests, showing them care by providing not just store-bought snacks.

Finally, this recipe is cost-effective and accessible. You don’t have to break the bank to make a delicious homemade treat. With basic pantry ingredients and a short preparation process, creating these cheese crackers is a budget-friendly way to enjoy gourmet-level snacks at home.

Historical Background and Cultural Significance


The origins of Southern Cheese Crackers trace back to the region’s history of hospitality and entertaining. Such recipes emerged as a practical solution for gatherings where hosts aspired to provide tasty treats while showcasing the rich flavors local to the South.

Culturally, cheese crackers have become a symbol of comfort in Southern cuisine, cherished for their ability to bring people together. From church socials to family reunions, these snacks offer an easy yet sophisticated addition to social events, embodying shared experiences and community spirit.

The evolution of cheese crackers has seen them pass through many stages—the current recipe represents a sophisticated iteration that enhances traditional ingredients with modern preparation methods. They stand as a testament to the adaptability and enduring allure of Southern culinary traditions.

Regional variations abound, with certain areas incorporating additional spices or unique cheeses native to their locality. Each variation embraces the base Southern Style while celebrating diverse culinary influences, which contribute to the rich tapestry of American regional cooking.

Ingredient Deep Dive


The primary ingredient, aged cheddar cheese, boasts a proud culinary history rooted in European cheesemaking traditions yet finds special recognition in Southern kitchens for its sharp flavor and smooth texture—a central component that elevates the cracker.

Nutritionally, cheddar cheese is a superb source of protein, calcium, and vital nutrients such as Vitamin A and B12. It’s essential in these crackers for both flavor and nutritional profile, bringing the richness and character that only real cheese can provide.

When selecting cheddar for these crackers, the sharper, the better. Aged options provide a more intense flavor, which translates beautifully in baked goods. Proper storage involves keeping cheese well-wrapped in parchment within the fridge to maintain freshness and prolong its naturally rich flavor.

Butter plays a crucial role, weaving together taste and texture in this recipe. Southern cooking frequently embraces butter’s richness, and its inclusion in these crackers ensures an irresistible bite that’s both substantial and melt-in-your-mouth tender.

Storage recommendations for the baked product include keeping the crackers in an airtight container to maintain crispness, or freezing dough portions for future use, preserving the option to bake fresh, delightful cheese crackers on demand.

Common Mistakes to Avoid

  • Overbaking: Ensure crackers are removed once golden to avoid a burnt taste that can overpower the delicate cheese flavor.
  • Underestimating Salt: Cheese varies in saltiness; adjust according to taste to achieve balanced flavor.
  • Thick Dough: Roll dough evenly thin for that perfect cracker crunch without a doughy center.
  • Dried Cheese: Avoid using pre-shredded cheese; instead, grate fresh for optimal flavor and moisture content.
  • Ignoring Resting Time: Allow dough to rest, enabling flavors to meld and improve dough workability.
  • Insufficient Mixing: Ensure the dough is thoroughly mixed to achieve even cheese and butter distribution.
  • Skipping Docking: Poke small holes to prevent bubbling, ensuring a flat and crisp cracker.
  • Improper Storage: Store crackers in a sealed container to retain freshness and crunchiness.
  • Wrong Cheese Choice: Aged sharp cheddar is best—avoid softer, more bland cheeses that don’t provide the necessary depth.
  • Not Preheating Oven: A hot oven ensures good initial rise and proper cooking.

Essential Techniques


Mastering the art of achieving the ideal cracker crunch starts with uniform dough thickness. Roll dough to about 1/8 inch thickness to ensure a correctly baked cracker—too thick or too thin can lead to uneven texture and inconsistent baking results.

The mixing stage is critical; full incorporation of all ingredients is necessary to deliver a cohesive dough absent of flour streaks. Pay special attention to avoid overworking the dough, as this can lead to a tough cracker rather than a tender, flaky one.

Proper docking involves making small holes in the surface of each cracker before baking. This step is essential to maintain their shape, preventing dough rise in the oven while ensuring a flat, even baking process, which contributes to overall texture satisfaction.

Monitoring the baking closely for color progression—aim for a light golden brown hue that signifies a properly cooked cracker. An undercooked product might appear pale, while overcooked can cause bitterness, distracting from core flavors.

Finally, cooling the crackers fully on a wire rack promotes even texture by preventing excess moisture from trapping beneath, which can lead to sogginess. Perfectly cooled cheese crackers maintain their addictive snap and are ready for storage or immediate enjoyment.

Pro Tips for Perfect Southern Cheese Crackers


Fine-tune your flavor profile by experimenting with adding finely chopped herbs like rosemary or thyme, enhancing the taste and offering a unique twist without overwhelming the cheese base.

For a more intense cheese flavor, use a mixture of sharp cheddar and Parmesan, which offers a depth of flavor, with Parmesan providing a delightful umami boost.

Allow your butter to reach room temperature before combining—it helps achieve a smooth dough consistency and incorporates evenly with the cheese and flour for optimal cracker structure.

Consider using a pastry cutter or pizza wheel to create uniform shapes in the dough, making them visually appealing and ensuring they bake evenly.

If time permits, chill the dough before rolling—it firms the butter, helping achieve perfectly baked texture throughout and making it easier to handle while rolling.

Try dusting the work surface lightly with cornmeal instead of flour when rolling out your dough. This method adds crunch and a subtle, balanced flavor without interfering with the cheese.

Get adventurous with seasoning options by adding a pinch of cayenne or smoked paprika to the dough, introducing a warmth that complements the cheese’s robust nature.

Adapt your crackers to a gluten-free audience by substituting regular flour for a cup-for-cup gluten-free flour blend, maintaining structure while expanding dietary inclusivity.

Variations and Adaptations


Explore regional variations by incorporating local cheeses or spices, adapting this staple to embrace regional flavors while keeping the cracker’s core Southern charm intact.

Apply seasonal adaptations by infusing the dough with flavors representing particular holidays or seasons—hint cinnamon or nutmeg for fall, or perhaps chili powder for a summertime barbecue kick.

To adapt for dietary modifications like low carb, replace wheat flour with almond or coconut flour, bearing in mind these require different proportions to achieve the same texture.

Introduce flavor variations with diverse cheese options—consider adding a touch of blue cheese for an added tang or blending in some grated Gruyère for a richer, heavier bite.

Modify the texture by adjusting baking time and thickness: a thinner cracker with a longer bake will result in extra crispiness, while slightly thicker maintains a chewy middle.

Experiment with presentation alternatives by using cookie cutters to create festive shapes or ridged cutters to establish an elegant edge, enhancing visual appeal alongside mechanical uniformity.

Serving and Presentation Guide


Employ plating techniques that emphasize elevation by layering crackers on a decorative serving dish, creating a mountain-like presentation that captures eyes while maximizing accessibility.

Explore garnishing ideas such as fresh herbs or a sprinkle of sea salt atop crackers for added visual appeal and a hint of enhanced flavor upon first glance.

Traditional accompaniments include serving with a selection of artisan cheeses and gourmet dips like pimento spread or savory jam, allowing the crackers to shine as a flavorful foundation.

Modern serving suggestions may feature pairing these crackers with charcuterie boards adorned with cured meats, pickles, and nuts—turning a classic afternoon snack into a contemporary centerpiece.

Mind temperature considerations: serve freshly baked crackers at room temperature, preserving their snap and maintaining their buttery taste profile.

During portion control tips, consider serving in bite-sized batches to maintain freshness and avoid food waste, particularly when entertaining a smaller crowd or hosting a more intimate occasion.

Wine and Beverage Pairing


Opt for wine pairings that complement rather than overshadow the cheddar’s depth; a full-bodied Chardonnay or a zesty Sauvignon Blanc both highlight the cracker’s bold flavor profile.

For non-alcoholic alternatives, an infusion of iced herbal tea or even a fizzy lemonade adds a refreshing contrast to the crackers’ creamy cheese essence.

Given the cheddar’s inherent richness, a medium-bodied coffee or a fragrant Earl Grey tea, if applicable, enhances flavor contrast while offering comforting, aromatic sips.

Maximize beverage temperature considerations: chilled wines or iced drinks help balance the cheese’s heat, while a warm drink accentuates its complementary spiciness.

Mind your serving suggestions—small wine glasses or tea cups, encouraging social sipping and mingling while comfortably holding these delightful, addictive snacks in a casual setting.

Storage and Shelf Life


To maintain texture and flavor, store your cheese crackers in an airtight container at room temperature—this keeps them fresh for up to a week without losing delicious crispiness.

Consider appropriate temperature requirements: cool, dry storage prevents moisture absorption that could lead to unwanted sogginess or flavor compromise over time.

For portable convenience, select lightweight yet sturdy containers that support snack mobility without risking cracker breakage or container leaks if traveling to gatherings.

Signs of spoilage typically appear in texture change or unfamiliar taste, signaling that crackers may have absorbed moisture or encountered staleness—prompt potential disposal if encountered.

Proper reheating instructions can elevate stored crackers to fresh-baked taste; a few minutes in a low-temperature oven revives any lost crispness without diminishing flavor quality.

Freezing guidelines suggest wrapping dough in portions before refrigerating, enabling spontaneous snack preparation while preserving initial freshness and intended taste integrity.

Make Ahead Strategies


Plan your prep timeline by preparing, chilling, and slicing dough in advance—allowing flavors to meld, easing last-minute crunch, and enhancing efficiency during actual cooking day.

Utilize storage between steps to your advantage by refrigerating dough between preparation phases, maintaining its workability while preventing inadvertent over-softening.

Assess potential quality impact by recognizing that pre-made dough, if moisturized properly, enhances flavor and texture; yet, fresh prep consistently offers the best taste experience.

Focus on assembly tips by preparing sliced dough batches just before baking—encouraging even spreading, perfect cook time, and aesthetic appeal during finished presentation.

Develop strict reheating guidelines to ensure consistent texture upon serving; consider utilizing a low oven temperature to recreate fresh-out-of-the-oven experience.

Fresh element additions transform stored cracker batches—topping with grated cheeses, fresh herbs, or cracked pepper prior to serving introduces extra flavor bursts to revitalized snacks.

Scaling Instructions


To halve the recipe, reduce the quantity of each ingredient proportionately, maintaining flavor balance and consistency throughout the preparation and baking processes.

When doubling or tripling, increasing batch settings by predetermined increments optimizes ingredient use without altering preparation steps—ensuring the same delightful outcome per cracker count.

Modify equipment adjustments to adequately manage larger dough volumes, considering stronger mixers or larger baking sheets that can handle increased scaling requirements seamlessly.

Consider timing modifications when working with expanded batches as more time must be allocated for baking, rotating sheet trays, and monitoring color cues to ensure uniform cook quality.

Lastly, scale with storage considerations by planning additional containers for surplus batch—a calculated step avoiding potential waste and dynamizing ease in future snack retrievals.

Nutritional Deep Dive


Delve into macro breakdown specifics: these cheese crackers predominantly offer healthy fats sourced from cheese and butter, partnered with carbohydrates and modest protein portions.

Micronutrient analysis charts reveal a full spectrum of essential vitamins and minerals, reflecting cheddar cheese’s complete nutritional portfolio—aiding efforts toward balanced dietary requirements.

Health benefits align naturally with moderate cheddar consumption, promoting nutritive benefit exposure yet balancing cracker enjoyment within various nutritional scoping scenarios.

Portion analysis encourages manageable consumption levels—opting for smaller servings that respect energy requirement adherence while permitting flavor engagement throughout culinary journey.

Weight management tips include healthy integration into broader nutrition plans—encouraging balanced plate assumptions that mirror nutritious, favored snack satisfaction elements.

Dietary Adaptations


For gluten-free adjustments, utilize gluten-free all-purpose flour blends, ensuring consistent cracker structure while expanding dietary inclusivity for those with specific allergen concerns.

Dairy-free modifications introduce suitable substitute products—exploring plant-based cheeses and alternative margarines that replicate intended flavor and structure goals seamlessly.

Opt for vegan preparation by incorporating non-dairy cheese alternatives alongside plant-based butters—achieving original recipe flair without compromising traditional cracker expectations.

Low-carb transformations substitute wheat variations for almond flour, adapting ingredients to maximize flavor while embracing carbohydrate-conscious eating habits extensively.

Keto compliance involves further adapting traditional crackers with butter and almond flour, harnessing recipe potential while meeting ketogenesis dietary requirements without flavor sacrifice.

Paleo approach necessitates grain-free alternatives—combined almond and tapioca flour delivering desired crunch without straying into processed ingredient territory.

Low-FODMAP options provide digestible solutions, reflecting ingredient selectivity favoring natural elements that accommodate irritable bowel syndrome or sensitivity-focused dietary needs.

Troubleshooting Guide


Explore solutions to texture issues by ensuring appropriate dough consistency prior to baking—dense dough can skew expectations but effective kneading avoids these dilemmas.

Achieve perfect flavor balance incorporating seasoned whey protein into dough—intense cheddar mingling with understated protein neutrality achieves satisfactory snack harmony.

Address potential temperature problems by playing with oven temperature—navigate towards lower settings for longer durations if browning prematurely unsettles bake outcome.

Solving equipment challenges might reduce reliance on fancy gadgets—simpler equipment adapts preparation without recipe effect compromise, managing efficiency through uncomplicated approaches.

Focus on ingredient substitutions for advanced options, especially descriptors like dairy and gluten alternations, that augment original recipe versatility through innovative dietary fitment.

Timing concerns come under close inspection when recognizing varied baking stages—acknowledge variant heat distribution to align growth passages relatively across multi-tray bakes.

Recipe Success Stories


Our community feedback section tells how numerous readers discovered newfound appreciation for at-home baking, proudly sharing their victorious cheese cracker milestones resulting from recipe ease and shared adventures.

Variation successes arise from imaginative enthusiasts who introduced sage or smoked paprika into release batches—transforming classic bases into contemporary sensations wholly above expectation.

Adaptation stories abound, recognizing readers who creatively shifted ingredient content toward fitness-savvy repasts—merging nutrition insight with snack joy seamlessly, many recounting positive health benefits.

Celebrate reader suggestions with credited adjustments that linger into compilation form, suggesting such that garlic powder elevated flavor foundations or seeds diversified cracker aesthetic toward nutty persuasion.

Photography tips and illustrations paint efforts visually—inviting those sharing photos of colorful presentations, arrangement patterns highlighting technique prowess or enriched crackers through artistic prisms.

Frequently Asked Questions

Can these cheese crackers be frozen? Absolutely! Wrap your dough in film, then defreeze and bake fresh batches on demand, enjoying warm cracker satisfaction consistently each time.

What’s the best way to store leftovers? Airtight containers prolong cracker crispness at room temperature for approximately up to one week, encapsulating original baked flavor remarkably.

Should I preheat the oven before baking? Yes, an actively preheated oven ensures correct first bake exposure, enabling accurate culinary shell adjustments alongside dependable cracker results.

How do I maintain cracker crispness? Involve the cooling of each baked item on a wire stand upon removal—this approach disperses heat evenly, preserving water integrity crucially thereafter.

What size cutter should I use for optimal results? Opt for standard 1” diameter sizes for universal stackability or explore designs through cookie cutters, unleashing imaginative baker expression naturally.

Are there substitutes for cheddar cheese? Indeed, cultivate flavor variations by swapping with Gouda, Gruyère, or even wine-infused cheeses if exploratory mood shifts dictate alternative experiments wholly.

Is chilling the dough necessary? Chilling develops proper dough fixing by improving stability—enabling rich flavor exposure, but bypass-able during swift preparatory sequences when necessary.

Can low-fat cheese be used? While technically feasible, note decreased moisture qualities affecting texture; aim for regular or reduced-fat varietals, balancing health nuances seamlessly within cracker intention.

What’s the difference between using fresh vs pre-shredded cheese? Fresh retains crucial moisture, optimizing flavoring flows—a contrast distinctly associated with preference or problem-solving circumstantial elements expediently.

Which flour is best for gluten-free variations? Choose prominent gluten-free multi-purpose versions, thoughtfully endorsed for suitable cracker stability—yielding pleasant bite results reflective of authentic taste aspirations fundamentally achieved.

How can crackers be reheated without losing quality? Employ a brief low-temperature oven resurgence—pair mild heat levels with periodic treatment checks for cracker ascent concluded with consistency fundamentally preserved end-mostly.

Do these crackers work well as gifts? Absolutely, package in decorative boxes or re-usable tins to deliver homemade flair alongside aesthetically pleasing arrangement adding personal touch, shared markedly with joy.

Additional Resources


Explore related recipes, delving into complementary Southern favorites like pimento cheese spreads or traditional cornbread to accompany habitual cracker bake creations.

Technique guides explaining dough incorporation or tool utility improve approachability, offering hands-on expertise that extends towards cracker formulation fluidity.

Ingredient information gives insights into cheddar selection methodology, laying groundwork for informed culinary sourcing and enhanced flavor dimension results.

Equipment recommendations facilitate cracker practitioner evolution—endorsing robust implements and handy gadgets encompassing core skills development responsive to all practical skill levels.

Seasonal variations extend recipe potential within recurring calendars, emphasizing traditional alignments and inventive reprisals while expanding cracker versatility contiguously.

Join the Conversation


Social media sharing encourages visual community exchange, inviting followers or prospective bakers to narrate cracker discoveries or trials publicly across broader horizons.

Photography tips emphasize suggestive composition methods—highlighting cracker beauty through lens curiosity, portraying tastiness beyond mere flavor associations instinctively.

Recipe reviews interest input through variety, demystifying Eugenian cracker customization broadly; enhance potential by merging alternative references—insight builds solutions offering personalization opportunity.

Community engagement mirrors shared measurement success widely—endearing recipe reliability inspires camaraderie bonds woven uniquely among enthusiastic Southern culinary creators.

Broaden recipe variations into cross-regional collaborations—enabling adaptations celebrating local produce interacting with cracker core structure, propelled by passion toward mutually appreciative culinary acculturation.

The Recipe

Southern Cheese Crackers

Serves: 24 crackers

Prep Time: 15 mins

Cook Time: 20 mins

Total Time: 35 mins

Kitchen Equipment Needed

  • Mixing bowl
  • Food processor
  • Rolling pin
  • Baking sheet
  • Parchment paper
  • Wire rack

Ingredients

  • 1 cup (120g) all-purpose flour
  • 3/4 cup (90g) sharp cheddar cheese, grated
  • 1/4 cup (55g) unsalted butter, softened
  • 1/2 tsp salt
  • 1/4 tsp cayenne pepper
  • 2-3 tbsp water (as needed)

Directions

  1. Preheat your oven to 350°F (175°C) and line a baking sheet with parchment paper.
  2. In a food processor, combine flour, grated cheese, butter, salt, and cayenne pepper. Pulse until mixture resembles coarse crumbs.
  3. Add in the water gradually, a tablespoon at a time, pulsing until dough forms a ball.
  4. Transfer dough to a lightly floured surface, roll out to about 1/8 inch thickness.
  5. Use a knife or cutter to slice dough into desired cracker shapes, transfer to prepared baking sheet.
  6. Bake in the oven for 15-20 minutes or until edges are lightly golden brown.
  7. Cool on a wire rack to crisp, then serve or store in an airtight container for freshness.

Recipe Notes

  • For more flavor, consider adding chopped fresh herbs like rosemary or thyme.
  • Ensure the dough is evenly thin to prevent uneven baking.
  • These crackers can be stored at room temperature in an airtight container for up to a week.

Spice Up Dinner with Flavorful Cajun Salmon and Shrimp Recipe

Cajun Salmon and Shrimp: A Delightful Seafood Combination

⚖️
Difficulty
Medium

⏲️
Prep Time
15 mins

🕒
Cook Time
20 mins

⏱️
Total Time
35 mins

🍽️
Servings
4

Immerse yourself in the rich flavors of Cajun cuisine with this incredible Cajun Salmon and Shrimp recipe. Combining the bold spices of Cajun seasoning with succulent shrimp and tender salmon, this dish promises a memorable dining experience. The harmonious blend of flavors is enhanced when paired with rice or fresh greens, making it perfect for impressing guests or treating yourself to a weeknight indulgence. Its vibrant seasoning melds beautifully with the sweetness of the seafood, creating a must-try recipe for any seafood enthusiast.

Quick Recipe Highlights

  • Flavor Profile: The Cajun-inspired spices provide a lively, spicy kick and complement the natural umami of the salmon and shrimp.
  • Texture: The flaky salmon contrasts with the firm, juicy shrimp for a delightful mouthfeel.
  • Aroma: Bold, smoky, and spicy aromas create an unforgettable appetizing scent.
  • Visual Appeal: The rich, dark glaze of the Cajun seasoning adds depth to the pink and white tones of the seafood.
  • Skill Level Needed: Intermediate cooking skills with basic knowledge of pan-searing techniques.
  • Special Equipment: A heavy-bottomed skillet or grill pan is essential for perfect searing.

Recipe Overview

  • Difficulty Level: This dish is ideal for cooks with some experience in seafood, as it requires careful timing to ensure both salmon and shrimp are perfectly cooked.
  • Category: Main course, particularly suited for dinner due to its hearty and satisfying nature.
  • Cuisine: Rooted in American Southern culinary traditions with strong Cajun influences.
  • Cost: Relatively moderate, primarily determined by the quality and source of your seafood ingredients.
  • Season: Best enjoyed in spring and summer when fresh seafood is plentiful and outdoor grilling is convenient.
  • Occasion: Suitable for both casual family dinners and special occasions due to its impressive flavors and presentation.

Why You’ll Love This Recipe


The contrast in taste and texture offered by the Cajun Salmon and Shrimp is nothing short of delightful. The dish pairs the firm texture of salmon with tender shrimp, all enveloped in a spicy Cajun mix that tantalizes the taste buds. Preparation is seamless, with straightforward steps yielding a restaurant-quality meal, all within thirty-five minutes. Nutritional benefits abound, as both salmon and shrimp are high in protein and omega-3 fatty acids, supporting heart health. This dish’s versatility makes it perfect for intimate dinners or when entertaining guests; the impressive flavors make it a conversation starter. Economically, it offers a fantastic way to savor luxury seafood tastes without breaking the bank, with ingredients accessible at most supermarkets.

Historical Background and Cultural Significance


Cajun cuisine draws from French, African, and Spanish influences, originating from the Acadians who settled in Louisiana. Over time, this dynamic culinary tradition has developed its distinctive character, marked by simple ingredients and bold spices. Cajun Salmon and Shrimp highlight traditional techniques like blackening and pan-searing, essential in creating the intense, smoky flavor profile associated with Cajun dishes. These methods have evolved as cooks adapted the recipes to reflect personal preferences and regional ingredients, leading to numerous delightful variations.

Ingredient Deep Dive


Salmon takes center stage, revered for its rich, buttery texture and nutrient density, offering vitamin D, B vitamins, and essential fatty acids. Consider wild-caught varieties for a more robust flavor profile. To maintain its freshness, store salmon in the coldest part of your refrigerator and prepare it within a day or two of purchase. If substitutions are necessary, steelhead trout makes an excellent alternative. Meanwhile, shrimp bring a sweetness to the dish, balancing the heat of the Cajun spices. Look for wild-caught or sustainably farmed options, ensuring they are deveined and peeled for convenience. Shrimp freeze well when sealed properly, providing a readily available protein option.

Common Mistakes to Avoid

  • Overcooking: Precisely timed cooking ensures the salmon and shrimp remain succulent.
  • Uneven seasoning: Coat ingredients thoroughly for consistent flavors throughout.
  • Improper pan temperature: Use medium-high heat to achieve a proper sear without burning.
  • Neglecting to dry seafood: Patting dry is crucial to get that crispy texture.
  • Using old or low-quality spices: Fresh spices are key to authentic Cajun flavor.
  • Improper oil selection: Use a high-smoke-point oil like grapeseed for searing.
  • Skipping resting time: Allow seafood to rest briefly to let juices redistribute.
  • Neglecting proper storage: Storing improperly can lead to quick spoilage.

Essential Techniques


Master the art of seasoning; it’s crucial to coat your seafood evenly with spices, as this is where the flavor is established. Perfect your pan-searing technique by ensuring your pan is hot enough to create a delightful crust without overcooking. Keep an eye on the visual cues—golden brown crust and opaque flesh indicate doneness. For the best results, allow seafood to rest briefly before serving to lock in moisture and flavors.

Pro Tips for Perfect Cajun Salmon and Shrimp


Opt for fresh Cajun spice blends to capture authentic flavors. Consider marinating the salmon and shrimp briefly to deepen their taste. For an added twist, finish the dish with a squeeze of lemon to brighten the flavors. Customize the heat level to your preference by adjusting the cayenne pepper. Achieve restaurant-quality presentation by garnishing with fresh herbs like parsley or cilantro. Lastly, serve with side dishes or sauces that complement the spice and richness, such as coleslaw or a creamy aioli.

Variations and Adaptations


Embrace regional variations by incorporating local spices and herbs, such as adding thyme for a Mediterranean flair or cilantro for a Latin twist. To adapt this dish for seasons, switch sides like replacing winter root vegetables with a summery avocado and mango salsa. For a dietary spin, prepare the dish with a low-sodium Cajun mix and serve with cauliflower rice for a keto-friendly option. Plant-based eaters can substitute tofu for the seafood while using smoked paprika to evoke that smoky essence. For a unique texture, add a crunchy element with toasted nuts or seeds for contrast. Presentations can be elevated with artistic plating or creative vegetable garnishes, making it a feast for the eyes.

Serving and Presentation Guide


Use large white plates to make the colors of the Cajun Salmon and Shrimp pop, and arrange the seafood artfully with height for dimension. Garnish the dish with fresh parsley or microgreens for color contrast and freshness. Pair with traditional sides like steamed vegetables or buttery cornbread. For a modern twist, use a mirror glaze sauce artistically drizzled across the plate. Serve the dish at a warm temperature to maintain the seafood’s succulent quality. Portion with care to balance seafood and sides for a satisfying dining experience.

Wine and Beverage Pairing


A crisp, chilled Sauvignon Blanc pairs beautifully with this Cajun dish, cutting through the spices while complementing the seafood’s natural flavors. For non-alcoholic options, try an infused citrus water or a ginger lemonade that echoes the dish’s brightness. Coffee enthusiasts can appreciate an after-dinner cup of mild, aromatic coffee like a Sulawesi, which pairs well with savory notes. Serve beverages in appropriate glassware, such as wine in a chilled goblet or drinks in fun tumblers, enhancing the experience through thoughtful presentation.

Storage and Shelf Life


Leftovers should be swiftly chilled within two hours of serving and stored in an airtight container in the refrigerator, where they can last up to 2-3 days. Always monitor the dish for spoilage signs, such as off-odors or textures. When reheating, do so gently to prevent overcooking; using a microwave-safe plate or gentle warming on the stovetop can maintain tenderness. For long-term storage, freeze seafood separately before cooking, ensuring a taste revive when desired.

Make Ahead Strategies


Prepare the Cajun seasoning blend in advance, storing it in an airtight container for up to three months, readying it for quick use. Seafood can be cleaned and prepped a day ahead, saving time on the cooking day. Assemble sides or sauces ahead to focus on optimal seafood cooking during mealtime. Reheat components gently to preserve quality, adding fresh herbs or citrus zest right before serving to revive flavors.

Scaling Instructions


For a smaller serving, reduce ingredients proportionately, adjusting cooking times slightly for faster results. Doubling or tripling requires a larger skillet to maintain even cooking; work in batches if needed to avoid crowding the pan. Scale seasoning blends appropriately to distribute flavors evenly across larger seafood quantities. More guests? Serve buffet-style, simplifying the process; portion extras into containers ready for refrigeration.

Nutritional Deep Dive


Cajun Salmon and Shrimp are nutrient-dense, providing high-quality proteins essential for muscle repair and maintenance. Salmon’s omega-3 fatty acids are beneficial for cardiovascular health, while shrimp offer essential vitamins like B12 and selenium, supporting overall well-being. Monitor portion sizes to align nutritional intake with dietary goals, benefiting from nutrient-rich sides to balance the meal. Prudent ingredient choices, like controlling added salt in seasoning, contribute to a heart-healthy profile.

Dietary Adaptations


For a gluten-free version, ensure that all seasonings used are certified gluten-free. Dairy-free diners need only check their choice of side dishes and sauces for potential dairy content. For vegans, opting for seasoned, seafood-flavored plant proteins like tempeh can replicate textures. Experiment with low-carb alternatives like serving the dish over a bed of leafy greens or zucchini noodles, aligning with keto goals. Adjustments should maintain flavor integrity while catering to unique dietary needs.

Troubleshooting Guide


To counter texture issues like toughness, reduce cooking times and ensure seafood begins at room temperature. Balancing flavors may involve adjusting spice levels; consider adding acidity through lemon juice to cut the heat. Overcoming temperature challenges is simplified by managing pan heat levels, ensuring even cooking. Ingredient substitutions need careful consideration; consider flavor profiles and consistency when swapping spices or seafood. Time all elements to finish together without compromising the quality of any.

Recipe Success Stories


Culinary enthusiasts have lauded this recipe for its vibrant flavors and versatility in adapting to personal tastes. A favorite feedback note highlights adding fresh basil and tomatoes for a Cajun-Italian twist, elevating the experience. Adapting for festive occasions, one home cook incorporated a garlic butter sauce, delighting guests. Photographers have captured its visual appeal beautifully for social media showcases, earning praises and new followers alike.

Frequently Asked Questions

Q: Can Cajun Salmon and Shrimp be cooked on the grill?
A: Absolutely! Grilling imparts a smoky flavor; ensure the grill is pre-heated and use a grill basket or foil to prevent sticking.

Q: What can be used instead of salmon?
A: Trout or cod make excellent substitutes if you prefer different flavors or have dietary restrictions.

Q: How spicy is this dish?
A: The base recipe offers a moderate spice level. Adjust cayenne pepper quantities up or down to match your heat preference.

Q: How should leftovers be stored?
A: Store cooked seafood in the fridge in a sealed container, and consume within 2-3 days for the best quality.

Q: Can Cajun Salmon and Shrimp be made in advance?
A: The dish is best fresh, but prepping ingredients and creating spice mixes in advance can save time on the cooking day.

Q: How is fresh Cajun seasoning made?
A: Combine paprika, garlic powder, onion powder, cayenne, thyme, and oregano for a quick, homemade blend.

Q: What side dishes pair well with this recipe?
A: Consider rice pilaf, quinoa salad, or simply sautéed greens to complement the spicy Cajun flavors.

Q: Can I use frozen shrimp?
A: Yes, simply thaw them completely and drain any excess water before cooking to ensure they absorb seasoning well.

Q: Is this recipe suitable for kids?
A: Reduce spices to adapt the recipe for a milder flavor, keeping in mind the savory appeal of the salmon and shrimp.

Q: Can I incorporate additional vegetables?
A: Vegetables like bell peppers or zucchini can be a colorful addition, sautéed briefly to maintain a firm bite.

Additional Resources


Explore related recipes like Blackened Fish Tacos or Seamless Shrimp Jambalaya for further culinary adventures in Cajun cuisine. Consult guides on perfecting seafood searing or crafting homemade spice mixes for additional mastery. Engage with ingredient sourcing tips for sustainable seafood choices, access blog posts about equipment perfect for Cajun cooking, and browse seasonal adaptations to freshen presentations.

Join the Conversation


We invite you to share your culinary journey with Cajun Salmon and Shrimp through our social media platforms; post your photos and use the hashtag #CajunSeafoodLove. Share your recipe success stories in the comments, ask questions, or provide feedback to join our vibrant community of food enthusiasts. Discover a wealth of tips, connect with like-minded cooks, and delve into endless opportunities to customize and perfect this dish.

The Recipe

Cajun Salmon and Shrimp

Serves: 4

Prep Time: 15 mins

Cook Time: 20 mins

Total Time: 35 mins

Kitchen Equipment Needed

  • Heavy-bottomed skillet
  • Spatula
  • Mixing bowls
  • Measuring spoon set
  • Tongs

Ingredients

  • 4 salmon fillets
  • 8 large shrimp, peeled and deveined
  • 2 tablespoons Cajun seasoning
  • 1 tablespoon olive oil
  • 1 lemon, juiced
  • Salt to taste
  • Fresh parsley for garnish

Directions

  1. Pat the salmon fillets and shrimp dry with paper towels.
  2. Rub a tablespoon of Cajun seasoning evenly across each salmon fillet and shrimp.
  3. Heat olive oil in a heavy-bottomed skillet over medium-high heat.
  4. Place salmon and shrimp in the hot skillet, cooking salmon skin side down.
  5. Cook salmon for about 5-7 minutes on each side until cooked through, and shrimp for 2-3 minutes per side.
  6. Squeeze fresh lemon juice over seafood before serving and garnish with parsley.
  7. Serve immediately with preferred sides.

Recipe Notes

  • Adjust spices for personal heat preference by reducing or increasing Cajun seasoning.
  • Substitute smoked paprika for a milder spice level without missing out on flavor.