Delicious Gingerbread Cupcakes with Creamy Cinnamon Frosting Recipe

Gingerbread Cupcakes with Creamy Cinnamon Frosting: A Festive Treat to Delight Your Senses

⚖️
Difficulty
Moderate

⏲️
Prep Time
20 mins

🕒
Cook Time
18 mins

⏱️
Total Time
38 mins

🍽️
Servings
12 cupcakes

Imagine biting into a soft, moist cupcake where the warmth of ginger and spices envelops your taste buds. These gingerbread cupcakes are the epitome of festive baking, topped with a creamy cinnamon frosting that melts in your mouth. Whether for a holiday gathering or a simple sweet treat, they offer a delightful combination of flavors that evoke the cozy feeling of classic holiday desserts.

The rich molasses adds depth, while the spices bring warmth, complementing the lightness of the cupcakes perfectly. The frosting, infused with cinnamon, enhances the overall flavor profile, creating a harmonious blend of sweetness and spice. These are not just any cupcakes; they are a celebration of the holiday spirit in every bite, appealing to both children and adults alike.

The creamy cinnamon frosting is the ideal companion to these spiced cupcakes, providing a silky finish that elevates the dessert to new heights. The combination of ginger and cinnamon isn’t just flavorful but also aesthetically pleasing, making these gingerbread cupcakes a showstopper at any event. Crafting this recipe is an experience, a joyous journey that culminates in creating a batch of delectable treats that are hard to resist.

Quick Recipe Highlights

  • Flavor Profile: The gingerbread cupcakes have a rich, spiced flavor due to the blend of ginger, cinnamon, and nutmeg, with a sweet touch from the creamy frosting.
  • Texture: The cupcakes boast a perfect balance between moist and fluffy, while the frosting adds a creamy smoothness across the palate.
  • Aroma: A warm, inviting aroma of ginger and cinnamon fills the air as they bake, providing a sensory experience that hints at the deliciousness to come.
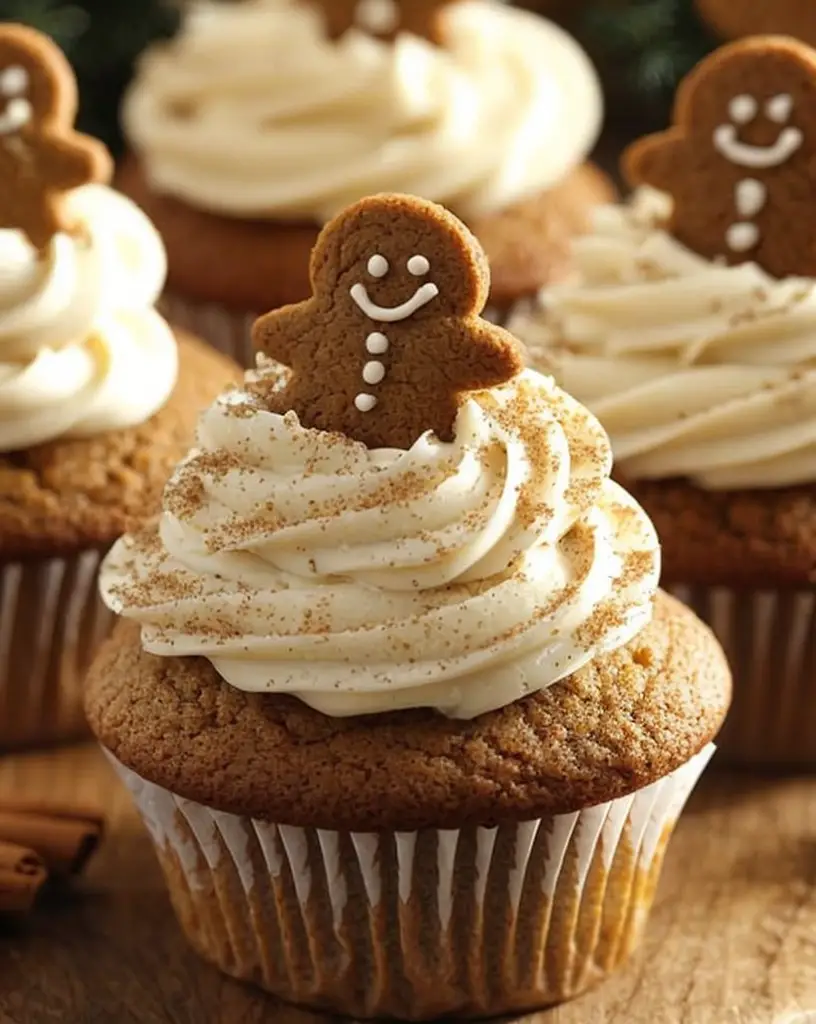
  • Visual Appeal: With their golden-brown hue and snow-white frosting swirls, these cupcakes are visually stunning and entice anyone who lays eyes on them.
  • Skill Level Needed: Moderate; the recipe requires basic baking skills and attention to detail in mixing ingredients and frosting the cupcakes.
  • Special Equipment: You will need a standard muffin tin, cupcake liners, mixing bowls, and an electric mixer to achieve the best results.

Recipe Overview

  • Difficulty Level: Moderate – This recipe requires straightforward techniques like mixing and frosting, but attention to ingredient measurements and baking times is crucial for perfect results.
  • Category: Dessert – A perfect sweet addition to any meal or festive gathering.
  • Cuisine: This dessert has roots in Western baking but is widely loved for its universally appealing spices and flavors.
  • Cost: Moderate – The ingredients are standard pantry staples, though fresh spices and quality molasses can influence cost slightly.
  • Season: Best enjoyed during the cooler months; ideal for the holiday season when warm spices are most appreciated.
  • Occasion: Perfect for festive gatherings, holiday parties, or as a sweet treat to enjoy with family during cozy evenings at home.

Why You’ll Love This Recipe


These gingerbread cupcakes offer a delightful balance of bold, warm flavors thanks to the spices that shine through in every bite. The creamy cinnamon frosting adds a sweet, smooth contrast, creating a dessert that is both comforting and exciting to the taste buds.

The preparation of these cupcakes is both fun and rewarding. The process is straightforward, allowing even novice bakers to create a professional-quality dessert. Preparing and decorating them can be a joyful activity shared with family or friends, making the journey to a delicious treat as enjoyable as eating it.

From a nutritional standpoint, ginger and cinnamon bring potential health benefits, including anti-inflammatory properties. Molasses, while sweet, also contains some vitamins and minerals, making this dessert not only tasty but also somewhat wholesome.

Serve these at your next social event for a conversation-starting dessert. Their enticing aroma and beautiful presentation are sure to impress guests and add a homemade touch to any gathering. They make for excellent gifts, too, as their festive flair is always well-received.

Despite their gourmet appeal, the ingredients for these cupcakes are accessible and often pantry staples. This makes them both cost-effective and easy to prepare on short notice, ensuring you don’t have to break the bank to enjoy a truly delicious homemade dessert.

Historical Background and Cultural Significance


Gingerbread dates back centuries, deeply rooted in ancient traditions where ginger was revered for its culinary and medicinal properties. Initially introduced to Europe in the 11th century, gingerbread evolved from a confectionery made by monks to a staple in cultural festivals across the continent.

In various cultures, gingerbread has been shaped into impressive architectural structures or delicately decorated cookies. Its inception as a cupcake is a much more modern adaptation, one that combines traditional flavors with contemporary baking styles.

The spices used in gingerbread have long symbolized warmth and festivity, making it an integral element of holiday celebrations worldwide. The tradition of utilizing gingerbread during winter months persists, characterized by its comforting flavors and robust tastes.

Regional variations of gingerbread showcase diverse uses of spices, sweeteners, and additional ingredients, demonstrating how this traditional dish has adapted and been embraced by different cultures. Each version has its own charm and maintains the spirit of the original confection.

Ingredient Deep Dive

Ginger: This spicy root has a rich history dating back to ancient China and India. Known for its distinctive heat and sweetness, ginger is both a flavor powerhouse and a potential digestive aid. When selecting ginger, choose firm, smooth skin for optimal freshness. Store in a cool, dry place or freeze to extend shelf life. If fresh ginger is unavailable, ground ginger can serve as an adequate substitute.

Molasses: A byproduct of sugar cane or beet refinement, molasses imparts a deep, earthy sweetness crucial to gingerbread’s traditional flavor. It offers a moderate source of minerals, such as iron and calcium. When choosing molasses, opt for unsulfured varieties for the purest taste. Store tightly sealed in a cool, dark pantry. Substitute with honey or maple syrup if necessary, but be mindful of altering the flavor profile.

Cinnamon: Essential for cinnamon frosting, this aromatic spice is known for its warming, sweet, and woody notes. Cinnamon, derived from tree bark, is rich in antioxidants and may have anti-inflammatory benefits. For the best quality, buy ground cinnamon in small quantities and store in a tight container. If substituting with cinnamon sticks, remember the flavor intensity varies.

Common Mistakes to Avoid

  • Overmixing the batter can lead to dense cupcakes. Mix until ingredients are just combined to maintain a light texture.
  • Ignoring ingredient temperatures can affect results. Use eggs and butter at room temperature for better emulsification.
  • Skipping molasses substitution consideration can alter flavors dramatically. Ensure you use a similar sweetener if necessary.
  • Frosting too soon will cause melting. Let cupcakes cool completely before decorating.
  • Incorrect oven temperatures can ruin texture. Ensure your oven is correctly preheated and use an oven thermometer if unsure.
  • Using old spices diminishes flavor. Always check expiration dates for maximum freshness.
  • Neglecting cupcake liners may make removal difficult. Always line your muffin tin.
  • Not measuring flour correctly leads to dryness. Spoon into the measuring cup and level with a knife for accuracy.
  • Overbaking results in dry cupcakes. Check doneness with a toothpick to avoid this.
  • Improper storage affects freshness. Keep in an airtight container to maintain softness and flavor.

Essential Techniques


Measuring Ingredients: Accurate measurement is crucial for consistent results. Always use a scale for dry ingredients and specific measuring cups for liquids to ensure precision.

Creaming Butter and Sugar: This technique incorporates air, which contributes to a lighter cupcake texture. Beat them together until pale and fluffy for the best outcome.

Frosting Techniques: Using a piping bag provides control and allows for even, attractive distribution of frosting. Explore different tips for various decorative effects.

Baking Time Management: Keeping an eye on baking time is vital. Look for signs like golden edges and a clean toothpick to gauge doneness effectively.

Folding: Combine wet and dry ingredients with a gentle folding motion to maintain air and avoid tough cupcakes. Use a spatula and light wrist movement for ideal results.

Proper Cooling: Allow cupcakes to cool in the pan briefly, then transfer to a rack to prevent residual heat from overbaking. A completely cool cupcake is less likely to have frosting issues.

Pro Tips for Perfect Gingerbread Cupcakes


Maintain an even batter distribution by using an ice cream scoop. This ensures cupcakes bake evenly in both size and texture.

Add a touch of orange zest to the batter for an unexpected citrus note that complements the spices beautifully.

For extra moisture, consider adding a tablespoon of applesauce along with the wet ingredients. It integrates well with the ginger flavor.

Enhancing cinnamon flavor in the frosting can be achieved with a sprinkle of cinnamon sugar atop the finished cupcakes.

For individualized decoration, consider topping each cupcake with a candied ginger piece for added flair and texture.

When piping frosting, apply consistent pressure and move in a circular motion to achieve smooth, professional-looking swirls.

Before serving, lightly dust with powdered sugar for a snow-dusted effect, enhancing visual appeal, especially during the holidays.

Experiment with different frosting shapes and decor elements like edible glitter or holiday-themed sprinkles to suit specific occasions.

Variations and Adaptations


For a spicier kick, try incorporating a bit of ground black pepper or cayenne into the batter for a unique twist on traditional gingerbread.

In warmer months, consider swapping the cream cheese in the frosting for a mascarpone base, resulting in a lighter summer cupcake.

Achieve a gluten-free version by using a high-quality gluten-free flour blend to seamlessly replace all-purpose flour in the recipe.

To create a vegan variant, substitute dairy products with plant-based equivalents such as coconut oil and almond milk, and use flax eggs in place of regular eggs.

Add chopped nuts such as pecans or walnuts to the batter to introduce a new texture and a nutty counterpoint to the sweet spices.

Invert the flavors by making a ginger-infused frosting over vanilla cupcakes, allowing the spiced elements to shine in new ways.

Introduce a fruit element, like diced apple or pear, into the batter to create a deliciously juicy component that pairs with ginger seamlessly.

Serving and Presentation Guide


For an elegant touch, present cupcakes on a tiered cake stand to allude to their sophisticated flavors and make them the centerpiece of your table.

Garnish each cupcake with a small mint sprig or holiday-themed candy to add a dynamic green shade against the warm spice tones.

Pair with a dollop of freshly whipped cream or a scoop of vanilla ice cream for a luxurious, complete dessert experience.

For a novel serving approach, deconstruct the cupcakes into jars with layered frosting for a portable and visually appealing treat.

Consider serving at room temperature to allow the spices and frosting to express their full flavors and textures naturally.

Maintain balance by offering a secondary option, like fruit skewers, for guests who appreciate a lighter accompaniment to their cupcake.

Wine and Beverage Pairing


Opt for a sweet Riesling or Moscato wine that complements the spicy notes with its light, fruity sweetness, enhancing the cupcake experience.

Pair with mulled cider or a spiced tea for a non-alcoholic option that mirrors the warmth of the ginger and cinnamon.

If you’re serving these cupcakes during a morning gathering, consider a rich, smooth vanilla latte as a perfect coffee pairing.

Consider serving alongside hot cocoa with a hint of chili for a playful, contrasting experience that aligns perfectly with the gingerbread theme.

Chilled sparkling water with a splash of citrus juice cleanses the palate between bites, allowing each cupcake’s flavors to shine anew.

Aim to serve beverages at complementary temperatures—wine chilled and coffee piping hot—for a harmonious dining experience.

Storage and Shelf Life


Store cupcakes in an airtight container at room temperature to preserve their texture and prevent staleness. They’ll keep fresh for up to three days.

For longer storage, refrigerate them in a sealed container for up to a week, ensuring the frosting remains intact and deliciously soft.

Freezing is possible—wrap each cupcake individually in plastic wrap, then in foil, storing them in a freezer-safe bag for up to three months.

Signs of spoilage include any off odors or flavors, or if the cupcakes become too dry or hard. Always check before serving.

When ready to enjoy frozen cupcakes, thaw them at room temperature or defrost gently in the microwave, taking care to avoid texture changes.

Reheat cupcakes in a preheated oven for a few minutes to refresh their soft texture if they have become slightly stale.

Make Ahead Strategies


Bake cupcakes a day in advance, allowing them to cool fully before storing in an airtight container to maintain freshness.

Prepare frosting ahead and store it separately, chilled in the refrigerator. Let it reach room temperature for easy spreading or piping before use.

If stacking or transporting, frost on-site to ensure the cupcakes arrive in pristine condition for any event or gathering.

Assemble frostings using fresh cream or milk right before serving to maintain their creamy texture and vibrant taste, especially in warm climates.

Mix dry ingredients ahead of time, storing them in a sealed bag, to simplify the baking process when you’re ready to begin.

Invest in a cupcake carrier to simplify transport while maintaining aesthetic appeal and preventing damage.

Scaling Instructions


When halving, reduce ingredient amounts evenly and consider using a smaller muffin pan to ensure even baking times.

Doubling or tripling the recipe is straightforward but may require extra mixing batches if your equipment’s capacity is limited.

Adjust oven timing slightly when baking large batches, as the increased moisture may slightly alter the drying process in the oven.

For substantial batches, consider freezing some, noting “Storage and Shelf Life,” so you have a ready-made dessert on hand.

If scaling for a large event, pre-measure ingredients into sets to streamline the baking process and focus energy on technique.

Ensure you use a reliable oven thermometer, as larger batches can create slight temperature variations affecting cooking evenly.

Nutritional Deep Dive


These gingerbread cupcakes provide a mix of macronutrients with moderate fats from the frosting and carbohydrates from the sugars and molasses, important for an energy boost.

In terms of micronutrients, molasses is surprisingly nutritive, offering small amounts of essential minerals like iron, calcium, and magnesium.

Ginger carries potential health benefits, ranging from anti-inflammatory effects to digestive health support, aligned with traditional uses over centuries.

By controlling portion sizes and moderation consumption, these cupcakes can fit within a balanced diet without derailing typical nutritional goals.

Keep alternative sweeteners in mind when necessary to adjust sugar levels for health advantages without sacrificing flavor completely.

Substituting whole grain flour can provide additional fiber, aligning with dietary goals without significantly impacting the cupcakes’ beloved texture.

Dietary Adaptations


For gluten-free, choose a reputable gluten-free flour blend and check labels on other ingredients to ensure no cross-contamination.

To make dairy-free, opt for plant-based yogurt and cream cheese to maintain a creamy texture without animal products.

Vegan adaptations can include egg replacements like applesauce or a chia seed mixture, ensuring a tender and fluffy crumb.

Low-carb enthusiasts can experiment with almond flour mixtures and alternative sweeteners to maintain flavor with significantly reduced carb counts.

A keto version might include coconut flour adaptations, aligned with high-fat frostings and sugar substitutes like erythritol.

Paleo interpretation can use almond flour and coconut milk to adhere to primal lifestyle restrictions while maintaining the dish’s core flavors.

Low-FODMAP considerations would involve omitting molasses for maple syrup and experimenting with coconut sugar for a gut-friendly alternative.

Troubleshooting Guide


If cupcakes are too dense, likely causes include overmixing or expired leaveners. Always use fresh baking powder and fold gently.

Achieving the right balance of spices can be tricky. Gradually taste the batter, adjusting accordingly to suit personal preferences without overpowering.

If frosting melts, ensure cupcakes are cooled entirely before application and aim to frost in cooler conditions to maintain texture.

Variations in texture often signal inconsistent ingredient temperatures or inaccurate measurements. Room-temperature components combine more smoothly.

Don’t stress if you run out of specific equipment; many tools are interchangeable, such as using a hand whisk instead of an electric mixer.

For dry outcomes, baking times may need adjustment. Ensure batter isn’t overbeaten, as this can release crucial moisture incorporated during mixing.

Stale spices won’t deliver depth of flavor. Replace spices promptly and regularly to guarantee the richest possible taste.

Experiment confidently with substitutes, but scrutinize with neutrality, especially where texture and consistent flavor balance are concerned.

Recipe Success Stories


Community response has been overwhelmingly positive, with many readers enjoying the festive flavors and easy steps for replication.

Some have incorporated reader suggestions of adding citrus zest or chocolate chips for extra flavor dimensions to resounding success.

Reader-adapted versions include gluten-free, nut-adapted, and rum-flavored frostings, expanding the recipe’s versatility while honoring core elements.

Inward discussions have provided great insight into varying presentation techniques, imparting professional-looking results with home-level ease.

Reader photography has showcased varied decoration methods with a broad array of garnishes, ranging from traditional to modern flair.

Suggestions over hands-on family activities while crafting these cupcakes have made them a preferred choice for many holiday afternoons.

Frequently Asked Questions

How should I store these cupcakes? Store in an airtight container at room temp for up to 3 days; for longer storage, refrigerate or freeze for future enjoyment.

Can I make these cupcakes vegan? Yes, substitute dairy products with plant-based alternatives such as almond milk and ensure eggs are replaced with suitable vegan solutions.

How do I ensure my cupcakes are light and fluffy? Don’t overmix the batter, use room-temperature ingredients, and ensure your leaveners are fresh for optimal results.

What should I do if my frosting is runny? Adjust by gradually mixing in powdered sugar to thicken; ensure frosting elements are appropriately chilled before whipping.

What if my cupcakes sink in the middle? Critically check baking soda and powder viability, as runtime differences along with ingredient freshness heavily influence successful rising.

Can I use ground ginger instead of fresh? Ground ginger can replace fresh if necessary, but remember to adjust quantities, as ground will typically be more potent.

Can I make this recipe as a cake? Yes, adapt proportions and baking time accordingly; aim to keep batter levels consistent and ensure proper cake pan preparation.

Why are my cupcakes dry? Mix only until ingredients combine, monitor bake length carefully, and check ingredient proportions against listed values for accurate outcomes.

How can I scale this recipe? Maintain an even ratio when adjusting ingredient amounts, retaining consistency and incorporating practical knowledge of the oven and space constraints.

Can I add more spices? Certainly; enhance or adapt the spice mix according to personal preference, aligning it with desired flavor depth without overwhelming sweetness or structure.

Additional Resources


Exploring other seasonal recipes can inspire creativity and expand your dessert repertoire, introducing new flavors, textures, and ingredient combinations.

Explore spiced cake guides and books focusing on the blend of spices, understanding ingredient function, and balancing various sweeteners.

Ingredient diaries that delve into the rich history of spices used, spotlight their culinary narratives, and appreciate their global culinary adoption.

Consider investing in specialized baking equipment for higher accuracy, standardization, and skillful execution, transitioning home cooking into professional-like mastery.

Maintain familiarity with seasonal fruit and vegetable availability to accentuate your dessert with refreshing components that enhance both taste and presentation.

Join the Conversation


Engage with us on social media by sharing your gingerbread cupcake creations and join a community sharing tips, variations, and presentation ideas.

Photography submissions remain popular in our community—showcase your work and receive constructive feedback that ensures delightful photo-worthy results.

Leave recipe reviews to encourage fellow bakers and note adaptations that have proven successful and those which need mindful alteration.

Connect and exchange ideas in our forums with fellow dessert enthusiasts, gathering inspiration, support, and new techniques for the future.

Share your personal recipe adaptations, building on global culinary innovation, and contribute to a growing library of personalized gingerbread cupcake renditions.

The Recipe

Gingerbread Cupcakes with Creamy Cinnamon Frosting

Serves: 12 cupcakes

Prep Time: 20 mins

Cook Time: 18 mins

Total Time: 38 mins

Kitchen Equipment Needed

  • Muffin tin
  • Cupcake liners
  • Mixing bowls
  • Electric mixer
  • Ice cream scoop (for batter portioning)
  • Cooling rack
  • Piping bag and tips

Ingredients

  • 1 1/2 cups all-purpose flour
  • 1 teaspoon baking soda
  • 1/2 teaspoon salt
  • 1 tablespoon ground ginger
  • 1 teaspoon ground cinnamon
  • 1/4 teaspoon ground nutmeg
  • 1/2 cup unsalted butter, softened
  • 1/2 cup granulated sugar
  • 1/2 cup molasses
  • 1 large egg
  • 1 teaspoon vanilla extract
  • 1/2 cup buttermilk

Directions

  1. Preheat your oven to 350°F (175°C) and line a muffin pan with cupcake liners.
  2. In a bowl, whisk together flour, baking soda, salt, ginger, cinnamon, and nutmeg.
  3. In another bowl, beat the butter and sugar until light and fluffy. Mix in molasses, egg, and vanilla extract.
  4. Gradually add the dry ingredients to the wet mixture, alternating with buttermilk, beginning and ending with flour. Mix until just combined.
  5. Divide the batter evenly among cupcake liners, filling about 2/3 full.
  6. Bake for 18-20 minutes, or until a toothpick inserted into the center comes out clean. Cool completely on a wire rack.
  7. For the frosting, beat together softened cream cheese, butter, powdered sugar, and ground cinnamon until smooth and fluffy.
  8. Pipe the frosting onto cooled cupcakes using a piping bag and decorative tip of choice.
  9. Store in an airtight container until ready to serve.

Recipe Notes

  • For more robust ginger flavor, add 1/4 teaspoon ground cloves to the dry mix.
  • If you prefer less sweet frosting, reduce powdered sugar by 1/4 cup.
  • Decorate with sugared cranberries or a sprinkle of cinnamon sugar for holiday flair.

Irresistible Mint Chocolate Cheesecake Fudge Recipe for Dessert Lovers

Mint Chocolate Cheesecake Fudge: A Decadent Delight

⚖️
Difficulty
Medium

⏲️
Prep Time
20 mins

🕒
Cook Time
10 mins

⏱️
Total Time
30 mins

🍽️
Servings
16 squares

Imagine indulging in a velvety Mint Chocolate Cheesecake Fudge where the rich flavors of creamy cheesecake meet the refreshing hint of mint, all enveloped in a smooth chocolatey bliss. This decadent treat is perfect for chocolate lovers and offers a delightful twist that will captivate your senses. From the first bite, you’ll be entranced by the sensational combination of cool mint and luscious chocolate, a pairing that not only tantalizes but leaves a lasting impression.

This Mint Chocolate Cheesecake Fudge is more than just a treat; it’s an experience waiting to be savored. Its silky texture is complimented by the crunchy base, providing a satisfying bite that melts seamlessly in your mouth. The delightful mint aroma wafts up even before you take your first bite, making every moment with this fudge an aromatic adventure. Captivating in its presentation, the contrasting layers offer a visual feast with the pristine white of the cheesecake against the deep richness of chocolate. Despite its sophisticated appearance, the skill level required is quite approachable, ensuring that even novice bakers can create this masterpiece. The only essential tool you’ll need is a heavy-duty mixer to achieve the perfect creamy consistency.

Quick Recipe Highlights

  • Flavor Profile: Indulge in a harmonious blend of rich chocolate and cool mint, perfectly balanced with creamy cheesecake notes.
  • Texture: A dreamy, melt-in-your-mouth fudge with a delightful velvety finish and just the right amount of chew.
  • Aroma: Inviting mint essence intertwined with tantalizing chocolatey undertones.
  • Visual Appeal: Striking layers of deep chocolate and pristine cheesecake with a unique marbled top.
  • Skill Level Needed: Designed for the home cook with basic baking skills; the process is straightforward with impressive results.
  • Special Equipment: A stand or hand mixer for achieving the ultimate fudge consistency.

Recipe Overview

  • Difficulty Level: Mint Chocolate Cheesecake Fudge is classified as a medium-difficulty recipe. The preparation requires attention to detail to get the ideal consistency and flavor balance but is manageable even for those new to baking.
  • Category: This fudge falls under desserts and festive treats, perfect for holiday gatherings, parties, or a special homemade gift.
  • Cuisine: While it takes inspiration from American classic desserts, the addition of mint provides a refreshing twist that resonates with European confectionery influences.
  • Cost: The recipe is budget-friendly, utilizing common ingredients found in most pantries. Even when purchasing premium chocolate and cream cheese, the costs remain modest, rendering this treat accessible.
  • Season: Best enjoyed during the cooler months when rich, comforting flavors are most appealing, though it can be made year-round for those who adore mint-chocolate combinations.
  • Occasion: Ideal for festive celebrations, holiday tables, or as a sweet ending to a dinner party. It also makes for a luxurious homemade gift.

Why You’ll Love This Recipe


The taste and texture of Mint Chocolate Cheesecake Fudge are truly unparalleled. The fudge’s creamy consistency with the added dimension of the mint provides a refreshing lift to the rich chocolate. Each bite is a decadent indulgence that feels both classic and innovative. The convenience of preparing this fudge is another appealing aspect. It’s a no-bake dessert that doesn’t require a lot of hands-on time, making it simple for anyone to tackle.

Nutritional advantages lie in its moderate portion size, allowing you to enjoy this treat without overindulgence. Mint has digestive benefits, which add to the recipe’s positive points. Socially, this fudge is a showstopper at gatherings and functions, inviting conversation and compliments. It’s a dessert that encourages sharing, bringing people together over a shared love of sweet treats.

This Mint Chocolate Cheesecake Fudge is not only an indulgent taste sensation but also a cost-effective dessert solution. Its ingredients are readily available and cost-effective, providing a luxury experience without a hefty price tag. Due to its rich flavors, a little goes a long way, ensuring a batch can serve a large group without needing much adjustment, making it a go-to recipe for various occasions.

Historical Background and Cultural Significance


The origin story of this delightful fudge starts with the classic American chocolate fudge, which first gained popularity in the United States during the late 19th century. Its velvety texture captured the hearts of many, leading to countless variations, including the intriguing combination of mint and chocolate, influenced by European dessert traditions. The cultural importance of fudge, particularly during festive seasons, has made it a staple in many holiday traditions. Its rich flavors and flexible base allow for creative adaptations, bringing joy to familial and cultural gatherings alike.

Through the years, the recipe for fudge has evolved, incorporating different flavors and textures to cater to diverse palates. The addition of mint gives a refreshing twist to the classic dessert, aligning with global trends of mixing savory and minty flavors in sweet confections. This variation showcases the universal appeal of pairing mint with chocolate, a combination beloved for its refreshing yet comforting profile.

Regional variations of fudge across the world include adaptations with nuts, caramel, and spices, but the mint chocolate variation stands out for its dynamic flavor profile. Offering nostalgia and novelty, Mint Chocolate Cheesecake Fudge has undoubtedly cemented its place in the world of confections.

Ingredient Deep Dive

The chocolate used in this Mint Chocolate Cheesecake Fudge is key to achieving its decadent flavor. High-quality dark chocolate provides a rich, intense flavor that is both robust and smooth. Historically, chocolate has been prized since ancient times, often reserved for the elite. Today, it is appreciated for its antioxidant properties, supporting heart health when consumed in moderation. Selecting good-quality chocolate involves checking for a glossy finish and a smooth texture.

The cream cheese brings a tangy richness that complements the chocolate, creating a balanced and delightful mouthfeel. Cream cheese has evolved from its ancient roots into a versatile ingredient loved worldwide, often found in both sweet and savory dishes. Cream cheese is a good source of vitamin A and contributes healthy fats to the diet. Look for a fresh, unopened package for the best results, and store it in the fridge to maintain its creamy texture.

Common Mistakes to Avoid

  • Overheating the chocolate can cause it to seize, leading to a gritty texture. Melt gently over a double boiler.
  • Using low-quality cream cheese can result in less richness. Opt for a full-fat version for the best texture.
  • Skipping the cooling process will affect slicing precision; allow the fudge to set completely before cutting.
  • Not mixing thoroughly results in uneven flavor distribution. Ensure ingredients are well combined.
  • Using too much mint extract can overwhelm the taste; adhere to the recipe’s suggested quantity.
  • Failing to line the baking dish will cause difficulty in removing fudge; always use parchment paper.
  • Overbeating the mixture may introduce air bubbles, affecting texture. Mix just until blended.
  • Ignoring measurements results in inconsistent flavor; follow the recipe for best results.

Essential Techniques


Melting chocolate correctly is crucial for achieving the right texture in Mint Chocolate Cheesecake Fudge. Using a double boiler allows for gentle, even melting, crucial to avoid seizing, which occurs when chocolate is melted too quickly or at a temperature too high. Master it by keeping water low in the pot and ensuring the bowl doesn’t touch it directly. Look for a smooth, glossy sheen as a sign of success.

Incorporating the cream cheese effectively is key to achieving the desired fudge firmness. It requires adequate mixing to ensure smooth incorporation without lumps. Use a mixer at low speed to gradually blend until creamy. Be cautious not to overmix, which could introduce air and compromise the dense texture this dessert is known for.

Pro Tips for Perfect Mint Chocolate Cheesecake Fudge


Let the cream cheese come to room temperature before beginning; this ensures a smooth mixture without noticeable lumps. Invest in good-quality chocolate for a superior taste, which can elevate the entire recipe. When lining the pan, leave extra parchment paper hanging over the sides for easy lifting once set.

A slight chilling period in the fridge can help firm the fudge faster if you’re pressed for time. To perfect presentation, wipe your knife with warm water between cuts for clean edges. If you prefer a subtler mint flavor, start with a smaller quantity of mint extract, as you can always add more to taste.

Avoid greasing your parchment; the fudge will set perfectly and won’t stick once it’s cooled. Lastly, allow ample cooling time to ensure clean cuts; patience yields the finest results.

Variations and Adaptations


Regional variations of Mint Chocolate Cheesecake Fudge can easily be attained by incorporating nuts, such as walnuts or pecans, adding a crunch to the creamy texture. For a seasonal adaptation, consider incorporating festive toppings like crushed peppermint for a winter holiday version.

Dietary modifications are straightforward with this recipe. Utilizing a dairy-free cream cheese alternative and dark chocolate that’s naturally free of milk solids will yield a vegan-friendly version. Flavor variations with extracts such as orange or almond can offer diverse tastes, personalized to preference.

For a textured fudge, incorporate additional fillings like crispy rice cereal or marshmallows into the base. Presentation alternatives range from serving the fudge as a traditional block or rolling into bite-sized truffles coated with cocoa or shaved chocolate.

Serving and Presentation Guide


Enhance the presentation of your Mint Chocolate Cheesecake Fudge by cutting it into uniform squares or diamonds for a refined look. Consider garnishing each piece with a drizzle of white chocolate and a sprinkle of crushed candy canes during the holiday season, or use mint leaves for a fresh, sophisticated touch.

Traditional accompaniment options include vanilla ice cream, which provides a delightful contrast to the fudge’s richness. For a modern twist, pair with fresh berries for a pop of color and a hint of acidity that complements the chocolate.

Always serve chilled to maintain its firmness; however, allow the fudge to sit at room temperature for a few minutes prior to serving for optimal creaminess. For portion control, aim for bite-sized pieces, mindful of the richness that characterizes this treat.

Wine and Beverage Pairing


Pairing wine with Mint Chocolate Cheesecake Fudge can elevate the tasting experience. Opt for a rich, full-bodied red wine like a Syrah or an indulgent Port, offering a balanced sweetness against the rich fudge. For non-alcoholic alternatives, consider a robust coffee or espresso, accentuating the chocolate notes.

If coffee isn’t your preference, a fresh mint tea would maintain the mint undertone, providing a harmonious pairing. Serving beverages at room temperature ensures a perfect pairing experience without overshadowing the fudge’s flavors. Ensure your coffee or tea is freshly brewed, enhancing aromatic notes to complement the fudge.

Storage and Shelf Life


Proper storage of Mint Chocolate Cheesecake Fudge extends its shelf life efficiently. Store pieces in an airtight container to prevent moisture loss, ideally in a single layer. For longevity, keep the container in the refrigerator, maintaining its creamy texture and fresh taste.

Be mindful of temperature fluctuations to avert condensation, which could alter texture. Watch for signs of spoilage, such as changes in color or texture, especially in warm environments. For extended storage, freeze fudge in a well-sealed container, layering parchment paper between slices, and defrost chilled before serving for best consistency.

Make Ahead Strategies


This fudge is an excellent make-ahead dessert, allowing flavors to meld beautifully over time. Prepare the mixture and allow it to set well before the event, maintaining freshness in an airtight container refrigerated until ready to serve.

Layering parchment between pieces helps in retaining moisture and prevents sticking. Quality remains intact over a few days, rendering it perfect for early preparations. Adding fresh mint leaves or chocolate curls just before consuming ensures that the freshness and visual appeal stay pristine.

Scaling Instructions


Scaling this Mint Chocolate Cheesecake Fudge recipe is straightforward, whether you want to halve or double it. When halving, consider using a smaller, appropriately size pan to maintain the original thickness. For doubling, two batches might ensure consistent results rather than cramming into a single dish.

Adjust the width of the pan to achieve uniform thickness when increasing the quantity. While scaling up, ensure all equipment can accommodate larger volumes without overloading, particularly mixers. Additional cooling time may be necessary for larger batches to set properly.

Nutritional Deep Dive


A portion of Mint Chocolate Cheesecake Fudge offers a gratifying dose of both indulgence and pleasure in moderation. Its macro breakdown includes carbohydrates primarily from chocolate and sugars, coupled with fats from cream cheese and chocolate, delivering energy-packed morsels.

The micronutrient analysis reveals contributions of calcium from cream cheese and antioxidants from dark chocolate. While not an everyday treat, its concentrated richness encourages smaller designated portions for mindful consumption. Perfect as an occasional sweet snack, this fudge satisfies cravings without overindulging.

Dietary Adaptations


Creating a gluten-free version of Mint Chocolate Cheesecake Fudge is seamless as the core ingredients naturally possess no gluten. For dairy-free adaptations, swap traditional cream cheese with a vegan equivalent, maintaining the luscious texture and taste.

Vegan modifications are easily attainable by leveraging plant-based chocolate and cream cheese substitutes, ensuring this dessert remains inclusive. A keto-friendly variation can be achieved through sugar-free sweeteners and high-cacao chocolate bars, which balance carbs with healthy fats. Paleo enthusiasts can adapt this recipe by integrating raw honey and almond butter for sweetening, ensuring compliance with their dietary guidelines.

Troubleshooting Guide


In the case of texture issues with your Mint Chocolate Cheesecake Fudge, consider if the fudge was set for the correct duration and at adequate temperature. For flavor imbalances, adjust mint extract in small increments until desired taste is reached without overpowering.

Temperature problems often arise from storage conditions; remember to maintain a consistent, cool environment. Equipment challenges may manifest when incorrect tools are utilized; confirm correct sizes and functionality before beginning. Ingredient substitutions sometimes lead to inconsistencies; it’s crucial to maintain the balance of wet and dry ratios to ensure ideal results.

Recipe Success Stories


This Mint Chocolate Cheesecake Fudge has become a crowd favorite, as shared by many home cooks who’ve adapted the recipe to their own tastes. Community feedback highlights its adaptability to various flavor profiles, with some using orange essence for a citrus twist.

Reader suggestions have inspired additions like a crunchy biscuit base, creating a robust contrast with the creamy fudge layer. Photography enthusiasts have shared tips on capturing its allure, focusing on its layered beauty and garnishes.

Frequently Asked Questions

Q: Can I use milk chocolate instead of dark chocolate?
A: Yes, milk chocolate can be used, but the overall flavor will be sweeter and less intense. Adjust sugar quantities if needed to balance the flavors.

Q: What’s the best way to store this fudge?
A: To retain freshness, place the fudge in an airtight container, storing it chilled in the fridge. Ensure parchment layers separate pieces to avoid sticking together.

Q: Can I add nuts to the recipe?
A: Absolutely, adding chopped nuts such as walnuts or almonds can provide a delightful textural contrast, altering the mouthfeel positively.

Q: How long will it last?
A: When stored properly, this fudge can last up to two weeks in the fridge, making it a great make-ahead dessert option.

Q: What alternatives exist for cream cheese?
A: Mascarpone can serve as a substitute, providing a similar creamy texture while altering the flavor slightly. For a dairy-free version, choose a vegan cream cheese alternative.

Q: Can this fudge be frozen?
A: Yes, this fudge freezes well. Wrap it tightly in foil or plastic wrap and place in an airtight container. It can be frozen for up to three months.

Q: Will using a different mint extract affect the flavor?
A: Different brands can vary in strength, so adjust the quantity based on taste tests, starting with reduced amounts and increasing as needed.

Q: Why did my fudge come out crumbly?
A: Overmixing or overheating the chocolate can cause crumbly textures. Ensure gentle heating and adequate mixing until ingredients are just combined.

Q: Is there a way to lower the sugar content?
A: Substitute sugar with a sweetener like erythritol or stevia, keeping in mind this may affect sweetness and texture slightly.

Q: Can I add food coloring for a vibrant green hue?
A: Yes, adding a few drops of food-safe color can enhance the mint aspect visually, though this step is optional based on your preferences.

Additional Resources


Explore our other rich and indulgent dessert recipes, such as double chocolate brownies and raspberry swirl cheesecake bars, which offer similar luxurious experiences. Visit our technique guides for more on mastering chocolate tempering and crafting creamy delights.

Discover insightful reviews on various cream cheeses and chocolates to elevate your culinary creations. Our seasonal variations section offers inspiration for adapting dessert recipes throughout the year.

Join the Conversation


Engage with our community of dessert enthusiasts by sharing your experiences with Mint Chocolate Cheesecake Fudge on social media. We invite your feedback and creative adaptations in the comments section below, allowing for a dynamic exchange of ideas and versions.

We encourage novice photographers to explore their creativity in capturing the essence of this decadent fudge through unique angles and lighting techniques. Share your results for a chance to be featured in our community’s showcase of sweet treats.

The Recipe

Mint Chocolate Cheesecake Fudge

Serves: 16 squares

Prep Time: 20 mins

Cook Time: 10 mins

Total Time: 30 mins

Kitchen Equipment Needed

  • Heavy-duty mixer
  • Double boiler
  • 9×9 inch baking dish
  • Parchment paper
  • Mixing bowls
  • Spatula

Ingredients

  • 2 cups dark chocolate, chopped
  • 1 cup cream cheese, softened
  • 1/4 teaspoon mint extract
  • 1/2 cup sugar
  • 1/4 cup unsalted butter
  • Pinch of salt

Directions

  1. Line a 9×9 inch baking dish with parchment paper, leaving excess for easy lifting.
  2. In a double boiler, gently melt the dark chocolate and butter, stirring until smooth.
  3. In a mixing bowl, whip cream cheese until fluffy, then gradually add sugar, mint extract, and a pinch of salt.
  4. Slowly incorporate the melted chocolate mixture, blending until smooth and fully combined.
  5. Pour the mixture into the prepared baking dish, smoothing the top with a spatula.
  6. Refrigerate for at least 2 hours, or until fully set.
  7. Once set, remove fudge from the dish using the parchment edges. Cut into squares and serve chilled.

Recipe Notes

  • For a vegan alternative, use dairy-free cream cheese and chocolate.
  • Adjust mint flavor by starting with a smaller amount of extract and tasting as you go.
  • Nuts or dried fruit can be added for additional texture.

Magical Bubblegum Cloud Fudge Recipe: Sweet Treats to Delight

Bubblegum Cloud Fudge: A Whimsical Delight

⚖️
Difficulty
Easy

⏲️
Prep Time
10 mins

🕒
Cook Time
5 mins

⏱️
Total Time
15 mins

🍽️
Servings
16 pieces

Dive into a sweet, dreamy treat with Bubblegum Cloud Fudge, where nostalgia meets modern indulgence. This vibrant, sumptuous dessert whisks you away to a world of childhood memories with its fun bubblegum flavor and cloud-like texture. The marriage of creamy white chocolate and bubblegum essence forms a perfect harmony that dances on your taste buds, leaving a lasting impression of sweetness and joy. Easy to prepare yet delightful to consume, this fudge is a dreamy creation for all ages.

Bubblegum Cloud Fudge embodies a playful charm, not only in flavor but also with its eye-catching pastel colors. This fudge boasts a creamy, rich consistency thanks to silky-smooth white chocolate and sweetened condensed milk. The bubblegum flavor infuses a unique and unexpected twist, making it both familiar and exciting. The fudge is easy to make with no need for complex equipment or techniques, inviting you to explore your creative side with ease.

Indulge in the sensory delight that is Bubblegum Cloud Fudge, a treat that’s as enjoyable to make as it is to eat. Whether you’re hosting a party or simply craving a delightful sweet, this recipe is sure to brighten your day!

Quick Recipe Highlights

  • Flavor Profile: Sweet and nostalgic bubblegum flavor encased in a creamy fudge texture.
  • Texture: Smooth, melt-in-your-mouth richness with a slightly chewy finish.
  • Aroma: Sweet and inviting aroma of bubblegum evokes fond childhood memories.
  • Visual Appeal: Eye-catching pastel colors make this fudge as delightful to see as it is to eat.
  • Skill Level Needed: Simplistic preparation with easy-to-follow steps perfect for beginners.
  • Special Equipment: No special equipment, just a saucepan and a baking dish for setting.

Recipe Overview

  • Difficulty Level: Bubblegum Cloud Fudge is incredibly easy to make, requiring only a few basic ingredients and minimal cooking skills, making it an excellent recipe for novice and seasoned bakers alike.
  • Category: Dessert category, fitting perfectly into sweet tables, party snacks, or a child’s birthday celebration.
  • Cuisine: A fusion of playful, modern American cuisine with reminiscent flavors of traditional candy fair.
  • Cost: Budget-friendly, using affordable ingredients readily available in your local grocery store.
  • Season: While perfect year-round, the bright colors and fun flavors are especially fitting for spring and summer celebrations.
  • Occasion: Ideal for birthday parties, festive holidays, or any occasion calling for a touch of whimsy and sweetness.

Why You’ll Love This Recipe


Dive into the delightful combination of flavor and texture that Bubblegum Cloud Fudge offers. This fudge provides a perfect balance of sweetness with its unique bubblegum flavor, complemented by the decadent and smooth texture of white chocolate. It’s an indulgent treat that melts in your mouth, leaving you with a satisfying, sweet-tasting experience.

The convenience of preparing Bubblegum Cloud Fudge makes it a standout recipe. With simple steps and common household ingredients, you’ll find this a breeze to prepare. It requires no specialist tools, thus making it perfect for spontaneous dessert-making. The entire process, from start to finish, can be completed within 15 minutes, leaving you with ample time to enjoy the outcome.

Bubblegum Cloud Fudge offers a meaningful blend of sweet pleasure and nutritional balance when consumed in moderation. While it’s primarily a treat, it’s made with real white chocolate, allowing you to enjoy some essential nutrients like calcium and cocoa butter-derived fats. This fudge can be part of a balanced diet when savored responsibly.

The recipe’s simplicity and whimsical design make it a wonderful addition to any social gathering. Its vibrant colors and nostalgia-inducing flavor make it a conversation starter at parties. Moreover, its universal appeal ensures it will be a hit with both children and adults, making your hosting efforts even more memorable.

Moreover, Bubblegum Cloud Fudge offers great value for its cost. With ingredients that are economical and in-season most of the time, preparing this fudge does not strain your wallet. The fun and joy it brings far exceed its budget-friendly preparation, offering excellent accessibility for anyone looking to add a sweet touch to their day.

Historical Background and Cultural Significance


The inspiration behind Bubblegum Cloud Fudge can be traced back to traditional American treats where sweet confections filled candy shops and children’s dreams alike. Bubblegum, invented in the early 20th century, has since captured the hearts of many, its signature sweetness and aromas lingering in the air of candy stores across generations.

Culturally, bubblegum is a beloved treat, featured in countless childhood experiences. It is iconic in American pop culture, representing joy, youthfulness, and play. This fudge takes this cultural fondness and transforms it into a more sophisticated dessert option, appealing to both the young at heart and adventurous palates.

Bubblegum Cloud Fudge also shows culinary evolution as it transforms a simple candy flavor into a widely cherished dessert offering. Through experimentation, chefs and home bakers alike have adapted this flavor into a myriad of desserts, exploring nostalgic flavor profiles and achieving delightful new creations.

Across regions, Bubblegum Cloud Fudge might see variations in presentation and minor ingredient adjustments, but its core flavor profile remains a steadfast homage to days of innocence and blissful indulgence. Its regional adaptations maintain the fundamental mood it seeks to evoke, ensuring its lasting presence in dessert culture.

Ingredient Deep Dive


White chocolate is pivotal in creating the rich, creamy texture of Bubblegum Cloud Fudge. Originating in Europe, white chocolate is made from cocoa butter, sugar, and milk solids, making it a versatile ingredient in the dessert realm. Nutritionally, it’s a source of energy-dense fats and provides calcium.

To ensure you’re purchasing quality white chocolate, look for cocoa butter as the primary fat and avoid products with added vegetable oils. Store it in a cool, dry place to prevent melting and discoloration. In a pinch, substitute with vegan white chocolate for a plant-based version of the fudge.

The bubblegum flavoring reunites us with childhood delights, bringing the essence of confectionery adventures to this fudge. This flavor doesn’t contain natural nutrients but is key in delivering nostalgia. Choosing high-quality extracts or flavor pastes will provide the most genuine taste, which is crucial for achieving the intended sensory experience.

The flavoring should be stored tightly sealed to prevent aroma loss. If desired, unflavored or other flavor extracts could replace it for a different fudge adventure, but this would stray from the signature nostalgia Bubblegum Cloud Fudge seeks to capture.

Common Mistakes to Avoid

  • Using low-quality white chocolate can lead to a grainy texture. Choose one with cocoa butter, not vegetable oils.
  • Overheating the chocolate can cause it to seize. Melt gently over low heat or a double boiler for best results.
  • Forgetting to stir continually may lead to uneven melting and texture issues.
  • Incorrect measurements of ingredients can result in a fudge that’s too firm or too soft.
  • Skipping the lining in your pan will make removing the fudge difficult and could cause it to crumble.
  • Rushing the setting process may result in fudge that doesn’t hold together well. Allow ample time to cool.
  • Improper storage can lead to fudge drying out. Store in airtight containers to maintain softness.
  • Cutting the fudge before fully set may cause it to crack or crumble. Patience ensures clean slices.

Essential Techniques


Mastering the art of melting chocolate is crucial for obtaining the ideal smoothness in Bubblegum Cloud Fudge. Melt your white chocolate over low heat or using a double boiler to distribute heat evenly and avoid seizing. The smoothness of the melt ensures a creamy fudge final product.

To prevent burning your chocolate, patience is key. Keep the temperature low, stir consistently, and utilize gentle heat to achieve that perfect silky texture. Visual indicators of success include a glossy, even consistency without visible lumps. Practice these techniques for the best results.

Pro Tips for Perfect Bubblegum Cloud Fudge


The secret to a rich, creamy fudge is using high-quality white chocolate. Look for brands that specify pure cocoa butter content to ensure an even, melt-in-your-mouth consistency.

Add your bubblegum flavoring slowly, tasting as you go. This way, you can balance and adjust the flavor to your liking without overwhelming the creamy chocolate base.

To achieve clean, perfect cuts, use a sharp knife run under hot water. Dry the knife before slicing, and repeat between cuts to keep edges clean and fudgy.

Stir the mixture patiently until it’s glossy and smooth. A well-combined fudge mixture will set perfectly without granular texture.

For an extra touch of visual flair, consider swirling in a bit of food coloring before the fudge sets. This creates beautiful patterns reminiscent of old-fashioned candy swirls.

Chill the fudge in the refrigerator for a few hours for optimal setting time. Patience here enhances texture and flavor, ensuring a perfect piece every time.

Variations and Adaptations


To give Bubblegum Cloud Fudge a regional twist, incorporate local flavors or garnishes. In the south, a sprinkle of crushed pecans can add a delightful crunch and complement the sweetness of the fudge.

Embrace seasonal changes with adaptations. Springtime brings floral elements like lavender or rose extracts that pair beautifully with the fudge’s creaminess, while autumn calls for a hint of warming cinnamon.

For dietary modifications, almost any fudge flavor can be adapted. Vegan white chocolate ensures this treat suits those avoiding dairy. Seek extracts labeled as allergy-friendly to accommodate the necessity of specific dietary paths.

Experiment with various flavorings beyond bubblegum. Mint extract can provide a fresh alternative, or use fruit-flavored extracts such as raspberry or cherry to craft a summer-centric confection.

Alter texture by incorporating crunchy elements like nuts or coconut flakes. These add surprise to the otherwise consistent texture, creating layers of enjoyment with each bite.

Consider creative presentation alternatives. Fudge can be cut into shapes, set in unique molds, or topped with edible glitter for occasions that demand extra glitz and glamour.

Serving and Presentation Guide


Presentation of Bubblegum Cloud Fudge is as crucial as its flavor. Consider cutting into clean, symmetrical squares and serving on a vibrant platter to enhance its visual appeal. Plating on a white dish allows its cheerful colors to pop fantastically.

Garnishing with edible flowers or a light dusting of powdered sugar can elevate the presentation. These simple touches add elegance and sophistication to a fun dessert.

Traditional accompaniments like a beautifully brewed cup of coffee or a hot chocolate can enhance the eating experience. If serving to adults, a splash of coffee liquors can create a unique pairing.

Consider serving this fudge chilled during summer months, and let it come to room temperature in cooler seasons to maintain the perfect consistency and palate feel.

Portion control is best achieved by cutting into modest sizes, making enough for everyone to enjoy without overindulgence. Accompanied by other treats, this fudge forms part of a balanced dessert table raising any occasion’s caliber.

Wine and Beverage Pairing


Pair Bubblegum Cloud Fudge with a mildly sweet dessert wine such as Moscato or an ice wine for a delightful match-up of complementary sweetness. The wine’s crisp aftertaste balances the fudge’s creamy richness.

Non-alcoholic alternatives like a sparkling fruit juice can make a refreshing contra-bitterness to the fudge’s sweetness, perfect for those who prefer a fizzy complement without the alcohol.

Pairing with certain teas such as a delicate jasmine or a rich Earl Grey can enhance the flavors found within the fudge, creating a refined balance between sweet and savory notes.

The beverage serving temperature matters; chilled wines or juices alongside the fudge create contrast, or a warm beverage offering coziness making the fudge a warming treat.

Presentation of beverages can elevate the entire dessert experience. Serve the wines in beautiful glassware or the teas in fine china to enhance the dessert’s sophisticated appeal, merging a delightful culinary experience with elegant charm.

Storage and Shelf Life


Preserve your Bubblegum Cloud Fudge through thoughtful storage methods that extend its delightful texture. Place in an airtight container to maintain freshness and prevent drying out, especially in environments with varying humidity.

Optimal storage temperatures lie within the refrigerator for long-lasting freshness, or in a cool pantry during cooler months where conditions are more stable, preserving the fudge’s soft texture and creamy consistency.

Choose a container that minimizes air exposure. With less air, top layers remain supple and enticing to eat. Consider dividing into layers atop parchment paper to prevent sticking if stacking is necessary.

Signs of spoilage include tough, grainy textures or discoloration. These warning signs mean it’s time to bid farewell. While the fudge lasts 2-3 weeks when stored properly, consume sooner for best quality.

Reheating isn’t recommended as it negatively affects the texture. Enjoy the fudge as it comes, at room temperature or chilled for a refreshing experience during warmer days.

Freezing is also an option for longer storage. Wrap tightly in freezer-friendly bags, expel as much air as possible, and enjoy within 3 months for preserved quality when defrosted.

Make Ahead Strategies


The best way to prepare Bubblegum Cloud Fudge ahead of time is by focusing on the key components. Tackle each step in manageable timelines to create less pressure and more joy in dessert preparation.

Between completion and serving, store the fudge carefully to maintain desired texture. Refrigerating or placing over parchment in a sealed container keeps taste and quality at its peak.

Consider the quality impact throughout your preparation. Patience pays off when time has been given to each step, especially letting flavors meld and textures set perfectly for anticipated enjoyment.

Assembly can be paced based on events; preparing flavors and melting chocolates earlier relieves stress. Enjoy the process in incremental steps, achieving indulgence without pressure.

Reheating isn’t suggested for this dish, yet bringing a cold fudge piece to room temperature before serving can enhance its texture, creating a melt-in-your-mouth indulgence.

Add fresh elements once set; a sprinkle of edible decoration or fresh fruit on top creates vibrant, exciting layers that engage those consuming, weaving a touch of personalization into each serving.

Scaling Instructions


Adaptations for Bubblegum Cloud Fudge cater to various crowd sizes, from intimate gatherings to grand celebrations. Scaling recipes alters ingredient quantities but maintains core presence; simply adjust the batch as needed.

When halving, use a smaller dish to set the fudge, ensuring height consistency. Adjust melting times slightly shorter due to less volume, maintaining quality and integrity.

For doubling or tripling batches, ensure larger equipment or divide as necessary into manageable portions, guaranteeing mixing and setting quality remain unaffected by size.

Tools may need adjustments; broader mixing bowls, more expansive baking trays, and increased freezer space may be required. Keep weight-bearing distribution in balance for each step.

Time considerations expand with larger batches; allow extra minutes to melt ingredients evenly and set uniformly, avoiding rushed sections that could break the final presentation.

With all size adjustments comes potential storage needs, as increases demand appropriate space both pre and post creation, securing indulgence at optimal consumption.

Nutritional Deep Dive


Understanding Bubblegum Cloud Fudge’s nutritional density allows for informed consumption choices, weaving enjoyment into balanced lifestyle practices while savoring its delights.

A small serving contributes modest macros, offering a balanced indulgence. Caloric intake derives primarily from the white chocolate, providing sweetness and energy.

Micronutrient analysis of this fudge sees contributions of calcium and modest iron from the chocolate, adding depth beyond its primary dessert purpose for those mindful of intake.

The health benefits of balanced moderation revolve around integrating small treats into diet plans with intention. This fudge serves as a delightful offset within broader nutritious frameworks.

Dietary considerations must always involve portion sense. One piece satisfies without overwhelming daily intake, adhering to non-negotiable balance across meals and indulgent moments.

For those managing weight, sharing options expand portion control. Alongside full meals, this fudge need not exclude healthy choices but enhance them harmoniously.

Dietary Adaptations


Gluten-free options naturally align with this fudge, as ingredients typically lack gluten presence. Confirm extract labeling for pureness, removing trace concerns.

For a dairy-free alternative, source vegan white chocolate and dairy-free condensed milk. These preserve fudge integrity while adapting to dietary needs seamlessly.

Vegan adaptations demand similar swaps, ensuring no animal product derivatives exist within chosen ingredients, completed by plant-based replacements that honor core flavor.

Bubbling creativity for low-carb ambitions involves focusing on chocolate and extract purity, maintaining fiber through alternative options that align with specific carbohydrate goals.

Keto possibilities emphasize portion control and ingredient awareness, optimizing indulgence through considered carbohydrate allocations within fudge preparation.

Paleo and low-FODMAP considerations adhere to fundamental recipe adjustments, exploring natural flavoring or alternative sugar substitutes addressing specific dietary preferences without sacrifice.

Troubleshooting Guide


Texture issues resolved through balance in ingredient ratios; dryness signals overcooking, while overly soft signals undercooking or incorrect setting times.

Flavors out of balance may stem from extract overuse; remain prudent with slow increments, tasting for desirable layers and adjusting to preference gradually.

Temperature must remain gentle; efficient stove control ensures smoothness required, avoiding compounds seizing from rapid heat exposure.

Equipment challenges forewarned against through cook’s awareness. Ensure possession of necessary basics: sensitive pans and thorough utensils to produce even results.

Ingredient substitutions carry specific alignment; replace wisely based on original purpose, particularly within core components such as chocolate, observing overall effect cautiously.

Timing concerns revolve around event schedule; advance preparations lessen rush, preparing sequential steps into task batches that simplify and guarantee success.

Recipe Success Stories


Community feedback praises Bubblegum Cloud Fudge notably for its simplicity and sensory impact, with audiences worldwide sharing their successful iterations and adaptions.

Reader variations inspire others; submissions feature new flavors and designs, affirming the fudge’s versatility and endless creative possibilities beyond the original recipe.

Adaptation stories include substitutions that rest assuredly in the delight of creation, with varying textures and new discoveries evolving as prominent within home kitchens.

Photography tips contribute visual splendour; bloggers reveal lighting and plating techniques that complement the fudge’s pastel hues and sumptuous textures, basking in shared artistic expression.

Enthusiasts emerge through repeated exploration, sharing how integrating fudge into diverse festivity cycles created heightened culinary anticipation, cementing its allure.

Frequently Asked Questions

How long does the fudge need to set?
Allow your fudge to set in the refrigerator for at least 2 to 3 hours. This ensures proper texture and consistency, giving you fudge that’s delightfully creamy and easy to cut.

Can I use different white chocolate brands?
Yes, but ensure that it lists cocoa butter as a primary fat. Using inferior chocolate with added oils can affect the final texture of your fudge, leading to a less creamy result.

What if I don’t have bubblegum flavoring?
If bubblegum flavoring is unavailable, feel free to experiment with other extracts, such as vanilla or almond, for a completely different, yet equally delightful, fudge flavor.

How should I store leftover fudge?
Store leftover fudge in an airtight container within the refrigerator. It will keep for up to three weeks, maintaining both its delicious flavor and rich, smooth texture.

What’s the best way to cut fudge cleanly?
For perfect slices, use a sharp knife warmed under hot water. Wipe the knife’s blade dry after each cut and repeat the process for the cleanest, most precise pieces.

Can I freeze Bubblegum Cloud Fudge?
Absolutely! Wrap the fudge securely in plastic wrap and place it in a freezer bag for up to three months. Thaw in the refrigerator to enjoy later on.

Is it possible to make this fudge ahead of time?
Certainly, making it ahead can save preparation time. The fudge can be prepared and stored up to a week in advance, ensuring it’s fresh and set perfectly for when needed.

Can this recipe be made vegan or dairy-free?
Yes, with simple adjustments! Use vegan white chocolate and dairy-free condensed milk to ensure the fudge remains delightful for those adhering to plant-based or lactose-free diets.

How do I prevent the fudge from sticking to the pan?
Line your baking dish with parchment paper, ensuring an easy release once the fudge sets. Extend it up the sides to pull the fudge out effortlessly when ready.

What should I do if my fudge won’t set?
Consider refrigerating it longer as fudge typically requires firm chilling over time. If still unset, revisit measurement corrections and ingredient accuracy for subsequent attempts.

Additional Resources


For curious minds eager to explore beyond Bubblegum Cloud Fudge, delve into related recipes that speak of similar sugary nostalgia. These classics include traditional caramel confections or modern candy-inspired creations.

Technique guides ensure mastery over all things fudge. Detailed instructions covering chocolate melting processes, flavoring adaptations, and setting stages support evolving fudge artistry.

Our ingredient information section clarifies frequently needed details, from sourcing quality vanilla beans to exploring alternative dairy solutions, enriching your detailed understanding.

Essential equipment recommendations streamline dessert success. From choosing durable saucepans to specialized confectionery tools, these guidelines equip you with precise, effective kitchen skills.

Seasonal variations further your delight in culinary play. Evening parties invite unique decorations, while summer sweet tables encourage vibrant presentations, ensuring Bubblegum Cloud Fudge fulfills its fun delight.

Join the Conversation


Engage with our passionate culinary community on social media to showcase your Bubblegum Cloud Fudge creations. Tag your photos and share experiences to deepen collective enjoyment.

Our photography tips enhance your visual artistry, transforming well-loved recipes into stand-out visual pieces, drawing inspiration and engagement from expanding audiences.

Contribute to recipe reviews and delve into discussions, sharing feedback on what aspects thrill and what inquiries arise, fortifying the connection within our culinary camaraderie.

Community engagement thrives when sharing recipe variations. Whether thematic or flavor-based, your interpretations celebrate the diversity of Bubblegum Cloud Fudge in all its vibrant pride.

The Recipe

Bubblegum Cloud Fudge

Serves: 16 pieces

Prep Time: 10 mins

Cook Time: 5 mins

Total Time: 15 mins

Kitchen Equipment Needed

  • Medium saucepan
  • Baking dish
  • Wooden spoon for stirring
  • Parchment paper
  • Sharp knife

Ingredients

  • 2 cups white chocolate chips
  • 1 can (14 oz) sweetened condensed milk
  • 2 teaspoons bubblegum flavoring
  • Food coloring (pastel colors suggested)

Directions

  1. Line a baking dish with parchment paper to prevent sticking and ease removal.
  2. In a medium saucepan over low heat, melt white chocolate chips and sweetened condensed milk. Stir continuously until smooth.
  3. Once melted, remove from heat and stir in bubblegum flavoring, adjusting to taste.
  4. Divide the fudge mixture if using multiple colors, and add your desired food coloring, stirring until evenly distributed.
  5. Pour the mixture into the prepared dish, swirling colors as desired for a decorative effect.
  6. Refrigerate for 2-3 hours until fully set.
  7. Cut into squares using a sharp knife warmed in hot water for clean edges.

Recipe Notes

  • Adjust amount of bubblegum flavoring to personal taste preferences.
  • For even swirls, use a skewer or knife to blend colors gently.
  • Store fudge in an airtight container for up to three weeks.

Irresistible Garlic Bread Sloppy Joes Recipe for Easy Dinners

Garlic Bread Sloppy Joes: A Flavorful Twist on a Classic Favorite

⚖️
Difficulty
Easy

⏲️
Prep Time
10 mins

🕒
Cook Time
20 mins

⏱️
Total Time
30 mins

🍽️
Servings
4

Garlic Bread Sloppy Joes brings together two comfort food favorites into a single delightful dish that will tantalize your taste buds. Imagine the savory flavors of traditional sloppy joes melded with the rich, buttery notes of garlic bread. This easy recipe is perfect for busy weeknights or a cozy weekend meal, promising to deliver a fulfilling and flavorful experience with each bite.

These Garlic Bread Sloppy Joes are more than just a meal; they are a delightful experience that combines textures, aromas, and tastes to create something truly special. Picture the perfect crispiness of garlic-infused bread cradling a hearty and savory beef mixture topped with melted cheese—every ingredient plays its part in creating a beautiful harmony that defines comfort and indulgence.

Quick Recipe Highlights

  • Flavor Profile: Expect a perfect balance of savory ground beef, infused with the aromatic punch of garlic, and a hint of sweetness from ketchup.
  • Texture: Enjoy a delightful contrast between the crispy toasted garlic bread and the juicy, tender beef filling, crowned with melted cheese.
  • Aroma: Savor the enticing scent of freshly toasted garlic bread mingling with the rich aroma of seasoned beef.
  • Visual Appeal: Presenting vibrant red from the beef mix, golden-brown garlic bread, and gooey cheese, creating an inviting and mouthwatering display.
  • Skill Level Needed: Beginner-friendly, requiring basic cooking techniques and common kitchen tools.
  • Special Equipment: A large skillet or frying pan will effectively accommodate all ingredients.

Recipe Overview

  • Difficulty Level: Chosen as easy due to the straightforward preparation steps, requiring minimal cooking skills, perfect for novice cooks or quick meals.
  • Category: This recipe fits the category of quick, filling, and heartwarming meals, suitable for lunch, dinner, or weekend gatherings.
  • Cuisine: Rooted in American comfort food, this dish showcases culinary influences of traditional homemade recipes with a modern twist.
  • Cost: An economical option, affordable ingredients make this dish both budget-friendly and accessible for most households.
  • Season: Best enjoyed year-round, providing warmth and comfort during colder seasons yet delightfully satisfying anytime.
  • Occasion: Ideal for weeknight dinners, casual parties, or family gatherings, delivering flavor without complexity.

Why You’ll Love This Recipe


This Garlic Bread Sloppy Joes recipe offers taste and texture appeal that merges two beloved comfort foods into one extraordinary dish. The juicy beef mixture, combined with fragrant garlic bread and melted cheese, creates a burst of flavors in every bite. Whether you’re craving something hearty or need a quick, fulfilling meal, this recipe checks all the boxes.

Convenience is a highlight, as this dish requires minimal preparation time and effort, making it perfect for busy days or last-minute meal plans. With just a few common ingredients, you can create a delightful and satisfying dinner that requires just 30 minutes from start to finish.

Nutritionally, this dish offers a good balance of protein from beef, carbohydrates from bread, and fat from cheese, making it a complete and satisfying meal. While it exudes indulgence, you can tweak ingredients to better fit dietary needs or preferences, offering flexibility and healthful advantages.

Socially, this dish is a true crowd-pleaser, perfect for sharing with friends and family. Its comforting nature makes it a fantastic option for game nights, casual get-togethers, and family dinners, creating joy and conversation around the table.

Cost-effectiveness is another plus. The use of affordable, easily accessible ingredients ensures that this recipe can fit within a budget, offering a delicious and satisfying meal without breaking the bank.

Historical Background and Cultural Significance


The origin of sloppy joes traces back to the early 20th century in America, believed to have emerged as an adaptation of a loose meat sandwich. Simple yet filling, it quickly gained popularity, becoming a staple in diners and home kitchens alike. Over the years, the dish evolved, with countless variations emerging in different regions.

Culturally, the sloppy joe represents the epitome of comfort food, evoking nostalgia for many. It has been adapted and modified to suit various tastes and preferences, from the traditional beef filling to vegetarian and vegan versions, illustrating its versatility.

The recipe’s evolution showcases how a basic concept can flourish into countless adaptations, each adding a new layer of flavor and style. Regional variations highlight local ingredients and flavors, ensuring that the dish remains fresh and exciting wherever it is served.

In different regions, ingredients and flavors vary, contributing to the dish’s adaptability. Whether it’s adding spices for heat, incorporating vegetables for texture, or tweaking the sauce for sweetness, each version reflects local tastes and preferences, offering a unique spin on a classic.

Ingredient Deep Dive


Ground beef serves as the protein heart of this dish, offering both taste and nutrition. Its cultural significance in American cuisine cannot be overstated, often associated with traditional dishes such as burgers and meatloaf. Nutritionally, beef provides a rich source of protein, iron, and essential nutrients, supporting muscle growth and energy.

When selecting ground beef, consider the fat content. A lean blend (85% lean) is preferred for balancing flavor and health benefits. Freshness is key, so check for a bright red color and firm texture. Store wrapped in airtight containers in the fridge for 1-2 days or freeze for up to 3 months.

Garlic contributes a significant aromatic note to this recipe. Known for its strong cultural significance and usage across various cuisines, garlic adds depth and warmth. Its nutritional benefits include anti-inflammatory and immune-boosting properties. Choose fresh, plump bulbs for maximum flavor, storing them in a cool, dry place away from direct sunlight.

Sloppy joes often include bread, with garlic bread elevating them to new heights. Choose a hearty loaf that can withstand the filling’s moisture. Storage tips for garlic bread involve cooling it to room temperature before refrigerating in a sealed bag for 2-3 days. For longer storage, wrap and freeze, reheating in an oven before serving.

Consider substitutions to adapt to dietary needs. Turkey or chicken offer lower-fat alternatives to beef, while mushrooms or lentils provide a vegetarian option. For bread, gluten-free variations are available, offering flexibility without sacrificing the dish’s integrity.

Common Mistakes to Avoid

  • Overcooking the beef can lead to a dry filling. Cook just until browned and no longer pink to retain juiciness.
  • Using stale or overly thick bread could result in a soggy sandwich. Opt for fresh, well-textured garlic bread to maintain crispiness.
  • Not balancing flavors can lead to a one-dimensional dish. Ensure a harmonious balance between savory, sweet, and tangy elements.
  • Overloading the sandwich can make it difficult to eat. Ensure a generous but manageable filling.
  • Skipping fresh garlic for powder reduces aromatic depth. Fresh garlic provides a robust and authentic garlicky punch.
  • Forgetting to pre-toast the bread may result in a lackluster texture. Light toasting enhances crunch and flavor.
  • Neglecting to season the beef mixture can make the dish bland. Salt and pepper, along with herbs, enhance flavors.
  • Using the wrong cheese can overpower the dish. Choose a mild, melty cheese to complement the flavors.
  • Overcooking the garlic can cause bitterness. Sauté until golden, not brown, for optimal flavor.

Essential Techniques

Creating the perfect Garlic Bread Sloppy Joes involves mastering a few essential techniques. The initial technique is browning the beef. This process not only cooks the meat but also develops a rich, savory flavor due to the Maillard reaction. To master this, ensure your pan is hot before adding the beef and avoid crowding to prevent steaming.

Perfectly toasting the garlic bread is another key technique. The goal is to achieve a crisp exterior with a soft interior. This is accomplished by brushing the bread lightly with garlic-infused butter and baking until golden brown, providing a savory and crunchy base for the sloppy joe mixture.

Combining flavors effectively is crucial for this recipe’s success. Ensuring that each ingredient is proportioned correctly and seasoned allows the unique characteristics of each to shine while harmonizing into a comforting, cohesive dish. Tasting as you go helps maintain balance and adjust to personal preferences.

Pro Tips for Perfect Garlic Bread Sloppy Joes

For exceptionally flavorful beef, add a splash of Worcestershire sauce during browning. It enhances umami, pairing perfectly with the garlic bread’s savory profile.

Include finely chopped onions in the beef mixture to add moisture and depth of flavor. Cook until translucent for a subtle sweetness that complements the beef and garlic.

For added richness, incorporate a tablespoon of tomato paste into the beef mixture. It provides a concentrated tomato flavor, enhancing the overall taste.

Enhance garlic flavor by using roasted garlic in the butter mix for the bread. Roasting reduces bitterness and intensifies sweetness, offering a delicious twist.

Keep melted cheese in mind. Cheddar offers sharpness, Monterey Jack adds creaminess, and Swiss provides nuttiness. Blend to your preference for a custom cheese experience.

Switch up your greens. Adding fresh spinach or arugula to the filling introduces a fresh note, balancing the hearty, meaty tones, and incorporating additional nutrients.

Variations and Adaptations

Regional variations of Garlic Bread Sloppy Joes abound, allowing customization to personal taste and cultural influences. In the Southwest, adding chili powder and jalapeños infuses the dish with characteristic heat, while Midwest versions may incorporate sweet corn for added texture and sweetness.

Taking advantage of seasonal ingredients allows for refreshing adaptations. Summer might introduce fresh basil or pesto for a Mediterranean flair, while autumn could inspire incorporating mushrooms and sage for earthiness.

To accommodate dietary needs, consider designing a low-carb version by placing the beef mixture in hollowed-out bell peppers. Keto followers may use almond flour bread, while gluten-free options exist to suit various restrictions.

Flavor variations can take this dish from familiar to exotic with a few simple tweaks. Try infusing the beef with curry powder and coconut milk for an Indian-inspired twist, or add teriyaki sauce and sliced green onions for an Asian influence.

Adjusting for texture may include using a food processor to finely mince vegetables, creating a smoother filling. More crunch can be introduced through toppings like crispy onions or shredded cabbage.

Presentation can also vary, from the traditional open-faced sandwich style to bite-sized, appetizer-friendly sliders, allowing flexible serving options for different occasions.

Serving and Presentation Guide

For an eye-catching presentation, consider plating open-faced Garlic Bread Sloppy Joes using rustic wooden boards or colorful ceramic plates. The contrast between the golden bread and the vibrant beef topping is visually enticing.

Garnishing with freshly chopped parsley or basil provides a pop of color and freshness, enhancing both aesthetics and flavor. A light sprinkle of paprika adds a touch of smokiness and visual warmth, perfect for enhancing the rustic appeal.

Traditionally paired with a refreshing side salad or crispy fries, this dish is versatile enough for modern accompaniment as well. Think roasted vegetables or quinoa salad for a refreshing change, bringing additional nutrients to your meal.

When serving, temperature matters; aim to deliver the dish hot, just out of the oven, ensuring the cheese is at its gooey best and the beef filling remains juicy.

Consider portion control techniques like slicing the bread into manageable sections, suitable for individual servings, making it ideal for gatherings and buffet-style dining.

Wine and Beverage Pairing

Pairing wine with Garlic Bread Sloppy Joes can elevate the dining experience. Opt for a medium-bodied red like Merlot or Zinfandel, their fruity and subtle spice notes complement the savory beef filling.

For non-alcoholic alternatives, consider a glass of iced tea or sparkling water infused with lemon or mint. Their refreshing nature contrasts with the rich garlic and beef flavors without overpowering them.

Coffee may not be a common pairing, but a strong espresso can serve as a bold finish to this hearty meal, cleansing the palate and complementing the savory notes.

The serving temperature of beverages should be balanced; chilled for wines and non-alcoholic beverages contrasts with the hot dish, enhancing the overall sensory experience.

Serving suggestions include using stemless glasses for a casual setting, matching the laid-back vibe of the meal, and making the experience comfortable and approachable for all guests.

Storage and Shelf Life

Storing leftovers properly ensures the quality and safety of your Garlic Bread Sloppy Joes. Refrigerate the beef mixture in an airtight container for up to 3 days, ensuring freshness.

For the best method, separate the components: Keep the beef mixture and bread separate to avoid sogginess. The bread should be wrapped in foil or stored in a bread box.

Temperature considerations suggest refrigerating promptly to prevent bacterial growth, maintaining a temperature below 40°F (4°C).

Signs of spoilage include off odors, change in texture, or visible mold, indicating the leftovers should not be consumed if present.

Reheat leftovers in a skillet for best texture, adding a splash of liquid to retain moisture. Alternatively, use the microwave for convenience, but be cautious of overcooking the beef.

Freezing the beef filling is a viable option, allowing storage for up to 3 months. Thaw overnight in the refrigerator before reheating, ensuring food safety and quality.

Make Ahead Strategies

Prepare components ahead of time for a stress-free cooking experience. The beef mixture can be cooked in advance and refrigerated, staying good for 2-3 days.

Storage between steps is crucial. Keep beef in airtight containers and store bread in a bread box or similar to maintain freshness.

Quality impact assessment shows minimal change; flavors meld beautifully over time, enhancing taste without compromising texture.

Assembly tips include ensuring bread is toasted just before serving, guaranteeing crispiness and not absorbing too much moisture.

Reheating guidelines emphasize using a skillet for the filling to maintain moisture and texture. Cheese can be added during reheating for freshness.

Fresh element additions, such as fresh herbs or a squeeze of lemon, brighten flavors, adding a pop of freshness when ready to serve.

Scaling Instructions

When halving the recipe, reduce each ingredient accordingly, ensuring a consistent balance of flavors. Use smaller equipment, if possible, to avoid altering the cooking process.

Doubling or tripling requires scaling ingredients proportionally, ensuring appropriate seasoning adjustments as flavors concentrate with larger volumes.

Equipment adjustments might include using larger frying pans or multiple skillets to accommodate increased quantities, maintaining consistent cooking times and textures.

Timing modifications may be necessary for browning or simmering processes, so keep an eye on cooking cues to prevent over or undercooking.

Storage considerations increase with scaling; ensure sufficient containers and refrigerator space to accommodate additional portions securely.

Nutritional Deep Dive

Breaking down the macronutrient profile, Garlic Bread Sloppy Joes deliver a balanced mix of protein, carbohydrates, and fats, providing energy and sustenance.

The micronutrient analysis highlights essential vitamins and minerals such as iron, vitamin B12 from beef, and the immunity-boosting properties of garlic.

Health benefits include muscle maintenance from protein, energy from carbohydrates, and beneficial fats, with garlic contributing to anti-inflammatory and cardiovascular health.

Dietary considerations might involve portion control for calorie-sensitive individuals, ensuring a balanced intake according to dietary needs.

Portion analysis aids in understanding caloric distribution per serving, assisting with meal planning for weight management and healthy living.

Weight management tips include pairing the dish with a salad or steamed vegetables, providing fiber, reducing calorie density, and promoting satiety.

Dietary Adaptations

For gluten-free variations, use gluten-free bread alternative while ensuring all ingredients, like sauces, are certified gluten-free to avoid cross-contamination.

Create a dairy-free version by substituting cheese with a dairy-free alternative or nutritional yeast, offering a cheesy flavor without the lactose.

A vegan adaptation involves replacing beef with lentils or black beans and ensuring all components, such as bread and sauces, align with vegan principles.

For low-carb enthusiasts, consider using almond flour bread or lettuce wraps, maintaining the filling’s essence while significantly reducing carbohydrate intake.

Those following a keto diet may appreciate using low-carb bread alternatives and incorporating high-fat ingredients like avocado or full-fat cheeses.

Paleo adaptations include eliminating grains and refined sugars, using sweet potatoes or cauliflower as a base instead of bread and ensuring natural ingredient use.

Troubleshooting Guide

Address texture issues by ensuring proper cooking time for each component. Tough beef might be due to overcooking; use gentle, moderate heat to maintain tenderness.

Flavor balance can be restored by adjusting seasonings. If too salty, add sweeteners or acidity. Conversely, a bland dish can benefit from more spices or aromatics.

Temperature problems arise from inadequate reheating. Ensure components are even in temperature to maintain flavor and texture integrity.

Equipment challenges involve ensuring the skillet size matches the ingredient volume, preventing overflow or inadequate caramelization during cooking.

Ingredient substitutions may require taste testing; alternative proteins or vegan cheeses can alter flavors, so season adaptively for best results.

Timing concerns, especially for multitasking, can be mitigated by pre-prepping ingredients, ensuring a smooth recipe flow and timely completion.

Recipe Success Stories

Community feedback consistently highlights the recipe’s adaptability and crowd-pleasing nature. Readers love sharing their flavor variations, achieving unique dishes with ease.

Variation successes include incorporating locally sourced ingredients and switching up herbs or spices, yielding delightful twists that often become newfound favorites.

Adaptation stories showcase readers altering components to fit dietary needs, proving the recipe’s flexibility while maintaining its delicious core.

Reader suggestions offer valuable insights; small tips from adding heat with cayenne to enhancing flavors with fresh herbs contribute to the communal cooking experience.

Photography tips guide aspiring food bloggers in capturing the dish’s beauty. Highlight cheese pulls, garnish vibrancy, and texture for eye-catching visuals.

Frequently Asked Questions

What type of beef should I use?
Choose ground beef with around 15% fat content for flavor and juiciness, but adjust based on preference for leanness.

Can I use pre-made garlic bread?
Yes, pre-made garlic bread is a time-saving option, but ensure it’s freshly toasted for optimal texture and flavor.

How can I add more vegetables?
Incorporating finely chopped vegetables like bell peppers or carrots into the beef mix can add nutrition and texture.

What’s the best way to store leftovers?
Store components separately in airtight containers in the fridge for up to 3 days and reassemble before serving.

Are there vegan alternatives?
Use plant-based ground meat and vegan cheese substitutes for a delicious vegan adaptation of the recipe.

How do I prevent soggy bread?
Ensure the bread is toasted well, serve immediately, and avoid excess filling to maintain crispness.

Can I freeze the assembled sandwiches?
It’s best to freeze the components separately; thaw and combine upon reheating for freshness.

What sides pair well with this dish?
A fresh green salad, roasted vegetables, or corn on the cob complement and balance the meal nicely.

How can I add spice?
Incorporate sliced jalapeños or a dash of chili powder to the beef mixture for an added kick.

Is there a substitute for Worcestershire sauce?
Soy sauce with a splash of vinegar offers a similar savory depth if Worcestershire sauce is unavailable.

What’s the best cheese to use?
Cheddar, Monterey Jack, or a cheese blend provide gooey goodness, enhancing the dish’s savory profile.

How do I keep cheese from sticking to the pan?
Use a non-stick skillet or lightly coat the surface with non-stick spray to prevent sticking.

Additional Resources

Explore related recipes such as Classic Sloppy Joes or transform leftover garlic bread into amazing croutons, each providing new ways to enjoy similar flavors.

Technique guides can enhance kitchen skills, offering insights on perfecting frying techniques or understanding flavor profiles to better tackle any dish.

For those interested in ingredient information, delve into articles exploring beef varieties, the health benefits of garlic, and selecting the best cheeses.

Equipment recommendations guide you to finding the perfect skillet or bread knife, ensuring seamless preparation and presentation.

Seasonal variations highlight the recipe’s adaptability to new ingredients, encouraging exploration of local markets and fresh produce.

Join the Conversation

Engage with us on social media by sharing your Garlic Bread Sloppy Joes creations. Tag us with your photos and experiences using the recipe hashtag, fostering community interaction and shared culinary joy.

Photography tips offer guidance on capturing your culinary masterpiece. Focus on lighting, composition, and detail to highlight the food’s texture and colors.

Recipe reviews help fellow home cooks learn from shared experiences; offer your thoughts, tweaks, and tips in the comments section below the post.

Join our community through cooking forums and recipe swaps, sharing successes, adaptations, and inspirational ideas with fellow culinary enthusiasts.

Experiment with recipe variations and innovation, whether it’s international influences or dietary adjustments, and share your newfound favorites with fellow readers.

The Recipe

Garlic Bread Sloppy Joes

Serves: 4

Prep Time: 10 mins

Cook Time: 20 mins

Total Time: 30 mins

Kitchen Equipment Needed

  • Large skillet
  • Oven-safe tray
  • Spatula
  • Garlic press (optional)

Ingredients

  • 1 lb ground beef
  • 4 slices of garlic bread
  • 1 cup shredded cheese (cheddar or Monterey Jack)
  • 1 small onion, finely chopped
  • 2 cloves garlic, minced
  • 1 cup ketchup
  • 1 tbsp Worcestershire sauce
  • Salt and pepper to taste
  • Basil or parsley for garnish

Directions

  1. Preheat oven to 350°F (175°C). Arrange garlic bread on a baking tray.
  2. In a large skillet over medium heat, cook the onions and garlic until translucent.
  3. Add ground beef, breaking apart with a spatula, and cook until browned. Drain excess fat.
  4. Stir in ketchup, Worcestershire sauce, salt, and pepper; cook for an additional 5 minutes.
  5. Toast the garlic bread in the oven until crispy, approximately 5-7 minutes.
  6. Spoon the beef mixture over the toasted garlic bread, top with cheese, and bake until cheese is melted.
  7. Garnish with chopped basil or parsley before serving.

Recipe Notes

  • Substitute turkey for a leaner meat option.
  • To add more flavor, incorporate herbs like oregano or thyme into the beef mixture.
  • For a spicier version, add chili flakes or hot sauce to the beef.

Delicious Chicken with Spinach and Mushrooms in Creamy Parmesan Sauce Recipe

Chicken with Spinach and Mushrooms in Creamy Parmesan Sauce: A Delightful Dinner Delight

⚖️
Difficulty
Intermediate

⏲️
Prep Time
10 mins

🕒
Cook Time
25 mins

⏱️
Total Time
35 mins

🍽️
Servings
4

Imagine a dinner that ignites your senses and comforts your soul. Our Chicken with Spinach and Mushrooms in Creamy Parmesan Sauce does exactly that. The tender pieces of chicken are enveloped in a rich, velvety sauce made with freshly grated Parmesan, paired perfectly with earthy mushrooms and freshly wilted spinach. This dish not only appeals to your taste buds with its symphony of flavors but also presents a visually stunning meal that is as pleasing to the eye as it is to the palate.

In this family favorite recipe, the textures intertwine as the creamy sauce cloaks the succulent chicken while the spinach offers a slight crunch, complementing the umami-rich mushrooms. The aroma wafts through your kitchen, with tantalizing notes of garlic and sautéed mushrooms that promise a delightful culinary experience. This recipe is ideal for a weekend dinner treat or an elegant yet simple meal on a busy weeknight, bringing gourmet dining into your home.

Quick Recipe Highlights

  • Flavor Profile: Enjoy a harmonious blend of savory chicken, rich Parmesan, and complementary spinach and mushrooms.
  • Texture: Experience tender chicken in a silky, creamy sauce contrasting with a slight crunch of fresh spinach.
  • Aroma: Delight in the inviting scent of garlic and sautéed mushrooms combined with creamy Parmesan.
  • Visual Appeal: Present a stunning plate featuring vibrant green spinach against a golden, creamy backdrop.
  • Skill Level Needed: Suitable for intermediate cooks who are comfortable with sauce preparation.
  • Special Equipment: You’ll need a non-stick skillet, sharp knife, cutting board, and a whisk for the sauce.

Recipe Overview

  • Difficulty Level: This dish requires some finesse with cooking chicken to perfection and creating a smooth, lump-free sauce.
  • Category: Perfect for dinner, both as a family meal or a sophisticated dinner party offering.
  • Cuisine: This recipe takes inspiration from Italian cuisine with its use of Parmesan and a rich cream sauce.
  • Cost: Reasonably priced, with the main expenses being fresh chicken breasts and good-quality Parmesan cheese.
  • Season: Best enjoyed in colder months when hearty, comforting dishes are most appealing.
  • Occasion: Ideal for intimate gatherings or special family dinners.

Why You’ll Love This Recipe


Indulge in the sumptuous taste of creamy Parmesan sauce lovingly embracing tender chicken, with the freshness of spinach and earthiness of mushrooms playing supporting roles. Every bite is a testament to balance and culinary expertise, merging the simplicity of ingredients with complexity of flavors.

Prepare to be amazed by the ease of creating such a dish. With a total time of just 35 minutes from preparation to table, this meal provides gourmet dining without demanding hours in the kitchen, proving perfect for the modern, busy cook.

Not only delicious but also nutritious, this meal offers lean protein from chicken and a host of vitamins from spinach, making it an excellent choice for health-conscious diners who refuse to compromise on flavor.

Entertain your guests with a dish that carries both elegance and warmth. This recipe fills the room with an inviting aroma that speaks of hospitality and culinary joy, ready to be shared and savored.

Enjoy both affordability and accessibility; most ingredients are common pantry staples or easily found at your local grocery store. The cost-effective nature of this dish makes it suitable for cooks who desire taste to meet value.

Historical Background and Cultural Significance


Chicken and spinach have been a part of culinary traditions for centuries, finding their way into savory pies, stews, and gratins across cultures. The integration of these elements into a creamy Parmesan sauce reflects an Italian influence, where dairy, cheese, and fresh ingredients combine harmoniously.

Throughout history, Parmesan cheese has been revered not only for its flavor but also for its ability to enrich dishes, showcasing how regional flavors like Parmigiano-Reggiano shape global cuisines. This fusion pays homage to Italian culinary arts while adapting them for global tastes.

The evolution of this recipe mirrors changes in dietary preferences and ingredient availability, shifting towards simpler, home-friendly versions that maintain the essence of traditional recipes. It’s a testament to the adaptability and enduring nature of ingredients like spinach and mushrooms.

While traditionally enjoyed at family dinner tables, modern adaptations emphasize ease of cooking without sacrificing depth of flavor. Embracing regional variations, this dish can be found in myriad forms worldwide, celebrating the shared love for creamy, savory meals.

Ingredient Deep Dive


Chicken, the star of many culinary cultures, is prized for its lean protein and versatility. Historically significant from curries to roasts, it’s cherished across cuisines for its adaptability in absorbing flavors from a multitude of spices, herbs, and sauces.

Spinach, hailed for its nutritional profile, was first cultivated in ancient Persia and has since travelled to tables worldwide. Its rich iron and vitamin content make it a staple in health-focused diets, enhancing dishes with both color and nutrients.

Mushrooms add an umami depth, revered in both Asian and European kitchens. Rich in antioxidants and immune-boosting benefits, they should be firm to the touch and free from moisture for optimal freshness when selecting from markets.

Parmesan cheese brings a pronounced savory richness. Known for its long maturation, this cheese should be stored in airtight conditions to preserve its intense flavor, serving as a key ingredient for thickening and enriching sauces.

Cream, the cornerstone of decadent sauces, boasts luxurious mouthfeel. Opt for heavy cream for a thicker sauce, and ensure freshness by selecting cream with a firm, rich consistency to avoid separation during cooking.

Substitute options abound in this dish; cauliflower or zucchini can replace mushrooms for varied textures, while lactose-free cream provides a dairy-free twist. Consider kale as a robust alternative to spinach, enhancing both nutritional value and flavor diversity.

Common Mistakes to Avoid

  • Overcooking the chicken can result in dry, tough meat. Ensure to sear just until golden before removing from heat to allow finishing in sauce.
  • Failing to deglaze the pan after mushrooms can lead to burning and uneven sauce consistency. Use chicken broth or wine to release flavorful brown bits.
  • Adding spinach too early can overcook it, leading to a loss of vibrant color and nutrient value. Introduce spinach last to retain its freshness.
  • Using pre-grated Parmesan can result in a less creamy sauce. Freshly grated cheese melts more smoothly, creating a silkier texture.
  • Neglecting seasoning adjustments once combined may underwhelmingly balance flavors. Taste and adapt salt and pepper levels towards the end.
  • Rushing through sauce reduction can prevent proper thickening. Allow time for cream to simmer gently and thicken naturally for a cohesive sauce.
  • Selecting the wrong cream may cause sauce separation. Use heavy cream to ensure it blends well with Parmesan without curdling.
  • Unsuitable pan size can hinder even cooking. Choose a pan wide enough to accommodate chicken pieces without overcrowding for efficient heat distribution.

Essential Techniques


Mastering the pan-searing of chicken ensures it retains juicy tenderness while acquiring a delicious golden crust. Use a hot pan and avoid turning too soon to achieve perfect Maillard reaction.

Perfecting a creamy sauce involves steady whisking while adding cheese to prevent clumping. Opt for gradual incorporation of Parmesan into gently simmering cream, aiming for a smooth consistency.

Deglazing is crucial for lifting flavorful fond from the pan. Introduce broth or wine after cooking mushrooms, scraping the bottom to integrate rich, caramelized notes into the sauce.

Timing is key with fresh additions like spinach. Incorporate greens at the last moment to briefly wilt while maintaining vibrant color, achieving optimal freshness.

Gauge sauce thickness by coating the back of a spoon, ensuring it leaves a clear line when running a finger through. This “nape” test confirms a perfectly thickened, luscious sauce.

Troubleshoot sauce separation by adjusting heat gently and incorporating a splash of cooking water to achieve the desired emulsification in cases of over-thickening.

Pro Tips for Perfect Chicken with Spinach and Mushrooms in Creamy Parmesan Sauce


Utilize a heavy-bottom skillet for effective heat distribution, improving caramelization without scorching your ingredients.

Enhance mushroom flavor by allowing them to brown undisturbed initially, releasing natural sugars and umami-driven richness.

Boost Parmesan flavor intensity with a small pinch of nutmeg, echoing traditional Italian seasoning practices for creamy dishes.

Experiment with fresh herbs such as parsley or basil for brightness in finish, offering both added flavor and visual appeal.

Keep chicken warm in a low oven post-searing, preserving its heat and moisture while preparing the sauce.

For an elegant presentation, serve chicken over a bed of risotto or garlic mashed potatoes, ensuring each element contributes to the overall flavor harmony.

Variations and Adaptations


For regional twists, introduce sun-dried tomatoes and olives as Mediterranean additions, amplifying the dish’s savory complexity and texture.

Seasonally, substitute mushrooms with other hearty vegetables like winter squash or bell peppers, adapting to what’s freshest and most flavorful.

Adjust for dairy-free diets with non-dairy cream and nutritional yeast instead of Parmesan, catering to lactose sensitivities while maintaining creamy texture.

Create flavor variations by incorporating truffle oil for an elevated, luxury edition, or chili flakes for a hint of heat that enlivens the traditional creamy profile.

Alter textures with walnuts or pine nuts for a crunchy element, adding both richness and depth to the dish’s ensemble of ingredients.

Consider using elegant serving alternatives like individual mini casserole dishes for a refined, personalized presentation at your dinner table.

Serving and Presentation Guide


Utilize classic plating principles with chicken as the focal point, artfully draped with sauce, contrasted by the vibrant spinach for a professional finish.

Garnish with freshly grated Parmesan and a sprinkle of cracked black pepper, accentuating flavors and offering a hint of color contrast.

Accompany traditionally with fresh ciabatta or focaccia, allowing diners to soak up the scrumptious sauce, maximizing the dish’s enjoyment.

Modernize with a refreshing arugula or radicchio salad on the side, providing a crisp, peppery counterpoint to the rich main course.

Ensure optimal serving temperature by plating just before dining, allowing the cream sauce’s warmth to accentuate its flavors and textures.

Adopt portion control by slicing larger chicken pieces into medallions, enabling ease of serving and enhanced presentation of even-sized portions.

Wine and Beverage Pairing


Complement with a full-bodied Chardonnay or a light Pinot Grigio to balance the rich sauce and enhance the dish’s subtle earthy notes.

Offer a non-alcoholic pairing with sparkling water infused with lemon and rosemary, refreshing and cutting through the creaminess superbly.

For alternatives, consider a gentle green tea, which introduces a delicate infusion pairing while offering aromatic balance to the creamy components.

Maintain proper serving temperatures: serve white wines chilled to heighten freshness and complex bouquet of flavors, elevating the dining experience.

Suggest glassware that complements each beverage’s characteristics, enhancing both aroma and presentation through suitable wine or tumbler glasses.

Storage and Shelf Life


Store leftovers in an airtight container in the refrigerator for up to 3 days to preserve freshness and prevent contamination.

Maintain the sauce’s integrity by reheating gently over low heat, adding a splash of milk or cream to restore its smooth texture.

Opt for sturdy, freezer-safe containers if planning to freeze portions for later use, ensuring an airtight seal to avoid freezer burn.

Identify spoilage through changes in color, unpleasant odor, or separation in the sauce, signaling possible bacterial growth over time.

Implement proper freezing techniques by cooling the dish before storing, preventing excess condensation and maintaining flavor cohesion.

Strategize optimal consumption by thawing frozen portions evenly in the refrigerator to prepare them for gentle reheating when ready to eat.

Make Ahead Strategies


Prepare the chicken in advance by marinating and precooking for refrigerated storage, simplifying day-of assembly and maintaining flavor depth.

Craft the sauce separately, storing it in a sealed container to prevent skin formation. Reheat gently, incorporating spinach fresh during final assembly.

Assess quality impacts of early preparation by maintaining strict temperature controls; this ensures flavors remain robust and the sauce smooth post-assembly.

Enhance assembly tips by organizing ingredients for each stage in advance, streamlining integration and ensuring minimal kitchen disruptions.

Refine reheating guidelines to preserve creaminess, employing low heat and gradual warming techniques to retain sauce consistency and flavor profile.

Introduce fresh elements like parsley or lemon zest just before serving, amplifying both visual appeal and refreshing notes against the sauce’s richness.

Scaling Instructions


Halve the recipe by adjusting ingredient amounts accordingly, ensuring cooking times remain consistent through precise proportion reduction.

Double or triple using larger cookware to accommodate increased volume, ensuring proper heat distribution maintains cooking efficiency and uniformity.

Consider equipment adjustments for larger batches, such as utilizing a wider saucepan or batch-cooking chicken for even searing and result consistency.

Adapt timing by adding a few extra minutes to each cooking stage when scaling up, allowing for thorough cooking and flavor integration across larger amounts.

Store extra portions appropriately, adhering to refrigeration and freezing guidelines to maximize freshness and prevent any quality degradation.

Nutritional Deep Dive


Analyze macronutrients with a focus on protein from chicken and healthy fats from cream, supporting muscle growth and satiety for balanced meals.

Highlight micronutrient contributions from spinach, offering Vitamin K, iron, and essential minerals that support overall health and well-being.

Emphasize health benefits from fresh mushroom content, such as antioxidants and immune-boosting properties, bolstering resilience against illness.

Detail dietary considerations for lactose intolerance or gluten-free dining, suggesting potential ingredient swaps to accommodate varying nutritional needs.

Portion insights guide balanced servings, aligning dish satisfaction with hunger levels and maintaining nutritional balance within dietary guidelines.

Connect weight management efforts through controlled ingredient choices and serving suggestions that maximize fullness while preventing overindulgence.

Dietary Adaptations


Modify for gluten-free diets using rice flour instead of wheat-based thickeners, maintaining sauce texture and flavor without compromising dietary restrictions.

Adapt to dairy-free preferences through almond or coconut cream substitutes, paired with nutritional yeast for a similar cheesy note without dairy.

Create vegan versions by replacing chicken with tofu or tempeh and eliminating animal-based products, focusing on plant-driven flavors and textures.

Switch to a low-carb format by serving over cauliflower rice, preserving creamy goodness while accommodating carbohydrate-conscious meal planning.

Experiment with a keto twist using high-fat dairy options like butter or coconut cream, aligning the dish with popular ketogenic dietary frameworks.

Embrace paleo adaptability by utilizing organic, whole-food ingredients, pairing high-quality proteins with natural, nutrient-dense produce choices.

Address low-FODMAP diets with advisements on suitable ingredients, focusing on ease of digestion and minimizing potential gastrointestinal disturbance.

Troubleshooting Guide


Prevent texture concerns by assessing chicken doneness with a meat thermometer, achieving a juicy center with a safe internal temperature.

Balance flavor components through cautious salt and pepper adjustments post-sauce creation, ensuring a harmonious and enticing flavor profile.

Overcome temperature difficulties by adhering to gradual heating methods for both preparation and reheating — avoiding abrupt heat that coagulates sauce elements.

Address equipment usage issues by checking cookware presence and quality, verifying sharp knives for ingredient preparation to prevent cutting obstacles.

Navigate ingredient substitutions through strategic selection: lighter creams blending well, and suitable green alternatives for spinach offering similar outcomes.

Time management solutions involve structuring preparation phases, leading to efficient use of resources and prevention of disengagement during cooking.

Recipe Success Stories


Take inspiration from our community of home chefs who’ve embraced personal twists on this classic, infusing their personality or local spices into the mix.

Benefit from learnings of global variations successfully adapted by fans, showcasing the dynamic versatility of foundational flavors and ingredients.

Engage with reader insight, utilising feedback about recipe results and adjustments posited by fellow culinary enthusiasts gathered through passionate exchanges.

Inspired by social media showcases, witness different plating styles and garnishes creatively displayed, creating visual allure and dynamic hospitality captured through photography.

Draw empowerment from community storytelling, sharing mutual love for creating flavorful, warming meals that connect families and commemorate gatherings.

Frequently Asked Questions

Can I use frozen spinach?

Yes, you can use frozen spinach as a convenient alternative. Ensure to thaw and drain excess moisture before adding to the sauce, maintaining thickness and flavor.

What’s the best way to reheat this dish?

Reheat over low heat on the stovetop, stirring occasionally. Add a splash of cream or milk to restore sauce consistency if it thickened during refrigeration.

Can I add other vegetables?

Absolutely, experiment with vegetables like bell peppers or zucchini for added flavors and texture. Add them based on cooking times to ensure they are cooked evenly.

How do I prevent the sauce from separating?

Ensure the sauce maintains a gentle simmer. Gradually incorporate cheese with continuous stirring, avoiding high temperatures to maintain smoothness.

Can I make this with chicken thighs?

Chicken thighs are a great alternative, offering more juicy flavor. Adjust cooking times slightly longer for darker meat to ensure it cooks through perfectly.

Is this recipe suitable for meal prep?

Yes, prepare in advance and store components separately to combine when needed. The sauce can be made ahead, and chicken pre-seared for simplified reheating and assemblage.

What can I serve with this dish?

This dish complements well with side servings of parmesan risotto, roasted vegetables, or garlic bread. Fresh salads with lemon dressing refresh the palate effectively.

Does the dish freeze well?

While chicken and sauce can be frozen, do so separately to maintain creaminess. Thaw thoroughly before reheating to preserve flavor and consistency.

Can I use other cheeses?

Parmesan is preferred, but feel free to experiment with Asiago or Pecorino for unique flavor enhancements. Each brings distinct tasting notes to the cream base.

How do I know when the chicken is cooked?

Use a meat thermometer to check the internal temperature reaches 165°F (74°C). Alternatively, slice open the thickest part to ensure clear juices and no pinkness.

How should leftovers be stored?

Store in airtight containers, keeping chicken and sauce separate to maintain texture. Consume within 3 days for best results, ensuring freshness and flavor retention.

Additional Resources


Explore related recipes like Chicken Alfredo or classic Coq au Vin for varied culinary adventures rooted in similar ingredient combinations and techniques.

Access technique guides detailing methods like pan-searing and sauce reduction to elevate your kitchen skills and apply them to a variety of dishes confidently.

Discover ingredient information focusing on essential components like cheese aging processes and mushroom varieties, enriching your understanding of culinary options.

Refer to equipment recommendations for cookware that enhances cooking results, such as non-stick pans, ensuring consistent success across various recipes.

Adapt meals seasonally by examining ingredient availability and freshness, maximizing both flavor and nutritional benefits through aligned cooking practices.

Join the Conversation


Engage with our vibrant culinary community via social media platforms. Share your success stories, ask questions, and offer insights for personalized variation ideas.

Refine your photography skills through basic tips for capturing this dish’s elegance on camera, turning meals into beautiful visual narratives.

Contribute your reviews and experiences to our growing recipe discussions, offering feedback and ideas for enhancement that inspire fellow cooks.

Invite friends and family to join you in trying out this recipe, fostering connections over shared meals and creating lasting culinary memories.

Incorporate reader variations into your repertoire, experimenting with established suggestions while remaining open to further innovations and creativity.

The Recipe

Chicken with Spinach and Mushrooms in Creamy Parmesan Sauce

Serves: 4

Prep Time: 10 mins

Cook Time: 25 mins

Total Time: 35 mins

Kitchen Equipment Needed

  • Non-stick skillet
  • Sharp knife
  • Cutting board
  • Whisk

Ingredients

  • 4 boneless, skinless chicken breasts
  • 1 tablespoon olive oil
  • 2 cups fresh spinach
  • 8 ounces mushrooms, sliced
  • 1 cup heavy cream
  • 1 cup freshly grated Parmesan cheese
  • 2 cloves garlic, minced
  • Salt and pepper to taste

Directions

  1. In a non-stick skillet, heat olive oil over medium heat. Season chicken breasts with salt and pepper. Cook chicken until golden brown on both sides, about 6-7 minutes per side. Remove and set aside.
  2. In the same skillet, add mushrooms and garlic, sautéing until mushrooms are the golden and garlic is fragrant.
  3. Reduce heat to low, stir in heavy cream and Parmesan cheese, whisking until blended smoothly.
  4. Return chicken to the skillet, spoon sauce over the top. Simmer until chicken is fully cooked through and sauce thickens, about 8-10 minutes.
  5. Incorporate spinach and cook until just wilted. Adjust seasoning as needed with salt and pepper.
  6. Serve hot, garnished with additional Parmesan and fresh herbs if desired.

Recipe Notes

  • For added depth, deglaze the pan with white wine before adding cream.
  • Substitute spinach with kale for a heartier texture.