Delicious Festive Cranberry Turkey Stuffing Balls for Holiday Gatherings

Festive Cranberry Turkey Stuffing Balls: A Holiday Delight

⚖️
Difficulty
Easy

⏲️
Prep Time
15 mins

🕒
Cook Time
30 mins

⏱️
Total Time
45 mins

🍽️
Servings
6

Imagine celebrating the holidays with a dish that perfectly encapsulates the spirit of the season. Festive Cranberry Turkey Stuffing Balls combine all the traditional flavors of Thanksgiving into perfectly bite-sized portions. The savory essence of turkey mixed with the tart sweetness of cranberries and the warmth of classic stuffing spices create a harmony of flavors that’s truly irresistible. Whether you’re hosting a gathering or simply want to enjoy a taste of the holidays, these stuffing balls are a delicious and convenient solution.

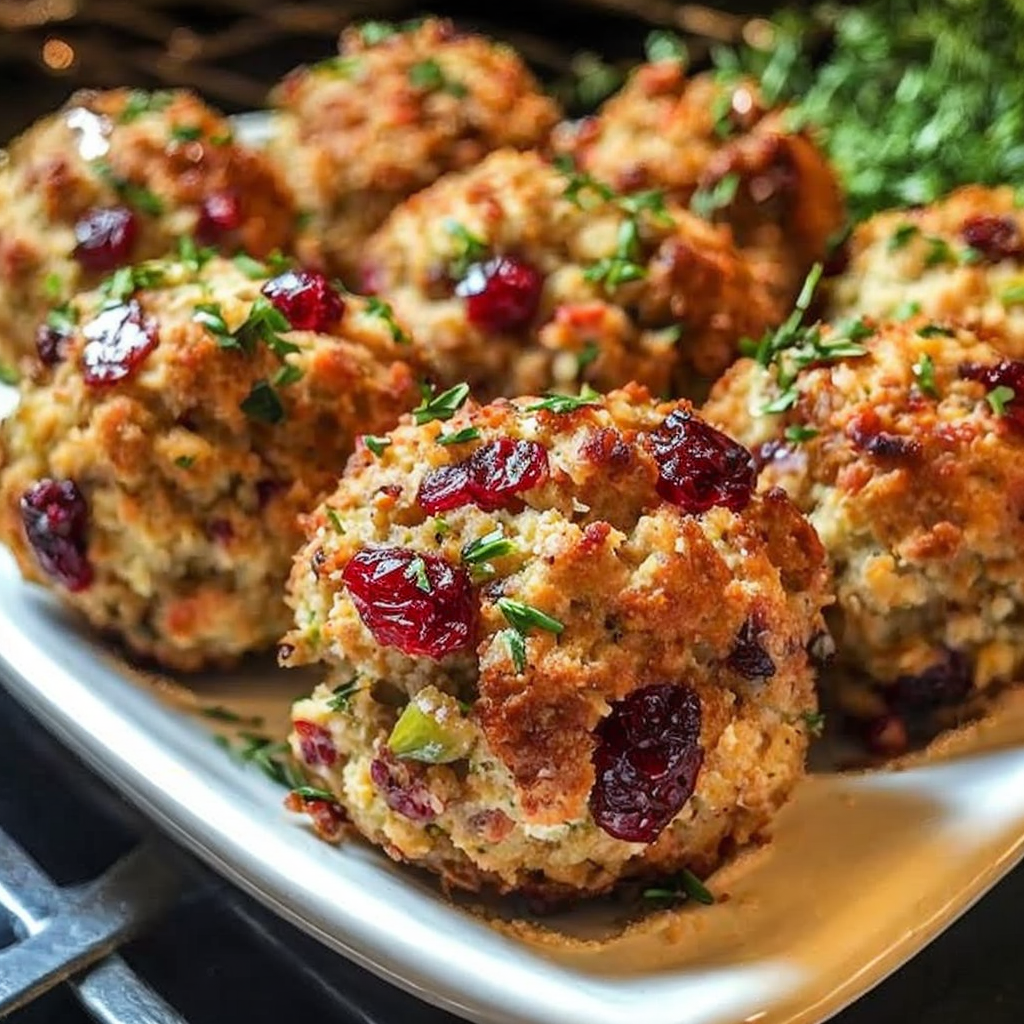
These delectable Festive Cranberry Turkey Stuffing Balls are not just about taste—they bring visual appeal and an enticing aroma to your table as well. Picture crispy golden-brown exteriors giving way to moist, flavorful interiors. Each bite releases the comforting smell of herbs and cranberries, instantly evoking cherished memories around the dinner table. Moreover, they’re easy to prepare, making them the perfect addition to your holiday menu without the stress.

Quick Recipe Highlights

  • Flavor Profile: A delightful blend of savory turkey and tart cranberries, complemented by fragrant herbs and spices.
  • Texture: Crispy on the outside with a moist, tender interior that melds the best of stuffing and turkey in every bite.
  • Aroma: Inviting scents of roasted turkey and herbs, with a hint of cranberry sweetness wafting through the kitchen.
  • Visual Appeal: Perfectly golden in color, these stuffing balls add a charming and festive touch to your dining table.
  • Skill Level Needed: Simple and straightforward, requiring basic mixing and baking skills.
  • Special Equipment: Baking sheet, mixing bowl, and measuring cups for an effortless preparation.

Recipe Overview

  • Difficulty Level: This recipe is easy to master, even for novice cooks. The steps are straightforward, making it a great choice for a first-time holiday cook.
  • Category: Perfect as an appetizer or a side dish, these stuffing balls fit well into any festive spread.
  • Cuisine: Rich in holiday tradition, they pull from classic American Thanksgiving elements with a contemporary twist.
  • Cost: Economically satisfying, this dish uses common holiday ingredients that are budget-friendly.
  • Season: Best enjoyed during the fall and winter holidays, they capture the essence of Thanksgiving and Christmas.
  • Occasion: Ideal for large family gatherings, potlucks, and festive celebrations where convenience and taste are paramount.

Why You’ll Love This Recipe


These Festive Cranberry Turkey Stuffing Balls boast a flavor that is both nostalgic and comforting. The juxtaposition of tart cranberries with savory turkey and herbed stuffing creates a well-balanced taste that delights the palate. Each bite is a sensory celebration, making them a standout dish during holiday meals.

One of the major conveniences is their make-ahead potential. You can prepare these stuffing balls ahead of time, allowing you to focus on other elements of your holiday feast. Their bite-sized nature means that they also serve well as appetizers, reducing the need for multiple courses and thus simplifying your hosting duties.

On the nutrition front, these stuffing balls pack protein from turkey along with fiber from the bread and cranberries, offering a reasonably balanced addition to your holiday menu. They’re a more wholesome option compared to some traditional heavy dishes, allowing guests to indulge without overindulgence.

Socially, they serve as a fantastic talking point. Friends and family will love the idea of enjoying stuffing in a new form. They’re easy to serve and pass around, making them perfect for mingling during holiday parties. Plus, their festive appearance and aroma set the stage for contagious holiday cheer.

Cost-effectiveness is another highlight. Utilizing leftovers or affordable ingredients, these stuffing balls are a host’s dream, as they don’t break the budget. This accessibility means that you can whip up a batch for every event without overthinking the expense.

Historical Background and Cultural Significance


The tradition of stuffing can be traced back to ancient times where different cultures would stuff various meats and vegetables to enhance their flavors. In America, stuffing became synonymous with Thanksgiving, dating back to early colonial days when it was introduced using native ingredients like cornmeal and herbs.

Cranberries, another staple, have deep roots in North American cuisine, serving as both a food item and a medicinal ingredient for Native Americans. They were integral to indigenous diets and later became a Thanksgiving essential as settlers learned their nutritional benefits and tart flavor.

Over the years, stuffing recipes have evolved significantly, incorporating regional ingredients and international influences. What was once a simple mixture has now branched into diverse interpretations, including these easily shareable stuffing balls that offer portability and ease of serving during festive occasions.

Across different regions, similar recipes have emerged, with each adapting to local tastes and available produce. In the southern U.S., cornbread stuffing is popular, while the North often features herb-seasoned bread. Our recipe combines these traditional elements with modern practicality, providing a festive twist on a timeless classic.

Ingredient Deep Dive


Turkey, a central ingredient, is a low-fat protein source that has cemented its place as the go-to meat for festive occasions. Its history in holiday cooking is rich, known for its ability to complement diverse flavors such as the tang of cranberries.

Cranberries are esteemed not only for their bright color but also for their tangy, refreshing taste and health benefits, being a source of antioxidants and vitamins C and E. When selecting cranberries, look for those that are plump and firm, avoiding any that are shriveled or bruised.

For the bread, a quality loaf can make all the difference in your stuffing balls. Opt for something slightly stale, which will absorb flavors better and hold up during cooking. If purchasing in advance, store it in a dry area, ensuring it doesn’t become moldy or overly stale.

Common Mistakes to Avoid

  • Using overly fresh bread, which may lead to soggy stuffing balls. Allow the bread to become slightly stale or toast it lightly before using.
  • Overmixing the stuffing mixture can lead to a dense texture. Mix until just combined for the best results.
  • Under-seasoning can make these stuffing balls bland. Taste the mixture before baking to ensure it’s well-seasoned.
  • Overbaking results in dry stuffing balls. Keep an eye on them and remove from the oven once they’re golden brown.
  • Not cooling the turkey leftovers could lead to a mushy texture. Allow them to cool slightly before mixing.
  • Adding too many cranberries can dominate the flavor. Balance the ratios to maintain harmony in taste.
  • Skipping the resting time after baking may cause your stuffing balls to fall apart. Letting them sit ensures they set properly.
  • Forgetting to grease the baking sheet can lead to sticking. Ensure all surfaces are adequately prepared for a clean release.

Essential Techniques


The art of creating perfect Festive Cranberry Turkey Stuffing Balls lies in achieving the right stuffing consistency. It’s crucial to balance moisture levels to ensure the stuffing holds together without becoming too dry. Test the mixture by forming a small ball in your hand; it should hold its shape but remain slightly pliable.

Even cooking is vital, so space the stuffing balls uniformly on a baking tray. This helps maintain consistent heat distribution, ensuring each ball is perfectly cooked throughout.

The browning of the stuffing balls is your cue to their readiness. A golden crust will hint at the delicious contrast between a crisp exterior and a moist interior. Check from time to time to avoid overbaking, which may result in a less appetizing, overly crunchy texture.

Pro Tips for Perfect Festive Cranberry Turkey Stuffing Balls


Ensure your turkey leftovers are finely chopped for a cleaner mix with the bread and cranberries. Larger pieces might not bind well with other ingredients, affecting the overall texture.

Soak the bread pieces briefly in chicken stock before mixing. This step ensures a deeper flavor infusion throughout the stuffing balls.

Adjust the cranberry amount based on tartness preference. Fresh cranberries will offer a sharper taste than dried ones.

Add a dab of butter on top of each stuffing ball before baking to encourage an extra golden and flavorful crust.

Sprinkle a pinch of fresh herbs over the cooked balls immediately after removal from the oven. This enhances aroma and adds a vibrant green color.

Experiment with cheese by incorporating grated cheddar or parmesan into the mixture for added richness.

Utilize a mini muffin tin for consistent shapes and portions. This helps especially when serving at larger gatherings for uniformity.

Variations and Adaptations


Consider a Southern take by using cornbread instead of traditional white bread, adding a touch of sweetness to balance the tart cranberries.

For a winter variation, include finely chopped nuts like pecans or walnuts to introduce a crunchy element.

Replace turkey with chicken for a more economical option without losing traditional flavors.

To easily make this dish vegetarian, substitute turkey with sautéed mushrooms, bringing a hearty, umami flavor to the stuffing.

Incorporate seasonal vegetables like diced roasted pumpkin for a fall twist, adding both color and a subtle sweetness.

Get creative with presentation by using festive cocktail sticks, allowing guests to easily partake at celebratory events.

Serving and Presentation Guide


Arrange these stuffing balls around a central serving dish of cranberry sauce for a beautiful and cohesive presentation. The glistening red of the sauce against the golden balls creates an enticing contrast.

Sprinkle fresh chopped parsley over the balls before serving to add a splash of vibrant color and a fresh aroma.

Traditional accompaniments like gravy or herb-infused olive oil complement these balls well, enhancing their rich flavors.

For a modern look, consider serving the stuffing balls in individual ramekins, elevating the presentation and making them perfect for personal-sized servings.

Ensure they are served warm, as the texture and flavors are best experienced when freshly baked.

Portion control is simplified with these stuffing balls, making them ideal for buffets, where guests can easily choose how many they’d like to enjoy.

Wine and Beverage Pairing


A bright, fruity Pinot Noir pairs exceptionally well with these Festive Cranberry Turkey Stuffing Balls, highlighting the cranberry while balancing the turkey’s flavors.

Consider a crisp white like a Chardonnay, which offers a buttery note that complements the dish’s savory aspects perfectly.

Non-alcoholic options like a sparkling cranberry lemonade can mirror the cranberries used in the recipe, tying the flavors together.

If serving coffee or tea, opt for a light-bodied black tea that provides a subtle contrast to the stuffing’s richness.

For best results, serve both wines and beverages slightly chilled, enhancing the festive atmosphere.

Wine should be poured just before the meal to ensure it maintains optimal temperature and flavor profile throughout the course.

Storage and Shelf Life


Store any leftover stuffing balls in an airtight container in the refrigerator, maintaining their freshness for up to three days.

For extended storage, these stuffing balls freeze well. Place them on a baking sheet to freeze initially, preventing them from clumping together, then transfer to a freezer bag.

Reheat frozen stuffing balls in the oven to regain their crispy exterior. Let them thaw slightly and bake at a moderate temperature.

Signs of spoilage include a noticeable change in texture or an off smell, at which point leftovers should be discarded.

Use airtight containers to prevent exposure to air, which can cause the stuffing balls to dry out.

Avoid microwaving unless absolutely necessary, as this can lead to uneven reheating and loss of crispness.

Make Ahead Strategies


Prepare the stuffing mixture a day in advance, storing it covered in the refrigerator. This allows the flavors to meld together, enhancing taste.

Form the stuffing balls the night before and place them on a baking sheet. Cover and refrigerate, enabling you to bake them fresh just before serving.

Reheat cooked stuffing balls in a preheated oven, rather than a microwave, to maintain their delightful crispy texture.

Consider splitting the prep work—one day for mixing and another for forming and baking to manage time efficiently.

Ensure thawing time if pre-baking and freezing, moving them to the fridge a day ahead to thaw gently.

Add fresh garnishes like herbs or cranberry sauce just before serving to maintain their vibrancy and freshness.

Scaling Instructions


Easily halve the recipe for smaller gatherings without affecting the final outcome, adjusting the ingredient quantities accordingly.

Doubling or tripling the recipe is straightforward, though ensure you have adequate baking sheets and oven space to accommodate larger batches.

When increasing quantities, distribute the mixture evenly across multiple baking sheets to avoid overcrowding in the oven.

Adjust cooking times slightly if necessary, checking for doneness to prevent over-baking when producing larger batches.

Storage considerations are crucial when scaling. Ensure enough space for refrigerated or frozen leftovers.

Large-scale production might require additional mixing bowls or utensils to comfortably blend ingredients without spillage.

Nutritional Deep Dive


These stuffing balls offer a balanced macronutrient profile with protein from turkey, carbohydrates from bread, and a modest amount of healthy fats.

Cranberries supplement with vitamin C and antioxidants, contributing to the dish’s nutritional value.

Herbs like sage and thyme provide flavor without adding calories, making these balls a wholesome choice within a varied diet.

Portion control ensures that you’re serving a reasonable amount of calories while still enjoying the satisfying flavors of your holiday meal.

Pay attention to sodium levels in ingredients like stock or pre-seasoned bread to maintain heart health.

Weight management can be supported by opting for whole grain bread and leaner turkey meat, adding fiber and reducing fat.

Dietary Adaptations


Create a gluten-free variation by substituting traditional bread with gluten-free alternatives like cornbread or gluten-free rolls.

For a dairy-free version, ensure any stocked used is free from added dairy ingredients.

Take a vegan approach by replacing turkey with a combination of roasted mushrooms and walnuts, offering a savory umami effect.

A low-carb option involves using almond flour or a similar low-carb mix as a binding agent instead of breadcrumbs.

Keto-friendly adaptions would use almond flour and increase the fat content slightly with added butter or cheese for a richer taste.

Paleo adaptations replace bread with a mixture of almond meal or coconut flour and additional nuts for texture.

For a Low-FODMAP version, avoid ingredients like garlic or onion and use substitutes such as garlic-infused oil for flavoring.

Troubleshooting Guide


If your stuffing balls appear too dense, consider loosening the mixture with additional liquid like stock, ensuring a softer finish.

Balance the flavor by adjusting seasoning if the initial taste falls flat; sometimes a touch more salt or herbs can elevate the dish drastically.

Ensure oven temperatures are correct if browning is uneven or inconsistent, checking with an accurate oven thermometer.

In case of ingredient substitutions, verify equivalencies to maintain recipe integrity, as some alternatives may alter texture or flavor unexpectedly.

Adjust cooking times based on your specific equipment and environment; not all ovens heat evenly, and altitude can affect cooking times too.

Monitor moisture levels if the mixture seems too dry or wet, as ingredient variations often necessitate a bit of flexibility in preparation.

Recipe Success Stories


Readers have shared numerous adaptations of these stuffing balls, incorporating local flavors and adding personal twists, like adding a touch of bacon or roasted peppers.

One variation featured the addition of dried apricots, praised for adding a unique sweetness that complemented the cranberries beautifully.

Engaging photos captured by our community showcase creative plating methods, from elegant starters to cozy holiday meals, inspiring others to try this delightful recipe.

Several fans have found success using these stuffing balls as sandwich fillers the next day, proving their versatility and appeal.

Enthusiastic cooklings have noted how popular these balls have become at potlucks, with requests for the recipe often following soon after.

Frequently Asked Questions

Can I make these stuffing balls in advance?
Yes, you can prepare the mixture ahead of time and freeze the unbaked balls. Bake them as needed to keep them fresh and crispy.

What type of bread works best?
Slightly stale bread is ideal as it absorbs flavors better. White or sourdough works well, but you can also experiment with different types like rye or whole grain.

How do I prevent the balls from falling apart?
Ensure the mixture is moist enough to bind by checking that the breadcrumbs are sufficiently soaked in broth and that the turkey is chopped finely.

Can I use fresh cranberries?
Fresh cranberries provide a more tart profile and can be used in moderation. Adjust sugar or sweetening agents to balance their natural tartness.

What should I do if the stuffing is too dry?
Gradually add more broth to the mixture until it reaches a sticky consistency that holds its shape when formed into balls.

Are there any vegetable substitutions available?
Certainly. Swapping in ingredients like diced bell peppers or shredded carrots can add variety and boost nutritional content.

What is the best way to reheat these stuffing balls?
The oven is the best method to reheat, restoring crispiness while ensuring even warming throughout. Avoid microwaving for best results.

How can I make these balls spicier?
Add a pinch of cayenne pepper or chili flakes to the mixture to introduce a slight heat that complements the other flavors.

What are nutritious accompaniments?
Pair them with a crisp salad or roasted vegetables, bringing balance and freshness to the meal.

Do these stuffing balls freeze well?
Yes, they freeze beautifully and can be baked from frozen, making them a convenient make-ahead option for busy holiday times.

Additional Resources


For a deeper exploration of stuffing variations, consider looking into regional stuffing recipes like those featuring cornbread or wild rice, each bringing unique traits to the table.

Several technique guides available online can help with perfecting the art of making stuffing, offering tips on seasoning and texture management.

Ingredient-specific literature delves into the benefits of cranberries and turkey, clarifying why these staples hold such value in festive dishes.

Equipment recommendations can guide you to the best tools for baking these stuffing balls, from non-stick trays to silicone mats that ensure easy cleanup.

Seasonal twists can include changes based on the availability of fresh herbs or seasonal fruits, providing a new angle for traditional recipes.

Join the Conversation


We love seeing your interpretations of Festive Cranberry Turkey Stuffing Balls. Share your creations on social media using #FestiveStuffingBalls for a chance to be featured in our roundup.

For aspiring food photographers, experiment with different lighting and angles to capture the vibrant colors and textures of your dish.

Leave reviews on the recipe page to let others know about your experiences, and discuss how you tailored the recipe to suit dietary needs or preferences.

Engage with our community by exchanging tips and variations. Your insights might just help someone create their perfect holiday menu.

Keep experimenting with ingredient combinations, and don’t hesitate to revisit and tweak the recipe based on feedback and your evolving culinary skills.

The Recipe

Festive Cranberry Turkey Stuffing Balls

Serves: 6

Prep Time: 15 mins

Cook Time: 30 mins

Total Time: 45 mins

Kitchen Equipment Needed

  • Baking sheet
  • Mixing bowl
  • Measuring cups
  • Mixing spoon
  • Chopping board and knife

Ingredients

  • 2 cups leftover turkey, finely chopped
  • 1.5 cups cubed bread, slightly stale
  • 1/2 cup dried cranberries
  • 1/3 cup chopped celery
  • 1/4 cup finely chopped onion
  • 1 tsp dried sage
  • 1 tsp dried thyme
  • 1/2 cup chicken or turkey broth
  • Salt and pepper to taste
  • 2 tbsp melted butter

Directions

  1. Preheat oven to 375°F (190°C) and lightly grease a baking sheet.
  2. In a mixing bowl, combine the turkey, bread cubes, cranberries, celery, onion, sage, and thyme.
  3. Slowly add the broth while mixing until the mixture holds together.
  4. Season with salt and pepper according to taste.
  5. Shape the mixture into balls and place them on the prepared baking sheet.
  6. Brush the tops with melted butter for a golden finish.
  7. Bake for 25-30 minutes or until the balls are firm and golden brown.
  8. Let them rest for a few minutes before serving with your choice of dipping sauces or as part of a festive meal.

Recipe Notes

  • Consider using lemon zest in the mixture for an added citrusy freshness.
  • Swap dried cranberries with cherries for a different fruit profile.
  • Leftovers can be crumbled and used as a topping for casseroles or salads.

Irresistible No Bake Mini Lemon Raspberry Cheesecakes Recipe

No Bake Mini Lemon Raspberry Cheesecakes: A Deliciously Tangy Dessert Delight

⚖️
Difficulty
Easy

⏲️
Prep Time
30 mins

🕒
Cook Time
0 mins

⏱️
Total Time
30 mins + chilling time

🍽️
Servings
12 mini cheesecakes

With the refreshing blend of lemons and raspberries, these No Bake Mini Lemon Raspberry Cheesecakes are a perfect treat for the hot summer days. The tartness from the lemon combines harmoniously with the sweetness of the raspberries, creating a burst of flavor in every bite. These cheesecakes are both visually stunning and utterly delicious.

Prepared with a delightful graham cracker crust that is topped with a creamy lemon-infused cheesecake layer, these mini desserts are easy to make and require no baking. Perfect for summer gatherings or simply to brighten any family meal, these cheesecakes are a sure crowd-pleaser.

Quick Recipe Highlights

  • Flavor Profile: A tantalizing combination of tart lemon and sweet raspberry, complemented by a buttery graham cracker base.
  • Texture: Creamy cheesecake filling paired with a slightly crunchy crust; fresh raspberries add a burst of natural juiciness.
  • Aroma: Citrus notes from the lemon zest mingle with a subtle sweetness from the vanilla.
  • Visual Appeal: Bright yellow cheesecake topped with vibrant red raspberries, a feast for the eyes.
  • Skill Level Needed: Ideal for beginners; no-bake and no advanced techniques required.
  • Special Equipment: You’ll need a muffin tin and food processor or blender for crust preparation.

Recipe Overview

  • Difficulty Level: These cheesecakes are beginner-friendly due to the no-bake process and simple ingredients.
  • Category: Perfect as a dessert or a sweet snack, they fit into any meal that could use a tangy finish.
  • Cuisine: While this dessert is distinctly American, its fresh ingredients are beloved worldwide.
  • Cost: Relatively inexpensive as it primarily consists of seasonal produce and common pantry items.
  • Season: Best enjoyed in spring and summer when berries are in season and their flavors are most pronounced.
  • Occasion: Ideal for picnics, BBQs, or refreshing after-dinner treats particularly during festive summer events.

Why You’ll Love This Recipe


One of the best aspects of these No Bake Mini Lemon Raspberry Cheesecakes is the delightful harmony between their taste and texture. The zesty lemon compliments the rich creaminess of the cheesecake, while the graham cracker crust provides balance and texture. The fresh raspberries enhance the tartness, making this an appetizing summer delight.

Convenience is another reason to cherish this recipe. The no-bake aspect is a lifesaver during hot days when using the oven is less than ideal. The simplicity of preparation — requiring only basic kitchen tools and no advanced techniques — makes this recipe accessible to even novice chefs.

Nutritionally, these mini cheesecakes offer a refreshing alternative to heavier desserts. They are portioned to manage calorie intake while still delivering the sweet satisfaction you’re craving. The fresh berries are an excellent source of vitamins and antioxidants, adding a healthy twist to your dessert.

Perfect for social gatherings, these cheesecakes bring a wow factor with their tidy presentation and vibrant color. Being individually portioned, they are easy to serve and enjoy in any setting, from laid-back picnics to more formal gatherings.

Cost-effectiveness adds to their appeal. Using pantry staples and in-season fruits, this dessert provides luxury without an extravagant price tag. This makes hosting a breeze, keeping both your guests and wallet happy.

Historical Background and Cultural Significance


The concept of cheesecake dates back to ancient Greece, where it was served to athletes during the first Olympic Games. The addition of fruits and diverse flavors evolved through centuries as the dessert circulated through various regions.

Cheesecakes were adapted in America, becoming an integral part of bakeries’ cuisines. The introduction of the no-bake variety was a modern culinary adaptation for those seeking simpler, non-traditional methods.

Lemon-flavored desserts are particularly popular due to their refreshing and palate-cleansing properties. The combination of lemon and raspberry in cheesecake showcases a European influence with a fresh American twist.

Over the years, cheesecakes have experienced numerous variations and modifications, each bringing unique ingredients and techniques but all aligned in celebrating the rich, creamy indulgence of this iconic dessert.

Ingredient Deep Dive


Cream cheese is the foundation of any cheesecake, lending the dish its signature creamy texture. It originates from dairy-rich locales, with Americans embracing it in the form of cheesecake due to its smooth consistency and versatility.

Graham crackers are the classic choice for cheesecake crusts. Their slightly sweet yet subtle flavor acts as a perfect base, maintaining the dessert’s integrity while supporting the boldness of the filling.

Raspberries bring a natural sweetness and a pop of color to the dessert, making them aesthetically pleasing and nutritionally beneficial. Rich in fiber and antioxidants, they are a smart addition.

Fresh lemon juice and zest provide acidity that balances the cheesecake’s richness. Opt for organic lemons when possible, as the zest brings concentrated citrus flavor that enlivens the entire dish.

Vanilla extract adds a tranquil sweetness that enhances the creamy nature of the cheesecake. Opt for pure vanilla extract as it’s more robust in aroma and flavor.

Common Mistakes to Avoid

  • Using low-quality cream cheese can affect the creaminess and taste. Opt for full-fat, high-quality cream cheese for the best results.
  • Not chilling the cheesecakes long enough can result in a runny filling. Ensure at least 4 hours in the refrigerator or overnight for the perfect set.
  • Overblending the crust mixture can lead to it becoming too fine and creating a dense base. Pulse gently to maintain some texture.
  • Failing to measure ingredients precisely affects the balance of flavors and texture consistency. Accuracy is key, especially in desserts.
  • Skipping the zest can result in a less flavorful cheesecake. The zest holds as much flavor as the juice, if not more.
  • Using frozen raspberries might add excess moisture, risking a soggy top layer. Fresh berries are best for this dessert.
  • Not properly lining the muffin tin can cause difficulties in removing the mini cheesecakes intact. Use liners or lightly grease the tins.
  • Ignoring the resting period post-chilling can affect texture. Allow at least 10 minutes at room temperature before serving.
  • Overbeating the cheesecake filling introduces too much air, leading to cracks. Beat just until smooth for a perfect finish.
  • Not adjusting sweetness according to taste preference can lead to overly sweet or tart results. Taste and adjust as necessary.

Essential Techniques


Achieving the perfect cheesecake texture involves carefully balancing ingredients. The key is to ensure all components are at room temperature before mixing to avoid lumps. Beat the mixture just enough to combine, avoiding incorporating too much air to maintain that classic dense melt-in-the-mouth quality.

For the crust, it’s important to blend the graham crackers finely enough to bind together but not so much that they lose all texture. This technique gives structural support while offering a nice crunch.

The layering of ingredients demands patience — press the crust into the base firmly, ensuring even distribution. Add the cheesecake filling smoothly over the crust to create defined, clean layers that set attractively once chilled.

Pro Tips for Perfect No Bake Mini Lemon Raspberry Cheesecakes


Chill your cheesecake mixture before layering for a more structured result. This helps in managing consistency while ensuring it sets faster once layered.

Use citrusy fruits in moderation alongside lemon to avoid overpowering the cheesecake’s natural flavors with excessive tartness.

If the crust remains crumbly, consider adding a touch more butter which acts as a binding agent without altering the overall taste.

Experiment with different berries or fruits for a personalized twist. Strawberries, blueberries, or even kiwi can substitute raspberries while complementing the lemony undertones.

For a darker, richer flavor, consider using brown sugar instead of white sugar in the crust mixture. It pairs beautifully with the graham crackers’ toasted notes.

For an extra kick of freshness, garnish with freshly chopped mint just before serving. Its aromatic oils enhance the lemon’s brightness and add a visual flourish.

Incorporate a pinch of salt to the cheesecake mixture. This unconventional step can elevate sweetness and highlight flavors more distinctly.

Variations and Adaptations


Regionally, substituting local fruits or flavors can make this dessert unique to its setting. Tropical areas might enjoy mango or passionfruit, offering a different yet delightfully exotic experience.

In colder months, clementines or cranberries make delicious seasonal alternatives, adding a festive twist with their distinct flavors.

For dietary modifications, using almond flour instead of graham crackers can cater to gluten-free diets. Greek yogurt could replace cream cheese for a lighter, tangier filling for health-conscious individuals.

To adjust the sweetness and introduce extra flavor, a swirled raspberry compote topping can be freshly prepared and incorporated just before serving.

Texture can be modified by adding a spoonful of meringue or whipped cream as a topping, enhancing the fluffiness and complementing the dense cheesecake interior.

Innovation can extend into the plating as well. Consider shaping the cheesecakes into bars or squares for modern, easy-to-serve alternatives that hold the recipe’s iconic essence.

Serving and Presentation Guide


For a professional presentation, neatly pipe swirls of whipped cream atop each mini cheesecake and sprinkle finely grated lemon zest for contrast and elegance.

Garnish with whole raspberries, mint leaves, or edible flowers to add vibrant color and a touch of sophistication to your plate.

Serve these cheesecakes on beautiful platters or individual dessert plates. White or pastel colors can offer a neutral background that lets the vibrant hues pop.

Consider traditional accompaniments like a raspberry coulis or a simple lemon glaze drizzled over the plate. This adds a gourmet touch while contributing additional layers of flavor.

Ensure these delicacies are served chilled but not ice-cold. Giving them a moment at room temperature before serving will enrich the taste and delicacy of each bite.

Portion control is built-in with these mini delights, making them an ideal pick-up dessert for events with many guests, ensuring everyone samples the flavors.

Wine and Beverage Pairing


These cheesecakes complement well with a chilled glass of Moscato or a sparkling wine, where the sweet, citrusy notes harmonize beautifully with each other.

For a non-alcoholic alternative, consider pairing with a sparkling lemonade or homemade iced tea – preferably lemon-flavored to strengthen the citrus theme.

If you prefer coffee or tea, pairing with a light green tea or a subtle white tea enhances the dish’s freshness, offering a soothing balance.

Maintain chilled beverage temperatures to parallel the dessert’s perfect serve – relaxing and revitalizing in every sip.

Serve in elegant, thin-rimmed glassware, which allows the wine or beverage’s aroma and flavor to integrate perfectly with each cheesecake bite.

Storage and Shelf Life


Store these cheesecakes in an airtight container in the refrigerator, ensuring freshness for up to 3 to 4 days without losing their desired texture.

Keep them at consistent, cool temperatures avoiding exposure to ambient heat, which may soften them excessively.

Glass containers can be ideal for storage due to their non-reactive nature and ease in sealing, keeping the flavors pristine.

Discard any cheesecakes that show visible signs of spoilage such as an unusual odor or mold, preserving the overall quality of your batch.

If making ahead, cheesecakes may be frozen for a month. Wrap securely in plastic wrap and aluminum foil to prevent freezer burn.

To enjoy post-freezing, thaw in the refrigerator overnight and consume within 24 hours for optimal texture and taste experience.

Make Ahead Strategies


Plan to make these mini cheesecakes a day in advance when entertaining to allow ample chilling time and ease event day stresses.

After assembling the layers within the muffin tins, keep them refrigerated to retain their shape securely until you’re ready to serve.

Be mindful of the quality impacts of extended refrigeration. Fresh fruits maintain their vibrancy and taste, best added as a finishing touch just before serving.

Assemble the base and filling separately if pressed for refrigerator space and integrate when closer to serving times. This fits seamlessly with brings convenience and keeps the components deliciously fresh.

If reheating the crust is preferred, briefly warm in a low oven, although traditionally this no-bake dessert shines fullest in its chilled form.

Introduce fresh zest and berries last minute for an added burst of flavor and enhanced aesthetic appeal directly before presenting them to your guests.

Scaling Instructions


Halve the recipe efficiently by reducing ingredient measurements by 50%, adjusting to personal or small gathering needs.

For doubling or tripling the recipe, ensure you have adequate chilling space and use larger, flat containers that fit within setup parameters.

Adjust the mixing times proportionately when using increased quantities to ensure even distribution and consistency across larger batches.

Use multiple muffin tins for expanded servings rather than overfilling one. This maintains even cheesecake sizes and allows for concurrent chilling.

For larger gatherings, prepare batches days ahead and rotate chilling stages to manage kitchen flow effectively.

When scaling up, ensure you have enough serving wares to present in unified, elegant groupings to amplify your dessert’s appeal.

Nutritional Deep Dive


Each serving delivers a balanced diet punch, as mainstream in portion control, while embracing the creamy indulgence.

Primary macros include moderate carbs from the graham crackers and fats from cream cheese, making them rich yet indulgent on occasion.

Micronutrients stem primarily from the raspberries, providing vitamins, fiber, and antioxidants.

Consider these cheesecakes as a treat within a balanced diet for their rich flavors and diversity in taste over their caloric density.

Understand dietary considerations such as lactose intolerance if using cream cheese, offering alternatives like lactose-free products when possible.

For weight management, these minis showcase tempting flavor and portion size without over-indulging, supporting healthier dessert choices.

Dietary Adaptations


For a gluten-free option, replace graham crackers with gluten-free alternatives without altering the dessert’s iconic taste.

Transform into a dairy-free delight by choosing soy or cashew-based cream cheese, maintaining similar texture and flavor without dairy.

To suit vegan diets, combine plant-based cream cheese and buttery-flavored spreads in place of traditional dairy components successfully.

Low-carb followers can lessen sugar content, considering stevia or erythritol as alternatives to maintain sweetness, managing carbohydrate consideration.

For a keto version, focus on using almond meal for the crust and cream cheese blend flavored with monk fruit sweetener.

Ensure paleo compatibility with cashews and coconut cream instead of cream cheese, creating a nutty, casserole base that remains true to its flavors.

Those observing low-FODMAP diets may still enjoy by selecting ingredients lower in fermentable carbohydrates, adapting sweeteners with care.

Ultimately, varied personalization sustains these cheesecakes’ appeal among diverse dietary needs, keeping flavor and joy intact across many tables.

Troubleshooting Guide


If your cheesecakes don’t set correctly, double-check cream cheese was not overbeaten, which could introduce too much air into the filling.

A runny cheesecake filling often stems from insufficient chilling; ensure full rest time before assessing modification attempts.

If the flavor seems overly bitter or tart, taste and adjust with a little more sugar or vanilla to by-pass excessive acidity.

Trust in timed refrigeration stages to keep your no-bake cheesecakes temptingly tender without teetering into texture trouble.

Use equipment sparingly, such as blenders, to avoid altering ingredients’ consistency too drastically from mix sufficiency.

Substituting ingredients require careful proportions, try small sample batches to achieve the desired aesthetic before serving.

Observed cracking could be from excess air introduced during mixing—blend ingredients smoothly to avoid unwanted shifts post-chill.

Timing oversights, if skipped, could seize their ideal flavor metamorphosis where patience equates to prime, unparalleled taste excellence.

Ultimately, watch ingredient measurements closely to protect integrity, guaranteeing vibrant cheesecake enjoyment from conception to consumption.

Recipe Success Stories


Feedback from countless tables applauds the refreshing taste and aesthetic appeal these mini cheesecakes contribute to gatherings of all sizes.

Innovative variations highlight commendations, as various flavor additions or substitutions travel these cheesecake gems through seasons effortlessly.

Reader tips suggest attractive new garnishes, from sprigs of rosemary beside citrus slices to culinary expertness shared socially online.

Photo opportunities emerge triumphantly as these mini masterpieces impress with brightness in bagged picnics or five-star dining room banquets alike.

Culinary progress and engagement enhances communal bonds while elevating household recipes into blue-ribbon worthy presentations. Through experience shared, gratitude wraps each culinary endeavor taken on these lemon raspberry fronts.

Frequently Asked Questions

Can these cheesecakes be made in advance?

Yes, they can be made a day ahead. Ensure they are well-chilled in an airtight container for peak freshness upon serving.

Can I freeze these cheesecakes?

Absolutely, just wrap them properly to prevent freezer burn and enjoy them for up to a month, thawing overnight before enjoying.

What is the best way to thaw frozen mini cheesecakes?

For uniform texture and flavor, thaw them in the refrigerator overnight to avoid excessive condensation or a shift in even bite qualities.

Can I double the ingredients for bigger gatherings?

Doubling the recipe is feasible by scaling measurements proportionally and using multiple muffin tins or a larger freezer space.

What if I do not have a muffin tin?

You could utilize other small molds or form layers directly into flexible silicon molds that pop easily post-set.

Is it necessary to use a food processor for the crust?

While it’s recommended for finer results, a rolling pin or manual crushing will suffice provided crumbs remain consistent in texture.

Can I use different kinds of berries?

Indeed, switching raspberries for strawberries, blueberries, or mixed berries is encouraged and offers intriguing variations to explore.

What’s the easiest way to enhance the lemon flavor?

A bit of zest adds concentrated citrus notes beyond the juice. The zest enhances both flavor depth and visual showcase.

How do I prevent raspberries from becoming mushy?

Opt for fresh, firm berries. A gentle rinse and pat dry just before application ensures their resilience atop your creation.

Are these cheesecakes suitable for dietary restrictions?

With adaptations mentioned, such as gluten or dairy alterations, they’re able to accommodate a range of preferences successfully.

What wine complements the flavor of these cheesecakes?

Sparkling wine or light Moscato complements the lemon freshness perfectly for a matching drink-dine experience alongside the dessert.

Why is my crust crumbly?

If that happens, don’t hesitate to adjust the butter slightly, ensuring the mix cohesively compacts and then sets beautifully.

Additional Resources


To explore more dessert possibilities, consider checking out related cheesecake variations such as New York-style or rich take on chocolate-infused options.

Technique guides provide extensive insights into mastering even seamless cheesecake recipes with flourish and fineness.

For ingredient clarity, discover the numerous advantages of using seasonal eats or homegrown produce available locally to ignite the freshest kitchen start.

Our recommended equipment listings highlight essentials that merge convenience with usability, optimizing your cheesecake creation journey.

Seasonal variations inspire your dish repertoire through times and textures, welcoming innovative sweet times within culinary calendars to expand satisfied tables.

Join the Conversation


Share your own dazzling versions via social media platforms by tagging us to showcase your stunning cheesecake creations.

Photography tips are a bonus here where light balance and color pop should celebrate focal points, illustrating each cheesecake’s personality through lens capture.

Leave recipe reviews to share your unique transformations and tweak insights beyond common practice, engaging fellow home-chefs across communities.

Join us in exploring recipe variations and share inventive ingredient swaps or personal eureka moments discovered along the way, building a vibrant baking community.

The Recipe

No Bake Mini Lemon Raspberry Cheesecakes

Serves: 12 mini cheesecakes

Prep Time: 30 mins

Cook Time: 0 mins

Total Time: 30 mins + chilling time

Kitchen Equipment Needed

  • Muffin tin
  • Food processor or blender
  • Mixing bowls
  • Zester
  • Whisk

Ingredients

  • 1 cup graham cracker crumbs
  • 1/4 cup melted butter
  • 2 cups cream cheese, softened
  • 1/2 cup sugar
  • 1 tsp vanilla extract
  • 2 tbsp lemon juice
  • Zest of 1 lemon
  • 1 cup fresh raspberries

Directions

  1. In a food processor, pulse graham crackers until fine. Mix with melted butter. Press into the base of a muffin tin lined with paper cups.
  2. In a bowl, beat cream cheese, sugar, vanilla, lemon juice, and zest until smooth.
  3. Spoon the cheesecake mixture over the crust, smoothing tops with a spatula. Top with fresh raspberries.
  4. Refrigerate for at least 4 hours to set.
  5. Before serving, remove cheesecakes from the muffin tin, peel off paper cups and enjoy fresh.

Recipe Notes

  • Ensure cream cheese is at room temperature to prevent lumps.
  • Feel free to add a dollop of whipped cream on top before serving for an added touch of luxury.
  • Raspberry preservation recommends fresh consumption post-preparation for peak flavor.

Irresistible Cranberry Honey Butter: The Perfect Holiday Spread Recipe

Cranberry Honey Butter Recipe: A Delightful Spread for Every Occasion

⚖️
Difficulty
Easy

⏲️
Prep Time
10 mins

🕒
Cook Time
5 mins

⏱️
Total Time
15 mins

🍽️
Servings
8 servings

Imagine spreading a luscious cranberry honey butter on a warm loaf of bread, with its vibrant color and a perfect balance of sweet and tart flavors. This Cranberry Honey Butter Recipe marries the sweet goodness of honey with the zesty zing of cranberries, creating a sensational spread that can enhance a simple breakfast or act as a delightful accompaniment to a festive meal. Whether you’re slathering it on toast or using it as a dip, this recipe elevates any dish with its rich flavors.

The union of cranberries and honey provides not just a taste infusion but also a delightful aroma that fills your kitchen, invoking the sweet scents of harvest time. The creamy butter base adds a luxurious texture, making every bite smooth and delightful. This spread isn’t just a treat for your taste buds but also a visual feast, with its stunning deep pink hue adding vibrancy to any tablescape. The experience of making this Cranberry Honey Butter is as enjoyable as savoring it, with simple steps that yield extravagant results.

Quick Recipe Highlights

  • Flavor Profile: A perfect blend of sweet honey and tangy cranberries, creating a harmonious balance that delights all palates.
  • Texture: The creamy butter complements the chunky texture of cranberries, offering a velvety mouthfeel with bursts of fruit.
  • Aroma: The subtle sweetness of honey blends with the fresh and fruity scent of cranberries, filling the air with a pleasant aroma.
  • Visual Appeal: The vivid pink color of the Cranberry Honey Butter makes it a stunning addition to any meal, drawing compliments and appetite alike.
  • Skill Level Needed: With easy-to-follow steps, this recipe is perfect for beginners who wish to craft impressive spreads without complex techniques.
  • Special Equipment: A food processor or blender is essential for achieving the perfect consistency, ensuring the cranberries are well blended with the butter.

Recipe Overview

  • Difficulty Level: Easy. This recipe involves minimal ingredients and simple blending, making it accessible for cooks of all levels.
  • Category: This Cranberry Honey Butter is versatile, perfect as a spread for breakfast, a topping for desserts, or a unique appetizer condiment.
  • Cuisine: While it complements a variety of cuisines, this recipe has roots in Western culinary traditions that emphasize festive flavors.
  • Cost: The ingredients are affordable and easily accessible, making this spread an economical way to add flair to any meal.
  • Season: Best enjoyed in fall and winter when cranberries are in season, infusing dishes with their festive cheer.
  • Occasion: Ideal for holiday gatherings, brunches, or as a thoughtful homemade gift that impresses with its flavor and sophistication.

Why You’ll Love This Recipe

Explore the unique taste and texture that make Cranberry Honey Butter a must-try. The spread blends the natural sweetness of honey with the tartness of cranberries to create a flavor profile that stands out. The balance is stellar, enhancing the taste of whatever it accompanies without overpowering it.

Beyond its taste, this recipe is incredibly convenient. With minimal preparation and cook time, it’s a quick way to add a gourmet touch to everyday meals. Plus, it can be made in advance, giving you more time to entertain or relax.

Cranberry Honey Butter also comes with nutritional benefits, as cranberries are loaded with antioxidants and honey offers natural sweetness without processed sugars. Enjoy a delicious spread that not only tastes good but is also better for you.

Socially, this butter brings a touch of sophistication to your gatherings. Whether it’s a formal dinner or casual brunch, the spread’s vibrant color and delightful flavor spark conversations and bring people together over good food.

Finally, the accessibility and cost-effectiveness of the recipe allow you to experiment without breaking the bank. With ingredients that are easily found in most kitchens, you’re a few steps away from creating a culinary masterpiece that impresses every time.

Historical Background and Cultural Significance

Cranberry Honey Butter finds its origins within the larger tradition of fruit and honey blends, which have been cherished across different cultures for centuries. Originally inspired by Native American uses of cranberries as a staple fruit, this recipe pays homage to their resourcefulness and culinary innovation.

The Cranberry Honey Butter evolved from simple cranberry preserves, incorporating honey as a naturally sweet alternative to sugar. Embraced by settlers and passed down through generations, this recipe captures the historical bond between natural flavors and homey goodness.

Over time, regional variations of this butter have emerged. In New England, where cranberries grow abundantly, the recipe captures the spirit of local harvests. Meanwhile, Western influences introduced honey to this fruit, crafting a harmonious blend that reflects the melding of different culinary traditions.

Today, Cranberry Honey Butter transcends its seasonal roots, being adapted to suit year-round consumption. Whether spread on toast, added to savory meals, or used as an ingredient in baking, its timeless appeal continues to delight food lovers globally.

Ingredient Deep Dive

The cranberries in this recipe are more than just a seasonal fruit. With their rich history as a food staple among Native Americans, they offer a taste of tradition and culture. Beyond being a key ingredient, cranberries are packed with vitamin C and antioxidants, making them both flavorful and nutritious.

Honey, a natural sweetener used for millennia, plays a crucial role in this recipe. It provides a rich depth of flavor that is both sweet and floral. When selecting honey, opt for local varieties to capture the essence of regional flora. Store honey at room temperature to avoid crystallization and preserve its liquid form.

Butter serves as the creamy base, transforming the fruit and honey into a spreadable delight. For optimal results, use unsalted butter, allowing you to control the overall saltiness of the dish. Store butter in the refrigerator to maintain its freshness and texture.

If cranberries are unavailable, consider using dried cranberries soaked in warm water or cranberry preserves. Similarly, maple syrup or agave nectar can be substituted for honey, providing unique flavors while catering to dietary preferences.

Common Mistakes to Avoid

  • Overprocessing: Avoid blending the ingredients into a single monotonous paste; you want small bits of cranberry for texture.
  • Using salted butter: This may alter the flavor balance, making the spread too salty.
  • Storing improperly: Ensure butter is refrigerated to maintain taste and prevent spoilage.
  • Skipping the chilling step: This allows flavors to meld, enhancing the overall taste profile.
  • Choosing the wrong cranberries: Fresh cranberries provide the best flavor; frozen ones should be thawed before use.
  • Adding too many extra ingredients: Keep the recipe simple to let the natural flavors shine.
  • Forgetting to soften the butter: This makes mixing difficult and can lead to an uneven texture.
  • Neglecting to taste and adjust: Varying sweetness levels in honey require a taste test to balance flavors.
  • Failing to garnish creatively: A sprinkle of fresh herbs or a zest of citrus can enhance presentation and taste.

Essential Techniques

Mastering the blend of flavors is crucial for perfect Cranberry Honey Butter. Use a food processor to ensure the cranberries and butter blend evenly, achieving a rich and creamy consistency without losing texture. Taste and adjust sweetness as necessary, as honey’s flavor can vary widely.

Another key technique is temperature control. Soften butter to room temperature for easy mixing but avoid melting it entirely, as this can alter the spread’s texture. Similarly, allow flavors to meld in the fridge before serving, enhancing the harmonious blend of sweet, tangy, and buttery notes.

Pro Tips for Perfect Cranberry Honey Butter

Consider experimenting with additional flavors such as a pinch of cinnamon or clove for a spiced twist. These spices complement the natural flavors without overwhelming them.

If you desire a smoother texture, strain the blended mixture to remove larger cranberry pieces. This ensures a uniform spread that can be used in various culinary applications.

Pair your Cranberry Honey Butter with freshly baked bread or muffins to experience its full flavor potential. The warmth from the baked goods melts the spread just enough, releasing its aromatic notes.

Refrigerate leftover butter in an airtight container to maintain its freshness. Before serving, allow it to sit at room temperature for a few minutes to soften, making spreading easier.

Explore the potential of this butter as a glaze for roasted meats or vegetables, leveraging its sweet-tangy profile to enhance savory dishes. For those with a sweet tooth, mixing with powdered sugar can turn it into a delightful frosting for cakes or cookies.

Variations and Adaptations

Cranberry Honey Butter is versatile enough to accommodate various regional twists. In Northern Europe, try adding cardamom or nutmeg to give a warm, spiced flavor reminiscent of traditional Scandinavian baked goods. During summer, swap cranberries for strawberries or raspberries for a fresh, seasonal twist.

For dietary adaptations, consider substituting butter with a plant-based alternative for a vegan version. Use agave nectar instead of honey to cater to different dietary requirements while maintaining sweetness.

The texture can be modified by adjusting the amount of cranberry chunks. For a chunkier spread, blend less. Conversely, for smoothness, blend more and strain the mixture to remove any pieces. Presentation-wise, serve the butter in decorative jars, topped with a sprig of mint or rosemary, adding elegance to your table setting.

Serving and Presentation Guide

Give your Cranberry Honey Butter a modern twist by presenting it on a wooden charcuterie board amid an assortment of bread, fruits, and cheeses. This not only elevates its appearance but encourages sharing and engaging culinary experiences.

Traditional accompaniments include warm bread rolls or croissants, where the spread serves as a meltingly rich enhancer. Make use of garnishes like cranberry zest or a drizzle of extra honey for both decoration and flavor heightening.

Temperature plays an essential role; serve the spread slightly chilled for a firm texture, or at room temperature for convenience and easy application. Guide your guests on portion control by providing small serving knives or spoons, emphasizing etiquette and enjoyment.

Wine and Beverage Pairing

Pair your Cranberry Honey Butter with a classic Pinot Noir or a light-bodied Riesling, both of which complement the spread’s sweet-tart profile. These wines bring out the richness of the butter while balancing the tart cranberry notes.

For non-alcoholic alternatives, consider pairing it with a lightly brewed green tea or sparkling water infused with lemon. These options cleanse the palate between bites, allowing the spread’s flavor to shine with each tasting.

Coffee enthusiasts might enjoy this butter alongside a rich, creamy latte, while tea drinkers might pair it with a soothing cup of chamomile, enhancing the butter’s sweetness and butteriness with each sip.

Storage and Shelf Life

Store Cranberry Honey Butter in an airtight container or jar to keep it fresh. In the refrigerator, it can last for up to two weeks. If you need to store it longer, consider freezing portions in silicone molds for easy use.

Always check for signs of spoilage, such as off-odors or changes in color, to ensure safety. When reheating, do so gently to avoid altering the texture. For optimal thawing, move the butter from the freezer to the refrigerator overnight.

Make Ahead Strategies

The components of this butter can be prepared in advance to streamline assembly. Consider chopping the cranberries and softening the butter a day prior, storing them separately until ready to blend.

Store assembled butter in airtight containers, ensuring flavors have time to meld during refrigeration. If serving later, allow the spread to soften at room temperature before presentation, ensuring optimal texture and spreadability.

Adding fresh elements like herbs or a sprinkle of zest just before serving can enhance freshness and visual appeal, ensuring your Cranberry Honey Butter remains as vibrant and delightful as when freshly made.

Scaling Instructions

If scaling down, simply halve the ingredient quantities to maintain flavor balance. For larger batches, double ingredients while ensuring your food processor can handle the increased volume.

Pay attention to equipment capacity when increasing quantities; larger batches may require blending in multiple rounds. Adjust timing minimally, as the overall preparation and cooking process remains consistent with scaling.

Store any excess in usable portions, keeping whatever is not immediately needed frozen or refrigerated. This way, your delicious Cranberry Honey Butter remains easily accessible and ready for future use.

Nutritional Deep Dive

Cranberry Honey Butter provides a well-rounded macro profile, offering healthy fats and carbohydrates from its core ingredients. The butter supplies rich fatty acids vital for energy, while cranberries contribute vitamins like C and E.

Its micronutrient profile includes calcium and potassium, supporting overall well-being. The natural sweeteners used make it a better option for those watching processed sugar intake.

When considering dietary portions, a modest tablespoon can offer satisfaction without excessive calorie load. Adjust portions according to dietary goals, balancing taste and nutritional benefits for a well-rounded consumption experience.

Dietary Adaptations

For gluten-free diners, ensure all accompanying items like bread are certified gluten-free. Dairy-free enthusiasts can substitute butter with margarine or other plant-based options, maintaining flavor integrity.

Vegans may enjoy the recipe with non-dairy butter and agave syrup. For those following a low-carb or keto lifestyle, replace honey with a low-carb sweetener substitute, keeping carb count minimal.

The versatility of this recipe extends to being altered for diverse diets without losing its essence, showcasing its flexibility while respecting individual dietary needs and preferences.

Troubleshooting Guide

If the texture seems too gritty, increase blending time or adjust butter consistency. For balance issues, vary the amount of honey or cranberries to suit personal taste, ensuring neither dominates.

Should your cranberry honey butter be too soft, refrigerate longer to allow it to set firmly. Conversely, if too hard, let it sit at room temperature briefly before serving.

For temperature concerns, remember that the spreadability changes with cooler or warmer environments; always maintain it at a comfortable serving temperature for best results.

Recipe Success Stories

Our community members have raved about this versatile spread. Anna from Texas swapped cranberries for blackberries, delighting her family with the adapted recipe’s surprising depth of flavor.

A reader named John creatively incorporated orange zest, adding a citrusy note that perfectly complemented the butter’s natural sweetness. His dinner guests couldn’t get enough, jotting down the recipe unsure of its evolving possibilities.

Lucy’s suggestion to embellish it with freshly chopped mint received much applause, enhancing both aroma and presentation. Share your creations with us, and maybe your story will inspire the next delicious adaptation!

Frequently Asked Questions

Can I use frozen cranberries? Yes, thaw them completely before using, ensuring they blend smoothly without altering the recipe’s consistency.

What type of honey is best for this recipe? Choose a mild-flavored honey to ensure it complements without overpowering the cranberry tartness.

Can this butter be stored outside the refrigerator? Store Cranberry Honey Butter in the refrigerator to maintain freshness and prevent spoilage.

What is a good substitute for cranberries if not available? Consider using raspberries or strawberries for a different but complementary fruity note.

How long does this butter last once made? When stored properly in the refrigerator, it can last up to two weeks.

Can I add spices to enhance flavor? Absolutely, spices such as cinnamon or nutmeg can be added for a delightful twist.

Is it possible to make this without a food processor? While it may be more challenging, manually chopping cranberries and whisking them into softened butter is feasible.

What are some serving suggestions? Spread it over warm breads, pair with cheeses on a board, or even mix into baked goods for unique treats.

Can I freeze this recipe? Yes, portion and freeze for longer storage, thawing as needed.

What can I do if the butter is too sweet? Adjust the quantity of honey to balance sweetness to your preference.

Additional Resources

Explore related recipes like Honey Almond Butter or Cranberry Sauce for more fruity spreads. Our technique guides on homemade butter techniques can aid your next culinary adventure.

Dive into ingredient insights to better understand the nutritional benefits and history of honey, cranberries, and butter. Look through seasonal variations to discover fresh, exciting adaptations tailored for each year’s experience.

Join the Conversation

We invite you to join our vibrant cooking community by sharing your Cranberry Honey Butter creations on social media. Use #CranberryHoneyButter to connect with fellow enthusiasts and share your unique variations or tips.

Review the recipe here, highlighting your personal touches and successes. Engage with other readers to exchange feedback, stories, and culinary ideas that can inspire and elevate this delightful spread further.

The Recipe

Cranberry Honey Butter

Serves: 8 servings

Prep Time: 10 mins

Cook Time: 5 mins

Total Time: 15 mins

Kitchen Equipment Needed

  • Food processor or blender
  • Measuring cups and spoons
  • Mixing bowl
  • Spatula

Ingredients

  • 1/2 cup fresh cranberries
  • 1/4 cup honey
  • 1 cup unsalted butter, softened

Directions

  1. In a food processor, pulse cranberries until coarsely chopped.
  2. Add in the honey and continue to pulse until the mixture is combined.
  3. In a mixing bowl, blend the softened butter until smooth.
  4. Gradually add the cranberry-honey mixture to the butter, stirring until all ingredients are fully integrated.
  5. Transfer the mixture to a storage container and chill for at least 1 hour before serving allowing flavors to meld.

Recipe Notes

  • Adjust honey to taste for your preferred sweetness level.
  • For a spicier butter, add cinnamon or nutmeg during blending.
  • The butter can be frozen in airtight containers for extended preservation.

Indulge in a Delicate Cake with Caramel Coffee Cream

Delicate Cake with Caramel and Coffee Cream: A Symphony of Flavors

⚖️
Difficulty
Intermediate

⏲️
Prep Time
30 mins

🕒
Cook Time
45 mins

⏱️
Total Time
75 mins

🍽️
Servings
8

Every bite of this delicate cake with caramel and coffee cream promises an exquisite blend of flavors. The silky coffee cream layers counterbalance the sweet, rich caramel, offering a sensory delight that’s hard to resist. This cake is perfect for those who appreciate a fine balance of sweetness and bitterness, with a texture that melts in your mouth. Its visual appeal is matched only by its taste, making it a splendid centerpiece for any gathering.

Quick Recipe Highlights

  • Flavor Profile: A harmonious blend of bitter coffee and sweet caramel, creating a sophisticated taste.
  • Texture: Soft and moist cake layers interlaced with creamy, smooth coffee-flavored cream.
  • Aroma: Rich notes of roasted coffee and warm caramel fill the air as this cake bakes.
  • Visual Appeal: A stunning two-tone layer cake with a glossy caramel glaze and delicate coffee cream swirls.
  • Skill Level Needed: Intermediate baking skills required, as this recipe involves multi-step frosting and layering.
  • Special Equipment: Stand mixer, and cake turntable for professional results.

Recipe Overview

  • Difficulty Level: This recipe demands attention to detail while preparing the caramel and coffee cream layers. It’s ideal for bakers with some experience looking to challenge themselves.
  • Category: This is a dessert recipe, perfect for post-dinner indulgence or as a key feature in a celebratory dessert spread.
  • Cuisine: Drawing from classic European dessert traditions, this cake combines timeless flavors appreciated globally.
  • Cost: Moderate, as it involves premium ingredients like coffee extract and high-quality butter, fetching around $15-$20.
  • Season: Best enjoyed during cooler months when rich flavors are most appreciated, although it can be enjoyed year-round.
  • Occasion: Perfect for special occasions such as birthdays, anniversaries, and festive gatherings.

Why You’ll Love This Recipe


The taste and texture of this delicate cake with caramel and coffee cream is a standout in any culinary lineup. The layering of flavors ensures each bite delivers a balanced profile that’s rich but not overwhelming. The cake is moist, complemented beautifully by the smoothness of the coffee cream. Convenience is another key feature, as this cake can be prepared in stages, allowing for flexible baking. Nutritionally, ingredients like sugar and butter are used in moderation, and there are opportunities to substitute for lower-fat cream options if desired.

From a social perspective, this cake is a crowd-pleaser, earning compliments at any gathering. Its unique flavor combination and impressive presentation make it a perfect conversation starter. Economically, it is accessible; while some ingredients are on the premium side, they are single-time purchases that balance out over 8 servings, providing good value for money.

Historical Background and Cultural Significance


Originating from the rich dessert traditions of Europe, this cake has evolved over time to incorporate the bold flavors of coffee and caramel. Historically, caramel has been a favored element in many French desserts, renowned for its ability to transform simple sugar into a deep, nutty treat. On the other hand, coffee is cherished around the world for its invigorating properties, slowly finding its way into the world of confections. The combination of these two iconic ingredients brings forth a cake that pays homage to both tradition and modern culinary experimentation.

The cultural importance of dessert as a symbol of celebration is not lost on this cake. It has become a staple in luxury dining experiences, often featured in high-end cafes and bakeries as a nod to refined taste. Over the years, bakers have experimented with various regional adaptations, adding local ingredients or modifying the cream content to suit their audience’s palates.

Ingredient Deep Dive


Butter plays a central role in this recipe, enriching the cake’s texture and flavor. With its origins in European cooking, butter is lauded for its ability to transform baked goods with its creamy touch. Nutritionally, butter offers essential vitamins such as A and D when consumed in moderation. Opt for unsalted butter to control the recipe’s overall flavor balance, and store it in its original wrapping in the fridge to maintain freshness. If needed, margarine can be a substitute, though it may slightly alter the taste.

Coffee extract is crucial for the distinctive flavor in the cream. Initial uses of coffee in baking emerged to add depth to desserts without overpowering them. Its benefits include a hint of caffeine and antioxidants, promoting energy while enjoying a treat. Choose high-quality coffee extract for the best flavor profile, and store it in a cool, dark place. For a more intense flavor, consider using an equal amount of freshly brewed espresso as an alternative.

Common Mistakes to Avoid

  • Overbeating the cake batter can lead to a dense texture; blend just until ingredients are combined.
  • Failing to chill the caramel results in a runny consistency; ensure it sets properly before use.
  • Adding coffee extract to hot mixtures diminishes its flavor; allow components to cool slightly first.
  • Neglecting to preheat the oven can cause uneven baking; ensure it reaches the recommended temperature beforehand.
  • Skipping the cake cooling process leads to a messy assembly; patience is key for clean layers.
  • Using low-quality coffee extract impacts taste negatively; invest in a reputable brand for best results.
  • Wrong frosting consistency can ruin presentation; adjust thickness with powdered sugar or cream as necessary.
  • Storing the cake improperly causes drying; wrap the cake tightly if keeping it overnight.

Essential Techniques


Creating a successful caramel involves a keen eye. It’s crucial to keep a steady gaze on the pot as sugar transforms to ensure the right amber color without crossing into bitterness. A light swirl of the pot rather than stirring prevents crystallization, a common pitfall. Mastering caramel requires confidence and practice, but noting the pivotal moment when bubbles slow and deepen their hue leads to visual success.

Pro Tips for Perfect Delicate Cake


Start baking with all ingredients at room temperature; this ensures even mixing and a consistent cake crumb. To achieve that flawless layer, invest in a cake leveler for even slices. If you’re pressed for time, prepare the components a day ahead to simplify the final assembly. For an added visual and textural contrast, consider lightly toasting the surface of the cake before adding the cream. Lastly, a touch of flaked sea salt on the caramel glaze amplifies its flavor magnificently.

Variations and Adaptations


Regional adaptations highlight unique benefits: Consider using a local nut butter to replace the traditional cream for a nutty twist. Add a fruit layer, like thinly sliced bananas, for a tropical flair in summer months. For dietary shifts, silky coconut cream can substitute heavy cream to satisfy a vegan palate while retaining richness.

Serving and Presentation Guide


Elegance in presentation elevates this dessert; consider a minimalist white plate to let the cake’s colors shine. For garnishing, a light dusting of cocoa powder or a few coffee beans strategically placed enhances the coffee theme. Traditionally served with just a fork, a modern twist could include a small dollop of whipped cream on the side to enrich the experience without overshadowing the cake’s flavors.

Wine and Beverage Pairing


A well-chilled glass of Sauternes expertly pairs with this cake, lending honeyed sweetness that complements the caramel notes. Alternatively, an iced Americano provides a caffeine-centric pairing for those desiring something non-alcoholic. Consider serving a medium steeped black tea to balance the cake’s richness if a lighter choice is preferred.

Storage and Shelf Life


Store this cake in an airtight container at room temperature for up to two days to maintain moisture. For longer storage, refrigerate while ensuring it’s well-wrapped to prevent drying out. Recognize spoilage if the caramel turns grainy or cream appears separated, indicating it’s past its best. For reheating, allow the cake to reach room temperature first, before gently warming individual slices in the oven to avoid melting the cream.

Make Ahead Strategies


Each component—cake layers, caramel, and coffee cream—can be prepared separately up to a day in advance. This spread timeline allows for less rushed assembly come serving day. Refrigerate the caramel and cream in airtight containers, allowing them to soften before final layer creation. This strategy maintains the integrity of flavors and textures, ensuring freshness.

Scaling Instructions


To halve the recipe, adjust ingredients precisely, taking note especially of liquids and leaveners which can greatly affect the outcome. Scaling up relies on doubling all ingredients while using larger baking pans to accommodate volume without altering cook time drastically. Be cautious of equipment limitations—overfilling decreases bake consistency—and extend baking time in smaller increments to avoid overcooking.

Nutritional Deep Dive


Each serving of this cake offers a balanced macro composition, with carbohydrates as the primary focus from sugar and flour. It includes beneficial fats from butter, providing energy and aiding nutrient absorption. Among micronutrients, it offers small amounts of calcium and potassium. Mindfulness of portion sizes and a balanced diet ensures this dessert satisfies both taste and health expectations.

Dietary Adaptations


For a gluten-free version, substitute traditional flour with a compliant blend, offering similar textural results. Dairy-free adaptations involve coconut or almond milk as primary replacements. A vegan-friendly route requires substituting eggs with applesauce or flaxseed meal, while maintaining moisture through plant-based creams.

Troubleshooting Guide


Should your cake crumb crumble, you might opt for a bit more moisture in the batter. A bitter caramel calls for closer watch times, while under-set cream indicates insufficient cooling. If frosting appears too runny, more powdered sugar ensures stability. For burned cake edges, check rack placements and possibly reduce oven temperature slightly.

Recipe Success Stories


Our community has embraced this recipe warmly, with stories of successful personal touches like adding a layer of orange curd for a citrus note. Variations across regions have included integrating a dash of spice for a warming, comforting twist. Photography enthusiasts have captured its elegant simplicity, highlighting the enticing layers.

Frequently Asked Questions

What makes this cake delicate?
The balance of moist crumb and light cream contributes to its delicate texture.

Can I use instant coffee instead of extract?
Yes, dissolve instant coffee in a tablespoon of water for a more robust coffee flavor.

Is homemade caramel necessary?
Store-bought caramel can be used, but homemade offers superior flavor and texture.

How do I maintain consistent frosting layers?
Use a piping bag to ensure even distribution before smoothing with a spatula.

Can I add nuts to this recipe?
Chopped walnuts or hazelnuts can be incorporated for a crunchy contrast.

What if my cake is too dense?
Ensure leavening agents are fresh, and avoid overmixing the batter.

Does the coffee flavor dominate?
It’s balanced with caramel but can be adjusted to taste preferences.

What if my caramel crystallizes?
Consider adding cream of tartar or lemon juice buffer in the cooking process.

How do I prevent the cake from drying out?
Wrap tightly and seal in an airtight container when not serving.

Is refrigeration necessary?
Only if room temperature exceeds a comfortable level, otherwise it can safely sit out for a short period.

Additional Resources


Explore related recipes like a classic tiramisu for another caffeine-flavored dessert. For better caramel techniques, consult our guide on sugar cooking. Ingredient exploration articles provide in-depth looks at coffee and its global impact, while modern plating techniques can inspire visually stunning presentations.

Join the Conversation


Share your delicate cake with caramel and coffee cream masterpieces via Instagram using #DelicateCakeCreation. Come connect on our baking forums for advice, tweaks, and success stories. Engage with other culinary explorers, sharing variations that worked for you and discussing how this cake found its way into your celebration.

Irresistibly Easy No-Bake Crunch Bars for Quick Desserts

Deliciously Easy No-Bake Crunch Bars: The Sweetest Treat

⚖️
Difficulty
Easy

⏲️
Prep Time
10 mins

🕒
Cook Time
0 mins

⏱️
Total Time
10 mins

🍽️
Servings
12

Dive into the world of indulgence with these No-Bake Crunch Bars. Perfect for satisfying your sweet tooth without the hassle of baking, these bars are both simple and scrumptious. Imagine rich, creamy layers mingled with a delightful crunch, offering a contrast that dances on your palate. Whether you’re craving a mid-day snack or crafting a dessert tray for a gathering, these crunch bars are sure to be the star attraction, radiating not just charm but an impeccable balance of flavor and texture.

No-Bake Crunch Bars deliver a satisfying experience with every bite. Each layer presents a harmonious interplay of sweet and nutty elements that cater to all your taste preferences. The creamy chocolate coats your taste buds with a luxuriously smooth sensation, while the crispy rice cereal adds the perfect texture contrast, making these bars irresistibly delightful.

Quick Recipe Highlights

  • Flavor Profile: Sweet and nutty flavors with a rich chocolate base. Each bite is a symphony of sweetness complemented by a soft hint of vanilla.
  • Texture: The bars boast a delightful crunch from the crispy cereal, enveloped in creamy, smooth chocolate for a perfect mouthfeel.
  • Aroma: The inviting scent of melted chocolate with a whisper of nutty undertones lingers in the air, making it impossible to resist.
  • Visual Appeal: These bars present a beautifully layered appearance with visible flecks of nuts, promising a treat that is as delightful to the eyes as it is to the palate.
  • Skill Level Needed: Ideal for beginners; requires basic mixing and layering skills, making it suitable for cooks of all levels.
  • Special Equipment: No special tools needed, just a mixing bowl and a baking dish, making it a straightforward recipe to execute anywhere.

Recipe Overview

  • Difficulty Level: The No-Bake Crunch Bars are rated easy, as they require no cooking or baking, merely combining ingredients and allowing them to set.
  • Category: Perfect for desserts or snacks, these bars are suitable for any time of the day.
  • Cuisine: While they offer a modern twist, the roots of using chocolate and nuts are proudly influenced by classic American desserts.
  • Cost: Affordable to make, using common pantry staples like chocolate chips and cereal, these bars are budget-friendly.
  • Season: Best enjoyed year-round, with a refreshing cold set perfect for summer, and a rich chocolate taste that warms the winter.
  • Occasion: These bars are incredible for casual get-togethers, holiday parties, potlucks, or simply as a family treat after dinner.

Why You’ll Love This Recipe


No-Bake Crunch Bars are the epitome of sweet delight, offering a rich blend of flavors that tantalize the taste buds. The smooth, creamy layer of chocolate, finely complemented by the crispy rice cereal and peanuts, provides a perfect textural balance that is both satisfying and addictive. It’s a delicious indulgence that offers a versatile treat for any dessert or snack occasion.

Beyond their mouthwatering taste and texture, these crunch bars are a breeze to prepare. Without the need for an oven, you can whip up a batch in mere minutes, making them an abundant choice for last-minute gatherings or a quick personal treat. The steps involve simple mixing and layering, ensuring that anyone can create a delicious dessert with ease.

These No-Bake Crunch Bars boast a nutritional profile that’s both satisfying and fulfilling. While indulging your sweet cravings, the incorporation of nuts and cereal adds a boost of healthy fats and fiber, contributing to a more balanced treat. It’s a delightful way to enjoy a snack without straying too far from your dietary goals.

The social benefits of preparing No-Bake Crunch Bars are immense. Their easy preparation allows for conversational cooking moments with friends and family, making every creation an opportunity for bonding. Also, their universal appeal across age groups makes them a hit at parties and celebrations, sparking joy and enthusiasm among guests.

Cost-effectiveness is a stand-out feature of these bars. Utilizing widely available ingredients, like chocolate and peanuts, keeps expenses down while still producing a lavish-tasting treat. Their accessibility is perfect for those looking to enjoy a delicious dessert without breaking the bank, all while maintaining high quality and flavor standards.

Historical Background and Cultural Significance


No-Bake Crunch Bars trace their origins back to the mid-20th century when convenience foods became integral to American households. With the advent of quick desserts, recipes that required minimal preparation gained popularity. These bars gained recognition for providing a straightforward, delicious treat without the need for a traditional oven.

Culture-wise, the recipe has become part of many family traditions, passed down through generations as a quick and reliable dessert for holidays and special occasions. This transitional nature highlights the American spirit of adaptation and innovation, creating delightful treats from available ingredients while embodying simplicity and warmth.

As recipes traveled through regions, the core essence of No-Bake Crunch Bars remained, while allowing for creative adaptations. Variations arose using different types of nuts, cereals, or even marshmallows, showcasing regional preferences in taste and texture. This versatility marks an evolution of a simple treat into a canvas for culinary creativity.

Globally, similar concepts have been embraced, with various countries introducing their own versions influenced by local tastes and available resources. This cross-cultural adaptation underscores the universal appeal of a sweet treat that requires minimal resources, offering an inclusive dessert that transcends boundaries.

Ingredient Deep Dive


Chocolate is the star ingredient in No-Bake Crunch Bars, bringing a rich, smooth essence that anchors every bite with decadence. Its deep history, originating from ancient Mesoamerica, lends cultural significance and versatile applications in sweet treats. The dark, bittersweet or milk varieties cater to different palates, offering a wide spectrum of flavors.

Nutritionally, chocolate, especially dark, contains antioxidants and minerals beneficial for health when consumed in moderation. Selection tips include choosing quality chocolate with high cocoa content to enhance flavor and texture. Store in a cool, dry place to maintain its glossy appearance and prevent blooming, which affects texture and taste.

Crispy rice cereal, providing the delightful crunch in the bars, has its own historical roots with early iterations appearing in the 1920s. Its role extends beyond texture, as it enhances the nutrition profile with added grains. Selecting a fresh and crispy cereal is key to maintaining the intended mouthfeel, while variations like flavored cereals can add an extra flavor dimension.

The inclusion of peanuts in No-Bake Crunch Bars introduces a nutty depth, historically intertwined with American culinary tradition since its cultivation by Native American tribes. They are a powerhouse of protein, vitamins, and healthy fats, playing a dual role in elevating flavor and providing sustenance, making this ingredient invaluable.

Common Mistakes to Avoid

  • Using low-quality chocolate can lead to a dull, waxy coating on the bars. Always choose high cocoa content chocolate for the best results.
  • Skipping the cooling step will result in bars that don’t set properly. Ensure that the bars are completely set in the refrigerator before slicing.
  • Overheating the chocolate may cause it to seize, turning it grainy. Melt the chocolate gently using a double boiler or in short bursts in the microwave.
  • Under-mixing the ingredients might lead to uneven distribution. Mix thoroughly to ensure all components are well-coated in chocolate.
  • Using stale or soft cereal will diminish the crunch. Keep the rice cereal crisp by storing it in an airtight container until use.
  • Overloading the bars with too many extras can make them too dense. Stick to the recipe’s recommended ingredient quantities for optimal texture.
  • Not lining the pan can cause sticking issues. Always use parchment paper to ensure the bars can be easily removed and cut.
  • Omitting nuts may alter the texture significantly. If there’s an allergy or preference issue, substitute with other crunchy ingredients rather than skipping.
  • Skipping the leveling step may result in uneven bars. Smooth the top with a spatula for an even finish.
  • Not adjusting sugar levels for sweetened cereal or chocolate can make the bars overly sweet. Taste and modify according to your preference.

Essential Techniques


When melting chocolate, patience is key. A slow, controlled melt over a double boiler or in bursts in a microwave ensures the smoothest texture without graininess. Mastering this ensures the glossy finish characteristic of well-made chocolate-based treats, enhancing both appearance and consistency.

Mixing ingredients uniformly is another essential technique. Even distribution of cereal and nuts in the chocolate ensures every bite is consistent in taste and texture, maximizing the indulgence experience. This technique prevents clumping and preserves the uniformity crucial to any layered bar recipe.

When setting the bars, the transition from warm to cool should be carefully paced. A gradual cooling aids in the overall set texture, crucial for clean cuts and well-formed bars. Observing visual cues, like a firm top and set edges, guides the readiness for serving and enhances presentability.

Preparation of the base lining is a vital yet often overlooked technique. Properly lined pans allow for easy transfer and cutting of bars, preserving their structure and appearance. Ensuring the protective layer covers all base areas enhances play efficiency, delivering visually appealing, professionally finished bars.

Portioning the bars is not just about equal parts, but about creating visually appealing, uniform pieces. Use sharp knives and precise motion to maintain integrity with neat edges and consistent size. Mastering this technique facilitates an enhanced dining experience and aesthetically pleasing dessert presentations.

Pro Tips for Perfect No-Bake Crunch Bars


To elevate your No-Bake Crunch Bars, use premium baking chocolate for a richer taste and smoother texture. Darker chocolate will bring a depth of flavor, while milk chocolate offers a creamy indulgence; both work brilliantly depending on your personal preference.

For an extra layer of flavor, consider adding a pinch of sea salt to the melted chocolate. It enhances the sweetness while introducing a subtle contrasting note that heightens the overall taste experience, perfect for those who enjoy a sweet-salty treat.

Incorporate diverse nuts or dried fruits to tailor the bars to seasonal preferences or dietary needs. Almonds, walnuts, or hazelnuts can offer different flavor profiles, while dried berries add a hint of tartness, expanding the flavor complexity.

Experiment with flavored extracts like vanilla or almond to infuse the bars with a signature aroma. A small amount can introduce a noteworthy difference, making your bars uniquely yours and delightfully aromatic.

For a stellar presentation, swirl melted white chocolate over the bars before setting. This added visual element creates an appealing pattern, enhancing both aesthetics and offering a slight variation in taste.

To maintain the crunch of cereals, ensure all mix-ins are added to the cooled chocolate. This prevents premature sogginess, maintaining the desired texture that defines these bars as crunchy and satisfying.

Variations and Adaptations


Diverse regional variations can be explored with No-Bake Crunch Bars. Incorporate local flavors like cinnamon, cayenne, or matcha to reflect your cultural influences or preferences, tailoring the sweet treat to align with diverse palates and celebrate unique culinary identities.

Seasonal adaptations allow the bars to fit any time of the year. Utilize pumpkin spice for autumn charm, peppermint extract for a winter twist, or tropical fruits like coconut for a summer vibe, showcasing the versatility and adaptability of these beloved treats.

For dietary modifications, consider gluten-free cereals or dairy-free chocolate varieties. This ensures that those with specific dietary restrictions can still indulge, turning the already accessible recipe into an inclusive dessert option.

Flavor variations can be achieved by experimenting with different chocolate types, such as switching dark chocolate for white chocolate or blending two different kinds. This not only offers taste diversity but also allows the creativity of customization.

Texture modifications might include additional layers of crispy elements or a chewy dimension through marshmallows or toffee bits. This variation creates a new sensory experience while keeping the core essence of No-Bake Crunch Bars intact.

Explore modern presentation alternatives by cutting the bars into bite-sized pieces or using molds for themed shapes. Personalized touches elevate the presentation, making these bars a whimsical addition to dessert platters and guaranteeing an impressive look.

Serving and Presentation Guide


Enhance the presentation of your No-Bake Crunch Bars with creative plating techniques. Stack them in staggered layers for height and dimension or fan them out on a vibrant platter to create a color contrast with the chocolate hues, making them a visual delight.

Consider garnishing ideas to elevate your bars. A light dusting of powdered sugar or a sprinkle of crushed nuts enhances both flavor and appearance, while fresh fruit slices add vibrant color and a fresh flavor contrast.

Traditional accompaniments such as a glass of cold milk, a scoop of vanilla ice cream, or a simple dollop of whipped cream can enhance the enjoyment of your bars, creating a well-rounded dessert experience that satisfies both comfort and indulgence.

Modern serving suggestions include pairing your bars with a chilled dessert wine for a sophisticated touch, or serving them with a fresh mint sprig for added aroma and color. These pairings elevate your dessert for gatherings while showcasing your culinary flair.

Temperature considerations involve serving bars slightly chilled to maintain their integrity and enhance the satisfying texture contrast. This not only preserves the crispness but amplifies the flavor of the chocolate and nuts in each bite.

Portion control tips ensure ideal serving sizes. Using guides, such as cutting into uniform pieces, helps manage portions for balanced distribution, making them ideal for parties and ensuring every guest enjoys a perfect slice of the No-Bake Crunch Bars.

Wine and Beverage Pairing


Pair No-Bake Crunch Bars with rich, full-bodied red wines like Merlot or Cabernet Sauvignon, whose berry notes complement the chocolate’s depth. These combinations enhance the bars’ flavors, accentuating both the fruitiness of the wine and the richness of the dessert.

For non-alcoholic alternatives, consider serving the bars with a chocolate or caramel-flavored coffee, emphasizing the dessert’s chocolatey notes. A creamy café au lait can also enhance the sweetness, while a bold espresso balances that richness with its robust intensity.

If pairing with tea, opt for a spiced chai or rooibos blend. The spices in chai offer an aromatic counterpart to the bars’ sweetness, while the rooibos’ earthiness complements the creamy, nutty components, providing a calming, balanced beverage experience.

Temperature considerations are crucial for drinking enhancing enjoyment. Coffee should be served warm to slightly hot to promote those bold, enveloping flavors, while tea should not be piping hot to allow for a seamless merge of flavors with the bars.

Serving suggestions for wine would be to aerate and chill slightly before serving, ensuring flavors are at their peak. For coffee and tea, consider serving alongside fresh cream or milk, allowing personal customization to complement the dessert’s sweetness perfectly.

Storage and Shelf Life


Proper storage of No-Bake Crunch Bars ensures longer shelf life and maintains their desirable texture. Store the bars in an airtight container in the refrigerator to prevent moisture loss and to keep the chocolate firm and the cereals crisp, prolonging their palatable freshness.

Temperature requirements suggest keeping the bars chilled to enhance both preservation and taste. Maintaining a stable cool environment prevents ingredient separation and retains initial structure, crucial for maintaining quality over several days.

Container recommendations include using airtight, glass, or plastic containers with a locking lid to preserve texture and prevent dry-out or refrigerator odors from penetrating the bars, ensuring an optimal freshness level until ready to serve.

Signs of spoilage in these bars would be noticeable changes in color, texture, or smell. A white film on chocolate might suggest sugar or fat bloom, while chewy cereals could point to moisture exposure necessitating timely consumption.

Reheating instructions involve allowing the bars to sit at room temperature before serving for optimal texture, as microwaving might cause the chocolate to melt unevenly and compromise the overall integrity of the bars.

For freezing guidelines, wrap individual portions in wax paper or foil before placing them in a freezer-safe bag or container. This protects against freezer burn, extends shelf life significantly, and enables convenient, single-serving access.

Make Ahead Strategies


Master the art of preparing ahead with a planned prep timeline. Complete mixing and layering a day in advance, allowing the bars to set overnight for optimal texture, ensuring maximum flavor and convenience for any event or gathering.

Storage between steps involves chilling layers sequentially to solidify each component’s setting. This technique prevents flavor mingling and guarantees a seamless texture transition between layers, creating a visually appealing and well-structured dessert.

Assessing quality impact when prepared ahead involves tasting and potentially adjusting flavors, maintaining a balance between sweetness, chocolate, and nut components, ensuring any make-ahead preparation hasn’t altered intended taste goals.

Assembly tips recommend using a lined pan for batch preparation, facilitating easy removal and clean cutting. For event presentation, consider pre-slicing into serving sizes to streamline final assembly, ensuring the bars’ structure remains intact and aesthetically pleasant.

Reheating guidelines suggest tempering at room temperature if needed to soften slightly before consumption. Avoid microwaving or heat exposure, which could jeopardize their established texture and melt texture-sensitive components.

Adding fresh elements like garnishes or drizzles just before serving offers a tailored touch that enhances flavors while visually reviving the dessert’s presentation, ensuring the No-Bake Crunch Bars remain appealing and captivating.

Scaling Instructions


Scaling recipes, whether halving, doubling, or tripling the batch, requires precise fraction-based measurement adjustments to ensure ingredient ratio consistency, maintaining the intended flavor balance and texture quality.

Equipment adjustments are crucial when making larger batches. Use proportionately larger bowls and pans to accommodate increased quantities without crowding, promoting uniform mixing and even setting, crucial for desirable textural outcomes.

Timing modifications involve extending or reducing refrigeration times depending on batch size to optimize ingredient solidification and flavor infusion, ensuring each bar retains its characteristic texture and flavor regardless of portion adjustments.

Storage considerations need addressing when scaling up, necessitating additional airtight containers to house surplus bars while maintaining their freshness, ensuring each piece delivered to guests remains just as delectable and well-preserved as the last.

Nutritional Deep Dive


Delving into the nutritional profile of No-Bake Crunch Bars reveals a breakdown rich in essential macronutrients: carbohydrates from cereal and sugar, fats primarily from nuts and chocolate, and a protein contribution through nuts and possibly cereals.

Micronutrient analysis sees a range of vitamins and minerals like magnesium and iron from chocolate, and Vitamin E and folate from nuts, contributing to a rounded micronutrient intake when consumed as part of a balanced snack.

Health benefits highlight antioxidant potential from chocolate and heart-healthy fats in nuts, supporting overall wellness when enjoyed in moderation. These elements balance indulgence with nutritional value essential for a health-conscious lifestyle.

Dietary considerations involve balancing caloric content with portion awareness, aiming to align these sweet treats within broader eating plans without compromising the overall dietary framework or intended nutritional intake targets.

Portion analysis recommends consumer awareness in slicing sizes, providing around 3-4 bars per typical serving to maintain caloric intake in alignment with individual dietary goals, ensuring both satisfaction and health balance.

For weight management tips, incorporate these bars as controlled treats; view them as a satisfying dessert to avoid exceeding daily caloric limits, thus supporting ongoing wellness goals while still enjoying delightful indulgences.

Dietary Adaptations


For gluten-free adaptation, use certified gluten-free cereal to ensure compliance, maintaining a delicious option for those with gluten sensitivities without altercating taste or texture of traditional No-Bake Crunch Bars.

For dairy-free modification, employ dairy-free chocolates and non-dairy butter substitutes, slightly altering their taste profile yet delivering a comparable experience suitable for lactose-intolerant or dairy-averse individuals.

For a vegan variation, use plant-based alternatives like vegan chocolate, plant-based milk, and a non-dairy butter substitute. This shift opens opportunities for a broader audience to indulge in desserts aligned with their dietary ethics and choices.

For a low-carb/keto version, opt for sugar-free chocolate and nuts alongside any low-carb cereal variant. This adaptation maintains indulgence while adhering to macronutrient restrictions typical of a ketogenic eating plan.

Embrace a paleo approach by utilizing non-dairy, grain-free, and refined sugar-free alternatives, crafting a bar that is deliciously satisfying for primal diet followers without deviating from core principles.

For low-FODMAP needs, ensure ingredients like chocolate, nuts, and cereals align with FODMAP guidelines, maintaining an accessible treat for those requiring digestive-friendly adaptations without compromising on taste or pleasure.

Troubleshooting Guide


For texture issues, if bars are too hard, check ingredient ratios and chilling times; adjust to allow for a softer, more balanced finish. Softer-than-expected bars suggest an under-set environment, necessitating additional refrigeration.

Flavor balance issues could imply a disproportionate ingredient mix. Ensure accuracy in measuring sugar and chocolate ratios when diversifying chocolate types to maintain the bar’s intended sweet essence without overpowering secondary flavors.

Temperature problems, like melting before setting, could be due to not cold enough fridges. Verify equipment temperatures and ensure proper pre-refrigeration, central for achieving the desired texture for these no-bake delights.

Equipment challenges often include insufficient mixing implements or pans too rigidly configured; using flexible, silicone equipment can aid in seamless ingredient blending and easy removal, critical for the bar’s consistency.

Ingredient substitutions might require tasking alternatives care to maintain similar texture, taste, and experience, promptly adjusting quantities where necessary within the framework to ensure unchanged experience and quality.

Timing concerns can involve both refrigeration set points and mixing timelines, highlighting the importance of adherence to pacing parameters—involving complete setting before removal or applying dividers between layers to control texture flow.

Recipe Success Stories


Community feedback often highlights the versatility and ease of these bars, with many celebrating their ability to adapt and adjust flavor profiles to align with varied palates, ensuring a loved dessert that continually inspires.

Variation successes abound, with home cooks introducing elements like caramel drizzles or coconut flakes, breathing new life into traditional recipes, offering delightful twists that span abundant creativity and guest satisfaction.

Adaptation stories often emphasize dietary compliance, with gluten-free, vegan, and paleo versions receiving praise for maintaining the core delectable experience while addressing specific dietary constraints and broadening their consumption appeal.

Reader suggestions include creative tips for serving enhancements, like pairing suggestions or additional flavor accent possibilities, fostering a collective culinary atmosphere that empowers, informs, and elevates No-Bake Crunch Bars’ communal experience.

Photography tips usher aspiring culinarians to capture these bars’ beauty, encouraging natural light for texture detail, thus rendering every element from drizzled chocolate to crispy edges in luminous allure, documenting culinary creativity.

Frequently Asked Questions

Can I make these bars ahead of time?
Yes, No-Bake Crunch Bars are perfect for making ahead. Prepare them up to two days in advance and store them in an airtight container in the fridge. This not only saves time but also enhances the chocolate flavor as it firms up.
What can I substitute for nuts in the recipe?
If you need a nut-free version, consider using sunflower seeds or pumpkin seeds. These alternatives maintain a nice crunch without compromising the overall texture or taste of the bars, making them more inclusive for those with allergies.
Are these bars suitable for freezing?
Absolutely. Wrap individual portions in wax paper and store them in a freezer bag. They can last up to one month. Thaw at room temperature when ready to enjoy, maintaining their delightful texture and flavor profile.
How do I prevent the bars from being too sweet?
Use bittersweet chocolate to balance sweetness or reduce the amount of sweetened cereal. Tasting the mixture before it sets can help you adjust the sweetness level to meet your personal preference.
What can I do if my bars don’t set properly?
Ensure adequate refrigeration time; at least two hours is recommended for firm bars. If your kitchen is especially warm, additional time may be necessary, or consider using a cooler environment.
Can I add extra flavors to the bars?
Certainly! Add vanilla or almond extract for additional depth. Always incorporate the extracts into the melted chocolate for a seamless infusion, enhancing overall taste without altering foundational ingredients.
What is the serving size for these bars?
For a standard-sized dessert treat, consider slicing the batch into 12 servings. However, for smaller bites suitable for parties or buffet-style settings, creating 18 pieces might be preferable.
Can I use other cereals instead of rice cereal?
Yes, while rice cereal provides a classic crunch, feel free to experiment with cornflakes or bran flakes for varied textures and flavors. Ensure the chosen cereal pairs well with your chocolate choice for optimal enjoyment.
What kind of chocolate is best to use?
Dark chocolate offers a rich, robust flavor, while milk chocolate caters to those preferring sweeter options. Ensure using a high-quality brand for best results, influencing both taste and texture of the final product.
How do I store leftover bars?
Store leftovers in an airtight container in the refrigerator to maintain their crisp texture up to a week, safeguarding against sweat or odor absorption. If longer storage is needed, consider freezing single servings instead.
Can I add toppings to the bars?
Absolutely, adding toppings like shredded coconut or drizzled white chocolate prior to setting complements their taste and enhances visual appeal. Incorporate these final touches for a personalized presentation and flavor contrast.

Additional Resources


Enhance your dessert repertoire with related recipes focusing on similar no-bake techniques, including alternatives like cheesecakes or based-treats, expanding skills and convenience knowledge with parallel delights.

Technique guides elaborate on melting chocolate or mixing consistency mastery, equipping aspiring dessert-makers with critical insights ensuring success in not just bars, but broader confectionery accomplishments.

Comprehensive ingredient information helps discern quality and application nuances, fostering informed decisions, thus maximizing flavor profiles for No-Bake Crunch Bars consequently extending to diverse dessert-making.

Equipment recommendations provide insight into essential and additional tools, like silicone molds for imaginative presentations, empowering one to exercise creativity when showcasing delectable no-bake creations.

Seasonal variations can inspire skilled tweaks, exploring seasonal-ingredient swaps in cereals or infusions to adapt expertly while nurturing a series of beloved, universally adored, delectable bars throughout the year.

Join the Conversation


Engage with us on social media platforms, sharing your No-Bake Crunch Bars success stories and personal adaptations. We love to see the creativity in your kitchen and aim to foster a community of shared culinary wisdom.

Capture your creations beautifully with wide-aperture shots that highlight delight textures and colors. Share photography tips with peers, enriching food bloggers or enthusiasts alike in perfecting sweet treat presentation.

Provide in-depth recipe reviews, offering personal experience insights or challenges met at ease within the recipe. Your critiques or suggestions motivate ongoing dialogue and recipe refinement, underscoring shared culinary pursuits.

Explore a vibrant community engagement platform by suggesting future recipe ideas or tweaks on established favorites. Encourage interactions that spark passion and interest, ensuring sustained felicity and innovation around shared dessert wonders.

Uncover and explore community-driven variations, showcasing new interpretations and collaborative creations demonstrating the limitless possibilities existent in every seemingly simple bind—an affirmation that each recipe evolves through mindful sharing.

The Recipe

No-Bake Crunch Bars

Serves: 12

Prep Time: 10 mins

Cook Time: 0 mins

Total Time: 10 mins

Kitchen Equipment Needed

  • Mixing bowl
  • Microwave or double boiler
  • Spatula
  • Baking dish (8×8 inch)
  • Parchment paper

Ingredients

  • 2 cups chocolate chips (dark or milk)
  • 1 cup peanut butter
  • 4 cups crispy rice cereal
  • 1/2 cup chopped peanuts
  • 1/4 cup honey or corn syrup
  • 1 tsp vanilla extract
  • Pinch of salt

Directions

  1. Line the baking dish with parchment paper, ensuring edges overhang for easy removal.
  2. In a microwave-safe bowl, combine chocolate chips and peanut butter. Heat in increments, stirring in between, until smooth.
  3. Stir in the honey, vanilla extract, and salt until well-mixed.
  4. Fold in the crispy rice cereal and peanuts, ensuring everything is evenly coated.
  5. Spread the mixture into the prepared dish, pressing firmly to achieve an even layer.
  6. Refrigerate for at least 2 hours, or until set. Lift from the dish and cut into bars with a sharp knife.

Recipe Notes

  • For variation, try different nut butters or add dried fruit for added dimension.
  • Ensure the mixture is well-pressured into the pan to prevent crumbling when slicing.
  • Store in an airtight container in the fridge to maintain freshness.