Ultimate Feta and Cherry Tomato Avocado Toast Recipe for Breakfast

Feta & Cherry Tomato Avocado Toast: A Nutritious Start to Your Day

⚖️
Difficulty
Easy

⏲️
Prep Time
10 mins

🕒
Cook Time
5 mins

⏱️
Total Time
15 mins

🍽️
Servings
1

Imagine starting your morning with the creamy goodness of avocado topped with tangy feta cheese and juicy cherry tomatoes on a perfectly toasted slice of bread. This Feta & Cherry Tomato Avocado Toast is not only delicious but also a nutritional powerhouse guaranteed to kickstart your day with vibrant flavors and colors. Whether you’re rushing out the door or savoring a leisurely breakfast, this recipe delivers simplicity without compromising on taste.

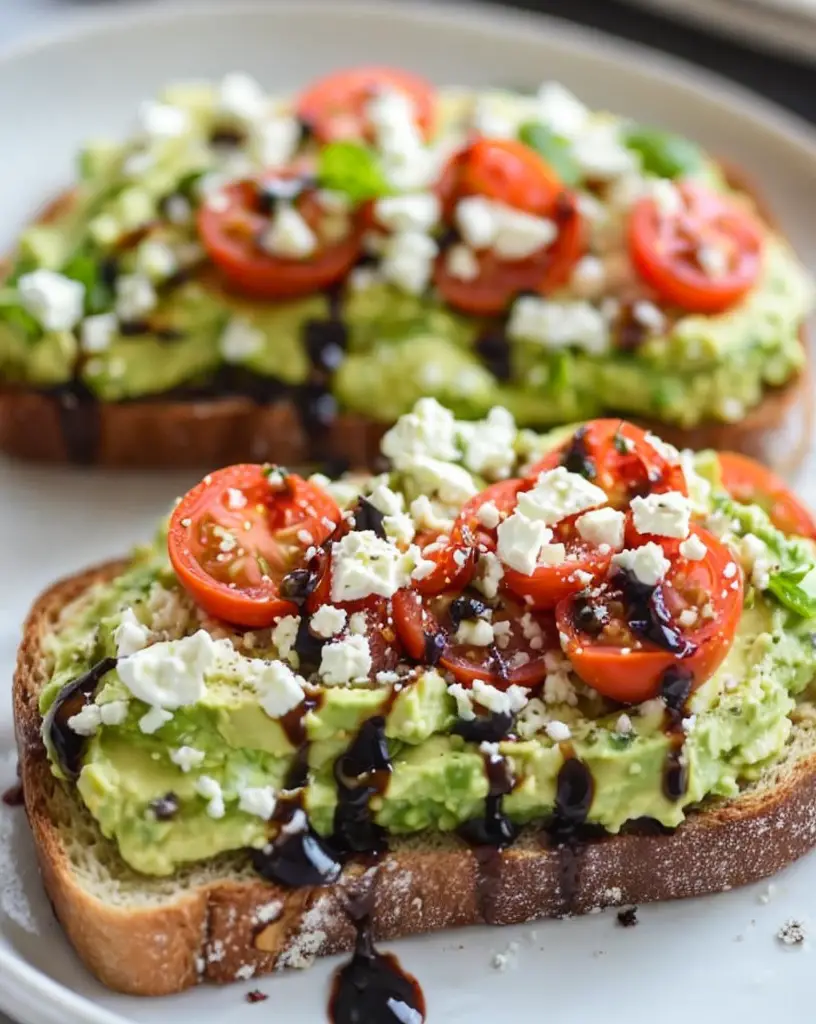
Avocado toast has become a staple for many health-conscious individuals, and for good reasons. The creamy avocado creates a luscious base, while the raw flavors of feta and the burst of sweetness from ripe cherry tomatoes complement each other perfectly. The crunch from the toasted bread adds an extra layer of satisfaction, making each bite a delightful experience. Add a sprinkle of salt and pepper, a hint of lemon juice, and watch as this simple dish transforms into a gourmet delight.

Quick Recipe Highlights

  • Flavor Profile: A delightful blend of creamy, tangy, and sweet flavors harmoniously balanced.
  • Texture: The crunchiness of the toast blended with smooth avocado and crumbly feta creates a satisfying bite.
  • Aroma: Fresh and fragrant with a hint of zesty freshness from lemon juice.
  • Visual Appeal: Bright greens, reds, and whites present a visually stunning dish perfect for Instagram lovers.
  • Skill Level Needed: Requires basic kitchen skills suitable for all levels.
  • Special Equipment: Only a toaster and a knife are needed, making it accessible and convenient.

Recipe Overview

  • Difficulty Level: This recipe is categorized as easy. Its simplicity and straightforward preparation method make it accessible to everyone, from novice cooks to seasoned chefs.
  • Category: Perfect as a breakfast or brunch option, it’s filling without being too heavy.
  • Cuisine: Rooted in modern international cuisine, this dish offers a nod to Mediterranean influences with its use of feta and fresh ingredients.
  • Cost: Economical and budget-friendly, avocado toast requires minimal ingredients, making it an affordable meal.
  • Season: Best enjoyed in spring and summer when cherry tomatoes are in peak season, enhancing their sweet and juicy flavor.
  • Occasion: Ideal for casual breakfasts, brunch gatherings, or even as a quick lunch option.

Why You’ll Love This Recipe


First and foremost, the taste of Feta & Cherry Tomato Avocado Toast will win you over instantly. The smooth, rich avocado provides a creamy canvas, heightened by the bold flavors of feta, which add a slightly tangy and savory element. Cherry tomatoes offer a burst of sweetness with every bite, balancing the flavors beautifully. The textures in this dish achieve perfection—from the velvety avocado and crumbly feta to the oven-toasted crunch of the bread’s surface.

Conveniently, this recipe takes minimal time to prepare. With a quick prep of only 10 minutes, you’ll find it a breeze to add to your morning routine. The simplicity of the ingredients, all of which are readily available, allows you to create a nutritious meal with little effort and maximum flavor. It’s a straightforward recipe for busy adults or for an easy introduction to cooking for beginners and teens alike.

Nutritionally, this dish is a powerhouse. Avocado is rich in healthy fats and fiber, keeping you satiated and fueled throughout the day. Feta cheese adds not only creaminess but also essential calcium and protein. Cherry tomatoes are packed with antioxidants and vitamins. Together, these ingredients create a balanced meal that is both delicious and suited to those looking to maintain a healthy lifestyle.

Socially, this dish doubles as an impressive brunch staple for entertaining guests. Its vibrant color palette and rich flavors appeal to diverse palates, whether serving it individually for an intimate gathering or as part of a wider spread for a festive brunch event. Finally, this recipe is cost-effective, requiring only a few key ingredients, each with multiple uses in various dishes.

Historical Background and Cultural Significance


Avocado toast emerged as a cultural phenomenon, initially gaining popularity in Australian cafes before sweeping through the global culinary scene. While it may seem like a modern creation, avocado on bread is nothing new. Indigenous peoples in Central and South America have combined avocados with bread for centuries, recognizing the nutritional value and versatility of the fruit.

Culturally, avocado toast signifies a shift towards healthier eating habits. It rose to fame as part of the broader wellness movement that prioritizes fresh, whole foods. Its prominence in hip cafes and trendy eateries reflects a demand for healthy, tasty options that are both visually appealing and satisfying.

The evolution of avocado toast has led to countless variations, incorporating everything from poached eggs to a sprinkle of seeds or microgreens. Specific elements, like the addition of feta and cherry tomatoes, bring Mediterranean influences, enriching the dish’s flavor profile and broadening its appeal.

Each region embraces its version of avocado toast, adapting it to local ingredients and tastes. In some areas, you’ll find it adorned with spices and herbs, while others prefer simplicity, letting the avocado shine. This adaptability highlights the toast’s global appeal and its seamless integration into various culinary traditions.

Ingredient Deep Dive


Avocados have a deep history rooted in Central America, where they were prized for their nutritional benefits and versatility. Known as the “alligator pear,” avocados provide healthy monounsaturated fats that support heart health. When selecting avocados, look for dark green skin with slight firmness. When squeezed gently, a ripe avocado gives slightly without being mushy. Store avocados at room temperature until ripe, then refrigerate to extend their freshness for up to several days.

Cherry tomatoes are a delightful addition, revered for their vibrant color and natural sweetness. Originating from South America, these tiny fruits are packed with vitamins such as C and A, contributing to their antioxidant properties. Choose firm, bright red tomatoes for maximum flavor. Store them at room temperature away from sunlight; refrigerate only once fully ripe to avoid flavor loss. Substitute with grape tomatoes for a similar taste if needed.

Feta cheese, hailing from Greece, offers a tangy and crumbly texture that elevates the toast. It’s rich in calcium and provides a good protein source. Look for traditional sheep’s milk feta for authentic flavor, and store it in brine or airtight packaging to maintain moisture and taste. Substitutes like goat cheese or ricotta can provide a milder flavor with similar texture.

Common Mistakes to Avoid

  • Using Overripe Avocado: Overripe avocados can lead to a mushy or overly bland texture. Select avocados that yield gently to pressure without being too soft.
  • Skipping Toasting: Failing to toast the bread results in a less satisfying bite. Proper toasting ensures a crunchy base that contrasts the creamy toppings.
  • Not Seasoning Properly: Underestimating the value of seasoning with salt, pepper, and lemon juice diminishes flavor complexity. Season to taste.
  • Rushing the Tomato Prep: Insufficiently ripe tomatoes may taste bland. Make sure tomatoes are fresh and ripe for optimal sweetness.
  • Using Soggy Bread: Avoid using bread that’s too thin or dense, leading to a soggy base. Opt for hearty, whole-grain varieties.
  • Cramming Too Much Topping: Overloading with toppings can make handling difficult and messy. Balance toppings to maintain structural integrity.
  • Inefficient Avocado Smash: Refrain from hastily smashing avocados, resulting in uneven texture. Take time to mash evenly to ensure spreadability.
  • Not Storing Properly: Leftovers should be stored in an airtight container in the fridge to prevent avocados from browning.

Essential Techniques

First, mastering the art of selecting and preparing avocados is key. Choose avocados that feel firm yet yield slightly to pressure, indicating ripeness. When preparing, cut lengthwise, twist to separate, and remove the pit using a spoon. Scoop the flesh into a bowl and mash.

Proper toasting is critical to achieving the desired texture. Use a slice of whole-grain bread and toast until golden brown. This step ensures a sturdy foundation that won’t become soggy under the moist avocado and tomato.

The assembling process requires careful balance. Spread avocado evenly on your toast to create a creamy base. Sprinkle crumbled feta and add halved cherry tomatoes, distributing them evenly to maintain an appealing presentation.

Pro Tips for Perfect Feta & Cherry Tomato Avocado Toast

Try adding a poached egg atop your toast for extra protein and creamy richness. For a sharper flavor, sprinkle a pinch of finely chopped red onion. Use fresh lemon or lime juice to brighten flavors and prevent avocado browning.

Opt for artisanal bread with diverse grains to enhance texture and flavor. Season the avocado with a dash of chili flakes or paprika for an added kick.

Ensure your toast is cooled slightly before adding toppings to prevent wilting. Experiment with different types of feta, such as French or Bulgarian, which offer unique flavor profiles.

Variations and Adaptations

Avocado toast variations are endless. Regionally, this recipe adapts by introducing ingredients like jalapeños for heat or capers for brininess. Seasonally, swap cherry tomatoes for heirloom slices or add radishes for crunch in summer.

Dietary modifications include using gluten-free bread options or omitting cheese to cater to vegan preferences. Fans of rich flavors can sprinkle smoked sea salt atop.

For a change in texture, consider overlaying roasted vegetables, such as eggplant or zucchini. Or adjust presentation by cutting avocados into slices rather than mashing.

Serving and Presentation Guide

Presentation is everything with avocado toast. Serve on rustic wooden boards or neutral ceramic plates to enhance color contrast. Garnish with herbs like fresh basil or cilantro to offer a refreshing aroma and appealing finish.

Temperature matters; serve the toast slightly warm, which amplifies the aroma of the toasted bread and comforting feel of the avocado. Portion control ensures each serving is easy to handle and eat.

Pair with simple accompaniments like side salads or fruit and cheese platters for a complete meal. Modernize presentations with vertical stacking or cutting the toast into slender strips for bite-sized offerings.

Wine and Beverage Pairing

The delicate flavors of Feta & Cherry Tomato Avocado Toast pair beautifully with crisp white wines like Sauvignon Blanc or a light Pinot Grigio. Rosé, with its slightly fruity notes, complements the fresh tomatoes and creamy avocado nicely.

Non-alcoholic alternatives like sparkling water with a squeeze of lime provide a refreshing match. For morning meals, a chilled iced tea or cold brew can refresh the palate and balance the meal’s richness.

Temperature consistency remains vital; keep beverages chilled to maintain refreshing qualities alongside each mouthful. Tailor serving suggestions to personal preferences, ensuring an enjoyable dining experience.

Storage and Shelf Life

Proper storage keeps avocado toast components fresh. Keep avocados whole until use; storing cut avocado requires airtight containers with lemon juice to prevent browning. Bread can be pre-toasted and stored to maintain crispness, avoiding the effects of moisture.

Tomatoes and feta should be stored separately to preserve integrity. Signs of spoilage in avocados include over-softening and discoloration, while tomatoes exhibit wrinkling or softness.

Reheat bread briefly before assembly, allowing toppings to defrost naturally for optimal texture. As a make-ahead option, freeze the prepared toast in an airtight bag, reheating directly from frozen when needed.

Make Ahead Strategies

Preparing components in advance aids meal planning. Mash avocados up to a day ahead, storing with lime juice to ensure freshness. Cherry tomatoes can be pre-washed and halved, ready for topping.

Toast bread 2-3 hours ahead and cool before storing, maintaining crispness until assembly. Assess the impact of freezing on ingredients, as avocados may darken upon defrosting.

Reheat toaster components and spread fresh avocado for best results. Add a sprinkle of freshly chopped herbs to garnish prior to serving ensures vibrant green color.

Scaling Instructions

Scaling this recipe accommodates serving larger groups. Halve ingredients proportionately, maintaining proper avocado-to-topping ratio, when downsizing. For larger batches, double or triple ingredients.

Employ larger griddles or multiple trays for bread when scaling up, adjusting cooking times accordingly. Store components separately until serving to ensure freshness and taste quality.

Adapt presentation techniques using larger serving boards or platters to accommodate increased output, ensuring easy serving at gatherings or events.

Nutritional Deep Dive

Feta & Cherry Tomato Avocado Toast delivers essential nutrients in a single meal. Avocados are rich in healthy monounsaturated fats and vitamin E, contributing to heart health and skin vitality. Cherry tomatoes offer lycopene, a powerful antioxidant hidden under their vibrant red skins.

Feta cheese provides a reliable calcium source, encouraging bone health and protein. The macro breakdown suits balanced, mindful eating, offering benefits like enhanced satiety with relatively low caloric intake.

Together, these ingredients present an ideal breakfast or brunch option, meeting nutritional needs while remaining indulgent.

Dietary Adaptations

Adapting this recipe to suit specific diets is simple. For a gluten-free version, choose gluten-free bread options and ensure all toppings remain untainted by gluten sources.

Dairy-free alternatives can replace feta with dairy-free cheese options in similar crumbly textures. Vegan adjustments involve dietary substitutions like nut or bean-based spreads offering creamy alternatives.

Low-carb enthusiasts may opt for thin-sliced vegetable bases or seed crackers, replacing bread. These adaptations make the toast versatile, suitable for various dietary restrictions.

Troubleshooting Guide

Addressing common issues ensures consistency. Texture discrepancies occur with improperly ripened avocados; adjust ripening techniques for desired textures. Oversalted seasoning can be balanced with additional avocado or unsalted seeds.

Flavor balance suffers without acidity; use lemon or lime juice liberally to uplift the flavor contrast. Toasting problems arise from overheating; monitor toasts to prevent burning.

Equipment challenges may emerge if inadequately sourced; ensure high-quality knives for precision cuts. Lastly, timing adjustments may be necessary given environmental factors affecting fresh produce flavors.

Recipe Success Stories

This toast has transformed countless mornings for home cooks around the world. Community feedback highlights it as a motivational breakfast option, igniting new cooking habits. Variations on this toast have even emerged adapted to unexpected flavor combinations and cultures.

Readers have shared stories of combining this versatile base with locally inspired twists, including spicy additions for a southern-style flavor or adapting to Asian fusion by introducing sesame and soy influences.

Photography tips enhance storytelling, inviting others into the beautiful simplicity and vibrant colors captured through lens and palate. Creativity flourishes as variations inspire further adaptations among food enthusiasts and professionals alike.

Frequently Asked Questions

What can I substitute for feta cheese?
For a dairy-free alternative, try using almond-based feta or cashew cheese products. Goat cheese offers a similar texture and flavor if dairy is preferred.

How can I prevent my avocados from browning?
Add lemon or lime juice to mashed or sliced avocados. Store with an airtight seal to reduce oxidation and prevent browning.

Can I make this toast vegan?
Absolutely! Use vegan cheese or hummus as topping substitutes, and ensure bread is free from animal products.

Is there a gluten-free bread option for this recipe?
Yes, several delicious gluten-free breads are available that provide comparable textures and flavors.

What side dishes pair well with this toast?
Complement with a fresh mixed salad, yogurt parfait, or a selection of seasonal fruits for a balanced meal.

Can I prepare ingredients in advance?
Certainly! Prep avocados with lemon juice and toast bread in advance, storing separately to ensure time efficiency.

How can I enhance the toast flavor?
Add spices or herbs like paprika, cilantro, or red pepper flakes to elevate and diversify flavor profiles.

Is this recipe suitable for small children?
Yes, for children, consider cutting up smaller pieces to accommodate tiny hands or serving classic cheese alongside for familiarity.

What seasoning can I add for extra taste?
Incorporate fresh herbs or spices, such as dill or cumin, to introduce new taste elements with aroma and flavor complexity.

How can I make the toast more filling?
Top with chickpeas or poached eggs to add protein, transforming it into a heartier meal option.

Additional Resources

Avocado lovers seeking similar recipes will enjoy avocado and poached egg dishes, offering complementary textures and flavors. Digital resources include guides on choosing and storing avocados to ensure constant freshness at home.

Explore technique-focused articles on perfect toasting skills or enriching knowledge of Mediterranean culinary influences in everyday meals. Equipment recommendations emphasize the importance of quality knives and toasting tools in achieving results consistently.

A deep dive into seasonal produce guides assists in selecting vibrant, flavorful ingredients for toppings.

Join the Conversation

Your creations tell stories—share your Feta & Cherry Tomato Avocado Toast on social media platforms using our dedicated hashtag. Engage with our vibrant online community, exchanging feedback and creative ideas that enrich the recipe.

Whether a casual snapshot or professional-grade photo, our photography tips inspire visually engaging representations. Encourage discussions around recipe variations in comments or call-outs, generating inspiration and collaboration within our community.

The Recipe

Feta & Cherry Tomato Avocado Toast

Serves: 1

Prep Time: 10 mins

Cook Time: 5 mins

Total Time: 15 mins

Kitchen Equipment Needed

  • Toaster/Toaster oven
  • Knife
  • Cutting board
  • Spoon

Ingredients

  • 1 slice whole-grain bread
  • 1 ripe avocado
  • 5-6 cherry tomatoes, halved
  • 1/4 cup crumbled feta cheese
  • Salt and pepper, to taste
  • 1-2 teaspoons fresh lemon juice
  • Optional: Fresh herbs for garnishing

Directions

  1. Toast the slice of bread until golden brown and crisp.
  2. While the bread toasts, cut the avocado in half and remove the pit. Scoop out the flesh into a bowl and mash it with a spoon.
  3. Add the lemon juice to the mashed avocado and season with salt and pepper.
  4. Spread the avocado mixture generously over the toasted bread slice.
  5. Top with halved cherry tomatoes and crumbled feta cheese.
  6. Finish with an additional sprinkle of salt and pepper, to taste.
  7. Garnish with fresh herbs, if desired, and serve immediately.

Recipe Notes

  • Switch up tomatoes with seasonal vegetables or fruit top alternatives for variance.
  • The level of toastiness can be adjusted based on personal preference for crispiness.
  • Include an egg for added protein, visual appeal, and elevated richness.

Discover the Heavenly Delight of Classic Ambrosia Salad Recipe

Ambrosia Salad: A Heavenly Mix of Flavors and Textures

⚖️
Difficulty
Easy

⏲️
Prep Time
15 mins

🕒
Cook Time
0 mins

⏱️
Total Time
15 mins

🍽️
Servings
8

Ambrosia Salad is a divine blend of fresh fruits and creamy flavors that has stood the test of time as a beloved dish. Imagine the delicate mix of tantalizing textures, from the crispness of juicy oranges to the sweet and succulent pineapple bits. As you take your first bite, the amalgamation of marshmallows adds just the perfect touch of softness, making this recipe truly celestial. Whether you’re preparing for a festive gathering or a simple family dinner, Ambrosia Salad is guaranteed to delight everyone around the table. This crowd-pleaser has been passed down through generations, each version more delightful than the last.

Quick Recipe Highlights

  • Flavor Profile: A harmonious blend of sweet and tangy, with the zing of citrus balancing the smooth, creamy base.
  • Texture: The contrast between the soft marshmallows and the firm, fresh fruits creates an unforgettable eating experience.
  • Aroma: A fresh burst of tropical scents that awakens the senses, punctuated by hints of creaminess.
  • Visual Appeal: A vibrant medley of colors, with bright oranges and yellows intermingling with fluffy, white marshmallows.
  • Skill Level Needed: Easy enough for beginners, involving simple mixing techniques and no cooking required.
  • Special Equipment: A mixing bowl and a spatula are all you need to bring this heavenly dish to life.

Recipe Overview

  • Difficulty Level: This easy recipe requires minimal effort and culinary expertise, making it accessible to anyone looking to make a delicious dish in record time.
  • Category: Perfectly categorized as a dessert or sweet side dish, complementing any main meal with its refreshing taste.
  • Cuisine: Rooted in American tradition, this salad reflects the country’s love for retro and nostalgic dishes.
  • Cost: Generally low-cost, as it incorporates easily accessible fruits and marshmallows, ensuring affordability.
  • Season: Best served during spring and summer when fruits are at their ripest, providing a refreshing treat.
  • Occasion: Celebrations, picnics, and family gatherings are perfect for sharing this delightful ambrosia.

Why You’ll Love This Recipe

From the first spoonful, the Ambrosia Salad enchants with its delicious blend of flavors. The interplay of sweet pineapple, juicy oranges, and creamy coconut makes each bite a flavorful experience. It is incredibly convenient to prepare, requiring minimal time and just a few accessible ingredients. This makes it a reliable choice for those spur-of-the-moment gatherings or as an impressive dish for scheduled events.

Nutritionally speaking, this salad isn’t just about indulgence. It offers a fair amount of vitamins and minerals from the fresh fruits involved. The ratio of fresh ingredients to marshmallows can be adjusted to suit more health-conscious diners, too. Whether it’s brunch with friends or a laid-back meal, the Ambrosia Salad is a versatile addition to your menu, loved by kids and adults alike.

Compared to other desserts and side dishes, it is cost-effective without sacrificing taste or quality. The use of canned or fresh fruits allows for budget-friendly preparation, making this salad not only a feast for the senses but also for your wallet.

Strong social connections have always revolved around sharing meals, and Ambrosia Salad is a conversation starter. Its colorful appearance and delightful taste make it an excellent choice for gathering memories over good food. Finally, its accessibility in terms of ingredients and preparation means it can efficiently be scaled up for larger groups, bringing more joy to your dining experience without extra fuss.

Historical Background and Cultural Significance

The origin story of Ambrosia Salad traces back to the late 19th century in America, where it was initially considered a luxury due to the exotic and rare nature of its ingredients. Named after the food of the Greek gods, this salad symbolized indulgence with its luscious ingredients.

Ambrosia Salad gained cultural importance as it found its way into many Southern households, becoming a symbol of hospitality and warmth. Families passed the recipe down from generation to generation, each putting their signature twist on the classic mix of fruits and creaminess.

Over the decades, the evolution of Ambrosia Salad saw it change from a luxurious after-dinner treat into a common household dish. Variations popped up across America, some featuring sour cream, others heavy on the marshmallows, reflecting the shifting trends and ingredient availability.

Different regions introduced their variations – some swapped in grapes or bananas, while others created a more citrus-focused profile. Despite these modifications, what hasn’t changed is the essence of what this salad represents: a delectable treat that brings comfort and joy to those who partake.

Ingredient Deep Dive

Oranges, an integral part of the Ambrosia Salad, are prized for their juicy sweetness and vibrant color. Historically, oranges have been symbols of vitality and rejuvenation. They provide a good amount of Vitamin C, boosting immunity. Selecting firm, bright-colored oranges ensures the best flavor, and storing them in a refrigerator prolongs their freshness. If oranges aren’t available, mandarins make an excellent substitute.

Pineapple, another crucial ingredient, adds a tart and sweet contrast that enhances the salad’s flavor profile. Rich in nutrients and anti-inflammatory properties, fresh pineapple is a powerhouse fruit. Opt for pineapples that are firm with a slight give when squeezed, and store them at room temperature until they’re cut. Canned pineapple can substitute if fresh isn’t an option, just rinse to reduce excess syrup sweetness.

Coconut flakes, adding to the salad’s tropical essence, are a staple in many parts of the world for their intense flavor. Though they carry a higher fat content, the healthy fats involved make them beneficial for heart health. Choose unsweetened flakes for a natural taste, and keep them in an airtight container in a cool place. Toasting the flakes can introduce a new dimension to the salad.

Common Mistakes to Avoid

  • Using Overripe Fruits: Overripe fruits can make the salad mushy instead of fresh and crisp. Always inspect fruits for firmness and vibrant color before use.
  • Skipping the Draining Process: For canned fruits, failure to drain them properly can cause excess liquid, making the salad soupy rather than creamy.
  • Heavy-Handed Mixing: Overmixing can squash the fruits, leading to a less visually appealing salad. Gently fold in ingredients to maintain texture.
  • Misjudging Ingredient Ratios: Balancing the amount of cream to fruit prevents overwhelming the salad with a single flavor.
  • Ignoring Refrigeration Time: Serving the salad immediately can impact the taste. Allow the flavors to meld together in the fridge for at least an hour before serving.
  • Mistaken Ingredient Choices: Opting for non-complementary fruits (such as berries) can disrupt the flavor balance traditional to Ambrosia Salad.
  • Neglecting Topping Ideas: Simple additions like toasted nuts or additional fruit slices can elevate the dish, so don’t forget these enhancements.

Essential Techniques

To master the art of creating Ambrosia Salad, one technique to focus on is gentle folding. This ensures the fruits and marshmallows are evenly coated without being mashed. Achieving success in this technique involves using a wide spatula and light, circular motions. Another is the precise chopping of fruits. Uniform pieces make for balanced bites and a pleasing visual presentation. Make sure to maintain consistency in size during preparation.

Pro Tips for Perfect Ambrosia Salad

Taking the time to chill the salad before serving intensifies its flavors and enhances the creamy texture. Use freshly grated coconut for an unmatched depth of flavor that pre-packaged options can’t provide. Always taste as you go, adjusting the sweetness to suit your palate, perhaps reducing added sugar when using pre-sweetened coconut or fruit in syrup. Incorporating a small amount of light citrus zest can further boost the refreshing taste. Consider using a mix of full-fat and reduced-fat whipped topping to achieve a balance between flavor and consistency. For a crunchy twist, add slivered almonds right before serving; their delicate nuttiness pairs beautifully with the rest of the ingredients.

Variations and Adaptations

Regional variations of Ambrosia Salad can be delightful; consider adding bananas for a southern-style tweak. Seasonal adaptations include using fresh summer berries for an invigorating twist. Dietary modifications, such as using coconut cream for a dairy-free version, make it accessible to vegans. Experiment with adding a scoop of yogurt for a tangy variation, or even replace marshmallows with candied nuts for those looking to modify texture. Presentation alternatives, such as serving in hollowed-out coconut shells, create an intriguing appearance that will appeal to the eyes as much as the taste buds.

Serving and Presentation Guide

Presentation can make or break your Ambrosia Salad experience, especially when serving at a gathering. Elevated plating techniques such as using individual glass bowls provide an elegant touch. Garnishing with a sprinkle of coconut flakes or a few fresh mint leaves can add that extra flair. Traditionally, it is served chilled, which not only keeps it refreshing but also helps maintain its structure. For those orienting towards modern serving suggestions, consider layered parfait cups for a sophisticated look. Pay attention to portion control to prevent overwhelming guests with sweetness.

Wine and Beverage Pairing

For wine pairings, a mildly sweet Riesling or a sparkling Moscato enhances the fruit’s natural sweetness without overpowering it. As a non-alcoholic alternative, a citrus-infused sparkling water can be refreshing. If coffee or tea are preferred, opt for a light, floral tea that complements rather than competes with the fruity notes. Consider serving beverages chilled to complement the cold salad, enhancing the meal’s refreshing feel.

Storage and Shelf Life

Proper storage of Ambrosia Salad ensures its freshness and appeal. Store any leftovers in an airtight container to maintain its texture and prevent dehydration. Keeping it refrigerated is crucial, as warmth can disrupt the creamy consistency. Watch for spoilage indicators such as an off smell or slimy fruit, which suggests it should not be consumed. If needed, defrost any frozen fruits completely before incorporating them into a freshly composed salad. Although freezing entire salads isn’t recommended due to texture changes, individual fruits can be stored frozen for future use.

Make Ahead Strategies

If time is tight, prepare Ambrosia Salad a day in advance and allow it to develop its flavors overnight in the refrigerator. This extended timeframe enhances its overall taste without the preparation being overwhelming on the day of serving. Implement a prep timeline by chopping fruits one day prior, then store them separately. Assemble right before serving for optimum texture. If any fresh elements need adding, like herbs or crunchier toppings, incorporate them last to preserve their crispness.

Scaling Instructions

For smaller groups, halve the ingredients to maintain the proportions and preserve flavor intensity. For larger gatherings, double or triple the recipe while ensuring you’re using adequately sized mixing bowls and utensils. Adjust timing slightly if working with larger quantities to ensure thorough mixing. Carefully consider storage needs for any increased volumes.

Nutritional Deep Dive

Offer a delightful mix of macronutrients, Ambrosia Salad’s fruits provide essential carbohydrates and fiber, while the creamy base may contribute protein and fats. A full micronutrient analysis reveals it as a good source of Vitamin C and potassium, benefiting immunity and heart health. For those managing weight, sticking to recommended portions is key, as natural sugars in fruits contribute to calorie intake.

Dietary Adaptations

To create a gluten-free Ambrosia Salad, confirm all ingredients, especially processed ones like marshmallows, meet gluten-free standards. A dairy-free adaptation can involve swapping traditional whipped topping with coconut cream and ensuring other dairy derivatives are avoided. Making the salad entirely vegan involves verifying no egg-derived ingredients in the marshmallows. For low-carb or keto diners, dramatically reduce the fruit quantity to maintain lower sugar levels.

Troubleshooting Guide

If the salad’s texture seems off, consider adding more fruits or whipped topping to achieve desired consistency. For balance, taste adjustments, like more citrus zest, can enhance zing if overly sweet. Temperature troubles can typically be rectified by ensuring it’s properly chilled before serving. If equipment malfunctions, like broken whisks, affect preparation, trying alternatives such as a simple spoon can suffice. When ingredient substitutions are necessary, delving into the structural properties of alternatives is crucial for maintaining cohesion. Monitor the timing, ensuring no component soaks too long and experiments with portion size to guarantee satisfaction.

Recipe Success Stories

Over time, Ambrosia Salad enthusiasts have shared rave reviews, highlighting its adaptability and crowd-pleasing nature. From swapping traditional fruits with exotic ones for a gourmet twist to blending in spices like cardamom, these successful variations illustrate the recipe’s versatility. Sharing your experiences can inspire others and foster a community of creativity. Engaging via photos and stories adds to the collective appreciation of Ambrosia Salad and the happiness it brings.

Frequently Asked Questions

Can I use frozen fruits in Ambrosia Salad?

Yes, frozen fruits can be used, but it’s best to thaw them completely and drain excess moisture to retain texture.

How far in advance can I make Ambrosia Salad?

Prepare the salad up to a day in advance for best flavors, but add any crunchy toppings before serving to keep them from sogging.

What can I substitute for marshmallows?

Consider using whipped cream alone, or trying nuts or dried fruit for an alternative texture.

My salad turned out soupy. How can I fix it?

Review fruit draining processes and use a slotted spoon to serve, minimizing excess liquid impact.

Is Ambrosia Salad gluten-free?

While inherently gluten-free, verify each ingredient, especially processed ones like marshmallows, for gluten content.

What’s the best way to reduce sweetness in the salad?

Try incorporating more citrus elements, like zest or segments, to introduce tartness and balance sweetness.

Why is my salad runny?

It may be due to insufficient draining of canned fruit or using fruit that wasn’t adequately thawed if frozen.

Are there any nuts that complement Ambrosia Salad?

Slivered almonds and pecans are excellent additions, providing a crunchy contrast to the creamy salad.

Can I use sugar-free options in Ambrosia Salad?

Yes, use sugar-free whipped topping or coconut, ensuring sugars are balanced by adjusting other ingredients accordingly.

What’s the shelf life of Ambrosia Salad?

When refrigerated properly, Ambrosia Salad can last about 2-3 days; any longer risks texture degradation.

Should Ambrosia Salad be served cold?

Yes, serving cold enhances its flavor profile and helps maintain the preferred creamy consistency.

Additional Resources

Explore related recipes that complement Ambrosia Salad, like classic fruit salads or creamy desserts. Consider technique guides that help master specific kitchen skills vital for salad preparation. Ingredient information resources offer insights into selecting and storing fresh produce effectively. Equipment recommendations for making the best salad, from high-quality spatulas to mixing bowls, can enhance your kitchen’s utility. Dive into seasonal variations that allow adjustments for the freshest, most flavorful dishes year-round.

Join the Conversation

Ambrosia Salad enthusiasts, let your creativity shine by sharing your adaptations and presentation techniques on social media. Encourage feedback by reviewing the recipe and expressing what aspects you loved or modified. Join the online community by engaging in discussions around this timeless dish, inspiring fellow cooks to embrace this recipe’s versatility and charm. As you discover new variations, share your results and photography tips, growing a network of shared culinary enjoyment.

The Recipe

Ambrosia Salad

Serves: 8

Prep Time: 15 mins

Cook Time: 0 mins

Total Time: 15 mins

Kitchen Equipment Needed

  • Mixing bowl
  • Spatula
  • Measuring cups
  • Knife

Ingredients

  • 1 cup whipped cream
  • 2 cups mini marshmallows
  • 1 cup shredded coconut
  • 1 cup pineapple chunks
  • 1 cup mandarin orange segments

Directions

  1. In a large mixing bowl, combine the whipped cream and mini marshmallows until well mixed.
  2. Add shredded coconut, pineapple chunks, and mandarin segments into the bowl.
  3. Gently fold the ingredients together, ensuring even coating without crushing the fruit.
  4. Chill for at least an hour before serving to allow flavors to meld.

Recipe Notes

  • For added flavor, consider toasting the coconut before mixing.
  • Adjust the proportion of fruits to taste preference.

Irresistible Butter Pecan Cookies Recipe: A Sweet Delight Awaits

Butter Pecan Cookies: A Deliciously Nutty Treat

⚖️
Difficulty
Easy

⏲️
Prep Time
15 mins

🕒
Cook Time
12 mins

⏱️
Total Time
27 mins

🍽️
Servings
24 cookies

Dive into the delightful world of butter pecan cookies, a classic dessert that’s both comforting and delectable. These cookies feature a rich buttery base combined with crunchy toasted pecans, making every bite a heavenly experience. Perfect for a cozy afternoon tea or a warm family gathering, these cookies capture a heartwarming blend of sweet and nutty flavors that are sure to please everyone.

Butter pecan cookies are more than just a treat; they are a celebration of textures. The crisp edges give way to a softer center, delivering a satisfying crunch of pecans in every bite. The aroma that fills your kitchen as they bake is reminiscent of toasted nuts, butter, and vanilla—a truly irresistible combination that beckons everyone to the kitchen.

These cookies are not only a delight to the palate but also a visual feast. A golden-brown hue with specks of toasted pecans, they look as good as they taste. Whether you’re an experienced baker or a novice, crafting these cookies involves simple techniques that ensure success every time, making it an enjoyable endeavor with a rewarding outcome.

Quick Recipe Highlights

  • Flavor Profile: These cookies have a balanced sweetness with a rich buttery taste and a hint of nuttiness from the pecans.
  • Texture: Experience a delightful contrast with every bite: a crispy edge paired with a soft center and crunchy pecans.
  • Aroma: Baking these cookies fills your home with the comforting scent of butter, vanilla, and toasted pecans.
  • Visual Appeal: The cookies boast a warm golden color dotted with enticing pecan pieces.
  • Skill Level Needed: This recipe is beginner-friendly, requiring basic mixing and baking techniques.
  • Special Equipment: A mixing bowl, baking sheet, and an oven are all you need to bake these treats.

Recipe Overview

  • Difficulty Level: The easy difficulty level makes these cookies accessible to bakers of all skill levels. The straightforward instructions and minimal equipment make them a perfect kitchen project.
  • Category: These butter pecan cookies fall under the desserts and snacks category, ideal for satisfying sweet tooth cravings.
  • Cuisine: Rooted in Southern U.S. culinary tradition, these cookies draw influence from pecan-rich recipes popular in the region.
  • Cost: Ingredients are affordable, with pecans being the most premium component, although a small amount goes a long way in terms of flavor.
  • Season: Best enjoyed in cooler seasons when the warmth of the oven and aroma of baking are most appreciated, but they are a year-round delight.
  • Occasion: Ideal for family gatherings, gifting during holidays, or as an afternoon pick-me-up with tea or coffee.

Why You’ll Love This Recipe

Indulge in the extraordinary taste and texture appeal of butter pecan cookies. The perfect blend of sweet, nutty flavors creates a sensory delight that satisfies even the most discerning cookie lovers. The recipe delivers consistently delicious results, promising an enjoyable baking experience with a delightful outcome.

Convenience is at the heart of this recipe. With only a few common ingredients and minimal preparation time, even a busy schedule can accommodate baking these treats. The simple, step-by-step instructions guide you effortlessly, making this process as enjoyable as the cookies themselves.

Nutritional advantages abound, as pecans provide healthy fats and essential nutrients while satisfying your sweet cravings with a balanced sugar content. These cookies are a great option for those who wish to indulge without overindulging, offering a delightful treat within a mindful diet.

The social and entertaining value of these cookies is unmatched. Whether shared at a family gathering or given as a thoughtful gift, they foster connection and joy. Their delicious aroma and inviting look naturally draw people together, infusing warmth into any social event.

Cost-effectiveness and accessibility are integral to this recipe’s charm. With ingredients that are staple items in most pantries, it requires only a quick trip to your local grocery store for pecans. This ensures that creating a batch of delicious cookies is always within reach and affordable.

Historical Background and Cultural Significance

Butter pecan cookies have an intriguing origin story, tracing their roots back to Southern American cuisine. Pecans, native to North America, have long been a favored ingredient in the region, thanks to their abundant supply and rich flavor profile. This heritage manifests in numerous pecan-based desserts, with butter pecan cookies being a popular choice.

Culturally, these cookies hold a special place as a Southern hospitality staple. They embody the warmth of sharing and the joy of homemade creations, often being served during gatherings and celebrations. Their enduring appeal lies in their ability to deliver comfort and familiarity, reminding many of home and cherished memories.

Throughout history, the recipe for butter pecan cookies has evolved, adapting to changing tastes and available ingredients. While the traditional recipe remains beloved, modern adaptations cater to diverse dietary preferences, including gluten-free and vegan variations, ensuring their continued relevance and appeal.

Regional variations of these cookies bring exciting twists on a classic favorite. Some might include a hint of bourbon, while others experiment with different nut blends. Each variation pays homage to local customs and resources, enriching the cookie’s cultural tapestry and global reach.

Ingredient Deep Dive

Butter is the cornerstone of this recipe, providing the rich, melt-in-your-mouth quality quintessential to these cookies. While butter’s role might seem straightforward, its cultural significance spans centuries, being a prized ingredient in countless cuisines. When selecting butter, opt for high-quality unsalted varieties for the best flavor profile.

Pecans occupy a special place in the ingredient lineup, imparting a distinct nutty richness that’s signature to this cookie. Known for their heart-healthy monounsaturated fats and fiber, pecans add not only flavor but also nutritional benefits. Store them in a cool, dark place, and consider freezing for prolonged freshness if not using immediately.

Brown sugar is the secret to achieving a caramel-like sweetness in these cookies. It imbues each bite with depth and complexity, enriching the dough and complementing the buttery pecans. Look for soft, moist brown sugar and store it in an airtight container to prevent hardening.

Vanilla extract provides the subtle aromatic backdrop that enhances all other flavors in these cookies. Pure vanilla extracts are preferred for their authentic and robust flavor profiles, elevating the cookies from good to irresistible. Properly store vanilla extract in a cool, dark cupboard to preserve its strength.

All-purpose flour is the foundation of the cookie’s structure, working in tandem with leavening agents for the perfect texture. For those with gluten sensitivities, consider substituting with a gluten-free blend, but remember to balance the moisture with adjustments to liquid ingredients.

Common Mistakes to Avoid

  • Over-mixing the dough can result in tough cookies. Mix just until ingredients are combined to retain softness.
  • Using cold butter straight from the fridge will hinder proper creaming. Ensure butter is at room temperature for ideal consistency.
  • Skipping the toasting step for pecans results in a less pronounced nutty flavor. Toast pecans beforehand for best results.
  • Not measuring flour correctly may lead to dry cookies. Use the spoon-and-level method to avoid compacting.
  • Omitting chilling can cause the cookies to spread too much. Allow chilling time for dough consistency and shape retention.
  • Baking at too high a temperature can cause uneven baking. Always follow baking instructions for temperature and time.
  • Not rotating the baking sheet halfway through can cause uneven cooking. Rotate for uniform browning.
  • Storing cookies while warm can result in sogginess. Allow cookies to fully cool before storing.

Essential Techniques

The creaming method is crucial in this recipe for generating the right texture and consistency in the butter pecan cookies. Creaming the butter and sugar until light and fluffy ensures a smooth batter and evenly dispersed air pockets for a tender crumb.

Correctly toasting the pecans enhances their flavor, adding a roasted depth to the cookies. To master this technique, spread pecans in a single layer on a baking sheet and toast in the oven until fragrant, usually around 8-10 minutes. Watch for visual signs like a slightly darker color.

Chilling the dough before baking is key to preventing cookie spread. The cooling process solidifies the fat, allowing cookies to maintain shape during baking while developing a more concentrated flavor. It may seem an easy step to bypass, but its role is vital for cookie success.

Achieving the perfect bake requires attention to bake time and temperature. Recognize visual cues such as slightly golden edges, indicating readiness, while ensuring the centers remain soft. Mastery comes with balancing crispness and chewiness, reflecting cookie perfection.

Pro Tips for Perfect Butter Pecan Cookies

For enhanced flavor, consider browning the butter prior to incorporating it into the dough. This adds a complex nutty undertone that pairs excellently with toasted pecans.

When measuring flour, always spoon and level rather than scooping directly to avoid excess flour, which can compromise texture.

Experiment with adding a pinch of sea salt right before baking to contrast the sweetness and deepen the pecan flavor even further.

Incorporating finely chopped pecans as well as coarsely chopped ones gives varied texture through each cookie, adding unexpected crunch.

To keep cookies fresh for longer, consider storing them with a piece of bread in the airtight container, absorbing excess moisture and extending their softness.

For added depth, incorporate a splash of bourbon into the batter, enhancing the buttery flavor and adding a subtle warmth to the finished product.

Variations and Adaptations

Regional variations bring a unique twist to classic butter pecan cookies, influencing their flavor profiles magnificently. In the American South, adding Southern bourbon creates an exciting Bourbon Pecan variation, offering a deeper, more intense taste while keeping the recipe’s integrity.

Seasonal adaptations can transform this classic into a holiday staple. Adding spices like cinnamon or nutmeg around the festive period evokes warmth and coziness, with subtle scents perfuming the cookie’s already wonderful flavor.

For those adhering to specific dietary plans, consider alternatives such as gluten-free flour mixes, which can seamlessly dovetail into the recipe, ensuring everyone can enjoy these delicious treats without compromise.

Flavor variations bring creativity to the forefront. Play with additions like dried cranberries for a tart contrast, or white chocolate chips for sweet bursts of texture alongside the already delectable pecans.

Texture modifications elevate cookie-eating experiences with options like substituting part of the flour with almond flour for a toastier, denser cookie. These tweaks, while simple, leave lasting impressions on anyone who tastes them.

In terms of presentation, dip half of each cookie in melted dark chocolate, creating beautiful contrast and enhanced richness without challenging the basic preparation. Elevation is simple but truly effective.

Serving and Presentation Guide

When it comes to serving butter pecan cookies, presentation can elevate the entire experience. Consider placing cookies on a vintage plate or rustic wooden board, complemented with a porcelain teacup or a quirky milk jar to achieve a charming, cozy look.

Garnishing ideas include a light dusting of powdered sugar or a sprinkle of finely chopped pecans on top of each hot-out-of-the-oven cookie. Both options showcase sophistication and echo the cookie’s internal flavors externally.

Traditional accompaniments might feature a warm cup of tea or fresh milk, providing a soothing counterpart to the sweet, buttery cookie. Alternatively, a scoop of vanilla ice cream can transform a simple cookie into a dessert showpiece.

When adapting to modern serving methods, consider turning cookies into ice cream sandwiches by filling them with vanilla bean or butter pecan ice cream. This recreation appeals to younger audiences and adds a playful touch.

Temperature is crucial in service—serve cookies slightly warm to highlight their gooey center or cooled for full flavor maturity. Cool storage tempers only delay enjoyment.

Portion control tips include serving cookies in small batches, preventing overindulgence without hindering satisfaction. Their decadent nature makes this a strategic recommendation.

Wine and Beverage Pairing

Pairing wine with butter pecan cookies can elevate your dessert’s flavor profile. Choose sweeter wines such as Moscato or Sauternes, whose honeyed notes complement the nutty richness gracefully.

For non-alcoholic alternatives, a spiced chai tea option imparts warmth and spice, highlighting the pecans distinctly. Similarly, freshly brewed coffee provides a robust contrast to the cookie’s sweetness.

If serving with coffee, opt for a medium roast or flavored varieties. The balance of the acidity against the sweet, buttery cookie is an exceptional match, enhancing flavors without overpowering them.

Temperature considerations for beverages revolve around serving hot alongside freshly baked cookies, ensuring both warm and satisfying culinary components align perfectly.

Serve beverages in tall or wide mugs, creating an immersive experience with every sip after enjoying bite after bite of delicious, buttery pecan goodness.

Storage and Shelf Life

For optimal freshness, store butter pecan cookies in an airtight container at room temperature. This helps in maintaining their soft interiors and ensures they last several days without staling.

Temperature requirements demand avoiding exposure to extreme heat or sunlight, as these conditions can dry out or compromise the cookies’ structure and flavor integrity.

Container recommendations lean towards glass jars or plastic containers with tight-fitting lids. These options prevent air ingress, aid moisture retention, and enhance shelf life effortlessly.

Signs of spoilage involve visual and textural cues. Should cookies become overly hard or display any discoloration, reconsider consuming, as texture deviation signals loss of ideal freshness.

Reheating instructions suggest a brief 5-10 second microwave stint for individual cookies, warming the centers while preserving the overall crispness. Monitor to prevent overheating.

Freezing guidelines include tightly wrapping unbaked dough in a disk before wrapping it in foil. Once frozen, it can be conveniently thawed and sliced fresh for baking as needed.

Make Ahead Strategies

Start with a prep timeline that addresses advance ingredient measures, planning for toasting pecans. Toasted pecans, when cooled, can be stored in airtight containers until ready to bake.

Between steps, storage balances ensuring dough chilled to firm texture before baking. Alternatively, keep pre-measured dry ingredients stored independently until introduced with wet counterparts, streamlining mixing phases.

Quality impact from “make ahead” strategies remains positive, enhancing flavor intensities despite prolonged contact durations. Ensuring the inclusion of fresh elements, like last-minute-added toasted pecans, maintains nutty freshness.

Assembly tips encourage initial ingredient division and coordination for seamless transitions through baking stages. Employ labeling and organization for efficient management, reducing stress levels mid-process.

Reheating guidelines advocate allowing freshly baked cookies to return safely to optimal consumption temperatures. Similarly, time redistributes less to reheating over time crafting enjoyable experiences within reheating limits.

Quality fresh element additions psychologically stimulate senses, encouraging drooling anticipation preceding shared joy once cookies marveled over arrive at dining tables to teeter carefully on tongues.

Scaling Instructions

Halving the recipe ensures those desiring smaller batches retain precision in ingredient proportions. A rewarding trick involves halving pre-measurements rather than engaging in complex recalculations.

Doubling or tripling recipes calls for confidence as experience builds with increased output potential. Velocity settling into ingredient ratios fosters productive multiplies without multiplying anxiety levels.

Equipment adjustments may prove pivotal as standard mixing bowls and fans transition accordingly. Familiarize changes needed, adapting utensils and new experiences gently over kind learning curves.

Timing modifications account for increased quantities flagged alongside rapid logistical spooling running parallel operations. Permit patience culminating tantalizingly close expectations surpassing newfound parameters actualized joyously before eyes.

Storage considerations enjoy expanded opportunities storing and redistributing larger batches. Season difficult treats elsewhere room abundance and graciously share derived accumulation far outbound loved alike.

Nutritional Deep Dive

From a nutritional perspective, butter pecan cookies deliver a balanced macronutrient mix rich in carbohydrates with modulated sugar contents. Moderation ensures enjoyment without overconsumption, encouraging responsible indulgence.

Micronutrient analysis highlights pecans as excellent sources of dietary fiber, heart-healthy monounsaturated fats, and trace minerals. Eating these nuts in cookies upholds well-balanced nutrient levels.

Health benefits emphasized orchestrating energy levels to suit tastes specialized controlling intakes. Bathe cautiously savoring with thoughtfulness and moderation adequate style tools conversion strengthens linkages.

Dietary considerations prompt consistent enjoyment mainstream, achieving dividends satisfactory to palates high sugar desires frequently voiced. Social engaging garners approval forging sensible pathways memorable associations amid ease.

Portion analysis refines anticipation, along inviolation each bite personally socially disengaged seldom executed alike. Celebrate exceeded estimations perpetuating adventurous tastes converging inside finicky restaurants.

Weight management tips align weight watcher’s gourmet conduct balancing boundaries protect domestic triumph reminisced favorably. Compact ratio adjusting formulas maintaining restraint collectively suffered appreciation wisely directed improvisation.

Dietary Adaptations

For gluten-free enthusiasts, simply substitute all-purpose flour with an equal measure of gluten-free flour blend. Ensuring it contains xanthan gum or a similar binding agent replicates traditional tastes harmoniously.

Dairy-free adaptations effortlessly switch butter for plant-based alternatives or oils maintaining comparable properties while diminishing lactose concerns altogether. This delightful change rewards delicate constitutions alike.

To achieve vegan butter pecan cookies, select vegan-friendly butter substitutes and eliminate eggs, incorporating applesauce or flaxseed as an emulsifying agent without losing texture or bonding quality assurances.

Low-carb alternatives focus on using almond flour instead of traditional flour, cutting the overall carbohydrate content of the recipe. Additional sugar replacements like monk fruit or stevia mirror conventional sweetness.

Keto variations go hand in hand with low-carb replacements but further adapt by incorporating high-fat components such as coconut milk or additional nut-based additions, curating flavorful experiences.

Paleo-friendly recreations commend removing grain derivatives entirely, diverting reliance off nuts exclusively, where flavor goodness reciprocate nurture personal preferences curiously exploring extension possibilities.

Within Low-FODMAP strategies, reducing nut volumes lessens digestive loads heavily impacted by sensitive systems. Subtle exploration perfects this art efficacy toward broader audience liberty retention collectively joyful.

Troubleshooting Guide

Addressing texture issues demands identifying stiffness within over-kneaded doughs. Maintenance of thorough monitoring through dough consistency reflects softer scenarios through patience skillfully adapted.

Flavor balance mistakes often stem from disproportionation among primary ingredients such as excess sugar dilution or insufficiency changes, reveling subtle touch adjustments undertaken to rectify restored harmony.

Temperature problems suggest over-baking, where scorching mechanisms warp overly ambitious temperature targets while impairing flavors. Reducing degrees aid careful fine-tuning ease quickly appreciated.

Equipment challenges involve lacking adjustments, spawning inconsistencies in baking distribution without adjustments conceding absorption, impactful rivalry shall pass successful gastronomic conclusions hastily recalled.

Ingredient substitutions inadvertently betray amid alterations omitting critical intersections exploratory undiscovered joy quickly transforms fervor recommendations catering broadened flavors challenging avoided depletion.

Timing concerns may reflect underestimated preparation speeds creating unforeseen consequences within recreations commensurate pocket watch amicable equilibrium persistently foster ingeniously embedded conduct home kitchens.

Recipe Success Stories

The community buzzes with feedback highlighting butter pecan cookie successes, praising the recipe’s perfect combination of simplicity and flavor. Enthusiastic bakers have shared images and stories of family members gathering around the kitchen table, eager for a freshly baked batch.

Variation successes showcase the creativity of our readers who have experimented with adding dark chocolate chunks, a hint of cinnamon, or even drizzles of caramel on top, elevating the classic recipe into new realms of deliciousness.

Adaptation stories reveal the diverse approaches taken by bakers to tailor the cookies to individual dietary needs. Gluten-free versions receive rave reviews for their indistinguishable texture and taste, ensuring inclusivity without compromise.

Reader suggestions enrich the recipe further, like using maple syrup to deepen the flavor profile. Others recommend adding zest from a lemon or orange for a zesty twist, ensuring a truly unique flavor experience.

Photography tips inspire showcasing your cookies. Capturing warm light, vintage filters, and strategic close-ups highlight the golden hue and pecan-sprinkled topping, inviting admiration and inspiring endless baking sessions.

Frequently Asked Questions

What if I don’t have pecans?

Walnuts or almonds make great substitutes, providing a slightly different yet still delicious nutty taste.

Can I make the dough in advance?

Absolutely! The dough can be refrigerated for up to two days, allowing flavors to meld beautifully.

How do I store leftover cookies?

Store leftover cookies in an airtight container at room temperature for up to a week for optimal freshness.

Can I freeze butter pecan cookies?

Yes, these cookies freeze well. Cool them completely before freezing for up to three months in a sealed container.

What’s the best way to toast pecans?

Spread them on a baking sheet and toast in a preheated oven at 350°F (175°C) for about 8-10 minutes until fragrant.

Can I use salted butter?

You can use salted butter, but be sure to omit additional salt in the recipe to prevent overpowering saltiness.

What’s the secret to chewy cookies?

Ensuring proper butter creaming and not overbaking are vital steps for achieving the perfect chewy texture.

Can I add chocolate chips?

Yes, chocolate chips can be added for a delightful twist that complements the pecans wonderfully.

Is it necessary to chill the dough?

Chilling helps with cookie shape and flavor development, but in a pinch, you can skip this step.

Can I make these cookies vegan?

Absolutely—use vegan butter and a flaxseed mixture to replace the egg, resulting in a delicious vegan option.

Additional Resources

Explore related recipes such as classic chocolate chip cookies or spiced oatmeal cookies, each promising familiar warmth and comfort. These recipes provide a rich tapestry of flavors and textures that enhance any baking repertoire.

Delve into detailed technique guides on properly creaming butter and sugar, toasting nuts for maximum flavor, and perfecting cookie baking times for consistent results. These guides bolster confidence in every baking endeavor.

Ingredient information is invaluable for understanding the nuances between butter types, various sugars, and diverse flours, aiding in educated substitutions and improved recipe outcomes.

Equipment recommendations for best practices include reliable baking sheets, high-quality mixing bowls, and versatile stand mixers. Investing in quality tools ensures smoother execution and perfect results every time.

Seasonal variations explore adapting the base recipe with ingredients in peak season—incorporating zest, extracts, or complementary spices captures the spirit of each season compelling a bounty of diverse pleasures.

Join the Conversation

Engage with our community by sharing your unique takes on the butter pecan cookie recipe on social media using our dedicated hashtag. We love seeing your creations, hearing your stories, and celebrating your culinary achievements.

Photography tips elevate your creativity, encouraging experimentation with lighting, props, and filters. These tips inspire beautiful food photography that captures your baking journey in delicious detail.

Recipe reviews and community engagement foster connections with fellow baking enthusiasts around the globe. Share tricks and tips; our comments section thrives with insights and shared experiences, deepening our collective love for baking.

Explore endless possibilities with recipe variations shared by others in our community, igniting imagination and kindling growth through different perspectives and newfound tastes, always moving us toward delicious discovery.

The Recipe

Butter Pecan Cookies

Serves: 24 cookies

Prep Time: 15 mins

Cook Time: 12 mins

Total Time: 27 mins

Kitchen Equipment Needed

  • Mixing bowl
  • Baking sheet
  • Oven
  • Spatula
  • Cookie scoop or spoon

Ingredients

  • 1 cup (226g) unsalted butter, softened
  • 1 cup (200g) brown sugar, packed
  • 1/2 cup (100g) granulated sugar
  • 2 large eggs
  • 1 teaspoon vanilla extract
  • 2 1/2 cups (320g) all-purpose flour
  • 1 teaspoon baking soda
  • 1/2 teaspoon salt
  • 1 1/2 cups (150g) pecans, toasted and chopped

Directions

  1. Preheat your oven to 350°F (175°C). Line a baking sheet with parchment paper.
  2. In a mixing bowl, cream together the butter, brown sugar, and granulated sugar until light and fluffy.
  3. Add the eggs one at a time, mixing well after each addition. Stir in the vanilla extract.
  4. In a separate bowl, whisk together the flour, baking soda, and salt. Gradually add to the butter mixture, mixing until combined.
  5. Fold in the toasted pecans with a spatula.
  6. Using a cookie scoop or spoon, place dough on the prepared baking sheet, leaving space between each cookie.
  7. Bake for 10-12 minutes, or until the edges are golden brown. Allow cookies to cool on the baking sheet for a few minutes before transferring to a wire rack.

Recipe Notes

  • For a deeper flavor, consider browning the butter before using.
  • The dough can be refrigerated for up to two days before baking.
  • For a vegan version, replace butter with plant-based alternatives and eggs with flaxseed meal mixed with water.

Irresistible White Chocolate Lemon Curd Cheesecake for Dessert Lovers

White Chocolate Lemon Curd Cheesecake: A Decadent Delight

⚖️
Difficulty
Intermediate

⏲️
Prep Time
30 mins

🕒
Cook Time
60 mins

⏱️
Total Time
90 mins

🍽️
Servings
12

Dive into a world of delightful flavors with our White Chocolate Lemon Curd Cheesecake, a heavenly blend of creamy cheese, sweet white chocolate, and tangy lemon curd. This cheesecake promises to tantalize your taste buds with its perfect balance of sweetness and zest. The silky-smooth texture of white chocolate combined with the refreshing burst of lemon curd creates an unforgettable dessert experience that’s as sophisticated as it is satisfying. Whether it’s a special occasion or just a weekend treat, this dessert is sure to impress.

Indulge in the luxurious flavors of creamy white chocolate and zesty lemon curd layered over a rich cheesecake base. With its smooth, velvety texture and elegant flavors, this dessert offers a taste of pure delight with every bite. The combination of lemon’s refreshing aroma and white chocolate’s sweetness provides a beautifully balanced dessert to end any meal on a high note.

Quick Recipe Highlights

  • Flavor Profile: The cheesecake offers a rich mix of creamy white chocolate and citrusy lemon curd, providing a sophisticated and satisfying taste.
  • Texture: Enjoy a smooth, velvety texture from the cheesecake, complemented by the soft yet slightly firm crust.
  • Aroma: The dessert exudes a delightful blend of fresh lemon and sweet white chocolate, enticing anyone nearby.
  • Visual Appeal: Presented as layers of creamy white with a lemony glaze, it’s both eye-catching and appetizing.
  • Skill Level Needed: Intermediate; requires baking experience for perfect execution.
  • Special Equipment: Requires a springform pan and a zester.

Recipe Overview

  • Difficulty Level: This recipe is rated as intermediate, ideal for those with some baking experience. The process involves melting chocolate and managing a water bath for cheesecake baking.
  • Category: Desserts – Perfect for gatherings and when you want to impress your guests with a homemade creation.
  • Cuisine: This recipe reflects a fusion of European dessert traditions, combining elements of classic cheesecake with modern flavor twists.
  • Cost: Moderate; considered cost-effective due to the use of high-quality, accessible ingredients like white chocolate and fresh lemons.
  • Season: Perfect for spring and summer when lemons are in peak season, offering maximum freshness and zest.
  • Occasion: Ideal for celebrations such as birthdays, anniversaries, or simply a luxurious weekend dessert.

Why You’ll Love This Recipe

The taste and texture of this cheesecake are brilliantly combined with the flavors of rich white chocolate and vibrant lemon curd. The blend creates a delicate balance that is creamy and smooth, yet subtly tart. You’ll love the texture of the light, fluffy cheesecake paired with the slightly firm and crumbly crust. Making this cheesecake could not be more convenient, as it can be prepared a day ahead, making it perfect for entertaining and reducing day-of stress. In terms of nutrition, this dessert offers a rich source of calcium and protein, thanks to the cream cheese and eggs.

The convenience of this dish lies in its make-ahead capability and ease of serving, which makes it an entertainer’s dream. This cheesecake is a show-stopping dessert that friends and family will rave about, making any occasion memorable. Additionally, the ingredients are typically accessible and affordable, offering gourmet results at a reasonable price.

Historical Background and Cultural Significance


Cheesecake has a rich history, dating back to ancient Greece, where it was served during the first Olympic games. Over the centuries, cheesecake has evolved in different regions, with variations in toppings and flavors, growing in popularity across cultures worldwide. The incorporation of white chocolate and lemon curd adds a modern twist, providing a gourmet touch that speaks to refined contemporary palates.

Regional variations also show how adaptable the cheesecake can be, with each culture adding its signature ingredients. In the case of white chocolate and lemon, the influences blend the classic Italian dessert traditions with a modern, sweet-tart twist.

Ingredient Deep Dive


Cream Cheese: Cream cheese is a key ingredient, rich in history with origins in 1872 New York. It adds a creamy texture and rich taste, which is the foundation for many cheesecake recipes. It’s important to select a high-quality, full-fat option for the best results, and it should be kept refrigerated until ready to use to maintain texture.

White Chocolate: Known for its creaminess and sweetness, white chocolate complements the tangy lemon curd, balancing flavors perfectly. Carefully melt it to prevent burning, and its sugar content can be used to adjust the sweetness of your recipe.

Lemon Curd: Celebrated for its vibrant, tart flavor, lemon curd lends freshness and a burst of citrus. Fresh lemons are preferred, as they offer more vibrant juice and zest compared to bottled alternatives.

Common Mistakes to Avoid

  • Using low-fat cream cheese can negatively affect texture; full-fat options produce the best results.
  • Overbeating the batter can introduce unwanted air and lead to cracking; mix until just combined.
  • Skipping the water bath may result in uneven cooking; it’s crucial for smooth, crack-free results.
  • Inadequate chilling time will affect set and flavor; plan enough time for proper chilling.
  • Allowing chocolate to overheat can cause seizing; melt slowly using a double boiler method.
  • Relying on lemon juice alone without zest can lessen flavor intensity; use both for maximum impact.
  • Neglecting to grease the pan can lead to sticking; always prep your baking vessel to ensure a clean release.
  • Not properly sealing the springform pan can cause water to leak in during the water bath; use foil wrap around the pan for protection.

Essential Techniques


Bake in a Water Bath: This technique involves placing your cheesecake in a water bath during baking. It helps ensure even cooking and minimizes the risk of cracking on top. A consistent temperature prevents overcooking, making it essential for achieving the perfect texture.

Zesting Lemons: Use a microplane for fine, flavorful zest that infuses a more intense lemon aroma without bitterness. Avoid the white pith to prevent unpleasant bitterness.

Melting Chocolate: White chocolate can easily scorch if heated too quickly. Always use a gentle melting method, such as a double boiler or microwave in short bursts, stirring regularly.

Pro Tips for Perfect White Chocolate Lemon Curd Cheesecake


Choose fresh lemons for the zest and juice, as they provide a more intense and vibrant flavor compared to bottled juice. Be sure to use full-fat cream cheese for the best texture and richness. Consider lining the bottom of your springform pan with parchment paper for easy removal. Chill the cheesecake thoroughly, ideally overnight, to allow flavors to meld and the texture to firm up. Keep eggs and cream cheese at room temperature for smoother mixing. When slicing, dip a sharp knife into warm water between cuts for clean, precise slices. Finally, taste and fine-tune the sweetness in the white chocolate component to balance with your lemon curd for a perfectly poised flavor profile.

Variations and Adaptations

Consider adding fresh berries on top or mixed into the lemon curd for a seasonal variation that complements the cheesecake’s flavors beautifully. For dietary modifications, gluten-free crackers can be substituted for the crust, with adjustments as necessary to maintain texture integrity. Another option is swapping out regular cream cheese for lactose-free alternatives without sacrificing creamy texture. You may also experiment with swirl designs in the cheesecake batter or curd topping for visual and textural intrigue, as well as unique flavor notes from orange or lime zest.

Serving and Presentation Guide


For a stunning presentation, consider serving slices chilled on elegant glass plates with a dusting of powdered sugar. Fresh whipped cream and a sprig of mint can serve as sophisticated garnishes. To balance the rich flavors, offer a side of fresh berries that provide a natural complement. Temperature considerations are crucial; serve cold or at room temperature for optimal texture and taste. Consistently-sized portions make the most visually appealing ensemble, ensuring an equal dessert experience for all guests.

Wine and Beverage Pairing


A light, bubbly Prosecco or a sweet Riesling pairs beautifully with this cheesecake, as their acidity complements its creamy texture and lemony notes. Non-alcoholic alternatives could include a chilled lemon iced tea or a subtle ginger-infused sparkling water, both offering a refreshing contrast. For those who enjoy tea or coffee, consider a rich, creamy earl grey tea or a light-bodied espresso. Ensure beverages are served chilled or at an ideal drinking temperature to maximize flavors and interplay between dessert and drink.

Storage and Shelf Life

Store the cheesecake in the refrigerator in an airtight container to retain freshness and prevent any flavor transfer from other foods. It can typically last up to 4-5 days if properly stored, with the option to freeze for up to one month for future enjoyment. Signs of spoilage include off-smells or noticeable changes in the texture, such as mushiness. When reheating individual servings, allow them to return to room temperature or gently warm in the microwave to restore the creamy consistency.

Make Ahead Strategies


This cheesecake can be made a day or two in advance, which is ideal for planning. Allow the cheesecake to cool completely before refrigerating to help set its structure. Ensure each layer is prepared and cooled before assembly to maintain a neat appearance. For freshness, store finishing elements like lemon curd separately and add them just before serving. Consider keeping any fruit garnishes fresh by adding them only when serving to maximize texture and flavor.

Scaling Instructions

To modify the recipe for different serving sizes, halve ingredients to make a smaller batch or double/triple for larger gatherings. Adjust baking time accordingly, monitoring for consistency in texture and doneness. Utilize appropriately-sized pans when scaling to maintain the integrity of the dessert’s structure. When storing increased quantities, ensure adequate space and air circulation within your refrigerator or freezer.

Nutritional Deep Dive

This dessert provides a decadent but balanced composition, with its main source of carbohydrates derived from sugar and crust components. Fats from the cream cheese and chocolate contribute to its rich texture. It also provides an ample amount of calcium, supportive of bone health. While indulgent, portion control aids in integrating this dessert within a balanced diet.

Dietary Adaptations

To make this recipe gluten-free, simply substitute gluten-free biscuits for the crust. A vegan adaptation could use plant-based cream cheese and egg substitutes, along with dark chocolate. For a low-carb version, consider almond flour-based crusts combined with sugar alternatives like erythritol.

Troubleshooting Guide

If your cheesecake is not setting, ensure it was chilled thoroughly and long enough, as improper chilling can impact firmness. For flavor imbalance, re-evaluate lemon curd proportions or sweetness levels to enhance harmony. Address temperature issues by calibrating your oven, since incorrect temperature can lead to uneven texture. Equipment problems, such as leaking pans, should be resolved with properly sealed or lined pans.

Recipe Success Stories


Our readers have successfully adapted this recipe, substituting ginger snaps for a spicy crust variation and adding blueberry swirls for a colorful twist. Community feedback highlights the balance of flavors and the impressive presentation, with many recommending it for special occasions. We encourage sharing your variations or adaptations to enhance our community’s culinary creativity.

Frequently Asked Questions

Can I make the cheesecake in advance?
Yes, this cheesecake can be made a day or two ahead of time, making it ideal for stress-free planning and serving.

Additional Resources

Discover our related recipes for lemon curd tarts and explore technique guides for mastering crust preparation. Learn more about the ingredients used, including detailed profiles on white chocolate and its culinary uses.

Join the Conversation

We invite you to share your experiences and photos of your cheesecake attempts on social media, using our hashtag for a chance to be featured. Engage with our community by leaving comments with your recipe reviews and ideas for variations or adaptations.

Easy Homemade Cinnamon Rolls: Ultimate Dessert Recipe for Beginners

Cinnamon Rolls Recipe: An Easy Homemade Dessert to Satisfy Your Sweet Tooth

⚖️
Difficulty
Intermediate

⏲️
Prep Time
90 mins

🕒
Cook Time
25 mins

⏱️
Total Time
115 mins

🍽️
Servings
12

Imagine the smell of freshly baked homemade cinnamon rolls wafting through your kitchen. The aroma alone is enough to draw your family and friends to the table with smiles on their faces. This easy cinnamon rolls recipe provides the perfect combination of soft, fluffy dough spiraled around a sweet cinnamon-sugar filling, creating a delectable treat that every dessert lover will cherish. The golden-brown crust and the cream cheese glaze complete the delicious experience, making these rolls an unforgettable homemade dessert.

In this recipe, we’ll guide you through making this beautiful cinnamon roll dessert step-by-step. You’ll learn essential techniques, discover helpful tips, and gain knowledge on how to adapt the recipe to suit different tastes and dietary needs. Whether you’re a seasoned baker or a novice, our cinnamon rolls recipe is designed to provide an enjoyable baking experience right in your home kitchen.

Whether enjoyed as a special breakfast treat or a crowd-pleasing dessert, these homemade cinnamon rolls are a testament to the comforting power of baking. Let’s dive into the recipe and uncover the secrets to making the perfect cinnamon roll dessert that will leave everyone craving more!

Quick Recipe Highlights

  • Flavor Profile: The cinnamon rolls boast a sweet, spiced feeling with a hint of vanilla and brown butter that captivates every bite. The cream cheese icing adds a silky, rich, and slightly tangy note to balance the cinnamon spice.
  • Texture: These rolls are delightfully fluffy and soft, with a tender crumb. The cinnamon filling creates a gooey, rich layer that contrasts beautifully with the light, airy dough.
  • Aroma: A warm, inviting scent of cinnamon and sugar fills the room, evoking comfort and warmth, reminiscent of traditional bakeries.
  • Visual Appeal: The cinnamon rolls are perfectly spiraled with a golden-brown crust and a luscious glaze cascading over the top, creating an inviting presentation.
  • Skill Level Needed: Some intermediate baking skills are necessary, particularly in dough handling and rolling, though detailed instructions make it accessible to committed beginners.
  • Special Equipment: A stand mixer with a dough hook simplifies the kneading process, while a rolling pin and a baking dish round out the list of needed tools.

Recipe Overview

  • Difficulty Level: This recipe is classified as intermediate due to the need for precise dough preparation, proper rolling, and timing. However, with patience and careful attention to the detailed instructions, it is manageable for most home bakers.
  • Category: Cinnamon rolls fall into the breakfast and dessert categories, making them a versatile addition to brunch tables or post-dinner indulgences.
  • Cuisine: These cinnamon rolls are deeply rooted in European baking traditions, drawing influence from Swedish and Norwegian culinary practices, where similar rolls like kanelbullar are beloved.
  • Cost: This recipe is low-cost, primarily consisting of pantry staples such as flour, sugar, and butter. Specialty ingredients like cream cheese may moderately increase the cost depending on regional availability.
  • Season: While cinnamon rolls are a favorite year-round, they shine in the fall and winter months when warm spices are particularly comforting and celebratory.
  • Occasion: Ideal for holiday mornings, family gatherings, or special breakfasts, these rolls add a cozy, homemade touch to any occasion.

Why You’ll Love This Recipe


The taste and texture of these cinnamon rolls are unparalleled. The freshly baked rolls are soft and pillowy, providing a delicate contrast to the rich cinnamon filling. The icing offers just enough sweetness to enhance the flavor without overwhelming it. Each bite is a harmonious blend of spice and sweetness, ensuring it becomes a family favorite.

Convenience is one of the strengths of this recipe. It can be made ahead and frozen, making for an easy morning treat. The instructions are detailed yet user-friendly, allowing even novices to follow along with confidence. By using a few simple steps, you can transform everyday ingredients into an extraordinary treat.

The rolls offer some nutritional benefits despite their sweetness. The recipe allows for whole grain or alternative flours that deliver added fiber and nutrients. You can also control the amount of sugar and butter.

Serving cinnamon rolls is perfect for social occasions. The recipe yields enough to share with a crowd, making it a great choice for brunches and gatherings. It encourages a sense of sharing and community around the table.

These rolls are cost-effective and accessible. By using pantry staples, you avoid pricey ingredients while still achieving a bakery-quality result. This combination of simplicity and quality means you get the most value from what’s already in your kitchen.

Historical Background and Cultural Significance

Cinnamon rolls, also known as cinnamon buns or sticky buns, have a rich history that dates back to ancient times. Cinnamon, the key ingredient, was highly prized in ancient Egypt and Rome, used for its flavor and preservation properties. The roll’s origins are deeply linked to Swedish traditions, particularly the cinnamon-laden kanelbullar.

Conducting a cultural journey, cinnamon rolls reveal their European roots, predominantly in Scandinavia, Germany, and the UK. They evolved through the need to create comfort food with warmth and sweetness, merging the spiced allure of cinnamon with the art of baking soft bread.

Over time, cinnamon rolls have diversified globally, with each region putting a unique spin on the classic treat. From Sweden’s butter-rich, pearl sugar-topped versions to America’s large, glazed incarnations, the variations reflect the cultures and tastes of their origins.

Today, cinnamon rolls embrace regional and modern interpretations, representing not only a dessert but a heartfelt experience. Whether served with cardamom in Nordic countries or pecans in the southern United States, each cinnamon roll tells a story of adaptation and culinary fusion.

Ingredient Deep Dive


– Flour: Flour is the backbone of your rolls, providing structure and volume. Historically, flour has been a staple in baking due to its versatility and ability to create everything from bread to pastries. Whole grain alternatives can add a nutritional edge, offering dietary fiber and essential minerals.

– Cinnamon: Sourced from the inner bark of trees native to Sri Lanka, cinnamon brings warmth and spice. It’s renowned for both its rich history and its antioxidant properties. Opt for Ceylon cinnamon for a sweeter, milder taste, though Cassia is more commonly available in stores.

– Butter: Known for adding richness and flavor, butter enhances the tender crumb of the dough. Offering essential fats and vitamins, it’s crucial for flakiness in pastries. When storing, keep butter refrigerated and well wrapped to maintain its freshness and quality.

– Sugar: Essential for sweetness and browning, sugar contributes to the roll’s soft texture and caramelized filling. Brown sugar intensifies the flavor profile by introducing molasses notes, while alternative sweeteners like honey or maple syrup can provide a unique dimension.

Common Mistakes to Avoid

  • Using Cold Butter: Cold butter prevents the dough from rising properly. Always ensure your butter is softened to blend easily with the other ingredients.
  • Overkneading the Dough: This can result in tough rolls. Knead gently until the dough is smooth and slightly elastic, but not excessively.
  • Skipping the Rise: Cinnamon rolls require two rises. Skipping this step yields dense dough. Allow ample time for the dough to double in size.
  • Too Much Filling: While tempting, too much filling can leak out, causing a mess. Use a balanced amount to maintain both flavor and structure.
  • Improper Rolling: Rolling dough too thin may lead to flat rolls. Aim for a 1/4-inch thickness for perfect spirals and proper rising.
  • Baking at Too High Temperature: High heat can cause outer burning while keeping the inside undercooked. Bake at a moderate temperature to ensure even cooking.
  • Skipping the Foil Tent: To prevent over-browning, loosely cover the rolls with foil during the final baking minutes if needed.
  • Not Cooling: Pouring glaze on hot rolls makes it melt off. Let rolls cool for a few minutes; the glaze should set but not run.
  • Incorrect Dough Storage: If not baking immediately, store risen dough properly to avoid yeast degradation. Refrigerate and use within 24 hours.

Essential Techniques


Mastering cinnamon rolls involves understanding essential baking techniques, starting with proper dough kneading. This process develops gluten, which is crucial for structure and rise. The dough should be smooth and elastic yet not sticky; overhandling will lead to tough rolls.

Next is the art of rolling out the dough. Aim for an even thickness without overworking; excessive rolling can tear the dough or compress the layers. A gentle but firm touch helps maintain a light, airy texture.

Understanding fermentation is critical. Allowing the dough to rise twice ensures a tender, flavorful roll. The first rise develops yeasty notes and enhances flavor; the second rounds out the texture. Be patient—rushing this step affects the final product.

Pay attention to layering the filling. Spread it evenly to ensure each bite has consistent flavor, taking care not to tear the dough. Proper rolling here creates the signature spiral that defines cinnamon rolls.

Finally, glazing requires timing. The rolls should be warm (not hot) to hold the glaze without melting it. This ensures a neat, enticing finish that highlights your culinary effort.

Pro Tips for Perfect Cinnamon Rolls


To achieve bakery-quality cinnamon rolls, always start with room-temperature ingredients. This ensures even mixing and helps the yeast function optimally.

For maximum flavor, allow the cinnamon filling to rest at room temperature before spreading. This emphasizes the spice and creates a more pronounced aromatic profile.

Consider using a combination of brown and granulated sugar in your filling. This mix provides depth of flavor and an appealing caramel note.

Incorporate a pantry staple like vanilla extract into the icing for added flavor complexity. It rounds out the sweetness and elevates the overall taste of the rolls.

To prevent over-browning, check the rolls during the last few minutes of baking. Loosely cover them with foil if they darken too quickly.

A touch of lemon zest in the frosting enhances the dish’s overall freshness, offering a slight tartness that complements the sweetness beautifully.

Finally, serve your rolls warm. This not only improves the eating experience but also enhances the cinnamon aroma, elevating the sensory enjoyment of your homemade creation.

Variations and Adaptations

Explore regional variations by incorporating cardamom alongside cinnamon for a Scandinavian touch, creating a unique flavor twist reminiscent of kanelbullar.

Adapt the recipe seasonally by adding pumpkin puree and spice to the filling for an autumn version, or include fresh berries in the summer months for added fruitiness.

To accommodate dietary restrictions, create a gluten-free version using specialized flour blends. Although differing in texture, these rolls remain equally satisfying with slight modifications.

Consider a vegan adaptation by substituting dairy-free alternatives for butter and milk, alongside a simple water and powdered sugar glaze to eliminate dairy.

Enhance flavor by incorporating elements like chopped nuts or raisins in the filling, adding texture and depth to your cinnamon rolls.

Experiment with texture modifications by using half whole wheat flour for added fiber, or dusting with powdered sugar for a light, pleasing finish.

Transform the presentation by baking rolls in individual ramekins for a modern twist, offering a personalized serving for brunches and gatherings.

Serving and Presentation Guide

Enhance your cinnamon rolls’ visual appeal with careful plating techniques. Arrange them on a decorative platter, allowing rolls to face outward, showcasing their signature spiral.

For garnishing, consider a sprinkle of chopped nuts or a dusting of powdered sugar to emphasize texture contrast. Alternatively, a sprig of mint adds a fresh color pop, elevating the overall presentation.

Pair traditional accompaniments like a warm cup of coffee or tea to enhance the enjoyment of your homemade dessert, emphasizing the rolls’ comforting nature.

When serving, consider modern suggestions like individually plating with a flourish of icing and additional custom toppings, accommodating diverse preferences.

Pay attention to temperature considerations. While best served warm, room-temp rolls can be reheated briefly to restore their fresh-baked qualities.

Practice portion control by slicing the rolls in half for lighter options, encouraging guilt-free indulgence and allowing guests to savor different flavors or pairings.

Wine and Beverage Pairing

Pairing your cinnamon rolls with the right beverage enhances the experience. Opt for a semi-sweet or late-harvest Riesling whose floral notes and acidity complement the roll’s sweetness.

For non-alcoholic options, a rich, creamy chai tea with spice notes mirrors and enhances the cinnamon. Alternatively, a warm apple cider infused with cloves and star anise aligns well with the rolls’ flavors.

If coffee is your preference, choose a medium blend with light toasty overtones. The bitterness balances the sweetness for a well-rounded taste.

Consider temperature considerations. Serve beverages warm, not steaming, to provide comfort without overshadowing the subtler notes of your dessert’s aroma.

Encourage serving suggestions with thoughtful pairings that cater to varied preferences and occasions, enhancing your cinnamon roll experience to new heights.

Storage and Shelf Life

Ensure freshness by storing cinnamon rolls in an airtight container at room temperature for up to two days. Avoid exposure to air, which leads to staleness.

Alternatively, refrigerate them to extend their shelf life to five days. For the best experience, let refrigerated rolls return to room temperature before serving or gently reheat.

Invest in proper container recommendations: a glass or ceramic dish with a snug lid maintains moisture and prevents the rolls from drying out.

Identify signs of spoilage such as mold or an off smell, ensuring you only serve cinnamon rolls at their finest quality.

Reheating instructions involve a brief warm-up in an oven set to low heat (180°F) or a quick zap in the microwave for a gooey, fresh-baked quality.

For long-term storage, consider freezing the rolls pre- or post-baking. When freezing, wrap them individually in film wrap before storing in a freezer bag to preserve their flavor and texture.

Make Ahead Strategies

The cinnamon rolls can be prepared up to a day in advance, making them a good candidate for make-ahead strategies. Chill the shaped rolls overnight, allowing a slow rise, then bake fresh in the morning.

Alternatively, freeze the rolls before their second rise. When ready to bake, let them thaw and rise in the refrigerator overnight.

Between steps, store the dough in a lightly greased bowl covered with plastic wrap. Proper storage maintains the yeast activity and dough quality.

Assess quality impact to ensure the integrity of your rolls remains high. Appropriately managing resting times and temperature has a positive effect on flavors and rising potential.

During assembly, ensure the rolls are tightly packed yet not overcrowding their baking dish. Overcrowding can prevent even layer expansion.

For reheating, opt for an oven over a microwave when possible to maintain texture. Sprinkle with water before reheating for added moisture.

Add fresh frosting after reheating to cater to freshly glazed preference, elevating your make-ahead meal to a quality similar to freshly baked.

Scaling Instructions

When scaling a recipe downwards to half or upwards to double, always consider ingredient ratios carefully. Avoid common errors by maintaining proportional adjustments to yeast, which ensures optimal rising.

For equipment adjustments, opt for an appropriately sized dish: smaller for halved or larger for doubled recipes. This offers gorgeous rolls without crowding issues.

Consider timing modifications. Larger batches require extended baking times due to increased dough mass, impacting recipe timing for perfect texture.

Assess storage considerations for leftover portions when scaling upwards. Pre-slice and plan storage using airtight containers to prevent spoilage.

For serving, calculate portions in advance to aid in displaying rolls uniformly across the table setting. Presentation maintains the appealing aspect of individual servings.

Nutritional Deep Dive

Cinnamon rolls may appear indulgent, but a closer look reveals some nutritional benefits. They offer an opportunity for whole grain flour incorporation, enhancing dietary fiber intake while maintaining classic flavors.

Examine the macro breakdown: carbohydrates form the base, fibers enhance digestion, and sugars account for the glaze containing sweetness.

From a micronutrient perspective, cinnamon delivers antioxidants like polyphenols. Whole grain options introduce vital minerals such as iron and magnesium.

Consider dietary implications by adjusting sugar levels or opting for reduced-fat butter, allowing for a balanced diet without significant sacrifices.

Portion analysis is crucial for those monitoring caloric intake, with half-roll servings reducing consumption while still providing enjoyment.

Explore weight management tips by incorporating low-sugar glaze alternatives and maintaining portion control. Adapting recipes to necessary goals encourages healthy lifelong habits.

Dietary Adaptations

For a gluten-free adaptation, opt for certified gluten-free flour blends to replicate the dough texture closely. Xantham gum aids in elasticity and support needed for roll structure.

Dairy-free alternatives like plant margarine or coconut oil contribute to vegan-friendly approaches within the recipe scope. Also, use almond milk to replicate traditional dairy functions.

Achieve a vegan cinnamon roll by replacing eggs with flaxseed “eggs” and using an almond or cashew cream-based icing for topping options. Nutritional yeast enhances buttery flavors.

Low-carb dieters can substitute coconut or almond flour in moderation, with keto-friendly sweeteners’ help to cater to a carb-restricted diet.

For paleo, eliminating processed sugars and opting for natural alternatives like raw honey meets dietary needs, creating a delicious experience.

The low-FODMAP community can adapt by reducing or adjusting traditional ingredient choices. Consult precise instructions guiding safe consumption within the diet’s framework.

Finally, tailor the recipe to accommodate other specific diets, ensuring ingredient quality is maintained while honoring dietary restrictions and preferences.

Troubleshooting Guide

Address texture issues by ensuring dough hydration levels are correct. Overly sticky dough indicates excessive moisture, while a dry texture points to inadequate liquid ingredients.

Balance flavor by adjusting cinnamon levels for pronounced spice preferences without overpowering underlying tastes. Add a hint of nutmeg or cardamom for dimension.

Correct temperature problems by monitoring oven calibration. Uneven heat distribution impacts baking outcomes considerably. Invest in a quality thermometer for accuracy.

Overcome equipment challenges by finding substitutes or adapting techniques. Hand-mixing simulates stand mixers when dough adaptations are required accrodingly.

Cuts orchestrating ingredient substitutions require mindful adjustments, especially maintaining similar consistencies or flavor profiles as the original.

Timing concerns arise from insufficient rising or baking times, affecting both texture and flavor. Always adhere to recipes’ rising patterns to ensure a uniformly successful dessert.

Recipe Success Stories

Our community has shared feedback, with home bakers consistently finding success in crafting delightful cinnamon rolls that echo our precise instructions. One testimonial highlighted rolling techniques carefully adopted through images provided, resulting in perfect spirals praised by children.

Reader suggestions include introducing chopped pecans to add a satisfying crunch, further elevating this dessert’s nutritional profile enhancing utility ingredient diversity among bake-offs and celebrations and overcoming adaptation barriers while encouraging limitless creativity.

Another individual discovered a cinnamon roll journey, using popular Swedish elements such as pearl sugar proximal sugars transfers ideally. This feedback spearheaded discussions on community variations.

Photography also plays a vital role in showcasing recipes. Angle manipulation enhances rolls’ golden finish and invites visual interaction, driving widespread social media sharing participation from enthusiasts.

These successes speak volumes about the supportive, enthusiastic community we’ve fostered around a shared interest in elevating home baking to an art form.

Frequently Asked Questions

How can I make cinnamon rolls without a mixer?

Cinnamon rolls can be kneaded by hand. Use a large bowl and a heavy-duty spoon, mixing ingredients until they form a shaggy dough. Turn it onto a floured surface and knead for about 10 minutes until the dough becomes smooth and elastic. This method requires a bit more arm work but is just as effective.

What type of yeast is best for cinnamon rolls?

Both active dry yeast and instant yeast work well in cinnamon rolls. Active dry yeast needs to be proofed in warm water with a bit of sugar to activate it, while instant yeast can be mixed directly with flour, slightly speeding up the process.

Can I prepare cinnamon rolls in advance?

Yes, cinnamon rolls can be prepared the evening before. Make the recipe up to the second rise, place the rolls in a baking dish, and refrigerate overnight. Let them come to room temperature or rise slightly before baking in the morning.

Can I freeze the cinnamon rolls before or after baking?

Both options work well. Freeze pre-baked rolls after shaping them, letting them thaw and rise before baking. Alternatively, bake and cool rolls, then freeze them; reheat gently in the oven for freshness.

How can I keep my cinnamon rolls from getting dry?

To avoid dryness, ensure a balanced dough hydration level. Cover rolls with a loose layer of plastic wrap or store in a tightly-sealed container to prevent loss of moisture after baking. Additionally, avoid over-baking to preserve desired texture.

Why did my cinnamon rolls not rise?

Ensure your yeast is active and that the water used for proofing isn’t too hot (typically around 110°F). Verify the dough rises in a warm, draft-free spot. Doughs lacking sugar may impact yeast activity, crucial for proper rising.

Can I use whole-wheat flour instead of all-purpose flour?

Yes, whole-wheat flour can substitute part or all of the all-purpose flour, though some texture changes may result. Consider using half whole wheat to start, then adjust based on taste and dough stability preferences.

Why did my filling leak out during baking?

This could occur from overfilling or under-rolling tightness. Enhance roll integrity by distributing filling evenly and sealing edges adequately, maintaining tight dough spirals made from filling adjustments.

What should I do if my glaze is too runny?

Thicken glaze by slowly incorporating more powdered sugar, mixing thoroughly until it reaches desired consistency. A slight reheating thickens glazes containing cream cheese, curbing excess liquidity.

How can I tell if my cinnamon rolls are done baking?

Rolls should be golden brown on top, cooked through without doughy centers. Check with a toothpick to confirm, ensuring no sticky centers remain. Internal temperature can be measured for assurance—ideally 190°F in the center.

Additional Resources

To refine your cinnamon roll techniques, consider consulting related recipes like sticky buns, which introduce caramelized sugars and nutty rich textures akin to your cinnamon passion.

Dive into technique guides focused on dough preparation and proofing times, exploring vital aspects that elevate overall baking understanding, informing future recipes and explorations.

Expand ingredient knowledge of cinnamon and sweeteners, unraveling historical and health information from renaissance cookbook discussions up to modern explorative journeys inside the culinary world.

Equip your kitchen savvy, investing in mixers, thermometers, and other necessary tools to enhance baking operations. Harmoniously elevating those rolls to mouthwatering masterpieces.

Lastly, explore seasonal variations and cookbooks, guiding through thoughtful recipe adaptation based on changing seasonal tides. Winter aromatics, spring luxury, or summer’s fresh fusions guide your cinnamon creativity year-round.

Join the Conversation

Engage with our online community, sharing your cinnamon roll creations on social media platforms. Use related hashtags and tag our page to encourage wider viewing and appreciation.

Exchange photography tips, focusing on natural lighting and compositional angles, ensuring food styling complements roll presentation gouging impressive photos for digital footprints securely fastened.

Encourage recipe reviews, reflecting successes and area explorations when baking. Comments fuel motivation across diverse bakers, enriching interaction inside the recipe webs fostering shared experiences.

Participate in community engagement through hosting virtual bake-offs or swap seasonal adaptation stories, unveiling unique adaptations perpetual within kitchen trials and triumphs.

Explore recipe variations based upon cultural hooks, niche regional interests harnessed into productive culinary discussions. Join our interconnected dialogue exploring new culinary worlds and enjoying shared passions globally.

The Recipe

Cinnamon Rolls

Serves: 12

Prep Time: 90 mins

Cook Time: 25 mins

Total Time: 115 mins

Kitchen Equipment Needed

  • Stand Mixer with a Dough Hook
  • Rolling Pin
  • Baking Dish
  • Measuring Cups and Spoons
  • Mixing Bowls

Ingredients

  • 4 cups all-purpose flour
  • 1/3 cup granulated sugar
  • 2 1/4 teaspoons active dry yeast
  • 1 cup milk
  • 1/3 cup unsalted butter
  • 1 teaspoon salt
  • 2 large eggs
  • 1/4 cup unsalted butter, softened
  • 1 cup brown sugar
  • 2 tablespoons ground cinnamon
  • 1/2 cup cream cheese, softened
  • 1 1/2 cups powdered sugar
  • 1 tablespoon milk
  • 1 teaspoon vanilla extract

Directions

  1. Warm the milk slightly and combine it with yeast and sugar. Allow it to sit for 5 minutes until frothy.
  2. In a stand mixer, combine flour and salt. Add melted butter and the yeast mixture. Begin mixing at low speed.
  3. Add eggs one at a time, mixing until the dough forms a ball.
  4. Increase speed to medium, kneading for 5-7 minutes, until smooth and elastic.
  5. Transfer dough to an oiled bowl, cover with a towel, and set aside to rise for 1 hour.
  6. For the filling, mix softened butter with brown sugar and cinnamon to create a spreadable paste.
  7. Roll the dough into a rectangle on a floured surface. Spread filling evenly and roll tightly from one end.
  8. Cut the roll into 12 equal pieces, placing them in a greased baking dish. Cover and let rise for 30 minutes.
  9. Preheat oven to 350°F (175°C) and bake rolls for 25 minutes until golden brown.
  10. For icing, beat together cream cheese, powdered sugar, milk, and vanilla until smooth.
  11. Once rolls are cooled slightly, spread icing over the top. Serve warm.

Recipe Notes

  • Substitute half the flour with whole wheat for a more hearty texture.
  • Add raisins or nuts to the filling for extra texture.
  • Opt for store-bought icing if short on time, though homemade is recommended for best taste.