Cozy Crockpot Chicken Parmesan Soup Recipe for Easy Comfort
Crockpot Chicken Parmesan Soup: A Comforting Delight
⚖️
Difficulty
Easy
⏲️
Prep Time
15 mins
🕒
Cook Time
6 hours
⏱️
Total Time
6 hrs 15 mins
🍽️
Servings
6
There is nothing quite like the warmth and comfort of a delicious Crockpot Chicken Parmesan Soup. This recipe is designed for those who crave the classic flavors of Chicken Parmesan but with a delightful twist in a soup form. Slow-cooked to perfection, this soup captures the essence of traditional Italian cuisine with the convenience of modern cooking techniques.
As the soup simmers over the course of six hours, the mouthwatering aroma fills your kitchen, promising a delightful meal. The rich tang of tomatoes blends beautifully with the tender chicken and melted cheese, creating a hearty, savory dish perfect for chilly days or family gatherings. Embrace simplicity without compromising on flavor with this easy and fulfilling recipe.
Quick Recipe Highlights
Flavor Profile: A perfect balance of savory and umami with hints of garlic and basil, making each spoonful a burst of classic Italian flavors.
Texture: Creamy broth with tender chicken pieces and melted cheese ensuring a satisfying mouthfeel in every bite.
Aroma: Aromatic herbs and tomato essence meld together to create an inviting and heartwarming smell as the soup simmers.
Visual Appeal: A vibrant red soup with scattered patches of creamy white cheese and fresh green herbs, enticing both the eyes and the palate.
Skill Level Needed: Suitable for beginners, requiring only basic cooking skills involving chopping and layering ingredients.
Special Equipment: A slow cooker (crockpot) is essential for this recipe, along with standard kitchen tools like knives and measuring cups.
Recipe Overview
Difficulty Level: The recipe is incredibly straightforward, making it an excellent choice for those with minimal cooking experience or those needing a quick fix. With simple steps and time as the major ingredient, perfection is easily achieved.
Category: A hearty soup, it comfortably fits into winter warmers, weeknight dinners, or as an appetizer in a multi-course meal.
Cuisine: Rooted in Italian tradition, the soup embodies classic flavors with a modern presentation, appealing to international palates.
Cost: The approximate cost remains moderate, using easily accessible and economical ingredients, making it a budget-friendly yet delightful meal option.
Season: Ideal for autumn and winter, the soup’s warmth offers a cozy escape from cold weather, yet remains enjoyable year-round.
Occasion: From casual weekday dinners to festive gatherings, this soup provides a versatile option ready to impress guests and family alike.
Why You’ll Love This Recipe
Crafted with love and simplicity, this Crockpot Chicken Parmesan Soup transcends the bounds of traditional comfort food. Each spoonful offers a delightful marriage of taste, combining the classic flavors of Chicken Parmesan with the soulful heartiness of soup. The smooth, creamy texture juxtaposes beautifully with the tender chicken, creating an unforgettable eating experience.
Convenience is at the core of this recipe. Drawing on the ease of the crockpot, it allows you to set it and forget it, freeing up time to handle the day’s demands or simply relax. Minimal prep work and an effortless cooking process mean you are rewarded with a delicious dinner with the least effort.
Nutritionally, the soup is a balanced affair. Lean chicken provides a good protein source, while the tomatoes and herbs add a welcome punch of vitamins and antioxidants. This makes it a dish that appeals to both taste buds and health-conscious eaters, ensuring nutritional and gastronomic satisfaction.
The social aspect of sharing a hearty bowl of soup cannot be underestimated. It brings people together, be it around a family dining table or during a cozy dinner party with friends. The recipe doubles as an excellent dish for both intimate meals and larger gatherings, boasting enough flavors to engage and delight all palates.
Cost-effective without sacrificing quality, this dish uses basic pantry staples elevated by a touch of Italian flair. The balance of accessible ingredients and a gourmet result makes the soup an attractive option for those wanting to enjoy a sophisticated meal without breaking the bank.
Historical Background and Cultural Significance
Nestled within the rich tapestry of Italian cuisine, Chicken Parmesan Soup borrows from the classic dish, Chicken Parmigiana, which originated from Southern Italy. Known for its decadent flavors, Chicken Parmesan has long been a staple in Italian-American dining, beloved for its satisfying nature and comforting taste.
Over the years, the classic Chicken Parmesan has evolved to meet modern preferences, leading to a myriad of interpretations, including this delightful soup adaptation. The soup retains key elements like cheese, tomatoes, and lean chicken, but presents them in a lighter, broth-based form, ideal for today’s health-conscious and time-crunched cook.
Culturally, Chicken Parmesan Soup exemplifies the adaptation of traditional Italian recipes to new-world cuisines. It highlights the versatility and enduring popularity of Italian flavors, aligning them with evolving cooking techniques such as the widespread use of crockpots and slow cookers in contemporary kitchens.
This recipe embraces regional variations and individual creativity, allowing each cook to infuse personal touches while maintaining the core of what makes Chicken Parmesan so beloved. It celebrates Italian heritage through a modern-day lens, ensuring the continuing legacy of cherished culinary traditions.
Ingredient Deep Dive
Tomatoes, the backbone of this soup, are a staple in Italian cooking, revered for their vibrant color and rich, tangy flavor. Historically, they symbolize the vibrancy of Mediterranean cuisine, bringing a distinct brightness to countless dishes. Nutritionally, they are packed with vitamins A and C and are a significant source of lycopene, an antioxidant linked to numerous health benefits.
Chicken is an adaptable protein choice, widely used across global cuisines for its versatility and ability to blend with various flavors. In this recipe, its mildness complements the robustness of the tomatoes and herbs. Selection tips include choosing fresh, boneless cuts to ensure maximum tenderness and ease of shredding post-cooking.
Cheese brings a creamy richness to this soup, with options like Parmesan or mozzarella offering distinct textures and flavors. Beyond taste, cheese adds calcium and protein, enhancing the soup’s nutritional profile. Storing cheese properly is essential, either refrigerated and wrapped tightly to maintain freshness, or grated and frozen for extended use.
Herbs such as basil and oregano infuse the soup with quintessential Italian aromas and flavors. Their cultural significance in Italian cuisine is profound, often emblematic of freshness and tradition. Dried or fresh, these herbs transform the soup, providing the aromatic depth that characterizes the best of Italian cooking.
Common Mistakes to Avoid
Overcooking the chicken can lead to dryness. It’s critical to follow the recommended cooking time and check for doneness early.
Not shredding the chicken while it’s still warm can make the process unnecessarily difficult and less uniform.
Skipping the browning step with cheese may lead to a lack of depth in flavor. A gentle toast of the cheese enhances overall richness.
Using low-quality canned tomatoes can result in a less vivid flavor and color. Opt for premium brands to ensure robust taste and bright presentation.
Adding too much salt initially can be a misstep, as flavors concentrate during slow cooking. Adjust seasoning towards the end of the process.
Failing to stir the soup occasionally can cause ingredients to stick or clump at the bottom, disrupting the texture.
Neglecting to taste as you go can result in a one-dimensional soup. Tasting allows for correct seasoning and balance.
Using dried herbs exclusively may not yield the best aroma. Combining fresh and dried provides the right balance of intensity and freshness.
Essential Techniques
Building flavor is crucial to maximizing the dish’s potential. Begin by searing the chicken briefly before slow cooking; this locks in juices and adds a subtle depth. Likewise, sauteing garlic and onions first releases their flavors fully, intensifying the soup’s aromatic profile.
Mastering crockpot cooking involves an understanding of time. Low, slow heat is your ally, allowing flavors to meld gradually. Regular stirring isn’t necessary, allowing layers to develop naturally without interference, thus preserving the integrity of each ingredient.
Achieving the perfect soup consistency requires balance. Be attentive to the liquid ratio; too much can dilute flavors, while too little may dry the soup. Visual cues are your guide: aim for a glossy, viscous broth that signals premium richness without over-reduction.
The cheese addition is best executed with thoughtful timing. Introduce it during the final stages to prevent premature melting that could affect texture adversely. Proper timing guarantees the cheese remains luscious and well-distributed.
Pro Tips for Perfect Crockpot Chicken Parmesan Soup
Purposeful layering of ingredients enhances overall flavor. Introduce heartier elements like chicken and onions at the base for even cooking, and reserve delicate items like cream and fresh herbs for later inclusion to protect their distinct characteristics.
For those craving extra flavor complexity, roast the tomatoes lightly beforehand. This process highlights their natural sweetness and adds a slight char, elevating the soup’s taste profile.
Utilize quality stock or broth as your base. Homemade or reputable store-bought versions can impart a pervasive depth that rounds out flavors effectively while preserving natural sapidity.
Fresh herbs are more than garnish — they offer a burst of immediate flavor. Add them just before serving to retain their vibrance and aromatic contributions.
Don’t shy away from creative substitutions to match dietary needs, such as using plant-based cheese for lactose intolerance. This maintains textural integrity while serving different preferences.
For a creamy variant, consider incorporating a touch of heavy cream or coconut milk towards the end. This twist can provide a velvety mouthfeel, diversifying classic texture without overpowering the primary tastes.
Indulge in a Heavenly Black Forest Roll Cake Recipe 🍫🍒
Black Forest Roll Cake – A Chocolate & Cherry Delight
⚖️
Difficulty
Intermediate
⏲️
Prep Time
30 mins
🕒
Cook Time
15 mins
⏱️
Total Time
45 mins
🍽️
Servings
8
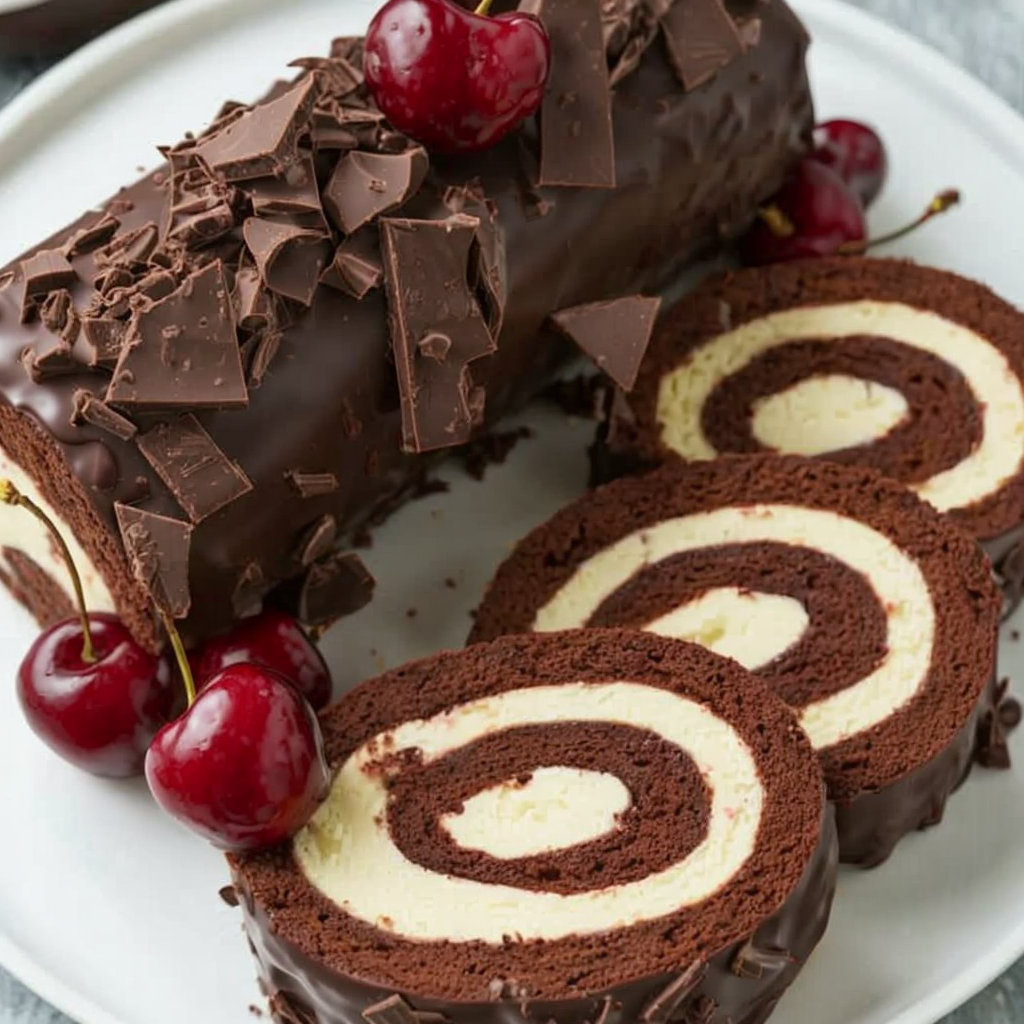
Indulge in the rich and decadent flavors of a classic Black Forest Roll Cake, a truly delightful chocolate and cherry dessert. This roll cake combines a velvety chocolate sponge with layers of whipped cream and luscious cherry filling. Perfect for special occasions or a luxurious treat, this dessert boasts an exquisite balance of sweetness and a slight tartness from the cherries. Experience the harmony of flavors and textures in this captivating pastry, layered to perfection.
As you slice into the Black Forest Roll Cake, be prepared to be wowed by its beautiful presentation. The spirals of chocolate and cream create a mesmerizing pattern, accented with vibrant red cherries. The aroma alone will captivate you, with its intoxicating blend of rich chocolate and fresh cherries. Whether you’re a seasoned baker or trying your hand at something new, this recipe is a rewarding culinary adventure that delivers visual and gastronomic satisfaction.
Quick Recipe Highlights
Flavor Profile: A delightful symphony of chocolate’s deep richness paired with the refreshing tartness of cherry, complemented by sweet, airy whipped cream.
Texture: The sponge is light and moist, perfectly balanced with the creamy, fluffy layers of whipped cream and the bite of juicy cherries.
Aroma: Expect a heady blend of cocoa, vanilla, and cherries that fills your kitchen with a memorable, inviting fragrance.
Visual Appeal: Each slice reveals a stunning swirl of dark chocolate, white cream, and vivid red cherries, making it a feast for the eyes.
Skill Level Needed: Intermediate skills required, involving careful rolling and attention to detail to maintain the cake’s structure.
Special Equipment: Requires a jelly roll pan, whisk, and parchment paper to ensure perfect rolling.
Recipe Overview
Difficulty Level: This recipe is labeled intermediate due to the steps involved in baking a sponge evenly and rolling it without cracking. It demands a precise touch and attention to small details, perfect for those looking to expand their baking repertoire.
Category: Perfect as a dessert option, this roll cake fits into the indulgent sweet category, suitable for celebrations and dessert tables.
Cuisine: This cake draws inspiration from the classic German Black Forest Cake, known for its rich chocolate and vibrant cherry flavors.
Cost: Ingredients such as high-quality chocolate and fresh cherries may be on the pricier side, but they contribute to a luxurious dessert experience.
Season: Ideally suited for cherry season in the summer, but also can be made year-round with preserved cherries.
Occasion: This luscious cake is excellent for birthdays, anniversaries, and holiday gatherings, providing a stunning centerpiece.
Why You’ll Love This Recipe
The Black Forest Roll Cake is a masterpiece of taste and texture. It delivers a divine balance of rich chocolate, fluffy whipped cream, and tart cherries that delights every taste bud with each bite. Its indulgent layers provide a mouthfeel that’s as satisfying as it is decadent, making it a preferred choice for dessert lovers.
Preparation is streamlined for convenience, allowing you to create a show-stopping dessert without excessive fuss. The recipe breaks down each step, guiding you through rolling the perfect sponge and maintaining its structure, ensuring a rewarding baking experience.
Not only does the Black Forest Roll Cake tantalize the senses, but it also offers a modest nutritional profile. The cherries offer natural sweetness and provide antioxidants, while the controlled portions of cream and chocolate help manage indulgence without going overboard.
This cake is an entertainer’s dream, impressing guests with its appearance and flavor. It’s an ideal choice for hosting, offering something special and memorable to your friends and family while showcasing your baking prowess.
Accessible in terms of ingredients, this cake allows for quality without the hefty price tag. While incorporating premium components like decent chocolate and fresh cherries might seem expensive, the overall cost-effectiveness shines when you consider the number of servings a single roll provides.
Historical Background and Cultural Significance
The Black Forest Roll Cake finds its roots in Germany’s Black Forest region, known for its culinary traditions and the iconic Black Forest cake known as “Schwarzwälder Kirschtorte.” Traditionally, the cake draws inspiration from the region’s abundance of cherry trees and rich dairy products, crafting a dessert that echoes the local landscape.
Over the years, this dessert has evolved, witnessing variations and adaptations across the world. Its appeal lies in its photogenic presentation and harmonious flavor balance, making it a beloved treat internationally. The roll cake format presents a more approachable iteration, maintaining the traditional flavor while offering a unique visual twist.
This cake has become a symbol of celebration, embraced worldwide in various cultural events and celebrations. Its adaptability and the allure of its flavors make it a staple in many households, proving its timeless appeal.
Regional variations can be found where local influences add unique twists. Some might infuse the cake with local spirits, while others play with the fruit layer by incorporating native, seasonal berries, demonstrating its culinary flexibility.
Ingredient Deep Dive
Cherries hold a significant place in many culinary traditions, particularly within European cuisine. Known for their vibrant hue and juicy texture, cherries are a cherished fruit, adding both visual and flavor contrast. Nutritionally, they are packed with antioxidants and vitamin C, supporting wellness and complimenting the dessert’s indulgence.
For the selection of cherries, consider their ripeness and firmness. Fresh, in-season cherries are ideal; tart cherries, in particular, balance the sweetness of chocolate and cream. Store cherries in a cool, dry place to maintain freshness, or chill them to extend shelf life.
Chocolate is another crucial component, offering a rich, robust base. The best chocolate is dark and slightly bittersweet, enhancing the dessert’s depth. When selecting chocolate, opt for high cocoa content, ideally above 60%, to maximize flavor. Store chocolate in a cool, dry place, ideally out of direct sunlight.
Common Mistakes to Avoid
Over mixing the batter: This can lead to a dense, tough sponge instead of a light, airy texture. Mix until just combined.
Incorrect oven temperature: Always preheat your oven to ensure even baking, preventing an undercooked or overcooked sponge.
Neglecting to grease and line pans: Properly preparing pans prevents sticking, facilitating easy rolling without breakage.
Uneven spreading of batter: Ensure the batter is spread in an even layer on the pan for uniform baking.
Rolling the sponge while it’s cold: Always roll the cake while warm to avoid cracking, using parchment paper to assist the roll.
Not chilling the cream sufficiently: Ensure the cream is cold before whipping for optimal volume and stability.
Filling roll too generously: Excess filling can squeeze out while rolling, compromising presentation and stability.
Storing improperly: Keep the roll in an airtight container in the refrigerator to maintain freshness and prevent drying out.
Essential Techniques
Mastering the sponge is crucial for this roll cake. Achieving a light sponge requires gentle folding of ingredients to maintain volume. Look for a smooth, uniform batter that retains air bubbles, indicating readiness for baking.
Rolling the cake is another essential technique. Begin by rolling the sponge while warm using parchment. Rolling while warm helps set the cake’s shape without cracks. Allowing the cake to cool in its rolled form sets its structure, ensuring clean, sharp spirals when sliced.
Whipped cream requires patience and precision. Begin with chilled cream and equipment, whipping on medium speed until peaks form. Avoid over-whipping, which can cause the cream to stiffen excessively or turn into butter, losing its ideal fluffy texture.
Pro Tips for Perfect Black Forest Roll Cake
To perfect your Black Forest Roll Cake, use high-quality dark chocolate. The richness and complex flavors it provides elevate the entire dessert. Aim for at least 60% cocoa content for the best results.
When rolling the cake, utilize parchment paper to aid in even rolling. This helps prevent tearing and ensures a tidy, uniform roll with clean edges.
Ensure the cherries are well-drained if using preserved varieties. Excess moisture can cause the roll’s center to become soggy, affecting texture and structural integrity.
Experiment with different layers of cherries within the roll. A blend of whole and chopped cherries can provide varied texture and visual interest.
Incorporate a splash of kirsch, a traditional cherry brandy, to enhance the cherry flavor and authenticity of the dessert.
Store your roll cake in the refrigerator, preferably overnight, to allow the flavors to meld and the texture to set, delivering a more cohesive flavor experience.
Variations and Adaptations
The Black Forest Roll Cake can embrace regional variations. For an American twist, incorporate a cream cheese layer for distinct tanginess that complements the cherries.
For a seasonal adaptation, strawberries or raspberries can replace cherries during winter months, offering complementary notes to the chocolate.
Dietary modifications are possible; a gluten-free sponge can be achieved using almond flour or a gluten-free baking blend, maintaining texture without gluten.
For those focusing on flavor, infuse the whipped cream with subtle vanilla or almond extracts. For added depth, sprinkle a bit of cinnamon into the chocolate batter.
Texture can be diversified by adding finely chopped nuts between layers, providing a delightful crunch against the soft cream and sponge.
Modern presentation might include cutting the roll into bite-sized pieces for an elegant buffet, using a stabilized whipped cream to assist in maintaining clean cuts.
Serving and Presentation Guide
Plating a Black Forest Roll Cake is a chance to showcase its beauty. Lay slices flat or prop them standing to highlight the swirling layers.
For garnishing, fresh cherries atop whipped cream dollops provide a refreshing contrast. Chocolate shavings add elegance and additional chocolate aroma.
Traditional accompaniments such as a dollop of extra whipped cream or a scoop of vanilla ice cream add richness and complement the cake’s flavors.
Modern serving suggestions include a dusting of icing sugar before serving for a winter-themed effect or a drizzle of cherry syrup for added sweetness.
Consider serving the cake chilled, which enhances the creamy texture and stabilizes the whipped cream layers.
Portion control is simple with precise cuts, keeping slices adequate yet restrained, ensuring enjoyment without overindulgence.
Wine and Beverage Pairing
For wine pairings, consider a robust body red wine such as Pinot Noir, which complements the cherry and chocolate elements in the dessert.
Non-alcoholic alternatives include cherry or raspberry sparkling water, providing brightness and effervescence without overshadowing the roll’s flavors.
Coffee or strong black tea can pair beautifully, the bitterness aligning with chocolate while the warmth complements the cake’s chill.
Ensure served beverages are chilled for contrast, yet not too cold to dull flavors. Serve in narrow wine glasses or elegant tumblers for an elevated experience.
Storage and Shelf Life
Store the Black Forest Roll Cake in an airtight container within the refrigerator. Its cool environment helps preserve the sponge’s moisture and cream’s freshness.
Aim to consume within 3-4 days to ensure peak taste and texture. Prolonged storage past this period may affect flavor integrity.
Signs of spoilage include off smells, significant moisture loss with a dry texture, or unusual coloring, indicating it’s time to discard.
If planning to freeze portions, wrap them tightly in plastic wrap, followed by aluminum foil to prevent freezer burn. Thaw overnight in the fridge for best results.
When reheating for a warm serving option, use a microwave gently on low power to avoid melted cream and ensure even heat distribution.
Make Ahead Strategies
Plan your timeline around the roll’s resting period. Assembled a day prior allows the roll to sit overnight in the refrigerator, enhancing flavors.
Store components separately between steps; sponge rolled but unfilled, cream in refrigeration, and cherries in a sealed container to maintain freshness.
Assess quality impact with each step, ensuring cream holds its shape and sponge retains softness without becoming soggy from fillings.
When assembling, spread cream evenly and align cherries down the center to maintain a balanced roll. Allow the assembled roll to chill before slicing for clean, precise cuts.
Introduce fresh elements during serving; additional fresh cherries or chocolate shavings enhance presentation and flavor.
Scaling Instructions
When halving the Black Forest Roll Cake recipe, reduce ingredient measures proportionately except for baking time, which remains similar. Use a smaller pan or divide batter evenly.
To double or triple the recipe, maintain proportions and opt for multiple pans rather than larger single pans, ensuring uniform baking.
Equipment adjustments might require extra pans or spatulas to handle the increased quantities, ensuring efficiency.
Adjust timing estimates slightly for larger batches, accounting for longer cooling durations if preparing multiple rolls simultaneously.
Nutritional Deep Dive
The Black Forest Roll Cake offers a balanced macronutrient profile, with carbohydrates from the sponge, fats from cream, and minimal proteins from eggs.
Micronutrients include vitamin C from cherries and antioxidants from chocolate, contributing to overall wellness.
Portion considerations are vital; small, controlled slices maintain nutritional benefits without excessive sugar or calorie intake.
For those focused on weight management, a single slice as part of a varied diet ensures balance without sacrificing enjoyment.
Dietary Adaptations
For a gluten-free adaptation, substitute traditional flour with a gluten-free blend, ensuring similar texture without gluten.
Dairy-free approaches utilize coconut cream or almond-based alternatives, maintaining creamy texture without dairy allergens.
Vegan suitability requires a combination of non-dairy cream and egg alternatives such as aquafaba or flaxseed for whipping.
Low-carb and keto adjustments can incorporate almond flour and sugar alternatives, such as erythritol, providing a lower glycemic impact.
Other adaptations, like Low-FODMAP, focus on using lactose-free cream and cherry substitutes to align with dietary restrictions.
Troubleshooting Guide
Texture issues arise from overbaking; ensure your oven is properly calibrated and cakes are watched closely near end times to avoid dryness.
Flavor balance requires careful cherry integration; uneven distribution can lead to overpowering or lackluster flavors. Tasting as you prepare ensures adjustments to sweetness and tartness.
Temperature problems often relate to cream whipping; ensure cream is thoroughly chilled before whipping to achieve desired consistency.
Equipment challenges like improper pan sizes affect baking duration and evenness; opt for recommended dimensions and check mid-bake.
Ingredient substitutions can alter outcomes; when substituting, choose equivalents noted for success, minding flavor and consistency changes.
Timing concerns lead to structural flaws; allowing the sponge ample cooling time before filling prevents melting or separation issues.
Recipe Success Stories
Readers rave about their successful adaptations of the Black Forest Roll Cake. One popular modification includes swapping cherries for other berries, discovering delightful new flavor combinations.
Community feedback highlights the cake’s consistent applause at gatherings, often sharing stories of hosts celebrated for their baking achievements.
Photography tips focus on capturing the cake’s swirls and cherries, using natural light to highlight colors and textures.
Adaptations like adding a subtle liquor imbibement receive positive acclaim, with readers experimenting and sharing their success stories.
Frequently Asked Questions
Can I use frozen cherries for this recipe?
Yes, you can use frozen cherries if fresh ones aren’t available. Thaw them before use, and ensure to drain excess liquid to prevent sogginess.
How do I prevent the cake from cracking while rolling?
Rolling the sponge cake while it is still warm is key to preventing cracks. Using a damp towel can help start the rolling process smoothly.
Can I make this recipe ahead of time?
Absolutely, the cake can be made a day in advance. In fact, allowing it to sit overnight in the fridge enhances the flavors and ensures it sets well.
What can I use if I don’t have kirsch?
You can use a cherry-flavored syrup or skip it entirely for a non-alcoholic version. An almond extract can also provide a complementary flavor profile.
What’s the best way to store leftovers?
Store any leftover Black Forest Roll Cake in an airtight container in the refrigerator. Eat within three days for the best taste and texture.
Why is my sponge roll sticky?
A sticky roll typically means moisture hasn’t dissipated properly. Ensure your sponge is cooled sufficiently before rolling and wrapping.
Is there a substitute for whipped cream?
Coconut cream is an excellent substitute, especially if you want a dairy-free version while maintaining a similar texture and consistency.
How do I achieve well-defined swirls?
Evenly spreading the cream and using a steady hand while rolling make for defined swirls. Chilling also helps the structure hold firmly.
Can sugar substitutes be used?
Yes, sugar substitutes like erythritol work well for those on low-carb diets. Adjust the amount according to the sweetness preference.
What if I don’t have a jelly roll pan?
A standard baking sheet can work as a substitute, ensuring similar size and edge height for even baking.
Can I add nuts to the roll?
Yes, incorporating chopped nuts like almonds or hazelnuts can add texture and complexity, either within the roll or as garnish.
Additional Resources
Explore related recipes that complement your Black Forest Roll Cake experience, such as traditional German cakes and fruity desserts that showcase similar flavor profiles.
Technique guides are invaluable; they offer step-by-step assistance in perfecting your sponge texture and mastering the critical rolling technique.
Ingredient information benefits those curious about the origins and substitutions, demystifying how each component contributes to the final dessert.
Equipment recommendations encompass tools that enhance baking ease, from sturdy pans to reliable mixers, emphasizing quality baking practices.
Seasonal variations provide insight into adapting the roll for when specific fruits are unavailable, encouraging creativity in flavor incorporation.
Join the Conversation
Share your Black Forest Roll Cake success on social media, inspiring bakers with your creative takes and modifications. Use the hashtag #BlackForestRoll to connect with fellow enthusiasts.
Photography tips focus on capturing the cake’s allure; utilize natural lighting and close-ups to accentuate the decadent spirals and contrasts.
Leave a recipe review to inspire others; feedback is valuable for those contemplating their next kitchen endeavor, encouraging more people to try their hand at this cake.
Engage with our community by participating in discussions about variations; suggest new flavor combinations or presentation ideas.
Have fun experimenting with the recipe and don’t shy away from trying new variations. Your insights could become the next reader-favorite adaptation!
The Recipe
Black Forest Roll Cake
Serves: 8
Prep Time: 30 mins
Cook Time: 15 mins
Total Time: 45 mins
Kitchen Equipment Needed
Jelly roll pan
Mixing bowls
Whisk or electric mixer
Parchment paper
Offset spatula
Wire rack
Ingredients
6 large eggs, separated
1 cup granulated sugar, divided
1/2 cup all-purpose flour
1/4 cup cocoa powder
1 teaspoon vanilla extract
1 teaspoon baking powder
2 cups heavy cream
1 tablespoon powdered sugar
1 cup fresh or canned cherries, pitted and chopped
1 tablespoon kirsch (optional)
Chocolate shavings and whole cherries for garnish
Directions
Preheat your oven to 375°F (190°C). Line a jelly roll pan with parchment paper, extending past the edges for easy cake removal.
In a bowl, whisk egg yolks with half the sugar until thick and pale. Stir in vanilla extract.
In another bowl, beat the egg whites until soft peaks form. Gradually add remaining sugar, beating until stiff and glossy.
Sift flour, cocoa, and baking powder together. Gently fold the flour mixture into the yolks, followed by the whipped whites, ensuring not to deflate the batter.
Spread the batter evenly in the prepped pan. Bake for 12-15 minutes until the cake springs back when touched lightly.
While the cake bakes, whip the cream with powdered sugar until it forms stiff peaks. Fold in the kirsch, if using.
Once baked, invert the cake onto a clean towel dusted with powdered sugar. Peel away parchment and gently roll the cake with the towel. Let it cool in this shape.
Unroll the cooled cake carefully and spread whipped cream over the surface, leaving a small border. Sprinkle chopped cherries evenly on top.
Re-roll the cake, enclosing the cherries and cream, and transfer it seam side down onto a platter. Chill for at least an hour.
Slice and serve, garnished with chocolate shavings and extra cherries.
Recipe Notes
For added flair, drizzle cherry syrup over the roll before serving.
Substitute cherries with berries of choice for seasonal adaptations.
Ensure the cream is well chilled for optimal whipping volume and stability.
Discover the Irresistible Charm of Southern Pecan Bread Recipe
Southern Pecan Bread: A Taste of Southern Comfort
⚖️
Difficulty
Easy
⏲️
Prep Time
15 mins
🕒
Cook Time
50 mins
⏱️
Total Time
65 mins
🍽️
Servings
8
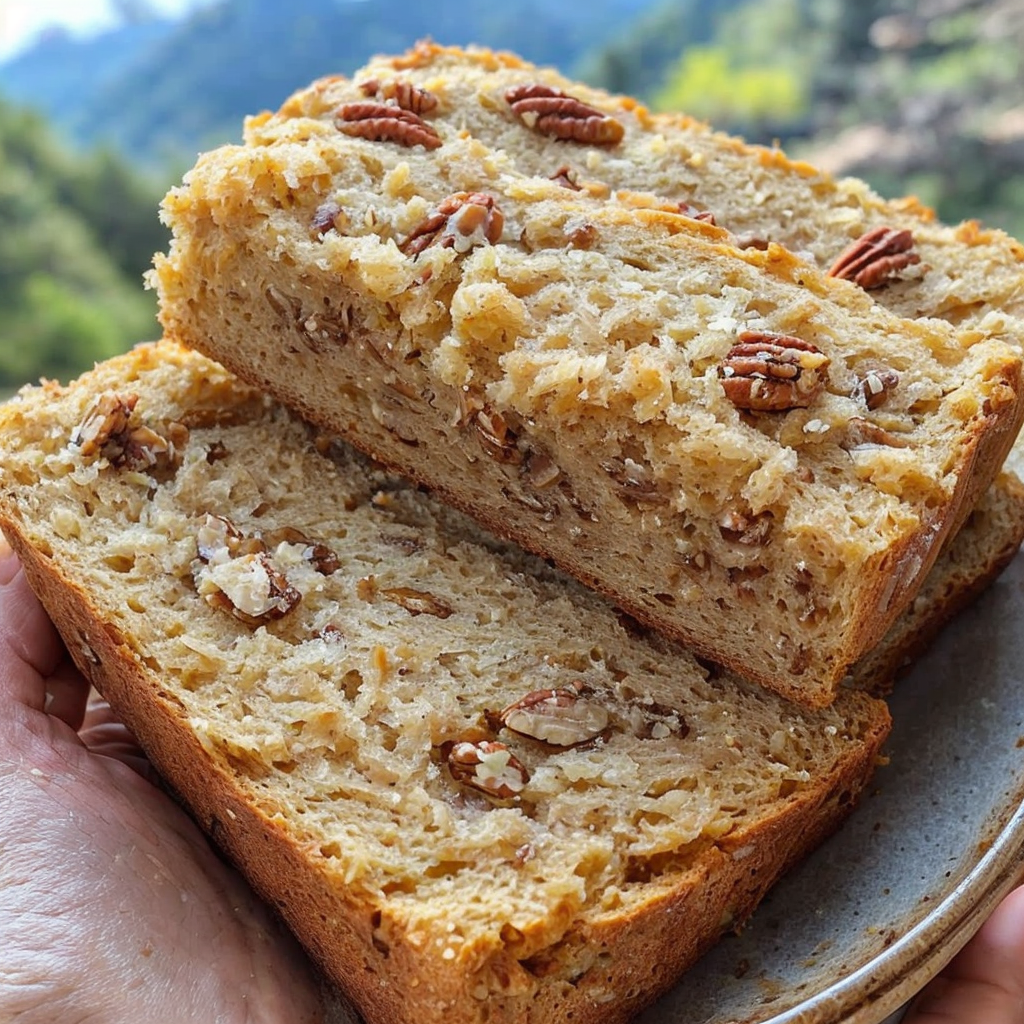
Indulge in the comforting and nutty flavors of Southern Pecan Bread, a classic recipe that embodies the rich culinary traditions of the American South. This delightful bread is packed with toasted pecans for a satisfying crunch and sweetened with a hint of maple syrup, making it a perfect treat for breakfast or an afternoon snack. With its warm, inviting aroma and tender crumb, Southern Pecan Bread captures the essence of southern hospitality and home-cooked goodness.
Quick Recipe Highlights
Flavor Profile: Nutty and sweet, with subtle notes of vanilla and maple creating a harmonious blend that tantalizes the taste buds.
Texture: Crunchy pecans are embedded in a smooth, moist bread base, providing a delightful contrast in every bite.
Aroma: The bread exudes a warm and inviting fragrance of toasted nuts and sweet vanilla, filling the air with the spirit of southern cooking.
Visual Appeal: Golden brown crust with speckled pecan pieces give this bread a rustic and homey look that draws the eyes.
Skill Level Needed: Simple mixing and baking techniques make this recipe accessible for bakers of all levels.
Special Equipment: A standard loaf pan, mixing bowls, and a spatula are all you need to create this delicious bread.
Recipe Overview
Difficulty Level: This recipe is categorized as easy due to its straightforward steps and minimal preparation.
Category: This Southern Pecan Bread fits into both the breakfast and snack categories, perfect for any time of day.
Cuisine: Rooted in Southern American cuisine, this bread highlights regional ingredients and traditional baking methods.
Cost: The primary ingredients are pecans, which can be moderate in cost, but overall, the recipe remains budget-friendly.
Season: While enjoyable year-round, the pecan nut flavors are particularly appealing in the autumn months.
Occasion: Ideal for family gatherings, potlucks, or as a thoughtful homemade gift during holidays.
Why You’ll Love This Recipe
Experience unmatched taste and texture with Southern Pecan Bread. The blend of sweet, nutty flavors provides a delightful treat that’s hard to resist. The moist crumb and crunchy pecans offer a textural delight in every bite, making it a favorite among all ages. The ease of preparation means you can have fresh bread without the wait—a perfect weekend project or midweek pick-me-up. Nutritionally, the pecans offer healthy fats and proteins, adding to the bread’s value as a nutritious snack.
Whether you’re making it for brunch with friends or as an everyday treat for your family, the social aspect of sharing this bread enhances its charm. A homemade loaf instantly raises the level of enjoyment, making everyone feel cherished. Moreover, the affordable ingredients and simplicity make this recipe accessible to everyone, saving time and money without sacrificing taste.
Historical Background and Cultural Significance
Southern Pecan Bread has deep roots in the culinary history of the southern United States. Pecans are native to the region, and their use in baking showcases the resourceful cooking of early settlers. Served at family gatherings and festive celebrations, pecan bread reflects the region’s emphasis on hospitality and communal dining.
Over time, the recipe evolved to incorporate modern baking techniques while retaining its original flavors. Variations of pecan bread can be found in cookbooks across the South, with each family adding its own twist. This recipe honors tradition while welcoming new approaches, making it a beloved staple in southern kitchens.
Ingredient Deep Dive
Pecans are the star of Southern Pecan Bread, offering a buttery sweetness and a rich, nutty flavor. Historically, pecans have been a valuable crop in the south, celebrated for their culinary versatility and nutritional benefits, including heart-healthy fats and essential minerals. When selecting pecans, look for fresh, whole nuts with a uniform color and sweet aroma. Store them in an airtight container in a cool, dry place to maintain freshness.
Maple syrup adds a natural sweetness and depth to the bread’s flavor profile. Its amber tones enhance the nutty taste of the pecans. Choose pure maple syrup for its superior flavor and health benefits, including antioxidants and minerals. Be sure to store maple syrup in the fridge after opening to keep it fresh and extend shelf life.
Common Mistakes to Avoid
Overmixing the batter: This can result in a dense, tough bread. Mix just until the ingredients are combined.
Using stale pecans: Fresh pecans are key for optimal flavor and texture. Be sure to use recently purchased nuts.
Incorrect pan size: Using the wrong size can affect baking time and texture. Stick with a standard loaf pan.
Skipping ingredient measurement: Precision is crucial in baking to achieve desired texture and flavor.
Substituting maple syrup with pancake syrup: This will alter the taste and sweetness—opt for pure syrup.
Ignoring oven temperature: Bake at the recommended temperature for consistent results.
Not toasting pecans: Toasted pecans have enhanced flavor, adding depth to the bread.
Allowing batter to sit: Bake immediately to avoid a flat, dense texture.
Overbaking: Keep an eye on the bread and test with a toothpick to ensure it stays moist.
Essential Techniques
Mixing ingredients correctly is crucial for Southern Pecan Bread. Begin by creaming the butter and sugar until light and fluffy, which helps incorporate air and makes the bread rise well. Gradually add eggs to maintain the mixture’s stability. When folding in pecans, be gentle to preserve their crunch. Avoid overmixing to prevent developing gluten in the flour, which can make the bread tough.
Bake the bread in a preheated oven, and use a toothpick for doneness; it should come out clean when inserted in the center. These techniques ensure a tender crumb and flavorful crust every time.
Pro Tips for Perfect Southern Pecan Bread
Use room temperature ingredients to help them blend seamlessly, enhancing the bread’s texture. Toast the pecans lightly before incorporating them; this brings out their natural oils and amplifies their nutty flavor. If you prefer a sweeter bread, add a touch more maple syrup, but balance it by reducing sugar slightly to prevent overpowering sweetness.
Experiment with adding spices like cinnamon or nutmeg for a warm twist. Line your loaf pan with parchment paper for easy removal and a clean presentation. Allow the bread to cool completely on a wire rack before slicing to prevent crumbling.
Variations and Adaptations
Southern Pecan Bread invites creativity. Explore regional variations by adding dried fruits like raisins or apricots for sweetness. Seasonally, incorporate pumpkin puree for a fall twist or swap pecans with walnuts for a different nut profile. For dietary needs, substitute almond flour for a gluten-free option or use coconut oil instead of butter for a dairy-free adaptation.
Enhance flavor by adding shredded coconut or chocolate chips. To modify texture, use buttermilk instead of regular milk to add tanginess and softness. Adjust presentation by creating mini loaves or muffins for on-the-go snacking or portion control.
Serving and Presentation Guide
Serve Southern Pecan Bread warm with a pat of butter or cream cheese for a simple yet elegant presentation. Slice thick for hearty servings, or cut thin for a light snack. Garnish with a sprinkle of powdered sugar or a few whole pecans on top for added appeal.
Offer alongside traditional accompaniments like fruit preserves or honey for added sweetness. For a modern touch, pair with a cheese board featuring soft brie or tangy chèvre. Maintain ideal temperature by warming slices before serving, especially if made ahead.
Wine and Beverage Pairing
This bread pairs beautifully with a light, fruity wine such as Riesling or a chilled Chardonnay, both enhancing the nutty flavors. Non-alcoholic alternatives include herbal teas or sparkling water with a slice of lemon for a refreshing contrast. For coffee lovers, serve with a robust, full-bodied brew to complement the bread’s sweetness.
Ensure beverages are served at appropriate temperatures—chilled wines or warm teas—to balance the bread’s offering. Pairing suggestions enhance the tasting experience, making it memorable and delightful.
Storage and Shelf Life
Store Southern Pecan Bread in an airtight container at room temperature for up to three days to maintain freshness. For longer storage, wrap slices in plastic and freeze for up to a month. Thaw at room temperature or reheat in a low oven before serving to revive texture and aroma.
Avoid refrigerating, as it may dry out the bread. Look for signs of spoilage such as mold or off-smell before consuming. Proper storage extends shelf life, keeping the bread delightful for days.
Make Ahead Strategies
Easily make Southern Pecan Bread ahead by preparing the batter up to a day in advance. Store covered in the refrigerator, then bake fresh when needed. This allows the flavors to meld even further, enhancing the delicious taste. Before baking, bring the batter to room temperature.
For steps that allow same-day preparation, bake the bread, cool completely, slice, and store as recommended. Reheat slightly before serving to awaken its rich flavors, maintaining the freshness of a just-baked loaf.
Scaling Instructions
To halve the Southern Pecan Bread recipe, divide all ingredient quantities by two. This is ideal for smaller households or less consumption. Conversely, double or triple the recipe to accommodate larger gatherings or meal prepping. Use multiple loaf pans and stagger baking times to ensure even cooking.
Adjust equipment accordingly—larger bowls for mixing or additional utensils to manage increased quantities. Anticipate minor timing modifications for larger loaves. Store extra bread using recommended methods to enjoy at another time.
Nutritional Deep Dive
A balance of carbs, fats, and proteins makes Southern Pecan Bread a wholesome snack or breakfast option. Pecans contribute healthy monounsaturated fats and a dose of protein, beneficial for heart health. Meanwhile, maple syrup provides a natural sugar alternative, packing antioxidants and minerals.
Portion control ensures balanced consumption, aligning with weight management goals. The bread’s nutritional profile supports well-being, with a nod towards indulgence without overindulgence, meeting dietary preferences without compromise.
Dietary Adaptations
To create a gluten-free Southern Pecan Bread, substitute all-purpose flour with a gluten-free baking mix or almond flour, adjusting liquid ratios as needed. For a dairy-free version, use coconut oil instead of butter and almond milk in lieu of regular milk.
To meet vegan requirements, replace eggs with flax eggs or applesauce, maintaining moisture and binding ingredients. Modify for a low-carb diet by using almond flour and sugar alternatives like stevia or erythritol, creating a delicious alternative for various dietary needs.
Troubleshooting Guide
If your Southern Pecan Bread is too dense, ensure ingredients are at room temperature for optimal blending and that you’re not overmixing the batter. Adjust oven temperature with a reliable thermometer to avoid uneven baking.
Counteract overly subtle flavors by adding a dash of spices like cinnamon for complexity. If nuts sink to the bottom, lightly coat them in flour before incorporating into the batter. When timing seems off, adjust based on your oven’s specific behavior using tried-and-true methods.
Recipe Success Stories
Many have shared their love for Southern Pecan Bread by adding personal twists, such as dried fruits or tweaking sweetness levels to suit their taste. Others have embraced adaptations for dietary needs, finding joy in gluten-free and vegan versions without trading away traditional flavors.
Readers appreciate our step-by-step guidance, which yields consistent results. Photography tips guide in capturing perfect shots, showcasing the bread’s golden crust and rich interior—a testament to its popularity and adaptability among diverse communities.
Frequently Asked Questions
Can I use other nuts besides pecans?
Yes, walnuts or almonds are great substitutes, though they may alter the flavor slightly.
How do I know if my pecans are fresh?
Fresh pecans should have a sweet aroma and not taste musty or rancid.
Can this bread be made in a bread machine?
While it’s designed for traditional baking, investigate specific bread machine settings for similar recipes.
What’s the best way to toast pecans?
Spread them on a baking sheet and toast at 350°F for 5-7 minutes until fragrant.
Can I freeze the batter?
It’s better to bake then freeze slices, which maintains texture better than freezing batter.
Is it possible to make this bread sugar-free?
Substitute sugar with erythritol or stevia while adjusting for sweetness preference.
What oils can replace butter?
Coconut oil is a great dairy-free option, providing a different yet pleasant taste.
How long will the bread last unrefrigerated?
It should remain fresh in an airtight container for up to three days.
Will the bread rise without baking soda?
Baking soda is crucial for leavening; without it, your bread may be denser.
What can I do if my bread is too dry?
Ensure accurate ingredient measurement and avoid overbaking to prevent dryness.
Additional Resources
Check out our related recipes for more southern classics, like Pecan Pie and Sweet Potato Bread, to further expand your culinary repertoire. Discover technique guides for toasting nuts and baking essentials to refine your skills.
Explore detailed ingredient articles that cover everything from types of flour to syrup options to broaden your knowledge base. Our seasonal variations help keep your kitchen dynamic and inspired, aligning with fresh produce and festive flavors.
Join the Conversation
We invite you to join our vibrant online community, sharing your Southern Pecan Bread experiences and modifications on social media. Show off your photographic creativity with bread snaps, whilst exchanging helpful tips. We value your reviews and look forward to seeing your inspired variations, fostering an enriching dialogue.
The Recipe
Southern Pecan Bread
Serves: 8
Prep Time: 15 mins
Cook Time: 50 mins
Total Time: 65 mins
Kitchen Equipment Needed
Standard loaf pan
Mixing bowls
Spatula
Wire rack
Measuring cups and spoons
Ingredients
1 cup chopped pecans
1/2 cup butter, softened
1 cup granulated sugar
2 large eggs
1/2 cup milk
1 tsp vanilla extract
1/4 cup maple syrup
1 3/4 cups all-purpose flour
1 tsp baking soda
1/2 tsp salt
Directions
Preheat your oven to 350°F (175°C) and grease a standard loaf pan.
In a medium bowl, cream together the butter and sugar until light and fluffy. Add eggs one at a time, beating well after each addition.
Mix in the milk, vanilla extract, and maple syrup until smoothly combined.
In another bowl, whisk together flour, baking soda, and salt. Gradually add the dry ingredients to the wet mixture.
Gently fold in the chopped pecans until evenly distributed.
Pour the batter into the prepared loaf pan and bake for 50 minutes or until a toothpick inserted into the center comes out clean.
Let the bread cool in the pan for 10 minutes, then transfer to a wire rack to cool completely.
Recipe Notes
For a richer flavor, add a teaspoon of cinnamon or nutmeg to the dry ingredients.
If using salted butter, reduce the added salt by half.
Feel free to toast the pecans for enhanced flavor and texture.
Delicious Feta-Cilantro Roasted Beets and Sweet Potatoes Recipe
Feta-Cilantro Roasted Beets and Sweet Potatoes: A Flavorful Medley
⚖️
Difficulty
Easy
⏲️
Prep Time
15 mins
🕒
Cook Time
35 mins
⏱️
Total Time
50 mins
🍽️
Servings
4
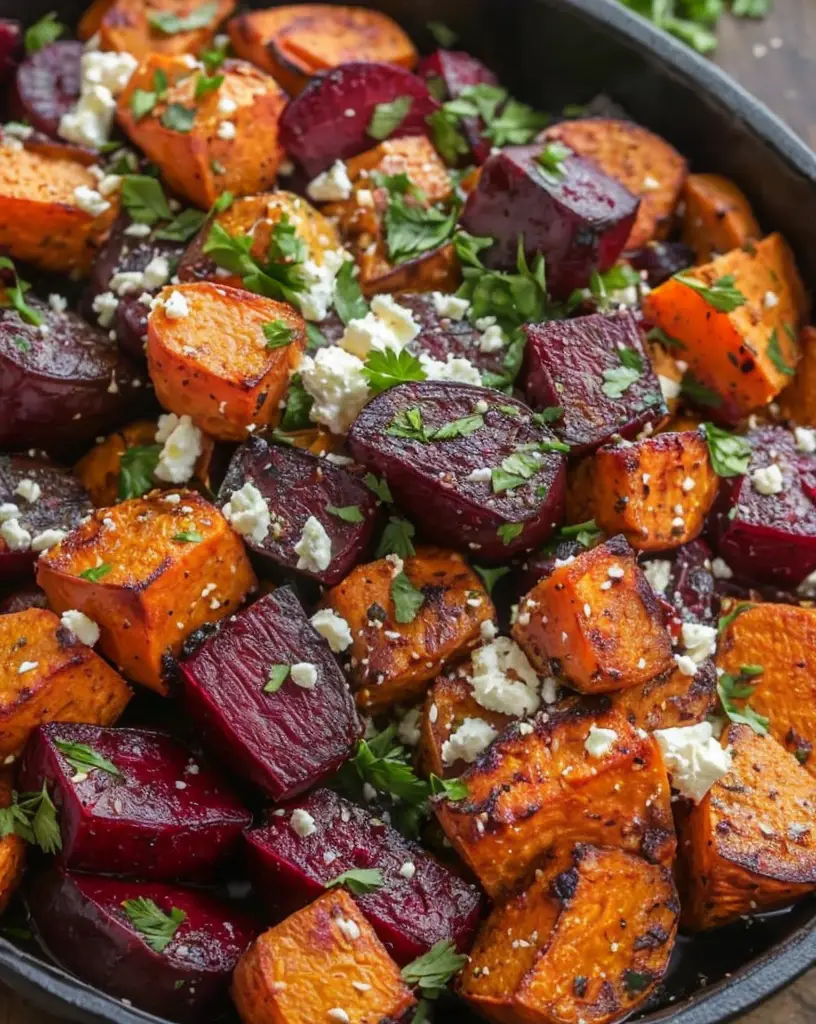
Crisp autumn air calls for a comforting dish like the Feta-Cilantro Roasted Beets and Sweet Potatoes. This vibrant recipe not only bursts with a spectrum of flavors but also celebrates the harvest season, making it perfect for a cozy dinner or a holiday gathering. The earthy sweetness of the roasted vegetables harmonizes with the salty tang of feta cheese, while fresh cilantro adds a bright finish.
The essence of this dish lies in its simplicity and rich flavors that surprise and delight. Sweet potatoes bring their characteristic gentle sweetness, while beets add a savory depth. The tanginess of feta complements the roasted goodness, and a sprinkle of cilantro introduces a herbal aroma that ties it all together elegantly.
No matter the occasion, this roasted vegetables recipe serves as a testament to how simple ingredients can create a memorable culinary experience. With its easy preparation and gourmet taste, it’s a sure hit in any kitchen.
Quick Recipe Highlights
Flavor Profile: A delightful balance of sweet, savory, and tangy flavors from roasted vegetables contrasted with creamy feta and fresh cilantro.
Texture: Soft, tender sweet potatoes and beets with creamy bits of feta cheese and the crisp freshness of cilantro.
Aroma: Earthy notes from roasting, complemented by the sharpness of feta and the bright herbal scent of cilantro.
Visual Appeal: A colorful presentation with deep reds and oranges of the vegetables, contrasted by the white of feta and green of cilantro.
Special Equipment: Just a baking sheet and cutting board necessary for preparation.
Recipe Overview
Difficulty Level: This recipe is categorized as easy due to its straightforward preparation and cooking methods that require minimal supervision.
Category: Ideal for a main or side dish at dinner, but can also be featured at brunches and potlucks.
Cuisine: While it nods to Mediterranean influences with feta and cilantro, the dish seamlessly fits into modern American cuisine.
Cost: Approximately $10-$15, making it an economical choice for a family meal or entertaining guests.
Season: Best enjoyed in fall and winter, when sweet potatoes and beets are in peak season.
Occasion: Suitable for everyday meals or special occasions like Thanksgiving and holiday gatherings.
Why You’ll Love This Recipe
The Feta-Cilantro Roasted Beets and Sweet Potatoes dish provides an indulgent taste that marries well with a variety of other dishes. The sweetness of roasted root veggies pairs incredibly with the saltiness of feta cheese, creating a balanced symphony of flavors in every mouthful. These satisfying and rich flavors will cater to your taste buds’ needs while keeping your meal nutritious.
When it comes to convenience, this recipe exceeds expectations. With only 15 minutes of prep time, the dish allows you more time to relax while the oven works its magic. All you need are basic kitchen tools, a baking sheet, and an oven. Once the sweet aroma fills your kitchen, you’ll know comfort food is within reach without any hassle.
Nutritionally speaking, this dish is a powerhouse. Beets are rich in antioxidants and fiber, while sweet potatoes provide beta-carotene, vitamin C, and potassium. Feta adds protein and calcium, making this a complete dish with a wholesome touch. It’s a delightful way to incorporate more nutritious vegetables into your diet.
Hosting guests and keen on impressing? This dish not only tastes divine but is a visual treat. The vibrant colors create a feast for the eyes, and the dish’s unique combination of flavors can be a delightful surprise for friends and family alike. Besides, its adaptability allows it to complement a vast range of meals, upgrading your dinner party effortlessly.
As for cost-effectiveness, the recipe’s affordability and accessibility to the ingredients make it a staple for budget-conscious cooks. The ingredients are common and readily available at most grocery stores, allowing anyone to create a gourmet experience without breaking the bank.
Historical Background and Cultural Significance
Roasted vegetables have long been a staple in many traditional diets worldwide. The method of roasting root vegetables such as beets and sweet potatoes likely finds its origin in ancient times when open fire cooking was common. These vegetables have been favored for their ability to be easily preserved and their rich nutrient content, making them a reliable food source through the seasons.
Beets have historical significance across various cultures, particularly in Eastern Europe, where they were a critical component of winter diets, giving rise to iconic dishes such as borscht. Similarly, sweet potatoes have deep roots in Southern American cuisine and are heralded for their health benefits.
With the globalization of food, this dish has evolved to merge different culinary practices, such as the Mediterranean inclusion of feta and cilantro, which add a refreshing twist to classic roasted vegetables. This recipe stands as a fusion, representing the melding of various cultural influences into one coherent dish.
Across regions, variations of roasted root vegetables can be found, each incorporating local ingredients to reflect the unique flavors and preferences of different communities. Yet, the core appeal remains consistent—a reliance on natural sweetness and deep, earthy flavors.
Ingredient Deep Dive
Sweet Potatoes have been a dietary staple in many cultures due to their nutrient density and versatility. Rich in beta-carotene, vitamin C, and potassium, sweet potatoes offer significant health benefits, including supporting immune function and promoting eye health. When selecting sweet potatoes, opt for those with firm skin and no blemishes. Store in a cool, dry place to maintain freshness. They can also be substituted with butternut squash for a similar texture and sweetness.
Beets, with their vibrant color and earthy taste, have earned a place in both culinary and medicinal contexts throughout history. They are packed with essential nutrients like folate, manganese, and iron. Choose beets that are firm with smooth skin. Store them in the refrigerator for up to two weeks. If you prefer a slightly less earthy flavor, carrots can serve as a substitute, providing a sweeter taste.
Feta cheese, beloved in Mediterranean cuisine, adds a salty tang and creamy texture to dishes. It is an excellent source of calcium and protein. When shopping, look for feta that is stored in brine to maintain its moisture and flavor. It can be kept in the fridge for several weeks. A suitable substitute would be goat cheese, sharing a similar flavor profile and consistency.
Fresh cilantro brings a refreshing and aromatic quality to the dish. Known for its bright flavor and unique aroma, cilantro is a staple in many global cuisines. It offers vitamin K and antioxidants. Store in the refrigerator and use within a week for maximum freshness. If cilantro isn’t to your taste, try parsley as an alternative to keep the herbaceous note alive.
Common Mistakes to Avoid
Skipping the peeling process for beets and sweet potatoes. Though the skin is edible, it can impact the texture negatively if not removed thoroughly.
Underestimating the importance of even slicing, as uneven pieces will cook at different rates, leading to inconsistent texture across the dish.
Not seasoning adequately. It’s essential to add sufficient salt and pepper to elevate the dish’s natural flavors, ensuring each bite is well-seasoned.
Overcooking the vegetables, which can lead to mushiness rather than a desirable tender-crisp texture. Always keep an eye on cooking times.
Ignoring the freshness of cilantro. Using wilted or past-due cilantro can impart a bad taste and detract from the dish’s overall flavor.
Using low-quality feta cheese. Opt for authentic, high-quality feta to ensure a creamy texture and robust flavor.
Not roasting at a high enough temperature. This can prevent caramelization, leading to dull flavors and textures.
Overcrowding the baking sheet, which causes steaming rather than roasting. Use an appropriately sized tray to allow air circulation around the vegetables.
Storing leftovers incorrectly. Ensure an airtight container is used to maintain the dish’s integrity over time.
Freezing leftovers. The texture of roasted vegetables doesn’t withstand freezing well, leading to an undesirable consistency upon thawing.
Essential Techniques
Achieving the perfect roast on beets and sweet potatoes requires understanding how to caramelize them properly. The key is to use a high oven temperature, around 400°F, which enables the natural sugars in the vegetables to caramelize, resulting in deep, rich flavors and golden-brown edges. Ensure your baking sheet is not overcrowded to allow even heating.
Mastering the art of seasoning is crucial in this dish. Start with a generous sprinkle of salt and black pepper, which enhances flavor profiles and balances the sweetness of the vegetables. Introducing flavors like smoked paprika or cumin can provide an additional depth and complexity, ensuring each bite is bursting with taste.
To ensure the vegetables cook evenly, cut them into uniform pieces. This uniformity ensures the sweet potatoes and beets cook at the same rate, preventing some pieces from becoming mushy while others remain undercooked. Pay attention to visual cues like browned edges and tender interiors to confirm they are perfectly roasted.
Pro Tips for Perfect Feta-Cilantro Roasted Beets and Sweet Potatoes
Always preheat your oven fully before placing the vegetables to ensure an even cook from the start. A hot oven jump-starts the roasting process, achieving the desired caramelization more swiftly.
Incorporate garlic cloves into the roasting tray for an added layer of flavor. The roasted garlic mellows out and adds a sweet aroma that complements the other ingredients superbly.
Toss your vegetables halfway through the cooking process. This ensures all sides are exposed to the heat, promoting even browning and preventing any pieces from sticking.
For an added touch, finish the dish with a squeeze of lemon juice right before serving. The acidity will cut through the richness of feta, enhancing the dish’s vibrancy and freshness.
If you want to make the dish ahead of time, roast the vegetables and store them separately. Before serving, reheat and add fresh cilantro and feta to revive their flavors.
Consider experimenting with spices such as cumin or coriander for a delightful twist on the classic dish. These spices add intriguing layers that can elevate your meal significantly.
Variations and Adaptations
In certain regions, similar dishes utilize locally available root vegetables, such as parsnips or rutabagas, to add their distinctive flavors to the mix. You can adapt this recipe to reflect local ingredients for a unique twist on the classic.
For a spring adaptation, swap out the sweet potatoes for fresh asparagus and carrots, which will provide a lighter taste suitable for the season. Their fresh, subtle flavors contrast beautifully with the other elements of the dish.
To cater to different dietary requirements, consider using a vegan cheese instead of feta. The vegan alternative will provide a similar creamy texture and saltiness, maintaining the dish’s core taste appeal while reducing animal-based ingredients.
If you’re looking to introduce new flavors, experiment with different herbs such as dill or basil. Each herb will impart a unique taste profile, allowing you to customize the dish to fit your flavor preferences.
Texture modifications can include incorporating roasted nuts like pine nuts or walnuts, adding a crunch to each bite. The nuts provide a delightful change in texture, enriching the overall mouthfeel.
Presentation can be adapted by deconstructing the dish, serving roasted vegetables on a bed of greens, topped with crumbled feta and fresh herbs. This enhances the visual appeal and introduces new layers of taste with each bite.
Serving and Presentation Guide
To make the dish stand out, consider using a wide, shallow dish that allows the vibrant colors of the roasted vegetables to be fully appreciated at the table. A white serving platter will emphasize the colors, making the meal visually enticing.
For garnishing, select a variety of herbs like parsley or chives alongside cilantro to enhance the dish’s freshness and visual interest. A sprinkling of toasted seeds or pine nuts can provide added crunch and contrast.
While traditional accompaniments include grains or bread, modern serving suggestions involve placing the roasted vegetables atop a bed of arugula or spinach, adding nutritional value and contrasting color.
The dish is best served warm, allowing the roasted flavors to shine. Timing is essential, so aim to serve directly after garnishing for optimal flavor.
Control portions by serving the dish family-style, allowing guests to select their desired amount. This method is both informal and interactive, enhancing the dining experience for everyone.
Wine and Beverage Pairing
A classic pairing for this dish is a crisp white wine, such as Sauvignon Blanc or Chardonnay, which complements the tangy feta and earthy sweet potatoes while enhancing the cilantro’s freshness.
For a non-alcoholic option, consider serving a sparkling citrus water infused with lime or lemon, complementing the dish’s freshness and cleansing the palate between bites.
If you’re a coffee enthusiast, a medium-bodied coffee blend pairs surprisingly well, helping emphasize the dish’s sweetness and roasted nuances.
When serving beverages with this dish, ensure they’re chilled for refreshing contrast that brings out the best of each component’s flavors. Serve in clear glasses to enhance visual appeal.
Storage and Shelf Life
To extend the flavors’ freshness, store leftovers in an airtight container in the refrigerator, where they’ll last for about three days. The key is retaining moisture while preventing drying out, which is why airtight storage is essential.
Temperature control is crucial; ensure that leftovers are chilled soon after serving to maintain quality and avoid spoilage. Be cautious of temperature swings, as these can degrade the vegetables’ texture.
Use sturdy glass containers for storage, as they preserve flavors and textures much better than plastics, which can sometimes impart unwanted tastes.
Pay attention to signs of spoilage, like off smells or a mushy texture. Good roasted vegetables maintain a slight firmness even as leftovers.
For reheating, avoid microwaves; instead, use an oven or stovetop to bring back the original texture and crispiness without drying the dish out.
Freezing is not recommended due to the altered texture upon thawing, which can be unappealing. It’s best to enjoy this dish fresh or stored in the fridge within a few days.
Make Ahead Strategies
To streamline your cooking process, you can slice and prepare the vegetables in advance, storing them in the fridge until ready to roast. this allows for quick assembly day-of, minimizing kitchen stress.
Between preparation steps, ensure that the vegetable slices are stored in a cool place, sealed, to retain their moisture and freshness until needed.
The dish’s quality holds well for a couple of days if prepared in stages, allowing you to roast on the day for utmost freshness while prepping at your leisure beforehand.
For easy assembly, have your garnishes and other components prepped beforehand, which will allow for quick finishing touches when serving.
Reheating is simple, but remember to maintain the roast’s original integrity by utilizing an oven rather than the microwave to preserve texture and flavor.
If you’ve included fresh elements like herbs, consider adding these just before serving to maintain their bright flavor and visual appeal.
Scaling Instructions
Halving the recipe is straightforward. Simply reduce the ingredient amounts by half and use a smaller baking sheet to ensure proper roasting. Pay attention to cooking time, as smaller amounts can cook faster.
When doubling or tripling the recipe, ensure oven capacity can handle the increased volume without overcrowding. Utilize multiple trays if necessary and adjust cooking time to accommodate more vegetables.
With increased recipe size, consider the tools and equipment needed. Larger bowls for mixing and a sufficient number of trays are essential.
Timing adjustments may be needed when scaling the recipe, with larger batches potentially taking longer to achieve the perfect roast.
For larger quantities, proper storage becomes crucial if not serving immediately. Leftovers should be kept in multiple containers to maintain freshness and allow for easy reheating.
Nutritional Deep Dive
The macronutrient breakdown of this dish provides a balanced approach; with carbohydrates mainly from sweet potatoes, proteins from feta cheese, and healthy fats from olive oil, it forms a well-rounded meal.
Micronutrient highlights include strong contributions from beta-carotene, vitamin C, vitamin K, and folate, making the dish beneficial for boosting immunity and promoting overall health.
With a wealth of antioxidants and fiber, the recipe supports a healthy digestive system and may contribute to reduced inflammation within the body.
For those pursuing specific dietary considerations, be aware of contents like dairy from feta, which can be substituted if needed.
Portion sizes are critical when maintaining weight loss or management plans, as sweet potatoes have a high carbohydrate content despite their nutritional benefits.
Incorporating this meal as part of balanced diet orders it to be a fulfilling, nourishing choice without compromising taste or variety.
Troubleshooting Guide
For issues with texture, always consider the oven temperature and slicing consistency. Ensure both are optimized for even cooking and desired firmness.
To address flavor imbalance, adjust seasonings incrementally to identify the missing note, whether it’s salt for depth, lemon juice for brightness, or herbs for freshness.
If temperature problems occur, check your oven’s actual temperature with a thermometer to confirm accuracy. Adjust cooking times as necessary.
Equipment can occasionally pose challenges; oversized baking sheets overcrowd ovens. Choose appropriately sized cookware to maintain air circulation.
If substitutions are necessary, familiarize yourself with ingredient equivalencies to ensure similar results when alternates are employed.
Timing concerns can be mitigated by organizing prep and cooking steps for smooth progression through the recipe.
Recipe Success Stories
The feedback for this dish is overwhelmingly positive, as the harmonious blend of flavors resonates well with diverse palates. Cooks from various backgrounds have shared their successes, noting the unique elements that have made this dish a standout in their kitchens.
Variations in ingredient choices offer different regional undertones, with great success customizing herbs and spices to align with personal preferences, enhancing the dish without veering from its core appeal.
Readers have praised the dish for its adaptability, frequently incorporating seasonal twists or catering to dietary needs to great success, making it an indispensable recipe for any occasion.
Photography tips submitted by the community emphasize the beauty of this visually striking dish, noting how to best capture the bold colors using natural lighting and neutral backgrounds to highlight the stunning contrast of ingredients.
Frequently Asked Questions
Can I use a different type of cheese if I don’t have feta?
Yes, goat cheese or ricotta salata can be great substitutes for feta, offering similar salty and creamy qualities.
What can I do if I don’t like cilantro?
You can replace cilantro with parsley or basil for a different herbal note that still complements the dish.
Can I roast the vegetables in advance and serve them cold?
While roasted vegetables can be refrigerated and served cold, warming them slightly before serving is ideal to enhance the dish’s flavors.
How do I know when the vegetables are perfectly roasted?
Look for browning around the edges and a tender interior. Additionally, a fragrant aroma indicates that roasting is complete.
Is there a way to make the dish vegan-friendly?
Yes, replace the feta cheese with a plant-based alternative or simply omit it for a strictly vegan option.
What’s the best way to reheat leftovers?
Reheat in a preheated oven rather than a microwave to revive the texture and flavor of the roasted vegetables.
How can I use leftovers creatively?
Consider incorporating the roasted vegetables into a warm salad, adding them to a sandwich, or blending them into a soup to extend their use.
What are some alternative herbs to use?
Try using tarragon or chive for slightly different but equally vibrant flavors that enhance the overall taste profile.
Can I freeze this dish?
Freezing is not recommended, as texture changes from the process may negatively affect the dish.
What’s the recommended substitute for sweet potatoes?
Butternut squash or carrots can be used in place of sweet potatoes, providing a similar sweetness and texture.
Additional Resources
Explore related roasted vegetable recipes that expand on this dish’s themes. Options like garlic rosemary potatoes or honey-glazed carrots offer similar satisfaction.
Dive into technique guides, including the best practices for roasting different vegetable types, ensuring consistency across dishes for maximum flavor.
Discover ingredient information, exploring the health benefits, history, and usage of the various components in the recipe.
Find specific equipment recommendations that enhance efficiency in your kitchen and help achieve the perfect roast every time.
For seasonal variations, see how different growing seasons influence the availability and flavors of vegetables, ensuring sustainable consumption.
Join the Conversation
Share your take on this recipe via social media platforms, exchanging photos and feedback about variations or techniques you’ve tried.
Experiment with photography tips provided by the culinary community to showcase the vivid colors and textures of your creations.
Leave reviews and engage with fellow cooks who have tested this recipe, exchanging notes to improve and personalize it.
Become a part of the recipe community, contributing new adaptations or ways to serve, thus enriching the collective knowledge base of fellow enthusiasts.
The Recipe
Feta-Cilantro Roasted Beets and Sweet Potatoes
Serves: 4
Prep Time: 15 mins
Cook Time: 35 mins
Total Time: 50 mins
Kitchen Equipment Needed
Baking sheet
Cutting board
Chef’s knife
Mixing bowl
Measuring spoons
Ingredients
2 medium sweet potatoes, peeled and diced
3 medium beets, peeled and sliced
2 tbsp olive oil
1 tsp salt
1/2 tsp black pepper
1 cup crumbled feta cheese
1/4 cup chopped fresh cilantro
Directions
Preheat the oven to 400°F (200°C).
In a large mixing bowl, toss the diced sweet potatoes and sliced beets with olive oil, salt, and pepper until well coated.
Spread the vegetables evenly on a baking sheet, ensuring they aren’t overcrowded.
Roast in the preheated oven for 30-35 minutes, turning them halfway, until they are tender and slightly caramelized.
Remove from the oven and let them cool slightly.
Transfer the roasted vegetables to a serving platter. Top with crumbled feta cheese and fresh cilantro.
Serve warm and enjoy.
Recipe Notes
For a spicier kick, add a sprinkle of cayenne pepper before roasting.
Leftovers make a fantastic addition to salads or sandwiches.
Feel free to mix in roasted garlic or red onion for extra depth.
Decadent Chocolate Indulgence Cake Recipe to Satisfy Your Cravings
Delicious Chocolate Indulgence Cake: A Heavenly Dessert Experience
⚖️
Difficulty
Moderate
⏲️
Prep Time
30 mins
🕒
Cook Time
45 mins
⏱️
Total Time
75 mins
🍽️
Servings
8
This Delicious Chocolate Indulgence Cake is the epitome of decadence for chocolate lovers. Infused with rich cocoa and a hint of vanilla, this cake is the ultimate treat for those seeking to indulge their sweet tooth. Each bite offers a luxurious taste experience that is sure to please even the most discerning dessert aficionados. Whether you’re celebrating a special occasion or simply treating yourself, this cake is guaranteed to deliver a sensational chocolate experience.
Imagine the cake’s velvety texture melting on your palate, leaving behind layers of chocolate and hints of sophisticated sweetness. The aroma of freshly baked chocolate will fill your kitchen, providing an irresistible invitation to anyone who walks by. With its glossy ganache topping and perfectly moist crumb, this cake is as visually stunning as it is delicious, making it a true show-stopper on any dessert table.
Quick Recipe Highlights
Flavor Profile: This cake offers a deep, rich chocolate flavor complemented by a subtle sweetness, making it perfect for true chocolate enthusiasts.
Texture: Each slice reveals a moist and tender crumb, with a silky ganache that adds a luxurious touch.
Aroma: Expect a captivating blend of chocolate and vanilla aromas that fill the room as the cake bakes.
Visual Appeal: With its glossy finish and beautiful layers, this cake is a feast for the eyes as well as the taste buds.
Skill Level Needed: Moderate baking skills are required, ensuring that both novice and experienced bakers can create this cake with success.
Special Equipment: Use a springform pan to achieve a perfect shape; a mixer is recommended for ease of preparation.
Recipe Overview
Difficulty Level: A moderate level of difficulty that involves basic baking techniques, making it accessible to enthusiastic home bakers.
Category: This is a dessert cake suitable for various celebrations, including birthdays, anniversaries, or simply as a weekend treat.
Cuisine: Inspired by classic European baking traditions, this cake combines rich ingredients for a sophisticated finish.
Cost: The ingredients for this cake are relatively affordable, with key items like cocoa and butter being staples in most kitchens.
Season: Perfect for all seasons, but especially delightful during winter when rich desserts are most appreciated.
Occasion: Ideal for festive occasions, family gatherings, or as a decadent finish to a special dinner.
Why You’ll Love This Recipe
The Delicious Chocolate Indulgence Cake stands out for its exceptional taste and texture. The deep cocoa flavor, combined with the richness of the ganache, ensures every bite is fulfilling. The balance of sweetness is crafted perfectly, so even those who don’t traditionally enjoy desserts will find themselves returning for more. This recipe is a convenient choice for busy bakers, with straightforward steps that don’t compromise on quality. The end result is a dessert that’s easy to prepare, making it a go-to option for any occasion.
Aside from its taste, the nutritional benefits of this cake are noteworthy. Made with real ingredients, you avoid the artificial additives found in store-bought alternatives. Using high-quality cocoa adds antioxidants to your dessert, while the use of fresh eggs and butter enhances nutritional value. The cake’s social versatility also plays a key role; it’s easily shared, making it a wonderful centerpiece for any gathering, encouraging conversation and connectivity among guests.
The cake’s cost-effectiveness and accessibility are undeniable. With common pantry items and easily sourced ingredients, this cake is affordable for most households. It also accommodates adjustments for those with dietary preferences or allergies, allowing everyone to enjoy a slice. Whether for an intimate family gathering or a large celebration, this cake is an economical solution for creating memorable moments without breaking the bank.
Historical Background and Cultural Significance
Chocolate cake has a rich and storied past, originating from ancient cultures that first harvested cacao beans. Over centuries, chocolate has been revered for its luxurious and energizing properties, later transforming into the decadent confection we enjoy today. In the 19th century, chocolate cake as we know it first made its appearance, influenced by European baking traditions incorporating chocolate into desserts.
The cultural importance of chocolate cake is evident in its presence at almost any celebratory gathering. Whether commemorating a birthday or a wedding, its rich flavor and joyful symbolism make it a cultural staple. Over time, chocolate cake has evolved, with countless variations developed worldwide, adapting to local ingredients and preferences. From classic styles to modern twists, its versatility continues to delight taste buds across generations and cultures.
Around the globe, various regions have made their unique mark on chocolate cake recipes. European styles often focus on rich, dense cakes with layered ganaches, while American versions might lean towards lighter textures and sweeter flavors. From the French gâteau fondant au chocolat to the Brazilian brigadeiro cake, these regional variations showcase the adaptability and timeless appeal of chocolate as a primary ingredient in baking.
Ingredient Deep Dive
Cocoa powder plays a central role in creating the cake’s rich flavor. Originating from ancient civilizations, cocoa has long been esteemed for its depth of taste and potential health benefits. Packed with antioxidants, cocoa can help reduce inflammation and improve heart health. When selecting cocoa powder, opt for high-quality unsweetened varieties to ensure the deepest flavor. Store cocoa in a cool, dark place in an airtight container to maintain freshness. If needed, Dutch-processed cocoa can be substituted for a milder flavor.
Butter is another indispensable ingredient, providing the cake with its tender texture and buttery richness. Its origins date back centuries, cherished for its versatile culinary uses. Butter contains beneficial fatty acids and fat-soluble vitamins and is essential for achieving the perfect cake crumb. Choose unsalted butter to control the cake’s salt content, and let it soften before use for better integration. If necessary, margarine can serve as a substitute, although it may alter the cake’s flavor slightly.
Common Mistakes to Avoid
Overmixing the batter can lead to a dense cake. Mix just until the ingredients are combined.
Incorrect oven temperature can alter texture; always preheat and check with an oven thermometer.
Using cold ingredients can impede proper mixing; ensure butter and eggs are at room temperature.
Skipping the step to sift cocoa powder can result in lumps and uneven texture.
Underestimating bake time can lead to an unbaked center; bake until a toothpick comes out clean.
Cutting the cake too soon can make it crumbly; allow it to cool completely before slicing.
Not lining the pan may cause sticking; use parchment paper for easy removal.
Inaccurate measuring of ingredients, especially flour and cocoa, can affect texture; always use the scoop and level method.
Ignoring the need to test ganache consistency may cause it to be too thin or thick.
Leaving out a pinch of salt in the ganache can result in lackluster flavor.
Essential Techniques
Creaming the butter and sugar is a crucial step, as it determines the cake’s texture. Properly creamed, the mixture should be light and fluffy, indicating the incorporation of air into the batter. Mix on medium speed for about three minutes until you achieve the desired consistency. Be mindful of your mixer’s speed settings to avoid over whipping. Visual cues include a paler color and noticeably increased volume, essential for a balanced, moist cake.
Pro Tips for Perfect Delicious Chocolate Indulgence Cake
To enhance the chocolate flavor, add a teaspoon of espresso powder to the dry ingredients. This amplifies the cocoa’s depth without adding coffee taste. When preparing the ganache, use a high cocoa content dark chocolate for both richness and balance. Ensure the cream is heated just until simmering before pouring over the chopped chocolate for a smooth, glossy finish. For extra moisture, consider brushing the cake layers with a simple syrup flavored with vanilla or, for an adult twist, a splash of your favorite liqueur.
Variations and Adaptations
Regional variations of chocolate cake abound, each offering unique flavors and textures. For a seasonal touch, incorporate zest from oranges or limes during citrus harvest, adding a refreshing contrast to the chocolate’s richness. To adapt the cake for dietary needs, explore gluten-free flour alternatives or substitute dairy-free ingredients while maintaining flavor integrity. Incorporate different flavors like almond or mint extracts to diversify the cake’s profile while experimenting with different ganache or frosting styles for aesthetic diversity.
Serving and Presentation Guide
To present this cake with flair, consider using a cake stand that lifts it to eye level, showcasing its attributes. Garnish with chocolate shavings or dusting of cocoa powder for an elegant finish. Accompany each slice with a dollop of whipped cream or ice cream, providing temperature and texture contrast. Ensure neat slices by cleaning your knife with warm water between cuts. As with any chocolate dessert, serve at room temperature for optimal flavors.
Wine and Beverage Pairing
Pair this indulgent cake with a full-bodied red wine like Cabernet Sauvignon, which complements the intensity of the chocolate. Non-alcoholic options include a bold coffee or a rich hot cocoa, both enhancing the deep flavors. For tea enthusiasts, consider an Earl Grey or a black tea blend with a hint of citrus. When serving, consider the temperature. A chilled rosé can offer a refreshing contrast, and beverages should be served at their optimal temperatures to enhance the cake’s characteristics.
Storage and Shelf Life
To store the Delicious Chocolate Indulgence Cake, wrap it in plastic wrap and refrigerate it for up to five days, keeping it moist and fresh. Plastic or glass containers with tight seals work well for storing individual slices. To prolong its shelf life, freeze slices separately, using parchment paper between layers to prevent sticking. Thaw in the fridge overnight before serving. Signs of spoilage include a dry texture or any off-putting smell, indicating it’s time to discard the cake.
Make Ahead Strategies
Preparing this cake in advance is manageable with strategic planning. Bake the cake layers a day or two ahead and store them in the refrigerator, wrapped tightly. Wait to make and apply the ganache the day of serving to maintain its sheen and consistency. Between steps, ensure the cake is kept covered to prevent drying out. When reheating, use a gentle method, such as warming the whole cake in an oven on low, preserving its moisture and freshness.
Scaling Instructions
Scaling the Delicious Chocolate Indulgence Cake is straightforward whether you’re halving for smaller gatherings or doubling for large parties. When halving, reduce baking time by checking for doneness earlier. Doubling requires careful attention to mixing, avoiding overfilling pans. Utilize multiple pans to ensure even cooking. Consider equipment capacity, adjusting pan sizes and mixer loads accordingly. Store excess batter refrigerated for a short period if needed, and always rehearse time modifications to maintain the cake’s quality.
Nutritional Deep Dive
The Delicious Chocolate Indulgence Cake, while decadent, can fit into a balanced diet in moderation. Each serving provides essential macronutrients: carbohydrates from flour and sugars, and fats from butter and cream. Cocoa contributes dietary fiber and polyphenols, beneficial for heart health. Consider portion control and pairing with fresh berries for added vitamins and antioxidants. This cake suits occasional indulgence, fitting well into a varied diet mindful of calorie intake.
Dietary Adaptations
For gluten-free needs, substitute all-purpose flour with a high-quality gluten-free blend, ensuring similar texture and rise. Dairy-free requirements can be met using plant-based butter alternatives and dairy-free chocolate for the ganache. Vegan adaptation involves replacing eggs with flaxseed meal or applesauce for moisture and structure. Each adaptation maintains the cake’s integrity while accommodating specific dietary restrictions, extending its enjoyment to a wider audience without sacrificing taste or presentation.
Troubleshooting Guide
Achieving the ideal texture in your Delicious Chocolate Indulgence Cake requires balance. If results seem dry, ensure your butter and eggs are at room temperature to enhance creaminess. An overly moist cake typically signals inaccurate flour measurement; adopt the scoop and level method. With flavor balance, adjust sugar to taste if overly sweet or enhance chocolate with added cocoa. Equipment challenges include check mixer speeds to prevent overmixing, and invest in an oven thermometer to ensure accurate baking temperatures.
Recipe Success Stories
Our baking community has shared countless triumphs with this Delicious Chocolate Indulgence Cake recipe. User adaptations highlight creative variations, such as incorporating spicy notes with cayenne pepper for a Mexican-inspired twist. Readers have recommended the cake for weddings and intimate dinners alike, praising its universal appeal. Hobby bakers share photography tips, suggesting natural lighting for capturing the cake’s rich tones. The enthusiasm and feedback from our community continue to inspire delicious and memorable interpretations.
Frequently Asked Questions
What if I don’t have a springform pan? Use a regular round cake pan lined with parchment paper for easy removal.
Can I substitute dark chocolate for milk in the ganache? Yes, but the flavor will be less intense with milk chocolate.
How do I store leftovers? Wrap slices tightly in plastic and refrigerate; freeze for longer storage.
What if my ganache is too runny? Let it sit at room temperature; it should thicken as it cools.
Can I make the cake ahead of time? Yes, bake and cool the layers in advance; frost just before serving.
What is the best way to serve this cake? At room temperature with a scoop of vanilla ice cream or fresh fruit.
How do I prevent the cake from sticking? Use parchment paper to line your pans or generously grease with a non-stick spray.
Can I make cupcakes instead? Yes, adjust bake time accordingly as they will cook faster.
What if my cake turns out too dense? Ensure your baking powder is fresh and ingredients are properly measured.
How can I enhance the chocolate flavor? Add a teaspoon of espresso powder to deepen the chocolate essence.
Can I use salted butter? If using salted butter, reduce any additional salt in the recipe.
What type of cocoa powder is best? Choose high-quality, unsweetened cocoa powder for the best results.
Additional Resources
Explore related recipes, including chocolate tarts and cookies, expanding your chocolate dessert repertoire. Technique guides provide detailed insights into baking fundamentals, ensuring success in your kitchen. Discover comprehensive ingredient information, aiding in the selection and storage of key components. Recommended equipment enhances your culinary efforts, with suggestions supporting a range of culinary pursuits. Seasonal variations offer inspiration, enabling adaptations to align with available ingredients and flavors.
Join the Conversation
Engage with our community through social media, sharing experiences and feedback on the Delicious Chocolate Indulgence Cake. Photography tips enhance presentation, inviting community members to showcase their baking prowess. Share your recipe reviews, driving collective improvement and innovation. Participate in discussions, offering creative variations and adaptations to classic favorites. Your input enriches our culinary dialogue, celebrating the art of baking and the joy of sharing delectables.
The Recipe
Delicious Chocolate Indulgence Cake
Serves: 8
Prep Time: 30 mins
Cook Time: 45 mins
Total Time: 75 mins
Kitchen Equipment Needed
Springform pan
Electric mixer
Mixing bowls
Whisk
Parchment paper
Ingredients
1 cup unsalted butter, softened
1 1/2 cups granulated sugar
4 large eggs
1 teaspoon vanilla extract
2 cups all-purpose flour
3/4 cup unsweetened cocoa powder
1 1/2 teaspoons baking powder
1/2 teaspoon salt
1 cup whole milk
1/2 cup heavy cream (for ganache)
8 oz dark chocolate, chopped (for ganache)
Directions
Preheat your oven to 350°F (175°C) and prepare a springform pan by lining it with parchment paper.
In a large bowl, cream the butter and sugar together until light and fluffy.
Add eggs one at a time, beating well after each addition, then stir in the vanilla extract.
In a separate bowl, mix the flour, cocoa powder, baking powder, and salt.
Gradually add the dry ingredients to the creamed mixture alternately with milk, beginning and ending with dry ingredients.
Pour the batter into the prepared pan and smooth the top with a spatula.
Bake in the preheated oven for 40-45 minutes or until a toothpick inserted into the center comes out clean.
Let the cake cool in the pan for 10 minutes, then remove from the pan and cool completely on a wire rack.
To make the ganache, heat heavy cream in a saucepan until it just begins to simmer. Remove from heat and pour over chopped chocolate. Let it sit for a few minutes, then stir until smooth.
Spread the ganache over the cooled cake, allowing some to drip over the edges.
Recipe Notes
For a deeper chocolate flavor, add a small amount of espresso powder to the batter.
Substituting with Dutch-processed cocoa can yield a milder chocolate taste.
Allow the ganache to firm up slightly before slicing the cake.