Deliciously Easy Cheesy Baked Pepperoni Stromboli Recipe for Dinner

Cheesy Baked Pepperoni Stromboli: A Delicious Twist on a Classic

⚖️
Difficulty
Medium

⏲️
Prep Time
15 mins

🕒
Cook Time
25 mins

⏱️
Total Time
40 mins

🍽️
Servings
4

The Cheesy Baked Pepperoni Stromboli is a perfect blend of crispy, savory, and cheesy goodness, making it an irresistible choice for any meal. This delectable dish combines the classic flavors of Italian cuisine with a modern twist. Imagine gooey mozzarella and spicy pepperoni encased in a crispy, golden-brown crust, offering a delightful contrast of textures and flavors with every bite. The aroma of melted cheese and baked dough wafting through your kitchen will entice your senses and whet your appetite, making this dish an instant favorite among family and friends.

Quick Recipe Highlights

  • Flavor Profile: The Cheesy Baked Pepperoni Stromboli bursts with the savory notes of pepperoni and the creamy, stretchy texture of melted mozzarella cheese, beautifully complemented by the herbs and spices that give it its Italian flair.
  • Texture: Enjoy a contrast of textures with a crunchy outer crust that encases a soft, cheesy, and slightly chewy interior, each bite offering a symphony of sensations.
  • Aroma: As your Stromboli bakes, your kitchen will be filled with the mouthwatering aroma of baking bread, tantalizing spices, and a hint of garlic that’s sure to invite hunger and anticipation.
  • Visual Appeal: Golden brown crust with spots of bubbling cheese and the red hint of pepperoni peeking through make this Stromboli not only delicious but also visually attractive.
  • Skill Level Needed: Intermediate cooking skills are ideal for managing dough handling and baking techniques to achieve a perfect Stromboli.
  • Special Equipment: A rolling pin and a baking sheet are essential tools to help shape and cook your Stromboli perfectly.

Recipe Overview

  • Difficulty Level: With its manageable dough manipulation and straightforward filling process, it’s suited for cooks with a bit of experience with baking.
  • Category: The Cheesy Baked Pepperoni Stromboli fits perfectly as a main course, snack, or appetizer.
  • Cuisine: Inspired by traditional Italian flavors, this dish brings a modern twist with its baked presentation and fusion of classic ingredients.
  • Cost: This budget-friendly dish uses everyday ingredients such as cheese, pepperoni, and flour, making it affordable for a family meal or gathering.
  • Season: Perfect for any season, but especially comforting during colder months when warm, hearty meals are most desired.
  • Occasion: Ideal for game nights, casual get-togethers, or family dinners, offering a delightful and shareable meal.

Why You’ll Love This Recipe

The taste and texture of the Cheesy Baked Pepperoni Stromboli will captivate your taste buds, offering a delicious combination of crisp dough and a rich, creamy, spicy filling. Preparing this Stromboli is also remarkably convenient, using easy-to-find ingredients and straightforward techniques. Its preparation benefits busy cooks who still wish to deliver a home-cooked meal with impressive flavors and presentation.

From a nutritional standpoint, swapping out traditional ingredients for healthier alternatives can make this recipe a balanced part of your diet. Its versatility also allows you to sneak in additional vegetables or nutrient-rich alternatives. Moreover, the Cheesy Baked Pepperoni Stromboli serves as an exciting and savory dish for social gatherings, making it a hit for entertaining guests who will appreciate its flavor and originality.

Cost-wise, this recipe is both budget-friendly and scalable, perfect for making in large quantities without breaking the bank. Utilizing common pantry staples, the Stromboli is accessible for cooks at varying budget levels without compromising on taste or presentation.

Historical Background and Cultural Significance

The origin of the Cheesy Baked Pepperoni Stromboli harkens back to the traditional Italian-American cuisine that merged classic Italian flavors with new-world conveniences. This comforting dish emerged as a variant of the beloved calzone, using similar ingredients wrapped and baked to perfection. Over time, the Stromboli became a celebrated part of casual dining, offering a portable and easy-to-serve option perfect for modern lifestyles.

Culturally, Stromboli signifies the Italian tradition of crafting simple yet flavorful meals that can be shared among family and friends. Its composition reflects the diverse Italian-American influence that has evolved recipes to accommodate contemporary tastes and faster preparation times. Despite these changes, Stromboli remains a deeply rooted dish with historical significance linked to Italian immigrant communities and their culinary impact.

Each region may offer its variation, showcasing local ingredients and compliance with different dietary preferences. For instance, adding vegetables, alternative proteins, or regional spices can significantly change the recipe, ensuring it remains adaptable while retaining its delicious appeal.

Ingredient Deep Dive

Mozzarella cheese serves as the gooey, melty centerpiece of our Cheesy Baked Pepperoni Stromboli, bringing a rich creaminess that enhances the overall mouthfeel of the dish. Known for its mild flavor and superb melting capabilities, mozzarella is a fundamental part of Italian dishes worldwide. Using it shredded ensures even distribution, while full-fat mozzarella imparts a creamier texture, making each slice irresistible. When selecting mozzarella, opt for fresh blocks that can be shredded or pre-shredded varieties if pressed for time.

Pepperoni adds the spice and bold flavor that makes this Stromboli a standout. The cured meat delivers a punch of savory umami and subtle heat, complementing the cheese and dough perfectly. As a cured product, pepperoni offers a longer shelf life, but ensure it’s kept cool to extend its usability. For alternatives, consider using turkey pepperoni for a lower-fat option or substituting with salami for a twist in flavor.

Common Mistakes to Avoid

  • Overfilling the dough can lead to burst Stromboli, leaking the delicious fillings. Maintain a balance to keep everything neatly enclosed.
  • Not sealing the edges properly may cause the cheese to escape during baking. Ensure the ends are well-sealed by pinching and folding.
  • Ignoring the importance of egg wash might result in a pale crust. The wash not only provides a golden color but also helps seal the edges together more effectively.
  • Skipping the step of venting steam can lead to a soggy interior. Make small slits on top to allow steam to escape.
  • Baking at an incorrect temperature might result in uneven cooking. Ensure the oven is properly preheated to achieve an evenly baked Stromboli.
  • Using low-quality ingredients can diminish the overall taste. Invest in fresh, quality cheese and pepperoni for the best results.
  • Underbaking leads to a doughy interior. Keep an eye on the baking time and ensure it’s cooked through.
  • Using wet ingredients without draining excess moisture can make the dough soggy. Pat dry any ingredients like fresh tomatoes or mushrooms before using.

Essential Techniques

The perfect dough handling is crucial in achieving the desired crispy texture and proper pocket formation for the filling. Start with a well-floured surface to prevent sticking and use a rolling pin to achieve an even thickness that allows for easy wrapping of fillings. It’s crucial to stretch the dough uniformly to avoid any breaks or thin spots that might lead to leaks.

Understanding the cheese melting point is vital to enhance the Stromboli’s interior. Mozzarella, known for its meltability, should be evenly distributed. Being cautious not to pile the cheese too densely in one area prevents uneven cooking and soggy dough after baking.

Pro Tips for Perfect Cheesy Baked Pepperoni Stromboli

Add a brush of olive oil with garlic and herbs atop the dough before baking for an extra layer of flavor and an irresistible aroma. This simple touch enhances each bite with aromatic delight.

To prevent a soggy bottom, slightly prebake the bottom part of the dough alone for a few minutes before adding toppings. This step helps firm up the base, allowing for a crispy crust.

Consider using a pizza stone which helps regulate heat distribution effectively, thus creating an even, crispy Stromboli that’s cooked to perfection.

Let the Stromboli rest for a few minutes after baking, allowing the cheese to set, making it easier to slice without spilling filling.

Use fresh, herbs such as basil or oregano, folded within the cheese layer to provide a burst of authentic Italian flavor in each bite.

Experiment with diets like vegetarianism by replacing pepperoni with roasted vegetables, resulting in a different yet equally delicious Stromboli variation.

Variations and Adaptations

For a regional variation, incorporate local cheeses or cured meats for a personal touch that resonates with the flavors of a specific area. Seasoning the dough with regional spices can further increase authenticity. Adjust the ingredients seasonally to reflect the freshest produce available, ensuring a robust finish regardless of the time of year.

To cater to special dietary needs, such as gluten-free eaters, utilize specifically designed dough substitutes that achieve a similar texture and flavor as traditional recipes without sacrificing the Stromboli’s wholesome appeal.

Change up the flavor profile by replacing pepperoni with your choice of smoked meats or sausages, adding a unique twist to each Stromboli. Texture modifications can be made by including softer, crumbled cheese alongside mozzarella for a creamier texture experience.

For plating and presentation alternatives, serve mini-Stromboli portions on a platter, making them an excellent choice for individual servings at parties or gatherings. Pair these with dipping sauces, such as marinara or garlic butter, for an enhanced flavor journey.

Serving and Presentation Guide

To serve the Cheesy Baked Pepperoni Stromboli, slice it diagonally for a classic presentation. This exposes the vibrant interior layers of meat and cheese, adding to its appeal. Arrange slices attractively on a serving platter garnished with fresh herbs or grated Parmesan for a sophisticated finish.

For accompaniments, consider a simple green salad or a selection of antipasti that can complement the rich flavors of the Stromboli. If serving as a main dish, incorporate a light soup or broth-based dish to offset the heavier texture and richness.

Temperature can play a role in presentation, as slightly cooled Stromboli is easier to handle and slice. This aids portion control, preventing the filling from escaping and maintaining the beautiful spiral of the filling.

Wine and Beverage Pairing

The rich flavors of the Cheesy Baked Pepperoni Stromboli pair beautifully with a medium-bodied red wine, such as Chianti or Merlot, which offsets the cheese’s richness with their tannic structure and complex profiles. These wines enhance the savory flavors and cleanse the palate between bites.

For non-alcoholic options, consider sparkling water with citrus elements or iced tea with a hint of lemon, providing a refreshing contrast and cutting through the dish’s richness.

If your meal concludes with coffee or tea, a strong espresso or a robust black tea works to complement the rich and savory elements of the Stromboli without being overpowered.

Storage and Shelf Life

Properly storing leftover Stromboli can extend its shelf life up to 3 days. Wrap slices in aluminum foil and store them in an airtight container in the refrigerator. To reheat, use a preheated oven at a lower temperature, around 300°F, to avoid drying out the dough while ensuring a warm consistency throughout.

Freezing is an excellent option if you wish to store the Stromboli for a more extended period. Ensure it is wrapped tightly to prevent freezer burn. When ready to enjoy, thaw it in the fridge overnight and reheat using the oven for the best results, maintaining its flavor and texture.

Make Ahead Strategies

Preparing your Stromboli in advance can save time while maintaining quality. Prepare the filling ingredients and dough separately, storing them in appropriate conditions to avoid spoilage. Just before baking, assemble and bake for fresher results.

Store partially assembled Stromboli in the refrigerator for a day before baking, allowing the dough to develop flavor and maintain structure. If planning a larger gathering, make the dough ahead of time and refrigerate or freeze it, thawing it before assembly.

Incorporating fresh elements such as basil or other herbs just before serving guarantees that these bright additions maintain their vivid flavor and visual appeal.

Scaling Instructions

Halve the Cheesy Baked Pepperoni Stromboli recipe for a smaller gathering without sacrificing its delicious flavors. Ensure that dough proportions are adjusted, and retain the order of assembly to guarantee a perfect, smaller version.

Doubling or tripling the recipe is easily annotated by multiplying each ingredient accordingly. Pay attention to equipment adjustments, such as oven space, to accommodate larger volumes without overcrowding the baking sheets.

When scaling, cooking times may vary slightly according to changes in thickness and ingredient volume. Adapt timing with careful monitoring to achieve the desired texture and doneness, guaranteeing perfect Stromboli every time.

Nutritional Deep Dive

The Cheesy Baked Pepperoni Stromboli offers a robust macronutrient profile anchored by proteins from cheese and pepperoni, fats for satiety, and carbohydrates for energy. Pay attention to portion sizes to ensure balance and moderation, especially when adapting for specific diets.

Micronutrients, including calcium from cheese for bone support and certain B vitamins from enriched flour, make this dish nutritious and balanced when consumed mindfully. Making small substitutions can cater to dietary needs like low-carb or low-fat diets.

By analyzing each component, cooks can achieve a comprehensive understanding of how this meal fits into broader nutritional goals, making it a delicious yet thoughtful indulgence.

Dietary Adaptations

For a gluten-free version, substitute the dough with a gluten-free alternative that accommodates desired textures. Ensure no cross-contamination by solely using gluten-free surfaces and utensils.

Create a dairy-free Cheesy Baked Pepperoni Stromboli by using vegan cheese options that mimic mozzarella’s texture and melting capabilities. Check pepperoni for lactose and substitute as necessary.

Adapt the Stromboli for vegans by opting for plant-based proteins such as tofu or structured plant-based pepperonis and cheeses, maintaining full flavor without animal products.

Adjust for keto diets by lowering carb intake through specialized dough recipes that include almond flour or other low-carb alternatives while retaining the savory flavors of this beloved dish.

Troubleshooting Guide

Texture issues may arise due to underbaked dough or improperly handled fillings. Ensure uniform dough thickness and proper cooking time for best results, monitoring closely while baking.

Balanced flavor is achieved by harmonizing the salt from cheese and pepperoni with a complementary, slightly sweet dough and herbs. Adjust proportions as needed for personal taste.

Temperature problems can be mitigated by consistent oven heat and pre-baking techniques to firm up the bottom, ensuring evenly cooked Stromboli.

Equipment challenges may necessitate minor adjustments, such as using a larger baking sheet or pizza stone for even heat distribution, enhancing final crust texture.

Ingredient substitutions provide freedom in dietary adaptations without sacrificing the core concept. Select high-quality alternatives, and ensure moisture levels are balanced.

Timing concerns can be managed by observing the Stromboli during the cooking process, adjusting minimally for larger or smaller batches to ensure perfect completion without overcooking.

Recipe Success Stories

Feedback from the culinary community highlights the Cheesy Baked Pepperoni Stromboli as a success in both flavor and presentation, often lauded for its adaptability and ease. Variations such as incorporating locally sourced ingredients or personal family twists are popular.

Creative adaptations from fellow cooks demonstrate the recipe’s versatility, offering confidence for others to experiment with new flavors and components, developing everything from a spicy Stromboli to a vegetable-filled rendition.

Sharing suggestions and photography tips encourage others to present Stromboli attractively, capturing the vibrant colors and enticing layers through well-lit, staged photos for an added social media appeal.

Frequently Asked Questions

Can I freeze Stromboli?
Yes, you can freeze Cheesy Baked Pepperoni Stromboli. Ensure it’s cooled completely before wrapping in aluminum foil and placing in an airtight container. When reheating, allow it to defrost in the fridge overnight before baking until heated through.

What type of dough works best?
Use pizza dough for a classic texture, ensuring it’s rolled uniformly thin to achieve even baking. Store-bought or homemade dough will both work effectively.

Are there gluten-free alternatives?
Yes, gluten-free pizza dough substitutes are readily available and can be used to maintain a similar texture while keeping the recipe accessible to those with gluten intolerances.

What if the Stromboli leaks?
Properly sealing the edges and ensuring vents on top for steam escape can minimize leaking. Additionally, monitoring filling portions and maintaining optimal rolling technique helps prevent overflow during baking.

Are vegetarian adaptations possible?
Absolutely! Substitute pepperoni with ample vegetables such as sautéed mushrooms, onions, or spinach for a meat-free option while maintaining flavor depth.

How do I achieve a Golden crust?
A good egg wash applied to the surface before baking promotes the characteristic golden crust, achieved through even baking and careful heat monitoring.

What wine should complement it?
Pair this Stromboli with light to medium-bodied red wines like Merlot or Cabernet Sauvignon, which balance the richness with refreshing tannins.

What if my dough tears?
Lightly flour surfaces and tools, handle gently, and patch small tears by pinching dough together or using a small dough scrap to cover gaps.

What could cause sogginess?
To avoid sogginess, ensure fillings are drained of moisture thoroughly before use, and allow air vents for steam escape during baking.

Can I prepare certain elements in advance?
Preparing toppings and dough separately, storing them appropriately, allows for quicker assembly, maintaining freshness and reducing prep time.

Additional Resources

Explore related recipes offering variations in presentation or complementary dishes like spinach salads that pair beautifully with stromboli on each occasion. Technique guides for key methods such as dough handling or rolling further aid culinary exploration.

Ingredient information provides insight into the finest selection tips, storage methods, and alternatives suited to individual preferences, enhancing a customizable cooking experience.

Discover equipment recommendations, seasonal variations, and cleaning instructions to ensure a streamlined and enjoyable cooking session, welcoming exploration of culinary creativity with confidence.

Join the Conversation

Engage with the community by sharing your Cheesy Baked Pepperoni Stromboli creations on social media, showcasing stunning photography of delicious slices and imaginative plating ideas. Participate in recipe discussions, leave reviews, and join forums where cooking enthusiasts exchange stories, adaptations, and valuable culinary tips. Share your unique adaptations, provide feedback, and encourage others to explore the delicious possibilities this Stromboli recipe offers.

The Recipe

Cheesy Baked Pepperoni Stromboli

Serves: 4

Prep Time: 15 mins

Cook Time: 25 mins

Total Time: 40 mins

Kitchen Equipment Needed

  • Rolling pin
  • Baking sheet
  • Pastry brush
  • Sharp knife

Ingredients

  • 1 lb pizza dough
  • 1 cup shredded mozzarella cheese
  • 1/2 cup sliced pepperoni
  • 1/4 cup grated Parmesan cheese
  • 1 tbsp olive oil
  • 1 tsp dried Italian herbs
  • 1 egg, beaten

Directions

  1. Preheat the oven to 400°F (200°C) and line a baking sheet with parchment paper.
  2. On a floured surface, roll out the pizza dough into a rectangle about 1/4 inch thick.
  3. Layer mozzarella cheese evenly across the dough, leaving a 1-inch border. Top with pepperoni and sprinkle with Parmesan and Italian herbs.
  4. Roll the dough tightly, starting from one long edge, and tuck in the ends to seal.
  5. Transfer the Stromboli to the prepared baking sheet and brush with beaten egg.
  6. Make three small slits on top to vent steam and bake for 25 minutes or until golden.
  7. Let rest for 5 minutes before slicing and serving warm.

Recipe Notes

  • For a vegetarian option, substitute pepperoni with roasted vegetables such as bell peppers and mushrooms.
  • To spice it up, add red chili flakes to the filling for an extra kick.

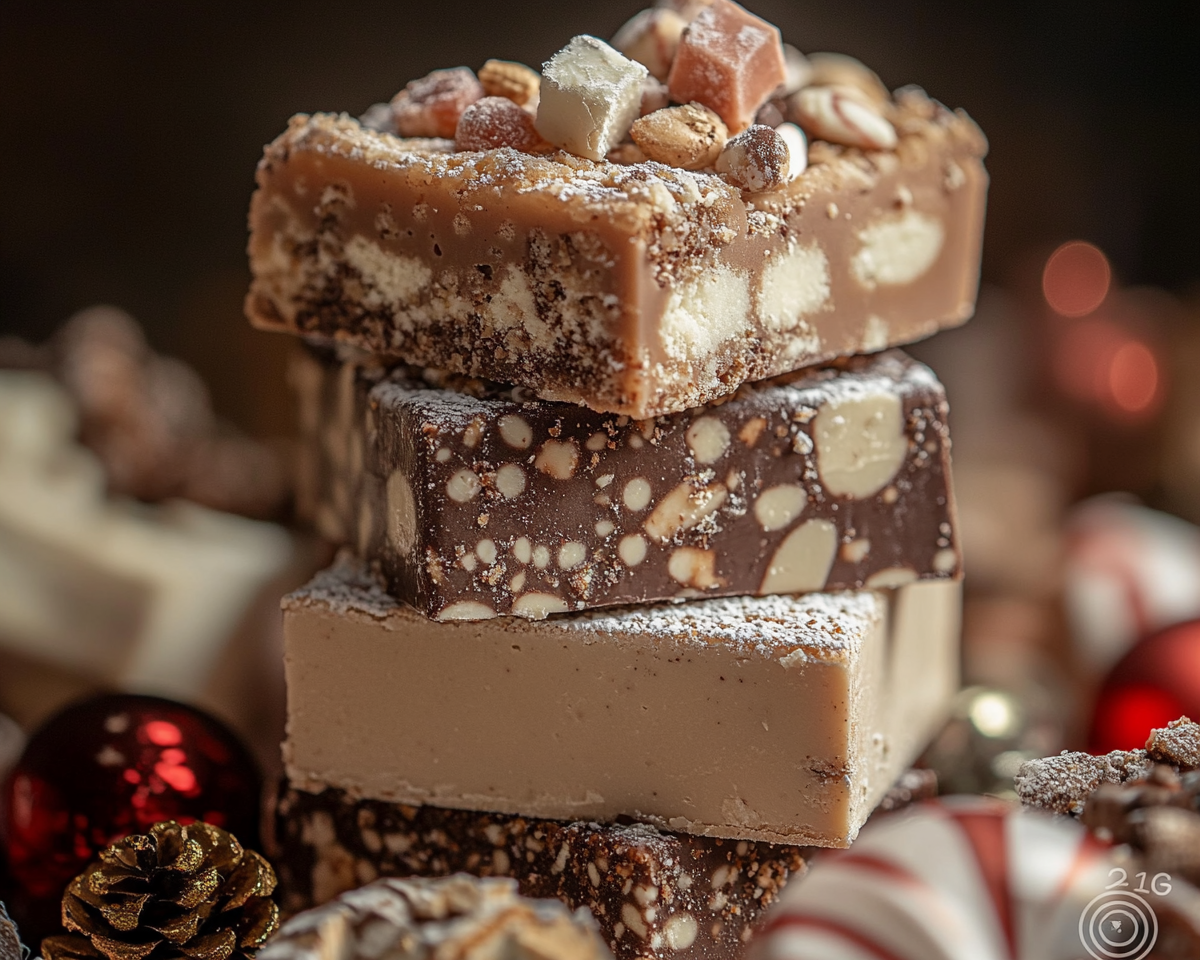
Christmas Fantasy Fudge: A Festive and Decadent Holiday Treat

holiday fudge, festive fudge recipe, easy Christmas fudge, marshmallow fudge recipe, chocolate fantasy fudge, nutty holiday fudge

Christmas Fantasy Fudge: A Festive Delight for the Holidays


Introduction
Christmas is incomplete without the rich and creamy Christmas Fantasy Fudge. This timeless holiday treat combines the sweetness of chocolate and marshmallow crème for a melt-in-your-mouth experience. Whether shared as gifts or served at holiday parties, this fudge is always a crowd-pleaser.


Why Christmas Fantasy Fudge is a Holiday Staple

Decadence Made Easy

The simplicity of the recipe makes it perfect for both novice and seasoned cooks. Its rich, smooth texture ensures it stands out on any dessert table.

Ideal for Gifting

Christmas Fantasy Fudge is easy to package in festive boxes, making it a thoughtful homemade gift for friends and family.

For creative fudge gifting ideas, explore Creative Fantasy Fudge Recipes.


Essential Ingredients for Christmas Fantasy Fudge

  • Core Ingredients:
    • 3 cups granulated sugar
    • ¾ cup margarine or butter
    • ⅔ cup evaporated milk
    • 12 oz semi-sweet chocolate chips
    • 1 jar (7 oz) marshmallow crème
    • 1 tsp vanilla extract
    • 1 cup chopped walnuts (optional)

Substitutions and Variations

  • Use white chocolate chips for a “snowy” version of the fudge.
  • Swap walnuts with pecans or leave out nuts for a nut-free option.

Step-by-Step Recipe

  1. Prepare Ingredients: Measure out all ingredients before starting.
  2. Combine Sugar, Butter, and Milk: Heat them in a saucepan over medium heat, stirring constantly.
  3. Boil: Bring the mixture to a rolling boil, cooking for 4-5 minutes.
  4. Add Chocolate and Marshmallow Crème: Remove from heat, stir until melted and smooth.
  5. Mix and Pour: Add vanilla and nuts, pour into a prepared pan, and let cool.

Tips for Perfect Christmas Fantasy Fudge

  • Prevent Crystals: Stir continuously to avoid sugar crystallization.
  • Use a Candy Thermometer: Ensure the mixture reaches the right temperature for perfect consistency.
  • Allow Cooling Time: Let the fudge set at room temperature before refrigerating.

Learn more about the science behind fudge-making at The Science of Fudge.


Creative Variations

  • Peppermint Fantasy Fudge: Add crushed candy canes for a festive touch.
  • Layered Fudge: Create layers with red and green food coloring for extra holiday flair.
  • Nut-Free Fudge: Replace nuts with dried cranberries or mini marshmallows.

Presentation Ideas

  • Gift Boxes: Wrap pieces in parchment paper and place them in holiday-themed boxes.
  • Shaped Fudge: Use cookie cutters for star or Christmas tree-shaped fudge.
  • Plated Desserts: Pair fudge with Mini Pineapple Upside-Down Cakes for a festive dessert spread.

FAQs About Christmas Fantasy Fudge

Can I Make Fudge Without Nuts?

Yes, simply omit the nuts, and the recipe will remain delicious.

How Long Does Fudge Last?

Store in an airtight container at room temperature for up to two weeks or in the refrigerator for one month.

Can I Freeze Fudge?

Yes, wrap tightly in plastic wrap and store in a freezer-safe container for up to three months.

What If My Fudge Doesn’t Set?

Ensure you’ve boiled the mixture long enough and used the correct ratios of ingredients.

Can I Use Condensed Milk Instead of Evaporated Milk?

No, condensed milk is sweeter and thicker, which will alter the fudge’s consistency.


Internal Linking Opportunities


Conclusion

Christmas Fantasy Fudge combines the nostalgic flavors of chocolate and marshmallow with the joy of holiday traditions. This easy recipe ensures perfect results every time, making it a must-have for your festive celebrations. Try it today and make your holidays sweeter than ever!

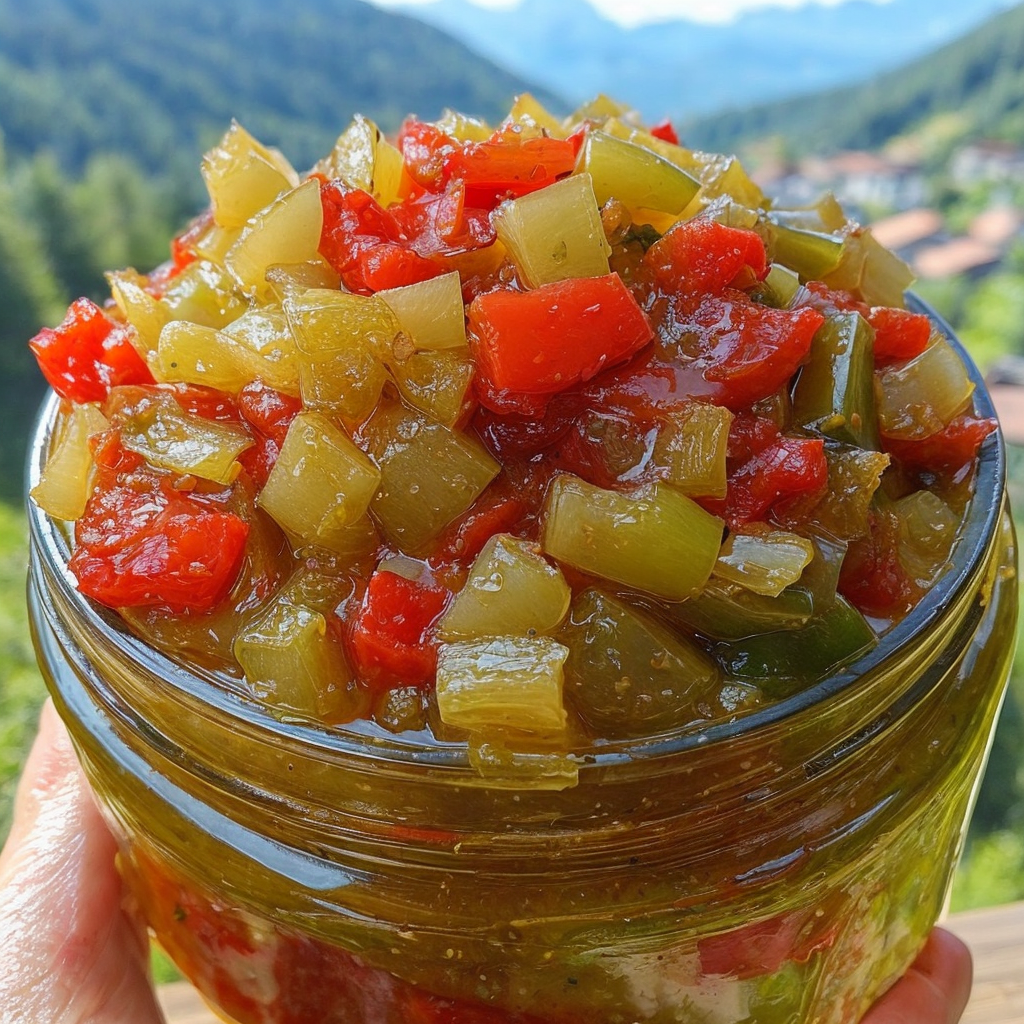
Spice Up Your Meals with Homemade Pepper & Onion Relish

Pepper & Onion Relish: A Zesty Delight

⚖️
Difficulty
Easy

⏲️
Prep Time
15 mins

🕒
Cook Time
30 mins

⏱️
Total Time
45 mins

🍽️
Servings
8

Dive into the bold and vibrant world of Pepper & Onion Relish—a zesty companion that will elevate any dish. This relish brings together the perfect blend of sweet, spicy, and tangy notes, making it a must-have in your culinary arsenal. Whether it’s jazzing up a sandwich or adding depth to a gourmet spread, this delightful concoction is sure to become a kitchen staple.

Imagine the tantalizing combination of crisp peppers and savory onions, slowly simmered to perfection. As you cook, the kitchen fills with the intoxicating aroma of charred vegetables and spices, promising a relish that is as versatile as it is flavorful. Easy to prepare and even easier to love, Pepper & Onion Relish is the ideal accompaniment for cheese boards, barbecues, and more.

Quick Recipe Highlights

  • Flavor Profile: The relish is a dynamic balance of sweet, savory, and mildly spicy tones, making it a flavor explosion with every bite.
  • Texture: Expect a satisfying crunch from the peppers complemented by the softness of caramelized onions, creating a remarkable texture.
  • Aroma: A delightful fusion of charred pepper and onion aromas with an undertone of tangy vinegar and spices.
  • Visual Appeal: Vibrant reds, yellows, and greens bring a colorful medley that captures the essence of summer on a plate.
  • Skill Level Needed: Perfect for beginners, requiring only basic chopping and simmering skills.
  • Special Equipment: A heavy-bottomed saucepan or skillet to ensure even cooking.

Recipe Overview

  • Difficulty Level: Easier steps are involved, from chopping to simmering, making it approachable for cooks of all experience levels.
  • Category: This relish fits neatly into condiments, perfect for topping burgers or spreading on crackers.
  • Cuisine: A fusion of influences from Southern American and Mexican cuisines, both known for vibrant flavors.
  • Cost: With affordable, readily available ingredients, this recipe is budget-friendly.
  • Season: Best enjoyed during the summer when peppers are at their peak, but accessible year-round.
  • Occasion: An ideal choice for barbecues, picnics, and holiday spreads where condiments can shine.

Why You’ll Love This Recipe

Pepper & Onion Relish offers a remarkable taste and texture appeal, combining the crispness of fresh peppers with soft onions for a textural delight. The flavors meld beautifully, providing a sweet-spicy combo that’s both addicting and refreshing. This relish is ultra convenient, coming together quickly and easily, with minimal equipment needed. It is a powerhouse of vitamins from the peppers, making it a nutritious condiment choice. The relish adds a burst of color and flavor that enhances social gatherings, making meats, cheeses, and bread sing. Cost-effective and accessible, this relish uses simple ingredients that are easy to find, making it a go-to recipe for any occasion.

Historical Background and Cultural Significance

The history of pepper relishes traces back to Southern American cuisine, where preserving peppers for use in winter months became a tradition. It holds cultural importance due to its role in enhancing the flavors of classic Southern dishes. Over time, this recipe evolved, incorporating a diverse range of peppers and spices, influenced by Mexican culinary traditions. Regional variations abound, from the tangy and thin versions of the South to heartier, thicker variations found in Northern regions, showcasing the recipe’s adaptability.

Ingredient Deep Dive

The primary ingredient, bell peppers, are steeped in history, being cultivated in South America for thousands of years. These vibrant vegetables are rich in vitamins, particularly vitamin C, making them excellent for immune health. When selecting, choose firm, brightly colored peppers without blemishes. Store them in the refrigerator crisper to prolong their freshness. Onions complement the peppers with their sweetness and are also rich in antioxidants. They should be firm and heavy for their size, stored in a cool, dry place. Substitutions for this relish can include using jalapeños for added heat or substituting bell peppers with roasted red peppers for a smoky twist.

Common Mistakes to Avoid

  • Overcooking the peppers, which can result in a mushy rather than crisp texture. Aim for a tender but firm bite.
  • Not chopping the vegetables uniformly, leading to uneven cooking.
  • Using high heat, which may burn the ingredients before they softly caramelize.
  • Skipping the vinegar, as it provides vital acidity that balances the relish’s sweetness and spice.
  • Ignoring salt and pepper seasoning can lead to bland flavors.
  • Storing scallions with too much moisture; ensure dry storage to prevent early spoilage.
  • Rushing the simmering process, which prevents flavors from melding fully.
  • Leaving relish uncovered in the fridge, leading to possible drying out and flavor absorption of refrigerator smells.

Essential Techniques

Mastering the art of simmering is crucial here—it allows flavors to meld and deepen without burning. Maintain a low flame, stirring occasionally to redistribute heat evenly. Uniform chopping ensures even cooking. Watch for the telltale signs of doneness: onions turning translucent and peppers gently wilting. Stir gently; vigorous stirring can break down the vegetables too much, compromising texture.

Pro Tips for Perfect Pepper & Onion Relish

Use a variety of pepper colors for a visually appealing, complex flavor profile—reds for sweetness, greens for a sharper bite. Consider adding a pinch of sugar to accentuate the natural sweetness of the vegetables. If you prefer a spicier relish, incorporate a small amount of crushed red pepper flakes during cooking. For a smoky flavor, try roasting peppers beforehand. For added depth, integrate a splash of apple cider vinegar alongside regular vinegar. Allow the relish to sit overnight for flavors to intensify, making it tastier over time.

Variations and Adaptations

Regional adaptations can include more heat; in the Southwest, add jalapeños or chipotles for a kick. In colder months, use canned or roasted peppers for a seasonal touch. Dietary modifications include using honey for a twist on sweeteners. To alter the flavor, incorporate herbs like cilantro or thyme. Texture modifications involve finely dicing all elements, creating a more uniform spread. Presentation changes can include serving in hollowed-out pepper boats for a stunning appetizer display.

Serving and Presentation Guide

When serving, use a small ramekin or mason jar for rustic charm. As a garnish, consider a sprinkle of fresh minced cilantro or parsley for a bright finish. Traditionally, it pairs well with grilled meats or barbeques. For a modern touch, layer it into sandwiches or wraps. Consider the relish’s temperature, ideally served chilled to maintain freshness. Ensure no single serving is overwhelming by managing portions to small dollops per dish.

Wine and Beverage Pairing

A dry Riesling or Sauvignon Blanc complements the tangy and sweet elements well, offering a refreshing contrast. For non-alcoholic options, consider iced green tea with a hint of lemon. The refreshment and subtle astringency help cut through and balance the relish’s flavors. Serve beverages chilled, enhancing the dish’s fresh quality.

Storage and Shelf Life

Store the relish in an airtight glass jar in the fridge to maintain freshness. Ensure containers are clean and dry to prevent contamination. Relish should be consumed within two weeks for optimal flavor. If noticing any off-smells or slime, it’s advisable to discard it. For long-term storage, freezing in ice cube trays can be handy, defrosting as needed.

Make Ahead Strategies

Prepare the relish a day in advance to allow flavors to meld, intensifying the taste upon serving. Between preparation and use, store in the fridge, covered tightly. After assembly, monitor for any moisture loss, adding a bit of vinegar if needed to freshen. Freshly chopped herbs can be stirred in before serving for additional flavor lift.

Scaling Instructions

When halving the recipe, adjust seasoning cautiously, ensuring flavors remain balanced. For doubling, ensure a sufficiently larger pan to accommodate increased ingredients and maintain consistent heat. Adjust cooking times as needed, thinning relish out if over-reduction occurs. When making large quantities, storage becomes crucial; consider multiple jars to maintain freshness.

Nutritional Deep Dive

A serving provides an excellent source of dietary fiber and vitamins A, C, and B6. Low in calories and cholesterol-free, it’s friendly for various diets. The peppers offer antioxidants, contributing to overall wellness. With minimal refined sugars, it serves as a guilt-free condiment. Vitamins and minerals support immune health, vision, and skin vitality.

Dietary Adaptations

To make it gluten-free, simply ensure any accompanying dishes, such as bread, are gluten-free. For a vegan alternative, the recipe is naturally vegan as is, with no animal products involved. Keto observers may swap out or be mindful of portion sizes due to natural sugars in peppers. A low-carb variant involves reducing any added sugars.

Troubleshooting Guide

For overly mushy relish, adjust cooking time next attempt, aiming for brightly colored, tender vegetables. If flavors lack contrast, a splash more vinegar or a touch more salt can enhance balance. If heat is too much, add some sweet bell peppers to dilute spiciness. If ingredients are sticking to the pan, ensure consistent stirring and add a touch more oil.

Recipe Success Stories

Our community raves about using this relish at community cookouts, sharing rave reviews about its ability to enhance simple grilled meals. Variants using roasted peppers add a welcomed smoky undertone. Readers have adapted it, adding their spice mixes or regional peppers, and they have shared vivid photos capturing its glory, enhancing the recipe’s popularity.

Frequently Asked Questions

Can I can this relish for long-term storage? Yes, follow proper canning guidelines using sterilized jars and a hot water bath for preservation.

What dishes pair well with pepper & onion relish? It’s versatile, great with cold meats, cheeses, sandwiches, and as a burger topping.

Is it necessary to refrigerate the relish? Yes, refrigeration after preparation is crucial for freshness and safety, extending its shelf life.

Can I use different types of onions? Absolutely, try red onions for a milder flavor or shallots for a subtle sweetness.

How can I add more heat? Incorporate diced jalapeños or a pinch of cayenne pepper to the mix while cooking.

What’s the best way to dice peppers? Cut around the seeds, remove the stem, and slice into uniform squares for even cooking.

Are there any sugar-free sweeteners I can use? Yes, alternatives like Stevia or erythritol work well without altering texture much.

How long should the relish simmer? Generally, let it simmer for at least 30 minutes for flavors to meld and intensify.

Is it normal for the relish to thicken as it cools? Yes, as it cools, the relish will thicken, enhancing spreadability and flavor.

Should I use fresh or dried herbs? Fresh herbs are preferable for a brighter, more vibrant flavor profile.

Can this relish be served warm? While best chilled, it can be lightly warmed to pair with hot dishes like sausages and meats.

Can I omit vinegar if I dislike the taste? It’s integral for acidity balance, but reducing or substituting with lemon juice is possible.

Additional Resources

Explore related recipes to expand your condiment repertoire, such as tomato chutneys or spiced-pineapple salsas. Delve into technique guides focusing on chopping vegetables efficiently or perfecting the art of simmering. Discover ingredient information, understanding how different peppers can change a dish’s dynamics. Equipment recommendations will guide optimum buys for cooking success. Seasonal variations suggest slight tweaks, providing inspiration based on produce availability.

Join the Conversation

Engage with us online by sharing your Pepper & Onion Relish creations on social media. Use hashtags to connect with others trying the recipe, exchanging suggestions and alterations. Photography tips can help capture the vivid colors of your relish, immortalizing your culinary skills. Community engagement encourages sharing ratings and experiences, helping others customize and perfect their relish. Provide reviews to offer insights and feedback for those yet to try, fostering a supportive community atmosphere.

The Recipe

Pepper & Onion Relish

Serves: 8

Prep Time: 15 mins

Cook Time: 30 mins

Total Time: 45 mins

Kitchen Equipment Needed

  • Sharp knife
  • Cutting board
  • Heavy-bottomed saucepan or skillet
  • Wooden spoon
  • Airtight container for storage

Ingredients

  • 2 large red bell peppers, diced
  • 1 large yellow onion, chopped
  • 1/2 cup white vinegar
  • 1/4 cup sugar
  • 1 tablespoon olive oil
  • Salt and pepper to taste
  • Pinch of red pepper flakes (optional, for heat)

Directions

  1. Heat olive oil in a heavy-bottomed saucepan over medium heat.
  2. Add onions and sauté until translucent, about 5 minutes.
  3. Stir in the bell peppers, cooking for an additional 5 minutes until slightly softened.
  4. Add vinegar and sugar, stirring to combine. Season with salt, pepper, and optional red pepper flakes.
  5. Reduce heat to low and simmer for 20 minutes, stirring occasionally, until the mixture thickens and coalesces.
  6. Let cool and transfer to an airtight container. Refrigerate for up to two weeks.

Recipe Notes

  • For a smoky twist, char the peppers on an open flame before dicing.
  • Adjust the sweetener based on personal preference, using honey or agave as substitutes.
  • If scaling the recipe, ensure even distribution of oil and vinegar to maintain consistency.

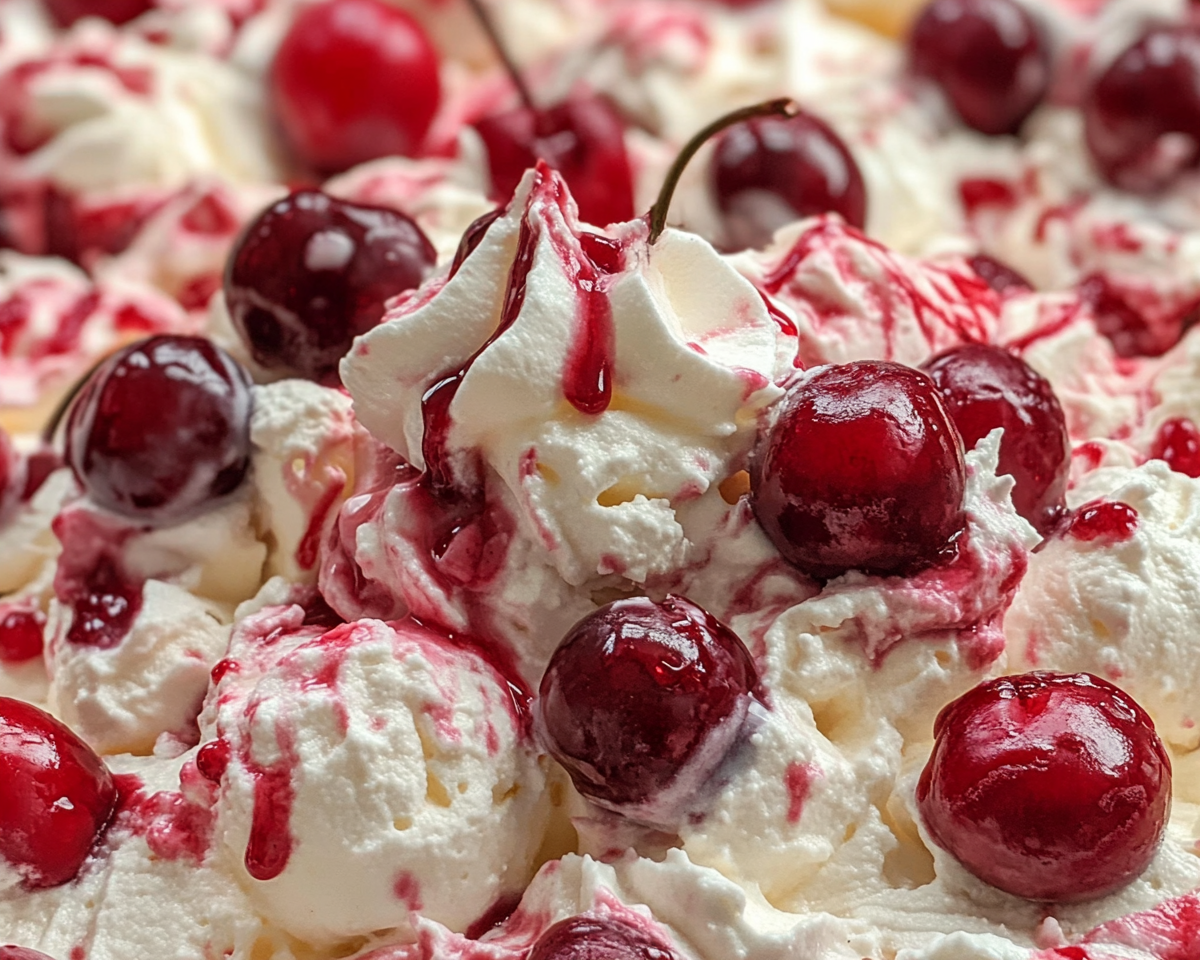
Cherry Cheesecake Fluff: A No-Bake Dessert Everyone Will Love

no-bake cheesecake fluff, cherry fluff dessert, easy cheesecake fluff, whipped cheesecake dessert, cherry pie cheesecake fluff, creamy cherry dessert

Cherry Cheesecake Fluff: A Delightful Dessert for Any Occasion


Introduction
Cherry cheesecake fluff is the perfect no-bake dessert, combining creamy textures with the sweet tanginess of cherries. It’s an easy recipe for busy days, ideal for potlucks, holidays, or as a quick treat. Whether you’re hosting a party or satisfying your sweet tooth, this dessert is sure to impress.


Why Cherry Cheesecake Fluff Is a Must-Try Dessert

Simplicity Meets Indulgence

Cherry cheesecake fluff requires minimal effort and delivers maximum flavor. With no baking involved, it’s a beginner-friendly recipe that tastes as decadent as it looks.

For more no-bake dessert ideas, check out No-Bake Cheesecake Tips for inspiration.

Versatile and Customizable

From adding graham cracker crumbs for crunch to experimenting with different fruit toppings, this dessert offers endless possibilities to suit your preferences.

Learn about complementary recipes like Mini Pineapple Upside-Down Cakes for pairing ideas.


Ingredients for Cherry Cheesecake Fluff

Core Ingredients

  • 1 package (8 oz) cream cheese, softened
  • 1 can (14 oz) sweetened condensed milk
  • 1 can (21 oz) cherry pie filling
  • 1 container (8 oz) whipped topping or Cool Whip
  • Optional: 1 cup mini marshmallows, graham cracker crumbs for garnish

Substitutions and Variations

  • Use low-fat cream cheese for a lighter version.
  • Swap cherry pie filling with blueberry or raspberry for a different flavor profile.

Step-by-Step Recipe for Cherry Cheesecake Fluff

Preparation

  1. Mix Cream Cheese and Milk: Beat softened cream cheese until smooth, then add sweetened condensed milk and blend well.
  2. Add Cherry Filling: Gently fold in cherry pie filling until evenly distributed.
  3. Incorporate Whipped Topping: Fold in whipped topping or Cool Whip to create a fluffy texture.
  4. Chill and Garnish: Refrigerate for 2 hours. Garnish with graham cracker crumbs or fresh cherries before serving.

Tips for Perfect Cherry Cheesecake Fluff

  • Achieve Smoothness: Use room-temperature cream cheese to prevent lumps.
  • Balance Flavors: Adjust the sweetness by using unsweetened whipped cream if preferred.
  • Chill Time: Allow the fluff to set in the fridge for at least two hours to enhance the flavors.

For more tips on creating smooth, creamy desserts, explore Perfect Whipped Cream Techniques.


Variations to Try

  • Chocolate-Cherry Cheesecake Fluff: Add cocoa powder or chocolate chips to the mix for a richer taste.
  • Tropical Cheesecake Fluff: Incorporate diced pineapple or mango for a fruity twist.
  • Berry Cheesecake Fluff: Replace cherry pie filling with a mix of fresh berries for a tart flavor.

Presentation and Serving Suggestions

  • Individual Cups: Serve in small dessert glasses for an elegant presentation.
  • Layered Fluff: Create layers with graham cracker crumbs and whipped cream for a parfait effect.
  • Party-Ready Bowl: Garnish with chocolate shavings or fresh cherries for a festive touch.

Pair this dessert with Kentucky Butter Cake for a complete indulgent meal.


FAQs About Cherry Cheesecake Fluff

Can I Make Cherry Cheesecake Fluff Ahead of Time?

Yes, prepare it a day in advance and store it in an airtight container in the fridge.

How Long Does It Last?

Cherry cheesecake fluff stays fresh for up to 3 days when refrigerated.

Can I Freeze It?

Freezing is not recommended, as it may alter the creamy texture.

What Are Good Substitutes for Sweetened Condensed Milk?

You can use evaporated milk with added sugar or make a homemade version.

How Can I Make It Dairy-Free?

Use vegan cream cheese, coconut whipped topping, and non-dairy condensed milk alternatives.


Common Mistakes to Avoid

  • Lumpy Texture: Always use room-temperature cream cheese to achieve a smooth mix.
  • Overmixing: Gently fold in whipped topping to retain its airy texture.
  • Skipping Chill Time: Allow enough time for the dessert to set for the best flavor.

Internal Linking Opportunities


Conclusion

Cherry cheesecake fluff is a delightful, no-bake dessert perfect for any occasion. With its creamy texture and tangy cherry flavor, it’s a crowd-pleaser that’s easy to make and customize. Try this recipe today and enjoy a taste of pure indulgence!

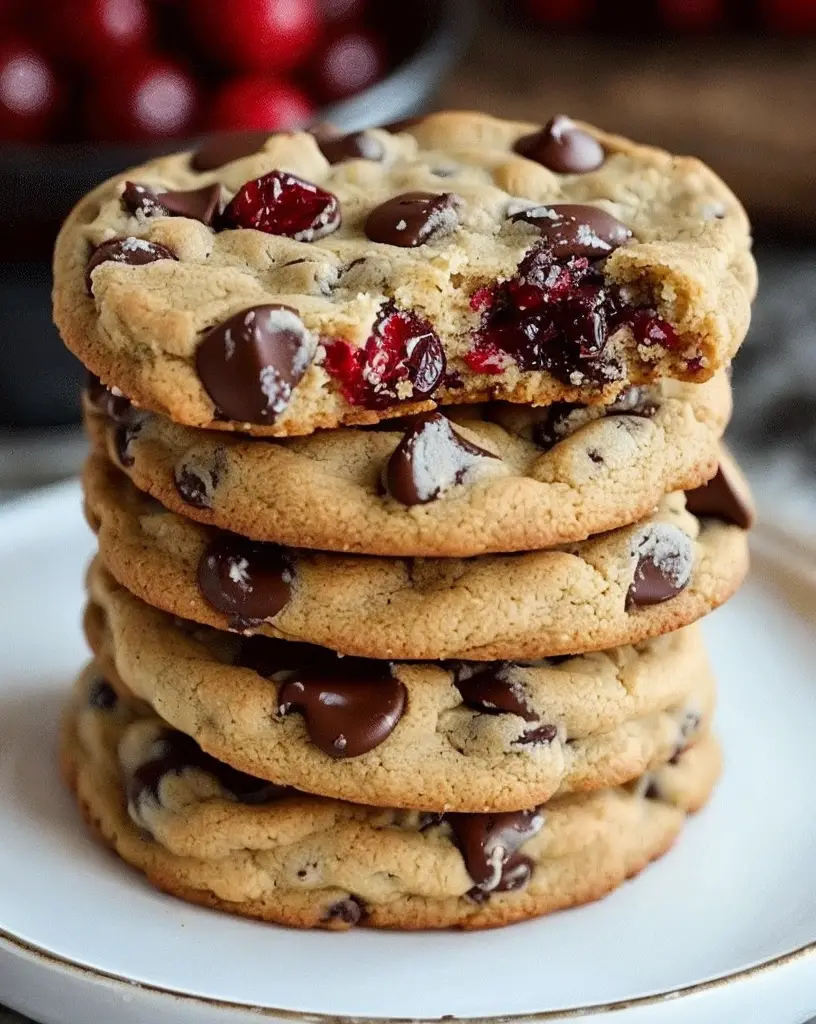
Irresistible Chewy Chocolate Chip Cranberry Cookies for Easy Dessert Ideas

Chewy Chocolate Chip Cranberry Cookies Recipe 🍪❤️ – Easy Dessert Ideas 😋

⚖️
Difficulty
Easy

⏲️
Prep Time
15 mins

🕒
Cook Time
12 mins

⏱️
Total Time
27 mins

🍽️
Servings
24 cookies

Imagine biting into a soft, warm cookie bursting with melty chocolate and the tart sweetness of cranberries. This Chewy Chocolate Chip Cranberry Cookies Recipe is not just an easy dessert idea but a delightful experience for your taste buds. The combination of rich chocolate and dried cranberries offers a balance of flavors that make these cookies stand out. Whether you are a seasoned baker or a beginner, this recipe is simple enough to make and delicious enough to impress.

Packed with love and just the right amount of chewiness, these cookies have a perfect texture that makes them a joy to eat. You will find the interplay between the gooey chocolate chips and the soft cookie dough symphony irresistible. Probably the best part is the fragrance that fills your kitchen while they’re baking, a blend of sweet chocolate melting into the warm cookie base, mingling with the floral notes of cranberries.

These cookies aren’t just a treat; they are a moment of peace and happiness on a busy day. The chewy texture combined with the cranberry tang gives you all the comfort you need. Plus, these cookies come together in under half an hour and are the perfect stress-reliever to make and bake.

Quick Recipe Highlights

  • Flavor Profile: Rich chocolate meets tart cranberries in a perfectly sweet and slightly tangy harmony.
  • Texture: These cookies are chewy with a slight crunch at the edges, making every bite satisfying.
  • Aroma: Experience a comforting vanilla and chocolate aroma with hints of cranberry warmth.
  • Visual Appeal: The golden-brown cookies studded with vibrant red cranberries and melted chocolate chips attract not just the eye but also the appetite.
  • Skill Level Needed: This recipe is designed for any skill level, offering a straightforward baking process without complicated techniques.
  • Special Equipment: An electric mixer is helpful for creaming the butter and sugar, ensuring a uniformly mixed dough.

Recipe Overview

  • Difficulty Level: These cookies are categorized as easy, with minimal steps perfect for beginner bakers. The recipe avoids any advanced techniques, focusing on simplicity and enjoyment.
  • Category: Ideal for desserts and snacks, these cookies fit into the ‘sweet baked goods’ category and are perfect for tea time or an afternoon treat.
  • Cuisine: This recipe borrows from traditional American-style cookies, with a modern twist through the inclusion of cranberries, making it a fusion of classic and contemporary flavors.
  • Cost: On average, the ingredients cost around $10, mainly owing to pantry staples like flour, sugar, and butter, making it economical for an impressive treat.
  • Season: While delightful year-round, the combination of chocolate and cranberries suits both cozy winter baking and festive holiday celebrations.
  • Occasion: Perfect for family gatherings, holiday parties, or a cozy night in, these cookies are versatile enough for any occasion that calls for a comforting dessert.

Why You’ll Love This Recipe

The Chewy Chocolate Chip Cranberry Cookies offer a taste and texture that’s hard to resist. Their chewy base complements the bursts of chocolate and cranberry flavors, making them a refined choice for those seeking more than the average cookie. They are a testament to how the right ingredients can come together seamlessly in a dessert that’s both indulgent and heartwarming.

Preparation is not only convenient but enjoyable, with a recipe designed to minimize fuss and maximize flavor. With just a few steps and basic ingredients, these cookies are perfect whether you are planning a quick baking session or a relaxed day in the kitchen.

Nutrition-wise, these cookies have a sensible indulgence factor. They offer a delicious way to enjoy sweet treats without overindulging, especially when made at home where you can control the quality and quantity of ingredients.

Social and entertaining value is inherent in every batch. Imagine showcasing a plate at a party or simply charming your family with a batch on a lazy Sunday afternoon. These cookies are a social currency of happiness and sharing.

Lastly, they are cost-effective and accessible to make. Since the recipe relies heavily on everyday pantry items, it’s convenient whenever you’re in the mood for baking, without having to make special grocery trips.

Historical Background and Cultural Significance

The origins of chocolate chip cookies trace back to the 1930s when American chefs Ruth Graves Wakefield and Sue Brides created the Toll House Cookie, forever changing the dessert landscape. This innovative creation combined chocolate with a traditional cookie base, sparking a trend that spread across the United States and beyond.

Their cultural importance cannot be overstated; chocolate chip cookies are a staple of American desserts. Over the decades, they have become synonymous with comfort and nostalgia, a symbol of homespun goodness shared across generations.

Evolving from a simple chocolate chip recipe, numerous variations have incorporated diverse ingredients, such as cranberries for a touch of tartness, showcasing how adaptable these cookies are. This evolution highlights their universality and beloved status.

Regional variations abound, each adding a unique twist. European versions may include nuts for extra texture, while South American recipes often showcase native ingredients like cacao nibs. Our version with cranberries reflects both a modern palate and a nod to the original simplicity.

Ingredient Deep Dive

Chocolate chips are the star ingredient, offering history that dates back to America’s culinary innovation. Their popularity in desserts reflects their comforting and indulgent flavor, while also providing essential antioxidants when used in moderation.

Cranberries add a delightful tang and a pop of color to the cookies. Historically valued for their nutritional properties, they are rich in Vitamin C and antioxidants. Select high-quality, unsweetened dried cranberries and store them in a cool, dry pantry for optimum freshness.

All-purpose flour forms the base of the cookie. It’s a versatile flour commonly used in baking, and its availability makes it a go-to choice. When selecting, look for unbleached, all-purpose to avoid additives, storing it in a cool place to maintain its integrity.

Butter is essential for the flavor and tender crumb of the cookies. Choose high-quality unsalted butter to control the saltiness of the final bake. For storage, keep it refrigerated until ready to use, and bring to room temperature when baking for the best texture.

Eggs act as a binding agent, contributing to the cookies’ structure and richness. Opt for fresh, large eggs from a reliable source, storing them in the refrigerator for safety and freshness until use.

Common Mistakes to Avoid

  • Overmixing the dough: Too much mixing can result in tough cookies. Mix until combined to maintain the desired chewy texture.
  • Ignoring ingredient temperatures: Ingredients like butter should be room temperature for proper emulsification. Cold ingredients can lead to uneven baking.
  • Overbaking: Pay attention to baking time; cookies should be golden, not brown. They continue to firm up as they cool.
  • Skipping the chill time: If your dough is too soft, chilling it helps prevent excess spreading during baking.
  • Incorrect measurements: Use a kitchen scale for accuracy, particularly for precise flour and sugar amounts to ensure the right cookie texture.
  • Substituting ingredients without consideration: Not all fats or flours can substitute directly without affecting taste and texture.
  • Poor storage: Improperly storing baked cookies can lead to staleness. Use an airtight container to maintain freshness.
  • Not preheating the oven: Ensure your oven is at the right temperature before baking to achieve the perfect cookie consistency.
  • Essential Techniques

    Creeking butter and sugar are essential for a light and fluffy cookie base. Mastering this technique ensures sugar is properly integrated, creating a smooth texture. Avoid overbeating to prevent a greasy dough, looking for a pale and creamy mix as a visual cue.

    Cookie portioning impacts the final bake, affecting both size and consistency. Use a cookie scoop for uniform shapes, helping them bake evenly. Visual cues for success include consistent edges and even browning.

    Chilling the dough, if necessary, can help the flavors meld, evening out hydration and developing complex flavors. Thirty minutes to an hour is often sufficient, avoiding freezing which can cook the dough unevenly.

    Proper baking techniques involve evenly spacing cookies on the sheet, allowing air to circulate, which results in even baking. Lining the tray with parchment paper aids in preventing sticking and achieving that golden bottom.

    Pro Tips for Perfect Chewy Chocolate Chip Cranberry Cookies

    Tip 1: Always use fresh baking soda for the perfect rise and texture. Old baking soda can lead to flat cookies.

    Tip 2: For an extra burst of flavor, toast the cranberries lightly before use. This enhances their natural sweetness and adds a unique depth to your cookies.

    Tip 3: Adjust the ratio of chocolate chips and cranberries to suit your preferences. More chocolate will offer a richer taste, while more cranberries increase the tartness.

    Tip 4: If you prefer your cookies thicker, slightly reduce the sugar or increase flour, as it helps create a denser and fluffier dough.

    Tip 5: Experiment with brown sugar variations. Dark brown sugar adds a deeper molasses flavor, whereas light brown sugar keeps the sweetness subtle.

    Tip 6: Store cookies in a cookie jar with a slice of bread to keep them fresh and chewy for an extended period.

    Variations and Adaptations

    Regional variations might include adding pecans or walnuts for a nutty twist, echoing southern baking traditions where nuts are a staple component, adding both flavor and texture.

    In seasonal adaptations, swap cranberries for dried figs or apricots to complement summertime vibes with their sunny sweetness, offering an excellent chewy alternative.

    For dietary modifications, consider using gluten-free flour blends for accessible baking. Make sure to adjust liquid additions, recognizing how gluten-free mixes may affect dough elasticity differently.

    Introduce spices like cinnamon or nutmeg for a warm, holiday season variation. These spices naturally complement the cranberry notes while enhancing the chocolate’s velvety richness.

    For texture modifications, add a tablespoon of milk powder to boost the cookie’s chew by lending additional proteins and fat, giving each bite a pleasant moist mouthfeel.

    Presentation alternatives could involve drizzling white chocolate over cooled cookies, creating a visually striking contrast with the dark cookie base and adding extra layers of flavor.

    Serving and Presentation Guide

    For a classic presentation, stack cookies on a rustic wooden platter with a dusting of powdered sugar for a snow-capped effect. This approach echoes traditional home-style gatherings with a hint of elegance.

    When looking to garnish, consider a sprinkle of sea salt on the gooey chocolate while warm. It accentuates the chocolate’s richness and introduces a new flavor dimension.

    Traditional accompaniments could include a scoop of vanilla ice cream beside warm cookies, balancing the chewy texture with creamy smoothness, creating a symphony of contrasts.

    Modern serving suggestions involve crafting cookie sandwiches using simple buttercream, doubling the decadence and brokering a creative take on a dessert classic.

    Temperature considerations are key; serve cookies slightly warm to enjoy the chocolate’s gooey texture. If reheating, briefly in a low oven or a few seconds in the microwave revitalizes their appeal.

    Portion control tips include cutting cookies in half for taste testing or serving alongside small shots of espresso or hot chocolate, keeping indulgence luxurious yet balanced.

    Wine and Beverage Pairing

    Pair these cookies with a semi-sweet red wine such as a Zinfandel, whose fruit-forward body complements the cranberries’ tartness while balancing the chocolate’s richness.

    Non-alcoholic alternatives may include pairing with cranberry spritzers, where the effervescent bubbles echo the cookies’ bright notes, maintaining a refreshing complement.

    For a cozy tea pairing, selections like a light Oolong offset the cookie’s sweetness, adding floral undertones that harmonize with the cranberries’ tang.

    Temperature considerations advise serving beverages slightly chilled against the warm cookies to create a refreshing interplay that complements the overall experience.

    For serving suggestions, use glass or delicate porcelain to elevate presentation; using elements that enhance the engaging contrast of rustic cookies with refined design.

    Storage and Shelf Life

    Store cooked cookies in an airtight container to maintain freshness. Use parchment paper between layers to prevent sticking and conserve their delightful chew.

    Temperature requirements encourage storing at room temperature, typically ensuring freshness for up to 5 days. For longer durations, consider freezing.

    Use freezer-safe bags for extended storage. If freezing, wrap individual cookies in wax paper to safeguard against freezer burn and preserve taste and texture integrity.

    Signs of spoilage include any presence of mold or a stale smell, indicating the cookies have exceeded their shelf life or insufficient moisture retention.

    For reheating, gently warm in a preheated low oven for 3-5 minutes, restoring the initial aroma and appealing texture without compromising softness.

    Freezing guidelines suggest portioning dough into balls before freezing to maximize convenience in quick future bakes. This method safeguards against the dough becoming overly hard or difficult to manage.

    Make Ahead Strategies

    Establish a prep timeline by gathering all ingredients prior to mixing. Premeasure to streamline workflow and avoid interruptions during the baking process.

    Between steps, properly chill dough to enhance flavor fusion and structural integrity — consider 30-minute intervals, allowing resting periods to develop complexity.

    Assess the impact on quality for longer storage by monitoring dough firmness. Dough which stiffens excessively requires slight room temperature adjustment for manageability.

    Assembly tips bolster efficiency; consider shaping dough into logs for slice-and-bake approaches, using this strategy as a time-saver particularly for holiday prep.

    To reheat, position in a moderate oven for brief periods ensuring the chocolate melts just enough without drying the cookie base, preserving moisture and chewiness.

    Fresh element additions like adding a sprinkle of zest or nuts post-bake can rejuvenate cookies, introducing vibrant pops of flavor and visual contrast.

    Scaling Instructions

    When halving the recipe, ensure equal reductions across all ingredients, particularly maintaining the core ratio of dry to wet elements to safeguard against texture deviation.

    Doubling or tripling highlights the need for larger mixing bowls and adjusted baking sheets. Consider spacing adjustments to maintain even heat exposure across expanded batches.

    Equipment adjustments become essential with larger quantities; invest in heavy-duty mixers if available, ensuring efficient dough integration without overmixing.

    Timing modifications may necessitate slightly longer baking for larger cookies; observe visually for the iconic golden-brown edges rather than relying solely on clock timing.

    Storage considerations grow with scale; plan for batch container capacity and access to both freezing and refrigerated options for optimal storing strategies.

    Nutritional Deep Dive

    The macro breakdown indicates a balanced approach for moderate indulgence, acknowledging the mixture of carbohydrates, proteins, and fats within a classic dessert context.

    Micronutrient analysis sheds light on contributions from cranberries, laden with antioxidants and vitamins, infusing the cookie with a hint of nutritious value amidst indulgence.

    Health benefits align with mindful eating. Opt for quality ingredients allowing controlled sugar and fat content, balancing pleasure with dietary mindfulness.

    Dietary considerations evidence the choice of whole-food-based ingredients, favoring natural flavors over synthetic additives or overly processed elements.

    Portion analysis emphasizes the importance of moderation, supplying satisfaction through quality rather than quantity, helping in weight management strategies.

    Weight management tips highlight savoring in smaller doses, celebrating the cookie’s indulgence as a mindful culinary experience rather than an everyday fare.

    Dietary Adaptations

    For gluten-free adaptations, replace traditional flour with a reputable gluten-free alternative, ensuring it’s a blend specifically designed to mimic wheat-based structure.

    To create dairy-free cookies, switch out butter for coconut oil, achieving a similar textural effect while offering a mild coconut note that pairs well with cranberries.

    For a vegan approach, substitute eggs with flax eggs or aquafaba, carefully monitoring hydration levels to maintain dough cohesiveness and avoid crumbling effects.

    Low-carb options can be derived from almond flour bases, although texture consistency may differ, reflecting a denser crumb appreciated by low-carb adherents.

    Adapting to keto lifestyles demands reduced sugar substitutes like erythritol or monk fruit, altering sweetness without reliance on carbohydrates while retaining palatability.

    Paleo-friendly tweaks involve natural sweeteners like coconut sugar, attracting enthusiasts with its minimal processing and alignment with ancestral diet principles.

    Low-FODMAP adjustments require acknowledging potential fructose or polyol contents in cranberries, substituting similarly tangy low-FODMAP fruit or reducing portions.

    For other specific diets, modifying ingredient quantities and choices can tailor the cookie experience, considering personal health criteria and nutritional balance.

    Troubleshooting Guide

    Texture issues often arise from misbalanced moisture content and mixing habits. Monitor liquid ratios and ensure careful incorporation, achieving the desired consistency.

    Flavor balance concerns might come from uneven ingredient distribution. Stir thoroughly and utilize quality extracts, emphasizing the vanilla and chocolate notes over chemical undertones.

    Temperature problems often occur when baked under improper conditions. Calibrate ovens if needed and ensure cookies bake at correct heat for optimal results.

    Equipment challenges, such as inadequate mixing gear, may hinder ingredient integration. Employ tools properly sized for batch volumes to prevent overloading effects.

    Ingredient substitutions should consider the unique characteristics involved. Maintaining texture indicators emphasizes cautions against arbitrary ingredient swapping without testing.

    Timing concerns arise frequently from differential baking setups. Visual and tactile cues such as firmness and color should guide bake time over specified durations solely.

    Recipe Success Stories

    Community feedback often praises the simplicity and vibrant flavors of these cookies, sparking culinary creativity and broad audience appeal within the baking community.

    Variation successes include adding zest for citrus notes, illustrating adaptability and personal expression through minor recipe tweaking and local ingredient inclusions.

    Adaptation stories reveal new inspirations, with tales of gluten-free pioneers triumphing through alternative flours, sharing approaches to transcend dietary barriers.

    Reader suggestions lean into creativity, advocating changes like spice blends or alternative sweeteners, intersecting personal tastes with foundational recipe frameworks.

    Photography tips highlight aesthetics—capture cookies in natural light for true representation of texture and color, leveraging the camera’s precision to tell a mouth-watering tale.

    Frequently Asked Questions

    Q: Can I freeze the cookie dough?
    A: Yes, you can freeze cookie dough for up to 3 months. Roll into balls, freeze on a tray, then store in bags for easy future baking. Thaw slightly before baking for even results.

    Q: Should I soak dried cranberries before use?
    A: Soaking isn’t necessary unless you want extra plumpness. Slight warm water soaking can rehydrate them, but ensure draining well to avoid excess moisture in the dough.

    Q: Can I use white chocolate chips instead?
    A: Absolutely! White chocolate complements cranberries’ tartness excellently, providing a creamy sweetness that highlights different flavor layers compared to traditional chocolate.

    Q: How do I ensure an even bake for all cookies?
    A: Use consistent size for each cookie by employing a cookie scoop. This helps maintain similar baking times, preventing some cookies from over- or undercooking.

    Q: Is it okay to substitute fresh cranberries?
    A: Dried cranberries offer a concentrated flavor that fresh ones lack in baking contexts. However, adjusting sugar levels to pair fresh cranberries can explore alternative fresh-baked results.

    Q: How do I adjust for high-altitude baking?
    A: You may require slight modifications: generally, increase flour by 1–2 tablespoons and decrease sugar slightly to maintain structural balance under high-altitude conditions.

    Q: Can these cookies be tailored for a nut-free diet?
    A: Certainly! Ensure all products are nut-free certified, carefully reading package labels as some chocolate brands might use shared facilities, important for allergy considerations.

    Q: How do I store leftover baked cookies?
    A: After cooling, keep them in an airtight container at room temperature. For prolonged periods, freeze for maximum quality retention and thaw at room temperature when needed.

    Q: What’s the best way to measure flour for this recipe?
    A: Employ the spoon-and-level method—fluff flour, spoon it lightly into measuring cups, then level with a knife to prevent compact measure variations.

    Q: Can I add a glaze to these cookies?
    A: Yes, a simple icing sugar glaze adds sweetness and visual appeal. Drizzle a light layer over cooled cookies, allowing to set for a glossy finish that contrasts nicely with cookie surfaces.

    Q: What’s the key to keeping them chewy?
    A: Maintain the indicated baking time—overcooking dries cookies quickly. Additionally, sugar levels and ratios are integral to preserving that perfect chewy consistency.

    Additional Resources

    Related recipes, such as double chocolate or white chocolate macadamia cookies, explore deeper chocolate profiles or different nutty inclusions, opening new flavor adventures.

    Technique guides aim to refine creaming or chocolate handling methods. Articles here sharpen skills and ensure every batch bakes to its ideal potential, with step-by-step clarity.

    Ingredient information accesses in-depth studies on chocolate types or cranberries’ health impacts, curating extensive knowledge and aiding in adaptable and informed baking choices.

    Equipment recommendations clarify the selection, from electric mixers to spatulas, guiding enthusiasts to suitable choices enhancing baking sessions both technically and enjoyably.

    Seasonal variations captivate bakers eager for traditions, recommending spices or zest tendencies fitting into seasonal bakes, bridging historical treats with modern palettes.

    Join the Conversation

    Social media sharing offers visual engagement; encourage posting cookie variations and technique exploration to engage with a diverse community of passionate bakers.

    Capture photography tips—focus on lighting, angles highlighting textures, and using background contrast to bring out visual appeal, sparking followers’ curiosity through artistry.

    Recipe reviews create valuable community insights, providing feedback loops enhancing future recipe iterations and suggesting versatile pathways in evolving culinary approaches.

    Community engagement invites questions, promotes feedback, and facilitates idea adaptation, fostering a collaborative atmosphere where experiences meet professionalism and warmth.

    Recipe variations open a trove of creative discoveries, leading enthusiasts to experiment boldly while maintaining the essence through the foundation provided in this beloved recipe.

    The Recipe

    Chewy Chocolate Chip Cranberry Cookies

    Serves: 24 cookies

    Prep Time: 15 mins

    Cook Time: 12 mins

    Total Time: 27 mins

    Kitchen Equipment Needed

    • Electric mixer
    • Mixing bowls
    • Baking sheets
    • Cookie scoop
    • Cooling rack

    Ingredients

    • 1 cup unsalted butter, softened
    • 1 cup brown sugar, packed
    • 1/2 cup granulated sugar
    • 2 large eggs
    • 1 teaspoon vanilla extract
    • 2 1/4 cups all-purpose flour
    • 1 teaspoon baking soda
    • 1/2 teaspoon salt
    • 1 cup semi-sweet chocolate chips
    • 1 cup dried cranberries

    Directions

    1. Preheat your oven to 350°F (175°C) and line baking sheets with parchment paper.
    2. In a large mixing bowl, cream together the butter, brown sugar, and granulated sugar until light and fluffy.
    3. Add eggs one at a time, mixing well after each addition. Stir in vanilla extract.
    4. In another bowl, whisk together flour, baking soda, and salt. Gradually blend into the creamed mixture.
    5. Fold in the chocolate chips and dried cranberries until evenly distributed.
    6. Drop rounded tablespoonfuls of cookie dough onto prepared baking sheets, leaving space for spreading.
    7. Bake in preheated oven for 10-12 minutes or until edges are golden.
    8. Let cookies cool on the baking sheets for a few minutes before transferring to a wire rack to cool completely.

    Recipe Notes

    • Consider chilling the dough for 30 minutes if you notice excess spreading.
    • You can substitute white chocolate chips for a different flavor profile.
    • Try adding a pinch of cinnamon for a warm spiced variation.