Indulge in No-Bake Chocolate Cheesecake Delight Today

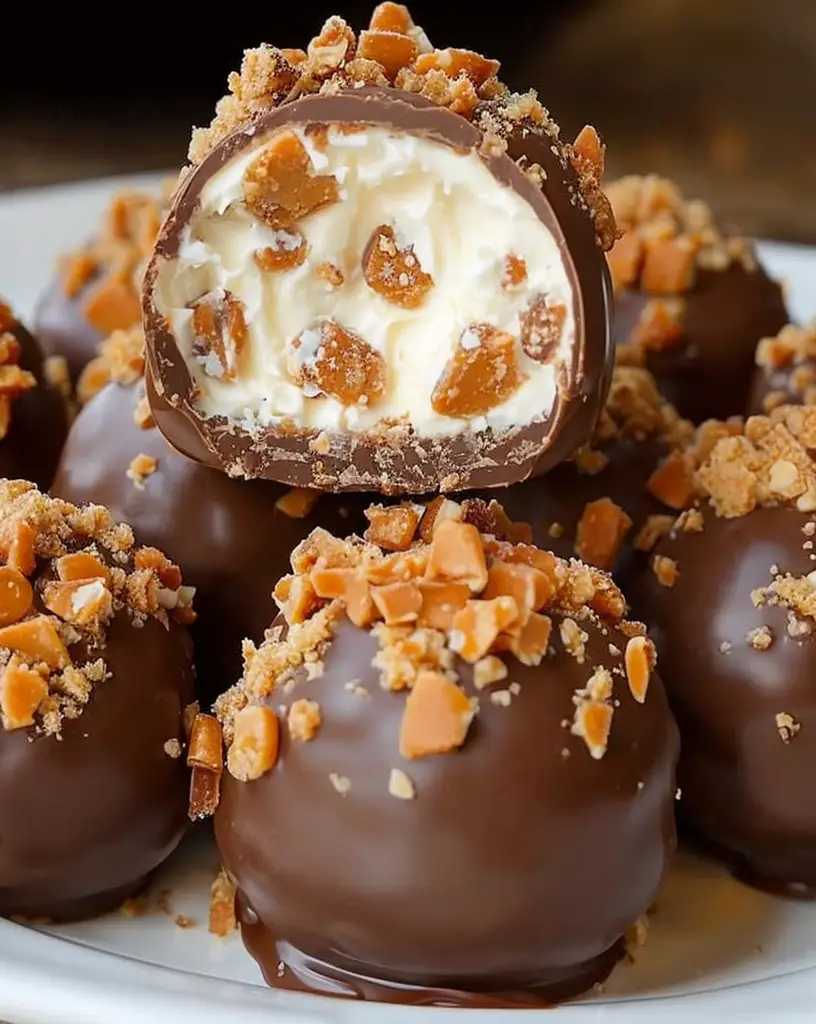
No-Bake Chocolate Cheesecake Delight: A Decadent Treat for Every Occasion

⚖️
Difficulty
Easy

⏲️
Prep Time
15 mins

🕒
Cook Time
0 mins

⏱️
Total Time
3 hours (chilling)

🍽️
Servings
8 servings

Indulge in the luscious flavors of our No-Bake Chocolate Cheesecake Delight. This easy yet sophisticated dessert combines rich chocolate and velvety cream cheese to create a melt-in-your-mouth experience. Perfect for chocolate lovers, this no-bake treat boasts a buttery graham cracker crust that complements the creamy filling exceptionally well. Whether it’s for a family gathering, party, or just a sweet craving at home, this dessert is sure to impress both family and friends alike.

The joy of making this no-bake cheesecake delight lies in its simplicity—no baking required! With just a few ingredients and minimal effort, you can whip up a dessert that tastes like it came straight from a fancy bistro. Serve it cold for maximum enjoyment, and watch as your guests rave about each luscious bite. This delightful dessert is a perfect way to celebrate special moments or simply indulge yourself.

Quick Recipe Highlights

  • Flavor Profile: The chocolatey richness pairs perfectly with a hint of creaminess from the cheesecake filling, creating a delightful balance that is sure to satisfy any sweet tooth.
  • Texture: This dessert features a silky-smooth filling over a buttery and crumbly crust, offering a sumptuous mouthfeel that melts in your mouth.
  • Aroma: The enticing scent of chocolate wafts through the air, delivering a warm and inviting aroma that simply beckons you to indulge.
  • Visual Appeal: The glossy chocolate layer on top and the creamy white cheesecake provide an eye-catching contrast that makes for an impressive presentation.
  • Skill Level Needed: This no-bake recipe is beginner-friendly, making it accessible for those new to the kitchen.
  • Special Equipment: All you need is a mixing bowl, a whisk or electric mixer, and a springform pan to achieve that perfect layered cheesecake.

Recipe Overview

  • Difficulty Level: This No-Bake Chocolate Cheesecake Delight is considered easy, making it perfect for novice bakers who want to create an impressive dessert without the complexity.
  • Category: This dessert falls into the sweet treats category and can be enjoyed at any time of day, from a delicious brunch to sweet evening gatherings.
  • Cuisine: Inspired by classic American desserts, our no-bake cheesecake brings a modern twist to traditional flavors, perfect for any culinary enthusiast.
  • Cost: With a few straightforward and affordable ingredients, this recipe remains budget-friendly, making it a fantastic option for everyday celebrations.
  • Season: This dessert shines year-round, but it’s especially delightful during summer when a cool treat is most refreshing.
  • Occasion: Ideal for birthdays, anniversaries, or holiday gatherings, No-Bake Chocolate Cheesecake Delight is the perfect show-stopping dessert for special occasions.

Why You’ll Love This Recipe

This No-Bake Chocolate Cheesecake Delight not only tantalizes your taste buds but also pleases your palate with its creaminess and decadent flavor. Each bite encapsulates a perfect blend of rich chocolate enveloping a smooth cheesecake filling. The texture is creamy and rich, yet light enough that you can savor multiple pieces without feeling overwhelmed, making it an irresistible option for gathering with friends.

In addition to its deliciousness, this recipe offers convenience. Forget about preheating the oven or watching the clock; you simply mix the ingredients, pour them into a crust, and let the refrigerator do the rest. This allows you to focus more on entertaining guests or enjoying the moment without fussing over a complicated baking process. Prepare it ahead of events, and it’ll be ready when you are!

Furthermore, this no-bake treat delivers nutritional benefits too. While indulgent in flavor, it’s made with cream cheese, providing some protein. The use of cocoa powder introduces antioxidants, which can be beneficial. Plus, you can easily modify the ingredients to fit healthier choices by opting for low-fat cream cheese or a gluten-free crust, ensuring everyone can enjoy a slice.

Social gatherings are made richer with this dessert option. Its sophisticated appearance and luxurious flavor make it a conversation starter, allowing it to take center stage at any event. Whether at a casual get-together or a more formal gathering, this treat encourages connections over a shared love of delicious desserts.

Cost-effectiveness plays a significant role in its appeal. The ingredients are simple and widely available, allowing you to create an impressive dessert without breaking the bank. This means you can share your love for dessert with friends and family, making it a fantastic option for budget-conscious hosts looking to impress.

Historical Background and Cultural Significance

The origins of cheesecake can be traced back to ancient Greece, where it was served to athletes during the first Olympic Games in 776 BC. The simple blend of cheese and honey was a source of energy for competitors. As civilizations evolved, cheesecake recipes transformed, making their way to America, where they became a staple dessert.

The significance of cheesecake, especially the chocolate variety, has seen it cemented in pop culture. It features heavily in celebrations, with many families passing down treasured recipes through generations. The combination of chocolate and cream cheese has made this dessert a favorite, especially for those with a penchant for the sweeter side of life.

Through the years, the recipe has evolved with various regional influences, adapting to local tastes and ingredient availability. From classic New York-style cheesecake to contemporary no-bake versions, there are countless adaptations to cater to diverse palates around the world. Each unique twist provides a glimpse into different culinary traditions while maintaining the charming essence of cheesecake.

No-Bake Chocolate Cheesecake Delight exemplifies this evolution, offering an easy-to-make version that captures the indulgence we associate with traditional cheesecakes. As it finds a home in celebratory occasions, it remains a reminder of the dessert’s rich history and cultural significance.

Ingredient Deep Dive

Chocolate

Chocolate has a fascinating history, originating from the ancient Mesoamericans who created a beverage from cacao beans. Rich in flavor and a beloved ingredient worldwide, chocolate also boasts numerous health benefits, including antioxidants that can reduce inflammation and improve heart health. When selecting chocolate for this recipe, opt for high-quality semi-sweet or dark chocolate to maximize flavor. Store unused chocolate in a cool, dark place, and consider substituting with cocoa powder for a low-calorie option.

Cream Cheese

Cream cheese emerged in the United States in the 19th century and has become an essential ingredient in pastries and spreads. It is known for its creamy texture and mild flavor, making it perfect for cheesecakes. Additionally, cream cheese offers calcium and protein, which contribute to a balanced diet. When storing cream cheese, keep it refrigerated and use it within a few weeks for the best freshness. For a healthier take, consider low-fat cream cheese as an alternative.

Graham Crackers

Graham crackers have a long-standing association with desserts, primarily as a base for many beloved sweet treats. Invented in the 19th century, these crunchy snacks are made primarily from whole-wheat flour, making them a healthier choice for crusts. They offer a slight sweetness that pairs beautifully with rich cheesecake. Select crisp, fresh crackers, and store them in an airtight container to maintain their crispness. Substitute gluten-free crackers to accommodate dietary preferences.

Sugar

Sugar enhances the flavors of this recipe and contributes to its sweetness. While sugar’s roots go back thousands of years, it is often advised to consume it in moderation. For this cheesecake, regular granulated sugar is recommended, but alternatives like coconut sugar or stevia can provide different flavor profiles while reducing calorie intake. Store sugar in a dry, cool environment to prevent clumping.

Common Mistakes to Avoid

  • Overmixing the cream cheese: Mixing too vigorously can incorporate excess air, leading to a lighter texture than desired. Mix until just combined for creamy results.
  • Skipping the chilling step: Allowing the cheesecake to chill is essential for proper setting. Skipping this step will result in a runny filling.
  • Using low-quality chocolate: Cheap chocolate may not melt smoothly, affecting the final texture and flavor of your cheesecake. Invest in good-quality chocolate for best results.
  • Incorrect measurements: Precision matters in baking and no-bake recipes. Use measuring cups and spoons for accuracy to ensure balanced flavors.
  • Neglecting to grease the pan: Not greasing the pan can make it hard to release the cheesecake after chilling. Lightly grease the sides of the springform pan for easy removal.
  • Not checking for doneness: Although it’s a no-bake recipe, visually check the filling after chilling to ensure it has set. If it’s still liquid, chill longer.
  • Rushing through the recipe: Patience is key for achieving the best results. Take time during preparation and chilling for optimal flavor and consistency.
  • Skipping garnishes: The dessert is visually inviting, and garnishes heighten the appeal. Don’t miss out on adding toppings like whipped cream or chocolate shavings!
  • Incorrect storage: Storing the cheesecake in an open container can lead to dryness. Use plastic wrap or an airtight container to maintain freshness.
  • Using sweeteners incorrectly: If using alternatives, ensure you understand their sweetness levels to avoid overly sweet or bland cheesecakes.

Essential Techniques

Mixing Cream Cheese

Mixing cream cheese properly is critical for a smooth cheesecake filling. Begin with room temperature cream cheese to prevent lumps. Use a hand mixer or stand mixer on low speed to combine and gradually increase to medium speed. Look for a creamy consistency without visible lumps; this ensures a luscious filling that will set beautifully.

Chocolate Melting

Melting chocolate can be done on the stovetop or in the microwave. In the stovetop method, use a double boiler to prevent direct heat. For microwave melting, heat in 30-second intervals and stir between each to avoid scorching. Melted chocolate should be glossy and smooth, serving as a key flavor component in this dessert.

Crust Preparation

Creating the perfect graham cracker crust involves finely crushing the crackers and mixing them with melted butter. Be sure to press the mixture firmly into the springform pan’s base and sides to create a sturdy support for the cheesecake filling. This not only provides texture but helps the crust hold its shape during slicing and serving.

Chilling

Chilling the cheesecake is an essential step to ensure it sets properly. After pouring the filling over the crust, cover the cheesecake to prevent it from absorbing odors. A minimum of 3 hours is recommended for optimal firmness, but overnight chilling provides the best flavor and texture.

Pro Tips for Perfect No-Bake Chocolate Cheesecake Delight

1. Use high-quality chocolate for a richer flavor; it makes a noticeable difference in the final taste.
2. Make sure your cream cheese is at room temperature to prevent lumps in your filling.
3. Chill the cheesecake overnight for the best texture and flavor.
4. Experiment with different toppings to add variety; whipped cream, fruit, or nuts can enhance the dessert.
5. Always press the crust mixture firmly into the pan to avoid crumbling when slicing.
6. If you’re short on time, freeze individual slices for a quick dessert option later.
7. Add a pinch of salt to the chocolate mixture to enhance the flavor profile further.
8. If you’re planning to serve the cheesecake outdoors, keep it chilled until serving to maintain the consistency.

Variations and Adaptations

You can customize this No-Bake Chocolate Cheesecake Delight in various delightful ways. Consider creating a flavored cheesecake by adding your favorite extracts, like vanilla or almond, to the filling. You can also try switching it up with white chocolate for a different flavor profile while maintaining that creamy texture you’re looking for.

Seasonal adaptations can breathe new life into this dessert; for example, add fresh berries in the summer or crushed peppermint during the holiday season. You can also swap the graham cracker crust with crushed cookies like Oreos or chocolate wafers for a more intense chocolate experience.

Dietary modifications are easy too. For a gluten-free version, use gluten-free graham crackers or a nut-based crust. Those looking for lower sugar options can try using natural sugar substitutes without sacrificing flavor. Lastly, if you’re interested in a vegan version, replace the cream cheese with cashew cream and the gelatin with a plant-based alternative to set the dessert.

Serving and Presentation Guide

When presenting your No-Bake Chocolate Cheesecake Delight, consider plating techniques that elevate its visual appeal. A simple way to serve slices is to use a heated knife for clean cuts. Add a drizzle of chocolate sauce or a dollop of whipped cream on top for a decadent finish.

Garnishing with fresh mint or seasonal fruits can create color contrast and brighten the overall presentation. You might also consider serving individual portions in small dessert cups for a modern twist alongside a scoop of ice cream.

Temperature matters when serving this dessert; it should remain chilled to preserve its texture. Keep it in the refrigerator until ready to serve, and be sure to slice it carefully to maintain the layering of the crust and filling.

Wine and Beverage Pairing

Pairing wine or beverages with No-Bake Chocolate Cheesecake Delight can enhance the tasting experience. A rich dessert like this pairs beautifully with a glass of Merlot or Malbec, as their fruity notes complement the chocolate and creamy filling.

For a non-alcoholic option, consider serving it with a refreshing iced coffee or a rich hot chocolate to maintain the chocolate experience. Additionally, pairing it with herbal teas, such as peppermint or chai, can provide a delightful contrast to the cheesecake’s richness.

When serving, remember to balance the sweetness of the cheesecake with the drink’s flavor profile to create a harmonious pairing for your guests.

Storage and Shelf Life

To maintain the quality of your No-Bake Chocolate Cheesecake Delight, store it in the refrigerator covered with cling film. It generally lasts around 5-7 days, although freshness is best enjoyed within the first few days. Use an airtight container to keep it moisture-free and prevent it from absorbing other odors in the fridge.

Significant changes in texture or flavor can indicate spoilage, so look for any changes in aroma or an unusual texture before consuming leftovers. If you plan to keep it for an extended period, consider freezing it. Wrap individual slices tightly in plastic wrap and seal them in a container to maintain their quality for up to three months.

Make Ahead Strategies

Making No-Bake Chocolate Cheesecake Delight in advance is an excellent approach for reducing stress on the day of your gathering. Prepare the cheesecake up to a day ahead, allowing it to chill properly for maximum flavor development and texture.

For longer storage, you can assemble the crust a day in advance and keep it covered. Alternatively, prepare the filling and store it in the refrigerator until it’s time to assemble and chill the dessert. Always be sure to give enough time for the cheesecake to set after assembly.

At serving time, top with fresh garnishes to add a touch of freshness and maintain visual appeal. You can also prepare your toppings ahead and keep them stored separately to ensure the cheesecake maintains its original form until presentation.

Scaling Instructions

If you want to adjust the serving size for your No-Bake Chocolate Cheesecake Delight, scaling the recipe is straightforward. Halve the ingredients for a smaller dessert or double them to make more for larger gatherings.

When doubling or tripling the recipe, ensure you have an adequately sized pan to accommodate the larger volume. Adjust the chilling time accordingly, as larger cheesecakes may take longer to set properly.

Keep in mind that if you’re adjusting ingredient proportions, consider the balance of flavors, especially if you’re adding more chocolate or sugar. Smaller group gatherings might benefit from reducing sugar slightly to allow the chocolate’s natural richness to shine through.

Nutritional Deep Dive

Assessing the nutritional value of No-Bake Chocolate Cheesecake Delight requires a closer look at its ingredients. Each slice contains a balance of macronutrients, with proteins from cream cheese and carbohydrates from the graham cracker crust. The chocolate also provides healthy antioxidants which can contribute positively to your diet.

It’s essential to consider the micronutrients contributed by cream cheese and chocolate, including calcium and iron, essential for maintaining optimal health. If you substitute ingredients for healthier alternatives, your dessert can be tailored to merely meet dietary needs, making it versatile.

When planning portion sizes, remember the richness of this dessert; smaller servings often suffice, especially when paired with lighter accompaniments. This balance will provide satisfaction without overindulging.

Dietary Adaptations

Creating dietary adaptations for No-Bake Chocolate Cheesecake Delight allows you to cater to various preferences. For gluten-free individuals, use gluten-free graham crackers or alternative crusts made from oats or almond flour to keep the dish enjoyable for everyone.

Dairy-free and vegan versions can be made by substituting cream cheese with alternatives such as cashew cream or coconut cream. For a lower-carb option, consider a keto-friendly crust made from crushed nuts and butter and replace sugar with a suitable low-carb sweetener.

Experimenting with flavor profiles is also possible to accommodate a broader range of tastes. For example, users can incorporate different extracts or flavors like matcha for a unique twist that aligns with specific diets.

Troubleshooting Guide

For perfect results every time with your No-Bake Chocolate Cheesecake Delight, here’s how to troubleshoot some common issues. If your cheesecake isn’t setting, ensure you allowed adequate chilling time; it may need additional time in the refrigerator to firm up properly.

If the texture turns out grainy, it might be due to overmixing or not allowing the cream cheese to soften sufficiently before stirring. Always mix until just combined to achieve the desired smoothness.

For flavor balance, if the cheesecake ends up overly sweet, consider reducing the sugar in future batches or adding a pinch of salt to elevate flavors. If you encounter cracks on the surface after chilling, it could indicate rapid temperature changes; avoid placing it directly in the refrigerator immediately after mixing.

Recipe Success Stories

Many enthusiastic bakers have shared their experiences with making No-Bake Chocolate Cheesecake Delight, raving about its ease and flavor. Customers frequently report omitting effort and time without compromising taste, ensuring this recipe remains a crowd favorite. Photographs shared across social media showcase stunning variations, depicting creative garnish ideas like fresh mint and colorful sprinkles.

Readers also express their triumphs in customizing flavors to suit diverse palettes, which showcases the recipe’s versatility. Some have used flavored cheeses or alternative crusts, resulting in a unique dessert experience. The mutual support and inventive suggestions foster a sense of community among dessert lovers, inspiring even those new to baking to try their hand at this delightful recipe.

Frequently Asked Questions

Can I use a different type of crust?

Yes! While a graham cracker crust is traditional, you can easily switch to an Oreo crust for a chocolate version or a gluten-free option made from almond flour.

How long will the cheesecake last in the refrigerator?

It usually lasts about 5-7 days when stored correctly in an airtight container in the fridge.

Can I freeze this cheesecake?

Yes, you can! Wrap individual slices tightly in plastic wrap and place them in a suitable container to freeze for up to three months.

Is there a vegan option for this cheesecake?

Absolutely! Substitute the cream cheese with cashew cream, and use a vegan crust. Ensure any sweeteners used are also plant-based for best results.

Why didn’t my cheesecake set properly?

It may need longer chilling time. Ensure you’ve covered it well and allow it to sit for a minimum of 3 hours, ideally overnight for best results.

Can I make this cheesecake ahead of time?

Certainly! It can be prepared a day in advance. Just cover it tightly and store it in the refrigerator until serving.

What can I use instead of sugar?

You can opt for natural sweeteners like honey, agave syrup, or sugar substitutes like stevia depending on your dietary needs.

How do I prevent cracks in my cheesecake?

Chilling slowly and avoiding rapid temperature changes can help. Ensure your cream cheese is at room temperature before mixing, and don’t overmix!

Can I use low-fat cream cheese?

Yes! Low-fat or reduced-fat cream cheese can be used in place of regular cream cheese, though the texture and taste may differ slightly.

What’s the best way to decorate the cheesecake?

Decorate with chocolate shavings, fresh fruits, or a drizzle of caramel or chocolate sauce to accentuate its appearance and flavor.

Additional Resources

Explore related recipes that complement your No-Bake Chocolate Cheesecake Delight, including assorted fruit tarts or chocolate lava cakes to further satiate dessert cravings. Check out our guides on essential baking techniques that can enhance your skills and provide tips for working with different ingredients.

For further ingredient information, such as sourcing high-quality chocolates or tips for making the best cheese mixtures, feel free to peruse our detailed articles. With seasonal variations often inspiring new recipes, consider trying other fruity no-bake desserts as you venture to expand your culinary repertoire.

Join the Conversation

We love hearing from our readers! Share your own experiences with No-Bake Chocolate Cheesecake Delight and tag us on social media with your culinary creations. Your stunning photographs and feedback inspire others in the community to try their hands at this delicious recipe.

Feel free to leave a review, offering suggestions or adjustments you’ve made to tailor the dessert to your tastes. Engaging with our community is essential, and we encourage recipe variations that may spark new favorites among fellow dessert enthusiasts.

The Recipe

No-Bake Chocolate Cheesecake Delight

Serves: 8 servings

Prep Time: 15 mins

Cook Time: 0 mins

Total Time: 3 hours (chilling)

Kitchen Equipment Needed

  • Springform pan
  • Mixing bowl
  • Hand or stand mixer
  • Spatula
  • Measuring cups and spoons

Ingredients

  • 1 ¾ cups graham cracker crumbs
  • ½ cup unsalted butter, melted
  • 2 cups cream cheese, softened
  • 1 cup powdered sugar
  • 2 cups semi-sweet chocolate, melted
  • 1 teaspoon vanilla extract
  • 1 cup whipped cream (for topping)

Directions

  1. In a mixing bowl, combine graham cracker crumbs and melted butter. Press mixture firmly into the bottom and up the sides of a greased springform pan.
  2. In another bowl, beat the softened cream cheese and powdered sugar until creamy. Add melted chocolate and vanilla extract, mixing until well combined.
  3. Gently fold in the whipped cream until fully integrated. Pour the mixture over the crumb crust and smooth the top.
  4. Cover and refrigerate for at least 3 hours, or until set. For best results, chill overnight.
  5. Once set, remove the cheesecake from the springform pan, slice, and serve decorated with additional whipped cream as desired.

Recipe Notes

  • Feel free to add different toppings such as chocolate curls, berries, or nuts for added texture and flavor.
  • If you’re using alternative sweeteners, adjust the quantity according to their sweetness level.
  • For a chocolate lover’s dream, consider drizzling chocolate sauce over each slice when serving.

Indulge in Irresistible Butterfinger Chocolate Caramel Crunch Truffles

Butterfinger Chocolate Caramel Crunch Truffles: A Decadent Treat!

⚖️
Difficulty
Medium

⏲️
Prep Time
30 mins

🕒
Cook Time
15 mins

⏱️
Total Time
45 mins

🍽️
Servings
24 Truffles

Indulge in the delightful world of Butterfinger Chocolate Caramel Crunch Truffles. These luscious treats offer a heavenly combination of creamy chocolate, crunchy Butterfinger pieces, and gooey caramel, making them a perfect dessert for any occasion. With a rich flavor profile that tantalizes the taste buds, each bite melts in your mouth, delivering a burst of decadent sweetness that chocolate lovers will adore.

Whether you are preparing for a festive gathering, a cozy movie night, or simply treating yourself, these truffles stand out as an impressive and delicious treat. The blend of textures—the smooth chocolate outer layer, the crispy Butterfinger bits, and the chewy caramel—creates a fascinating experience that will leave everyone craving more. Get ready to elevate your dessert game with this Butterfinger Chocolate Caramel Crunch Truffles recipe!

Quick Recipe Highlights

  • Flavor Profile: Sweet chocolate mingling with the salty crunch of Butterfingers and warm caramel.
  • Texture: A texture enthusiasts’ dream—smooth, crunchy, and chewy all in one bite.
  • Aroma: Aromas of rich chocolate and caramel waft through the air, inviting everyone to indulge.
  • Visual Appeal: Beautifully rolled truffles coated in chocolate topped with crushed Butterfinger pieces.
  • Skill Level Needed: Accessible for home bakers with some basic confectionery skills.
  • Special Equipment: A microwave or double boiler for melting chocolate and a baking sheet for resting truffles.

Recipe Overview

  • Difficulty Level: Medium—requires some patience and precision, but is achievable for most home cooks.
  • Category: Perfect as a dessert for parties, special events, or a delightful homemade gift.
  • Cuisine: A sweet treat often found in American dessert culture, merging traditional confectionery techniques with modern flavors.
  • Cost: Budget-friendly; most ingredients can be sourced for under $15, making it an affordable indulgence.
  • Season: Great year-round, especially during holidays or celebrations when sweet treats are in high demand.
  • Occasion: Ideal for birthdays, holiday parties, or as a special surprise for loved ones.

Why You’ll Love This Recipe

Treat your tastebuds to a delightful experience with these Butterfinger Chocolate Caramel Crunch Truffles. The combination of rich chocolate and the distinct sweetness of Butterfingers creates a flavor explosion that’s irresistible. Each bite offers a unique experience—smooth outside, with a delightful crunch and chewy caramel center that pops with flavor.

Convenience is another fantastic aspect of this recipe. With just a few steps and easily accessible ingredients, you can whip up a batch of truffles that look and taste gourmet. They are perfect for sharing at gatherings or keeping around for a sweet treat at home.

Not only are these truffles a delight to eat, but they also bring some nutritional benefits. Dark chocolate provides antioxidants, while the caramel offers a quick energy boost. Enjoy them in moderation, and you can satisfy your sweet tooth while indulging in a little treat.

Socially, these truffles are a show-stopper. When you serve them at parties or give them as gifts, you’re sure to impress your friends and family. They’re perfect for sharing, bonding, and creating sweet moments together.

Moreover, the affordability of this recipe makes it accessible. With common pantry ingredients, you can prepare a delicious dessert without breaking the bank, making these truffles a delightful addition to your cooking repertoire without the guilt of overspending.

Historical Background and Cultural Significance

The origin of truffles dates back centuries, with roots in French cuisine. As chocolate confections gained popularity worldwide, American bakers began to innovate and play with different flavor combinations, leading to delightful creations like the Butterfinger Chocolate Caramel Crunch Truffles that we enjoy today.

In American culture, chocolate truffles symbolize indulgence and luxury, often associated with celebration and special occasions. These sweet treats have become a staple at parties, weddings, and holidays, representing joy and celebration in many families.

The evolution of truffle recipes has witnessed fascinating adaptations over time. As innovative chefs and home bakers experiment with flavors and ingredients, we see variations like these Butterfinger truffles, combining nostalgic candies with gourmet chocolate techniques, showcasing the endless possibilities of dessert creation.

Regionally, the popularity of chocolate varies, with truffles being particularly loved across the nation. Each region might adapt recipes based on local tastes, but the fundamental appeal of chocolate truffles remains universally cherished.

Ingredient Deep Dive

Chocolate: Chocolate is perhaps the centerpiece of this recipe, rich in history and significance. Originating from sources like the cacao bean, it dates back to ancient Mesoamerican cultures. This ingredient provides numerous health benefits, especially dark chocolate, which contains flavonoids, contributing to heart health and improved mood. When selecting chocolate, opt for high-quality brands with at least 60% cocoa for the best flavor and texture. Store chocolate in a cool, dry place away from strong odors. If you need to substitute, consider any quality dark or semi-sweet chocolate.

Butterfingers: A beloved candy bar, Butterfingers are known for their unique combination of crunchy peanut butter and chocolate. This candy has strong cultural ties in America, often evoking nostalgia for many who grew up enjoying it. Nutritionally, they are higher in sugar and fat, so moderation is key, but they do provide a fun crunch to desserts. When selecting Butterfingers, ensure they are within their expiration date for optimum freshness. For alternatives, consider other crunchy peanut butter candies for a similar effect.

Common Mistakes to Avoid

  • Not tempering chocolate properly can lead to a dull finish and undesirable texture.
  • Using low-quality chocolate can affect the overall flavor of your truffles; always choose good quality chocolate.
  • Skipping the cooling step may result in melted truffles that don’t hold their shape.
  • Forgetting to crush Butterfinger pieces finely can cause uneven texture in the truffles.
  • Not allowing caramel to cool adequately can make it too runny when filling the truffles.
  • Overfilling the truffles with caramel may cause them to burst during the coating process.
  • Failing to chill the truffles sufficiently before serving can lead to soft and difficult-to-handle treats.
  • Not pressing the top firmly can cause the crushed Butterfingers to slide off or not adhere properly.
  • Using the wrong size chocolate chips or pieces can alter melting time and texture.
  • Not keeping an eye on the cooking time can lead to burnt chocolate or overcooked caramel.

Essential Techniques

Melt the chocolate carefully using a microwave or double boiler to ensure it doesn’t seize. Stir consistently and watch for visual cues; chocolate should be glossy and smooth when properly melted. Avoid overheating, as this can cause the chocolate to become grainy and unusable.

Chilling the truffles is crucial for achieving the right texture. After rolling the truffles, allow them to rest in the refrigerator until firm. This helps maintain shape and prevents melting during the coating process. Always use a proper cooling time to ensure the final product achieves the desired consistency.

Pro Tips for Perfect Butterfinger Chocolate Caramel Crunch Truffles

– Use high-quality chocolate for melting for the best flavor and texture—cheap chocolate often results in a lackluster taste.
– Chill your hands briefly in cold water before rolling the truffles to prevent the chocolate from melting during shaping.
– Experiment with flavored chocolates, such as milk or dark, to create unique variations—you can customize the sweetness and richness.
– If you’re sensitive to sugar, use sugar-free alternatives that work well in melting chocolate and candy bars.
– Ensure the crushed Butterfingers are fresh and not stale for the best crunch and flavor impact.
– Allow the truffles to rest after coating to give the chocolate a chance to set before serving.
– For a more sophisticated look, consider drizzling white chocolate over the finished truffles for added decoration.
– Serve them chilled for the best texture and flavor profile; the chocolate will have a delightful snap when cold.

Variations and Adaptations

Explore different flavor profiles by switching up the chocolate types used in the recipe. Try using peppermint-flavored chocolate for a festive twist or dark chocolate for a richer flavor. Seasonal adaptations can also be made with festive elements like pumpkin spice or cinnamon for autumn treats.

Creating dietary modifications is also possible; for a vegan option, substitute dairy chocolate with high-quality vegan chocolate and use a plant-based caramel. For those following low-carb or keto diets, consider using sugar-free Butterfinger alternatives and sugar-free chocolate to keep the indulgence guilt-free.

For flavor variations, consider adding a hint of sea salt on top of the melted chocolate for a salted caramel effect, or infuse some espresso powder into the chocolate to enhance the flavor complexly.

Presentation alternatives can include placing the truffles in decorative wrappers or serving them on a tiered dessert stand for visual appeal at gatherings.

Serving and Presentation Guide

When plating your Butterfinger Chocolate Caramel Crunch Truffles, use vibrant decorative plates or a rustic wooden board to enhance their visual appeal. Garnish with additional crushed Butterfinger pieces scattered artfully around the truffles for added texture.

Traditionally, these truffles might be served at room temperature, but they are particularly delightful when chilled. Small cupcake liners make for an excellent serving suggestion for individual presentation and easy handling.

For modern takes, consider serving the truffles alongside a rich chocolate dipping sauce or a scoop of ice cream. The combination of cold ice cream and chocolaty warmth elevates the entire experience.

Portion control is essential as well; aim for one to two truffles per serving, as they are rich and satisfying. This encourages guests to enjoy without overindulging.

Wine and Beverage Pairing

Consider pairing these Butterfinger Chocolate Caramel Crunch Truffles with a rich red wine like a Merlot or a bold Zinfandel, which complements the sweetness of the chocolate and caramel. The fruity notes in the wine balance perfectly with the dessert’s flavors.

For non-alcoholic alternatives, a rich chocolate milkshake or a creamy vanilla latte provides a delicious pairing without the alcohol. The creaminess enhances the overall flavor profile of the truffles while keeping the indulgence alive.

In warmer months, consider serving chilled sparkling water with a wedge of lemon for a refreshing complement that cleanses the palate and prepares you for another bite of your decadent truffles.

Storage and Shelf Life

To store your Butterfinger Chocolate Caramel Crunch Truffles, keep them in an airtight container at room temperature for up to one week. If you prefer longer shelf life, refrigerate them, which can extend freshness to two weeks.

Ensure to separate layers with wax paper to prevent sticking. Avoid storing them near strong odors, as chocolate can easily absorb unwanted scents. Signs of spoilage usually include a dull appearance or changes in texture; if the chocolate blooms, it doesn’t affect the flavor but may alter the visual appeal.

If you wish to freeze the truffles, line them up on a baking sheet to freeze individually before placing them in a freezer-safe container. Thaw in the refrigerator just before serving for the best texture and flavor recovery.

Make Ahead Strategies

These truffles can be made ahead of time, allowing for several days of preparation. Prepare the chocolate and caramel filling a day prior, and let them chill overnight for optimal flavor melding.

Store the truffles in an airtight container in the fridge and allow to come to room temperature before serving for the best flavor experience. When planning a party, consider making them a week in advance, ensuring they are kept chilled until the day of the event.

For fresher elements, consider adding sprinkle toppings or fresh fruit garnishes the day before serving to keep their appearance vibrant and enticing.

Scaling Instructions

If you want to halve the recipe for a smaller gathering, simply divide all ingredient amounts by two, adjusting cooking times slightly as needed. This ensures you maintain the perfect flavor and consistency without waste.

When doubling or tripling the recipe, ensure you have adequate melting equipment; you might need to work in batches if using a microwave or smaller bowls. Additionally, carefully monitor the melting times to avoid scorching chocolate in larger quantities.

Adjust storage containers accordingly—larger batches will need appropriate scaling to avoid overflow. If times are a concern, consider preparing larger amounts in advance to save prep time on the serving day.

Nutritional Deep Dive

When analyzing the nutritional profile of Butterfinger Chocolate Caramel Crunch Truffles, keep in mind that one truffle approximately contains around 150 calories, primarily from sugars and fats. These provide instant energy; however, moderation is key for maintaining a balanced diet.

Checking the macro breakdown, these truffles have a significant amount of carbohydrates, primarily from sugars, with moderate amounts of fat predominantly contributing to texture and richness. Tracking these macronutrients can help balance your overall daily intake.

On the micronutrient side, these truffles may contain small amounts of iron and magnesium like that found in dark chocolate. This showcases the benefits of treating yourself occasionally; however, keep dietary considerations in mind for a well-rounded approach to indulgence.

The health benefits of dark chocolate shouldn’t be overlooked—antioxidants present can help improve heart health when consumed in moderation. Always consider your daily intake when indulging in sweet treats.

Dietary Adaptations

For those seeking gluten-free options, these truffles can readily be made gluten-free by using certified gluten-free candy bars. Be sure to read labels to ensure no cross-contamination occurs during ingredient sourcing.

For a dairy-free or vegan version, opt for vegan chocolate and plant-based caramel alternatives that effectively replace traditional ingredients, ensuring the recipe remains just as delightful without using animal products.

Low-carb and keto dieters can enjoy these truffles by selecting sugar-free chocolates and low-carb alternative butterfinger components, allowing for a guilt-free treat that aligns with dietary restrictions.

For paleo dieters, modifications can include using nut-based chocolates or raw sweeteners like honey or maple syrup in small quantities. Adopting these practices ensures that you can still enjoy these indulgent desserts while adhering to dietary needs.

Troubleshooting Guide

If your truffles struggle with texture issues, ensure all ingredients are properly tempered before utilizing them together, as improper temperatures can lead to undesired outcomes. Always check melting techniques to confirm uniform consistency.

For flavor balance, adjust the sweetness by incorporating small amounts of sea salt or a touch of espresso to counteract overly sweet notes. Tasting during preparation can help prevent flavor disparities.

In cases of temperature problems during the melting process, invest in a thermometer to check the chocolate; overheating can lead to a ruined batch. Instead, try melting in smaller bursts for an even finish.

If you encounter challenges with your equipment while coating the truffles, consider using a fork for ease of handling or work on ensuring melted biscuits remain at a controlled warm temperature throughout the process.

Timing concerns can often lead to truffles not firming correctly; be diligent in sticking to chilling times and avoid rushing through essential steps to produce perfect outcomes regularly.

Recipe Success Stories

Over the years, numerous readers have shared their delightful experiences with Butterfinger Chocolate Caramel Crunch Truffles. From birthday celebrations to holiday parties, they have consistently been a hit, garnering rave reviews for their rich flavors and impressive appearance.

Variations have resulted in creative adaptations, including even using flavored chocolates, such as orange or mint, enriching the traditional recipe. Success stories showcase community engagement with the recipe, sparking creativity among home bakers who share their personal versions.

Many readers report success in taking these truffles to social gatherings, expressing how they became the talk of the party, leading people to request the recipe. The sharing and community drive associated with this recipe are a testament to its appeal.

Photography tips shared amongst community members have also inspired others to showcase their beautiful creations online, helping others become inspired to recreate these lovely treats in their own kitchens.

Frequently Asked Questions

Can I use other types of candy in the truffles?

Absolutely! You can experiment with various candy bars for a customized flavor. Just ensure the taste pairs well with chocolate and caramel, such as Reese’s Peanut Butter Cups or Twix bars.

How should I store leftover truffles?

Store leftover truffles in an airtight container at room temperature or in the refrigerator with parchment separating layers to prevent sticking. They can last up to two weeks if kept properly.

Can I make these truffles ahead of time?

Yes! These truffles can be made a day or two in advance, storing them in the fridge. Just let them come to room temperature before serving for the best texture.

What if my chocolate seized when melting?

If your chocolate seizes, don’t panic! Adding a small spoonful of vegetable oil or coconut oil can help restore a smooth consistency. Stir it in slowly to reintroduce moisture.

Can I freeze these truffles?

Yes, Butterfinger truffles freeze well! Place them in a sealed container, separating layers with paper, and they can last up to three months in the freezer. Thaw them in the refrigerator before serving.

What type of chocolate is best for this recipe?

Using high-quality dark chocolate or semi-sweet chocolate delivers the best flavor. Look for chocolate that contains at least 60% cocoa for optimal balance between bitterness and sweetness.

What can I substitute for Butterfinger?

If you cannot find Butterfinger, consider using other crunchy candy bars like Heath bars or Milky Way for a similar texture and flavor, though it will slightly alter the taste.

How can I make these truffles dairy-free?

To make the truffles dairy-free, swap out regular chocolate for dairy-free chocolate and use a vegan caramel alternative. Both are easily accessible in many grocery stores.

What other toppings can I use on top of the truffles?

Topping ideas include crushed nuts, sea salt flakes, or a drizzle of white chocolate for a decorative finish. Experiment to find your perfect topping combination!

Can I use chocolate chips instead of chocolate bars?

Yes, chocolate chips can be used, but they may include stabilizers that can affect melting quality. Choose high-quality brands for the best results.

Additional Resources

Looking to expand your dessert-making skills? Explore related recipes like chocolate-covered strawberries or caramel-filled cupcakes, which elevate your sweet treats game. For technique guides, search out those focused on truffle making or tempering chocolate to enhance your cooking skill set.

Ingredient information is crucial too; understanding the nuances between different types of chocolate can arm you with the knowledge to make informed purchasing decisions for future recipes. Finally, don’t overlook equipment recommendations that can make preparation smoother—investing in proper melting tools can save frustration and enhance results.

Join the Conversation

We invite you to share your creations and experiences with Butterfinger Chocolate Caramel Crunch Truffles on social media! Use our hashtag to connect with others who have made the recipe, and don’t forget to include photography tips to help fellow bakers improve their skills.

Provide your recipe reviews and suggestions, as we’re eager to hear about any variations you’ve successfully tried! Engaging with our community not only fosters creativity but also provides delightful new ideas to try in your kitchen.

The Recipe

Butterfinger Chocolate Caramel Crunch Truffles

Serves: 24 Truffles

Prep Time: 30 mins

Cook Time: 15 mins

Total Time: 45 mins

Kitchen Equipment Needed

  • Microwave or double boiler
  • Baking sheet
  • Parchment paper
  • Mixing bowls
  • Food processor (for crushing Butterfingers)

Ingredients

  • 2 cups dark chocolate chips
  • 1 cup crushed Butterfinger candy bars
  • 1/2 cup caramel sauce
  • 1/2 cup heavy cream
  • A pinch of salt

Directions

  1. In a microwave-safe bowl, melt chocolate chips in heating intervals of 30 seconds, stirring until smooth.
  2. In another bowl, mix crushed Butterfinger and caramel sauce until well combined.
  3. Chill the chocolate mixture in the fridge for 10 minutes to firm up slightly.
  4. Using a scoop, form into small balls, then make a depression in the center and fill with the Butterfinger caramel mixture.
  5. Roll the chocolate mixture around the caramel to form a truffle shape.
  6. Dip each truffle into the melted chocolate to coat evenly, then place them on a parchment-lined baking sheet.
  7. Sprinkle additional crushed Butterfinger on top before the chocolate sets.
  8. Once set, store in an airtight container.

Recipe Notes

  • Feel free to experiment with toppings like crushed nuts or sprinkles for added flavor.
  • Truffles can be stored in the refrigerator or at room temperature for a week.
  • Adjust the caramel amount for a chewier or gooey center based on your preference.

Delicious Homemade Apple Turnovers: A Perfect Fall Treat

Delicious Apple Turnovers: A Sweet and Flaky Delight

⚖️
Difficulty
Medium

⏲️
Prep Time
30 mins

🕒
Cook Time
25 mins

⏱️
Total Time
55 mins

🍽️
Servings
8 turnovers

Apple turnovers are the perfect dessert to satisfy your sweet cravings while offering a delightful homemade touch. These flaky pastries, enveloping a luscious apple filling, evoke feelings of warmth and nostalgia with every bite. As you take your first bite, you’ll experience the crispiness of the golden pastry dance with the tender, cinnamon-spiked apples—a combination that is simply irresistible. This recipe is not only easy to follow but also allows for creativity in using various types of apples and spices, ensuring each turnover reflects your personal touch.

The best part about making apple turnovers at home is the ability to savor their aroma as they bake in the oven— the wafting scent of butter, sugar, and cinnamon filling your kitchen is a promise of the sweet rewards to come. These apple turnovers can be enjoyed warm with a scoop of vanilla ice cream on the side or cooled with a light glaze drizzled over the top, making them a versatile treat for gatherings or quiet family afternoons.

Quick Recipe Highlights

  • Flavor Profile: Enjoy the balance of sweet and tart apples, enhanced by warm spices like cinnamon and nutmeg.
  • Texture: The contrast between the flaky, crispy outer layer and the soft, juicy apple filling adds an exciting mouthfeel.
  • Aroma: The delightful fragrance of baking apples and warm spices fills the air, creating an inviting atmosphere.
  • Visual Appeal: Golden brown pastries with visible apple chunks, dusted with powdery sugar, look as good as they taste.
  • Skill Level Needed: This recipe is achievable for beginners while offering enough depth to challenge more experienced bakers.
  • Special Equipment: You’ll need basic baking tools, including a baking sheet, rolling pin, and parchment paper.

Recipe Overview

  • Difficulty Level: Apple turnovers present a medium difficulty, making them perfect for those looking to improve their pastry skills without the need for advanced techniques.
  • Category: These delightful pastries fall under dessert and can easily be served as a sweet breakfast option or afternoon snack.
  • Cuisine: While often associated with American baking traditions, apple turnovers have roots in various cultures, showcasing unique ways to celebrate apple harvests.
  • Cost: Ingredients are readily available and budget-friendly, making batches of apple turnovers a cost-effective choice for satisfying a crowd.
  • Season: Autumn is the perfect season for baking apple turnovers as it showcases the best apples at their peak flavor.
  • Occasion: Whether it’s a family gathering, holiday celebration, or simply a cozy night in, apple turnovers are always a welcomed treat.

Why You’ll Love This Recipe

Apple turnovers are an ideal blend of flavor and texture that delights the palate. The sweetness of the baked apples, coupled with the buttery, flaky pastry, creates a satisfying combination that is hard to resist. Not only are they delicious, but they also allow for versatility in flavor by experimenting with different types of apples or adding other ingredients like nuts or raisins.

Preparing apple turnovers is a convenient option for busy bakers. They can be made ahead of time and stored, making them an excellent choice for impromptu gatherings or occasions where time is limited. The simplicity of assembling turnovers allows you to enjoy the baking process without feeling overwhelmed by the intricacies of pastry-making.

Nutritionally, apple turnovers can offer benefits from the fruit itself, providing fiber and essential vitamins, especially when made with fresh, wholesome ingredients. You can even opt for lower-sugar designs or use whole-wheat pastry for a healthier twist without compromising taste.

For social gatherings, these pastries are a hit. Their glossy appearance and inviting aroma create an inviting atmosphere, encouraging conversation and a sense of community among friends and family as they enjoy warm apple turnovers.

Moreover, this recipe showcases cost-effectiveness. With minimal ingredients needed, you can easily make a batch that feeds a crowd without stressing about your budget, making apple turnovers a popular choice for many occasions.

Historical Background and Cultural Significance

The origin of apple turnovers can be traced back to various European traditions of wrapping fruits in dough. Many countries have similar pastry dishes that showcase local produce, particularly seasonal fruits, thus varying the filling based on regional availability.

These pastries are significant culturally, as they often celebrate the harvest season. Many recipes have evolved over generations, incorporating different fruits and spices, and showcasing the creativity of families during festive periods.

Over time, the recipe for apple turnovers has evolved from its basic form into numerous variations, with people incorporating different spices like cardamom or even incorporating caramel in the filling for a decadent twist. Each adaptation tells a unique story of the baker’s influence and the local culture.

Regional variations also abound, with some cultures adding distinctive touches—like a sugar glaze or fresh cream—showcasing how similar recipes can be beautifully unique across the world.

Ingredient Deep Dive

Apple turnovers primarily revolve around the star ingredient—apples. Apples have been cultivated for thousands of years, with documented cultivation as early as 6500 B.C. They hold significant cultural importance in many societies, symbolizing knowledge and temptation in biblical tales. Nutritionally, apples are rich in dietary fiber, vitamin C, and antioxidants. When selecting apples for your turnover, look for firm varieties like Granny Smith or Honeycrisp, which hold their shape well during baking. Store apples in a cool, dry place for maximum freshness, and consider keeping them in the fridge for extended shelf life.

Pastry dough is another essential ingredient. The evolution of pastry recipes dates back centuries, with various cultures contributing to the development of flaky crusts. The beauty of homemade pastry lies in its versatility and the ability to customize it for different fillings, from savory to sweet. The nutritional benefits include complex carbohydrates and fats, contributing to energy levels. When selecting pastry dough, choose one that feels pliable and smooth without cracks. For storage, keep it wrapped in plastic and refrigerated—this will preserve freshness and maintain its texture.

Common Mistakes to Avoid

  • Overworking the dough: This leads to tough turnovers instead of flaky layers. Handle the dough delicately, mixing just until combined.
  • Not chilling the dough: Chilling the pastry before baking helps create a flakier texture. Always allow it to rest in the fridge.
  • Filling too much: While generous filling is tempting, overstuffing can lead to leaks during baking. Follow recommended amounts for best results.
  • Ignoring egg wash: An egg wash provides a golden sheen to your pastry. Skipping this step can lead to lackluster color.
  • Using watery fillings: Ensure the apple mix isn’t too moist. Strain excess liquid or cook the filling slightly to prevent soggy turnovers.
  • Baking on an ungreased tray: Always use parchment paper or oil the baking sheet to avoid sticking.
  • Not preheating the oven: Always preheat your oven before placing in the turnovers to ensure they bake evenly.
  • Using stale ingredients: Always ensure your ingredients, especially spices and flour, are fresh for the best flavor.
  • Skipping cooling: Allow the turnovers to cool slightly before serving—this enhances flavor and texture.
  • Choosing the wrong apple variety: Use apples that hold their shape well when baking; avoid mushy varieties.

Essential Techniques

To master rolling out pastry dough is crucial for creating the ideal base for your apple turnovers. The dough should be rolled out to an even thickness to ensure uniform baking. When rolling, make sure to gently flour your workspace and rolling pin to prevent sticking. It’s important to maintain the dough’s chill, as warmer dough can lead to a tough texture after baking.

Mastering the art of assembling the turnovers is another essential technique. Once you’ve cut the pastry into squares, place the filling in the center, ensuring there’s enough space around the edges for sealing. Be sure to press down the edges firmly and crimp with a fork or fingers to prevent the filling from leaking while they bake.

Additionally, knowing how to glaze your pastries can elevate their presentation and flavor. The egg wash achieves a beautiful gloss and encourages even browning—apply it gently using a pastry brush for a professional finish.

Pro Tips for Perfect Apple Turnovers

Start with chilled ingredients to keep the pastry flaky. When the butter is cold and the dough is well chilled, it creates steam during baking, leading to a delightful rise and flaky texture.

Use a mix of apples for a more complex flavor profile. Combining tart and sweet varieties can significantly enhance the taste, providing a well-rounded filling that pleases all palates.

Cut uniform apple pieces for even cooking. Uniformity ensures that all pieces cook at the same rate, preventing some from being mushy while others remain crunchy.

Test your filling’s sweetness before sealing. Taste your apple mixture, adding sugar or spices as desired to achieve the right flavor before sealing the turnovers.

Experiment with spices for a personalized touch. Beyond the usual cinnamon, consider adding nutmeg or cloves for a creative variation that can really uplift your turnovers.

Create a double batch and freeze the extras. Assemble turnovers and freeze before baking for a quick dessert option that can be ready to go at a moment’s notice.

Dust with powdered sugar or drizzle with caramel for a stunning visual effect. Presentation can elevate the perceived value of homemade desserts, making them suitable for any occasion.

Keep an eye on the baking time. Each oven is different, so monitor your turnovers as they bake to avoid burning or undercooking.

Variations and Adaptations

Regional variations of apple turnovers can include local fruits or integrate specific spices that characterize a cultural cuisine. For instance, a southern twist might incorporate peaches along with apples for a unique summer flavor.

Seasonal adaptations keep the recipe fresh. Substituting apples with seasonal fruit like pears or berries can make delightful hybrid turnovers perfect for various times of the year.

For those with dietary needs, explore gluten-free or dairy-free dough recipes that suit specific lifestyles. This adaptability allows everyone to enjoy a delicious turnover regardless of dietary restrictions.

Flavor variations create exciting twists. Adding ingredients like caramel, chocolate, or even a hint of bourbon can elevate the turnover filling, offering an indulgent dessert experience.

Texture modifications can also be explored by mixing in nuts like walnuts or pecans, adding a crunch that complements the soft apple filling.

Presentation alternatives, like serving in a mini tart form, can give a refreshing giveaway for gatherings and parties, transforming your beloved apple turnovers into trendy finger foods.

Serving and Presentation Guide

Crafting the perfect plating is essential when serving apple turnovers. Place turnovers on a beautiful platter or wooden board, allowing their warm, golden exterior to shine.

Garnishing with fresh mint or a sprinkle of powdered sugar offers a nice visual contrast, making your dessert appealing to guests.

Pair with ice cream, whipped cream, or a dollop of crème fraîche beside each turnover for a delightful combination that balances flavors and textures.

Serve warm for optimal enjoyment, as it enhances the flavor of the filling and keeps the pastry crispy.

Consider portion control by slicing larger turnovers in half and serving with a small scoop of ice cream, ensuring everyone can enjoy a taste without overindulgence.

Temperature plays a role too. Always allow turnovers to cool slightly before serving, creating a delightful contrast between hot filling and a warm pastry shell.

Wine and Beverage Pairing

Selecting the right wine can enhance your apple turnover experience significantly. A sweet Riesling or a light Moscato can complement the sweetness of the baked apple filling, allowing for a harmonious balance of flavors.

For non-alcoholic options, consider homemade apple cider or iced tea, both of which bring refreshing acidity to complement the richness of the turnovers.

Should you prefer a coffee or tea pairing, a medium roast coffee or an herbal tea like chamomile can create a lovely interplay with the spices in the pastry, enhancing the overall experience.

Temperature considerations are important as well. Serve the selected drinks chilled or warm to match the pastries and encourage people to enjoy them in various ways.

Lastly, create a versatile serving suggestion by offering a selection of drinks, allowing your guests to choose their favorite pairing with the apple turnovers.

Storage and Shelf Life

To store apple turnovers, keep them in an airtight container at room temperature for up to 2 days. For longer storage, they can be refrigerated, although this may affect their flakiness.

Reheating in an oven rather than the microwave will help retain the pastry’s crispiness. Set your oven to 350°F (175°C) and heat for about 10 minutes or until warmed through.

For freezing, place fully assembled turnovers in a single layer on a baking sheet to freeze, then transfer them into freezer bags for up to 3 months. Do not bake them first to maintain fresh flavors upon reheating.

When it comes to signs of spoilage, be vigilant for changes in texture or an increase in moisture inside the container. If the turnover feels soggy or has a strange smell, it’s best to err on the side of caution and discard them.

Make Ahead Strategies

Preparing components ahead of time can significantly ease the cooking process. You can chop and prepare the apple filling in advance, storing it in the refrigerator for up to 3 days before using it.

Consider making the pastry dough in advance, allowing it to chill. This can help the flavors meld and saves time on baking day.

When ready to bake, assemble the turnovers and freeze them uncooked. Bake directly from the freezer, adding a few extra minutes to the baking time for perfectly cooked pastries.

Think about quality impact after refrigerating or freezing. Refrigerated turnovers may lose some crispness, so reheating properly is crucial to ensuring the quality remains high.

Incorporate finishing touches just before serving. Dust with powdered sugar or drizzle with a simple icing to elevate the turnovers right before they hit the table.

Scaling Instructions

Scaling your recipe can easily accommodate larger gatherings or small family needs. When halving the recipe, simply divide all ingredients accordingly while maintaining the same cooking times.

Doubling or tripling the quantities works well, but always ensure enough space for the baking sheets. A larger oven might be necessary to bake more batches simultaneously.

Adjust equipment as needed—large-batch baking might require larger trays or pans to ensure even cooking without crowding.

Maintain similar timing modifications even when scaling. Keep an eye on each turnover during baking, as ovens may behave differently when full of pastries.

Consider storage implications as you scale up. Ensure that you have enough containers or freezer space if preparing in advance.

Nutritional Deep Dive

Understanding the nutritional profile of your apple turnovers is vital for healthier living. Each turnover contains an array of macronutrients, with carbohydrates stemming from both the pastry and the fruit filling.

In terms of micronutrient analysis, apples bring vitamin C and potassium. Choosing whole-wheat flour for the dough can enhance fiber content, offering additional health benefits.

Health benefits of apples include digestive support due to their high fiber content, while apples are linked to heart health through their antioxidant properties.

Dietary considerations should account for missing nutrients if modifying the recipe. Aim for balanced filling by ensuring an adequate amount of apples to keep benefits high.

Pay attention to portion analysis. Limiting to one turnover per serving allows enjoyment without excessive calorie intake, supporting weight management efforts.

Savoring apple turnovers in moderation allows a delightful treat while contributing nutritional value to your diet.

Dietary Adaptations

To cater to gluten-free needs, consider almond or coconut flour as a replacement for traditional flour in pastry-making. This not only accommodates gluten-sensitive individuals but also offers a unique flavor experience.

For dairy-free versions, swap butter for coconut oil or vegan margarine. Ensure all other ingredients suit dairy-free diets, such as considering non-dairy milk for any glaze.

Vegan adaptations can also be embraced by using egg replacements like flaxseed meal or chia seeds to wash the pastry without losing structure.

Low-carb options can focus on almond flour, creating a pastry that aligns with keto diets while enhancing the nutty flavor profile of turnovers.

Individuals following a paleo diet can utilize almond or coconut flour while ensuring all ingredients remain unprocessed. These minor adjustments can yield delicious results without compromising values.

Low-FODMAP diets can consider low-fructose apple varieties and controlled serving sizes to enjoy apple turnovers without distress.

Troubleshooting Guide

Common texture issues often arise when the dough is overworked or too warm. Remedy this by ensuring proper chilling times and gentle handling to maintain crispness.

Flavor balance can feel off if the spices are uneven. Consider taste-testing your apple mixture before sealing to adjust sweetness or spice levels where needed.

Temperature problems in the oven can affect baking results. Ensure that the oven is preheated properly, and rotate trays halfway through baking for even cooking.

Equipment challenges like insufficient space can lead to a crowded baking sheet. Baking in batches might be necessary to maintain airflow around pastries, allowing for optimal results.

Ingredient substitutions must be carefully accounted for when altering recipes. Aim to recreate textures of original ingredients in your replacements.

Timing concerns, particularly with larger batches, may result in uneven baking. Monitoring the pastries closely while using a baking thermometer can help prevent mishaps.

Recipe Success Stories

Our community has shared wonderful feedback about personal adaptations made to the apple turnover recipe, many highlighting their unique twist on spices or filling options.

Readers have reported successful variations involving seasonal fruits, showcasing how versatile the recipe can be, turning simple apple turnovers into exciting culinary experiences.

Photography tips from amateur bakers have highlighted appealing ways to capture the turnover’s golden exterior and inviting fillings, encouraging others to appreciate their baking endeavors.

Success stories from family gatherings spotlight this recipe as a crowd favorite, with many sharing how easy it was to outsell store-bought pastries, leaving guests raving about the homemade touch.

Engagement from the community has been fantastic, with discussions circling around the best apple varieties and country-specific adaptations, showcasing the pride of collective baking adventures.

Frequently Asked Questions

Can I freeze apple turnovers before baking?

Yes! Freeze assembled, uncooked turnovers on a baking sheet until firm, then transfer to a freezer bag and bake straight from frozen. Adjust time slightly for baking.

What type of apples are best for baking?

Firm varieties like Granny Smith and Honeycrisp are recommended for their balance of sweetness and tartness, which holds well during cooking.

How do I reheat apple turnovers to keep them flaky?

Reheat in the oven at 350°F for about 10 minutes. This method ensures the pastry remains crisp rather than soggy.

Can I make turnovers without sugar?

Absolutely! Consider using unsweetened apples or natural sweeteners like maple syrup, adjusting the amount to taste.

How long do baked turnovers last?

Baked turnovers can be stored in an airtight container at room temperature for 2 days or in the refrigerator for up to a week.

Can I use store-bought pastry dough?

Yes, using store-bought dough is a great time-saver! Just roll it out before use and follow the assembly instructions as usual.

What’s the best way to serve apple turnovers?

Warm is best, served with a scoop of ice cream, whipped cream, or a dusting of powdered sugar, elevating their presentation.

Can I add nuts to the filling?

Definitely, adding chopped nuts like walnuts or pecans can provide a lovely crunch alongside the soft apple filling!

What can I serve with apple turnovers?

Consider pairing your turnovers with drinks like coffee, tea, or sweet cider, which enhances the overall serving experience.

Are they suitable for kids?

Yes! With their sweet apple filling and flaky pastry, these turnovers are a hit with kids – just be wary of serving them hot.

Additional Resources

If you’re interested in exploring more recipes, check out our comprehensive dessert section that features similar pastries, showcasing other fruit fillings and flavor profiles.

Technique guides to perfect pastry-making can be found throughout our blog, detailing essential skills like dough handling and basic baking science.

Understanding the ingredients used can boost your confidence in cooking. Our ingredient information spotlight delves deeper into using fresh produce and pantry staples more efficiently.

Moreover, consider our equipment recommendations for the best tools to assist you in creating beautifully baked goodies, ensuring quality in your results.

During seasonal variations, we offer recommendations on using fresh, seasonal fruits in your desserts, promoting a sustainable and delicious cooking approach.

Join the Conversation

We encourage you to share your apple turnover creations on social media! Using dedicated hashtags helps others to discover your baking success while allowing us to connect with our amazing community.

Our photography tips also provide insight on capturing the beauty of your homemade treats, encouraging others with similar baking interests in elevating their food photography.

We invite you to leave reviews of these turnovers or share your inventive variations. Engage with others by discussing your experiences, challenges, and successes with this delightful recipe.

Consider starting a conversation about your favorite fillings and flavors—what twists have you tried, and how have they turned out?

Your recipes can inspire others to explore the simple yet satisfying pleasure of homemade apple turnovers, affirming the essence of baking as a shared joy.

The Recipe

Apple Turnovers

Serves: 8 turnovers

Prep Time: 30 mins

Cook Time: 25 mins

Total Time: 55 mins

Kitchen Equipment Needed

  • Rolling pin
  • Baking sheet
  • Parchment paper
  • Mixing bowls
  • Pastry brush
  • Knife or pastry cutter
  • Measuring cups and spoons

Ingredients

  • 2 cups all-purpose flour
  • 1 teaspoon salt
  • 1 cup unsalted butter, chilled and diced
  • 6-8 tablespoons ice water
  • 4-5 medium apples, peeled, cored, and chopped
  • ¾ cup sugar
  • 1 teaspoon cinnamon
  • 1 tablespoon lemon juice
  • 1 egg, beaten (for egg wash)

Directions

  1. In a large bowl, mix flour and salt. Cut in butter until mixture resembles coarse crumbs. Stir in ice water, a tablespoon at a time, until dough forms.
  2. Wrap dough in plastic wrap and refrigerate for at least 30 minutes.
  3. In another bowl, combine apples, sugar, cinnamon, and lemon juice. Set aside.
  4. Preheat oven to 375°F (190°C). Roll out chilled dough on a floured surface to ⅛-inch thick. Cut into squares or circles.
  5. Place a spoonful of apple mixture in the center of each piece of dough.
  6. Fold dough over filling to create a triangle or crescent shape. Seal edges tightly with a fork.
  7. Brush the top of each turnover with the beaten egg.
  8. Bake for 25 minutes or until golden brown. Allow to cool slightly before serving.

Recipe Notes

  • Feel free to spice up your filling with nutmeg or cloves.
  • For extra sweetness, consider adding caramel pieces with the apple filling.
  • These turnovers freeze well, so consider making a double batch!

Delicious Slow Cooker Potato Broccoli Cheddar Soup Recipe

Slow Cooker Potato Broccoli Cheddar Soup: Creamy Comfort in Every Bowl

⚖️
Difficulty
Easy

⏲️
Prep Time
10 mins

🕒
Cook Time
6-8 hours

⏱️
Total Time
6-8 hours 10 mins

🍽️
Servings
4-6

Broccoli cheddar soup is the epitome of comfort food, and when prepared in a slow cooker, it becomes a convenient and hassle-free meal. This Slow Cooker Potato Broccoli Cheddar Soup combines the earthiness of potatoes and the vibrant, fresh flavor of broccoli with the rich creaminess of cheese. The slow cooker allows the flavors to meld beautifully, creating a warm and inviting dish that fills the kitchen with a delightful aroma.

Imagine coming home after a long day to the welcoming smell of savory soup ready to be savored. Each spoonful offers a satisfying blend of vegetables and creamy cheddar that wraps around your taste buds like a warm hug. This recipe not only nurtures the body but also warms the soul, making it the perfect choice for chilly nights or cozy gatherings.

Quick Recipe Highlights

  • Flavor Profile: This soup presents a rich, cheesy flavor balanced by the freshness of broccoli and the heartiness of potatoes, making each bite exceptionally flavorful.
  • Texture: The soup is creamy and smooth, with tender pieces of broccoli and potatoes adding a pleasant heartiness, creating a delightful textural experience.
  • Aroma: Notes of cheddar cheese blend with the earthy scent of potatoes and the freshness of greens, resulting in an irresistible savory aroma.
  • Visual Appeal: A vibrant green color from the broccoli, contrasted with the creamy yellow hue of cheddar, makes this soup visually inviting and comforting.
  • Skill Level Needed: This recipe is easy to follow, great for beginner cooks, and requires minimal hands-on time.
  • Special Equipment: A slow cooker is essential for this recipe, allowing for hands-off cooking while the flavors develop over several hours.

Recipe Overview

  • Difficulty Level: This soup is categorized as easy, making it accessible even for novice cooks. The steps are straightforward, and with the slow cooking process, time management is minimal.
  • Category: This dish can be enjoyed as a hearty appetizer or a main course, perfect for dinner with crusty bread or as part of a soup and salad combo.
  • Cuisine: While this soup is widely enjoyed in American cuisine, various interpretations exist in different cultures, using unique spices and ingredients to customize flavors.
  • Cost: The ingredients for this soup are budget-friendly, typically costing between $10 to $15, making it an economical choice for families.
  • Season: Ideal for fall and winter, this soup embodies comfort and warmth during the colder months when fresh produce is readily available.
  • Occasion: Perfect for cozy family dinners, casual gatherings, or even meal prep for the week, it’s versatile for various occasions.

Why You’ll Love This Recipe

Delighting your palate is just one of the reasons why this Slow Cooker Potato Broccoli Cheddar Soup is a must-try. The creaminess of this soup pairs perfectly with the vegetables, making it an indulgent yet healthy option for any meal. With a rich cheesy flavor balanced by the freshness of broccoli, it’s a dish that comforts as much as it satisfies.

The convenience of the slow cooker means you can prepare this robust soup with minimal fuss. Dice the ingredients, add them to the pot, and let the slow cooker do the hard work, allowing the flavors to blend beautifully over hours. This hands-off approach is perfect for busy weekdays or weekends spent relaxing at home.

Nutritionally speaking, this soup packs a punch. With broccoli rich in vitamins K and C, and potatoes providing essential carbohydrates, you get a nutritious dose of energy and health benefits in every bowl. Additionally, the creaminess comes without compromising flavor, allowing you to enjoy a delicious meal that also nourishes your body.

Sharing a pot of soup can elevate any meal into a social and entertaining experience. Whether you’re serving it at a family reunion or a casual dinner with friends, this dish invites conversation and warmth, creating cherished memories around the table.

Finally, the affordability of the ingredients makes this soup not only accessible but also a prudent option for those looking to maintain a budget while still serving up tasty meals for their loved ones.

Historical Background and Cultural Significance

The origins of potato broccoli cheddar soup can be traced back to traditional recipes that celebrate root vegetables and hearty greens. As a staple dish in many households, variations have sprung up based on regional produce availability and family preferences. Over the years, the creamy versions became popularized in restaurants, solidifying their place in American comfort food culture.

Culturally, soups have always served as a means of nurturing and community bonding. They are often made in large quantities, making them perfect for gatherings and celebrations. The warmth of a crock of soup evokes feelings of safety and homeliness, making it a beloved dish in households across America, particularly during cold seasons.

The evolution of this soup has seen it transformed from a simple preparation to a gourmet dish, thanks to the addition of rich cheeses and gourmet spices. Modern takes have added elements like bacon, spices, and different kinds of cheese, showcasing the versatility and adaptability of a classic recipe.

Regional variations abound, with some incorporating local ingredients or adding unique spices that reflect family heritage or culinary traditions. This soup not only fills the belly but also serves as a canvas for culinary creativity and expression, continually evolving with each cook.

Ingredient Deep Dive

Each ingredient in this soup plays a crucial role in its flavor and nutritional profile. Potatoes, a staple food around the world, have a long history that dates back to ancient civilizations in South America. They are rich in carbohydrates and provide energy, making them an essential component in many diets.

Broccoli is celebrated not only for its nutritional value, being high in vitamins and minerals, but also for its health benefits. Known for its cancer-fighting properties, it’s a powerhouse vegetable that should be included in regular meals. Freshness is key when selecting broccoli; look for firm florets and vibrant green color.

Cheddar cheese brings a delightful creaminess and depth of flavor to the soup. With a rich history rooted in the English countryside, cheddar has become one of the most popular cheeses in the world. When selecting cheddar cheese, opt for sharp varieties for a more robust flavor profile. Proper storage is essential to maintain taste, especially since exposure to air can lead to spoilage.

Cream is often used to finish off this soup, adding that silky texture we crave in comfort food. Understanding the balance of creaminess and flavor is crucial to achieving the perfect texture. Consider using heavy cream for the richest result while ensuring to store it properly to maximize its shelf life.

Common Mistakes to Avoid

  • Overcooking the broccoli: Cooking broccoli too long can lead to mushy texture and loss of vibrant color. Add it midway through cooking when using a slow cooker.
  • Not seasoning properly: Failing to season can result in bland soup. Taste as you go and adjust seasoning throughout the cooking process.
  • Using low-quality cheese: The flavor of the soup heavily relies on the cheese. Always opt for high-quality cheddar for the best results.
  • Skipping the sauté step: Sautéing onions and garlic before adding to the slow cooker builds a flavor base that’s critical for depth.
  • Ignoring the liquid balance: Too little or too much broth can alter the soup’s consistency. Follow the recipe for liquid amounts.
  • Using whole potatoes instead of chopped: Whole potatoes take longer to cook and won’t meld well into the soup’s creamy texture.
  • Adding cream too early: Cream can curdle during prolonged cooking. Add it during the last hour of cooking for the best texture.
  • Forgetting to blend the soup: For creamy soup, blending is key. Use an immersion blender or a regular blender and blend until smooth.
  • Not preparing for leftovers: This soup tastes even better the next day! Make sure to store it properly so the flavors can meld overnight.
  • Skipping the garnish: A simple sprinkle of cheese or herbs can elevate presentation and appeal. Take the time to garnish for visual impact.

Essential Techniques

Sautéing vegetables is a foundational technique that adds depth to your soup. This step caramelizes the sugars in the onions and helps build layers of flavor. Master this by cooking until the onions are translucent and extend the sautéing time if you want a deeper flavor.

Blending is crucial for achieving that creamy soup consistency. If using an immersion blender, move it around thoroughly to ensure all chunky bits are blended into a smooth mixture. Visual cues include a continuous silky texture, but make sure not to over-blend, as that can introduce excess air.

Slow cooking effectively allows for the flavors to merge beautifully over time. Set your slow cooker on low for 6-8 hours for maximum flavor extraction, which is critical in achieving rich, hearty soup without continuously monitoring.

Adding cream at the right time is essential to maintaining the soup’s texture and preventing curdling. Always add it towards the end of the cooking time. Look for it to blend into the soup effortlessly, ensuring a smooth result.

Pro Tips for Perfect Slow Cooker Potato Broccoli Cheddar Soup

1. For an extra layer of flavor, consider adding crumbled bacon or smoked paprika during the cooking process to introduce a savory depth.
2. Use fresh herbs such as thyme or parsley for brightness – garnish with them just before serving for a fresh finish.
3. Experiment with different types of cheese; a mix of Gruyère and cheddar can elevate the flavor profile.
4. Thicken the soup further by using a cornstarch slurry if you prefer a denser texture – mix equal parts of cornstarch and water, and stir into the soup during the last hour.
5. If you’re feeling adventurous, try adding some chopped green chilies or jalapeños for a spicy kick.
6. Adjust the consistency towards the end of the cooking by adding more broth if it gets too thick or blending it for a smoother soup.
7. For cream-free options, substitute with cashew cream or coconut milk, which can provide a rich texture without dairy.
8. Make it a meal by adding cooked chicken or diced ham for added protein, turning it into a heartier dish.

Variations and Adaptations

Regional variations of this soup might include the introduction of local vegetables or spices that reflect cultural preferences. For instance, adding corn can give a slight sweetness that complements the cheese, while Italian herbs can create a different flavor foundation.

Seasonal adaptations can easily be made by incorporating vegetables that are at their peak – think pumpkin or sweet potatoes in the autumn months for a fall twist. This approach allows- for using seasonal produce, maximizing freshness and flavor.

Dietary modifications such as making it vegan are easily achievable by substituting the cheese and cream with plant-based alternatives like nutritional yeast for a cheese flavor without dairy. Additionally, using a vegetable-based cream can maintain the soup’s rich texture.

Flavor variations can be introduced by experimenting with different types of broths, such as vegetable or chicken, enhancing the overall taste. Incorporating leeks instead of onions can offer a milder flavor profile, while adding spices like curry powder can bring warmth and complexity.

Texture modifications can include adding in cooked rice or quinoa after blending to give a new texture element without compromising the smoothness of the soup.

Presentation alternatives such as serving in a bread bowl or garnishing with crispy onions can elevate your dish visually and make it more festive for special occasions.

Serving and Presentation Guide

Plating your Slow Cooker Potato Broccoli Cheddar Soup beautifully can enhance both visual appeal and dining experience. Serve it in rustic bowls, garnished with a swirl of cream or a sprinkle of cheese to create inviting colors and textures.

Adding fresh parsley or chives can brighten up the dish, giving that extra pop of color alongside the hearty soup base. Use crusty bread on the side for dipping, which complements the creamy texture and adds an additional element to the meal.

For modern serving suggestions, consider pairing the soup with a fresh side salad for a balanced meal. This combination provides a contrasting crunch that is satisfying alongside the richness of the cheddar soup.

Temperature considerations are crucial; serve the soup hot, ensuring that it has been heated sufficiently. If it thickens while cooling, simply add warm broth to reach a desirable consistency before serving.

Portion control is essential, especially when serving at gatherings. Consider using a ladle to portion out servings ensuring that everyone receives an even amount of chunky vegetables and creamy goodness, making serving easy and neat.

Wine and Beverage Pairing

When it comes to pairing, a crisp white wine like Sauvignon Blanc complements the earthy flavors of this soup beautifully. The acidity of the wine balances the creaminess, creating a refreshing harmony of flavors on the palate.

For non-alcoholic alternatives, consider serving the soup with sparkling water infused with lemon or herbs. This palate-cleansing drink enhances the overall experience without overshadowing the soup’s flavors.

If you’re a coffee drinker, a light roast coffee can also be a delightful accompaniment, offering a contrast to the savory notes of the soup. Always serve coffee warm to match the comforting experience of the soup.

Temperature considerations are key; enjoy chilled beverages alongside hot soup to create an inviting dynamic. Serve wine or non-alcoholic options in chilled glasses for refreshing enjoyment.

Storage and Shelf Life

To store your Slow Cooker Potato Broccoli Cheddar Soup effectively, let it cool completely before transferring it to airtight containers. Glass containers work best, as they prevent any contamination and preserve flavor.

For optimum freshness, store in the refrigerator for up to four days. If you plan to keep it longer, freezing is an excellent option. Use freezer-safe containers, leaving adequate space for expansion.

Signs of spoilage include unusual odors, discoloration, or mold growth. Discard if you notice any of these indicators as safety should always be a priority.

When reheating, do so slowly on the stovetop over low heat, stirring regularly to prevent sticking to the bottom of the pot. You can also use a microwave, but use shorter intervals to ensure uniform heating.

For freezing guidelines, portion out servings to make reheating easier. The soup can be stored in the freezer for up to three months, maintaining its quality and flavor.

Make Ahead Strategies

To make your soup ahead of time without compromising flavor, consider prepping ingredients a day in advance. Chop vegetables and store them in a sealed container in the fridge to save time on cooking day.

You can also cook the soup entirely and let it cool before transferring it to storage. This allows the flavors to deepen overnight and tastes best when allowed to set. Just warm it up before serving.

Quality impact assessment is vital; soups often taste better after resting. The components have time to meld together, enhancing the overall profile and depth of flavor.

Assembly tips include preparing a slow cooker overnight, adding all ingredients except the cream and blending options right before cooking. This means you can set it to cook in the morning for a delicious dinner.

When reheating, especially from frozen, ensure to gradually warm the soup, allowing it to heat evenly without losing any fresh flavors. A touch of fresh cream can rejuvenate the soup before serving.

Scaling Instructions

Scaling this recipe is straightforward, allowing you to adjust servings for smaller or larger gatherings. Halving the recipe can be easily done by dividing all ingredients in half without changing the cooking method.

Doubling or tripling the batch requires a larger slow cooker or dividing it into multiple smaller cookers. Adjust cooking times based on your appliance’s size and efficiency while monitoring to ensure even cooking.

Equipment adjustments may include using larger mixing bowls for preparation or ensuring using ample containers for storage. Proper kitchen tools are key when scaling recipes to handle larger quantities.

Timing modifications can require attention; when increasing the amount, check the soup earlier than the anticipated cooking time to ensure the vegetables are tender.

Storage considerations imply that larger batches can be stored similarly, but ensure proper labeling for freezing with dates and portions for easy reference.

Nutritional Deep Dive

Nutritionally, this Slow Cooker Potato Broccoli Cheddar Soup provides a balance of macronutrients. With potatoes for carbohydrates, broccoli for fiber, and cheese for protein, it covers essential dietary needs that offer energy and satisfaction.

Micronutrient analysis reveals that broccoli is notably rich in vitamin K, C, and A while potatoes contribute significant potassium among other nutrients. This combination supports overall health and well-being.

Health benefits derived from this soup include cardiovascular support, digestion aid through fiber from vegetables, and the satisfying energy boost from hearty carbohydrates.

Dietary considerations like serving sizes can impact nutritional intake, so awareness of portion control ensures balanced meals. This soup makes it easy to incorporate essential nutrients without excessive calories.

Weight management tips suggest enjoying the soup in moderation, pairing it with fresh, crunchy salads to fulfill hunger without overindulging.

Dietary Adaptations

Making this recipe gluten-free can be achieved simply by ensuring that all ingredients are free from gluten-containing stabilizers. Most fresh ingredients fit perfectly, just check labels on any packaged items.

For a dairy-free option, substitute the cheese with nutritional yeast and heavy cream with coconut milk; these replacements add richness without dairy. The flavors will slightly change but remain delicious and creamy.

A vegan adaptation is accessible by using plant-based ingredients for every component of the recipe, ensuring to check all stock and cream for animal-derived ingredients.

For low-carb diets, you can reduce the potatoes or substitute them with cauliflower to lower carbohydrate intake while keeping similar flavor and texture.

Keto and paleo followers can similarly benefit by limiting or completely removing potatoes and using alternative veggies, enhancing culinary creativity while adhering strictly to their dietary needs.

Low-FODMAP options include reducing garlic and onion or replacing them with green tops of spring onions for a flavorful yet gentle option, ensuring easy digestion for sensitive stomachs.

Troubleshooting Guide

Savvy cooks may encounter texture issues if the soup turns out too thin. To resolve this, simply create a cornstarch slurry and add it during the last hour of cooking for an instant thickener that won’t alter flavor.

Flavor balance can sometimes skew towards too salty or bland. Adjusting seasoning incrementally by adding more cream, vegetables, or herbs can help achieve a better flavor harmony throughout the soup.

Temperature problems may arise; if the soup sits too long and gets too thick, consider slowly reheating and adding warm broth until desired consistency is attained for serving.

Equipment challenges can depend on the slow cooker quality – monitor it to ensure it’s efficiently cooking through the time or invest in a new appliance if necessary.

Ingredient substitutions may require attention since changes can lead to flavor inconsistencies. It’s advised to always stick closely to the recipe before making significant changes the first time around.

Timing concerns usually stem from varying slow cooker speeds. Keep an eye on the doneness of the vegetables to avoid overcooking or undercooking by adjusting cooking time and setting accordingly.

Recipe Success Stories

In our community, this soup recipe has garnered enthusiastic feedback, with readers praising its comforting nature and ease of preparation. Many have found it to be a regular feature in their meal rotation, often sharing variations they’ve tried.

Colorful adaptation stories highlight how family members add their unique touches, from spice adaptations to the inclusion of health-focused ingredients, like adding shredded chicken or quinoa for added protein.

Readers often share photography tips, emphasizing close-up images of the chowder’s creamy texture, garnished beautifully with a sprig of greenery and a sprinkle of cheese.

Sharing success stories has fostered engagement; people highlight the love this soup brings to gatherings and the heartwarming conversations that revolve around it during meals.

Incorporating reader suggestions into variations has encouraged continual evolution, showing the adaptability of this recipe while maintaining its beloved flavor and comforting essence.

Frequently Asked Questions

Q: Can I freeze the soup?
A: Yes, this soup freezes well. Just ensure it’s cooled before transferring to airtight containers. It can be stored in the freezer for up to three months. Reheat gently for best results.

Q: How do I reheat the soup?
A: You can reheat it on the stovetop over low heat, stirring occasionally. You can also use a microwave, heating in intervals and stirring between to ensure even warmth.

Q: Can I use other vegetables?
A: Absolutely! Feel free to add or substitute other vegetables such as carrots, spinach, or cauliflower for added nutrients and flavor variations.

Q: Is this soup vegan-friendly?
A: This recipe can be made vegan by using plant-based cheese and cream alternatives, maintaining that creamy consistency while eliminating animal products.

Q: How do I adjust the thickness of the soup?
A: If the soup turns out too thin, add a cornstarch slurry during the last hour of cooking. You may also blend a portion for a creamier texture.

Q: Can I use pre-shredded cheese?
A: While you can use pre-shredded cheese, grating your own will melt better and yield a smoother texture and flavor in the soup.

Q: How do I make it lower in sodium?
A: Use low-sodium broth and limit added salt, tasting as you go along to ensure balanced flavor without excess sodium.

Q: How long can leftovers last?
A: Leftovers can be stored in an airtight container in the refrigerator for approximately four days. Always look for signs of spoilage before consumption.

Q: Can I make this soup in a regular pot?
A: Yes! If you don’t have a slow cooker, you can make this soup in a large pot on the stovetop, adjusting the cooking time accordingly.

Q: What should I serve with this soup?
A: It pairs great with crusty bread, side salads, or grilled cheese sandwiches for a complete and comforting meal experience.

Additional Resources

For those interested in expanding their culinary repertoire, consider exploring related recipes like creamy potato soup, cauliflower cheese soup, or rich chowder variations. Each recipe builds on similar techniques while introducing other flavors and ingredients.

Technique guides on sautéing and slow cooking can enhance your skills in the kitchen, leading to a more fulfilling cooking experience while ensuring each dish is made to its best potential.

Ingredient information about seasonal vegetables can help you incorporate fresh produce into various recipes, thus improving the nutritional aspects of your meals.

Equipment recommendations are vital when selecting kitchen gadgets that can simplify cooking. Prioritize slow cookers with programmable settings for convenience and reliability.

Lastly, experimenting with seasonal variations, like using pumpkins in the fall or fresh tomatoes in the summer, can help keep your dishes exciting and fresh throughout the year.

Join the Conversation

We love to hear from you! Share your experience with the Slow Cooker Potato Broccoli Cheddar Soup by connecting with us on social media. Post your creations and tag us to join our culinary community and inspire others.

Photography plays a big role in how recipes are shared and enjoyed. Capture and share the vibrant colors of your soup, and don’t forget to highlight any creative garnishing you’ve done.

Recipe reviews help us improve and adapt content to suit your needs better. Share your feedback and any suggestions for variations you’ve made or would like to see.

Community engagement is essential, and we encourage sharing this recipe with friends and family to strengthen connections over meal times while enjoying delicious homemade food together.

Celebrate your personal recipe variations and contribute ideas that reflect your culinary experiments. Your involvement enriches our community and helps foster a love for sharing delicious meals.

The Recipe

Slow Cooker Potato Broccoli Cheddar Soup

Serves: 4-6

Prep Time: 10 mins

Cook Time: 6-8 hours

Total Time: 6-8 hours 10 mins

Kitchen Equipment Needed

  • Slow Cooker
  • Knife and Cutting Board
  • Measuring Cups and Spoons
  • Immersion Blender or Regular Blender
  • Mixing Bowl

Ingredients

  • 4 cups chopped potatoes (about 4 medium)
  • 4 cups chopped broccoli florets
  • 1 onion, diced
  • 3 cloves garlic, minced
  • 3 cups vegetable or chicken broth
  • 2 cups cheddar cheese, grated
  • 1 cup heavy cream
  • Salt and pepper to taste

Directions

  1. Begin by sautéing the onions and garlic in a separate pan until translucent; add them to the slow cooker.
  2. Add the chopped potatoes and broccoli to the slow cooker.
  3. Pour in the broth, season with salt and pepper, and stir to combine.
  4. Cover and cook on low for 6-8 hours, or high for 3-4 hours.
  5. Once the vegetables are tender, blend the soup to your desired texture using an immersion blender or regular blender in batches.
  6. Add the cheddar cheese and heavy cream, stirring until the cheese melts and combines.
  7. Serve hot, garnished with extra cheese and herbs as desired.

Recipe Notes

  • Feel free to adjust the cheese quantity according to your preferences.
  • For a gluten-free option, ensure all broth and cheese are labeled gluten-free.
  • You may substitute heavy cream with a dairy-free option, such as coconut milk.
  • Add cooked protein like chicken or bacon for an additional heartiness.

Delicious Golden Balsamic-Thyme Potato Torte Recipe for Every Occasion

Golden Balsamic-Thyme Potato Torte: A Savory Delight for Every Occasion

⚖️
Difficulty
Medium

⏲️
Prep Time
20 mins

🕒
Cook Time
50 mins

⏱️
Total Time
70 mins

🍽️
Servings
6

Indulge in the layers of flavor offered by this Golden Balsamic-Thyme Potato Torte, a stunning centerpiece that tales of simple ingredients transformed into culinary art. With its crispy, golden-brown exterior giving way to tender, herb-infused potatoes, every slice serves as a delicious reminder that comfort food can be visually captivating as well. The tang of golden balsamic vinegar enriches the dish’s profile, while fresh thyme adds an aromatic depth that elevates each bite.

This savory potato torte is more than just a recipe; it’s a celebration of flavors that can bring joy to any gathering. Whether it’s a casual weeknight dinner or a special occasion with friends, the balance of crispy and soft textures, coupled with the fragrant ubiquity of thyme, makes this torte a dish that diners won’t soon forget. It’s a meal that dazzles the palate as much as it pleases the eye, promising satisfaction no matter the season.

Quick Recipe Highlights

  • Flavor Profile: The torte balances the sweetness of golden balsamic with the earthiness of potatoes and fresh thyme, making it a delectable choice for any meal.
  • Texture: The outer layer provides a satisfying crunch, enveloping fluffy, soft potato slices that melt in your mouth.
  • Aroma: The inviting scent of thyme and roasted potatoes fills your kitchen, evoking a sense of warmth and comfort.
  • Visual Appeal: With its golden crust and earthy tones, the torte is not only a treat for the taste buds but also a delightful feast for the eyes.
  • Skill Level Needed: While slightly complex, the steps are manageable for anyone with basic cooking skills and an eagerness to impress.
  • Special Equipment: A pie dish or springform pan is essential to create the perfect shape and allow for easy serving.

Recipe Overview

  • Difficulty Level: This dish falls into the medium category. It requires careful layering of ingredients, but the overall process is straightforward for most home cooks.
  • Category: This torte fits perfectly as a main dish for a brunch or a side dish for dinner, blending seamlessly into various meal settings.
  • Cuisine: The Golden Balsamic-Thyme Potato Torte draws inspiration from classic French cooking, marrying simplicity and elegance to create a delightful dish.
  • Cost: With common ingredients like potatoes and herbs, this recipe is both budget-friendly and satisfying.
  • Season: This dish shines in cooler months, when hearty ingredients like potatoes and fresh herbs bring warmth and comfort to the table.
  • Occasion: Ideal for family gatherings, dinner parties, or potlucks, this torte impressively feeds a crowd while remaining simple to prepare.

Why You’ll Love This Recipe

The Golden Balsamic-Thyme Potato Torte is a symphony of flavors that will awaken your taste buds. The richness of the balsamic vinegar combined with the comforting texture of potatoes creates an irresistible combination. As you fork through the layers, you’ll discover the surprise of thyme, which enhances the dish with a fragrant herbaceous note that is both comforting and refreshing.

Convenience is also a strong point of this recipe. Most of the main ingredients are pantry staples, allowing for spontaneous cooking. With straightforward preparation and cooking times, this torte can be whipped up with minimal fuss, making it a perfect candidate for your weeknight meals or weekend entertaining. Plus, its ability to shine both hot and at room temperature gives you the flexibility to serve it when it suits you best.

Nutritionally, potatoes are a fantastic source of vitamins and fibers, making this recipe not only satisfying but also nourishing. The combination of healthy fats from the olive oil and the natural sweetness from the golden balsamic vinegar works harmoniously to create a dish that you can feel good about serving to family and friends.

Gathering around a beautifully presented dish like the Golden Balsamic-Thyme Potato Torte invites conversation and shared enjoyment. Its striking appearance will surely garner compliments and encourage people to come back for seconds, enhancing your hosting experience and creating lasting memories.

Finally, the cost-effectiveness of this recipe cannot be overlooked. With simple, seasonal ingredients readily available, you can create a masterpiece without breaking the bank, making it perfect for budget-conscious cooks who still want to impress.

Historical Background and Cultural Significance

The origins of potato torte can be traced back to European culinary traditions, where layering ingredients has long been a method to create hearty, comforting dishes. Potatoes, a staple food in many cultures, have been adapted into various styles, making them a beloved culinary choice worldwide. The incorporation of golden balsamic vinegar adds a modern twist, reflecting the evolving preferences for flavors and ingredients in contemporary cuisine.

In many regions, particularly in Mediterranean countries, potatoes symbolize warmth and hospitality. Dishes using potatoes bring families together and are often featured in celebrations and gatherings. As recipes have evolved, the versatility of potatoes has allowed them to be transformed into numerous beloved dishes, including this torte.

Over the years, variations of potato torte have emerged, showcasing local flavors and ingredients. For instance, in Italian cuisine, it’s common to find variations using different cheeses or greens, highlighting the regions’ agricultural bounty. This torte can thus be seen as a canvas for personal expression, allowing cooks to adapt it based on personal tastes or local produce.

Each bite of the Golden Balsamic-Thyme Potato Torte tells a story of culinary history and culture, connecting the past with present innovations in the kitchen. It invites those who prepare and consume it to partake in a timeless tradition that values resourcefulness and creativity in using humble ingredients.

Ingredient Deep Dive

Potatoes, the star ingredient of this recipe, have a fascinating cultural significance, particularly in Europe where they were first cultivated. Rich in carbohydrates, potatoes provide energy while also being a source of vitamins C and B6, potassium, and dietary fiber. When selecting potatoes for the torte, opt for waxy varieties like Yukon Gold or Red Potatoes, which maintain their shape and flow less than starchy types. Proper storage is key to preserving their freshness; keep them in a cool, dark place, but avoid refrigeration, which can impart a sweet flavor.

Golden balsamic vinegar, on the other hand, adds a unique sweet and tangy profile to the dish, differentiating it from regular balsamic with its lighter taste. Its creation involves a blend of white grape must and vinegar, aged for a shorter period, making it a delightful choice for dressings and glazes. When shopping for balsamic vinegar, look for brands that specify quality production methods. Store it in a dark bottle out of direct sunlight to maintain its flavor over time.

Fresh thyme is integral to the torte, providing not just flavor but also nutritional benefits, including anti-inflammatory properties and antioxidants. Always choose bright-green, fresh sprigs over dried herbs for this dish, as they yield a more vibrant flavor. Store fresh thyme in the refrigerator wrapped in a damp paper towel, or place it in a glass of water to keep it fresh for longer. If fresh thyme isn’t available, consider using dried thyme, but use it sparingly due to its concentrated flavor.

Common Mistakes to Avoid

  • Choosing the wrong type of potato: Using starchy potatoes can result in a mushy torte. Opt for waxy varieties that hold their shape better.
  • Overcrowding the layers: Ensure you leave enough space between potato slices to allow for even cooking and crispness.
  • Inadequate seasoning: Don’t skip seasoning the layers adequately; taste adjustments throughout preparation can elevate the entire dish.
  • Skipping the resting time: Allow the torte to rest after baking. This helps in setting the layers and makes slicing easier.
  • Using stale herbs: Fresh herbs provide a far superior flavor; avoid using dried ones for the best results.
  • Neglecting to preheat the oven: A preheated oven ensures even cooking and crisping on the outside while keeping moisture locked inside.
  • Improper storage: If storing leftovers, seal the torte well to prevent it from drying out in the refrigerator.
  • Not using a non-stick spray or parchment paper: Prevent sticking by ensuring your baking dish is properly coated before adding ingredients.
  • Forgetting to check the oven temperature: Different ovens can vary significantly, so use an oven thermometer for consistency.
  • Going too heavy with the balsamic: While it adds flavor, excessive vinegar can overpower the other ingredients; measure carefully.

Essential Techniques

Layering is a crucial technique for crafting a perfect potato torte. It not only ensures even cooking but also guarantees each piece is visually appealing when served. Start with evenly sliced potatoes, and alternate between different flavors and textures for enhanced complexity. Use a sharp mandoline for uniformity in thickness, which will help in achieving the best results.

Another essential technique is proper cooking of the torte. A slow bake allows the flavors to meld beautifully, while the bottom crisps up just right. Be attentive to the signs of cooking; the torte should bubble slightly at the edges, and a golden crust should form on the top. Use a toothpick to test for doneness; it should slide through easily without resistance.

Pro Tips for Perfect Golden Balsamic-Thyme Potato Torte

1. Use a combination of different herbs for a more complex flavor profile. Rosemary pairs beautifully with thyme and adds depth.
2. For an extra crunch, sprinkle some panko breadcrumbs on top of the torte before baking to create a crispy layer.
3. Consider seasoning each layer of potatoes when adding them to the baking dish to ensure even flavor distribution.
4. If going vegetarian or vegan, replace cheese with a cashew cream to enrich flavors while keeping it dairy-free.
5. Experiment with different vinegars; aged balsamic will provide a richer flavor while apple cider vinegar can add a fruity twist.
6. Allow the torte to cool before slicing to ensure clean cuts and prevent unwanted mushiness.
7. When reheating leftover torte, warm it in the oven rather than the microwave to maintain its crispy texture.
8. Always taste for seasoning before baking; adjusting flavors pre-cooking is far more effective than trying to fix the end result.

Variations and Adaptations

For a regional twist, try adding sun-dried tomatoes or olives for a Mediterranean flair. Seasonal variations like substituting sweet potatoes in the fall can provide an unexpected but delightful sweetness to the dish. For dietary modifications, consider making this torte gluten-free by ensuring any breadcrumbs or fillers used are GF certified.

Flavor variations can also shine through; consider adding shredded cheese between layers for a decadent touch, or incorporate roasted garlic for more depth. If you’re looking to modify the texture, experiment by using different slicing techniques for the potatoes, such as rounds or matchsticks, to change the visual appeal and cooking time.

When it comes to presentation, using a round springform cake pan can yield stunning edges, making the torte a work of art. Garnishing can vary from a sprinkle of fresh parsley to a drizzle of extra virgin olive oil for a finishing touch that elevates the plate.

Serving and Presentation Guide

Plating your Golden Balsamic-Thyme Potato Torte can enhance your dining experience immensely. Use a wide spatula to gently lift it from the dish and allow the layers to shine. Consider using a large white plate for visual contrast, allowing the golden tones of the torte to pop.

Garnishing with fresh herbs not only adds color but also accentuates the flavors present in the torte. A light sprinkle of sea salt can enhance the dish’s natural flavors as well. Pair it with a salad or roasted vegetables on the side for a well-rounded presentation and added nutritional value.

Temperature considerations matter too; serving the torte warm adds an inviting element. However, it also tastes delicious at room temperature, making it versatile for various occasions. For portion control, slicing into even wedges or squares ensures everyone gets a piece, while also making the torte look elegant on the table.

Wine and Beverage Pairing

Pair your Golden Balsamic-Thyme Potato Torte with a glass of chilled Sauvignon Blanc, which offers a crisp acidity that complements the rich flavors of the dish. Alternatively, a light Pinot Noir can add depth without overpowering the torte, enhancing the flavors while balancing out the richness.

For a non-alcoholic option, consider a sparkling water with a splash of citrus, which can cleanse the palate between bites. If coffee is more your style, a lightly brewed cold brew with hints of caramel can beautifully contrast the savory nature of the torte.

Temperature matters; always serve the wine chilled or at room temperature as per its requirement. When hosting, offer a selection of beverages to provide your guests with enjoyable choices that pair well with the rich, savory notes of the torte.

Storage and Shelf Life

To store your Golden Balsamic-Thyme Potato Torte properly, place it in an airtight container in the refrigerator, where it can last for about three days. Ensure it’s cooled completely before sealing to avoid condensation and sogginess.

If you wish to extend its shelf life, consider freezing the torte. Cut it into individual portions, wrap each piece in plastic wrap, and then place them in a freezer-safe bag. When stored properly, it can last up to three months in the freezer.

For reheating, place the torte in a preheated oven at 350°F for about 20 minutes until warmed through. Check for signs of spoilage before consuming, such as an off smell or mold growth, to ensure safety.

Make Ahead Strategies

Planning ahead? You can prepare your Golden Balsamic-Thyme Potato Torte components a day prior. Slice and store the potatoes in cold, salted water to prevent browning. Prepare the herbs and any additional flavors you plan to add in advance to save time during assembly.

Assembling the torte can happen the night before, allowing it to set in the fridge overnight. Just ensure it’s covered well to maintain freshness. When ready to bake, let it come to room temperature for about 30 minutes before placing it in a preheated oven, promoting even cooking.

This torte also adapts beautifully. Lay it in the dish the night before and simply pop it in the oven the following day. This planning saves time and stress on busy days, making it an ideal dish for when entertaining guests.

Scaling Instructions

If you need to adjust your Golden Balsamic-Thyme Potato Torte recipe, halving it is simple. Cut all ingredients and times down by fifty percent, but ensure you still use a baking dish that’s appropriate for smaller portions.

To double or triple the recipe, consider using larger baking dishes or multiple pans, keeping in mind that cooking time might slightly increase. Always check for doneness with a toothpick as larger sizes may require more time for the center to cook through.

Ensure you adjust your timing when scaling; larger dishes may take an additional 10-15 minutes in the oven, while smaller medicated portions may cook faster. Always make sure ingredients are mixed well and baked evenly for fantastic results all around.

Nutritional Deep Dive

The Golden Balsamic-Thyme Potato Torte offers a well-balanced nutrient profile. Potatoes provide essential carbohydrates that serve as a primary energy source, while herbs like thyme offer antioxidants that can benefit overall health. It’s crucial to understand the balance of macronutrients in this torte, with a focus on healthy fats and fiber-rich servings.

Micronutrient analysis reveals that this dish contains significant amounts of vitamin C and potassium from the potatoes, as well as beneficial compounds from the balsamic vinegar, which is rich in polyphenols. Each serving offers health benefits that contribute to a rounded diet, especially for those seeking comfort foods with nutritional value.

Considering portion control, each slice can be rich, so be mindful of serving sizes, especially if you’re focusing on weight management. However, the torte can easily fit into a balanced diet, as it can be paired with a variety of vegetables or salads for added fiber and nutrients.

Dietary Adaptations

For those needing gluten-free options, rest assured; this recipe naturally fits, as it doesn’t contain wheat products. For a dairy-free version, consider excluding any cheeses you might want to add, making this torte accessible to vegan diets.

If you’re on a low-carb or keto diet, cauliflower can substitute for potatoes. Simply steam and mash it, then layer it in the same way to create a light and delicious version perfect for those watching carb intake.

For paleo enthusiasts, the use of herbs, fresh produce, and healthy fats aligns well with dietary guidelines. Make sure the balsamic vinegar you choose adheres to paleo principles, and you’ve got a dish that meets stringent eating plans.

Troubleshooting Guide

If you encounter texture issues, like a soggy bottom, ensure your potatoes are placed in an adequately preheated oven and layered properly. Using waxy potatoes will help maintain a good texture while baking, too.

Flavor balance concerns can arise if you’ve added too much vinegar. If this happens, try balancing flavors with a touch of sugar or incorporating additional ingredients like cooked garlic to round out the dish.

If you face temperature problems during cooking, always invest in an oven thermometer to confirm your oven is at the correct heat. Different brands and models can vary significantly, and understanding your specific oven can prevent mishaps.

Equipment challenges, like a torte sticking to the pan, are often avoidable. Always grease your pans liberally, and consider lining with parchment paper for the best results when it’s time to serve.

Timing concerns often arise with larger or smaller portions. Continually check doneness throughout cooking and adjust based on the thickness of your layers and the specific size of your pan.

Recipe Success Stories

Community feedback on the Golden Balsamic-Thyme Potato Torte has showcased the adaptability of the dish. Many readers have successfully experimented with different herbs and spices, sharing their personalized touches with various regions in mind, which has created a lovely exchange of culinary ideas.

Adapting the recipe with family traditions, some cooks have included their favorite cheeses, creating a delightful richness that resonates with many home cooks and generates excitement amongst their guests. Those who try their hand at this recipe consistently rave about the ease with which it comes together, making it a preferred choice for gatherings.

Photography tips often discuss the beautiful golden layers created when sliced properly. Observing food presentation leaves diners captivated by the dish, prompting many to bring their versions into family gatherings to share.

Engaging with readers through recipe variations has resulted in delightful stories of success, as families come together over working in the kitchen, laughing during the process, and creating wonderful memories tied to the dinner table.

Frequently Asked Questions

How do I know when the potato torte is done?

The torte is done when the top is golden brown and bubbling. Additionally, you can insert a toothpick into the center—if it comes out clean, the torte is ready to serve.

Can I make this torte a day ahead?

Yes! You can prepare the torte a day before by assembling it and keeping it covered in the fridge until you’re ready to bake it. Just add a few extra minutes to the baking time if it’s cold from the fridge.

What can I do with leftover torte?

Leftover Golden Balsamic-Thyme Potato Torte can be enjoyed cold or reheated. It pairs well with salad, and is excellent for brunch or as a quick snack!

Can I freeze the potato torte?

Yes, this torte freezes beautifully. Wrap individual portions tightly in plastic wrap and store in an airtight container. To reheat, just pop it in a preheated oven until warmed through.

What type of potatoes yield the best results?

Waxy potatoes like Yukon Gold or Red Potatoes work best due to their ability to hold their shape. Avoid starchy potatoes as they can become too mushy.

Can I use different herbs?

Absolutely! Feel free to experiment with herbs like rosemary, oregano, or basil, tailoring the flavors to your liking.

What can I serve with the torte?

This potato torte makes a great side dish! Pair it with grilled meats, a fresh salad, or simply enjoy it on its own.

Does balsamic vinegar change flavor when cooked?

Yes, balsamic vinegar’s sweetness intensifies when it’s cooked. Just be careful not to overdo it, as too much could overpower the dish.

Is the torte gluten-free?

Yes! The Golden Balsamic-Thyme Potato Torte is naturally gluten-free, making it a great option for those with dietary restrictions.

How hot should the oven be for cooking the torte?

Preheat your oven to 375°F (190°C) to ensure that the torte bakes evenly and achieves that golden crust.

Can I add cheese to the torte?

Yes! Adding cheese between the layers enhances the flavor and creates a richer dish. Consider using Gruyere or Parmesan for a delicious twist!

Additional Resources

If you’re looking for more inspiration, consider exploring related recipes such as a classic French Ratatouille, which also uses seasonal vegetables and speaks to a similar culinary heritage. For technique guides, our website offers resources on mastering the perfect potato slicing technique, ensuring uniformity for perfect baking results every time.

Dive deeper into ingredient information to learn about the different types of potatoes and their uses in modern cooking. Our section on kitchen equipment recommendations also highlights essential tools that will make your cooking journey smoother and more enjoyable.

Lastly, keep an eye on seasonal variations; popular dishes to try for each season can give you inspiration to adapt this torte to what’s currently fresh and available. With so many ways to enjoy this dish, the possibilities are endless!

Join the Conversation

We love hearing from our readers! If you decide to try the Golden Balsamic-Thyme Potato Torte, share your photos and experiences on social media using our hashtag. Don’t forget to leave a review explaining your adaptations and any personal touches you’ve included in your Torte.

We want to engage and connect with our community, encouraging discussions around variations and strategy. Your feedback helps us to continue improving our recipes and to expand upon our culinary adventures together. Join in on the fun, and make this dish your own!

The Recipe

Golden Balsamic-Thyme Potato Torte

Serves: 6

Prep Time: 20 mins

Cook Time: 50 mins

Total Time: 70 mins

Kitchen Equipment Needed

  • Pie dish or springform pan
  • Mandoline or sharp knife
  • Oven mitts
  • Spatula
  • Measuring cups and spoons

Ingredients

  • 2 pounds of waxy potatoes, thinly sliced
  • 1/3 cup of golden balsamic vinegar
  • 1/4 cup of olive oil
  • 2 tablespoons of fresh thyme leaves
  • Salt and pepper to taste
  • Optional: grated cheese of choice

Directions

  1. Preheat the oven to 375°F (190°C).
  2. In a large mixing bowl, combine sliced potatoes, balsamic vinegar, olive oil, thyme, salt, and pepper. Toss until evenly coated.
  3. Layer half of the potato mixture in a greased pie dish, packing it tightly.
  4. If using cheese, add a layer between the potatoes.
  5. Add the remaining potato mixture on top, placing it carefully for even distribution.
  6. Cover with aluminum foil and bake for 30 minutes.
  7. Remove the foil and bake for an additional 20 minutes, or until the top is golden brown.
  8. Allow to cool for 10 minutes before slicing and serving.

Recipe Notes

  • Feel free to add additional herbs or seasonings as per your taste.
  • You can prepare the torte a day ahead; simply bake it when ready to serve.
  • This recipe is very adaptable—consider adding vegetables like spinach or kale for added nutrition.