Delicious Mongolian Ground Beef Noodles: A Flavorful Recipe Guide

Mongolian Ground Beef Noodles Recipe: A Flavorful Asian Delight

⚖️
Difficulty
Easy

⏲️
Prep Time
15 mins

🕒
Cook Time
20 mins

⏱️
Total Time
35 mins

🍽️
Servings
4 servings

Mongolian Ground Beef Noodles are a delectable fusion of flavors and textures that captures the essence of Asian cuisine. This dish combines the comfort of hearty beef with the satisfying chewiness of noodles, all bathed in a savory sauce that tantalizes your taste buds. As you take your first bite, the rich umami flavors explode in your mouth, offering a delightful experience that feels like a warm hug on a plate. Whether you’re a busy professional or a family looking for a quick weeknight meal, this recipe is sure to become a beloved staple in your kitchen.

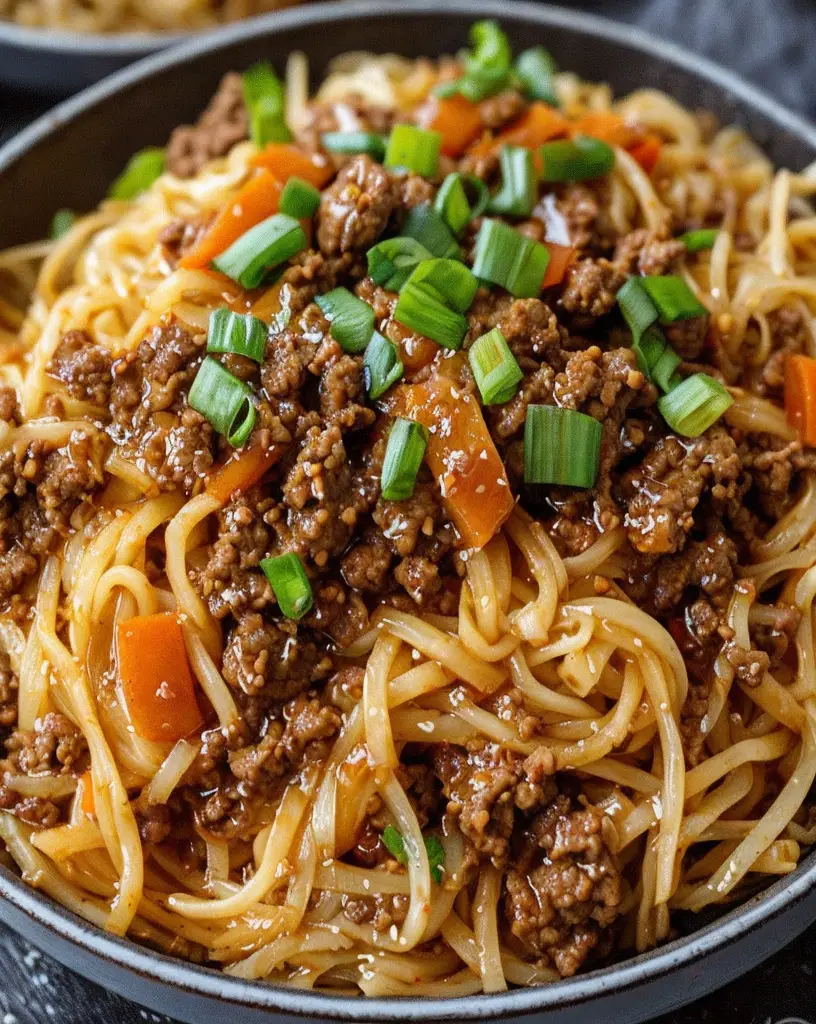
Imagine slurping up perfectly cooked noodles, casual yet elegant—perfect for any occasion. The sauce, imbued with soy sauce’s depth and a hint of sweetness, coats the noodles beautifully while tender green onions and vibrant bell peppers add a refreshing crunch that complements the softness of the beef. It’s a beautiful medley of colors, smells, and flavors that you’ll want to return to time and again.

Quick Recipe Highlights

  • Flavor Profile: Sweet and savory with a kick of umami from soy sauce.
  • Texture: Tender beef paired with chewy noodles and crunchy vegetables.
  • Aroma: Rich and fragrant, with the scent of garlic and ginger permeating the air.
  • Visual Appeal: A colorful dish with vibrant greens, reds, and golden-brown beef.
  • Skill Level Needed: Perfect for beginner cooks who want to expand their culinary repertoire.
  • Special Equipment: A non-stick skillet and a pot for boiling noodles.

Recipe Overview

  • Difficulty Level: This Mongolian Ground Beef Noodles recipe is classified as easy, making it accessible for novice cooks and families alike.
  • Category: A fantastic choice for dinner, it offers a well-rounded meal in one dish.
  • Cuisine: This recipe draws inspiration from Mongolian cuisine, known for its rich, savory flavors and hearty ingredients.
  • Cost: Ingredients are generally budget-friendly, with the total cost around $15 for four servings.
  • Season: Great for year-round dining, but particularly delicious during colder months when comfort food is desired.
  • Occasion: Perfect for family meals, casual gatherings, or weeknight dinners.

Why You’ll Love This Recipe

Mongolian Ground Beef Noodles are not just a meal; they’re an experience. This dish’s taste and texture are unmatched, with the savory beef creating a satisfying bite paired with soft noodles. The addition of fresh vegetables adds crunch, while the sauce ties everything together, making each bite delightful and satisfying.

Convenience is another highlight of this recipe. With a prep time of just 15 minutes and a cook time of 20 minutes, you can whip up this delicious meal even on the busiest weeknights. It’s the perfect solution for families seeking quick, tasty dinner options without compromising on flavor or nutrition.

Speaking of nutrition, this dish offers a balanced mix of protein from the beef and carbohydrates from the noodles, along with essential vitamins from the vegetables. It’s not just filling—it’s a wholesome meal option that satisfies both hunger and nutritional needs.

Moreover, Mongolian Ground Beef Noodles are fantastic for social gatherings. Whether you’re hosting a dinner party or a casual get-together, this dish is sure to please your guests, with its flavors inviting compliments and second helpings.

Finally, let’s talk about cost-effectiveness. Most ingredients are easily found in your local grocery store, and the entire dish can be made for a fraction of what you’d pay for a takeaway. This makes it a budget-friendly option for families looking to stretch their dining dollar.

Historical Background and Cultural Significance

The roots of Mongolian Ground Beef Noodles can be traced back to the cultural exchanges between Mongolian and Chinese culinary traditions. Originally, stir-fried noodle dishes were popular among nomadic herders who required hearty meals that fueled their labor-intensive lifestyles. Over time, as trade routes opened up, flavors and cooking techniques blended, giving birth to dishes that are now loved across many cultures.

Culturally, Mongolian cuisine emphasizes the importance of meat, particularly beef and lamb. Both are central to Mongolian identity and livelihood, as the harsh climate favors livestock farming. Thus, beef became a staple ingredient in various Mongolian dishes, including stir-fried noodle preparations that resonate with the longevity of these traditions.

The evolution of the recipe reflects regional influences, notably incorporating aspects of Chinese and even Western cuisine through the introduction of sauces and cooking methods. Today, Mongolian Ground Beef Noodles not only serve as a delicious meal but also stand as a testament to culinary adaptation and globalization, making it popular in many households worldwide.

Regional variations of this dish can be found throughout Asia, often utilizing different types of noodles or proteins. This adaptability showcases the dish’s versatility and widespread appeal, allowing it to fit seamlessly into various gastronomic cultures while retaining its identity.

Ingredient Deep Dive

Ground Beef: This key ingredient is not only a source of protein but also plays a significant role in Mongolian culinary traditions. Beef is favored for its rich flavor and tender texture when cooked right. When selecting ground beef, look for options with a good fat content (around 80/20) for balanced flavor. Store in the refrigerator and consume within a couple of days or freeze for longer storage. Substitutions can include ground turkey or chicken for a leaner option.

Egg Noodles: Egg noodles are widely used in many Asian dishes for their chewy texture and ability to absorb sauces. Historically, they are prominent in East Asian cuisine, offering a hearty and fulfilling base. For selection, opt for fresh noodles when available, and store them appropriately to maintain freshness. If you need alternatives, consider using rice noodles or even whole grain options for different dietary preferences.

Bell Peppers: The addition of bell peppers not only provides a vibrant pop of color but also contributes essential vitamins and a touch of sweetness to the dish. Traditionally, bell peppers are easy to incorporate into various cuisines due to their versatility and flavor. When purchasing, select firm unblemished peppers, and store them in the refrigerator. Consider substituting with other vegetables like snap peas or carrots for a varied twist.

Common Mistakes to Avoid

  • Overcooking the noodles: Make sure to follow the package instructions for cooking time to avoid mushy noodles, which detract from the overall texture of the dish.
  • Using high heat for too long: While stir-frying, maintaining the right temperature is crucial to avoid burning the meat and vegetables—aim for medium-high heat.
  • Not seasoning properly: Ensure ample seasoning of both the meat and vegetables; under-seasoned dishes can taste bland.
  • Skipping the marination: Allowing the ground beef to marinate briefly enhances flavor throughout the dish, making it more enjoyable.
  • Using cold ingredients: Ensure your vegetables and meat are at room temperature before cooking to promote even cooking.
  • Rushing the process: Give yourself time to prepare ingredients properly; mise en place will simplify your cooking session.
  • Ignoring the resting time: Letting the cooked dish sit for a few minutes helps the flavors to meld together beautifully.
  • Not adjusting sauce levels: Taste your sauce as you cook; it’s essential to balance sweetness, saltiness, and spiciness according to your preference.

Essential Techniques

Stir-Frying: This fundamental technique allows for quick cooking at high heat, preserving the flavors and nutrients of the ingredients. Mastering stir-frying involves using a non-stick skillet or wok, keeping the ingredients moving constantly, and ensuring not to overcrowd the pan.

Marination: Allowing the ground beef to marinate in soy sauce and other seasonings is crucial for depth of flavor. The process not only tenderizes the meat but also infuses it with additional taste, enhancing the overall dish. Avoid vegetable-based marinades if you’re looking for a strong flavor infusion.

Pro Tips for Perfect Mongolian Ground Beef Noodles

1. **Prep Ingredients Before Cooking:** Have all your ingredients prepped and ready to go; stir-frying goes fast, and you’ll want everything at hand.
2. **Use Fresh Noodles:** If possible, opt for fresh egg noodles—they will elevate the dish’s texture significantly compared to dried varieties.
3. **Adjust Sauce According to Taste:** Feel free to tweak soy sauce, sugar, or even add chili paste based on your personal flavor preference.
4. **Don’t Rush the Cooking Process:** Allow the beef to sear properly before adding the vegetables for the best flavor development.
5. **Experiment with Vegetables:** Don’t hesitate to add or substitute your favorite vegetables; broccoli or bok choy can be great additions.
6. **Serve Hot for Best Flavor:** Always serve immediately for the best taste experience; noodles are best enjoyed fresh.
7. **Garnish Creatively:** Consider garnishing with sesame seeds or cilantro to boost visual appeal and add extra flavor layers.
8. **Make it a Meal:** Pair with a side salad or spring rolls to turn this simple dish into a full meal spread.

Variations and Adaptations

Regional variations of this dish can include switching up the protein—try chicken or tofu for a vegetarian-friendly option. Seasonal adaptations might involve adding seasonal vegetables like zucchini in the summer. For those looking to reduce carbs, spiralized veggies such as zucchini or carrots can serve as a base in place of traditional noodles.

Flavor variations can be achieved by incorporating different sauces like teriyaki or even adding a splash of vinegar for a tangy twist. Texture adaptations may include adding nuts or seeds for crunch or cooking the vegetables just until tender for an extra crisp bite.

Presentation alternatives could involve serving the dish in lettuce wraps for a fun, fresh twist or in bowls garnished with chopped nuts and green onions, scaling the dish up for entertaining.

Serving and Presentation Guide

For optimal presentation, serve Mongolian Ground Beef Noodles in a large bowl or platter, showcasing the ingredients’ colors. Use chopsticks or large forks for a traditional aesthetic and garnish with green onions and sesame seeds.

Accompany the dish with a side of pickled vegetables, enhancing the flavor profile. Consider using thinly sliced lime or lemon on the side, allowing guests to brighten their plates to their taste.

For temperature considerations, ensure that the noodles are served hot but not scalding; allow a minute of rest before serving. Finally, practice portion control, serving smaller amounts to encourage guests to take seconds without overfilling their plates.

Wine and Beverage Pairing

When it comes to wine pairings, consider a light-bodied red, such as Pinot Noir or a medium-bodied white like Riesling. Those wines complement the sweet and savory aspects of the dish beautifully.

For non-alcoholic options, a refreshing iced tea or lemonade can also provide the perfect balance, enhancing the meal’s flavors without overpowering them. If you enjoy coffee or tea, a mild green tea can be delightful alongside, bringing a refreshing, herbaceous note to the table.

Temperature is essential—serve wine chilled or at room temperature, while iced tea should be served abundantly, catering to guests’ preferences during meals.

Storage and Shelf Life

To store any leftover Mongolian Ground Beef Noodles, place them in an airtight container in the refrigerator, where they will keep well for 3-4 days. For longer storage, consider freezing the dish in iindividual portions to enjoy later on busy days.

Ensure the dish has cooled to room temperature before sealing to prevent condensation buildup which can cause sogginess. If reheating, utilize a microwave or stovetop for quick and even warming, adding a splash of water or broth to restore moisture if needed.

Watch for signs of spoilage such as an off smell or changing color; these are indicators to discard. When freezing, enjoy within 2-3 months for the best quality and taste.

Make Ahead Strategies

To make your Mongolian Ground Beef Noodles ahead of time, consider prepping ingredients a day before. Chop vegetables and marinate the ground beef, storing them separately in the refrigerator to maintain freshness.

While you can cook the noodles in advance, it’s best to do it on the day you intend to serve for the optimal texture. Assemble and cook the dish when ready, ensuring that all ingredients are at room temperature for even cooking.

If you’d like to add a fresh touch, consider keeping additional herbs or fresh vegetables to sprinkle on right before serving, adding crispness and color.

Scaling Instructions

If you wish to halve the Mongolian Ground Beef Noodles recipe, simply divide all measurements by two and adjust cooking times slightly if necessary. For doubling or tripling, prepare ingredients in larger batches, and ensure you have enough cooking space to avoid overcrowding the pan.

Equipment adjustments may be necessary, opting for larger skillets or two pans working together if preparing for crowds. Monitor timing carefully, as larger quantities may take a little longer to cook through while still achieving that beautiful sear on the beef.

For storage considerations, allow extra portions to cool completely before placing them in appropriate containers; ensure you label them well with dates for freshness tracking.

Nutritional Deep Dive

Mongolian Ground Beef Noodles offer a healthy balance of macronutrients, providing protein from the beef, carbohydrates from the noodles, and essential fats if you choose higher fat content beef. Each serving can contain around 400-500 calories, depending on the portion size and recipe variations.

Micronutrient-wise, this dish is rich in iron, zinc (from beef), and vitamins A and C (from the bell peppers). Incorporating various vegetables contributes to a broader spectrum of vitamins and minerals.

When considering health benefits, protein is essential for muscle repair and growth, while the vitamins contribute to overall immune function and skin health. For portion analysis, serving sizes should be controlled, particularly if one aims to maintain or lose weight, being mindful of ingredient ratios in larger batches.

Dietary Adaptations

For those following gluten-free diets, rice noodles can be substituted to make this dish safe for all diners. For dairy-free adaptations, all ingredients are naturally dairy-free, making the dish inclusive.

Vegetarians can replace beef with tofu or mushrooms, adding meat-like textures and flavors when marinated properly. Low-carb or keto enthusiasts can use spiralized zucchini or shirataki noodles as a replacement for traditional egg noodles to enjoy a similar dish without the carbs.

Paleo followers might use coconut aminos instead of soy sauce and replace the noodles with spiralized vegetables for a compliant meal. Low-FODMAP eaters can adjust ingredients by excluding high-FODMAP vegetables while retaining flavor by focusing on the lean protein and acceptable veggies.

Troubleshooting Guide

For texture issues such as overly chewy noodles, ensure they are cooked al dente; they should have a slight bite to them. If the beef turns out tough, consider marinating it longer next time or reducing cooking time to enhance tenderness.

Flavor balance can become skewed if over-salted; balance with additional sugar or fresh vegetables. Monitor your other ingredients to alleviate any bitterness from the sauce, using maple syrup or honey for a natural sweetness.

Temperature problems often arise from cooking on high heat too long; always strive for a consistent medium-high heat for even cooking results. If ingredients are substituted, be wary of different cooking times needed and adjust accordingly.

Lastly, if timing concerns arise, consider preparing components in advance to ensure all ingredients are ready to go so your meals can be stress-free.

Recipe Success Stories

Community feedback reveals that Mongolian Ground Beef Noodles have become a family favorite, with readers often sharing their enjoyment and success stories. Parents have noted how their children adore the dish, prompting them to try various adaptations with different vegetables and noodles.

Many have experienced success with variations that incorporate local produce, showing how delightful it can be to alter a traditional recipe. Feedback often highlights tips on how to take great photos of the dish, emphasizing proper plating and natural lighting to showcase the vibrant colors beautifully.

Readers also enjoy sharing suggestions for spice levels and alternative marinades, creating a lively exchange of culinary experiences that fosters community engagement around this beloved dish.

Frequently Asked Questions

What can I use instead of ground beef?
Ground turkey, chicken, or even plant-based meat alternatives can work well in this dish. Just ensure to adjust cooking times as necessary to ensure fully cooked protein.

Can I make this dish vegetarian?
Absolutely! Use tofu or tempeh and incorporate more vegetables for a filling and satisfying vegetarian meal.

How do I store leftovers?
Place any leftovers in an airtight container and refrigerate for up to 3-4 days, or freeze for longer shelf life.

Can I prepare this dish in advance?
Yes, you can prepare ingredients a day in advance but it is best to cook the noodles fresh right before serving.

What type of noodles should I use?
Egg noodles are traditional, but feel free to substitute with rice noodles or even whole wheat noodles for a slight twist.

Is this dish gluten-free?
To make it gluten-free, simply substitute traditional noodles with rice noodles or a gluten-free variety, and use tamari instead of soy sauce.

How can I make it spicier?
Add in some crushed red pepper flakes or a dash of chili sauce for an extra kick if you enjoy heat in your dishes.

Is there a way to reduce calories in this recipe?
Opt for leaner cuts of beef or utilize ground turkey to lower calorie content, and serve with a larger portion of vegetables.

Can I add more vegetables?
Certainly! Feel free to add favorites such as carrots, snap peas, or broccoli for extra flavor and nutrients.

What should I serve with this dish?
Consider pairing with a light salad or some spring rolls to create a full meal experience that balances flavors and textures.

Additional Resources

For further inspiration, explore related recipes like Quick Stir-Fried Noodles or Beef and Vegetable Stir Fry, both offering variations on similar flavor profiles. Additionally, techniques such as quick marinades or mastering stir-fry can enhance your overall cooking skills.

Investing in quality kitchen equipment can also make significant differences. Woks and good knives can improve your preparation speed and stirring techniques, drastically changing your cooking experience.

For seasonal variations, consider adapting main ingredients to align with summer produce or winter root vegetables that might mix delightfully with this recipe’s core components.

Join the Conversation

We’d love to hear your experiences with making Mongolian Ground Beef Noodles! Share your culinary creations on social media using our hashtag, and show us your delicious twists on the classic recipe.

Don’t forget to leave us feedback on your experience—your insights help other home cooks navigate their culinary adventures. Engage with others in the community by commenting on their photos and suggestions to create a lively and informative space for sharing family recipes and ideas.

Let’s keep the conversation going as we embrace delicious, diverse culinary experiences and continue creating exciting dishes together!

The Recipe

Mongolian Ground Beef Noodles

Serves: 4 servings

Prep Time: 15 mins

Cook Time: 20 mins

Total Time: 35 mins

Kitchen Equipment Needed

  • Non-stick skillet
  • Pot for boiling noodles
  • Cutting board
  • Knife
  • Measuring cups and spoons

Ingredients

  • 1 pound ground beef
  • 8 ounces egg noodles
  • 1 bell pepper, sliced
  • 3 green onions, chopped
  • 3 cloves garlic, minced
  • 1 inch ginger, grated
  • 1/4 cup soy sauce
  • 2 tablespoons brown sugar
  • 2 tablespoons vegetable oil
  • Salt and pepper to taste

Directions

  1. Cook the noodles according to package instructions; drain and set aside.
  2. In a large skillet, heat oil over medium-high heat.
  3. Add ground beef and cook until browned, breaking it apart with a spatula.
  4. Stir in garlic and ginger, cooking for an additional minute until fragrant.
  5. Add bell pepper, soy sauce, and brown sugar to the beef; mix well.
  6. Add the cooked noodles to the skillet, tossing to combine and heat through.
  7. Season with salt and pepper, and garnish with green onions before serving.

Recipe Notes

  • Feel free to substitute ground beef with turkey or chicken for a leaner option.
  • Adjust the level of sweetness or saltiness based on your taste preferences.
  • Add your favorite vegetables for variety and nutrition.

Delicious Golden Scallops with Creamy Parmesan Polenta Recipe

Golden Scallops with Parmesan Polenta: A Delightful Seafood Dish

⚖️
Difficulty
Medium

⏲️
Prep Time
15 mins

🕒
Cook Time
20 mins

⏱️
Total Time
35 mins

🍽️
Servings
4

Indulge in the exquisite combination of flavors in this Golden Scallops with Parmesan Polenta dish, a seafood culinary delight that elevates any dinner occasion. Each plump, tender scallop is seared to golden perfection, creating a savory crust that beautifully contrasts the creamy, rich polenta infused with Parmesan cheese. Whether you’re cooking for a special occasion or simply wanting to savor a gourmet meal at home, this dish promises to impress your guests with its elegant presentation and delightful taste.

As you take your first bite, the crisp exterior of the scallops gives way to a buttery, ocean-kissed interior. Paired with the smooth and cheesy polenta, the dish delivers a delightful balance of textures and flavors—each mouthful is a harmonious blend of sea and savor. It’s not just a meal; it’s an experience that invites you to slow down and relish the moment.

Quick Recipe Highlights

  • Flavor Profile: The dish offers a rich umami flavor from the Parmesan cheese, perfectly complemented by the sweet undertones of the scallops.
  • Texture: Expect a delightful contrast between the crispy outer layer of the scallops and the creamy, velvety mouthfeel of the polenta.
  • Aroma: The warm, buttery aroma of seared scallops combined with the rich scent of melted cheese fills your kitchen with a comforting fragrance.
  • Visual Appeal: The striking golden color of the scallops against the silky white polenta creates a visually stunning presentation.
  • Skill Level Needed: This recipe requires basic cooking skills, making it accessible yet impressive for novice and seasoned cooks alike.
  • Special Equipment: A non-stick skillet and wooden spoon are essential for achieving the ideal sear and creamy texture for the polenta.

Recipe Overview

  • Difficulty Level: Preparing Golden Scallops with Parmesan Polenta is rated medium due to the need for precise cooking times for both components to achieve optimal texture and flavor.
  • Category: This recipe falls under the seafood category and serves as a fantastic main course, ideal for dinner parties or romantic meals.
  • Cuisine: This dish showcases influences from Italian cuisine, emphasizing the harmony between seafood and cheese, commonly found in coastal regions.
  • Cost: Ingredients such as scallops can vary in price, but the overall cost remains reasonable, typically around $15-$20 for a delicious dinner for four.
  • Season: While scallops are available year-round, this dish is particularly delightful in the cooler months when hearty meals are most appreciated.
  • Occasion: Perfect for a variety of events, from intimate dinners to festive gatherings, this recipe is versatile enough to suit many occasions.

Why You’ll Love This Recipe

Crafted to please the palate, this Golden Scallops with Parmesan Polenta dish celebrates the exquisite flavors of the sea. The subtle sweetness of the golden scallops is enhanced by a perfect sear, which locks in their natural juices, resulting in a succulent and tender bite that melts in your mouth. The creamy Parmesan polenta serves as a delicious canvas, soaking up the flavors of the dish while adding a rich, comforting element that complements the scallops beautifully.

Additionally, the convenience of this recipe makes it a constant favorite. The cooking steps are straightforward and can be accomplished in about 35 minutes, allowing you to enjoy a gourmet meal without spending hours in the kitchen. This time efficiency does not compromise the quality or experience, making it perfect for both weeknight dinners and weekend gatherings.

From a nutritional standpoint, scallops are lean protein powerhouses, offering an excellent source of vitamins and minerals such as B12, selenium, and omega-3 fatty acids. When paired with the wholesome benefits of polenta, which provides fiber and healthy carbohydrates, this dish becomes a well-rounded meal that supports a balanced diet. It’s a smart, delicious way to indulge without compromising your health goals.

Sharing this dish at your dinner table creates a space for connection and conversation. The appealing presentation of the scallops and creamy polenta invites compliments, making it a perfect centerpiece for family dinners or celebrations with friends. Enjoying this meal together fosters enjoyment, sparking delightful conversations about food culture and personal experiences.

Finally, this dish is budget-friendly, especially when prepared at home. Purchasing fresh scallops and simple pantry ingredients means that you can serve an elegant meal without breaking the bank. It’s a cost-effective way to impress your guests and indulge in the flavors of fine dining.

Historical Background and Cultural Significance

The origins of scallop dishes can be traced back to coastal communities worldwide, celebrating the seafood bounty available to them. In Italy, seafood is pivotal in many traditional dishes, especially in coastal regions where fresh ingredients thrive. The combination of seafood and cream-based sauces has evolved over centuries, highlighting the elegance of fresh, local seafood.

Culturally, scallops represent abundance and prosperity. In many traditions, they are viewed as a delicacy served during significant ceremonies or gatherings, symbolizing luxury and celebration. The appreciation for scallops is reflected in their inclusion in various recipes and culinary adaptations around the globe.

Over the years, recipes featuring scallops have transformed, adapting to contemporary tastes and cooking methods. The traditional approach of sautéing scallops has now found its way into modern interpretations involving unique techniques and flavor profiles, showcasing chefs’ creativity while respecting time-honored traditions.

Regional variations also exist, with different cultures using local herbs, spices, and cooking techniques to enhance their scallop dishes. Whether grilled, baked, or seared, the versatility of scallops allows for a wide array of culinary expressions that celebrate diverse flavor profiles.

Ingredient Deep Dive

For the scallops, their cultural significance extends beyond delightful taste; they are integral to many coastal cuisines. Rich in protein and low in fat, scallops provide many essential nutrients, including B vitamins and selenium. When selecting scallops, look for fresh, firm specimens with a slight sweet scent of the sea. Store them in the coldest part of your refrigerator and aim to consume them within a day of purchase for optimal freshness. If unavailable, shrimp or tilapia can serve as suitable substitutions.

Parmesan cheese is another key ingredient, renowned for its rich flavor and nutritional benefits. This cheese is a staple in Italian cuisine, providing depth to pasta, salads, and sauces. When selecting Parmesan, opt for the real thing with a proper D.O.P. certification for quality. It adds calcium and protein to your meal and enhances flavor complexity. Properly storing Parmesan involves keeping it wrapped tightly in wax paper within a refrigerator, ensuring it stays fresh for as long as possible.

Polenta, a staple in Italian cooking, is made from ground corn and boasts a rich history tied to rural food traditions. It’s a whole grain that provides essential nutrients and is gluten-free, making it an excellent option for those with dietary restrictions. When choosing polenta, look for stone-ground varieties for better texture and flavor. Store it in a cool, dry place and consider experimenting with toppings and mix-ins to adjust flavors and textures.

Common Mistakes to Avoid

  • Overcooking the scallops: This leads to a rubbery texture; aim for about 2-3 minutes per side.
  • Underseasoning: Don’t forget to season both the scallops and the polenta; a pinch of salt can make a big difference in flavor.
  • Not preheating the skillet: Make sure your skillet is hot enough before adding scallops to achieve a proper sear.
  • Using cold ingredients: Ensure that your ingredients, especially the polenta, are at room temperature before cooking for ideal consistency.
  • Not tasting as you cook: Adjust flavors along the way to ensure your final dish is well-seasoned.
  • Skipping the resting period: Allowing scallops to rest for a minute after cooking helps retain moisture.
  • Using low-quality Parmesan: It can affect the overall flavor of the dish; opt for fresh-grated or block cheese instead.
  • Neglecting the order of cooking: Cook the polenta first to ensure it’s warm when served with scallops.
  • Not allowing polenta to thicken: Stir frequently and monitor the heat, as polenta needs proper cooking time to reach its creamy state.
  • Inadequate cleaning of the scallops: Remove the side muscle and any grit for the best taste and texture.

Essential Techniques

Searing scallops is a critical technique that elevates their flavor and presentation. It allows the natural sugars to caramelize, creating a golden crust while keeping the interior tender and juicy. To master this, preheat your skillet and dry the scallops thoroughly—this prevents steaming and enables that coveted sear. A common pitfall is overcrowding the pan, which populates heat and leads to uneven cooking. Watch for visual cues; scallops should be opaque and easily release from the pan.

For preparing polenta, it’s essential to understand the importance of slow cooking. This technique helps the cornmeal absorb water and swell, creating a creamy texture. Regular stirring prevents lumps and sticking, ensuring smoothness. Many beginners rush this step or use high heat, leading to burnt bits or undercooked grains. Look for a thick, creamy consistency as an indication of success, and don’t hesitate to adjust with more liquid as needed.

Pro Tips for Perfect Golden Scallops with Parmesan Polenta

1. Always pat the scallops dry before cooking to ensure that you achieve that beautiful sear without steaming them.
2. Use a combination of olive oil and butter for searing to enhance both flavor and browning.
3. When cooking the scallops, resist the urge to move them too much in the pan—let them be to allow for the development of a perfect crust.
4. For even creamier polenta, consider adding a splash of cream or a pat of butter at the end, enriching the overall texture.
5. Experiment with different cheeses in the polenta, such as Gouda or feta, to add unique flavors that complement the scallops.
6. Always taste as you go; small adjustments of cheese or seasoning preparations can enhance the dish significantly.
7. Use fresh herbs such as parsley or chives for sprinkling on top just before serving to add a touch of freshness.
8. Make sure to serve immediately after plating for the best texture and taste experience.

Variations and Adaptations

Explore exciting regional variations of this dish by utilizing local seafood options in place of scallops. For example, substituting shrimp or crab can introduce different flavor profiles and textures while preserving the essence of the dish. Seasonally, feel free to enhance your polenta with roasted vegetables like zucchini or peppers for added depth.

For dietary modifications, consider using dairy-free cheese alternatives if making the dish vegan. The texture of polenta remains complimentary, and you can still achieve a rich, creamy base. You can also customize the flavors of polenta by incorporating spices such as smoked paprika or turmeric, adding warmth and vibrant color.

Adjusting the presentation can also elevate the dining experience; consider layering the polenta with fresh spinach or arugula before adding the scallops for an inviting visual contrast. This change not only enhances the dish’s appearance but also adds nutritional value.

Serving and Presentation Guide

When serving Golden Scallops with Parmesan Polenta, consider plating techniques that showcase the delicate textures and colors of the dish. A simple yet elegant approach is to place a generous scoop of polenta in the center of the plate, creating a pool for the scallops to rest. For garnish, sprinkle freshly chopped herbs over the top, enhancing the dish’s aesthetic appeal.

Garnishing ideas include adding a sprinkle of freshly grated lemon zest for a burst of brightness that complements the oceanic flavors. Traditional accompaniments such as a drizzle of high-quality olive oil or a light squeeze of lemon juice can further enhance the taste profile.

For modern serving suggestions, consider setting the scallops atop the polenta at a slight angle, allowing their golden edges to create visual interest. Temperature considerations should ensure the polenta is served warm for optimal creaminess, while the scallops should be cooked just before serving.

Portion control can be adjusted based on serving size preferences; averaging 3-4 scallops per person, accompanied by a generous portion of polenta, makes for a balanced meal.

Wine and Beverage Pairing

To complement the rich flavors of Golden Scallops with Parmesan Polenta, consider pairing it with a crisp, white wine such as Sauvignon Blanc or a light Chardonnay. These wines possess refreshing acidity that beautifully balances the dish’s buttery elements.

For non-alcoholic alternatives, consider a bright lemon-infused sparkling water, which can cleanse the palate between bites and enhance the seafood’s essence. If coffee or tea options are desired, an herbal tea with citrus notes can provide a refreshing finish to the meal, particularly after indulging in a creamy dish.

Wine serving suggestions include slightly chilling the Chardonnay to maintain its refreshing crispness while enhancing the scallops’ flavors. Ensure that your beverage pairings are served at optimal temperatures for the best experience.

Storage and Shelf Life

The best storage methods for leftover Golden Scallops with Parmesan Polenta include placing them in an airtight container to maintain freshness and prevent sogginess. Refrigeration is necessary for short-term storage, allowing leftovers to last for 2-3 days.

Ensure the leftovers are stored promptly and at appropriate temperatures, aiming to consume them quickly to maintain quality. Signs of spoilage can include off odors or visual changes in texture, particularly in the scallops.

Reheating instructions should involve using a gentle heat to prevent overcooking the scallops, ideally employing a stove or microwave. Consider adding a splash of broth or water when reheating the polenta to restore its creamy consistency.

For longer storage, you can freeze the polenta but should avoid freezing scallops, as this can affect texture and flavor significantly.

Make Ahead Strategies

To streamline your cooking experience, consider preparing the polenta in advance. It can be made a day ahead and stored in the refrigerator until it’s time to serve. Simply reheat it with a little water or broth to achieve the desired creamy consistency.

If you’re planning to entertain, searing the scallops just before serving is essential for optimal texture. To ensure that proteins are perfectly timed, have all ingredients measured and ready to go before you start cooking. This approach creates a smooth experience and means you can focus on enjoying your time with guests.

Consider preparing additional sauces or garnishes in advance, such as herb toppings or dressings, to save time and elevate your dish easily. Having these elements prepped allows you to create a beautiful presentation without fuss at the moment of serving.

Finally, be strategic about your serving timeline; allowing the polenta time to cool in shapes or molds can enhance presentation without impacting quality.

Scaling Instructions

Adjusting the quantities of Golden Scallops with Parmesan Polenta is straightforward. To halve the recipe, cut the ingredients down by 50%, ensuring to maintain the same cooking techniques for best results.

If doubling or tripling, be mindful of equipment adjustments; using larger skillets or cooking in batches can ensure that scallops achieve that golden crust without crowding. Timing modifications will be minimal unless using a larger skillet, in which case, keep an eye on cooking times to ensure even doneness.

Storage considerations become crucial with larger batches; ensure ample space in your fridge or containers to accommodate the extra volume while retaining quality. Note that reheating larger quantities may take longer, so plan accordingly.

Nutritional Deep Dive

Golden Scallops with Parmesan Polenta presents a balanced approach to nutrition, showcasing macronutrients critical for overall health. The dish consists primarily of lean proteins from scallops, supporting muscle maintenance and overall physical health, while polenta offers valuable carbohydrates, providing energy to fuel your day.

Micronutrient analysis reveals essential vitamins and minerals such as B12, iron, and magnesium derived from the scallops, essential for neurological function and reducing fatigue. The cheese in the polenta also adds calcium, supporting bone health and well-being.

Health benefits extend beyond the plate; scallops are rich in omega-3 fatty acids, beneficial for cardiovascular health, while polenta, being gluten-free, accommodates those with sensitivities. This dish aligns well with dietary considerations, catering to various needs while providing satisfaction and flavor.

Portion analysis remains important; consider serving sizes of scallops along with an appropriate portion of creamy polenta. This control encourages enjoying your meal while still being aligned with mindful eating practices.

Dietary Adaptations

Golden Scallops with Parmesan Polenta can be adjusted to suit various dietary needs. For a gluten-free version, simply ensure that all ingredients, including any broths used, are gluten-free, as polenta is naturally gluten-free.

Dairy-free adaptations are achievable by using nutritional yeast for cheesy flavor in the polenta or argyle-specific dairy alternatives. This keeps the comforting texture while ensuring dietary restrictions are met.

For those following vegan diets, replace scallops with a plant-based protein option such as mushrooms or marinated tofu, conveying umami flavors while enhancing the meal’s nutritional profile. Be cautious with seasoning to retain depth.

Low-carb variations can involve substituting polenta with a cauliflower mash, offering a similar texture while reducing carbohydrate intake. This swap retains the creaminess of the dish while supporting low-carb diets.

For keto enthusiasts, opting for high-fat dairy products in the preparation, such as cream cheese or grass-fed butter, can increase fat content with a similar texture. Portions should still align with keto-friendly guidelines.

Troubleshooting Guide

Addressing texture issues in scallops often involves adjusting cooking times or heat settings; ensure your skillet is properly heated before adding the seafood to avoid rubbery results.

For flavor balance, adjust seasoning gradually, using salt, acids, or herbs to enhance or counter-balance natural sweetness; taste as you experiment to achieve the desired profile.

Temperature problems may arise if scallops are added too cold; always allow them to reach room temperature before cooking to ensure even cooking and a golden crust.

Equipment challenges often involve cookware that isn’t non-stick. To prevent sticking, ensure proper preheating and adjust your oil quantities accordingly; cast iron or seasoned pans typically work best for high temperatures.

Ingredient substitutions should be considered if staple ingredients are unavailable; culinary creativity allows for unique presentations—consider using different seafood or cheeses for varied offerings.

Timing concerns for scallops require careful monitoring. A quick sear is vital; overcooking can lead to unsatisfying outcomes. Knowing when to flip and efficiently timing polenta preparation will yield the best results.

Recipe Success Stories

In our community, countless home cooks share stories of the joy brought by Golden Scallops with Parmesan Polenta during family meals. Many have reported delight at how quickly the dish comes together, even when entertaining guests, emphasizing the recipe’s accessibility for skill levels of all backgrounds.

Feedback highlights that variations, such as using different types of cheese or seafood, can lead to surprising results that sparked deeper culinary exploration and experimentation. Individual adaptations honoring taste preferences have resulted in unique family recipes, leading to proud moments during gatherings.

Photography tips abound as well; home chefs often showcase the vibrant colors and textures of this dish on social media, generating excitement and appreciation from family and friends. Such feedback contributes towards building confidence in culinary skills and elevating home dining experiences.

Adapting the recipe for dietary restrictions has also led to success stories, with many sharing how modifications make the dish wholesome while still honoring the essence of the original.

These anecdotal experiences emphasize the enduring nature of the recipe, showcasing its success in diverse kitchens and among various culinary cultures.

Frequently Asked Questions

1. How can I make the scallops more flavorful?
Seasoning with fresh herbs, citrus zest, or spices can elevate the flavor profile significantly. A marinade or a quick brine before cooking can also deepen their taste.

2. Can I use frozen scallops for this recipe?
Yes, but ensure to thaw them properly in the refrigerator before cooking to maintain their texture and flavor—never refreeze scallops after thawing.

3. What can I use instead of Parmesan cheese?
Alternatives like Pecorino Romano or Nutritional Yeast can provide a similar cheesy flavor depending on dietary preferences and restrictions.

4. How do I ensure my polenta is creamy?
Regular stirring while gradually adding broth or water helps achieve a smooth, creamy texture. Use high-quality cornmeal for the best results.

5. How can I store leftovers?
Place scallops and polenta in airtight containers; consume them within 2-3 days for optimal freshness. Reheat gently to avoid overcooking.

6. Should I rinse the scallops before cooking?
Yes, rinsing helps remove any grit, but remember to pat them dry with paper towels to ensure proper searing.

7. Can I double the recipe?
Absolutely! Just adjust cooking times as needed, cooking in batches if necessary to ensure even searing.

8. Is this dish suitable for meal prep?
The polenta can be made ahead, but scallops are best cooked fresh due to their delicate texture.

9. What sides would pair well with this dish?
A fresh, crisp salad or roasted asparagus can make excellent accompaniments that enhance the overall meal.

10. Can I serve this dish cold?
This dish is best enjoyed warm, but if preferred, you can chill it slightly; however, it will affect the texture of both components.

Additional Resources

Explore related recipes on our blog that highlight seafood and creamy grains to enhance your culinary repertoire. Dive into technique guides that provide insightful cooking methods for perfecting your skills in the kitchen.

Investigate ingredient information ensuring you select the best types for your culinary endeavors—understanding the nuances of seafood quality can significantly impact flavor. Utilize equipment recommendations to choose appropriate tools that enhance your cooking experience.

Seasonal variations provide the opportunity for creativity; explore fresh ingredients that can be incorporated into this dish, allowing your meals to change with the seasons while retaining essential flavors.

Join the Conversation

We invite you to share your culinary adventures with Golden Scallops with Parmesan Polenta on social media. Show us your successful plates and engage with our community for inspiration, tips, and personal stories surrounding this enjoyable recipe.

Leave a review on this recipe to help fellow cooks discover its potential, or share a unique variation you’ve tried. Your contributions help build a supportive community centered on culinary exploration and shared success.

Photography tips for capturing the beauty of this dish are encouraged, ensuring that even the most novice cook can showcase their efforts in an engaging way—making every dining experience memorable.

The Recipe

Golden Scallops with Parmesan Polenta

Serves: 4

Prep Time: 15 mins

Cook Time: 20 mins

Total Time: 35 mins

Kitchen Equipment Needed

  • Non-stick skillet
  • Wooden spoon
  • Pot for polenta
  • Measuring cups and spoons
  • Knife and cutting board

Ingredients

  • 1 pound of scallops
  • 1 cup of polenta
  • 4 cups of chicken or vegetable broth
  • 1 cup of grated Parmesan cheese
  • 2 tablespoons of butter
  • 2 tablespoons of olive oil
  • Salt and pepper to taste
  • Fresh herbs for garnish

Directions

  1. In a pot, bring the broth to a boil. Add the polenta, whisking continuously to prevent lumps. Reduce heat and simmer until thickened, about 10-15 minutes.
  2. Stir in the Parmesan cheese, butter, salt, and pepper until smooth and creamy.
  3. While polenta cooks, heat olive oil in a non-stick skillet over medium-high heat. Pat scallops dry and season with salt and pepper.
  4. Add scallops to the hot skillet; sear for 2-3 minutes on each side until golden brown and cooked through.
  5. To serve, spoon polenta onto plates and top with sautéed scallops. Garnish with fresh herbs.

Recipe Notes

  • Don’t overcrowd the pan when cooking scallops for an even sear.
  • Ensure scallops are dried thoroughly for best texture.
  • Protein (scallops) can be swapped with any other seafood of preference.

Indulge in Heavenly Banana Split Fluff Delight Recipe Today

Banana Split Fluff Delight Recipe: A Sweet Treat for All Occasions

⚖️
Difficulty
Easy

⏲️
Prep Time
15 mins

🕒
Cook Time
0 mins

⏱️
Total Time
15 mins

🍽️
Servings
8 servings

The Banana Split Fluff Delight is a nostalgic dessert that will take you back to your childhood. This delightful dish blends the classic flavors of a banana split into a fluffy, creamy treat that’s perfect for parties, barbecues, or a simple family gathering. The combination of ripe bananas, whipped cream, and pudding creates a luscious texture, making each bite a blissful experience. With just a few simple ingredients, you can whip up this easy recipe that promises smiles all around!

Picture a bowl brimming with a medley of colors and flavors — luscious yellow bananas, velvety chocolate drizzle, and vibrant strawberries. The creamy fluffiness contrasts delightfully with the crunchy nuts sprinkled on top. Not only is this recipe eye-catching, but it is also incredibly easy to prepare. In no time, you’ll have a delicious dessert that feels indulgent yet is uncomplicated enough for beginner cooks.

Quick Recipe Highlights

  • Flavor Profile: This dessert offers a sweet burst of banana, the richness of chocolate, and a hint of vanilla from the pudding.
  • Texture: The combination of smooth whipped cream and soft bananas creates a creamy texture, contrasted with crunchy toppings.
  • Aroma: Aromatic notes of ripe bananas coupled with vanilla sweetness fill the air, inviting everyone to indulge.
  • Visual Appeal: Brightly colored ingredients are beautifully layered, making it a visually stunning addition to any table.
  • Skill Level Needed: This recipe is perfect for cooks of all skill levels due to its simplicity and quick preparation.
  • Special Equipment: No special equipment is required, just a mixing bowl and a whisk!

Recipe Overview

  • Difficulty Level: This Banana Split Fluff Delight recipe is straightforward, requiring no baking. It’s ideal for novice cooks as well as experienced chefs looking for something quick.
  • Category: This dessert fits perfectly into the category of no-bake treats, making it an easy choice when you want something sweet without heating up the kitchen.
  • Cuisine: While this recipe draws inspiration from classic American desserts, it reflects a universal love for fruit and cream combinations, transcending culinary boundaries.
  • Cost: The estimated cost of this dessert is low, as common ingredients like bananas, pudding mix, and whipped cream can be found at affordable prices.
  • Season: Perfect for any season, this dessert shines in the summer at picnics, but it’s also a comforting treat in the colder months.
  • Occasion: This Banana Split Fluff Delight is suitable for all occasions, from birthday parties to family dinners or summer cookouts.

Why You’ll Love This Recipe

The Banana Split Fluff Delight stands out for its incredible taste and texture. The harmony of flavors — from the sweetness of bananas to the richness of chocolate and cream — creates an unforgettable dessert. Each mouthful delivers a delicious contrast, delightful for any palate.

In terms of convenience, this recipe requires minimal prep time and no cooking, making it an excellent option for last-minute gatherings or serving unexpected guests. You can prepare it in a few minutes and chill it while you tidy up or focus on other dishes.

Nutritionally speaking, bananas provide essential vitamins and minerals, making this dessert not just indulgent but also a source of nutrition. The ingredient profile allows for lighter versions without significantly compromising on flavor, appealing to health-conscious individuals.

For social occasions, this dessert sparks joy and nostalgia among guests. It serves as an icebreaker, evoking fond memories of childhood treats and fun outings, creating a communal experience in every bite.

Lastly, the affordability and accessibility of ingredients make this recipe a budget-friendly choice without sacrificing taste. The use of common kitchen staples means you may already have most of the components on hand, making it easy to create this delightful dessert any day of the week.

Historical Background and Cultural Significance

The banana split, a staple in American dessert culture, traces its origins back to the early 1900s, widely believed to have been invented in 1904 by David Strickler, a 23-year-old pharmacist. He created the treat in Latrobe, Pennsylvania, and from there, it gained immense popularity, becoming a symbol of indulgence in ice cream parlors nationwide.

Culturally, the banana split has been celebrated as a whimsical dessert, often featured in diners and ice cream shops, capturing the hearts of many generations. This dessert has transcended its humble beginnings, finding a beloved place in various regional adaptations, which adds to its charm.

Over time, the banana split has evolved from a simple concoction of bananas, ice cream, and toppings to be integrated into countless dessert forms. It influences many recipes, such as sundaes and trifles, showing its versatility in dessert preparation.

Regionally, variations of the banana split have emerged, incorporating local favorites. From caramelized fruits to innovative toppings, each area has added its flair to this classic dessert, solidifying its position as a beloved treat in American cuisine.

Ingredient Deep Dive

Bananas: Bananas are not only a delicious fruit but also an excellent source of potassium and vitamins. They have been enjoyed since ancient times, originating in Southeast Asia before making their way to America in the 19th century. When selecting bananas, choose ones that are ripe with a few brown spots for optimal sweetness. Store them at room temperature, and if overripe, they can be used in smoothies or baked goods.

Pudding Mix: The pudding mix adds a creamy, rich thickness to the fluff. It’s a convenient ingredient that brings nostalgia to many desserts. Made from a blend of cornstarch and flavorings, it requires no cooking for easy preparation. Consider choosing instant pudding mixes for quicker results, and store any unopened packages in a cool, dry place.

Common Mistakes to Avoid

  • Using overripe bananas can cause the dessert to turn too mushy. Select just ripe or slightly unripe bananas for the best texture.
  • Not chilling the dessert long enough can lead to a runnier consistency. Aim for at least 1-2 hours in the refrigerator before serving.
  • Overmixing the whipped cream can cause it to become grainy. Mix just until soft peaks form for a smooth texture.
  • Forgetting to layer ingredients can affect the overall flavor profile. Layering helps to combine flavors beautifully with each bite.
  • Not tasting the mixture during preparation might lead to unbalanced flavors. Adjust sweetness with sugar or other flavors as needed.
  • Neglecting to garnish appropriately can diminish the visual appeal. Add nuts or chocolate shavings for an attractive finish.
  • Using flavored yogurt instead of whipped cream can alter the texture significantly. Stick with heavy whipped cream for the fluffiest result.
  • Failing to store leftover fluff properly can lead to spoilage. Keep it in an airtight container in the fridge to maintain freshness.

Essential Techniques

Layering: Mastering the layering technique is essential for creating a visually appealing dessert. Start with a base layer of bananas, followed by pudding and whipped cream. Use a gentle hand to evenly distribute layers, avoiding mixing, which can ruin the effect. Visual cues for success include distinct layers and a clean edge on the serving glass.

Whipping Cream: Whipping cream should be whisked to soft peaks to achieve the right texture. Start with chilled cream and a cold bowl; this helps stabilize the whipping process. Common pitfalls include over-whipping, which can lead to a grainy texture. Stop once soft peaks form to ensure a smooth consistency.

Pro Tips for Perfect Banana Split Fluff Delight

– Use chilled mixing bowls to help whip the cream faster and maintain its stability.
– Add a splash of vanilla extract or almond extract to elevate the dessert’s flavor.
– Incorporate various toppings to cater to different tastes, such as crushed cookies or sprinkles.
– Allow the dessert to sit overnight for flavors to meld beautifully.
– Switch it up with different fruits based on the season for delightful variations.
– Use dairy-free whipped cream alternatives for a lighter version without sacrificing flavor.
– Keep some pudding mixture aside to drizzle on top before serving for added richness.
– Try swapping standard chocolate sauce with Nutella for a creamy, hazelnut twist.

Variations and Adaptations

Explore regional variations by incorporating local fruits into your Banana Split Fluff Delight, such as peaches in summer or apples in fall. For a seasonal adaptation, add autumn spiced ingredients like cinnamon to the cream or switch your fruit selections to match seasonal harvests.

Dietary modifications can include using coconut whipped cream for a vegan version or substituting traditional pudding with almond or coconut milk pudding for a dairy-free treat. Flavor variations may include adding a touch of coffee or mocha for a unique flair or experimenting with different candy toppings to electrify the taste experience.

Texture modifications could involve blending frozen bananas for a creamier pudding base or using crushed graham crackers in the layers for added crunch. For presentation alternatives, serve in individual jars for a modern touch, enhancing the dining experience visually.

Serving and Presentation Guide

A key to serving this dessert is how you plate your Banana Split Fluff Delight. Use large bowls or individual glasses to create an inviting visual presentation. For garnishing, consider whipped cream peaks topped with a cherry or chocolate drizzle for that classic look.

You can pair this dessert with fresh fruit on the side to enhance the flavors and provide a colorful contrast. To modernize your serving, consider adding edible flowers for a surprising pop. Serve chilled for optimal taste, but use room temperature servings to ensure accessibility for all guests.

Portion control is also crucial; consider using smaller bowls to encourage guests to indulge but not overfill, making it ideal for social settings where multiple desserts are offered.

Wine and Beverage Pairing

To complement your Banana Split Fluff Delight, consider pairing it with a sweet dessert wine like Moscato or a light, fruity rosé. Both choices enhance the dessert’s sweetness without overpowering it.

For non-alcoholic alternatives, serve it alongside iced sweet tea or lemonade to maintain a refreshing balance. If coffee lovers are at the table, a light roast coffee or even flavored coffee, such as hazelnut, can serve as a delightful pairing.

Temperature should be considered; serve desserts chilled and drinks at a moderate temperature to create a refreshing contrast on the palate.

Storage and Shelf Life

To store your Banana Split Fluff Delight, transfer it to an airtight container and refrigerate to maintain its freshness. It will typically last up to three days in the fridge, but for the best texture and taste, consume it within two days.

Temperature requirements call for refrigeration; avoid leaving it at room temperature for extended periods. If transferred into a larger container, ensure it seals tightly to prevent moisture loss or fridge odors from seeping in.

Signs of spoilage include an off smell or liquid separation; always check before indulging. For reheating, avoid microwave usage and instead serve cold directly from the refrigerator to maintain its delicious fluffiness.

Freezing guidelines recommend against freezing this dessert, as the texture will be compromised when thawed.

Make Ahead Strategies

To make your Banana Split Fluff Delight ahead of time, prepare the ingredients a day in advance. Slice bananas just before layering to prevent browning.

Store any pudding or whipped cream components separately to maintain their structure until you’re ready to assemble. The fluff mixture can be prepped and chilled, allowing for easier gathering.

The quality impact assessment suggests that while freezing is not advisable, preparing the fluff mix a few hours ahead enhances the flavor melding process. When serving, feel free to wait for guests to arrive before folding in the bananas for freshness.

Add any fresh elements, such as nuts or fruits, right before serving to maintain their crunch and visual appeal.

Scaling Instructions

Scaling the Banana Split Fluff Delight recipe is straightforward. To halve the recipe, simply divide the quantity of each ingredient by two while maintaining the overall proportions.

For larger gatherings, doubling or tripling the recipe is a breeze. Ensure your mixing bowls are large enough to accommodate increased volumes, and consider using an industrial-sized container for easier mixing.

Timing modifications may be necessary, especially if preparing multiple batches at once; space out your mixing sessions to avoid overwhelming your workspace. Store any leftovers accordingly, maintaining freshness and quality.

Nutritional Deep Dive

Delving into the nutrition of this dessert reveals it’s primarily fueled by carbohydrates and sugars from bananas and pudding. While high in sugar, bananas contribute vital vitamins and minerals including potassium and vitamin C, promoting heart health and overall wellness.

Micronutrient analysis shows that using whole ingredients, like heavy cream, provides calcium while offering a balance to the overall fat content. Adjusting portion sizes can also ensure a lighter dessert experience that aligns with dietary goals.

Health benefits of incorporating bananas and moderation with sweet ingredients make this fluff dessert less guilt-inducing. For individuals mindful of their weight, consider lowering ingredient quantities while retaining flavor integrity.

Portion control tips include using smaller dishes to manage serving sizes effectively, encouraging diners to enjoy a taste without overindulgence.

Dietary Adaptations

Adapting the Banana Split Fluff Delight for dietary preferences opens up possibilities. For a gluten-free version, use certified gluten-free pudding mix and ensure toppings like cookies or granola are gluten-free as well.

For a dairy-free option, simply use almond or coconut-based whipped creams and pudding mixes, accommodating vegan diets without losing original flavors.

Low-carb options can explore sugar-free pudding mixes and heavy cream alternatives like coconut milk, providing delicious results while staying within dietary limits.

Keto and Paleo-friendly adaptations emphasize whole ingredients, like opting for fresh fruits and low-sugar bases, resulting in a fresher flavor while managing carbohydrate levels effectively.

Specific diets should consider the sensitivities involved. For instance, low-FODMAP diets can exclude certain fruits, offering a tailored version such as the Banana Split Fluff Delight with only lactose-free ingredients included.

Troubleshooting Guide

When facing texture issues in this dessert, overmixing the whipped cream can lead to a grainy result. To correct this, ensure you monitor whipping closely and stop when soft peaks form, mixing lightly.

Flavor balance can sometimes skew toward overly sweet. In such cases, adjust the sweetness in the pudding mix, or add a dash of salt to enhance flavors and bring out the creaminess.

If the temperature proves problematic, a lack of chilling can result in runniness. Always refrigerate adequately before serving; a minimum of two hours ensures better consistency.

Equipment challenges may occur, such as incorrect bowl sizes affecting mixing. Use large bowls for optimal whipping space to improve performance.

Ingredient substitutions might inadvertently change textures. When swapping ingredients, try to mimic the initial flavor profile to maintain balance; for instance, using Greek yogurt instead of whipped cream.

Timing concerns can be resolved by ensuring proper chilling times; rushing this process can compromise the fluff’s integrity. Be patient and allow it to set, ensuring an enjoyable serving experience.

Recipe Success Stories

Community feedback has shown that the Banana Split Fluff Delight remains a favorite among families, often praised for its nostalgic flavors. Parents appreciated its simplicity in introducing their children to cooking, allowing for shared kitchen moments.

Variation successes are highlighted through social media, where users have shared delightful twists on this classic dish, inviting different fruits or toppings, turning it into a family favorite.

Adaptation stories often feature crowd-pleasing modifications, incorporating seasonal fruits or local ingredients, showcasing the versatility of this easy recipe.

Reader suggestions continually emerge, with enthusiasts experimenting with their favorite toppings, igniting creativity in presentation and flavor combinations.

Photography tips have inspired many home cooks to showcase this visually appealing dessert, enhancing the online conversation and community engagement around this delightful treat.

Frequently Asked Questions

Can I use frozen bananas instead of fresh? While fresh bananas yield the best flavor and texture, frozen bananas can work in a pinch. They will alter the consistency a bit, but they’re a fantastic option for smoothies or blended desserts.

How long can I store the Banana Split Fluff Delight? It’s best consumed within two to three days when stored properly in an airtight container in the refrigerator to ensure maximum freshness and flavor.

Can I make this recipe vegan? Absolutely! Use plant-based whipped cream and pudding options to create a delicious vegan version of this delightful dessert.

What toppings can I add to my fluff? Feel free to get creative with toppings! Crushed nuts, chocolate chips, or sprinkles are all great choices to enhance the texture and flavor.

Is it necessary to refrigerate before serving? Yes, allowing the Banana Split Fluff to chill helps the flavors meld and the texture to firm up, ensuring a delightful serving experience.

Can I use different flavors of pudding? Certainly! Chocolate, vanilla, or even strawberry pudding can be used to create unique variations of the Banana Split Fluff Delight.

What’s the best way to serve this dessert? Serve it chilled, either in large bowls or individual cups for a more casual gathering. Garnish with extra fruit or chocolate sauce for a polished finish.

Can this dessert be frozen? It’s not recommended to freeze this dessert as the texture might change once thawed. It’s best enjoyed fresh or refrigerated.

How can I adjust the sweetness? You can adjust the sweetness by modifying the amount of pudding mix or using sugar alternatives if you prefer a less sweet dessert.

What if I can’t find ripe bananas? If ripe bananas are unavailable, you can let slightly green ones sit at room temperature until they ripen or use mashed bananas as an alternative.

Additional Resources

Expand your dessert repertoire with related recipes that focus on easy, no-bake options for summer gatherings. Technique guides can help refine your whipping and layer techniques for various desserts.

Ingredient information is available for those interested in exploring more about bananas, their health benefits, and their availability according to the season.

Consider investing in quality equipment for dessert preparation, such as mixing bowls and electric mixers, to enhance your cooking experience and efficiency.

For seasonal variations, check out fruit-specific recipes that blend fun flavors into classic elements like the Banana Split Fluff Delight, enticing guests with new spins on beloved traditions.

Join the Conversation

We invite you to share your Banana Split Fluff Delight experiences on social media! Post pictures of your creations and don’t forget to tag us to join our vibrant community.

Feel free to leave reviews, share tips, or suggest variations that make your versions unique. Engaging questions and feedback can offer fresh perspectives and inspire others to create delicious memories in their kitchens.

Don’t hesitate to contribute to our repository of recipe stories, sharing your success or even misadventures in crafting this delightful dessert. Every shared experience can help others enhance their culinary journeys!

The Recipe

Banana Split Fluff Delight

Serves: 8 servings

Prep Time: 15 mins

Cook Time: 0 mins

Total Time: 15 mins

Kitchen Equipment Needed

  • Mixing bowl
  • Whisk or hand mixer
  • Measuring cups and spoons
  • Serving bowls or glasses

Ingredients

  • 4 ripe bananas, sliced
  • 1 package (3.4 oz) instant vanilla pudding mix
  • 2 cups milk
  • 1 cup heavy whipped cream
  • ½ cup chocolate syrup
  • ½ cup chopped nuts (optional)
  • 1 cup sliced strawberries (optional)

Directions

  1. In a large mixing bowl, whisk together the pudding mix and milk until smooth and set aside.
  2. In another bowl, whip the heavy cream until soft peaks form.
  3. Gently fold the whipped cream into the pudding mixture until well combined.
  4. In a serving dish, layer the sliced bananas, pudding fluff, chocolate syrup, and strawberries if using.
  5. Repeat the layering until all ingredients are used, finishing with a top layer of whipped cream and a drizzle of chocolate sauce.
  6. Cover and refrigerate for about 1-2 hours to chill and set before serving.

Recipe Notes

  • Feel free to substitute different fruits based on your preference, such as mango or peach slices.
  • This dessert can be made ahead and stored in the refrigerator for up to two days.
  • For a delightful twist, consider adding a splash of vanilla or almond extract to the whipped cream.

Irresistible Creamy Potato and Bacon Soup Recipe for Comfort Food Lovers

Creamy Potato and Bacon Soup: A Heartwarming Delight

⚖️
Difficulty
Easy

⏲️
Prep Time
15 mins

🕒
Cook Time
30 mins

⏱️
Total Time
45 mins

🍽️
Servings
4 bowls

Creamy Potato and Bacon Soup is a deliciously indulgent dish that brings comfort and warmth to any meal. This hearty soup combines tender potatoes with crisp bacon, creating a savory flavor profile that is hard to resist. The creamy texture comes from blending the ingredients to a silky smooth consistency, ensuring that every spoonful feels like a warm hug. Perfect for chilly evenings or casual gatherings, this soup is a go-to recipe that showcases the delightful balance of flavors in rustic cooking.

As you take in the steaming bowl of this creamy creation, the aroma of bacon wafts through the air, instantly drawing you in. The rich scent of butter mingling with potatoes creates an inviting atmosphere, making it the perfect recipe to share with family or friends. Each bite is a harmony of creamy potato goodness complemented by the satisfying crunch of crispy bacon, making this soup a satisfying choice that warms both the body and soul.

Quick Recipe Highlights

  • Flavor Profile: This soup boasts a harmonious blend of savory bacon, creamy potatoes, and a hint of onion and garlic that creates a delightful umami flavor.
  • Texture: The smooth puree of potatoes melds seamlessly with the crunchy bits of bacon, offering a delightful contrast that enhances the eating experience.
  • Aroma: The fragrant notes of sautéed onions and garlic create an inviting aroma that delights your senses and whets your appetite.
  • Visual Appeal: This dish features a rich, creamy color accented by the golden brown of crispy bacon, making it visually appetizing.
  • Skill Level Needed: The recipe is simple enough for beginners while providing enough depth to challenge more experienced cooks.
  • Special Equipment: A stick blender or a traditional blender is essential for achieving the creamy texture without losing the heartiness of the ingredients.

Recipe Overview

  • Difficulty Level: The creamy potato and bacon soup is easy to prepare, making it ideal for home cooks of all experience levels. Following straightforward steps ensures success in the kitchen.
  • Category: This recipe falls under soups and stews, perfect as an appetizer or a comforting main course.
  • Cuisine: While rooted in classic American comfort food, creamy potato soup has variations that travel through many cuisines worldwide, showcasing its versatility and appealing flavors.
  • Cost: Budget-friendly, this recipe uses pantry staples like potatoes and bacon, ensuring deliciousness without a hefty price tag.
  • Season: Ideal for fall and winter months, this soup provides the warmth and comfort needed during colder weather.
  • Occasion: Serve this creamy potato and bacon soup as a delightful starter during dinner parties or as a weekday family meal.

Why You’ll Love This Recipe

Creamy Potato and Bacon Soup is more than just a dish; it’s an experience that excites the palate and satisfies the heart. The rich combination of flavors, from salty bacon to buttery smooth potatoes, creates a unique taste that leaves a lasting impression. The comforting nature of this soup ensures that it brings people together, making it perfect for family dinners or cozy meals with friends.

Convenience is another compelling reason to love this soup. Preparation doesn’t take much time, allowing busy cooks to whip up a wholesome meal in less than an hour. You can even prepare it in larger batches to enjoy leftovers throughout the week, making it an efficient dish for meal planning.

Nutritionally, this creamy potato and bacon soup offers comfort without compromising on health. Potatoes are packed with vitamin C and potassium, while bacon adds protein to your diet. Whether served as a main dish or a side, this soup can be part of a balanced meal.

Moreover, this recipe shines during social gatherings. The aroma wafting through the kitchen invites conversation and warmth, making it a perfect dish to share. The simplicity of serving a bowl of creamy soup makes it a hassle-free choice for entertaining.

Lastly, this soup is cost-effective. With accessible ingredients that you likely already have on hand, you can create a delicious meal without overspending. It’s an excellent choice for families or anyone looking to enjoy homemade comfort food without breaking the bank.

Historical Background and Cultural Significance

The origins of potato soup can be traced back centuries to various culinary traditions across Europe, where potatoes were a staple food due to their versatility and ease of cultivation. With the arrival of bacon in European cuisine, often used as a prized ingredient, the two came together brilliantly, resulting in what we now cherish as creamy potato and bacon soup.

Culturally, this dish symbolizes comfort and practicality, often served in homes as a hearty meal. Its simplicity speaks to resourcefulness, allowing home cooks to utilize leftover ingredients effectively—hence forming a comforting staple in many kitchens.

The evolution of this recipe is fascinating; the original versions were likely handcrafted with whatever ingredients were available. Today, variations allow for creativity, reflecting regional flavors and preferences, from adding cheese to incorporating local herbs.

Furthermore, various regions have embraced unique spins on potato soup, telling stories of their local ingredients and culinary approaches. From regional spices to diverse preparation methods, each version adds to the soup’s rich tapestry, affirming its status as a beloved dish worldwide.

Ingredient Deep Dive

– Potatoes: A cornerstone of this recipe, potatoes are a nutrient-dense food that offers carbohydrates, fiber, and essential vitamins. When selecting potatoes, opt for starchy varieties like Russets or Yukon Golds for better texture. Store in a cool, dry place and avoid exposure to direct light to prevent sprouting.

– Bacon: As the soul of this soup, bacon adds a rich umami flavor and enticing aroma. The nutritional benefits of bacon include high protein and certain essential vitamins. Choose high-quality bacon for the best results. To ensure longevity, keep bacon refrigerated and consume it by the sell-by date for optimal freshness.

Common Mistakes to Avoid

  • Overcooking the Potatoes: This can lead to a mushy texture; instead, cook them until just fork-tender for optimal consistency.
  • Not Blending Enough: A smooth puree enhances the creaminess; blend thoroughly, adjusting the consistency with broth as needed.
  • Using Low-Quality Bacon: This can lead to a bland flavor; choose thick-cut, high-quality bacon for maximum taste and texture.
  • Skipping the Aromatics: Failing to sauté onions and garlic beforehand lacks the foundational flavor; always sauté to build depth.
  • Overseasoning: Adding salt too early can intensify flavors; season gradually and taste as you go to achieve the perfect balance.
  • Rushing the Cooking Process: Allowing flavors to develop through slow cooking enhances the overall taste of the soup.
  • Not Adjusting for Creaminess: If the soup isn’t creamy enough, add additional cream or milk gradually to achieve the desired richness.
  • Neglecting Portion Sizes: Be mindful of serving sizes to avoid wastage and ensure everyone enjoys a satisfying bowl.

Essential Techniques

– Sautéing: This is crucial for flavor development. Start with medium heat and add butter or oil to the pan, cooking onions until translucent. Avoid high heat to prevent burning while achieving that essential sweet flavor.

– Blending: Whether using a stick blender or traditional blender, achieving the perfect smoothness is vital. If using a traditional blender, blend in batches, allowing steam to escape to avoid overflow—always remember to secure the lid tightly.

Pro Tips for Perfect Creamy Potato and Bacon Soup

1. Use a mix of potato types for added flavor and texture, incorporating waxy varieties that preserve their shape and creamy ones for smoothness.
2. For extra creaminess, consider adding cream cheese or sour cream after blending; this elevates the soup’s richness.
3. To enhance the smoky flavor, try using pancetta or smoked bacon as a substitute for traditional bacon.
4. If you enjoy subtle heat, add a pinch of cayenne pepper or red pepper flakes during cooking, balancing the flavors beautifully.
5. Incorporating herbs such as thyme or rosemary can elevate the dish’s aroma and add a touch of freshness to the soup.
6. Garnish with chopped fresh chives or crispy bacon right before serving for added flavor and visual appeal.
7. Adjust the thickness of the soup by varying the amount of broth; for a thicker soup, reduce the liquid incrementally until desired texture is achieved.
8. Pair it with crusty bread for a perfect meal that combines the warmth of the soup and delightful crunch of the bread.

Variations and Adaptations

For a regional twist, consider adding local spices or ingredients, such as cheddar cheese for a sharp bite or chopped kale for a nutritional boost. Seasonal adaptations might include using pumpkin or butternut squash during fall, altering the soup’s flavor while keeping the creamy base intact.

Dietary modifications can also cater to different preferences; for gluten-free options, ensure your chicken broth is labeled gluten-free, or use vegetable broth for a vegetarian version. Flavor variations include adding roasted garlic for depth or smoked paprika for a cheery kick. Tex-mex flavors can be introduced by spicing up the dish with chilies, lime, and cilantro.

For texture, try incorporating various toppings, like toasted croutons for crunch or a dollop of herbed yogurt for creaminess and visual contrast. Presentation can also be adapted by serving in unique bowls or utilizing edible garnishes to heighten the visual appeal.

Serving and Presentation Guide

Plating your creamy potato and bacon soup beautifully elevates the dining experience. Consider using deep bowls to create a comforting vibe while ensuring ample space for garnishes. You can spiral a bit of cream atop the soup for flair, or drizzle a bit of olive oil for an aromatic touch.

Garnishing is essential—chopped chives or parsley can enhance color, while crispy bacon bits add an enticing crunch. Pair with warm, crusty bread for dipping, encouraging a homely atmosphere, perfect for family gatherings.

Temperatures should be served hot, as creamy soups lose charm when cooled, though they can be enjoyed warm as leftovers. To ensure portion control, serve smaller bowls, allowing guests to sample alongside other delightful dishes.

Wine and Beverage Pairing

When considering wine pairings for creamy potato and bacon soup, opt for a medium-bodied white wine like Chardonnay, which can complement the creaminess without overpowering the dish. A light Pinot Noir can also work beautifully, bringing in additional flavors of earthiness and depth.

For non-alcoholic alternatives, serve sparkling water with a slice of lemon or a herbal iced tea to refresh your palate without being too heavy. If coffee or tea is your preference, opt for a light herbal tea to balance the richness of the soup. When serving, ensure beverages are at the right temperature, enhancing the overall dining experience.

Storage and Shelf Life

To store creamy potato and bacon soup, let it cool before transferring it to an airtight container. This soup can typically be stored in the fridge for up to 4 days. Ensure it is kept at a temperature below 40°F for maximum preservation.

For longer storage, consider freezing the soup. Use freezer-safe containers, leaving space for expansion, as the soup will freeze solid and keep for 2-3 months. When reheating, thaw it overnight in the fridge for best results, and gently heat on the stovetop while stirring to maintain creaminess, adjusting the thickness with broth as needed.

Signs of spoilage include off odors, unusual colors, or separation in the mixture. If there’s any doubt about the freshness, it’s best to discard the soup.

Make Ahead Strategies

For efficient meal preparation, consider making creamy potato and bacon soup in advance. Start by prepping the ingredients a day before, peeling and chopping potatoes and bacon, and storing them in the refrigerator. This saves valuable time on cooking day.

You can also prepare the entire soup base and then allow it to cool before refrigerating. When you’re ready to serve it, simply reheat the soup, adjusting the consistency as required by adding cream or broth. Consider supplementing freshness by adding chopped herbs right before serving for a burst of flavor.

In terms of quality, reheating may cause the soup to thicken; feel free to add a splash of broth to restore consistency. Make sure fresh ingredients like herbs or garnishes are added just before serving to maintain their vibrancy.

Scaling Instructions

Scaling the recipe for more or fewer servings is straightforward. If you plan to halve the recipe, ensure you keep the proportions consistent to maintain flavor integrity. Similarly, doubling or tripling will still yield a delicious result; just be cautious about overcooking or adjusting time on larger batches.

Equipment adjustments may be necessary, especially when scaling up; use larger pots or additional cooking tools to accommodate the increased volume. Timing modifications might also be required, as larger batches may need more time to reach the desired tenderness. Storage considerations also change—ensure you have sufficient container space to store larger amounts effectively.

Nutritional Deep Dive

The creamy potato and bacon soup offers a balanced macro breakdown. A typical serving contains carbohydrates primarily from potatoes, protein from bacon, and fat primarily from cream and butter. The balance of these macros makes it a filling meal option.

Micronutrient analysis reveals that potatoes are a good source of vitamins C and B6, alongside potassium. Bacon provides essential B vitamins, while the optional cream adds vitamin A and D. As it comes together, this soup offers nutritional value without sacrificing flavor.

While creamy in nature, it can be part of a well-rounded diet when matched with fresh veggies or whole grains on the side. The richness provides satiety, making it an excellent option for maintaining energy levels throughout the day.

For weight management, however, portion control is key. Serve smaller bowls and incorporate a salad or vegetables to accompany the soup, ensuring balanced meals without excess calories.

Dietary Adaptations

For gluten-free adaptations, ensure all ingredients are gluten-free, including any stock or broth used. A dairy-free version can easily be made by substituting cream with coconut milk or cashew milk and using non-dairy bacon alternatives.

Vegan adaptations are possible as well; replace bacon with smoked tempeh or mushrooms, and ensure plant-based substitutions for cream and broth. For low-carb options, swap potatoes for cauliflower, blending until smooth to create a similar texture.

Keto adaptations align with reducing carbohydrates—prioritize lower-carb vegetables while maintaining creamy richness with cheese or heavy cream for texture. Many people also find joy in paleo diets, simply replacing conventional ingredients with whole, unprocessed options while maintaining the essence of the soup.

Troubleshooting Guide

Texture issues can often arise with creamy potato and bacon soup. If it feels too gritty or chunker, kick the blending into high gear for a silkier finish. Taste balance is another common issue; if the soup seems too salty, adjust by adding a splash of water or adding unsalted broth to bring everything back into harmony.

Temperature problems, such as soup being too thick, can be remedied by adding additional broth or milk. On the other hand, if it’s too thin, let it simmer uncovered to reduce excess liquid.

If you substituted ingredients but the flavor is lacking, enhance it by incorporating additional spices or aromatics, adjusting each to build a flavor profile that pleases your palate. Equipment challenges, like using an insufficient blender, can result in inconsistent consistency; always ensure you have the right tools for the job.

Timing concerns often stem from over or undercooked potatoes; start checking for doneness earlier in the cooking process, ensuring they remain tender and fluffy.

Recipe Success Stories

Community feedback for creamy potato and bacon soup highlights its universal appeal. Many home cooks rave about how easy it is to modify to personal taste, resulting in unique variations that delight friends and family. Some have even shared their success in making the soup gluten-free or dairy-free, showcasing its versatility.

Readers often come back to share their tips for adding extra ingredients like cheese or herbs, enhancing the dish based on their culinary preferences. Additionally, many enjoy taking show-stopping photographs as they showcase their finished bowls, which often garners compliments from social media followers.

Adaptation stories also abound; one reader’s addition of leeks led to a delightful twist that intrigued her family. Such success in variations contributes to a collective sense of community, where cooks can experiment and have fun while still maintaining the original essence of this beloved soup.

Frequently Asked Questions

1. Can I freeze creamy potato and bacon soup? Yes, this soup freezes well. Ensure it is cooled before storing in an airtight container. It can remain frozen for up to 3 months. When ready to eat, thaw overnight in the refrigerator before reheating.

2. How can I make the soup vegan? To make this soup vegan, you can substitute bacon with smoked tempeh or mushrooms and replace cream with coconut cream or cashew cream.

3. Is it necessary to peel the potatoes? Peeling is not required; leaving the skins on can add additional nutrients and texture. Ensure to clean them well if you choose to keep the skin.

4. Can I make this soup in a slow cooker? Absolutely! Start by sautéing the onion and garlic, then add all ingredients into the slow cooker and set it on low for 6-8 hours or high for 3-4 hours.

5. What is the best type of potato for this recipe? Starchy potatoes like Russet or Yukon Gold work best for a creamy texture while retaining flavor. Waxy potatoes may not yield the same consistency.

6. Can I make this soup spicier? Absolutely! Feel free to add red pepper flakes or cayenne pepper for a subtle kick. Adjust to your preferred heat level.

7. How do I know when the potatoes are done cooking? Potatoes are properly cooked when they are easily pierced with a fork but remain intact enough to hold their shape.

8. Can I use another type of meat in this recipe? Yes, smoked sausage or ham are excellent substitutes for bacon and will provide a similar rich flavor profile.

9. How should I store leftover soup? Store leftovers in an airtight container in the refrigerator for up to 4 days. To extend its life, consider freezing portions for later consumption.

10. What’s the best way to reheat the soup? Reheat the soup gently on the stove over medium-low heat. Stir frequently and add a bit of broth if it’s too thick when reheating.

Additional Resources

For those who want to explore further, try related recipes like classic tomato basil soup or chicken noodle soup for more comforting options. Technique guides for blending or sautéing can also aid your culinary skills. Understanding various ingredient properties, such as which potatoes to use or types of bacon available, can further enhance your cooking repertoire.

Equipment recommendations include using a high-quality blender for smooth textures or a great cast iron pot for even heating during cooking. Lastly, seasonal variations can include using ingredients like pumpkin or squash during fall for a delicious twist on this comforting classic.

Join the Conversation

We love hearing from our readers! Share your creations with us on social media and join the conversation by tagging us in your photos. Whether it’s a modification you made to the recipe or a perfect match with a side dish, your feedback helps build a community of passionate cooks.

Photography tips can help improve images of your delicious soup, allowing you to showcase your culinary accomplishments. Recipe reviews from your experience cooking this creamy potato and bacon soup also contribute to a knowledge base that helps others recreate this beloved dish.

Feel free to suggest recipe variations that you’ve discovered or ideas for additional ingredients, encouraging fellow readers and enriching our culinary community together.

The Recipe

Creamy Potato and Bacon Soup

Serves: 4 bowls

Prep Time: 15 mins

Cook Time: 30 mins

Total Time: 45 mins

Kitchen Equipment Needed

  • Large pot or Dutch oven
  • Stick blender or traditional blender
  • Cutting board
  • Knife
  • Measuring cups and spoons

Ingredients

  • 4 large Russet potatoes, peeled and diced
  • 5 slices of bacon, chopped
  • 1 medium onion, diced
  • 2 cloves garlic, minced
  • 4 cups chicken or vegetable broth
  • 1 cup heavy cream
  • Salt and pepper to taste
  • Fresh chives for garnish

Directions

  1. In a large pot, cook the bacon over medium heat until crispy. Remove bacon and set aside, leaving bacon grease in the pot.
  2. Add diced onion and garlic to the pot, and sauté until softened and fragrant, about 3-5 minutes.
  3. Add diced potatoes and broth to the pot, bringing to a boil. Reduce heat and simmer for 20 minutes, until potatoes are fork-tender.
  4. Using a stick blender, puree the soup until smooth. If using a traditional blender, allow the soup to cool slightly before blending in batches.
  5. Return the pureed soup to the pot, stir in the heavy cream, and adjust seasoning with salt and pepper.
  6. Serve hot, garnished with crispy bacon and fresh chives.

Recipe Notes

  • Feel free to add additional spices or herbs to suit your taste.
  • For a lower fat version, replace heavy cream with half-and-half or non-dairy milk.
  • Consider adding cheese for a cheesy twist; cheddar pairs especially well!

Delicious Taco Pizza Recipe to Satisfy Your Cravings

Taco Pizza: A Flavorful Twist on Two Classics

⚖️
Difficulty
Easy

⏲️
Prep Time
15 mins

🕒
Cook Time
20 mins

⏱️
Total Time
35 mins

🍽️
Servings
4

Indulge in the delightful combination of flavors with our Taco Pizza, a delicious blend of two beloved foods that will satisfy your cravings and impress your guests. Imagine biting into a warm, crispy crust topped with seasoned ground beef, vibrant vegetables, and gooey cheese, all harmonizing beautifully with zesty taco flavors. Whether you’re hosting a game night, family dinner, or just enjoying a cozy meal at home, this Taco Pizza is sure to become a favorite among friends and family alike.

The beauty of this recipe lies not only in its taste but also in its versatility. You can easily customize the toppings to suit your personal preferences or dietary needs. From spicy jalapeños to fresh cilantro, the options are endless, allowing you to create a taco pizza experience uniquely yours. With just a few simple ingredients, you’ll have a fun and delicious dish ready in no time.

Quick Recipe Highlights

  • Flavor Profile: This Taco Pizza tantalizes your taste buds with a medley of savory and spicy flavors, reminiscent of your favorite tacos but presented in a delightful pizza format.
  • Texture: Experience a perfect balance of crunch from the crust and a gooey, cheesy layer that melts in your mouth, creating a satisfying bite every time.
  • Aroma: As it bakes, your kitchen will be filled with the irresistible aroma of seasoned meat, rich cheeses, and fresh vegetables, making it hard to resist.
  • Visual Appeal: The vibrant colors of the toppings come together beautifully, creating a visually appealing dish that’s perfect for entertaining.
  • Skill Level Needed: This recipe is ideal for beginners and seasoned cooks alike, as it requires minimal cooking skills while still resulting in a gourmet outcome.
  • Special Equipment: No special equipment is needed; just a baking sheet or pizza stone will do the trick!

Recipe Overview

  • Difficulty Level: The Taco Pizza is classified as easy, making it accessible for all levels of cooking expertise. It’s a straightforward recipe that allows for creativity while remaining simple to execute.
  • Category: This dish falls into the categories of comfort food and party food, making it perfect for casual gatherings or evening meals.
  • Cuisine: Influenced by Mexican and Italian cuisines, this recipe pays homage to the classic flavors of tacos while combining them with pizza, creating an exciting culinary fusion.
  • Cost: The ingredients for Taco Pizza are generally inexpensive, making it a cost-effective choice for feeding a crowd or preparing a family meal.
  • Season: Taco Pizza is a year-round favorite, suitable for any season but particularly enjoyable during summer barbecues or fall game days.
  • Occasion: This ultimate fusion dish is ideal for casual gatherings, birthday parties, or a fun family night in.

Why You’ll Love This Recipe

Taco Pizza combines the best of two worlds, offering a unique taste experience with every slice. The savory ground beef is perfectly seasoned, bringing a hearty element to the dish, while the melty cheese ties it all together in a comforting way. The freshness of the toppings, such as lettuce and tomatoes, provides a refreshing contrast, ensuring every bite is flavorful and satisfying.

One of the greatest advantages of Taco Pizza is its convenience. With a quick prep time of just 15 minutes and minimal cooking involved, this dish is perfect for busy weeknights or spontaneous dinner plans. The straightforward steps make it easy for anyone to whip up this delightful meal without stress.

Nutritionally, Taco Pizza can be a balanced dish if you opt for whole grain crusts and load up on fresh vegetables. You can also swap in lean meats or plant-based options to create a healthier version without sacrificing flavor.

Taco Pizza is also a hit for social gatherings. The unique combination of flavors encourages sharing and discussions, making it a great choice for parties or family dinners. Its adaptability allows guests to customize their slices, catering to various tastes and preferences.

Lastly, Taco Pizza is a wonderful option in terms of cost-effectiveness. The ingredients are often pantry staples, and you can easily multiply the recipe to serve larger groups without breaking the bank.

Historical Background and Cultural Significance

The origins of Taco Pizza can be traced back to the late 20th century, a period where culinary creativity thrived, leading to the fusion of beloved dishes. Combining the crispy crust of pizza with the flavorful toppings of tacos became a hit, especially in regions where both cuisines are celebrated.

In many households, Taco Pizza represents a comforting meal enjoyed by families during game nights or casual get-togethers, creating fond memories filled with laughter and warmth. This dish’s significance extends beyond its taste; it evokes a sense of togetherness, making it a staple for gatherings.

Taco Pizza has also evolved over the years, adapting to various cultural influences and regional culinary trends. While some people stick to the classic combination of ground beef and cheddar cheese, others experiment with unconventional toppings such as grilled chicken or a spicy chipotle sauce, reflecting their personal flavor preferences.

Regional variations have emerged, especially in areas known for their robust Mexican and Italian cuisine. In cities like Chicago, for instance, Taco Pizza has gained popularity, often showcasing unique local ingredients that elevate the traditional recipe while honoring its roots.

Ingredient Deep Dive

Pizza Dough

Traditionally made from flour, water, yeast, and salt, pizza dough serves as the foundation for this dish. Its history dates back to ancient civilizations where flatbreads were baked on stones. Nutritionally, it provides carbohydrates, crucial for energy. Selecting high-quality flour ensures a good rise, while proper storage in a cool, dry place extends its shelf life. If you’re gluten-free, alternatives like almond or cauliflower crust work well.

Ground Beef

Ground beef is the star component of Taco Pizza, seasoned to perfection. Historically a staple in various cuisines, it provides essential protein and iron. When selecting beef, opt for lean cuts to reduce fat content. Store it in the fridge for up to two days or freeze for longer periods, and keep within the ‘best before’ guidelines to ensure freshness. Substituting with turkey or plant-based meat can cater to dietary preferences.

Taco Seasoning

Taco seasoning infuses flavor into the meat, comprising spices like cumin, chili powder, and garlic. Originating from Mexican cuisine, it enhances the dish’s authenticity. Nutritionally, it adds minimal calories while delivering rich flavors. Ensure you choose a blend without additives for a cleaner taste. Store unused seasoning in a cool, dark place to maintain its potency, and feel free to experiment with homemade versions for tailored flavors.

Cheese

Cheese serves as the magical ingredient that brings the whole dish together, with varieties like cheddar or a Mexican blend being popular choices. Its rich history dates back thousands of years and has a notable cultural significance in many dishes. Cheese provides calcium and proteins, vital for various bodily functions. Opt for fresh cheese for the best melt and flavor, and store in the refrigerator to keep it fresh. Alternatives like dairy-free cheese can accommodate vegan diets.

Fresh Vegetables

Fresh vegetables like lettuce, tomatoes, and onions add crunch and freshness, balancing the richness of the pizza. Vegetables have been a staple in diets worldwide for centuries, revered for their nutrients and health benefits. Choose seasonal produce for the best flavor and nutritional value. Store vegetables in the fridge, wrapped properly, to prevent wilting. You can also switch out ingredients based on availability or preference, making it versatile.

Common Mistakes to Avoid

  • Using too much taco seasoning can overpower the dish. Start with a small amount and adjust to taste to achieve the perfect flavor balance.
  • Overcooking the taco pizza can lead to a dry crust. Keep an eye on it while baking, ensuring it is cooked through but still retains moisture.
  • Failing to preheat the oven can result in uneven cooking. Always preheat to the recommended temperature for the best results.
  • Skipping the resting time for the dough can make it hard to stretch and shape. Allow it to rest for at least 30 minutes for improved texture.
  • Not using a pizza stone or baking sheet can hinder crispiness. Preheat these before adding the pizza for an optimal crust.
  • Omitting fresh toppings until after baking can cause them to wilt. Add them right after removing the pizza from the oven for freshness.
  • Neglecting to check ingredient freshness can affect taste. Always use the freshest vegetables and meats available for the best flavor.
  • Not letting the pizza cool slightly before slicing can lead to messy cuts. Allow it to sit for a few minutes for clean slices.
  • Using cold toppings post-baking can affect the overall temperature. Allow toppings to come to room temperature to meld better with the pizza.
  • Using too much flour when shaping the dough can lead to a dense crust. Use flour sparingly for the best texture.

Essential Techniques

Dough Stretching

Dough stretching is essential for achieving a perfectly sized crust. Gently press the dough from the center outward, avoiding forceful pulls that can create holes. Master this technique by letting dough rest before shaping, ensuring elasticity.

Seasoning the Meat

Properly seasoning the meat is critical to infusing flavor throughout the dish. Start with a light sprinkle and taste as you go. A successful mix will incorporate depth and a rich flavor profile without overindulgence in any spice.

Layering Ingredients

Strategically layering ingredients helps maintain structure and flavor separation. Start with the cheese as a base to create a barrier against moisture, then layer toppings to ensure an even distribution of flavors.

Baking

To achieve the perfect bake, ensure the oven is preheated sufficiently before introducing the pizza. Observing color cues and oven temperatures is vital for knowing when it’s done, ensuring a golden-brown crust without charring.

Cutting the Pizza

Cutting the pizza effectively enhances presentation. Use a sharp, non-serrated knife or pizza cutter to slice through without causing squishing. Allowing the pizza to rest a few minutes before slicing minimizes mess, creating neat presentation pieces.

Pro Tips for Perfect Taco Pizza

– Always preheat your oven to achieve that crispy crust that you desire. A hot oven ensures even cooking and a golden finish.
– Use a pizza stone if possible; it retains heat and creates a perfectly baked crust.
– Consider a mix of cheeses for depth; combining mozzarella with sharp cheddar can enhance the flavor profile.
– Always season your meat liberally, as this will ensure each bite of the pizza is bursting with flavor. Don’t shy away from adding extras like diced jalapeños or chilies for an extra kick.
– Fresh ingredients should be used as top-layer toppings to maintain their texture and taste.
– Experiment with sauces; drizzling taco sauce after baking can elevate your Taco Pizza to the next level.
– Garnish your pizza with chopped cilantro or avocado for a refreshing flavor add-in.
– Allow the pizza to cool on a wire rack for a minute to keep the crust crisp while slicing.

Variations and Adaptations

Feel free to experiment with Taco Pizza variations! For a regional twist, consider using BBQ sauce instead of traditional taco sauce for a Southern flavor profile. You can also adapt it seasonally by adding butternut squash or pumpkin puree in the fall for a deliciously hearty base.

Dietary modifications are simple with Taco Pizza; for a vegan version, swap ground beef for lentils or crushed black beans and use dairy-free cheese. You can also make it keto-friendly by utilizing a cauliflower crust as an alternative to traditional pizza dough.

Flavor variations are endless; consider experimenting with different spices to create a spicy taco crunch or adding unique toppings like grilled shrimp for a coastal influence. Presentation can also be altered by cutting the pizza into fun shapes for children’s parties or festive occasions.

Serving and Presentation Guide

When it comes to serving Taco Pizza, simplicity is key. Slice into traditional wedges or fun shapes, depending on your occasion. Garnish with fresh herbs such as cilantro or parsley for that extra pop of color and freshness.

Pair it with traditional accompaniments like sour cream, guacamole, or salsa on the side, perfect for adding a cooling contrast to the spiced flavors. Consider modern serving suggestions by offering individual mini taco pizzas for a unique twist on serving at gatherings.

Temperature considerations are key; while serving hot, remember that sides like guacamole or salsa should be served chilled for optimal enjoyment. Always keep the portion sizes in control for an inviting display on the table.

Wine and Beverage Pairing

For the best experience, pair your Taco Pizza with a light and crisp white wine, such as Sauvignon Blanc, which complements the taco flavors beautifully. If you prefer red, a light Pinot Noir provides a nice contrast without overwhelming the dish.

Non-alcoholic alternatives like sparkling water with lime or a refreshing iced tea can also enhance your meal. If you enjoy coffee or tea, consider a light herbal tea for a refreshing palate cleanser afterward.

Temperature considerations are important in your beverage choice; serve white wines chilled and red wines slightly below room temperature for optimal sipping.

Storage and Shelf Life

To store leftover Taco Pizza, cover it tightly with plastic wrap or place in an airtight container. Maintain in the refrigerator for up to 3-4 days. When reheating, consider using an oven for the best texture; a microwave might make the crust chewy.

Signs of spoilage include off-odors or a slimy texture. If your leftovers show signs of spoilage, it’s best to toss them. If you wish to freeze, wrap the pizza tightly and it can last for up to 3 months; reheat by baking directly from frozen.

For reheating, place the pizza directly in an oven at 350°F for about 10-15 minutes, or until warmed throughout.

Make Ahead Strategies

For a hassle-free meal, you can prepare ingredients in advance. Dice vegetables and store them in the fridge to cut your prep time significantly on the day of making Taco Pizza.

If you’re planning on making your dough from scratch, prepare it a day in advance and let it rise in the refrigerator overnight. Doing so will enhance flavor and texture, making for a superior pizza crust.

Assemble the pizza in advance, wrapping it tightly and placing it in the fridge until you’re ready to bake. This strategy allows you to serve fresh pizza quickly when guests arrive while maintaining quality. Add fresh toppings just before serving for the best flavor.

Scaling Instructions

Scaling Taco Pizza for larger crowds can be done effortlessly. For halving the recipe, simply reduce the ingredients but maintain the same cooking times.

Doubling or tripling is also straightforward; prepare multiple pizza stones or baking sheets at once. Ensure your oven can handle the additional load without affecting baking times.

Adjustments to equipment, such as larger pans or preheating multiple baking sheets, will be essential if you’re making a large batch. Finally, keep an eye on cooking times, as larger or multiple pizzas may require slightly longer to reach the desired doneness.

Nutritional Deep Dive

Taco Pizza offers a balanced macro breakdown, providing ample carbohydrates from the crust, protein from the meat, and healthy fats from cheese. Typically, one slice can contain around 250-300 calories, depending on the toppings and crust thickness.

A micronutrient analysis shows a good source of calcium and iron due to cheese and meat ingredients, which are essential for bone health and oxygen transport in the body.

Health benefits include essential vitamins from incorporated vegetables, promoting a balanced diet. It can easily fit into various dietary considerations by adjusting ingredients to meet needs without sacrificing flavor.

For portion analysis, stick to two slices per serving to meet a balanced meal requirement, especially when accompanied by light side salads for added nutrients.

Dietary Adaptations

For a gluten-free version of Taco Pizza, opt for gluten-free pizza dough or cauliflower crust, ensuring everyone can enjoy this delectable dish.

If you’re looking for a dairy-free option, substitutes like cashew cream or plant-based cheese varieties work wonderfully for a vegan Taco Pizza while still offering rich flavors.

Low-carb or keto dieters can benefit from cauliflower crust or cheese crisps as a base for pizza, greatly reducing carbohydrate intake while maintaining the enjoyable experience of pizza.

For those following a paleo or whole foods diet, use ground turkey or chicken for a lighter meat option and load up on fresh vegetables as toppings.

Troubleshooting Guide

For texture issues, such as a soggy crust, consider pre-baking the crust for a few minutes before topping it to develop a sturdy foundation.

If flavor balance is lacking, assess your seasoning levels; increasing taco seasoning or adding fresh lime juice can elevate the overall taste, ensuring it’s vibrant and punchy.

Temperature problems can arise if your oven isn’t preheated sufficiently; always ensure it’s up to temperature before baking.

If using substitute ingredients, be cautious as they can affect the final outcome. For instance, using a different type of cheese may alter melting properties and taste.

Timing concerns can lead to either undercooked or overcooked pizza; setting a kitchen timer for checking every few minutes can help create the perfect bake.

Recipe Success Stories

Our community has shared countless success stories with Taco Pizza, from simple family dinners to extravagant themed parties. Many have revitalized this recipe by experimenting with local ingredients or adding personal flair to the toppings, resulting in unique presentations and flavors.

Readers often highlight the adaptability of this recipe, allowing them to enjoy it on various occasions, whether it’s a casual Friday night or a festive gathering, with every one of them praising its flavorful versatility.

Photography tips from avid cooks showcase beautifully garnished slices alongside fresh ingredients, elevating the dish’s visual appeal and encouraging others to give it a try.

Cooking with kids has also been a highlight for families, with children enjoying the hands-on making of this pizza. Many report bonding moments centered around the kitchen as they assemble their very own creations.

Frequently Asked Questions

Can I prepare Taco Pizza in advance?

Yes! You can prep the dough and toppings ahead of time. Store them separately in the fridge and assemble before baking to enjoy a fresh pizza.

What is the best way to store leftover Taco Pizza?

Store leftover Taco Pizza in an airtight container in the refrigerator for up to 3-4 days. Reheat it in the oven for the best texture.

Can I use different meats for this recipe?

Absolutely! You can substitute ground beef with turkey, chicken, or even plant-based options like lentils or tofu for a vegetarian pizza.

What toppings can I add to my Taco Pizza?

Customize your Taco Pizza with an array of toppings! Consider adding jalapeños, olives, avocado, or additional salsa to enhance flavors.

Is Taco Pizza kid-friendly?

Yes, Taco Pizza is highly adaptable and can be made mild for kids. Let them choose their own toppings for a fun cooking experience!

Can I freeze Taco Pizza?

Yes! Taco Pizza can be frozen, but it’s best to do so without fresh toppings. Store it well-wrapped and enjoy within 3 months.

How do I make my crust crispy?

Preheat your baking sheet or pizza stone before adding the dough. This helps achieve a crispy texture while baking the pizza.

What side dishes pair well with Taco Pizza?

Complement your Taco Pizza with side salads, refried beans, or traditional Mexican sides such as elote or guacamole for a complete meal.

Can I make this recipe gluten-free?

Yes! Use gluten-free pizza dough or a cauliflower crust for a delightful gluten-free alternative without compromising on taste.

What is the cooking temperature for Taco Pizza?

The ideal cooking temperature for Taco Pizza is usually between 425°F to 450°F for best results.

Can I use store-bought dough?

Yes! Store-bought pizza dough is a great time-saver and can still deliver a delicious end product for your Taco Pizza.

Additional Resources

For more exciting culinary creations, check out these related recipes: BBQ Chicken Pizza, Veggie Loaded Flatbreads, and Traditional Tacos for inspiration.

Explore technique guides like dough-making and ingredient selection to sharpen your kitchen skills further. Learn about essential tools that’ll make your cooking journey easier and more enjoyable.

Check seasonal variations and clever substitutions you can employ in your cooking to always keep your meals fresh and exciting!

Join the Conversation

We love hearing from our readers! Share your thoughts and photographs on social media using our hashtag #TacoPizzaDelight. Engage with others in our community by offering recipe suggestions and adaptations based on your own experiences and creativity!

Don’t forget to leave a review to let everyone know how your Taco Pizza turned out and what unique twists you tried. Happy cooking, and we can’t wait to see your delicious creations!

The Recipe

Taco Pizza

Serves: 4

Prep Time: 15 mins

Cook Time: 20 mins

Total Time: 35 mins

Kitchen Equipment Needed

  • Oven
  • Baking Sheet or Pizza Stone
  • Mixing Bowl
  • Rolling Pin
  • Chef’s Knife
  • Pizza Cutter

Ingredients

  • 1 Pizza Dough (store-bought or homemade)
  • 1 lb Ground Beef
  • 2 tbsp Taco Seasoning
  • 1 cup Shredded Cheese (cheddar or Mexican blend)
  • 1 cup Chopped Tomatoes
  • 1 cup Shredded Lettuce
  • 1/2 cup Diced Onions
  • Sour Cream and Jalapeños for topping (optional)

Directions

  1. Preheat the oven to 425°F (220°C). If using a pizza stone, place it in the oven to preheat as well.
  2. In a skillet, cook the ground beef over medium heat until browned. Drain excess fat, then mix in taco seasoning.
  3. Roll out your pizza dough on a floured surface to your desired thickness.
  4. Transfer the dough to a baking sheet or preheated pizza stone.
  5. Spread the seasoned ground beef evenly over the dough.
  6. Top with shredded cheese, followed by diced onions and tomatoes.
  7. Bake for 15-20 minutes, or until the crust is golden and the cheese is bubbly.
  8. Remove from the oven, let cool slightly, then add shredded lettuce on top.
  9. Slice the pizza and serve with sour cream and jalapeños if desired.

Recipe Notes

  • Feel free to customize toppings based on your preferences.
  • For a vegetarian option, substitute ground beef with lentils or meat alternatives.
  • Store any leftovers in an airtight container in the fridge for up to 3-4 days.
  • Reheat in the oven for best results.