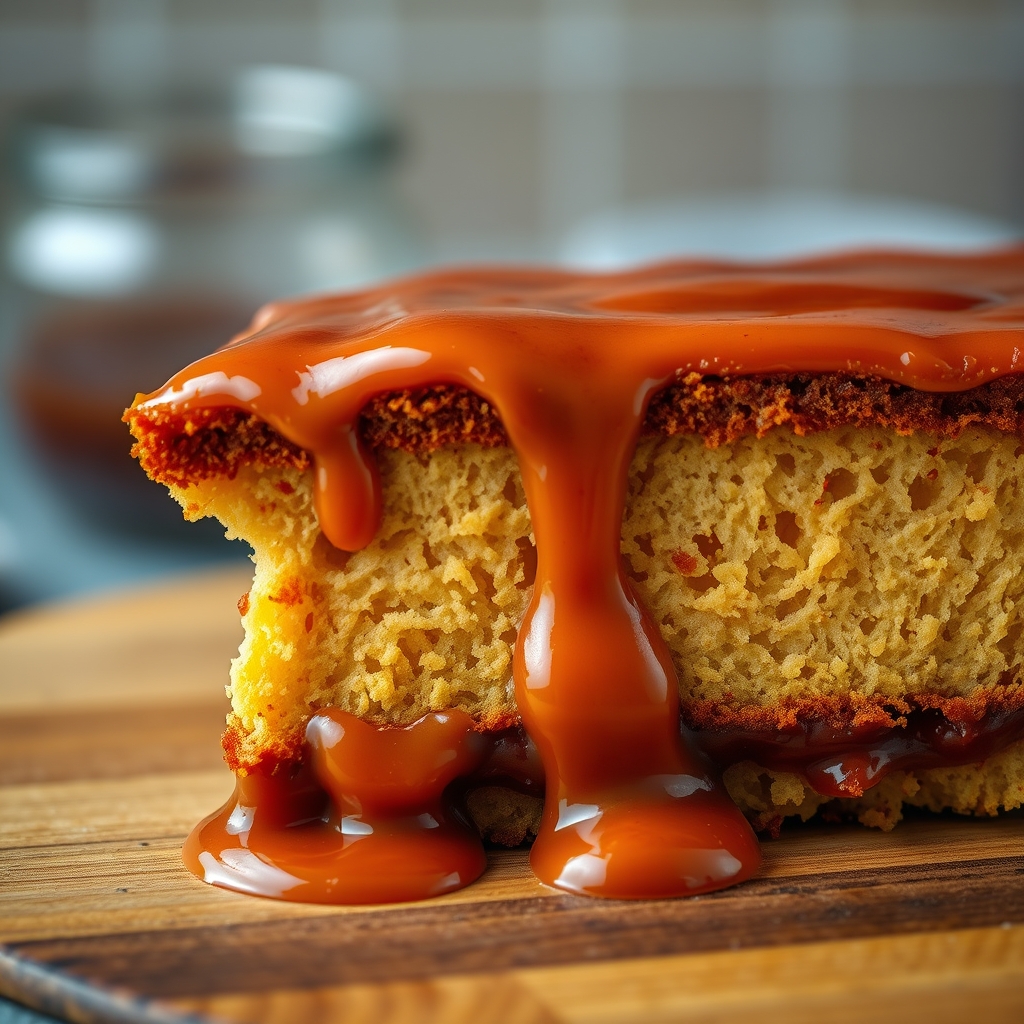
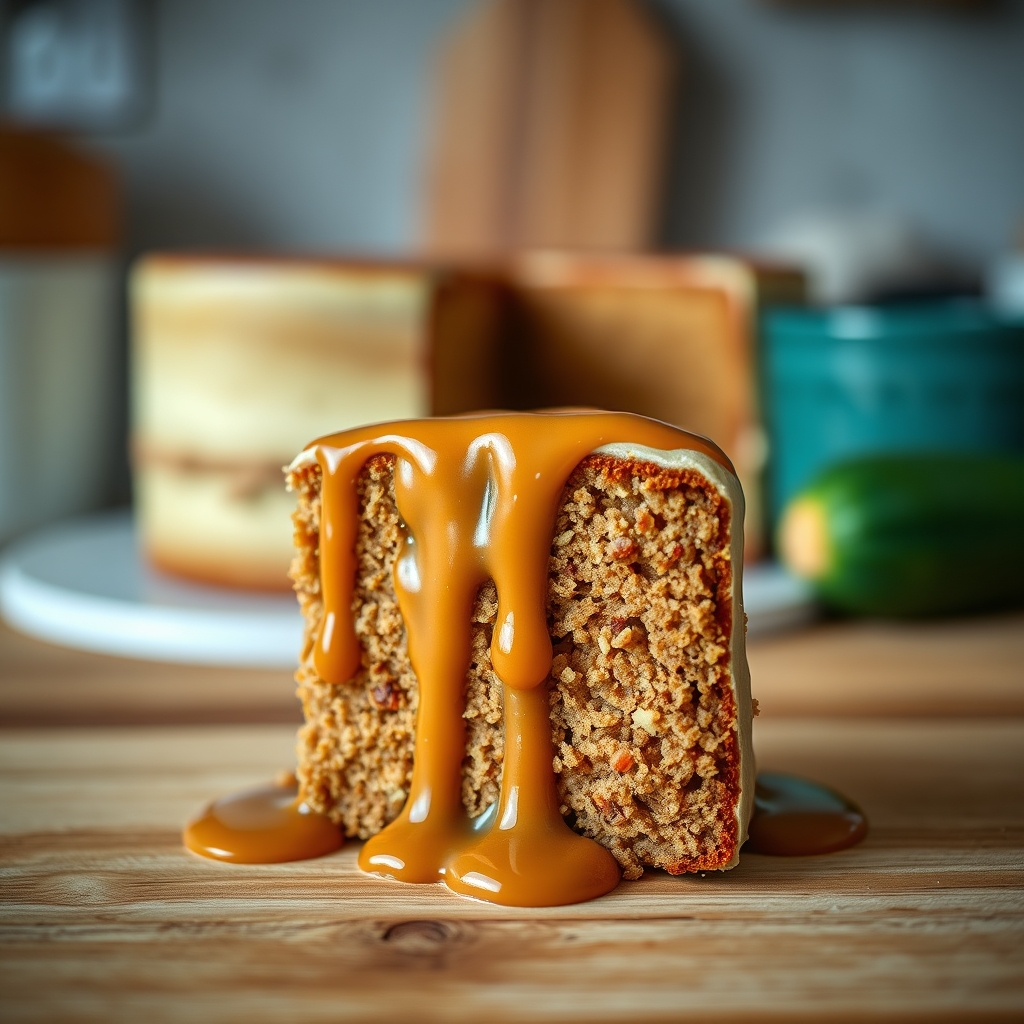
Zucchini Spice Cake

Zucchini Spice Cake

There’s something undeniably comforting about a slice of moist, warmly spiced cake—especially when it sneaks in a serving of vegetables. This Zucchini Spice Cake is a delightful twist on classic dessert flavors, blending the earthy sweetness of zucchini with cinnamon, nutmeg, and a hint of vanilla. Whether you’re looking for a creative way to use up garden zucchini or simply craving a dessert that feels both indulgent and wholesome, this recipe is a must-try. Let’s dive into why this cake deserves a spot in your baking repertoire.

Why You’ll Love This Recipe

First, this zucchini spice cake is incredibly moist, thanks to the natural water content in zucchini. Unlike some desserts that dry out quickly, this cake stays tender for days. Second, it’s packed with warm spices that evoke the cozy feeling of autumn, but it’s light enough to enjoy year-round. Third, it’s versatile—serve it as a simple snack, dress it up with cream cheese frosting for a special occasion, or even enjoy it for breakfast with a cup of coffee. Finally, it’s a fantastic way to sneak extra veggies into your diet without sacrificing flavor. Kids and adults alike will adore this spiced zucchini cake.

Ingredients Breakdown

Let’s take a closer look at the key ingredients that make this zucchini spice cake so irresistible:

  • Zucchini: The star of the show, grated zucchini adds moisture and a subtle sweetness. Be sure to squeeze out excess water to prevent a soggy batter.
  • Flour: All-purpose flour provides structure, but you can substitute with whole wheat or gluten-free flour if needed.
  • Spices: A blend of cinnamon, nutmeg, and cloves gives this cake its signature warmth. Freshly ground spices will elevate the flavor.
  • Brown Sugar: Deepens the sweetness and contributes to the cake’s moist texture.
  • Eggs: Bind the ingredients together and add richness.
  • Oil: Using oil instead of butter keeps the crumb tender and extends freshness.
  • Vanilla Extract: Enhances the overall flavor profile with its aromatic sweetness.

How to Make Zucchini Spice Cake

Follow these steps for a perfectly spiced zucchini cake every time:

  1. Prep the Zucchini: Grate the zucchini using the large holes of a box grater. Place it in a clean kitchen towel and squeeze firmly to remove excess moisture. Set aside.
  2. Mix Dry Ingredients: In a large bowl, whisk together flour, baking powder, baking soda, salt, cinnamon, nutmeg, and cloves.
  3. Combine Wet Ingredients: In another bowl, beat eggs, brown sugar, oil, and vanilla until smooth.
  4. Fold in Zucchini: Add the grated zucchini to the wet mixture and stir until evenly distributed.
  5. Combine Wet and Dry: Gradually add the dry ingredients to the wet mixture, stirring just until no flour streaks remain. Avoid overmixing.
  6. Bake: Pour the batter into a greased 9×13-inch pan and bake at 350°F for 30-35 minutes, or until a toothpick inserted in the center comes out clean.
  7. Cool: Let the cake cool in the pan for 10 minutes before transferring to a wire rack.

Pro Tips for the Best Results

  • For extra depth, toast the spices lightly in a dry pan before adding them to the batter.
  • If you prefer a lighter texture, substitute half the oil with unsweetened applesauce.
  • Add a handful of chopped walnuts or pecans for a delightful crunch.
  • For a more decadent treat, top with cream cheese frosting or a simple dusting of powdered sugar.

Variations and Substitutions

This zucchini spice cake is wonderfully adaptable. Here are a few ways to customize it:

  • Gluten-Free: Swap all-purpose flour for a 1:1 gluten-free baking blend.
  • Dairy-Free: The recipe is naturally dairy-free, but ensure your frosting or toppings align with dietary needs.
  • Vegan: Replace eggs with flax eggs (1 tbsp ground flaxseed + 3 tbsp water per egg).
  • Flavor Twists: Add a handful of raisins, shredded coconut, or dark chocolate chips for extra texture and flavor.

What to Serve With It

This cake pairs beautifully with a variety of accompaniments. Try serving it with:

  • A dollop of whipped cream or vanilla ice cream for a richer dessert.
  • A hot cup of chai tea or spiced coffee to complement the warm spices.
  • Fresh berries or a fruit compote for a bright contrast.

How to Store and Reheat

To keep your zucchini spice cake fresh:

  • Room Temperature: Store in an airtight container for up to 3 days.
  • Refrigerator: For longer storage, refrigerate for up to a week.
  • Freezer: Wrap individual slices tightly in plastic wrap and freeze for up to 3 months. Thaw at room temperature before serving.
  • Reheating: Warm slices in the microwave for 10-15 seconds or in a 300°F oven for 5 minutes.

Frequently Asked Questions (FAQs)

Can I use frozen zucchini?
Yes, but thaw and drain it thoroughly to avoid excess moisture in the batter.

Why is my cake dense?
Overmixing the batter can lead to a dense texture. Stir just until ingredients are combined.

Can I make this as cupcakes?
Absolutely! Bake in a lined muffin tin for 18-22 minutes.

How do I know when the cake is done?
A toothpick inserted into the center should come out clean or with a few moist crumbs.

Can I reduce the sugar?
Yes, but reducing sugar may affect texture and moisture. Consider substituting with a natural sweetener like maple syrup.

Final Thoughts

This zucchini spice cake is more than just a dessert—it’s a celebration of simple ingredients coming together in the most delicious way. Whether you bake it for a family gathering, a potluck, or just because, it’s sure to become a favorite. The next time you find yourself with an abundance of zucchini, skip the bread and try this spiced cake instead. One bite, and you’ll understand why it’s a recipe worth keeping.

Print
clock clock iconcutlery cutlery iconflag flag iconfolder folder iconinstagram instagram iconpinterest pinterest iconfacebook facebook iconprint print iconsquares squares iconheart heart iconheart solid heart solid icon

Zucchini Spice Cake

  • Author: Baking Enthusiast

Description

A moist and flavorful zucchini spice cake infused with warm spices and topped with a creamy frosting. Perfect for any occasion!


Ingredients

Scale

For the Crust:

  • For the cake:
  • 2 cups grated zucchini
  • 2 1/2 cups all-purpose flour
  • 1 1/2 cups granulated sugar
  • 1/2 cup brown sugar
  • 3/4 cup vegetable oil
  • 3 large eggs
  • 2 teaspoons vanilla extract
  • 2 teaspoons ground cinnamon
  • 1 teaspoon ground nutmeg
  • 1/2 teaspoon ground cloves
  • 1 teaspoon baking soda
  • 1/2 teaspoon baking powder
  • 1/2 teaspoon salt
  • For the frosting:
  • 8 oz cream cheese, softened
  • 1/2 cup unsalted butter, softened
  • 3 cups powdered sugar
  • 1 teaspoon vanilla extract
  • 1/2 teaspoon ground cinnamon

Instructions

1. Prepare the Crust:

  1. Preheat oven to 350°F (175°C). Grease and flour a 9×13-inch baking pan.
  2. In a large bowl, whisk together flour, cinnamon, nutmeg, cloves, baking soda, baking powder, and salt.
  3. In another bowl, beat together granulated sugar, brown sugar, vegetable oil, eggs, and vanilla extract until smooth.
  4. Gradually add the dry ingredients to the wet mixture, mixing until just combined.
  5. Fold in the grated zucchini until evenly distributed.
  6. Pour the batter into the prepared pan and bake for 35-40 minutes, or until a toothpick inserted in the center comes out clean.
  7. Let the cake cool completely before frosting.
  8. For the frosting, beat cream cheese and butter until smooth. Gradually add powdered sugar, vanilla extract, and cinnamon, beating until creamy.
  9. Spread the frosting evenly over the cooled cake. Slice and serve.

Notes

Store leftovers in an airtight container in the refrigerator for up to 5 days. The cake can also be frozen (without frosting) for up to 3 months.

Lime Green Jello Salad with Cottage Cheese & Pineapple

Lime Green Jello Salad with Cottage Cheese & Pineapple

There’s something undeniably nostalgic about a vibrant, wobbly Jello salad. This Lime Green Jello Salad with Cottage Cheese & Pineapple is a retro-inspired dish that brings together creamy, tangy, and sweet flavors in one refreshing bite. Whether you’re hosting a potluck, a family gathering, or simply craving a throwback dessert, this recipe is a guaranteed crowd-pleaser. Let’s dive into why this dish deserves a spot on your table.

Why You’ll Love This Recipe

First, this Lime Green Jello Salad is effortlessly easy to make. With just a handful of ingredients and minimal prep time, you can whip up a dish that looks as impressive as it tastes. No complicated techniques or hard-to-find ingredients—just pure simplicity.

Second, it’s a textural delight. The smooth creaminess of the cottage cheese contrasts beautifully with the juicy pineapple chunks and the jiggly Jello, creating a mouthfeel that keeps you coming back for more.

Third, it’s versatile. Serve it as a side dish at a summer barbecue, a light dessert after a heavy meal, or even as a fun snack for kids. Its bright lime green hue makes it a showstopper on any buffet table.

Finally, this recipe is customizable. Don’t like pineapple? Swap it for mandarin oranges. Prefer a richer taste? Add a dollop of whipped cream. The possibilities are endless.

Ingredients Breakdown

Understanding each ingredient’s role will help you perfect this Lime Green Jello Salad with Cottage Cheese & Pineapple.

Lime Jello: The star of the show, lime Jello provides the vibrant color and refreshing citrus flavor. Its gelatin base gives the salad its signature jiggle.

Cottage Cheese: This adds a creamy, slightly tangy element that balances the sweetness of the Jello. Opt for small-curd cottage cheese for a smoother texture.

Canned Pineapple: Pineapple chunks bring a juicy, tropical sweetness. Make sure to use crushed pineapple if you prefer a more uniform texture.

Cool Whip or Whipped Topping: This lightens the texture and adds a subtle sweetness. If you prefer, homemade whipped cream works just as well.

Optional Nuts: Chopped pecans or walnuts can add a delightful crunch if you enjoy contrasting textures.

How to Make Lime Green Jello Salad with Cottage Cheese & Pineapple

Follow these simple steps to create this nostalgic treat.

Step 1: Prepare the Jello according to the package instructions, but use only half the recommended water. This ensures a firmer set that holds up well with the other ingredients.

Step 2: Allow the Jello to cool slightly before folding in the cottage cheese. This prevents the dairy from curdling while maintaining a smooth consistency.

Step 3: Drain the pineapple thoroughly to avoid excess liquid, which could make the salad too watery.

Step 4: Gently fold in the Cool Whip or whipped topping until fully incorporated. Be careful not to overmix, as this can deflate the airiness.

Step 5: Pour the mixture into a serving dish or individual molds. Refrigerate for at least 4 hours, or overnight for best results.

Step 6: Before serving, garnish with additional pineapple or a sprinkle of nuts for an extra touch.

Pro Tips for the Best Results

For a smoother texture, blend the cottage cheese briefly before adding it to the Jello. This eliminates any large curds and creates a creamier consistency.

If you want a lighter version, substitute sugar-free Jello and low-fat cottage cheese. The flavor remains just as delicious.

For a faster set, pour the mixture into a shallow dish instead of a deep bowl. This reduces chilling time significantly.

To prevent separation, avoid adding the cottage cheese while the Jello is still hot. Let it cool to room temperature first.

Variations and Substitutions

This Lime Green Jello Salad is incredibly adaptable. Here are some fun twists:

Fruit Variations: Swap pineapple for mandarin oranges, diced peaches, or even maraschino cherries for a different flavor profile.

Dairy-Free Option: Use coconut yogurt or a dairy-free whipped topping to make this recipe vegan-friendly.

Extra Creamy: Add a block of softened cream cheese for a richer, denser texture.

Crunchy Add-Ins: Stir in mini marshmallows, shredded coconut, or graham cracker crumbs for extra texture.

What to Serve With It

This Lime Green Jello Salad pairs beautifully with a variety of dishes. Serve it alongside grilled meats like barbecue chicken or glazed ham for a refreshing contrast. It also complements classic potluck favorites such as baked beans, deviled eggs, or a fresh garden salad.

For a dessert spread, pair it with other retro treats like ambrosia salad or a classic chocolate sheet cake. A glass of iced tea or lemonade makes the perfect beverage pairing.

How to Store and Reheat

Since this is a chilled dish, storage is simple. Cover the salad tightly with plastic wrap or transfer it to an airtight container. It will keep in the refrigerator for up to 3 days.

Freezing is not recommended, as the texture of the Jello and dairy components may become grainy upon thawing.

If the salad becomes too soft after sitting out, simply return it to the fridge for 30 minutes to firm up again.

Frequently Asked Questions (FAQs)

Can I use fresh pineapple instead of canned? Fresh pineapple contains enzymes that prevent gelatin from setting properly. If using fresh, briefly heat the pineapple to deactivate these enzymes before adding it to the Jello.

Can I make this ahead of time? Absolutely. This salad actually tastes better when made a day in advance, allowing the flavors to meld.

Why is my Jello salad watery? This usually happens if the pineapple wasn’t drained well or if the Jello wasn’t given enough time to set. Always pat the pineapple dry with a paper towel before adding it.

Can I use a different Jello flavor? Yes. Strawberry, raspberry, or orange Jello would all work wonderfully, though the color and taste will vary.

Final Thoughts

This Lime Green Jello Salad with Cottage Cheese & Pineapple is more than just a recipe—it’s a little slice of nostalgia. Whether you remember it from family gatherings or are discovering it for the first time, its cheerful color and delightful mix of textures make it a standout dish. Give it a try for your next gathering, and watch it disappear before your eyes. Happy cooking!

Print
clock clock iconcutlery cutlery iconflag flag iconfolder folder iconinstagram instagram iconpinterest pinterest iconfacebook facebook iconprint print iconsquares squares iconheart heart iconheart solid heart solid icon

Lime Green Jello Salad with Cottage Cheese & Pineapple

  • Author: Classic Recipe Collection

Description

A retro-inspired lime green Jello salad with creamy cottage cheese and sweet pineapple chunks for a refreshing and nostalgic side dish.


Ingredients

Scale

For the Crust:

  • For the Jello base:
  • 2 packages (3 oz each) lime gelatin
  • 2 cups boiling water
  • For the creamy mixture:
  • 1 cup cottage cheese (small curd)
  • 1 cup crushed pineapple, drained
  • 1 cup whipped topping (like Cool Whip)
  • Optional garnish:
  • Maraschino cherries
  • Extra pineapple chunks

Instructions

1. Prepare the Crust:

  1. 1. Dissolve lime gelatin in boiling water in a large bowl, stirring until completely dissolved (about 2 minutes).
  2. 2. Refrigerate gelatin for 45-60 minutes until slightly thickened (consistency of egg whites).
  3. 3. Gently fold in cottage cheese, drained pineapple, and whipped topping until fully incorporated.
  4. 4. Pour mixture into a 9×9 inch dish or decorative mold.
  5. 5. Chill for at least 4 hours or overnight until fully set.
  6. 6. Garnish with cherries or pineapple before serving.

Notes

For a lighter version, use sugar-free gelatin and low-fat cottage cheese. The salad firms up best when made a day in advance. If using a mold, lightly grease with cooking spray before adding mixture.

Rhubarb Shortbread Bars

Rhubarb Shortbread Bars

There’s something undeniably magical about the combination of tart rhubarb and buttery shortbread. These Rhubarb Shortbread Bars are a celebration of spring flavors, offering a perfect balance of sweet and tangy in every bite. Whether you’re a seasoned baker or just starting out, this recipe is straightforward yet impressive, making it ideal for gatherings, afternoon tea, or a simple treat to enjoy with coffee. Let’s dive into why these bars deserve a spot in your baking repertoire.

Why You’ll Love This Recipe

First, the contrast of textures is irresistible. The crumbly, buttery shortbread base pairs beautifully with the soft, jammy rhubarb filling, creating a dessert that’s both rich and refreshing. Second, rhubarb’s natural tartness cuts through the sweetness, making these bars far more nuanced than your average dessert. Third, they’re versatile—serve them warm with ice cream for a decadent dessert or enjoy them at room temperature as a snack. Finally, they’re freezer-friendly, so you can make a batch ahead of time for impromptu guests or future cravings.

Ingredients Breakdown

Understanding the ingredients helps you appreciate how each component contributes to the final product. The shortbread crust relies on cold butter, flour, and a touch of sugar for its signature crumbly texture. Using cold butter ensures the crust stays tender rather than greasy. The rhubarb filling combines fresh rhubarb, sugar, and a bit of cornstarch to thicken the juices as it bakes. If rhubarb isn’t in season, frozen rhubarb works just as well. A splash of vanilla extract enhances the filling’s depth, while a pinch of salt balances the sweetness.

How to Make Rhubarb Shortbread Bars

Start by preheating your oven to 350°F and lining an 8×8-inch baking pan with parchment paper for easy removal. For the shortbread crust, pulse flour, sugar, and salt in a food processor, then add cold butter cubes until the mixture resembles coarse crumbs. Press this evenly into the pan and bake for 15 minutes until lightly golden. Meanwhile, toss diced rhubarb with sugar, cornstarch, and vanilla, then spread it over the partially baked crust. Return to the oven for another 30-35 minutes until the filling bubbles and the edges are golden. Let cool completely before slicing to allow the filling to set.

Pro Tips for the Best Results

For an extra-flaky crust, freeze the butter before grating it into the flour mixture—this creates even distribution without overworking the dough. If your rhubarb is especially tart, increase the sugar in the filling by a tablespoon or two. To prevent a soggy bottom, ensure the shortbread crust is fully baked before adding the filling. For a glossy finish, brush the baked bars with a thin layer of apricot jam while still warm.

Variations and Substitutions

If you’re feeling adventurous, mix in strawberries or raspberries with the rhubarb for a sweeter twist. For a nutty flavor, add finely chopped almonds or pecans to the shortbread crust. Those avoiding gluten can use a 1:1 gluten-free flour blend, though the texture may be slightly denser. Vegan bakers can substitute coconut oil for butter, but keep it chilled to mimic the shortbread’s crumbly texture.

What to Serve With It

These bars shine on their own but become even more delightful with a scoop of vanilla bean ice cream or a dollop of whipped cream. For a brunch-worthy presentation, pair them with a citrusy salad or a cup of Earl Grey tea. If serving as part of a dessert spread, consider adding lemon bars or almond biscotti for variety.

How to Store and Reheat

Store leftover bars in an airtight container at room temperature for up to 2 days or refrigerate for up to 5 days. To freeze, wrap individual bars in plastic wrap and place them in a freezer-safe bag for up to 3 months. Thaw at room temperature or warm briefly in a 300°F oven to revive the crispness of the crust.

Frequently Asked Questions (FAQs)

Can I use frozen rhubarb? Absolutely. Thaw and drain it well to avoid excess moisture in the filling.

Why did my shortbread crust turn out tough? Overworking the dough develops gluten, leading to a tougher texture. Handle it as little as possible.

Can I make these bars ahead of time? Yes, they keep well for a day or two, and the flavor often improves as the filling settles.

What if I don’t have a food processor? A pastry cutter or two forks will work to blend the butter into the flour.

How do I know when the bars are done baking? The filling should be bubbling, and the edges of the crust should be golden brown.

Final Thoughts

Rhubarb Shortbread Bars are a testament to how simple ingredients can create something extraordinary. Whether you’re baking them for a special occasion or just to brighten an ordinary day, their vibrant flavor and comforting texture are sure to impress. Don’t be surprised if this recipe becomes a seasonal staple—once you taste that buttery crust mingling with the tangy rhubarb, you’ll understand why it’s worth making again and again.

Print
clock clock iconcutlery cutlery iconflag flag iconfolder folder iconinstagram instagram iconpinterest pinterest iconfacebook facebook iconprint print iconsquares squares iconheart heart iconheart solid heart solid icon

Rhubarb Shortbread Bars

  • Author: Baking Enthusiast

Description

These Rhubarb Shortbread Bars combine a buttery shortbread crust with a tangy rhubarb filling, creating the perfect balance of sweet and tart. Ideal for spring and summer gatherings!


Ingredients

Scale

For the Crust:

  • For the Shortbread Crust:
  • 1 1/2 cups all-purpose flour
  • 1/2 cup granulated sugar
  • 1/2 teaspoon salt
  • 3/4 cup unsalted butter, cold and cubed
  • For the Rhubarb Filling:
  • 3 cups fresh rhubarb, chopped into 1/2-inch pieces
  • 1/2 cup granulated sugar
  • 1 tablespoon lemon juice
  • 1 teaspoon vanilla extract
  • 2 tablespoons cornstarch
  • For the Topping:
  • 1/2 cup all-purpose flour
  • 1/4 cup brown sugar
  • 1/4 cup unsalted butter, melted
  • 1/4 teaspoon cinnamon

Instructions

1. Prepare the Crust:

  1. Preheat oven to 350°F (175°C). Line an 8×8-inch baking pan with parchment paper, leaving an overhang for easy removal.
  2. Make the shortbread crust: In a food processor, pulse flour, sugar, and salt. Add cold butter and pulse until the mixture resembles coarse crumbs.
  3. Press the crust mixture evenly into the prepared pan. Bake for 15 minutes until lightly golden. Let cool slightly.
  4. Prepare the rhubarb filling: In a saucepan over medium heat, combine rhubarb, sugar, lemon juice, and vanilla. Cook for 5-7 minutes until rhubarb softens. Stir in cornstarch and cook for another 2 minutes until thickened. Remove from heat.
  5. Spread the rhubarb filling over the pre-baked crust.
  6. Make the topping: Mix flour, brown sugar, melted butter, and cinnamon until crumbly. Sprinkle evenly over the rhubarb layer.
  7. Bake for 25-30 minutes, or until the topping is golden and the filling is bubbly. Cool completely before slicing into bars.

Notes

For a sweeter version, add an extra 1/4 cup sugar to the rhubarb filling. Store bars in an airtight container in the fridge for up to 5 days.

Carolina Mustard BBQ Sauce

Carolina Mustard BBQ Sauce

There’s something undeniably special about Carolina Mustard BBQ Sauce. This tangy, slightly sweet, and boldly flavored condiment is a staple in Southern barbecue, particularly in South Carolina, where mustard-based sauces reign supreme. Unlike the tomato-based sauces you might be used to, this golden-hued delight brings a unique zing to grilled meats, sandwiches, and even roasted vegetables. Whether you’re a barbecue enthusiast or just looking to expand your sauce repertoire, this recipe is a must-try.

Why You’ll Love This Recipe

Carolina Mustard BBQ Sauce is more than just a condiment—it’s a game-changer for your cookouts and weeknight dinners. Here’s why it deserves a spot in your kitchen:

  • Bold and Unique Flavor: The combination of tangy mustard, apple cider vinegar, and a touch of sweetness creates a complex, mouthwatering profile that stands out from traditional BBQ sauces.
  • Versatile: It pairs beautifully with pulled pork, chicken, ribs, or even as a dipping sauce for fries and nuggets.
  • Quick and Easy: Ready in under 15 minutes, this sauce requires no special equipment—just a saucepan and a whisk.
  • Customizable: Adjust the heat, sweetness, or tanginess to suit your personal taste.
  • Crowd-Pleasing: Whether you’re hosting a backyard BBQ or meal prepping for the week, this sauce will earn rave reviews.

Ingredients Breakdown

Understanding the ingredients in Carolina Mustard BBQ Sauce helps you appreciate how each component contributes to its signature taste. Here’s what you’ll need:

  • Yellow Mustard: The star of the show, yellow mustard provides the base with its sharp, tangy flavor. Avoid Dijon or whole-grain mustard—this recipe calls for classic yellow for authenticity.
  • Apple Cider Vinegar: Adds brightness and acidity, balancing the sweetness and enhancing the sauce’s tangy profile.
  • Brown Sugar: A touch of sweetness to round out the sharpness of the mustard and vinegar. Light or dark brown sugar both work well.
  • Honey: Adds depth and a natural sweetness that complements the other ingredients.
  • Worcestershire Sauce: Brings umami and complexity, deepening the overall flavor.
  • Hot Sauce: Optional, but a dash of hot sauce or cayenne pepper can add a subtle kick.
  • Spices: Garlic powder, onion powder, and black pepper enhance the savory notes.

How to Make Carolina Mustard BBQ Sauce

Making this sauce is incredibly simple—just follow these steps for a perfect batch every time:

  1. Combine Ingredients: In a medium saucepan, whisk together the yellow mustard, apple cider vinegar, brown sugar, honey, Worcestershire sauce, hot sauce (if using), garlic powder, onion powder, and black pepper.
  2. Simmer: Place the saucepan over medium heat and bring the mixture to a gentle simmer, stirring frequently to dissolve the sugar and prevent sticking.
  3. Reduce and Thicken: Let the sauce simmer for 8–10 minutes, stirring occasionally, until it thickens slightly. The sauce will continue to thicken as it cools.
  4. Cool and Store: Remove from heat and let cool to room temperature before transferring to an airtight container. The flavors will meld and deepen if allowed to rest for at least an hour before serving.

Pro Tips for the Best Results

For the most flavorful Carolina Mustard BBQ Sauce, keep these expert tips in mind:

  • Use Fresh Spices: If your garlic or onion powder has been sitting in the pantry for months, consider replacing them—fresh spices make a noticeable difference.
  • Adjust Consistency: If the sauce is too thick, thin it with a splash of water or apple cider vinegar. If too thin, simmer a few minutes longer.
  • Let It Rest: Allowing the sauce to sit for an hour (or overnight) before serving enhances the flavors.
  • Low and Slow for Meat: When using this sauce for pulled pork or ribs, baste during the last 30 minutes of cooking to prevent burning.

Variations and Substitutions

This recipe is wonderfully adaptable. Here are some ways to tweak it to your liking:

  • Spicier Version: Add extra hot sauce, cayenne pepper, or a minced jalapeño for more heat.
  • Smoky Twist: Stir in a teaspoon of smoked paprika or a dash of liquid smoke for a deeper, wood-fired flavor.
  • Sugar-Free Option: Replace brown sugar and honey with a sugar-free sweetener like erythritol or monk fruit.
  • Vegan-Friendly: Use maple syrup instead of honey and ensure your Worcestershire sauce is vegan.

What to Serve With It

Carolina Mustard BBQ Sauce is incredibly versatile. Here are some delicious pairings:

  • Pulled Pork: A classic pairing—pile it high on a bun with coleslaw.
  • Grilled Chicken: Brush it on during the last few minutes of grilling.
  • Ribs: Slather it on for a sticky, tangy glaze.
  • Burgers: Swap ketchup for this sauce for a Southern-inspired twist.
  • Roasted Vegetables: Drizzle over roasted Brussels sprouts or cauliflower for extra flavor.

How to Store and Reheat

This sauce stores beautifully, making it perfect for meal prep or leftovers:

  • Refrigeration: Store in an airtight container in the fridge for up to two weeks.
  • Freezing: Pour into ice cube trays or small containers and freeze for up to three months. Thaw overnight in the fridge before using.
  • Reheating: Warm gently in a saucepan over low heat, stirring occasionally. If needed, add a splash of water to loosen the consistency.

Frequently Asked Questions (FAQs)

Can I use Dijon mustard instead of yellow mustard?
While you can substitute Dijon, it will alter the flavor significantly. Yellow mustard is traditional and provides the right tanginess for authentic Carolina-style sauce.

Is this sauce gluten-free?
Most of the ingredients are naturally gluten-free, but check your Worcestershire sauce and hot sauce labels to ensure they don’t contain gluten.

Can I make this sauce ahead of time?
Absolutely! In fact, the flavors improve after sitting for a few hours or overnight.

What’s the best way to use this sauce for pulled pork?
Toss shredded pork with the sauce after cooking, or baste during the last 30 minutes of smoking or roasting.

How can I make it less tangy?
Increase the honey or brown sugar slightly to balance the acidity, or reduce the amount of vinegar.

Final Thoughts

Carolina Mustard BBQ Sauce is a vibrant, flavorful departure from the usual tomato-based sauces, and once you try it, you’ll wonder how you ever grilled without it. Whether you’re serving it at a summer cookout or jazzing up a weeknight meal, this sauce brings a taste of Southern tradition to your table. Give it a try, play with the flavors, and make it your own—your taste buds will thank you.

Print
clock clock iconcutlery cutlery iconflag flag iconfolder folder iconinstagram instagram iconpinterest pinterest iconfacebook facebook iconprint print iconsquares squares iconheart heart iconheart solid heart solid icon

Carolina Mustard BBQ Sauce

  • Author: Southern BBQ Master

Description

A tangy, sweet, and slightly spicy mustard-based BBQ sauce that’s a staple in South Carolina. Perfect for pulled pork, chicken, or as a dipping sauce.


Ingredients

Scale

For the Crust:

  • For the sauce base:
  • 1 cup yellow mustard
  • 1/2 cup honey
  • 1/4 cup apple cider vinegar
  • For seasoning:
  • 2 tablespoons brown sugar
  • 1 tablespoon Worcestershire sauce
  • 1 teaspoon garlic powder
  • 1 teaspoon onion powder
  • 1/2 teaspoon smoked paprika
  • 1/2 teaspoon cayenne pepper (adjust to taste)
  • 1/4 teaspoon black pepper
  • 1/4 teaspoon salt

Instructions

1. Prepare the Crust:

  1. 1. In a medium saucepan, combine all ingredients (mustard, honey, apple cider vinegar, brown sugar, Worcestershire sauce, and spices).
  2. 2. Whisk thoroughly until smooth and well blended.
  3. 3. Place the saucepan over medium heat and bring to a gentle simmer, stirring frequently.
  4. 4. Reduce heat to low and let simmer for 10-15 minutes, allowing flavors to meld and sauce to thicken slightly.
  5. 5. Remove from heat and let cool to room temperature before using.
  6. 6. Store in an airtight container in the refrigerator for up to 2 weeks.

Notes

For a smoother sauce, blend after cooling. For extra heat, add more cayenne or a dash of hot sauce. This sauce pairs exceptionally well with smoked pork shoulder.

Raspberry Lemon Heaven Cupcakes

Raspberry Lemon Heaven Cupcakes

There’s something undeniably magical about the combination of tart lemon and sweet raspberries. These Raspberry Lemon Heaven Cupcakes are a celebration of bright, zesty flavors wrapped in a tender, moist crumb, topped with a cloud of fluffy frosting. Whether you’re baking for a special occasion or simply indulging in a sweet afternoon treat, this recipe is guaranteed to bring a little slice of sunshine to your table.

Why You’ll Love This Recipe

First, let’s talk about why these cupcakes deserve a spot in your baking repertoire. Here are a few reasons they’ll become an instant favorite:

  • Perfect Balance of Flavors: The tangy lemon and juicy raspberries create a harmony that’s neither too sweet nor too tart—just pure bliss in every bite.
  • Moist and Fluffy Texture:
    Thanks to buttermilk and a careful mixing technique, these cupcakes stay incredibly tender, even days after baking.
  • Stunning Presentation: With their vibrant raspberry swirls and lemon-infused frosting, these cupcakes look as heavenly as they taste, making them ideal for parties or gifting.
  • Easy to Customize: Whether you prefer a stronger lemon kick or extra raspberry jam filling, this recipe is wonderfully adaptable to suit your taste.
  • Crowd-Pleasing Versatility: They’re equally at home at a summer picnic, bridal shower, or cozy winter tea party—raspberry lemon is a year-round winner.

Ingredients Breakdown

Every ingredient in these Raspberry Lemon Heaven Cupcakes plays a crucial role in building flavor and texture. Here’s what you’ll need and why:

  • All-Purpose Flour: The foundation of the cupcake batter, providing structure without making it dense.
  • Granulated Sugar: Sweetens the cupcakes while helping to create a light, airy crumb.
  • Buttermilk: Adds moisture and a subtle tang, enhancing the lemon flavor while keeping the cupcakes tender.
  • Fresh Lemons: Both zest and juice are used for a bright, citrusy punch that cuts through the sweetness.
  • Raspberries: Fresh or frozen raspberries can be used, lending a natural fruity sweetness and gorgeous color.
  • Eggs: Bind the ingredients together and contribute to the cupcakes’ rise.
  • Unsalted Butter: Provides richness and ensures a velvety texture.
  • Cream Cheese: The base of the frosting, adding a slight tang that complements the lemon and raspberry.

How to Make Raspberry Lemon Heaven Cupcakes

Follow these steps to create cupcakes that are as delightful to make as they are to eat:

Step 1: Prep Your Ingredients

Preheat your oven to 350°F and line a muffin tin with cupcake liners. Bring your eggs and buttermilk to room temperature for even mixing.

Step 2: Make the Batter

In a large bowl, cream together softened butter and sugar until light and fluffy. Add eggs one at a time, mixing well after each. Stir in lemon zest and juice. Alternate adding the dry ingredients (flour, baking powder, salt) with the buttermilk, beginning and ending with the dry mix. Fold in mashed raspberries gently to create a marbled effect.

Step 3: Bake to Perfection

Divide the batter evenly among the cupcake liners, filling each about two-thirds full. Bake for 18–20 minutes, or until a toothpick inserted comes out clean. Let them cool completely before frosting.

Step 4: Whip Up the Frosting

Beat cream cheese and butter until smooth. Gradually add powdered sugar, lemon juice, and a pinch of salt. Pipe or spread onto cooled cupcakes and garnish with fresh raspberries or lemon zest.

Pro Tips for the Best Results

  • Don’t Overmix: Stir the batter just until combined to avoid dense cupcakes.
  • Use Room Temperature Ingredients: This ensures a smoother batter and even baking.
  • Boost the Raspberry Flavor: Swirl a teaspoon of raspberry jam into each cupcake before baking for an extra burst of fruitiness.
  • Chill the Frosting: If it’s too soft, refrigerate for 15 minutes before piping for cleaner swirls.

Variations and Substitutions

This recipe is wonderfully flexible. Here are some ways to make it your own:

  • Gluten-Free: Swap all-purpose flour for a 1:1 gluten-free blend.
  • Dairy-Free: Use plant-based butter and coconut milk yogurt instead of buttermilk.
  • Extra Lemon: Add a tablespoon of lemon extract to the batter for an intense citrus kick.
  • Berry Swap: Try blackberries or strawberries instead of raspberries for a different twist.

What to Serve With It

These cupcakes shine on their own, but pairing them with the right accompaniments can elevate the experience:

  • A hot cup of Earl Grey tea or a glass of sparkling lemonade.
  • Fresh berries and whipped cream for a mini dessert platter.
  • A scoop of vanilla bean ice cream for an indulgent cupcake sundae.

How to Store and Reheat

To keep your cupcakes fresh:

  • Room Temperature: Store in an airtight container for up to 2 days.
  • Refrigerate: If frosted, they’ll last up to 5 days in the fridge—let them come to room temperature before serving.
  • Freeze: Unfrosted cupcakes can be frozen for up to 3 months. Thaw overnight and frost before serving.

Frequently Asked Questions (FAQs)

Can I use frozen raspberries?

Absolutely. Thaw and drain them well to avoid excess moisture in the batter.

Why did my cupcakes sink in the middle?

This usually happens from overmixing or opening the oven door too early. Be gentle with the batter and wait until the minimum bake time before checking.

Can I make these ahead of time?

Yes. Bake the cupcakes a day in advance and frost them the next day for the freshest taste.

How do I get fluffy frosting?

Beat the cream cheese and butter for a full 3–5 minutes to incorporate air, creating a lighter texture.

Can I omit the lemon?

If you prefer pure raspberry cupcakes, replace the lemon juice with milk and omit the zest.

Final Thoughts

Baking these Raspberry Lemon Heaven Cupcakes is like capturing a little bit of joy in every bite. Whether you’re sharing them with loved ones or savoring one all to yourself, their vibrant flavors and tender crumb are sure to delight. Don’t be afraid to experiment with the recipe—after all, the best bakes come from a dash of creativity and a whole lot of love. Happy baking!

Print
clock clock iconcutlery cutlery iconflag flag iconfolder folder iconinstagram instagram iconpinterest pinterest iconfacebook facebook iconprint print iconsquares squares iconheart heart iconheart solid heart solid icon

Raspberry Lemon Heaven Cupcakes

  • Author: Sweet Delights Bakery

Description

These Raspberry Lemon Heaven Cupcakes are a burst of tangy lemon and sweet raspberry in every bite. Perfect for spring gatherings or a delightful dessert any time of year.


Ingredients

Scale

For the Crust:

  • For the Cupcakes:
  • 1 1/2 cups all-purpose flour
  • 1 1/2 teaspoons baking powder
  • 1/4 teaspoon salt
  • 1/2 cup unsalted butter, softened
  • 1 cup granulated sugar
  • 2 large eggs
  • 1 teaspoon vanilla extract
  • 1/2 cup whole milk
  • Zest of 1 lemon
  • 2 tablespoons fresh lemon juice
  • For the Raspberry Filling:
  • 1 cup fresh raspberries
  • 2 tablespoons granulated sugar
  • 1 teaspoon lemon juice
  • For the Lemon Frosting:
  • 1 cup unsalted butter, softened
  • 4 cups powdered sugar
  • 2 tablespoons fresh lemon juice
  • 1 teaspoon vanilla extract
  • 12 tablespoons heavy cream (as needed)
  • For Garnish:
  • Fresh raspberries
  • Lemon zest

Instructions

1. Prepare the Crust:

  1. Preheat oven to 350°F (175°C). Line a muffin tin with cupcake liners.
  2. In a medium bowl, whisk together flour, baking powder, and salt. Set aside.
  3. In a large bowl, beat butter and sugar until light and fluffy. Add eggs one at a time, then mix in vanilla, lemon zest, and lemon juice.
  4. Alternately add the dry ingredients and milk to the butter mixture, beginning and ending with the dry ingredients. Mix until just combined.
  5. Divide batter evenly among cupcake liners, filling each about 2/3 full. Bake for 18-20 minutes or until a toothpick comes out clean. Cool completely.
  6. For the raspberry filling: In a small saucepan, combine raspberries, sugar, and lemon juice. Cook over medium heat until raspberries break down and mixture thickens (about 5-7 minutes). Strain to remove seeds and let cool.
  7. For the frosting: Beat butter until creamy. Gradually add powdered sugar, lemon juice, and vanilla. Add heavy cream as needed for desired consistency.
  8. To assemble: Core each cupcake and fill with raspberry filling. Pipe lemon frosting on top and garnish with fresh raspberries and lemon zest.

Notes

Store cupcakes in an airtight container in the refrigerator for up to 3 days. Bring to room temperature before serving for best texture.