Deliciously Inspired Potatoes au Gratin for Your Next Dinner

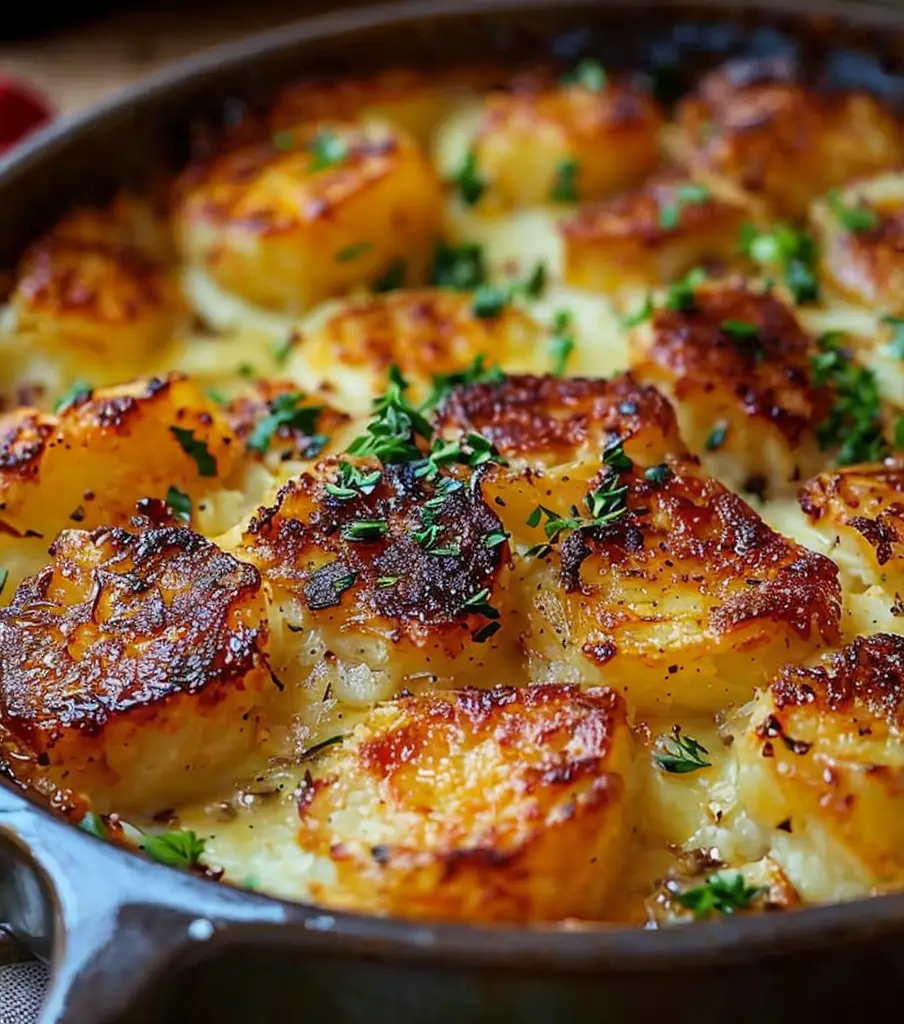
Inspired Potatoes au Gratin: A Creamy Comfort Food Delight

⚖️
Difficulty
Medium

⏲️
Prep Time
30 mins

🕒
Cook Time
45 mins

⏱️
Total Time
75 mins

🍽️
Servings
6

Are you ready to elevate your dining experience with an exquisite dish of Inspired Potatoes au Gratin? This creamy delight is more than just potatoes; it symbolizes warmth and comfort that resonates through generations. Picture perfectly sliced potatoes enveloped in rich cream, seasoned to perfection, and baked until golden and bubbly. It’s a classic recipe that not only satisfies the palate but also delights the senses with its enticing aromas and captivating textures.

Potatoes au Gratin is the ideal companion for a family gathering or a festive celebration, serving as a comforting staple to complement any main course. This recipe blends traditional techniques with modern twists, ensuring every bite delivers a delicious explosion of flavors. Whether it’s a cozy dinner at home or a posh get-together, this dish is guaranteed to impress, evoking cherished memories around the dinner table.

Quick Recipe Highlights

  • Flavor Profile: Creamy, cheesy goodness with a touch of garlic and herbs.
  • Texture: Smooth and velvety with tender potatoes and a crispy top.
  • Aroma: Inviting scents of garlic, butter, and melted cheese wafting through the kitchen.
  • Visual Appeal: Golden-brown surface with layers of beautifully arranged potatoes.
  • Skill Level Needed: A medium-difficulty recipe suitable for home cooks looking to enhance their skills.
  • Special Equipment: A mandoline slicer for uniform potato slices and a baking dish.

Recipe Overview

  • Difficulty Level: This recipe requires a balance between technique and timing, making it perfect for intermediate cooks who wish to develop their culinary skills.
  • Category: Ideal as a side dish to accompany meats, it shines during holiday feasts and family dinners.
  • Cuisine: Originating from French culinary tradition, it brings a touch of elegance to everyday meals with its rich and creamy profile.
  • Cost: The ingredients are budget-friendly, usually totaling around $15, making it an accessible gourmet treat.
  • Season: Potatoes are versatile and available year-round, but colder months enhance its comfort food qualities.
  • Occasion: Perfect for holiday celebrations, potlucks, or whenever you need something scrumptious and shareable.

Why You’ll Love This Recipe

This Inspired Potatoes au Gratin is not just a dish; it’s an experience. The creamy sensation that dances on your tongue, paired with the comforting taste of baked potatoes, ensures each bite is memorable. This is a dish designed for heartwarming gatherings, where family and friends can savor the flavors of home-cooked goodness together.

Beyond its delightful taste, this recipe is incredibly convenient. Layer the ingredients in a baking dish, pop it in the oven, and let the magic happen while you attend to your guests or prepare other dishes. It’s a true time-saver that allows you to enjoy the cooking process without the fuss of constant supervision.

Nutritionally, while creamy and indulgent, you can make healthier substitutions without sacrificing flavor. Choosing low-fat dairy or adding vegetables can elevate the dish. It accommodates various dietary needs while still being irresistibly delicious.

The social value of this dish is immense; it’s the ultimate crowd-pleaser. Whether served at a festive table or a casual gathering, it sparks conversations and fosters connections. The shared experience of enjoying a classic like this creates lasting memories.

Cost-effectiveness is one of its strongest appeals. With inexpensive and readily available ingredients, you can create a masterpiece that impresses guests without breaking the bank. It’s the kind of dish that feels extravagant but is surprisingly affordable.

Historical Background and Cultural Significance

The origins of potatoes au gratin can be traced back to the French countryside, where simple ingredients were transformed into hearty meals to sustain families. Its evolution reflects the adaptability and creativity of home cooks who sought to elevate humble potatoes into gourmet delicacies.

Culturally, this dish represents comfort and warmth, often served during holidays or family gatherings. It embodies the essence of French cooking, where emphasis is placed on flavor and quality within the simplest fare. Over time, variations have been embraced globally, with each region adding its personal touch.

As culinary traditions evolve, so does the approach to this classic. Modern interpretations incorporate diverse ingredients, such as different cheeses and spices, making it relevant for today’s adventurous eaters while honoring its classic roots.

Regional variations abound, ranging from different cheese types in Italy to the inclusion of seasonal vegetables in other cultures. Still, the core of the dish remains steeped in history, allowing it to thrive in kitchens worldwide.

Ingredient Deep Dive

Potatoes: The star of this dish, potatoes are a staple in many cuisines due to their versatility and heartiness. High in fiber and vitamin C, they can be prepared in countless ways. When selecting potatoes for au gratin, opt for starchy varieties like Russets for the best texture.

Cheese: Cheddar cheese is commonly used for its sharp flavor and melting properties. Cheese not only enhances the dish’s richness but also contains calcium and protein. There are numerous alternatives depending on preference, such as Gruyère or a dairy-free cheese for substitutions.

Common Mistakes to Avoid

  • Using the wrong type of potato: Choose starchy potatoes for the best texture; waxy varieties can result in mushy gratin.
  • Overcooking: Monitor the cooking time carefully; over-baking can lead to burnt edges.
  • Inadequate layering: Ensure even distribution of cheese and seasoning between layers to maximize flavor.
  • Skipping the resting time: Letting the dish rest after baking allows it to set properly and enhances its flavor.
  • Not seasoning adequately: Don’t shy away from seasoning both the potato layers and the cream; it boosts the overall taste.
  • Rushing the prep: Take your time slicing the potatoes; uneven slices result in uneven cooking.
  • Using cold ingredients: Ensure your cream and cheeses are at room temperature for easier mixing and integration.
  • Neglecting to cover: If the top browns too quickly, cover with foil to prevent burning while allowing the rest to cook through.

Essential Techniques

Proper Slicing: Uniform slices ensure even cooking, and using a mandoline can help achieve this. Aim for around 1/8 inch thickness to maintain consistency. Check for visual cues such as tinging edges to tell when they are perfectly cooked.

Layering: Adding ingredients in layers is key to ensure even distribution of flavors. Alternate potatoes with cheese and seasoning to create a depth of flavor and visually appealing appearance.

Pro Tips for Perfect Inspired Potatoes au Gratin

1. Experiment with cheese combinations to find a blend that you love; different cheeses can introduce unique flavor profiles.

2. Consider adding herbs like thyme or rosemary to enhance aroma and elevate taste.

3. Preheat your oven for thorough cooking, ensuring the cheese browns evenly while the potatoes soften.

4. Use heavy cream for richness, but you can substitute with half-and-half for a lighter option.

5. For extra crunch, sprinkle breadcrumbs on top before baking for that delightful texture contrast.

6. When layering, push down with a spoon, ensuring each layer is tightly packed for even cooking.

7. Let the gratin sit before slicing; this allows flavors to meld and makes serving easier.

8. Don’t forget to taste the cream mixture before pouring it over the potatoes; adjust seasoning as needed for a perfectly balanced dish.

Variations and Adaptations

Regional variations can include adding ingredients like bacon or mushrooms for an umami kick, while seasonal adaptations might see you introducing butternut squash or sweet potatoes during the fall months.

Dietary modifications can be made for gluten-free needs by checking that all ingredients are certified gluten-free. For vegan adaptations, use a cashew cream base and nutritional yeast as a cheese substitute, ensuring all flavors are preserved.

Texture modifications might involve adding a layer of soft-cooked vegetables between the potato layers, enhancing both nutrition and flavor.

Lastly, for presentation alternatives, consider using individual ramekins for serving, allowing you to create a delightful table setting.

Serving and Presentation Guide

As with any great dish, presentation enhances the dining experience. Serve the gratin in a beautifully crafted baking dish that retains heat and adds rustic charm to your table.

For garnishing, sprinkle fresh herbs like parsley or chives on top for a splash of color and a fresh flavor contrast. Plating individual portions can also provide a sophisticated touch, especially during formal occasions.

Pairing with traditional accompaniments like roasted meats or a side salad can balance the richness, while modern suggestions could involve serving with grilled vegetables.

Temperature is key; let the potatoes au gratin cool slightly before serving to firm up the layers, making it easier to slice into perfect, delectable portions.

Wine and Beverage Pairing

When it comes to wine, a crisp white Sauvignon Blanc balances the creaminess beautifully, while a light-bodied red like Pinot Noir can also complement the dish’s flavors nicely.

For non-alcoholic alternatives, consider serving a sparkling water infused with citrus for a refreshing counterpoint to the richness.

If you opt for coffee, a light roast would enhance the dish after dinner without overpowering its flavors, ensuring a lovely end to the meal.

Storage and Shelf Life

For storage, allow the dish to cool completely and cover it tightly with plastic wrap or aluminum foil, ensuring it retains moisture while stored in the refrigerator.

It can last for about 3-4 days in the fridge. Store in an airtight container if possible to extend freshness.

For re-heating, use the oven to maintain the crispy top; warm at 350°F until heated through. Freezing may alter texture, so it’s best enjoyed fresh, but can be frozen for up to two months in a well-sealed container.

Make Ahead Strategies

If entertaining, consider prepping the dish a day in advance; just keep the cream and potatoes separate until ready to bake, avoiding sogginess while allowing flavors to develop overnight.

Assemble all components but delay adding the cream and cheese until just before baking to maintain texture and taste integrity.

Reheating should be done carefully to avoid drying out; cover the dish with foil for part of the reheating to preserve moisture.

Scaling Instructions

Halving the recipe is easy and requires minimal adjustment; simply divide the ingredients proportionally and use a smaller baking dish.

For doubling or tripling, use larger pans to accommodate the increased volume but remember that baking time may vary, requiring you to check for doneness more frequently.

Be mindful of your oven space; stagger batches if necessary and store leftovers correctly to maintain freshness.

Nutritional Deep Dive

This dish provides essential carbohydrates from potatoes, making it a great energy source; each serving contains substantial amounts of dietary fiber and vitamins.

Cheese adds an excellent source of calcium and protein, integral for bone health particularly in family-friendly meals.

Keep in mind the caloric density; portion control is essential for balancing indulgent meals with healthy eating practices. Adjust your ingredients to maintain balance while enjoying this classic dish.

Dietary Adaptations

For gluten-free diets, ensure all products used are certified gluten-free, allowing you to enjoy the creamy texture minus the gluten.

Dairy-free modifications can be executed through the use of plant-based milks and cheeses, keeping flavor profiles rich without compromising dietary needs.

For those adhering to low-carb or keto diets, swapping out traditional potatoes with cauliflower can create a similar texture with fewer carbohydrates. Ensure the cheese remains a key feature to retain the gratin’s essence.

Troubleshooting Guide

In the event of a texture issue, overcooked potatoes may become mushy. To mitigate this, adjust cooking time and use a timer for accuracy.

Flavor balance concerns can arise if seasoning is overlooked; conducting a taste test before the final baking phase can help correct any imbalances.

Temperature problems can usually be resolved by checking your oven’s calibration; ensure it’s accurate as variations can lead to under or overcooked results.

Recipe Success Stories

Our community has shared numerous successes converting this recipe into a family favorite! Creative variations such as adding caramelized onions or jalapeños have made it a staple at gatherings.

Photography tips from our audience emphasize natural light for capturing the golden crust—ideal for sharing on social media platforms.

Frequently Asked Questions

Q: Can I prepare this recipe in advance?
A: Yes, you can prepare the potato layers ahead of time, just cover them until you’re ready to bake.

Q: What is the best type of cheese to use?
A: A combination of sharp cheddar and Gruyère tends to work best for flavor and melt.

Q: Is there a vegan alternative?
A: Absolutely! Use cashew cream and vegan cheese to maintain that creamy texture without dairy.

Q: Would adding meat be a good idea?
A: Yes! Incorporating bacon or ham can enhance the flavor profile significantly.

Q: How do I store leftovers?
A: Store in an airtight container in the fridge, consuming within 3-4 days.

Q: Can I freeze the gratin?
A: Yes! It freezes well, but the texture may change slightly upon reheating.

Q: What if my gratin is too watery?
A: Use thicker cream, and ensure potatoes are well-seasoned for better absorption.

Q: How can I make this dish lighter?
A: Use half-and-half or substitute some cheese for lower-fat versions for a lighter take.

Q: Can I add vegetables?
A: Certainly! Layering in spinach or mushrooms can add flavor and nutrients.

Q: How do I prevent the top from burning?
A: Cover with foil midway through cooking if the top is browning too quickly.

Additional Resources

Explore related recipes that feature comforting, cheesy elements or delve into techniques such as knife skills for prep work. Ingredient guides focusing on potatoes and cheese could also provide additional knowledge to enhance your culinary adventures. Recommendations for kitchen equipment can assist in achieving the best results every time you cook.

Join the Conversation

We invite you to share your Inspired Potatoes au Gratin experiences with us! Use social media platforms to post your culinary creations and any variations you’ve tried. Engage with our community through comments or questions; your feedback enriches our collective cooking journey!

The Recipe

Inspired Potatoes au Gratin

Serves: 6

Prep Time: 30 mins

Cook Time: 45 mins

Total Time: 75 mins

Kitchen Equipment Needed

  • Mandoline slicer
  • Baking dish
  • Mixing bowl
  • Measuring cups and spoons
  • Oven mitts

Ingredients

  • 2 lbs potatoes, thinly sliced
  • 2 cups heavy cream
  • 2 cups shredded cheddar cheese
  • 2 cloves garlic, minced
  • 1 tsp salt
  • 1/2 tsp black pepper
  • 1/4 cup fresh parsley, chopped (for garnishing)

Directions

  1. Preheat your oven to 375°F (190°C).
  2. In a mixing bowl, combine heavy cream, garlic, salt, and pepper.
  3. Layer half of the sliced potatoes in a greased baking dish.
  4. Pour half of the cream mixture over the first layer of potatoes.
  5. Sprinkle a layer of cheddar cheese over the cream.
  6. Repeat with the remaining potatoes, cream, and cheese.
  7. Cover the dish with foil and bake for 30 minutes.
  8. Remove the foil and bake for an additional 15 minutes, until golden and bubbly.
  9. Let rest for 10 minutes before serving.
  10. Garnish with fresh parsley before serving.

Recipe Notes

  • Feel free to add spices or herbs, such as thyme or rosemary, to the layers for extra flavor.
  • Substituting with different types of cheese can offer a unique spin on the classic recipe.
  • Ensure potatoes are evenly sliced for consistent cooking and texture.

Delicious and Easy Recipe to Elevate Your Cooking Skills

Delicious Spaghetti Aglio e Olio: A Classic Italian Delight

⚖️
Difficulty
Easy

⏲️
Prep Time
10 mins

🕒
Cook Time
15 mins

⏱️
Total Time
25 mins

🍽️
Servings
4

Indulge in the delightful simplicity of Spaghetti Aglio e Olio, a classic Italian dish that captures the essence of Italy’s culinary tradition. Only a few ingredients are needed to create a satisfying meal that tantalizes the taste buds. With its rich garlic flavor complemented by the heat of red pepper flakes, this dish is perfect for a quick weeknight dinner or an elegant weekend meal. The golden olive oil, fragrant garlic, and fresh parsley create a mouth-watering aroma that fills your kitchen and beckons everyone to the table.

This dish is not only about flavor but also about texture. The perfectly al dente spaghetti is enveloped in a glossy, unctuous sauce made from sautéed garlic and oil. Each bite offers a burst of spice and a hint of freshness from the parsley, making it a dish that balances warmth with vibrancy. Whether served as an everyday recipe or a gourmet offering, Spaghetti Aglio e Olio proves that simplicity can be truly exquisite.

Quick Recipe Highlights

  • Flavor Profile: This dish boasts a harmonious balance of savory garlic, subtle heat from red pepper flakes, and the freshness of parsley.
  • Texture: The spaghetti is perfectly chewy with a luxurious coating of oil, making each mouthful both satisfying and comforting.
  • Aroma: The dish radiates an inviting aroma, thanks to the sautéed garlic that subtly fills your kitchen with warmth.
  • Visual Appeal: The vibrant green parsley contrasts beautifully with the pale spaghetti, making it visually captivating.
  • Skill Level Needed: This recipe is beginner-friendly, requiring basic cooking skills and techniques.
  • Special Equipment: No special tools are necessary, just a pot for boiling pasta and a skillet for sautéing.

Recipe Overview

  • Difficulty Level: The easy preparation makes it suitable for novice cooks and a fantastic weeknight option for busy families.
  • Category: Ideal as a main dish or hearty side, it suits various meal types.
  • Cuisine: Rooted in Italian cuisine, this recipe reflects the heart of Mediterranean cooking.
  • Cost: Inexpensive to prepare, making it budget-friendly with common pantry ingredients.
  • Season: Perfect year-round, though it shines in summer when fresh herbs are at their best.
  • Occasion: A versatile dish suitable for casual dinners, entertaining guests, or as part of an elaborate Italian feast.

Why You’ll Love This Recipe

Spaghetti Aglio e Olio appeals to food lovers through its bold flavors and simple preparation. The garlic delivers a comforting sensation that reminds you of home, while the red pepper flakes add just the right amount of heat to awaken the palette. The fresh parsley provides a pop of color and a refreshing lift, making it an all-time favorite.

Convenience is another compelling reason to embrace this dish. With just a few minutes of cooking time and minimal cleanup, you can have a gourmet experience at your fingertips without overwhelming your schedule. It’s the ideal recipe for those nights when you crave something delicious without spending hours in the kitchen.

From a nutritional standpoint, this spaghetti dish is a wholesome choice. Olive oil is rich in healthy fats, while garlic is known for its immune-boosting properties. When served with a side of salad or vegetables, it becomes a balanced meal that caters to various dietary needs.

Socially, Spaghetti Aglio e Olio serves as a great conversation starter. Sharing a dish steeped in Italian tradition adds depth to any gathering, and it invites others to participate in the cooking process. It’s a perfect meal to enjoy with friends and family, encouraging stories and laughter over a shared table.

Finally, affordability is a key attribute of Spaghetti Aglio e Olio. Most of the ingredients are basic staples found in most kitchens, making it an accessible option for everyone. Whether you’re cooking for one or a crowd, this recipe delivers satisfaction without straining the budget.

Historical Background and Cultural Significance

The origins of Spaghetti Aglio e Olio date back to the impoverished southern regions of Italy, where simple, quality ingredients were essential. This dish exemplifies the Italian philosophy of making the most out of what you have—creating meals that celebrate flavor rather than complexity.

In Italian culture, the dish is often a staple for late-night evenings, enjoyed by university students and families alike as a quick meal after a long day. Its popularity has transcended borders, bringing a slice of Italian culture to kitchens around the globe.

There is a fascinating evolution surrounding Spaghetti Aglio e Olio as it adapted to various regional palates, incorporating local flavors while maintaining its core ingredients. Modern takes on this dish may include extra ingredients like seafood or vegetables, expanding its versatility.

Regional variations abound, especially in seaside towns where the seafood is abundant. These adaptations showcase the flexibility of the recipe while honoring its humble origins, ensuring that Spaghetti Aglio e Olio remains a beloved classic.

Ingredient Deep Dive

Spaghetti

Spaghetti serves as the quintessential pasta shape for this dish, providing the perfect balance of texture and sauce adherence. Traditionally made from durum wheat semolina, it is rich in protein and fiber. When selecting spaghetti, look for high-quality brands that use 100% durum wheat to ensure authenticity and optimal flavor. Store dry spaghetti in a cool, dry place, and it can last up to two years.

Garlic

Garlic is a primary flavor in Spaghetti Aglio e Olio, celebrated for its aromatic qualities and numerous health benefits. As a core component of Mediterranean cooking, it’s known for its antioxidant properties. When choosing garlic, look for firm cloves with stiff skin and avoid any that appear soft or sprouted. Garlic should be stored in a cool, dark place, ideally in a mesh bag to allow airflow.

Olive Oil

High-quality extra virgin olive oil is essential to this recipe, providing rich flavor and health benefits. Derived from cold-pressed olives, it boasts monounsaturated fats and antioxidants. When selecting olive oil, opt for dark glass bottles that protect it from light, and check for a harvest date to ensure freshness. Store opened bottles in a cool, dark place to maintain its quality.

Red Pepper Flakes

Red pepper flakes introduce a subtle heat and depth to the dish. Commonly used in Italian cuisine, they can vary greatly in spiciness depending on the blend. When purchasing red pepper flakes, consider the heat level you desire and check the label for quality. Keep them in an airtight jar away from direct sunlight to preserve flavor and potency.

Parsley

Fresh parsley adds a delightful freshness and vibrant color to Spaghetti Aglio e Olio. Known for its culinary versatility, parsley also offers health benefits, being rich in vitamins C and K. When selecting parsley, look for bright green leaves without any yellowing. Store unwashed parsley in a glass of water or wrapped in a damp paper towel in the fridge for optimal freshness.

Common Mistakes to Avoid

  • Overcooking the pasta: Ensuring the spaghetti remains al dente is crucial; follow package instructions and taste test for optimal texture.
  • Burning the garlic: Cook garlic on low heat to prevent it from turning bitter; it should be golden, not browned.
  • Using low-quality olive oil: The flavor of this dish heavily relies on olive oil, so invest in a good quality product to enhance the taste.
  • Adding salt too late: Seasoning the pasta water early helps flavor the spaghetti; don’t skip this step.
  • Neglecting to reserve pasta water: Retaining some pasta water helps create a silkier sauce when mixed with the oil.
  • Skimping on parsley: Freshness is key and enhances the overall flavor, so don’t be shy with the herbs.
  • Not tossing quickly: Ensure all components are mixed immediately after combining to distribute flavors evenly.
  • Ignoring personal preferences: Tailoring the amount of garlic and spice to your taste is important to make the dish enjoyable.

Essential Techniques

Cooking Pasta

Cooking pasta to perfection is vital for this dish. Use a large pot with plenty of salted water, as this enhances flavor throughout the cooking process. Stir occasionally to prevent sticking and taste a minute before the recommended time for the ideal texture.

Sautéing Garlic

Mastering the sautéing of garlic is critical. Start with medium heat and add garlic once the oil is hot. Keep an eye on it, as it can burn quickly, leading to an undesirable bitterness. Aim for a golden color and an aromatic smell for ideal results.

Tossing Ingredients

Tossing the spaghetti with the garlic oil immediately after draining is crucial for ensuring an even coat of flavor. Using tongs or a pasta fork can enhance the mixing process, blending the sauce and spaghetti seamlessly. Aim for a glossy finish without excess oil pooling on the plate.

Pro Tips for Perfect Spaghetti Aglio e Olio

1. Use a heavy-bottomed pan for even heat distribution when sautéing the garlic.
2. Consider using fresh chili peppers instead of red pepper flakes for a unique flavor and presentation.
3. Add a splash of white wine to the oil after sautéing the garlic for added depth and richness.
4. Pair with freshly grated Parmigiano-Reggiano or Pecorino Romano cheese for an extra touch of flavor.
5. Squeeze fresh lemon juice over the finished dish for a bright note that complements the garlic.
6. Serve immediately for the best texture and flavor; reheating may lead to sogginess.
7. Customize the dish by adding sautéed vegetables like spinach or mushrooms for added texture and nutrition.
8. For a richer flavor, allow the garlic to infuse longer in the olive oil before adding the spaghetti.

Variations and Adaptations

Spaghetti Aglio e Olio lends itself to numerous delicious variations. For a meatier option, consider adding sautéed shrimp or chicken to the dish, which will harmonize beautifully with the garlic and olive oil. Seasonal adaptations such as incorporating fresh summer vegetables like zucchini or bell peppers can introduce a vibrant array of flavors.

Dietary modifications are easy to implement — simply swap traditional spaghetti for gluten-free pasta while maintaining the same cooking techniques for an equally satisfying experience. For those seeking bold flavors, experiment with different types of fresh herbs or additional spices; basil or thyme can offer new aroma profiles.

Texture modifications can be as simple as switching up the type of oil — try using a blend of olive oil with sesame oil for a nutty flavor that complements the garlic. When it comes to presentation, consider serving the dish in a shallow bowl to highlight the pasta’s beauty and allow for a more elegant dining experience.

Serving and Presentation Guide

Plating your Spaghetti Aglio e Olio can elevate the dining experience significantly. Use a large fork to twirl the spaghetti onto the plate, creating a nest effect. Drizzle additional olive oil over the top for a polished appearance, and finish with a sprinkle of fresh parsley.

Garnishing ideas include shaved Parmesan or red pepper flakes arranged artfully on top to signal the flavors to expect. Traditional accompaniments like a simple green salad and crusty bread can enhance the meal, inviting diners to experience a full Italian feast.

Consider temperature controls when serving; this dish is best served warm, encouraging the garlic aroma to linger. For portion control, be mindful of serving sizes, keeping in mind the rich flavors will satiate even the biggest appetite when presented well.

Wine and Beverage Pairing

For wine pairings, an Italian white wine such as Pinot Grigio or a light Chianti complements Spaghetti Aglio e Olio beautifully, enhancing the meal’s flavors with crisp acidity. If you prefer non-alcoholic options, a refreshing sparkling water with a wedge of lemon brings a palate-cleansing brightness.

If coffee or tea is your go-to post-dinner beverage, a smooth brew of espresso or herbal tea can balance the garlic flavors well while providing a comforting finish.

Temperature considerations are essential; serve wines chilled for whites and allow reds to breathe slightly for optimal flavor development. Encourage your guests to explore different pairings to find their perfect complement.

Storage and Shelf Life

Proper storage of any leftovers from Spaghetti Aglio e Olio is important to maintain quality. Store in an airtight container in the refrigerator for up to three days. The pasta may absorb the oil and garlic flavor over time, which can slightly alter the texture.

For reheating, gently warm the dish in a saucepan over low heat, adding a splash of olive oil or a bit of reserved pasta water to restore moisture and flavor. Freezing is not recommended for this dish, as the texture may suffer upon thawing.

Signs of spoilage include off-smells or discoloration; always trust your senses to determine food safety.

Make Ahead Strategies

If you wish to prepare Spaghetti Aglio e Olio in advance, consider prepping the ingredients like chopping garlic, measuring olive oil, and even cooking pasta ahead of time. Store each component separately to maintain freshness and prevent sogginess.

To maximize flavor, allow the garlic to infuse in the olive oil for a longer duration before combining with the pasta. Remember to keep everything properly refrigerated and only mix them just before serving to preserve texture and aroma.

When layering flavors, consider adding fresh elements like parsley or cheese just before serving to ensure they maintain their vibrancy and freshness.

Scaling Instructions

Preparing larger portions of Spaghetti Aglio e Olio is a great way to serve more guests. Halving the recipe is straightforward; simply divide the ingredient amounts by two and follow the same cooking times.

To double or triple the recipe, keep in mind that you may need a larger pot for boiling pasta, and you might need to sauté in batches to avoid overcrowding the pan, which can affect flavor distribution.

Adjusting cooking times slightly may also be necessary, as larger quantities may require additional minutes for boiling; always taste to ensure proper doneness.

For storage considerations, larger batches may be kept in its entirety in airtight containers but be cautious of over-saturation of sauce upon reheating if serving multiple meals.

Nutritional Deep Dive

The macro breakdown of Spaghetti Aglio e Olio primarily leans on carbohydrates from the pasta and healthy fats from olive oil. This combination provides a good source of energy while being relatively low in protein.

In terms of micronutrient analysis, garlic plays a starring role, delivering important vitamins such as vitamin B6 and important minerals like manganese. The olive oil provides a dose of vitamin E and antioxidants, supporting overall health.

Health benefits of this dish range from providing a quick energy source to offering heart-healthy fats from olive oil. When combined with fresh herbs and vegetables, the dish can contribute to a balanced diet.

Dietary considerations are important; while Spaghetti Aglio e Olio may appear simple, it can be enjoyed in moderation as part of a larger balanced meal alongside proteins or leafy greens.

For portion analysis, a serving size of about one cup of cooked spaghetti allows for enjoyment without excessive calorie intake, supporting weight management goals.

Dietary Adaptations

For those seeking gluten-free options, look for high-quality gluten-free pasta to substitute directly. The cooking process remains the same, ensuring anyone can enjoy this classic dish.

Dairy-free adaptations are easily achieved by omitting cheese or using nutritional yeast as a substitute for a similar textural effect without compromising flavor.

Vegan options are straightforward; the original recipe is naturally vegan-friendly, containing no animal products. For extra texture, consider adding sautéed mushrooms to enhance the dish’s heartiness.

Low-carb dieters can enjoy spaghetti squash as a healthy alternative, which can mimic the texture of spaghetti while cutting down on carbohydrates significantly.

For those following keto diets, ensure that all ingredients are compliant, focusing on high-quality olive oils and non-starchy vegetables as accompaniments.

Troubleshooting Guide

Texture issues can arise if the pasta is overcooked; always check for al dente doneness and adjust timing as needed for perfect texture. If the sauce is too oily, consider combining it with a small amount of reserved pasta water for balance.

Flavor balance can be adjusted by adding additional salt or acidic components like lemon juice if the dish is overly bland. It’s important to season gradually and taste frequently.

Temperature problems occur when the dish sits too long after preparation. To maintain warmth, cover with foil during any downtime until you are ready to serve.

Equipment challenges often arise from using inadequate pasta pots; ensure you pick a large enough pot to accommodate the spaghetti without sticking.

Ingredient substitutions can be tricky; always aim to replace with similar textures or flavors, such as using shallots instead of garlic for a milder taste.

Timing concerns are commonly faced; having everything prepped ahead of time allows for a more straightforward execution, making the cooking process efficient and manageable.

Recipe Success Stories

Community feedback on this dish is overwhelmingly positive, with many people praising its simplicity and flavor. Many readers have shared their creative adaptations, incorporating seasonal vegetables or proteins that suit their dietary needs.

Variation successes have been reported with the addition of fresh basil or even roasted garlic, enhancing the dish’s flavor profile and adding an exciting twist to a classic.

Adaptation stories often include family traditions, where readers recall making this dish with loved ones as a cherished recipe passed down through generations, highlighting its authenticity and importance.

Photography tips for showcasing the dish include using natural light to capture the vibrant colors and plating techniques that highlight the spaghetti’s glossy texture, encouraging readers to share their culinary creations online.

Frequently Asked Questions

Q: Can I make Spaghetti Aglio e Olio in advance?
A: Yes, you can prep ingredients ahead of time, storing them separately until you’re ready to cook for optimal freshness.

Q: What can I add for more protein?
A: To enhance nutritional value, consider adding shrimp, chicken, or even chickpeas for a hearty vegan option.

Q: What type of parsley is best?
A: Flat-leaf parsley is preferred for its robust flavor, but curly parsley can be used for a different texture and presentation.

Q: Can I use other types of pasta?
A: Absolutely! While spaghetti is traditional, feel free to experiment with linguine, fettuccine, or even gluten-free varieties.

Q: Is it necessary to use red pepper flakes?
A: Red pepper flakes contribute heat; however, you can adjust the amount to suit your taste or leave them out altogether.

Q: What should I serve with this dish?
A: Consider accompanying it with a simple salad, garlic bread, or roasted vegetables to create a well-rounded meal.

Q: Can this recipe be doubled?
A: Yes, simply increase the ingredient amounts accordingly, but be mindful of cooking in batches to achieve the best flavor.

Q: How do I make this dish vegan?
A: The original recipe is already vegan-friendly; just ensure no cheese is added, or use a dairy-free alternative.

Q: How can I elevate the flavors further?
A: Consider adding fresh herbs, lemon zest, or a splash of white wine to boost the dish’s complexity.

Q: Why is my garlic bitter?
A: Garlic can become bitter if cooked too quickly or at too high of a temperature; always sauté on low to medium heat for best results.

Additional Resources

Enhance your cooking repertoire with related recipes such as classic marinara sauce or creamy carbonara to further explore Italian cuisine. Technique guides on pasta-making can enrich your culinary skills, while ingredient information can help deepen your understanding of Mediterranean diets.

Explore equipment recommendations for essential kitchen tools such as pasta pots, strainers, and quality knives to assist in your cooking endeavors. Seasonal variations can keep your dishes versatile, allowing you to incorporate fresh, local ingredients into family favorites.

Join the Conversation

Share your experiences with Spaghetti Aglio e Olio on social media using our hashtag and engage with fellow cooking enthusiasts! Photography tips for capturing your creation can enhance your culinary showcase online.

Recipe reviews and community engagement create a wonderful atmosphere for exchanging tips and ideas, contributing to a collective love for this classic Italian dish. Encourage variations by inviting your followers to share their twists and adaptations.

The Recipe

Spaghetti Aglio e Olio

Serves: 4

Prep Time: 10 mins

Cook Time: 15 mins

Total Time: 25 mins

Kitchen Equipment Needed

  • Large pot for boiling pasta
  • Sauté pan or skillet
  • Measuring cups and spoons
  • Pasta tongs or fork

Ingredients

  • 12 ounces spaghetti
  • 6 cloves garlic, thinly sliced
  • 1/2 cup extra virgin olive oil
  • 1 teaspoon red pepper flakes (or to taste)
  • 1/4 cup fresh parsley, chopped
  • Salt, to taste

Directions

  1. Bring a large pot of salted water to a boil. Add the spaghetti and cook according to package instructions until al dente.
  2. While the pasta is cooking, heat the olive oil in a large sauté pan over low heat. Add the sliced garlic and red pepper flakes, stirring occasionally until the garlic is golden but not burned.
  3. Once the pasta is cooked, reserve 1/2 cup of pasta water, then drain the spaghetti.
  4. Add the drained spaghetti to the sauté pan, tossing it quickly with the garlic oil to incorporate all the flavors. If the pasta seems dry, add reserved pasta water gradually until desired consistency is reached.
  5. Remove from heat, stir in the fresh parsley, and season with salt to taste. Serve warm.

Recipe Notes

  • This dish is best enjoyed immediately. If making ahead, add the parsley just before serving for optimal freshness.
  • Feel free to experiment by adding different proteins or vegetables according to personal preference!

Delicious Stuffing Balls Recipe for Your Holiday Gatherings

Irresistible Stuffing Balls: A Perfect Holiday Delight

⚖️
Difficulty
Easy

⏲️
Prep Time
20 mins

🕒
Cook Time
30 mins

⏱️
Total Time
50 mins

🍽️
Servings
6-8 servings

As the holiday season approaches, nothing brings the family together quite like homemade stuffing balls. These delectable bites are a delightful twist on the traditional stuffing, combining rich flavors and a perfect texture that will have your guests reaching for seconds. Made from a blend of bread, herbs, and spices, these stuffing balls become golden and crisp on the outside while remaining fluffy and moist inside. Their classic combination of savory notes with aromatic touches of sage and thyme evokes warmth and nostalgia that we associate with our best family gatherings.

Preparing stuffing balls allows the comforting aroma of garlic and onions to fill your kitchen, creating an inviting atmosphere. Each bite bursts with flavor, thanks to the integration of fresh herbs and hearty ingredients that truly showcase the essence of home-cooked meals. Whether serving them as a side dish for your Thanksgiving feast or incorporating them into a winter dinner party, these stuffing balls will surely impress your guests and become a family favorite.

Quick Recipe Highlights

  • Flavor Profile: The stuffing balls are savory with hints of garlic, onion, sage, and thyme, perfectly balanced with the rich taste of butter and chicken broth.
  • Texture: Achieving a satisfying crunch on the outside while maintaining a tender, fluffy interior is the hallmark of great stuffing balls.
  • Aroma: A warm, inviting scent fills your kitchen with garlicky goodness and aromatic herbs, reminiscent of family gatherings.
  • Visual Appeal: These golden brown balls are visually enticing, making your holiday table a feast for the eyes.
  • Skill Level Needed: This recipe is beginner-friendly, requiring basic cooking techniques that anyone can master.
  • Special Equipment: You’ll need a mixing bowl, a baking sheet, and parchment paper for easy clean-up.

Recipe Overview

  • Difficulty Level: Easy; making stuffing balls involves straightforward steps that require minimal cooking skills, making them accessible for everyone.
  • Category: This recipe falls into the appetizer or side dish category, perfect for holiday meals and family gatherings.
  • Cuisine: Stuffing has roots in both American and European culinary traditions, often associated with festive occasions and comfort food.
  • Cost: This budget-friendly recipe utilizes affordable ingredients, making it economical to prepare for large gatherings.
  • Season: Ideal for the fall and winter months, stuffing balls shine during Thanksgiving and Christmas celebrations.
  • Occasion: Perfect for holiday gatherings, potlucks, and family dinners, these stuffing balls are a crowd-pleaser.

Why You’ll Love This Recipe

Stuffing balls offer a unique blend of taste and texture that elevates any meal. Their savory, herb-infused flavor transports you to a cozy cabin in the woods, where family stories are shared around the table. The crispy exterior pairs beautifully with the tender interior, resulting in a delightful mouthfeel that keeps you returning for more.

Beyond taste, the convenience of making stuffing balls is unparalleled. They can be prepared ahead of time and baked just before serving, allowing for a stress-free cooking experience during festive occasions. Their ability to be frozen and reheated further enhances their appeal, making them a go-to recipe for busy hosts.

Nutritionally, these stuffing balls can be made with wholesome ingredients such as whole-grain bread and fresh vegetables, providing a nutritious side without compromising on flavor. You can easily adapt the recipe to include nutrient-dense ingredients like spinach or mushrooms.

Socially, stuffing balls invite sharing and camaraderie. As an interactive dish, guests can enjoy them straight from a platter, fostering a warm, inviting atmosphere that encourages conversation and connection.

Finally, the cost-effectiveness of this recipe makes it an ideal choice for large gatherings. Utilizing simple pantry staples means you can feed a crowd without breaking the bank, allowing everyone to enjoy a satisfying meal together.

Historical Background and Cultural Significance

Stuffing, in its various forms, has been a part of culinary traditions for centuries, with origins tracing back to ancient civilizations that utilized herbs and grains to fill meats. The practice of stuffing food items is prevalent in many cultures, each with its signature ingredients and spices. In the United States, stuffing has taken on a life of its own, particularly associated with Thanksgiving, symbolizing abundance and gratitude.

The cultural importance of stuffing cannot be understated; it represents togetherness during festive occasions, allowing families to connect over a shared meal. The evolution of stuffing balls showcases the creative ways cooks have adapted traditional recipes to meet nutritional trends and dietary preferences, resulting in a dish that resonates with a broader audience.

Regional variations abound, with Southern-style stuffing often incorporating cornbread, while Northerners prefer a bread-based approach. These adaptations highlight the diversity of ingredients and flavors that different cultural backgrounds bring to the table.

Ingredient Deep Dive

  • Bread: Bread is the heart of stuffing balls. It provides structure and texture. Whole grain varieties add more fiber, while white bread offers a classic taste. When selecting, choose day-old bread for better absorption of liquids. Store leftover bread in a cool, dry place, and consider freezing to prevent spoilage.
  • Herbs: Fresh herbs like sage, thyme, and parsley are integral to the flavor profile. Sage traditionally symbolizes wisdom and has cultural significance in many cuisines. Nutritionally, fresh herbs provide antioxidants and vital nutrients. Always opt for vibrant, fragrant herbs at the market, and store them in the refrigerator to maintain freshness.

Common Mistakes to Avoid

  • Using fresh bread that is too soft can lead to soggy stuffing balls. Make sure to use slightly stale bread for the best texture.
  • Not letting the onion and garlic cook down properly before mixing can result in a harsh flavor in your stuffing balls.
  • Overmixing the dough may lead to dense stuffing balls rather than fluffy, tender bites. Mix just until combined.
  • Skipping the moisture-control step can result in dry stuffing balls. Always ensure you have enough broth to moisten the bread adequately.
  • Not seasoning thoroughly can cause blandness. Make sure to taste and adjust the seasoning before baking.
  • Baking at too high a temperature can cause the outside to burn while the inside remains undercooked. Follow the recommended baking temperature closely.
  • Ignoring the resting time after baking means losing the golden crisp texture. Allow them to sit for a few minutes before serving.
  • Not checking for doneness can lead to inconsistent cooking. Use a thermometer to ensure they reach an internal temperature of 165°F.

Essential Techniques

Each technique plays a crucial role in ensuring the success of your stuffing balls. Chopping vegetables finely allows for an even distribution of flavors while sautéing them to release their natural sweetness. Mastering the sauté technique holds the key to infusing the stuffing balls with rich depth, and always cook them until they are golden brown.

Properly cubing the bread is another essential technique. The right cube size ensures even absorption of the broth while allowing for a pleasant bite when cooked. Aim for ½-inch cubes; smaller pieces may lead to mushiness. Don’t forget to allow the stuffing to cool slightly before combining it with the other ingredients, preventing clumping and ensuring a thorough mix.

Pro Tips for Perfect Stuffing Balls

To elevate your stuffing balls, start with artisanal bread for a richer flavor. You can experiment with a mix of different breads like sourdough or rye for an interesting taste.

Don’t shy away from adding mix-ins like cranberries, nuts, or sausage to enhance texture and create unique flavor profiles.

Be generous with your broth—your stuffing balls should be moist, but not overly soggy. Adjust the liquid content to your desired consistency.

Chill your stuffing mixture for at least 30 minutes before forming into balls, which helps them hold their shape during baking.

Consider using a combination of butter and olive oil for a delicious flavor boost and a lovely golden color on the outside.

Experiment with various herbs and spices that suit your palate. A pinch of nutmeg or a dash of cayenne can transform your stuffing balls into a standout dish.

Don’t overcrowd the baking sheet; space them out to ensure that they crisp up nicely on all sides.

Finally, garnish with fresh herbs right before serving to add freshness and visual appeal to your dish.

Variations and Adaptations

Stuffing balls can be easily tailored to suit various tastes and dietary preferences. For a regional twist, try Southern-style stuffing balls incorporating cornbread and spices typical of the South.

In the spirit of the seasons, consider seasonal adaptations by adding roasted pumpkin or butternut squash during fall or incorporating herbs that are vibrant in spring.

For dietary modifications, there are numerous options; swap regular bread for gluten-free alternatives without compromising taste. Vegan diets can be accommodated by using vegetable broth and plant-based butter.

Explore flavor variations by adding cheeses like parmesan or cheddar for a creamy finish or even sun-dried tomatoes for a Mediterranean flair.

Regarding texture modifications, consider experimenting with panko breadcrumbs or crushed nuts for added crunch.

Finally, for presentation, stuffing balls enveloped in a savory gravy or served on a bed of fresh greens can create an elegant dining experience.

Serving and Presentation Guide

When it comes to serving your stuffing balls, plating them beautifully enhances the meal experience. Arrange them in a cast iron skillet or rustic wooden bowl for an inviting look. Garnish with fresh herbs like parsley or thyme to add visual interest and a dash of color.

Traditional accompaniments may include gravy or cranberry sauce, both of which complement the flavors beautifully. Modern twists could feature a drizzle of balsamic reduction for added sophistication.

Consider serving them warm rather than hot to ensure a tender texture and full flavor enjoyment. For portion control, aim for about two to three balls per person, adjusting based on other sides being served.

Wine and Beverage Pairing

Pairing wine with stuffing balls can enhance the dining experience significantly. A medium-bodied Chardonnay, with its rich notes, complements the savory flavors of the stuffing. Alternatively, opt for a light-bodied Pinot Noir, which offers subtle berry notes that contrast beautifully with the herbs.

For non-alcoholic options, consider serving sparkling apple cider, providing a refreshing sweetness that blends well with the savory profile of your dish. If coffee or tea is more to your taste, a gently brewed herbal tea can provide a warm, calming finish to the meal.

Pay attention to temperature—if serving white wines, aim for a chilled bottle at around 50°F, while reds are best at room temperature, around 65°F.

Storage and Shelf Life

Proper storage is essential to maintain the quality of your stuffing balls. Store them in an airtight container in the refrigerator for up to three days. If you’d like to maximize their shelf life, freezing is a great option. They can last for up to three months in the freezer.

To reheat, place frozen stuffing balls directly in the oven at 350°F for 15-20 minutes until heated through. Make sure to check for any signs of spoilage, such as off-odors or changes in texture before consuming.

For best results, use a wide, shallow container for storage, allowing the balls to cool fully before transferring them, which helps prevent condensation.

Make Ahead Strategies

Preparing stuffing balls ahead of time removes stress when hosting. You can assemble your mixture a day in advance and refrigerate it until you’re ready to form and bake the balls.

Alternatively, you can shape them and freeze them before baking. When you’re ready to serve, take them out of the freezer and bake them directly, giving you freshly baked goodness within minutes.

Consider cooking them the day before and then reheating them in the oven for a crispy texture before serving. To keep their flavor fresh, add any sauces or garnishes just before serving to enhance visual appeal.

Scaling Instructions

Scaling your stuffing ball recipe is straightforward. For a smaller gathering, halve the ingredients while adjusting the baking time as necessary.

If you’re hosting a large event, you can double or even triple the recipe. Just ensure that you have ample cooking sheets and oven space to accommodate the increased batch.

Adjusting cooking time may be necessary, so keep an eye on their color and texture during the bake. For storage, ensure that scaled amounts are appropriately labeled to avoid confusion later.

Nutritional Deep Dive

An estimated serving of stuffing balls provides a moderate caloric density with balanced macronutrients. The nutritional breakdown typically reveals a healthy dose of carbohydrates from the bread, protein from any added meats, and fats from butter or oil.

Micronutrient analysis highlights vitamins and minerals present from the herbs and vegetables used, including Vitamin K from sage and antioxidants from garlic. Incorporating whole-grain bread enhances fiber content, benefiting digestive health.

For those mindful of their diet, consider portion analysis to keep servings in check. By substituting higher-fat ingredients for lighter alternatives, you can also easily manage calorie counts without sacrificing flavor.

Dietary Adaptations

When catering to diverse dietary needs, consider gluten-free bread alternatives made from rice flour or chickpea flour, ensuring delicious results for those avoiding gluten.

For dairy-free options, plant-based butter and non-dairy milk can seamlessly replace traditional ingredients, maintaining the integrity of the flavors while being suitable for vegans.

For those practicing low-carb diets, experiment with cauliflower or almond flour-based stuffing balls that remain satisfying without the excess carbohydrates.

Keto enthusiasts can delight in stuffing balls made from cheese and almond flour, ensuring they fit within dietary restrictions while still delivering on taste.

Other specific diets, such as Paleo and Low-FODMAP, can be accommodated through ingredient swaps that align with those eating lifestyles.

Troubleshooting Guide

If you encounter texture issues, such as sogginess, ensure the proper bread type and moisture content balance. Stale bread absorbs liquid better, creating a desirable stuffing ball.

Flavor balance can be tricky; consider adjusting the seasoning with more salt or herbs until the mixture resonates with your palate. If your stuffing balls turn out dry, adding a bit of broth to the mixture can help.

Temperature problems can arise, either undercooking or overbaking. Using a thermometer to check the stuffing ball’s internal temperature ensures they’ve reached the desired doneness at 165°F.

For equipment challenges, ensure that your baking sheet is adequately sized to accommodate the balls without overcrowding, allowing for even cooking.

If you find yourself without a required ingredient, explore substitutions, and always taste throughout the process to maintain flavor integrity.

Timing concerns may also arise; depending on the size of your stuffing balls, baking time will vary. Adjust according to how you shape them and watch for golden perfection.

Recipe Success Stories

Community feedback has been overwhelmingly positive, with many readers sharing how stuffing balls became the highlight of their holiday gatherings. Through variation successes, some home cooks discovered creative additions like jalapeños for a spicy kick, proving that these stuffing balls can easily adapt to regional preferences and personal tastes.

Adaptation stories abound as well; readers have shared experiences of transforming the traditional stuffing into themed concepts for casual get-togethers, making worthy companions for casual picnics or potlucks.

Photographers also love capturing the beautiful golden morsels on their tables, spreading inspiration across social media platforms. The comments section is filled with tips and variations that highlight the versatility of stuffing balls.

Bringing together countless stories from those that made this recipe part of their routine has created a shared culinary experience centered on tradition and family.

Frequently Asked Questions

Can I make stuffing balls ahead of time? Yes! You can prepare the mixture a day in advance and store it in the refrigerator until you are ready to bake it. Alternatively, shape the balls and freeze them before baking for up to three months.

Can I use different types of bread? Absolutely! Feel free to experiment with various breads, such as sourdough, rye, or whole wheat. Just ensure to use a slightly stale bread for optimal texture.

How do I know if the stuffing balls are done? Use a food thermometer to check the internal temperature, which should reach 165°F. The balls should appear golden brown and slightly crispy.

Can I add meat to my stuffing balls? Yes! Ingredients such as cooked sausage or bacon can be incorporated into the mixture for a heartier dish with extra flavor.

What if my mixture is too dry? If your mixture feels too dry, adjust the moisture by gradually adding more broth until you reach a better consistency.

Can I freeze leftover stuffing balls? Yes! Store any leftovers in an airtight container and freeze them for up to three months. Reheat in the oven for best results.

Are stuffing balls gluten-free? You can make gluten-free stuffing balls by using gluten-free bread options. Many stores offer suitable alternatives that work well in this recipe.

What’s the best way to reheat stuffing balls? The best way to reheat stuffing balls is in a preheated oven at 350°F for about 15-20 minutes, ensuring they are heated through without losing texture.

Can I make stuffing balls without eggs? Yes! As this recipe does not require eggs, it remains vegan-friendly. If you want to bind the mixture further, consider adding flaxseed meal mixed with water.

How do I store leftover stuffing balls? Store any leftovers in an airtight container in the refrigerator for up to three days. For longer storage, make sure to freeze them.

Additional Resources

For those looking to expand their culinary repertoire, consider exploring related recipes that incorporate stuffing with other ingredients. Check out techniques for preparing homemade broth for even richer flavors or delve into ingredient guides that highlight seasonal produce for flavorful additions.

Equipment recommendations can also help streamline your cooking process. Investing in high-quality mixing bowls, sharp knives for chopping, and reliable baking sheets can elevate your efficiency in the kitchen. Testing out seasonal variations will introduce exciting elements to your digest while satisfying your cravings.

Join the Conversation

We would love to hear your thoughts and experiences with these delicious stuffing balls! Share your culinary triumphs or any variations you’ve tried that made this recipe your own. Take stunning photos of your creations and tag us on social media; we’d be thrilled to see your success stories.

Your feedback, reviews, and suggestions are invaluable as we continue to create flavorful, community-driven recipes. Join our online community, and let’s inspire each other to infuse our kitchens with wonderful flavors and cherished memories.

The Recipe

Stuffing Balls

Serves: 6-8 servings

Prep Time: 20 mins

Cook Time: 30 mins

Total Time: 50 mins

Kitchen Equipment Needed

  • Mixing bowl
  • Baking sheet
  • Parchment paper
  • Measuring cups and spoons
  • Food thermometer

Ingredients

  • 4 cups day-old bread, cubed
  • 1 cup chicken or vegetable broth
  • 1 medium onion, finely chopped
  • 2 garlic cloves, minced
  • 1 teaspoon dried sage
  • 1 teaspoon dried thyme
  • 1 teaspoon salt
  • ¼ teaspoon black pepper
  • ½ cup butter, melted
  • Fresh parsley, for garnish

Directions

  1. Preheat your oven to 350°F (175°C) and line a baking sheet with parchment paper.
  2. In a skillet over medium heat, melt half of the butter and sauté the onions and garlic until translucent, about 5 minutes.
  3. In a large mixing bowl, combine the cubed bread, cooked onion and garlic, dried herbs, salt, and pepper.
  4. Pour in the broth and the remaining melted butter, mixing until the ingredients are fully combined but not overly mushy.
  5. Shape the mixture into balls about 2 inches in diameter and place them on the prepared baking sheet.
  6. Bake for 25-30 minutes until golden brown and crispy on the outside.
  7. Garnish with fresh parsley before serving.

Recipe Notes

  • Feel free to add in cooked sausage or nuts for added flavor and texture.
  • These stuffing balls can be frozen before baking and then baked directly from the freezer.
  • Adjust seasoning to your taste; herbs can be varied based on personal preference.

Delicious Grilled Steak Tacos: A Perfect Recipe for Tasty Meals

Grilled Steak Tacos: A Flavorful Delight for Your Taste Buds

⚖️
Difficulty
Easy

⏲️
Prep Time
15 mins

🕒
Cook Time
10 mins

⏱️
Total Time
25 mins

🍽️
Servings
4

Grilled steak tacos are the perfect marriage of robust flavors and mouthwatering textures that will tantalize your taste buds. Imagine succulent slices of seasoned steak wrapped in warm tortillas, topped with fresh vegetables, zesty lime, and a hint of salsa. This dish is not just a meal but a celebration of culinary joy that can bring friends and family together for any occasion. The aroma of grilling meat fills the air, promising a feast that’s as satisfying to the palate as it is to the soul.

The beauty of grilled steak tacos lies in their simplicity and versatility. You can customize each taco to your liking, making it easy to cater to different tastes and preferences. Think about the contrast of grilled steak’s savory richness paired with cool, crunchy slaw and fresh pico de gallo. Each bite is an explosion of flavors and textures—smoky, spicy, and bright, all united in one delightful package. Whether it’s a casual weeknight dinner or a lively weekend gathering, these tacos are sure to impress and make any meal special.

Quick Recipe Highlights

  • Flavor Profile: Grilled steak provides a savory and smoky flavor, perfectly complemented by fresh toppings.
  • Texture: A combination of tender steak, soft tortillas, and crunchy toppings gives a delicious mouthfeel.
  • Aroma: The smoky scent of grilled steak mixed with fresh herbs and spices creates an inviting atmosphere.
  • Visual Appeal: Vibrant colors from fresh veggies and garnishes make this dish as visually stunning as it is tasty.
  • Skill Level Needed: This recipe is straightforward and suitable for novice cooks and seasoned chefs alike.
  • Special Equipment: A grill or grill pan is essential for achieving that perfect char on the steak.

Recipe Overview

  • Difficulty Level: This recipe is easy to execute, making it perfect for beginner cooks or those looking for a quick meal solution.
  • Category: Grilled steak tacos fit well into the lunch and dinner categories, versatile enough for any mealtime.
  • Cuisine: With roots in Mexican cuisine, these tacos reflect a rich culinary tradition that celebrates fresh ingredients and vibrant flavors.
  • Cost: The ingredients are budget-friendly, making this a cost-effective meal option for families or gatherings.
  • Season: Grilled steak tacos are ideal for warm weather, especially during barbecues and outdoor events when grilling is more common.
  • Occasion: Perfect for casual gatherings, game days, or any occasion where friends and family come together to enjoy delicious food.

Why You’ll Love This Recipe

One of the main reasons you will adore grilled steak tacos is their amazing taste and texture appeal. The seasoned steak grilled to perfection offers a savory depth that will leave you craving more. Pairing it with fresh veggies adds a refreshing crunch, while the warm tortilla provides the ultimate comfort. Together, these components create a well-rounded meal that’s satisfying and delightful.

In terms of convenience, grilled steak tacos require very little prep work and cook time, making them an ideal choice for busy weeknights. You can marinate the steak ahead of time or even grill extra for another meal, reducing your kitchen time significantly. Quick and easy, these tacos bring freshness to your table without the fuss.

From a nutritional perspective, using quality ingredients means you can enjoy a balanced meal. Lean steak offers protein and essential nutrients, while the fresh toppings contribute vitamins and minerals. Unlike many takeout options, grilled steak tacos allow you to control what goes into your meal, making it a healthier choice.

These tacos also shine in social settings. The interactive element of assembling your own tacos encourages connection and conversation among guests. Whether you’re hosting a party or a casual get-together, serving grilled steak tacos creates an inviting atmosphere that’s perfect for mingling.

Moreover, grilled steak tacos are cost-effective. The ingredients are affordable and readily available at most grocery stores. The ability to feed a crowd with minimal expense makes this recipe an accessible option for anyone looking to make delicious homemade food that won’t break the bank.

Historical Background and Cultural Significance

Grilled steak tacos have a rich history rooted in Mexican culinary traditions. The taco, a staple of Mexican cuisine, has evolved over centuries and embodies the art of combining simple ingredients for maximum flavor. Originally, tacos were made with whatever ingredients were readily available, showcasing the resourcefulness of Mexican families.

The cultural importance of tacos extends beyond mere nourishment; they represent community, family gatherings, and celebrations. People often come together to share meals, creating bonds and memories. Grilled steak tacos, with their savory filling, have become a popular choice for both casual gatherings and festive occasions.

Over time, this recipe has evolved and adapted to various regions, infusing local tastes and flavors. Different parts of Mexico showcase unique takes on tacos, from street vendor-style to artisanal versions found in restaurants. This adaptability has allowed grilled steak tacos to thrive globally.

Today, you can find grilled steak tacos served in homes and restaurants worldwide, celebrating the diverse flavors and ingredients of various cultures. Their popularity is a testament to the taco’s ability to bridge culinary traditions and create a sense of community at the dining table.

Ingredient Deep Dive

Steak: A quintessential ingredient in grilled steak tacos, steak provides rich, savory flavor and essential protein. When selecting steak, opt for cuts like flank or skirt for optimal tenderness. Look for bright red color and minimal fat. Store in the coldest part of the fridge to maintain freshness, and use within a few days. These cuts are ideal for marinating and grilling, ensuring delicious results.

Tortillas: Tortillas serve as the foundation for tacos, holding all the flavorful fillings together. Corn varieties are traditional in Mexican cuisine, prized for their gluten-free properties and distinct taste. When choosing tortillas, look for those made with simple ingredients. For storage, keep them in an airtight bag in the refrigerator. You can also find whole wheat or low-carb options to suit dietary preferences.

Common Mistakes to Avoid

  • Overcooking the steak: Ensure you monitor the cooking time to prevent toughness. Use a meat thermometer to check for doneness.
  • Using pre-packaged tortillas: Fresh, homemade or high-quality tortillas elevate the flavor and texture of your tacos.
  • Not letting steak rest: Allowing the steak to rest before slicing helps retain juices for a more flavorful bite.
  • Overstuffing the tacos: Too much filling can cause the tortillas to tear. Find a good balance for best results.
  • Skipping the seasoning: Seasoning the steak is essential for depth of flavor; don’t be afraid to be generous.
  • Neglecting fresh toppings: Fresh ingredients like cilantro and lime enhance the overall flavor and make a huge difference.
  • Using cold ingredients: Take all ingredients out ahead of time to let them reach room temperature for better flavor and integration.
  • Ignoring cleaning the grill: A clean grill ensures the best flavor and prevents sticking while cooking the steak.

Essential Techniques

Grilling the steak: This is a crucial technique that brings out the flavors through direct heat. Preheat your grill and ensure it’s clean for even cooking. Familiarize yourself with cooking times for different meat cuts to achieve the desired doneness without inadvertently overcooking.

Assembling the tacos: Mastering the art of taco assembly will enhance your dining experience. Start with the tortilla and layer your ingredients thoughtfully, balancing flavors and textures to create an inviting presentation. Common pitfalls include adding too many toppings, making it hard to eat, so keep it simple yet satisfying.

Pro Tips for Perfect Grilled Steak Tacos

1. Choose quality meat for the best flavor and tenderness. Look for marbled cuts with good fat content.

2. Marinate the steak for at least 30 minutes to infuse flavor; do it overnight for superb taste.

3. Preheat the grill for even cooking and to achieve those desirable grill marks.

4. Use a two-zone fire method for better control over the cooking process.

5. Experiment with different citrus juices in your marinade to add unique flavors.

6. Ensure all toppings are prepared and ready to use before cooking the steak to make assembly easier.

7. Use a quick-cooking method for the tortillas, warming them briefly on the grill to enhance flavor.

8. Garnish each taco with a squeeze of lime to brighten the flavors of the dish.

Variations and Adaptations

Grilled steak tacos can be customized based on regional preferences. In California, for example, you may find tri-tip steak used, while in Texas, brisket could be a popular choice. Seasonal adaptations include adding peach salsa in the summer for a touch of sweetness, whereas hearty roasted vegetables are perfect for fall.

Dietary modifications also abound. To make grilled steak tacos gluten-free, simply switch to corn tortillas. For a healthier twist, consider using lean cuts of meat or grilling vegetables exclusively, creating delicious vegetarian options. Flavor variations can be accomplished with unique spice blends or marinades, adapting to taste preferences effortlessly.

Texture modifications also add an interesting element. Try adding crispy fried onions on top of the usual toppings for a crunchy contrast or switching to soft flour tortillas for a different mouthfeel. Presenting tacos on vibrant serving platters adorned with colorful garnishes can create a feast for the eyes.

Serving and Presentation Guide

To create an appealing presentation, stack the tacos neatly on a platter with ample space to avoid overwhelming the table. Garnish with fresh herbs, lime wedges, and vibrant salsas. Use colorful napkins and enhance the table with bright decorations to evoke a festive atmosphere. For modern serving suggestions, consider using small wooden boards or slate plates to amplify the rustic appeal.

When serving, keep in mind temperature considerations. Tacos can be served warm for maximum flavor; hence, assembly should be near the grill. Control portions by offering smaller servings, allowing guests to sample a variety of toppings and flavors throughout their meal. This also encourages interaction as diners create their customized tacos.

Wine and Beverage Pairing

When it comes to wine pairings, a robust red like a Cabernet Sauvignon or a Malbec complements the toppings and richness of the steak beautifully. For a lighter option, consider a zesty Sauvignon Blanc that balances the dish’s savory flavor with its freshness. If you prefer non-alcoholic alternatives, refreshing agua fresca or sparkling water with lime offers an excellent counterpart.

For coffee lovers, consider a medium roast brewed with a hint of nuttiness to pair well with the savory elements. Ensure that all beverages are served chilled, especially if you are enjoying this dish on a warm day. This enhances the eating experience, allowing flavors to shine brighter.

Storage and Shelf Life

Properly storing grilled steak tacos is crucial for maintaining freshness. Keep cooked steak in an airtight container and refrigerate for up to three days. If you want to store tacos, consider keeping all components separate to prevent sogginess. Reheat the steak in a hot skillet or microwave, and quickly warm the tortillas to restore their softness.

To extend shelf life, steak can be frozen in portions, maintaining quality for up to three months. For optimal results, wrap portions in freezer bags, ensuring to remove as much air as possible. Before consuming, thaw in the refrigerator overnight and reheat thoroughly, taking care to bring the flavors back to life.

Make Ahead Strategies

For a smoother cooking experience, consider a prep timeline that allows for marinating the steak in advance—ideally overnight. Chop fresh toppings ahead of time and store them in separate containers in the fridge, ready for assembly. This cuts down on prep time to just minutes before serving, bringing everything together efficiently.

When it comes to assembling your tacos, do so close to serving time to ensure the freshness of the toppings remains intact. If you need to prepare tacos earlier, wrap them in foil and keep them warm in the oven at low heat. Add fresh ingredients just before serving for maximum flavor.

Scaling Instructions

To halve the recipe, simply divide the amount of each ingredient in half while monitoring cooking times and temperatures closely. Doubling or tripling the recipe is straightforward—consider using larger mixing bowls and trays for assembly, ensuring you have ample space. Adjust your grill usage and cook in batches to maintain optimal grilling temperatures.

When scaling, remember to taste and adjust seasoning as needed, particularly with larger quantities. Be sure to increase cooking times proportionally, taking into account how the increased volume of ingredients may affect heat distribution. Provide ample space around tacos when storing to prevent any unpleasant compressing during refrigeration.

Nutritional Deep Dive

The nutritional profile of grilled steak tacos can be quite balanced. Each taco contains protein from the steak, important for muscle recovery and maintenance. The fiber from tortillas and fresh veggies adds dietary benefits, promoting digestive health.

In terms of micronutrients, the combination offers essential vitamins and minerals from veggies, providing antioxidants while the steak contributes iron and zinc. Being mindful of portion sizes can help with weight management, while opting for lean cuts and fresh ingredients ensures a nutritious meal.

Dietary Adaptations

For gluten-free variations, select corn tortillas and ensure no cross-contamination in cooking equipment. A dairy-free approach can involve omitting cheese or using alternatives like cashew cream. To make these tacos vegan, simply replace the steak with grilled mushrooms or jackfruit, presenting a satisfying texture alongside robust flavors.

For low-carb options, substitute tortillas with lettuce wraps, creating an excellent vessel for all fillings. Keto enthusiasts can also enjoy modified versions using cauliflower rice instead of tortillas. Embrace creativity with flavors and presentation to cater to various dietary preferences without losing the essence of grilled steak tacos.

Troubleshooting Guide

If your steak turns out tough, reconsider your cooking method, adjusting heat levels to find the sweet spot for your meat cut. If flavors lack balance, ensure proper seasoning is applied; sometimes a burst of lime juice can enhance overall taste dramatically.

Temperature issues may arise if the grill is not preheated adequately. Always allow time for the grill to reach the desired heat before cooking. Ingredient substitutions can affect texture and flavor, so familiarize yourself with how different ingredients interact before making changes to the recipe.

Recipe Success Stories

Community feedback often highlights how grilled steak tacos become a favorite in family meal rotations. Many readers appreciate how adaptable the recipe is, sharing personal variations that showcase local ingredients or family traditions. Success stories often include tips for enhancing flavor or presentation, successfully inspiring fellow cooking enthusiasts.

Photography tips for this recipe frequently mention capturing the colorful presentation and grill marks on the steak. Highlights of flavors and ingredients entice readers while encouraging them to try the recipe at home. Each success story reinforces the idea that grilled steak tacos are not just a meal; they’re an experience.

Frequently Asked Questions

1. What type of steak is best for grilled tacos? Flank, skirt, and sirloin cuts are excellent choices for grilled steak tacos as they are flavorful and tender when cooked properly.

2. Can I use a grill pan instead of an outdoor grill? Absolutely! A grill pan can achieve similar results, providing those sought-after grill marks and smoky flavors indoors.

3. How do I prevent my tortillas from tearing? Warm the tortillas gently before assembling the tacos, and avoid overstuffing them to keep them intact.

4. What toppings are recommended for steak tacos? Traditional toppings include fresh cilantro, diced onions, and pico de gallo, but feel free to add avocado, cheese, and jalapeños for extra flavor.

5. Can I prepare the steak in advance? Yes! Marinating and cooking the steak ahead of time is a great time-saver, simply reheat before assembling the tacos.

6. Are these tacos suitable for meal prep? Yes! Store ingredients separately in the refrigerator to keep them fresh for several days, allowing easy assembly during the week.

7. How can I make these tacos spicier? Incorporate spicy salsa or pickled jalapeños as toppings for an extra kick, or mix chili powder into your marinade for a zestier steak.

8. Can I freeze grilled steak tacos? It’s best to freeze the cooked steak separately and warm it up fresh when ready to eat, as the tortillas do not freeze well.

9. How do I know when the steak is done? Use a meat thermometer to check for doneness; for medium-rare, aim for 130°F to 135°F.

10. What sides pair well with grilled steak tacos? Consider serving with Mexican rice, beans, or a fresh salad for a complete meal that complements the tacos.

Additional Resources

To explore more delicious recipes, be sure to wander through our collection of taco-inspired dishes that celebrate vibrant flavors. Technique guides for grilling and marinating can enhance your culinary skills, making cooking enjoyable. A deep dive into ingredient information helps you make the best choices for your meals, from selecting high-quality meats to finding the freshest produce.

Don’t miss out on equipment recommendations for the best grills or pans to achieve perfect grilling results. Seasonal variations can keep meals exciting, inspiring you to explore new options throughout the year.

Join the Conversation

Share your experiences with grilled steak tacos on social media! We encourage you to post pictures of your creations, any unique twists on the recipe, and your feedback. Engaging with our cooking community fosters connection and broadens culinary horizons, as fellow food enthusiasts share tips and inspiration.

The Recipe

Grilled Steak Tacos

Serves: 4

Prep Time: 15 mins

Cook Time: 10 mins

Total Time: 25 mins

Kitchen Equipment Needed

  • Grill or grill pan
  • Meat thermometer
  • Mixing bowls
  • Cutting board
  • Sharp knife

Ingredients

  • 1 lb flank steak
  • 2 tablespoons olive oil
  • 2 tablespoons lime juice
  • 2 cloves garlic, minced
  • 1 teaspoon cumin
  • 1 teaspoon chili powder
  • 8 corn or flour tortillas
  • Fresh cilantro for garnish
  • Chopped onions and tomatoes for topping
  • Lime wedges for serving

Directions

  1. In a bowl, whisk together olive oil, lime juice, garlic, cumin, and chili powder. Marinate the steak for at least 30 minutes.
  2. Preheat the grill to medium-high heat.
  3. Remove the steak from the marinade and grill for about 5-7 minutes per side for medium-rare. Use a meat thermometer to ensure it reaches desired doneness.
  4. Let the grilled steak rest for about 5 minutes before slicing thinly against the grain.
  5. Warm the tortillas on the grill for about 30 seconds on each side.
  6. Assemble the tacos by placing sliced steak on the tortillas and topping with onions, tomatoes, cilantro, and a squeeze of lime juice.

Recipe Notes

  • Feel free to adjust the marinade spices according to your taste preferences.
  • Consider adding avocado or salsa for extra flavor and texture.
  • Mix and match toppings based on what you have on hand for variety.

Delicious Beef Stroganoff with Egg Noodles Recipe Explained

Delicious Beef Stroganoff with Egg Noodles: A Comforting Classic

⚖️
Difficulty
Moderate

⏲️
Prep Time
20 mins

🕒
Cook Time
30 mins

⏱️
Total Time
50 mins

🍽️
Servings
4 servings

Beef Stroganoff with Egg Noodles is a classic dish that evokes feelings of warmth and comfort. This rich and creamy recipe features tender strips of beef simmered in a luscious sauce alongside perfectly cooked egg noodles, making it an ideal choice for family dinners or cozy gatherings. The harmony of flavors in this dish is enhanced by the earthiness of mushrooms and the aromatic notes of onions, all tied together with a drizzle of sour cream that brings a delightful tanginess. The result is a meal that not only satisfies the palate but also warms the heart.

Imagine plopping down after a long day, greeted by the inviting aroma of beef stroganoff wafting through your kitchen. The tender beef soaks up the delicious sauce while the egg noodles serve as the perfect vehicle for each bite. This comfort food staple is not just about fullness; it’s about pleasure and nostalgia. Whether you’re new to cooking or a seasoned chef, this recipe will guide you through creating a mouthwatering dish that’s guaranteed to impress.

Quick Recipe Highlights

  • Flavor Profile: Earthy, creamy, and slightly tangy, the balance of flavors in this dish provides a deliciously satisfying experience.
  • Texture: The combination of tender beef and soft egg noodles creates a pleasing contrast in every bite, enriched by the creamy sauce.
  • Aroma: The savory scent of sautéed onions and garlic combined with the rich scent of beef creates an enticing aroma that fills your kitchen.
  • Visual Appeal: Creamy sauce-coated noodles dotted with tender beef and mushrooms make for an inviting and comforting presentation.
  • Skill Level Needed: This recipe is moderately difficult, making it perfect for those eager to expand their culinary skills without feeling overwhelmed.
  • Special Equipment: A large skillet and a pot for boiling noodles are essential, along with basic cooking utensils.

Recipe Overview

  • Difficulty Level: This beef stroganoff is considered a moderate recipe, requiring some chopping and sautéing skills, but it is manageable for most home cooks.
  • Category: This dish falls under the category of main course meals, suitable for lunch or dinner, especially during colder months.
  • Cuisine: Originating from Russia, beef stroganoff has become a popular meal in many countries, each adding their own twist to the traditional recipe.
  • Cost: The ingredients for this recipe are generally affordable, making it a cost-effective option for family meals.
  • Season: Beef Stroganoff is a fantastic dish for all seasons, particularly fall and winter when hearty meals are most comforting.
  • Occasion: Whether it’s a weeknight dinner or a special family gathering, this dish fits perfectly into a variety of dining scenarios.

Why You’ll Love This Recipe

The taste and texture appeal of Beef Stroganoff with Egg Noodles cannot be understated. The combination of tender beef, creamy sauce, and soft noodles creates a satisfying experience that resonates with both young and old. Every bite brings forward a fusion of flavors that performs a delightful dance on your palate, making it hard to resist seconds.

Convenience is another key benefit. This recipe can be prepared in under an hour, making it an excellent option for busy weeknights. The simplicity of the ingredients and the straightforward cooking steps allow even novice cooks to whip up a gourmet meal with ease, providing an enriching experience in the kitchen.

Nutritional advantages come into play with this dish, balancing protein from the beef with the carbohydrates in the egg noodles, providing sustenance and energy. You can also include additional vegetables such as spinach or bell peppers to boost the nutritional value.

This recipe shines when it comes to social and entertaining value. It’s a crowd-pleaser that’s perfect for gatherings. A hearty beef stroganoff dish tends to pique interest and spark conversations around the table, creating a warm and inviting atmosphere.

Cost-effectiveness and accessibility are significant perks as well. Most of the ingredients for Beef Stroganoff are budget-friendly, and they’re typically staples found in many households. This makes preparing a delicious meal both economical and accessible for everyone.

Historical Background and Cultural Significance

The origin of Beef Stroganoff can be traced back to 19th-century Russia, named after the Stroganov family, who were wealthy landowners. Initially, the dish contained just beef and mustard, as culinary traditions evolved, it developed into the creamy version we know today, enriched with the influence of French cuisine.

Culturally, Beef Stroganoff holds a significant place in Russian gastronomy, symbolizing the blending of cuisines and culinary techniques. Over time, this dish has transformed into an international staple, reflecting the cultural exchanges that occur via food.

The evolution of this recipe has seen various iterations, from the original simplified version to the creamy, mushroom-laden dish popular today. Each adaptation tells a story about the taste preferences and ingredients available throughout different eras and regions.

In terms of regional variations, cultures around the world have embraced this dish, leading to delightful interpretations such as using chicken or pork, or even going vegetarian. These variations showcase regional flavors and local ingredients, ensuring that Beef Stroganoff can be found on dinner tables globally.

Ingredient Deep Dive

Beef: This key ingredient is the star of the dish, providing a hearty and satisfying base. Choose quality cuts such as sirloin or tenderloin for the best texture and flavor. Nutritionally, beef is rich in protein and essential nutrients, including iron and B vitamins. It’s important to store beef correctly to maintain freshness; always refrigerate or freeze it promptly after purchase. For those seeking alternatives, chicken or turkey can be used, though the flavor will differ.

Egg Noodles: A classic component, egg noodles offer a delightful texture that complements the creamy sauce. These noodles are typically made with eggs, allowing them to hold onto sauces well. In terms of nutrition, egg noodles provide carbohydrates for energy. When selecting, look for fresh noodles for a tender bite or choose whole grain options for added fiber. Store any leftover noodles in an airtight container in the fridge, and they can be enjoyed later in salads or soups.

Common Mistakes to Avoid

  • Not searing the beef properly, which can result in tougher meat. Always heat the pan well before adding the beef to lock in the flavors.
  • Overcooking the noodles, leading to a mushy texture. Cook them until just al dente, as they will continue to cook in the sauce.
  • Skipping the resting time for the beef after cooking, diminishing tenderness. Allowing the beef to rest helps in retaining moisture.
  • Adding the sour cream too early, causing it to curdle. Add it at the end of the cooking process for the best results.
  • Using low-quality beef, which can negatively impact flavor and texture. Always opt for good cuts of meat.
  • Failing to season adequately throughout the cooking process. Seasoning at each step enhances overall flavor.
  • Overloading the dish with too many ingredients, leading to a lack of balance in flavors. Stick to the core ingredients for the best outcome.
  • Not letting the sauce simmer enough for flavors to develop. Take the time to let the mixture meld for a richer taste.

Essential Techniques

Searing the Beef: This technique is crucial for developing deep, rich flavors. Begin by bringing a skillet to a high heat, ensuring the pan is hot enough to achieve a good sear. This process caramelizes the meat’s surface, intensifying flavor. Avoid overcrowding the pan as it can lead to steaming instead of searing, which can dull the flavors.

Deglazing the Pan: After sautéing the beef and vegetables, deglazing is important to capture the flavorful bits stuck to the pan. Pour a splash of broth or wine into the hot skillet, scraping with a wooden spoon to lift those flavors into your sauce. This technique adds depth and complexity to the final dish.

Pro Tips for Perfect Beef Stroganoff

1. Choose tender beef cuts like sirloin or tenderloin for a juicy texture. The quality of the beef will greatly affect the overall taste of your stroganoff.

2. Don’t rush the cooking process. Allow ample time for each ingredient to develop its flavor before adding the next. This will ensure a rich and savory sauce.

3. Use good stock for a flavorful sauce. Homemade or high-quality store-bought stock can deeply enhance the taste profile of your stroganoff.

4. For added depth, consider a splash of Worcestershire sauce or Dijon mustard to the sauce.

5. Experiment with different mushrooms, such as shiitake or cremini, for an earthy flavor boost.

6. Consider fresh herbs like thyme or parsley for a bright finish just before serving.

7. Make the sauce in advance and store it separately until ready to serve to allow flavors to meld.

8. Always adjust seasoning to your preference. A touch of salt and pepper can elevate the dish.

Variations and Adaptations

Regional variations of Beef Stroganoff can introduce exciting twists on the classic dish. For instance, in Hungary, Paprika is often added for a kick of heat, while in Sweden, it’s common to see this dish served with pickles for an added crunch.

Seasonal adaptations can include adding fresh vegetables during the spring and summer months. Incorporating asparagus, peas, or bell peppers can create a lighter version, allowing you to enjoy the dish year-round.

For dietary modifications, consider using mushrooms or tempeh as alternatives to beef for a vegetarian take. You can also opt for gluten-free pasta if necessary, allowing everyone to enjoy this delicious meal.

Flavor variations can include experimenting with different herbs and spices, such as smoked paprika or a sprinkle of cayenne pepper, to add a new dimension to the dish. Additionally, substituting heavy cream with Greek yogurt can provide a tangy twist while cutting down on fat content.

Serving and Presentation Guide

Plating can elevate your Beef Stroganoff experience. Serve the dish in wide, shallow bowls to showcase the creamy sauce and noodles. Top with parsley or chives for a pop of color, and consider adding a sprinkle of paprika for added visual appeal.

Garnish ideas include a dollop of sour cream or crème fraîche on each portion, enhancing the creaminess of the dish. Traditional accompaniments like crusty bread or a side salad balance the richness and provide a refreshing contrast.

Modern serving suggestions might include pairing the dish with sautéed vegetables or a grain salad for a nutritious spin. Keep temperature considerations in mind to ensure the stroganoff stays warm until serving.

Wine and Beverage Pairing

When it comes to wine pairings for Beef Stroganoff, look for red wines with soft tannins, such as Merlot or Pinot Noir. These will complement the rich flavors of the beef without overwhelming the dish. Serve your wine at a slightly cooler temperature, around 60-65°F, for optimal enjoyment.

Non-alcoholic alternatives could include cranberry or pomegranate juice served with a splash of club soda for a refreshing yet complementary beverage. For coffee lovers, a robust dark roast or an espresso can provide a wonderful contrast to the creamy sauce.

Storage and Shelf Life

When it comes to storage methods, ensure your Beef Stroganoff is cooled properly before transferring it to an airtight container. Refrigerated, it will last about 3 to 4 days. For longer storage, consider freezing the stroganoff; it can last for up to 3 months when properly sealed in a freezer-safe container.

Signs of spoilage include an off smell or discoloration in the sauce or meat. When reheating, do so slowly either on the stove or in the microwave, ensuring that the dish reaches an internal temperature of 165°F for safe consumption.

Make Ahead Strategies

For those who want to streamline dinner preparations, consider making the beef stroganoff sauce a day in advance. Allowing the sauce to sit overnight enhances the flavors, making it even more delicious. Store it separately from the egg noodles, which can be cooked fresh just before serving.

When assembling the dish, ensure you have all the components ready—beef, sauce, and noodles—to save time. To maintain freshness, refrigerate any ingredients you aren’t using immediately and be sure to reheat the sauce gently.

Scaling Instructions

For those looking to scale down, simply halve the recipe while maintaining the balance of ingredients and seasoning. If doubling or tripling, it’s wise to cook in batches to ensure even cooking and flavor distribution.

Equipment considerations are crucial when scaling recipes. Using a larger pot or multiple skillets may be necessary to ensure your beef is seared correctly without crowding. Adjust the cooking times slightly, as larger quantities might require a bit more cooking time.

Nutritional Deep Dive

This Beef Stroganoff recipe offers a balanced macro breakdown, providing a hearty dose of protein from the beef, carbohydrates from the egg noodles, and fats from the sauce, making it a satisfying meal.

Micronutrient analysis reveals that beef contributes essential iron and B vitamins, which support various bodily functions, while the addition of mushrooms provides antioxidants and fiber. It’s advisable to keep portion analysis in mind, especially for those monitoring their dietary intake.

Dietary Adaptations

For those following a gluten-free diet, using gluten-free egg noodles or alternative grains such as quinoa is an excellent option. Additionally, selecting gluten-free soy sauce—if used—will help maintain the integrity of the dish.

For dairy-free adaptations, substituting sour cream with coconut cream or a dairy-free alternative can achieve a similar creaminess without using dairy products. Exploring these modifications allows everyone to enjoy the richness of the dish while adhering to dietary restrictions.

Troubleshooting Guide

If you encounter texture issues with the beef, ensure that you are not overcooking it, as this can lead to a chewy result. Use a meat thermometer to achieve the preferred doneness and allow resting time for better tenderness.

Flavor balance can sometimes be off; if the dish tastes bland, try adding a pinch of salt or a splash of vinegar to brighten up the flavors. Always taste the sauce before serving to make necessary adjustments.

Recipe Success Stories

Community feedback on this beef stroganoff recipe has been overwhelmingly positive, with many sharing their successful adaptations and variations. Readers enjoy experimenting with different ingredients, sharing pictures of their delicious creations on social media.

Success stories highlight how simple adaptations, such as including seasonal vegetables or using alternative proteins, have led to new favorites within families. These contributions foster a supportive cooking community, encouraging more home cooks to try their hands at this beloved dish.

Frequently Asked Questions

Can I use frozen beef? Yes, but make sure to thaw it completely before cooking. Frozen beef can result in uneven cooking and texture issues.

What can I substitute for egg noodles? You can opt for gluten-free pasta, rice, or even zucchini noodles for a low-carb alternative.

How long can I store the leftovers? Stored properly in an airtight container, leftovers can last 3 to 4 days in the refrigerator and up to 3 months in the freezer.

Can I make this dish in advance? Absolutely! You can prepare the sauce in advance and refrigerate it, then cook the noodles when ready to serve.

Is it possible to make this recipe without mushrooms? Yes, you can omit the mushrooms or substitute them with another vegetable like bell peppers or spinach.

How do I prevent the sauce from curdling? Avoid boiling the sauce after adding sour cream; instead, let the sauce cool slightly before incorporating it.

Can I use a slow cooker for this recipe? Yes, you can use a slow cooker, but sear the beef first to enhance the flavor. Cook on low for several hours until tender.

What herbs work well in Beef Stroganoff? Fresh parsley, thyme, or dill pairs beautifully with stroganoff, adding herby freshness to the dish.

Is Beef Stroganoff gluten-free? Traditional recipes are not gluten-free; however, you can easily adapt it by using gluten-free noodles and sauces.

Can I use cream instead of sour cream? Yes, but keep in mind that you may lose some of the tangy flavor. A little lemon juice can help mimic the acidity.

How spicy is Beef Stroganoff? It’s usually not spicy, but you can add crushed red pepper or hot sauce for a kick if desired!

Additional Resources

If you’re looking for more meal ideas, check out our collection of related recipes such as creamy chicken alfredo or classic macaroni and cheese. We also have technique guides on sautéing and making sauces that may enhance your cooking skills further.

For ingredient information, explore our guides on selecting quality beef and fresh herbs. Additionally, check out essential kitchen equipment recommendations to ensure you are well-equipped for your cooking endeavors.

Join the Conversation

We invite you to share your cooking experiences and adaptations of this Beef Stroganoff recipe on social media. Connect with our community, share your photography tips, or leave a review about your experience preparing this comforting dish.

The Recipe

Beef Stroganoff with Egg Noodles

Serves: 4 servings

Prep Time: 20 mins

Cook Time: 30 mins

Total Time: 50 mins

Kitchen Equipment Needed

  • Large skillet
  • Pot for boiling noodles
  • Wooden spoon
  • Knife and cutting board
  • Airtight container for leftovers

Ingredients

  • 1 lb beef (sirloin or tenderloin), sliced into strips
  • 8 oz egg noodles
  • 1 cup mushrooms, sliced
  • 1 medium onion, chopped
  • 2 cloves garlic, minced
  • 2 tbsp olive oil
  • 1 cup beef broth
  • 1 cup sour cream
  • 1 tbsp Worcestershire sauce
  • Salt and pepper, to taste
  • Fresh parsley, chopped (for garnish)

Directions

  1. Heat olive oil in a large skillet over medium-high heat. Add the sliced beef, searing until browned on all sides. Remove and set aside.
  2. Add onions and garlic to the skillet, sautéing until translucent.
  3. Stir in mushrooms and cook until soft.
  4. Add the beef back to the skillet along with beef broth and Worcestershire sauce. Bring to a simmer and cook for 10 minutes.
  5. Reduce heat, then stir in sour cream. Mix well and heat through, ensuring not to boil.
  6. Meanwhile, cook the egg noodles according to package instructions. Drain and set aside.
  7. Serve the beef mixture over the egg noodles, garnished with fresh parsley.

Recipe Notes

  • Feel free to adjust the amount of sour cream based on your preference for creaminess.
  • For a thicker sauce, simmer the beef broth longer to reduce it before adding sour cream.
  • Leftover stroganoff is great for pasta salads the next day!