Indulge in Strawberry Cheesecake Stuffed French Toast Delight

Indulgent Strawberry Cheesecake Stuffed French Toast: A Sweet Morning Treat

⚖️
Difficulty
Moderate

⏲️
Prep Time
20 mins

🕒
Cook Time
15 mins

⏱️
Total Time
35 mins

🍽️
Servings
4 servings

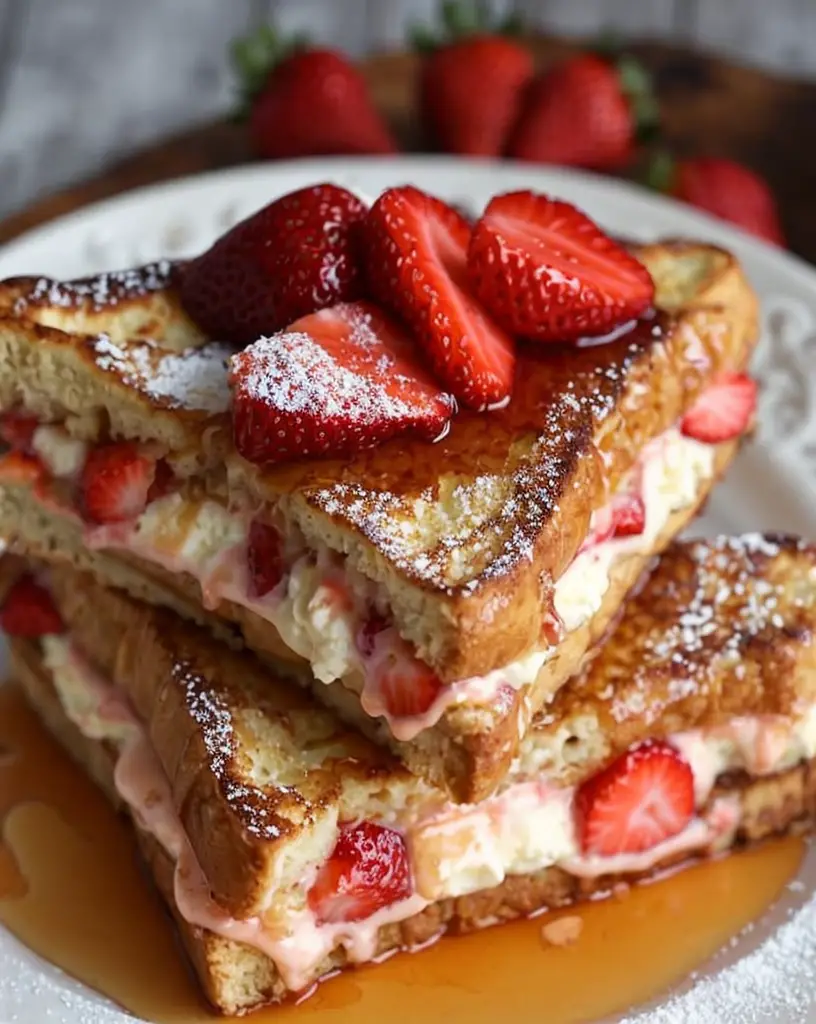
Good morning, food lovers! Are you ready to treat yourself to something truly indulgent? This Strawberry Cheesecake Stuffed French Toast will elevate your breakfast experience to new heights of deliciousness. Imagine crispy, golden-brown bread encasing a rich cheesecake filling and fresh strawberries, all topped with a dusting of powdered sugar and a drizzle of syrup. Each bite is a perfect blend of creamy and fruity goodness that will tantalize your taste buds and make your mornings feel special.

This delightful recipe combines classic French toast with the sweet sophistication of strawberry cheesecake. The contrasting textures of the crunchy exterior and the velvety interior create an irresistible experience that makes breakfast feel like a luxurious treat. Perfect for brunch gatherings, holiday celebrations, or just a weekday pick-me-up, this dish will leave you and your loved ones smiling from ear to ear.

Quick Recipe Highlights

  • Flavor Profile: This dish features a wonderful balance of sweet and creamy flavors from the cheesecake, complemented by the fresh acidity of strawberries.
  • Texture: Expect a delightful contrast between the crispy, buttery bread and the soft, creamy filling inside.
  • Aroma: The irresistible aroma of warm, cinnamon-spiced toast mingling with sweet strawberries will fill your kitchen.
  • Visual Appeal: The vibrant red of fresh strawberries and the golden edges of the French toast make for a stunning presentation.
  • Skill Level Needed: While it’s moderately challenging, anyone with basic cooking skills can master this recipe with ease.
  • Special Equipment: You’ll need a skillet or griddle, mixing bowls, and a whisk for effective preparation.

Recipe Overview

  • Difficulty Level: This recipe falls under the moderate category due to the multiple steps involved, but it is achievable for most home cooks.
  • Category: Breakfast or brunch is the perfect category for this indulgent treat that brings a touch of gourmet to the table.
  • Cuisine: While French toast has French origins, this recipe beautifully incorporates American flavors with the cheesecake filling.
  • Cost: The approximate cost is reasonable, especially considering the quality and indulgence of the dish, making it accessible for most households.
  • Season: Strawberries are best in spring and summer, making those seasons the ideal time to prepare this recipe fresh.
  • Occasion: This indulgent French toast is perfect for special occasions such as Mother’s Day brunch, holidays, or a simple weekend treat.

Why You’ll Love This Recipe

Every bite of this Strawberry Cheesecake Stuffed French Toast is a celebration of taste and texture. The creamy cheesecake acts as a decadent filling that pairs wonderfully with slices of fresh strawberries, creating an explosion of flavor that dance on your palate. When you take a bite, the sweetness from the strawberries perfectly balances out the richness of the cheesecake, making it an unforgettable experience.

Not only is this recipe delicious, but its convenience is another reason to cherish it. While it requires a few steps, each one is straightforward, making it easy to prepare. The best part is that you can make the cheesecake filling in advance, which streamlines the cooking process for busy mornings or spontaneous brunch dates.

Health-wise, this dish can also provide some nutritional benefits. Using whole-grain bread or reducing the sugar in the filling can create a healthier version of this delightful dish. Plus, the inclusion of fresh strawberries adds vitamins and antioxidants, making this treat not only indulgent but also beneficial in moderation.

Socially, serving Strawberry Cheesecake Stuffed French Toast is a fantastic way to impress guests at any gathering. It’s visually appealing and will certainly make a statement at brunch. Sharing this dish can create wonderful memories and delightful conversations as everyone indulges in such a sweet treat.

On top of that, the cost-effectiveness of this recipe makes it a great addition to your breakfast rotation. With simple ingredients and a reasonable price point, you can whip up this gourmet dish without stretching your budget, and the best part is that your friends and family will think you’ve concocted something extraordinary.

Historical Background and Cultural Significance

The origins of French toast are believed to date back to ancient times when bread was soaked in milk and eggs to avoid waste. The modern version we enjoy today likely evolved through various cultural adaptations. The French have long claimed the dish, but it has become popular around the world, often enjoyed as a sweet breakfast dish.

In American cuisine, French toast became particularly popular in the early 20th century. People began adding toppings ranging from powdered sugar to fruit, paving the way for creative variations like this Strawberry Cheesecake Stuffed French Toast. This recipe honors the tradition of French toast while introducing the beloved dessert-style cheesecake, showcasing a beautiful fusion of two classic favorites.

Over time, the recipe has transformed, with many variations celebrating regional ingredients and techniques. For example, in New Orleans, the dish is often enriched with cinnamon and nutmeg, reflecting the city’s rich culinary heritage. Our recipe leans toward the sweet and fruity by prominently featuring strawberries while also integrating elements of classic cheesecake.

Regional variations are abundant; in some cultures, the filling is made with sweetened cream cheese, while others might opt for custards filled with local fruits. The incorporation of strawberries pays homage to seasonal bounty and showcases how this dish can evolve with time and trends.

Ingredient Deep Dive

Strawberries

Strawberries are cherished not only for their sweet flavor but also for their cultural and nutritional significance. Popular in numerous desserts and summer recipes, these fruits are rich in antioxidants, vitamin C, and dietary fiber. When selecting strawberries, opt for vibrant red ones with vibrant green caps, and avoid any that are overly soft or bruised. For storage, keep them dry in the refrigerator and consume them within a few days for peak freshness. If fresh strawberries aren’t available, frozen strawberries can be used as a tasty alternative.

Cream Cheese

Cream cheese has its roots in early American cheese-making, gaining popularity in the 19th century as a unique, spreadable cheese. It’s notable for its creamy texture and mild flavor, which can be enhanced with various flavorings. Cream cheese provides a great source of protein, and when used in dessert recipes, it often contributes to a rich and decadent taste. Opt for full-fat cream cheese for the best flavor, and keep it refrigerated for freshness. Low-fat versions are available for those seeking lighter options without losing the creamy consistency.

Bread

The choice of bread is fundamental in French toast, with brioche and challah being classic favorites due to their sweetness and rich texture. Bread made from whole grains can also serve as a healthier option, adding fiber and nutrients. When selecting bread, look for a loaf that is a bit stale or dried out, as it soaks up the egg mixture better without falling apart. Store any leftover bread in a cool, dry place, and if it starts to dry out, feel free to use it for this recipe before it spoils.

Eggs

Eggs are vital in binding the ingredients together and giving French toast its custardy texture. They are rich in protein, vitamins, and minerals, making them a staple in many diets across cultures. Fresh, organic eggs are often preferred for their superior flavor and quality. When cooking, ensure the eggs are at room temperature for better incorporation into the batter. Eggs can be stored in their original carton in the fridge, and to keep them fresh longer, avoid washing them before storage.

Milk

Milk serves as the base for the egg mixture and enriches the flavor of the custard. Whole milk offers a creamy texture, but you can experiment with almond milk or oat milk for dairy-free variations. Look for milk that meets your dietary preferences, and always check the expiration date. Store milk in its original container in the coldest part of the refrigerator. If using non-dairy milk, consume it within the recommended shelf life after opening.

Common Mistakes to Avoid

  • Using fresh bread: Opt for a day or two-old bread, as it will absorb more of the custard without falling apart.
  • Over-soaking the bread: Soak just long enough to soak through, or the toast will become mushy.
  • Not preheating the pan: Ensure your skillet or griddle is hot enough before cooking to achieve a golden-brown crust.
  • Skipping the vanilla: Adding vanilla enhances the flavor profile; don’t forget this key ingredient!
  • Not letting it rest: Allow the filled toast to rest before cooking so the filling has time to set.
  • Under-seasoning: A pinch of salt can enhance the flavor of the French toast even more.
  • Forgetting to adjust heat: Manage the heat to avoid burning the toast; medium-low is ideal.
  • Using too much filling: Avoid overfilling as it can ooze out while cooking, making a mess.
  • Not cleaning the pan: Clean your griddle or skillet between batches to prevent burnt bits from ruining the appearance of the next toast.
  • Skipping toppings: Don’t overlook the presentation; toppings such as syrup or whipped cream elevate the dish visually and flavor-wise.

Essential Techniques

Using stale bread is essential for achieving the best texture in your French toast. The slight dryness allows the bread to soak up more of the custard, creating a rich, custard-like interior while staying sturdy enough to retain its shape during cooking. Avoid fresh bread as it can become overly soggy, compromising the final dish.

Another crucial technique is managing the temperature of your pan. A medium-low setting generally allows for an even cook without burning the exterior. If the heat is too high, the bread may brown quickly without properly cooking the inside. You should always start with a hot pan, and adding a little butter or oil at the beginning will help create that perfect golden crust.

A final technique involves the incorporation of flavors into your custard. Whisking together the eggs, milk, and vanilla extract aerates the mixture, ensuring a light and fluffy texture. Make sure to combine these ingredients thoroughly before soaking the bread to achieve an even flavor throughout the dish.

Pro Tips for Perfect Strawberry Cheesecake Stuffed French Toast

1. Use day-old bread or toast to enhance texture and prevent mushiness.
2. Chill the cheesecake filling before spreading it to make assembly easier.
3. Add a touch of cinnamon to the egg mixture for extra warmth and flavor complexity.
4. Ensure your skillet is well-greased to prevent sticking and enhance browning.
5. Allow the toast to sit in the egg mixture for a short time, balancing soaking and firmness.
6. Serve warm straight off the skillet for the best texture and flavor experience.
7. Pair with fresh strawberries on top for an added burst of flavor.
8. For a gourmet touch, sprinkle with graham cracker crumbs before serving.

Variations and Adaptations

This recipe can easily adapt to seasonal variations by incorporating different fruits. In the fall, consider adding spiced apples or pears, while winter might call for cranberry sauce. For those avoiding dairy, a simple swap to almond or cashew cream can provide a decadent vegan filling just as delightful as the original.

For a richer flavor, you could infuse the filling with chocolate or peanut butter to create an entirely new flavor profile. Alternatively, variations in bread types, such as using cinnamon swirl or brioche, can enhance the dish’s overall sweetness. Presentation can be modified by serving the toast on a cloud of whipped cream instead of syrup for a lighter touch.

Serving and Presentation Guide

When plating your Strawberry Cheesecake Stuffed French Toast, stack two pieces on top of each other for a visually appealing presentation. Drizzle warm maple syrup artistically around the plate for a splash of color and flavor. Garnish with fresh slices of strawberries and a light dusting of powdered sugar to create an inviting look.

For an extra indulgent touch, serve with dollops of whipped cream or a scoop of vanilla ice cream on the side. Cognizant of temperature, serve the toast while still warm so the flavors bloom forth with every bite. Consider portion control tips; serving one to two pieces per person will satisfy without overwhelming.

Wine and Beverage Pairing

For a delightful brunch experience, consider pairing this dish with sparkling wines like prosecco or a sweet moscato. The bubbles add a festive touch, while the sweetness complements the flavors of the strawberries and cheesecake. For non-alcoholic options, freshly brewed coffee or a citrus-spiced iced tea can balance the richness of the dish.

Additionally, pairing this delight with a nice chai latte can elevate the experience with assorted spices that will harmonize well with the sweetness of the French toast. Regardless of your beverage choice, remember to serve drinks chilled or hot, depending on your preference.

Storage and Shelf Life

To store leftover French toast, allow it to cool and then place it in an airtight container in the refrigerator for up to three days. Reheat gently in a skillet to maintain its texture, or pop it in the toaster for a quick reheating method. If you choose to freeze your stuffed French toast, wrap each piece tightly in plastic wrap and freeze for up to two months.

Signs of spoilage can include an off smell, odd texture, or discoloration, indicating that it should be discarded. To avoid waste, ensure you only prepare as many servings as you can consume or properly store for later enjoyment.

Make Ahead Strategies

Making this dish ahead of time can streamline your morning routine. Prepare the cheesecake filling the night before and store it in the refrigerator, allowing the flavors to meld. You can also assemble the stuffed French toast the evening prior, just ensuring to store it securely to prevent sogginess.

On the day you plan to serve it, simply cook the assembled toast. Store the cookable mixture in the refrigerator between steps to prevent spoilage. Reheating is straightforward: cook again in the skillet or the oven to bring back the original crispy texture while keeping the inside warm.

Scaling Instructions

If you want to halve or double the recipe, adjusting the ingredient quantities is simple. For halving, take half of the measurements for all ingredients uniform with baking math principles. Doubling the recipe may require ensuring your cooking equipment is large enough to accommodate the larger volume of filled French toast without crowding.

Keep an eye on timing, as doubling may affect the average cooking time; larger batches could take slightly longer. Additionally, storing cooked portions may require more additive thought, as it’s better to do so in staggered single-serving numbers for convenience.

Nutritional Deep Dive

This delicious indulgence provides a good mix of macronutrients, with protein from eggs and cream cheese, alongside healthy fats. The strawberries offer a dose of dietary fiber and vitamin C. Adjusting portion sizes is key, with mindful eating incorporating fewer servings while enjoying this delightful dish.

For a more tailored approach, consider substituting certain ingredients: using whole-grain bread adds fiber and sustenance, while reducing added sugars can enhance its health value. For weight management, consider smaller portions and pairing with a source of protein like Greek yogurt to feel more satisfied.

Dietary Adaptations

To accommodate gluten-free diets, swap regular bread for gluten-free alternatives, ensuring that all ingredients are certified gluten-free. For a dairy-free option, consider using almond cream cheese or cashew cream blended with a touch of natural sweetener.

Vegans can substitute eggs with flax eggs or aquafaba mixed with a non-dairy milk of choice, while sugar can be replaced with natural sweeteners like maple syrup or coconut sugar. Low-carb or keto variations could utilize bread substitutes that are low in carbohydrates, focusing on cheeses and sugars with lower glycemic indexes to maintain a keto approach.

Troubleshooting Guide

If your French toast ends up soggy, it might be due to using fresh bread. Always choose slightly stale bread to create a better texture. For uneven cooking heat, test your pan before adding the toast by sprinkling some water droplets to see if they sizzle.

Overcooking may lead to a burnt exterior, so manage your heat and timing carefully. If the filling spills out while cooking, ensure you don’t overstuff the bread and allow it to set properly before cooking. If you face ingredient availability issues, substitute fresh fruits with frozen berries or utilize other cream cheese alternatives, adjusting flavors accordingly.

Recipe Success Stories

Readers have shared wonderful feedback after trying this Strawberry Cheesecake Stuffed French Toast. Many celebrate the ease of making this dish ahead of time, making family brunches feel effortless yet indulgent. Some have added their personal twists by including chocolate or experimenting with different fruits, encouraging creativity.

Photography enthusiasts have noted the beauty of the dish and shared their images on social media, which has sparked a further conversation about adaptation. Tales of serving this dish at family gatherings evoke lovely memories, frequently leading to requests for seconds— a true sign of a recipe’s success!

Frequently Asked Questions

Can I make this recipe in advance?
You can prepare the filling the day before and assemble the toast, storing it in the refrigerator overnight. Cook it fresh in the morning for best results.

Is there a gluten-free option for this recipe?
Absolutely! Substitute regular bread with your favorite gluten-free bread to enjoy this delicious treat.

Can this be frozen?
Yes, you can freeze cooked or assembled French toast. Wrap individual pieces in plastic wrap and store them in a freezer bag for up to two months.

What can I serve as a side?
A light fruit salad or a serving of yogurt can complement the richness of the stuffed French toast perfectly.

Can I use alternative fruits?
Definitely! Feel free to use bananas, blueberries, or even peaches based on your preference and seasonal availability.

How do I reheat leftover stuffed French toast?
To reheat, place it in a hot skillet or toaster to revive its crispy exterior and warm the filling.

What other toppings can I use?
Consider whipped cream, chocolate sauce, or a sprinkle of nuts as delightful toppings to elevate the dish even further.

Is this recipe suitable for kids?
Yes, kids generally enjoy sweet flavors, and you can adjust the sweetness level based on their taste.

What if I don’t have cream cheese?
If you don’t have cream cheese, consider using ricotta or mascarpone cheese for a similar texture and flavor.

How can I make this recipe healthier?
Use whole-grain bread, reduce sugar in the filling, and add extra fresh fruit for added nutrition without adding too many calories.

Additional Resources

For those looking to expand their culinary repertoire, consider exploring related recipes like classic French toast variations, pancake stacks, or decadent desserts featuring strawberries. Technique guides can help refine skills in making the perfect custard or managing the delicate balance of baking and frying.

You can also delve into ingredient information on seasonal fruits to elevate your dishes. Investing in quality kitchen equipment, including a good non-stick skillet, can facilitate smoother cooking experiences and lead to better overall results.

Join the Conversation

We invite you to share your experiences making this Strawberry Cheesecake Stuffed French Toast. What variations have you tried? Post your photographs and tag us on social media! Engage in discussions to learn and exchange ideas with fellow food enthusiasts on exciting twists to this recipe. Your feedback enriches our community and inspires others to get creative in the kitchen.

The Recipe

Strawberry Cheesecake Stuffed French Toast

Serves: 4 servings

Prep Time: 20 mins

Cook Time: 15 mins

Total Time: 35 mins

Kitchen Equipment Needed

  • Skillet or griddle
  • Mixing bowls
  • Whisk
  • Spatula

Ingredients

  • 8 slices of day-old bread (brioche or challah preferred)
  • 1 cup cream cheese, softened
  • 1 cup strawberries, chopped
  • 1/4 cup powdered sugar
  • 2 large eggs
  • 1 cup milk
  • 1 teaspoon vanilla extract
  • 1/2 teaspoon cinnamon
  • Butter or oil for cooking

Directions

  1. In a mixing bowl, combine softened cream cheese, chopped strawberries, and powdered sugar until smooth. Set aside.
  2. In another bowl, whisk together eggs, milk, vanilla, and cinnamon until well blended.
  3. Spread the cream cheese mixture evenly between two slices of bread to form a sandwich.
  4. Heat the skillet over medium-low heat, adding butter or oil to coat.
  5. Dip each sandwich in the egg mixture, ensuring both sides are coated well.
  6. Add dipped sandwiches to the skillet and cook for 3-4 minutes on each side or until golden brown.
  7. Remove from skillet and drizzle with maple syrup or garnish with fresh strawberries and powdered sugar as desired.

Recipe Notes

  • Feel free to substitute strawberries with other fresh fruits like blueberries or bananas for variation.
  • This dish can be frozen; just ensure to wrap it tightly to prevent freezer burn.
  • Experiment with flavored cream cheese for an added twist on flavor.

Indulge in Italian Amaretto Pistachio Fudge Delightfully Easy Recipe

Italian Amaretto Pistachio Fudge: A Sweet Indulgence

⚖️
Difficulty
Easy

⏲️
Prep Time
15 mins

🕒
Cook Time
20 mins

⏱️
Total Time
35 mins

🍽️
Servings
16 pieces

Indulge in the exquisite flavors of Italian Amaretto Pistachio Fudge, a sweet treat that captures the essence of Italy with every bite. This delightful fudge melds the nutty flavors of pistachio with the warm, almond-rich notes of Amaretto liqueur, creating a decadent dessert that’s perfect for any occasion. Whether served at a festive gathering or enjoyed as a simple afternoon treat, this fudge will leave your taste buds dancing with joy.

With its creamy texture and rich flavor profile, Italian Amaretto Pistachio Fudge is not only a dessert but also a conversation starter. The vibrant green of the pistachios adds a visually appealing touch, making it an attractive addition to your dessert platter. In this blog post, we will explore the recipe, sharing not only the steps to create this delicious fudge but also insights into its flavor, texture, and the cultural significance behind one of Italy’s beloved indulgences.

Quick Recipe Highlights

  • Flavor Profile: This fudge highlights the delightful balance of nutty pistachios and the sweet, aromatic essence of Amaretto, creating a harmonious blend that’s rich yet not overwhelming.
  • Texture: The fudge boasts a smooth, creamy consistency that melts in your mouth, complemented by the slight crunch of chopped pistachios, offering an enjoyable textural contrast.
  • Aroma: The warm, inviting aroma of Amaretto marries beautifully with the buttery scent of the fudge, making it irresistible as it bakes.
  • Visual Appeal: Its striking pale green hue combined with the glistening texture of the fudge creates an eye-catching dessert perfectly suited for any table setting.
  • Skill Level Needed: Making this fudge is simple, requiring basic cooking techniques, making it accessible for both novice and experienced bakers.
  • Special Equipment: A heavy-bottomed saucepan is essential for smooth melting, along with a baking dish lined with parchment paper for easy removal.

Recipe Overview

  • Difficulty Level: This Italian Amaretto Pistachio Fudge is classified as easy, allowing even beginner bakers to feel confident while creating this delicious treat.
  • Category: As a dessert, this fudge shines during celebrations but can equally serve as a sweet snack or an after-dinner treat.
  • Cuisine: Italian cuisine often features rich, indulgent desserts, and this fudge embraces that tradition, highlighting the country’s love for creamy sweets and nut flavors.
  • Cost: The approximate cost of ingredients is relatively low, making this a budget-friendly recipe that doesn’t compromise on flavor.
  • Season: This fudge is perfect for year-round enjoyment but shines especially during festive seasons, lending a touch of elegance to holiday gatherings.
  • Occasion: Whether for holiday celebrations, birthdays, or simply because you deserve a treat, this fudge fits perfectly into any occasion.

Why You’ll Love This Recipe

The Italian Amaretto Pistachio Fudge captivates your palate with every bite, offering a delightful balance of sweetness and warmth. The fusion of amaretto and pistachios creates a distinctive flavor that sets it apart from ordinary fudge. Each piece delivers a rich, buttery taste while the chopped pistachios provide a fun crunch that complements the smoothness of the fudge, making it an irresistible dessert.

Preparation is a breeze, allowing you to whip up this fudge in just a short amount of time. Although it sets in the refrigerator, the active cooking time is minimal, making it convenient for busy bakers. This simplicity invites everyone to enjoy the process, gathering friends or family to craft their own version of this delicious treat, fostering shared moments over a delightful experience.

Beyond the irresistible taste and ease of preparation, this fudge also offers nutritional benefits thanks to the presence of pistachios, which are packed with protein, healthy fats, and essential vitamins. This makes each bite not just a tempting indulgence but also a treat that aligns with a balanced diet.

Socially, this fudge can elevate any gathering, serving not just as dessert but also as a stunning centerpiece. Its rich colors and flavors will entice guests, sparking conversations and enhancing the mood of joyful celebrations. Sharing this fudge is a wonderful way to connect with others through good food and shared experiences.

Lastly, given its affordability and easy-to-source ingredients, the Italian Amaretto Pistachio Fudge provides an accessible way for everyone to enjoy a touch of gourmet indulgence at home without breaking the bank. You can savor the luxury of homemade fudge right from your kitchen.

Historical Background and Cultural Significance

The roots of fudge can be traced back to the confectionery innovations of the 19th century, primarily within American culture. However, the inspiration for Italian Amaretto Pistachio Fudge draws heavily on Italy’s culinary traditions, known for blending flavors harmoniously. Amaretto, originating in Saronno, Italy, is believed to be a sweet liqueur dating back to the Renaissance, illuminating the country’s penchant for craft and rich taste experiences.

Culturally, Italian desserts, particularly those involving nuts and sweet liqueurs, are popular choices for celebrations and gatherings across Italy. Nuts embody prosperity and abundance, values highly cherished in Italian culture. Incorporating pistachios into fudge celebrates this tradition of using local ingredients to create flavorsome sweets that everyone can indulge in.

The evolution of this recipe reflects a growing appreciation for fusion desserts, combining elements from different culinary backgrounds to create unique and playful treats. Today, innovations like the Italian Amaretto Pistachio Fudge pave the way for creative adaptations of traditional recipes, attracting food enthusiasts eager to experience something new yet rooted in tradition.

Regional variations abound in Italy, where different locales favor distinct nuts and liqueurs. In Sicily, for instance, you might find similar fudge featuring almonds or other local nuts. These adaptations exhibit how culinary traditions can blur and blend across boundaries, enriching our dessert repertoire with diverse flavors and textures.

Ingredient Deep Dive

Pistachios hold a significant place in culinary traditions, particularly within Mediterranean cuisines, known not only for their unique flavor but also their nutritional benefits. Rich in healthy fats, protein, and fiber, pistachios also contain essential vitamins like vitamin B6 and minerals such as copper. When selecting pistachios for this fudge, opt for shelled and unsalted varieties to maintain the balance of sweetness in the dessert. Store them in an airtight container in a cool, dry place to preserve freshness and prevent them from becoming rancid.

Amaretto liqueur, another star ingredient, has roots in Italian heritage with a rich history tied to 1525. Made from almonds and sugary spirits, it adds an unmistakable flavor to desserts, elevating their taste. This liqueur provides not just sweetness but aromatic notes reminiscent of marzipan. When selecting Amaretto for this recipe, quality matters—rich, artisanal brands will yield the best results. Store it upright in a cool place, and it can last for years if unopened.

Sweetened condensed milk serves as the creamy base for this fudge, granting it an indulgent texture. It’s known for its convenience and versatility in baking, often providing a creamy element that can’t be obtained through regular milk alone. When purchasing, look for brands with no preservatives to ensure your fudge remains a pure treat. Store any leftover condensed milk in an airtight container in the refrigerator for up to a week.

Butter plays a fundamental role in the fudge, enhancing its creaminess and richness. Choose unsalted butter to allow better control over the overall flavor. Freshly sourced butter will yield the best results, contributing its creamy goodness to the fudge. It’s best to store butter in the fridge and keep it tightly wrapped to maintain its quality.

Common Mistakes to Avoid

  • Overheating the Mixture: One of the most critical mistakes when making fudge is overheating the sugar and butter mixture, which can lead to a grainy texture. Stir consistently and monitor the temperature.
  • Not Stirring Enough: Insufficient stirring can result in uneven melting and lumps. Ensure you are mixing continuously for uniform texture.
  • Skipping the Cooling Step: Allowing the fudge to cool for the recommended time is vital for achieving the right setting consistency. Patience pays off for a perfect fudge.
  • Improper Measurements: Baking is a science, so accurate measurements are crucial. Use measuring cups and spoons for precision.
  • Not Using Parchment Paper: Skipping parchment paper can lead to difficulties removing the fudge from the dish. Always line the pan to ensure easy release.
  • Choosing Low-Quality Ingredients: Using subpar quality ingredients can affect the taste significantly. Invest in high-quality pistachios and Amaretto for the best results.
  • Overmixing After Adding the Nuts: Adding pistachios and immediately overmixing can break them down too much. Gently fold them in to maintain their integrity.
  • Neglecting to Allow for Proper Cooling: Allow the fudge to sit at room temperature to set properly; otherwise, you may end up with a gooey fudge instead of a nice, firm texture.
  • Storing Improperly: Fudge should be stored in a cool, dry place. Don’t store it in a hot environment, as that can cause it to melt and lose its shape.
  • Not Chilling the Fudge Long Enough: Be patient in allowing the fudge to chill for at least a few hours before slicing for better texture and easy cutting.

Essential Techniques

Fudge making often seems intimidating, but mastering the art is simply about understanding a few essential techniques. One key technique is the low and slow heating method. This technique ensures that sugar crystals dissolve correctly, preventing graininess. To master this, keep a close watch on the temperature, using a candy thermometer, and always stir constantly until the desired consistency is achieved.

Another essential technique is correct cooling. Once the mixture has been combined, allow it to cool sufficiently to develop a smooth surface. After pouring it into the prepared dish, lightly tap the pan to release any air bubbles, ensuring an even texture throughout. Look for visual cues such as clarity in the fudge before it goes into the fridge to chill.

Additionally, incorporating nuts like pistachios requires careful consideration. Toasting the nuts can elevate their flavor and texture immensely, allowing their natural oils to enhance the overall taste of the fudge. For perfect results, watch them closely in the oven, as nuts can quickly move from perfectly toasted to burnt.

Pro Tips for Perfect Italian Amaretto Pistachio Fudge

1. **Use Quality Ingredients:** Always choose the best pistachios and a high-quality Amaretto liqueur; the better the ingredients, the better the fudge will taste.

2. **Precise Temperature Control:** Use a candy thermometer to monitor the temperature of your fudge mix to prevent it from overheating, which leads to graininess.

3. **Chill in Layers:** If you want layers of different flavors or colors, allow each layer to set slightly in the fridge before adding the next.

4. **Don’t Rush the Cooling Process:** For the best results, allow your fudge to cool to room temperature before putting it in the fridge to set.

5. **Chop Nuts Finely:** For a more delicate texture, finely chop the pistachios instead of adding whole pieces; this allows the flavor to spread throughout the fudge.

6. **Experiment with Flavors:** Consider mixing in other flavors like orange zest or a hint of espresso for a more complex taste profile.

7. **Use Parchment Paper for Easy Removal:** To prevent sticking, always line your pan with parchment paper; this also makes cleanup a breeze.

8. **Slice Carefully:** Wait until the fudge has set completely in the fridge before slicing it to maintain clean edges and an attractive presentation.

Variations and Adaptations

Italian Amaretto Pistachio Fudge is versatile and open to experimentation. One popular variation is the addition of chocolate; simply swirl in melted dark chocolate before the fudge sets for an extra layer of flavor. Additionally, one can adapt the recipe by swapping pistachios for other nuts such as almonds or hazelnuts, which offer different flavor profiles while still harmonizing with Amaretto.

Seasonal adaptations can also enhance this recipe; consider introducing dried cranberries or orange zest during the winter holidays to bring in flavors of the season. For those with dietary restrictions, gluten-free versions are simple to achieve, as this recipe naturally fits gluten-free diets. Opting for sugar-free condensed milk is another way to cater to those seeking lower sugar options without sacrificing flavor.

You can also play with the proportions of the nuts or create a domed presentation by using a rounded mold instead of a flat tray, adding visual interest. Experimenting with different liqueurs, such as Irish cream or hazelnut liqueur, can offer delightful twists to this already unique flavor combination.

Serving and Presentation Guide

Presentation plays a significant role in enjoying your Italian Amaretto Pistachio Fudge. For an elegant serving option, cut the fudge into neat squares and arrange them on a beautiful platter or tiered stand. Dusting the fudge with a light sprinkle of powdered sugar can add an attractive contrast, making it visually appealing.

For an added touch, garnish each piece with a whole pistachio or a drizzle of melted chocolate for that gourmet look. When serving, include small tasting spoons for guests to easily enjoy a portion without too much fuss. This method can enhance the experience at parties or gatherings.

Consider pairing your fudge with classic Italian coffee or espresso for an indulgent dessert experience, or serve with ice cream for a delightful contrast of flavors and textures. Don’t forget temperature considerations; serving the fudge just slightly chilled can enhance the creamy texture.

Controlling portion sizes is also essential. Each square should represent a satisfying amount—neither too small to be hit or too large to be overwhelming. Aim for 1-inch squares, making it easy for guests to take one or two without guilt.

Wine and Beverage Pairing

When it comes to pairing wine with Italian Amaretto Pistachio Fudge, consider a sweet dessert wine such as Vin Santo, which complements the sweetness of the fudge beautifully. The nutty character of Vin Santo harmonizes with the pistachios, enhancing the overall tasting experience.

For a non-alcoholic option, a creamy almond milk latte can provide a lovely balance, mirroring the almond notes of Amaretto while also offering a soothing complement to the richness of the fudge.

If you prefer coffee, an espresso served alongside the fudge creates a wonderful contrast, intensifying both the chocolate and pistachio flavors. Alternatively, pair it with a tea like chamomile or ginger, which can bring out subtle flavors in the fudge.

Temperature consideration is also crucial—serve the dessert wine slightly chilled, while the fudge should sit at room temperature for the best consistency. This way, you can truly enjoy each delicious layer of flavor, enhancing the gourmet experience.

Storage and Shelf Life

To keep your Italian Amaretto Pistachio Fudge fresh, store it in an airtight container. This will protect it from prevalent moisture or odors in your kitchen. Properly stored, the fudge can last for up to two weeks at room temperature or up to a month if refrigerated.

It’s important to monitor it for signs of spoilage, such as an off smell, which indicates it may no longer be safe to consume. If you notice any changes in texture or color, it’s better to err on the side of caution and dispose of it.

For longer storage, consider freezing the fudge. Cut it into squares, place parchment paper between layers, and then store it in a freezer-safe container. It should maintain its quality for up to three months in the freezer. To enjoy, simply bring the fudge to room temperature before serving.

Reheating the fudge is not necessary; however, if you choose to warm it slightly for a more gooey texture, be careful to do so gently in a microwave or on the stovetop.

Make Ahead Strategies

Preparing Italian Amaretto Pistachio Fudge ahead of time is easy and allows you to enjoy the dessert stress-free during gatherings. Plan to make the fudge at least a day in advance, allowing it ample time to set.

You can prepare it two to three days ahead, storing it in an airtight container in the refrigerator. Ensure you wrap it well to keep it from absorbing any refrigerator odors. Consider creating larger batches; fudge refrigerates and freezes well, enabling you to serve it as needed without the hassle of repeated preparations.

When you require a fresh element upon serving, consider topping the fudge with chopped pistachios or fine sea salt just before presenting for an inviting touch. This simple addition can elevate the overall experience, keeping each serving deliciously fresh.

Scaling Instructions

For those wanting to adjust this Italian Amaretto Pistachio Fudge recipe, scaling it up or down is straightforward. If halving the recipe, simply reduce all ingredients proportionately but keep in mind the timing may shift slightly depending on your cooking pan size and oven power.

If you’re doubling or tripling the batch, it’s best to use a larger saucepan and prepare in batches if necessary, as attempting to cram too much mixture into one pan can lead to uneven cooking. Use the same cooking time based on recipe consistency, but be prepared to adjust based on visual cues.

Additionally, if scaling up, consider investing in a larger storage container to accommodate the increase in fudge volume, ensuring it’s sealed properly to maintain freshness.

Nutritional Deep Dive

When analyzing the nutritional content of Italian Amaretto Pistachio Fudge, an emphasis on balance is key. Each piece delivers a rich dose of flavor due to its combination of condensed milk, sugar, pistachios, and butter. A standard piece includes about 200 calories, primarily from the healthy fats in pistachios, and sugar content from the fudge base.

Pistachios not only contribute to the taste but also to the nutritional profile, providing essential nutrients like protein, potassium, and fiber, while the Amaretto enhances flavor without adding significant calories. While enjoyable, moderation is essential, especially for those monitoring their sugar intake.

For a more robust understanding, consider breaking down individual ingredients, noting their unique contributions. For instance, condensing the calories from sugar and checking the protein content from nuts can help create dietary guidelines. Serving sizes also play an important role. One or two squares may satisfy a sweet tooth without compromising a balanced diet.

Dietary Adaptations

This Italian Amaretto Pistachio Fudge can be easily adapted for various dietary preferences. For a gluten-free option, the recipe is already free of gluten-containing ingredients; just ensure all mixers and nuts are certified gluten-free.

For a dairy-free version, you can use full-fat coconut milk in place of condensed milk, and coconut oil instead of butter, which will still yield a creamy consistency while catering to those avoiding dairy.

Vegans can replicate the recipe by using plant-based alternatives for butter and honey or maple syrup instead of the usual sugar, ensuring it remains free of animal products while keeping the flavors intact.

Low-carb and keto diets can modify this fudge using sugar substitutes such as erythritol or monk fruit, reducing the overall carbohydrates without sacrificing taste. Additionally, paleo followers will appreciate substituting regular sugar with raw honey or coconut sugar to align with their dietary values.

These dietary modifications allow everyone to enjoy Italian Amaretto Pistachio Fudge, bringing people together over a delicious, inclusive dessert.

Troubleshooting Guide

If you encounter texture issues while making fudge, they can often be remedied by adjusting your heating approach. If the fudge is too grainy, it’s likely that too much heat caused the sugar to crystallize. To avoid this, be mindful of the temperature and stir continuously.

Flavor balance can also pose a challenge; if the fudge is too sweet, try incorporating a pinch of salt to elevate the flavors. A little salt can enhance the sweetness without making the fudge taste salty, creating a delightful contrast.

Temperature problems might arise if the fudge doesn’t set properly. If it remains too gooey, leaving it to chill longer in the refrigerator can rectify this. Conversely, if it’s rock solid, gently reheat and add a touch of creamy liquid to soften.

Equipment challenges are common too. If using a non-stick saucepan, ensure it’s suitable for high heat to avoid burning. If you notice your fudge sticking, consider using a better-quality non-stick or switching to a heavy-bottomed stainless steel pan.

Ingredient substitutions can lead to unexpected flavors. If you switch out types of nuts or liqueurs, know that it can alter the overall flavor aspect. So, always taste as you go, especially with highly flavored items like alcohol.

Timing concerns generally arise when preparing fudge to set. Always allow enough time in the refrigerator; checking texture periodically ensures it’s not overly firm or too soft before slicing.

Recipe Success Stories

Over the years, Italian Amaretto Pistachio Fudge has garnered numerous compliments from friends and family who have tried it. Many appreciate the ease of preparation, with several sharing that they successfully replicated the recipe for seasonal gatherings, receiving rave reviews from guests.

Readers have also expressed their excitement at how well the fudge holds up for events. It becomes a conversation starter due to its unique flavor profile, leading to gratifying discussions, especially among dessert aficionados. One reader noted how their family requested it for every birthday and holiday celebration, further underlining its charm.

Adaptation stories abound, with several individuals experimenting by adding their favorite flavors, like dark chocolate or coconut, enhancing the versatility of the original recipe. These personalized touches have resulted in a newfound appreciation for an already beloved treat.

Photography tips from our readers have suggested arranging the fudge in festive settings, using contrasting plates and garnishes to highlight its vibrant colors. This attention to detail elevates the serving experience, enticing others to want to try the fudge.

Encouraged by its success, many have started a tradition of gifting portions of this fudge, delighting friends and family with homemade treats, further reinforcing its status as a cherished recipe in their households.

Frequently Asked Questions

What makes this fudge different from traditional fudge?
Traditional fudge typically uses chocolate, while this recipe highlights Amaretto and pistachios, giving it a unique flavor profile that differentiates it from the classic variant.

Can I leave out the Amaretto?
Yes, you can replace Amaretto with milk or a different flavored syrup if you prefer a non-alcoholic option, although it will alter the taste slightly.

How should I store the fudge?
Store it in an airtight container at room temperature or in the refrigerator. Properly stored, it can last up to two weeks.

Can I freeze this fudge?
Absolutely! Cut the fudge into squares, place parchment paper in between layers, and store in a freezer-safe container. It can last up to three months.

Can I use different nuts?
Yes! Feel free to substitute pistachios with almonds, hazelnuts, or even walnuts for a different flavor experience.

Is this fudge gluten-free?
The recipe is naturally gluten-free, making it suitable for those with gluten sensitivities or celiac disease.

How can I ensure the fudge sets properly?
Allow it to cool at room temperature and then refrigerate it for at least a few hours to ensure it sets correctly.

What’s the best way to cut the fudge?
Use a sharp knife to cut the fudge after it has been chilled thoroughly. Running the knife under hot water beforehand can help achieve cleaner cuts.

Can I make this fudge vegan?
Definitely! Substitute dairy ingredients with plant-based alternatives like coconut cream and vegan butter.

How can I add more flavor to the fudge?
Experimenting with extracts or spices, like vanilla, coffee, or cinnamon, can add depth to the flavor profile while maintaining the original integrity.

Additional Resources

For those wanting to learn more about making desserts, consider checking out related recipes on fudge variations or explore other Italian desserts like Tiramisu or Panna Cotta. Technique guides on chocolate tempering and candy-making can also enhance your dessert skills.

Investing in essential kitchen equipment like a candy thermometer and high-quality non-stick pans assures better results in your dessert-making adventures. Exploring seasonal variations can spark creativity, offering you chances to try out new ingredients and flavors throughout the year.

Join the Conversation

We love hearing from our readers! Share your experiences with making Italian Amaretto Pistachio Fudge on social media, showcasing your beautiful creations with photos. Engaging with our community and offering feedback on the recipe helps inspire others to give it a try.

If you’ve made any unique adaptations, feel free to share them and inspire the next baker! We encourage recipe reviews as they not only serve as guidance for fellow bakers but also help refine our recipes further based on crowd feedback.

Don’t forget to follow us for more delectable recipes and food photography tips that bring your sweet creations to life. Join the conversation today!

The Recipe

Italian Amaretto Pistachio Fudge

Serves: 16 pieces

Prep Time: 15 mins

Cook Time: 20 mins

Total Time: 35 mins

Kitchen Equipment Needed

  • Heavy-bottomed saucepan
  • Spatula
  • 8×8 inch baking dish
  • Parchment paper
  • Candy thermometer

Ingredients

  • 1 cup shelled pistachios, chopped
  • 1 cup sweetened condensed milk
  • 1/2 cup unsalted butter
  • 2 cups sugar
  • 1/2 cup Amaretto liqueur
  • 1 teaspoon vanilla extract
  • Pinch of salt

Directions

  1. Prepare an 8×8 inch baking dish by lining it with parchment paper. Set aside.
  2. In a heavy-bottomed saucepan, combine the sweetened condensed milk, sugar, and butter. Cook over medium heat, stirring constantly until the mixture comes to a boil.
  3. Once boiling, reduce the heat and continue to cook, stirring for an additional 5 minutes. Remove from heat.
  4. Stir in the Amaretto liqueur, vanilla extract, salt, and chopped pistachios until well combined.
  5. Pour the mixture into the prepared baking dish, spreading it out evenly.
  6. Let it cool to room temperature, then refrigerate for at least 2 hours or until set.
  7. When fully chilled, lift the fudge from the baking dish using the parchment paper, and cut it into squares. Enjoy!

Recipe Notes

  • Store leftovers in an airtight container at room temperature for up to 2 weeks or in the refrigerator for up to a month.
  • Feel free to experiment with different types of nuts or liqueurs for unique flavor variations.

Indulge in Decadent Chocolate Hazelnut Cheesecake Trifle Recipe

Delicious Chocolate Hazelnut Cheesecake Trifle: A Decadent Dessert Experience

⚖️
Difficulty
Medium

⏲️
Prep Time
30 mins

🕒
Cook Time
15 mins

⏱️
Total Time
45 mins

🍽️
Servings
6-8 servings

Indulge in the rich and creamy layers of this Chocolate Hazelnut Cheesecake Trifle, a dessert that beautifully combines the nutty flavor of hazelnuts with decadent chocolate. Perfect for gatherings or as a special treat at home, this trifle layers luscious cheesecake filling, whipped cream, and cookie crumbles, allowing you to savor every delightful bite. The harmonious interplay of textures and flavors creates a dessert experience that is both satisfying and elegant.

The Chocolate Hazelnut Cheesecake Trifle not only appeals to the palate with its sweet and nutty crochet but also captivates the eyes with its stunning presentation. Each layer showcases the rich chocolate and creamy cheesecake, all crowned with a sprinkling of crushed hazelnuts, inviting you to dig in. This dessert encapsulates the essence of indulgence while being simple enough to prepare for any occasion.

Quick Recipe Highlights

  • Flavor Profile: A perfect balance of sweet, nutty chocolate and creamy cheesecake.
  • Texture: The delightful crunch from cookie crumbles contrasts with the smooth cheesecake layers.
  • Aroma: Aromatic notes of chocolate and roasted hazelnuts entice your senses as this dessert bakes.
  • Visual Appeal: The layered presentation in a clear dish creates an eye-catching centerpiece.
  • Skill Level Needed: This recipe is suitable for home chefs with basic baking skills.
  • Special Equipment: A trifle dish or glass bowl works best for showcasing the layers.

Recipe Overview

  • Difficulty Level: The Chocolate Hazelnut Cheesecake Trifle is classified as medium difficulty, requiring several steps but no advanced techniques.
  • Category: This is a dessert, perfect for special occasions or holiday gatherings—an impressive addition to any festive table.
  • Cuisine: Drawing inspiration from both American and European desserts, this trifle marries classic cheesecake with a gourmet twist.
  • Cost: The estimated cost for the ingredients is moderate, making it accessible for home bakers.
  • Season: Ideal for year-round enjoyment, especially during holidays when rich desserts are favored.
  • Occasion: Perfect for birthdays, holidays, or dinner parties where a show-stopping dessert is desired.

Why You’ll Love This Recipe

The taste of this Chocolate Hazelnut Cheesecake Trifle is undeniably luxurious, with each bite offering a perfect blend of rich chocolate, creamy cheesecake, and nutty hazelnuts. The layers create an enchanting burst of flavor that delights both your palate and your senses. Each component—from the smooth cheesecake to the crunchy biscuit layer—works in harmony to provide a dessert that is anything but ordinary.

Convenience and ease are at the forefront of this recipe. You can prepare the cheesecake filling in advance, allowing you to assemble the trifle when guests arrive. This means you can spend more time enjoying their company rather than being stuck in the kitchen. The no-bake aspects of the cheesecake filling make it a hassle-free option, further enhancing its appeal.

Nutritional advantages can be savored too. The combination of hazelnuts adds a hearty dose of healthy fats and fiber while maintaining the fun of a decadent dessert. Although indulgent, when served in moderation, it can be part of a balanced diet.

Sharing this trifle with friends and family can elevate your gatherings. The visual appeal and delicious flavors spark conversation and create a memorable experience. It’s perfect for serving at events where you want to impress your guests. The versatility of this trifle also encourages sharing at various occasions, from casual family dinners to more formal celebrations.

Cost-effectiveness is another reason to love this recipe. You can make this Chocolate Hazelnut Cheesecake Trifle for about the same price as store-bought desserts while delivering a house-made treat that far exceeds expectations. Additionally, the use of simple, widely available ingredients ensures that creating this delightful masterpiece is financially accessible.

Historical Background and Cultural Significance

The roots of the cheesecake can be traced back to ancient Greece, where it was served to athletes during the first Olympic games. Over the centuries, this dessert has evolved into numerous variations, influenced by different cultures and regions. The incorporation of chocolate and hazelnuts is a nod to contemporary twists that reflect modern baking trends and consumer preferences.

In many European countries, trifles are a traditional dessert, often layered with fruits, creams, and sweets. This format provides not only a pleasing visual experience but also allows for endless creative possibilities. The Chocolate Hazelnut Cheesecake Trifle beautifully marries these traditions, incorporating the beloved flavors of chocolate and hazelnuts into a cohesive dish loved by many.

Traditionally, trifles symbolize celebration and indulgence. They evoke a sense of togetherness and joy, often served at family gatherings and holidays. The various layers represent the complexities of life, where sweet and savory moments intermingle, much like the flavors and textures found in this dessert.

Regional variations of chocolate desserts often showcase unique ingredients or techniques. For instance, a common variation might include adapting the cheesecake filling by using local nuts or flavored liqueurs, emphasizing the versatility and cultural significance of desserts like this trifle.

Ingredient Deep Dive

Chocolate: Chocolate has a rich history dating back to the ancient Mesoamericans who used it as a beverage. Nutritionally, chocolate is known for its antioxidants and potential heart benefits. When selecting chocolate for baking, opt for high-quality dark chocolate with at least 60% cocoa for depth of flavor. Store chocolate in a cool, dry place, and consider using cocoa powder as a substitute in recipes that call for melted chocolate.

Hazelnuts: Hazelnuts are celebrated globally, particularly in Italian cuisine where they complement sweets and pastries. They are beneficial for heart health, high in healthy fats, and offer protein and fiber. When selecting hazelnuts, look for fresh, whole nuts that have not been roasted for maximum flavor. Store hazelnuts in an airtight container in a cool, dark place, and consider substituting pecans or almonds if necessary.

Cream Cheese: Cream cheese is a staple ingredient in many desserts and originated in the U.S. It provides richness and creaminess in recipes. It’s high in protein and calcium but can be high in fat. Choose full-fat cream cheese for the best texture and flavor. Store cream cheese in the refrigerator and consume it by the expiration date. Greek yogurt can be used as a lighter alternative in many recipes.

Common Mistakes to Avoid

  • Overmixing cream cheese can lead to a grainy texture in your cheesecake layers. Mix just until smooth for creamy results.
  • Not chilling the cheesecake filling long enough can cause it to be too soft, making layering difficult.
  • Using stale cookies for the crust can ruin the texture; always ensure the ingredients are fresh.
  • Neglecting to taste your filling can lead to a bland cheesecake; be sure to adjust flavors as necessary.
  • Assembling the trifle too early results in soggy layers as the cookies absorb moisture; assemble just before serving.
  • Using the wrong binder can make your cheesecake layers unstable; ensure the right ratio of ingredients for best results.
  • Not using a clear dish can disguise the beautiful layers; opt for a trifle dish or clear glass bowl for presentation.
  • Not allowing the trifle to set properly can lead to a messy dessert; patience pays off in achieving a perfect trifle.

Essential Techniques

Layering: Proper layering is crucial for presenting your chocolate hazelnut cheesecake trifle. Ensure each layer is evenly distributed to create a beautiful visual contrast. Start with cookie crumbles, followed by the cream layer, and repeat. Visually check the layers after assembly; if necessary, use a spoon to gently readjust the layers for an aesthetically pleasing presentation.

Chilling: Allowing the cheesecake filling to chill is important for flavor melding and textural improvement. The filling will become firmer, making it easier to layer within the trifle. To master this technique, remember to let the cheesecake mixture sit for at least 4 hours or overnight. Look for a smooth and spreadable consistency before using.

Pro Tips for Perfect Chocolate Hazelnut Cheesecake Trifle

– Use high-quality chocolate for richer flavor; the better the chocolate, the more intense the flavor.
– Crush your cookies in a food processor for a finer crumb that binds better with melted butter.
– Let your cheesecake mixture come to room temperature before whipping; this helps in achieving a smooth consistency.
– Don’t skip the chilling steps; the texture and flavor improve significantly with time.
– Offer a variety of toppings—think whipped cream or chocolate shavings to elevate the presentation and flavor profiles.
– Consider making individual servings in small cups for a fun and elegant party option.
– If using store-bought cookies, taste them first to adjust sweetness accordingly, as some brands can be sweeter than others.
– For a twist, add a splash of hazelnut liqueur to the cheesecake mix for an extra layer of flavor.

Variations and Adaptations

There are numerous ways to adapt the Chocolate Hazelnut Cheesecake Trifle to suit different tastes. For regional variations, consider incorporating local nuts or seasonal fruits, which can add a unique twist. Instead of hazelnuts, feel free to use almonds or pecans for a different flavor profile.

Seasonal adaptations could involve infusing the cheesecake with seasonal flavors; for example, adding pumpkin spice in the fall or peppermint in winter. For dietary modifications, turning this dessert gluten-free is simple with gluten-free cookies, while vegan options can utilize coconut cream in place of cream cheese.

Flavor variations can also greatly enhance this dessert. Try adding espresso powder to accentuate the chocolate flavors or incorporate fresh berries for a fruitier version. Texture modifications can involve varying the type of cream used—like whipped coconut cream for a dairy-free spin.

For presentation alternatives, consider serving the trifle in mason jars for a rustic touch or layer it in a tiered dessert stand for a stunning display at events.

Serving and Presentation Guide

Presentation is key for any dessert, especially for something as visually appealing as a trifle. A clear glass bowl allows the layers to shine; arrange the layers thoughtfully, providing an enticing view of the chocolate and cheesecake. For plating, consider using small individual dishes or cups to create a more personal touch.

You might garnish the top with a dollop of whipped cream and sprinkle with crushed hazelnuts to enhance visual appeal. For modern serving suggestions, try adding a side of chocolate sauce or fresh berries to enhance the flavor profile and offer an interactive element to each serving.

Temperature considerations are essential; serve the trifle slightly chilled for a refreshing experience. Additionally, use a spatula or spoon for careful portion control, allowing guests to savor every layer without overwhelming them.

Wine and Beverage Pairing

When pairing beverages with the Chocolate Hazelnut Cheesecake Trifle, dessert wines tend to work beautifully. A rich port or a sweet dessert wine like Sauternes can elevate the indulgence. Alternatively, consider pairing it with a coffee cocktail, blending the flavors of chocolate and coffee for a delightful finish.

For non-alcoholic options, a rich hot chocolate or a creamy chai latte could complement the flavors perfectly. If serving with tea, consider a robust black tea that can stand up to the richness of the trifle, while herbal teas can offer a lighter contrast.

Temperature considerations are important for serving these beverages; serve wines chilled or at room temperature, and ensure hot beverages are at an optimal sipping temperature to enhance the overall experience.

Storage and Shelf Life

For storage methods, keep the assembled Chocolate Hazelnut Cheesecake Trifle in an airtight container in the refrigerator. This dessert can last up to 3-4 days when stored correctly; however, the cookie layers may become softer over time due to moisture.

Maintaining temperature requirements is vital. Always refrigerate the trifle and ensure it is consumed within the suggested storage time. Use a clear container for visibility, allowing you to monitor any changes in freshness.

Signs of spoilage include off-odors or mold, which should immediately indicate that the dessert is no longer safe to consume. If reheating is necessary, consider only reheating portions of individual servings rather than the entire trifle, as the texture may suffer when heated.

If freezing is desired, do so before assembly; freeze the cheesecake mixture in an airtight container and the cookie layers separately. Defrost prior to assembling and enjoy at a later date.

Make Ahead Strategies

Planning ahead is easy with the Chocolate Hazelnut Cheesecake Trifle. You can prepare the cheesecake filling up to two days in advance, allowing the flavors to meld beautifully in the fridge. This pre-preparation saves you time on the day of an event.

When making this trifle, store each component separately until you’re ready to assemble for best results. This approach will ensure that your cookie layers remain crunchy while your cheesecake filling stays silky smooth.

Quality is crucial; consider the impact of storage solutions on overall freshness. Use airtight containers for individual components, and safeguard against any cross-flavors to keep the integrity of each ingredient.

When assembling, make sure to layer the components efficiently, starting with cookies at the base to avoid sogginess. Follow with the cheesecake layer, cream, and repeat to achieve striking visual layers. Fresh elements like whipped cream should be added right before serving for optimal taste and texture.

Scaling Instructions

Adapting the Chocolate Hazelnut Cheesecake Trifle for different servings is straightforward. To halve the recipe, simply adjust each ingredient proportionately and use a smaller dish. For doubling or tripling, ensure you have adequate bowl size to accommodate larger quantities, and increase preparation times as necessary to stay on track.

Adjusting timing is also crucial. While the cooking time remains mostly the same, assembly may take longer with larger volumes of fillings and layers. Allow extra time for chilling to ensure the layers set properly.

As you scale, be mindful of ingredients; some may need personal adjustments for flavor intensity. For instance, when doubling chocolate, experiment with ratios to prevent overpowering sweetness. Lastly, ensure proper storage considerations as larger batches may require larger containers.

Nutritional Deep Dive

The chocolate hazelnut cheesecake trifle provides a delightful combination of macros. It contains a balance of carbohydrates from sugar and cookies, protein from cream cheese, and healthy fats from hazelnuts. Managing portion sizes can help control caloric intake while still enjoying this confection.

Micronutrient analysis shows interesting benefits from the hazelnuts, which offer vitamin E, magnesium, and fiber. These nutrients contribute to overall wellness and heart health, making the dessert a more informed indulgence.

Health benefits extend beyond the flavors. The presence of antioxidants in dark chocolate can enhance cardiovascular function, providing health-conscious consumers ways to enjoy dessert guiltlessly. Understanding these benefits can help inform decisions for those mindful of dietary habits.

In terms of dietary considerations, this dessert offers flexibility. For those managing their weight, adjusting portion sizes can allow for a treat without exceeding caloric goals, making indulgence both enjoyable and manageable.

Dietary Adaptations

For gluten-free adaptations, substitute traditional cookies with gluten-free alternatives, ensuring that all ingredients are certified gluten-free. This way, those with gluten sensitivities can fully enjoy this dessert without any worries.

Dairy-free options can be created using cream cheese alternatives like cashew cream or silken tofu blended until smooth. Coconut cream can serve as a replacement for whipped cream, delivering a similar texture without dairy.

For vegan modifications, use plant-based cream cheese and replace eggs in any other recipes with flax or chia eggs, maintaining the integrity of the dish while making it vegan-friendly.

Low-carb and keto-friendly variations can employ almond flour for the cookie base and sugar substitutes to maintain the dessert’s sweetness without the carbs. This adaptability allows more individuals to join in on the chocolate hazelnut cheesecake trifle experience.

Paleo-friendly versions can utilize natural sweeteners and unprocessed ingredients throughout the recipe. Using these alternative paths allows for creative culinary options across various dietary needs.

Troubleshooting Guide

For common texture issues, like a grainy cheesecake layer, be mindful of the mixing process. Overmixing can lead to undesirable textures; only mix until fully combined and smooth. Additionally, ensure that your cream cheese is at room temperature when you mix to avoid lumps.

Flavor balance can occasionally misfire—should your trifle turn out too sweet, incorporating a touch of salt in your cream cheese mixture can counteract excessive sweetness and enhance overall flavor.

Temperature problems crop up when serving desserts cold. If suggested chill times are not met, the trifle may not set properly, making it challenging to serve. Always ensure adequate chilling time for the creamiest results.

For equipment challenges, if you lack a trifle dish, layer the dessert in clear glass bowls or individual cups to achieve a similar effect; make sure the contents are visible.

Ingredient substitutions can lead to unexpected results; if you’re swapping ingredients, test small batches first to avoid wasting food.

Timing concerns may arise if the trifle is prepared too far in advance. Always check for best quality and flavor, serving it chilled but not frozen to ensure optimal enjoyment.

Recipe Success Stories

Community feedback around the Chocolate Hazelnut Cheesecake Trifle often highlights its impressive presentation, leading to numerous requests for the recipe. Many home cooks share their successes with variations, like adding different flavors or attempting to create individual servings.

Variation successes showcased new flavor profiles, including raspberry or espresso layered with traditional chocolate. Reader suggestions frequently include innovative garnishing ideas, incorporating edible flowers or chocolate curls for an artistic touch.

Photography tips often include using natural light, which can create beautiful highlights and shadows on the trifle layers, capturing the dessert’s rich complexity.

For many, this dessert has become a family favorite, passed around during gatherings, reinforcing a sense of community and shared joy in dessert-making.

Frequently Asked Questions

Can I make this trifle ahead of time? Yes, you can prepare the cheesecake filling and cookie layers ahead of time. Just assemble the trifle closer to serving time to maintain the texture of the cookie layers.

What can I use instead of hazelnuts? If you’re unable to use hazelnuts, feel free to substitute with almonds, pecans, or any nut you prefer that resonates with your taste.

Is there a way to make this dessert gluten-free? Absolutely! Use gluten-free cookies in place of traditional cookies to maintain the dessert while accommodating gluten-sensitive diets.

What can I do if my cheesecake filling is too runny? If the filling is too runny, ensure that the cream cheese is well-beaten and at room temperature, and consider chilling it longer to help it firm up.

How can I store leftovers of the trifle? Store any leftover trifle in an airtight container in the refrigerator for up to four days to maintain freshness.

Can I freeze the trifle? It’s best to freeze the components separately. The assembled trifle may not hold its texture well once defrosted.

What type of chocolate should I use? Use high-quality dark chocolate with a cocoa content of at least 60% for the richest flavor.

Can you adapt this recipe for keto diets? Yes, by substituting sugar with low-carb sweeteners and using almond flour for the cookie base, you can create a keto-friendly version.

How many servings does this recipe yield? This recipe serves approximately 6 to 8 people, depending on portion sizes.

What is a good substitution for cream cheese? For dairy-free options, use silken tofu blended until smooth or dairy-free cream cheese as a substitute.

Additional Resources

If you’re looking for related recipes, consider exploring variations of cheesecake, such as no-bake or fruit-topped desserts. Comprehensive technique guides for dessert making can enhance your skills, while ingredient-focused articles can expand your knowledge on chocolate and nuts.

For equipment recommendations, investing in quality mixing bowls, food processors, and trifle dishes can ease your baking experiences and improve outcomes. Exploring seasonal variations of this trifle during various holidays can also provide new culinary fun and adventure in your kitchen.

Join the Conversation

We invite you to share your experiences with the Chocolate Hazelnut Cheesecake Trifle! Use social media to showcase your delicious creations, and provide feedback or suggestions based on your personal adaptations. Photography tips can require practice, but they can greatly enhance your food presentation.

Engage with the community by discussing your variations or favorite dessert recipes. Each contribution adds to the rich tapestry of baking storytelling, enhancing the overall experience for all enthusiasts.

The Recipe

Chocolate Hazelnut Cheesecake Trifle

Serves: 6-8 servings

Prep Time: 30 mins

Cook Time: 15 mins

Total Time: 45 mins

Kitchen Equipment Needed

  • Trifle dish or clear glass bowl
  • Mixing bowls
  • Electric mixer
  • Spatula
  • Food processor (optional)

Ingredients

  • 8 oz cream cheese, softened
  • 1 cup heavy whipping cream
  • ½ cup powdered sugar
  • ½ cup chocolate hazelnut spread (like Nutella)
  • 1 cup crushed cookies (like Oreos or chocolate wafers)
  • ½ cup chopped hazelnuts
  • 1 tsp vanilla extract
  • Optional toppings: whipped cream, chocolate shavings

Directions

  1. In a mixing bowl, beat the cream cheese until smooth.
  2. Gradually mix in the chocolate hazelnut spread and vanilla extract until combined.
  3. In another bowl, beat the heavy whipping cream and powdered sugar until stiff peaks form.
  4. Gently fold the whipped cream into the cream cheese mixture until fully integrated.
  5. In a trifle dish, start layering with cookie crumbs, followed by the cheesecake filling. Repeat the layers until all ingredients are used.
  6. Top with chopped hazelnuts and optional whipped cream or chocolate shavings.
  7. Chill for at least 2 hours before serving to allow layers to settle.

Recipe Notes

  • For a decadent touch, drizzle with additional chocolate hazelnut spread before serving.
  • To make it gluten-free, use gluten-free cookies.
  • Consider individual servings in small glasses for a fun presentation.

Delicious Beef-Stuffed Pasta Shells with Creamy Ricotta Filling Recipe

Beef-Stuffed Pasta Shells with Creamy Ricotta Filling: A Delicious Comfort Food

⚖️
Difficulty
Medium

⏲️
Prep Time
20 mins

🕒
Cook Time
40 mins

⏱️
Total Time
60 mins

🍽️
Servings
4 servings

The delightful flavors of Beef-Stuffed Pasta Shells with Creamy Ricotta Filling make this dish a standout choice for any dinner table. Imagine large pasta shells cradling a savory mixture of seasoned ground beef, aromatic herbs, and a velvety ricotta filling, all enveloped in a rich marinara sauce. This comforting dish brings a sense of warmth and satisfaction, making it perfect for family gatherings or weeknight dinners.

As the pasta bakes, the cheese melts and blends into the sauce, creating a delectable aroma that fills your kitchen. Each bite offers a delightful contrast of textures, from the tender pasta shells to the hearty beef filling and the creamy ricotta. Whether you are serving this up for a special occasion or simply enjoying a cozy night in, these beef-stuffed shells are sure to impress your taste buds and heart.

Quick Recipe Highlights

  • Flavor Profile: A rich blend of beefiness complemented by the creaminess of ricotta and the acidity of marinara sauce.
  • Texture: Tender pasta shells filled with a robust beef mixture and topped with a luscious, creamy ricotta.
  • Aroma: Inviting scents of herbs, garlic, and slow-cooked tomatoes will make your kitchen smell heavenly.
  • Visual Appeal: A vibrant plate featuring golden pasta shells smothered in bright red marinara sauce and garnished with fresh basil.
  • Skill Level Needed: Ideal for cooks with basic knowledge, yet can impress advanced chefs with its presentation.
  • Special Equipment: A large baking dish for assembly and oven-safe cookware for added convenience.

Recipe Overview

  • Difficulty Level: Medium, perfect for those who are comfortable with basic cooking techniques yet willing to take on a bit more.
  • Category: Comfort food, ideal for cozy family meals or potluck gatherings.
  • Cuisine: Italian-inspired, reflecting the rich pasta tradition of Italy while embracing hearty beef fillings common in many comfort dishes.
  • Cost: Approximately $18-25 for a filling meal that serves four, affordable for family dinners.
  • Season: Year-round favorite, but particularly comforting during cooler months when heartier meals are desired.
  • Occasion: Perfect for family dinners, gatherings with friends, or casual potlucks.

Why You’ll Love This Recipe

Indulge in the savory taste and delightful texture of these Beef-Stuffed Pasta Shells with Creamy Ricotta Filling. The combination of ground beef and ricotta creates a satisfying meal that is both hearty and comforting. You’ll love how easy it is to prepare this dish, making it a great option for busy weeknights or special gatherings.

This recipe also offers impressive nutritional advantages, as it incorporates protein-rich beef and cheese, delivering essential nutrients while remaining filling and delicious. Sharing this dish with friends or family guarantees memorable moments around the dinner table, sure to generate conversation and compliments.

When considering cost-effectiveness, this recipe shines, allowing you to enjoy a gourmet experience without breaking the bank. The affordability of the ingredients makes it accessible for most home cooks, turning each meal into a celebration of flavor without excessive spending.

Historical Background and Cultural Significance

Like many beloved Italian dishes, the origin of stuffed pastas can be traced back to Italy’s rich culinary traditions. Historically, pasta stuffing was a way to utilize leftover meats and cheeses, allowing families to create hearty meals with minimal waste. Over time, various regions developed their unique interpretations of stuffed pasta, each infusing local flavors and ingredients.

Cultural importance is woven into the fabric of this dish, representing the Italian philosophy of sharing food with loved ones. From family holidays to everyday dinners, pasta has always played a central role in gathering people together, making it a cornerstone of community and family bonds.

The evolution of the recipe has seen numerous adaptations, with chefs experimenting with ingredients ranging from classic ground beef to vegetarian options using spinach and cheese. Each variation tells a story of its region and personal touch, showcasing the versatility of stuffed pastas while staying true to their comforting roots.

Regional variations can be found in dishes like cannelloni or manicotti, each offering a slight twist on the original concept while celebrating pasta’s ability to transform into countless forms. Regardless of the specifics, all stuffed pasta retains the core essence of comfort and family.

Ingredient Deep Dive

  • Pasta Shells: Typically made from durum wheat semolina, pasta shells are crucial for holding the delicious filling. Consideral selection tips include choosing large shells for easy stuffing and checking for integrity (no cracks). Store them in a cool, dry place. For substitutions, consider large conchiglie or jumbo shells.
  • Ground Beef: A staple protein choice, ground beef provides essential iron and protein. When selecting, opt for leaner cuts to avoid excessive grease. If unavailable, ground turkey or chicken could also serve as great alternatives. Store in the fridge for up to 2 days or freeze for longer use.
  • Ricotta Cheese: Renowned for its creamy texture, ricotta enhances the filling and adds richness. For the best taste, fresh ricotta is preferred, which can be made from whole milk. Proper storage includes refrigeration and use within a week for the best flavor. Substitutes include cottage cheese blended until smooth.
  • Marinara Sauce: This tangy tomato-based sauce elevates the dish, bringing moisture and flavor. Opt for sauces rich in herbs and spices for the best taste. Store in the fridge for 3-5 days; jarred versions can last longer. Homemade versions offer the best flavor profile with fresh tomatoes and herbs.

Common Mistakes to Avoid

  • Overcooking the pasta shells can lead to a mushy texture, making them difficult to stuff.
  • Not seasoning the beef mixture properly results in a bland filling that lacks depth of flavor.
  • Piling too much filling into each shell can cause them to burst while cooking.
  • Skipping the baking step can lead to a less cohesive dish; the flavors meld beautifully in the oven.
  • Using low-quality marinara sauce compromises the overall taste of the dish; choose a brand known for robust flavor.
  • Not letting the baked shells cool slightly before serving can lead to burns and tricky plating.
  • Forgetting to cover the baking dish with foil can lead to uneven cooking and dryness.
  • Using pre-grated cheese can yield a less creamy texture; always prefer fresh cheese for the best results.
  • Ignoring the cooking time can either dry out the pasta or leave the meat undercooked.
  • Rushing through the ingredient prep creates inconsistency in texture and flavor.

Essential Techniques

Expertly mastering the technique of stuffing pasta shells is vital for successful presentation and flavor distribution. Properly filling each shell involves using a small spoon or piping bag to ensure no gaps. Practice makes perfect; aim for consistency in portioning.

Baking the pasta shells with marinara sauce is an art that captures the essence of harmony in flavors. Preheating your oven to the correct temperature before putting the dish inside guarantees even cooking and bubbling cheese. Use visual cues, like bubbling sauce and a golden cheese top, to signify readiness.

Pro Tips for Perfect Beef-Stuffed Pasta Shells

1. Ensure your pasta shells are cooked al dente for the right texture and firmness.
2. Incorporate fresh herbs into your beef mixture for an elevated flavor.
3. Let the ricotta sit at room temperature before mixing to create an ultra-creamy texture.
4. Consider adding sautéed vegetables, such as spinach or mushrooms, to the beef mixture for added nutrition.
5. Drizzle freshly grated parmesan on top before serving to add a touch of luxury.
6. Bake the shells uncovered for the last 10 minutes for a delightful crispy topping.
7. For a spicy kick, add crushed red pepper flakes to your marinara sauce.
8. Allow the stuffed shells to rest after baking to enable easy serving without falling apart.

Variations and Adaptations

Explore regional variations by colorful adaptations such as using seafood or vegetarian fillings. Seasonal adaptations can include adding pumpkin or squash for a fall-themed dish, enhancing not just flavors but visuals too.

Dietary modifications can accommodate gluten-free consumers by substituting traditional pasta shells with gluten-free ones. For vegan needs, consider a chickpea-based filling with a cashew ricotta alternative for a rich, creamy texture.

Flavor variations can be executed by incorporating herbs like basil or oregano, while texture modifications can include adding crispy breadcrumbs on top for an inviting crunch. Presentation alternatives such as serving the shells in individual ramekins can add an elegant touch for special gatherings.

Serving and Presentation Guide

Effective plating techniques enhance the visual appeal of beef-stuffed pasta. Consider adding a light sprinkle of fresh herbs over the plated shells for color and elegance. Garnishing with shredded cheese or a spoonful of marinara can elevate the presentation.

Traditional accompaniments like a side salad or garlic bread provide a well-rounded meal. For modern servings, consider offering a wine pairing or artisan bread to augment the dining experience. Serving at a warm temperature allows the cheese to maintain its creamy texture while inviting guests to dig in.

Lastly, maintaining a reasonable portion size ensures everyone can savor the dish without feeling overly stuffed, facilitating enjoyable meal pacing.

Wine and Beverage Pairing

When pairing wine with Beef-Stuffed Pasta Shells, a medium-bodied red like Chianti or Sangiovese complements the meaty flavor while balancing the acidity of the marinara sauce. For white wine enthusiasts, a lightly oaked Chardonnay can add extra depth to the creamy ricotta.

Non-alcoholic alternatives like sparkling water with a lemon wedge can cleanse the palate effectively. Additionally, for a cozy touch, serve coffee or a robust herbal tea as a delightful end to the meal, drawing out the flavors of both the pasta and dessert if desired.

Storage and Shelf Life

Proper storage of the Beef-Stuffed Pasta Shells ensures freshness for later enjoyment. To store, allow the dish to cool completely, cover it tightly with plastic wrap or aluminum foil, and refrigerate for up to 3 days. If planning to freeze, assemble the dish without baking for optimal results, allowing you to bake it fresh later.

Signs of spoilage include an off odor or unusual texture changes, indicating it’s best to discard. When reheating, ensure the internal temperature reaches 165°F to guarantee food safety, either in the oven or microwave.

For freezing, consult guidelines for securely packaging, and note that the dish may harbor slightly altered textures upon thawing, worth considering when planning your meals.

Make Ahead Strategies

Prepare your Beef-Stuffed Pasta Shells in advance by boiling the shells and preparing the filling a day beforehand, storing separately until you’re ready to bake. This approach allows flavors to meld beautifully when combined fresh just before baking.

Consider assembling the entire dish without baking, refrigerating it until you’re ready to cook. Quality is preserved by covering the dish in the fridge. If slightly reheating ingredients before baking, be sure to adjust baking times accordingly to achieve a perfect finish.

Adding fresh ingredients such as herbs right before serving can infuse extra vibrancy into your dish, avoiding wilting or losing flavor during storage.

Scaling Instructions

When scaling your Beef-Stuffed Pasta Shells recipe, consider halving or doubling the ingredients accordingly. For larger gatherings, simply prepare additional baking dishes to accommodate increased portions while managing oven space efficiently.

Ensure that cooking times remain relatively consistent; larger or smaller portions may require minor adjustments but typically cook within the same range. Consider timing not just for baking but also for prep—enlist help for an efficient assembly line when preparing larger batches.

Storage considerations should remain similar; additional dishes might necessitate faster cooling methods to promote optimal food safety, particularly when preparing in advance or for freezing.

Nutritional Deep Dive

The Beef-Stuffed Pasta Shells deliver a satisfying macro breakdown, with proteins from the beef and ricotta, carbohydrates from the pasta, and fats that add richness. Each serving provides excellent fiber content through whole grain options or added vegetables.

Micronutrient analysis shows essential vitamins and minerals, such as iron and calcium, benefiting muscle and bone health through the hearty ingredients. Balance in dietary considerations can help those mindful of their nutrition while still enjoying a hearty meal.

Understanding portion analysis can aid in weight management; balance your plate by pairing with lighter sides like salad or fresh vegetables. Engaging in mindful eating practices around this dish can help appreciate flavors while staying mindfully satiated.

Dietary Adaptations

Crafting gluten-free versions of Beef-Stuffed Pasta Shells can involve substituting traditional pasta with a gluten-free product made from rice or lentils, ensuring that everyone can enjoy the meal.

For dairy-free needs, replacing ricotta with a plant-based cheese or puree can create an equally satisfying filling. To accommodate vegan diners, consider a hearty filling of lentils and fresh vegetables packed with flavor.

Low-carb adaptations can include using zucchini noodles in place of pasta shells, maintaining the comfort of the dish while adhering to dietary needs. Keto and paleo-friendly versions can be achieved through similar vegetable substitutes paired with a delicious meat sauce.

Troubleshooting Guide

If your filling lacks flavor, revisit your seasoning choices; adding salt, pepper, and herbs while tasting can elevate the overall dish. Addressing texture issues in the beef filling can be resolved by taking care not to overcook it before assembly.

Temperature problems arise when the dish is not heated evenly. Use a meat thermometer to verify cooking, ensuring each portion reaches safe temperatures. Ingredient substitutions must be measured accurately for success; not all toppings contribute equally to flavor.

Sticking pasta can be resolved by proper cooking methods that account for just the right amount of water and time, while any pooling excess sauce can be handled with careful control during assembly and dispersing of marinara.

Recipe Success Stories

Community feedback showcases the delightful experiences that come from preparing Beef-Stuffed Pasta Shells. Many readers have embraced personal variations, like swapping out marinades or incorporating seasonal vegetables, leading to inspiring adaptations.

Variation successes often include friends gathering to share this dish; stories finalized with memories made during cooking or family discussions elevate the experience, showing how food creates camaraderie.

Photography captures the vibrant colors of the completed dish, inviting everyone’s appetite. Tips from readers regard optimal lighting and angles for showcasing sumptuous servings, adding visual appeal and making the recipe more shareable.

Frequently Asked Questions

Can I make these shells in advance? Yes, you can prep the pasta shells and filling in advance, storing them separately in the fridge until you’re ready to bake.

What can I substitute for ricotta cheese? Cottage cheese blended until smooth or tofu mixed with nutritional yeast can serve as dairy-free alternatives while providing similar creamy textures.

Can I freeze beef-stuffed shells? Absolutely, they freeze well! Just ensure they are cooled completely, then wrap in airtight containers or freezer bags.

What sauces go well with this dish? Besides marinara, a béchamel or alfredo sauce can also enhance the flavor profile, especially for creamy variations.

How do I keep the shells from breaking? Cooking the shells just until al dente before stuffing helps maintain their structural integrity during baking.

What herbs can I add for more flavor? Fresh basil, oregano, or parsley contribute delightful Mediterranean flavors, enhancing the overall appeal.

How do I select the best ground beef for this recipe? Look for lean ground beef with a fat content of 80/20, providing a good balance of flavor and moisture without being overly greasy.

Can I add vegetables to the filling? Yes! Chopped spinach, mushrooms, or bell peppers can be incorporated into the beef mixture for added nutrition and flavor.

Is this recipe suitable for kids? Absolutely! Kids typically love this comforting dish, and you can adjust the spice level for younger palates.

What is the best way to reheat leftovers? Oven reheating creates an evenly warmed dish, while the microwave is fine for quicker reheats, ensuring cheese remains melty but not dry.

Additional Resources

For more exciting Italian-inspired recipes, consider exploring our collection of pasta dishes that guide you through authentic preparations. Included are technique guides for mastering pasta-making, ingredient information for making fresh sauces at home, and equipment recommendations to enhance your culinary journey.

Connecting with seasonal variations opens avenues for creative cooking throughout the year, ensuring every occasion can feature a festive centerpiece dish.

Join the Conversation

Engaging with our community through social media sharing of your recipe attempts and feedback will inspire others to recreate their own Beef-Stuffed Pasta Shells. Share your photography to showcase your unique presentation styles, fostering a shared love for cooking.

Participate in recipe reviews to share your modifications and successes, helping others to find their path while exploring culinary creativity.

The Recipe

Beef-Stuffed Pasta Shells

Serves: 4 servings

Prep Time: 20 mins

Cook Time: 40 mins

Total Time: 60 mins

Kitchen Equipment Needed

  • Large baking dish
  • Large pot for boiling pasta
  • Mixing bowl
  • Spoon or piping bag for stuffing
  • Oven-safe cookware

Ingredients

  • 12 large pasta shells
  • 1 pound ground beef
  • 1 cup ricotta cheese
  • 2 cups marinara sauce
  • 1/2 cup grated parmesan cheese
  • 1 tablespoon olive oil
  • 1 teaspoon garlic powder
  • Salt and pepper to taste
  • Fresh basil for garnish

Directions

  1. Preheat the oven to 375°F (190°C).
  2. Cook the pasta shells according to package instructions until al dente and drain.
  3. In a skillet, heat olive oil over medium heat, add ground beef, garlic powder, salt, and pepper, and cook until browned.
  4. In a bowl, mix the cooked beef with ricotta cheese until combined.
  5. Stuff each pasta shell with the beef and ricotta mixture and place them in the baking dish.
  6. Pour marinara sauce evenly over the stuffed shells, ensuring they are well coated.
  7. Sprinkle grated parmesan cheese on top.
  8. Cover the dish with aluminum foil and bake for 25 minutes. Remove the foil and bake for an additional 15 minutes until heated through and golden.
  9. Let cool slightly before serving; garnish with fresh basil.

Recipe Notes

  • Feel free to substitute ground beef with turkey or chicken for a lighter version.
  • Experiment with adding vegetables to the filling for added nutrition.
  • This dish can be frozen unbaked, just allow extra cooking time when baking from frozen.
  • Consider adding capers or olives to the marinara sauce for a flavor twist.

Indulge in Decadence with This Chocolate Fudge Brownie Cake

Decadent Chocolate Fudge Brownie Cake: A Rich Delight

⚖️
Difficulty
Moderate

⏲️
Prep Time
20 mins

🕒
Cook Time
30 mins

⏱️
Total Time
50 mins

🍽️
Servings
12

Indulging in a slice of Chocolate Fudge Brownie Cake is more than just enjoying dessert; it’s an experience that speaks to the heart of chocolate lovers everywhere. This cake combines the rich, dense texture of brownies with the fluffiness of cake, creating a unique treat that is both satisfying and delightful. Imagine the first bite melting in your mouth, a perfect blend of chocolatey goodness enhanced with a moist crumb that leaves you yearning for more. Each layer is crafted to perfection, ensuring that every slice is an indulgence you won’t soon forget.

What sets this Chocolate Fudge Brownie Cake apart is not only its rich flavor but also the way it envelops you in a warm embrace of childhood memories and joyful moments. It’s perfect for celebrations, casual gatherings, or even a cozy night in with a cup of tea or coffee. The aroma wafting through your kitchen as it bakes is intoxicating, whisking you away to a world of chocolatey delights. Each moment spent preparing this cake is filled with anticipation for the bliss it promises to deliver.

Quick Recipe Highlights

  • Flavor Profile: This cake features rich chocolate notes complemented by a hint of vanilla, making every bite an exquisite experience.
  • Texture: The chewy, fudgy center contrasted by a slight crispiness on the edges delivers a delightful mouthfeel.
  • Aroma: The irresistible scent of chocolate baking wafts through the air, creating an inviting atmosphere for everyone.
  • Visual Appeal: The glossy frosting and dense layers exude elegance, making it a stunning centerpiece for any occasion.
  • Skill Level Needed: While this recipe is moderately difficult, it’s still accessible for home bakers looking to impress.
  • Special Equipment: You’ll need a 9-inch round cake pan and an electric mixer to achieve the perfect consistency.

Recipe Overview

  • Difficulty Level: This recipe is classified as moderate due to the precise measurements and timing required to achieve that signature fudginess.
  • Category: Ideal for dessert lovers, this Chocolate Fudge Brownie Cake falls into the dessert and special occasion categories.
  • Cuisine: Rooted in classic American baking, this recipe highlights the tradition of chocolate desserts that unite people.
  • Cost: With standard ingredients, this recipe is cost-effective, averaging about $10-15 for the entire cake.
  • Season: Best enjoyed throughout the year, but particularly popular during the cooler months when warm, comforting desserts are desired.
  • Occasion: Perfect for birthdays, holidays, or any gathering where chocolate is a must-have.

Why You’ll Love This Recipe

Embracing the rich taste and luxurious texture of this Chocolate Fudge Brownie Cake makes every bite an adventure. The layers are sinfully delicious, combining the best attributes of brownies and cake to create a decadent dessert that satisfies cravings. The sweetness is perfectly balanced, allowing the chocolate to shine without overpowering other flavors.

Not only is this cake a show-stopper, but its convenience in preparation is another reason to love it. The straightforward steps make it accessible even for novice bakers. You’ll quickly find that this cake can be whipped together in no time, with minimal mess and preparation required, making it an outstanding option for spontaneous gatherings or celebrations.

Nutritionally, while this cake is undeniably indulgent, it can be made using high-quality ingredients that add comfort without compromising flavor. Using options like dark chocolate can enhance the richness, providing antioxidants and a deep flavor profile that elevates the overall taste.

Socially, this Chocolate Fudge Brownie Cake acts as a wonderful conversation starter, encouraging sharing and laughter. Its presentation speaks volumes, making it the centerpiece of any dessert table and inviting guests to indulge in a slice. It seamlessly integrates into gatherings, adding a touch of warmth and celebration.

Finally, the cost-effectiveness of this recipe cannot be overstated. With readily available ingredients and a straightforward approach, this cake stands out as an impressive treat that does not break the bank. You can bake something extraordinary at home that rivals expensive bakery offerings, allowing everyone to enjoy a taste of luxury on a budget.

Historical Background and Cultural Significance

The origins of the brownie date back to the late 19th century in the United States, and as the dessert evolved, various interpretations emerged, leading to the creation of the Chocolate Fudge Brownie Cake. Historically, brownies were conceived as a simpler dessert, offering a dense chocolate experience without the need for complicated techniques.

The cultural significance of brownies can be observed in their status as a comfort food across many American households. They symbolize home baking and nostalgia, creating a link to family gatherings and celebrations over the decades. The transition from traditional brownies to cakes signals an evolution that embraces creativity, allowing bakers to experiment while retaining classic elements.

As the recipe further evolved, regional variations began to emerge. Different parts of the United States developed unique twists on the traditional brownie, with some regions favoring nuts, while others leaned towards richer chocolate frosting, highlighting America’s diverse culinary landscape.

Ultimately, the Chocolate Fudge Brownie Cake embodies a fusion of tradition and innovation, making it a beloved choice in modern kitchens while paying homage to its humble beginnings.

Ingredient Deep Dive

Dark Chocolate
Dark chocolate serves as the backbone of this cake, providing a rich flavor and deep color. It’s believed to have ancient origins, dating back to the Olmecs in Mesoamerica. Nutritionally, dark chocolate is rich in antioxidants and promotes heart health. When selecting dark chocolate for baking, opt for high-quality brands with a cocoa content of at least 70%. Store it in a cool, dry place and consider substitutions such as cocoa powder if needed.

Butter
Butter contributes to the rich flavor and chewy texture of the cake. It has been a staple in baking for centuries, celebrated for its ability to enhance the flavor profile of desserts. Butter is a good source of vitamins A and D but should be used in moderation. Choose unsalted butter for baking, as it allows better control over the cake’s saltiness. For storage, keep butter in the fridge for freshness or freeze it for long-term use.

Common Mistakes to Avoid

  • Overmixing the batter: Overmixing results in a tough cake. Mix until just combined for a tender texture.
  • Not measuring ingredients accurately: Use a kitchen scale or measuring cups for precision, as baking is a science.
  • Using cold ingredients: Room temperature ingredients mix more evenly; make sure eggs and butter are not cold.
  • Skipping the lining of the pan: Failing to line your baking pan can lead to sticking, ruining your cake’s presentation.
  • Baking at the wrong temperature: Always preheat your oven to the correct temperature; this is vital for even baking.
  • Using the wrong pan size: Different sizes affect bake time and texture; ensure you use the correct dimensions.
  • Underbaking or overbaking: Check for doneness with a toothpick; the cake should be moist but not gooey.
  • Not letting the cake cool properly: Cutting a warm cake can lead to crumbling; allow it to cool completely in the pan.

Essential Techniques

To achieve a perfect Chocolate Fudge Brownie Cake, mastering the art of melting chocolate is critical. Gently warm the chocolate using a double boiler or microwave at low power. Avoid overheating, as burnt chocolate can ruin your dessert. Look for a smooth texture and glossy finish as cues for success.

Additionally, understanding how to fold ingredients can make a difference. Use a spatula to gently combine mixtures without deflating them. Practicing this technique ensures that your cake remains airy and fluffy while maintaining its moist fudginess.

Pro Tips for Perfect Chocolate Fudge Brownie Cake

1. Use the best quality ingredients available for the richest flavor.
2. Experiment with different chocolate types for a unique taste profile.
3. Allow the cake to cool completely before frosting for better adherence.
4. For an extra touch, sprinkle sea salt on top of the frosting for contrast.
5. Layer the cake with ganache for an exquisite finish.
6. Store leftovers in an airtight container to maintain freshness.
7. Consider using a silicone baking mat for easy removal from the pan.
8. Experiment with mix-ins like nuts or chocolate chips to customize your cake.

Variations and Adaptations

Chocolate Fudge Brownie Cake can be easily adapted to suit various occasions and tastes. For regional variations, consider adding spices like cinnamon or even a dash of espresso powder to enhance the chocolate flavor.

Seasonal adaptations can include adding grated zest from oranges or limes for a refreshing twist. For dietary modifications, use almond or coconut flour for gluten-free options and incorporate dairy-free chocolate for a vegan version.

Flavor variations can also include playing around with different extracts like peppermint or almond to introduce new savory dimensions. For a textural modification, incorporating crushed cookies or adding a layer of textured frosting creates a unique presentation that intrigues guests.

Serving and Presentation Guide

When it comes to serving your Chocolate Fudge Brownie Cake, presentation matters. Plate each slice elegantly, perhaps adding a scoop of vanilla ice cream alongside for a delightful contrast. Drizzling chocolate sauce or caramel over the top enhances visual appeal and adds flavor depth.

Garnishing the cake with fresh berries or mint leaves not only adds color but also freshness that balances the richness. For a classic touch, dusting powdered sugar over the top can give a charming, rustic finish.

Consider serving at room temperature or slightly warmed, allowing the gooey texture to shine through. Portion control is key; cut generous slices that invite indulgence without overwhelming guests, ensuring everyone can savor the chocolate experience.

Wine and Beverage Pairing

Pair your Chocolate Fudge Brownie Cake with rich beverages to enhance the chocolate’s flavor. A full-bodied red wine, like a Cabernet Sauvignon, complements the cake’s richness beautifully. For a non-alcoholic option, espresso or dark roast coffee enhances the chocolate experience.

If preferred, consider a sweet dessert wine, such as Port, which harmonizes with the cake’s sweetness. Serve these beverages slightly chilled or at room temperature for the best flavor profiles.

Storage and Shelf Life

Proper storage ensures your Chocolate Fudge Brownie Cake remains fresh and delicious. Store the cake in an airtight container at room temperature for up to three days. For longer storage, refrigerate the cake, but it’s best enjoyed fresh.

Signs of spoilage include an off smell or changes in texture; avoid consuming if in doubt. Reheating slices in a microwave for a few seconds brings back that delightful warmth. For long-term storage, consider freezing, wrapping slices in plastic wrap, and placing them in a freezer bag.

Make Ahead Strategies

This cake can easily be made ahead of time, saving you stress on the day of your event. Prepare the batter a day in advance, storing it in the fridge, and bake just before serving for the freshest taste.

Storage between steps can help as well. Allow the baked cake to cool completely, then wrap it tightly and refrigerate for several days, or freeze for up to a month. Quality remains intact if properly stored. When ready to serve, simply frost and enjoy, adding any fresh elements just prior to serving.

Scaling Instructions

Scaling the Chocolate Fudge Brownie Cake is simple. If you want to halve the recipe, use smaller cake pans or ensure even baking in a single larger pan without overfilling. Doubling or tripling the recipe necessitates larger pans and may require longer bake times.

Adjustments in baking times may be necessary based on pan sizes; monitor the cake closely and perform testing with a toothpick for doneness. For storage considerations, ensure that larger batches are adequately wrapped to retain moisture and flavor.

Nutritional Deep Dive

The Chocolate Fudge Brownie Cake delivers protein and healthy fats, largely from the eggs and butter. However, it is important to enjoy it in moderation due to its sugar content. Each slice can be high in calories, so it’s essential to consider portion sizes when indulging.

Micronutrients are also present; chocolate contains minerals like iron, magnesium, and zinc. For those watching their diet, being mindful of the cake’s calorie density may promote better weight management goals. Enjoying in moderation allows you to savor without excessive guilt.

Dietary Adaptations

Creating a gluten-free Chocolate Fudge Brownie Cake is simple with a few ingredient adjustments, such as using gluten-free flour blends. Dairy-free versions are achievable by substituting standard butter and cream with coconut oil and almond milk, respectively.

For vegans, replacing eggs with flaxseed meal and ensuring all chocolate products are dairy-free makes this indulgent cake accessible. Those following low-carb or keto diets can experiment with sugar substitutes while utilizing nut flours for a low-carb twist.

Paleo and low-FODMAP adaptations can also be accomplished with minimal adjustments, providing versatile options for various dietary needs.

Troubleshooting Guide

For texture issues, ensure accurate flour measurements; too much flour can lead to a dry cake. Achieving the right flavor balance may require adjusting the sugar levels, especially if you’re using dark chocolate.

Temperature issues can arise; an oven thermometer ensures your oven is at the correct temperature for optimal baking. If using substitutions, familiarize yourself with how each ingredient affects the final product, particularly regarding timing and moisture.

If encountering equipment challenges, always read through your recipe beforehand to ensure proper tool availability. Ingredient substitutions should be tested prior to serving to gauge flavor outcomes, and timing should also be adjusted to account for different baking methods.

Recipe Success Stories

Community feedback highlights the creativity baked into this Chocolate Fudge Brownie Cake. Home bakers have reported delightful variations, swapping chocolate types and incorporating nuts, leading to unique versions that wow guests.

Photography tips shared by enthusiasts showcase the cake’s luscious layers and frosting techniques, inspiring others to capture the beauty of their baking. Success stories feature connection tales, with families celebrating milestones through this shared dessert.

Reader suggestions for modifying the recipe encouraged collaboration, creating a sense of community among those who appreciate chocolate desserts. Each adaptation fosters creativity and spreads joy, making this cake a true favorite.

Frequently Asked Questions

Can I make this cake ahead of time?

Absolutely! You can bake the cake a day in advance, store it properly, and frost it just before serving for the freshest taste.

What’s the best way to store leftovers?

Store the cake in an airtight container at room temperature for up to three days or refrigerate it for longer freshness.

Can I freeze the cake?

Yes, you can freeze the unfrosted cake. Wrap it tightly in plastic wrap and store it in a freezer bag to maintain freshness.

What can I substitute for eggs?

You can use flaxseed meal or unsweetened applesauce as a substitute for eggs in this recipe, especially for vegan adaptations.

How can I enhance the chocolate flavor?

Add a teaspoon of espresso powder to deepen the chocolate flavor without adding coffee taste.

Is this recipe suitable for dietary restrictions?

Yes! The recipe is adaptable for gluten-free, dairy-free, and even vegan diets with simple ingredient swaps.

What type of chocolate works best?

Using high-quality dark chocolate (70% cocoa or higher) will yield the best flavor and texture for this cake.

How do I know when the cake is done baking?

Test for doneness by inserting a toothpick in the center; it should come out with a few moist crumbs but no wet batter.

Can I add mix-ins like nuts or chocolate chips?

Absolutely! Adding nuts or chocolate chips can enhance the flavor and texture of your cake. Just fold them in gently.

How long does it take to bake?

The baking time for this cake is approximately 30 minutes, but always check for doneness toward the end of the cooking time.

Additional Resources

If you enjoyed this Chocolate Fudge Brownie Cake, consider exploring other related recipes such as molten chocolate lava cake or classic brownies. Technique guides on baking basics can enhance your skills in crafting perfect desserts.

For a deeper understanding of ingredients, detailed information about chocolate and its varieties will broaden your knowledge. Additionally, investing in good baking equipment can make a significant difference in your baking journey, ensuring that you have everything you need at your fingertips.

Join the Conversation

We invite you to share your baking experiences and variations of this Chocolate Fudge Brownie Cake! Post your pictures on social media, tagging us so we can see your creations. We’d love to hear your feedback and how the recipe turned out for you.

Engaging with our community not only inspires fellow bakers but fosters a love for baking that unites us all. Share your tips, tricks, and personal touches to this recipe and encourage others in their culinary adventures.

The Recipe

Chocolate Fudge Brownie Cake

Serves: 12

Prep Time: 20 mins

Cook Time: 30 mins

Total Time: 50 mins

Kitchen Equipment Needed

  • 9-inch round cake pans
  • Electric mixer
  • Mixing bowls
  • Spatula
  • Cooling rack

Ingredients

  • 1 cup unsalted butter
  • 8 ounces dark chocolate, chopped
  • 2 cups granulated sugar
  • 4 large eggs
  • 1 teaspoon vanilla extract
  • 1 cup all-purpose flour
  • 1/2 teaspoon salt

Directions

  1. Preheat your oven to 350°F (175°C) and grease the cake pans.
  2. Melt the butter and dark chocolate together in a double boiler, stirring until smooth.
  3. Remove from heat and mix in the sugar until well combined.
  4. Add the eggs, one at a time, then stir in the vanilla extract.
  5. Gradually fold in the flour and salt until just combined.
  6. Pour the batter evenly into the prepared pans and smooth the tops.
  7. Bake for 30 minutes or until a toothpick inserted in the center comes out with few moist crumbs.
  8. Allow cakes to cool in pans for 10 minutes, then transfer to a cooling rack to cool completely.
  9. Once cooled, frost and decorate as desired.

Recipe Notes

  • For a richer flavor, try using different types of chocolate.
  • Feel free to add nuts or chocolate chips to the batter for added texture.
  • This cake can be made a day ahead and frosted before serving.