Delicious Orange Jam Recipe: Brighten Your Breakfast Table

Delicious Orange Jam Recipe: A Sweet Citrus Delight

⚖️
Difficulty
Easy

⏲️
Prep Time
15 mins

🕒
Cook Time
30 mins

⏱️
Total Time
45 mins

🍽️
Servings
5 jars

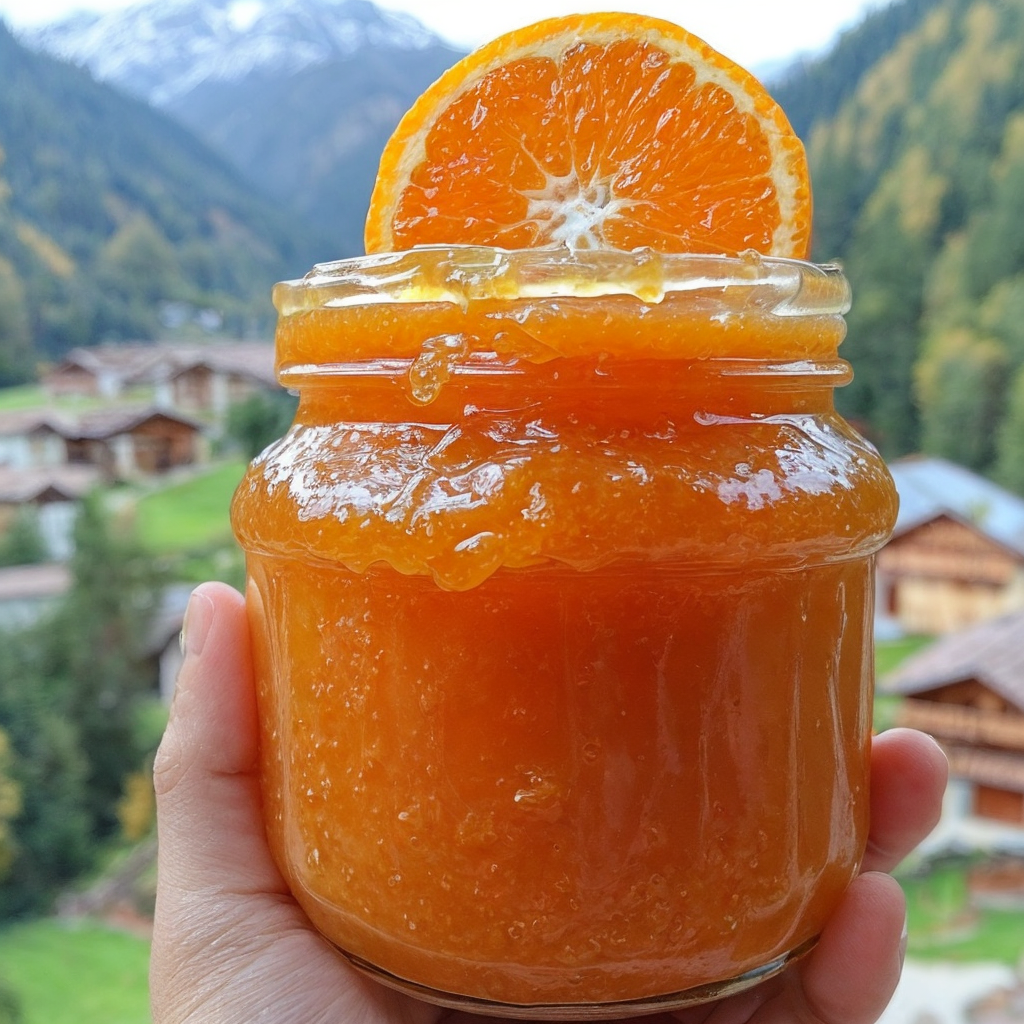
Indulge in the bright and zesty flavors of homemade Orange Jam, a delightful spread that captures the essence of fresh citrus in every jar. This luscious jam not only adds a pop of color to your breakfast table but also brings a burst of flavor that can brighten up your mornings. Imagine slathering this sweet, tart jam on warm toast or using it as a filling for pastries; every bite is like a sunny day in a jar.

In this recipe, we will guide you through the simple process of making this delicious Orange Jam, which captures the sweet and tangy notes of oranges sweetened just right. Whether you spread it on pancakes, pair it with cheese, or enjoy it right out of the jar, this jam is guaranteed to become a household favorite. Plus, the preparation is straightforward, making it a perfect activity to do with family or friends.

Quick Recipe Highlights

  • Flavor Profile: This Orange Jam strikes a perfect balance between the sweet notes of ripe oranges and the tangy undertones that citrus lovers adore.
  • Texture: The jam boasts a luscious consistency, smooth yet filled with small bits of pulp that deliver excitement in every spoonful.
  • Aroma: The aromatic fragrance of fresh oranges fills the kitchen, invoking memories of sun-soaked orchards.
  • Visual Appeal: The vibrant orange color of the jam is not only eye-catching but also suggests the freshness and quality of the ingredients used.
  • Skill Level Needed: This recipe is suitable for beginners, requiring just basic kitchen skills and minimal oversight.
  • Special Equipment: All you need is a pot, a wooden spoon, and canning jars to store your delicious creation.

Recipe Overview

  • Difficulty Level: Making Orange Jam is easy and enjoyable, perfect for beginners looking to try their hand at preserving fruit.
  • Category: This recipe falls under breakfast spreads and is ideal for both sweet and savory pairings.
  • Cuisine: Orange Jam has roots in various culinary traditions, often found in both European and American kitchens, celebrating the sweetness of citrus fruits.
  • Cost: The cost of making your Orange Jam is minimal, primarily consisting of fruit and sugar, making it a budget-friendly option.
  • Season: While oranges are available year-round, winter is the peak season when they are at their sweetest and most flavorful.
  • Occasion: Perfect for breakfast gatherings, holiday brunches, or as homemade gifts, this Orange Jam fits any occasion delightfully.

Why You’ll Love This Recipe

The taste and texture of this Orange Jam are simply irresistible. Each spoonful is a blend of sweetness with a hint of tartness, reminiscent of a sunny day. The smooth consistency makes it delightful to spread, whether on toast or as a filling for desserts. Enjoying this homemade jam feels rewarding, knowing you crafted this delightful treat from scratch using simple ingredients.

Convenience is key when preparing this recipe. With just a few ingredients and minimal kitchen tools required, anyone can seize the opportunity to make flavorsome homemade jam. Unlike store-bought varieties loaded with additives, this Orange Jam is made entirely of fresh oranges, preserving their natural goodness and vibrant flavors.

Nutritionally, oranges are packed with vitamins, particularly vitamin C, which is essential for boosting your immune system. The inclusion of natural fruit in your diet, through delicious jams like this, adds beneficial nutrients and can enhance overall well-being.

Socially, sharing homemade jam is an excellent way to connect with others. Whether you gift a jar or serve it to guests at a breakfast gathering, people appreciate the effort and love that goes into homemade treats. This jam can also serve as a fascinating discussion piece regarding your culinary endeavors.

Finally, the cost-effectiveness of making your Orange Jam cannot be overlooked. With the ability to produce several jars at minimal expense, you have an endless supply of this flavorful spread ready to enjoy anytime. Why not indulge while saving money?

Historical Background and Cultural Significance

The origin of Orange Jam can be traced back to ancient civilizations that recognized the sweetness of fruits and the importance of preserving them to enjoy year-round. Citrus fruits, particularly oranges, were revered for their health benefits and flavorful contributions to diets across cultures.

In culinary history, preserving fruits as jams and jellies became popular during the 18th century, particularly in Europe, where it allowed households to make the most of seasonal fruits. Families utilized traditional methods passed down through generations, showcasing the significance of resourcefulness and creativity in cooking.

As recipes evolved, regions began to develop their unique variations of Orange Jam. Some traditions introduce spices like cinnamon or ginger, while others explore combining citrus with different fruits, resulting in diverse flavors and textures.

Today, the cultural significance of Orange Jam continues as people embrace homemade cooking, celebrating nostalgia and the connection to family heritage. This jam stands as a testament to the joy of preserving seasonal produce for future enjoyment.

Ingredient Deep Dive

Oranges: The star ingredient in this Orange Jam, oranges are rich in history and cultural importance, symbolizing fertility and prosperity in many cultures. They are packed with nutritional benefits, including vitamin C, folate, and antioxidants, which support immune health and overall wellness. When selecting oranges, opt for firm, brightly colored fruit that gives slightly when pressed, indicating freshness. For storage, keep them in a cool, dry place, and use them within a week or two of purchase for optimal flavor. If you have surplus oranges, consider freezing them for later use, or substituting them with other citrus like grapefruits or lemons for a unique twist.

Sugar: A vital ingredient in preserving fruit, sugar not only sweetens the jam but also acts as a preservative, helping to maintain the jam’s consistency and preventing spoilage. From a nutritional standpoint, sugar provides quick energy; however, moderation is encouraged in any diet. When choosing sugar, granulated white sugar is typically preferred, but brown sugar can lend a slight difference in taste. Store sugar in an airtight container in a cool, dry location where it can last indefinitely. Consider using alternative sweeteners, such as honey or maple syrup, for a unique flavor, but adjust quantities accordingly to achieve the desired sweetness.

Common Mistakes to Avoid

  • Using overripe oranges can lead to a jam that ferments rather than preserves. Ensure your fruit is fresh and firm for a successful outcome.
  • Not measuring ingredients accurately will affect the balance of sweetness and acidity, altering the flavor profile of your jam.
  • Skipping the sterilization of jars can lead to spoilage. Ensure that jars are sterilized before filling them with jam.
  • Cooking the jam for too long can create a caramelized flavor that may not be desirable. Monitor closely to achieve perfect consistency.
  • Not properly sealing jars can cause contamination. Make sure the seals are intact to extend shelf life.
  • Overcooking the mixture can lead to a jelly-like texture instead of a spreadable consistency. Cook just until the setting point is reached.
  • Ignoring proper storage methods can result in spoilage. Store your sealed jars in a cool, dark place.
  • Not tasting during the cooking process may miss the chance to adjust sweetness or acidity to your liking.
  • Using a non-stick pot may prevent proper caramelization and texture. Opt for a heavy-bottomed pot for even cooking.
  • Not allowing the jam to cool before storing could cause steam to build up, leading to condensation and spoilage.

Essential Techniques

Preparing the Fruit: Properly washing and peeling the oranges is essential to ensure no pesticides or impurities remain. Master this step by using a soft brush under running water. Look for shiny skin with no blemishes for the best results.

Cooking Techniques: Understanding the importance of cooked sugar is crucial in making jam. The sugar should be dissolved completely before the mixture reaches the boiling point. To master this, maintain medium heat and stir regularly. Use a thermometer to check for proper temperatures; visual cues like bubbling and thickening indicate success.

Pro Tips for Perfect Orange Jam

1. Always select ripe, seasonal oranges for the best flavor; avoid using overripe or inferior quality fruit.
2. Experiment with adding zest from the oranges to intensify the citrus flavor; just a teaspoon can make a significant difference.
3. Consider adding a splash of lemon juice for a hint of acidity; this can balance the sweetness beautifully.
4. Stir the mixture continuously while cooking to prevent it from sticking to the bottom of the pot and burning.
5. Test for consistency by spooning a small amount onto a cold plate; it should hold its shape without running.
6. Be creative with spices; adding a pinch of cinnamon or nutmeg can introduce an exciting twist to your jam.
7. Store opened jars in the refrigerator for maximum freshness and use within a couple of months.
8. Share the love; gift jars of your homemade jam to friends and family for a personal touch.

Variations and Adaptations

For a regional twist, consider adding spices like ginger or cardamom for warmth. Seasonal adaptations could include mixing in berries when they are ripe in summer, creating unique flavor combinations. For dietary modifications, this Orange Jam is easily adaptable to accommodate lower sugar needs by substituting half of the sugar with a sweetener like stevia. For flavor variations, try incorporating vanilla extract or zest from lime alongside the oranges, enhancing the tropical essence. Texture modifications can be achieved by finely chopping the pulp for a smoother jam or leaving it chunkier for added bite. Presentation alternatives could involve canning the jam in themed jars for holidays or special occasions.

Serving and Presentation Guide

Plating your Orange Jam beautifully can elevate the experience. Serve it in a neat glass jar for a rustic touch at breakfast. Consider garnishing with fresh mint leaves for a pop of color. Traditional accompaniments include warm scones or biscuits, while modern serving suggestions may feature a cheese platter, pairing well with soft cheeses. Serving the jam alongside tea or coffee should see it consumed while still slightly warm. Be mindful of portion control, ensuring the jam is available in small servings to keep it fresh and enjoyable for longer.

Wine and Beverage Pairing

When pairing wine with Orange Jam, sweet wines such as Moscato or Late Harvest Riesling complement the citrus flavors nicely. For non-alcoholic alternatives, consider serving it with mint-infused iced tea or sparkling water for a refreshing twist. If enjoying with breakfast, a rich cup of freshly brewed coffee or tea provides a delightful contrast to the sweet jam. Serve beverages chilled to enhance the overall dining experience.

Storage and Shelf Life

Proper storage of your Orange Jam is essential for longevity. Once sealed, store the jars in a cool, dark place away from direct sunlight. After opening, keep your jam refrigerated and consume it within 2-3 months for the best flavor. Use glass containers or BPA-free plastic jars to minimize spoilage risks. Signs of spoilage include mold growth or an off odor; if either occurs, discard the jam immediately. If you need to store your jam longer, consider freezing it in airtight containers but note that texture may change slightly upon thawing.

Make Ahead Strategies

To streamline your cooking process, prepare the oranges a day in advance. This allows flavors to meld before cooking. Store them in an airtight container in the fridge to retain freshness. Consider making large batches and sterilizing jars well in advance; this allows you to create a stockpile of jam that’s ready to enjoy anytime. When reheating, be gentle, warming to just the right temperature without compromising the flavor. Briefly warm the jam before serving to enhance its spreadability, especially after taking it from the fridge.

Scaling Instructions

Should you want to halve or double your Orange Jam recipe, use equal parts sugar and oranges according to the new total. Ensure equipment size adjustment as necessary; larger batches may require more substantial cookware. Note that doubling the recipe may also require longer cooking time to reach the proper consistency. When scaling, always account for the same STM (setting temperature method) to guarantee the perfect final product.

Nutritional Deep Dive

In terms of macronutrient breakdown, this Orange Jam contains carbohydrates primarily from sugar, with little protein or fat. Each serving offers a burst of vitamin C, supporting immune function and skin health. The inclusion of fresh oranges also provides fiber, contributing positively to digestive health. For those mindful of dietary considerations, portion sizes are critical; moderation is encouraged due to sugar content, making up approximately 12-15 grams per tablespoon. Being aware of these factors is essential for maintaining a balanced diet while still enjoying this sweet, citrusy delight.

Dietary Adaptations

Making this Orange Jam can be easily adapted to suit various dietary restrictions. For gluten-free diets, this recipe naturally fits as it contains no gluten-containing ingredients. For dairy-free options, the jam fits perfectly, requiring no adjustments. To cater to vegan preferences, use a plant-based sweetener like coconut sugar in place of traditional sugar. Low-carb and keto options can utilize erythritol or monk fruit sweeteners instead of standard sugar without sacrificing flavor. Those following Paleo diets can enjoy adapted recipes that involve using natural sweeteners, keeping the ingredients clean and simple.

Troubleshooting Guide

For texture issues, if the jam is too runny, re-cook it while continuously stirring until it thickens. If too thick, loosen it with a bit of orange juice. For flavor balance, consider that spoilage can occur if the citrus isn’t sweet enough; adjust sweetness with additional sugar. Temperature problems can arise during cooking; ensure you maintain consistent heat throughout the process to prevent scorching. If you encounter equipment challenges, using the right pot for the recipe is essential; a heavy-bottomed pot is preferred. Lastly, for timing concerns, always use a timer; preserve a balance between cooking too long or too short.

Recipe Success Stories

Many readers have expressed their delight in preparing this Orange Jam. The simplicity of the recipe, paired with fantastic results, made it a favorite during family gatherings. One reader shares how they introduced this jam to their friends at a brunch, receiving praise for its fresh taste and versatility. Others have successfully adapted the recipe to include different fruits, showcasing the recipe’s flexibility and encouraging experimentation. Photography enthusiasts also highlight that the vivid colors of the jam make for stunning visuals, encouraging them to share their creations on social media.

Frequently Asked Questions

1. Can I use other fruits in this jam? Yes! While this recipe is for Orange Jam, you can mix in other fruits like lemons or grapefruits to create unique blends. Ensure you adjust sugar levels accordingly to match the tartness of the added fruits.

2. How long can I store the jam? Unopened jars can last many months when stored in a cool, dark place. Once opened, refrigerate and use within 2-3 months for the best quality.

3. Can I can this jam for long-term storage? Definitely! Proper canning techniques will allow your Orange Jam to be stored safely for an extended period. Make sure to use sterilized jars and seals.

4. What if I don’t have any canning jars? You can store the jam in any airtight container; glass containers with lids work well as an alternative for short-term storage.

5. How do I know when the jam is set? Use the cold plate test: spoon a small amount of jam onto a plate and place it in the freezer for a minute. If it holds its shape, it’s ready.

6. What can I do with leftover pulp? Leftover pulp can be used in baking, stirred into yogurt, or incorporated into smoothies for added flavor and nutrients.

7. Is there a sugar-free alternative? Yes, you can replace sugar with sweeteners like stevia or erythritol, but follow the manufacturer’s instructions for substitution ratios to maintain sweetness.

8. How can I enhance the flavor of this jam? Add spices like cinnamon or cardamom during cooking, or incorporate flavored liqueurs for a more sophisticated jam.

9. Can I freeze this jam? Yes, Orange Jam freezes well in airtight containers. Just remember to leave some space at the top for expansion.

10. Can I adjust the thickness of the jam after cooking? If it’s too runny, reheat and simmer to evaporate some liquid. For a thicker jam, mix in pectin while boiling.

Additional Resources

If you enjoyed this Orange Jam recipe, you might also try other jam recipes, like strawberry or raspberry. Explore our technique guides on preserving fruits or making fruit butters for more delicious homemade ideas. Look into ingredient information to learn more about the health benefits of citrus fruits. Recommendations for essential kitchen equipment can help streamline your cooking journey and enhance your culinary skills.

Join the Conversation

We’d love to hear from you! Share your experiences making Orange Jam on social media by tagging us and using our recipe hashtag. We also encourage you to share your photography tips and variations of the recipe. Engaging with the community through reviews and feedback enriches our culinary adventures and inspires others to try their hand at this delightful jam recipe.

The Recipe

Orange Jam

Serves: 5 jars

Prep Time: 15 mins

Cook Time: 30 mins

Total Time: 45 mins

Kitchen Equipment Needed

  • Heavy-bottomed pot
  • Wooden spoon
  • Chopping board
  • Knife
  • Measuring cups
  • Jars with lids

Ingredients

  • 4 medium-sized oranges
  • 1 cup granulated sugar
  • 1/4 cup lemon juice
  • 1/2 cup water

Directions

  1. Wash and peel the oranges, removing any seeds, and chop them into coarse pieces.
  2. In a heavy-bottomed pot, combine the orange pieces, sugar, lemon juice, and water, stirring to dissolve the sugar.
  3. Bring the mixture to a boil over medium heat, stirring frequently.
  4. Reduce heat and simmer for about 30 minutes, stirring occasionally, until the mixture thickens.
  5. Test for set by placing a spoonful on a cold plate; if it holds its shape, it’s ready.
  6. Pour the hot jam into sterilized jars, leaving a bit of space at the top before sealing.
  7. Allow the jars to cool completely at room temperature, then store them in a cool, dark place.

Recipe Notes

  • For a more intense flavor, consider adding orange zest to the mixture.
  • This jam pairs wonderfully with cream cheese on bagels or melted into a glaze for meats.
  • Feel free to customize by adding other citrus or spices to enhance the flavor profile.

Ultimate Homemade Spaghetti Sauce Recipe for Flavorful Masterpieces

The BEST Homemade Spaghetti Sauce: A Flavorful Classic

⚖️
Difficulty
Easy

⏲️
Prep Time
10 mins

🕒
Cook Time
30 mins

⏱️
Total Time
40 mins

🍽️
Servings
4 servings

Indulging in a plate of homemade spaghetti sauce is a comforting experience that evokes memories of family dinners and cherished recipes passed down through generations. This sauce is not just any tomato concoction; it’s the BEST homemade spaghetti sauce packed with vibrant flavors, fresh ingredients, and a touch of love. Its perfect balance of savory and slightly sweet notes creates an unforgettable taste that enhances any pasta dish, making it a culinary staple in every kitchen.

With a blend of fresh tomatoes, aromatic herbs, and a hint of garlic, this sauce is designed to tantalize your taste buds and warm your heart. As you simmer it on the stove, the kitchen will fill with a mouthwatering aroma that invites everyone to gather around the table. Whether served on a special occasion or a casual weeknight, this spaghetti sauce will impress your family and friends, ensuring they’ll always ask for seconds.

Quick Recipe Highlights

  • Flavor Profile: This spaghetti sauce boasts a rich tomato base, complemented by hints of garlic and basil, creating a savory and slightly sweet symphony on your palate.
  • Texture: The sauce is velvety and thick, becoming luscious when tossed with al dente pasta, making every bite satisfying.
  • Aroma: The fragrant blend of simmering tomatoes, fresh herbs, and sautéed garlic creates an irresistible scent that envelops your kitchen.
  • Visual Appeal: A vibrant red hue dotted with green herbs makes the sauce visually enticing, inviting you to dive in.
  • Skill Level Needed: This recipe is straightforward and perfect for beginners, requiring minimal technique while still delivering professional results.
  • Special Equipment: All you need is a sturdy pot, a cutting board, and a knife to prepare this crowd-pleaser effortlessly.

Recipe Overview

  • Difficulty Level: This dish is classified as easy, making it accessible for anyone keen to try their hand at home cooking without overwhelming complexities.
  • Category: This spaghetti sauce is ideal for dinner and pairs well with a variety of pasta dishes.
  • Cuisine: Originating from Italian cuisine, this sauce carries the rich culinary traditions of Italy while allowing for personal touches.
  • Cost: Preparing this sauce is budget-friendly; most ingredients are affordable and commonly found in most kitchens.
  • Season: With its hearty ingredients, this sauce is perfect for year-round cooking, particularly in the colder months when comfort food is most sought after.
  • Occasion: This homemade spaghetti sauce is fantastic for family gatherings, casual dinners, or even romantic meals.

Why You’ll Love This Recipe

The taste and texture of this homemade spaghetti sauce are simply enticing. The fresh tomatoes create a robust foundation, while the harmonious blend of herbs energizes each bite. You will appreciate the vibrant tanginess combined with a natural sweetness, which transforms a basic plate of pasta into a gourmet dining experience. The silky texture coats your pasta perfectly, ensuring that every strand is enveloped in flavor.

Convenience is another significant factor that will make you love this recipe. With just 10 minutes of prep time and 30 minutes of cooking, you can create a delightful sauce that is far superior to store-bought versions. The simplicity of the preparation encourages you to use fresh, wholesome ingredients, giving you complete control over the flavors and quality of your meal.

Furthermore, the nutritional advantages of this sauce cannot be overlooked. Packed with fresh tomatoes, garlic, and herbs, this sauce is low in calories and rich in vitamins. Tomatoes are an excellent source of vitamin C, while garlic can promote heart health; thus, you are not only indulging in delicious food but also nourishing your body.

Sharing a meal prepared with this spaghetti sauce fosters a warm, social atmosphere, making it an ideal choice for entertaining. No one can resist a hearty bowl of pasta, and this sauce is perfect for gathering family and friends together. It invites conversation, laughter, and the sharing of stories, accentuating the joy of dining together.

Lastly, the cost-effectiveness and accessibility of homemade spaghetti sauce are incredibly appealing. Most ingredients are commonly found in pantry staples, making this an economical meal choice. You won’t break the bank, and you’ll have plenty of leftovers to enjoy again, maximizing your cooking efforts.

Historical Background and Cultural Significance

The origin of spaghetti sauce is deeply rooted in Italian culinary tradition. It is believed that tomatoes were first brought to Italy from the Americas in the 16th century, and since then, they have become a key ingredient in Italian cuisine. Early versions of spaghetti sauce were simple and rustic, focusing on seasonal ingredients and local flavors.

The cultural importance of spaghetti sauce extends beyond just being a dish; it’s a staple of Italian family meals, often associated with gatherings and celebrations. Many Italian households pass down recipes through generations, and each family adds its twists, making each version unique and special.

Over the years, the evolution of spaghetti sauce has seen a move towards richer flavors and diverse ingredients, influenced by Italian-American adaptations. Ingredients such as ground meats, onions, and different herbs emerged, offering a range of flavors that appeal to varying palates.

Regional variations are also noteworthy, with each part of Italy boasting its unique take. For example, the sauce in Naples might include capers and olives, while in Bologna, a meat-based “ragù” is popular. These regional differences showcase the depth and richness of Italy’s culinary heritage.

Ingredient Deep Dive

Tomatoes are the star of this spaghetti sauce. They are rich in antioxidants, particularly lycopene, which is believed to have various health benefits, including reducing the risk of certain cancers. When selecting tomatoes, look for fresh, ripe options if you’re making sauce from scratch, or consider high-quality canned varieties for convenience. Store fresh tomatoes at room temperature, away from direct sunlight, and canned tomatoes should be kept in a cool, dark pantry.

Garlic adds depth to the flavor profile of spaghetti sauce. It has been revered not only for its aromatic qualities but also for its potential health benefits, including immune-boosting properties. Fresh garlic bulbs are best; they should feel firm and free from sprouts. Store garlic in a cool, dry place, and consider using roasted garlic for a sweeter, mellow alternative.

Basil, the final key ingredient, brings a fresh herbal element to the sauce. This fragrant herb is known for its aromatic oils, which are beneficial for digestion. Fresh basil is ideal, with vibrant green leaves and no signs of wilting. It’s best used fresh but can be stored in a glass of water in the refrigerator. Basil dried is a good substitute if fresh isn’t available, offering a different flavor intensity.

Common Mistakes to Avoid

  • Using unripe tomatoes can lead to a tart sauce. Always select ripe tomatoes for the best flavor.
  • Overcooking garlic may cause bitterness; always sauté until fragrant but not browned.
  • Neglecting to season adequately can leave the sauce bland; remember to taste and adjust the seasoning as necessary.
  • Cooking the sauce for too short a time prevents flavors from truly melding; a longer simmer allows the sauce to deepen in flavor.
  • Using low-quality canned tomatoes can compromise the taste; invest in premium brands for better results.
  • Not allowing the sauce to sit can reduce flavor complexity; letting it rest for a few minutes enhances the overall taste.
  • Skipping fresh herbs leads to a less vibrant flavor; use fresh whenever possible for the best aroma and taste.
  • Failing to balance acidity can create a harsh flavor; a pinch of sugar can balance out the acidity of the tomatoes.

Essential Techniques

A crucial technique in making homemade spaghetti sauce is sautéing the garlic. This step is important as it releases the essential oils and flavor compounds, making the sauce aromatic and flavorful. To master this, ensure you cook the garlic over medium heat, stirring constantly, to prevent it from burning. A visual cue for success is when the garlic turns golden and fragrant.

Simmering the sauce is another essential technique. This step allows the flavors to meld and deepen, creating a rich sauce. Simmer gently rather than boil, as boiling can reduce the sauce too quickly. A good sign of success is when the sauce thickens slightly and becomes aromatic, usually after 30 minutes of cooking.

Pro Tips for Perfect Homemade Spaghetti Sauce

To achieve the best homemade spaghetti sauce, always begin with high-quality ingredients. The fresher your tomatoes and herbs, the more flavorful your sauce will be. Opt for heirloom tomatoes when in season for an exemplary flavor profile.

Don’t rush the sautéing process. Take your time with the onions and garlic; caramelizing them brings out the sweetness and complexity that will enrich the sauce.

Emerging flavors can be enhanced by adding a splash of red wine during simmering. The acidity from the wine brightens the sauce while adding an additional layer of flavor.

Experiment with different herbs for variety; while basil is classic, oregano or thyme can also be wonderful additions to personalized sauce perfection.

Allowing the sauce to cool and develop flavor overnight in the refrigerator is an excellent way to elevate its taste; many chefs believe it tastes even better the next day.

Consider adjusting the sauce according to your preference by adding red pepper flakes for a hint of heat, or incorporating ground meat for a heartier dish.

Always taste and adjust when seasoning; this ensures a balanced sauce that satisfies your taste buds every time.

Variations and Adaptations

Regional variations of spaghetti sauce abound. For example, in Northern Italy, it may be combined with cream for a saucier dish, while in Southern Italy, it often contains olive oil and minimal ingredients to emphasize freshness.

Seasonal adaptations can include fresh vegetables like zucchini or bell peppers, which can be sautéed alongside onions for added texture and layers of flavor.

For dietary modifications, consider substituting sugar with a natural sweetener like honey or maple syrup to enhance the sauce without added refined sugars.

Flavor variations can be achieved by adding different spices, such as cumin for an exciting twist or smoked paprika for a deeper, smokier flavor profile.

Texture modifications can be implemented with crushed red pepper for a spicy kick or using blended vegetables to create a smoother sauce.

Presentation alternatives might include serving the sauce in an elegant bowl garnished with grated cheese and fresh basil, creating an inviting dish that looks as good as it tastes.

Serving and Presentation Guide

Plating techniques can significantly enhance the dining experience. Twirl spaghetti on a fork before gently placing it in the center of a plate for an elegant mound, then generously spoon your sauce over the top.

Garnishing ideas include sprinkling freshly grated Parmesan cheese or torn basil leaves just before serving, adding a burst of color and flavor to the dish.

Traditional accompaniments, such as garlic bread or a side salad, can complement your spaghetti beautifully, offering a well-rounded meal.

Modern serving suggestions may incorporate adding a drizzle of high-quality extra virgin olive oil just before serving for a touch of richness and aroma.

Temperature is crucial; ensure your spaghetti sauce is hot before tossing with pasta to maintain its comforting warmth.

For portion control, consider measuring servings using a pasta scoop, which can help serve consistent portions and avoid waste.

Wine and Beverage Pairing

For wine pairings with homemade spaghetti sauce, look for a Chianti or Sangiovese. These red wines complement tomato-based sauces perfectly, offering balance to the acidity of the tomatoes.

Non-alcoholic alternatives such as sparkling water with lemon can cleanse the palate while enhancing the overall meal experience.

For a unique twist, consider pairing the dish with a light-bodied white wine, such as Pinot Grigio, which provides a refreshing contrast to the richness of the sauce.

Temperature considerations dictate that red wines should be slightly chilled while white wines should be served cold.

Serving suggestions could include decanting red wine for an hour before serving to allow the flavors to open up, enhancing your dining experience.

Storage and Shelf Life

When storing homemade spaghetti sauce, transfer it to an airtight container and let it cool completely before refrigerating. It can be stored in the refrigerator for up to 4 days.

For longer preservation, consider freezing the sauce. It can be stored in freezer-safe bags or containers for up to 3 months. To prevent freezer burn, ensure as much air is removed from the containers as possible.

Signs of spoilage include an off smell or unusual texture changes, indicating that it’s time to discard the sauce.

Reheating instructions are simple; gently warm the sauce on the stovetop over medium heat, stirring frequently to ensure even warming. Consider adding a splash of water or broth if it seems too thick.

Freezing guidelines suggest portioning the sauce into individual servings before freezing for quicker thawing and convenience, making meal prep easier.

Make Ahead Strategies

To save time, prep the sauce a day or two in advance. Making the sauce a day prior allows the flavors to develop further, enhancing the overall taste.

Store any sauce made ahead in an airtight container in the refrigerator. Allow it to cool completely before sealing to maintain freshness.

When making the sauce ahead, assess the quality of the herbs and spices, as they can lose potency. Consider adding fresh herbs just before serving for an invigorating touch.

Assembly tips include preparing pasta ahead as well, storing it in a bit of olive oil to prevent sticking and reheating by boiling.

Reheating guidelines suggest using low heat to warm the sauce while cooking fresh pasta to serve alongside, ensuring everything is ready and fresh when dining.

For a fresh addition, consider tossing in fresh basil or a sprinkle of cheese just before serving for an optimal dining experience.

Scaling Instructions

For halving the recipe, simply divide each ingredient measurement by two, ensuring flavors remain balanced and the cooking time adjusts slightly for smaller quantities.

Doubling or tripling the recipe is possible, but be mindful of your pot’s size. Cooking in batches may yield a more evenly cooked sauce, allowing flavors to meld without overcrowding.

Equipment adjustments may include using larger pots or slow cookers to accommodate increased quantities, especially when making sauces for gatherings or meal prep.

Timing modifications are necessary; larger quantities may need additional simmering time but check for flavor to ensure a balanced sauce develops.

Storage considerations when scaling involve planning for larger freezer containers or more compact space for portioning when freezing, ensuring an effective meal planning strategy.

Nutritional Deep Dive

A macro breakdown of the homemade spaghetti sauce highlights its relatively low calorie count, primarily sourced from tomatoes and herbs. A serving typically contains around 120 calories, offering a guilt-free indulgence.

Micronutrient analysis showcases important vitamins, including vitamin C from tomatoes and various B vitamins from other ingredients, contributing to a well-rounded dish.

Health benefits include the powerful antioxidants found in tomatoes, which can promote heart health and lower the risk of chronic diseases. Garlic also boasts properties that support the immune system.

Dietary considerations might include assessing sodium content, especially if using canned tomatoes. Opt for low-sodium varieties to maintain a healthier profile when cooking.

For portion analysis, considering the richness of the sauce helps in understanding appropriate serving sizes. A cup served with pasta provides enough flavor without overwhelming calories.

Weight management tips may involve enjoying the sauce with whole-grain pasta or zucchini noodles for a lighter alternative, enhancing nutritional value while reducing carb intake.

Dietary Adaptations

For gluten-free diets, use gluten-free pasta to enjoy this rich spaghetti sauce without dietary restrictions, ensuring a flavorful meal without compromising health needs.

Dairy-free modifications can include omitting cheese toppings or using dairy-free cheese alternatives, maintaining flavor while catering to lactose intolerance or vegan preferences.

A vegan version can easily be achieved by incorporating mushrooms or protein-rich lentils, adding substance while keeping the dish purely plant-based.

Low-carb diets can utilize spiralized vegetables such as zucchini or spaghetti squash, offering a satisfying alternative to traditional spaghetti while enjoying the delicious sauce.

Keto adaptations may include stewed vegetables instead of higher-carb flour-based pasta; this enhances your meal while keeping it compliant with dietary restrictions.

Paleo diets can utilize fresh ingredients, avoiding processed additives, and ensuring your meal is as wholesome as possible while enjoying rich flavors.

Low-FODMAP modifications focus on garlic alternatives such as garlic-infused oil, allowing flavor without triggering digestion issues for sensitive individuals.

Troubleshooting Guide

For texture issues, adjusting the thickness of the sauce may be necessary. If it seems too watery, simmer it longer to reduce excess moisture and concentrate flavors.

Flavor balance problems could stem from over-salting or lack of seasoning. Taste frequently and adjust ingredients, possibly adding sugar to balance acidity if it becomes too bitter.

Temperature problems can arise if the sauce is too hot or cooked too long. If it thickens excessively, add a splash of water or broth to restore the desired consistency.

Equipment challenges relating to the cooking vessel may require transfers to larger pots if making larger batches; choose pots with even heat distribution for better results.

If you need to replace ingredients, consider what flavors might be altered, and use substitutions that complement the remaining flavor components of the sauce.

Timing concerns can affect the overall dish; if pasta isn’t ready when the sauce finishes cooking, a gentle reheat can keep the sauce warm without losing flavor.

Recipe Success Stories

Community feedback on this homemade spaghetti sauce recipe has been overwhelmingly positive, with many readers expressing how it has transformed their dinner experience into cherished family traditions.

Variation successes have included readers experimenting with different herbs and spices that have tailored the sauce to their unique preferences, driving engagement within the community as they share their adaptations.

Adaptation stories tell of how families have introduced the sauce to children unfamiliar with homemade cooking, with success in creating new generations of pasta lovers.

Reader suggestions often prompt a vibrant exchange of ideas on pairing this sauce with various pasta types and accompaniments, enriching the collective culinary experience.

Photography tips from readers include capturing the steam and vibrancy of the sauce in images, heightening visual appeal that encourages others to try the recipe and share their outcomes online.

Frequently Asked Questions

1. Can I use canned tomatoes instead of fresh?
Absolutely! Canned tomatoes are a great option, especially if you’re short on time or if fresh tomatoes aren’t in season. Look for high-quality canned tomatoes for the best flavor.

2. How can I adjust the sauce for a spicy kick?
You can add red pepper flakes or a minced jalapeño during the sautéing step to infuse heat into the sauce. This allows you to control the spice level to your preference.

3. Can I freeze this spaghetti sauce?
Yes! Homemade spaghetti sauce freezes beautifully. Allow it to cool completely, then store it in freezer-safe containers for up to three months.

4. What can I do if my sauce is too acidic?
If your sauce turns out too acidic, you can add a small amount of sugar, honey, or grated carrot to balance the flavors. Just a teaspoon at a time can make a big difference.

5. How can I make this sauce ahead of time?
You can prepare the sauce a day in advance and store it in the refrigerator. The flavors will deepen overnight, making it even tastier when reheated.

6. Is there a vegetarian version of this sauce?
Yes! The ingredients already make this sauce vegetarian-friendly. To enhance the texture, consider adding lentils or mushrooms that will provide substance without meat.

7. How long can I store leftover sauce in the fridge?
You can store leftover spaghetti sauce in the refrigerator for up to four days in an airtight container. Ensure it cools completely before sealing to maintain freshness.

8. What type of pasta pairs best with this sauce?
While a classic spaghetti pasta is traditional, you can pair this sauce with any type of pasta, including penne, fettuccine, or even zucchini noodles for a low-carb option.

9. Can I add meat to this sauce?
Absolutely! You can brown ground beef, turkey, or sausage before adding the tomatoes to make a hearty meat sauce variation.

10. How can I get a thicker sauce?
Simmer the sauce uncovered for longer to allow excess liquid to evaporate, thickening the consistency. Alternatively, puree portions of the sauce for a creamier body without additional cooking time.

Additional Resources

If you’re seeking related recipes, explore dishes such as lasagna or stuffed shells that beautifully incorporate this homemade spaghetti sauce.

Technique guides focusing on knife skills can also enhance your cooking efficiency by helping you chop your vegetables quickly and uniformly.

Ingredient information regarding seasonal freshness is vital; consider local markets for produce that ensures the highest quality in your cooking.

Equipment recommendations can include pots with heavy bottoms for even heat distribution when preparing sauces, improving cooking performance.

Don’t forget to check out seasonal variations around holidays; incorporating fresh herbs during the spring or roasted vegetables in the fall can elevate traditional recipes.

Join the Conversation

We’d love to see your successes with this recipe on social media! Share your creations, and connect with fellow home cooks to exchange tips and modifications.

Photography tips encourage you to capture the beauty of your finished dish; natural light and close-ups can make your food photos stand out.

Recipe reviews not only help others discover this homemade spaghetti sauce but also encourage an interactive community where ideas are shared and celebrated.

Engage with readers by sharing your variations or unique pairings, fostering a lovely conversation around the joys of cooking.

Recipe variations help inform others about diverse dietary needs while creating an inclusive atmosphere that brings everyone to the table.

The Recipe

The BEST Homemade Spaghetti Sauce

Serves: 4 servings

Prep Time: 10 mins

Cook Time: 30 mins

Total Time: 40 mins

Kitchen Equipment Needed

  • Sturdy pot
  • Cutting board
  • Knife
  • Spoon for stirring

Ingredients

  • 2 tablespoons olive oil
  • 1 small onion, chopped
  • 3 garlic cloves, minced
  • 1 can (28 oz) crushed tomatoes
  • 1 teaspoon dried oregano
  • 1 teaspoon dried basil
  • Salt and pepper to taste
  • A pinch of sugar (optional)
  • Fresh basil, for garnish

Directions

  1. In a large pot, heat olive oil over medium heat.
  2. Add chopped onion and sauté until translucent, about 5 minutes.
  3. Add minced garlic and sauté for an additional minute until fragrant.
  4. Stir in the crushed tomatoes, oregano, and dried basil.
  5. Simmer uncovered for 20-30 minutes, stirring occasionally.
  6. Season with salt, pepper, and sugar to taste.
  7. Serve over your favorite pasta, garnished with fresh basil.

Recipe Notes

  • You can add ground meat for a heartier sauce.
  • Feel free to experiment with additional herbs and spices based on your taste preferences.
  • Store leftovers in the fridge for up to 4 days or freeze for longer storage.

Delicious Greek Chicken Meatballs with Easy Homemade Tzatziki Recipe

Greek Chicken Meatballs with Tzatziki: A Flavorful Mediterranean Delight

⚖️
Difficulty
Easy

⏲️
Prep Time
15 mins

🕒
Cook Time
25 mins

⏱️
Total Time
40 mins

🍽️
Servings
4 servings

Indulge your taste buds with these delicious Greek Chicken Meatballs paired perfectly with a creamy tzatziki sauce. This dish captures the essence of Mediterranean cuisine, showcasing the vibrant flavors of herbs, spices, and fresh ingredients. Every bite offers a juicy chicken meatball, seasoned with classic Greek flavors like garlic, oregano, and parsley, which create a delightful mix that is both savory and refreshing.

This Greek Chicken Meatballs recipe is more than just a meal; it’s a cultural experience. The lightness of the chicken combined with the coolness of the tzatziki makes it perfect for any occasion, whether a casual family dinner or an impressive gathering with friends. Serve these meatballs on a platter or make them the star of your plate with a side of your favorite veggies, rice, or pita.

Quick Recipe Highlights

  • Flavor Profile: The Greek Chicken Meatballs are infused with aromatic spices and fresh herbs that create a well-balanced flavor, while the tzatziki sauce adds a zesty and cooling effect.
  • Texture: These meatballs offer a tender and juicy bite, complemented by the creamy texture of the tzatziki sauce making every mouthful delightful.
  • Aroma: The irresistible aroma of garlic, dill, and lemon in the meatballs and tzatziki will fill your kitchen and invite everyone to the table.
  • Visual Appeal: The vibrant colors of the meatballs, paired with the fresh green herbs and creamy white tzatziki, make this dish beautiful and appetizing.
  • Skill Level Needed: This recipe is suitable for beginners, as it involves straightforward measurements and cooking techniques that anyone can master.
  • Special Equipment: No special equipment is required other than basic kitchen tools like mixing bowls, measuring cups, and a frying pan.

Recipe Overview

  • Difficulty Level: The ease of preparing Greek Chicken Meatballs makes it accessible to home cooks of all skill levels, requiring minimal steps and ingredients.
  • Category: This dish can be categorized as an appetizer, main course, or snack, offering versatility in meal planning.
  • Cuisine: Rooted in Greek culinary traditions, this recipe showcases the region’s love for fresh ingredients and bold flavors.
  • Cost: Greek Chicken Meatballs are budget-friendly, with ingredients typically ranging from $10 to $15, making them an economical choice for meal preparation.
  • Season: Perfect for any season, these meatballs shine in summer gatherings or winter comfort food dining.
  • Occasion: Ideal for social gatherings, potlucks, or family dinners, these meatballs are sure to impress your guests.

Why You’ll Love This Recipe

Taste and texture appeal: The Greek Chicken Meatballs combine juicy chicken with a medley of spices that transports your taste buds to the sun-drenched shores of Greece. Each meatball delivers a satisfying bite, bursting with flavor and tender juiciness.

Convenience and preparation benefits: With only 15 minutes of preparation and 25 minutes of cooking time, this easy recipe fits effortlessly into your busy lifestyle without sacrificing flavor.

Nutritional advantages: These meatballs are lean, high in protein, and gluten-free, making them a healthy option for maintaining a balanced diet while still enjoying delicious meals.

Social and entertaining value: The shareable nature of these meatballs makes them perfect for parties or gatherings, encouraging guests to mingle while enjoying a taste of Greece.

Cost-effectiveness and accessibility: Affordable ingredients make this recipe accessible to anyone, ensuring you can whip up a delightful dish for family and friends without breaking the bank.

Historical Background and Cultural Significance

The origin of meatballs can be traced back to ancient civilizations where they were a convenient way to utilize leftover meats and spices. In Greek cuisine, they evolved into a cherished dish known as “keftedes,” often made with lamb or beef before poultry variations became popular.

Cultural importance is underscored by the prominence of meatballs in Mediterranean gatherings and celebrations. In Greece, families often prepare these savory bites to share during festive occasions, representing hospitality and togetherness.

The recipe has evolved over the years, incorporating various herbs and spices reflecting regional tastes and available ingredients. Today, these Greek Chicken Meatballs are a modern twist on classic recipes cherished by generations.

Regional variations abound, as different areas of Greece have their unique takes on meatballs, ranging from additional ingredients like feta cheese to variations in the sauce served alongside.

Ingredient Deep Dive

Chicken: As a lean protein source, chicken is favored in many cuisines for its versatility. It is rich in essential nutrients, including B vitamins and selenium. When selecting chicken for meatballs, choose fresh, organic options for the best flavor. Store raw chicken in the coldest section of your fridge and use it within 2 days, or freeze for longer storage. If you’re looking for alternatives, ground turkey or pork can save the day.

Oregano: This herb provides a quintessential flavor found in Greek cuisine. Oregano is laden with antioxidants and has anti-inflammatory properties. Always choose fresh oregano when available for optimal flavor, and store dried oregano in a cool, dark place to retain its potency. Consider substituting dried thyme or Italian seasoning in a pinch.

Common Mistakes to Avoid

  • Using overly lean meat: While chicken is a lean option, using too lean a cut can result in dry meatballs. Opt for ground chicken with some fat content to retain moisture.
  • Overmixing the ingredients: Mixing too vigorously can lead to tough meatballs. Use your hands gently to combine meat and seasonings.
  • Skipping the resting time: Allowing meatballs to rest before cooking helps them retain moisture. Skipping this step can lead to dryness.
  • Ignoring cooking temperature: Cooking meatballs at too high a temperature can result in burnt exteriors and undercooked centers. Aim for medium heat for even cooking.
  • Not using aromatics: Ingredients like garlic and onion are key to flavor. Omitting these can leave your meatballs bland.
  • Using stale breadcrumbs: Fresh breadcrumbs lead to better texture and flavor. Use day-old bread or purchase fresh bread crumbs for best results.
  • Not using enough seasoning: A well-seasoned meatball is essential. Don’t hesitate to taste your mixture before cooking to adjust seasoning.
  • Overcrowding the pan: Cooking too many meatballs at once can lower the oil temperature, resulting in steaming rather than browning.
  • Ignoring sauce pairing: A flavorful tzatziki enhances the meatballs. Don’t skip on this essential accompaniment.
  • Serving without accompaniments: Consider serving with pita bread, salad, or rice for a well-rounded meal.

Essential Techniques

Mixing the meat: Properly mixing ground meat with seasonings is crucial for flavor and texture. Use your hands to combine ingredients gently, ensuring not to overwork the meat, which can lead to a tough consistency. Visual cues for success include a uniform color throughout the mixture without any dry patches.

Shaping meatballs: When forming meatballs, aim for uniform size for even cooking. A quick way to portion your mixture is using a small ice cream scoop or your hands to create equally sized spheres. Avoid pressing too firmly; a light touch keeps them tender.

Pro Tips for Perfect Greek Chicken Meatballs

Chill the mixture before forming meatballs to help them hold their shape during cooking.

For added flavor, consider mixing some grated lemon zest into the meat mixture.

Cook a small test meatball to check for seasoning before shaping the entire batch.

Brown the meatballs in batches, allowing them space in the pan for a perfect sear.

Use a meat thermometer to ensure an internal temperature of 165°F for safe consumption.

Prepare a double batch and freeze for quick meals later—just thaw and reheat!

Variations and Adaptations

Regional variations include alternative meat choices, like lamb or beef, and mixing in local spices. Swap feta cheese for classic Greek flavor within the meatball mixture for a twist. Use gluten-free breadcrumbs for dietary adaptations or serve with whole wheat pita for a healthier twist on the traditional.

For a seasonal adaptation, consider incorporating finely grated zucchini or spinach for added nutrients and moisture during the summer months.

Serving and Presentation Guide

Plating your Greek Chicken Meatballs beautifully enhances your dining experience. Arrange meatballs in a circular pattern drizzled with tzatziki and garnished with fresh herbs, creating an inviting visual centerpiece. For garnishing, consider fresh parsley, dill, or a sprinkle of paprika. Traditional accompaniments may include warm pita, Greek salad, or roasted vegetables.

Temperature plays a key role in serving; ensure meatballs are served hot for optimal flavor. Portion control can be managed by serving 2-3 meatballs alongside a generous scoop of tzatziki and a side salad for a balanced dinner plate.

Wine and Beverage Pairing

When it comes to wine pairing, a crisp white wine like Sauvignon Blanc or a light-bodied red like Pinot Noir complements these meatballs wonderfully. For non-alcoholic alternatives, consider serving sparkling water with a splash of lemon for refreshment. If you enjoy a warm beverage, opt for a light herbal tea to cleanse the palate after a delicious meal.

Storage and Shelf Life

These Greek Chicken Meatballs can be stored in an airtight container in the refrigerator for up to 3 days. For longer shelf life, freeze them individually on a baking sheet before transferring to a storage bag or container. Signs of spoilage include an off smell or discoloration. When reheating, ensure they reach an internal temperature of 165°F. To freeze, consider placing meatballs in a single layer, then stacking once frozen to save space.

Make Ahead Strategies

To save time on busy days, prepare the meatball mixture and form meatballs the day before, then refrigerate until ready to cook. Consider cooking the meatballs partially and finishing them on the day of serving for maximum flavor retention. Additionally, you can prepare the tzatziki a day in advance to allow flavors to meld together. Keep fresh elements like diced cucumber to add just before serving for optimal texture.

Scaling Instructions

When scaling this Greek Chicken Meatballs recipe, simply adjust ingredient quantities based on the number of servings desired. For halving, use 50% of the ingredients and for doubling or tripling, ensure you have large enough pots and pans for cooking. Timing may also need adjustments; monitor cooking times when scaling up for even cooking and don’t overcrowd the pan.

Nutritional Deep Dive

Each serving of Greek Chicken Meatballs offers a hearty protein boost, with an average of 25 grams per serving, making them a superb choice for those looking to maintain muscle health. Carbohydrate content is low, especially if paired with veggies instead of grains, and fat content can vary based on the meat choices used. Incorporating fresh ingredients provides vital vitamins and minerals necessary for overall health.

Dietary Adaptations

For gluten-free options, simply use gluten-free breadcrumbs or ground oats as a substitute. Dairy-free adaptations are achievable by choosing a dairy-free yogurt for the tzatziki sauce. Vegan alternatives can be created by using textured vegetable protein or chickpeas in place of chicken, mixing in spices for flavor adjustments. For those following low-carb diets, serving meatballs with zucchini noodles instead of pita is a delicious option.

Troubleshooting Guide

If texture issues arise, ensure that you’re using the right fat content in your ground chicken—lean chicken can lead to dryness. For flavor balance, bit of salt or lemon juice can enhance taste if bland. If you struggle with equipment challenges, ensure your frying pan is well-preheated before adding meatballs to avoid sticking. Keep a close watch on timing; each stove varies slightly, so adjust as necessary.

Recipe Success Stories

Feedback from readers has highlighted the tenderness of the Greek Chicken Meatballs and their simple-to-follow recipe, resulting in rave reviews from family gatherings. Many have shared experiences adapting the recipe with different meats, showcasing the versatility of the dish. Photography tips shared by the community suggest focusing on vibrant colors and rich textures to best display this exquisite dish.

Frequently Asked Questions

Can I use ground turkey instead of chicken?

Absolutely! Ground turkey provides a lean alternative that works well with the same seasonings and cooking methods.

Is tzatziki necessary for this recipe?

While tzatziki enhances the meatballs with its coolness, they can be enjoyed on their own or with other dipping sauces as preferred.

Can I freeze these meatballs for later use?

Yes, they freeze well! Allow them to cool completely before placing them in an airtight container or freezer bag.

How do I know when the meatballs are cooked through?

Using a meat thermometer, check for an internal temperature of 165°F to ensure they are fully cooked.

What are some good sides to serve with these meatballs?

Consider pairing the meatballs with Greek salad, pita bread, or roasted vegetables for a well-rounded meal.

Can I add cheese to the meatball mixture?

Absolutely! Adding feta cheese to the mixture provides an additional layer of flavor and can help keep the meatballs moist.

What if I can’t find fresh herbs?

Dried herbs can be substituted at a ratio of 1:3; however, fresh herbs provide a brighter flavor.

Is this recipe suitable for meal prep?

Yes! Greek Chicken Meatballs are perfect for meal prep, and they reheat well, making them convenient for busy days.

How spicy are these meatballs?

This recipe is not spicy, but feel free to add chili flakes or a pinch of cayenne for some heat if desired.

Can I serve these meatballs cold?

While they’re best served warm, they can be enjoyed cold as an appetizer or in a salad.

Additional Resources

Explore related recipes such as Mediterranean Quinoa Salad or Grilled Vegetable Skewers for a full Greek feast. Consider technique guides on making homemade tzatziki or mastering ground meat cooking methods.

Join the Conversation

We’d love to hear from you! Share your experiences with Greek Chicken Meatballs on social media, post photos of your creations, or engage with others by sharing tips and variations. Join our community, and let’s celebrate the joy of cooking together!

The Recipe

Greek Chicken Meatballs with Tzatziki

Serves: 4 servings

Prep Time: 15 mins

Cook Time: 25 mins

Total Time: 40 mins

Kitchen Equipment Needed

  • Mixing bowls
  • Meat thermometer
  • Frying pan
  • Spatula

Ingredients

  • 1 lb ground chicken
  • 1/2 cup breadcrumbs
  • 1/4 cup parsley, chopped
  • 1 tsp oregano
  • 1/4 cup onion, finely chopped
  • 2 cloves garlic, minced
  • Salt and pepper to taste
  • 1 egg, beaten
  • 2 tbsp olive oil
  • 1 cup Greek yogurt for tzatziki
  • 1 small cucumber, grated
  • 2 cloves garlic for tzatziki, minced
  • 1 tbsp lemon juice
  • Salt to taste

Directions

  1. In a large mixing bowl, combine ground chicken, breadcrumbs, parsley, oregano, onion, minced garlic, salt, pepper, and beaten egg.
  2. Mix until well combined, but avoid overmixing.
  3. Form mixture into small meatballs (about 1 inch in diameter).
  4. Heat olive oil in a frying pan over medium heat.
  5. Add meatballs to the pan, cooking until browned on all sides and cooked through (approximately 10-15 minutes).
  6. For the tzatziki, combine Greek yogurt, grated cucumber, minced garlic, lemon juice, and salt in a bowl. Mix well.
  7. Serve meatballs warm with tzatziki sauce on the side.

Recipe Notes

  • For added flavor, consider adding feta cheese to the meat mixture.
  • These meatballs can be frozen for later use; simply thaw and reheat before serving.

Delicious Butter Pecan Fudge Recipe: A Sweet Treat to Savor

Butter Pecan Fudge Recipe: A Sweet Indulgence for Any Occasion

⚖️
Difficulty
Medium

⏲️
Prep Time
15 mins

🕒
Cook Time
25 mins

⏱️
Total Time
40 mins

🍽️
Servings
24 pieces

Butter Pecan Fudge is a delightful treat that combines the rich flavors of butter and brown sugar with the crunchy texture of pecans. This fudge is not only a sweet indulgence but also an impressive dessert that is perfect for sharing with family and friends. Whether you’re preparing for a holiday gathering or simply looking for a delicious snack, this Butter Pecan Fudge is sure to please.

As you take a bite, you’ll experience the creamy sweetness melting in your mouth, complemented by the slightly salty, toasted flavor of pecans. Each piece delivers a satisfying crunch that balances the rich, buttery fudge perfectly. With its appealing golden hue and inviting aroma, this fudge is as visually pleasing as it is tasty, making it an excellent choice for special occasions.

Quick Recipe Highlights

  • Flavor Profile: The combination of buttery sweetness and nutty pecans creates a delightful contrast that is both comforting and indulgent.
  • Texture: This fudge features a creamy base with a smooth mouthfeel, punctuated by crunchy bits of pecans.
  • Aroma: The fudge boasts rich notes of caramelized sugar and toasted nuts, filling your kitchen with an irresistible scent as it cooks.
  • Visual Appeal: Its golden, glossy finish and speckled pecan pieces make this fudge visually striking and inviting to serve.
  • Skill Level Needed: With simple techniques, this fudge is accessible even for novice bakers looking to impress.
  • Special Equipment: A candy thermometer is recommended for ensuring perfect consistency but is not strictly necessary.

Recipe Overview

  • Difficulty Level: Butter Pecan Fudge is rated medium. While the recipe is straightforward, careful attention is needed to bring the mixture to temperature without burning.
  • Category: This recipe falls under desserts and confections, making it ideal for sweet cravings and celebrations.
  • Cuisine: As a beloved American treat, fudge has roots in traditional candy-making but has evolved into numerous variations reflecting regional flavors.
  • Cost: Ingredients for this fudge are budget-friendly, typically costing less than $10 to make a batch that serves 24 pieces.
  • Season: Perfect for all seasons, this fudge shines at holiday gatherings, potlucks, and sunny picnics alike.
  • Occasion: Serve it during family gatherings, as thank-you gifts, or even at weddings for a sweet touch.

Why You’ll Love This Recipe

Butter Pecan Fudge is not just a dessert; it’s an experience. The harmonious blend of buttery caramel and toasted pecans creates a flavor explosion that is both nostalgic and comforting. Each bite is decadent, yet the crunchy pecans provide a satisfying crunch that elevates the texture to a new level of enjoyment. This rich treat is sure to put a smile on anyone’s face, making it a perfect choice for celebrations or just a cozy night in.

What’s more, this fudge is easily accessible for all home bakers. The straightforward steps and minimal prep time mean you can whip up a batch quickly, even on short notice. It requires simple ingredients that are often staples in your pantry, making it an efficient choice for those spontaneous sweet cravings. Plus, it keeps well, meaning you can prepare it ahead of time for parties or holiday festivities.

Health-conscious individuals will appreciate that this recipe can be tailored to incorporate healthier alternatives. You could use organic ingredients or adjust the sugar content to suit your dietary preferences. The nuts add a beneficial protein boost, making this treat a bit more nourishing compared to other confections.

Socially, Butter Pecan Fudge serves as a wonderful conversation starter at gatherings. Its beautiful appearance and delightful taste make it a favored treat among friends and family. Sharing this fudge with others creates lasting memories and sparks joy, whether enjoyed at a holiday party or shared as gifts for special occasions.

Lastly, this recipe is incredibly cost-effective. With minimal ingredients that yield a generous portion, it provides great value. You can satisfy your sweet tooth without breaking the bank, allowing you to indulge in a truly delightful treat successfully without feeling guilty.

Historical Background and Cultural Significance

The origin of fudge can be traced back to the early 19th century in the United States. The process of boiling sugar and butter together was likely discovered by accident, leading to the creation of this smooth, creamy confection. The name “fudge” itself is thought to have originated from the Southern dialect, as vendors began selling it in candy shops across the country.

Culturally, fudge became a popular treat among families and was often made during the holidays. This tradition continues today, with many families passing down their own recipes through generations. Butter Pecan Fudge honors the original recipe while adding a delightful twist with its unique flavor combination that celebrates Southern culinary traditions.

As fudge evolved, different regions began to introduce their unique spin on the classic treat. In the South, the addition of pecans is particularly beloved, reflecting the region’s abundance of this nut. These local variations help to preserve the cultural significance of fudge as a sweet emblem of regional culinary identity.

Today, Butter Pecan Fudge remains a popular choice during celebrations and holidays throughout the year. Its delightful flavors evoke nostalgia and warmth, making it a cherished sweet that brings people together, reinforcing its place in both American culture and the hearts of those who enjoy it.

Ingredient Deep Dive

Butter: Butter is an essential ingredient in fudge, contributing to its rich flavor and silky texture. Historically, butter has been used in confections to enhance flavor and mouthfeel. It contains healthy fats that provide energy, but it is important to use it sparingly at times to maintain balance in your diet. When selecting butter for this recipe, always choose high-quality, unsalted butter for the best flavor. Store butter in the refrigerator, ensuring it stays fresh for longer. If you’re out of butter, you can substitute with margarine, although the flavor may differ slightly.

Pecans: Pecans are not only delicious but also add a crunch that complements the creamy fudge. This nut has deep cultural roots in Southern cuisine and has been enjoyed for generations. Pecans are packed with antioxidants, healthy fats, and vitamins, making them a nutritious addition to your diet. When selecting pecans, look for ones that are firm and aromatic. For storage, keep them in a cool, dry place or refrigerate them to maintain freshness. If you don’t have pecans, walnuts or almonds can be used as substitutes, providing a different but delightful texture.

Common Mistakes to Avoid

  • Not using a candy thermometer: One of the most common mistakes is failing to measure the temperature of the fudge. This can lead to either a too-soft or overly hard texture. Always have a good-quality candy thermometer on hand to achieve the right consistency.
  • Overcooking the mixture: Cooking the fudge too long results in a grainy texture. Stop cooking as soon as the mixture reaches the soft-ball stage, around 234°F (112°C).
  • Under-mixing: When all ingredients are combined, it’s essential to mix thoroughly to ensure air is incorporated. Otherwise, the fudge can harden unevenly.
  • Using cold utensils: If using cold pans or utensils, the fudge may not set correctly. Always warm your equipment slightly to achieve better results.
  • Not letting the fudge cool properly: Be patient and don’t rush the cooling process. If you cut it while it’s too warm, it won’t hold its shape.
  • Skipping the buttering of the pan: Fudge can stick if the pan isn’t adequately greased. Always line your pan with parchment paper or butter it well to ensure easy removal.
  • Failing to toast the pecans: Toasting pecans enhances their flavor. Many home cooks skip this step, which can lead to a less robust taste.
  • Not allowing time to set: Leaving fudge to cool for adequate time is crucial. Cutting it too soon can ruin its structure and texture.
  • Choosing low-quality ingredients: As fudge is a simple recipe, using high-quality butter, sugar, and nuts makes a noticeable difference in the final taste.
  • Ignoring humidity levels: High humidity can affect the texture of your fudge, making it sticky or too soft. Adjust cooking conditions accordingly.

Essential Techniques

Temperature Control: This technique is crucial in candy making. The sugar mixture must be heated to the right temperature, as too low and it won’t set, too high will cause it to harden. To master this, use a reliable candy thermometer and check the temperature as you cook.

Mixing: Proper mixing is essential to create a uniform fudge. Once the mixture reaches the right temperature, remove it from the heat and stir vigorously. This helps to incorporate air and allows the fudge to set properly.

Cooling: Allowing the fudge to cool in the pan stabilizes its structure. After pouring it into the prepared pan, avoid cutting it until it cools and sets—around two hours. This technique ensures you get clean edges when you cut it.

Ingredient Preparation: Preparing ingredients beforehand can streamline the fudge-making process. For example, chopping pecans and measuring out ingredients in advance helps maintain focus and prevents rushing when the mixture is hot.

Tasting and Adjusting: Since every palate is unique, be sure to taste your fudge base before it sets. This ensures the balance of flavors is to your liking, allowing you to make adjustments if necessary.

Pro Tips for Perfect Butter Pecan Fudge

1. Always measure sugar accurately to prevent inconsistencies in texture.
2. Consider using brown sugar for added depth of flavor and richness in your fudge.
3. Toast your pecans before adding them for enhanced nuttiness.
4. Use a heavy-bottom pan to help distribute heat evenly and prevent scorching.
5. Pour the fudge into the lined pan while it’s hot for the best set.
6. Allow the fudge to cool at room temperature rather than in the refrigerator, as this ensures better texture.
7. For a chocolate twist, consider swirling in melted chocolate just before pouring the fudge into the pan.
8. Store leftover fudge in an airtight container at room temperature to retain its softness.

Variations and Adaptations

Throughout the years, variations of Butter Pecan Fudge have emerged, each adding a unique twist to this classic. For instance, you can incorporate different nuts such as walnuts or almonds, allowing for a diverse flavor profile. Seasonal adaptations can include adding spices like cinnamon or nutmeg during fall, lending warmth to the fudge.

For dietary modifications, consider making the fudge dairy-free by swapping butter for coconut oil or vegan butter. If you’re looking for a lower-carb option, you can substitute sugar with erythritol or other sugar alternatives to maintain sweetness without the added calories.

Flavor variations can be achieved by incorporating extracts like vanilla or maple. These small tweaks add complexity and richness to your fudge. Additionally, you can adjust the texture by opting for coarsely chopped pecans for a more rugged appearance or finely cut nuts for a smoother finish.

Serving and Presentation Guide

When serving Butter Pecan Fudge, presentation plays a key role in enhancing the dining experience. Cut the fudge into uniform squares for an elegant look, and consider stacking them on a cake stand for a showcase effect. Garnishing with a sprinkle of sea salt or a drizzle of melted chocolate can elevate the visual appeal significantly.

Traditional accompaniments like homemade whipped cream or ice cream can complement the rich flavors beautifully. For a modern touch, consider serving it with fresh fruits like strawberries or slices of orange to provide a refreshing balance.

Temperature considerations are important; serve the fudge at room temperature to allow its texture to shine. When hosting, remember to offer appropriate portion sizes. Small squares are perfect for satisfying the sweet tooth, leaving room for guests to enjoy other treats.

Wine and Beverage Pairing

Pairing Butter Pecan Fudge with the right beverages can enhance its flavors remarkably. A rich, sweet dessert wine like a late harvest Riesling or a tawny port offers complementary sweetness and texture. The nutty notes in the fudge resonate beautifully with these wines, making for a perfect match.

In addition to wine, consider non-alcoholic alternatives like a rich hot chocolate topped with whipped cream. Alternatively, a balanced espresso contrasts the sweet fudge nicely, enhancing its creamy richness. When serving, ensure the beverages are chilled or brewed to the perfect temperature to complement the fudge seamlessly.

Storage and Shelf Life

Proper storage is key to preserving the freshness of Butter Pecan Fudge. Keep the fudge in an airtight container at a cool room temperature away from direct sunlight. This helps it maintain its soft texture and sweet flavor for about 1 to 2 weeks.

If you want to extend its shelf life, consider refrigerating it. Although it is still safe to eat after a few weeks in the refrigerator, be mindful of the texture—refrigerated fudge may become a bit crumbly. Ensure you wrap it well to prevent any moisture loss and keep it tasting fresh.

For longer-term storage, you can freeze the fudge. Wrap it tightly in plastic wrap and place it in a freezer-safe container. It can last up to three months in the freezer. Just ensure to thaw it in the refrigerator overnight before serving.

Make Ahead Strategies

If you’re planning to serve Butter Pecan Fudge for a special occasion, consider making it ahead of time. Preparing the fudge a day or two in advance allows the flavors to meld, creating a more intense taste. Just ensure that it has sufficient time to cool and set fully, enhancing its texture and consistency.

While waiting for the fudge to set, you can store it in the fridge or at room temperature, depending on your serving timeline. Once set, it can be cut into squares and stored in an airtight container, ready for immediate serving.

If you’re worried about artificial elements when reheating or serving, keep a few added ingredients on hand—like freshly toasted pecans or coarse sea salt—to sprinkle on top just before serving for added texture and interest. This way, you enhance both presentation and freshness.

Scaling Instructions

Scaling Butter Pecan Fudge is quite easy. If you find yourself in need of fewer or more pieces, simply adjust the measurements proportionately. Halving the recipe is straightforward; just make sure your pan size reflects the change to maintain the right thickness.

If you decide to double or triple the recipe, be mindful of adjusting cooking times slightly, as larger batches may take longer to reach the desired temperature. Utilizing larger pots can help with maintaining the proper temperature while stirring continuously.

Store any extra fudge in airtight containers as mentioned previously, ensuring that it retains its freshness during storage. By following these simple guidelines, you can adapt the recipe to fit any occasion seamlessly.

Nutritional Deep Dive

Butter Pecan Fudge may be a treat, but understanding its nutritional data is important for mindful indulgence. Each square typically contains a healthy dose of fats from the butter and nuts, contributing to a satisfying, energy-boosting snack. However, it’s important to enjoy it in moderation due to its high sugar content.

Looking into micronutrients, pecans provide essential vitamins E and B6, along with protein and fiber, which can be beneficial for overall health. This makes Butter Pecan Fudge not just a sweet treat but a source of some nutritional value, especially when made with high-quality ingredients.

When considering dietary preferences, be cautious of portions, especially for those watching sugar or calorie intake. Remember that even a small piece can offer a rich, satisfying sweetness that feels indulgent while keeping caloric impact in check.

Dietary Adaptations

For those with dietary restrictions, Butter Pecan Fudge can be tailored in various ways. If you seek a gluten-free version, simply ensure that all sugar and additional ingredients are certified gluten-free; the core recipe is naturally gluten-free.

Dairy-free alternatives are also easily incorporated, swapping butter out for plant-based options such as coconut oil or vegan buttery spreads. Additionally, nut varieties can be adjusted for nut-free adaptations, using seeds like sunflower seeds or pumpkin seeds in their place.

For those adhering to a low-carb or keto diet, implementing sugar substitutes can yield a fudge that won’t derail your dietary goals. Options like erythritol, monk fruit sweetener, or stevia can provide the sweetness without unwanted carbs.

Troubleshooting Guide

If you encounter texture issues with your Butter Pecan Fudge, the most common reasons are either overcooking or under-mixing. If the fudge feels grainy, it’s usually due to the sugar crystallizing—this can happen if the mixture is stirred too vigorously while cooling. Ensure you mix gently and avoid water intrusion during the cooking stage.

When it comes to flavor balance, if the fudge tastes too sweet, consider adding a pinch of salt to enhance its flavors. This can surprisingly lower perceived sweetness while bringing out the depth of the buttery notes.

Temperature problems can arise if your stovetop varies widely in heat. Use a heavy-bottomed pot for more even distribution. If your fudge isn’t setting, it’s likely due to undercooking; check the temperature closely next time and ensure it reaches at least 234°F (112°C).

Equipment challenges can arise if pots are too small, causing spills. Always choose appropriately sized cookware for the batch size. If ingredient substitutions are made, double-check ratios; not all sweeteners or butters convert directly.

Timing concerns often occur when trying to rush the cooling phase. Always allow the fudge adequate time to set—it’s tempting to hurry but waiting enables a much neater cut.

Recipe Success Stories

Butter Pecan Fudge has received numerous praises from home cooks who have tried this recipe. Many found success with variations, sharing stories of experimenting with flavor additions like coconut or chocolate swirls that delighted guests at their gatherings.

Readers have described adaptations of the original recipe, swapping in healthier sweeteners that still yielded wonderful results without sacrificing taste. These adaptations inspire others in the community to try their hand at making their unique versions.

Photography tips have also flooded in, as many bakers seek to capture the deliciously rich appearance of their fudge. Simple styling tips like using contrasting backgrounds or garnishing with a dusting of powdered sugar create inviting visuals that highlight the creamy texture and crunch of the pecans.

Countless success stories demonstrate how adaptable and beloved this fudge has become, making it a staple recipe in many homes eager to share sweet memories with loved ones.

Frequently Asked Questions

How do I ensure my fudge sets properly?

To ensure your fudge sets properly, make sure to reach the right temperature during cooking; ideally, around 234°F (112°C). Allow it adequate time to cool before cutting, as this will help maintain its structure and prevent it from becoming too soft.

What can I do if my fudge turns out grainy?

If your fudge turns out grainy, it often means that the sugar crystallized during cooking. To avoid this, avoid stirring the mixture too vigorously while it is cooling, and ensure to keep moisture away from your sugar mixture as it cooks.

Can I freeze Butter Pecan Fudge?

Yes, Butter Pecan Fudge freezes beautifully. Wrap it tightly in plastic wrap and store it in an airtight container in the freezer. It can be kept for up to three months. Just thaw in the refrigerator before serving.

What other nuts can I use in this recipe?

While pecans are the classic choice, you can substitute them with walnuts, almonds, or even cashews for different flavor profiles and textures. Just be mindful of how the substitute affects your overall flavor balance.

What’s the best way to cut fudge?

To cut fudge neatly, allow it to set at room temperature first. Using a hot knife (dip in hot water and dry) can help create smooth cuts without the fudge sticking to the blade.

How long does Butter Pecan Fudge last?

When stored properly in an airtight container at room temperature, Butter Pecan Fudge can last around 1 to 2 weeks. It can also be refrigerated to extend its shelf life without losing flavor.

Can I add chocolate to this fudge?

Yes! You can incorporate chocolate by swirling melted chocolate into the fudge mixture just before pouring it into the pan. This will create a delightful combination of flavors and textures.

Is it possible to make this fudge without a candy thermometer?

While a candy thermometer is recommended for accuracy, you can do without it by testing the soft-ball stage by dropping a small amount of the mixture into cold water to see if it forms a soft ball.

What’s the best way to store leftover fudge?

The best method is to store leftover fudge in an airtight container at room temperature for up to 1 week or refrigerate it for up to 2 weeks. Just ensure it’s wrapped well to avoid drying out.

Can I use sugar substitutes for a healthier version?

Absolutely! You can use sugar substitutes like erythritol or monk fruit sweetener to reduce sugar content while maintaining sweetness. Just ensure to account for any differences in measurement and taste.

What other flavors can I add to customize this fudge?

Aside from nuts, consider adding flavors such as vanilla extract, maple syrup, or even spices like cinnamon for a unique twist. These additions can elevate the fudge and tailor it to your preferences.

Additional Resources

For those eager to dive deeper into the world of confections, there are plenty of resources available. Check out related recipes such as Chocolate Fudge, Peanut Butter Fudge, or Nut Brittle for even more indulgent treats. Additionally, technique guides on candy making offer invaluable insights into mastering the art of sweet creations.

Online ingredient information resources can help you understand the best ingredients to use for your fudge. Consider finding equipment recommendations to ensure that you only invest in the best quality tools for your kitchen.

Seasonal variations provide fresh inspiration; think about incorporating seasonal spices or flavors for the holidays, or using fresh ingredients for a summer take on fudge.

Join the Conversation

We love hearing from our readers! Share your experiences or adaptations of the Butter Pecan Fudge recipe. Engage with us on social media by posting your fudge-making adventures and tagging us in your photos. You can provide valuable tips, feedback, and even suggestions for new recipe ideas based on your baking triumphs.

Your photography can also inspire others; show off your stunning platters and unique presentations. Whether you’ve switched up the nuts or introduced exciting flavors, your variations are what keep our community vibrant and creative. We look forward to seeing your sweet creations!

The Recipe

Butter Pecan Fudge

Serves: 24 pieces

Prep Time: 15 mins

Cook Time: 25 mins

Total Time: 40 mins

Kitchen Equipment Needed

  • Heavy-bottom saucepan
  • Candy thermometer
  • Wooden spoon or spatula
  • Baking pan (8×8 inches)
  • Parchment paper (for lining)

Ingredients

  • 2 cups granulated sugar
  • 1/2 cup unsalted butter
  • 1/2 cup heavy cream
  • 1 cup chopped pecans
  • 1 teaspoon vanilla extract
  • 1/4 teaspoon salt

Directions

  1. In a heavy-bottom saucepan, combine sugar, butter, and cream. Heat over medium heat, stirring until the sugar dissolves.
  2. Attach a candy thermometer to the pan and bring the mixture to a boil. Allow it to cook without stirring until it reaches the soft-ball stage (234°F or 112°C).
  3. Remove from heat and let it cool for about 5 minutes. Stir in vanilla extract, salt, and toasted pecans.
  4. Pour the mixture into a greased or parchment-lined baking pan. Spread it evenly with a spatula.
  5. Allow the fudge to cool at room temperature for at least 2 hours before cutting it into squares.

Recipe Notes

  • For richer flavor, consider using dark brown sugar in place of granulated sugar.
  • Experiment with different nuts or chocolate swirls for personalized flavor.
  • Store in an airtight container to maintain freshness.

Indulge in Swiss Roll Black Forest Chocolate Cherry Delight

Swiss Roll Meets Black Forest Charm – A Chocolate & Cherry Masterpiece

⚖️
Difficulty
Medium

⏲️
Prep Time
30 mins

🕒
Cook Time
20 mins

⏱️
Total Time
50 mins

🍽️
Servings
8 servings

If you’re looking to impress your family and friends with a dessert that embodies the charm of European baking, the Swiss Roll Meets Black Forest Charm is a decadent blend of rich chocolate cake and luscious cherries, finished with whipped cream. This delightful roll cake not only pleases the eye with its beautiful presentation but also captivates the palate with layers of flavor. Each slice reveals a swirl of chocolate sponge intertwined with sweet cherry filling, topped with fluffy cream that transforms it into a show-stopping dessert.

This recipe is more than just a treat for your taste buds; it’s an experience that invokes a sense of nostalgia for classic cherry desserts. The combination of dark chocolate and tart cherries creates a harmonious symphony that resonates with anyone who has a sweet tooth. Whether it’s a birthday, holiday celebration, or simply a Sunday family gathering, this chocolate and cherry masterpiece brings joy and indulgence to any occasion.

Quick Recipe Highlights

  • Flavor Profile: Rich chocolate cake paired with tart cherries and sweet cream create a delightful blend of sweet and slightly tangy notes.
  • Texture: This cake features a light and airy sponge with a creamy filling, offering a satisfying contrast that melts in your mouth.
  • Aroma: The inviting aroma of freshly baked chocolate mingles with the sweet scent of cherries, creating an irresistible fragrance.
  • Visual Appeal: A stunning roll swirled with vibrant cherries and topped with a generous layer of whipped cream, making it a feast for the eyes.
  • Skill Level Needed: This recipe is medium in difficulty, requiring some baking skills and an understanding of rolling cakes.
  • Special Equipment: A baking sheet, parchment paper, and an electric mixer are essential for crafting this delightful dessert.

Recipe Overview

  • Difficulty Level: The difficulty is marked as medium because it requires baking a sponge cake and rolling it delicately without cracking.
  • Category: This recipe falls under dessert and is perfect for both casual and formal meals.
  • Cuisine: The Swiss Roll and Black Forest cake are rooted in German culinary tradition, celebrated across various cultures.
  • Cost: The ingredients are relatively affordable, with chocolate and cherries being the primary components.
  • Season: Enjoy this dessert year-round, but it is particularly popular in spring and summer when cherries are in peak season.
  • Occasion: Ideal for birthdays, picnics, or any festive gathering that calls for an impressive dessert.

Why You’ll Love This Recipe

The Swiss Roll Meets Black Forest Charm is not just exceptional in taste and presentation but offers a unique blend of flavors and textures. The light, fluffy chocolate sponge pairs wonderfully with the tartness of cherries, creating a complex yet harmonious flavor profile. Each bite provides a delightful experience, making it a dessert you’ll want to share and enjoy repeatedly.

Moreover, its convenience and versatility make it a popular choice. You can prepare it in advance, allowing the flavors to meld overnight, making it a time-saver for busy days. The finished roll can elegantly adorn your dessert table, giving you more time to spend with your guests.

Nutritionally, this dessert can be made with whole ingredients, which means it brings in the goodness of fruits and is a delightful spoonful of happiness without the guilt. The cherries provide antioxidants while the cake gives you that comforting feel of indulgence.

This Swiss Roll is not only delicious but a great conversation starter when hosting dinner parties. Its beautiful presentation and delectable taste will leave your guests asking for the recipe, creating a social atmosphere around the dining table.

Cost-effective, too, the ingredients won’t break the bank. The recipe’s affordability coupled with its stellar taste makes it a great addition to your baking repertoire.

Historical Background and Cultural Significance

The origins of the Swiss roll date back to the 15th century, but its popularity surged in England during the Victorian era. Known as “jelly roll” at the time, it was a beloved treat offering a fun twist to traditional sponge cakes. The incorporation of a Black Forest theme pays homage to the famous German Black Forest cake, which highlights the region’s plentiful cherries and cream.

Culturally, these desserts represent celebration and indulgence across many traditions. The Swiss roll, for instance, showcases baking artistry, while the Black Forest cake emphasizes the rich agrarian heritage of Germany where cherries thrive.

Throughout history, variations of both desserts have emerged, influencing each other. The Swiss roll has evolved to include a variety of fillings, from fruits to creams and even savory options, keeping its essence alive while catering to modern tastes.

Regional variations like the Swiss cherry roll or the American jelly roll carry this culinary heritage into today’s kitchens, inviting bakers worldwide to put their spin on these classic desserts.

Ingredient Deep Dive

Chocolate

Chocolate has deep cultural roots, originating in ancient Mesoamerica and being revered as a divine drink. In baking, chocolate offers rich flavor and numerous nutritional benefits like antioxidants and minerals. Choose high-quality dark chocolate for the best flavor. When storing, keep it in a cool, dry place to prevent melting or blooming. If you’re out of chocolate, cocoa powder blended with a small amount of fat can serve as a substitute.

Cherries

Cherries are a fruit rich in history, with roots in both Asia and Europe. Their tartness complements desserts perfectly and offers health benefits such as anti-inflammatory properties and high vitamin C content. When selecting cherries, opt for deep-colored, firm fruits. Store them in the fridge, and for long-term use, freeze them. If fresh cherries are unavailable, frozen or canned cherries can be used in this recipe.

Whipped Cream

Whipped cream has become a traditional topping for desserts, combining air with heavy cream for a fluffy texture. It enhances sweetness and adds richness to cakes and pastries. Always use cold cream for whipping, and avoid over-whipping to prevent turning it into butter. Store whipped cream in the fridge for short-term freshness. For a dairy-free alternative, coconut cream can achieve a similarly luscious texture.

Common Mistakes to Avoid

  • Overmixing the batter: This can result in a dense cake rather than a light and airy sponge. Mix just until the ingredients are combined.
  • Not cooling the cake properly: A hot cake will crack when rolling. Allow it to cool completely before rolling it up.
  • Using stale ingredients: Fresh eggs and flour are crucial for optimal texture and flavor.
  • Skipping the parchment paper: This prevents the cake from sticking to the pan, making it easier to roll and remove.
  • Rolling too tightly: While it’s important to roll tightly, too much force can break the cake; a gentle touch is key.
  • Not letting the cake set after rolling: Allow it to cool fully before unrolling to help retain its shape after filling.
  • Using warm filling: Always allow the filling to cool so it doesn’t melt the cake as you assemble.
  • Skipping chilling time: Placing the roll in the fridge allows flavors to meld and solidify the structure.
  • Ignoring cake cracks: If cracks occur when rolling, don’t worry; just use whipped cream to cover imperfections during presentation.
  • Using incorrect measuring techniques: Always measure accurately for the right consistency and texture.

Essential Techniques

Baking the Sponge Cake

Baking the sponge cake is essential to achieving the perfect texture. Use room temperature ingredients for a better mix, and watch for the cake to slightly spring back when touched for doneness. A toothpick should come out dry. Avoid overbaking as this can dry out the cake and make rolling difficult.

Rolling Technique

Rolling the cake can be tricky. Start from the shorter end and use the parchment to help guide it tightly without air pockets. Allow the cake to rest in this rolled shape to set before unrolling for filling, which helps maintain its structure.

Filling and Frosting

For the best results, spread the filling evenly to all edges, allowing for a delightful bite every time. For frosting, whipping the cream to soft peaks will yield a luscious texture; be careful not to over-whip, as it can turn grainy.

Chilling the Cake

Chilling your assembled cake is a crucial step. It not only helps enhance flavors but also ensures your cake keeps its shape when slicing. Cover it lightly with plastic wrap and refrigerate for at least 30 minutes before serving.

Pro Tips for Perfect Swiss Roll Meets Black Forest Charm

  • Use fresh, quality ingredients for the best flavor. Organic cherries and premium chocolate can make a significant difference.
  • Test your oven temperature with an oven thermometer to prevent overheating or underbaking your cake.
  • Consider adding a splash of cherry liqueur to the cherry filling for a sophisticated flavor twist.
  • Serve with a dusting of cocoa powder or chocolate shavings for an elegant finish.
  • Use a serrated knife for slicing to ensure clean cuts and beautiful presentation.
  • Experiment with different filling options such as almond extract or vanilla for varied flavors.
  • Dress the cake with whole cherries or fresh mint leaves for a beautiful garnishing touch.
  • Pair with coffee or dessert wine for a complementary experience.

Variations and Adaptations

The Swiss Roll Meets Black Forest Charm can be tailored to suit various tastes and dietary needs. For regional adaptations, consider incorporating local fruits such as raspberries or strawberries. Seasonal modifications can include adding spices like cinnamon or nutmeg during the holiday seasons to create warmth and comfort.

For dietary modifications, try making the cake gluten-free with alternatives such as almond flour or a store-bought gluten-free blend. Vegan adaptations can be achieved by substituting eggs with flaxseed meal and using aquafaba for whipped cream.

Flavor variations can include adding orange zest to the cake for a citrusy brightness or using white chocolate for a contrast against the dark sponge. If you prefer a different texture, consider mixing crunchy nuts into the filling.

For garnishing, use edible flowers or fruit coulis drizzled on the plate for a modern presentation. You can even create individual-sized rolls for a more unique serving style at your next gathering.

Serving and Presentation Guide

When serving your Swiss Roll Meets Black Forest Charm, consider plating techniques that showcase the beautiful swirls. Position the cake on a decorative platter and sprinkle cocoa powder lightly over the top. For garnishing, freshly whipped cream dollops beside each slice along with whole cherries will elevate its appeal.

Traditional accompaniments include coffee, tea, or sweet dessert wines, which complement the rich chocolate and cherries beautifully. If serving warm, consider a rich chocolate ganache drizzle over the top before placing in the refrigerator for a few minutes to set.

Temperature is essential; serve it chilled or at room temperature for the best flavors to shine. Ensure slices are generous without overwhelming guests, keeping portion control in mind for a balanced dessert experience.

Wine and Beverage Pairing

When it comes to wine pairings, a rich red such as a pinot noir complements the chocolate notes while bringing out the zestiness of the cherries. You might also consider a dessert wine like a late-harvest Riesling for a sweet contrast.

For non-alcoholic alternatives, try a tart cherry juice spritzer, which joys in both drink and dessert interplay. If coffee or tea is preferred, an espresso can cut through the sweetness and balance the dessert exceptionally.

Temperature considerations matter; serve chilled wines slightly colder than room temperature to highlight the flavors distinctly. Decanting the wine can also enhance its aromas, allowing guests to savor both the dessert and drink completely.

Storage and Shelf Life

Store any leftover Swiss Roll in an airtight container in the fridge for up to three days. To maintain texture, wrap it tightly in plastic wrap to prevent it from drying out. If freezing, slice individual portions and keep in freezer-safe bags, consuming within three months for optimal flavor.

Signs of spoilage include an off-smell or a change in texture. Reheating is best done gently in the oven at a low temperature or the microwave for a few seconds to prevent drying out. Remember, whipped cream should not be reheated but can be freshly dolloped upon serving.

Make Ahead Strategies

Preparation can be done a day in advance. Bake and cool the cake, wrap it well, and store it in the fridge overnight. Similarly, you can prepare the cherry filling ahead of time and keep it stored as well. Assembly can be done the next day, ensuring a fresher presentation for your guests.

In terms of quality impact, pre-prepared elements develop flavors better when allowed to meld. Just ensure you assemble within a few hours of serving for the freshest taste and texture. For additional fresh elements, consider adding freshly whipped cream right before serving to wow your guests with its lightness and flair.

Scaling Instructions

This recipe can be easily adapted according to your needs. Halving the batch is straightforward, while doubling or tripling may require larger baking sheets or both ovens if space allows. Adjust baking times accordingly, watching for visual cues of doneness.

Storing considerations for larger batches include ensuring adequate cooling space before wrapping any leftovers to prevent moisture buildup. Don’t hesitate to create smaller, personalize rolls if you’d like to cater to individual preferences.

Nutritional Deep Dive

This dessert can be surprisingly nutritious, provided you keep an eye on your portions. Loaded with cherries, you’ll benefit from fiber and antioxidants. In terms of macronutrients, the focus tends to lean towards carbohydrates and fats from the chocolate and whipped cream.

The micronutrient analysis reveals that cherries contribute vitamin C, while dark chocolate offers iron and magnesium. For weight management, it’s advisable to keep portions reasonable, making this a delightful treat that fits within a balanced diet while still being indulgent.

Dietary Adaptations

For those needing gluten-free options, swap out standard flour for gluten-free blends or almond flour. With proper substitutions, this dessert can cater to nearly any dietary requirement.

For a dairy-free alternative, replace heavy cream with coconut cream, and utilize plant-based margarine in the cake. Additionally, to make it vegan, replace eggs with flaxseed mix. Adjusting the sweetness profile might be necessary depending on the substitutes used.

Troubleshooting Guide

Common texture issues include a dense cake; this can often be attributed to overmixing or not incorporating enough air when whipping egg whites. Ensuring accurate oven temperatures and not opening the oven door too frequently also helps avoid baking inconsistencies.

For flavor balance, taste your filling and adjust sweetness or tanginess after each ingredient addition. The chocolate can overshadow other flavors; consider enhancing with extracts or zests.

If you experience cooling troubleshoot issues, ensure your roll is in an appropriate cooling place, as drafts or inadequate cooling time can affect its overall shape.

Equipment challenges, such as not having the right size pans, may require you to adjust cooking times or layer accordingly. Experiment with baking times based on oven characteristics.

Recipe Success Stories

Community feedback surrounding this delightful cake has been overwhelmingly positive, with many sharing their adaptations and unique flavors incorporated. Variations such as adding orange zest or experimenting with other berries have particularly been a big hit.

Readers often find that sharing their journey of baking this cake, along with tips for improvement and troubleshooting, fosters a deeper sense of accomplishment and connection within the baking community.

Photography tips shared highlight the use of natural light, ensuring that cake layers and fillings are beautifully presented when captured, enticing others to try their hands at this wonderful chocolatey cherry indulgence.

Frequently Asked Questions

Q: Can I use frozen cherries instead of fresh?
A: Absolutely! Frozen cherries work wonderfully; just thaw them and drain excess liquid before use.

Q: How should I store leftover Swiss Roll?
A: Wrap it well in plastic wrap or store in an airtight container, and keep it in the fridge for up to three days.

Q: Is it necessary to cool the cake before rolling?
A: Yes! Cooling is vital to prevent cracking and ensure the cake holds its shape when rolling.

Q: Can I make this cake gluten-free?
A: Yes! Substitute regular flour with a gluten-free blend or almond flour for the sponge.

Q: How can I prevent my cake from sticking to the pan?
A: Always line your baking sheet with parchment paper and lightly grease it for added security.

Q: Can I make this in advance?
A: Yes! You can prepare the components a day ahead and assemble it before serving for the freshest taste.

Q: What’s the best way to slice the Swiss Roll?
A: Use a serrated knife to ensure clean cuts without squishing the layers.

Q: How can I add more flavor to the whipped cream?
A: Whip in some vanilla extract or a splash of cherry liqueur for an enhanced flavor.

Q: Can I add more filling ingredients?
A: Certainly! Feel free to experiment by adding nuts like almonds or crushed cookies to your filling.

Q: How do I know when my cake is done baking?
A: When the cake springs back when touched lightly or when a toothpick inserted comes out clean, it’s done!

Additional Resources

Explore related recipes featuring cherries, chocolate, and other delightful desserts. Techniques like cake rolling and frosting can refine your skills further, ensuring your confidence grows in baking.

Ingredient information is extensive in our resource section, detailing how to select and store fresh cherries, chocolates, and creams for optimal use. Equipment recommendations guide you in choosing the best tools for your kitchen endeavors.

Join the Conversation

We invite you to share your creations on social media, using hashtags to join a community of bakers. Your photos and variations can inspire others to create their renditions of this beautiful Swiss Roll.

Engage with fellow bakers by sharing your tips and tricks or leave a review about your experience. Let’s create a vibrant, supportive baking community that celebrates creativity and deliciousness in every dessert!

The Recipe

Swiss Roll Meets Black Forest Charm

Serves: 8 servings

Prep Time: 30 mins

Cook Time: 20 mins

Total Time: 50 mins

Kitchen Equipment Needed

  • Baking sheet
  • Parchment paper
  • Mixing bowls
  • Electric mixer
  • Serrated knife

Ingredients

  • 1 cup all-purpose flour
  • 3/4 cup granulated sugar
  • 1/4 cup unsweetened cocoa powder
  • 4 large eggs
  • 1 teaspoon vanilla extract
  • 1/4 teaspoon salt
  • 1 cup heavy whipping cream
  • 2 cups cherries, pitted and chopped
  • Powdered sugar for dusting

Directions

  1. Preheat your oven to 350°F (175°C). Line a baking sheet with parchment paper.
  2. In a bowl, beat eggs and granulated sugar until fluffy and pale.
  3. In another bowl, whisk together flour, cocoa powder, and salt.
  4. Fold the dry ingredients into the egg mixture carefully until just combined.
  5. Pour batter into the prepared pan, spreading evenly.
  6. Bake for 15-20 minutes or until the cake springs back when touched.
  7. Allow to cool slightly before rolling the cake with the parchment.
  8. Whip the heavy cream until soft peaks form, then gently fold in cherries.
  9. Once cooled, unroll the cake, fill with cherry cream, and roll it back up.
  10. Chill for at least 30 minutes and then slice, dusting with powdered sugar before serving.

Recipe Notes

  • For added flavor, consider incorporating almond extract into your whipped cream.
  • Make sure all ingredients are at room temperature for best results.
  • This dessert keeps well in the refrigerator for up to three days.