Indulge in Garlic Butter Steak Bites with Parmesan Cream Sauce

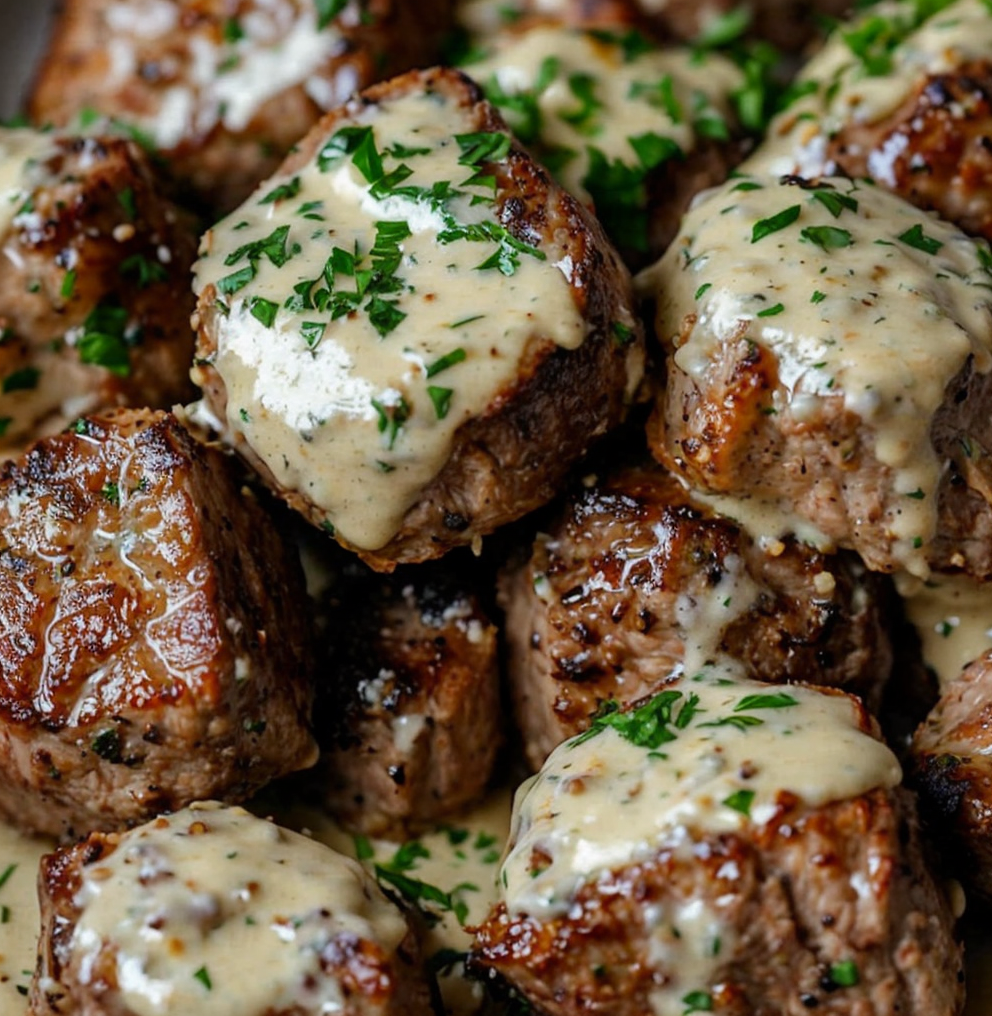
Garlic Butter Steak Bites with Parmesan Cream Sauce: A Decadent Treat

⚖️
Difficulty
Easy

⏲️
Prep Time
15 mins

🕒
Cook Time
10 mins

⏱️
Total Time
25 mins

🍽️
Servings
4

Garlic Butter Steak Bites with Parmesan Cream Sauce is an indulgent and delicious dish that brings the rich flavors of steak to your dinner table in a matter of minutes. The tender meat, seared to perfection, is coated in a fragrant garlic butter sauce that amplifies its natural flavors, while the creamy Parmesan sauce provides a luxurious finish. Whether you’re cooking for a weeknight meal or hosting a special occasion, these steak bites are sure to impress.

The combination of umami-rich steak, aromatic garlic, and rich Parmesan creates a flavor explosion that tantalizes your taste buds. Each bite is succulent, juicy, and perfectly complemented by the creamy sauce, making this dish not only a treat for the palate but a feast for the eyes as well. Serve these steak bites over a bed of mashed potatoes or alongside fresh veggies for a complete meal that satisfies both your hunger and your desire for flavor.

Quick Recipe Highlights

  • Flavor Profile: The rich and buttery garlic flavor pairs beautifully with the savory steak and the sharpness of the Parmesan.
  • Texture: Expect a tender bite from the steak contrasted with a creamy sauce that envelops it for a delightful mouthfeel.
  • Aroma: The enticing scent of garlic sizzling in butter fills your kitchen, promising a memorable dining experience.
  • Visual Appeal: The dish boasts a gorgeous golden-brown exterior with a delectable, creamy white sauce poured generously over it.
  • Skill Level Needed: Perfect for beginners, this recipe requires basic cooking skills and minimal preparation.
  • Special Equipment: A cast-iron skillet or a heavy frying pan works best for searing the steak bites.

Recipe Overview

  • Difficulty Level: This recipe is rated as easy, making it an ideal choice for novice cooks who want to make a delicious meal without extensive culinary skills.
  • Category: This dish fits perfectly into the dinner category, suitable for both family meals and special occasions.
  • Cuisine: Inspired by American cuisine, this dish features classic steak preparations melded with Italian influences through the use of Parmesan cheese.
  • Cost: An approximate cost breakdown makes this dish affordable, with steak and cheese being the main expenses, typically amounting to around $15 to $20 for four servings.
  • Season: While hearty enough for any season, the richness of the butter and cream makes it especially comforting in the cooler months.
  • Occasion: Great for date nights, family dinners, or even casual gatherings with friends, these steak bites are guaranteed to be a hit.

Why You’ll Love This Recipe

Garlic Butter Steak Bites with Parmesan Cream Sauce offer a tantalizing blend of flavors and textures that truly captures the essence of comfort food. Each bite bursts with the rich, buttery flavor of garlic while the steak provides a satisfying chew. The creamy sauce ties everything together, ensuring that you get a harmonious mix of flavors with every mouthful. This is a meal where every bite makes you want to indulge further, so be prepared to fall in love with it.

Convenience is another fantastic aspect of this recipe. With minimal prep and cook time, you can whip up a gourmet-style dish with ease. Perfect for busy weeknights or last-minute dinner parties, it allows you to enjoy a restaurant-quality meal without a long wait. Plus, you can have this delightful dish on the table in under half an hour.

Nutritionally, while this dish is indulgent, it does provide protein from the steak and beneficial fats from the butter and cream. Pair it with vegetables or a fresh salad to create a balanced meal. This dish can help fuel your body while also being a delightful treat, making it a versatile option to include in your meal rotation.

Socially, serving Garlic Butter Steak Bites is a sure way to impress your guests. The ease of preparation and the sumptuousness of the dish mean that you can focus on enjoying time with friends and family while relishing the compliments you’ll receive. This dish cold sparks lively conversation around the table, making your dining experience more memorable.

Lastly, cost-effectiveness is a clear highlight of this recipe. Sourcing quality steak doesn’t necessarily mean spending a fortune. Opting for more economical cuts can bring down the cost significantly, making this dish accessible for most home cooks. With such flavorsome results from relatively simple ingredients, it’s a win-win situation in any home kitchen.

Historical Background and Cultural Significance

The origins of steak bites trace back to a love for perfectly cooked beef, prevalent in many cuisines worldwide. Steak itself has a deep-rooted history, being a symbol of indulgence and celebration in various cultures, particularly in the United States where barbecues and grilling are essential aspects of culinary tradition. The practice of cutting steak into bite-sized pieces allows for quicker cooking, making it both practical and appealing for lives that are often fast-paced.

Culturally, steak bites may not only reflect a desire for delicious food but also the sense of community that comes from sharing a meal. In many traditions, preparing and enjoying beef dishes has brought families together, ensuring that the act of sharing food becomes a bonding experience. This recipe embraces that heritage, creating an opportunity for families and friends to gather around the table.

With time, the evolution of this dish has embraced new flavor profiles and cooking techniques. Incorporating global influences such as the creamy Parmesan sauce has added a contemporary twist, allowing home cooks to diversify their menus. This evolution reflects the dynamic nature of cooking where creativity and tradition go hand in hand.

Regional variations of steak bites can be found, showcasing how different cultures interpret the idea of bite-sized beef. From Asian marinated steak bites to Latin-style churrasco, these adaptations highlight the versatility of the basic concept, ensuring that steak bites can suit a myriad of palates and preferences.

Ingredient Deep Dive

Steak, a primary ingredient in this dish, enjoys cultural significance across many societies. It represents indulgence in Western cultures, where it is often featured in celebratory meals. Nutritionally, steak is an excellent source of protein, vitamins B12 and B6, iron, and zinc. When selecting steak for this recipe, look for cuts that are tender yet flavorful, like sirloin or ribeye. Store your steak in the coldest section of the fridge and consume it within a few days, or freeze for longer storage. If you need a substitute, consider using chicken or pork tenderloin, adjusting cooking times accordingly.

Butter is another key ingredient that enhances flavor and richness. Its historical roots tie back to ancient civilizations where it was prized for its versatility and flavor. Nutritionally, butter contains fat-soluble vitamins, although it should be consumed in moderation due to its calorie density. When selecting butter, opt for unsalted to have better control over the saltiness of the dish. Store it in the refrigerator, well-wrapped to maintain freshness. If you need a dairy-free option, you can use ghee or olive oil, keeping in mind that the flavor profile of the dish may slightly change.

Parmesan cheese brings an exceptional richness to the cream sauce, ultimately enhancing the overall depth of the dish. Originally from Italy, Parmesan cheese is revered for its sharp flavor and granular texture. It provides calcium and protein and can elevate even the simplest recipes. When purchasing, choose a block of cheese for the best flavor, and store it in an airtight container in the fridge. If you’re looking for substitutes, Pecorino Romano can offer a similar sharpness, while nutritional yeast serves as a dairy-free alternative.

Common Mistakes to Avoid

  • Overcooking the steak: It’s essential to sear the steak quickly to maintain its tender texture. Use a meat thermometer for precision.
  • Using cold ingredients: Starting with cold butter or cream can lead to a separated sauce. Allow these ingredients to come to room temperature for better emulsification.
  • Skipping the resting period: After cooking the steak, let it rest for a few minutes before slicing. This helps retain the juices.
  • Too much salt: It’s easy to oversalt when the sauce thickens. Add salt gradually to achieve the desired flavor without overwhelming the dish.
  • Using too much heat: Cooking on too high a heat can char the outside while leaving the inside undercooked. Medium-high heat is typically best for steak bites.
  • Piling the steak into the pan: Overcrowding the pan prevents proper browning. Cook in batches if necessary for a better sear.
  • Neglecting to taste as you go: Regularly tasting your dish helps you make adjustments and ensures balanced flavors.
  • Settling for pre-grated cheese: Pre-grated Parmesan lacks the rich flavor of fresh cheese. Always grate your cheese just before using to capture its full taste.
  • Insufficient sauce: Not making enough cream sauce can result in a dry meal. Ensure you’re preparing an ample amount to coat the steak bites nicely.
  • Choosing the wrong cut of meat: Opt for tender cuts like sirloin for the best results. Tougher cuts will affect both the cooking time and texture.

Essential Techniques

Searing meat is a crucial technique that ensures a flavorful crust. This method involves cooking the steak over high heat to create a Maillard reaction, enhancing the dish’s overall flavor. To master this, preheat your skillet until it’s hot, then add the meat without overcrowding. Look for a rich brown color to know your steak is developing the desirable crust—this should take just a few minutes. Avoid moving the steak around too much; let it sit and develop that essential sear.

Making a cream sauce involves bringing together ingredients in a way that creates a smooth, cohesive sauce. Start with a roux by cooking butter and flour until golden, then slowly add your liquid while whisking to prevent lumps. Aim for a gentle simmer to allow the sauce to thicken without boiling, which can cause it to separate. Monitor the consistency closely, as dairy-based sauces can thicken quickly. A well-made cream sauce enhances flavor and adds a velvety texture that is delightful with steak.

Pro Tips for Perfect Garlic Butter Steak Bites with Parmesan Cream Sauce

To get the best sear, ensure your meat is at room temperature before cooking, allowing for more even cooking throughout. Use a combination of butter and oil for sautéing; this prevents burning and helps achieve a lovely golden brown. Always check doneness using a meat thermometer—aim for 130°F for medium-rare, which remains juicy and tender. For added flavor, consider marinating the steak bites for an hour with garlic, herbs, and olive oil before cooking. This not only enhances flavor but also tenderizes the meat.

When making the cream sauce, keep it at low heat; high heat can lead to separation. Stir continuously for the smoothest texture. For a touch of brightness, add a splash of lemon juice or zest just as the sauce is finished cooking; this elevates the dish and balances the richness. Finally, garnishing with freshly chopped parsley or chives not only adds color but also a layer of fresh flavor that nicely complements the richness of the sauce.

Variations and Adaptations

Regional variations can bring exciting twists to this dish. For instance, consider a Mexican spin by incorporating spices such as cumin and chili powder into the steak marinade for added warmth and depth. Another option is using Asian flavors, such as a soy sauce-based marinade, combined with sesame oil and ginger for a unique profile. Seasonal adaptations might include serving your steak bites over sautéed seasonal vegetables like asparagus in the spring or roasted root vegetables in the fall.

For dietary modifications, you can adapt the dish for a keto or low-carb regime by replacing traditional starchy sides with cauliflower mash, while keeping the rich steak and creamy sauce. If you’re looking for vegan options, plant-based alternatives like tempeh or mushrooms can be used in place of steak, paired with a non-dairy cream substitute. Texture modifications can be achieved through different cooking methods, such as grilling for a smoky flavor or sautéing for a quick meal.

When it comes to presentation, consider serving the steak bites in small tapas-sized portions or skewered for finger foods at a gathering, making them perfect appetizers. Alternatively, serve them in a bowl drizzled with sauce for a more rustic, inviting style.

Serving and Presentation Guide

Plating steak bites elegantly enhances the dining experience. For a sophisticated touch, use a large white plate to create contrast against the golden-brown steak and creamy sauce. Consider stacking the steak bites neatly and drizzling the sauce artfully over them. Garnish with fresh herbs, such as parsley or thyme, to bring vibrancy and freshness to the dish.

Garnishes not only add visual appeal but can also contribute flavors. A sprinkling of cracked black pepper or chili flakes can provide an earthy depth, while a light citrus zest can brighten the plate. Traditional accompaniments to consider include mashed potatoes or a simple green salad that contrasts nicely with the richness of the dish.

Maintaining proper temperature is crucial for serving steak bites. Ensure the bites remain warm until plated, allowing for a delightful experience. As for portion control, offer a larger portion if serving as an entree but keep it smaller for appetizer-style dining where multiple dishes are enjoyed.

Wine and Beverage Pairing

When it comes to wine pairings, a robust red wine such as Cabernet Sauvignon or Merlot complements the richness of the steak beautifully. These wines enhance the umami flavors of the beef while cutting through the creamy sauce. If you prefer white wine, opt for a full-bodied Chardonnay that can hold up to the dish’s flavors without being overpowered.

For non-alcoholic alternatives, a sparkling grape juice can provide a celebratory feel, or a robust iced tea can balance the richness with its refreshing qualities. For those who enjoy coffee, a rich espresso can provide a satisfying finish to the meal. Each beverage pairing adds to the overall dining experience, enhancing the flavors of the dish.

Storage and Shelf Life

To ensure the Garlic Butter Steak Bites with Parmesan Cream Sauce stay fresh, store them in an airtight container in the refrigerator. They can be refrigerated for up to three days, but consuming them sooner ensures the best quality and taste. To reheat, gently warm on the stovetop over low heat to avoid drying out the steak and separating the creamy sauce.

For longer storage, you can freeze the cooked steak bites for up to three months. Ensure they are properly wrapped to avoid freezer burn. Thaw in the refrigerator overnight before reheating. If reheating from frozen, place them in a baking dish covered tightly with foil to retain moisture, heating at a low temperature.

Signs of spoilage include a sour smell or color changes in the sauce. Always check the steak’s texture and aroma before consuming leftovers, as freshness is key to both flavor and food safety.

Make Ahead Strategies

Preparing Garlic Butter Steak Bites in advance can save you time during busy weeknights or entertaining. You can marinate the steak bites up to 24 hours in advance, allowing the flavors to develop while tenderizing the meat. Store the marinated meat in the refrigerator until you’re ready to cook.

If you prefer, you can cook the steak bites in advance, then store them in an airtight container. Reheat them gently in the sauce to keep them juicy. Assemble the sauce in advance as well, allowing the flavors to meld, and store it separately until ready to serve.

Remember, some fresh elements, like herbs or garnishes, should be added right before serving to retain their vibrant colors and fresh flavors. Having these prepped will ensure that your meal is a success without excessive last-minute work.

Scaling Instructions

Scaling the recipe is straightforward whether you wish to halve or double it. For halving, simply divide the ingredient amounts by two, ensuring you maintain the same ratios. For doubling or tripling, keep the same proportions, but be aware of adjusting cooking time as larger quantities may take longer to cook evenly.

Equipment adjustments may include using larger pans or multiple pans to ensure that the steak does not overcrowd, impacting the sear. Always check for doneness in larger batches using a meat thermometer to ensure the steaks reach a safe internal temperature.

Timing modifications are essential; be attentive to cooking times as the volume of meat can affect how quickly it cooks. Storing considerations should also be kept in mind; larger batches need more space, so plan accordingly when refrigerating or freezing.

Nutritional Deep Dive

A nutritional breakdown of Garlic Butter Steak Bites with Parmesan Cream Sauce reveals a satisfying macro balance. Each serving offers a hearty dose of protein from the steak, providing essential amino acids crucial for muscle repair and overall health. The carbohydrates in this dish are low, especially if paired with non-starchy vegetables, making it suitable for low-carb diets.

Micronutrients include significant amounts of iron and vitamin B12 from the steak, vital for energy production and red blood cell formation. The addition of butter and cheese also provides sources of calcium and fat-soluble vitamins.

For those monitoring their health, portion control is essential—understanding the servings can help in managing caloric intake. While indulgent, enjoying this dish as part of a balanced meal plan can be very satisfying without compromising dietary goals.

Dietary Adaptations

For those following a gluten-free diet, ensure that all ingredients used, especially sauces, are certified gluten-free. The same goes for dairy-free or vegan adaptations; you can replace butter with olive oil and use plant-based cream and cheese alternatives.

People on a ketogenic diet can enjoy the steak bites while serving them over cauliflower mash instead of traditional sides. This ensures that they keep their meals low in carbohydrates while retaining that comforting richness.

Paleo eaters will find this dish aligns well with their guidelines; just substitute butter with coconut oil for a cleaner fat source. Further dietary modifications can accommodate those who follow specific dietary restrictions, ensuring everyone can enjoy this flavorful meal.

Troubleshooting Guide

When preparing Garlic Butter Steak Bites, you may experience some common issues. If your steak is tough, it could be due to using the wrong cut or overcooking; ensure you use tender cuts and monitor cooking times closely for the best texture.

Balancing flavors can sometimes be tricky; if your dish tastes overly salty or bland, adjusting with a splash of lemon juice can brighten it up, while a touch of honey can counteract excess saltiness.

Temperature issues arise when your steak is unevenly cooked; using a thermometer ensures that your meat cooks evenly without guesswork. If the cream sauce separates, stirring on low heat can help bring it back together.

If you’ve made ingredient substitutions and things don’t seem right, remember that flavor profiles vary widely. Experimenting with smaller quantities allows you to adjust without ruining your dish entirely.

Recipe Success Stories

Community feedback regarding Garlic Butter Steak Bites has been overwhelmingly positive, with many discussing their successful adaptations and variations. Readers frequently share unique marinades they’ve used, highlighting how personal touches can elevate the dish while retaining its core appeal.

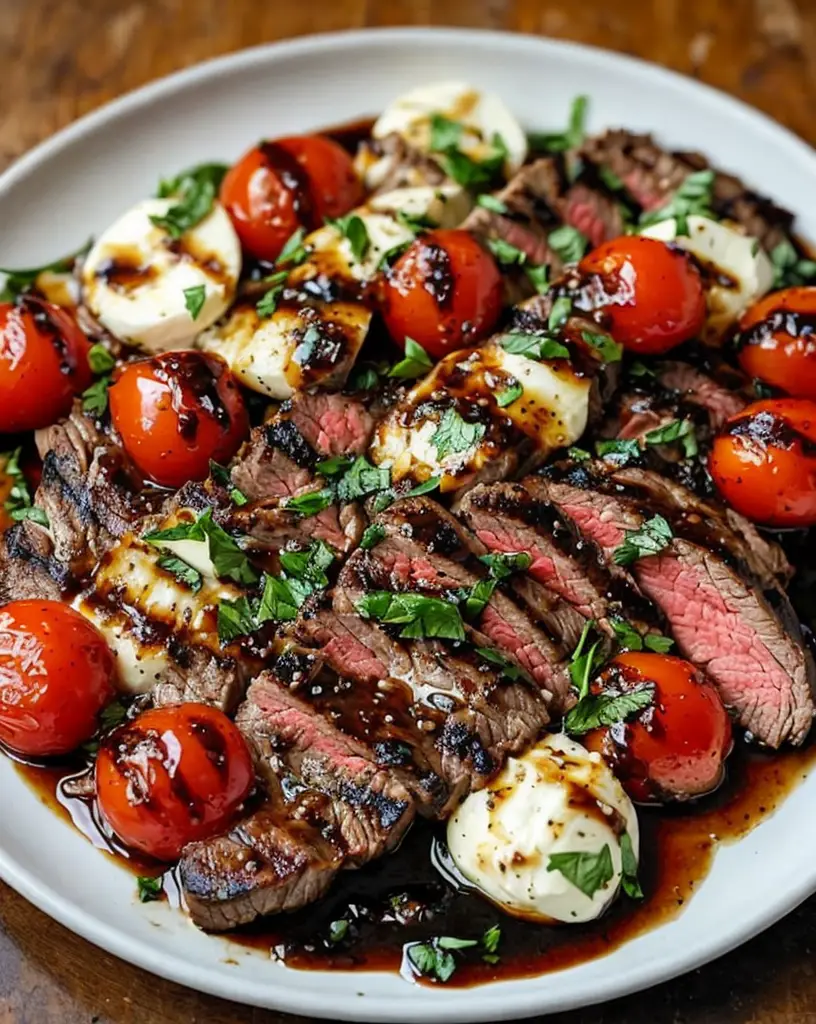
One particular story highlights a reader who incorporated a balsamic glaze, giving a lovely sweet contrast to the rich sauce. Others have shared delightful feedback about their successes in hosting dinner parties, emphasizing how this dish can truly impress guests.

Photography tips abound in the comments section, as readers share their techniques for capturing the beautiful golden colors of the steak bites and the enticing texture of the creamy sauce. The conversation continues to inspire home cooks to play with flavors and share their culinary adventures.

Frequently Asked Questions

1. Can I use a different type of meat? Yes! While steak is traditional, you can substitute with chicken or pork as long as you adjust the cooking times appropriately.

2. What can I serve with steak bites? Garlic Butter Steak Bites pair wonderfully with mashed potatoes, steamed vegetables, or even on top of a fresh salad for a complete meal.

3. How do I store leftovers? Store any leftovers in an airtight container in the fridge for up to three days. Reheat gently to maintain tenderness.

4. Can I make the sauce ahead of time? Yes, you can prepare the sauce a day in advance and reheat it before serving. This allows the flavors to meld beautifully.

5. Is this dish suitable for meal prep? Absolutely! It reheats well and can be conveniently stored for weekday lunches or quick dinners.

6. Can I use dried herbs instead of fresh? Yes, but remember to use less as dried herbs are more concentrated than fresh herbs.

7. Can I make this dish spicy? Definitely! You can add red pepper flakes or a dash of hot sauce to the sauce for a spicy kick.

8. Can I double the recipe? Yes, you can easily scale the recipe up for larger gatherings; just be mindful of cooking times as they may vary.

9. How can I make the sauce richer? To make the sauce richer, you can add more cream or a blend of cream and cheese to enhance the flavor further.

10. Is this dish kid-friendly? Yes! The mild flavors and appealing presentation make these steak bites a favorite among kids, especially if served with their favorite sides.

Additional Resources

Explore related recipes that offer complementary flavors, such as creamy mushroom risotto or roasted garlic mashed potatoes. For technique guides, consider looking into searing meat and making cream sauces to build your culinary skills. Equipment recommendations include a good-quality cast-iron skillet that retains heat well, ensuring an even sear on steak bites. Seasonal variations can also be explored to keep the dish fresh and aligned with available ingredients throughout the year.

Join the Conversation

We invite you to share your experiences and variations of Garlic Butter Steak Bites with Parmesan Cream Sauce. Whether it’s through social media posts or comments on this blog, we love to hear your feedback and creativity. Photography tips for capturing your dish can also inspire others to replicate your success. Don’t hesitate to share any special stories related to this recipe or how it’s been part of a memorable meal in your home.

The Recipe

Garlic Butter Steak Bites with Parmesan Cream Sauce

Serves: 4

Prep Time: 15 mins

Cook Time: 10 mins

Total Time: 25 mins

Kitchen Equipment Needed

  • A heavy skillet (preferably cast iron)
  • Meat thermometer
  • Whisk
  • Cutting board
  • Knife

Ingredients

  • 1 lb steak (sirloin or ribeye), cut into bite-sized pieces
  • 3 tablespoons butter
  • 3 cloves garlic, minced
  • 1 cup heavy cream
  • 1/2 cup grated Parmesan cheese
  • Salt and pepper to taste
  • Fresh parsley for garnish

Directions

  1. Heat 1 tablespoon of butter in a cast-iron skillet over medium-high heat.
  2. Season the steak bites with salt and pepper, then add them to the skillet in a single layer.
  3. Sear for about 3-4 minutes, turning occasionally, until browned and cooked to your liking. Remove and let rest.
  4. In the same skillet, add the remaining butter and garlic. Sauté for 1-2 minutes until fragrant.
  5. Reduce heat to medium and pour in the heavy cream, stirring to combine with the garlic.
  6. Add the Parmesan cheese and continue stirring until melted and smooth. Season with salt and pepper.
  7. Toss the steak bites back in the skillet and coat them with the sauce.
  8. Serve immediately, garnished with fresh parsley.

Recipe Notes

  • For extra flavor, consider marinating the steak in your favorite spices for a few hours before cooking.
  • This sauce can be adapted by adding herbs like thyme or rosemary for a different flavor profile.
  • Leftover steak can easily be repurposed in salads or as a topping for baked potatoes.

BBQ Baked Kielbasa Sausages: Easy, Flavorful, and Perfect for Any Occasion

baked kielbasa recipes, BBQ smoked sausages, easy kielbasa dinner, oven-baked kielbasa, BBQ sausage recipe, caramelized kielbasa, BBQ glazed sausage, sweet and tangy kielbasa

BBQ Baked Kielbasa Sausages

Introduction

BBQ Baked Kielbasa Sausages are a delicious and versatile dish that combines the smoky, sweet, and savory flavors of kielbasa with the caramelized tanginess of barbecue sauce. Perfect for quick dinners, party appetizers, or hearty main courses, this recipe is simple yet packed with bold flavors. With minimal prep and endless customization options, BBQ baked kielbasa is a must-try for both novice and seasoned cooks.

For more inspiration on quick comfort foods, explore Crockpot Potato Soup with Hashbrowns or Slow Cooker Baked Ziti for pairing ideas.


Ingredients and Tools for BBQ Baked Kielbasa

Essential Ingredients:

  • Kielbasa Sausages: Smoked or fresh, depending on preference.
  • Barbecue Sauce: Use your favorite store-bought sauce or homemade BBQ sauce for a personal touch.
  • Optional Sweeteners: Brown sugar, honey, or maple syrup to enhance the glaze.
  • Spices and Add-ins: Garlic powder, onion powder, and a pinch of cayenne for added depth.

Tools Needed:

  • Baking sheet or oven-safe dish.
  • Parchment paper or foil for easy cleanup.
  • A sharp knife for slicing sausages into rounds or halves.

Step-by-Step Recipe for BBQ Baked Kielbasa

Preparation:

  1. Preheat your oven to 375°F (190°C).
  2. Line a baking sheet with parchment paper or foil for easier cleanup.

Cooking:

  1. Slice kielbasa into 1-inch rounds or leave them whole.
  2. In a bowl, mix the kielbasa with BBQ sauce until evenly coated.
  3. Arrange the sausages on the baking sheet, ensuring they are evenly spaced.
  4. Bake for 20–25 minutes, turning halfway, until the edges caramelize.

Finishing Touches:

  • Brush with extra BBQ sauce during the last five minutes for an intensified glaze.
  • Garnish with fresh parsley for a pop of color.

Creative Variations

Maple BBQ Kielbasa:

  • Mix maple syrup into the BBQ sauce for a sweet, smoky flavor.
  • Serve with roasted sweet potatoes for a cohesive meal.

Hasselback Kielbasa:

  • Slice sausages partway through to create a Hasselback effect.
  • Fill the cuts with BBQ sauce, cheese, or diced veggies before baking.

Kielbasa and Veggie Skewers:

  • Pair kielbasa chunks with bell peppers, onions, and zucchini on skewers.
  • Brush with BBQ sauce and bake or grill for a fun, handheld option.

Pairing BBQ Kielbasa with Sides

  • Classic Pairings:
    • Mashed potatoes or coleslaw.
    • Cornbread or garlic bread.
  • Unique Options:
    • Macaroni and cheese or roasted Brussels sprouts.
    • A fresh salad with a tangy vinaigrette.

For more side dish ideas, check out Creamy Baked Macaroni and Cheese or Garlic Rosemary Skillet Potatoes.


Tips for Perfect BBQ Baked Kielbasa

  • Prevent Dryness: Brush sausages with oil before adding BBQ sauce.
  • Caramelization: Broil for 2–3 minutes at the end for crispy edges.
  • Batch Cooking: Double the recipe and freeze extras for quick meals.

FAQs About BBQ Baked Kielbasa

  1. Can I use other types of sausages?
    Yes, smoked or fresh Italian, Polish, or chicken sausages work well.
  2. How do I make homemade BBQ sauce?
    Combine ketchup, brown sugar, vinegar, Worcestershire sauce, and spices.
  3. Can I grill kielbasa instead of baking?
    Absolutely! Grill over medium heat, brushing with BBQ sauce regularly.
  4. What’s the best way to reheat leftovers?
    Reheat in the oven at 350°F (175°C) for 10–15 minutes, or in a skillet over low heat.
  5. Can I make this dish ahead of time?
    Yes, prepare the sausages with sauce and refrigerate for up to a day before baking.

Internal Linking Opportunities


Conclusion

BBQ Baked Kielbasa Sausages are a flavorful, easy-to-make dish perfect for any occasion. Whether you serve them as an appetizer, main course, or snack, their versatility and bold flavors will make them a family favorite. Get creative with sauces, add-ins, and pairings to make this recipe uniquely yours!

Delicious Grilled Flank Steak Recipe with Fresh Caprese Salad

Grilled Flank Steak with Caprese Salad: A Delicious Summer Delight

⚖️
Difficulty
Moderate

⏲️
Prep Time
15 mins

🕒
Cook Time
10 mins

⏱️
Total Time
25 mins

🍽️
Servings
4

Grilled Flank Steak with Caprese Salad is the perfect dish to elevate your summer dining experience. The marinated flank steak, grilled to perfection, brings rich, smoky flavors that harmonize beautifully with the fresh and vibrant ingredients found in a classic Caprese salad. Imagine slicing into that juicy, tender steak, its surface marked with grill lines, and pairing it with the lore of creamy mozzarella, ripe tomatoes, and fresh basil, all drizzled with a balsamic reduction that ties the dish together. This recipe not only delights the palate but also adds a burst of color to your plate, creating a feast for both the eyes and the taste buds.

Whether you’re hosting a weekend barbecue, a casual dinner, or a festive gathering, this dish invites everyone to savor the best of summer’s flavors. You’ll appreciate how quickly it comes together, allowing you more time to enjoy your company. As the steak cooks, the tantalizing aromas of grilled meat fill the air, setting the stage for an unforgettable meal.

Quick Recipe Highlights

  • Flavor Profile: This dish boasts a rich umami depth from the flank steak, enhanced by the bright acidity and sweetness of the fresh tomatoes, while the creamy mozzarella adds a smooth, rich finish.
  • Texture: Expect the tender, chewy texture of well-cooked flank steak paired with the soft, melting mozzarella and the juicy crunch of fresh tomatoes.
  • Aroma: A delightful fusion of grilled meat and fresh herbs fills your kitchen, promising a delightful dining experience.
  • Visual Appeal: The vibrant greens of basil, the red hues of tomatoes, and the creamy white of mozzarella create a visually stunning dish.
  • Skill Level Needed: While the techniques are simple, attention to marinating and grilling times is crucial for achieving perfection.
  • Special Equipment: A grill or grill pan is essential for this recipe, along with a meat thermometer to ensure the steak is cooked perfectly.

Recipe Overview

  • Difficulty Level: Grilling steak requires some technique to ensure it’s cooked to your desired level. With proper adherence to cooking times, even a novice can master it.
  • Category: Ideal as a main course, this dish is perfect for lunch or dinner, making it versatile for numerous meal settings.
  • Cuisine: This recipe draws inspiration from Italian culinary traditions, combining rustic flavors with fresh ingredients commonly found in Mediterranean cooking.
  • Cost: With an affordable cut of beef and accessible fresh ingredients, this dish offers an impressive taste without breaking the bank.
  • Season: Best enjoyed in the summer months when tomatoes are at their sweetest, though the dish is delicious year-round.
  • Occasion: Perfect for gatherings, barbecues, and picnics, this steak recipe will impress your guests no matter the event.

Why You’ll Love This Recipe

Discover the multitude of reasons to fall in love with Grilled Flank Steak with Caprese Salad. The explosion of flavors is a sensory delight; each bite reveals the juicy, flavorful steak that contrasts beautifully with the fresh, creamy salad. It’s a celebration of taste and texture that’s bound to please any palate.

Made for convenience, this recipe is simple and quick, making it an ideal weeknight option or a standout dish for planned gatherings. The prep and cooking time can be easily managed, allowing even the busiest of cooks to whip up something special without stress.

In addition to being a taste sensation, this dish is also packed with nutritional benefits. Flank steak is a lean source of protein, while the Caprese salad adds essential vitamins and minerals through tomatoes and basil, alongside the healthy fats found in mozzarella.

Social gatherings become more enjoyable with this dish, encouraging sharing and conversation over a vibrant, color-filled plate. It creates an inviting atmosphere, perfect for making lasting memories with friends and family.

Cost-effective without compromising quality, this recipe offers an elegant dining option that feels extravagant yet remains budget-friendly. The ingredients are commonly found and can be adjusted for freshness based on market availability.

Historical Background and Cultural Significance

Flank steak has its roots in the working-class culinary traditions of various cultures but has risen to prominence in modern cuisine due to its rich flavor profile. Historically, flank cuts were often seen as inexpensive, making them a staple in many households, especially in barbecue and grilling cuisines.

The Caprese salad hails from Italy’s Campania region, named for the island of Capri. Thought to have originated in the early 20th century, this refreshing salad reflects the simplicity of Italian cuisine, relying on the beauty and quality of fresh ingredients rather than complex preparation.

Over time, the evolution of grilling techniques has led to a resurgence in popularity for dishes that emphasize outdoor cooking. The Flank Steak with Caprese Salad exemplifies this movement, showcasing a cross-cultural approach to cooking that emphasizes grilling while celebrating Italian heritage through the salad.

Regional variations exist, with some incorporating seasonal ingredients, like different herbs or cheeses. As people adapt this dish into their own cultures, new flavors and techniques emerge, ensuring its place in diverse culinary traditions.

Ingredient Deep Dive

  • Flank Steak: This cut of beef offers robust flavor and tenderness when marinated and grilled correctly. Known for being lean, it provides a high protein option without excessive fat. Look for steaks with a deep red color and marbling. Store it in the coldest part of your refrigerator, and consume it within three days for optimal freshness. If needed, flank steak can be substituted with skirt steak or sirloin, although the flavor profile will differ slightly.
  • Tomatoes: The key building block of a Calabrese salad, fresh tomatoes add splashes of color and sweetness. Varieties like heirloom or vine-ripened tomatoes deliver the best taste, so select those that feel heavy for their size with smooth, taut skin. Store tomatoes at room temperature for maximum flavor, and avoid refrigeration unless fully ripened. Substitute with cherry tomatoes for a bite-sized option or roasted tomatoes for a richer flavor.
  • Basil: This aromatic herb elevates the freshness of a dish, and it’s a cornerstone of Italian cuisine. Sweet basil, with its distinctive fragrance, blooms abundantly in summer gardens. Choose vibrant, green leaves and avoid any yellowed ones. Store basil at room temperature in a glass of water, or wrap it gently in a damp paper towel and place it in a resealable bag in the fridge. Substitute with parsley or mint if basil is unavailable, although this will alter the signature flavor.
  • Mozerella: This cheese adds a creamy texture to the salad and balances the acidity of the tomatoes. Authentic buffalo mozzarella from Italy is typically preferred for its freshness. Choose cheese that feels soft yet holds shape. Store it in its brine, or in a cold environment if unopened. Substitutes like burrata or feta can offer a different twist while still creating a complementary flavor.
  • Balsamic Reduction: This sweet-tart drizzle enhances all components of the dish. Look for a high-quality aged balsamic vinegar for the best results. It can be stored in a cool, dark place for years. Although substitutes can be made using other vinegars, the depth of flavor will change significantly, making it less ideal.

Common Mistakes to Avoid

  • Undermarinating the steak: Insufficient marinating time can lead to tough and bland meat. Ensure you marinade for at least one hour, if not longer, to maximize flavor.
  • Overcooking the steak: Flank steak can become dry if cooked too long. Use a meat thermometer to pull it off the grill at about 130°F for medium-rare.
  • Ignoring resting time: Cutting into the steak immediately after grilling allows juices to escape. Rest it for at least five minutes to let the juices redistribute.
  • Insufficient seasoning: Don’t skimp on seasoning the steaks and salad. Proper seasoning enhances the innate flavors of the ingredients and fully develops the dish.
  • Using low-quality ingredients: For fresh salads, especially, the quality of tomatoes and herbs matters significantly. Opt for fresh and organic products to achieve the best flavor.
  • Overcrowding the grill: Prevent steam by leaving space between pieces of flank steak, ensuring proper grill marks and sear.
  • Not slicing correctly: Cut the steak against the grain to maintain tenderness. Incorrect slicing can result in a tough texture.
  • Failing to balance flavors: Ensure your Caprese salad contains all three core components in balance. If tomatoes dominate, consider adding more mozzarella or basil.
  • Not tasting for seasoning: Always taste your dishes as you prepare them. Flavors can evolve, and a pinch of salt can enhance the overall taste.

Essential Techniques

– **Marinating**: Marinating flank steak not only infuses it with flavor but also tenderizes the meat. Always prepare your marinade in advance, allowing the steak to soak up the flavors fully. Avoid using metallic bowls that can react with acidic ingredients.

– **Grilling**: Achieving the perfect grill marks and doneness takes practice. Preheat your grill to high heat and ensure it’s clean to prevent sticking. Sear quickly on each side, and remember to use a meat thermometer for accuracy.

– **Resting**: Resting cooked meat is critical for retaining juices. Remove the steak from the grill and allow it to sit under a loose foil tent for at least five minutes before slicing. This simple technique guarantees juicy steaks every time.

– **Slicing**: Slicing against the grain is essential for texture. Examine the meat fibers and cut perpendicular to them to yield tender slices. A sharp knife is necessary for clean cuts that make for an appetizing presentation.

– **Assembly**: The technique of assembling your plate influences the overall dining experience. Layering flavors and colors thoughtfully will entice your guests and enhance enjoyment. Pay attention to portion sizes and arrangement for aesthetic appeal.

Pro Tips for Perfect Grilled Flank Steak with Caprese Salad

– Opt for quality, grass-fed flank steak for better flavor and healthier nutritional content. It enhances the dish greatly and makes a significant difference in taste compared to lower-quality meat.

– Consider using various herbs in addition to basil for the Caprese salad, such as oregano for an added depth of flavor. Fresh herbs bring a brightness that complements the juicy tomatoes beautifully.

– Always allow your grill to preheat to high temperature. This ensures proper searing, creating a delicious crust that seals in moisture while developing flavor.

– Incorporate fresh garlic or shallots into the marinade for an additional layer of taste. The aromatic qualities enhance the meat and provide a wonderful aroma during grilling.

– Enjoy flexibility with the Caprese salad; try adding avocados or a drizzle of pesto to elevate flavors and textures. Experimenting offers a chance to make the dish uniquely yours.

– Don’t rush the resting stage after grilling the steak; this crucial step significantly improves tenderness and juiciness. It’s well worth the wait!

– Adjust your balsamic reduction to personal taste. If you prefer a sweeter touch, add a bit of honey to the vinegar as you reduce it.

– Always invest time in arranging your dish artistically. The visual appeal enhances the dining experience, making it more memorable for everyone.

Variations and Adaptations

– **Regional Variations**: Flank steak can take on various flavor profiles based on regional influences. Consider a Mexican-inspired twist using chipotle flavors alongside fresh corn and avocado in the salad.

– **Seasonal Adaptations**: Catering to seasonal produce can enhance the salad’s freshness. In winter, try roasted vegetables or a butternut squash base to replace the tomatoes.

– **Dietary Modifications**: For a gluten-free option, this dish is naturally suitable. Vegan adaptations might replace the steak with grilled portobello mushrooms and use nut-based cheeses in the salad.

– **Flavor Variations**: Add zest to your marinade with citrus juice or experiment with different vinegars for tangy notes. A splash of soy sauce can also deepen the umami flavor in the steak.

– **Texture Modifications**: For a refreshingly crisp texture, add julienned radishes or sliced cucumbers to the salad, providing contrast against the creaminess of mozzarella.

– **Presentation Alternatives**: Serve individual portions in small bowls for an elegant appetizer style. Alternatively, create a family-style presentation that encourages sharing.

Serving and Presentation Guide

Plating your Grilled Flank Steak with Caprese Salad beautifully enhances the dining experience. Begin with a large platter for family-style service or individual plates for a more sophisticated meal. Start by laying down slices of grilled steak, then arrange the salad components artfully around the meat.

To elevate presentation, consider garnishing the dish with freshly torn basil leaves and a drizzle of balsamic reduction that adds both flavor and a visual element. Utilize contrasting colors effectively; the bright red of tomatoes against the whites of mozzarella creates visual interest.

Temperature also plays a key role; serve warm steak alongside chilled Caprese salad for a delightful contrast. Finally, aim for balanced portion control by ensuring each serving has enough steak and salad components, allowing guests to enjoy every facet of the dish.

Wine and Beverage Pairing

Selecting the right beverage can enhance your Grilled Flank Steak with Caprese Salad experience. A medium-bodied red wine such as a Chianti or a Malbec complements the richness of steak, bringing out its flavor and adding depth.

For those preferring white wine, a crisp Pinot Grigio offers a refreshing contrast without overwhelming the palate.

Non-alcoholic options can include sparkling water with a twist of lemon, making it a refreshing pair without competing flavors. For coffee aficionados, an espresso served after the meal can cleanse the palate and round out the dining experience.

Each drink choice offers a different way to enhance the multifaceted flavors of the dish, making your meal unforgettable.

Storage and Shelf Life

Storing your Grilled Flank Steak with Caprese Salad properly maximizes freshness. Flank steak can be stored in an airtight container in the refrigerator for up to three days or frozen for up to three months. To maintain quality, allow the steak to cool completely before refrigerating.

For the Caprese salad, store ingredients separately to avoid sogginess. Keep chopped tomatoes and mozzarella in airtight containers, using them within 24 hours for best flavor. Ensure the basil is only added at serving time to maintain its vibrant color and fresh taste.

Reheating steak can be done gently in an oven set to low heat or by briefly hovering over a pan on medium heat. Avoid microwaving, as it tends to dry out the meat.

Make Ahead Strategies

Embrace the possibility of prep work with this recipe. To ease the load during your event, marinate the flank steak a day in advance, allowing flavors to deeply penetrate the meat. Just ensure to store it in the refrigerator.

Chop salad ingredients ahead of time and keep them in separate containers until just before serving to maintain freshness. Create the balsamic reduction in advance, as it can be served cold or at room temperature, saving precious time when the meal is created.

When assembling, consider layer presentation to both save time and create visual impact. Always add the basil last to avoid wilting and impeding the dish’s appearance and flavor.

Scaling Instructions

Scaling your Grilled Flank Steak with Caprese Salad is simple. When halving the recipe, decrease the marination time proportionally while keeping the cooking time consistent as flank steak generally cooks evenly.

If doubling or tripling the recipe, consider using multiple grills or cooking in batches to avoid overcrowding, which can lead to uneven cooking. Adjust any accompanying salad ingredients proportionally, ensuring every component maintains its balance.

Be mindful of timing; larger quantities may take longer to prepare, particularly if marinating is significantly increased. Always taste and adjust flavors accordingly to keep the essence of the dish intact.

Nutritional Deep Dive

Understanding the nutritional content of your Grilled Flank Steak with Caprese Salad is essential to appreciate its health benefits. Flank steak is an excellent source of protein, offering approximately 22 grams per 3-ounce serving, which is vital for muscle growth and repair.

The salad components, particularly tomatoes, are rich in antioxidants, vitamins C and K, while mozzarella contributes calcium and healthy fats. Fresh basil includes various vitamins and is known for its anti-inflammatory properties.

Being mindful of portion sizes can be advantageous, especially for those managing their weight. While the steak has a higher caloric content, the fresh salad balances the meal, providing fibers that enhance feeling full without excess calories.

Dietary Adaptations

– **Gluten-free**: This dish naturally adheres to gluten-free dietary guidelines, making it suitable for those with gluten sensitivities.

– **Dairy-free**: Swap mozzarella for a quality dairy-free cheese or nut-based option to create a dairy-free version without compromising the flavor profile.

– **Vegan**: Replace the steak with marinated and grilled portobello mushrooms or tofu, ensuring the smoky flavor resonates with the dish.

– **Low-carb**: Enjoy the steak as the primary protein source while minimizing the amount of cheese and opting for more non-starchy vegetables in the salad.

– **Keto**: This recipe is almost keto-friendly when using full-fat cheese and, with careful ingredient adjustments, can easily align with ketogenic dietary requirements.

– **Paleo**: Serve the dish in its original form while ensuring no added sugars in the balsamic reduction for a clean and healthy meal.

– **Low-FODMAP**: For individuals on a low-FODMAP diet, ensure to avoid high fructose corn syrup in balsamic vinegar and utilize FODMAP-friendly vegetables in the salad.

Troubleshooting Guide

– **Texture issues**: If your steak turns out chewy, you might have overcooked it or not marinated long enough for tenderizing. Ensure each step, from marinating to the proper cooking time, is meticulously followed.

– **Flavor balance**: Too much acidity from the dressing can dominate. Adjust flavor levels gradually, tasting as you go to maintain the right balance of flavors.

– **Temperature problems**: If your steak is undercooked, return it to the grill for a few more minutes, checking frequently with a meat thermometer until it reaches the proper doneness.

– **Equipment challenges**: If you’re grilling on a pan, ensure it’s adequately pre-heated to achieve better sear marks and flavors; lack of heat may inhibit proper cooking.

– **Ingredient substitutions**: If using different ingredients, understand how their flavors converge and adjust marinating/seasoning accordingly. Substitutes may not carry the same flavor profiles as originals.

– **Timing concerns**: If pressed for time, try preheating your grill while preparing the steak and organizing your salad to best streamline the cooking process and ensure everything is ready simultaneously.

Recipe Success Stories

Community feedback on Grilled Flank Steak with Caprese Salad has been overwhelmingly positive. Readers often express their delight in how quickly the dish comes together without sacrificing taste, ideal for busy weeknights.

Variations shared by readers include switching out proteins to include chicken or even fish, often yielding successful adaptations. Many families savor the steak repeatedly, noting how it has become a staple at their summer barbecues.

Adaptation stories often highlight personal tweaks; for instance, an added layer of flavor from lime juice in the salad dressings has led to new family favorites.

Photography tips shared by users emphasize the importance of natural lighting and using a plain background to make the dish’s colors pop, encouraging others to capture their culinary creations.

Frequently Asked Questions

Q: Can I use a different cut of meat for this recipe?
A: Yes, other cuts like skirt steak or sirloin can substitute flank steak, but cooking times may vary slightly depending on the thickness of the cuts and fat content.

Q: How long should I marinate the steak?
A: A minimum of 1 hour is recommended, but if time allows, marinate overnight for even deeper flavor penetration.

Q: What sides would pair well with this dish?
A: Grilled vegetables, garlic bread or a light pasta dish complement the steak and salad beautifully while maintaining a summer vibe.

Q: Can I prepare the Caprese salad in advance?
A: While you can prep individual ingredients in advance, it’s best to assemble the salad just before serving to maintain freshness and prevent sogginess.

Q: What’s the best way to reheat leftover steak?
A: Reheat it in a low-temperature oven until warmed through or in a skillet over medium heat, avoiding the microwave for the best results.

Q: Is it possible to make a low-sodium version?
A: Yes! Opt for low-sodium versions of soy sauce in the marinade and skip added salt in the salad.

Q: What’s the ideal level of doneness for flank steak?
A: Medium-rare is generally recommended for flank steak, which is around 130°F on a meat thermometer for optimal juiciness.

Q: How do I know when my steak is done?
A: Using a meat thermometer, aim for around 130°F for medium-rare, 140°F for medium. Remember to rest your steak after cooking for maximum tenderness.

Q: Can I serve the steak cold in a salad?
A: Absolutely! Cold steak can be sliced thinly and added to salads for a refreshing twist, especially in summer.

Q: What’s the best way to preserve flavor if I freeze some steak?
A: For best flavor retention, wrap the steak tightly in plastic wrap, followed by aluminum foil to prevent freezer burn. Consume within three months for optimal quality.

Additional Resources

For those eager to enhance their culinary repertoire, consider checking out related recipes that include grilled chicken salads, marinated vegetable skewers, and hearty summer pasta dishes.

Technique guides may focus on mastering the art of grilling various types of meats or creating homemade dressings and marinades that can elevate any dish.

Deep dives into ingredient profiles will aid home cooks in selecting high-quality products, along with tips for seasonal variations to maximize flavors throughout the year.

Equipment recommendations can help with finding the best grill types or marinading tools to streamline your cooking process, ensuring success with every dish you attempt.

Join the Conversation

Engagement with fellow cooks through social media sharing invites the exchange of ideas and sparks creativity. Revisiting successful adaptations or variations witnesses community growth around beloved recipes.

Photography tips shared can inspire others to capture their dishes beautifully, promoting engagement, while recipe reviews help refine techniques and build trust within your cooking community.

By sharing personal stories and variations, readers can create a sense of collaboration that enhances the overall experience, showcasing the diversity around this timeless dish.

The Recipe

Grilled Flank Steak with Caprese Salad

Serves: 4

Prep Time: 15 mins

Cook Time: 10 mins

Total Time: 25 mins

Kitchen Equipment Needed

  • Grill or grill pan
  • Meat thermometer
  • Mixing bowls
  • Sharp knife
  • Slicing board

Ingredients

  • 1 lb flank steak
  • 2 large tomatoes, sliced
  • 8 oz fresh mozzarella, sliced
  • 1 cup fresh basil leaves
  • ¼ cup balsamic vinegar
  • 2 tbsp olive oil
  • 2 cloves garlic, minced
  • Salt and pepper to taste

Directions

  1. Prepare the marinade by mixing olive oil, garlic, salt, and pepper. Coat the flank steak and marinate for at least one hour.
  2. Heat your grill and cook the flank steak for 4-5 minutes on each side or until it reaches your desired doneness.
  3. Remove steak from the grill, allow to rest for 5 minutes, then slice against the grain.
  4. Assemble the Caprese salad by layering sliced tomatoes, mozzarella, and basil leaves on a serving plate.
  5. Drizzle with balsamic vinegar and additional olive oil, seasoning with salt and pepper as desired.
  6. Serve the sliced flank steak on the side or on top of the Caprese salad for added flavor.

Recipe Notes

  • For added flavor, let the steak marinate overnight.
  • Try different cheeses, such as burrata, for a creamy variation.
  • Feel free to add fresh greens to the Caprese salad for more texture.

Festive Brownie Christmas Trees: Easy and Delicious Holiday Treat

Christmas brownie recipe, festive brownie trees, holiday dessert brownies, brownie decorating ideas, Christmas tree brownies, holiday-themed brownies

Brownie Christmas Trees

Introduction

Brownie Christmas Trees are the perfect holiday treat, combining the rich, fudgy goodness of brownies with festive decorations that mimic a Christmas tree. These easy-to-make desserts are ideal for family baking sessions, holiday parties, or as delightful gifts. Their versatility and visual appeal make them a favorite during the festive season.

For more inspiration on holiday-themed treats, check out creative decorating ideas for holiday desserts and learn how to elevate your brownie presentation.


Ingredients and Tools for Brownie Christmas Trees

Essential Ingredients:

  • For the Brownies:
    • Unsalted butter
    • Granulated sugar
    • Eggs
    • Cocoa powder
    • All-purpose flour
    • Vanilla extract
    • Salt
  • For Decoration:
    • Green icing or frosting
    • Sprinkles, candy stars, and edible glitter
    • Candy canes (for tree trunks)

Tools Needed:

  • Square or rectangular baking pan
  • Knife or cookie cutters for shaping
  • Piping bags for frosting
  • Baking parchment paper

For those who prefer a more unique holiday treat, you might find this guide on cutting perfect brownie shapes especially useful.


How to Make Brownie Christmas Trees

Step-by-Step Guide:

  1. Prepare the Batter:
    • Melt butter and mix with sugar until creamy.
    • Add eggs one at a time, mixing well.
    • Stir in vanilla extract, cocoa powder, flour, and salt until just combined.
  2. Bake the Brownies:
    • Preheat the oven to 350°F (175°C).
    • Line a baking pan with parchment paper.
    • Pour the batter evenly into the pan and bake for 20–25 minutes or until a toothpick inserted comes out with moist crumbs.
  3. Cut into Tree Shapes:
    • Let the brownies cool completely.
    • Cut into triangles to resemble Christmas trees.
  4. Decorate the Trees:
    • Pipe green frosting in zig-zag patterns to mimic tree branches.
    • Add sprinkles, candy stars, and edible glitter as ornaments.
    • Attach candy canes as tree trunks.

Variations and Twists

Unique Ideas:

  • Layered Brownie Christmas Trees: Stack layers of brownies with frosting in between for a 3D effect.
  • Mint-Flavored Brownies: Add peppermint extract to the batter for a holiday twist.
  • Gluten-Free Option: Substitute regular flour with almond or gluten-free flour.

Kid-Friendly Tips:

  • Use edible markers for custom designs.
  • Pre-make brownies and let kids focus on decorating.

For a broader range of ideas, explore this collection of festive desserts to complement your brownie trees.


Presentation and Storage

Serving Suggestions:

  • Arrange on a festive platter with holiday-themed napkins.
  • Include them in a dessert bar alongside other holiday favorites.
  • Package in clear bags tied with ribbons for gifting.

Storage Tips:

  • Store in an airtight container at room temperature for up to 5 days.
  • Freeze undecorated brownies for up to 3 months and decorate when ready.

FAQs About Brownie Christmas Trees

1. Can I use store-bought brownie mix?
Yes, a mix works well if you’re short on time, but homemade batter offers a richer flavor.

2. How do I keep the brownies from crumbling while cutting?
Ensure the brownies are completely cooled before cutting and use a sharp knife or cutter.

3. Can I make these brownies ahead of time?
Yes, bake the brownies up to two days in advance, store them properly, and decorate closer to serving time.

4. Are there healthier alternatives for the frosting?
You can use Greek yogurt-based frosting or powdered sugar icing for lighter options.

5. Can I make these brownies vegan?
Yes, substitute eggs with flax eggs and butter with a plant-based alternative.


Internal Linking Opportunities

Use these relevant internal links to enhance your article:


Conclusion

Brownie Christmas Trees are the perfect combination of festive fun and delicious flavors. Whether you’re hosting a holiday party or looking for a creative gift idea, these brownies are guaranteed to impress. With endless decorating possibilities and simple ingredients, they’re a must-try for the season. Get your family involved, let your creativity shine, and enjoy these delightful holiday treats!

Indulge in Black Forest Cookie Dough Brownie Bombs Today

Indulgent Black Forest Cookie Dough Brownie Bombs

⚖️
Difficulty
Moderate

⏲️
Prep Time
30 mins

🕒
Cook Time
30 mins

⏱️
Total Time
60 mins

🍽️
Servings
12 Bombs

Prepare to indulge in the ultimate dessert experience with these decadent Black Forest Cookie Dough Brownie Bombs. Combining the rich flavors of chocolate and cherry, each bite is a delightful explosion of creamy cookie dough encased in a fudgy brownie layer. The iconic Black Forest cake flavors take center stage, making this dessert a perfect choice for celebrations or a sweet treat to satisfy your cravings.

Imagine biting into these brownie bombs: the outer shell is a perfectly baked brownie, while the inner core surprises with a luscious cookie dough texture, subtly flavored with cocoa and studded with chocolate chunks. The tartness of cherry comes through, making each morsel a delicious harmony of taste. This recipe is not just about eating; it’s a gourmet experience, inviting friends and family to gather and enjoy something truly special.

Quick Recipe Highlights

  • Flavor Profile: These bombs deliver a delightful blend of rich chocolate, buttery cookie dough, and tart cherries.
  • Texture: Enjoy a dual experience with a soft brownie exterior and a gooey cookie dough center.
  • Aroma: The sweet aroma of brown sugar mingled with decadent chocolate will fill your kitchen.
  • Visual Appeal: The shiny chocolate coating and bright cherry accents make for an eye-catching dessert.
  • Skill Level Needed: Moderate; requires basic baking skills and some patience.
  • Special Equipment: You’ll need a mixing bowl, measuring cups, and a baking dish to create these delicious bombs.

Recipe Overview

  • Difficulty Level: Moderately challenging; great for those familiar with baking.
  • Category: Dessert, Treats, Party Food; perfect for gatherings.
  • Cuisine: Inspired by traditional German Black Forest cake, featuring chocolate and cherries.
  • Cost: Generally inexpensive; costs range from $10 to $15 based on local prices.
  • Season: Ideal for all seasons, especially holidays and celebrations.
  • Occasion: Perfect for birthdays, potlucks, or holiday parties.

Why You’ll Love This Recipe

The taste and texture of Black Forest Cookie Dough Brownie Bombs are a match made in heaven. The chocolate brownie crust provides a rich and chewy exterior that combines perfectly with the sweet, soft cookie dough center, offering a delightful contrast. Each bite is filled with chocolate chunks and a hint of cherry, reminiscent of the classic Black Forest cake.

Assembling these brownie bombs is a breeze. With just a few simple steps, you can whip up a batch quickly, making them a convenient dessert option. Plus, they can be made ahead, ensuring you have a delicious treat at the ready for unexpected guests or late-night cravings.

Nutritionally, while these bombs are indulgent, the use of quality ingredients allows you to feel good about treating yourself. The chocolate provides antioxidants, and the cherries add a burst of vitamin C. Serving these sweet delights at your next gathering will make them a hit, as everyone appreciates a creative spin on traditional desserts.

Socially, Black Forest Cookie Dough Brownie Bombs foster a sense of togetherness. Whether enjoyed during a holiday gathering, a family reunion, or a casual get-together with friends, these desserts are perfect for sharing. Their fun shape and rich flavors are bound to spark conversation and smiles.

Cost-effective and accessible to prepare, this recipe doesn’t require extravagant ingredients or equipment, making it friendly on both your wallet and kitchen. With just a few pantry staples, you can create a delightful dessert that everyone will adore, without stretching your budget.

Historical Background and Cultural Significance

The origins of the Black Forest dessert are deeply rooted in German culture, particularly influenced by the Black Forest region in southwestern Germany. Traditionally, the Black Forest cake, known as Schwarzwälder Kirschtorte, showcases layers of chocolate sponge, cherries, and whipped cream, representing the beauty and flavors found in this picturesque locale. The dessert pays homage to the area’s rich cherry-growing tradition.

Over the decades, the popularity of the Black Forest cake has led to numerous adaptations and interpretations. Its central elements—chocolate, cherries, and cream—have transcended into various forms and styles, inspiring countless desserts, including these brownie bombs. This evolution showcases the ability of traditional recipes to adapt while maintaining core cultural significance.

Regionally, variants of the Black Forest treats can be found, with some incorporating additional flavors like almond or coffee, emphasizing local ingredients and tastes. These adaptations highlight the diversity of German baking and its widespread appeal, reminding us that delicious food has a universal language.

The rise of modern dessert trends has propelled the Black Forest flavor profile into new realms. Creating innovations like these brownie bombs honors the classic while introducing new techniques and culinary creativity, making old recipes feel fresh and exciting for new generations to enjoy.

Ingredient Deep Dive

Chocolate: Chocolate has a rich history, originating from the cacao trees of Central America. Not only does it add an irresistible flavor to desserts, but it also boasts health benefits such as improving heart health. When selecting chocolate for this recipe, opt for high-quality dark chocolate for the best results. Store it in a cool, dry place, and consider substituting with cocoa powder if needed.

Cherries: Cherries are often associated with summer and are known for being a staple in many desserts, especially in the Black Forest cake. Packed with vitamins and antioxidants, they offer significant health benefits. Look for fresh, ripe cherries, and if they’re out of season, frozen cherries are a great alternative and can be stored for extended periods.

Common Mistakes to Avoid

  • Using low-quality chocolate can lead to a less flavorful brownie bomb. Always opt for good-quality chocolate.
  • Overmixing the cookie dough can make it tough; mix until just combined to ensure softness.
  • Baking at too high a temperature can result in dry brownies, so adhere to temperature recommendations.
  • Not allowing the brownie bombs to cool before slicing may result in messy serving; patience is key!
  • Skipping the chilling process can lead to the bombs losing shape; always chill appropriately.
  • Forgetting to line your baking pan can make cleanup a hassle. Use parchment paper for easy removal.
  • Using too much flour when measuring can lead to dry bombs; always measure accurately.
  • Not checking the freshness of cherries can result in a less tasty dessert, so use ripe produce.
  • Overbaking can dry out the bombs, so keep an eye on the timing towards the end of baking.
  • Using too little salt can mute flavors; a pinch elevates the overall taste of chocolate.

Essential Techniques

Mixing Cookie Dough: It’s crucial to mix the cookie dough well, but not too much. The key is to combine ingredients until they just come together, which ensures a soft and chewy end result. Look for a thick consistency that holds shape without being crumbly.

Chilling and Shaping: Chilling the filled brownie bombs allows the dough to firm up, making them easier to shape and ensuring they hold together during baking. When shaping, ensure they’re compact and smooth to prevent any cracks during baking.

Pro Tips for Perfect Black Forest Cookie Dough Brownie Bombs

1. Use room temperature ingredients for the brownie base to achieve a smoother batter, which will enhance the overall texture.

2. Substitute half of the chocolate with white chocolate for a contrasting flavor that looks stunning and tastes fabulous.

3. Prior to serving, dust the tops with powdered sugar for an elegant finish that adds a special touch.

4. Experiment with different nuts like walnuts or pecans for a crunchy contrast to the chewy cookie dough.

5. Serve these bombs with a cherry sauce drizzled over the top for added pizzazz and an extra layer of flavor.

6. Consider using mini muffin tins for perfectly portioned brownie bombs that are great for gatherings.

7. Allow the brownie bombs to chill overnight for deeper flavors and a denser, chewier texture.

8. Pair with vanilla ice cream to take this treat over the top!

Variations and Adaptations

Black Forest Cookie Dough Brownie Bombs can be tailored to fit regional flavors; adding a hint of almond extract can evoke the nutty flavors commonly associated with traditional German desserts. Seasonal adaptations could incorporate seasonal fruits, like blueberries, instead of cherries for a refreshing summer treat.

For dietary modifications, consider using gluten-free flour blends to make this treat gluten-free without sacrificing taste. Additionally, modifying the sweetness by using alternative sweeteners can cater to those with dietary restrictions. Experimenting with different chocolate types, such as mint chocolate or caramel swirls, can create exciting flavor profiles that resonate with various audiences.

Serving and Presentation Guide

When plating your Black Forest Cookie Dough Brownie Bombs, consider using a simple yet elegant presentation. Arrange them on a white platter to highlight their colors and textures. Garnishing with fresh mint leaves or a drizzle of chocolate sauce adds a beautiful finishing touch.

Portion control can be achieved by cutting the bombs into halves or quarters, making them perfect bite-sized treats for parties. Serving at room temperature enhances the flavors, but pair them with a scoop of ice cream for an elevated dessert experience.

Wine and Beverage Pairing

When selecting wine to pair with these indulgent brownie bombs, a fruity Merlot enhances the flavors beautifully. The light acidity complements the sweetness of the dessert, while its rich berry notes echo the cherries in the recipe.

For non-alcoholic alternatives, consider serving a sparkling cherry soda, which will add a refreshing twist, or a classic iced tea infused with cherry flavor for a refreshing option. For coffee lovers, a strong espresso can provide a delightful contrast to the richness of the brownies without overwhelming the taste.

Storage and Shelf Life

Black Forest Cookie Dough Brownie Bombs can be stored in an airtight container at room temperature for up to 3 days or in the refrigerator for up to a week. To maintain freshness, it is best to keep them away from direct sunlight and excessive moisture.

If you need to prolong their shelf life, consider freezing the brownie bombs. Individually wrap each bomb in plastic wrap and place them in a freezer-safe bag. They can be frozen for up to 3 months; when ready to eat, simply let them thaw at room temperature or briefly warm them in the microwave for a few seconds.

Make Ahead Strategies

To simplify your entertaining plans, you can prepare these brownie bombs a day in advance. Follow the complete recipe up until the baking stage, and then chill them overnight. Bake them the next day for fresh-from-the-oven deliciousness.

You can also prepare the cookie dough ahead of time and keep it refrigerated for up to 48 hours before using. This allows you to save time during the actual baking process, ensuring that you’re ready to serve these delightful treats whenever needed.

Scaling Instructions

This Black Forest Cookie Dough Brownie Bombs recipe is easily scalable. For smaller gatherings, simply halve the ingredient measurements, ensuring that you adjust your baking time accordingly. You can also double or triple the recipe to satisfy larger crowds—just make sure to use a larger baking dish or multiple pans to accommodate the increased volume.

Timing modifications might be necessary depending on your oven; keep a close eye on the baking process to ensure perfect results. Moreover, consider using multiple racks in the oven to optimize baking efficiency, taking care to rotate the pans for even cooking.

Nutritional Deep Dive

The Black Forest Cookie Dough Brownie Bombs contain a mix of macronutrients, predominantly carbohydrates due to the sugars and flour. The chocolate and eggs contribute protein, while the cherries add beneficial sugars and fiber, enhancing digestion.

For those mindful of their diets, understanding the nutritional content can help with portions. While these bombs are indulgent, savoring a small piece can provide satisfaction, allowing for treats in moderation without straying from dietary goals. Consider using nutritional apps to track your intake if following a specific plan.

Dietary Adaptations

For those on a gluten-free diet, using gluten-free flour blends ensures that everyone can enjoy these brownie bombs without worry. Vegan versions are possible by substituting eggs with flax eggs and using dairy-free chocolate.

Other modifications could involve reducing sugar to cater to keto or low-carb diets. By replacing regular sugar with natural sweeteners such as stevia or erythritol, you can enjoy a guilt-free version of these delicious brownie bombs.

Troubleshooting Guide

If you encounter texture issues, ensure you’re not overbaking, as this can lead to dryness. If your cookie dough seems too crumbly, a touch of milk can help bring it back together. For flavor balance, a pinch of salt can enhance sweetness and prevent overwhelming chocolate richness.

Temperature problems can arise if the brownies don’t bake through; use a toothpick to check for doneness. If relying on older equipment, consider an oven thermometer to ensure your baking environment is accurate. For ingredient substitutions, keep in mind the ratios to avoid altering the recipe too dramatically.

Recipe Success Stories

Our community loves sharing their experiences with Black Forest Cookie Dough Brownie Bombs. Many have adapted the recipe with local ingredients, such as using fresh berries in place of the cherries, resulting in delightful outcomes.

Readers have enjoyed experimenting with different nuts, sharing their successes in adding crunchy texture while keeping the overall flavor intact. The feedback highlights the creativity these bombs inspire, making each batch a unique culinary delight.

Frequently Asked Questions

Can I make the dough ahead of time?

Yes, you can prepare the cookie dough a couple of days in advance. Just refrigerate it until you’re ready to bake.

How should I store the brownie bombs?

Store them in an airtight container at room temperature for up to 3 days or refrigerate for up to a week.

Can I use frozen cherries instead of fresh?

Absolutely! Frozen cherries work great and maintain that delicious fruity flavor in your brownie bombs.

Are these brownie bombs gluten-free?

You can make them gluten-free by using a suitable flour blend. Just ensure that all other ingredients you use are gluten-free.

What is the best way to reheat them?

For reheating, place them in the microwave for about 10-15 seconds. This warms them without drying them out.

Can I modify the chocolate type?

Yes! You can use white chocolate or milk chocolate for different flavor profiles, or even a mix!

How do I prevent the brownie bombs from sticking?

Using parchment paper in your baking pan will help prevent sticking, ensuring easy removal once baked.

What if my brownie bombs are too dry?

Ensure you measure your ingredients accurately. Moisture can be added by serving with a drizzle of chocolate sauce or whipped cream.

Can I double the recipe?

Yes, you can easily double the recipe. Just keep an eye on the baking time, as it may vary.

Are these suitable for kids?

Definitely! Kids love these tasty treats, but consider moderating the amount for younger children.

Additional Resources

For those interested in exploring more dessert recipes, consider checking out our other blog posts featuring delightful treats like chocolate lava cakes and strawberry shortcakes. Baking technique guides, such as mastering ganache or understanding chocolate tempering, can enhance your dessert-making skills.

We also provide resources on ingredient selection, ensuring you know how to pick the best chocolate or cherries for your recipes. Seasonal variations keep your dessert game fresh year-round, with alternatives that celebrate the flavors of each season.

Join the Conversation

We love hearing from our readers! Share your experiences with our Black Forest Cookie Dough Brownie Bombs on social media, and don’t forget to tag us in your photos! Your feedback and creative adaptations inspire other bakers to try new variations.

Consider leaving a review or commenting on the recipe post to connect with fellow dessert lovers. Your suggestions help create a vibrant community around our shared love for baking. Join the conversation and let your culinary creativity shine!

The Recipe

Black Forest Cookie Dough Brownie Bombs

Serves: 12 Bombs

Prep Time: 30 mins

Cook Time: 30 mins

Total Time: 60 mins

Kitchen Equipment Needed

  • Mixing bowl
  • Measuring cups
  • Baking dish
  • Electric mixer or whisk
  • Cookie scoop
  • Cooling rack

Ingredients

  • 1 cup all-purpose flour
  • 1/2 cup unsweetened cocoa powder
  • 1/2 cup granulated sugar
  • 1/2 cup brown sugar, packed
  • 1/2 cup unsalted butter, softened
  • 2 large eggs
  • 1 teaspoon vanilla extract
  • 1 cup semi-sweet chocolate chips
  • 1 cup cherries, pitted and halved

Directions

  1. Preheat the oven to 350°F (175°C) and grease a baking dish.
  2. In a mixing bowl, combine flour, cocoa powder, and sugars. Mix well.
  3. Add the softened butter, eggs, and vanilla extract to the dry ingredients. Beat until combined.
  4. Fold in the chocolate chips and cherries gently.
  5. Transfer half of the batter to the prepared baking dish and spread evenly.
  6. Chill the mixture in the refrigerator for 15 minutes to allow it to firm up.
  7. After chilling, form the brownie mixture into small balls and place them on a baking sheet.
  8. Bake the brownie bombs for 20-25 minutes, or until a toothpick comes out clean.
  9. Let them cool on a wire rack before serving.

Recipe Notes

  • Feel free to substitute fresh cherries with frozen or omit them entirely for a chocolate-only version.
  • For an added crunch, sprinkle chopped nuts over the brownie batter before baking.
  • Store any leftovers in an airtight container to maintain freshness.