Gooey Chocolate Chip Cookie Bars: The Ultimate Dessert Indulgence
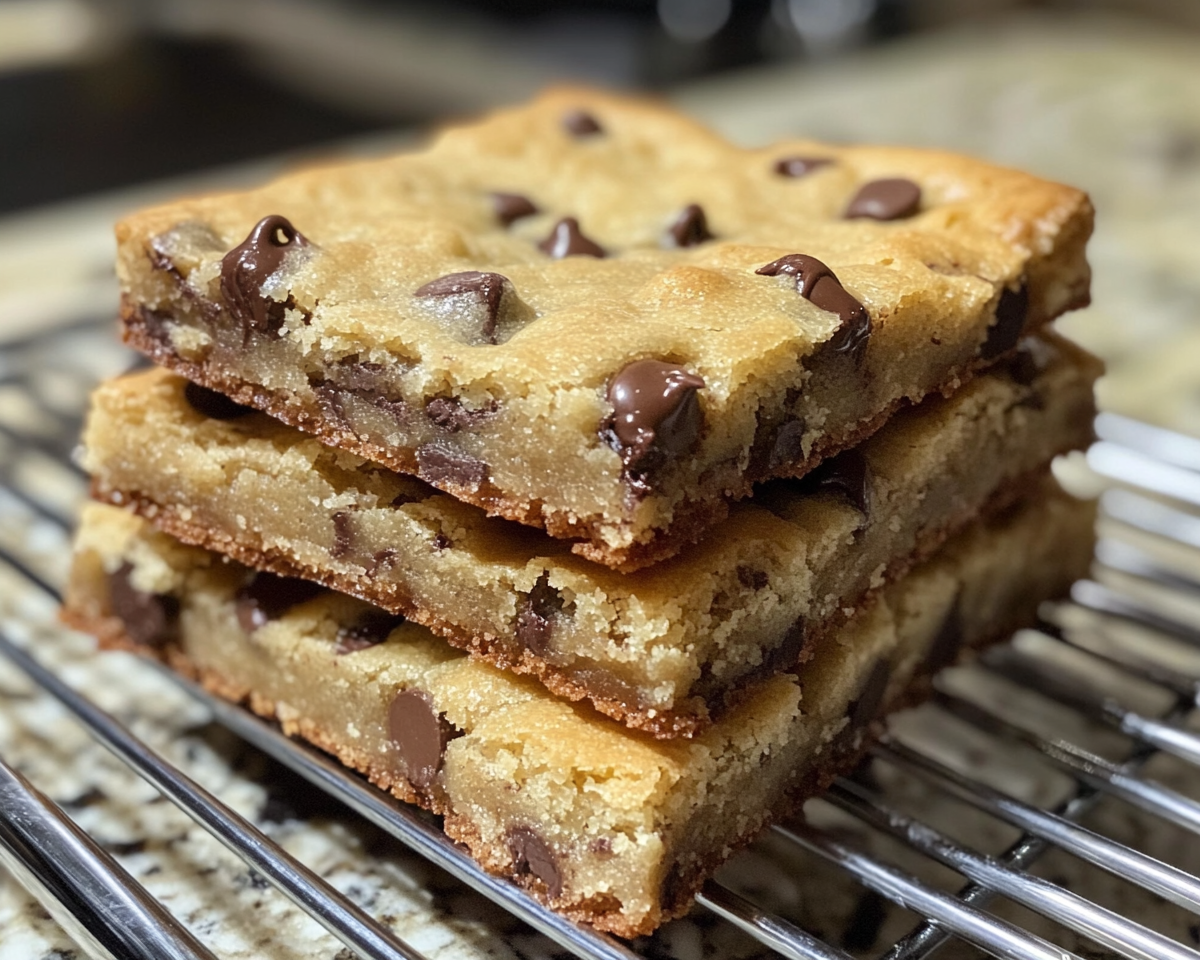
Gooey Chocolate Chip Cookie Bars
Introduction
Gooey Chocolate Chip Cookie Bars are a decadent, crowd-pleasing dessert that combines the best parts of a classic chocolate chip cookie with the convenience of a bar format. Their rich, buttery base, studded with gooey chocolate chips, makes them an instant favorite for gatherings, potlucks, or as an indulgent snack.
All-purpose flour, white sugar, brown sugar, butter, eggs, vanilla extract.
Gooey Additions:
Semi-sweet or milk chocolate chips, sweetened condensed milk, or caramel.
Optional Extras:
Chopped nuts, shredded coconut, or a pinch of sea salt.
Equipment:
9×13 baking pan lined with parchment paper.
Mixing bowls, spatula, and an electric mixer.
A sharp knife for clean slicing.
Step-by-Step Recipe
Mix the Dough:
Cream together butter and sugars, add eggs and vanilla extract, then fold in the dry ingredients.
Add Gooey Layers:
Press half the dough into the prepared pan. Spread a layer of sweetened condensed milk or caramel over the dough. Top with chocolate chips and the remaining dough.
Bake:
Bake at 350°F (175°C) for 25–30 minutes, ensuring the edges are golden but the center remains soft.
Creative Variations
Salted Caramel Chocolate Bars: Add a layer of salted caramel before baking.
S’mores Bars: Incorporate marshmallows and crushed graham crackers.
Nutty Chocolate Bars: Mix in pecans, almonds, or hazelnuts for added crunch.
Tips for Baking Gooey Chocolate Chip Cookie Bars
Use room temperature butter for easier mixing.
Avoid overmixing the dough to maintain a soft, tender texture.
Cool completely before slicing to achieve clean, even bars.
Presentation and Serving
Serve warm with vanilla ice cream or whipped cream.
Arrange on dessert platters for potlucks or parties.
Dust with powdered sugar for a polished finish.
Storage and Freezing
Short-Term Storage: Store in an airtight container at room temperature for up to 3 days.
Freezing: Wrap individual bars in plastic wrap and freeze for up to 2 months.
FAQs
Can I use dark chocolate chips instead of semi-sweet?
Yes, dark chocolate provides a richer flavor profile.
What’s the best way to prevent bars from drying out?
Avoid overbaking and store in airtight containers.
Can I substitute sweetened condensed milk?
You can use caramel sauce or a homemade condensed milk alternative.
Are there gluten-free or vegan options?
Use gluten-free flour and plant-based butter for dietary modifications.
Gooey Chocolate Chip Cookie Bars are the perfect dessert for chocolate lovers. Easy to make, endlessly customizable, and always satisfying, they’re a recipe you’ll turn to again and again. Whether served warm with ice cream or as a standalone treat, these bars are guaranteed to impress!
Crispy Air Fryer Pork Chop Bites for Delicious Quick Meals
Crispy Air Fryer Pork Chop Bites: The Ultimate Snack Delight!
⚖️
Difficulty
Easy
⏲️
Prep Time
10 mins
🕒
Cook Time
15 mins
⏱️
Total Time
25 mins
🍽️
Servings
4
Elevate your mealtime with these Crispy Air Fryer Pork Chop Bites that are bursting with flavor and textures! Cooked to perfection in an air fryer, these bite-sized delights are not only savory but also healthier than traditional fried pork. Imagine taking a crispy morsel, featuring juicy pork enveloped in a golden, crunchy coating, and savoring every moment. Perfect for gatherings or a cozy evening at home, these pork chop bites will quickly become a family favorite!
The balance of spice, crunch, and tenderness makes these bites irresistible. With each bite, the smokiness of paprika and the subtle bite of garlic swathe your senses in a pleasant embrace. You’ll find yourself going back for more, whether as a snack, appetizer, or even a meal paired with your favorite sides. It’s time to bring out your air fryer and prepare for a culinary adventure!
Quick Recipe Highlights
Flavor Profile: Savory, slightly smoky, with a hint of garlic.
Texture: Crispy outside and tender within, creating a delicious contrast.
Aroma: Enticing notes of roasted garlic and warm spices fill the air.
Visual Appeal: Golden brown bites that look as tempting as they taste.
Skill Level Needed: Ideal for novice cooks and seasoned chefs alike.
Special Equipment: An air fryer is essential for that perfect crisp.
Recipe Overview
Difficulty Level: This recipe is straightforward, making it a breeze for cooks at any skill level to master.
Category: Perfect as an appetizer, snack, or casual dinner option.
Cuisine: These pork chop bites blend classic American flavors with modern air frying techniques.
Cost: Affordable ingredients come together to create a delicious family meal.
Season: Ideal for any time of year but perfect for gatherings during any season.
Occasion: Great for game day, parties, or casual family dinners.
Why You’ll Love This Recipe
The taste and texture appeal of these Crispy Air Fryer Pork Chop Bites are truly remarkable. Each bite delivers a punch of flavor from the well-seasoned coating that perfectly complements the pork. This unexpected combination captivates the taste buds and leaves a lingering satisfaction that is hard to resist. The crispy exterior creates a delightful crunch followed by the juicy, tender pork filling that melts in your mouth.
Convenience is key with this recipe; it requires minimal prep and cooking time, allowing you to whip up a delightful dish in just 25 minutes. The air fryer not only makes this method quick but also cuts down on excess oil, offering a healthier alternative without sacrificing taste. Imagine being able to serve up a snack or meal that everyone will love without spending hours in the kitchen.
When it comes to nutritional advantages, pork is a great source of protein, providing essential amino acids to fuel your body. These pork chop bites can be part of a balanced diet when served with fresh veggies or whole grains, creating a satisfying meal that includes protein, fiber, and essential vitamins. It’s a fantastic way to incorporate wholesome ingredients into your family’s diet.
Socially, these crispy bites are perfect for entertaining. Their bite-sized nature makes them ideal for sharing at parties, and they present beautifully on any platter. Guests will appreciate the bold flavors, leading to great conversations around the snack table. You’ll find that the Crispy Air Fryer Pork Chop Bites not only please the palate but also foster an enjoyable social atmosphere.
Cost-effectiveness is another highlight of this recipe. Using simple ingredients, you can create a delicious dish that serves several people without breaking the bank. This makes it a great option for families and budget-conscious cooks looking for flavor-packed ideas that don’t rely on expensive cuts of meat. Everyone deserves a tasty treat without overspending!
Historical Background and Cultural Significance
The origin of pork in culinary culture dates back to ancient times when it was one of the first domesticated animals. Across various cultures, pork has played a vital role in different recipes, reflecting the adaptability and versatility of this meat. In the southern United States, for example, pork dishes often bring a combination of flavors and cooking techniques that highlight regional uniqueness.
Culturally, pork holds symbolic meanings in certain traditions, often associated with good fortune and prosperity. The way pork is prepared and served can vary widely across regions, yielding a rich tapestry of flavors and techniques that influence modern recipes today. The rise of air frying as a cooking method revolutionizes how we enjoy traditional pork dishes, making them healthier and more convenient.
The evolution of crispy pork recipes can be seen in the growing popularity of air fryers in contemporary kitchens. These machines allow cooks to achieve a deep-fried texture without the need for excess oil, appealing to health-conscious individuals while satisfying cravings for crispy bites. This transformation has given rise to a new generation of pork recipes that are equally delicious and healthier.
Regional variations of pork chop recipes exist, often influenced by local ingredients and spices used in traditional cooking. This dish embodies that spirit, enabling everyone to tailor their pork chop bites to fit their taste preferences by incorporating local flavors, creating a delightful fusion that resonates with both heritage and modern culinary practices.
Ingredient Deep Dive
The primary ingredient in this recipe is pork chop, a cut revered for its rich flavor and tenderness. Pork has been a staple in many diets around the world due to its versatility—whether it’s roasted, grilled, or cooked in stews, it adapts well to various culinary styles. Nutritionally, pork is a good source of protein, vitamin B12, and iron. When selecting pork chops, look for cuts with a pink hue and firm texture, avoiding any signs of discoloration or excessive marbling.
To ensure freshness, store pork chops in the refrigerator for up to 3-5 days before cooking. If you won’t use them within that timeframe, freezing is a viable option that can maintain their quality. If substituting, consider skinless chicken breast or turkey slices, which mirror the traditional flavor profile while still delivering tenderness.
Next up, let’s talk about breadcrumbs, which are essential for creating that perfect crispy exterior. Breadcrumbs, made from crusty bread, provide texture and crunch, elevating the overall mouthfeel of the dish. They can be plain or seasoned, adding layers of flavor to each bite. When opting for gluten-free options, look for gluten-free breadcrumbs to accommodate dietary needs.
Lastly, spices like garlic powder and paprika are crucial for enhancing the flavor profile of the pork chop bites. Garlic powder provides a savory aroma and richness, while paprika contributes overall depth and warmth. When selecting spices, opt for fresh and high-quality options, as they greatly impact the finished dish’s flavor. Store spices in a cool, dark place to prolong their potency, and don’t hesitate to adjust the quantities to fit your personal taste preferences.
Common Mistakes to Avoid
Overcooking the pork chop bites which results in a dry texture. Use a meat thermometer to ensure an internal temperature of 145°F (63°C).
Using stale breadcrumbs can lead to a soggy coating. Ensure your breadcrumbs are fresh and crispy for the best texture.
Not seasoning adequately; a sprinkle of salt and pepper goes a long way in enhancing flavors.
Skipping the preheating step of the air fryer can lead to uneven cooking. Always preheat your air fryer for optimal results.
Overcrowding the air fryer basket will prevent proper air circulation, leading to less crispy bites. Cook in batches if necessary.
Inconsistent chopping sizes can affect cooking time. Cut pork into uniform pieces for even cooking.
Neglecting to let the pork rest after cooking can drain moisture. Allow the bites to rest for a few minutes before serving.
Using too much oil can lead to greasier bites. A light misting is sufficient for achieving that crispy finish.
Ignoring the choice of dipping sauce can dull the flavors. Pair with a complementary sauce for an enhanced taste experience.
Forgetting to check on the bites midway through cooking can lead to burnt edges. Monitor them to ensure they cook perfectly.
Essential Techniques
Prepping the pork to ensure even cooking is essential. Use a sharp knife to cut the pork chop into uniform bite-sized pieces, ensuring that they will cook evenly. It’s important to also pat the pork dry with paper towels before seasoning and breading to help the coating adhere better. This technique not only enhances flavor but also improves texture.
Mastering the air frying technique is vital. An air fryer circulates hot air, creating a crispy exterior similar to deep-frying but with far less oil. Familiarize yourself with the different settings and cooking times unique to your air fryer model for optimal results. Pay attention to visual cues—golden-brown color and a crispy coating indicate that your pork bite is ready to perfection.
Pro Tips for Perfect Crispy Air Fryer Pork Chop Bites
1. Ensure your air fryer is preheated before adding the pork bites to ensure they cook evenly from the start.
2. Experiment with breadcrumbs, trying different types such as Panko for an extra crunch.
3. Season the flour mixture in addition to the breadcrumbs for a more flavorful bite.
4. Lightly spray your pork bites with cooking oil before air frying for enhanced crispiness.
5. Allow for enough space around the pork bites in the air fryer basket to avoid steaming.
6. Use a meat thermometer to check the internal temperature for perfect doneness.
7. Pair the bites with a dipping sauce like honey mustard or spicy mayo for a delicious flavor contrast.
8. If you have leftovers, place them in a hot air fryer for a few minutes to revive their crispy texture.
Variations and Adaptations
Regional variations can introduce exciting new elements to your Crispy Air Fryer Pork Chop Bites. You might consider incorporating a Southern-inspired seasoning blend that includes cayenne or a Midwestern style with a hint of sage. Each addition will give a unique twist to the traditional recipe, showcasing local flavors and preferences.
Seasonal adaptations may call for fresh herbs during spring or summer, such as rosemary or thyme, which can be infused into the coating or served as a garnish. In the fall, adding a touch of pumpkin spice to your breadcrumb mixture could create a warm, inviting flavor that ties into seasonal gastronomic trends.
If dietary modifications are necessary, consider using alternative proteins like chicken or turkey for a lighter version. You could also go meatless with tofu or tempeh bites that can be seasoned and air-fried similarly, catering to vegetarian diets while still satisfying the craving for crispy bites.
For flavor variations, experiment with different spice blends. Perhaps a Mediterranean twist with oregano and lemon zest or an Asian-inspired approach using sesame seeds and five-spice powder could enhance the overall experience. Adjusting your spices is a fantastic way to keep this recipe fresh and exciting!
For texture modifications, you can switch from regular breadcrumbs to nut-based coatings for a more crunchy experience. Ground almonds or pistachios can provide an interesting nutty flavor while adding a delightful crunch to your bites.
Presentation alternatives include serving these pork chop bites on a vibrant platter adorned with fresh herbs or with colorful dipping sauces alongside. Presentation can elevate the dining experience and make the dish feel special and festive.
Serving and Presentation Guide
Plating techniques play a significant role in the presentation of your dish. Arrange the pork chop bites in a circular pattern on a large platter, creating an appealing visual effect. For added color and appeal, garnish with fresh parsley or cilantro around the border.
Garnishing ideas include serving with a sprinkle of finely chopped green onions for a fresh touch. Consider drizzling a sauce over the bites or serving a dipping sauce in a small bowl positioned in the center of the platter for easy access.
Traditional accompaniments, such as coleslaw or potato salad, can enhance the flavor profile while providing a balancing element to the meal. Modern serving suggestions could include a side of roasted vegetables or a light salad for a complete dinner experience.
Temperature considerations are essential when serving these bites. They are best served hot, straight from the air fryer, so aim to time your cooking to coincide with your meal serving. If necessary, keep them warm in a resting oven set at a low temperature.
When it comes to portion control tips, consider serving the pork chop bites in small bowls or baskets alongside a selection of sauces, encouraging guests to sample different flavors while maintaining mindful portions without overloading their plates.
Wine and Beverage Pairing
When it comes to wine pairings, a crisp white wine such as Sauvignon Blanc or a light-bodied red wine like Pinot Noir would complement the flavors of the pork chop bites beautifully. The acidity in white wine helps cut through the richness while providing refreshing counterpoints to the meat.
For non-alcoholic alternatives, sparkling water with a twist of lemon or a homemade iced tea with herbs can enhance the meal pairing without overpowering the flavor. These drinks have cleansing properties that refresh the palate between bites.
If interested in coffee pairings, consider sampling a lightly roasted brew that accentuates the dish’s savory notes. Be sure to serve the coffee at a warm temperature to maximize the flavor experience.
Storage and Shelf Life
The best storage methods for leftover Crispy Air Fryer Pork Chop Bites involve placing them in an airtight container to avoid moisture build-up. Store the bites in the refrigerator for up to 3 days for optimal freshness. For longer shelf life, consider freezing them in a single layer on a baking sheet before transferring them to a freezer-safe container or bag.
When it comes to temperature requirements, ensure the bites are cooled to room temperature before refrigerating a batch to preserve their texture. Use a container that allows for even distribution of the bites, preventing crushing during storage.
Signs of spoilage include an off smell or signs of discoloration. If the pork bites have been stored correctly, they should remain safe to eat within the suggested time frame. To reheat, place them back in the air fryer for about 5-7 minutes at 350°F (175°C) for the crispiest outcome.
If you decide to freeze your pork bites, they can last up to 2-3 months in the freezer. Be sure to label and date your containers for tracking. Avoid making multiple freeze-thaw cycles, as they can compromise quality. Reheating your frozen bites should also take place in the air fryer for best results.
Make Ahead Strategies
Prepare your pork chop bites up to 24 hours in advance by cooking, cooling, and then storing them. Simply reheat them in the air fryer right before serving for a quick and easy solution. For a step-by-step prep timeline, marinate your pork and bread the pieces while the air fryer preheats.
In addition to preparing the pork bites, consider storing dips and sauces in advance for quicker serving. Make any sauces a day ahead, ensuring they have nice flavor profiles when it comes time to enjoy your bites. This not only saves time but also enhances the flavors in your dips.
Quality impact analysis allows you to assess the difference in flavor between freshly cooked verses reheated bites. Leftovers may not have the same crispy texture but can still be incredibly delicious when reheated effectively. If you know you have a busy schedule, making the bites ahead of time will be to your advantage.
Use assembly tips by breading your pork but waiting to air fry until closer to mealtime. Store the prepped pork in the refrigerator until you’re ready to cook. By assembling ahead and cooking last minute, you preserve freshness.
Fresh element additions can include topping the pork bites with herbs right before serving to enhance the visual and flavor profile. This simple step can make all the difference in presentation and taste!
Scaling Instructions
For halving the recipe, simply reduce all ingredients proportionately, ensuring all seasonings and breadcrumbs maintain flavor integrity. You can save time and maintain quality while using smaller quantities of pork.
When doubling or tripling the recipe, work in batches to avoid overcrowding the air fryer. Adjust cooking time as needed, checking doneness with a meat thermometer to ensure each batch cooks evenly and reaches a safe internal temperature.
Equipment adjustments may involve using multiple trays or a larger air fryer model to accommodate the increased quantity of pork chop bites. Timing modifications should accompany any change in portion sizes, ensuring that none of the bites are left uncooked or overcooked.
Storage considerations include safely refrigerating or freezing extras. Duplicating a recipe can lead to freezing leftovers, so ensure you’re following proper guidelines. It’s essential to observe how leftovers reheat and the timings you need in the air fryer.
Nutritional Deep Dive
When analyzing the macro breakdown, consider the protein content of pork, which serves as an excellent building block for muscle repair and energy. Each bite delivers a satisfying amount of protein, typically around 20 grams in a typical serving size.
Micronutrient analysis showcases the importance of vitamin B12 and iron found in pork, essential for energy production and the formation of red blood cells. Inclusion of side dishes rich in vitamins will enhance nutritional value.
Health benefits advance when these pork bites are combined with colorful vegetables that supply additional fiber and antioxidants. Opting to serve the bites with a side salad contributes to a well-rounded meal.
Dietary considerations come into play regarding individuals who must monitor sodium intake. You can easily customize the recipe to suit sodium-restricted diets by adjusting the salt content or selecting low-sodium breadcrumbs.
Portion analysis entails noting that moderation is key; aim for balanced servings alongside wholesome sides to align with a healthy eating approach. Enjoy these savory bites while being mindful of portions!
Dietary Adaptations
For gluten-free variations, select gluten-free breadcrumbs or crushed gluten-free crackers to maintain the dish’s crunchy exterior. Using almond or coconut flour can also yield delightful results without gluten.
If looking for a dairy-free option, ensure none of the breadcrumbs contain dairy. This adaptation allows everyone to savor the dish without the concerns of lactose or dairy allergies.
Trying a vegan alternative can turn these Pork Chop Bites into a unique tofu or tempeh dish. Marinate and coat these plant-based proteins in similar spices and place them in the air fryer for a crispy finish.
Low-carb options may include using crushed pork rinds in place of traditional breadcrumbs. This adjustment lends itself to the keto lifestyle while keeping the dish flavorful and satisfying.
The paleo diet can be accommodated by using almond or coconut flour as a breading choice, omitting grains entirely while maintaining texture and flavor. Access to ingredients also enhances the overall nutritional profile.
For a low-FODMAP approach, ensure seasoning blends don’t include garlic or onion powder. There are various substitutions to introduce flavor without compromising dietary needs.
Troubleshooting Guide
If you experience texture issues with your pork bites, ensure you’re not overcooking them, as this can lead to dryness. Keep a close watch during cooking to achieve that crispy yet tender texture.
Flavor balance problems may crop up due to insufficient seasoning. Adjust spices during prep to ensure that pork is well-seasoned before cooking, following the advice within this recipe.
Temperature problems can arise if the air fryer is not preheated adequately. Ensure your air fryer has fully reached the desired temperature before adding your pork bites for the best results.
Equipment challenges come from overcrowding the air fryer basket. Cooking in smaller batches will ensure that hot air circulates properly, resulting in consistent cooking.
Ingredient substitutions may lead to unforeseen outcomes. Search for ingredient alternatives that don’t compromise flavor, ensuring you’re using effective swaps that work well with air frying.
Timing concerns usually stem from unfamiliarity with your air fryer model. Always refer to the manufacturer’s recommendations when attempting new recipes, especially regarding cooking times and temperatures.
Recipe Success Stories
Community feedback often highlights the delightful flavor combinations that this recipe offers. Many readers rave about how quickly these bites become a family favorite, encouraging them to make repeat appearances at mealtime.
Variation successes have led readers to experiment with different spice blends and dipping sauces, emphasizing the adaptability of this recipe. People have loved customizing their bites to suit their individual palettes, often sharing their favorite adaptations.
Adaptation stories showcase not just recipe modifications but also cooking experiences, where parents involve children in the cooking process. Involving family members in meal prep often creates lasting memories in the kitchen.
Reader suggestions often revolve around making the recipe even simpler, collaborating on ideas to improve efficiency and cooking techniques for the busy home cook. They’ve also shared tips on meal prepping, providing insight into how best to enjoy these bites throughout the week.
Frequently Asked Questions
Can I use chicken instead of pork? Absolutely! Chicken breasts or thighs can be substituted using similar methods and flavors. Just adjust cooking times as needed based on the thickness of the pieces.
What dipping sauces work best? Sauces like honey mustard, ranch, or spicy mayo enhance the flavor of the pork bites. Feel free to get creative and mix your favorite condiments!
Can I freeze the cooked pork bites? Yes, you can freeze the bites! Ensure they are cooled completely before placing them in an airtight container for up to 2-3 months.
How do I reheat leftovers? For the best texture, reheat in the air fryer at 350°F (175°C) for about 5-7 minutes until warmed through and crispy again.
What type of air fryer is best for this recipe? Any standard air fryer will work well for this recipe. Adjustable temperature settings and adequate basket size contribute to the best results.
Can I make these bites ahead of time? Yes! Prepare and bread the pork bites in advance. Store them in the refrigerator and air fry just before serving.
What are good side dishes to serve with pork bite? Pair these bites with a fresh green salad, roasted vegetables, or some classic coleslaw for a full meal experience.
Are these bites gluten-free? You can make them gluten-free by using gluten-free breadcrumbs or almond flour as a coating instead.
Is it better to marinate the pork before cooking? Marinating can enhance flavor but is not mandatory. Seasoning the pork just before coating works well too.
Can I use a different protein for this recipe? Yes, other proteins like tofu or even seitan can be used, making them versatile for various dietary needs.
Additional Resources
If you enjoyed making Crispy Air Fryer Pork Chop Bites, you may want to check out related recipes like air fryer chicken wings, shrimp tempura, and vegetable fritters. Exploring these dishes can elevate your cooking repertoire.
Technique guides focused on air frying will provide you with tips, best practices, and troubleshooting for a variety of recipes. Knowing how the air fryer functions can maximize your creativity in the kitchen and help you achieve crispy perfection every time.
Ingredient information resources can lead you deeper into understanding the varieties of meat, breadcrumbs, and spices that will enhance your cooking. Knowing your ingredients not only makes you a better cook but allows for informed choices to suit dietary preferences.
If you need more equipment recommendations, consider researching air fryers with higher capacity or additional functionality that can serve a broader range of dishes and cooking styles. It’s a worthwhile investment for any cooking enthusiast.
Lastly, seasonal variations can inspire new ideas for how to incorporate seasonal fruits or veggies into your meals, keeping your cooking style fresh and creative throughout the year!
Join the Conversation
Sharing your cooking experiences, including photos of your crispy pork bites, creates a vibrant community. Engaging with others on social media helps create a network of sharing tips and ideas, as well as receiving feedback on your culinary adventures.
If you’ve tried this recipe and loved it, consider leaving a review or comments so other home cooks can get inspired as well! Encouragement from fellow cooks often leads to fruitful exchanges and ideas.
Photography tips are essential when showcasing your dishes online. Use natural light and experiment with angles to capture the beauty of your crispy pork bites. Sharing eye-catching images can draw others into discovering this exciting recipe.
Finally, encourage community engagement by initiating discussions about variations. What have others done to enhance their pork bites? Sharing adaptations opens doors to new ideas and creative cooking techniques!
The Recipe
Crispy Air Fryer Pork Chop Bites
Serves: 4
Prep Time: 10 mins
Cook Time: 15 mins
Total Time: 25 mins
Kitchen Equipment Needed
Air Fryer
Cutting Board
Sharp Knife
Mixing Bowls
Drying Paper Towels
Ingredients
1 lb pork chops, cut into bite-sized pieces
1 cup breadcrumbs
1/2 cup flour
2 tsp garlic powder
1 tsp paprika
Salt and pepper to taste
1 egg, beaten
Cooking spray
Directions
Preheat the air fryer to 400°F (200°C).
In a mixing bowl, combine breadcrumbs, garlic powder, paprika, salt, and pepper.
Coat pork pieces in flour, then dip into the beaten egg, and finally roll in the breadcrumb mixture.
Arrange the coated pork bites in the air fryer basket in a single layer, ensuring they are not crowded.
Lightly spray the bites with cooking spray to promote crispiness.
Air fry for 12-15 minutes, turning halfway through, until the bites are golden brown and cooked through.
Remove from the air fryer, allow to rest for a few minutes, and serve with your choice of dipping sauce.
Recipe Notes
Feel free to adjust spices based on your preference.
Consider marinating the pork for extra flavor before breading.
These bites may also be made ahead of time and frozen for later enjoyment.
Blueberry Butter Swim Biscuits: Flaky, Sweet, and Irresistibly Easy to Make
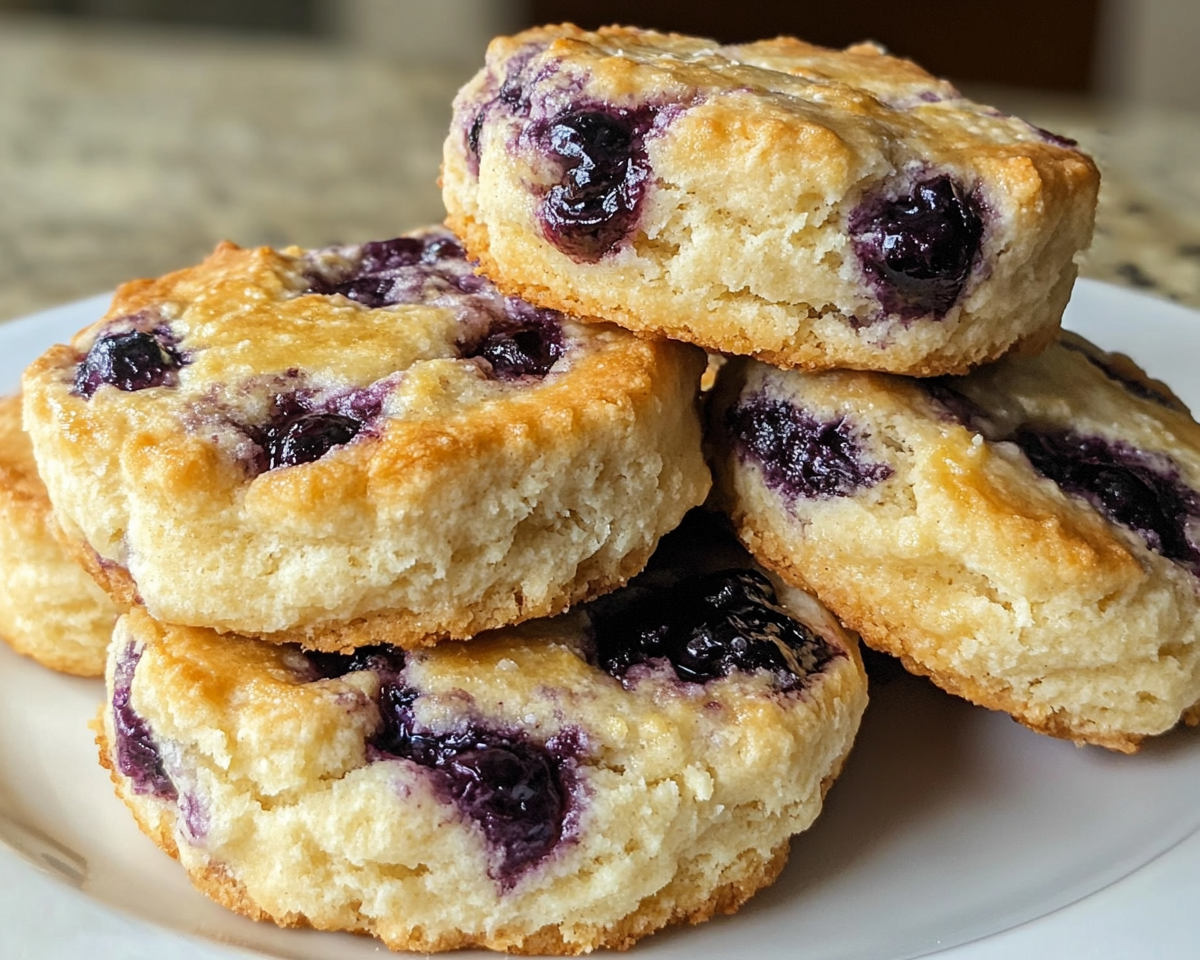
Blueberry Butter Swim Biscuits
Introduction
Blueberry Butter Swim Biscuits are a game-changer in the world of easy baking. These rich, flaky biscuits are made using a unique method that involves baking the dough directly in melted butter, giving them their signature moist and buttery texture. Adding juicy blueberries transforms these biscuits into a delightful combination of sweet and savory, perfect for breakfast, brunch, or a cozy snack.
Blueberry Butter Swim Biscuits are a simple yet indulgent recipe that combines the best of traditional Southern biscuits with the sweetness of fresh blueberries. With their unique baking method, these biscuits are a guaranteed hit for any occasion. Try them today and let their buttery, flaky texture brighten your table!
Incredible Christmas Pinwheel Cookies: A Festive and Fun Holiday Treat
Incredible Christmas Pinwheel Cookies
Introduction
Christmas Pinwheel Cookies are the quintessential holiday dessert that combines visual appeal with a rich, buttery taste. Their vibrant swirls of red and green symbolize the joy and festivity of the season. Whether for cookie swaps, party trays, or a holiday treat for the family, these cookies are both a delight to bake and share.
Christmas Pinwheel Cookies are a showstopper on any holiday table. Their vibrant colors, delightful flavors, and versatility make them a must-bake for the festive season. Get creative with flavors and designs, and enjoy sharing these sweet treats with friends and family!
Delicious Fried Cornbread Fritters Recipe for a Perfect Snack
Fried Cornbread Fritters Recipe: A Southern Delight
⚖️
Difficulty
Easy
⏲️
Prep Time
15 mins
🕒
Cook Time
20 mins
⏱️
Total Time
35 mins
🍽️
Servings
4 servings
If you’re craving a delicious and comforting treat, look no further than this Fried Cornbread Fritters recipe. These golden-brown fritters are crispy on the outside and soft on the inside, offering a perfect balance of flavors. Made from simple pantry ingredients, they provide a taste of Southern cooking that’s both nostalgic and satisfying. Ideal as a snack, side dish, or even a light meal, these fritters are sure to bring a smile to your face.
The aroma of frying cornmeal combined with spices fills your kitchen, tempting anyone nearby with its warm, inviting scent. Each bite reveals a delightful crunch, followed by the tender chew of cornbread that melts in your mouth. Served fresh and hot, these fritters complement everything from spicy chili to a refreshing salad. You’ll find that they can easily steal the show at any gathering or cozy family dinner!
Quick Recipe Highlights
Flavor Profile: Expect a rich, buttery flavor with a subtle sweetness complimented by a hint of jalapeño heat.
Texture: These fritters provide a delightful crispy exterior that gives way to a moist, fluffy interior.
Aroma: The sweet, nutty scent of cornmeal intertwined with spices creates an irresistible kitchen fragrance.
Visual Appeal: Golden-brown fritters are visually stunning, often garnished with fresh herbs or served alongside colorful dips.
Skill Level Needed: Perfect for beginners, but even seasoned chefs will enjoy making this easy dish.
Special Equipment: No extensive equipment needed—just a frying pan or deep fryer for perfect results.
Recipe Overview
Difficulty Level: This Fried Cornbread Fritters recipe is considered easy, making it approachable for cooks of all skill levels.
Category: This recipe fits perfectly into snack foods, appetizers, or side dishes, bringing versatility to your meal plans.
Cuisine: Fritters have deep roots in Southern American cuisine, drawing on traditions that celebrate corn as a staple ingredient.
Cost: Ingredients are budget-friendly, typically costing under $10 to make a batch.
Season: Ideal for all seasons, but especially winter gatherings where comfort food is a must.
Occasion: Perfect for family parties, casual get-togethers, or cozy weeknight dinners with friends.
Why You’ll Love This Recipe
First and foremost, the taste and texture of these fried cornbread fritters are simply irresistible. The buttery flavor paired with just the right amount of sweetness creates a mouthwatering treat that satisfies every craving. The contrast of crispy outside and fluffy inside keeps you coming back for more, making them an instant favorite for both kids and adults. Enjoy them plain, or dip them in your favorite sauce for added fun!
Convenience is another reason to love this fried cornbread fritters recipe. With a quick prep time of only 15 minutes and a cook time of 20 minutes, you can have a delicious snack or side dish ready to serve in under an hour. Minimal cooking experience is needed, so even novice cooks can tackle this recipe with success, making it a great option for busy weeknights.
Let’s not forget about the nutritional advantages. Cornmeal is enriched with fiber, vitamins, and minerals, making these fritters a more wholesome choice than some fried alternatives. Paired with tasty veggies or served with a fresh salad, they can contribute to a balanced meal without compromising flavor.
Entertaining made easy! These fritters are an excellent addition to any gathering. Their bite-sized nature encourages sharing and socializing around the table. Serve them at parties, and watch as guests rave about them while enjoying the hearty flavor they bring. They also pair splendidly with various dips and sauces, allowing for customization to suit everyone’s taste.
Finally, the affordability of this recipe ensures that you can enjoy a taste of home without breaking the bank. With simple ingredients that you can find at any grocery store, creating these delightful fritters is not just delicious—it’s easy on the wallet, too!
Historical Background and Cultural Significance
The origins of cornbread date back to Indigenous people in North America, who cultivated corn long before the arrival of Europeans. Cornmeal became a staple ingredient for many Southern households, leading to the creation of numerous dishes, including fritters. Over generations, the recipe for fried cornbread fritters evolved, integrating regional flavors and ingredients that highlight the diversity of Southern cooking.
Culturally, cornbread holds a special place in Southern tables, often associated with family gatherings, church events, and celebratory feasts. The act of cooking and sharing these dishes reinforces community bonds, inviting friends and family to gather around for hearty meals and stories from the past.
The evolution of the fritters themselves showcases regional variations, such as the addition of peppers, cheese, or spices reflecting local tastes. Each family often has its unique take on fried cornbread fritters, showcasing personal and cultural narratives that enrich the dish’s history.
Regional variations of corn fritters can be found across the South, from Louisiana-style with a kick of Cajun spices to sweet versions found in desserts. Each recipe tells a story—of the land, the people, and the evolving culinary arts that continue to bring together communities around delicious food.
Ingredient Deep Dive
Cornmeal: As the primary ingredient in these fritters, cornmeal is not only versatile but also rich in fiber and essential nutrients. When selecting cornmeal, look for stone-ground varieties for the best flavor and texture. Store it in an airtight container in a cool, dry place to maintain freshness, and consider using it in other dishes like cornbread or polenta.
Corn kernels: Fresh, frozen, or canned corn can be used in fritters to add flavor and texture. When using fresh corn, select ears that are plump and brightly colored. Corn is low in calories, rich in vitamins A and B, and provides a satisfying sweetness that enhances the overall taste of the fritters. If you find yourself with a surplus, cooked corn can be stored in an airtight container and frozen for up to six months.
Common Mistakes to Avoid
Overmixing the batter can result in dense fritters instead of light and fluffy ones—mix until just combined for the best results.
Heating the oil to the wrong temperature may lead to soggy fritters. Ensure the oil is hot enough before adding the batter and adjust heat as needed.
Not letting the fritters drain on paper towels can make them greasy—it’s essential to remove excess oil for better texture.
Frying too many fritters at once can drop the oil temperature, leading to unevenly cooked fritters. Fry in small batches to maintain a consistent temperature.
Using stale ingredients, especially cornmeal, can negatively affect the flavor. Always check for freshness before cooking.
Not seasoning the batter can lead to bland fritters. Adding salt and spices enhances the overall flavor profile.
Skipping the resting time for the batter can result in less fluffy fritters. Allow the mixture to sit for a bit before frying.
Forgetting to prepare the cooking area can result in a messy kitchen. Lay out all utensils and ingredients beforehand to streamline the process.
Using low-quality oil can impart undesirable flavors to the fritters. Select oils with high smoke points for frying, such as vegetable or canola oil.
Not storing leftovers properly can lead to spoilage. Always refrigerate uneaten fritters and follow reheating instructions to maintain flavor and texture.
Essential Techniques
Frying: This technique is crucial for crispy fritters. Ensure oil is heated to around 350°F (175°C) for optimal frying results. To master this, use a thermometer and test with one fritter before adding more to the pan. Watch for a golden-brown color as a cue for doneness.
Mixing batter: Proper mixing ensures the right consistency. Mix until the wet and dry ingredients just come together to prevent overworking the batter, which can lead to tough fritters. The batter should be somewhat chunky—avoid a smooth consistency for ideal results.
Pro Tips for Perfect Fried Cornbread Fritters
1. Use freshly ground cornmeal for enhanced flavor and texture. The fresher the cornmeal, the richer the taste in your fritters.
2. Experiment with spices—add cayenne or smoked paprika for an extra kick if you’re adventurous!
3. Try fresh herbs like chives or parsley to elevate the flavor further. Mix them into the batter for a fresh taste.
4. Pair fritters with a zesty dipping sauce, such as a lime crema or spicy remoulade, to balance flavors beautifully.
5. Adjust the frying time based on the size of your fritters; smaller ones cook quicker, so monitor them to avoid burning.
6. If you have leftovers, reheat them in the oven for crispiness rather than the microwave, which can make them soggy.
7. Keep the fritters warm in an oven set to low heat while you finish frying the remaining batches.
8. For added sweetness, consider adding a touch of honey or a sprinkle of sugar to the batter for dessert-like fritters.
Variations and Adaptations
One popular variation includes adding cheese, such as cheddar or pepper jack, to the batter for a creamy, savory twist. Alternatively, you can make them sweeter by including corn kernels and a dash of sugar, turning the fritters into a delightful dessert option. Additionally, experimenting with different spices can offer unique tastes, such as cumin for a more earthy flavor.
Seasonal adaptations are also possible; in summer, try incorporating fresh herbs or zucchini to add freshness to the dish. For a heartier winter option, mix in cooked bacon bits or sausage for a comforting twist. Adapting the fritters to fit dietary needs, such as gluten-free options using corn flour, is another way to enjoy this recipe without compromising flavor.
Texture modifications can be done to make them lighter or denser—baking instead of frying or using mashed potatoes in the mixture for a unique twist. Lastly, for presentation, consider forming them into dipper shapes and serving with colorful, vibrant dips for an enticing appetizer spread.
Serving and Presentation Guide
Plating techniques can make a significant difference in presentation. Arrange fritters in a circle on a platter, drizzling a complementing sauce in the center, or stack them high for a fun visual effect. Garnishing with fresh herbs or a sprinkle of cheese will elevate your dish to restaurant-worthy status.
Traditional accompaniments to serve alongside these fritters include leafy greens or a simple coleslaw, which adds a fresh crunch. Modern serving suggestions may include side dishes, such as roasted veggies or a bed of grains like quinoa for balanced plating. Pay attention to temperature; fritters are best served hot, so keep them warm in the oven until ready to serve.
Wine and Beverage Pairing
For wine pairings, consider a light Chardonnay or Pinot Grigio, which complements the flavors without overwhelming them. If you’re a red wine enthusiast, a light-bodied Pinot Noir can work wonderfully as well. For non-alcoholic alternatives, try a refreshing iced tea or sparkling lemonade to cut through the richness of the fritters.
Storage and Shelf Life
To store leftover fritters, place them in an airtight container in the refrigerator, where they should last for up to three days. For longer storage, freeze fritters by placing them on a baking sheet until solid, then transfer to a freezer bag. Signs of spoilage include an off smell or discoloration; always check before consuming.
Reheating is simple—microwave for a quick option, but for best texture, bake in the oven at 350°F (175°C) for about 10-15 minutes until heated through. You can also re-fry them briefly in a skillet for that crispy freshness.
Make Ahead Strategies
To save time, prepare your fritter batter a few hours in advance, allowing the flavors to meld. This will reduce the prep time when you’re ready to cook. Store the batter in the fridge, covered, until you’re ready to fry. Ensure to stir the batter before proceeding with cooking.
If needed, you can fry the fritters and then cool them on a wire rack before storing them in the fridge. Reheating them is easy, but ensure to avoid any sogginess by following proper reheating guidelines. For extra freshness, consider adding chopped herbs or grated cheese when ready to serve.
Scaling Instructions
Halving the recipe is easily achievable by reducing each ingredient accordingly, maintaining the ratios. If doubling or tripling, ensure your frying pan or deep fryer can accommodate the increased quantity without overcrowding, which could result in uneven cooking.
Make adjustments to cooking times as needed, as larger batches may take slightly longer to cook through. Store leftovers in airtight containers to maintain quality, and implement safety guidelines for storage and reheating for best results.
Nutritional Deep Dive
These fried cornbread fritters provide a delightful balance of macronutrients, featuring carbohydrates from cornmeal and proteins mainly from any added components. A typical serving contains moderate calories, making them suitable as a snack or side without excessive indulgence.
Micronutrient-wise, the fritters provide vitamins B and C, essential for maintaining energy levels and supporting the immune system. Adding vegetables or herbs can increase the nutritional content significantly, offering more fiber and essential nutrients, making them even more beneficial.
Dietary Adaptations
For a gluten-free version, simply substitute cornmeal with gluten-free corn flour. To cater to dairy-free diets, use almond milk or other non-dairy milk instead of regular milk in the batter. Vegans can also enjoy these fritters by ensuring the additional ingredients are plant-based.
For low-carb diets, consider reducing the cornmeal and incorporating almond flour instead, allowing for a low-carb option while still enjoying the flavors of the fritters. Adapting to various dietary needs can ensure everyone has a chance to enjoy this scrumptious recipe!
Troubleshooting Guide
If your fritters end up too dense, it may be due to overmixing the batter or using too much cornmeal. To rectify, consider adjusting your ingredients in future batches. If they come out oily, ensure your oil is hot enough before frying, and don’t overcrowd the pan.
Flavors falling flat can often be fixed by adding more seasoning or a splash of acid—lemon juice can brighten up the taste significantly. Watch for temperature issues while cooking; use a thermometer to maintain proper frying temperatures for best results.
Recipe Success Stories
Many cooks have shared their excitement after trying this fried cornbread fritters recipe, praising its simplicity and deliciousness. Community feedback often highlights how versatile these fritters are, with variations enjoyed by all who try them. Adaptation stories abound, with readers experimenting with different spices, cheeses, and serving styles.
Photography tips often encourage capturing the golden-brown fritters while serving on vibrant plates, surrounded by fresh garnishes. The visual appeal of the dish plays a crucial role in showcasing its deliciousness to friends and family, inviting them to join in on the culinary joy!
Frequently Asked Questions
Can I use white cornmeal instead of yellow? Yes, both types of cornmeal work well. The choice often comes down to personal preference in flavor and color.
What can I dip these fritters in? Fritters pair deliciously with a variety of dips such as sour cream, salsa, or avocado dip.
Can I bake these instead of frying? While frying gives them a distinct crispiness, you can bake them at a high temperature for a healthier option.
Is there a way to make these fritters spicier? Absolutely! Adding diced jalapeños or a pinch of cayenne pepper will amp up the heat significantly.
How should I store leftover fritters? Refrigerate them in an airtight container and enjoy them within three days for the best quality.
Are these fritters suitable for freezing? Yes, you can freeze cooled fritters in a single layer before transferring them to a freezer bag for longer storage.
What side dishes go well with fritters? They pair excellently with salads, soups, or a robust chili—making a great combo for meal planning.
Can I add different vegetables to the fritters? Certainly! Chopped bell peppers, green onions, or spinach could be fantastic additions for flavor and nutrition.
Are fried cornbread fritters gluten-free? Regular cornmeal is gluten-free, but always check the package to ensure no gluten-containing grains were included.
How long do I need to let the batter rest? Allowing it to rest for about 15 minutes can enhance texture and flavor, providing better results.
Additional Resources
For more treat options, consider exploring our extensive related recipes on the blog. Also, check out our technique guides for perfect frying and storage methods to elevate your culinary skills. Explore ingredient information to enhance your dish further, and find equipment recommendations for kitchen essentials necessary for making these fried cornbread fritters.
Join the Conversation
We invite you to share your experience with this fried cornbread fritters recipe! Engage with us over on social media by posting your successes and variations. Join our community of cooking enthusiasts as we explore shared recipes and ideas that inspire creativity in the kitchen. Your feedback and tips help to enrich our community, fostering a love for delicious and unique culinary creations!
The Recipe
Fried Cornbread Fritters
Serves: 4 servings
Prep Time: 15 mins
Cook Time: 20 mins
Total Time: 35 mins
Kitchen Equipment Needed
Large mixing bowl
Frying pan or deep fryer
Spatula or slotted spoon
Measuring cups and spoons
Cooking thermometer
Ingredients
1 cup cornmeal
1/2 cup all-purpose flour
1 tsp baking powder
1/2 tsp salt
1 cup milk
1 egg
1 cup corn kernels (fresh or frozen)
1-2 tbsp diced jalapeños (optional)
Vegetable oil (for frying)
Directions
In a large bowl, combine cornmeal, flour, baking powder, and salt.
In a separate bowl, whisk together milk and egg. Add to the dry ingredients and mix until just combined.
Fold in corn and jalapeños, if using.
Heat oil in a frying pan over medium heat until hot.
Drop spoonfuls of batter into the hot oil, frying in batches to avoid overcrowding.
Cook for 2-3 minutes each side, or until golden brown. Transfer to a paper towel-lined plate to drain excess oil.
Serve warm with your favorite dipping sauce.
Recipe Notes
For added richness, substitute milk with buttermilk.
Feel free to experiment with different cheeses or spices for varied flavors.
Store leftovers in an airtight container in the fridge for up to 3 days.