Delicious Brown Sugar Ham Glaze for Perfect Holiday Meals

Delicious Brown Sugar Ham Glaze: Elevate Your Holiday Ham

⚖️
Difficulty
Easy

⏲️
Prep Time
10 mins

🕒
Cook Time
15 mins

⏱️
Total Time
25 mins

🍽️
Servings
8 servings

Brown Sugar Ham Glaze is the epitome of comforting flavors that bring a touch of sweetness to your holiday gatherings or family dinners. The luscious combination of brown sugar, honey, and spices creates a glaze that not only caramelizes beautifully but also enhances the natural flavor of the ham. As you apply this glaze during the cooking process, the sweet aroma wafts through your kitchen, promising an unforgettable culinary experience.

This easy Brown Sugar Ham Glaze recipe is not just about flavor—it’s about creating memorable moments around the dining table. The perfect balance of sweetness with a hint of spice turns an ordinary ham into a centerpiece that delights the palate and warms the heart. With just a few simple ingredients and minimal prep time, you’ll have a glaze that can transform any occasion into a special celebration.

Quick Recipe Highlights

  • Flavor Profile: This Brown Sugar Ham Glaze offers a rich sweetness from the brown sugar and honey, paired with warm spices like cinnamon and clove that add depth and complexity.
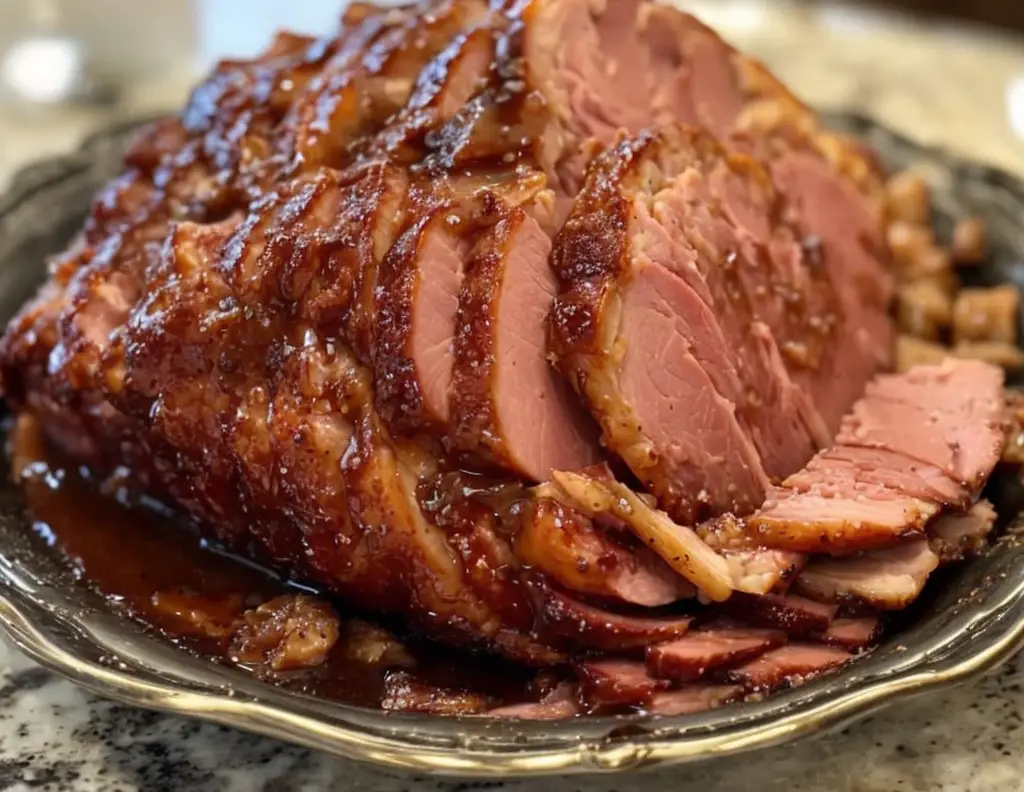
  • Texture: The glaze creates a sticky and caramelized coating that complements the juicy tenderness of the ham, enhancing its mouthfeel.
  • Aroma: Expect an inviting blend of sweet and spicy notes that envelops your kitchen, making it impossible to resist!
  • Visual Appeal: The deep golden hue of the glaze contrasts beautifully against the pink tones of the ham, making it visually stunning on any table.
  • Skill Level Needed: This recipe is perfect for beginners as it requires no advanced techniques, just a watchful eye to ensure perfect caramelization.
  • Special Equipment: A simple baking dish and a basting brush are all you need to make this glaze shine.

Recipe Overview

  • Difficulty Level: This Brown Sugar Ham Glaze is easy to prepare, making it a great choice for novice cooks looking to impress their guests without stress.
  • Category: Ideal for holiday meals, this glaze not only enhances ham but also works brilliantly for various meat dishes during festive gatherings.
  • Cuisine: Drawing from traditional American cooked meals, the flavors of this glaze are beloved and widely appreciated across different culinary backgrounds.
  • Cost: Economically, the ingredients are common pantry staples, making this a budget-friendly option for elevating your dish.
  • Season: This glaze is a classic favorite during the winter holiday season, perfect for Thanksgiving and Christmas feasts.
  • Occasion: Whether it’s a holiday gathering, family dinner, or special celebration, this glaze adds a touch of festivity to any meal.

Why You’ll Love This Recipe

You will adore the taste and texture of this Brown Sugar Ham Glaze, as it combines rich sweetness and a hint of spice to create a perfect balance that compliments the savory flavors of your ham. The tender, juicy ham absorbs the flavors of the glaze during cooking, resulting in each bite being a delightful explosion of taste. Furthermore, the caramelized surface it forms during baking provides an added crunch, enhancing the overall eating experience.

Convenience is key with this easy Brown Sugar Ham Glaze recipe. With minimal preparation time and simple ingredients, you can whip it up in just minutes. Simply combine the ingredients and baste your ham while it cooks, allowing the oven to do the hard work. This makes it an excellent choice for busy cooks who still want to impress their guests without spending all day in the kitchen.

Nutritionally, the glaze, while indulgent, enhances the enjoyment of a balanced meal. You can also lighten the glaze with fewer sugars or by adding some herbs, allowing you to adapt it to fit your dietary preferences while still adding flavor to your meal. It’s all about celebrating delicious textures and tastes without sacrificing health.

Social gatherings come alive with this glaze as your guests savor the rich, sweet, and spicy notes that fill the atmosphere. It creates an inviting setting, encouraging conversation and connection over a shared love of food. Whether you’re hosting a casual get-together or a formal dinner, this glaze is sure to garner compliments and requests for the recipe.

Lastly, from a cost perspective, this Brown Sugar Ham Glaze delivers impressive results without breaking the bank. The ingredients are affordable, widely available, and versatile, meaning you can use them for other recipes too. Plus, it’s a great way to enhance any leftover ham, making it a budget-friendly solution that stretches your food further.

Historical Background and Cultural Significance

The origins of the Brown Sugar Ham Glaze can be traced back to traditional cooking practices in the American South, where ham has long been a staple at family feasts and celebrations. The use of sweet glazes on meats, especially during holidays, was rooted in the desire to add flavor and enhance the richness of ham, often cured with salt and spice before cooking. Over time, the variations of glazes have expanded, with brown sugar becoming a beloved ingredient due to its depth of flavor.

Culturally, the brown sugar glaze is tied to holiday celebrations in American households, particularly during Thanksgiving and Christmas. It symbolizes warmth, hospitality, and gathering around the table to enjoy a meal with loved ones. The preparation and sharing of food, especially a dish as celebrated as glazed ham, evoke deep traditions and foster memories across generations.

The evolution of the Brown Sugar Ham Glaze reflects the broader trends in culinary practices where traditional recipes merge with modern tastes. Contemporary cooks often experiment with additional ingredients like mustard, fruit juices, or even spices to make the glaze resonate with their individual palates while honoring its traditional roots. This adaptability allows families to make the recipe their own, creating unique versions while preserving the essence of the original.

Regional variations of the glaze can be seen, particularly across the United States, where ingredients can shift based on local preferences and available resources. For example, in some Southern states, apple cider vinegar might be added for tang, while other regions might lean towards additional spices that reflect their culinary heritage. Through these adaptations, the Brown Sugar Ham Glaze continues to thrive in diverse kitchen settings.

Ingredient Deep Dive

Brown sugar is the star ingredient of the glaze, renowned for its ability to not only sweeten but also add a rich, caramel-like flavor and moist texture to dishes. Originating from sugarcane and sugar beet processing, brown sugar retains some of the plant’s molasses, which contributes to its unique taste. Rich in minerals like calcium, potassium, and iron, brown sugar can also provide some nutritional benefits as compared to white sugar, although it should still be consumed in moderation.

When selecting brown sugar for your glaze, consider using light brown sugar for a milder flavor or dark brown sugar for a richer, more intense sweetness. Proper storage is essential to keep it from hardening; always seal it in an airtight container. If you need a substitute, you can create a blend of granulated sugar and molasses to mimic the taste and texture of brown sugar quite effectively.

Honey is another key ingredient that adds distinct floral notes to the glaze. As a natural sweetener, honey has been used for centuries, not just for its taste but also for its potential health benefits. Rich in antioxidants, honey can support immune health while balancing the sweetness of the glaze. When looking for honey, consider using local varieties for the best flavor or opt for raw honey to retain beneficial properties.

Storage of honey is straightforward; keep it in a cool, dark place, and it will have an indefinite shelf life. In terms of substitutions, agave syrup or maple syrup can be used as alternatives, each bringing its own unique flavor profile that can complement the glaze beautifully.

Common Mistakes to Avoid

  • Not measuring ingredients accurately can lead to an unbalanced flavor. Always use precise measurements for the best results.
  • Overcooking the glaze can cause it to become too thick and caramelized, making it difficult to spread. Watch the cooking time closely.
  • Skipping the basting step can prevent the ham from absorbing the flavors of the glaze. Be sure to baste periodically for maximum flavor impact.
  • Using cold ham can lead to uneven cooking. Allow it to come to room temperature before applying the glaze.
  • Not stirring the glaze properly can cause ingredients to clump or burn. Make sure to stir consistently while heating.
  • Ignoring the type of ham used may yield unsatisfactory results. Opt for a quality ham with enough fat to absorb the glaze well.
  • Not allowing the glaze to set post-cooking can result in a less flavorful final dish. Let it sit to enhance the flavor.
  • Using low-quality brown sugar can lead to a lackluster taste. Choose a good quality sugar for the best glaze.
  • Neglecting to check your oven temperature can cause discrepancies in cooking time, leading to under or overcooking.
  • Overlooking garnishing options can leave your dish looking plain. Add fresh herbs or sliced fruits for a decorative touch.

Essential Techniques

To master the art of glazing, it is essential to understand the technique of basting. Basting is the process of spooning or brushing liquid over meat as it cooks, ensuring even coverage and allowing flavors to penetrate. To master this technique, start by using a basting brush or spoon at regular intervals, typically every 15-20 minutes for larger cuts of meat. Be wary of letting the ham become too dry; a good indication for success is a shiny, caramelized exterior.

Another technique integral to creating a great glaze is achieving the correct cooking temperature. High heat helps to caramelize sugars, providing both flavor and appealing color. Use a meat thermometer to ensure the ham reaches a safe internal temperature, around 140°F for precooked ham. Visual cues include a bubbly, bronzed surface that signals the sugars are doing their thing.

Pro Tips for Perfect Brown Sugar Ham Glaze

Be mindful of the type of ham you choose, whether it be smoked, fresh, or cured. Each carries its own flavors, which can enhance or alter the outcome of the glaze.

For added depth, consider adding spices such as nutmeg or ginger to the glaze mixture. This enriches the flavor profile and introduces an unexpected element that guests will love.

Don’t skimp on the time you spend letting the glaze set. After cooking, allowing the ham to sit for a few minutes before serving helps the glaze adhere better and enhances flavor.

Experiment with adding a splash of citrus juice, like orange or lemon, for a refreshing twist that cuts through the sweetness.

If the glaze appears thicker than desired, mix in a small amount of broth or water to reach your preferred consistency for easy application.

Consider garnishing with freshly chopped herbs such as rosemary or thyme for an aromatic and visually appealing touch that brightens the dish.

Lastly, when storing leftover glazed ham, ensure it’s kept in an airtight container. This maintains the quality and flavor, making sure you enjoy every bite again.

Variations and Adaptations

Regional variations of the Brown Sugar Ham Glaze can add unique twists. For example, some may use apple cider instead of water or broth, providing a fruity undertone that complements the savory ham beautifully.

Seasonal adaptations can also come into play. For instance, during summer, incorporating fresh herbs like basil or cilantro can provide a refreshing contrast, turning this glaze into a lighter version suited for barbecued ham.

Dietary modifications might require minimizing sugar or substituting with natural sweeteners like maple syrup or agave nectar, ensuring that the recipe remains accessible for various dietary needs while keeping it delicious.

For flavor variations, try adding extra spices like smoked paprika or chipotle powder, infusing an exciting smoky element that both surprises and pleases the palate.

Texture modifications can be achieved by leaving the glaze slightly chunky by using brown sugar as a base combined with chopped nuts, providing a delightful crunch alongside the smoothness of the ham.

Presentation alternatives, such as serving the glaze on the side for guests to ladle to their taste, can provide a unique dining experience and allow for customization on each plate.

Serving and Presentation Guide

When plating your glazed ham, presentation plays a crucial role. Place the ham on a large platter with ample space to accommodate garnishes and sides. Slicing the ham into thick, juicy portions allows guests to appreciate the golden glaze and its enticing appearance.

Consider garnishing your glazed ham with fresh bay leaves or sprigs of rosemary for a rustic presentation. This adds a touch of freshness and enhances the aroma as it is served. Additionally, a drizzle of extra glaze over the slices can create an inviting sheen that draws the eye.

Traditional accompaniments, such as roasted vegetables or a hearty potato dish, complement the richness of the glazed ham. Presenting these sides around the ham on the platter elevates the overall visual appeal.

Modern serving suggestions might include offering a fruit chutney or mustard on the side, allowing guests to mix and match flavors according to their preferences. Plating these elements together creates an appealing visual contrast against the ham.

Temperature considerations are also essential. Serve the ham warm, but not too hot, as this allows the flavors to shine without overwhelming the palate. Portion control can be managed by cutting slices before serving, ensuring guests can help themselves without waste.

Wine and Beverage Pairing

When selecting a wine to pair with your Brown Sugar Ham Glaze, opt for a light-bodied red such as Pinot Noir. Its fruit-forward qualities complement the sweetness of the glaze while maintaining sufficient acidity to balance the richness of the ham. Alternatively, a dry Riesling provides a refreshing contrast that enhances the flavors without overpowering them.

For non-alcoholic alternatives, a sparkling apple cider or herb-infused iced tea can offer a refreshing palate cleanser that works beautifully alongside the glazed ham. The natural sweetness of these beverages pairs wonderfully with the dish’s flavor profile.

Coffee enthusiasts can benefit from pairing a medium roast coffee post-meal. The subtle smoky notes found in many medium roasts can elegantly echo the flavors of the ham, enhancing the overall dining experience.

Temperature considerations are paramount when serving beverages. White wines should be chilled prior to serving, while red wines can be served slightly below room temperature. Sparkling beverages should remain ice cold for a refreshing experience.

Finally, alongside any beverage, presentation matters. Use elegant glassware and consider garnishing drinks with fresh herbs or citrus slices that complement the ham’s flavors, enhancing the dining atmosphere.

Storage and Shelf Life

To ensure the best flavor and quality, store any leftover Brown Sugar Ham Glaze in an airtight container in the refrigerator. It should last up to a week, retaining its delicious flavors. If you venture into freezing, be aware that the texture may slightly alter upon thawing, so consider using freezer-safe jars for airtight protection.

Signs of spoilage can include an off or sour smell, discoloration, or any mold formation. Discard any glaze that shows these signs to ensure food safety.

When it comes to reheating, gently warm the glaze on the stovetop over low heat or in the microwave in short intervals, stirring in between until it reaches the desired consistency for serving again. This method helps maintain the texture and flavor without compromising quality.

If your glaze becomes too thick during storage, simply whisk in a little water or broth while reheating to bring it back to the perfect flowing consistency.

Freezing is also an option if you have a large quantity. Portion out the glaze into smaller containers before freezing so you can thaw just what you need for future meals, maximizing taste and reducing waste.

Make Ahead Strategies

To streamline your cooking process, consider prepping your Brown Sugar Ham Glaze a day in advance. Gather and measure all ingredients into one container, allowing flavors to meld overnight in the refrigerator. This not only saves time but enhances the glaze’s taste when prepared in advance.

During the preparation stages, you can store your ham uncooked in the refrigerator for up to two days before baking, facilitating a stress-free cooking experience. Ensure it is well-covered to prevent odors from other foods from permeating.

Quality impact assessment is crucial; by making the glaze ahead of time, you won’t lose any flavor. However, ensure you reheat and use it within a week for the best results.

Assembly tips should include letting the sauce come to room temperature before applying it to the ham. If you heat up the glaze too much, it might not stick well, so take care to follow proper temperature guidelines.

If you plan to add fresh herbs or citrus as garnishes, do these just before serving to maintain their vibrant colors and aromas. These final touches will elevate your presentation and taste just in time for your guests.

Scaling Instructions

Halving this Brown Sugar Ham Glaze recipe is straightforward. Simply divide each ingredient by two, ensuring to balance flavors. Be sure to taste as you go, adjusting for personal preferences.

If you choose to double or triple the recipe for a larger gathering, consider batch preparing in a larger saucepan to maintain an even cooking process, stirring frequently for consistent results.

Equipment adjustments, such as using a larger baking dish, can accommodate your needs when scaling up, so ensure you have adequate space for the ham and the glaze to bake beautifully.

Timing modifications are important to consider—larger batches may require additional cooking time to allow flavors to develop fully and the glaze to caramelize.

Storage considerations should also change; when scaling up, think about how you’ll store excess glaze. Larger airtight containers can facilitate easy access for future meals, ensuring they stay fresh and flavorful.

Nutritional Deep Dive

When analyzing the macros of the Brown Sugar Ham Glaze, you’ll find a balance of carbohydrates primarily from the sugars. While good fats are minimal, the protein content comes from the ham itself, providing a comprehensive meal experience.

Looking into micronutrient analysis, brown sugar does offer trace amounts of minerals like calcium and iron. However, the overall glaze should be enjoyed as an accompaniment, as moderation is key given its sweetness.

In terms of health benefits, the glaze does encourage enjoying protein-rich meats while enhancing the taste, which could prompt the inclusion of more meals centered around lean meats.

Dietary considerations for this dish are essential. For those mindful of sugar intake, consider reducing brown sugar or substituting with healthier alternatives, aligning the recipe with more health-conscious choices.

Portion analysis indicates that, while delicious, the glaze should be used sparingly, especially on heavier meats, to ensure a well-rounded meal. This helps in managing overall caloric intake while still enjoying the flavors of the glaze.

As part of a weight management strategy, balancing this flavorful dish with fresh vegetables and whole grains can create a satisfying yet nutritious plate, keeping indulgence in check without sacrificing enjoyment.

Dietary Adaptations

For gluten-free adaptations of the Brown Sugar Ham Glaze, you can rest assured as this recipe is naturally gluten-free. However, ensure you verify that any store-bought ingredients, such as mustard, are also GF labeled.

Dairy-free concerns are also addressed, as this glaze contains no dairy products, making it suitable for those who avoid dairy for health or lifestyle reasons while still benefiting from flavors and textures.

Vegan adaptations would require a complete substitution of the main components; using a plant-based sweetener alongside a vegan-friendly ham alternative can yield a glaze that is both flavorful and satisfying.

For low-carb dieters, consider reducing the sugar and substituting with erythritol or monk fruit sweetener to minimize carbohydrate content while still achieving sweetness in the glaze.

Keto enthusiasts might find this recipe can easily pivot; simply adjust the sugar ratio to maintain ketosis while enjoying a sweet flavor profile.

Paleo-friendly adaptations would echo the use of natural sweeteners and whole ingredients, ensuring compliance with dietary guidelines while enjoying robust flavors.

For those on a low-FODMAP diet, pay attention to ingredient sources, ensuring you opt for low-FODMAP options where necessary to enjoy that sweet flavor profile without gastrointestinal distress.

Troubleshooting Guide

If you experience texture issues with your glaze, such as it being too runny or too thick, adjust by adding a pinch of cornstarch dissolved in water for thickening or a little liquid for thinning.

Flavor balance is a common concern; if your glaze is too sweet, adding a splash of vinegar or citrus juice can help cut through the sweetness. Adjusting the acidity can enhance the overall profile of flavors, providing depth.

Temperature problems can arise if the oven is not preheated; check your oven accuracy to ensure the glaze caramelizes properly and doesn’t burn.

Equipment challenges, such as improper cookware, can lead to uneven cooking. Use a heavy-bottomed pot to distribute heat evenly during the glaze preparation.

For ingredient substitutions, beware of altering ratios; different sweeteners may have varying sweetness levels, so always taste and adjust accordingly.

Timing concerns can lead to overcooked ham or burnt glaze; use a thermo probe inserted into the ham to ensure it cooks through without overdoing the outside.

Recipe Success Stories

Community feedback on the Brown Sugar Ham Glaze reveals stories from families who have made this dish their holiday staple, transforming traditional meals into something extraordinary.

Many readers have shared variations that include adding fruit preserves, which has enhanced the dish for their gatherings, proving that this glaze recipe is a canvas for creativity.

Several have highlighted the presentation of the glazed ham, with beautiful photos and descriptions detailing their holiday tables, successfully incorporating this recipe while also making it memorable.

Adaptive stories reflect how some have shifted this recipe to cater to dietary needs, ensuring friends can enjoy the glaze limited by health concerns without compromising on flavor and festive spirit.

Photography tips from the community highlight the use of natural light and simple garnishes like fresh herbs to elevate their dish presentation, enhancing the appeal of their culinary creations.

Frequently Asked Questions

What type of ham is best for this glaze?
Choosing a well-cured ham, like a bone-in smoked ham, typically allows for a balanced flavor profile when paired with the sweetness of the glaze. The smoky notes often enhance the overall taste, making it more complex.

Can I make the glaze ahead of time?
Absolutely! Preparing the glaze a day in advance can intensify the flavors. Store it in the refrigerator and reheat gently before using on the ham.

Is there a way to make this glaze less sweet?
If you find it too sweet, consider reducing the amount of brown sugar or adding a bit of apple cider vinegar to balance the sweetness with acidity.

How long can I store leftover glaze?
Leftover glaze can be stored in an airtight container in the refrigerator for up to a week. If you want to extend its life, you can freeze it for up to three months.

Does this glaze work with other meats?
Yes, this versatile glaze is excellent for other meats including chicken, turkey, or even roasted vegetables. The flavors adapt beautifully across various proteins.

Can I add more spices to the glaze?
Definitely! Feel free to experiment with spices like cinnamon, nutmeg, or smoked paprika to make the glaze reflect your taste preferences.

What can I substitute for honey?
If you don’t have honey, consider using maple syrup or agave nectar, both of which will retain the sweetness and add character to the glaze.

How do I prevent the glaze from burning?
Preheat your oven and baste the ham regularly to ensure the glaze caramelizes evenly without burning. Cover with foil if it browns too quickly.

Could this be adapted for a smaller gathering?
Yes! Halve the recipe easily by reducing the glaze ingredients or preparing a smaller ham to adapt to your gathering size.

What are some good side dishes to serve with glazed ham?
Popular choices include roasted vegetables, sweet potato casserole, or a light salad that complements the richness of the ham.

Additional Resources

For those looking to expand their cooking repertoire or further explore Southern cuisine, consider exploring related recipes that highlight flavorful glazes or slow-cooked meats. Resources on mastering roasting techniques can enhance skills further, ensuring beautiful dishes each time.

Ingredient information regarding the types of sugars and sweeteners can help optimize your recipes, while equipment recommendations can guide you in selecting the best tools for efficient cooking.

Seasonal variations can lead to exciting twists on your traditional dishes, allowing cooks to bring new life to old favorites.

Join the Conversation

We encourage readers to share their experiences with the Brown Sugar Ham Glaze on social media, showcasing their unique adaptations and the joy this recipe brought to their tables. Engaging with our community not only fosters connection but allows space for sharing photography tips and presenting stunning dishes.

Feedback on how this glaze turned out in your kitchen is invaluable; sharing successful stories and clever variations will inspire others and enhance the communal spirit of cooking.

Your reviews can help create a collection of success stories that resonate with home cooks, driving home how this glaze can be a delightful addition to any table.

The Recipe

Brown Sugar Ham Glaze

Serves: 8 servings

Prep Time: 10 mins

Cook Time: 15 mins

Total Time: 25 mins

Kitchen Equipment Needed

  • Baking dish
  • Basting brush
  • Mixing bowl
  • Measuring cups and spoons

Ingredients

  • 1 cup brown sugar
  • 1/2 cup honey
  • 2 tbsp Dijon mustard
  • 1 tsp ground cinnamon
  • 1/4 tsp ground cloves
  • 1/4 cup apple cider vinegar

Directions

  1. Preheat your oven according to the ham instructions.
  2. In a mixing bowl, combine brown sugar, honey, Dijon mustard, cinnamon, cloves, and vinegar. Mix until smooth.
  3. Baste the ham generously with the glaze before placing it in the oven.
  4. Continue to baste the ham every 15 minutes until cooked through and caramelized.
  5. Once the ham reaches the desired internal temperature, remove it from the oven and let it rest before slicing.
  6. Serve warm and enjoy!

Recipe Notes

  • This glaze can be made ahead of time and stored in the refrigerator for up to a week.
  • For added flavor, consider mixing in additional spices or citrus juice to your preference.
  • Feel free to adjust the sweetness by modifying the amount of brown sugar used.

Classic Sausage Stuffing Recipe: A Savory Holiday Side Dish

holiday stuffing recipe, sausage bread stuffing, Thanksgiving side dish, savory stuffing recipe, traditional stuffing with sausage, herb sausage stuffing

Sausage Stuffing: A Flavorful Holiday Classic

Introduction

Sausage stuffing is the epitome of comfort food during the holidays. Combining savory sausage, aromatic herbs, and hearty bread cubes, this dish is a staple on Thanksgiving and Christmas tables. It’s versatile, easy to make, and packed with flavor, making it a favorite side dish for gatherings.

For more holiday recipe ideas, explore Perfect Homemade Stuffing Balls and Momma’s Creamy Baked Macaroni and Cheese, both crowd-pleasers for festive occasions.


Ingredients and Tools

Ingredients:

  • Main Ingredients:
    • Bread cubes (stale or oven-toasted), ground sausage, onions, celery, chicken broth.
  • Herbs and Spices:
    • Sage, thyme, rosemary, parsley, salt, and pepper.
  • Optional Additions:
    • Dried cranberries, pecans, or mushrooms for added flavor and texture.

Tools Needed:

  • Large mixing bowls, skillet for browning sausage, and a baking dish.
  • Cutting board and knife for chopping vegetables.

Step-by-Step Recipe

  1. Prepare the Bread:
    • Dice bread into cubes and toast in the oven for a sturdy base.
  2. Cook the Sausage and Vegetables:
    • Brown sausage in a skillet. Sauté onions and celery in the rendered fat for added flavor.
  3. Combine Ingredients:
    • Mix bread, cooked sausage, vegetables, and herbs in a large bowl. Moisten with broth until just damp.
  4. Bake the Stuffing:
    • Transfer to a baking dish and bake at 350°F (175°C) until golden and crispy on top.

Creative Variations

  • Gluten-Free Stuffing: Use gluten-free bread for a celiac-friendly version.
  • Vegetarian Sausage Stuffing: Substitute with plant-based sausage.
  • Sweet and Savory Twist: Add dried cranberries or diced apples for a hint of sweetness.

Tips for Perfect Stuffing

  • Use day-old bread to prevent a soggy texture.
  • For a deeper flavor, deglaze the skillet with a splash of white wine after cooking the sausage.
  • Cover the dish with foil during baking to maintain moisture, removing it for the last 15 minutes for a crisp top.

Serving Suggestions


Storage and Leftovers

  • Storage: Store in an airtight container in the refrigerator for up to 3 days.
  • Reheating: Warm in the oven with a splash of broth to restore moisture.
  • Creative Uses for Leftovers:
    • Use as a filling for stuffed mushrooms or bell peppers.
    • Incorporate into a breakfast casserole with eggs and cheese.

FAQs

  1. Can I make sausage stuffing ahead of time?
    Yes, assemble it in advance and bake just before serving.
  2. What’s the best bread for stuffing?
    Use crusty bread like sourdough, French bread, or country loaf for structure and flavor.
  3. Can I use chicken sausage instead of pork?
    Absolutely, chicken sausage works well for a lighter version.
  4. How do I prevent stuffing from becoming too dry?
    Add enough broth to moisten the bread without making it mushy.
  5. Is it safe to cook stuffing inside the turkey?
    It’s best to bake stuffing separately to ensure even cooking and food safety.

Internal Linking Opportunities


Conclusion

Sausage stuffing is a classic holiday dish that combines rich flavors, hearty textures, and the aroma of fresh herbs. Whether you’re hosting a large gathering or enjoying an intimate meal, this recipe will be a crowd-pleaser. Experiment with variations and make it your own!

Indulge in This Easy and Delicious Chocolate Milkshake Recipe

Ultimate Chocolate Milkshake: A Creamy Indulgence

⚖️
Difficulty
Easy

⏲️
Prep Time
10 mins

🕒
Cook Time
0 mins

⏱️
Total Time
10 mins

🍽️
Servings
2

Indulge in the delight of a classic chocolate milkshake that tantalizes your taste buds. This scrumptiously creamy drink is a perfect blend of rich chocolate and velvety ice cream, making it the ideal treat for any occasion. Whether you’re celebrating a special moment or simply wishing to cool down on a hot day, this chocolate milkshake recipe will surely bring a smile to your face.

With the perfect balance of sweetness and creaminess, this milkshake not only satisfies your chocolate cravings but also evokes cherished childhood memories. Its rich, decadent flavor is enhanced by generous whipped cream and a drizzle of chocolate syrup, making it a visually appealing dessert that’s just as delicious as it looks.

Quick Recipe Highlights

  • Flavor Profile: A luxuriously smooth sweetness with deep chocolate undertones.
  • Texture: Creamy and thick with a luscious mouthfeel that coats the palate.
  • Aroma: A delightful chocolate scent that fills the air, inviting you to take a sip.
  • Visual Appeal: A glossy, chocolatey beverage topped with fluffy whipped cream and a cherry.
  • Skill Level Needed: This recipe requires no special culinary skills, making it accessible to all.
  • Special Equipment: A blender and a tall glass are all you need for this chocolate delight.

Recipe Overview

  • Difficulty Level: This chocolate milkshake is easy to prepare, perfect for both novice and experienced cooks alike.
  • Category: This delicious drink fits perfectly in the dessert category but can also be enjoyed as a snack.
  • Cuisine: Rooted in American culinary tradition, milkshakes have become a beloved treat worldwide.
  • Cost: This recipe is budget-friendly, with ingredients that are affordable and easy to find.
  • Season: Ideal for any season, it especially shines in summer when a cold drink is most refreshing.
  • Occasion: Great for casual gatherings, birthday parties, or just a delightful treat on a regular day.

Why You’ll Love This Recipe

Indulge in a chocolate milkshake that is not only delectable but also comforting. Each sip offers a rich, creamy texture that melts in your mouth, leaving a satisfying sweetness that lingers beautifully. The combination of chill and sweetness serves as an instant mood booster, perfect for when you need a little pick-me-up.

One of the best aspects of this recipe is the simplicity of its preparation. Within just ten minutes, you can whip up this treat, making it an effortless choice for spontaneous cravings or casual get-togethers with friends and family. The ease of preparation allows anyone to get involved, turning simply creating a chocolate milkshake into a fun activity for experience levels across the board.

From a nutritional standpoint, this milkshake can provide a small boost of energy thanks to the combination of ice cream and milk. While it’s best enjoyed as an occasional treat, the use of quality ingredients means you’re indulging in something more fulfilling than average fast-food offerings.

Gathering around to enjoy a milkshake brings an element of social delight to the experience. Preparing and presenting this drink can easily turn a lone snack into a shared moment of joy and conversation, making it ideal for gatherings, date nights, or even family film nights.

Finally, the cost-effectiveness of this homemade chocolate milkshake cannot be overstated. With inexpensive core ingredients, you can create a batch that rivals any milkshake shop, but with the added satisfaction of having crafted it yourself.

Historical Background and Cultural Significance

The origin of the milkshake can be traced back to the late 19th century, where it originally served as a wholesome drink made with whiskey and eggs. However, it wasn’t until the early 1900s that ice cream began to creep into the equation, turning milkshakes into the delightful dessert we know today.

Culturally, the chocolate milkshake has solidified itself as an American classic, often associated with diners and soda fountains. Throughout decades, the popularity of milkshakes has evolved, particularly with the rise of fast-food chains that offered their versions of this iconic drink.

This recipe showcases the evolution of a classic chocolate milkshake while remaining true to its roots. The adaptability of the chocolate milkshake means you’ll find variations worldwide, each featuring local ingredients and flavors that resonate with different cultures.

Regional variations abound, from the thick, creamy versions served at Southern diners to more tropical takes seen in coastal areas using fresh fruits. These variations highlight how adaptable and beloved the chocolate milkshake continues to be in contemporary cuisine.

Ingredient Deep Dive

Chocolate Syrup: Chocolate syrup is a kitchen staple that brings the unmistakable flavor of chocolate to your milkshake. Often used in desserts, its history dates back to the early 1900s in America, becoming a favorite topping for ice cream. The rich, sweet flavor pairs perfectly with the creaminess of the milkshake.

For selection, look for syrup with quality cocoa content for a deeper flavor. Store it in a cool, dry place and always check for a proper seal to maintain freshness. If you’re in a pinch, there are many homemade chocolate syrup recipes to explore!

Ice Cream: The essence of a chocolate milkshake lies in its ice cream base. Typically made from a mixture of cream, sugar, and flavorings, the deliciously cold treat has been a favorite since its invention in the 18th century. A solid chocolate ice cream provides the foundation for a rich and creamy milkshake.

When choosing ice cream, opt for high-quality, full-fat varieties to ensure a silky texture. Keep it stored in the freezer and watch the time to avoid freezer burn. For health-conscious modifications, sorbets or non-dairy ice creams can also be used as alternatives.

Common Mistakes to Avoid

  • Using warm ingredients: Always use chilled ingredients for a refreshing chocolate milkshake; warm ingredients will ruin the creamy texture.
  • Blending too long: Over-blending will result in a watery milkshake. Blend just until everything is combined.
  • Not adjusting sweetness: Taste the mixture before serving; if it’s not sweet enough, add more chocolate syrup or sugar gradually.
  • Using low-quality ice cream: Poor-quality ice cream can lead to a less satisfying flavor; choose full-fat varieties when possible.
  • Skipping the toppings: Don’t forget about presentation! A simple whipped cream topping and cherry make it visually appealing.
  • Ignoring serving temperature: Serve immediately after blending for the best texture and cooling experience.
  • Being afraid to experiment: Feel free to add other flavors, like vanilla, mint, or peanut butter, to elevate your chocolate milkshake.
  • Overloading with toppings: Adding too many toppings can overwhelm the flavor of the milkshake itself; keep it simple.

Essential Techniques

Blending: This technique is pivotal in achieving the perfect consistency for your chocolate milkshake. Ensuring all components are well blended contributes to a smooth and creamy mouthfeel without any lumps. Aim for a thick yet pourable texture.

**Visual Cue**: The ideal blended milkshake should be thick enough to keep its shape, and should smoothly flow out when poured.

Garnishing: Presentation can greatly enhance the enjoyment of your milkshake. Use whipped cream, chocolate shavings, or sprinkles for a delightful appearance. A well-garnished shake not only looks good but also entices taste buds before the first sip.

**Visual Cue**: Aim for a tall serving glass, allowing garnishes to be showcased atop the creamy shake for aesthetic appeal.

Pro Tips for Perfect Chocolate Milkshake

– Always chill your glass beforehand to keep the shake cold as you consume it.
– Balance your sweetness by starting with less chocolate syrup and adjust to taste for optimal flavor.
– For an even richer experience, combine chocolate milk with vanilla ice cream in your blender.
– Add a pinch of sea salt before blending to elevate the flavor complexity.
– Experiment with a dash of espresso for a mocha twist, perfect for coffee lovers.
– Use full-fat dairy products for a creamier texture that enhances the mouthfeel.
– If you prefer a healthier option, consider using frozen bananas for natural sweetness and texture.
– Serve with a wide straw for an enjoyable sipping experience, enabling you to soak in the flavors fully.

Variations and Adaptations

Explore an array of delicious adaptations for your chocolate milkshake. Consider incorporating seasonal ingredients like fresh mint or raspberries for added flavor. For a more indulgent experience, try adding malt powder that gives the shake a reminiscence of vintage diners.

If you wish to make this chocolate milkshake dairy-free, substitute regular milk and ice cream with almond or coconut versions. Blending dairy-free products allows everyone to enjoy this treat without dietary constraints.

Flavor variations can be sparked with a touch of peanut butter, caramel, or a hint of chili powder to create an exciting twist. The possibilities are endless!

For a lower-calorie version, replace regular ice cream with yogurt to keep the creamy texture but reduce the overall fat content.

To enhance the experience further, explore different ice cream flavors like cookies and cream or mint chocolate chip for new interpretations.

Serving and Presentation Guide

Serving your chocolate milkshake elegantly can enhance the overall experience. Use tall, clear glasses to showcase the delightful layers of chocolate and whipped cream. Consider invoking a rustic charm with mason jars for a vibe that’s both cozy and casual.

Garnish with a dollop of whipped cream, a drizzle of chocolate syrup, or shaved chocolate. For an extra layer of indulgence, consider a sprinkle of crushed nuts or colorful sprinkles as a finishing touch.

Traditional accompaniments like chocolate cookies or chocolate cake can elevate the dessert experience further. For modern flair, consider serving a side of chocolate-covered strawberries, perfect for dipping.

Ensure your milkshake is served at an ideal cold temperature for optimal enjoyment. Encourage portion control by serving in smaller, shorter glasses that still captivate and impress guests.

Wine and Beverage Pairing

Pairing your chocolate milkshake with complementary beverages adds depth to the dining experience. A sweet red wine like a port or a dessert wine harmonizes well with the rich flavors of chocolate.

Alternatively, a strong cup of coffee contrasts beautifully with the sweetness of the shake, enhancing the overall experience with a wonderful balance of flavors.

For non-alcoholic options, consider classic root beer floats, which can echo the creamy texture while adding a new flavor dimension. Opt for well-chilled beverages to maintain the perfect refreshment alongside your milkshake.

Pay attention to your serving temperatures; it’s crucial that both chocolate milkshake and accompanying beverages remain cool, creating a refreshing treat.

Storage and Shelf Life

Storing your chocolate milkshake is simple, but it’s best consumed fresh. However, if you need to store leftovers, keep them in an airtight container in the freezer for up to one week.

To ensure the best flavors, avoid leaving your shake at room temperature for extended periods. Signs of spoilage include separation of liquids and changes in texture; if it begins to look grainy or curdled, it’s best to discard it.

Reheating is not recommended as it diminishes texture and flavor; instead, blending with ice will refresh a stored shake. Avoid freezing too long to maintain the optimal taste profile.

For freezing guidelines, pour the milkshake into an appropriate container, leaving space for expansion and ensuring to seal it tightly to avoid freezer burn.

Make Ahead Strategies

Preparing your chocolate milkshake ahead of time can be seamlessly done. Consider pre-measuring ingredients like chocolate syrup and ice cream and storing them in the freezer until ready to blend.

While you can prepare your ingredients in advance, it’s best to blend the milkshake just before serving to preserve its texture and flavor. Store the blended milkshake in the fridge for up to 30 minutes if needed, but be wary that it may thicken slightly.

To keep flavors refreshing, refrain from adding garnishes like whipped cream until you’re ready to serve. This ensures every sip remains as delightful as the first.

If you want to add fresh elements later, consider chilling glasses with a sprinkle of cocoa powder to brighten the entire drink with each sip.

Scaling Instructions

Scaling your chocolate milkshake recipe is easy and adaptable for larger gatherings. Halving can be done effortlessly; just divide each ingredient in half and blend as usual.

For bigger batches, triple or quadruple the measurements while ensuring your blender can accommodate the volume—consider blending in two rounds for optimal texture.

Timing adjustments remain straightforward; allow for additional blending time if using a larger quantity to ensure all ingredients get incorporated smoothly.

Be mindful of storage considerations if preparing a large batch; keep leftover shakes sealed in the fridge or reheated only if necessary.

Nutritional Deep Dive

When analyzing the nutritional components of a chocolate milkshake, focus on macro breakdowns including calories, fat, carbohydrates, and proteins. A standard milkshake may contain around 400-600 calories per serving depending on the richness of the ingredients used.

Micronutrients from chocolate, dairy, and any additional flavor enhancers contribute to calcium, antioxidants, and vitamins, lending some health benefits while still being a indulgent treat.

For those mindful of their diet, portion control becomes key—consider serving smaller amounts to satisfy cravings without overwhelming caloric intake.

Evaluate dietary considerations based on personal health goals. If mindful of sugar intake, alternative sweeteners can be used without sacrificing taste.

Finally, for those looking to manage weight, enjoy chocolate milkshakes in moderation and as part of a balanced diet for a satisfying indulgence.

Dietary Adaptations

Dietary adaptations for chocolate milkshakes ensure everyone can enjoy this dessert. For gluten-free options, all listed ingredients are naturally gluten-free, allowing for easy inclusivity.

Dairy-free or vegan variations can be made with almond milk or coconut milk alongside dairy-free ice creams, providing similar textures and flavors without compromising dietary restrictions.

Low-carb and keto enthusiasts can substitute traditional ingredients with low-carb sweeteners and sugar-free ice creams, maintaining a delicious taste profile while adhering to dietary needs.

Paleo modifications could include using raw cocoa and natural sweeteners like honey for a healthier twist that aligns with paleo principles.

A careful selection of ingredients enables both delicious results and compliance with dietary guidelines, ensuring everyone participates in the fun.

Troubleshooting Guide

If encountering texture issues, often attributed to using overly soft ice cream—opt for firmer ice cream to maintain that perfect milkshake consistency. Blending for a shorter duration can also prevent a watery result.

For flavor balance, if the milkshake is too sweet, consider a hint of salt or a splash of vanilla extract to rebalance the flavors effectively.

Confront temperature problems by ensuring all ingredients are adequately chilled before blending; warm products can lead to a less satisfying result.

If your blender struggles with the desired thickness, adding less liquid or ice during blending can help achieve a more desirable consistency.

Ingredient substitutions should always be done cautiously; flavors like vanilla could enhance the classic chocolate taste if using flavored ice cream.

Timing concerns often relate to blending duration and preparation—focus on balancing both to ensure an efficient and flavorful outcome.

Recipe Success Stories

Community feedback regarding this chocolate milkshake has highlighted various successes, particularly with personal tweaks that enhance the recipe. Readers often share how they incorporated unique toppings reflecting their tastes or dietary preferences.

Through variations, users have joyfully embraced adaptations that cater to health-conscious lifestyles without sacrificing flavor, showcasing their creativity in the kitchen.

Photography insights reveal many enjoy capturing their milkshake moments; whether it’s a fun family event or a chilled summer afternoon, sharing these experiences has launched a new wave of enthusiasm for the recipe.

Engaging with the recipe allows for community connection, where followers can pass on tips and tricks from their personal kitchen adventures, uniting around a shared love for this classic dessert.

Frequently Asked Questions

Can I use dairy-free ingredients?
Yes! You can substitute regular milk and ice cream with almond or coconut alternatives to create a delicious dairy-free chocolate milkshake without losing flavor.

How long does a milkshake last in the fridge?
While it’s best to consume it immediately, a milkshake can last for about 30 minutes in the fridge before it begins to separate or lose its appealing texture.

What can I add for extra flavor?
Feel free to experiment with add-ins such as peanut butter, caramel, or a hint of mint or vanilla extract to enhance the taste profile of your chocolate milkshake.

Can I make it ahead of time?
Yes! You can pre-measure your ingredients and blend them right before serving to ensure the best texture and flavor. However, avoid blending too far in advance to maintain quality.

What types of ice cream work best?
Full-fat chocolate or vanilla ice cream works best for achieving that luscious, creamy texture. You can also try unique flavors like cookies and cream for a twist.

Is there a way to make it healthier?
Absolutely! Using lower-calorie ice cream, adding fruits like bananas, or using alternative sweeteners can all help create a healthier variation of your chocolate milkshake.

What equipment do I need?
A high-speed blender, measured cups, and a tall glass for serving are necessary. An ice cream scooper can be helpful for precise portions as well.

Is it necessary to garnish?
While not required, garnishing your milkshake with whipped cream, chocolate syrup, or a cherry adds visual appeal and enhances the indulgent experience of your drink.

Can I freeze my chocolate milkshake?
Yes, however, keeping it thick benefits from freezing in an airtight container for up to a week. Just be aware that it may need some blending afterward to regain texture.

Can I customize the sweetness?
Certainly! Start with lesser amounts of chocolate syrup and adjust to your taste for a sweet treat that suits your preferences.

Additional Resources

If you’re eager to expand your dessert repertoire, delve into related recipes that might excite your palate. Look for milkshake variations, including strawberry, banana, or even matcha flavors to diversify your chocolate milkshake experience.

Explore technique guides that cover essential blending methods or ingredient substitutions to enhance your cooking skills further. Tools for preparation like quality blenders can also make your milkshake-making journey smoother.

Discover more about ingredients, especially cocoa powder types, to find out what best suits your chocolate desires. Understanding how each ingredient interacts can be key in perfecting your recipes.

Lastly, keep the seasonal variations in mind! Fresh fruits or aromatic spices can easily be adapted into your chocolate milkshake to showcase seasonal delicacies.

Join the Conversation

Engaging with your audience about the chocolate milkshake recipe leads to wonderful community sharing. Encourage readers to share their personal stories or variations on social media, creating a community centered around delight and satisfaction.

Photography can enhance recipe sharing, and providing tips on capturing the perfect shot of a tempting milkshake may inspire others to join in on the creativity.

Encouraging recipe reviews can foster an atmosphere of appreciation, inspiring confidence in readers to experiment with their takes on the chocolate milkshake.

Lastly, community engagement allows for recipe modifications and suggestions, enabling everyone to share tips that can make this classic even more enjoyable.

The Recipe

Chocolate Milkshake

Serves: 2

Prep Time: 10 mins

Cook Time: 0 mins

Total Time: 10 mins

Kitchen Equipment Needed

  • Blender
  • Ice cream scoop
  • Tall glasses for serving
  • Measuring cups
  • Optional: Straw and whipped cream dispenser

Ingredients

  • 2 cups chocolate ice cream
  • 1 cup milk (any variety)
  • ¼ cup chocolate syrup
  • Whipped cream for garnish
  • Chocolate shavings or sprinkles for garnish (optional)

Directions

  1. In a blender, combine chocolate ice cream, milk, and chocolate syrup.
  2. Blend on medium speed until smooth and creamy, about 30 seconds.
  3. If the mixture is too thick, add a little more milk and blend again.
  4. Pour the milkshake into tall glasses and top with whipped cream.
  5. Garnish with chocolate shavings or sprinkles if desired.
  6. Serve immediately and enjoy your delicious chocolate milkshake!

Recipe Notes

  • For a thicker shake, reduce the amount of milk.
  • Add additional flavorings like vanilla or mint for a different twist.
  • Store any leftovers in the freezer, blending again before serving if necessary.

Christmas Pretzel Hugs: The Perfect Sweet and Salty Holiday Treat

holiday pretzel treats, festive pretzel snacks, Hershey’s hugs recipes, sweet and salty holiday bites, M&M pretzel hugs, Christmas candy recipes

Christmas Pretzel Hugs

Introduction

Christmas Pretzel Hugs are the quintessential holiday treat—easy to make, visually festive, and loved by everyone. Combining the sweet creaminess of Hershey’s Hugs with the crunch of pretzels and the colorful cheer of M&Ms, these bite-sized snacks are perfect for gift-giving, parties, or just enjoying at home.

For similar holiday recipes, explore Raspberry Shortbread with White Chocolate Drizzle and Delightful Mini Pineapple Upside-Down Cakes for festive inspirations.


Ingredients and Tools

Ingredients:

  • Core Ingredients:
    • Mini pretzels
    • Hershey’s Hugs
    • Festive red and green M&Ms
  • Optional Add-ons:
    • Sprinkles for additional holiday flair
    • White chocolate for drizzling

Tools:

  • Baking sheet lined with parchment paper
  • Microwave-safe bowls
  • Spatula for handling

Step-by-Step Recipe

  1. Prepare the Ingredients:
    • Preheat the oven to 200°F (93°C). Line the baking sheet with parchment paper.
    • Arrange pretzels evenly on the sheet. Place one Hershey’s Hug on each pretzel.
  2. Bake and Decorate:
    • Bake for 4–5 minutes until the Hugs are soft but not melted.
    • Press an M&M gently into each Hug to flatten and create a colorful topper.
  3. Cool and Serve:
    • Let the pretzels cool completely, allowing the chocolate to harden before transferring to a container.

Creative Variations

  • Candy Cane Pretzel Hugs: Use peppermint Hugs and crushed candy canes.
  • Nutty Delights: Press a pecan half instead of an M&M for a nutty twist.
  • Dark Chocolate Swaps: Replace Hugs with dark chocolate kisses for a richer flavor.

Tips for Perfect Pretzel Hugs

  • Avoid overbaking; the chocolate should be soft enough to press but not melted.
  • Work quickly when adding M&Ms to prevent uneven setting.
  • Use tweezers for precise placement of decorations like sprinkles.

Presentation and Serving


Storage and Freezing

  • Store in an airtight container at room temperature for up to 1 week.
  • Freeze in a single layer before transferring to freezer-safe bags for up to 1 month.
  • Thaw at room temperature before serving.

FAQs

  1. Can I use other types of pretzels?
    Yes, mini twists or pretzel snaps work well.
  2. How can I prevent the chocolate from becoming grainy?
    Keep the oven at a low temperature and avoid overheating.
  3. Can I make these ahead of time for a holiday party?
    Absolutely! They store well for several days.
  4. What other toppings can I use besides M&Ms?
    Try sprinkles, candy cane pieces, or nuts for variety.
  5. Are there gluten-free alternatives?
    Use gluten-free pretzels for a celiac-friendly option.

Internal Linking Opportunities


Conclusion

Christmas Pretzel Hugs are the ultimate holiday treat—quick to make, endlessly customizable, and universally loved. Whether you’re making them for gifts, parties, or a fun family activity, these festive bites are guaranteed to spread holiday cheer!

Chocolate Toffee Bars: A Perfectly Sweet and Crunchy Dessert

toffee chocolate bars, easy dessert bars, gooey toffee bars, sweet chocolate toffee treats, layered toffee bars, crunchy dessert bars

Chocolate Toffee Bars

Introduction

Chocolate Toffee Bars are the perfect combination of rich chocolate and buttery toffee, creating a dessert that is both indulgent and simple to prepare. These bars offer a chewy, crunchy texture with a burst of sweetness, making them ideal for holidays, parties, or an everyday treat.

For more sweet inspirations, check out Raspberry Shortbread with White Chocolate Drizzle or Kentucky Butter Cake.


Ingredients and Tools

Ingredients:

  • Base Layer:
    • Butter, brown sugar, all-purpose flour, vanilla extract.
  • Topping:
    • Semi-sweet or milk chocolate chips, toffee bits, and optional sea salt for garnish.

Equipment:

  • 9×13 baking pan lined with parchment paper.
  • Mixing bowls, spatula, and electric mixer.
  • Offset spatula for spreading melted chocolate.

Step-by-Step Recipe

  1. Prepare the Base Layer:
    • Combine butter, brown sugar, and vanilla until creamy.
    • Add flour to create a crumbly mixture and press into the pan.
  2. Bake the Base:
    • Preheat the oven to 350°F (175°C) and bake the crust until lightly golden.
  3. Add the Toppings:
    • Immediately sprinkle chocolate chips over the warm base and let melt.
    • Spread evenly, then sprinkle with toffee bits and sea salt.
  4. Cool and Slice:
    • Allow bars to cool completely before slicing into even squares.

Creative Variations

  • Nutty Toffee Bars: Add chopped pecans or almonds for extra crunch.
  • Salted Caramel Drizzle: Drizzle caramel sauce over the toffee layer before serving.
  • White Chocolate Toffee Bars: Swap semi-sweet chocolate for white chocolate chips.

Tips for Perfect Bars

  • Ensure the base is fully baked but not overcooked to maintain a chewy texture.
  • Allow sufficient cooling time for clean slices.
  • Use parchment paper for easy removal from the pan.

Presentation and Serving

  • Arrange bars on a decorative platter for gatherings.
  • Pair with coffee, tea, or hot chocolate for a cozy treat.
  • Serve warm with a dollop of whipped cream or a scoop of ice cream.

Storage and Freezing

  • Store in an airtight container for up to 5 days at room temperature.
  • Freeze individually wrapped bars for up to 2 months.
  • Thaw at room temperature or warm briefly in the microwave before serving.

FAQs

  1. Can I make these bars gluten-free?
    Yes, substitute the all-purpose flour with a gluten-free baking mix.
  2. Can I use different types of chocolate?
    Absolutely! Try dark, milk, or white chocolate for unique flavors.
  3. How do I prevent the chocolate from cracking when cutting?
    Allow the bars to reach room temperature before slicing with a sharp knife.
  4. Can I use homemade toffee instead of store-bought bits?
    Yes, crushed homemade toffee works perfectly.
  5. What is the best way to customize these bars?
    Add nuts, flavored chips, or drizzle with caramel for variety.

Internal Linking Opportunities


Conclusion

Chocolate Toffee Bars are a versatile dessert that combines rich chocolate, buttery toffee, and a crumbly base into an unforgettable treat. Whether for a holiday gathering or a quick snack, these bars are sure to please any crowd. Happy baking!