Delicious Chocolate-Covered Ice Cream Bars for a Sweet Treat

Delicious Chocolate-Covered Ice Cream Bars: The Ultimate Treat for Any Occasion

⚖️
Difficulty
Easy

⏲️
Prep Time
30 mins

🕒
Cook Time
0 mins

⏱️
Total Time
30 mins

🍽️
Servings
6 bars

Indulging in a creamy Chocolate-Covered Ice Cream Bar is a delightful experience that evokes a sense of nostalgia and joy. Picture biting into a smooth, chilled treat, where the rich, velvety chocolate coating gives way to a luscious ice cream center. This classic dessert is perfect for hot summer days or as a sweet treat any time of the year. Whether you’re celebrating a special occasion or simply craving a refreshing snack, these ice cream bars can bring smiles to faces young and old.

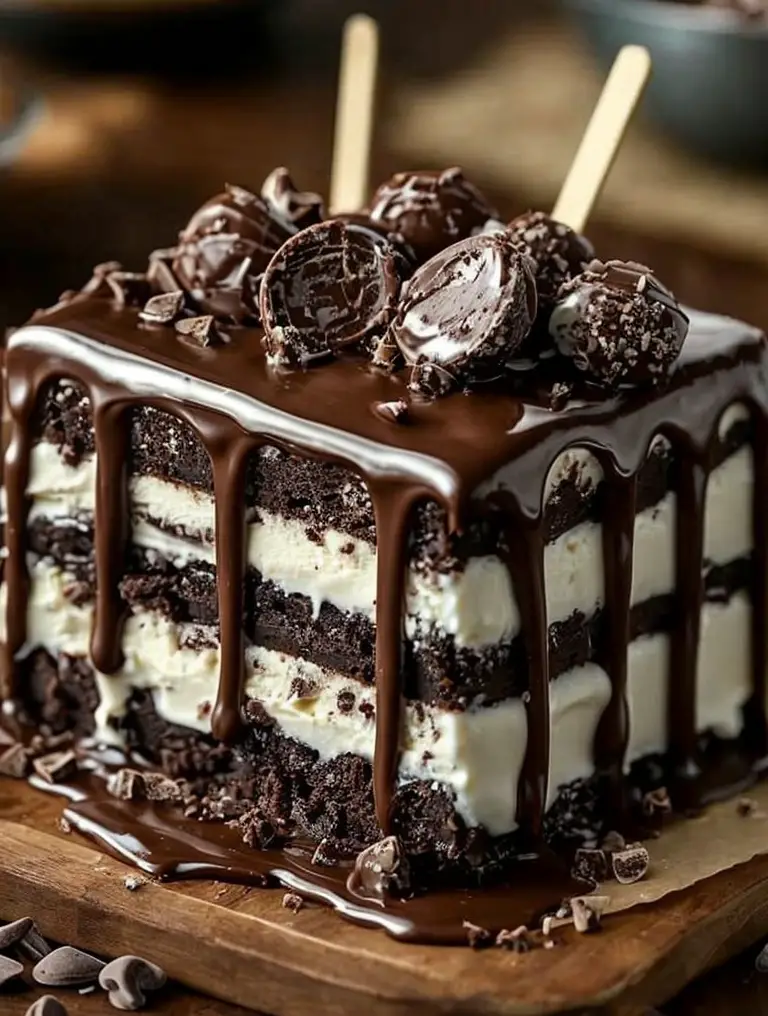
The combination of creamy ice cream and a crunchy chocolate shell creates a harmonious balance of textures and flavors that tantalizes your taste buds. The sweetness of the chocolate complements the coolness of the ice cream perfectly, while a hint of vanilla or any flavor you choose elevates this treat into a delicious experience. You can customize the flavors to suit your preferences or to impress your guests with something truly special.

Quick Recipe Highlights

  • Flavor Profile: Rich dark chocolate pairs beautifully with creamy vanilla ice cream.
  • Texture: The bars feature a crunchy chocolate shell and a soft, creamy ice cream interior.
  • Aroma: The enticing aroma of melting chocolate hints at the delightful flavors within.
  • Visual Appeal: The glossy finish of the chocolate coating makes these bars a feast for the eyes.
  • Skill Level Needed: Even beginner cooks can master this easy and fun recipe!
  • Special Equipment: A cookie sheet, parchment paper, and a heatproof bowl for melting chocolate are all you need.

Recipe Overview

  • Difficulty Level: This Chocolate-Covered Ice Cream Bars recipe is easy to follow, requiring no baking skills, making it suitable for home chefs of any level.
  • Category: These bars fall under the dessert category, specifically a frozen dessert offering satisfaction and sweetness.
  • Cuisine: Ice cream bars are popular in various cuisines worldwide, often representing summer and festive occasions.
  • Cost: Making these delicious bars at home is cost-effective, generally costing much less than store-bought varieties.
  • Season: Enjoy these Ice Cream Bars any time of the year, but they are especially refreshing during the warm summer months.
  • Occasion: Perfect for birthdays, barbecues, or simply as a treat to cool off after a long day.

Why You’ll Love This Recipe

The appeal of Chocolate-Covered Ice Cream Bars is undeniable. The delightful taste of rich chocolate combined with cold, creamy ice cream creates a perfect balance, providing a satisfying treat. Each bite offers a refreshing experience, making them an excellent choice for summer indulgence. You can experiment with different flavors of ice cream – from classic vanilla to exotic mango, every variation delights with its unique taste.

The convenience of making Chocolate-Covered Ice Cream Bars at home also adds to their charm. With easy preparation and straightforward steps, you can whip up a batch in under thirty minutes, which means spontaneous treats are always an option. Not only do they allow for customization, but they also encourage quality family time in the kitchen, making them a great addition to family gatherings.

Nutritionally, while indulgent, these bars can be made with healthier ingredients, including dairy-free or low-sugar alternatives. This flexibility gives you the power to treat yourself healthily. You can also introduce homemade variations that can sneak in nutritious elements, creating a sweet experience without a hefty guilt factor.

Socially, Chocolate-Covered Ice Cream Bars are a hit at gatherings and parties. Everyone loves homemade treats, and these bars tend to stir up fond memories and create new ones. Sharing these with friends and family makes for delightful moments in building connections. They also serve as excellent conversation starters, allowing for the exchange of personal recipes and favorite ice cream combinations.

Lastly, making these bars can be incredibly cost-effective. Purchasing commercial ice cream bars can add up, whereas creating your own at home can save you money. The ingredients are easy to source, and with minimal preparation, you can stock up these delicious treats, prepared fresh and tailored to your taste preferences.

Historical Background and Cultural Significance

Ice cream bars have become a beloved dessert, with origins tracing back to the early methods of freezing sweetened cream or flavored concoctions. The rise of chocolate as a popular coating in the 20th century transformed ice cream into a portable and shareable treat, paving the way for modern variations.

Culturally, chocolate-covered ice cream bars symbolize celebration and joy in many communities, often associated with summer festivals, birthday parties, and family gatherings. Their popularity can be attributed to their ability to bring people together, sharing a moment of delight and indulgence in a world of fast-paced living.

Over the decades, as refrigeration technology improved, the evolution of this dessert began to flourish with the introduction of new flavors and fillings. From standard chocolate and vanilla to innovative combinations involving nuts, fruit, and even gourmet chocolates, the recipe has been redefined for various palates.

Regional variations of ice cream bars showcase local flavors and preferences around the globe. For instance, in some countries, there are bars filled with traditional desserts or even spices that reflect cultural heritage, offering rich and diverse experiences.

Ingredient Deep Dive

  • Chocolate: Chocolate’s rich history dates back to ancient Mesoamerica, where it was consumed as a bitter beverage. Today, it is celebrated for its versatility in sweet recipes, providing both flavor and a satisfying crunch in desserts. It’s crucial to select high-quality chocolate to ensure a delicious coating for your ice cream bars, choosing between dark, milk, or white chocolate based on personal preference. Store untempered chocolate in a cool, dry place and consider using it within a year for the best flavor. If out of chocolate, you can substitute with carob or a blend of cocoa and coconut oil.
  • Ice Cream: This beloved frozen treat has roots that date back centuries, originating from the blending of cream and flavorings. Ice cream provides a creamy contrast to the crunchy chocolate coating and can be made from milk, cream, or even nut-based alternatives for a dairy-free option. When selecting ice cream for your bars, consider aspects like flavor intensity and base ingredients. Store homemade ice cream in an airtight container at a consistent temperature, and substitute with sorbet or yogurt for lighter variations.

Common Mistakes to Avoid

  • Not letting the chocolate cool properly before dipping, resulting in a soft coating that won’t set.
  • Using regular chocolate chips instead of high-quality chocolate bars, which may not melt smoothly.
  • Not freezing the ice cream bars long enough, causing them to melt quickly when coated.
  • Leaving the bars out too long before serving, leading to messy, drippy desserts.
  • Skipping parchment paper, resulting in difficult clean-up and potential damage to your bars.
  • Overdipping in chocolate, making it difficult to get the coating to adhere properly.
  • Using unflavored ice cream that lacks the rich taste needed for balance with the chocolate.
  • Not varying the ice cream flavors, which can lead to uniformity and lackluster results.
  • Forgetting to check for the right temperature when melting chocolate, resulting in burnt chocolate.
  • Neglecting to let the bars set properly after coating, causing chocolate to smudge or chip off.

Essential Techniques

To achieve the ideal chocolate coating on your ice cream bars, tempering is a crucial technique. Tempering chocolate stabilizes cocoa butter crystals, ensuring a shiny finish and snap when bitten into. To master this, slowly melt your chocolate in a bowl over simmering water, and monitor the temperature for accuracy, pulling it off the heat once it reaches the right point. Common pitfalls include overheating the chocolate; keep it under 120°F for best results.

Properly freezing your ice cream bars is vital for a successful coating. Ensure that your bars are well-frozen for at least 4 hours before dipping to avoid melting and destruction. Use a good quality ice cream that can hold its form. Look for ice cream with a higher fat content for excellent structural integrity, and keep an eye out for loose protein or emulsifiers that might affect the final outcome.

Pro Tips for Perfect Chocolate-Covered Ice Cream Bars

1. Choose the right chocolate based on your desired flavor—milk for sweetness, dark for richness, or white for a creamy touch.
2. Melt your chocolate using a double boiler to ensure precise temperature control and prevent scorching.
3. Freeze the ice cream bars for several hours ahead of coating to maintain their form when dipped.
4. Dip the bars quickly into the chocolate for even coverage, using a gentle swirl to allow excess chocolate to fall away.
5. Sprinkle toppings, like crushed nuts or sprinkles, immediately after coating while the chocolate is still wet for optimal adhesion.
6. Use a fork or skewer to easily dip the bars, avoiding messy hands and ensuring perfect chocolate coverage.
7. Store any leftover bars in an airtight container in the freezer to maintain quality and extend shelf life.
8. Experiment with different ice cream flavors and chocolate combinations for unique and exciting results.

Variations and Adaptations

There are many exciting ways to mix things up with Chocolate-Covered Ice Cream Bars. Try incorporating local and seasonal ingredients, such as adding a layer of berry jam or a splash of caramel sauce in the center for a fruity or caramel twist. During holidays, think of swapping chocolate for seasonal candies like crushed peppermint or festive-themed sprinkles.

For those with dietary restrictions, plenty of adaptations can be made. Substituting regular ice cream with dairy-free or vegan options can cater to a broader audience without sacrificing taste. Consider using gluten-free cookies or alternative sweeteners to make the bars suitable for gluten-free or sugar-free diets.

Culinary modifications can also be endlessly creative! With a variety of toppings, consider rolling your bars in toasted coconut, crushed pistachios, or cookie crumbs before the chocolate solidifies. Each variation not only adds a different flavor and texture but can create a visually stunning dessert.

For presentation, sample different serving styles, such as serving your bars in a decorated cup or alongside fresh fruit. Transform your traditional dessert into an artistic plate, creating a feast for the eyes as well as the palate.

Serving and Presentation Guide

The presentation of your Chocolate-Covered Ice Cream Bars can elevate any gathering. Begin with a clean, crisp white plate to make the colors pop. Consider placing the bars upright in a small vase or decorative cup, making them visually striking. Alternatively, meticulously arrange them on a platter with fresh fruit or drizzles of chocolate sauce for an elegant effect.

Garnishing is key; consider adding fresh mint leaves or a dusting of cocoa powder for appeal. If you have time, creating a homemade chocolate sauce and drizzling it across the plate offers the finishing touch, enhancing flavor and drawing the eye.

Depending on the occasion, choosing appropriate accompaniments enhances the experience. A scoop of sorbet or a dollop of whipped cream may be refreshing complements, while a side of fruit, such as strawberries or raspberries, offers a fresh burst of flavor. Pay attention to serving temperatures, ensuring the ice cream remains cold while the chocolate is not too hard—just the right texture for savoring.

Finally, portion control can be a consideration. If serving guests, cut the bars into smaller segments for easy consumption or pair them with mini cones for a fun sharing experience.

Wine and Beverage Pairing

Finding the right beverage to pair with your Chocolate-Covered Ice Cream Bars can enhance the overall experience. For wine lovers, a rich Cabernet Sauvignon or a Malbec pairs beautifully with chocolate due to its deep, fruity notes bridging the sweetness. If self-judging, opt for sweeter dessert wines like Port or Ice Wine to complement the dessert’s richness.

For non-alcoholic options, consider pairing your ice cream bars with a classic milkshake or a rich hot chocolate. The textures of cold and hot drinks together create an enjoyable contrast, enhancing each component.

If you’re a coffee drinker, a dark roast cappuccino or a mocha can serve as a perfect accompaniment, as the deep coffee flavor balances the sweetness of the dessert. Ensure the drinks are served at a comfortable temperature to prevent any inconsistency in enjoyment.

While serving, think about layering flavors; consider using flavored teas, such as chai or hibiscus, boasting aromatic properties that could help cleanse the palate between bites, keeping things light and refreshing.

Storage and Shelf Life

Storing Chocolate-Covered Ice Cream Bars properly is essential for maintaining their taste and quality. Keep your bars in an airtight container in the freezer to prevent freezer burn and ice crystals from forming. They can typically last in the freezer for up to two months but are best enjoyed within two weeks for optimal flavor.

To ensure freshness, avoid repeatedly removing the bars from the freezer—as this can expose them to temperature fluctuations. When you do remove them, serve immediately or return to storage as soon as possible.

If packaged correctly, signs of spoilage may include freezer burn on the chocolate coating or an off-taste from the ice cream. In such cases, it’s better to discard rather than risk any unpleasant flavors when serving.

In cases of leftovers after serving, store completed ice cream bars back in their container promptly. To reheat for revived flavor, simply allow the bars to thaw in the fridge for a couple of minutes.

Make Ahead Strategies

To maximize efficiency, these Chocolate-Covered Ice Cream Bars can easily be made ahead of time. Start by preparing the ice cream base—a homemade option may be prepared days in advance and stored in the freezer. Once your ice cream has been frozen solid, remove it and cut it into bars before you coat them in chocolate.

After the chocolate has been added, allow the bars to set completely in the freezer before wrapping or storing. This technique ensures fresh bars on hand for last-minute gatherings or casual weeknight treats.

Take stock of the timeline; make the bars a day or two in advance, allowing flavors to mature. It’s also a good practice to plan the assembly so you can enjoy the finishing touches. If interested, consider adding fresh garnishes just before serving to enhance appeal!

Remember, you can always add final touches, such as temperatures—serving in chilled bowls enhances texture and taste upon presentation.

Scaling Instructions

Scaling the Chocolate-Covered Ice Cream Bars recipe is quite straightforward. To make fewer servings, simply halve the ingredient quantities and prepare as directed. This approach allows you to customize the number of bars based on your needs.

Should you decide to double or triple the recipe for gatherings, ensure you have ample freezer space to accommodate the additional bars. Consider using larger baking sheets for melting and setting the ice cream bars, allowing them to freeze efficiently.

Time adjustments may be required when scaling; keep a close watch during the freezing phase, as larger batches might need extra time to reach the ideal firmness. When preparing, be mindful of your workspace—ensuring you have enough room to move around will help streamline the process.

Afterward, follow proper storage considerations, ensuring you label and date containers to keep track of freshness.

Nutritional Deep Dive

Understanding the nutritional breakdown of your Chocolate-Covered Ice Cream Bars can refine your dessert experience. The macro breakdown typically includes carbohydrates from the ice cream, sugars from both chocolate and sweetened bases, and fats, primarily from cream or nuts used in the ice cream.

Micronutrient analyses show that chocolate can deliver valuable antioxidants, while certain ice creams provide calcium along with essential vitamins depending on the base ingredients. Low-sugar and low-fat options are available for those who may still want to indulge without overdoing it.

Health benefits can be significant with moderation in mind, particularly when ingredients like dark chocolate provide heart-healthy properties when consumed in reasonable portions.

Portion control can help with weight management, and by monitoring serving sizes, you can maintain the balance between enjoying desserts and maintaining a healthy lifestyle.

Dietary Adaptations

For those following specific dietary needs, adapting the Chocolate-Covered Ice Cream Bars is truly feasible. Gluten-free options can be crafted using certified gluten-free products, ensuring everyone can enjoy a delicious treat without worry.

Dairy-free individuals can substitute recipes using coconut milk or almond milk to create softer, creamier ice creams. The flavor profiles remain delightful while meeting dietary restrictions.

Vegan adaptation can follow suit, offering a complete plant-based approach. Utilizing alternative sweeteners and ensuring all ingredients are sourced without animal products provides conscientious consumption while ensuring a delicious experience.

Incorporating low-carb options can transform the ice cream using coconut cream, hidden sweeteners, and sugar-free chocolate, producing an enjoyable experience for those on keto diets.

Paleo-friendly adaptations allow for caveman-inspired elements—utilizing honey or maple syrup to sweeten, while precluding refined sugars can push these bars into more ancient flavor profiles.

Troubleshooting Guide

If you encounter texture issues, such as graininess in your chocolate, review your melting technique. Ensure your chocolate is tempered and melted gently—high heat leads to burned chocolate and unusual textures.

Flavor balances may need adjusting if the chocolate tastes bitter; add a touch of sugar or opt for milk chocolate for sweetness. Always taste your chocolate before using, ensuring the selected recipe aligns with your preferences.

Temperature problems are common when melting chocolate or freezing ice cream bars too quickly. Make adjustments to your method, and remember to allow ample time for chilling, particularly when layered lasagna-style.

Equipment challenges arise unexpectedly; if your freezer isn’t freezing efficiently, double-check temperature settings and consider relocating to a space where airflow is optimal.

Ingredient substitutions may impact end taste; adjust future recipes based on what flavors shine through. In case of timing concerns while battering and freezing, remember that preparation ahead of schedule helps ease any pressure.

Recipe Success Stories

Many home cooks have shared feedback about their experience preparing Chocolate-Covered Ice Cream Bars. Numerous individuals appreciate the ease of creating these bars, allowing customization alongside family and friends each summer.

Variations have flourished; one individual successfully replaced traditional chocolate with a vibrant matcha coating, enthralling audiences with unique flavors. Others have enjoyed integrating local honey into the ice cream base, enhancing sweetness while supporting local farmers.

Adaptation stories resonate where dietary restrictions intersected with creativity, enabling those with lactose intolerance or gluten allergies to indulge alongside others, creating a more inclusive atmosphere during gatherings.

Readers frequently suggest photography tips, sharing insights to capture the glossy sheen of chocolate-covered bars against bright fruits or rustic wooden backgrounds, showcasing the inviting nature of this beloved dessert.

Frequently Asked Questions

1. Can I use store-bought ice cream for this recipe?

Absolutely! Store-bought ice cream works perfectly for these Chocolate-Covered Ice Cream Bars. Choose your favorite flavor for easy preparation, but feel free to experiment with homemade ice cream for a custom twist.

2. How long do the bars take to freeze?

Typically, the ice cream bars need about 4 hours to freeze solid. Ensure they are adequately frozen before dipping to maintain their shape while coating them with chocolate.

3. What is the best type of chocolate to use?

The best chocolate to use depends on your preferences. Dark chocolate delivers a rich experience, while milk chocolate offers sweetness. For a lighter option, consider using white chocolate or compounds made for easy melting.

4. Can I make these bars ahead of time?

Yes! You can prepare ice cream bars ahead of time and store them in the freezer for up to two months. Enjoying them fresh is best, but they’ll maintain quality if sealed properly.

5. What’s the best way to store leftover bars?

Store leftover Chocolate-Covered Ice Cream Bars in an airtight container in the freezer. They can last for up to two months, but it’s best to consume them within two weeks for optimal taste.

6. Can I use different toppings?

Yes! Feel free to experiment with various toppings such as nuts, sprinkles, coconut flakes, or crushed cookies for added flavor and texture before the chocolate sets.

7. What can I substitute for chocolate?

If you’re looking for an alternative to chocolate, caramel sauce or yogurt could be possible substitutes, but note that the texture and flavor profile will differ from the original recipe.

8. Can these bars be made vegan?

Certainly! Substitute dairy-free ice cream and use vegan chocolate chips for a delicious plant-based treat without compromising the delightful taste.

9. Is it possible to add flavorings to the chocolate?

Yes, you can add flavorings such as vanilla extract, peppermint extract, or sea salt to enhance the chocolate’s flavor before coating the bars for added depth.

10. What should I do if the chocolate isn’t coating evenly?

If your chocolate isn’t coating evenly, check its consistency. It may need to be melted again or thinned with a bit of coconut oil for a smoother application.

Additional Resources

If you loved creating these Chocolate-Covered Ice Cream Bars, explore related dessert recipes to continue your culinary journey. Try out different frozen desserts such as fruit sorbets or homemade popsicles for refreshing concepts. You can dive deeper into technique guides and learn how to master the art of tempering chocolate to enhance various recipes.

Discover ingredient information that crosses over into different desserts for useful kitchen knowledge. Additionally, identify equipment recommendations for perfect bar-making to ensure you have all necessary tools on hand. Finally, seasonal variations like pumpkin spice or peppermint-infused bars can be perfect for holiday celebrations.

Join the Conversation

We encourage you to share your experiences with Chocolate-Covered Ice Cream Bars on social media and engage with our community! Use hashtags to showcase your culinary creations along with photos that capture the essence of this delightful treat. Review your take on this recipe and provide your unique twists to inspire others.

Don’t hesitate to comment on variations you’ve tried or suggestions that stood out to you during the process. Let’s cultivate a vibrant, interactive community that celebrates the joy of cooking and creativity in the kitchen!

The Recipe

Chocolate-Covered Ice Cream Bars

Serves: 6 bars

Prep Time: 30 mins

Cook Time: 0 mins

Total Time: 30 mins

Kitchen Equipment Needed

  • Cookie sheet
  • Parchment paper
  • Heatproof bowl
  • Spatula
  • Ice cream scoop

Ingredients

  • 2 cups of your favorite ice cream
  • 1 1/2 cups semi-sweet chocolate chips
  • 1 tablespoon coconut oil (optional, for smoother chocolate)
  • Toppings: chopped nuts, sprinkles, or crushed cookies (optional)

Directions

  1. Line a cookie sheet with parchment paper. Scoop ice cream onto the parchment, forming bars.
  2. Freeze the bars for at least 4 hours until solid.
  3. Melt the chocolate chips in a heatproof bowl over simmering water, stirring until smooth. Add coconut oil for a thinner consistency if desired.
  4. Dip each ice cream bar into the melted chocolate, allowing excess to drip off.
  5. For added flavor, roll the bars in your choice of toppings immediately after dipping.
  6. Return the coated bars to the cookie sheet and freeze again until the chocolate is hard, about 15 minutes.
  7. Serve and enjoy your delightful chocolate-covered ice cream bars!

Recipe Notes

  • Feel free to substitute different flavors of ice cream or toppings based on your preferences.
  • Use a double boiler for melting chocolate to prevent scorching.
  • If you want a dark chocolate flavor, opt for high-quality dark chocolate bars.

Delicious Bacon-Wrapped Chicken Skewers for Your Next Meal

Bacon-Wrapped Chicken Skewers: A Flavor Explosion on a Stick

⚖️
Difficulty
Easy

⏲️
Prep Time
15 mins

🕒
Cook Time
20 mins

⏱️
Total Time
35 mins

🍽️
Servings
4

Indulge in the ultimate flavor combo with Bacon-Wrapped Chicken Skewers that promise to delight your taste buds. Juicy chicken pieces are enveloped in crispy, savory bacon, resulting in a treat that’s perfect for grilling season or any casual gathering. Pair them with a zesty dipping sauce, and you’ve got an appetizer that wows every time it’s served. The smoky notes from the bacon meld beautifully with the herbs and spices that season the chicken, making each bite a mouthwatering experience.

These skewers are versatile; they can serve as a main dish or an impressive appetizer at parties. Imagine starting your meal with them, the aroma of bacon wafting through the air as guests gather ’round. Easy to prepare and packed full of flavor, these are not just chicken skewers; they’re an invitation to gather and celebrate with friends and family.

Quick Recipe Highlights

  • Flavor Profile: The salty, smoky flavor of bacon perfectly complements the tender, juicy chicken, enhanced by your choice of spices.
  • Texture: Crispy bacon contrasts with the moist chicken, creating a delightful bite that’s both savory and satisfying.
  • Aroma: The smoky, savory scent of grilling bacon wraps your kitchen and beckons friends and family to the table.
  • Visual Appeal: Golden, crisp bacon wrapped around juicy chunks of chicken delivers both an inviting presentation and an indulgent experience.
  • Skill Level Needed: This recipe is simple enough for novice cooks, yet impressive enough to dazzle experienced chefs.
  • Special Equipment: You’ll need skewers (metal or wooden) and a grill or oven to achieve perfect results.

Recipe Overview

  • Difficulty Level: This recipe is easy to follow, making it accessible for cooks of all levels. With just a few steps, you can master the art of bacon-wrapping.
  • Category: Perfect for appetizers, party food, or as a fulfilling main dish for weeknight dinners.
  • Cuisine: Influenced by American cuisine, these skewers capture a classic grilling experience that is beloved globally.
  • Cost: Economical to make with simple ingredients like chicken and bacon, this dish offers great taste without breaking the bank.
  • Season: Ideal for summer barbecues, winter gatherings, or any special occasion year-round; perfect for outdoors and indoors alike.
  • Occasion: Versatile enough for game days, family get-togethers, or festive celebrations, these skewers adapt well to any event.

Why You’ll Love This Recipe

The irresistible taste and texture of Bacon-Wrapped Chicken Skewers will have you coming back for more. The combination of crispy bacon with succulent chicken creates an explosion of flavors, satisfying meat lovers everywhere. As these skewers simmer on the grill or bake in the oven, they transform ordinary chicken into a gourmet experience!

Convenience is another reason to love this skewer recipe. With a short prep time and quick cook time, you’ll have delicious food ready in no time, allowing you to spend more moments enjoying your meal and less time in the kitchen. Whether you whip them up for a weeknight dinner or as part of your weekend barbecue, these skewers keep things simple and stress-free.

Nutritionally, you gain protein from chicken while enjoying moderate indulgence with bacon. Opt for lean chicken cuts to maintain a balanced dish, making it enjoyable for those seeking flavorful yet healthier options. Paired with fresh vegetables, these skewers can fit into a balanced meal plan.

The social element of these skewers can’t be overlooked. Perfect for sharing, they encourage mingling and create a lively atmosphere at any gathering. Whether served as a finger food at parties or plated with sides for dinner, they’re sure to be a hit among friends and family.

More than just a tasty dish, Bacon-Wrapped Chicken Skewers offer great cost-effectiveness. With simple ingredients and straightforward preparation, it’s an accessible recipe perfect for feeding a crowd without overspending.

Historical Background and Cultural Significance

Bacon-Wrapped Chicken Skewers have roots deeply embedded in grilling culture and are a favorite at backyard barbecues and parties. Their combination of chicken and bacon speaks to the American love for grilled meats, showcasing how traditional preparation methods can yield delightful results. The origin of this dish intertwines with the history of skewered foods, which have been enjoyed globally for centuries, from Middle Eastern kebabs to Asian satays.

Culturally, these skewers are more than just food; they bring people together. The very act of sharing a meal, especially one that is grilled or cooked outdoors, fosters community. As families and friends gather around the grill or table, the Bacon-Wrapped Chicken Skewers symbolize celebrations, making them a popular choice for festive occasions.

Over time, recipes for bacon-wrapped dishes have evolved. They began as simple combinations but have since adapted to include various marinades, spices, and even vegetables. This adaptability ensures they remain fresh and enticing while preserving their classic appeal.

Regional variations abound, with unique spices or ingredients added depending on local flavor profiles. From barbecue rubs in the South to Mediterranean herbs in the North, each skewered dish reflects the culinary traditions of its region, making these skewers a truly versatile dish.

Ingredient Deep Dive

Chicken plays a pivotal role in this recipe, offering lean protein essential for a well-rounded diet. Historically, chicken has been a staple in many cuisines around the world, revered for its versatility. Nutritionally, chicken is rich in B vitamins and essential minerals like phosphorus and selenium, promoting muscle growth and overall health. When choosing chicken, look for organic or free-range options for optimal flavor and welfare standards.

Bacon adds that unmistakable savory aspect that elevates the dish to new heights. With origins tracing back thousands of years, bacon has found its place in numerous culinary traditions. While delicious, bacon is high in saturated fats, so enjoy it in moderation. When selecting bacon, consider artisanal varieties for a more nuanced flavor, and be aware of curing methods which can impact taste and quality.

To enhance flavor without overwhelming the main ingredients, various herbs and spices can be used. Garlic, paprika, and black pepper are popular choices that add depth. Opt for fresh herbs when possible to achieve a more intense aroma. Storing spices in a cool, dark place extends their shelf life, while herbs are best kept fresh in the refrigerator.

Common Mistakes to Avoid

  • Using thick-cut bacon: Thicker bacon takes longer to cook and can lead to undercooked chicken. Opt for regular cut for even cooking.
  • Overcrowding the skewers: Skewering too many pieces too closely can prevent even cooking. Leave space between pieces for air circulation.
  • Insufficient marinating time: Failing to marinate the chicken can result in bland flavors. Allow at least 30 minutes for spices to penetrate.
  • Neglecting to soak wooden skewers: If using wooden skewers, soak them in water for 30 minutes to prevent burning.
  • Skipping seasoning: Not seasoning well enough can lead to a flat taste. Don’t be shy with spices for the best results.
  • Inconsistent chicken sizes: Cutting chicken into uneven pieces can cause uneven cooking. Aim for uniform sizes for optimal results.
  • Ignoring food safety: Always check chicken is cooked thoroughly (internal temperature of 165°F). Use a meat thermometer to ensure safety.
  • Not basting during cooking: To keep the chicken moist, baste with marinade periodically as it cooks.
  • Rushing the cooking process: Cooking on high heat may char the bacon without cooking the chicken. Low and slow is better for this dish.
  • Forgetting to let skewers rest: Allow the skewers to rest after cooking for juices to redistribute, ensuring tenderness.

Essential Techniques

Marinating is a crucial step to infuse flavors into the chicken. A good marinade not only adds taste but also tenderizes the meat. To master this, allow adequate time for the marinade to penetrate—plan for at least 30 minutes for best results. Avoid using acidic ingredients for too long, as they can toughen the meat if overdone.

Proper skewering is vital for even cooking. Ensure that chicken pieces are secured but not packed too closely on the skewer. Create space for heat to circulate, promoting an even cook. For more stable skewers, alternate chicken with vegetables to add color and flavor while ensuring a secure grip.

Pro Tips for Perfect Bacon-Wrapped Chicken Skewers

Start with room temperature ingredients. Allow chicken to sit out for 15 minutes before cooking, helping it to cook evenly. Invest in high-quality bacon that crisps nicely without excessive grease, enhancing the dish’s overall feel. If making ahead, pre-wrap the skewers and refrigerate until you’re ready to cook. This can save time during busy mealtime preparations.

Utilize an instant-read thermometer to monitor the chicken’s internal temperature, ensuring it reaches 165°F for safety. For extra flavor, consider adding wood chips to the grill for a smoky element that complements the bacon. Finally, pair your skewers with a zesty dipping sauce, such as ranch or BBQ, to elevate the experience further.

Variations and Adaptations

Regional adaptations can include locally loved spices and flavors added to the marinade. For example, incorporating Southern spices like Cajun seasoning will give a unique twist reflecting the area’s culinary scene. Seasonal adaptations might involve adding seasonal vegetables, like bell peppers in summer or butternut squash in fall, to the skewers for a fresh presentation and taste.

Dietary modifications can allow for various diets. Try using turkey or chicken sausage as a lighter alternative to beef bacon for a healthier but equally satisfying option. For a vegetarian experience, replace chicken with hearty mushrooms or zucchini that can absorb the savory flavors of bacon.

To change the flavor profile seasonally, consider using different marinades or glazes, such as lemon herb in spring or teriyaki in fall. Texturally, you might experiment by adding cremini mushrooms for an added earthy flavor, while presentation alternatives can range from vibrant herb garnishes to side salads, matching the meal’s color.

Serving and Presentation Guide

Plating these skewers beautifully enhances their appeal. Arrange them neatly on a vibrant plate or wooden board, garnished with fresh herbs like parsley or chives for a pop of color. Serve with contrasting sauces displayed in small bowls for dipping, allowing guests to customize their experience.

Garnish with lemon wedges or additional herbs for flair, providing fresh elements. Traditionally, skewers are often served with sides like coleslaw or grilled corn, which can enhance the meal’s overall flavor while ensuring balance on the plate.

Consider temperature when serving. Ensure that the skewers are served warm, which enhances the flavors. Allow the skewers to cool slightly before serving to prevent burns and ensure a pleasurable eating experience. For portion control, cut each skewer into halves or thirds, enabling guests to nibble without overwhelming their plates.

Wine and Beverage Pairing

When pairing wine with Bacon-Wrapped Chicken Skewers, a light-bodied red wine, such as Pinot Noir, complements the savory notes without overpowering the dish’s flavors. For white wine lovers, a Chardonnay with a balance of acidity and oak can enhance the richness of the bacon beautifully.

Non-alcoholic options can include sparkling water with lime for a refreshing palate cleanser or homemade lemon iced tea, which adds a hint of sweetness. If coffee or tea pairings are preferred, opt for an herbal tea with citrus notes to complement the smoky bacon.

Serve drinks chilled to contrast the warmth of the skewers. Using decorative glasses for beverages can also add visual appeal to the dining experience.

Storage and Shelf Life

To store leftovers, place the skewers in an airtight container in the refrigerator. They should keep well for about 3-4 days, maintaining taste and texture. If you wish to prolong their shelf life, consider freezing after cooking. Wrap each skewer tightly in plastic wrap before placing them in a freezer-safe bag.

When reheating, use an oven to retain crispiness or a microwave for convenience, ensuring you reheat until fully warmed. Check for any signs of spoilage, such as off smells or changes in texture, before consuming. If reheating from frozen, let them thaw overnight in the refrigerator before reheating.

Make Ahead Strategies

For an efficient meal prep approach, consider marinating the chicken the night before, allowing deeper penetration of flavors. Store the wrapped skewers in the fridge, ready to grill or bake when you arrive home. This can significantly reduce cooking time, perfect for a busy weeknight dinner.

Covering and refrigerating the skewers before cooking can help maintain freshness. This pre-prep allows flavors to meld further while minimizing your active cooking time. When finishing your skewers, consider adding fresh herbs or a squeeze of lemon just before serving to enhance flavor without impacting the dish’s quality.

Scaling Instructions

If halving the recipe, use half of every ingredient while ensuring uniformity in the chicken pieces for even cooking. For larger gatherings, doubling or tripling the ingredients is efficient; just be mindful that cooking times may increase slightly.

Using multiple grilling surfaces or oven racks can help accommodate larger batches, ensuring that they cook evenly. Adjust serving sizes accordingly based on your group, and consider proportionate storage options to maintain freshness for leftovers.

Nutritional Deep Dive

Analyzing the macros, each serving of Bacon-Wrapped Chicken Skewers provides a healthy dose of protein, essential for muscle repair and growth. The inclusion of chicken meat ensures you receive vital nutrients like B vitamins and iron, contributing to overall health.

On a micronutrient level, this dish contains minerals like selenium found in chicken, which may bolster antioxidant defenses. By choosing leaner cuts and moderate portions, you can enjoy flavorful food while maintaining nutritional integrity.

For portion analysis, consider serving one skewer per person while pairing with vegetables or salads to ensure balanced meals. These strategies help in weight management for those aiming to enjoy a hearty meal while remaining mindful of their caloric intake.

Dietary Adaptations

To make Bacon-Wrapped Chicken Skewers gluten-free, swap out any sauces that may contain gluten with tamari or gluten-free options. This ensures everyone can enjoy this delightful dish without concerns. For those avoiding dairy, utilize olive oil to season the skewers instead of marinated butter.

If you’re adhering to a vegan lifestyle, replicate the experience using tempeh or plant-based bacon, imitating the savory elements of the original while preserving essential textures. For low-carb or keto diets, emphasize chicken while minimizing carbo-loading additives and sides.

Paleo enthusiasts will also find joy in this dish, as bacon and chicken are staples within the diet. Experiment with different marinades to align with dietary preferences, ensuring variations can accommodate diverse palate specialties.

Troubleshooting Guide

For texture issues such as chewy chicken, ensure the chicken is properly marinaded and cooked to a safe temperature for a tender bite. If overly salty due to bacon, balance by offering sides like unsalted vegetables or rice to offset the flavor.

When encountering flavor imbalances, assess the spice levels. A splash of citrus or acidic elements can cut through richness while adding brightness. For cooking challenges, ensure your grill or oven is preheated for optimal results; undercooking can lead to unappealing outcomes.

If you run into ingredient substitutions that alter cooking times, adjust your heat levels to ensure that all food reaches appropriate temperatures for safe consumption. Always monitor cooking closely when working with varied ingredients to maintain the best textures.

Recipe Success Stories

Our readers sing praises about their experiences with Bacon-Wrapped Chicken Skewers, often sharing delightful variations they’ve tried. One user incorporated pineapple chunks into her skewers, resulting in a tropical twist that amazed guests at a summer barbecue.

Another reader achieved rave reviews by substituting chicken with succulent shrimp, adding a seafood flair that complemented the bacon beautifully. Those suggestions highlight the adaptability of this recipe, showcasing how creative variations can lead to personal discoveries that enhance enjoyment.

Photography enthusiasts also shared their tips for capturing the finished dish, emphasizing natural light and close-up angles that showcase the sizzling bacon and juicy chicken, making the skewers irresistible on any feed.

Frequently Asked Questions

Can I use turkey bacon instead of traditional bacon?

Yes, you can use turkey bacon for a leaner option, though it may not crisp up the same way as traditional bacon. Adjust cooking times accordingly to achieve the desired crispiness.

How do I know when the chicken is fully cooked?

The chicken is done when it reaches an internal temperature of 165°F. Using a meat thermometer is the best way to ensure safety without cutting the skewers open.

What can I serve with the skewers?

These skewers pair wonderfully with side salads, grilled vegetables, or rice. Experimenting with dipping sauces like ranch or honey mustard can also enhance the flavor profile.

Can I prepare the skewers a day in advance?

Absolutely! You can assemble the skewers and store them in the fridge the night before. Make sure to toast or grill them the following day for the best flavor.

What should I do with leftovers?

Leftovers can be stored in an airtight container in the refrigerator for 3-4 days. They can be reheated in the oven or enjoyed cold in salads or wraps.

Are there vegetarian versions of this recipe?

Yes, you can create vegetarian skewers using vegetables like zucchini, bell peppers, and mushrooms, or opt for plant-based bacon alternatives to mimic the dish’s essence.

Will using metal skewers change the cooking time?

Metal skewers conduct heat better than wooden ones, which means your skewers may cook slightly quicker. Keep an eye on them to avoid overcooking.

Can I grill these skewers instead of baking them?

Yes, grilling is a fantastic method! Just ensure your grill is preheated and oiled to prevent sticking, allowing for that beautiful char to develop.

Is marinating necessary?

While not strictly necessary, marinating the chicken enhances the flavor profile and tenderness of the meat, making the dish even more delicious.

What types of dipping sauces work best?

Dipping sauces like ranch, honey mustard, or a spicy sriracha sauce complement the savory flavors of the skewers beautifully. Customize based on your taste preferences!

Additional Resources

If you’re craving more delicious recipes, try our spicy chicken wings or grilled vegetable skewers for versatile grilling options. For a hands-on learning experience, check out our detailed guides on grilling techniques to elevate your culinary skills. For ingredient-specific insights, explore our recommendations on selecting the freshest chicken or bacon to enhance the final dish. Seasonal variations, such as using fresh herbs or local produce, can also inspire delightful twists on classic recipes.

Join the Conversation

We’d love for you to share your Bacon-Wrapped Chicken Skewers experience! Join the conversation on social media by tagging us in your photos and using our hashtag. Have you tried a variation? Share your tips and tricks in the comments for others to discover. Your feedback inspires our community, and we can’t wait to see how you adapt this beloved recipe to make it uniquely yours!

The Recipe

Bacon-Wrapped Chicken Skewers

Serves: 4

Prep Time: 15 mins

Cook Time: 20 mins

Total Time: 35 mins

Kitchen Equipment Needed

  • Skewers (metal or wooden)
  • Grill or oven
  • Mixing bowl
  • Meat thermometer

Ingredients

  • 1 pound chicken breast, cubed
  • 8 slices of bacon
  • 1 tablespoon olive oil
  • 1 teaspoon garlic powder
  • 1 teaspoon paprika
  • Salt and pepper to taste

Directions

  1. Preheat your grill or oven to 400°F (200°C).
  2. In a mixing bowl, combine the cubed chicken with olive oil, garlic powder, paprika, salt, and pepper. Let marinate for at least 30 minutes.
  3. While the chicken marinates, soak wooden skewers in water if using.
  4. Wrap each chicken piece with a slice of bacon and thread onto the skewers, alternating with any extra vegetables if desired.
  5. Place the skewers on the grill or in the oven and cook for about 20 minutes or until the chicken reaches an internal temperature of 165°F.
  6. Remove from heat and allow resting for a few minutes before serving.

Recipe Notes

  • Experiment with different spices in the marinade for varied flavor profiles.
  • Consider adding peppers or onions between pieces for added color and taste.

Easy Crock Pot Lasagna Soup for a Cozy Dinner Night

Crock Pot Lasagna Soup: A Comforting Twist on a Classic Dish

⚖️
Difficulty
Easy

⏲️
Prep Time
15 mins

🕒
Cook Time
4 hours

⏱️
Total Time
4 hours 15 mins

🍽️
Servings
6

If you’re looking for a cozy and comforting meal, Crock Pot Lasagna Soup is the perfect choice. This dish combines all the rich flavors of traditional lasagna into a hearty soup, served warm in your bowl. From the savory blend of meats and cheeses to the comforting broth, this recipe is sure to become a family favorite. With the convenience of a slow cooker, you can easily enjoy a gourmet meal without spending all day in the kitchen.

made with layers of pasta, mouthwatering Italian sausage, and rich marinara sauce, this crock pot lasagna soup offers a flavorful experience from the first spoonful. Every bit is filled with delightful textures, from the tender noodles to the melty cheese topping. Plus, the aroma that wafts through your kitchen while it cooks is simply irresistible, making dinner time something everyone looks forward to.

Quick Recipe Highlights

  • Flavor Profile: Enjoy a rich blend of Italian spices, sweet marinara, and savory sausage that create a symphony of flavors in every bowl.
  • Texture: The soup features a nice contrast between the soft noodles, hearty sausage chunks, and creamy cheese that melt on top.
  • Aroma: The stunning aromas of garlic, basil, and simmering tomatoes fill your home, making it hard to resist the urge to dig in.
  • Visual Appeal: This vibrant soup is a beautifully layered presentation of reds and whites that looks as delicious as it tastes.
  • Skill Level Needed: With minimal chopping and easy cooking steps, this dish is perfect for novice cooks and busy families alike.
  • Special Equipment: Just a slow cooker is all you need to prepare this delightful meal!

Recipe Overview

  • Difficulty Level: This Crock Pot Lasagna Soup is easy to prepare, making it an excellent choice for busy weeknights and casual cooking enthusiasts.
  • Category: This soup falls under the comfort food category, perfect for cozy dinners.
  • Cuisine: A delicious blend of Italian flavors, this dish showcases the culinary tradition associated with lasagna while adapting it to soup form.
  • Cost: An affordable dish, mostly consisting of pantry staples and basic ingredients, making it accessible for everyone.
  • Season: Enjoy this hearty soup during the fall and winter seasons when warm dishes are comforting and satisfying.
  • Occasion: This recipe is suitable for family dinners, potlucks, or even casual gatherings with friends.

Why You’ll Love This Recipe

The allure of Crock Pot Lasagna Soup lies in its hearty and flavorful profile, making it not just a meal but a wholesome experience. Each bowl is a treasure trove of taste, combining vibrant tomatoes, savory sausage, and rich cheeses that blend beautifully in a comforting broth. The noodles, typically found in classic lasagna, provide a familiar feel, while the soup’s overall texture captivates with every spoonful.

Beyond the delightful taste, convenience is a significant advantage. Simply throw the ingredients into the slow cooker in the morning, and by dinner, an aromatic and hearty meal awaits you. With minimal preparation and cleanup required, it allows for more quality time with family or friends while cooking happens in the background.

Health-wise, this recipe is packed with protein from the sausage and nutrients from the tomatoes and other veggies. You can adjust the vegetables used based on your preference, making it a flexible option for adhering to dietary goals. Each serving provides a perfect balance of flavors with the added bonus of being well-rounded nutritionally.

In social settings, serving a big pot of lasagna soup encourages sharing and enjoyment among guests. It’s perfect for pairing with homemade garlic bread or a fresh salad, prompting everyone to settle in together around the table for good conversation and bites of bliss.

Finally, this recipe is accessible and budget-friendly. Most ingredients are staples found in kitchens or easily obtainable, allowing you to create a rich meal without breaking the bank.

Historical Background and Cultural Significance

Lasagna has a long and storied history, with roots tracing back to Ancient Greece. The concept of layering pasta with various fillings emerged over centuries, eventually evolving into the baked lasagna we know today. The adaptation of this classic dish into soup form is a modern interpretation, which showcases how culinary traditions continue to adapt to contemporary tastes and lifestyles.

Culturally, lasagna holds a significant place in Italian cuisine, symbolizing family meals and shared experiences. Dish variations across regions of Italy have created beloved twists, ensuring there’s a lasagna for everyone. This transformation into soup embraces the versatility of lasagna while maintaining the essence that makes it so cherished.

The adaptation to a soup recipe signifies a growing trend in home cooking that prioritizes comfort, ease, and warm gatherings. As families become busier, such adaptations breathe new life into beloved recipes, ensuring they remain relevant in modern kitchens.

Regional variations of lasagna, such as the introduction of vegetables or different types of meat, can be found across numerous cultures. This soup version invites creativity, allowing anyone to explore what flavors resonate in their homes while retaining a connection to its Italian heritage.

Ingredient Deep Dive

  • Italian Sausage: Known for its rich flavor, Italian sausage is essential in creating the dish’s savory base. It holds cultural significance in Italian cuisine, bringing traditionally infused spices to life. Nutritionally, it offers a good source of protein and fat, which can be moderated by leaner options. When choosing sausage, look for fresh options from local butchers. For storage, keep it refrigerated and use it within a few days. Alternatives like turkey sausage provide a leaner choice.
  • Lasagna Noodles: Traditionally a staple in Italian cooking, lasagna noodles provide structure to the dish. Opting for no-boil noodles simplifies preparation, ensuring they absorb the broth beautifully. Lasagna noodles deliver carbohydrates necessary for energy and can be substituted with gluten-free varieties to accommodate dietary needs. To store, keep in a cool, dry place. They can last for several months in sealed packages.

Common Mistakes to Avoid

  • Not browning the sausage: This step enhances the flavors and prevents a greasy finish to your soup.
  • Overcooking noodles: No-boil noodles should be monitored closely to ensure they maintain a pleasant texture.
  • Skipping cheese: This is crucial for authentic flavors! Mixing in ricotta or cream cheese elevates the dish.
  • Ignoring seasoning: Taste throughout cooking to adjust. Customize based on personal preference.
  • Using too much broth: Be mindful of liquid levels, as you want a thick, hearty soup rather than a watery stew.
  • Rushing the simmer time: Allowing the soup to develop flavors yields a richer taste; patience is key.
  • Serving too soon: Letting the soup cool slightly allows flavors to meld together for a better experience.
  • Neglecting garnishes: Fresh basil or a sprinkle of cheese adds a delightful finish to your Crock Pot Lasagna Soup.

Essential Techniques

Browning the Meat: This technique is essential as it develops a depth of flavor. To master it, cook over medium-high heat until golden brown, ensuring you break up the meat evenly. Look for a nice crust without burning for the best taste.

Layering Ingredients: Building flavors is crucial in creating the final dish. Start with a layer of meat, add sauce, then noodles, repeating. This ensures noodles soften evenly while absorbing flavors throughout cooking. Watch for visual cues; the noodles should blend seamlessly into the broth once cooked properly.

Pro Tips for Perfect Crock Pot Lasagna Soup

1. Use high-quality ingredients for richer flavors, especially the sausage and tomatoes.
2. For added nutrition, incorporate chopped vegetables like spinach or zucchini for extra vitamins.
3. Allow your soup to cool before storing—this prevents excess moisture and maintains its integrity.
4. Incorporate fresh herbs towards the end of cooking for a vibrant touch.
5. Consider adding a splash of white wine for additional depth of flavor.
6. Experiment with different types of cheese, such as mozzarella and parmesan, for a unique twist each time.
7. Always taste as you go to customize your seasoning levels.
8. Pair your soup with a fresh salad for a well-rounded meal experience.

Variations and Adaptations

This recipe offers myriad opportunities for personalization. You can create a vegetarian version by utilizing roasted vegetables and substituting meat with lentils or chickpeas, thereby maintaining protein while enhancing flavor.

Seasonal adaptations could include adding diced squash during the fall or fresh tomatoes in the summer. Flavor variances could involve experimenting with different sauces, like pesto for a fresh twist, or adding chili flakes for a spicy kick.

Texture modifications are straightforward; feel free to use a combination of different pastas or even switch to a creamy base for a richer outcome. Presentation alternatives could involve serving the soup in bread bowls for a charming presentation at gatherings.

Serving and Presentation Guide

When preparing to serve, consider using a large soup pot for communal enjoyment or individual bowls for a more personal touch. Garnishing with fresh basil or parsley adds a beautiful pop of color.

Pair your soup with crusty bread or garlic bread for traditional balance. Temperature is crucial; soup should be served hot, enhancing the comforting experience, while portion control helps guests enjoy without overindulging. If hosting, consider a buffet setup where guests can customize their toppings, making it interactive.

Wine and Beverage Pairing

For wine pairings, a medium-bodied Chianti complements the rich flavors of lasagna soup beautifully. Alternatively, a fruity Zinfandel enhances the dish’s sweetness. If looking for non-alcoholic alternatives, an Italian soda can add a flavorful contrast.

For a coffee or tea experience, an herbal tea with citrus notes offers a refreshing palate cleanser between bites. Ensure all beverages are served at optimal temperatures for enjoyment.

Storage and Shelf Life

Store leftover soup in an airtight container in the refrigerator, where it will last for up to 4 days. For maximum freshness, consume within this timeframe. Reheating should be done gradually on the stovetop or in the microwave—add a bit of water to retain consistency.

To freeze, ensure you let it cool completely before placing it in a freezer-safe container. It can be stored for up to 3 months. When reheating from frozen, allow to thaw overnight in the refrigerator for seamless cooking.

Make Ahead Strategies

To prep your Crock Pot Lasagna Soup ahead of time, consider chopping vegetables and gathering ingredients the night before. Store everything in the fridge to keep it fresh.

Quality can impact the flavor, so ensure not to freeze vegetables before cooking, as this may affect texture. The soup can also be assembled completely and refrigerated overnight, ready to start cooking the next day.

When reheating, allow sufficient time for a thorough warm-up to meld flavors together. You can also add fresh basil or parsley right before serving for a burst of freshness.

Scaling Instructions

Scaling the recipe is straightforward. If you need to halve it, cut every ingredient measurement in half, but maintain cooking times, checking doneness regularly.

For doubling or tripling the batch, ensure your slow cooker is large enough, and monitor liquid levels closely; particularly add a bit more broth as needed for consistency.

Adjusting timing might be necessary as bigger batches take longer to reach the desired temperature. For storage, consider additional containers for leftovers as larger portions will yield more.

Nutritional Deep Dive

On the nutritional front, each serving of this Crock Pot Lasagna Soup promises a balanced intake. With a breakdown of protein, carbohydrates, and fats, it caters to a well-rounded diet.

The macro breakdown varies depending on ingredient choices, so using lean meats or additional vegetables can enhance the healthy profile. Micronutrients found in tomatoes deliver essential vitamins like Vitamin C and potassium, providing health benefits beyond just taste.

For those watching their portions, analyzing the serving size against one’s dietary needs helps promote mindful eating and weight management success.

Dietary Adaptations

If you’re gluten-free, substitute pasta with gluten-free options or zucchini noodles. A dairy-free adaptation can be achieved by using nutritional yeast instead of cheese or plant-based cheese alternatives.

For a vegan version, swap out meat for protein-rich legumes and ensure no animal products are used in sauces. Those following a low-carb or keto lifestyle can skip traditional noodles altogether and enjoy the soup with extra veggies.

Similarly, variations to fit low-FODMAP or paleo diets can be executed by rethinking broth ingredients and focusing on fresh, permitted components.

Troubleshooting Guide

Should issues arise with texture, if the soup is too thick, add a little broth during reheating. For overly thin consistency, incorporate a cornstarch slurry to thicken.

If flavors seem unbalanced, enhance seasoning gradually with salt or spices and taste to adjust. Temperature problems may indicate uneven cooking; ensure the lid is on to keep heat locked in.

Facing equipment complications, ensure all tools are functioning correctly and follow all maintenance steps for your slow cooker for best results. Using fresh, high-quality ingredients significantly improves flavor; consider this when substitutions arise.

Recipe Success Stories

The community has widely praised this Crock Pot Lasagna Soup for its versatility and ease of preparation. Many users have shared their creative adaptations, finding success with unique ingredient swaps.

Reader suggestions celebrated the inclusion of seasonal vegetables, touting how these enhancements yielded stunning results. Those sharing photography tips often highlighted garnishing for visual appeal, encouraging others to present beautifully.

Frequently Asked Questions

1. Can I use regular lasagna noodles instead of no-boil noodles?
No-boil noodles work best for this recipe as they absorb liquid while cooking, making the process simpler. If using regular noodles, ensure to pre-cook them slightly before adding.

2. How long should I cook this soup?
Cook on low for about 4 hours for the best flavor integration and noodle tenderness.

3. Can I freeze leftover soup?
Yes, allow it to cool completely before transferring to an airtight container, where it can last up to 3 months in the freezer.

4. What are some good garnish options?
Fresh basil, grated parmesan, or a drizzle of olive oil makes for a lovely touch on top before serving.

5. How strinkingly impactful is the cheese?
Cheese enhances the flavor greatly, adding creaminess and richness to the soup that captures its essence.

6. Can I adapt this recipe for a slow cooker without a sauté function?
Absolutely! Simply brown your meat in a separate pan before adding everything to the slow cooker.

7. What if I’m allergic to tomatoes?
A tomato-free broth can be made with vegetable stock and other flavorful ingredients to keep the essence of the soup without the allergen.

8. How can I increase the nutritional content?
Consider adding leafy greens, chopped carrots, or other nutritious veggies for added fibers and vitamins.

9. Is this recipe spicy?
This dish is not inherently spicy but can be adapted by adding red pepper flakes or spicy Italian sausage.

10. Are there dairy-free options?
Yes, you can substitute traditional cheeses with plant-based alternatives to create a delicious dairy-free version!

Additional Resources

If you enjoyed this recipe, check out related options like Spiralized Vegetable Soup or Creamy Tomato Basil Soup. If you want to improve your cooking techniques, refer to our guide on slow-cooking tips or ingredient storage information.

Looking for equipment recommendations? We suggest quality slow cookers that yield consistently delicious results and can handle a variety of recipes. If you’re keen on seasonal variations, consider summer leads focused on fresh herbs or our fall-inspired collection highlighting cozy, warming meals.

Join the Conversation

We encourage you to share your experiences making this Crock Pot Lasagna Soup on social media. Show us your photos and adaptations, and engage with fellow cooking enthusiasts in the comments.

Your feedback not only helps others but also cultivates a community eager to share tips, tricks, and mouthwatering variations. Join our email list to never miss a recipe update and be inspired by what others have created!

The Recipe

Crock Pot Lasagna Soup

Serves: 6

Prep Time: 15 mins

Cook Time: 4 hours

Total Time: 4 hours 15 mins

Kitchen Equipment Needed

  • Slow cooker
  • Large skillet (for browning meat)
  • Wooden spoon
  • Measuring cups and spoons
  • Cutting board
  • Knife

Ingredients

  • 1 lb Italian sausage, casings removed
  • 1 onion, chopped
  • 2 cloves garlic, minced
  • 1 can (28 oz) crushed tomatoes
  • 4 cups chicken or vegetable broth
  • 2 cups no-boil lasagna noodles, broken into pieces
  • 1 cup ricotta cheese
  • 1 cup shredded mozzarella cheese
  • 1 tablespoon Italian seasoning
  • Salt and pepper to taste
  • Fresh basil for garnish

Directions

  1. In a large skillet, brown the Italian sausage over medium heat until fully cooked. Drain excess fat.
  2. Add chopped onion and minced garlic to the skillet, cooking until the onions are translucent.
  3. Transfer the sausage mixture to the slow cooker and blend in crushed tomatoes, broth, Italian seasoning, salt, and pepper.
  4. Cover and cook on low heat for 4 hours.
  5. About 30 minutes before serving, stir in broken lasagna noodles and ricotta cheese.
  6. Once cooked, stir in mozzarella cheese until melted and serve hot, garnished with fresh basil.

Recipe Notes

  • Feel free to substitute with lean ground turkey or chicken for a healthier option.
  • For a vegetarian version, omit sausage and use chickpeas or lentils instead.
  • Store leftovers in airtight containers in the refrigerator for up to 4 days.
  • Can be frozen and saved for up to 3 months; reheat on the stove for best results.

Delicious Grilled Scallops with Rémoulade Sauce Recipe to Try

Grilled Scallops with Rémoulade Sauce: A Seafood Delight

⚖️
Difficulty
Medium

⏲️
Prep Time
15 mins

🕒
Cook Time
6 mins

⏱️
Total Time
21 mins

🍽️
Servings
4

Experience the taste of the ocean with our delightful Grilled Scallops with Rémoulade Sauce. This recipe brings together the sweet and delicate flavors of scallops perfectly grilled, complemented by the tangy and zesty Rémoulade sauce. With just the right balance of spices, this dish will transport your taste buds to a coastal paradise, making it an ideal choice for a special dinner or a casual summer gathering.

Cooking scallops can be intimidating for some, yet this recipe is simple, highlighting the natural sweetness of the seafood. The Rémoulade sauce, with its creamy texture and robust flavor, adds an exciting punch that elevates the overall dining experience. Perfectly paired with fresh greens or roasted vegetables, Grilled Scallops are sure to impress both family and guests alike.

Quick Recipe Highlights

  • Flavor Profile: Sweet scallops combined with a tangy, creamy sauce create a delightful contrast that tantalizes your palate.
  • Texture: The scallops have a tender yet slightly charred exterior, while the Rémoulade offers a creamy, smooth mouthfeel.
  • Aroma: The enticing aroma of grilled seafood mixed with fresh herbs and spices fills the air, making it hard to resist.
  • Visual Appeal: Beautifully charred scallops arranged on a plate with a vibrant green sauce create a stunning presentation.
  • Skill Level Needed: This recipe is perfect for novice to intermediate cooks looking to enhance their seafood preparation skills.
  • Special Equipment: A grill (or grill pan) and skewers (if using) are recommended for optimal results.

Recipe Overview

  • Difficulty Level: Medium, this recipe involves grilling which requires attention to timing and heat control.
  • Category: Seafood main course, perfect for summer dinners or elegant gatherings.
  • Cuisine: This dish reflects coastal and French influences, particularly with the use of Rémoulade sauce.
  • Cost: Relatively moderate, scallops can be pricier but their superior taste justifies the expense.
  • Season: Ideal during warmer months when seafood is freshest and outdoor cooking is most enjoyable.
  • Occasion: Great for parties, fancy dinners, or romantic date nights.

Why You’ll Love This Recipe

This Grilled Scallops with Rémoulade Sauce is a taste sensation that will leave you craving more. The sweet flavor of the scallops, grilled to perfection, is beautifully complemented by the Rémoulade, making for a harmonious dish. Each bite showcases the natural sweetness of the seafood, alongside the zestiness of the sauce, creating an exquisite culinary experience. With a delectable texture that’s both tender and slightly crispy from the grill, this dish truly excites the senses.

What’s more, this recipe is extremely convenient to make. With a preparation time of just 15 minutes and a quick grilling process, you can have this sophisticated meal ready in no time. Ideal for eager home cooks, it allows for minimal fuss while delivering impressive results that are perfect for sharing with loved ones.

Not only is this dish delicious, but it also offers nutritional benefits. Scallops are an excellent source of lean protein, coupled with essential vitamins and minerals. They are low in calories and provide heart-healthy omega-3 fatty acids, making them a smart choice for anyone looking to eat healthily.

This recipe also shines during social gatherings, where its stunning presentation and delicious combination of flavors create a memorable experience. Serve it to impress your guests or bring it to potlucks—it’s sure to spark delightful conversations at the dinner table.

Cost-effective for the flavors you’re receiving, this dish stands as a testament to the idea that exquisite dining doesn’t have to break the bank. With the right technique, you’ll deliver a fine dining experience that is accessible to home cooks everywhere.

Historical Background and Cultural Significance

The origins of scallops date back thousands of years, tracing their roots to ancient coastal communities. Known for their natural sweetness, scallops have been a favorite among seafood lovers for centuries, celebrated in various cuisines around the world. The dishes served with scallops reflect the culinary diversity of coastal regions, highlighting local ingredients and preparation styles.

Rémoulade sauce has its origins in France, where it was initially served as a condiment for cold meats and fish. Over time, variations of the sauce spread across different cultures, often adapting to local tastes and ingredients. The sauce became synonymous with seafood dishes, providing a tangy balance to the delicate flavor of fish and shellfish.

This recipe showcases the meeting of two beloved culinary traditions, placing scallops at the forefront alongside a classic French sauce. As seafood becomes increasingly popular, both scallops and Rémoulade have become staples at both casual and upscale dining establishments, which speaks to their versatility and broad appeal.

Regional variations of this dish can be found in coastal areas around the world, each bringing unique local twists and flavor integrations reflective of their geography and culinary practices. Adaptations can include the use of different herbs in the Rémoulade or variations in how the scallops are cooked or accompanied.

Ingredient Deep Dive

Scallops: These shellfish are celebrated for their delicate sweetness and versatility in cooking. They are rich in protein, vitamins B12 and A, and minerals such as iron and magnesium. When selecting scallops, look for those that are firm, shiny, and have a slight ocean smell. Scallops should be stored in the refrigerator and used within one to two days for maximum freshness.

Options for substitution include sea scallops or bay scallops, with the former providing a larger size and meatier texture, making them ideal for grilling. If fresh scallops aren’t available, frozen scallops can be a suitable alternative, although fresh is generally recommended for optimal flavor.

Rémoulade Sauce: This classic sauce originated from a base of aioli and has evolved into a versatile condiment. It typically includes mayonnaise, mustard, capers, pickles, and herbs, giving it a bright and tangy flavor profile. Nutritionally, homemade Rémoulade can be made healthier by reducing oil or incorporating Greek yogurt. When preparing, be sure to taste and adjust seasoning to preference. Store in the refrigerator for up to a week, making it a convenient condiment for various dishes.

Substitutions can include using Greek yogurt as a base for a lighter version or swapping in different herbs to customize the flavor, tailoring the Rémoulade to suit your palate or the season.

Common Mistakes to Avoid

  • Overcooking scallops: Scallops cook quickly; too much time on the grill will turn them rubbery.
  • Not drying scallops: Ensure scallops are dry before grilling to achieve a great sear.
  • Skipping preheating the grill: A hot grill is essential for getting that perfect char on the scallops.
  • Using low-quality scallops: Fresh, high-quality scallops will make a noticeable difference in flavor.
  • Neglecting seasoning: Properly seasoning both the scallops and the Rémoulade sauce enhances the dish’s flavor.
  • Incorrect sauce storage: Rémoulade should be refrigerated immediately and used within a week.
  • Not using skewers: If grilling smaller bay scallops, consider using skewers to prevent them from falling through the grill.
  • Making Rémoulade too far in advance: Fresh herbs in the sauce may lose flavor over time, so prepare just before serving.
  • Forgetting to taste: Always taste your sauce and scallops before serving to ensure seasoning is balanced.
  • Using cold scallops: Let scallops sit at room temperature for a few minutes before cooking; this helps in even cooking.

Essential Techniques

Grilling: Grilling scallops perfectly is key to this dish. It’s important to use high heat to achieve that delicious char and to not overcrowd the grill. Mastering the grill will enhance the scallop’s flavors and create a delightful texture. Look for a golden brown crust as a visual cue for perfect timing.

Making Rémoulade: This technique is crucial for crafting the perfect sauce that complements the scallops. Start by mixing your base and adjusting flavors gradually. Tasting as you go will help achieve a balanced sauce. The key is to avoid over-mixing, as the sauce should retain some texture from the herbs and seasonings.

Pro Tips for Perfect Grilled Scallops with Rémoulade Sauce

1. Always start with dry scallops for that perfect sear; pat them dry with paper towels before cooking.

2. Use a high-quality grill for even heat distribution and optimal cooking.

3. For maximum flavor, marinate scallops for 30 minutes before grilling with olive oil and lemon juice.

4. Maintain grill temperature; ideal grilling temperature is around 400°F (200°C).

5. Let Rémoulade sit in the fridge for at least 30 minutes to allow flavors to meld before serving.

6. Pair scallops with seasonal vegetables to enhance their flavor profile and provide a balanced meal.

7. When serving, layer the sauce in the center of the plate and arrange scallops beautifully on top.

8. Use a meat thermometer to ensure scallops reach an internal temperature of 125°F (52°C) for optimal doneness.

Variations and Adaptations

For a regional twist, consider using local herbs or citrus in the Rémoulade, such as dill or grapefruit, to give it a distinctive flavor. Additionally, seasonal adaptations can include pairing grilled scallops with summer vegetables like zucchini or corn for a refreshing touch.

Dietary modifications can be made by using a vegan alternative for the Rémoulade or skipping the mayonnaise entirely in favor of a tahini-based sauce for a nutty flavor. Texture variations might involve serving the scallops over a bed of creamy polenta or risotto for a heartier dish.

Flavor variations can also opt for different marinades, such as a spicy remoulade using Sriracha or chili powder, giving the dish a kick. Presentation alternatives could include serving scallops on skewers for a fun, party-ready presentation.

Serving and Presentation Guide

When plating your grilled scallops, consider using a large, white plate to highlight the beautiful colors of the dish. A drizzle of the Rémoulade around the scallops not only enhances visual appeal but also adds flavor with every bite. For garnish, freshly chopped herbs or lemon zest can add a pop of color.

Pair your scallops with traditional accompaniments like a light salad or grilled vegetables, maintaining a focus on fresh ingredients. For modern serving suggestions, present the scallops on a wooden board for a rustic touch, or atop a bed of greens for a refreshing contrast.

Temperature considerations are essential; serve the dish immediately after cooking to ensure the scallops are warm and retain their tender texture. Portion control tips include serving 3-4 scallops per person, depending on the sides, to ensure a well-rounded meal.

Wine and Beverage Pairing

For a perfect pairing, consider a crisp white wine such as Sauvignon Blanc or a lightly oaked Chardonnay, which will beautifully complement the delicate flavor of the scallops. The acidity of these wines balances the richness of the Rémoulade sauce, creating a harmonious pairing.

If you prefer non-alcoholic beverages, consider serving a sparkling water with a slice of lemon or a refreshing lemonade to cleanse the palate. Tea, such as a light green tea, can also work well with the dish, offering a soothing contrast to the rich flavors of the scallops.

Storage and Shelf Life

To store leftover scallops, place them in an airtight container in the refrigerator. They are best consumed within one to two days for optimal freshness. Rémoulade should also be stored in the refrigerator and will keep for up to a week if properly sealed.

Signs of spoilage include an off smell or slimy texture for the scallops. If reheating scallops, do so gently to avoid overcooking; a quick sauté on low heat can work wonders. Freezing is not recommended for cooked scallops, as their texture can suffer upon thawing.

Make Ahead Strategies

To streamline your cooking process, consider preparing the Rémoulade sauce a day in advance, allowing the flavors to develop deeply. The scallops can be prepped by cleaning and drying them ahead of time, refrigerated until grilling.

Quality impact assessment is crucial; while scallops can be marinated in advance, avoid marinating too long as they may become mushy. Assembly tips involve grilling scallops just before serving to ensure optimal flavor and texture, making the most of your make-ahead strategies.

Scaling Instructions

Scaling the recipe is straightforward; simply adjust the quantity of scallops and Rémoulade sauce accordingly. If halving the recipe, ensure to divide the cooking time appropriately, particularly if using a smaller grill.

When doubling or tripling, consider the grill space; grilling in batches may be necessary to maintain even cooking. Additionally, timing modifications can be made by keeping an eye on the first batch to gauge cooking duration for subsequent batches.

Storage considerations include using larger containers for leftover Rémoulade and ensuring scallops are tightly sealed to avoid drying out.

Nutritional Deep Dive

Each serving of grilled scallops boasts impressive macros, particularly high in protein while being low in carbs and fat. This makes them a favorable choice for those focusing on muscle building and weight management.

Micronutrient analysis reveals scallops are rich in vitamins and minerals vital for overall health. They contain significant amounts of vitamin B12, essential for nerve function, and magnesium, which is key for muscle recovery.

This dish provides numerous health benefits, including potential cardiovascular advantages thanks to healthy omega-3 fatty acids present in scallops. Paying attention to portion analysis can help align this dish with dietary goals, making them an advantageous addition to many meal plans.

Dietary Adaptations

For gluten-free modifications, ensure all ingredients for the Rémoulade are gluten-free. This dish can naturally fit into gluten-free diets without any adjustments.

Vegan adaptations can be made by substituting scallops with marinated and grilled oyster mushrooms, while for those on a paleo diet, serve the dish with a tangy avocado sauce instead of traditional Rémoulade.

Low-carb variations can be achieved by serving scallops on a bed of zoodles (zucchini noodles) instead of rice or other starchy accompaniments. Similarly, a keto-friendly adaptation could involve focusing on butter-based sauces instead of traditional mayonnaise.

Troubleshooting Guide

Texture issues often arise if scallops are overcooked, leading to a rubbery consistency. To remedy, be vigilant and cook only until they are opaque and firm to the touch. For flavor balance, if the scallops appear bland, a light sprinkle of salt prior to grilling can enhance their natural sweetness.

If you experience temperature problems, ensure that your grill is adequately preheated before placing the scallops on it; a hot grill is essential for achieving the desired sear.

For equipment challenges, be mindful of your grill type; a cast-iron grill pan can be a suitable alternative to an outdoor grill to ensure that grilling can be done indoors without sacrificing flavor.

Recipe Success Stories

Readers have shared delightful stories of how this recipe has become a go-to for summer gatherings, with many commenting on the impressive flavor balance. Numerous variations have emerged, with individuals adding their own local herbs and spices, leading to unique twists on the classic Rémoulade.

Photography enthusiasts have also found joy in capturing the beautiful presentation of the scallops. Social media feedback frequently showcases stunning plates, inspiring others to try their hand at recreating this dish at home.

Frequently Asked Questions

Can I use frozen scallops for this recipe?
Yes, you can use frozen scallops; just ensure they are completely thawed and properly dried before grilling to achieve that perfect sear.

What can I do if I don’t have Rémoulade ingredients?
You can substitute with a mix of mayonnaise, mustard, and lemon juice for a quick and easy alternative or serve the scallops with a simple garlic butter sauce.

How do I prevent scallops from sticking to the grill?
Make sure both the grill and the scallops are adequately oiled before cooking, and always preheat the grill. This will help create a non-stick surface.

How long should scallops be grilled?
Grill scallops for about 2-3 minutes on each side, depending on their size, or until they are opaque and lightly browned.

Can I make the sauce ahead of time?
Absolutely! Rémoulade can be made in advance and stored in the refrigerator for up to a week.

Can I use this recipe with other shellfish?
Yes, you can adapt this recipe for shrimp, lobster, or even fish fillets using the same grilling method and sauce.

What should I serve with grilled scallops?
Grilled vegetables, a fresh salad, or a light grain like quinoa complement the dish beautifully.

What is the best way to know if scallops are cooked?
Scallops should feel slightly firm to the touch and be opaque throughout. Overcooked scallops become rubbery and dry.

How do I store leftover scallops?
Store cooked scallops in an airtight container in the refrigerator and consume within 1-2 days for the best taste and texture.

Do scallops have a lot of calories?
No, scallops are low in calories; approximately 30 calories per ounce, which makes them a healthy protein choice.

Additional Resources

For more seafood inspiration, check out our other recipes featuring shrimp, crab cakes, and grilled fish. Additionally, dive into our technique guides for grilling and seafood preparation to enhance your culinary skills.

Explore ingredient information to learn about the best seafood choices and their sustainability. This will help you make informed decisions while cooking and contribute to responsible consumption.

Join the Conversation

We’d love to hear your experiences with this Grilled Scallops with Rémoulade Sauce recipe. Share your photos, tips, and any variations you’ve tried on our social media channels. Engaging with our community helps inspire other cooks and spreads the love of seafood.

The Recipe

Grilled Scallops with Rémoulade Sauce

Serves: 4

Prep Time: 15 mins

Cook Time: 6 mins

Total Time: 21 mins

Kitchen Equipment Needed

  • Grill
  • Grill pan (optional)
  • Mixing bowl
  • Whisk
  • Measuring cups
  • Knife and cutting board

Ingredients

  • 1 lb fresh scallops
  • 2 tbsp olive oil
  • Salt and pepper, to taste
  • For Rémoulade Sauce:
  • 1 cup mayonnaise
  • 1 tbsp Dijon mustard
  • 1 tbsp capers, chopped
  • 2 tbsp fresh parsley, chopped
  • 1 tbsp lemon juice
  • 1 tbsp pickles, finely chopped
  • Salt and pepper, to taste

Directions

  1. Preheat your grill to medium-high heat.
  2. Pat the scallops dry and season with olive oil, salt, and pepper.
  3. In a mixing bowl, combine mayonnaise, Dijon mustard, capers, parsley, lemon juice, pickles, salt, and pepper to prepare Rémoulade sauce.
  4. Place scallops on the grill and cook for 3 minutes on one side, flip, and grill for an additional 2-3 minutes until cooked through and slightly charred.
  5. Plate the grilled scallops and drizzle with Rémoulade sauce before serving.

Recipe Notes

  • For a spicier version, add a teaspoon of hot sauce to the Rémoulade mix.
  • Consider marinating the scallops with herbs for extra flavor before grilling.
  • The Rémoulade can be stored in the refrigerator in an airtight container for up to a week.
  • Any leftovers can be added to salads or served with sandwiches for added flavor.

Indulge in This Easy Butterfinger Caramel Crunch Fudge Recipe

Butterfinger Caramel Crunch Fudge Recipe: Easy Holiday Dessert Idea

⚖️
Difficulty
Easy

⏲️
Prep Time
15 mins

🕒
Cook Time
30 mins

⏱️
Total Time
45 mins

🍽️
Servings
24 pieces

Indulge your senses this holiday season with our delightful Butterfinger Caramel Crunch Fudge Recipe. This easy holiday dessert combines the rich, creamy sweetness of fudge with the irresistible crunch of Butterfinger candy bars and smooth caramel. Each bite is a symphony of flavors that brings smiles and warmth to any gathering. The combination is not only delicious but also visually appealing, making this fudge a perfect centerpiece for your holiday dessert table.

Imagine a soft, velvety fudge that melts in your mouth, offering the crunch you crave. The sweet, nutty flavor of the Butterfinger pairs perfectly with the buttery, sweet notes of caramel, creating a flavor explosion that is simply irresistible. This fudge can be prepared quickly and is a fantastic way to share the joy of the season with friends and family. Whether you’re hosting a festive party or searching for the ideal homemade gift, this fudge is sure to impress everyone.

Quick Recipe Highlights

  • Flavor Profile: This fudge offers a delectable mix of chocolate, caramel, and buttery toffee notes from Butterfinger that will tantalize your taste buds.
  • Texture: Experience the smooth creaminess of fudge layered with the crunchy bits of Butterfinger, providing an exciting contrast.
  • Aroma: The sweet smell of melted chocolate and caramel fills your kitchen, promising a treat that is as fragrant as it is delicious.
  • Visual Appeal: The gorgeous swirls of chocolate and caramel create an eye-catching display, perfect for any festive occasion.
  • Skill Level Needed: Even novice bakers can successfully make this fudge, making it an accessible treat for all.
  • Special Equipment: A saucepan and a baking dish are all you need—no fancy tools required!

Recipe Overview

  • Difficulty Level: The simplicity of this Butterfinger Caramel Crunch Fudge makes it suitable for beginner cooks, while still delighting seasoned bakers looking for a quick treat.
  • Category: This recipe falls under the dessert category, perfect for celebrations, holidays, or as a sweet snack.
  • Cuisine: Although it pulls inspiration from classic American desserts, the rich flavors give it a gourmet twist beloved by many.
  • Cost: This recipe is budget-friendly, using common ingredients that won’t break the bank, making it an economic choice for holiday treat-making.
  • Season: Although ideal for the holiday season, its delicious flavor makes it a year-round favorite.
  • Occasion: Perfect for holiday gatherings, parties, or as a thoughtful gift for friends and family.

Why You’ll Love This Recipe

The incredible taste and texture of Butterfinger Caramel Crunch Fudge are sure to win over your palate. Each bite blends the creaminess of classic fudge with the delightful crunch of Butterfinger, making for an addictively delicious treat. It’s not just about the flavor; the smooth caramel complements the sweet chocolate, creating a luscious mouthfeel. The balance of flavors is so perfect that you might find yourself going back for seconds— or thirds!

Convenience is another reason you’ll adore this recipe. With only a handful of ingredients and minimal preparation time, you can whip up this fudge in no time. It requires no baking, and with careful attention, anyone can achieve perfect results. The ability to prepare this treat ahead of time also makes it an excellent choice for busy holiday schedules.

Not only is this fudge delicious, but it also has some nutritional benefits. The chocolate provides a burst of antioxidants, and the Butterfinger adds a hint of protein due to its nut content, striking a balance between indulgence and nourishment. While you wouldn’t exactly call this a health food, it does offer a touch of sweetness without sacrificing too much in the way of nutrition.

Social gatherings become more vibrant with homemade treats like this fudge. Sharing food strengthens bonds, and this Butterfinger Caramel Crunch Fudge provides a fantastic conversation starter and a joyful experience. Guests will be thrilled to enjoy a homemade dessert, creating lasting memories together.

Lastly, this fudge is incredibly cost-effective. The ingredients are readily available and inexpensive, allowing you to bake a large batch without overspending. Plus, its delightful packaging makes it a great gift, adding a personal touch to your holiday celebrations.

Historical Background and Cultural Significance

The history of fudge as a dessert dates back to the late 19th century, originating in United States culinary traditions. Fudge quickly became popular for its creamy texture and rich flavor and has been a beloved treat during the holidays ever since. This recipe takes inspiration from these roots while incorporating beloved components like Butterfinger candy bars for an unexpected twist.

Culturally, desserts like fudge have significant importance in American households, often homemade and shared during family gatherings and celebrations. These treats foster connection and nostalgia, bringing loved ones together during festive seasons. As the holidays approach, families often share favorite recipes, and this Butterfinger Caramel Crunch Fudge is a splendid modern addition to any tradition.

Over the years, the evolution of fudge recipes has seen various adaptations and flavors, reflecting the diverse palates of those who enjoy it. From classic chocolate fudge to creative variations incorporating caramel and crunchy elements, fudge now boasts numerous takes that cater to different tastes and preferences.

Regional variations of fudge exist across the nation, some experimenting with local ingredients that add a unique twist, while others stay true to the original chocolate flavor. No matter the version, fudge remains a cherished dessert among Americans, symbolizing warm hospitality and festive spirit.

Ingredient Deep Dive

Chocolate

Chocolate is a staple ingredient in countless desserts and carries a rich cultural significance, being enjoyed worldwide for over three thousand years. Not only is chocolate beloved for its decadent taste, but it’s also packed with antioxidants that may provide various health benefits. When selecting chocolate for fudge, opt for high-quality baking chocolate for optimal melting and flavor. Store chocolate in a cool, dry place, and be aware that it can last for several months when stored properly.

Butterfinger

Butterfinger bars are a classic candy that brings a nostalgic taste to many. These bars feature a unique combination of chocolate coating and a distinctively crunchy peanut butter core. Nutritionally, Butterfinger offers a small amount of protein due to the peanuts, adding a crunchy texture to fudge that elevates the taste experience. When purchasing Butterfinger bars, look for fresh items free of damage. They can be stored in their original wrappers at room temperature but are ideally kept in a cool spot.

Caramel

Caramel, made by heating sugar, has its roots deep in various culinary traditions worldwide. Its rich, sweet profile adds depth to desserts like fudge. In terms of nutrition, caramel is primarily sugar, so it’s essential to enjoy it in moderation. Look for high-quality caramel sauces that contain real ingredients over those with artificial additives. Store left-over caramel in airtight containers in the fridge, but be sure to use it within a week for the best quality.

Common Mistakes to Avoid

  • Skipping Ingredient Measurement: Accurate measuring is crucial in baking; using too much or too little can affect your fudge’s outcome.
  • Overheating the Chocolate: Chocolate can seize or become grainy if overheated. Melt slowly and gently over low heat for the best results.
  • Ignoring Temperature: Ensure the fudge cools completely before cutting to maintain its structure and prevent it from crumbling.
  • Using Subpar Ingredients: Always choose high-quality chocolate and caramel; less expensive varieties can negatively impact the taste.
  • Not Greasing the Pan: Always grease the baking dish well; otherwise, your fudge may stick and be difficult to cut.
  • Rushing the Cooling Process: Patience is key in allowing the fudge to set properly—don’t rush this step.
  • Forgetting to Mix Ingredients: Combine well while melting to avoid uneven textures in your fudge.
  • Storing Incorrectly: Once set, store fudge in a cool, dry place away from direct sunlight to maintain freshness.

Essential Techniques

The key technique for making Butterfinger Caramel Crunch Fudge is the melting of chocolate. It’s important because evenly melted chocolate ensures a smooth texture for your fudge. To master this technique, use a double boiler or a microwave, melting in short intervals and stirring frequently. Visual cues for success include a shiny, smooth consistency without any lumps. Always start at a lower power to prevent overheating.

Another essential technique is folding in the Butterfinger and caramel gently. This process allows you to create a beautiful mixture without breaking apart the candies. To avoid common pitfalls, don’t mix too vigorously; otherwise, you risk turning everything into a mushy mess. The result should be a beautiful blend of fudge, caramel, and crunchy bits peeking throughout.

Pro Tips for Perfect Butterfinger Caramel Crunch Fudge

Use the highest quality chocolate to ensure rich flavor and creamy texture.
Plan ahead: Allow plenty of time for the fudge to cool completely before cutting.
Try mixing mini marshmallows into the fudge for added chewiness.
Top the fudge with extra Butterfinger pieces for a decorative touch.
Experiment with different chocolate types, like dark or white chocolate, to create a unique flavor.
Store leftovers in an airtight container to prolong freshness and flavor.
Gently heat any hard leftover fudge in the microwave for a few seconds before serving to soften it slightly.
Consider adding a pinch of sea salt on top to enhance the sweetness of the fudge.

Variations and Adaptations

For regional variations of this fudge, you might consider incorporating nuts such as pecans or walnuts, which add a delightful crunch and flavor contrast. Seasonal adaptations may include adding peppermint extract around the holidays, making it a festive treat for winter gatherings. If dietary restrictions arise, this fudge can be modified into gluten-free and dairy-free versions using appropriate substitutes, like coconut cream or dairy-free chocolate.

Flavor variations are endless; try adding a hint of espresso powder for an alluring coffee twist that complements the chocolate beautifully. For texture modifications, consider blending in marshmallows or adding a base of rice cereal for an extra crunch. Finally, presentation alternatives can include cutting the fudge into different shapes, such as squares or festive holiday shapes, and adding garnishes like colorful sprinkles.

Serving and Presentation Guide

When plating Butterfinger Caramel Crunch Fudge, consider using a decorative serving platter or tiered stand to showcase its beauty. Garnishing with additional crushed Butterfinger on top adds a finished touch and entices guests. Traditional accompaniments, such as coffee or milk, enhance the flavor experience and cater to guest preferences. Serving the fudge at room temperature allows all flavors to shine.

Temperature considerations matter, as serving slightly warm fudge offers a delightful melt-in-your-mouth experience. Portion control plays a role in serving sizes; cutting the fudge into small squares ensures everyone enjoys this rich dessert without overindulging.

Wine and Beverage Pairing

Pairing wine with Butterfinger Caramel Crunch Fudge can enhance your dessert experience. A rich dessert wine, like a Port or a late harvest Riesling, complements the sweetness of the fudge beautifully. For non-alcoholic alternatives, consider hot chocolate or a spiced chai latte, both of which will echo the luscious chocolate tones.

Additionally, coffee or espresso offers a bold flavor that balances the sweetness of the fudge nicely. Be sure to serve these beverages warm, enhancing the overall cozy and inviting atmosphere this dessert promotes.

Storage and Shelf Life

To properly store Butterfinger Caramel Crunch Fudge, place it in an airtight container in a cool, dry location away from sunlight. This helps maintain the fudge’s freshness for up to two weeks. For optimal flavor, refrigerating the fudge is a great option, although it may become firmer.

When checking for signs of spoilage, look for an off smell or changes in texture. Should you need to reheat the fudge, a brief time in the microwave will soften it back to its original state. For longer storage, consider freezing the fudge in individual portions wrapped in plastic wrap. Allow it to thaw in the refrigerator before enjoying.

Make Ahead Strategies

If you’re looking to make your Butterfinger Caramel Crunch Fudge ahead of time, consider preparing it a week in advance. Store it in an airtight container to maintain freshness. When planning, a prep timeline of a couple of hours before serving is ideal; this allows sufficient time for cooling and cutting while also keeping the fudge fresh.

If baking in stages, consider melting the chocolate and preparing the rest of the ingredients first. Once cooled, the fudge can be cut, and individual pieces wrapped for gifting or saved for future enjoyment. Allow the fudge time to reach room temperature before serving, ensuring that the flavors are vibrant.

Scaling Instructions

To halve the Butterfinger Caramel Crunch Fudge recipe, simply cut all ingredient measurements in half. This is an easy way to test the recipe or make a smaller batch for an intimate gathering. Conversely, when doubling or tripling the recipe, ensure you use a larger baking dish to allow for even cooking and setting.

Adjust baking times slightly if using multiple pans; you may need to rotate the dishes halfway through. Be mindful of storage considerations; you will need more space for larger batches, especially if you plan to freeze portions.

Nutritional Deep Dive

Analyzing the macros in Butterfinger Caramel Crunch Fudge shows that it is high in carbohydrates, mainly from sugar and chocolate components. While enjoying this treat, being mindful of calorie intake and portion sizes is essential. The fudge does not provide significant protein, but the inclusion of Butterfinger offers some nutritional balance.

Micronutrient analysis reveals some trace minerals from the peanuts in Butterfinger, as well as antioxidants from the chocolate. Enjoying this dessert in moderation is key for those mindful of their dietary habits. For those aiming for weight management, consider cutting the fudge into smaller pieces to enjoy without excessive indulgence.

Dietary Adaptations

For gluten-free adaptations of Butterfinger Caramel Crunch Fudge, simply ensure the chocolate and other ingredients used are certified gluten-free. For those seeking a dairy-free option, plant-based chocolate and coconut cream can create a similar delicious result without dairy.

Vegan adaptations are achievable by using egg-free chocolate and substitutes for heavy cream. For low-carb and keto-friendly variations, consider sugar-free chocolate and a substitute for traditional sweeteners. Paleo aficionados can adapt the fudge using raw or natural sweeteners like honey, drastically altering the end flavor profile.

This versatility allows any dietary restrictions to be met without sacrificing flavor or enjoyment—a real win for inclusive dessert options.

Troubleshooting Guide

If your Butterfinger Caramel Crunch Fudge comes out gritty, it may be due to overheating the sugar or chocolate. Ensure gentle, slow heating to achieve a smooth consistency. If the fudge doesn’t set, try refrigerating for a longer period; you can also add a dusting of confectioners’ sugar to help bind the mixture if it remains too soft.

For flavor balance issues, adding a pinch of salt can enhance sweetness and round out the overall flavor. If using substitutions, be cautious; certain ingredients may behave differently when melted or cooled.

If you encounter issues with the fudge sticking to the pan, ensuring proper greasing before adding the mixture will help. Lastly, for those experiencing challenges with cutting clean pieces, try warming your knife slightly before slicing through the chilled fudge.

Recipe Success Stories

Feedback from the community on Butterfinger Caramel Crunch Fudge has been overwhelmingly positive. Home bakers appreciate how simple it is to make, noting it as a go-to holiday recipe. One reader shared their variation by swapping the Butterfinger for a mix of their favorite candies, resulting in a delightful and colorful fudge.

Others have shared photos showcasing creative ways to gift the fudge. From elegant boxes to festive wrapping, this fudge has become a crowd-pleaser among friends and family. This underscores the versatility and charm of sharing homemade treats during the holidays, making memory-making even sweeter.

Tips from the community on photography highlight the aesthetic beauty of this fudge, with plenty of suggestions for garnishing options that enhance the visual appeal and taste experience. Overall, Butterfinger Caramel Crunch Fudge has garnered a reputation for being as rewarding to share as it is to indulge in.

Frequently Asked Questions

Can I use other candy bars instead of Butterfinger?
Yes! Feel free to experiment with other candy bars like Snickers or Milky Way for different flavor experiences.

How long will the fudge last?
The fudge can last up to two weeks when stored in an airtight container, though it’s best fresh.

Can this fudge be frozen?
Yes, you can freeze it for up to two months. Just ensure it’s wrapped well to avoid freezer burn.

Do I have to use sweetened condensed milk?
While it adds a creamy sweetness, you can substitute with homemade caramel or other sweeteners if desired.

What can I do if my fudge is too soft?
If the fudge is too soft, try refrigerating it longer or re-melting, then re-setting it again in the pan.

Is there a vegan version of this fudge?
Yes! Use dairy-free chocolate and coconut cream as substitutes for traditional ingredients.

How do I know when the fudge is set?
The fudge will be firm to the touch and will have a matte finish on top once completely set.

Can I use microwave instead of stovetop for melting?
Yes, microwave melting is perfectly acceptable; just ensure to do it in increments to avoid burning.

What type of chocolate is best to use?
Opt for high-quality semi-sweet or dark chocolate for the richest flavor.

Can I add nuts to the fudge?
Absolutely! Chopped nuts can add a wonderful crunch and enhance the texture of your fudge.

Additional Resources

If you loved making Butterfinger Caramel Crunch Fudge, you might want to try related recipes such as classic chocolate fudge, rocky road, or peanut butter fudge. Consider exploring technique guides that focus on melting chocolate or making candy, which can be beneficial for any home baker.

Ingredient information is readily available to help you choose the best products, and equipment recommendations can make your baking experience more enjoyable. Seasonal variations can inspire other holiday treats that you can share alongside this delicious fudge, celebrating the flavors of the season in every bite.

Join the Conversation

We encourage our readers to share their experiences making Butterfinger Caramel Crunch Fudge! Engage with us on social media by sharing your photos, tips, or recipe variations. Your feedback is invaluable, and photography tips can inspire others to showcase this delightful recipe.

Recipe reviews help create a sense of community, allowing other home bakers to see the magic possible with Butterfinger Caramel Crunch Fudge. Share your stories and celebrate the joy of homemade treats this holiday season!

The Recipe

Butterfinger Caramel Crunch Fudge

Serves: 24 pieces

Prep Time: 15 mins

Cook Time: 30 mins

Total Time: 45 mins

Kitchen Equipment Needed

  • Medium saucepan
  • Wooden spoon
  • 9×9 inch baking dish
  • Parchment paper (optional for easy removal)

Ingredients

  • 2 cups semi-sweet chocolate chips
  • 1 cup sweetened condensed milk
  • 1 cup Butterfinger candy bars, crushed
  • 1/2 cup caramel sauce
  • 1 teaspoon vanilla extract

Directions

  1. In a medium saucepan, melt the chocolate chips and sweetened condensed milk over low heat, stirring frequently until smooth.
  2. Remove from heat and stir in vanilla extract and crushed Butterfinger bars until well combined.
  3. Pour half of the mixture into the prepared baking dish and spread evenly.
  4. Drizzle caramel sauce over the fudge layer and swirl gently with a knife.
  5. Top with remaining fudge mixture and smooth the top.
  6. Refrigerate for at least 2 hours or until set. Once set, cut into squares and serve.

Recipe Notes

  • Store fudge in an airtight container in a cool place for up to 2 weeks.
  • Feel free to substitute with your favorite candy bars for added variety.