Delightful Mini Crème Brûlée Cheesecakes You Can’t Resist

Irresistible Mini Crème Brûlée Cheesecakes: A Delightful Dessert Experience

⚖️
Difficulty
Medium

⏲️
Prep Time
30 mins

🕒
Cook Time
25 mins

⏱️
Total Time
55 mins

🍽️
Servings
12 mini cheesecakes

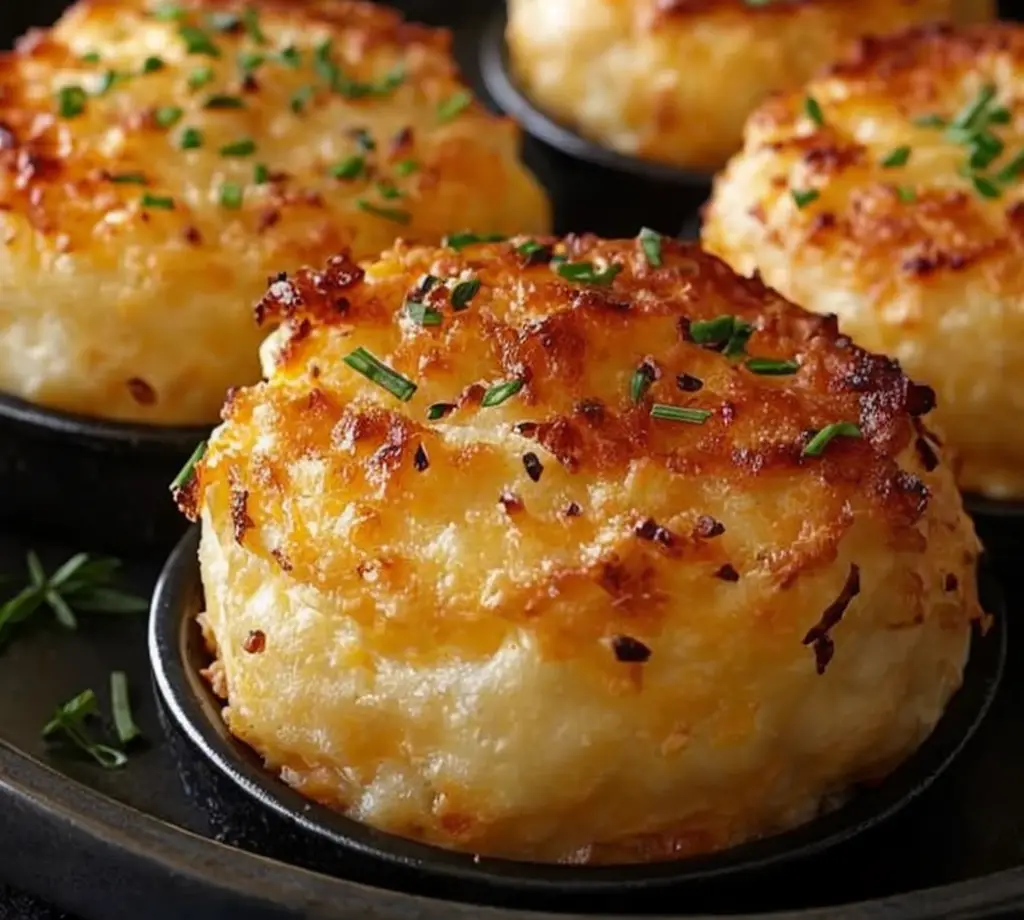
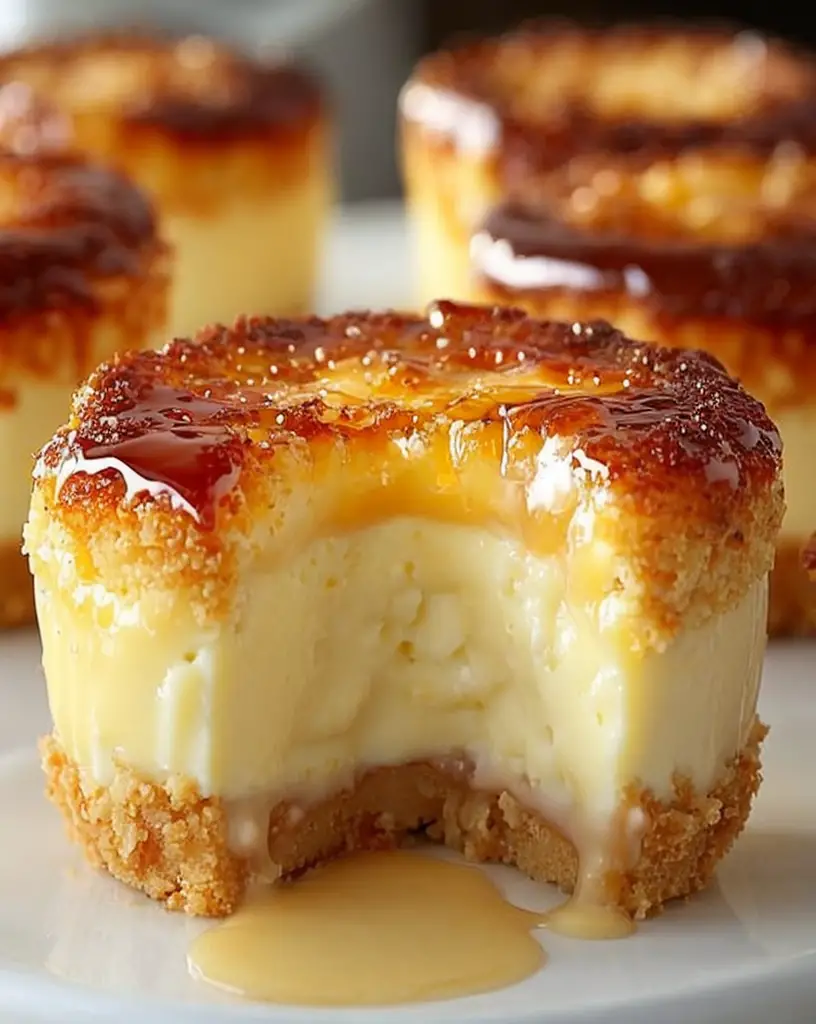
There’s something undeniably enchanting about crème brûlée, a dessert known for its rich custard base and crisp caramelized sugar topping. Now, imagine that same decadent experience transformed into mini cheesecakes! With these Irresistible Mini Crème Brûlée Cheesecakes, you can enjoy all the creamy, velvety goodness of traditional cheesecake, enhanced with the classic flavors of crème brûlée. Each tiny treat features a perfect graham cracker crust, a smooth cheesecake filling, and a caramelized topping that cracks beautifully when you tap it with a spoon. This dessert is not only a feast for the taste buds but also a visual delight.

Perfectly portioned, these mini cheesecakes are ideal for dinner parties, celebrations, or even a cozy night in. They are sure to impress your friends and family with their elegance and taste. The balance of sweetness and rich vanilla combined with the crunch of the caramelized sugar creates a delightful contrast that makes each bite memorable. Whether you’re treating yourself or sharing with loved ones, these cheesecakes will be an unforgettable dessert experience.

Quick Recipe Highlights

  • Flavor Profile: Creamy vanilla with a hint of caramel and a touch of lemon zest.
  • Texture: Smooth and creamy filling contrasted with a crunchy caramelized top.
  • Aroma: Rich vanilla bean and caramelized sugar that lingers in the air.
  • Visual Appeal: Elegant mini desserts with a glossy top and a golden-brown finish.
  • Skill Level Needed: Requires some baking experience but is accessible for enthusiastic home bakers.
  • Special Equipment: Mini tart pans or ramekins for baking the cheesecakes.

Recipe Overview

  • Difficulty Level: This recipe is categorized as medium difficulty. While the steps are straightforward, achieving that perfect caramelized top requires attention and a bit of practice.
  • Category: This dessert belongs to the indulgent sweets category and is perfect as a finishing touch to a meal.
  • Cuisine: Drawing from French culinary tradition, this dessert captures the essence of classic crème brûlée with a cheesecake twist.
  • Cost: The overall cost of the ingredients is reasonable, making this a great option for an impressive yet affordable dessert.
  • Season: Ideal for all seasons, particularly spring and summer celebrations when fresh berries can be added as a topping.
  • Occasion: Perfect for birthdays, anniversaries, holiday gatherings, or dinner parties where you want to impress your guests.

Why You’ll Love This Recipe

The taste and texture of these Irresistible Mini Crème Brûlée Cheesecakes are nothing short of extraordinary. The creamy filling is reminiscent of classic cheesecake, but the added flavor depth from vanilla and caramel gives it a unique twist. The contrast between the rich filling and the crunchy caramel topping creates a delightful mouthfeel that keeps you coming back for more.

Convenience and preparation benefits make this dessert a great choice for both seasoned bakers and beginners. The mini size allows for easy serving, and they can be made a day in advance, saving you time on the day of your event. All you need is some patience for the caramelization step, which adds a dramatic touch to the dessert.

Nutritional advantages can also be enjoyed, as the use of cream cheese and quality ingredients creates a dessert that feels indulgent without being overly heavy. Each mini cheesecake offers a rich flavor and satisfying texture while still being a smaller portion.

When it comes to social and entertaining value, these mini cheesecakes are winners. Their elegant presentation makes them perfect for gatherings or potlucks. Serve them with fresh berries or a dollop of whipped cream for added flair, and you’ll be the star of the event.

Lastly, the cost-effectiveness of this recipe makes it accessible for all budgets. With simple ingredients readily available, you can create a restaurant-quality dessert in the comfort of your own kitchen without breaking the bank.

Historical Background and Cultural Significance

The origin of crème brûlée dates back to the 17th century, with uncertain roots in France, Spain, and England. The traditional recipe has evolved over the centuries, but the core elements of creamy custard and crisp caramel remain integral. This dessert not only represents culinary excellence but also reflects a time of exploration and refinement in French cuisine.

Culturally, crème brûlée holds a special place in French gastronomy, often associated with fine dining and celebrated occasions. Its refined nature elevates any dining experience, making it a staple on dessert menus worldwide.

As culinary techniques advanced, the recipe adapted into various forms, leading to unique regional variations. From the classic French version to delightful adaptations like chocolate or fruit-infused recipes, this dessert showcases creativity and tradition in the kitchen.

Additionally, the evolution of the mini cheesecake has made this beloved dessert more accessible. By transforming the traditional crème brûlée into an individual serving, it honors the original while making it easier to enjoy at social gatherings or as a delightful personal indulgence.

Ingredient Deep Dive

Cream Cheese: A staple in many desserts, cream cheese originated in the United States and has become synonymous with a rich and creamy texture in cheesecakes. It’s an excellent source of calcium and protein, making it a satisfying addition to any dessert.

When selecting cream cheese, look for blocks that have a smooth texture and minimal preservatives. For storage, keep it in the refrigerator, tightly sealed, and look for the expiration date. If you need a substitute, mascarpone can provide a similarly creamy texture.

Sugar: One of the primary ingredients, sugar not only sweetens but also helps create the delightful caramelized topping. Sugar has been enjoyed for centuries worldwide, with its origins tracing back to ancient India and the Mediterranean region.

To choose the best sugar for caramelization, granulated sugar is ideal due to its purity. Store it in a cool, dry place, and if you prefer a less refined option, consider using brown sugar for a richer flavor profile.

Vanilla: A flavor powerhouse, vanilla is integral to these cheesecakes, enhancing the overall taste experience. Vanilla has a long history, being used by the Totonac people of Mexico long before being popularized in Europe.

When purchasing vanilla, opt for pure vanilla extract for the best flavor. Store it in a cool, dark place to preserve its potency. For substitutions, vanilla paste or imitation vanilla can be used, with varying flavor intensity and quality.

Common Mistakes to Avoid

  • Overmixing the batter can lead to excess air incorporation, resulting in a less creamy texture. Mix until combined for best results.
  • Not chilling the cheesecakes long enough can result in a soft filling that won’t hold its shape when serving. Make sure to chill for at least 4 hours.
  • Skipping the caramelization step will leave your cheesecake lacking that signature crunchy topping. Use a kitchen torch for the best results.
  • Using softened cream cheese rather than fully room temperature may cause lumps in the batter. Beat until completely smooth.
  • Baking at too high a temperature can dry out the cheesecakes. Follow the recommended temperature for proper cooking.
  • Not using a water bath can lead to uneven baking and a dry texture in the mini cheesecakes. Ensure even cooking by using this method.
  • Not allowing the cheesecakes to cool completely before removing them from the pans can result in cracks and a ruined presentation.
  • Not letting the cooked cheesecakes rest before adding the caramel layer can lead to melting sugar. Be patient for the perfect topping.
  • Using a high-sugar topping can overpower the delicate cheesecake flavor. Balance is key for the best overall taste.
  • Forgetting to grease the pans can lead to sticking, making it difficult to remove the mini cheesecakes without damage.

Essential Techniques

Water Bath Baking: This technique is crucial for achieving creamy, well-cooked mini cheesecakes. It prevents the direct heat from the oven from drying out the edges while keeping the center moist. To master this, wrap the bottoms of your cheesecake pans in aluminum foil, ensuring no water seeps inside. Place the pans into a larger baking dish filled with hot water before baking. Look for a gently set cheesecake with a slight jiggle in the center for perfect results.

Creaming Ingredients: Properly creaming together sugar and cream cheese is vital to a smooth cheesecake texture. This process incorporates air and creates a light mixture. Use a hand mixer or stand mixer on medium speed, ensuring the sugar is fully dissolved. Watch for a creamy consistency without lumps; this is your indicator of success.

Pro Tips for Perfect Irresistible Mini Crème Brûlée Cheesecakes

1. Invest in a quality kitchen torch for caramelizing sugar. It provides precise control over the browning process and helps avoid burns.

2. For an enhanced vanilla flavor, use vanilla bean paste instead of extract. It adds both flavor and visual appeal with visible flecks of vanilla.

3. If making these cheesecakes ahead of time, add the caramelized sugar topping just before serving to maintain its crunch.

4. Customize your toppings with seasonal fruits such as raspberries or strawberries for added freshness and flavor contrast.

5. Experiment with flavored crusts by adding crushed nuts or chocolate to the graham cracker mixture for a unique twist.

6. Ensure that all your ingredients are at room temperature before mixing for a more homogenous batter.

7. Allow the baked cheesecakes to cool in the oven after baking to minimize cracks and achieve a smooth top.

8. Use mini pie pans or silicone molds for easier removal and a more polished look on the plate.

Variations and Adaptations

For a regional variation, consider using matcha powder for a unique flavor twist that adds a stunning green color. This Asian-inspired adaptation offers a fresh take on the traditional flavor while maintaining the classic structure.

Seasonally, these cheesecakes can be infused with spices like pumpkin or ginger for a fall-inspired dessert. Topping with spiced whipped cream can elevate the flavors, making it perfect for autumn gatherings.

Dietary modifications can be made by using gluten-free graham crackers or nut-based crusts, ideal for those with gluten sensitivities. Experimenting with dairy-free cream cheese creates a vegan version for those who need it.

Flavor variations are endless; consider adding chocolate to the batter for a chocolate crème brûlée cheesecake. This decadent twist will satisfy any chocolate lover while keeping the essence of the original recipe.

For texture modifications, try adding a layer of fruit preserves between the crust and the filling for a fruity surprise, or top with a layer of mousse for added creaminess.

Finally, when it comes to presentation, consider serving these mini cheesecakes in decorative jars for a chic party look. Layer the cheesecake, caramel, and fresh berries for a visual treat.

Serving and Presentation Guide

When plating your Irresistible Mini Crème Brûlée Cheesecakes, consider using decorative plates to enhance the visual appeal. A simple drizzle of chocolate or raspberry sauce underneath can elevate the presentation.

Garnishing with fresh fruits or edible flowers adds a beautiful touch while complementing the flavors. A light dusting of powdered sugar can finish the look, adding elegance to each serving.

Traditional accompaniments like coffee or tea pair beautifully, enhancing the dessert experience. For modern suggestions, serve with a scoop of vanilla ice cream for a delightful contrast in temperature.

Temperature considerations are key; serve the cheesecakes chilled after caramelizing the sugar for optimal texture and flavor balance.

For portion control, consider serving these mini desserts in small portions, allowing guests to indulge without feeling overwhelmed. This fits the trend toward smaller, shared desserts in dining culture.

Wine and Beverage Pairing

When it comes to wine pairings, a sweet dessert wine like Sauternes or Moscato complements the richness of crème brûlée perfectly. These wines bring out the creamy notes while adding their floral or fruity character.

For non-alcoholic alternatives, a sparkling apple cider offers a refreshing contrast to the dense mini cheesecakes. The bubbles cleanse the palate and balance the sweetness effectively.

For coffee lovers, a rich espresso or gourmet coffee blend pairs excellently, enhancing the dessert with a touch of bitterness that contrasts with the sweetness.

Ensure beverages are served at the appropriate temperatures; chilled wines and warm coffee will maximize the enjoyment of this decadent dessert.

Storage and Shelf Life

To store your Irresistible Mini Crème Brûlée Cheesecakes, keep them in an airtight container in the refrigerator. They will last up to five days, maintaining their flavor and texture while chilled.

For transport, ensure they are secured in a sturdy container to avoid movement damage. If you notice any signs of spoilage such as off smells or discoloration, discard them immediately to ensure food safety.

Reheating is not recommended as it may alter the texture; enjoy them cold straight from the fridge. If you want to enjoy them later, consider freezing them before caramelizing the top layer.

When freezing, wrap each mini cheesecake in plastic wrap and place it in a freezer-safe container. They can last up to three months, but be sure to allow them to thaw completely before serving.

Make Ahead Strategies

Planning ahead is simple with these mini cheesecakes. Prepare the crust and filling a day in advance, allowing them to set overnight in the refrigerator for best results. This not only saves time but enhances the flavor as it melds overnight.

If you want to caramelize the sugar topping to serve later, do it just before serving to ensure maximum crunch, preserving the textural contrasts.

Assemble the cheesecakes in individual servings, or keep the components separate for guests to customize their desserts with fresh fruits and toppings.

Quality impact should focus on keeping the balance between taste and texture, resting the cheesecakes for a while before serving to settle flavors and improve texture.

Reheating any elements before serving should be avoided, as traditional crème brûlée is best served chilled. If using fresh elements, like fruits, add them right before serving for a refreshing finish.

Scaling Instructions

If you want to halve the recipe, simply divide all ingredient quantities by two, ensuring to keep the same cooking times. This is ideal for smaller gatherings or testing flavors before a larger event.

Doubling or tripling the recipe for larger groups should consider oven space; bake them in batches if necessary, and keep an eye on the timing adjustments based on different pan sizes or quantities.

Any equipment adjustments should cater to the number of servings; using smaller pans or muffin tins can help maintain even baking. Timing modifications are minimal if the overall volume is increased, so always keep a close eye on them as they bake.

Remember to adjust storage accordingly, as larger quantities may require more refrigerator space or more extensive planning for serving and display.

Nutritional Deep Dive

Each mini cheesecake boasts a macro breakdown primarily consisting of carbohydrates from the crust and sugars, fats from cream cheese, and a moderate amount of protein. This balance provides a satisfying treat that delivers on taste without excessive calories in smaller portions.

Micronutrient analysis reveals that ingredients like cream cheese and eggs provide calcium, vitamins A and D, while the addition of fruit toppings can enhance fiber content and add more vitamins.

Health benefits of enjoying these mini desserts include the enjoyment of creamy textures without guilt. Portion control allows for indulging without straying too far from dietary goals.

Dietary considerations should keep an eye on ingredients for allergies as well as balancing indulgence with moderation. Keeping desserts as occasional treats can help in a balanced diet.

Portion analysis shows these mini cheesecakes are concrete in achieving satisfaction without leading to overindulgence, making them an excellent choice for both health-conscious individuals and dessert lovers alike.

Dietary Adaptations

For a gluten-free version, simply use alternative flours for the crust, or consider using ground nuts for a granola-type base that doesn’t require baking. This caters to those with gluten intolerances while still providing a delicious crust.

To create a dairy-free variant, substitute cream cheese with cashew cream or a dairy-free cream cheese alternative, ensuring similar flavor and texture characteristics while accommodating those with dairy allergies.

If vegan adaptations are needed, eggs can be replaced with flaxseed meal or chia seeds mixed with water, allowing the structure to hold while catering to plant-based diets.

For a low-carb or keto version, use almond flour for the crust and sugar alternatives for sweetness. This satisfies cravings without breaking dietary restrictions.

Paleo adaptations can remove refined sugar entirely, relying on natural sweeteners like honey or pure maple syrup for a more wholesome treat.

For low-FODMAP options, ensure that the crust ingredients are safe and use lactose-free cream cheese to cater to sensitive digestive systems.

Troubleshooting Guide

Texture issues can arise if the filling is overbaked or underbaked; always aim for a slight jiggle in the center while cooling to ensure a creamy result.

To correct flavor balance, consider adjusting the sugar content or adding a touch of salt to enhance sweetness without overpowering. A hint of citrus can also brighten flavors effectively.

Temperature problems often arise during caramelization; if sugar burns, reduce the flame and mix with a splash of water, allowing it to dissolve more gradually.

If equipment challenges occur, such as using a torch, practice on a small area before caramelizing the full top, ensuring even and controlled melting of sugar.

For ingredient substitutions, like using a different type of cheese or sweetener, shading flavor might require trials to find the right balance and consistency.

If timing concerns arise, ensure that chilling times are strictly followed to allow flavors to meld and creating a nice structural hold before serving.

Recipe Success Stories

Community feedback has shown that these mini cheesecakes are a hit at all types of gatherings, with many praising their elegant appearance and rich taste. Readers consistently report back with great success stories, sharing how they’ve incorporated different flavors and toppings to make the dessert their own.

Variation successes abound, as bakers experiment with various seasonal fruits or spices, leading to unique twists on the classic recipe while maintaining its core elements.

Some readers report adaptation stories where dietary restrictions were taken into consideration, using products like gluten-free graham crackers or non-dairy cheese successfully.

For those interested in photography, tips from the community suggest using natural light and interesting garnishes to capture the beauty of these desserts effectively.

Frequently Asked Questions

1. Can I use other flavors besides vanilla? Absolutely! You can experiment with different extracts or citrus zest. Almond or orange can complement the flavors nicely. Just ensure they are used in moderation, as they can be potent!

2. How do I store leftover cheesecakes? Keep them in an airtight container in the refrigerator for up to five days. Ensure the caramelized sugar does not stay on top too long to maintain its crunch. For longer storage, freeze before caramelizing.

3. Can I make these gluten-free? Yes, simply substitute the graham crackers for gluten-free varieties or nut-based crusts, which can still provide a delicious result.

4. Is it necessary to use a water bath? While not strictly necessary, using a water bath prevents uneven cooking and helps retain moisture, leading to a creamier texture.

5. What if my sugar doesn’t caramelize correctly? If sugar clumps or burns, it might be too dry. Keep the temperature low and keep stirring to achieve a consistent caramelization.

6. Can I use a store-bought crust? Indeed! Pre-made graham cracker crusts are a convenient option; use them to save time. Just ensure the size fits your mini cheesecake pans.

7. How long should I chill the cheesecakes? Chill for a minimum of 4 hours or preferably overnight for best flavor and texture.

8. What’s the best way to reheat these mini cheesecakes? Reheating is not recommended as it alters the texture. Enjoy them chilled or at room temperature for the best experience.

9. Can I add toppings to these cheesecakes? Absolutely! Fresh fruit, chocolate shavings, or whipped cream make excellent accompaniments.

10. How do I know when they’re done baking? The cheesecakes are done when the edges are set but the center is still slightly jiggly. They will firm up as they cool.

Additional Resources

For related recipes, consider exploring other mini desserts or unique cheesecakes in our collection. Technique guides can help you master caramelization and baking methods for all types of cheesecakes. Ingredient information is available to provide insight into the best quality components to use.

Equipment recommendations focus on useful tools for baking cheesecakes, including high-quality pans and mixers, ensuring ease in preparation and cleanup. Seasonal variations encourage the incorporation of fresh ingredients that enhance flavor and keep this dessert fresh throughout the year.

Join the Conversation

We invite you to share your mini cheesecake experiences on social media! Whether it’s photos of your creations or suggestions for variations, the community loves to see how others enjoy these recipes.

Photography tips shared by followers stress the importance of natural light; unique garnishing plays a significant role in presentation that delights viewers. Recipe reviews help us refine our content and connect with readers more effectively, ensuring we continue to provide the best possible culinary experiences.

Engagement encourages creativity, and we welcome your input on recipe adaptations and improvements. You are an important part of our kitchen community!

The Recipe

Irresistible Mini Crème Brûlée Cheesecakes

Serves: 12 mini cheesecakes

Prep Time: 30 mins

Cook Time: 25 mins

Total Time: 55 mins

Kitchen Equipment Needed

  • Mini tart pans or ramekins
  • Mixing bowls
  • Electric mixer
  • Kitchen torch
  • Measuring cups and spoons
  • Aluminum foil (for water bath)

Ingredients

  • 1 cup graham cracker crumbs
  • 1/4 cup unsalted butter, melted
  • 2 cups cream cheese, softened
  • 2/3 cup granulated sugar
  • 2 large eggs
  • 1 tablespoon vanilla extract
  • 1/4 teaspoon salt
  • 3 tablespoons granulated sugar (for topping)

Directions

  1. Preheat your oven to 325°F (160°C). Prepare a water bath by placing a larger baking dish in the oven filled with hot water.
  2. In a mixing bowl, combine graham cracker crumbs and melted butter. Press mixture into the bottom of each mini tart pan to form the crust.
  3. In another bowl, beat the cream cheese and sugar until smooth and creamy. Add eggs, vanilla, and salt, mixing until fully combined.
  4. Pour the cheesecake filling over the prepared crust in each mini tart pan, filling them about 3/4 full.
  5. Place the mini cheesecakes into the water bath and bake for about 25 minutes, or until set around the edges but still jiggly in the center.
  6. Remove from the oven and let them cool completely before chilling in the refrigerator for at least 4 hours or overnight.
  7. Before serving, sprinkle a thin layer of granulated sugar on top of each cheesecake and use a kitchen torch to caramelize the sugar until golden brown. Let it sit for a few minutes before serving.

Recipe Notes

  • Ensure the sugar is evenly spread on top for a uniform caramel layer. Avoid using too much, as it can lead to bitterness.
  • If you don’t have a kitchen torch, you can place the sugar-topped cheesecakes under the broiler for a few seconds – just watch carefully to avoid burning.
  • For additional flavor, consider integrating citrus zest or flavored extracts into the filling.

Deliciously Cheesy Mashed Potato Puffs That Everyone Will Love

Cheesy Mashed Potato Puffs: Irresistibly Crunchy Bites

⚖️
Difficulty
Medium

⏲️
Prep Time
20 mins

🕒
Cook Time
25 mins

⏱️
Total Time
45 mins

🍽️
Servings
4-6 servings

Indulge in the crispy goodness of Cheesy Mashed Potato Puffs, a delightful treat that combines classic comfort food with an exciting twist. These puffs are golden and crunchy on the outside while remaining soft and cheesy on the inside, making them the perfect appetizer or side dish for any meal. Whether you’re entertaining guests at a dinner party or simply enjoying a cozy family dinner, these puffs will surely impress with their rich flavor and irresistible texture.

Made from leftover mashed potatoes, these bites are not just delicious but also a fantastic way to reduce food waste. The addition of cheese enhances the already creamy texture of the potatoes, creating a savory delight that’s hard to resist. Perfectly seasoned and baked to perfection, these Cheesy Mashed Potato Puffs are a satisfying finger food that everyone will love!

Quick Recipe Highlights

  • Flavor Profile: These puffs are a blend of creamy mashed potatoes, rich cheese, and a hint of garlic, offering a comforting yet elevated taste experience.
  • Texture: The crunchy exterior contrasts beautifully with the fluffy, cheesy interior, creating a delightful mouthfeel.
  • Aroma: As they bake, the savory scent of melted cheese and roasted garlic fills the kitchen, making it hard to resist a bite.
  • Visual Appeal: Golden brown on the outside, with a hint of cheesiness peeking through; they are as pleasing to the eyes as they are to the palate.
  • Skill Level Needed: This recipe is relatively straightforward, making it perfect for both novice cooks and seasoned chefs.
  • Special Equipment: A baking sheet and parchment paper are recommended for easy cleanup and perfect puff formation.

Recipe Overview

  • Difficulty Level: These Cheesy Mashed Potato Puffs are designed to be fun and easy to make, allowing you to master your kitchen skills with minimal effort.
  • Category: Ideal as a side dish, snack, or appetizer, they fit perfectly into various meal settings.
  • Cuisine: This dish embodies a fusion of American comfort food with Italian influences, particularly through the use of cheese.
  • Cost: This recipe is budget-friendly, utilizing common ingredients that are often found in many kitchens.
  • Season: These puffs are perfect year-round, but are especially well-suited for chilly months when comfort food is a must.
  • Occasion: Great for game days, parties, or holiday gatherings, they’re a crowd-pleaser every time.

Why You’ll Love This Recipe

The moment you take a bite of these Cheesy Mashed Potato Puffs, you’ll be captivated by their rich taste and satisfying texture. The creamy mashed potatoes combined with gooey cheese create a flavor explosion that is both comforting and indulgent. Every mouthful brings the warmth of home-cooked meals, making them perfect for cozy evenings or lively gatherings with friends and family.

One of the best parts about this recipe is its simplicity and convenience. Utilizing leftover mashed potatoes means you can whip these up in no time, making it an excellent choice for those who want something quick yet impressive. The preparation is very manageable, requiring minimal ingredients and steps—ideal for busy weeknights or last-minute entertaining.

From a nutritional standpoint, these puffs are a great source of carbohydrates and protein, thanks to the mashed potatoes and cheese. By incorporating whole ingredients, you can enjoy a guilt-free treat that satisfies without sacrificing flavor. Plus, adding vegetables like spinach or broccoli can enhance their nutritional value, catering to health-conscious eaters.

Socially, Cheesy Mashed Potato Puffs are perfect for entertaining. Their bite-sized form makes them easy to share, encouraging conversation and connection around the table. They’re also a fantastic way to highlight your cooking skills, as guests will be impressed by the unique presentation and delightful taste.

Finally, this recipe is incredibly cost-effective. Many of the ingredients are staples in your pantry, making it an economical choice for feeding a crowd without breaking the bank. By transforming leftovers into delicious bites, you can truly make the most out of your groceries.

Historical Background and Cultural Significance

Mashed potatoes have a rich history in global cuisine, originating from various cultures that embraced the potato as a staple food. Over time, different methods of preparing this beloved vegetable have evolved, with mashed potatoes becoming a quintessential comfort food in America. The invention of items like Cheesy Mashed Potato Puffs speaks to an innovative approach in contemporary kitchens, utilizing leftovers creatively.

The cultural significance of mashed potatoes cannot be overstated. They symbolize comfort and warmth across many households, often featured in holiday meals and family gatherings. For generations, recipes passed down through families have incorporated regional storylines, creating a sense of nostalgia and shared history around the dinner table.

As the recipe for Cheesy Mashed Potato Puffs has evolved, so have the ingredients and cooking methods. From the traditional use of butter and milk to contemporary enhancements like garlic and herbs, cooks have personalized their versions, making these puffs a versatile and cherished dish.

Regional variations of potato dishes highlight the ingredient’s adaptability. In southern cuisine, for example, you might find a version that features cheddar cheese and green onions, while in other cultures, spices and herbs are used to elevate the flavor profile. This cross-cultural blending showcases the universal love for potatoes and their potential in culinary creations.

Ingredient Deep Dive

Potatoes: Potatoes are a versatile staple found in numerous cuisines worldwide. Rich in carbohydrates, they provide energy and are a good source of vitamins C and B6. When selecting potatoes for this recipe, opt for starchy varieties like Russets or Yukon Golds, which create a creamy texture when mashed. Store potatoes in a cool, dark place to prevent sprouting.

For substitutions, sweet potatoes can offer a different flavor profile and added nutrition, bringing a touch of sweetness and more vitamins A and C into the dish.

Cheese: Cheese is the star of this recipe, imparting flavor and creaminess to the puffs. Choose varieties like cheddar, Monterey Jack, or even a sharp cheese to add depth. Nutritionally, cheese is a good source of protein and calcium, essential for bone health. When selecting cheese, look for high-quality options with a strong aroma for enhanced flavor.

Cheese can be stored in the refrigerator in a sealed container. For a lower-calorie version, consider using reduced-fat cheese, or for vegan adaptations, try using nutritional yeast or dairy-free cheese substitutes.

Common Mistakes to Avoid

  • Not drying the potatoes: Excess moisture will lead to soggy puffs; be sure to thoroughly dry your potatoes after boiling.
  • Overmixing: Mixing the ingredients too vigorously can cause the puffs to become dense; mix until just combined.
  • Skipping the chilling process: Letting the mixture chill ensures better handling and shapes; this step improves puff structure.
  • Incorrect oven temperature: Baking at too high of a temperature can brown the puffs too quickly; maintain a moderate heat for even cooking.
  • Using low-quality cheese: Cheap cheese can lead to poor melting; always choose quality cheese for the best results.
  • Not seasoning enough: Ensure adequate seasoning; tasteless potatoes make for bland puffs.
  • Overcrowding the baking sheet: Leaving adequate space between the puffs allows for proper browning and cooking.
  • Ignoring browning: Watch for the right golden-brown color; removing them too early will lead to a soggy texture.

Essential Techniques

Boiling Potatoes: Properly boiling your potatoes is key to achieving the right texture. Peel and chop potatoes into uniform pieces for even cooking. Once boiled, let them sit to drain excess water before mashing for a smoother consistency.

Watch for visual cues such as tender texture; pierced potatoes should break apart easily with a fork, indicating they’re ready to be mashed.

Mashing Potatoes: Use a potato masher or ricer for best results. Avoid using a food processor, as this can result in gummy mashed potatoes. When mashing, aim for a smooth but not too fine texture; some lumpiness adds character.

To master this, visualize the texture you want. Add milk and butter gradually, allowing integration without overworking the mixture.

Pro Tips for Perfect Cheesy Mashed Potato Puffs

1. For extra flavor, consider adding sautéed onions, herbs, or spices to your potato mixture before forming the puffs.

2. Experiment with different cheese blends for varying flavors; sharp cheddar pairs wonderfully with potatoes.

3. Use a cookie scoop to ensure uniform size and shape for all puffs, leading to consistent cooking.

4. For a spicy kick, mix in jalapeños or add a touch of cayenne pepper to the mixture.

5. Before baking, brush the tops of the puffs with egg wash or melted butter for an extra golden finish.

6. Allow sufficient space between the puffs on the baking sheet for even heat distribution and optimal crispiness.

7. Try freezing uncooked puffs for later; simply bake from frozen, adding a few extra minutes to the cooking time.

8. Pair with a flavorful dipping sauce like ranch, aioli, or a spicy salsa for added enjoyment.

Variations and Adaptations

Regional variations often yield delightful changes to Cheesy Mashed Potato Puffs. In Southern cuisine, add crumbled bacon or sharp cheddar for a bold flavor twist. During the fall, try integrating roasted pumpkin puree for a sweet touch.

For dietary modifications, consider making these puffs gluten-free by ensuring all added ingredients are certified gluten-free. Vegan adaptations can also be made using plant-based cheese and non-dairy milk to maintain creaminess without animal products.

Serving and Presentation Guide

When it comes to plating, place your Cheesy Mashed Potato Puffs on a rustic wooden board or a bright, colorful platter to create a visually striking display. Consider garnishing with chopped herbs like parsley or chives for a pop of color.

Pair these puffs with a range of traditional accompaniments such as savory dips or fresh vegetable sticks, encouraging guests to create their own snacking experience.

Wine and Beverage Pairing

A crisp white wine such as Sauvignon Blanc complements the richness of Cheesy Mashed Potato Puffs beautifully. For a non-alcoholic option, consider pairing with sparkling water infused with citrus for a refreshing contrast.

If you prefer a comforting warm drink, a robust cup of herbal tea can round out your meal perfectly, enhancing the flavors of the dish.

Storage and Shelf Life

Store any uncooked Cheesy Mashed Potato Puffs in an airtight container in the refrigerator for up to three days. Cooked puffs, once cooled, can be kept in the fridge for up to four days and reheated in the oven to regain their crispiness.

For longer storage, consider freezing puffs before cooking. Lay them out on a baking sheet until frozen solid, then transfer to a freezer-safe bag. When ready to cook, bake from frozen, adding additional time as necessary.

Make Ahead Strategies

Prep your Cheesy Mashed Potato Puffs a day ahead by preparing the mashed potato mixture and chilling it overnight. The next day, simply scoop, shape, and bake them for a quick, warm appetizer.

For the best results, freeze any leftovers if you have made more than you need. Properly stored and reheated, these puffs will maintain their delightful flavor and texture.

Scaling Instructions

If you need to adjust the serving size, simply halve or double the ingredients accordingly, ensuring you maintain the proper ratios of potatoes to cheese and other add-ins.

For larger gatherings, consider using a larger baking sheet or batch-cooking; just keep an eye on the cooking time, as more puffs may require slight adjustments in baking time for even cooking.

Nutritional Deep Dive

Each serving of Cheesy Mashed Potato Puffs typically provides a healthy dose of carbohydrates from the potatoes, along with protein and calcium from the cheese. When prepared with whole ingredients, they can be a satisfying and nourishing option for both adults and children.

For weight management, pay close attention to portion sizes, as they can be easy to overindulge. Balancing them with a side salad or vegetables can create a well-rounded meal.

Dietary Adaptations

For a gluten-free version, utilize certified gluten-free breadcrumbs or skip the breadcrumbs altogether. This adaptation retains the flavor without compromising on texture.

If you’re looking to go vegan, substitute the cheese with a plant-based cheese alternative and replace dairy with non-dairy milk to maintain the creamy texture. This version can easily satisfy those observing vegan diets.

Troubleshooting Guide

If your Cheesy Mashed Potato Puffs turn out too dry, ensure not to overcook the potatoes initially; overcooked potatoes can lead to moisture loss. Adding a touch of milk or butter to your mixture can also help maintain creaminess.

For flavor balance, if the puffs are bland, increase seasoning and consider adding flavorful ingredients like garlic powder, scallions, or cheese variations to enhance the taste.

Recipe Success Stories

Home cooks have praised this Cheesy Mashed Potato Puffs recipe for its versatility. Many have shared their personalized takes, incorporating ingredients like roasted garlic or herbs to make it their own.

Readers often capture and share their puff-making adventures on social media, showcasing their puff perfection in delightful photographs that inspire others to try their hand at this comforting dish.

Frequently Asked Questions

Can I use instant mashed potatoes? Yes, instant mashed potatoes can be used in a pinch, but for the best flavor and texture, freshly made mashed potatoes are recommended.

How do I store leftovers? Store leftover puffs in an airtight container in the fridge for up to four days, or freeze for longer storage, baking from frozen when ready to eat.

Can I bake these instead of frying? Yes, baking is the recommended method for a healthier version while still achieving a crispy texture.

What cheese works best? Cheddar is commonly used, but feel free to experiment with other cheeses like mozzarella or Monterey Jack for different flavors.

How do I achieve a crispy outside? Ensure that the puffs are spaced properly on the baking sheet and that your oven is preheated for the best results.

Can I make them ahead of time? Yes, you can prepare the potato mixture in advance and shape it into puffs just before baking.

What other ingredients can I add? Incorporate herbs, spices, or even vegetables like spinach or bacon to personalize your puffs.

Can I freeze uncooked puffs? Absolutely, freeze them on a baking sheet until solid, then transfer to a freezer-safe bag. Bake from frozen when ready to enjoy.

How many puffs does this recipe make? This recipe yields approximately 24 puffs, depending on the size you make them.

What’s the best way to reheat them? Bake reheated puffs in the oven at 350°F for about 10 minutes to restore crispiness.

Additional Resources

For more delicious potato recipes, check out our loaded potato skins and creamy potato soup. Additionally, explore our technique guides for mastering mashed potatoes and perfecting baked goods.

Don’t forget to look at our ingredient information page to learn about selecting the best varieties of potatoes and cheeses for your recipes.

Join the Conversation

We love hearing from you! Share your variations of Cheesy Mashed Potato Puffs or post your cooking photos on social media. Engage with other food lovers in the comments section and exchange tips, findings, and creative ideas.

Consider leaving a review of this recipe or any suggestions for improvements you’ve discovered along the way. Let’s create a vibrant community of passionate cooks!

The Recipe

Cheesy Mashed Potato Puffs

Serves: 4-6 servings

Prep Time: 20 mins

Cook Time: 25 mins

Total Time: 45 mins

Kitchen Equipment Needed

  • Large pot
  • Baking sheet
  • Parchment paper
  • Mixing bowl
  • Potato masher or ricer
  • Cookie scoop or spoon

Ingredients

  • 2 cups mashed potatoes (cooled)
  • 1 cup shredded cheddar cheese
  • 1/2 cup breadcrumbs
  • 1 egg (beaten)
  • 1/4 cup chopped green onions
  • 1 teaspoon garlic powder
  • Salt and pepper to taste

Directions

  1. Preheat your oven to 400°F (200°C) and line a baking sheet with parchment paper.
  2. In a mixing bowl, combine cooled mashed potatoes, cheese, breadcrumbs, beaten egg, green onions, garlic powder, salt, and pepper. Mix until well combined.
  3. Using a cookie scoop, form the potato mixture into small balls and place them on the prepared baking sheet.
  4. Bake in preheated oven for about 25 minutes or until golden brown and crispy.
  5. Remove from oven, let cool slightly, and serve with your favorite dipping sauce.

Recipe Notes

  • Feel free to add cooked bacon or sautéed vegetables into the mixture for additional flavor.
  • If you’d like a spicy kick, experiment with pepper jack cheese or add jalapeños.
  • Store leftovers in an airtight container in the fridge for up to four days.

Delicious Grilled Shrimp and Sausage Foil Packets Recipe

Grilled Shrimp and Sausage Foil Packets: A Flavorful Summer Delight

⚖️
Difficulty
Easy

⏲️
Prep Time
15 mins

🕒
Cook Time
20 mins

⏱️
Total Time
35 mins

🍽️
Servings
4

Grilled Shrimp and Sausage Foil Packets are the perfect dish for warm-weather gatherings, offering a delightful combination of savory flavors and smoky aromas. This recipe brings together succulent shrimp and hearty sausage, cooked to perfection along with fresh vegetables and aromatic herbs, all wrapped up in convenient foil packets. The result is a meal that’s not only easy to prepare but also bursting with flavor, making it a favorite for summer barbecues and family dinners.

The beauty of this dish lies in its simplicity and versatility. Imagine pulling your foil packets off the grill, the steam escaping as you unveil a medley of shrimp, sausage, bell peppers, and onions, all mingled together in a vibrant mix of colors. This recipe is a celebration of summer, crafted to be enjoyed outdoors, and brings friends and family together to savor delicious food surrounded by nature.

Quick Recipe Highlights

  • Flavor Profile: A delightful mix of smoky sausage, tender shrimp, and vibrant vegetables, complemented by a touch of seasoning that enhances the natural flavors.
  • Texture: The contrast between the juicy shrimp and the firm sausage offers a satisfying mouthfeel, while the vegetables add a crisp freshness.
  • Aroma: This dish fills the air with the enticing scent of grilled meat, fresh herbs, and sweet notes from caramelized vegetables.
  • Visual Appeal: The colorful combination of shrimp, sausage, and assorted vegetables makes for an impressive presentation on any table.
  • Skill Level Needed: With minimal cooking techniques required, this recipe is perfect for both novice cooks and seasoned chefs alike.
  • Special Equipment: All you need is a grill and aluminum foil, making this recipe accessible for any home cook.

Recipe Overview

  • Difficulty Level: This recipe is categorized as easy, making it a great option for cooks of all skill levels. The straightforward method of assembling foil packets allows for quick preparation without complex techniques.
  • Category: Grilled Shrimp and Sausage Foil Packets serve as a fantastic main dish, ideal for summer meals, picnics, or outdoor barbecues.
  • Cuisine: This dish draws inspiration from classic Southern and coastal cuisine, showcasing the use of seafood and local ingredients to create vibrant meals.
  • Cost: The ingredients for this recipe are affordable, with shrimp and sausage being budget-friendly proteins that deliver on taste.
  • Season: Perfect for summer cooking, these foil packets shine during warm months when grilling is most enjoyable and fresh vegetables are abundant.
  • Occasion: Ideal for casual gatherings, family picnics, or outdoor parties, this recipe fosters a communal dining experience.

Why You’ll Love This Recipe

Grilled Shrimp and Sausage Foil Packets offer an unrivaled taste and texture experience. The combination of juicy shrimp infused with the smoky flavor of sausage is simply irresistible. Every bite is bursting with flavor, and the addition of bell peppers and onions adds a layer of crunchy freshness. The ease of cooking and minimal clean-up, thanks to the foil packets, makes this dish a no-fuss option for busy weeknights or weekend BBQs.

Nutritionally, this recipe is rich in protein and provides a well-rounded meal with the inclusion of vegetables. It’s a great choice for those seeking healthier options without sacrificing flavor. The communal aspect of sharing these foil packets promotes social dining, making it perfect for gatherings where everyone can dig in and enjoy.

Cost-effectiveness is another major advantage of this recipe. Shrimp and sausage are accessible ingredients that vary in price but generally provide good value. This dish does not require any specialty items, making it easy on the wallet while still delivering a gourmet feel. Overall, Grilled Shrimp and Sausage Foil Packets are a winning dish that you’ll want to make again and again.

Historical Background and Cultural Significance

The origins of foil packet cooking can be traced back to various culinary traditions, but it became popular in outdoor cooking as a practical and innovative method to prepare meals over an open flame. In coastal regions, the use of fresh seafood, including shrimp, is deeply rooted in the diet and culture, reflecting the bounty of the sea. This technique became a staple for camping and family outings, allowing for easy preparation and cleanup.

In Southern cuisine, sausage holds cultural importance, representing the varied influences of European settlers. Combining sausage with seafood captures the essence of the region’s culinary heritage, offering a unique twist that celebrates local ingredients.

The evolution of this recipe has seen many interpretations, from traditional methods to modern adaptations that incorporate different spices and vegetables. Regional variations abound; for instance, some families may add herbs like cilantro or spices like Cajun seasoning to enhance the flavor profile.

Understanding these cultural nuances and the history behind Grilled Shrimp and Sausage Foil Packets deepens the appreciation for this dish, allowing you to connect more with the food you enjoy.

Ingredient Deep Dive

Shrimp are not only a delicious ingredient but they also carry significant historical importance in coastal cultures across the world. Rich in protein and low in calories, shrimp offer a variety of nutritional benefits, including omega-3 fatty acids. When selecting shrimp, look for firm, glassy shells and a mild sea scent. Fresh shrimp should be stored in the coldest part of your refrigerator and cooked within a day or two for optimal freshness.

Sausage, a staple in many cuisines, brings an unparalleled depth of flavor to dishes. Originating from various European traditions, sausage-making has evolved to reflect local tastes and ingredients. Nutritionally, sausage can be high in fat and sodium, so consider leaner varieties when possible. Always check for freshness by smelling for strong odors and looking for firmness. Sausages should be stored in the refrigerator and used within a few days; alternatively, they can be frozen for longer shelf life.

Vegetables like bell peppers and onions add not only flavor but also texture and nutritional value, offering vitamins and fiber. Choosing vibrant, firm vegetables is crucial, as they will add both visual appeal and a crunchy bite to your foil packets. Store vegetables in a cool, dark place and utilize them while they’re still fresh for the best flavor.

Common Mistakes to Avoid

  • Overcooking the shrimp: Shrimp cook quickly, and if left on the grill too long, they can become tough and rubbery. Aim for 2-3 minutes per side for perfectly cooked shrimp.
  • Using too much seasoning: While flavor is important, it’s easy to overpower the delicate taste of shrimp with too many spices. Start with a small amount and adjust to your preference.
  • Insufficiently sealing the foil packets: If the packets are not sealed properly, steam will escape, preventing even cooking. Ensure edges are tightly folded to trap the moisture inside.
  • Neglecting the vegetables: Some vegetables may require longer cooking times, so ensure that your vegetable choices can cook in the time it takes for shrimp and sausage.
  • Allowing packets to sit too long: Once off the grill, let the packets sit for too long before opening. This can lead to overcooking the ingredients with residual heat.
  • Forgetting to preheat the grill: Starting with a preheated grill is essential to achieve the best grilling results, so make sure to preheat for optimal searing.
  • Choosing the wrong type of sausage: Using a very fatty sausage can lead to a greasy texture. Leaner varieties work best for this dish.
  • Not adjusting for cooking method: If using an oven instead of a grill, adjust temperatures accordingly for best results.
  • Skipping fresh herbs: Fresh herbs enhance flavor significantly, so don’t skip them for a bland result; they should be added just before sealing the packets.
  • Using unwashed produce: Always wash your vegetables before incorporating them in the recipe to remove any pesticides or dirt.

Essential Techniques

Creating foil packets is a key technique that not only simplifies cooking but locks in moisture and flavor. To master this technique, lay out a large sheet of aluminum foil and place ingredients in the center, leaving space around the edges for folding. The key is to fold the edges tightly, creating a little pouch. Check your packets for visual cues; they should not leak any juices.

Grilling shrimp quickly is important for achieving the perfect texture. Learn to recognize when shrimp turn pink and opaque; this indicates they are fully cooked. Using a grill basket can help with smaller ingredients, preventing them from falling through the grates.

Selecting fresh ingredients enhances each bite’s flavor. Be sure to visually assess your ingredients for freshness and seasoning. A colorful medley of vegetables will not only elevate the dish visually but also provide diverse nutrients.

Pro Tips for Perfect Grilled Shrimp and Sausage Foil Packets

– Use large shrimp for better texture and visual appeal; they hold more flavor and create a more satisfying bite.
– Marinate shrimp and sausage beforehand for added depth of flavor; even a short 30-minute marinade can significantly enhance the dish.
– Experiment with various vegetables according to the season for a fresh twist on the dish; zucchini, corn, and asparagus are great options.
– Grill the packets over indirect heat to avoid burning the outside while allowing the inside to cook evenly.
– Consider adding citrus slices inside the packets for a burst of fresh flavor alongside shrimp and sausage.
– Use a mix of fresh herbs like parsley or thyme just before serving to enhance the aroma and freshness.
– For an extra smoky flavor, try adding a few drops of liquid smoke to your marinade.
– Have extra foil on hand to create new packets on the fly if you need to adjust for portion sizes.

Variations and Adaptations

Regional variations can really personalize your Grilled Shrimp and Sausage Foil Packets. For instance, a spice rub inspired by Cajun cuisine can add a whole new level of flavor. In the colder months, you can substitute shrimp for other seafood or even chicken to ensure you enjoy this dish year-round.

For dietary modifications, consider swapping out the sausage for turkey or plant-based alternatives for a lower-fat option. If you want to increase the flavor profile, try adding different seasonings, like taco seasoning for a fiesta-themed grill night.

In terms of texture modifications, you can roast vegetables beforehand for additional crunch and sweetness or grill whole cherry tomatoes to burst with flavor. For a refreshing twist, add a dollop of creamy avocado dip or sour cream on top when serving.

Finally, experiment with creative presentations by serving the foil packets on wooden boards or plates adorned with fresh herbs and lemon wedges for an appealing display.

Serving and Presentation Guide

To present your Grilled Shrimp and Sausage Foil Packets beautifully, begin by carefully unveiling the packets at the table to create a dramatic effect with the escaping steam and aromatic scents. For plating, consider transferring the contents to a large serving platter, carefully spreading them out to showcase the vibrant colors of the dish.

Garnish with fresh herbs such as cilantro or parsley to elevate the dish visually. You can also incorporate bright citrus wedges for a splash of color and flavor balance. Serve with crusty bread or a side salad for a complete meal.

Temperature plays a significant role in enjoyment, so serve the packets warm but not scalding hot to allow guests to dive in comfortably. Consider portion control by utilizing small plates or bowls, especially when serving at gatherings, to ensure guests can sample a variety of flavors.

Finally, emphasize freshness by pairing the dish with a crisp white wine or lemonade to enhance the dining experience.

Wine and Beverage Pairing

For a delightful pairing, consider a chilled Sauvignon Blanc or a light Pinot Grigio that complements the seafood without overpowering the delicate shrimp flavors. The acidity in these wines cuts through the richness of the sausage, creating a balanced sip.

For a non-alcoholic alternative, a refreshing iced tea with a hint of lemon can offer a beautiful contrast to the savory dish. If you prefer something bolder, a light lager or wheat beer enhances the grill flavors effectively.

When serving, make sure your drinks are well-chilled to amplify the overall freshness and enjoyment of the meal. Keep in mind that adjusting serving temperatures—serving whites cold and reds at room temperature—can enhance the tasting experience.

Storage and Shelf Life

To store leftover Grilled Shrimp and Sausage Foil Packets, allow them to cool completely before transferring to airtight containers. Store in the refrigerator for up to 3 days, but be mindful that the shrimp may lose some texture over time.

Ensure to label containers with the date for easy tracking. If you need to keep them longer, consider freezing leftovers by placing them in freezer-safe bags. These can be stored in the freezer for up to 2 months but are best enjoyed fresh.

When reheating, it’s best to avoid the microwave as it can overcook the shrimp, leading to a rubbery texture. Instead, reheat in the oven at a low temperature or on the stovetop with a splash of water to maintain moisture.

Make Ahead Strategies

To make the Grilled Shrimp and Sausage Foil Packets ahead of time, prepare your marinade and raw ingredients in advance. You can chop vegetables and portion out shrimp and sausage, allowing flavors to meld overnight before cooking.

Foil packets can be assembled and stored in the refrigerator a few hours prior to grilling. Just be sure to seal them tightly and mark each packet with the contents for easy identification.

Consider cooking the ingredients slightly less than the full cooking time recommended in the recipe. This approach allows for reheating while maintaining the quality of the shrimp and sausage during grilling.

When it’s time to serve, simply grill according to the recipe, ensuring the meal is quick and convenient for you and your guests.

Scaling Instructions

If you want to adjust the recipe’s serving size, halving it is simple; just divide all ingredients by two while maintaining the same cooking method. For doubling or tripling, ensure uniform packet sizes so that cooking times remain consistent.

Equipment adjustments may become necessary with larger quantities; use larger sheets of foil or multiple grilling areas. Timing modifications might be needed as well; monitor the packets closely, as cooking time will depend on the overall heat of the grill and number of packets.

As for storage considerations, ensure to safely separate packets in one container for easy reheating, or consider how to best group like ingredients for shared cooking space, so all packets cook evenly.

Nutritional Deep Dive

The nutritional breakdown of Grilled Shrimp and Sausage Foil Packets showcases an impressive balance of macronutrients. Shrimp contributes lean protein, while sausage can offer heartier macronutrient values, depending on the type. Overall, this dish provides a solid source of protein with fewer calories compared to heavier meal options.

Micronutrient analysis points to the benefits of including vegetables, which enhance fiber and provide essential vitamins like A and C, supporting overall health. This meal is well-suited for those looking to maintain a balanced diet while enjoying flavorful options.

In terms of health benefits, the omega-3 fatty acids in shrimp are known for their heart-healthy properties, while the inclusion of fresh vegetables helps support digestive health. Portion analysis allows for flexible serving sizes, accommodating various dietary needs.

For those on weight management plans, adjusting portion sizes and selecting leaner sausages can keep calorie counts in check without compromising on flavor.

Dietary Adaptations

To cater to a gluten-free diet, ensure that the sausage used is labeled as gluten-free, avoiding any sauces or marinades that may contain hidden glutens. The base recipe itself is naturally gluten-free, providing an appetizing option for those with sensitivities.

For dairy-free adaptations, since the recipe does not require any dairy products, it is suitable for those looking to exclude dairy from their diets.

Vegan adaptations can be achieved by completely replacing shrimp and sausage with plant-based protein sources, like grilled tempeh or marinated mushrooms, to maintain a satisfying texture and flavor.

Those on low-carb or keto diets may also enjoy this dish without the sausage, adding more non-starchy vegetables instead while keeping the original grilled shrimp as the focal point.

Consideration for paleo diets involves ensuring that all ingredients align with clean eating, promoting grassy-fed sausage and fresh produce while avoiding any heavily processed items.

Troubleshooting Guide

If you encounter texture issues, such as shrimp being rubbery, assess your cooking time to ensure that they haven’t been overcooked. Conversely, undercooked shrimp will be translucent and not ideal; adjust timing as necessary based on grill heat.

Flavor balance can be an issue if using strong seasonings; this can be tackled by recognizing when to add marinades and spices—to balance the overall taste and avoid being overly salty or pungent.

Temperature problems may arise from uneven heat on the grill. Be sure to utilize even grilling methods, whether gas or charcoal, to ensure consistent cooking of all packets.

If ingredient substitutions were made, ensure that replacements are also compatible with the cooking methods discussed for best outcomes. Timing concerns arise when grilling multiple packets, so always monitor carefully.

Finally, staying mindful of visual cues and aromas helps in anticipating the dish’s readiness and ensures delicious results without compromised flavor.

Recipe Success Stories

Community feedback on Grilled Shrimp and Sausage Foil Packets has been overwhelmingly positive. Many have noted how easy the recipe is to customize, allowing them to try various protein and vegetable combinations based on preference and seasons.

Readers’ adaptations, such as adding their favorite spicy sauces, have contributed to new flavor profiles, showcasing the dish’s versatility. Success stories highlight that this recipe is not only a hit among families but also a preferred choice for entertaining guests during summer gatherings.

A number of photography enthusiasts have shared stunning images of their finished packets, often featuring vibrant colors and appetizing presentations. Tips shared in cooking forums have helped others improve their techniques, leading to a wonderful sense of community engagement around this recipe.

Overall, the collaborative storytelling about Grilled Shrimp and Sausage Foil Packets emphasizes how food can bring people together, creating shared moments around delicious meals.

Frequently Asked Questions

Can I use frozen shrimp for this recipe?

Yes, you can use frozen shrimp. Ensure they are thawed completely before marinating or grilling. This will allow for even cooking and ensures flavor absorption from the marinade.

What type of sausage is best for this recipe?

The best type of sausage depends on your personal preference. Andouille sausage offers a spicy kick, while smoked sausage gives a richer flavor. Feel free to experiment with different varieties!

Are there vegetarian options for this dish?

Absolutely! You can substitute shrimp and sausage with a combination of hearty vegetables, tofu, or plant-based sausages to keep the spirit of the dish while accommodating vegetarian diets.

How can I cook these packets in the oven instead of on the grill?

Can I make this dish vegan?

Yes, you can create a vegan version by replacing shrimp with marinated tempeh or mushrooms and using plant-based sausage options that align with vegan diets.

What other vegetables can I add?

The options are endless! Consider using zucchini, corn, cherry tomatoes, or asparagus. Seasonal vegetables are a great way to customize the dish based on what’s fresh and available.

How long can leftovers be stored?

Leftovers can be stored in airtight containers in the refrigerator for up to 3 days. For longer storage, consider freezing the packets for up to 2 months.

Can I add extra spices or marinades?

Definitely! Feel free to add extra spices or marinades to customize the flavors. Just be mindful not to overpower the delicate shrimp flavors.

What’s the best way to reheat leftovers?

The best way to reheat leftovers is on the stove over low heat or in the oven. Avoid the microwave to prevent overcooking the shrimp and preserve texture.

Is it safe to eat shrimp that have turned pink?

Yes, cooked shrimp will turn pink and opaque when they’re safe to eat. Slightly translucent shrimp can indicate that they are undercooked and should not be consumed.

Additional Resources

To enhance your culinary repertoire, check out related recipes showcasing seafood grilling techniques that complement Grilled Shrimp and Sausage Foil Packets. Additionally, dive into technique guides on properly seasoning and marinating proteins for richer flavor profiles.

For ingredient recommendations, explore options that align with seasonal cooking to maximize freshness and flavor. As summer rolls in, consider outdoor cooking essentials for the best grilling experience, from grills to barbecue tools.

Finally, explore seasonal variations that can elevate your grilling adventures all year round, ensuring you make the most out of your time spent in the kitchen and at the grill.

Join the Conversation

We’d love to hear about your experiences with Grilled Shrimp and Sausage Foil Packets! Share your creations on social media and tag us to join a thriving community of food lovers. Whether you’ve captured a stunning photograph or modified the recipe with your personal touch, each story adds to the richness of our culinary journey together.

Engage with your friends and family by inviting them to try this recipe and sharing your thoughts on their variations. Don’t forget to leave a review if you’ve enjoyed making this dish—it helps others discover such delicious options. Together, let’s celebrate the love of cooking, sharing, and enjoying good food!

The Recipe

Grilled Shrimp and Sausage Foil Packets

Serves: 4

Prep Time: 15 mins

Cook Time: 20 mins

Total Time: 35 mins

Kitchen Equipment Needed

  • Grill or oven
  • Aluminum foil
  • Mixing bowl
  • Measuring cups and spoons
  • Knife and cutting board

Ingredients

  • 1 pound large shrimp, peeled and deveined
  • 1 pound sausage, sliced (Andouille or smoked sausage)
  • 1 bell pepper, sliced
  • 1 onion, sliced
  • 2 tablespoons olive oil
  • 2 teaspoons garlic powder
  • 1 teaspoon paprika
  • Salt and pepper to taste
  • Fresh herbs for garnish (optional)

Directions

  1. Preheat the grill to medium-high heat.
  2. In a mixing bowl, combine shrimp, sausage, bell pepper, onion, olive oil, garlic powder, paprika, salt, and pepper.
  3. Cut four large pieces of aluminum foil and place a portion of the mixture in the center of each piece.
  4. Fold the foil into packets, sealing them tightly to prevent any steam from escaping.
  5. Grill the packets for 15-20 minutes, flipping halfway through, until the shrimp are pink and the sausage is heated through.
  6. Carefully remove the packets from the grill and let them cool a bit before opening.
  7. Garnish with fresh herbs if desired and serve immediately.

Recipe Notes

  • Feel free to add other vegetables like zucchini or corn to the mix.
  • If cooking in the oven, preheat to 400°F (200°C) and bake for 20-25 minutes.
  • Leftovers can be stored in the fridge for up to 3 days.
  • Use different seasonings to customize the flavor to your preference.

Irresistible Butterfinger Balls Recipe You Can’t Afford to Miss

Ultimate Butterfinger Balls Recipe – Don’t Lose This One!

⚖️
Difficulty
Easy

⏲️
Prep Time
15 mins

🕒
Cook Time
0 mins

⏱️
Total Time
15 mins

🍽️
Servings
24 balls

Butterfinger Balls are a delightful and indulgent treat that will have your taste buds dancing with joy. Combining the sweet, crumbly texture of Butterfinger candy with a rich, creamy coating, these delicious bites are a perfect blend of flavors that are sure to satisfy any sweet tooth. They’re not only quick to prepare, but they also bring back nostalgic memories, making them a delightful treat for both kids and adults alike.

In just 15 minutes, you can whip up these tasty delights, making them perfect for parties, potlucks, or simply satisfying your sweet cravings. Imagine biting into this sweet confection, where the rich peanut butter mingles with the chocolate, creating a sensational explosion of flavor. Plus, you can easily customize them with your favorite toppings or serve them plain for a traditional take. Trust me, once you make Butterfinger Balls, you won’t want to lose this recipe!

Quick Recipe Highlights

  • Flavor Profile: The luscious taste of peanut butter combined with the sweet crunch of Butterfinger creates an irresistible flavor experience that will please all palates.
  • Texture: Each bite offers a satisfying crunch from the crushed candy, enveloped in a smooth, creamy exterior that melts in your mouth.
  • Aroma: The warm, inviting aroma of chocolate and peanut butter makes these treats incredibly tempting and enhances their overall appeal.
  • Visual Appeal: These delectable balls can be garnished with chocolate drizzle or colorful sprinkles, making them visually stunning on any dessert table.
  • Skill Level Needed: Easy enough for beginner cooks, Butterfinger Balls are a fun and simple project that can be done in no time.
  • Special Equipment: No special equipment is required, just basic kitchen tools and your hands for rolling the balls!

Recipe Overview

  • Difficulty Level: This recipe is rated easy, making it ideal for novice cooks who want to impress with a homemade treat.
  • Category: Butterfinger Balls fit perfectly in the dessert category, making them a fantastic addition to any sweet portfolio.
  • Cuisine: While rooted in American tradition, Butterfinger Balls have become a favorite in many households, reflecting a unique mix of comfort food and candy culture.
  • Cost: With budget-friendly ingredients, these delightful treats are also easy on the wallet, typically costing less than $10 to make.
  • Season: Butterfinger Balls are great year-round, but they make special appearances at holidays and gatherings, adding joy to festive occasions.
  • Occasion: Perfect for birthdays, holidays, or casual get-togethers, these bites are sure to be a hit on any dessert table.

Why You’ll Love This Recipe

Butterfinger Balls deliver an amazing taste with their perfect blend of sweetness and crunchy texture. The combination of peanut butter and chocolate not only satisfies dessert cravings but also creates a comforting experience reminiscent of childhood. In addition, the recipe requires minimal effort, making it a convenient choice for busy individuals who still want to indulge in homemade delights.

These treats also come with nutritional advantages. The peanut butter provides protein and healthy fats, while the crushed Butterfinger adds a touch of sugary sweetness that can be enjoyed in moderation. This balance makes Butterfinger Balls a more mindful choice for those looking to satisfy their sweet tooth without compromising on flavor.

Socially, Butterfinger Balls are great for entertaining. They can be easily shared among friends and family, creating a lively atmosphere during gatherings. Whether set out on a dessert platter or given as homemade gifts, these balls invite moments of togetherness and delightful conversations.

Moreover, Butterfinger Balls are cost-effective. With just a few simple ingredients, you can make a large batch that rivals more expensive store-bought treats. This value, combined with their delicious taste, makes them an excellent addition to your repertoire of desserts.

Finally, the simplicity of the recipe ensures accessibility for everyone. Whether you’re an experienced baker or a novice in the kitchen, these Butterfinger Balls are a treat that can be made with minimal fuss, making them a must-try.

Historical Background and Cultural Significance

Butterfinger itself is a candy bar that dates back to the 1920s, originally manufactured by the Curtiss Candy Company. The unique combination of chocolate, peanut butter, and crispy butter toffee made it a favorite among candy lovers. Over the years, Butterfinger’s popularity grew, leading to various recipes and adaptations incorporating its iconic flavor, including the beloved Butterfinger Balls.

In popular culture, Butterfinger gained fame through its playful advertising campaigns, appealing to both children and adults. The catchy slogan “Nobody’s gonna lay a finger on my Butterfinger” showcased the candy’s appeal as a treat worth protecting. This cultural significance has led to numerous recipes featuring Butterfinger, enabling it to maintain its popularity over the decades as part of American culinary tradition.

As new generations discover the joy of Butterfinger, adaptations like Butterfinger Balls have emerged. This evolution demonstrates how classic sweets can be reimagined and enjoyed in different forms. Connecting to various occasions, such as parties and potlucks, these adaptations ensure that the flavor of Butterfinger continues to spread joy and delight.

Regional variations of Butterfinger recipes have also surfaced, showcasing the adaptability of this treat. Some places incorporate additional flavors like banana or coconut, while others may use different chocolate coatings or drizzles. This evolution reflects the creative spirit of home bakers everywhere who want to innovate and personalize their treats.

Ingredient Deep Dive

Butterfinger Candy
Butterfinger is a beloved candy bar that’s famous for its distinct crunchy texture and nutty flavor. With its combination of chocolate and rich peanut butter layered with crisped layers of toffee, Butterfinger has become a staple in American candy culture since its introduction. Nutritionally, while Butterfinger provides a quick energy boost from sugar, it is important to consume it in moderation due to its high-calorie content.

When selecting Butterfinger for this recipe, look for bars that are fresh and free from damage. Store them in a cool, dry place to maintain their crunchy texture. If you’re unable to find Butterfinger candy bars, you can substitute them with similar crunchy peanut butter candies, keeping in mind that this may slightly alter the overall flavor of the Butterfinger Balls.

Peanut Butter
Peanut butter serves as the base for this decadent recipe, contributing creaminess and flavor. Rich in protein and healthy fats, peanut butter not only adds taste but also offers nutritional benefits, including heart-healthy fats, vitamins, and minerals. When choosing peanut butter for Butterfinger Balls, opt for a brand that’s made with minimal ingredients—preferably just peanuts and salt for a cleaner taste.

Storing peanut butter is simple; it can be kept in the pantry, and natural varieties may require stirring before use. If you have nut allergies, alternatives such as sunflower seed butter or tahini can be used, although they will slightly change the flavor profile of the final product.

Chocolate Coating
The chocolate coating provides a glossy finish and adds a rich sweetness that complements the peanut butter and candy flavors. Dark chocolate, milk chocolate, or even white chocolate can be used, depending on your preference. Chocolate is a source of antioxidants and can offer benefits when consumed in moderation.

When selecting chocolate for coating, consider using high-quality brands that melt well. Store chocolate in a cool, dry place, away from strong odors. If you want to customize the flavor, consider flavored chocolate melts that offer unique twists, or you can even sprinkle crushed candy or nuts on top for extra texture.

Common Mistakes to Avoid

  • Using stale Butterfinger: Make sure your Butterfinger is fresh to ensure the best taste and texture in the final product.
  • Not allowing the balls to chill: Chilling the balls helps them firm up and maintain their shape when coated in chocolate.
  • Overheating chocolate: Gently melt the chocolate to avoid burning it. Opt for a microwave or double boiler for more control.
  • Using too much or too little peanut butter: Measure your ingredients carefully to achieve the right consistency for rolling into balls.
  • Skipping the sprinkles: It may seem optional, but garnishing with chocolate chips or sprinkles enhances both flavor and visual appeal.
  • Coating while the chocolate is too hot: Let the chocolate cool slightly after melting before dipping to avoid melting the balls.
  • Not refrigerating before serving: Allow the Butterfinger Balls to set in the refrigerator before serving for the best texture.
  • Neglecting portion control: While tempting, avoid overindulging; these treats are rich and should be enjoyed in moderation.

Essential Techniques

Coating with chocolate
Coating your Butterfinger Balls in chocolate is a key technique that adds a delicious finish and enhances the presentation. To master this, melt your chocolate carefully and ensure it’s not too hot before dipping the balls. Use a fork to lift them out, allowing excess chocolate to drip off. This helps create an even coat and prevents pooling on your plate. Visual cues for success include a glossy appearance and complete coverage of the ball.

Rolling into balls
Rolling the mixture into uniform balls ensures consistent cooking and presentation. It’s important to keep your hands slightly damp to prevent sticking. Aim for uniform size to promote even chocolate coating and to achieve aesthetically pleasing treats. The final product should be about 1-inch in diameter, allowing for the perfect bite-sized indulgence.

Pro Tips for Perfect Butterfinger Balls

1. Use a food processor to crush the Butterfinger bars evenly. This ensures a fine crumb texture that’s easy to incorporate into the peanut butter.
2. Experiment with different types of chocolate for the coating—dark, milk, or even a mix of both—for diverse flavors and a fun twist.
3. If using natural peanut butter, stir well before measuring, as natural peanut butter tends to separate.
4. Allow the Butterfinger Balls to cool completely before serving to help maintain their shape.
5. If you want to add a crunch, consider mixing in crushed nuts before rolling into balls.
6. For a delightful presentation, sprinkle extra crushed Butterfinger on top of the coated balls before the chocolate sets.
7. Store your Butterfinger Balls in an airtight container in the refrigerator to keep them fresh and firm.
8. Consider making mini versions for bite-sized indulgence—just adjust the rolling size for smaller treats!

Variations and Adaptations

For a festive twist, consider adding seasonal flavorings like cinnamon or nutmeg during preparation. Another popular adaptation is to use white chocolate for coating, which provides a sweet contrast to the rich flavor profile of the original recipe. You can also swap out the Butterfinger for your favorite candy bars, like Reese’s or Snickers, to create unique flavor variations.

If you want to cater to dietary restrictions, opt for gluten-free alternatives by using certified gluten-free ingredients. For a vegan adaptation, utilize plant-based chocolate and nut butter. Seasonal ingredients can also be introduced to align with holidays, such as adding peppermint extract during the winter months.

Finally, experiment with presentation. Try serving the butterfinger balls on a showcase platter with a variety of toppings or in decorative boxes as thoughtful edible gifts. Each adaptation allows for personal expression and can elevate your Butterfinger Balls experience.

Serving and Presentation Guide

Plating is essential for enhancing the visual appeal of Butterfinger Balls. Use a decorative plate or tiered stand for an impressive display. Consider drizzling melted chocolate over the top or around the balls for added flair. For garnishing, top each ball with crushed Butterfinger or sprinkle some sea salt for a touch of sophistication.

Traditional accompaniments include coffee or milk, which provides a delightful beverage pairing balancing the sweetness of these treats. Modern serving suggestions can include fun-shaped paper liners or themed serving utensils for special occasions. Ensure the balls are served at a cool temperature for optimal flavor and texture.

Consider portion control: present individually wrapped balls for guests to enjoy on-the-go or set a few on each plate, inviting sharing. Additionally, if serving at a gathering, consider providing small takeaway containers to let guests bring home leftovers!

Wine and Beverage Pairing

When pairing wines with Butterfinger Balls, opt for sweet, dessert-style wines, such as a late-harvest Riesling or a rich port. These wine selections complement the sweetness of the chocolate and peanut butter while adding layers of flavor. Serve chilled to enhance the overall experience.

For non-alcoholic alternatives, a rich hot chocolate or a cold glass of almond milk work wonderfully, echoing the chocolate and peanut notes beautifully. Additionally, a flavored iced coffee can elevate the dessert experience, creating an enjoyable balance between creamy richness and light caffeine.

If you enjoy tea, consider pairing with a sweet chai or cinnamon-infused option. The warmth and spices in the tea complement the flavors of the Butterfinger Balls, bringing a comforting finish to your indulgent treat.

Storage and Shelf Life

To ensure longevity, store Butterfinger Balls in an airtight container in the refrigerator. This helps maintain their freshness and prevents the chocolate from becoming too soft. Under proper storage methods, they can last up to two weeks.

For best results, ensure that the balls are completely cooled before placing them in the container, as residual heat may lead to condensation, causing spoilage. If you notice any signs of spoilage, such as discoloration or an off smell, discard them immediately.

Butterfinger Balls can also be frozen! For freezing, arrange them in a single layer on a baking sheet until firm, then transfer to a freezer-safe container. They can last up to three months when frozen. To enjoy, simply thaw in the refrigerator overnight before serving.

Reheating is not typically required, but if you prefer a warm treat, allow them to sit at room temperature for a few minutes until slightly softened. This enhances the flavor for those who enjoy them fresh.

Make Ahead Strategies

Preparing Butterfinger Balls ahead of time is a great way to save effort on the day of your event. You can crush the Butterfinger and mix the oher ingredients a day in advance, storing them in the fridge until you’re ready to roll the balls.

For even more convenience, roll the balls and coat them in chocolate the day before. This allows the flavors to meld beautifully, enhancing the overall taste. After assembling, let them chill in the refrigerator to firm up overnight.

When planning for serving later, store the butterfinger balls in an airtight container with parchment paper between layers to prevent sticking. Be sure to follow the recommended refrigeration guidelines to preserve freshness until the day of serving. Adding fresh elements, such as a sprinkle of sea salt or extra candy bits, can elevate the flavor just before serving.

Scaling Instructions

For scaling your Butterfinger Balls recipe, determine how many servings you need. Halving the recipe is simple; adjust the ingredient amounts accordingly, keeping the same ratios for smooth execution. Doubling or tripling may require larger mixing bowls and thorough mixing, particularly for sticky mixtures like peanut butter.

Be mindful that as the size of the batch increases, so does the time required for chilling and setting. For large gatherings, consider spreading out the rolling process over a few hours or even a day—this minimizes last-minute rushing.

In terms of storage for larger batches, ensure that your container is spacious enough to accommodate the Butterfinger Balls without overcrowding. Remember to add extra parchment paper layers to keep them from sticking together!

Nutritional Deep Dive

Butterfinger Balls are decadent but can fit into a balanced diet when consumed in moderation. With a macro breakdown primarily consisting of carbohydrates from the crushed candy, fat from peanut butter, and protein component, they provide a sweet treat that fuels your energy needs.

The micronutrient analysis shows essential vitamins provided by peanut butter, including vitamin E and niacin, which are beneficial for skin health and metabolism. However, it’s vital to consider the high sugar content of the candy and chocolate coating when planning portions.

Health benefits include the protein and healthy fats from peanut butter, which contribute to satiety and sustained energy. Additionally, when enjoyed as part of a balanced diet, Butterfinger Balls can be a joyous way to indulge without overwhelming one’s nutrition.

For those looking to manage their weight, consider portion sizes carefully, as the rich mixture is calorie-dense. Planning for treats like Butterfinger Balls with an eye toward active lifestyles ensures you can enjoy them without guilt!

Dietary Adaptations

To make Butterfinger Balls gluten-free, confirm that all ingredients used, especially the Butterfinger, are certified gluten-free. This allows you to cater to guests with dietary restrictions without sacrificing flavor one bit.

For a dairy-free option, choose dairy-free chocolate and ensure the peanut butter used is free from any added dairy ingredients. This way, everyone can enjoy the treats, regardless of dietary preferences.

For a vegan-friendly adaptation, you can opt for plant-based chocolate, natural peanut butter, and any no-sugar addition like maple syrup for sweetness—these adjustments do not detract from the flavor everyone loves.

If you are looking for low-carb alternatives, try using sugar-free chocolate and substituting peanut butter with almond flour or a similar nut butter that suits your dietary requirements. Though it will alter taste, it will maintain the essence of the treat.

Troubleshooting Guide

If your Butterfinger Balls are excessively crumbly, you may have not added enough peanut butter. Ensure you use the correct ratios as listed. If they turn out too sticky, chilling the mixture for a bit longer can help mold them.

Common flavor balance issues can arise if the Butterfinger is too old or stale. Always check freshness, as older candies may lose their crunch and flavor, affecting the overall taste.

Temperature problems can occur if the chocolate cools too quickly when coating. Allow it to sit a minute after melting to ensure it’s workable while still maintaining a smooth coating technique.

Equipment challenges may arise when rolling the balls; using your hands can be messy. Try lightly greasing your palms with oil to prevent sticking, or use food-safe gloves for a cleaner approach.

Timed tasks such as setting chocolate too early can prevent the proper adhesion to the balls. Always allow plenty of chilling time before dipping to ensure those treats stay intact.

Recipe Success Stories

Many readers have shared their enthusiasm after trying Butterfinger Balls. One user reported that the sweet treats disappeared within minutes at a family gathering—testament to their irresistible charm! Guest feedback often highlights the delightful blend of textures and flavors, making them a family favorite.

Another reader shared a success story of adapting the recipe with a dark chocolate coating for a rich flavor enhancement, which received rave reviews. Some have even offered tips on innovative flavor variations, such as using crushed pretzels for added crunch.

Additionally, photographic submissions from the community have showcased the creativity in presentation, inspiring others to explore decorative options when serving. Each success story contributes to a growing community appreciation for these delectable Butterfinger Balls!

Frequently Asked Questions

Can I make Butterfinger Balls in advance?

Absolutely! You can prepare the mixture a day in advance and roll the balls when you’re ready. They store well and can easily be frozen as well!

How long do these last?

When stored properly in an airtight container in the refrigerator, Butterfinger Balls can last for up to two weeks. If frozen, they can keep for several months.

What can I use instead of Butterfinger?

Feel free to substitute with other crunchy candy bars, such as Reese’s, Snickers, or M&Ms for various flavors!

Is this a gluten-free recipe?

Yes, just make sure to use gluten-free ingredients. Some brands of Butterfinger are gluten-free, but it’s always good to check the packaging.

Can I use natural peanut butter?

Yes, natural peanut butter can be used. Just make sure to stir it well to combine the oil before measuring it for the recipe.

What chocolate works best for coating?

Both milk chocolate and dark chocolate work well, but you can also experiment with white chocolate or flavored chocolate melts for unique twists!

How do I store the leftovers?

Store them in a sealed container in the fridge. Use parchment paper between layers to keep them from sticking together.

Can I customize the ingredients?

Certainly! Feel free to add nuts, swap the candy, or incorporate spices to align with your flavor preferences.

Are these healthy?

While delicious, they are a treat and should be enjoyed in moderation. However, they do offer some protein and healthy fats from peanut butter!

What’s the best way to present these for parties?

Use a beautiful platter and consider adding colorful sprinkles or chocolate drizzle. They’re perfect for any social gathering!

Additional Resources

If you enjoyed making Butterfinger Balls, you might also like these related recipes: chocolate truffles, no-bake cheesecake bites, or peanut butter cookie bars. Each offers delightful flavor profiles that mirror the enjoyable aspects of Butterfinger Balls.

For technique guides, consult resources about melting chocolate or rolling dough, as these foundational skills enhance your dessert-making ability. Ingredient information about different types of chocolates and nut butters can also help you customize future recipes.

Lastly, be sure to explore equipment recommendations for excellent mixing bowls, measuring tools, or even fun silicone molds to add a creative touch to your treats!

Join the Conversation

We encourage you to share your creations on social media using our hashtag! Sharing your Butterfinger Balls experience helps spread the joy of this delightful treat. For tips on photography, lightening your dessert setup can enhance your reels or snaps.

Leave feedback or suggestions for this recipe in the comments. We love hearing about your variations and how you enjoy these treats with family and friends. Join the community and inspire others with your unique approaches to Butterfinger Balls!

The Recipe

Butterfinger Balls

Serves: 24 balls

Prep Time: 15 mins

Cook Time: 0 mins

Total Time: 15 mins

Kitchen Equipment Needed

  • Food processor (or a rolling pin and a ziplock bag)
  • Microwave-safe bowl
  • Parchment paper
  • Mixing bowl
  • Measuring cups and spoons

Ingredients

  • 2 Butterfinger bars, crushed
  • 1 cup creamy peanut butter
  • 2 cups chocolate chips (milk or dark)
  • Optional sprinkles or crushed candies for garnish

Directions

  1. In a mixing bowl, combine the crushed Butterfinger with peanut butter until fully incorporated.
  2. Form the mixture into 1-inch balls and place them on parchment paper.
  3. Refrigerate for about 15 minutes to firm up the balls.
  4. Melt the chocolate chips in a microwave-safe bowl in 30-second increments, stirring until smooth.
  5. Dip each ball into the melted chocolate, using a fork to remove excess chocolate.
  6. Place the chocolate-covered balls back on the parchment paper and sprinkle with additional crushed Butterfinger, if desired.
  7. Refrigerate again until the chocolate is fully set, about 30 minutes.
  8. Enjoy or store in an airtight container in the refrigerator!

Recipe Notes

  • For a twist, experiment with using different types of chocolate for coating.
  • If you want, add a dash of sea salt on top before the chocolate sets.
  • Store in an airtight container to maintain freshness for longer periods.

Irresistible Meat Lovers Pizza Tacos Recipe for Ultimate Flavor

Meat Lovers Pizza Tacos: A Flavor Explosion

⚖️
Difficulty
Easy

⏲️
Prep Time
15 mins

🕒
Cook Time
20 mins

⏱️
Total Time
35 mins

🍽️
Servings
4 servings

Indulge in the perfect blend of two culinary favorites with Meat Lovers Pizza Tacos. This unique dish marries the zest of savory pizza flavors with the handheld convenience of tacos, creating a delightful and satisfying meal that will please meat lovers and foodies alike. Picture warm, soft tortillas wrapped around the deliciousness of pepperoni, sausage, and crispy bacon, all melting together with gooey mozzarella cheese and fresh toppings.

Not only are these tacos easy to make, but they also offer a burst of flavors and textures that will leave your taste buds dancing. Imagine biting into a taco filled to the brim with perfectly seasoned meat, the salty crunch of bacon, and the comforting warmth of melted cheese. This recipe is perfect for gatherings or casual dinners, giving everyone the chance to enjoy an extraordinary fusion dish that feels both festive and comforting.

Quick Recipe Highlights

  • Flavor Profile: A delightful union of savory meats, tangy pizza sauce, and melty cheese creates a taste sensation.
  • Texture: Expect a satisfying crunch from the taco shell, combined with the tenderness of the cooked meats and the creaminess of the cheese.
  • Aroma: The rich scents of Italian spices, sizzling bacon, and freshly warmed tortillas fill the air, making it almost irresistible.
  • Visual Appeal: Vibrant colors from the meats and toppings make these tacos visually stunning on any plate.
  • Skill Level Needed: This recipe is easy enough for beginners, while still allowing experienced cooks to get creative.
  • Special Equipment: You’ll need a skillet, a spatula, and basic cooking utensils.

Recipe Overview

  • Difficulty Level: This is an easy recipe that combines familiar cooking techniques, making it accessible for all home cooks.
  • Category: Ideal for casual family dinners, game days, or as a fun party food option.
  • Cuisine: This dish reflects the beloved influences of both Mexican and Italian cuisines, melding their essences into one irresistible taco.
  • Cost: The ingredients are generally affordable, making this a budget-friendly meal option.
  • Season: Perfect for any season, but especially enjoyable during warm months or festive celebrations.
  • Occasion: Great for gatherings, informal parties, or a family night in.

Why You’ll Love This Recipe

There’s something irresistible about a good Meat Lovers Pizza Taco. Imagine sinking your teeth into a taco bursting with the rich flavors of pepperoni, sausage, and crispy bacon – for any meat lover, this is a dream come true. The combination of the juicy meats and warm, melty cheese paired with your favorite sauce results in a flavor explosion with every bite. The crunch of the taco shell adds a delightful contrast to the tender insides, making this recipe a well-rounded experience.

Preparation for Meat Lovers Pizza Tacos is a breeze, making this recipe a go-to for busy weeknights or last-minute gatherings. The effort required is minimal, and you can easily customize the ingredients to suit personal tastes or what you have on hand. This flexibility can make this dish not just a meal, but a creative culinary outlet.

From a nutritional standpoint, this recipe is packed with protein primarily from the meats and cheese, providing sustenance while still being indulgent. You can even sneak in some veggies by adding toppings like bell peppers or spinach, making it even healthier without sacrificing flavor.

This dish is also perfect for social occasions. Whether you’re having friends over for game night or hosting a casual family dinner, Meat Lovers Pizza Tacos are a sure hit. With their fun presentation and ability to be served buffet-style, everyone can create their own customized taco, making the experience interactive and engaging.

Finally, the cost-effectiveness of this recipe is commendable. It utilizes common ingredients that won’t break the bank, making it accessible for everyone looking to enjoy a delicious meal without stress. With Meat Lovers Pizza Tacos, you can serve up a mean feast while keeping your budget in check.

Historical Background and Cultural Significance

The fusion of pizza and tacos has its roots in the global love for both Italian and Mexican cuisines, each representing distinct culinary traditions. Both dishes have evolved significantly over time, with pizza originating in Naples, Italy, and tacos being a traditionally Mexican food staple. Mixing these cuisines speaks to the way food evolves and adapts to different cultures and preferences.

Culturally, pizza and tacos are often seen as comfort foods, enjoyed in casual settings and at celebrations. They bring people together, whether it’s over a family dinner or casual gatherings with friends. This recipe brings forth the societal joy of sharing a delightful dish while also allowing individuals to craft their ideal taco experience.

The evolution of the Meat Lovers Pizza Taco demonstrates culinary innovation. Chefs and home cooks alike are continuously blending flavors from different cuisines to create something fresh and exciting. This dish encapsulates the spirit of experimentation in the kitchen where creativity knows no bounds.

Regional variations of both tacos and pizza can fuel the imagination of cooks. While traditional pizza toppings may vary from region to region in Italy, tacos might be filled with local proteins and salsas in Mexico. The Meat Lovers Pizza Taco can be seen as a popularized version that showcases the bold flavors commonly enjoyed worldwide while also inviting adaptations based on personal preferences.

Ingredient Deep Dive

– Ground Beef: A staple in both Mexican and Italian cuisine, beef adds a rich flavor and hearty texture. It’s packed with protein, making it a great choice for those looking to build muscle or maintain energy levels. Look for lean cuts for a healthier option, and store it in the fridge for up to 2 days pre-cooking.

– Pepperoni: This spicy, flavorful ingredient has become synonymous with pizza. Traditionally made from cured pork and beef, it adds a delightful kick. Not only does pepperoni pack protein, but it also brings a familiar taste that enhances the overall taco experience. For freshness, keep it refrigerated and use it within a week of opening.

– Mozzarella Cheese: This cheese is celebrated for its creamy texture and mild flavor. A great source of calcium and protein, it melts beautifully, adding decadence to your dish. Always opt for fresh mozzarella when possible, and store it in the fridge to maintain its quality.

– Taco Shells: The foundation of the taco, shells can range from soft to crunchy. While corn tortillas are a common choice, flour tortillas offer a soft and chewy alternative. They’re generally inexpensive and can last in the pantry for several months when properly sealed.

Common Mistakes to Avoid

  • Overfilling tacos can cause them to break. Use a balanced amount of filling.
  • Using cold ingredients can prevent proper melting. Always allow cheese and meats to reach room temperature before cooking.
  • Not seasoning meat can lead to bland tacos. Be generous with spices and flavors.
  • Choosing the wrong tortilla type can affect texture; consider using fresh, quality tortillas for the best result.
  • Not properly cooking the meat can pose a health hazard; ensure appropriate internal temperatures are reached.
  • Waiting too long to serve can lead to soggy tacos; assemble just before serving.
  • Skipping garnishes may dull the flavors; use fresh toppings for contrast.
  • Not tasting along the way can lead to missed opportunities for better flavor; always adjust to your preference.

Essential Techniques

Mastering the art of cooking meat is crucial for creating flavorful tacos. It’s important to ground the meat evenly and season it while cooking to bring out the maximum flavor. Use a meat thermometer to ensure it reaches appropriate temperatures for safety and taste.

Properly warming tortillas is also essential – it enhances their pliability and taste. Heat them in a skillet for just a few seconds on each side until warm. This simple technique elevates the dining experience.

Pro Tips for Perfect Meat Lovers Pizza Tacos

– Always pre-season your meat a few hours ahead for deeper flavor penetration.
– Use a combination of cheeses for varying textures and flavors.
– Crisp up the taco shells in the oven for an extra crunch.
– Experiment with homemade sauce to elevate your pizza flavor.
– Use fresh herbs and quality toppings for a burst of freshness.
– Don’t be afraid to diversify your protein; try chicken or turkey!
– Opt for a light drizzle of balsamic reduction for a gourmet touch.
– Consider adding a squeeze of lime just before serving for brightness.

Variations and Adaptations

– Regional variations can include different types of meats such as chorizo or even seafood for coastal twists.
– Seasonal adaptations may dictate fresh vegetables like avocados or summer squash during the warmer months.
– Dietary modifications can be simple; opt for gluten-free tortillas and dairy-free cheese if needed.
– Flavor variations can range from spicy salsas to sweet BBQ sauce, transforming the flavor profile.
– Texture modifications can be achieved with crispy fried onions in place of raw ones for additional depth.
– Presentation alternatives like serving ingredients deconstructed on a platter can enhance the dining experience.

Serving and Presentation Guide

To plate your Meat Lovers Pizza Tacos, use a colorful platter that highlights the vibrant ingredients. Garnishing with fresh herbs such as cilantro or parsley adds a touch of color. For larger gatherings, consider a taco bar where guests can customize their creations, fostering interaction and fun.

Serve with complementary side dishes like a fresh salad or roasted vegetables to round out the meal. For temperature considerations, serve while the fillings are warm and tortillas are fresh to create the best experience.

Wine and Beverage Pairing

For wine pairings, consider a medium-bodied red like a Merlot that complements the rich flavors of meats. Alternatively, an IPA can offer a refreshing contrast to the savory taco fillings. For non-alcoholic alternatives, a sparkling water with lime is refreshing and keeps the palate clean.

If coffee or tea is desired, a bold black coffee serves as a satisfying finish following the meal, especially if enjoyed as a late-night treat.

Storage and Shelf Life

Store leftover Meat Lovers Pizza Tacos in an airtight container in the refrigerator for up to three days. Properly store all components separately to maintain texture, especially the taco shells to prevent them from becoming soggy. Signs of spoilage to monitor include discoloration, off-smells, or a slimy texture.

When reheating, use an oven to restore some crispness, and aim for a thorough warm-up in the center by checking with a thermometer.

Make Ahead Strategies

To save time, prepare your ingredients in advance. Season and cook the meat a day before, allowing it to marinate in flavors overnight. Keep it stored in the fridge, and warm it up before assembling your tacos. The toppings can also be prepped ahead of time to quicken assembly.

For optimal quality, avoid assembling the tacos until just before serving to keep the tortillas from getting soggy. If you want to add freshness, consider slicing avocados or preparing guacamole just prior to serving to include bright flavors.

Scaling Instructions

To halve the recipe, simply cut all ingredients and filling amounts in half while keeping cooking times similar. Doubling or tripling will require larger pans and possibly an adjustment to cooking times, as bulk cooking may take longer.

Be mindful of space in your refrigerator; ensure everything remains stored properly to maintain freshness. Scale slowly, measuring carefully, to keep flavors balanced.

Nutritional Deep Dive

When consuming Meat Lovers Pizza Tacos, it’s important to consider the macro breakdown, which primarily consists of protein from the meats and cheese, carbohydrates from the shells, and a small amount of fats mainly from cheese and addition of oils.

Micronutrient analysis shows a good source of vitamin B12 and iron due to the beef and sausage. Incorporating vegetables as toppings can add dietary fiber and vitamins.

Weight management tips include being mindful of portion sizes, especially if aiming to balance indulgence with nutritional goals.

Dietary Adaptations

– Gluten-free options can include corn tortillas, ensuring no cross-contamination.
– For dairy-free diets, consider using plant-based alternatives for cheese.
– Vegan adaptations can utilize lentils or mushrooms as substitutes for meat while ensuring flavor profiles are maintained.
– Low-carb enthusiasts may opt for lettuce wraps instead of traditional shells.
– Experimenting with paleo-friendly ingredients such as homemade almond flour tortillas can create a unique twist.
– The ketogenic diet can easily adapt by reducing the number of carbs in fillings.

Troubleshooting Guide

If tacos come out too dry, consider adding more sauce or using juicier meat cuts. For flavor balance, always taste and adjust seasonings while cooking, keeping a balance in spices and herbs.

Temperature problems could arise if ingredients weren’t warm enough; always preheat meats and toppings for the best eating experience.

If using alternative ingredients leads to texture discrepancies, think about loading more fresh toppings or employing a sauce to maintain moisture.

Timing concerns can arise based on the variability of cooking methods; keep an eye on each component to ensure all parts come together harmoniously.

Recipe Success Stories

Community feedback has been overwhelmingly positive. Many readers rave about making the recipe their own by incorporating different meats and sauces. Successes vary from families enjoying taco night to friends gathering over a fun dinner idea.

Adaptation stories include experimenting with buffalo chicken instead of traditional meats, appealing to a wider range of flavor preferences. Some have reported stunning photo successes on social media by layering ingredients artistically.

Reader suggestions emphasize the joy of entertaining with these tacos; they make superb finger foods for gatherings and parties, igniting creativity with each serving.

Frequently Asked Questions

Can I make these tacos ahead of time?

Yes, you can prepare the meat and toppings in advance. Just store them separately until ready to assemble, which helps keep the tortillas from becoming soggy.

What kind of cheese is best for tacos?

Mozzarella is excellent for a classic pizza flavor, but you can also experiment with cheddar, pepper jack, or a blend for varied tastes.

Are there vegetarian options for this recipe?

Absolutely! You can substitute meat with lentils, mushrooms, or cooked quinoa to create a hearty vegetarian filling.

Can I freeze these tacos?

While assembled tacos may not freeze well, you can freeze the cooked meat and toppings separately. Just reheat and assemble when you’re ready to eat.

What toppings do you recommend?

Fresh toppings like avocado, diced tomatoes, onions, lettuce, or even jalapeños will enhance the flavor and texture balance of the tacos!

How do I make the taco shells crispy?

Lightly bake soft tortillas in the oven until they are golden brown for a delicious crunch before assembling your tacos.

What sauces can I use?

Pizza sauce, ranch dressing, BBQ sauce, or hot sauce can elevate the flavor. Choose based on your personal preference!

Can I adapt this recipe for a low-carb diet?

Yes! Simply replace traditional taco shells with lettuce wraps to enjoy the flavors while staying in your carb range.

How can I make this dish spicier?

Adding jalapeños, hot sauce, or even incorporating spicy sausage will kick the heat up a notch to satisfy those looking for a spicy taco experience!

What other meats can I use?

Feel free to mix it up with chicken, turkey, or even plant-based alternatives such as tempeh for a creative spin on the dish.

Additional Resources

For those looking for related recipes, explore different taco types like fish tacos or breakfast tacos that also bring exciting flavors to the table. Technique guides on taco construction and meat preparation can further enhance your culinary skills.

Ingredient information will provide suggestions on sourcing the best cuts of meat, spices, and toppings while equipment recommendations can help streamline your processes in the kitchen.

Don’t forget to experiment with seasonal variations that can elevate your dishes year-round! Exploring new ingredients and blends for different occasions keeps things fresh and exciting.

Join the Conversation

We’d love to see your take on Meat Lovers Pizza Tacos! Share your photos on social media and engage with our community. Your adaptations and story additions could inspire others to try out this fun recipe.

Join our mailing list for exclusive updates and follow our page for more exciting recipes that push culinary boundaries. Together, let’s celebrate the joy of cooking and eating delicious food.

The Recipe

Meat Lovers Pizza Tacos

Serves: 4 servings

Prep Time: 15 mins

Cook Time: 20 mins

Total Time: 35 mins

Kitchen Equipment Needed

  • Skillet
  • Spatula
  • Tongs
  • Knife
  • Cutting board

Ingredients

  • 1 pound ground beef
  • 1 cup pepperoni slices
  • 1 cup crumbled sausage
  • 1 cup shredded mozzarella cheese
  • 1 cup taco shells
  • 1/2 cup pizza sauce
  • 1/4 cup chopped onions (optional)
  • 1/4 cup chopped cilantro (for garnish)

Directions

  1. In a skillet over medium heat, cook the ground beef until fully browned.
  2. Stir in the pepperoni and sausage, allowing them to heat through.
  3. Add in the pizza sauce and mix well to coat the meat mixture.
  4. Remove from heat and stir in the shredded mozzarella until melted.
  5. Warm the taco shells according to package instructions.
  6. Fill each taco shell with the meat and cheese mixture.
  7. Top with optional onions and garnish with chopped cilantro before serving.

Recipe Notes

  • Feel free to customize with additional toppings such as jalapeños or olives.
  • For a healthier version, consider using turkey or chicken instead of beef.
  • Leftover meat can be stored in the fridge for up to 3 days.