Irresistible Cherry Chocolate Ice Cream Cake Recipe for Summer Treats

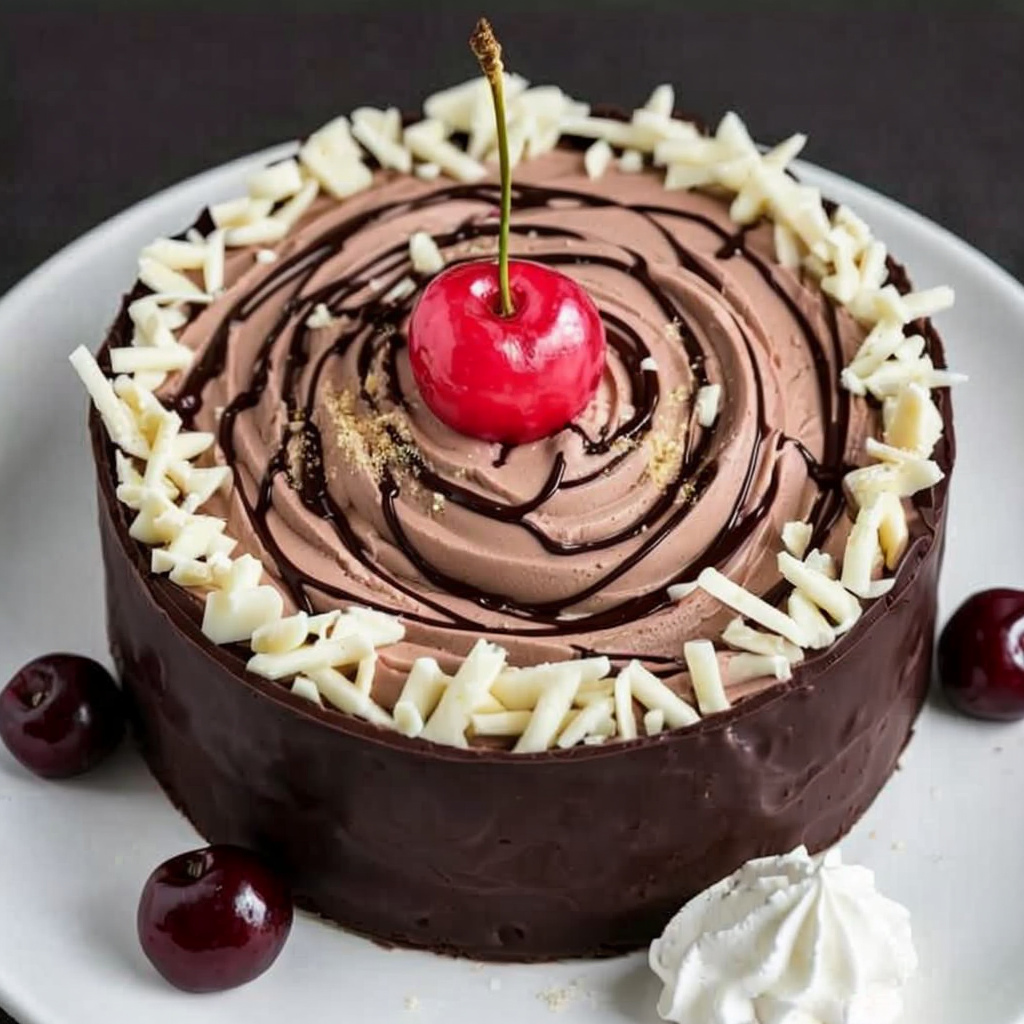
Cherry Chocolate Ice Cream Cake: A Heavenly Delight for Every Occasion

⚖️
Difficulty
Medium

⏲️
Prep Time
30 mins

🕒
Cook Time
15 mins

⏱️
Total Time
45 mins

🍽️
Servings
8

Are you ready to indulge in a luscious dessert that combines the sweetness of cherries with the richness of chocolate? Our Cherry Chocolate Ice Cream Cake is the ultimate treat for any occasion! Imagine layers of velvety chocolate cake filled with creamy cherry ice cream, drizzled with chocolate sauce, and topped with fresh cherries. This dessert not only delights the palate but also makes for a stunning centerpiece that will impress your guests and loved ones alike.

This frozen delight is perfect for warm summer nights or special celebrations and it effortlessly captures the playful essence of childhood treats. As you cut through the layers, you’ll reveal a beautiful contrast between the dark chocolate and the bright red cherries, making every slice a visual feast. Prepare yourself for a symphony of flavors that balance the tartness of cherries with the decadence of chocolate!

Quick Recipe Highlights

  • Flavor Profile: This cake features a harmonious blend of tart cherries and rich chocolate, making every bite an exciting experience.
  • Texture: Expect a delightful contrast between the creamy ice cream, light cake, and smooth chocolate sauce.
  • Aroma: Enjoy the intoxicating aroma of baked chocolate mingled with the fresh smell of cherries.
  • Visual Appeal: The vibrant red cherries stand out against a dark chocolate backdrop, creating an eye-catching presentation.
  • Skill Level Needed: While the recipe requires some baking skills, it is accessible for most home cooks.
  • Special Equipment: You will need a cake pan, mixing bowls, and an ice cream scoop!

Recipe Overview

  • Difficulty Level: The recipe is categorized as medium due to the baking and layering process involved.
  • Category: This dessert fits perfectly in a celebration or special occasion dessert category.
  • Cuisine: With influences from American baking traditions, this cake offers a modern twist on classic flavors.
  • Cost: Expect reasonable costs for the ingredients, primarily cherries and chocolate.
  • Season: Enjoy this recipe especially in summer when cherries are in season and at their sweetest.
  • Occasion: A perfect choice for birthdays, anniversaries, or any festive gathering!

Why You’ll Love This Recipe

Indulging in our Cherry Chocolate Ice Cream Cake is truly an experience. The first bite reveals a creamy and dreamy texture, where the cool cherry ice cream melts seamlessly into the rich chocolate cake layers. Combined, they create an irresistible balance that caters to both the sweet tooth and the lover of bold flavors. This cake is not merely a dessert; it’s a celebration of taste that sparks joy with every slice.

Convenience plays a massive role in why this recipe shines. While it does require some time and patience, much of the preparation can be done ahead of time, allowing you to serve a show-stopping dessert without the last-minute rush. You can assemble the layers ahead of time and simply freeze until needed, making entertaining a breeze.

From a nutritional perspective, the cherries provide a burst of antioxidants and vitamins, bringing a healthy dose to an otherwise indulgent dessert. The chocolate also has its benefits, rich in flavonoids that are known for heart health. It’s a sweet way to incorporate some positive elements into your meals.

Socially, this cake is a conversation starter at any gathering. When guests see this eye-catching dessert, it draws attention and prompts compliments, creating memorable moments. Sharing slices of this delightful cake fosters connection and laughter, making it a centerpiece beyond mere taste.

Cost-effectiveness also plays a critical role. While high-end desserts might break the bank, this Cherry Chocolate Ice Cream Cake can largely be made with affordable ingredients, demonstrating that gourmet treats can be achieved on a budget.

Historical Background and Cultural Significance

The origins of the ice cream cake can be traced back to the trend of frozen desserts that gained significant popularity in the United States during the early 20th century. As refrigeration became commonplace, ice cream transitioned from a luxury to a beloved staple, leading to the innovation of combining cake and ice cream into one delightful dessert.

Culturally, ice cream cakes often mark celebrations and joyous occasions. From birthdays to anniversaries, they evoke nostalgia and happiness, often reminding individuals of joyful childhood memories. With layers that can be customized, these cakes capture not only personal tastes but also family traditions of gathering for sweet treats.

The evolution of the Cherry Chocolate Ice Cream Cake reflects broader trends, where flavors have become more adventurous and global. As food culture embraces diverse ingredients, combinations of rich chocolate and tart fruits like cherries have become universally appreciated.

Regionally, varieties of ice cream cakes can be found in different cultures, often incorporating local flavors and preferences. For instance, in Italy, you may find gelato-based cakes, while other regions lean towards richer cakes enhanced with local fruit flavors.

Ingredient Deep Dive

In exploring the star ingredients of our Cherry Chocolate Ice Cream Cake, the cherries stand out for their cultural significance. Renowned for their sweet and tart profile, cherries have been celebrated in culinary traditions across various cultures, symbolizing renewal and the sweeter things in life. Nutritionally, they boast high levels of antioxidants such as vitamin C and anthocyanins, known for reducing inflammation and promoting heart health. When selecting cherries, choose plump, firm ones with a deep color for the best flavor. Store them in the refrigerator for optimal freshness and consume them within a week for peak ripeness.

Chocolate, the star of our cake layers, is steeped in history as well. Often regarded as a treat of the gods by ancient civilizations, chocolate today is a mainstay in many desserts. Its health benefits, particularly dark chocolate, include improved heart health and antioxidant properties. When picking chocolate for baking, opt for high-quality bars with a cacao content of 70% or higher for richer flavor. Be sure to store chocolate in a cool, dry place, and if substitutions are needed, cocoa powder can often be paired with fat to create a similar texture.

Common Mistakes to Avoid

  • Not letting the cake cool completely before layering can cause the ice cream to melt and create a soggy mess.
  • Using low-quality chocolate can significantly affect the flavor profile; choose high-quality chocolate for the best results.
  • Overmixing the batter may result in a dense cake rather than a light, fluffy one.
  • Not freezing the ice cream long enough before assembly can lead to it being too soft and runny.
  • Forgetting to properly grease the cake pan may cause the cake to stick, resulting in unsightly edges.
  • Using room temperature ingredients for the cake batter can lead to inconsistencies in texture.
  • Skipping the refrigeration time after assembly can lead to a soft, unstable cake structure.
  • Not measuring the ingredients accurately can disrupt the balance and flavor of the cake.
  • Ignoring the preference for texture when picking between different types of cake and ice cream can lead to a less satisfying dessert.
  • Straying from the recommended chilling times can impact the final presentation of the ice cream layers.

Essential Techniques

To achieve the perfect layer of chocolate cake, mastering the art of mixing is key. Ensure the dry ingredients are well-combined before incorporating wet ingredients. This creates a uniform batter free of lumps. Avoiding overmixing is equally crucial; a gentle fold will maintain the cake’s airy structure, providing a light and fluffy texture. Signs of success include a smooth batter that flows easily but is not overly runny.

When it comes to layering your cake, patience is necessary. Giving time for each layer to firm up in the freezer helps create defined layers, contributing to both the aesthetic and textural experience. Use a serrated knife for astoundingly clean cuts through layers; it enables you to handle the cake with more finesse and minimizes the risk of melting during assembly.

Incorporating a ganache or chocolate sauce also elevates your cake to the next level. A simple preparation strategy involves heating equal parts cream and chocolate until melted, allowing it to cool slightly before pouring it over the layered cake. Watching for the right pouring consistency, where it flows like syrup but does not overly run, is crucial for a beautiful presentation.

Pro Tips for Perfect Cherry Chocolate Ice Cream Cake

Use high-quality ingredients, particularly for cherries and chocolate, to ensure a rich flavor profile in your cake. Consider freezing the cherries prior to use to prevent them from releasing too much moisture during assembly. Another tip is to let the ice cream soften slightly before spreading it, making it easier to layer without disrupting the cake beneath. Use a hot, dry knife to slice through the ice cream, which will help create neat portions. If you’re looking for additional flavor, consider mixing in chopped nuts or flavored extracts into the batter.

Experimenting with different cake flavors can offer delightful surprises; consider substituting vanilla or almond cake for a new dimension of flavor. To make the cake more visually appealing, you can garnish with fresh mint leaves alongside the cherries atop the cake. Lastly, allowing the finished cake to rest in the refrigerator overnight before serving intensifies the flavor fusion and gives it a firmer, sliceable texture.

Variations and Adaptations

For a regional twist, you could replace cherries with other fruits, such as raspberries or strawberries, which would provide a seasonal adaptation while maintaining a similar flavor depth. For dietary needs, experiment with gluten-free flour for the cake base to cater to gluten-intolerant guests. If you’re looking for a different texture, consider layering whipped cream atop the ice cream.

Seasonal adaptations could include adding fall spices, such as cinnamon or nutmeg, to the chocolate cake batter to give it a warm and cozy feel. Additionally, providing a chocolate-covered cherry variation with dipped cherries atop the ice cream layer can offer elegance and enhance the flavor further. Presentation choices such as serving the cake in individual portions rather than a larger slice could create a more appealing dessert at gatherings, ensuring that everyone has their unique serving.

Serving and Presentation Guide

For an impressive display, consider using a cake stand to elevate the Cherry Chocolate Ice Cream Cake, allowing for a captivating view from all angles. Drizzle additional chocolate sauce and sprinkle fresh cherries around the base of the cake for a dramatic finish. Portion control is vital; ensure to slice the cake with a clean knife, rinsed in hot water to maintain neat edges.

For garnishing, whipped cream clouds can be piped onto each slice or decorative plate, enhancing both flavor and visual appeal. Traditional accompaniments such as a scoop of vanilla ice cream or a side of fruit compote pair harmoniously with the cake and add an extra dimension to each serving. Serving cold is essential; keep the cake in the freezer until just moments before serving to maintain freshness.

Wine and Beverage Pairing

When it comes to wine pairings, a rich red wine, such as a Merlot or Cabernet Sauvignon, complements the chocolate flavors beautifully. Non-alcoholic alternatives can include cherry soda or sparkling water with a hint of lime to echo the tartness of the cherries. For coffee lovers, a robust espresso creates a delightful contrast to the sweet layers, enhancing the overall experience with its deep, bitter notes.

Temperature plays a vital role in serving beverages; serve the wine slightly chilled for optimal enjoyment, while ensuring any non-alcoholic options are refreshing and cool. For an elevated experience, consider pairing the dessert with a flavored tea, such as a vanilla or chocolate-infused option, which ties in deliciously with the cake’s profile.

Storage and Shelf Life

To store the Cherry Chocolate Ice Cream Cake, wrap it tightly in plastic wrap or aluminum foil to prevent freezer burn and maintain freshness. Storing the cake at a consistent temperature is crucial; the freezer should be set at 0°F (-18°C) or lower for optimal preservation. Signs of spoilage include ice crystals forming on the surface or an off odor.

If you have excess cake, reconsider individual servings by slicing and storing them in airtight containers, allowing easy access for later enjoyment. For reheating, defrost in the refrigerator rather than on the counter to ensure gradual temperature changes, preserving both flavor and texture. If you prefer a soft serve method, allow it to sit at room temperature for 10-15 minutes before eating.

Make Ahead Strategies

Creating the Cherry Chocolate Ice Cream Cake ahead of time can streamline your preparation process for gatherings. Consider baking the cake layers a day in advance and wrapping them tightly to maintain freshness. Ice cream can also be made from scratch or purchased a few days beforehand, giving it ample time to freeze.

Utilizing a well-planned prep timeline ensures efficiency in assembly. After the initial layers are created, store the fully assembled cake in the freezer and only frost it with chocolate ganache or toppings just before serving—this keeps it looking pristine. For any fresh elements, such as fruit garnishes, add them right before serving to ensure they maintain their vibrancy.

Scaling Instructions

Scaling the Cherry Chocolate Ice Cream Cake recipe can easily adapt to different gathering sizes. To halve the recipe, keep in mind to adjust your baking pan size to avoid spills or uneven cooking. For doubling or tripling, ensure you have larger equipment like mixing bowls and pans to accommodate the additional ingredients, while keeping an eye on baking times as they may vary.

When factoring in timing modifications for larger batches, baking times may increase slightly due to the volume. Always check doneness with a toothpick; it should come out clean from the center of the cake. Consider storing portions of the un-iced cakes if not consumed immediately; they can be layered up later for easy assembly.

Nutritional Deep Dive

Examining the macros of our Cherry Chocolate Ice Cream Cake reveals a balance of carbohydrates, fats, and proteins. Each slice typically contains around 250-350 calories, making it a moderate indulgence. The inclusion of fruit, particularly cherries, adds fiber to the cake, which aids digestion and promotes a feeling of fullness.

Micronutrient analysis showcases that while indulging in a sweet dessert, one also receives beneficial nutrients. Cherries are rich in vitamins C and K, while dark chocolate can add trace minerals like magnesium and iron. However, for those managing weight, mindful portion control is advisable; half-sized slices can fulfill sweet cravings while reducing overall calorie intake.

Dietary considerations revolve around the use of cake bases and ice creams that can cater to varying preferences; gluten-free or reduced-sugar options can be easily implemented without sacrificing flavor. It’s essential to balance sweet indulgences with mindful nutrition and tastiness despite the indulgence.

Dietary Adaptations

Catering to various dietary restrictions need not compromise on flavor in our Cherry Chocolate Ice Cream Cake. For those avoiding gluten, utilizing almond or gluten-free flour allows for a similar texture and taste while ensuring no gluten exposure. Dairy-free options are also readily available; use coconut cream or other dairy alternatives for the ice cream layer to cater to lactose-intolerant guests.

Vegan adaptations can involve using aquafaba for cake moisture instead of eggs while still achieving a moist cake. For those on low-carb or keto diets, substituting sugar with stevia or erythritol can maintain a sweet flavor without the carbs, while almond flour can replace regular flour for lower carbohydrates.

Being mindful during meal preparations ensures everyone can enjoy delicious desserts without feeling excluded; various substitutions allow for creativity and flexibility without losing the dessert’s core essence.

Troubleshooting Guide

Should you encounter texture issues, such as a dry cake, consider reducing bake time or ensuring proper measuring of flour. If the ice cream is too soft during layering, refreeze it for 10-15 minutes before using, ensuring it maintains a thick consistency. Adjusting flavor balance can be solved by enhancing the sweetness; a simple syrup poured over the layers before assembly can remedy a lack of sweetness.

If you find the cake is running too soft upon slicing, it may benefit from additional freeze time to set prior to serving. Equipment challenges may arise; a food processor can make pureeing cherries a breeze if a fork isn’t yielding results. In timing concerns, if pressed for time, assembling the cake in stages can alleviate waiting times—tackle one layer before moving onto the next.

Recipe Success Stories

The Cherry Chocolate Ice Cream Cake has seen many stars rise within the community; feedback is overwhelmingly positive, highlighting the impressive appearance and delightful balance of flavors. Many home bakers have shared their tales of adaptation, whether by infusing their favorite spirits for added kick or experimenting with different ice cream flavors—ranging from vanilla bean to mint chocolate chip.

Readers have noted successful variations using alternative fruits, ultimately leading to unique twists that uphold the cake’s essence. Many have shared tips through photography, showcasing beautiful dessert tables featuring the cake as the crown jewel, inviting others to dabble with their take on this dessert.

Frequently Asked Questions

What is the best way to store leftover Cherry Chocolate Ice Cream Cake?

Leftovers should be tightly wrapped in plastic wrap and stored in the freezer to maintain their freshness. Ensure they are airtight to prevent freezer burn and texture loss. For best quality, consume within a week if possible.

Can I use frozen cherries instead of fresh ones?

Absolutely! Frozen cherries work well in this recipe. Just ensure to thaw and drain them to minimize excess moisture before using.

How long do I need to freeze the cake before serving?

For optimal texture, you should freeze your assembled cake for at least 4-6 hours or overnight. This helps the ice cream firm up properly for easy slicing.

Can I make this recipe gluten-free?

Yes! Using gluten-free flour as a substitute for regular flour will work just fine. Ensure that all other ingredients are also gluten-free.

What can I substitute for chocolate if I want a different flavor?

You can experiment with vanilla or almond flavors instead of chocolate, adjusting the same ratios for a unique cake creation.

Is it possible to prepare the cake in advance?

Definitely! You can bake the cake up to two days in advance and assemble it a day before your event. Just be sure to keep it tightly wrapped in the freezer.

Can I use whipped cream instead of ganache for icing?

Yes, whipped cream is a lighter option for frosting this cake. However, it won’t hold its shape as well as chocolate ganache, so serve it right after assembling.

How do I get clean slices when cutting the cake?

Using a hot, dry knife will help achieve clean cuts. Wipe the knife clean after each slice to maintain uniform portions.

Is this cake suitable for kids?

Yes! The combination of flavors and textures tends to be a hit among both children and adults alike. Just monitor serving sizes due to its sweet nature.

Can I add nuts to the cake for extra texture?

Adding chopped nuts is a great idea! They add an extra crunch to the texture, and you can fold them into the cake batter or use them as a topping.

Additional Resources

If you enjoyed making the Cherry Chocolate Ice Cream Cake, you might also like our other festive dessert recipes such as the classic Tiramisu or a vibrant Red Velvet Cake. For technique guides, check out our Baking Tips for Beginners, which covers fundamental skills and best practices that will elevate your baking game.

Expand your ingredient knowledge by diving into our Ingredient Spotlight that focuses on the health benefits of cherries and chocolate. Further, if you’re looking for kitchen tools, explore our recommended Baking Essentials that include everything from silicone spatulas to cake pans ideal for all baking projects.

Join the Conversation

We invite you to share your Cherry Chocolate Ice Cream Cake creations across social media! Post your photos and variations, tagging us to create a recipe community that practices culinary joy together. Engage with fellow bakers to exchange tips, suggestions, and modifications that suit all preferences.

Your feedback is essential to our recipe development; leave comments and reviews on your experience making the cake. Feel free to share what adaptations worked best and encourage others to explore new dessert horizons.

The Recipe

Cherry Chocolate Ice Cream Cake

Serves: 8

Prep Time: 30 mins

Cook Time: 15 mins

Total Time: 45 mins

Kitchen Equipment Needed

  • Cake pans
  • Mixing bowls
  • Electric mixer
  • Serrated knife
  • Rubber spatula
  • Ice cream scoop
  • Measuring cups and spoons

Ingredients

  • 1½ cups all-purpose flour
  • 1 cup granulated sugar
  • ½ cup unsweetened cocoa powder
  • ½ cup butter, softened
  • 2 large eggs
  • 1 cup milk
  • 1 teaspoon vanilla extract
  • 2 cups cherry ice cream
  • 1 cup chocolate sauce for drizzling
  • Fresh cherries for garnish

Directions

  1. Preheat the oven to 350°F (175°C). Grease and flour two 9-inch round cake pans.
  2. In a large mixing bowl, cream together the butter and sugar until light and fluffy. Add in the eggs and vanilla extract, mixing until well combined.
  3. In a separate bowl, sift together the flour and cocoa powder. Gradually add this mixture to the wet ingredients, alternating with the milk to create a smooth batter.
  4. Pour the batter evenly into the prepared cake pans and bake for 25-30 minutes or until a toothpick inserted in the center comes out clean. Allow to cool.
  5. Once cooled, layer the bottom cake with cherry ice cream and gently spread to evenly coat the top. Place the second layer on top.
  6. Cover the cake with chocolate sauce and add fresh cherries on top. Return to the freezer for 1-2 hours to set.
  7. Slice and serve while still firm!

Recipe Notes

  • Feel free to experiment with different ice cream flavors to find your perfect combination.
  • Consider using a chocolate ganache topping for a richer chocolate experience.
  • For dietary adjustments, substitutions for gluten-free and vegan options list in previous sections apply well.

Delicious Homemade Soft Pretzels: Your Ultimate Recipe Guide

Homemade Soft Pretzels: The Perfect Snack for Any Occasion

⚖️
Difficulty
Medium

⏲️
Prep Time
30 mins

🕒
Cook Time
15 mins

⏱️
Total Time
45 mins

🍽️
Servings
12 Pretzels

Nothing beats the warm, buttery goodness of Homemade Soft Pretzels. With their golden brown crust and chewy center, these pretzels are perfect for sharing at gatherings or enjoying as a snack any time of day. You will find that making these delicious treats at home brings an inviting aroma to your kitchen and fills your heart with joy.

The satisfying process of kneading dough and shaping pretzels is not only fulfilling but also a wonderful way to get the family involved. Once baked, these pretzels can be enjoyed plain or generously sprinkled with coarse salt. For a twist, serve them with your favorite dips like mustard or cheese sauce for an irresistible snack experience that will leave everyone wanting more.

Quick Recipe Highlights

  • Flavor Profile: A delightful combination of savory and tangy, with the perfect balance of salt and buttery goodness.
  • Texture: Soft pretzels have a chewy interior and a slightly crispy, golden-brown exterior that make every bite enjoyable.
  • Aroma: The smell of freshly baked pretzels is mouthwatering, filled with notes of warm dough and toasted buttery goodness.
  • Visual Appeal: The shine of the pretzels enhances their golden hue, making them visually irresistible on a serving platter.
  • Skill Level Needed: This recipe is approachable for beginners, with straightforward steps that can be mastered with practice.
  • Special Equipment: A large mixing bowl, baking sheet, and pot for boiling are essential for this homemade pretzel experience.

Recipe Overview

  • Difficulty Level: The process requires a bit of attention to detail, such as boiling the pretzels for the right time to achieve that perfect crust, but it’s manageable for novice bakers.
  • Category: These pretzels serve as an excellent snack or appetizer, ideal for game days, parties, or family movie nights.
  • Cuisine: Soft pretzels have a rich history in German cuisine and are widely enjoyed in the U.S. as stadium snacks and street food.
  • Cost: Ingredients are typically inexpensive, so making pretzels at home is a budget-friendly option compared to buying them from a store.
  • Season: Enjoy them year-round, but they are especially popular during fall and winter gatherings and festivals.
  • Occasion: Perfect for casual gatherings, family bonds, or even as a fun project for kids on the weekends.

Why You’ll Love This Recipe

The delightful taste and texture of homemade soft pretzels come together to create a magical snack that everyone loves. The buttery flavor mingles with the salt, making each bite a savory experience that pairs perfectly with various dips, enhancing the overall flavor profile. With a chewy yet tender interior and a crisp exterior, these pretzels stand out as a quintessential comfort food.

Convenience is another reason to adore this recipe. In just under an hour, you can whip up a batch of fresh pretzels without the need for special bakery equipment. Gather your family in the kitchen for a fun bonding experience, as making pretzels together can become a cherished tradition. Plus, the dough can be prepared ahead of time for an effortless bake when you’re ready to enjoy.

In terms of nutritional advantages, soft pretzels provide energy through carbohydrates, essential for keeping you fueled throughout the day. Modify the recipe by incorporating whole grain flour for increased fiber content, making them a more wholesome snack option. With careful ingredient selection, you can make your pretzels more nutritious while maintaining that beloved flavor.

Soft pretzels also shine in social contexts as they are the perfect sharing food. Whether served at a game, a backyard party, or simply at home, they bring people together. Their warm aroma fills the air, enticing everyone to gather around the table and celebrate good times with good company.

Cost-effectiveness only adds to their appeal. With simple, budget-friendly ingredients, you can make a large batch that impresses without straining your wallet. When you know you can create such delightful treats at home, you’ll be amazed at how often you’ll want to make them.

Historical Background and Cultural Significance

The origin of soft pretzels can be traced back to ancient times, believed to have been created by monks who shaped the dough to symbolize arms crossed in prayer. With varied stories across different cultures, pretzels became particularly popular in Germany, where they were known for their unique twist and rich flavor.

Culturally, soft pretzels have evolved into a beloved snack in both street food scenes and festivals across Europe and the United States. In Germany, they are often served with mustard, while American variations have emerged with creative toppings and sauces that appeal to modern palates. Crucially, they represent community and togetherness in shared experiences.

Over the centuries, the pretzel recipe has evolved, incorporating various styles and ingredients. From traditional coarse salt to contemporary toppings like cheese or garlic, the adaptability of pretzels has kept them relevant over generations. Today’s pretzels reflect cultural influences from around the globe, showcasing their universal appeal.

Regional variations abound as well; for instance, the Philadelphia pretzel, characterized by its soft dough and pretzel-shaped form, has gained notoriety. Other regions have embraced baking styles, creating distinct versions, whether they’re served in bite-sized pieces or with inventive dips, each elevating this simple recipe.

Ingredient Deep Dive

Flour is the foundation of pretzels, providing the necessary structure. Whole wheat flour offers a nuttier taste and higher fiber, while all-purpose flour contributes to a softer texture. When selecting flour, aim for high protein content which enhances gluten formation, ensuring your pretzels are chewy and delicious. Store your flour in a cool, dry place, and consider sealing it in an airtight container for longer shelf life.

Yeast plays a critical role in the rise and flavor of pretzels. Active dry yeast or instant yeast can be employed, with the latter requiring no proofing. Yeast is sensitive to temperature, so it’s important to store it in a cool, dark place to maintain viability. Always check the expiration date to ensure successful fermentation for fluffy pretzels.

Salt is essential for taste and plays a dual role in controlling fermentation. Coarse salt is ideal for sprinkling on top, adding a burst of flavor. When selecting salt, consider sea salt or kosher salt for a delightful crunch. Store it in a dry environment away from moisture to prevent clumping.

Baking soda is used in the boiling step, giving pretzels that iconic flavor and dark color. Using a solution of water and baking soda to dip the formed pretzels mimics the traditional lye bath of authentic pretzel-making. Store baking soda in a cool, dry place to maintain its freshness and effectiveness.

Common Mistakes to Avoid

  • Using the wrong flour type – Make sure to select high-protein flour to achieve the desired chewiness.
  • Not letting the dough rise sufficiently – Patience is key; allow the dough enough time to double in size for the best texture.
  • Overboiling the pretzels – Keep an eye on them; boiling for too long can make them tough instead of soft.
  • Skipping the baking soda bath – This step is crucial for that perfect chewy crust that distinguishes pretzels.
  • Insufficient salt – Don’t shy away from finishing salt; it balances the sweetness of the dough beautifully.
  • Overcrowding on the baking sheet – Leave adequate space between pretzels to allow even baking.
  • Not preheating the oven – Ensure your oven is hot enough to give the pretzels a good rise while baking.
  • Ignoring cooling time – Let pretzels cool slightly; this improves their texture and makes them easier to eat.

Essential Techniques

Kneading the dough is fundamental to developing gluten, which creates the chewy texture in pretzels. Ensure you’re properly incorporating all ingredients and kneading until the dough is smooth and elastic. Use visual cues like a smooth surface and slight spring back to gauge completion.

Boiling the pretzels in a baking soda solution is crucial for achieving their signature taste and color. Master this technique by carefully monitoring the boiling time for each pretzel. A minute is generally effective; overboiling can yield a rubbery texture, while underboiling will affect the crispness of the crust.

Pro Tips for Perfect Homemade Soft Pretzels

1. Use warm water (about 110°F) to activate the yeast – this helps it dissolve quickly and rise effectively.

2. Make sure you have a smooth kneading surface to work with; a clean countertop or wooden board works best.

3. Sprinkle flour on your hands while shaping to prevent sticking, ensuring a clean process.

4. Allow the prefolded pretzels to rest for about 5 minutes before boiling – this ensures they retain their shape.

5. Experiment with toppings after boiling; try sprinkling garlic powder, cheese, or even cinnamon sugar for a twist.

6. Bake pretzels in a preheated oven; this ensures an irresistible contrast between the soft interior and crisp exterior.

7. Always keep an eye on the baking time; pretzels should be golden brown but not overly dark.

8. Enjoy them fresh out of the oven for the best experience!

Variations and Adaptations

Explore regional variations of soft pretzels by incorporating local spices or toppings that reflect your culinary culture. For instance, add rosemary or garlic to the dough for a savory twist, or experiment with flavored sea salts post-baking.

Seasonal adaptations can transform this recipe; consider pumpkin spice for a fall treat or topping them with a festive blend during the holidays. By using ingredients in harmony with the season, you can make pretzels that reflect the changing times.

Dietary modifications include gluten-free alternatives. Substitute regular flour with a blend of gluten-free flours and adjust the liquid amounts accordingly to achieve the right consistency. Keep in mind, though, that they may have a slightly different texture and flavor than traditional pretzels.

Flavor variations can add a unique touch, such as using malt powder for a sweet caramelized flavor or adding cheese into the dough for a delightful cheesy soft pretzel experience.

Texture modifications are also possible; try brushing the pretzels with olive oil before baking to achieve a softer crust. Alternatively, if you prefer a crunchier texture, consider baking them a few minutes longer until they reach the perfect golden brown.

For presentation alternatives, shape pretzels in different styles such as knots or bites. Serving them alongside assorted dips will elevate the experience and provide guests with various flavors to explore.

Serving and Presentation Guide

When plating your pretzels, consider twirling them into lovely shapes or arranging them in a circle to create an inviting centerpiece for your table. A sprinkle of coarse salt can enhance the visual appeal while adding a touch of flair to their presentation.

Garnishing ideas can include fresh herbs or a drizzle of melted butter over the top for an indulgent finish. Traditional accompaniments like spicy mustard or cheese dips can be served in small bowls nearby for easy access.

Modern serving suggestions may involve pairing pretzels with craft beers or sweet beverages for a creative twist. Consider adjusting the temperature of your pretzels when serving, ensuring they are warm but not too hot to handle. Portion control is key; cut pretzels into smaller pieces to allow for sharing and tasting without overindulgence.

Wine and Beverage Pairing

Chilled lager or pilsner is an ideal match for soft pretzels, as they complement the salty flavors beautifully. If you prefer a fuller-bodied option, opt for a robust amber or brown ale which adds depth to the overall taste experience.

Non-alcoholic alternatives such as sparkling water or homemade lemonade can provide a refreshing contrast to the warm, salty pretzels, making them enjoyable for everyone. Consider pairing pretzels with herbal teas like chamomile or mint, which can offer a soothing complementary flavor.

If coffee is your preference, a light roast flavor can offer a delightful contrast to the pretzels without overwhelming them. Regardless of your choice, keep beverage temperatures in mind while serving; warm pretzels and cool drinks create the ideal balance.

Storage and Shelf Life

Proper storage methods for soft pretzels are crucial to maintain their freshness. Store cooled pretzels in airtight containers to prevent them from drying out, placing parchment paper between layers to avoid sticking.

Temperature requirements suggest keeping them at room temperature for a short duration. If stored longer, consider refrigerating them, though this may alter texture slightly. For those wanting to store for extended periods, freezing is an excellent option.

When freezing, wrap individual pretzels tightly in plastic wrap, followed by foil for insulation. Signs of spoilage to look for include musty odors or mold; in such cases, it’s best to discard the affected pretzel. Reheating methods involve placing them in a preheated oven for 5-10 minutes to restore their delightful warmth and texture.

Make Ahead Strategies

If you want to prepare soft pretzels in advance, consider making the dough the night before and storing it in the fridge for up to 24 hours. Bring the dough to room temperature before shaping and boiling. This not only saves time but can enhance the flavors as they develop over time.

To store between steps, freeze the shaped pretzels after boiling and before baking; this allows for an effortless baking session when you’re ready. When it comes to quality, note that freshness is critical, and some methods may result in a slightly altered texture.

Assembly tips involve lightly dusting flour on a surface for easy shaping; this prevents sticking and allows for smooth transitions between each step. Fresh element additions such as toppings or cheese can be incorporated just before baking to ensure they are at their peak when served.

Scaling Instructions

When scaling this pretzel recipe, halving the ingredients can provide just the right amount for a small gathering without overpowering your event. Choose appropriate mixing and baking tools to accommodate the smaller batch.

For those looking to double or triple the recipe, ensure your mixing bowl is spacious enough to handle the increased ingredients and consider longer kneading times. You may need to adjust baking sheets to fit all pretzels comfortably in the oven at once.

Timing modifications are essential; monitor the pretzels while baking, as smaller or larger sizes may cook differently. Storage considerations should be factored in; if making in bulk, ensure airtight storage to prolong their freshness.

Nutritional Deep Dive

Macro breakdown shows that homemade soft pretzels primarily consist of carbohydrates, which provide energy. Each soft pretzel can vary, but a typical serving contains around 200-300 calories, depending on size and toppings. Adjust the ingredients to achieve desired macro ratios, perhaps by incorporating whole grains for added fiber.

Micronutrient analysis reveals that soft pretzels can provide essential nutrients such as B vitamins from yeast and iron from the flour. Monitor your diet by complementing pretzels with nutrient-rich toppings like dips made from legumes or vegetables.

Health benefits of soft pretzels include the satisfaction of making something from scratch, alongside potential modifications for healthier versions. By opting for lower-calorie toppings and whole grain flour, you also enhance this snack’s nutritional value.

Dietary considerations are essential for maintaining a balanced diet. Utilizing portion analysis helps ensure that pretzels fit comfortably within individual daily calorie allowances while allowing you to enjoy them guilt-free. Weight management tips involve practicing mindful eating and exploring these pretzels as an occasional indulgence rather than a staple.

Dietary Adaptations

For a gluten-free version, utilize gluten-free flour blends that replicate the characteristics of traditional flour, ensuring the dough’s integrity. This may involve adjusting hydration levels due to gluten-free flour’s differing absorbency.

Dairy-free variations can replace butter with olive oil or coconut oil, ensuring delicious flavor without sacrificing integrity. Baking soda remains compatible with such adjustments, allowing for simple adaptations while maintaining taste.

For vegan options, use flaxseed meal as an egg substitute in the dough while ensuring any toppings are likewise plant-based. Adjustments will deliver a delectable result that satisfies diverse dietary needs.

Low-carb and keto adaptations generally involve reducing the flour content drastically or substituting with alternatives like almond or coconut flour. Remember to factor in any potential texture alterations that these substitutions may introduce.

Paleo followers can concoct soft pretzels by employing ingredients like almond flour and tapioca starch, conforming to dietary preferences while retaining the joy of this beloved snack.

For those following low-FODMAP diets, explore therapies like egg alternatives and specialized flours to yield pretzels that align with your dietary requirements, enabling enjoyment without discomfort.

Troubleshooting Guide

When facing texture issues, check the dough’s hydration; it should be slightly tacky but not sticky. Adjust flour amounts during kneading for a more desirable consistency if necessary.

For flavor balance, tweaking the salt levels can significantly enhance taste; keep experimenting until you achieve the savory profile perfect for your palate.

If temperature problems arise during baking, invest in an oven thermometer to ensure accurate cooking times and temperatures for the ultimate consistency in pretzel results.

Equipment challenges can be tackled by improvising with available tools—consider using a large pot instead of a specialty apparatus for boiling if needed.

If ingredient substitutions have squandered the result, experiment gradually. Take notes to determine which adjustments yield successful variations before finalizing a new recipe.

Timing concerns may require adjusting your kneading and rising stages. Being patient in these areas is crucial to developing the best texture over rush for quick preparation.

Recipe Success Stories

Reader feedback often highlights how homemade soft pretzels sparked fun family baking nights. Many have shared successes using unique toppings and adapting flavors, showing the versatility of this recipe.

Success stories abound from bakers experimenting with different shapes and techniques—kids especially enjoy trying their hands at pretzel knots or bites for a playful approach.

Variations have led to amazing outcomes, including cheese-stuffed pretzels, demonstrating the endless possibilities to customize this recipe to individual tastes and preferences.

If you’re keen on photography tips, capturing those golden pretzels fresh from the oven creates mouthwatering images sure to impress family and friends on social media!

Frequently Asked Questions

How do I store leftover pretzels?

Store your pretzels in an airtight container at room temperature for up to 2 days. For longer storage, wrap them tightly and freeze.

Can I make the dough the night before?

Absolutely! Prepare the dough the night before, let it rise, and refrigerate it. Bring it to room temperature before shaping.

What’s the best way to reheat pretzels?

Preheat your oven to 350°F and bake for 5-10 minutes until warmed through and crispy.

Can I use milk instead of water?

Yes, you can use warm milk instead of water for a richer flavor; however, it may alter the dough consistency slightly.

How long do soft pretzels last?

Homemade soft pretzels are best enjoyed fresh but can be stored in an airtight container for up to 2 days or frozen for several months.

Can I add ingredients to the dough?

For sure! Enhance flavor by adding cheese, herbs, or spices before kneading the dough.

What kind of salt should I use?

Coarse salt or pretzel salt is best for topping; however, sea salt or kosher salt can also be used effectively.

Do I have to boil them first?

Yes, boiling in a baking soda solution is crucial to achieve that classic crust and flavor characteristic of soft pretzels.

Can I use whole wheat flour?

Whole wheat flour can add nutritional value and flavor. However, consider combining it with all-purpose flour for best results.

Are soft pretzels vegan-friendly?

They can easily be made vegan by substituting butter with plant-based oils and ensuring cheese used in dips is vegan-friendly.

Additional Resources

For similar snacks, consider exploring recipes for homemade bagels or garlic knots, as they share similar dough preparation techniques. Ingredient information may also enhance your understanding of flours and yeast, guiding your baking endeavors.

Feel free to explore equipment recommendations, such as mixing bowls and baking sheets that suit home bakers’ needs. Seasonal variations of this pretzel recipe can range from sweeter cinnamon twists to savory herb-infused versions, enriching your baking repertoire.

Join the Conversation

Share your pretzel-making adventures on social media! Join the community by tagging your photos, sharing tips, and encouraging new bakers to give it a try. Recipe reviews can provide invaluable feedback that enriches everyone’s experiences, creating a supportive growth environment.

Explore variations and share what works best for you. We love hearing about successful adaptations and personal choices that make your soft pretzels truly yours!

The Recipe

Homemade Soft Pretzels

Serves: 12 Pretzels

Prep Time: 30 mins

Cook Time: 15 mins

Total Time: 45 mins

Kitchen Equipment Needed

  • Large mixing bowl
  • Baking sheet
  • Pot for boiling
  • Measuring cups and spoons
  • Spoon for mixing
  • Rolling pin or hands for shaping

Ingredients

  • 4 cups all-purpose flour
  • 1 packet (2 1/4 tsp) active dry yeast
  • 1 teaspoon salt
  • 1 cup warm water
  • 1/4 cup baking soda (for boiling)
  • Coarse salt for topping
  • 2 tablespoons melted butter (for brushing)

Directions

  1. In a bowl, combine warm water and yeast; let it sit until foamy.
  2. Add flour and salt, mixing until a dough forms. Knead for about 5 minutes until smooth.
  3. Let the dough rise in a greased bowl for about 30 minutes, covered with a cloth.
  4. Preheat the oven to 450°F and bring a large pot of water to a boil, adding baking soda.
  5. Divide the dough into 12 equal pieces and roll each into long strips, shaping them into pretzels.
  6. Boil each pretzel in baking soda water for about 30 seconds on each side, then place on a greased baking sheet.
  7. Bake for 12-15 minutes or until golden brown. Brush with melted butter and sprinkle with salt.

Recipe Notes

  • For a sweeter option, brush with cinnamon sugar instead of butter after baking.
  • Experiment with different toppings such as garlic powder or cheese.
  • Leftover pretzels can be stored in an airtight container for up to 2 days.

Deliciously Moist Chocolate Chip Zucchini Banana Bread Recipe

Chocolate Chip Zucchini Banana Bread: A Healthy Twist on a Classic Treat

⚖️
Difficulty
Easy

⏲️
Prep Time
15 mins

🕒
Cook Time
50 mins

⏱️
Total Time
65 mins

🍽️
Servings
12 slices

Chocolate Chip Zucchini Banana Bread is a delightful fusion of flavors that combines the sweetness of ripe bananas with the subtle earthiness of zucchini, all contrasted by the rich, melty chocolate chips that dot the loaf. This recipe not only satisfies your sweet tooth but also serves up a healthy dose of vegetables, making it perfect for breakfast, an afternoon snack, or even a guilt-free dessert. The combination of these ingredients creates a moist and tender crumb that is sure to please family and friends alike.

As you bake this Chocolate Chip Zucchini Banana Bread, your kitchen will be filled with the warm aroma of baked goods, inviting everyone to gather around as it cools. The golden-brown crust gives way to a soft, fluffy interior, accented by the deliciously sweet bursts of chocolate. With its beautiful presentation, this bread is not only tasty but adds an inviting touch to any table, making it a wonderful choice for gatherings or as a delightful gift.

Quick Recipe Highlights

  • Flavor Profile: This recipe balances the sweetness of bananas and dark chocolate with the mild flavor of zucchini, creating a harmonious taste experience.
  • Texture: The bread is incredibly moist with a soft crumb, while the chocolate adds a satisfying richness and the zucchini lends a slight slight texture.
  • Aroma: The warm, comforting scents of vanilla, banana, and chocolate meld together to create an irresistible aroma that fills your home.
  • Visual Appeal: The vibrant green flecks of zucchini contrast beautifully with the rich brown of the loaf, making it delectable to look at.
  • Skill Level Needed: The recipe is straightforward, perfect for beginner bakers, requiring just basic techniques to create a scrumptious bread.
  • Special Equipment: No special equipment is needed; just standard baking tools like a mixing bowl, whisk, and loaf pan.

Recipe Overview

  • Difficulty Level: This Chocolate Chip Zucchini Banana Bread is easy to prepare, making it suitable for bakers of all levels. With simple steps and minimal ingredients, even beginners can create this treat with confidence.
  • Category: This recipe falls under breakfast and snacks, making it versatile for any time of day. It’s also a great option for brunch or as part of a lunchbox for kids.
  • Cuisine: While this recipe showcases American baking traditions, the incorporation of zucchini reflects a growing trend towards health-conscious, vegetable-infused desserts.
  • Cost: The ingredients are affordable, often arising from staples already in your kitchen, making it a budget-friendly choice for delicious homemade bread.
  • Season: This loaf is wonderful year-round but is a great way to use up summer zucchini, making it especially popular in gardening seasons.
  • Occasion: Perfect for casual gatherings, brunches, or even holiday parties where a sweet comfort food is desired without excessive indulgence.

Why You’ll Love This Recipe

This Chocolate Chip Zucchini Banana Bread takes the traditional banana bread to another level with the inclusion of zucchini, adding not only nutrition but also enhancing the moistness of the loaf. The slices melt in your mouth, offering a deliciously sweet yet wholesome treat that you can feel good about indulging in. Paired perfectly with a pat of butter or enjoyed plain, this bread invites you to savor every bite.

Making this bread is remarkably convenient, as the preparation requires minimal effort. Grating the zucchini and browning the bananas can be done in a matter of minutes. Moreover, this recipe gives you the freedom to prepare a large batch, storing extras for future snacking or gifting. Its adaptability makes it an excellent choice for busy weekends when a quick wholesome recipe is needed.

Nutritionally, this bread packs a punch. It combines the natural sweetness of bananas with the vitamins and minerals found in zucchini. With this recipe, you not only satisfy your cravings but also incorporate essential nutrients into your diet. Additionally, the use of whole grain flour can enhance the fiber content, making this a nourishing option.

Socially, this Chocolate Chip Zucchini Banana Bread brings people together around a common love for baked treats. Whether you’re hosting friends or sharing with family, this recipe fosters connection through its inviting aroma and delicious taste. It’s a great conversation starter and a staple for gatherings.

Lastly, this recipe is incredibly cost-effective. All the ingredients are easily accessible and typically found in your pantry. Making your baked goods at home not only saves money but also allows you to enjoy a fresh, wholesome product without preservatives or artificial ingredients often found in store-bought options.

Historical Background and Cultural Significance

Chocolate Chip Zucchini Banana Bread may seem like a modern creation, but its roots can be traced through various baking traditions that allow for creativity with surplus ingredients. The classic banana bread recipe, which gained popularity in the 1930s with the advent of baking powder, makes use of overripe bananas—a common occurrence in many households. The addition of zucchini, typically seen in savory dishes, reflects a trend towards healthy baking and creative utilization of garden vegetables.

Culturally, this recipe represents a fusion of flavors and practices from American kitchens, where resourcefulness in cooking is celebrated. The zucchini’s inclusion into sweet dishes highlights the contemporary shift towards combining health with indulgence.

Over the years, banana bread has evolved, and with each adaptation, it becomes a canvas for personal expression. Families might pass down their treasured recipes, often swapping ingredients based on local crops and preferences. The chocolate adds decadence, making it a popular choice for dessert lovers.

Regional variations of zucchini banana breads are now common, with bakers across the world putting their twists on the classic recipe. In some areas, spices like cinnamon are incorporated, while others may choose different types of chocolate, nuts, or even dried fruits, adapting the loaf to their culinary styles and tastes.

Ingredient Deep Dive

Bananas

Bananas are a staple in many cultures worldwide. Their sweet flavor and creamy texture make them a beloved fruit in desserts and snacks. Rich in potassium and vitamin C, bananas have great nutritional benefits, aiding in heart health and aiding digestion. When selecting bananas for this recipe, look for ones that are overly ripe with brown spots for maximum sweetness. They should be stored at room temperature and can be frozen for future use if they become too ripe.

Zucchini

Zucchini is often viewed as a savory vegetable, but its subtle flavor makes it a fantastic addition to sweet dishes as well. High in water content, zucchini adds moisture without altering taste, enhancing the nutrient profile with vitamins A and C. Always choose firm, glossy zucchinis and avoid ones with blemishes. They should be stored in a cool, dry place and can be grated and frozen for use in baking.

Chocolate Chips

Chocolate chips are a versatile ingredient associated with indulgence, often found in desserts across cultures. Rich in antioxidants, semi-sweet or dark chocolate chips sweeten and deepen the flavor of this bread. Choosing high-quality chocolate offers a significant flavor boost. Store chocolate chips in a cool, dry place, and they can be substituted with carob chips or chopped chocolate for different flavor profiles.

Flour

Flour is the backbone of nearly all baked goods. It contributes to structure, texture, and overall taste. When selecting flour, consider using whole wheat for added nutrition and fiber. You want a flour that is finely milled for smooth-textured baked goods. Store flour in a cool, dry environment, and it can be substituted with gluten-free blends for those with dietary restrictions.

Common Mistakes to Avoid

  • Using young or under-ripe bananas: For optimal sweetness, ensure your bananas are fully ripe with plenty of brown spots.
  • Skipping the option to drain zucchini: If you don’t remove excess moisture from grated zucchini, your bread may turn out soggy.
  • Overmixing the batter: Overmixing can lead to dense and rubbery bread; mix until just combined.
  • Using too much or too little flour: Ensure accurate measurements; either can lead to inconsistent texture.
  • Baking at incorrect temperatures: Make sure your oven is preheated, as uneven heat can affect baking time.
  • Improper storage: Store your bread in an airtight container to keep it fresh and moist for longer.
  • Adding ingredients at wrong temperatures: Ensure ingredients like eggs and butter are at room temperature for better incorporation.
  • Not checking for doneness: Use a toothpick; if it comes out clean, your bread is ready. A loaf can quickly overbake if not monitored.

Essential Techniques

Properly measuring ingredients is crucial. Use dry measuring cups for dry ingredients and liquid measuring cups for liquids to ensure accuracy. Level off dry ingredients for precise quantities; this prevents dense or overly dry bread.

Mixing techniques are also important. Start by combining dry ingredients, then slowly incorporate wet. Use a folding technique for incorporating chocolate chips and zucchini gently, as over-mixing leads to a tough batter and dense bread.

Baking at the right temperature significantly impacts the end result. Use an oven thermometer to check that your oven is calibrated correctly, as precision is key to achieving a perfectly risen loaf.

Pro Tips for Perfect Chocolate Chip Zucchini Banana Bread

1. For added depth, consider browning your butter before mixing it into the batter to enhance the flavor profile.
2. If desired, add nuts or seeds for added crunch and texture; walnuts or chia seeds pair beautifully with chocolate.
3. Experiment with spices like cinnamon or nutmeg for a cozy flavor twist.
4. To boost nutrition without sacrificing taste, swap a quarter of the all-purpose flour for oats or nut flour.
5. Let your bread cool completely before slicing; this allows it to set and maintain moisture.
6. Consider drizzling with honey or maple syrup for an extra touch of sweetness before serving.
7. For a darker loaf, use dark chocolate chips in place of semi-sweet or milk chocolate.
8. If you have leftovers, wrap slices in plastic wrap and store them in the fridge for a refreshing snack.

Variations and Adaptations

Regional variations of Chocolate Chip Zucchini Banana Bread can be seen, such as adding spices based on local preferences. In some cultures, cinnamon, nutmeg, or ginger are included for additional warmth.

Seasonal adaptations allow for experimentation; in fall, consider adding pumpkin puree or substituting the bananas with applesauce for a weirder twist on flavors. In spring, fresh fruit can be incorporated for bursts of color and flavor.

Dietary modifications are also simple; swap regular flour for gluten-free or almond flour. For a vegan option, replace eggs with flax seeds or applesauce. If you prefer lower sugar, consider using light brown sugar or agave nectar for a healthier alternative.

Flavor variations can include different types of chocolate like white or even incorporating flavored chocolate chips to add a unique twist.

Presentation alternatives might involve topping with a cream cheese glaze or serving with fresh fruit, transforming your loaf into a gourmet experience.

Serving and Presentation Guide

Serving Chocolate Chip Zucchini Banana Bread is all about presentation. Slice the loaf evenly and stack on a beautiful platter. Garnish with fresh mint leaves or edible flowers for an elegant look. Consider serving alongside a dollop of cream cheese or vanilla yogurt for richness.

Temperature considerations are key; this bread is delightful when served warm, but can also make a refreshing snack when chilled. Portion control is essential; aim for thick slices for a filling breakfast or thinner slices for easy snacking.

Plating techniques can elevate the experience; drizzle a homemade glaze across the top for visual appeal or serve individual slices on elegant dessert plates.

Garnishing ideas include a dusting of powdered sugar or cocoa powder, which can add a touch of sophistication while enhancing flavors.

Wine and Beverage Pairing

When it comes to beverage pairings, a light-bodied white wine such as a Riesling complements the sweetness of the bread beautifully. The slight acidity balances the richness of the chocolate while enhancing the overall experience.

For a non-alcoholic option, try serving herbal tea, like chamomile or mint, which pairs wonderfully with the warm and comforting flavors of the bread. Cold brew coffee also brings a pleasant contrast.

If you prefer something more decadent, a hot chocolate topped with whipped cream can complement the chocolate chips, creating a cohesive dessert experience.

Be mindful of temperature when serving; beverages should be at their ideal drinking temperature to enhance enjoyment.

Storage and Shelf Life

To maintain freshness, store your Chocolate Chip Zucchini Banana Bread in an airtight container at room temperature for up to three days. For longer storage, refrigeration is recommended, where it can last up to a week.

Temperature requirements are crucial; avoid storing it in humid areas to prevent spoilage. Utilize glass or plastic containers with tight seals to keep moisture locked in while preventing it from going stale.

Signs of spoilage include changes in texture—becomes overly dry or excessively soggy—and off odors. If mold appears or if it has a bad taste, it should be discarded.

For reheating, slice the bread and warm in the microwave for a few seconds or in an oven at 350°F until warm throughout.

If you’re looking to extend your storage options, consider freezing the bread. Wrap in plastic followed by foil to protect against freezer burn, where it can last for up to three months.

Make Ahead Strategies

To streamline your baking process, consider preparing the batter ahead of time. You can refrigerate it for up to 24 hours before baking. Just ensure to let it sit out for a few minutes to return to room temperature for optimal results.

Once baked, the bread can be sliced and stored in the fridge, making it easy to grab a quick breakfast or snack throughout the week. Allow slices to cool completely before wrapping to avoid sogginess.

Quality remains a priority; cool your bread on a wire rack to prevent moisture from accumulating at the bottom. If you plan to store the bread, it’s best to wait until it has completely cooled.

Assembly tips include prepping dry and wet ingredients separately and combining them just before baking to maintain freshness. This method is particularly useful for those who want to prepare for party gatherings or unexpected guests.

When reheating, add fresh elements such as butter or fruit spreads to enhance flavor while reviving the bread’s freshness.

Scaling Instructions

Halving the recipe is effortless; simply divide each ingredient by two and follow the instructions without any changes to method or time.

Doubling or tripling the recipe requires larger mixing vessels and potentially longer baking times. Always monitor doneness using a toothpick to ensure it cooks evenly in the middle.

Equipment adjustments may include using multiple loaf pans if making larger batches, which could also recommend adjusting the oven racks for optimal heat distribution.

Timing modifications may occur; larger loaves take longer to bake, while mini loaves will bake more quickly, so timing adjustments are essential.

Storage considerations for larger batches should take into account ample airtight storage containers to maintain the quality of your freshly baked bread.

Nutritional Deep Dive

This recipe is not only delicious but also provides substantial nutritional value as well. It includes healthy fats from chocolate, vitamins from zucchini, and carbohydrates from bananas, offering a balanced profile.

A macro breakdown reveals that each slice consists of approximately 180 calories, including healthy carbohydrates, small amounts of protein, and fats derived from chocolate.

Micronutrient analysis highlights contributions from bananas and zucchini, offering potassium, vitamin C, and dietary fiber that supports digestion and overall health.

Health benefits extend beyond basic nutrition, targeting overall wellness, energy levels for everyday activities, and even aiding in weight management when consumed in moderation.

Dietary considerations are essential; those looking to account for macros can use alternative flours and sugars to increase fiber content while lowering the glycemic load.

Monitoring portion sizes is advised, as enjoying this treat in moderation maximizes pleasure while aligning with healthy eating patterns.

Dietary Adaptations

For those seeking gluten-free options, substitute regular flour with a gluten-free flour blend. Most blends will work well without altering the texture significantly.

Dairy-free adaptations can easily be achieved using plant-based butter or coconut oil, making this recipe suitable for vegan diets as well. Replace eggs with flaxseed meal or applesauce for a compassionate version.

Keto modifications ask for changes in sweeteners; consider using erythritol or stevia and almond flour for lower carbs.

If pursuing a paleo approach, use almond flour and a natural sweetener like honey while ensuring all ingredients align with paleo principles.

For those on a low-FODMAP diet, including lactose-free yogurt and omitting chocolate can tailor the recipe to personal needs.

Finally, supporting specific dietary needs while still offering deliciousness ensures everyone can enjoy a slice of this delightful Chocolate Chip Zucchini Banana Bread.

Troubleshooting Guide

Texture issues often arise from not allowing bananas to ripen sufficiently. Ensure you use overly ripe bananas for better moisture and sweetness. In case your bread turns out too dry, it may indicate overbaking or excessive flour use. next time, use a little less flour or keep an eye on the oven timer.

Flavor balance can be tricky; if your bread lacks sweetness, check if your bananas were ripe. If the bread is overly sweet, consider reducing the sugar next time or incorporating more whole-grain flour.

Temperature problems can occur if your oven runs hot; investing in an oven thermometer could help ensure accurate temperatures. If baking too hot, simply reduce the temperature by 25°F and adjust your baking time.

For equipment challenges, if you don’t have a loaf pan, consider using muffin tins to create banana bread muffins that will bake evenly and quickly.

Timing concerns are common; if you’re new to baking, keep a close watch on the timer and test for doneness earlier than specified in the recipe.

Ingredient substitutions might sometimes invite issues. If you swap flours, always control for moisture differences to maintain texture.

Recipe Success Stories

Readers have shared their success in experimenting with this Chocolate Chip Zucchini Banana Bread. Many have highlighted how they used additional spices or swapped out ingredients to make the recipe their own, contributing to a unique touch.

Community feedback emphasizes how families enjoyed this bread as a bonding experience, whether baking together or sharing stories around the breakfast table. Local variations from different family traditions have strengthened the connection between cooking and culture for many.

Photo success stories showcase artists capturing the beauty of the loaf, inviting others to create and share their renditions. Social media has played an essential role, allowing readers to inspire each other and provide tips based on shared experiences.

Adaptation stories often mention how individuals showcased this bread at gatherings and received rave reviews, reinforcing the recipe’s delicious reputation among friends and family.

Ultimately, these success stories add a personal touch to every slice of Chocolate Chip Zucchini Banana Bread, making each loaf not just a recipe but a treasured tradition and community creation.

Frequently Asked Questions

Can I make this bread without eggs?

Absolutely! To substitute eggs, consider using flaxseed meal or applesauce. One egg can be replaced with 1 tablespoon of flaxseed meal mixed with 2.5 tablespoons of water, or you can use 1/4 cup of applesauce.

How can I store leftovers?

Leftover bread can be stored in an airtight container at room temperature for up to three days. For longer storage, wrap tightly and freeze individual slices for up to three months.

Can I use frozen zucchini in this recipe?

Yes, you can use frozen grated zucchini. Just make sure to thaw it and drain any excess moisture before adding it to the batter.

What if my bread is too dense?

Dense bread can be a result of overmixing the batter. Mix until just combined and avoid over-beating the eggs as well for a lighter loaf.

Is it necessary to peel zucchini before using?

No, you do not need to peel zucchini for this recipe. The skin adds nutrients and will not impact the flavor of the bread.

What variations can I make?

You can customize this recipe by adding nuts, trying different flavored chocolate, or including spices like cinnamon or nutmeg for added warmth.

Can I make this recipe as muffins?

Definitely! To make muffins, simply pour the batter into a lined muffin tin and bake for about 20-25 minutes or until a toothpick inserted comes out clean.

What can I use instead of chocolate chips?

You can use chopped nuts, dried fruits, or alternative sweets like coconut flakes or butterscotch chips for a different flavor profile.

How can I tell when the bread is done?

Insert a toothpick or skewer into the center of the loaf. If it comes out clean or with a few moist crumbs, it’s ready to be taken out of the oven.

Can I lessen the sugar in the recipe?

Absolutely! You can reduce the sugar to your preference. Just be mindful that it might slightly alter the texture or moisture of the final product.

Additional Resources

For those looking to expand their baking horizons, we recommend exploring related recipes that incorporate seasonal vegetables and fruits, like carrot bread or apple cinnamon muffins. A technique guide on mastering banana bread variations can be exceedingly helpful too.

If you’re curious about ingredient information, look into the benefits of whole grains and their nutritional value in baking. Equipment recommendations for different kitchen tools can also enhance your baking experience.

Seasonal variations allow you to adapt recipes based on what’s fresh and available, ensuring that you are always creating with the best quality ingredients.

Join the Conversation

We encourage you to share your baking experiences with Chocolate Chip Zucchini Banana Bread on social media! Tag us with your photos to inspire others who might want to try this delightful recipe.

Connect with fellow bakers in our community, swapping tips or ideas for variations! Share your favorite ways of enjoying this loaf and lend recommendations on pairing perfect beverages to enhance the experience.

Your feedback and suggestions are invaluable, as they not only foster creativity within the community but also open up a space for sharing culinary love. We look forward to hearing your stories and seeing your delicious results!

The Recipe

Chocolate Chip Zucchini Banana Bread

Serves: 12 slices

Prep Time: 15 mins

Cook Time: 50 mins

Total Time: 65 mins

Kitchen Equipment Needed

  • Mixing bowl
  • Loaf pan
  • Whisk
  • Grater
  • Measuring cups and spoons
  • Oven

Ingredients

  • 2 ripe bananas, mashed
  • 1 cup grated zucchini (drained)
  • 1/2 cup granulated sugar
  • 1/2 cup brown sugar
  • 1/3 cup melted butter
  • 2 eggs
  • 1 teaspoon vanilla extract
  • 1 1/2 cups all-purpose flour
  • 1 teaspoon baking soda
  • 1/2 teaspoon salt
  • 1 cup chocolate chips

Directions

  1. Preheat your oven to 350°F (175°C) and grease a loaf pan.
  2. In a mixing bowl, mash the bananas and whisk in the melted butter.
  3. Add sugars, eggs, and vanilla extract. Mix well until all ingredients are combined.
  4. In another bowl, mix flour, baking soda, and salt.
  5. Gradually add the dry ingredients to the wet mixture, stirring until just combined.
  6. Fold in the grated zucchini and chocolate chips gently.
  7. Pour the batter into the prepared loaf pan.
  8. Bake for 50-60 minutes or until a toothpick comes out clean.
  9. Let it cool in the pan for 10 minutes before transferring it to a wire rack to cool completely.

Recipe Notes

  • For a richer flavor, use dark chocolate chips.
  • If you prefer less sweetness, reduce the sugar.
  • Can also be made as muffins; adjust baking time to about 20-25 minutes.
  • Store leftovers in an airtight container for up to a week.

Delicious Cheesesteak Tortellini in Creamy Parmesan Sauce Recipe

Cheesesteak Tortellini in Creamy Parmesan Sauce: A Delicious Twist on a Classic Favorite

⚖️
Difficulty
Intermediate

⏲️
Prep Time
15 mins

🕒
Cook Time
25 mins

⏱️
Total Time
40 mins

🍽️
Servings
4 servings

If you’re a fan of classic flavors with a touch of modern flair, then Cheesesteak Tortellini in Creamy Parmesan Sauce is the perfect dish for you. This delightful recipe combines the rich and savory elements of a traditional cheesesteak with the soft and pillowy texture of tortellini, all enveloped in a luxurious creamy parmesan sauce. Each bite offers a comforting burst of flavors that will warm your soul and satisfy your cravings for something hearty and delicious.

Imagine a plate filled with beautifully cooked tortellini, tossed generously in a creamy sauce that glistens with rich cheddar and parmesan. The addition of tender ribeye steak, sautéed peppers, and onions provides a colorful contrast that makes this dish not only delectable but visually appealing as well. You’ll find that this Cheesesteak Tortellini is not just a meal; it’s an experience that transports you to the bustling streets of Philadelphia with each forkful.

Quick Recipe Highlights

  • Flavor Profile: The cheesesteak flavors shine through with melted cheese, savory beef, and aromatic herbs.
  • Texture: The combination of creamy sauce with tender tortellini delivers a luxurious mouthfeel.
  • Aroma: The enticing scents of sautéed onions and peppers complement the richness of the creamy sauce.
  • Visual Appeal: The dish boasts vibrant colors from peppers and herbs, making it a feast for the eyes.
  • Skill Level Needed: Perfect for cooks with basic culinary skills aiming to elevate their dinner game.
  • Special Equipment: A saucepan, skillet, and colander are essential to create this dish beautifully.

Recipe Overview

  • Difficulty Level: This recipe falls under the intermediate category due to the coordination required for cooking multiple elements simultaneously.
  • Category: This dish works well as a main course, ideal for family dinners or casual gatherings.
  • Cuisine: While inspired by American cuisine, this dish incorporates Italian influences thanks to the tortellini and cream sauce.
  • Cost: Budget-friendly, with all ingredients easily accessible at local grocery stores.
  • Season: Perfect for year-round enjoyment, particularly on cooler days when a hearty meal is most welcome.
  • Occasion: This delicious dish is great for family dinners, weeknight meals, or even special occasions when you want to impress guests.

Why You’ll Love This Recipe

When it comes to taste and texture, Cheesesteak Tortellini in Creamy Parmesan Sauce truly excels. The savory flavors of the tender ribeye steak meld effortlessly with the creamy sauce and fresh herbs, creating a delightful symphony on your palate. The silky tortellini enhances this experience, delivering a comforting sensation that makes every bite enjoyable.

This recipe boasts impressive convenience, allowing you to prepare a wholesome meal in about 40 minutes. The straightforward steps require minimal effort, enabling cooks of all levels to enjoy a gourmet-like experience without excessive time commitment. It’s perfect for those busy weeknights where you still wish to serve a delightful dinner.

Nutritionally, this dish offers a balanced combination of protein from the steak and carbohydrates from the tortellini. Incorporating bell peppers adds essential vitamins, making it not just indulgent but nutritious as well. With the right portions, it fits into a balanced diet without compromising on flavor.

Serving this dish at your next gathering will surely be a hit. Its vibrant presentation and rich flavors make it a crowd-pleaser, prompting compliments from friends and family alike. You’ll find that the combination of classic cheesesteak elements with pasta creates engaging conversations around the table.

From a cost perspective, Cheesesteak Tortellini is budget-friendly, offering significant flavor and satisfaction without breaking the bank. Most ingredients are commonly found in home kitchens, making it easy to whip up even on short notice without a special trip to the store.

Historical Background and Cultural Significance

The cheesesteak has its origins in Philadelphia, Pennsylvania, believed to have been created in the 1930s. It embodies the heart and soul of the city’s culinary scene, symbolizing classic American comfort food. Combining this iconic sandwich with tortellini creates a fusion that respects its roots while also inviting creativity in the kitchen.

Incorporating cheesesteak flavors into Italian-inspired dishes showcases the melting pot of cultures that exist in American cuisine. The evolution of both cheesesteaks and pasta over time has resulted in endless adaptations, allowing for innovative recipes that continue to honor traditional flavors.

This recipe connects with many food enthusiasts who appreciate the harmony of various culinary influences. Regional variations of the cheesesteak include different toppings and meats, exemplifying how deeply ingrained this dish is within American culture.

Today, variations of the cheesesteak abound, with numerous adaptations emerging to accommodate diverse dietary preferences. This versatility makes it relevant and cherished, allowing people to enjoy familiar flavors in new and exciting ways.

Ingredient Deep Dive

Ribeye Steak: Ribeye is renowned for its tenderness and rich flavor. This cut is well-marbled, offering a juicy experience that elevates any dish. For selection, look for firm, bright red meat with good marbling. Store it in the coldest part of your fridge and consume within 3-5 days. If unavailable, flank steak or sirloin can serve as suitable substitutions.

Tortellini: Italian in origin, tortellini are pasta filled with a variety of meats or cheeses, providing delightful bites of comfort. They can be found fresh or frozen; opt for fresh when making this dish for the best texture. Store fresh tortellini in the refrigerator and use within a week or freeze for longer preservation. Cheese ravioli can be a delicious alternative as well.

Parmesan Cheese: Parmigiano-Reggiano is the gold standard for parmesan cheese, known for its nutty, buttery flavor. It’s rich in calcium and protein, making it a popular choice among health-conscious eaters. When shopping, always opt for cheese that has a hard texture and a strong aroma. Store in a cool, dry place and wrap in parchment paper for freshness. Grana Padano is a widely acceptable alternative for those on a budget.

Bell Peppers and Onions: Fresh vegetables add color and nutrients to the dish, providing vitamins A and C, as well as a lovely sweetness when sautéed. When selecting, choose firm vegetables that are free of blemishes. Store them in a cool place and consume within a week. If you’re looking for a different flavor, consider using zucchini or mushrooms as replacements.

Common Mistakes to Avoid

  • Overcooking the steak: Aim for medium-rare to medium for the best flavor and texture.
  • Using pre-formed tortellini without understanding the cooking time, which can lead to mushy pasta.
  • Not seasoning each layer: Insufficient seasoning can result in bland sauce and meat.
  • Pasta cooking in the sauce too long: Prevents tortellini from maintaining its structure and integrity.
  • Skipping the rest time for the steak: Allowing the steak to rest helps retain juices.
  • Rushed prep time: Preparing ingredients in advance allows for smoother execution.
  • Ignoring sauce thickness: Adjust with pasta water or stock for the desired creaminess.
  • Choosing low-quality cheese: Freshly grated cheese enhances flavor more than processed varieties.
  • Neglecting to taste: Regularly tasting the dish during preparation helps in adjusting flavors.
  • Using the wrong size pan: An overcrowded pan can lead to steaming rather than sautéing ingredients properly.

Essential Techniques

Perfectly Cooking Steak: Understanding how to cook steak to the appropriate doneness is crucial. A good tip is to use a meat thermometer; medium-rare should read about 135°F. Always rest cooked meat for about five minutes to retain juices, resulting in a flavorful bite.

Cooking Tortellini: Boiling tortellini requires a rolling boil and enough water for even cooking. Stir gently to prevent sticking. Taste the pasta a minute before the package instructions suggest to achieve your desired consistency without overcooking.

Pro Tips for Perfect Cheesesteak Tortellini

Use high-quality ribeye for the best flavor and tenderness. Sear it quickly over high heat for excellent caramelization. If you’re short on time, pre-cooked tortellini can save you several minutes. To enhance the texture of the sauce, add a splash of pasta cooking water, which contains starch to help it adhere better to the pasta.

For extra flavor, sauté your onion and peppers until caramelized before adding them to the sauce. If you’re looking for a richer flavor, try adding a splash of white wine to the sauce as it thickens.

Lastly, don’t forget to adjust the garlic and onion levels according to your preference, and use fresh herbs like parsley for a refreshing garnish right before serving.

Variations and Adaptations

Regional variations of cheesesteak flavor profiles can be explored by using different meats, such as chicken or turkey, instead of ribeye. For a seasonal adaptation, consider stuffing the tortellini with ingredients like pumpkin during autumn for a delightful twist. You can also personalize this recipe by introducing textures with crispy fried onions as a topping or substituting cheese for provolone or mozzarella for a unique flavor. Adjusting seasonings and herbs can also provide a fresh twist, making this dish vibrant year-round.

Serving and Presentation Guide

For a standout presentation, arrange the tortellini in a circular pattern on a white plate to highlight the colorful ingredients. Top with freshly grated parmesan and a sprinkle of chopped parsley. Consider serving the dish with a side of crusty bread to complement the creamy sauce and soak up any leftovers. The dish is best served hot, though be mindful of portion sizes for guests; a healthy serving should be around one to one and a half cups to avoid overwhelming your guests.

Wine and Beverage Pairing

Pair this rich dish with a medium-bodied red wine, such as Chianti or Cabernet Sauvignon, which complements the savory profile of the steak. For a lighter option, a Chardonnay would harmonize beautifully with the creamy sauce. If you prefer non-alcoholic options, try sparkling water with lemon or a crisp apple cider, providing a refreshing contrast to the richness of the dish.

Storage and Shelf Life

Store any leftover Cheesesteak Tortellini in an airtight container in the refrigerator for up to 3 days. To maximize freshness, avoid mixing the sauce with pasta until you’re ready to serve. If you’re craving leftovers, reheat gently on the stovetop with a splash of milk to maintain creaminess. For longer storage, consider freezing portions in airtight containers for up to 3 months; however, be aware that the texture may change slightly upon reheating.

Make Ahead Strategies

Prepare the filling and sauce a day in advance and store them separately in the refrigerator. Cook tortellini just before serving to ensure they are fresh and maintain their texture. You can also freeze the sauce for quick meals later on. Just make sure to prepare fresh vegetables or sauté them shortly before serving for the best flavor.

Scaling Instructions

Scaling the recipe for larger gatherings is simple—just double or triple the ingredients. Keep cooking times similar, but be sure to monitor for doneness. Use larger pots or multiple pans as needed to keep everything cooking evenly. For portioning, consider using a large salad bowl for serving family-style, making it effortless for guests to help themselves.

Nutritional Deep Dive

This dish is a well-rounded meal that incorporates protein, fiber, and essential vitamins, contributing to a balanced diet. The protein from the ribeye supports muscle growth, while tortellini provides carbohydrates for energy. The addition of bell peppers adds vital vitamins A and C. This dish offers a satisfying option that aligns well with an active lifestyle when served in appropriate portions.

Dietary Adaptations

For gluten-free dietary needs, consider using gluten-free tortellini or substituting traditional pasta with zucchini noodles. A dairy-free version is also possible by using non-dairy milk and vegan cheese blends, replacing heavy cream with cashew cream for richness. For a lighter option, you can alter the ribeye with leaner proteins such as turkey or chicken breast, alongside low-carb sauces.

Troubleshooting Guide

If your sauce appears too thin, let it simmer longer to reduce and thicken, or add a cornstarch slurry for speedy thickening. If it tastes bland, simply increase seasoning, especially salt and pepper, and add fresh herbs. If the steak is tough, it might need more resting time after cooking or could be overcooked; consider using a different cut of meat for better tenderness next time.

Recipe Success Stories

Many readers rave about their versions of Cheesesteak Tortellini, often sharing how they adapted the dish based on personal preferences. Some have used different meats or cheese combinations, emphasizing how versatile this recipe can be. Others have shared photographs of their creations, showcasing plated dishes set for family meals, sparking inspiration among other cooking enthusiasts.

Frequently Asked Questions

Can I freeze Cheesesteak Tortellini? Yes, you can freeze the dish. Ensure it’s cooled, then transfer to an airtight container for up to 3 months. Reheat on the stovetop with a little added milk for creaminess.

What type of pasta is best for this recipe? Tortellini works best for its shape and ability to hold sauce but feel free to use any stuffed pasta you prefer.

Can I make this dish vegetarian? Absolutely! Swap ribeye for sautéed mushrooms or marinated tofu for a protein-rich vegetarian version.

How do I reheat the sauce without it separating? Slowly reheat over low heat, adding a splash of milk-stirring continuously to maintain its creaminess.

What other veggies can I add? Feel free to include spinach, zucchini, or even mushrooms to enhance the veggie content.

Can I make the sauce dairy-free? Yes! Use a non-dairy cream or cashew cream and a plant-based cheese alternative.

Is this recipe suitable for meal prep? Yes! It holds up well, allowing for delicious leftovers for lunches or quick dinners.

How spicy is this dish? The spice level largely depends on seasoning; you can add chili flakes or omit them to your taste.

What wine pairs best with this dish? A medium-bodied red wine like Chianti complements the cheesy and meaty flavors beautifully.

Can I use store-bought sauce? Yes, a pre-made alfredo or cheese sauce can be used to save time, although homemade adds an extra touch of flavor.

Additional Resources

If you enjoyed this recipe, consider trying other variations like Spinach and Ricotta Stuffed Shells or Chicken Alfredo Pasta. For technique enhancement, look into guides on perfecting sauces or mastering the art of sautéing vegetables. Fresh ingredient recommendations can also influence flavor, so explore what’s seasonal at your local market to boost your culinary options.

Join the Conversation

We encourage you to share your Cheesesteak Tortellini experiences on social media! Snap a photo of your creation and tag us for a chance to be featured. We love seeing how you put your unique spin on our recipes and invite feedback on what variations worked well for you. Join our community and engage with fellow food lovers over delicious meals!

The Recipe

Cheesesteak Tortellini in Creamy Parmesan Sauce

Serves: 4 servings

Prep Time: 15 mins

Cook Time: 25 mins

Total Time: 40 mins

Kitchen Equipment Needed

  • LARGE CHAUSER
  • SKILLET
  • COLANDER
  • WOODEN SPOON

Ingredients

  • 1 lb ribeye steak, thinly sliced
  • 12 oz cheese tortellini
  • 1 bell pepper, thinly sliced
  • 1 onion, thinly sliced
  • 2 cups heavy cream
  • 1 cup grated parmesan cheese
  • 2 tablespoons olive oil
  • Salt and pepper to taste
  • Fresh parsley for garnish

Directions

  1. In a pot of boiling salted water, cook the tortellini according to package instructions. Drain and set aside.
  2. In a skillet, heat olive oil over medium-high heat. Add the sliced ribeye and cook for 3-4 minutes until browned. Remove and set aside.
  3. In the same skillet, add the sliced onion and bell pepper, sauté for 5 minutes until soft. Season with salt and pepper.
  4. Add the cooked steak back into the skillet and pour in the heavy cream. Stir to combine.
  5. Reduce heat to low and gradually mix in the parmesan cheese until melted and smooth.
  6. Toss in the cooked tortellini until well coated. Adjust seasoning if needed.
  7. Serve hot, garnished with fresh parsley and extra parmesan if desired.

Recipe Notes

  • For a lighter version, substitute heavy cream with half and half or coconut milk.
  • Feel free to add more vegetables like mushrooms or spinach for added nutrition.
  • This dish can be easily doubled for larger gatherings.

Delicious One-Pot French Onion Chicken Rice for Easy Dinners

One-Pot French Onion Chicken Rice Recipe: A Cozy Culinary Delight

⚖️
Difficulty
Easy

⏲️
Prep Time
10 mins

🕒
Cook Time
30 mins

⏱️
Total Time
40 mins

🍽️
Servings
4

One-Pot French Onion Chicken Rice is the perfect dish for those chilly evenings when you crave comfort and warmth. This delightful recipe encapsulates the rich flavors of caramelized onions and savory chicken, all simmered together with fluffy rice that absorbs the delicious broth. With just one pot required, cleanup is a breeze, allowing you to enjoy more time with loved ones at the dinner table.

Imagine the enticing aroma filling your kitchen as onions slowly caramelize to a golden brown, blending harmoniously with tender chicken and herbs. This dish not only satisfies the taste buds but also wraps you in a cozy culinary hug, making it ideal for family gatherings or a simple weeknight meal.

Quick Recipe Highlights

  • Flavor Profile: The deep, sweet flavor of caramelized onions pairs beautifully with the savory, juicy chicken.
  • Texture: Tender chicken and fluffy rice create a satisfying mouthfeel, while the onions add a silky smoothness.
  • Aroma: Expect a captivating blend of sweet caramelized onion and savory chicken scents infused with herbs.
  • Visual Appeal: A golden-brown surface topped with garnished green herbs creates a dish that is as beautiful as it is delicious.
  • Skill Level Needed: This recipe is beginner-friendly, making it accessible for cooks of all levels.
  • Special Equipment: Just a large pot or Dutch oven is needed to prepare this dish easily.

Recipe Overview

  • Difficulty Level: This One-Pot French Onion Chicken Rice recipe is straightforward and manageable, making it perfect for novice cooks.
  • Category: This dish fits within comfort food and family meals, designed for shared experiences.
  • Cuisine: With roots in French cuisine, it captures the essence of traditional cooking fused with modern simplicity.
  • Cost: This budget-friendly recipe uses affordable ingredients without sacrificing flavor, averaging around $15 for the entire meal.
  • Season: Enjoyable year-round, this recipe especially shines during the fall and winter months.
  • Occasion: Ideal for casual family dinners, cozy gatherings, or any occasion that calls for hearty comfort food.

Why You’ll Love This Recipe

The delicious flavor combination of sweet onions and savory chicken creates a dish that is both comforting and satisfying. Each spoonful offers a delightful balance of taste and texture, ensuring it can easily become a family favorite. The soft, caramelized onions provide a unique depth of flavor that elevates the dish, while the chicken offers a hearty protein option, making it a complete meal.

What makes this One-Pot French Onion Chicken Rice even more appealing is its convenience in preparation. With everything cooked in a single pot, this recipe minimizes cooking time and maximizes flavor. You can start with chopping the onions and chicken, sauté, and let simmer— leaving you free to enjoy a glass of wine or tend to other dinner preparations.

In addition to convenience, this recipe is a nutritional powerhouse. With lean protein from chicken and whole grains from rice, it offers essential vitamins and minerals that contribute to a well-balanced diet. You can easily add vegetables to amp up the nutrition and create a vibrant colored dish full of wholesome ingredients.

Whether you’re hosting friends or spending a quiet night at home, this recipe fosters a sense of warmth and sharing. The inviting aroma wafting through your home draws in friends and family, seamlessly bringing everyone together around the dinner table.

Affordability is another great reason to love this dish. A small grocery budget goes a long way with this recipe, allowing you to provide a delicious home-cooked meal without stretching financial resources.

Historical Background and Cultural Significance

The origins of French onion soup can be traced back to ancient Rome, where onions were a staple food. However, the modern iteration of French onion soup that inspired this dish gained popularity in France during the 18th century. It became a beloved comfort food, often served in bistros and homes across the country.

Culturally, the dish symbolizes the art of transforming simple ingredients into something extraordinary. Much like the One-Pot French Onion Chicken Rice recipe, it illustrates how humble ingredients, when combined thoughtfully, can lead to magical results in the kitchen.

Over the years, variations of French onion soup and its adaptations have flourished globally. Some regions incorporate local produce, making each version unique while keeping the core flavors intact. This recipe represents the evolution of traditional flavors merged with modern cooking techniques for convenience.

In the United States, the popularity of onion soup has led to myriad dishes inspired by its comforting taste, including casseroles and one-pot meals. The One-Pot French Onion Chicken Rice serves as a testament to how cultural dishes can transform and adapt while maintaining their heart and soul.

Ingredient Deep Dive

Chicken

Chicken is versatile and widely adored in cuisines around the world. It provides essential proteins and is rich in B vitamins. When selecting chicken, opt for fresh, plump pieces with no discoloration. Store it in the refrigerator for up to two days or freeze for longer storage. If you need to make substitutions, turkey works well and offers similar flavor.

Onions

Onions have a long-standing culinary history, serving as a base flavor in many dishes. They are rich in antioxidants and vitamins, contributing to overall health. For freshness, choose firm onions with no soft spots, and store them in a cool, dark place. Substitute with shallots if looking for a milder flavor, or use green onions for a bit of a twist.

Rice

Rice is a staple in many diets across the globe, offering a source of carbohydrates. When selecting, choose high-quality long-grain rice such as basmati or jasmine for a more aromatic flavor. Store in a dry, cool area, and it can last for months. Quinoa or couscous can serve as gluten-free alternatives if needed.

Broth

Using broth adds depth of flavor to your dish. Store-bought or homemade, choose low-sodium options to keep it healthier. Make sure to store broth in airtight containers in the refrigerator or freezer. Vegetable broth can be a great substitution if you’re looking for a flavor twist.

Common Mistakes to Avoid

  • Not caramelizing the onions properly: Ensure they are cooked low and slow for the best flavor. Rushing this step leads to bland results.
  • Using cold chicken: Allow chicken to come to room temperature before cooking for even cooking and better texture.
  • Skipping the resting period: Allow the dish to rest after cooking to help meld the flavors together.
  • Overcrowding the pot: Cook in batches if necessary to ensure even cooking and proper browning.
  • Not seasoning adequately: Always taste as you go and adjust seasoning levels for optimal flavor.
  • Using instant rice: Regular long-grain rice absorbs flavors better and has a more appealing texture.
  • Rushing the simmering process: Allowing the dish to simmer helps develop the flavors and ensures rice cooks perfectly.
  • Ignoring ingredient swaps: Don’t hesitate to experiment with different herbs or add vegetables to enhance nutritional benefits.
  • Not covering the pot: Covering while simmering helps maintain moisture and ensures the rice cooks thoroughly.
  • Using too much liquid: Follow the recipe closely to achieve the right balance of moisture for fluffy rice.

Essential Techniques

Caramelizing onions are crucial for this dish, creating a sweet and savory base. This technique requires patience; onions should be cooked low and slow until they are golden and soft. Stir occasionally to prevent burning. Aim for a rich, caramel hue that indicates proper cooking.

Searing the chicken before adding it to the pot enhances the flavor through the Maillard reaction. Ensure the pot is hot enough to achieve a nice brown crust, which adds complexity to the overall taste. Be careful not to overcrowd the pot; work in batches if needed.

Cooking rice properly ensures it’s fluffy and well-seasoned. Use the right water-to-rice ratio, following the recipe closely. Bringing it to a boil before covering and simmering is important for perfect texture. After cooking, allow it to rest for a few minutes before serving.

Pro Tips for Perfect One-Pot French Onion Chicken Rice

– Always slice the onions evenly to ensure uniform cooking for the best caramelization.
– For deeper flavor, consider using a mix of chicken thighs and breasts; thighs add juiciness.
– Add a splash of white wine in the final stages of cooking for an added layer of flavor.
– Customize your herbs—thyme and rosemary are fabulous but don’t hesitate to add your favorites.
– To cut down on prep time, slice onions in advance and store them in the fridge.
– Use homemade broth for a richer flavor; it contributes greatly to the dish’s overall taste.
– Incorporate seasonal veggies like carrots or peas for added nutrition and color.
– Try a sprinkle of cheese on top before serving—the melted goodness takes it to the next level.

Variations and Adaptations

Regional variations of this recipe can include differing spices and proteins; adding chorizo or seafood can provide exciting twists. Seasonal adaptations might involve using zucchini in the summer or pumpkin in the fall for added richness.

For dietary modifications, substituting chicken with tofu or tempeh creates a vegan-friendly option while still providing protein. Similarly, cauliflower rice can be used for a low-carb variant.

Flavor variations are possible by incorporating distinct spices like smoked paprika or curry powder. Linings for texture can include crunchy topping options like fried onions to enhance every bite.

When serving, consider alternative styles such as individual ramekins for unique presentation ideas, elevating the experience for gatherings or special occasions.

Serving and Presentation Guide

For plating, use shallow bowls to showcase the vibrant colors of the dish. Garnish with fresh parsley or chopped chives for a bright contrast. A sprinkle of cheese just before serving enhances the visual appeal.

Traditional accompaniments might include a side of crusty bread or a fresh green salad to balance the richness. Modern serving suggestions could incorporate trendy elements like a dollop of sour cream or a drizzle of balsamic reduction for extra flavor.

Temperature plays a crucial role; serve this dish warm, as rice that cools can become gummy. Portion control is essential for a balanced meal; aim for 1 to 1.5 cups per serving—more if guests are particularly hungry.

Wine and Beverage Pairing

A glass of Chardonnay provides a delightful complement to the flavors of One-Pot French Onion Chicken Rice. The buttery notes enhance the dish, providing a fabulous pairing experience.

For non-alcoholic alternatives, herbal teas can serve wonderfully to cleanse the palate, while a light sparkling water infused with citrus can refresh your senses.

If coffee is on the menu, opt for a mild roast that won’t overpower the subtle flavor profiles of the meal.

Serving wine or beverages at optimal temperatures enhances the overall dining experience, ensuring all drinks complement the meal beautifully.

Storage and Shelf Life

Store leftover One-Pot French Onion Chicken Rice in airtight containers in the refrigerator for up to three days. This ensures flavors thoroughly meld as they cool and make for a convenient lunch option.

For longer preservation, freezing is efficient; use freezer-safe containers, and the dish can last up to three months. Remember to label the containers with the date for easy tracking.

Signs of spoilage include off smells, discoloration, or visible mold. When reheating, always ensure it’s heated through to a minimum internal temperature of 165°F to eliminate any bacteria.

When defrosting, transfer to the fridge overnight for the best texture retention. Reheat gently on the stove or microwave, adding a splash of broth to restore moisture.

Make Ahead Strategies

To simplify meal prep, consider chopping vegetables and measuring spices a day in advance. Store them in individual containers in the fridge, making assembly during the cooking process quicker.

You can make the broth or cook the chicken ahead of time, storing them separately and combining flavors just before mealtime for the freshest taste.

Quality impacts are profound; the fresher the ingredients right before cooking, the better flavors and textures you’ll achieve in the final dish.

Reheating guidelines dictate that you should gently warm the meal on low heat, adding splashes of liquid as necessary to keep the dish moist.

If your dish contains fresh herbs, consider adding them right before serving to preserve their aroma and color for an impactful presentation.

Scaling Instructions

If you wish to halve this One-Pot French Onion Chicken Rice recipe, adjust ingredients proportionally while maintaining cooking times essentially unchanged, as rice and chicken still require thorough cooking.

For larger gatherings, doubling or tripling the recipe is possible; however, ensure your pot is large enough, or consider cooking in batches for consistent texture and flavor.

Equipment adjustments may include using additional pots for batch cooking chicken or rice to save time.

Keep in mind timing modifications; while cooking time remains similar, batch cooking may introduce minor heating adjustments.

Storage considerations are essential; leftovers from scaled portions should still be treated with the same care, keeping them fresh and flavorful.

Nutritional Deep Dive

This One-Pot French Onion Chicken Rice offers a well-rounded meal consisting of proteins, healthy carbohydrates, and essential nutrients. A macro breakdown reveals high protein content from chicken and carbohydrates from rice, essential for energy.

Micronutrient analysis indicates that this dish contributes vitamins B6 and B12 from chicken, along with minerals like iron. The onions provide antioxidants that support overall health.

The dish’s health benefits extend to supporting muscle repair and immune health. Additionally, this recipe’s wholesome ingredients promote satiety, reducing the need for snacking.

Portion analysis shows that a serving provides around 400-500 calories, depending on specific amounts of chicken and rice used.

For those managing weight, it’s a wholesome full-meal recipe that can satisfy without leading to excessive calorie consumption.

Dietary Adaptations

For a gluten-free version of One-Pot French Onion Chicken Rice, ensure to use gluten-free broth and avoid traditional flour options in any gravies or sauces, adapting it for those sensitive to gluten.

A dairy-free adaptation can replace cheese with nutritional yeast or a dairy-free cheese option, providing richness without dairy products—ideal for vegan diets.

Low-carb enthusiasts can substitute rice with cauliflower rice, which ensures low calorie and carb consumption while maintaining a similar texture profile.

For those looking to incorporate keto adjustments, a combination of chicken thighs and healthy fats can create a satisfying, delicious dish.

Additionally, Paleo followers can skip grains altogether and bulk up with vegetables like spaghetti squash or zucchini for a nourishing alternative.

Troubleshooting Guide

Texture issues can arise if the rice becomes sticky; ensuring the right water-to-rice ratio is key to perfect fluffiness. Always fluff the rice gently with a fork before serving.

Flavor balance may fluctuate if seasoning is neglected; always taste before serving, adjusting salt, pepper, and herbs as needed to ensure a well-rounded taste.

Temperature problems can occur if simmering is too rapid; keep a steady low heat to allow gradual cooking. It keeps chicken moist and rice tender.

Equipment challenges such as a stuck pot can be avoided by allowing the initial sauté stage proper time and not overcrowding surfaces. Utilize non-stick cookware if possible.

Ingredient substitutions need careful consideration; avoid replacing ingredients with strong flavors that may overpower the dish.

Timing concerns include adjusting for pre-cooked chicken or rapid simmering; always monitor doneness to prevent overcooking and drying out ingredients.

Recipe Success Stories

Community feedback on One-Pot French Onion Chicken Rice has been overwhelmingly positive, with many praising its simplicity and heartiness. Locals shared they adapted it with seasonal produce, successfully enhancing flavors while catering to local availability.

Variation successes often include adding mushrooms or different herbs, prompting participants to experiment based on personal taste preferences, making the dish their own.

Readers often mention how swiftly the dish disappears at family gatherings, with children particularly enjoying the sweetness of caramelized onions.

Photography tips from the community suggest capturing the dish fresh out of the pot, highlighting the rustic feel that embodies comfort food. This has led many to share their beautiful creations on social media, celebrating culinary success.

Frequently Asked Questions

Can I use brown rice instead of white rice?

Yes, brown rice can be utilized, but it requires a longer cooking time and more liquid. Adjust the cooking process to accommodate for this variation.

Is it possible to make this dish ahead of time?

Absolutely! You can prepare it a day ahead and reheat just before serving. Flavors may deepen when it sits for a few hours.

Can I use different proteins?

Definitely! Chicken can be swapped for turkey or firm tofu for a vegetarian option while maintaining the integrity of the dish.

What herbs pair well with this recipe?

Thyme and rosemary complement the flavors beautifully, but you can also experiment with basil or oregano based on your preference.

Is this dish freezer-friendly?

Yes, this recipe freezes well. Allow it to cool completely and store in airtight containers for up to three months.

What can I serve with this dish?

A fresh salad or crusty bread are excellent accompaniments. They balance the rich flavors while enhancing the meal.

How long can leftovers be stored?

Leftover One-Pot French Onion Chicken Rice can be kept in the fridge for up to three days. Ensure it’s in an airtight container.

Can I double the recipe for meal prep?

Yes, you can double the recipe! Just ensure the pot is large enough to accommodate the increased ingredient amounts.

What adjustments are needed for a low-carb version?

To make it low-carb, replace rice with cauliflower rice. Adjust cooking time as needed to ensure it cooks properly.

Can I use vegetable broth instead of chicken broth?

Yes, using vegetable broth will keep the dish flavorful while making it suitable for vegetarian and vegan diets.

Additional Resources

Explore related recipes like creamy mushroom risotto or a hearty chicken stew to expand your comfort food repertoire. Emphasize learning about ingredient substitutions for versatile cooking in your kitchen.

Consider technique guides on caramelization or rice cooking methods to enhance your culinary skills. Recommendations for quality kitchen equipment will empower you further in achieving the best results with similar recipes.

Keep an eye on seasonal variations; each season brings unique produce that can elevate your One-Pot French Onion Chicken Rice dish, aligning your meals with available ingredients.

Join the Conversation

Sharing your creations on social media encourages community engagement and inspires others to try this delightful One-Pot French Onion Chicken Rice recipe.

Consider photography tips; natural light enhances the colors and textures, translating well on camera.

Encourage feedback on variations, inviting others to submit their adaptations and create an interactive dialogue around this recipe.

Foster community around recipe experiences—creating a platform where home cooks can inspire creativity in the kitchen will enrich everyone’s culinary journey.

The Recipe

One-Pot French Onion Chicken Rice

Serves: 4

Prep Time: 10 mins

Cook Time: 30 mins

Total Time: 40 mins

Kitchen Equipment Needed

  • Large pot or Dutch oven
  • Chopping board
  • Sharp knife
  • Wooden spoon or spatula
  • Measuring cups and spoons

Ingredients

  • 4 chicken thighs, skinless
  • 2 large onions, thinly sliced
  • 2 cups long grain rice
  • 4 cups low-sodium chicken broth
  • 2 tablespoons olive oil
  • 1 teaspoon dried thyme
  • Salt and pepper to taste
  • Fresh herbs for garnish

Directions

  1. In a large pot, heat olive oil over medium heat. Add sliced onions, cooking slowly until caramelized, about 10-15 minutes.
  2. Add chicken thighs to the pot, seasoning with thyme, salt, and pepper. Brown on both sides for about 5 minutes.
  3. Stir in the rice until coated with oil, cooking for another 2 minutes.
  4. Pour in chicken broth, bringing it to a gentle boil. Reduce heat to low, cover, and simmer for 20 minutes or until the rice is cooked through.
  5. Remove from heat and let it rest for an additional 5 minutes before serving, garnish with fresh herbs.

Recipe Notes

  • For a richer flavor, try adding a splash of white wine after browning the chicken.
  • Feel free to add seasonal vegetables like carrots or peas for added nutrition.
  • Substituting quinoa can create a gluten-free alternative if desired.