Delicious Avocado, Mozzarella, and Tomato Grilled Cheese Recipe

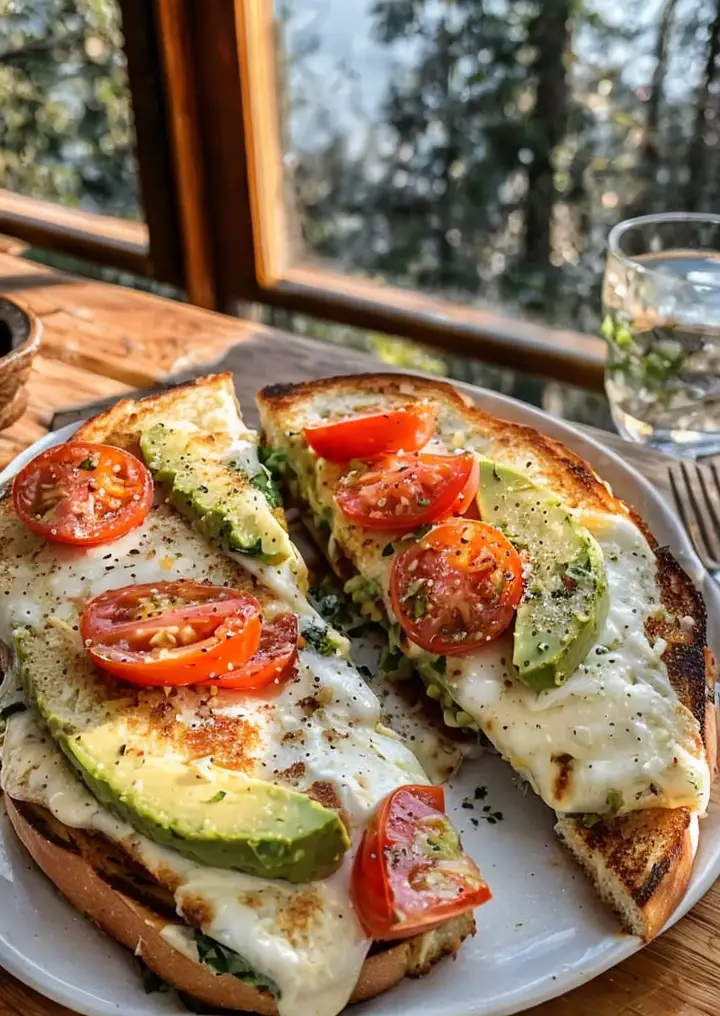
Delicious Avocado, Mozzarella, and Tomato Grilled Cheese: A Comfort Food Classic

⚖️
Difficulty
Easy

⏲️
Prep Time
10 mins

🕒
Cook Time
15 mins

⏱️
Total Time
25 mins

🍽️
Servings
2

When you are looking for a quick and satisfying meal, the Avocado, Mozzarella, and Tomato Grilled Cheese is the perfect solution. This vibrant sandwich is not only about indulgence; it brings together creamy avocado, fresh mozzarella, and juicy tomatoes between perfectly toasted bread. Each bite bursts with flavor, satisfying both your taste buds and your cravings. Imagine the gooey cheese melting into the rich avocado, pairing beautifully with the sweet and tangy tomatoes—a delightful experience that you won’t forget.

This dish combines essential ingredients that provide nourishment and satisfaction, making it an excellent choice for lunch or a light dinner. It’s simple yet incredibly satisfying, with the crisp exterior giving way to a gooey, rich interior that keeps you coming back for more. With minimal prep and cook time, this grilled cheese sandwich is easy to whip up, ensuring that you can enjoy comfort food without the fuss.

Quick Recipe Highlights

  • Flavor Profile: This sandwich offers a harmonious blend of creamy, sweet, and savory flavors, making it utterly irresistible.
  • Texture: Enjoy the contrast of crispy bread against the creamy avocado and soft melting cheese, providing a delightful mouthfeel.
  • Aroma: Aromatic notes of toasting bread coupled with the fresh scent of basil and ripe tomatoes make this grilled cheese irresistible.
  • Visual Appeal: With its vibrant colors, the green of avocado, the white mozzarella, and the red tomato render this dish visually stunning.
  • Skill Level Needed: This recipe is beginner-friendly; anyone can master the art of making a perfect grilled cheese.
  • Special Equipment: A non-stick skillet or griddle and a spatula are the only tools necessary to achieve a golden-brown crust.

Recipe Overview

  • Difficulty Level: This Avocado, Mozzarella, and Tomato Grilled Cheese is easy to make, perfect for novice cooks.
  • Category: Ideal as a lunch or light dinner, it acts as both a comfort food and a quick meal option.
  • Cuisine: This recipe embodies a modern twist on a classic American grilled cheese with Mediterranean influences from fresh ingredients like mozzarella and tomatoes.
  • Cost: This dish is budget-friendly, averaging around $5 to make two servings, highlighting cost-effectiveness.
  • Season: Enjoy this sandwich year-round, though it shines during summer when tomatoes are at their peak freshness.
  • Occasion: Perfect for casual meals, it’s ideal for lunches, picnics, and quick dinners any day of the week.

Why You’ll Love This Recipe

The taste and texture of the Avocado, Mozzarella, and Tomato Grilled Cheese will keep you coming back for more. The creamy avocado coupled with the gooey mozzarella and the juicy tomatoes provides a flavor explosion that is both comforting and invigorating. Every bite is a delightful combination of textures that will satisfy cravings and make mealtime enjoyable.

Convenience is at the forefront of this recipe. With only ten minutes of prep and fifteen minutes of cooking time, this grilled cheese offers a quick solution for busy days. Whether you’re a student or a working professional, enjoy a delicious meal in less than thirty minutes—perfect for lunch breaks or quick dinners.

Nutritionally, this sandwich is packed with beneficial ingredients. Avocado provides healthy fats, while tomatoes offer vitamins and antioxidants. With mozzarella adding protein, this dish is not only delicious but also compliments your dietary goals, making it a heart-healthy option.

Socially, this recipe is an excellent choice for gatherings or parties. Easy to prepare in large quantities, it can be catered to various tastes, ensuring everyone enjoys a classic comfort food. Pair it with a refreshing salad or soup for a full dining experience that will impress your guests.

In terms of cost-effectiveness, the Avocado, Mozzarella, and Tomato Grilled Cheese is a wise choice. Using affordable and readily available ingredients, this recipe allows you to create a gourmet meal without breaking the bank, making it accessible for everyone.

Historical Background and Cultural Significance

The origins of grilled cheese can be traced back to ancient civilizations that enjoyed cheese melted on bread, but it exploded in popularity during the Great Depression due to its affordability. As a comfort food, it has endured over decades, morphing into various versions that highlight local ingredients and tastes.

Its cultural significance is deeply embedded in American cuisine, often serving as a nostalgic reminder of childhood lunches. Many families have their unique takes on the grilled cheese sandwich, carrying regional preferences and traditions across generations.

As culinary landscapes evolved, variants of this classic recipe emerged. The introduction of gourmet cheeses and diverse toppings, like avocado and tomatoes, has transformed the humble grilled cheese into a versatile dish suitable for all palates.

Regional variations are abundant; in Italy, for example, the concept thrives in the form of “panini,” where crusty bread is filled with exquisite cheeses and fresh vegetables, often grilled to perfection. These adaptations honor the fundamental structure of a sandwich while allowing exploration of innovative flavor combinations.

Ingredient Deep Dive

Avocado: Avocado, native to Central Mexico, boasts a rich cultural heritage, celebrated for its creamy texture and health benefits. Packed with monounsaturated fats, it promotes heart health, while potassium aids in blood pressure regulation. When choosing avocados, opt for those that yield slightly to pressure, indicating ripeness. Store cut avocados in an airtight container to prevent browning; add a sprinkle of lemon juice for extended freshness. If you’re out of avocados, a spreadable hummus can be a delightful substitute, though the texture will differ.

Mozzarella: This soft cheese has its roots in Italy, traditionally made from water buffalo milk. It’s renowned for its mild flavor and is rich in protein and calcium, making it a healthful addition to any meal. Select fresh mozzarella that appears moist and slightly creamy, ensuring it hasn’t dried out. For storage, keep it submerged in its brine or wrap it tightly in plastic wrap. In a pinch, you can substitute mozzarella with provolone or gouda for a unique twist; just remember the melting properties might differ.

Tomato: Once considered exotic, the tomato has become a staple in cuisines worldwide. Rich in vitamins C and K, it is low in calories, making it an excellent addition to any dish. Choose tomatoes that are vibrant and fragrant, opting for heirloom varieties for a more robust flavor. Store tomatoes at room temperature away from direct sunlight for optimal freshness. In case tomatoes are unavailable, you can use sundried tomatoes or roasted red peppers for an alternative flavor profile.

Common Mistakes to Avoid

  • Overheating the pan: Too high heat can burn the bread before the cheese melts. Maintain medium-low heat for perfect cooking.
  • Not buttering the bread adequately: Skipping this step can lead to uneven browning. Ensure an even coat on both sides for an optimal crunch.
  • Using cold ingredients: Cold cheese and avocado won’t melt and integrate well. Allow them to reach room temperature before assembling.
  • Rushing the cooking time: Taking your time allows flavors to meld; don’t flip the sandwich too soon for even cooking.
  • Not pressing the sandwich: Lightly pressing it down helps achieve that golden exterior and ensures an even melt.
  • Inadequate toasting: A limp exterior won’t be pleasing. Aim for a crisp and golden finish for all sandwiches.
  • Ignoring the quality of ingredients: Using low-quality tomatoes or cheese can dull flavors. Select fresh, high-quality components for the best outcome.
  • Not letting it rest: Allowing the grilled cheese to rest for a minute before cutting helps retain the melted cheese.
  • Skipping seasoning: A pinch of salt and pepper on your ingredients can elevate the flavor dramatically. Don’t overlook seasoning!
  • Forgetting to slice fresh herbs: Adding fresh basil or oregano elevates this grilled cheese experience but can be easily missed.

Essential Techniques

Toasting Bread: Toasting your bread correctly is crucial for achieving that golden-brown crust. Use high-quality bread that can withstand some moisture from the fillings while still delivering that satisfying crunch. Ensure your pan is preheated and remember to butter the bread generously. Flip carefully to prevent losing hinges of flavors and textures; you’ll know it’s perfect when the edges are crisped well.

Melting Cheese: Properly melting cheese is essential to a delicious grilled cheese. Use low to medium heat to allow the cheese to melt uniformly without burning the bread. Covering your sandwich for a short period will trap heat, promoting perfect melting. Trust your visual instincts—look for that signature gooey, stretchy cheese to know the sandwich is done.

Pro Tips for Perfect Avocado, Mozzarella, and Tomato Grilled Cheese

1. Choose bread that is thick-cut to support the fillings and ensure even toasting without becoming soggy.
2. Experiment with different cheeses, such as sharp cheddar or pepper jack, for added flavor complexity.
3. For an extra layer of flavor, consider adding a spread, such as pesto or a dash of garlic aioli.
4. Allow the avocado to ripen fully before use; an under-ripe avocado may be hard, while an overripe one can be mushy.
5. Use fresh basil leaves or arugula for a peppery bite that complements the creaminess of the other ingredients.
6. Slicing the tomatoes just before assembly to maintain freshness can help prevent excess moisture from seeping into the bread.
7. Invest in a good non-stick skillet to ensure easy flipping and even browning of your sandwich.
8. Consider adding spices such as crushed red pepper flakes for a touch of heat that combines beautifully with the creamy ingredients.

Variations and Adaptations

For a regional twist, experiment with locally sourced cheeses like feta or gouda to offer unique flavor profiles. Seasonal adaptations can make this dish shine; consider adding grilled zucchini in summer or roasted butternut squash in fall to add a hearty aspect. Dietary modifications are also easy; to make a vegan version, replace the mozzarella with plant-based cheese and use non-dairy butter.

Flavor variations are endless—consider adding pesto, roasted red peppers, or hot sauce to ramp up the taste experience. To change the texture, try using thicker slices of bread or experimenting with ciabatta for a chewy bite. Presentation alternatives like cutting into triangles or using cookie-cutters can make serving exciting, especially for kids.

Serving and Presentation Guide

Plating your grilled cheese creatively can enhance the dining experience. Serve alongside a small bowl of tomato soup—a classic combination, or a vibrant side salad for a refreshing crunch. For garnishes, consider fresh basil leaves or a drizzle of balsamic reduction to elevate the plating.

When it comes to temperature, serving immediately after cooking is key to enjoying the melted cheese. If prepping for a party, consider arranging sandwiches on a platter where guests can choose their toppings. Finally, portion control is important; cut each sandwich into halves or quarters to encourage sharing while allowing everyone to enjoy the rich flavors.

Wine and Beverage Pairing

Pairing wine with your Avocado, Mozzarella, and Tomato Grilled Cheese can enhance the meal considerably. A crisp Chardonnay or Sauvignon Blanc complements the creaminess of the cheese while cutting through the richness. For those who prefer something non-alcoholic, a refreshing iced tea or sparkling lemonade can cleanse the palate beautifully.

For coffee lovers, a light roast coffee pairs surprisingly well due to its bright acidity, contrasting nicely with the richness of the sandwich. Remember to serve beverages chilled or at the appropriate temperature to elevate the overall dining experience.

Storage and Shelf Life

Storing your grilled cheese properly can help maintain its quality. While best enjoyed fresh, leftovers can be kept in an airtight container in the refrigerator for up to three days. Ensure that the sandwich cools completely before sealing to prevent condensation.

If reheating, use an oven or skillet to restore that crispy exterior; avoid the microwave to prevent sogginess. For longer storage, consider freezing unfilled bread slices and ingredients separately; component preparation allows you to create grilled cheese fresh whenever the craving strikes.

Make Ahead Strategies

For busy weeks, consider prepping ingredients ahead of time. Slice tomatoes and avocado the night before, storing them in separate containers, and have your cheese ready to go. You can also pre-butter the bread slices to cut down on assembly time during meal prep.

When making in bulk, cook extra sandwiches and freeze them individually wrapped. To enjoy, simply reheat on a skillet, paying attention to ensure that they crisp well. Fresh elements, like avocado or herbs, can be added post-reheating for a burst of freshness.

Scaling Instructions

If entertaining, this recipe adapts easily. Halving the ingredients will serve one, while doubling or tripling them allows for a great gathering option. Adjust your skillet size as necessary, ensuring that each sandwich has enough room to toast properly.

Timing modifications are crucial when scaling up; keep all sandwiches cooking simultaneously to maintain warmth and crispiness. For storage considerations, ensure that excess sandwiches are kept cool and stored correctly to preserve flavor and texture.

Nutritional Deep Dive

This Avocado, Mozzarella, and Tomato Grilled Cheese provides a well-rounded macro breakdown with healthy fats from avocado, protein from mozzarella, and carbohydrates from bread. With generous helpings of fresh vegetables, you’ll also garner essential vitamins.

Micronutrient analysis reveals significant contributions from cheese and tomatoes, rich in calcium and vitamin C respectively. These nutrients support bone health and immune function, enhancing the overall wellness value of your grilled cheese.

Health benefits extend beyond nutrition; the combination of healthy fats and proteins also promotes satiety, making this sandwich feel more indulgent without compromising on health. The well-balanced nature of this dish makes it ideal for various dietary considerations, mastering the art of comfort food wisely.

Finally, portion analysis is crucial; each ingredient contributes meaningfully to your meal, allowing you to enjoy a fulfilling experience while maintaining a balanced approach to your dining.

Dietary Adaptations

For gluten-free needs, choose gluten-free bread options to maintain the essence of this classic while ensuring everyone can enjoy it. Dairy-free adaptations are straightforward; use plant-based mozzarella, ensuring it melts well, accompanied by a suitable spread.

Vegan transformations can also incorporate chickpea spreads or hummus in place of cheese while adding nutritional benefits. For those on low-carb diets, consider using lettuce wraps or low-carb bread alternatives while still featuring the essential flavors of the filling without the carbs.

Keto enthusiasts can employ cauliflower bread as a base, keeping the spirit of the dish without the traditional carbs. For paleo followers, swapping out dairy cheese with nutritional yeast provides the cheesy flavor profile needed while remaining compliant with dietary guidelines.

Troubleshooting Guide

For texture issues, if your grilled cheese ends up tough or chewy, you may have overcooked the bread or chosen bread that’s too tough. Always prefer bread that is soft and mildly toasted before adding fillings. Adjust cooking times and techniques based on your bread variety for optimal results.

Flavor balance can be challenging if the dish seems bland; ensure adequate seasoning of each component, especially the tomatoes and avocados. Layering flavorful sauces or spreads can brighten dull flavor profiles.

Temperature problems often arise; ensure your skillet is adequately heated before cooking. If too cool, your bread won’t toast, and cheese will fail to melt correctly. Keep a cooking thermometer handy to check if you are achieving the right temperature.

Equipment challenges can lead to varied progress; ensuring your pan is non-stick or using parchment paper can help prevent sticking and flavor loss during the cook. Watch moisture levels carefully; ensure that sauces aren’t seeping into your bread before cooking.

Ingredient substitutions should always be made thoughtfully; while feta can work, it may alter flavors significantly. Testing a small amount first can help prevent unwanted surprises.

Timing concerns are common; the faster you cook, the less crispiness you’ll achieve. Allow ample time between flipping and checking for optimal browning.

Recipe Success Stories

Community feedback provides invaluable insights; many families have made this grilled cheese their go-to lunch recipe, sharing personal adaptations they made along the way. Unique variations based on available local produce highlight the dish’s versatility and universal appeal.

Adaptation stories have surfaced as readers explore other ingredient additions; some recommend tossing in grilled chicken or different herbs to elevate the experience even further.

Reader suggestions highlight a propensity for integrating other sides, like soups or salads, to create variations across meal types, continually refreshing this classic recipe for modern tastes.

Photography tips from participants emphasize using natural light and unadulterated backgrounds to showcase the dish’s vibrant colors. Sharing personal photographs reinforces the communal joy tied to both cooking and sharing success stories in the kitchen.

Frequently Asked Questions

Q: Can I make this recipe gluten-free?
A: Absolutely! Simply substitute regular bread with gluten-free options available at most grocery stores. Ensure that the ingredients you choose, including cheese and toppings, adhere to gluten-free standards for a safe and delicious meal.

Q: How can I prevent my grilled cheese from being soggy?
A: To avoid sogginess, ensure that your tomatoes and other wet ingredients are well-dried before adding them to the sandwich. Also, be sure to toast the bread on medium heat, allowing moisture to escape while achieving a crispy crust.

Q: What can I add to my grilled cheese for more flavor?
A: Consider incorporating pesto, fresh herbs like basil or cilantro, or even a thin layer of mustard or garlic aioli on the bread before grilling. These additions boost flavor significantly without overwhelming the sandwich’s character.

Q: How do I cut my grilled cheese for serving?
A: For serving, cut your grilled cheese diagonally into triangles or in half for standard servings. This not only looks appealing but allows for easy picking for snacks or when served at gatherings.

Q: Is it possible to freeze grilled cheese sandwiches?
A: Yes, you can freeze grilled cheese sandwiches! Assemble and toast them lightly, allow to cool completely, wrap in plastic wrap, and store them in the freezer. Reheat them in a skillet or toaster for the best results.

Q: What can I substitute mozzarella with?
A: While mozzarella is favored for its melting qualities, feel free to use provolone, gouda, or cheddar. Ensure whichever type you select has good melting potential to maintain the creamy texture desired.

Q: Can I make this sandwich in advance?
A: Certainly! You can prepare the filling in advance and store it in the fridge, saving assembly time when you want to enjoy the sandwich on the same day. Just assemble and grill before serving.

Q: Are there dairy-free alternatives for mozzarella?
A: Yes! Many brands offer dairy-free mozzarella alternatives made from nuts or soy. These can be great substitutes while allowing you to enjoy this grilled cheese in a vegan-friendly manner.

Q: What sides pair well with this grilled cheese?
A: Classic tomato soup is a popular choice, but consider pairing it with a fresh garden salad, some sweet potato fries, or even a bowl of chili for a heartier meal.

Q: How can I customize the level of cheesiness?
A: Adjust cheesiness by layering different cheese types, such as sharp cheddar or fontina, along with mozzarella. This enriches flavor profiles and adds a delightful twist to your grilled cheese experience.

Additional Resources

If you’re looking to expand your sandwich repertoire, consider trying variations like a Caprese or a Mediterranean sandwich. Looking for more technique guides? Explore cheese-melting tips or various-toasting methods for optimal results. For detailed information on cheeses, including flavors and textures, check out our ingredient recommendations for the best choices available at your local grocery stores.

Seasonal variations are also fun—during summertime, use fresh basil and vine-ripened tomatoes, while in fall, opt for pumpkin spread or roasted vegetables for a seasonal twist that resonates with changing flavors.

Join the Conversation

We love hearing about your culinary adventures! Share your recipe photos and experiences on social media, using our hashtags to connect with fellow food lovers. Engage in our community by sharing variations you’ve tried or unique adaptations that have become family favorites—every story enriches our collective culinary journey. If you’ve enjoyed this Avocado, Mozzarella, and Tomato Grilled Cheese recipe, leave a review, and let others know how it turned out for you!

The Recipe

Avocado, Mozzarella, and Tomato Grilled Cheese

Serves: 2

Prep Time: 10 mins

Cook Time: 15 mins

Total Time: 25 mins

Kitchen Equipment Needed

  • Non-stick skillet or griddle
  • Spatula
  • Cheese grater (optional)
  • Slicing knife
  • Cutting board

Ingredients

  • 4 slices of bread (sourdough or whole grain)
  • 1 large avocado, sliced
  • 1 cup fresh mozzarella, shredded or sliced
  • 1 medium tomato, sliced
  • 2 tablespoons butter
  • Salt and pepper to taste
  • Fresh basil leaves (optional)

Directions

  1. Spread butter on one side of each slice of bread.
  2. Place the unbuttered side of two slices on the skillet over medium heat.
  3. Layer sliced avocado, mozzarella, tomato, and fresh basil on top of each slice.
  4. Season with salt and pepper, then top with the other two slices of bread, buttered side up.
  5. Cook for about 3-4 minutes until the bottom is golden brown, then carefully flip to cook the other side until golden and the cheese is melted.
  6. Remove from heat, allow to cool slightly, then cut in half and serve immediately.

Recipe Notes

  • For spiciness, add sliced jalapeños or a sprinkle of crushed red pepper flakes.
  • Incorporate different cheese types for varied flavors.
  • Ensure avocados are ripe for best texture; use lemon juice to prevent browning if preparing in advance.

Delicious and Easy Lamington Cake Recipe You Must Try

Delicious Lamington Cake Recipe: A Sweet Australian Tradition

⚖️
Difficulty
Medium

⏲️
Prep Time
30 mins

🕒
Cook Time
25 mins

⏱️
Total Time
55 mins

🍽️
Servings
12 servings

Lamington cake is a cherished treat originating from Australia, perfect for any occasion. This delicious cake features soft sponge squares coated in chocolate and rolled in desiccated coconut. As you cut into each bite, the moist cake harmonizes beautifully with the rich chocolate and the aromatic coconut, providing a delightful experience that is both nostalgic and comforting. The squishy sponge retains an airy texture, which nicely contrasts with the crunchy coconut exterior. This recipe is not just about making cake; it’s about creating a slice of Australian heritage that you can share with family and friends.

Every layer of this cake is designed to evoke warmth and cheer. The combination of fluffy vanilla cake enveloped in a luscious chocolate glaze with a scattering of coconut flakes creates not just a dessert, but a festive centerpiece for gatherings. Whether served with tea or enjoyed as a sweet snack, the Lamington cake has a magical ability to transport you to sunny Australian picnics and cheerful gatherings.

Quick Recipe Highlights

  • Flavor Profile: The Lamington cake is delightfully chocolatey with a hint of sweetness from the coconut. The balance of flavors makes it irresistible for any sweet tooth.
  • Texture: The sponge cake is soft and fluffy, while the outer coating adds a satisfying crunch, creating a delightful contrast of textures in every bite.
  • Aroma: The aromatic notes of vanilla sponge cake paired with rich chocolate and fresh coconut fragrance fill your kitchen, making it an inviting baking experience.
  • Visual Appeal: The beautiful presentation of white coconut flakes against a dark chocolate backdrop makes the Lamington an eye-catching dessert at any table.
  • Skill Level Needed: While this recipe is moderately easy, it does require consistent baking skills and care when coating the cakes to avoid a mess.
  • Special Equipment: A few baking tools like a square baking pan, mixing bowls, and a cooling rack are all you need to create this delicious dessert.

Recipe Overview

  • Difficulty Level: The Lamington cake is considered medium in difficulty due to its layering process and the need for careful chocolate coating. However, with some attention and practice, anyone can master it.
  • Category: This cake fits beautifully into the dessert category but can also be served with afternoon tea or coffee as a delightful snack.
  • Cuisine: Rooted in Australian culinary traditions, this cake showcases the influence of British baking techniques while incorporating local flavors.
  • Cost: The ingredients needed for this recipe are generally affordable, making it cost-effective to prepare, especially for larger gatherings.
  • Season: Lamingtons are enjoyed year-round but are especially popular during national holidays and celebrations in Australia.
  • Occasion: Perfect for birthdays, afternoon tea, or simply as a treat for family and friends, this cake is versatile for many gatherings.

Why You’ll Love This Recipe

The Lamington cake delights the senses with its sweet and rich flavor profile that combines the nutty taste of coconut with the smooth richness of chocolate. Each bite melts in your mouth, offering a soft and moist experience that is simply heavenly. This cake is a fantastic way to enjoy a traditional baking experience while creating fond memories around the kitchen. Its comforting taste can evoke feelings of warmth and happiness, making it perfect for any time you want to enjoy a special treat.

Not only is this cake delicious, but it is also easy to prepare, with steps that allow you to involve family or friends in the fun of baking. You can easily bake the sponge the day before and coat it with chocolate and coconut the next day, allowing for a more relaxed preparation process. This adaptability makes it an excellent choice for busy individuals who still want to delight their loved ones with a homemade dessert.

In terms of nutrition, the Lamington cake can be modified to incorporate healthier ingredients, such as egg substitutes or lower-sugar chocolates, making it a more wholesome treat. These adaptations make it easier to enjoy the cake without feeling guilty, allowing everyone to indulge in its decadent flavor.

Socially, serving Lamington cake can ignite discussions about traditions and family stories associated with the recipe. It is often a nostalgic dessert that reminds people of celebrations and gatherings, enhancing bonding experiences with friends and family.

Lastly, the affordability of this cake ensures that it can be made for any occasion without breaking the bank. Its accessibility in terms of ingredients and simple preparation makes the Lamington cake a favorite choice for anyone looking to impress guests with a homemade dessert.

Historical Background and Cultural Significance

The origin of the Lamington cake is often debated, but it is widely believed to have been named after Baron Lamington, the Governor of Queensland, in the early 1900s. According to popular tales, the cake was first prepared by a servant who accidentally dropped the cake into chocolate and coconut, which then became a delightful surprise rather than a mishap. This “accidental” creation eventually became a beloved symbol of Australian baking.

Culturally, the Lamington cake holds a significant place in Australian heritage. It represents a fusion of British colonial influence and local ingredients and culinary adaptation. Lamington drives home the idea that food can be a powerful medium for cultural storytelling, as it connects generations and brings people together over shared experiences.

The recipe for Lamingtons has evolved over the decades, with many variations now existing beyond the traditional chocolate and coconut. Modern versions incorporate different flavors and fillings, catering to diverse tastes while maintaining the cherished essence of the original dessert.

Regional variations also play a key role in how the Lamington is enjoyed. In some parts of Australia, you might find Lamingtons dipped in raspberry sauce or even filled with cream. Each region contributes its own twist, showcasing how this cake can adapt while still being part of the same family of recipes.

Ingredient Deep Dive

Sponge Cake: The heart of the Lamington, the sponge cake, has a rich history that dates back to British tea traditions. Light and fluffy, it serves as the perfect base to hold the chocolate and coconut toppings. Nutritionally, sponge cake is light yet provides energy from carbohydrates. When selecting flour for the sponge, aim for all-purpose flour to achieve the desired texture, and when storing, keep it in an airtight container to maintain moisture. If you need substitutions, you can use almond flour for a gluten-free option.

Chocolate Glaze: Rich and smooth, the chocolate glaze offers not only irresistible flavor but also a beautiful sheen to the Lamington. Traditionally made from cocoa powder, it can be enriched with dark chocolate for depth. Nutritionally, dark chocolate is known for its health benefits, including antioxidants. When selecting chocolate, look for high-quality brands with higher cocoa content. Store any leftover glaze in the fridge and reheat gently. You can substitute the chocolate with carob for a different flavor experience.

Desiccated Coconut: This ingredient adds texture and an irresistible flavor, reminiscent of tropical locales. Coconuts have been adored across many cultures for centuries, both for their flavor and health benefits. It is essential to select unsweetened desiccated coconut to control the sweetness of your Lamington. Store it in a cool, dry place to avoid spoilage. If you need a substitution, shredded coconut can work, but ensure to adjust the moisture content of the recipe.

Common Mistakes to Avoid

  • Overmixing the batter: Mixing too much can lead to dense, chewy sponge cake instead of a light and airy texture.
  • Using cold ingredients: Always ensure eggs and butter are at room temperature, as this will help create a smoother batter and better rise.
  • Not letting the cake cool completely: Dipping warm cake into chocolate can cause the chocolate to melt and become runny.
  • Skipping the coconut: Ensure sufficient coconut coverage, as it enhances flavor and texture while contributing to the signature look of the Lamington.
  • Inconsistent cake size: Cut the sponge into equal-sized pieces for even coating and uniform baking times.
  • Not sifting dry ingredients: Sifting flour and cocoa can prevent clumps and create a lighter, fluffier cake.
  • Using low-quality chocolate: The chocolate glaze is key to flavor; using high-quality chocolate can elevate the overall taste of the dessert.
  • Not letting chocolate sit: Allowing the chocolate to thicken slightly before dipping helps create a more attractive and less drippy coating.
  • Improper storage: Always store Lamingtons in an airtight container to maintain freshness and prevent them from becoming dry.
  • Omitting flavor variations: Experimenting with different fillings or glaze flavors can reduce monotony and make the recipe more exciting.

Essential Techniques

Making the Perfect Sponge Cake: Achieving the right sponge cake texture is crucial. Start by creaming the butter and sugar until light and fluffy, incorporating air into the mixture. This will help create a lighter sponge. Be careful to fold in the flour gently using a spatula, avoiding any loss of air. Visual cues include a volume increase in the batter and a light, airy texture when baked.

Coating the Cake: Proper coating techniques ensure each piece is evenly covered. Dip each cake square into the chocolate glaze quickly and allow excess to drip back into the bowl before rolling in coconut. This method keeps the coating neat and ensures the coconut adheres well. A visual cue for success is a smooth, even coverage without chocolate pooling at the base.

Pro Tips for Perfect Lamington Cake

1. Always use fresh ingredients for the best flavor and texture.
2. Experiment with different chocolate types, such as milk or dark chocolate, for various flavor outcomes.
3. For a fun twist, try adding flavored extracts, such as almond or orange, to the sponge batter.
4. When rolling in coconut, press gently to ensure the coconut adheres well.
5. Allow the Lamingtons to sit for a few hours before serving; this will enhance the flavor as the chocolate sets.
6. Consider adding a layer of raspberry jam or cream in the center of sponge pieces for an extra decadent surprise.
7. Use a high-sided tray when coating the cakes to minimize mess.
8. For presentation, drizzle additional chocolate over the tops once coated for a more polished look.

Variations and Adaptations

One of the best aspects of the Lamington cake is its adaptability. You can customize this classic recipe based on seasonal ingredients, like adding fresh fruit or using various extracts to enhance the sponge’s flavor. During summer, try incorporating fresh berries within the layers, giving a refreshing twist to each bite.

For those observing dietary restrictions, Lamingtons can be made gluten-free by substituting traditional flour with almond or gluten-free flour blends. You can also create vegan Lamingtons by using plant-based butter and egg replacements. Each change maintains the integrity of the dish while accommodating diverse diets.

Adding unexpected flavor variations, such as matcha powder, can introduce an innovative twist. Alternatively, you can experiment with the texture by replacing desiccated coconut with chopped nuts, providing an entirely new crunchy experience.

Presentation alternatives can also enhance the visual appeal. Consider stacking the Lamingtons in tiers with a drizzle of chocolate and a sprinkle of coconut on top for a stunning display at parties or gatherings.

Serving and Presentation Guide

Plating the Lamington cake can be just as delightful as making it. Start by arranging the pieces on a beautiful serving platter; for an elegant touch, use a cake stand. Garnish with a dusting of extra desiccated coconut or a few fresh berries for color contrast.

Consider pairing the Lamington cake with a scoop of vanilla ice cream or whipped cream to elevate the dessert experience. A drizzle of warm chocolate sauce can also enhance the flavors. Remember to serve the cake at room temperature to fully appreciate its textures and flavors, adding to the enjoyment.

When it comes to portion control, cutting the cake into uniform squares or rectangles helps everyone grab an equal share. Additionally, aim for slices that are not too large, as Lamingtons are sweet and can be rich, making smaller portions more satisfying.

Wine and Beverage Pairing

Pairing beverages with Lamington cake can elevate your tasting experience. A light-bodied dessert wine, such as Moscato, complements the sweetness without overpowering the flavors. The fruity notes of the wine harmonize beautifully with the chocolate and coconut elements.

Alternatively, for a non-alcoholic option, consider serving the cake with freshly brewed iced tea or a tropical fruit punch. The acidity and brightness from these drinks can cleanse the palate between bites, enhancing the overall experience.

For coffee lovers, pairing Lamingtons with a rich espresso can create an indulgent afternoon treat. The bitterness of the coffee contrasts nicely with the sweetness of the cake, providing a delightful balance.

Storage and Shelf Life

Storing Lamingtons is essential for preserving their freshness. Keep them in an airtight container at room temperature to maintain their soft texture, ideally consumed within three to four days. If you want to extend shelf life, consider refrigerating them, but be mindful that refrigeration can affect textures.

For long-term storage, Lamingtons can be frozen. Wrap each piece in plastic wrap, ensuring they are well-sealed to prevent freezer burn, and store them in a freezer-safe bag. They can last for up to three months. When ready to enjoy, simply thaw them in the refrigerator or at room temperature for optimal taste.

Be cautious of signs of spoilage, such as off smells or dry textures, which can indicate the cake is past its prime. If reheating is necessary, do so gently in the oven to restore moisture without sacrificing texture.

Make Ahead Strategies

Make-ahead strategies for Lamington cake can streamline your baking process. Prepare the sponge cake a day in advance, allowing it to cool completely before wrapping it tightly. This helps to maintain moisture and makes coating easier when you’re ready to serve.

Another strategy is to prepare the chocolate glaze ahead of time. Store it in the fridge and reheat gently to avoid setting, which allows for better dipping consistency. This way, assembly on the day of serving becomes quick and easy.

Consider presenting the Lamingtons on a large tray with separate bowls of coatings, including coconut or nuts, providing a fun DIY element for guests. This method invites interaction and can add a sense of occasion to your dessert.

Scaling Instructions

When scaling the Lamington recipe, doubling or tripling the ingredients is straightforward. Simply maintain the same proportions, but adjust your baking time accordingly. Be sure to use larger baking pans to accommodate the increased batter.

Keep in mind that larger batches may require longer cooling time, as cakes retain heat differently. If scaling down, a half-batch can work well in smaller pans. Always keep an eye on baking times, as even slight variations in size can affect how quickly the cake cooks.

For the best flavor, consider adjusting flavorings like vanilla or the thickness of the chocolate glaze based on your scaled batch size. This will ensure that every piece remains delicious.

Nutritional Deep Dive

Lamington cake is a balance of flavors and nutrition. Each serving can provide a delightful mix of macronutrients, primarily carbohydrates from the cake and sugars from the glaze, which give a quick energy burst. However, portion control is key due to the sweetness and richness associated with each square.

Essential micronutrients such as iron and magnesium can be sourced from the cocoa and coconut. These nutrients contribute to overall health, providing benefits like enhanced mood and improved cardiovascular health.

Additionally, being mindful of portion sizes can assist in weight management, allowing indulgence without excess. Purposefully choosing smaller squares can lead to a satisfying experience while keeping nutritional boundaries in check.

Dietary Adaptations

For those with specific dietary needs, Lamington cake can be adapted easily. Gluten-free versions can be achieved using almond flour or gluten-free all-purpose flour without compromising flavor.

Dairy-free adaptations can involve substituting butter with plant-based options, and using non-dairy milk for moisture. Vegan recipes could replace eggs with flax eggs or applesauce, ensuring that everyone can enjoy this delightful treat.

Other popular adaptations include low-carb versions made with almond and coconut flour blends for those following keto diets. Each modification can ensure that Lamingtons remain both accessible and enjoyable for various dietary lifestyles.

Troubleshooting Guide

If you find your sponge cake is too dense, it might be a result of overmixing. Ensure to fold in flour gently to maintain airiness, or check if your baking powder is fresh and active.

Flavors might feel imbalanced if the chocolate is too bitter or the coconut too sweet. Adjust your ingredients in small increments while tasting to find the perfect balance.

If you experience temperature issues, such as cakes not rising, make sure your baking temperature is accurate and not too low, which can drop the overall rise.

Timing can be a concern, especially in larger batches. Always check for doneness with a toothpick inserted into the center, ensuring it comes out clean before removing from the oven.

HRounding out your Lamington journey may need adjustments based on the level of humidity, so adjustments might be necessary for your local climate.

Recipe Success Stories

In our recipe community, Lamington cake has inspired numerous adaptations and delightful feedback. Many home bakers share their stories of success, relating how the nostalgic treat sparked conversations and memories of past gatherings. One reader recently mentioned how they included strawberries between the cake layers, creating a modern twist on a classic recipe.

Readers also enjoy sharing their photography tips, showcasing their beautifully arranged Lamingtons on social media under various hashtags. The charm of each recipe reflects the heart and creativity of those who bake it, making it a collective success story in every kitchen.

Feel free to leave comments about your experiences and discoveries while making this delightful cake. It’s time to share the joy of baking!

Frequently Asked Questions

Q1: Can I freeze Lamington cake?
Yes, you can freeze Lamington cake. Wrap each piece individually in plastic wrap and store in a freezer-safe container. They can last up to three months in the freezer. To enjoy, simply thaw at room temperature.

Q2: How long does Lamington cake last?
When stored properly in an airtight container, Lamington cake can last for about 3-4 days at room temperature. Refrigerating it can extend the shelf life but might affect its texture.

Q3: Can I substitute the coconut?
Yes, if you’re not a fan of coconut, you can use chopped nuts or sprinkles as an alternative for coating the cake. Both will give a different taste and texture.

Q4: Is it possible to make Lamingtons in advance?
Absolutely! You can prepare the sponge cake a day in advance and coat it the next day. This allows for a more manageable baking schedule.

Q5: What can I add to the Lamingtons for flavor variations?
Feel free to experiment by adding fruit jams or flavored extracts like almond or orange to the batter for variety. Different chocolates can also offer unique flavor profiles.

Q6: Can I use a different type of flour?
Yes! You can substitute all-purpose flour with gluten-free flour blends or almond flour, but keep in mind that the texture may differ slightly.

Q7: How do I prevent the chocolate from seizing?
Make sure to melt the chocolate on low heat and avoid getting water in it. If it does seize, try adding a little vegetable oil to smooth it out.

Q8: What is the best way to coat the sponge in chocolate?
Dip the cooled sponge pieces into the chocolate glaze quickly, ensuring they’re fully coated, then allow the excess to drip back into the bowl before rolling in coconut.

Q9: How can I store leftover Lamingtons?
Store any leftover Lamingtons in an airtight container at room temperature or in the fridge for optimal moisture retention.

Q10: Is there a vegan option for Lamington cake?
Yes! Use plant-based butter and flax eggs to create a vegan version, ensuring everyone can enjoy this delicious treat.

Additional Resources

If you found this Lamington cake recipe delightful, consider exploring related recipes such as chocolate cupcakes or Australian pavlova for more inspired baking. Technique guides on cake decorating and chocolate tempering can also enhance your baking skills.

Further, learning about ingredient substitutions could be beneficial for future recipes, allowing you to create variations tailored to dietary needs. Equipment recommendations for cake-making tools ensure you have the right resources for your kitchens, such as quality mixing bowls and measuring cups.

Finally, seasonal variations can help you discover creative twists, like adding fruit preserves or nuts based on what’s available, keeping your baking fresh and exciting.

Join the Conversation

Sharing your baking experiences on social media enriches the baking community. Use hashtags associated with Lamingtons to connect with fellow bakers and photographers who enjoy capturing their culinary creations. Engage with readers by sharing your adaptation stories or submitting feedback about this recipe.

Encourage your friends and family to try baking Lamingtons themselves, sparking creativity and joy in the kitchen. Notes on flavors, textures, and personal favorites can make for lively discussions, community engagement, and recipe variations.

The Recipe

Lamington Cake

Serves: 12 servings

Prep Time: 30 mins

Cook Time: 25 mins

Total Time: 55 mins

Kitchen Equipment Needed

  • Square baking pan
  • Mixing bowls
  • Cooling rack
  • Whisk or mixer
  • Spatula
  • Fork for coating

Ingredients

  • ½ cup unsalted butter, softened
  • ¾ cup granulated sugar
  • 3 large eggs
  • 1 teaspoon vanilla extract
  • 1 ½ cups all-purpose flour
  • 2 teaspoons baking powder
  • ¼ teaspoon salt
  • ½ cup milk
  • 1 cup unsweetened cocoa powder
  • 2 cups desiccated coconut
  • 1 ½ cups powdered sugar
  • ½ cup milk for chocolate glaze

Directions

  1. Preheat your oven to 350°F (180°C) and grease a square baking pan.
  2. In a large bowl, cream the butter and sugar until light and fluffy.
  3. Add in the eggs one at a time, mixing well after each addition. Stir in the vanilla extract.
  4. In another bowl, combine the flour, baking powder, and salt. Gradually add this dry mixture to the wet ingredients, alternating with milk, and mix until smooth.
  5. Pour the batter into the prepared pan and bake for 25 minutes or until a toothpick comes out clean.
  6. Once the cake is baked, allow it to cool completely on a wire rack.
  7. For the chocolate glaze, melt the cocoa powder, powdered sugar, and milk together in a saucepan over low heat until smooth.
  8. Cut the cooled cake into squares, dip each piece into the warm chocolate glaze, then roll in desiccated coconut until well coated.
  9. Place the coated squares on a cooling rack to set before serving.

Recipe Notes

  • For a twist, try adding fruit preserves between layers.
  • Allow the Lamingtons to set for at least a few hours to develop even softer flavors.
  • Store in an airtight container at room temperature for optimal texture.
  • For a richer taste, consider adding a layer of raspberry jam or cream.

Indulge in Southern Creamy Pineapple Pecan Cake Delight

Southern Creamy Pineapple Pecan Cake Recipe: A Southern Delight

⚖️
Difficulty
Medium

⏲️
Prep Time
30 mins

🕒
Cook Time
45 mins

⏱️
Total Time
1 hr 15 mins

🍽️
Servings
12

The Southern Creamy Pineapple Pecan Cake is a quintessential dessert that captures the heart of Southern cooking. This cake boasts a moist and fluffy texture complemented by the sweetness of ripe pineapples and the crunch of toasted pecans. Each bite reveals layers of flavor, as the creamy frosting perfectly balances the cake’s sweetness. Crafted with love, this dessert is ideal for family gatherings, holidays, or any occasion that calls for a touch of Southern charm.

Imagine creating this masterpiece in your kitchen, the aroma of freshly baked cake wafting through the air, inviting everyone in the household to gather around. The combination of rich flavors and textures makes it not just a treat for the palate but also a feast for the eyes. Adorned with vibrant pineapple pieces and crunchy pecans, this cake is not only delicious but also visually stunning, making it an impressive centerpiece for any table.

Quick Recipe Highlights

  • Flavor Profile: This cake is incredibly sweet, thanks to the fresh pineapple, while the pecans add a delightful nuttiness. The combination creates a unique blend that is both refreshing and satisfying.
  • Texture: The cake is moist and fluffy, while the creaminess of the frosting contrasts beautifully with the crunchy pecans, providing a delightful mouthfeel.
  • Aroma: Expect an irresistible aroma from the warm cake and the scent of toasted pecans, intermingled with fruity notes from the pineapple, filling your kitchen with comfort and warmth.
  • Visual Appeal: The cake’s layers are beautifully highlighted with creamy frosting and topped with bright pineapple chunks, offering a colorful and inviting presentation.
  • Skill Level Needed: Moderate; the recipe involves baking, preparing a frosting, and layering, which may require some baking confidence.
  • Special Equipment: You’ll need standard baking pans, mixing bowls, and a hand mixer to achieve the perfect texture.

Recipe Overview

  • Difficulty Level: This Southern Creamy Pineapple Pecan Cake falls into the medium category due to the multiple steps involved, but with careful attention, even novice bakers can achieve great results.
  • Category: This dessert is a perfect addition to the cake category, suitable for any type of gathering from birthday parties to potlucks.
  • Cuisine: Rooted in Southern traditions, this cake reflects the vibrant flavors and community-focused dining typical of Southern folk cooking.
  • Cost: The estimated cost for ingredients is reasonable, making it a budget-friendly dessert choice for occasions.
  • Season: Although delicious year-round, this cake shines during spring and summer when pineapple is in season and gatherings are plentiful.
  • Occasion: Perfect for birthdays, family reunions, or any celebratory event, this cake is a crowd-pleaser.

Why You’ll Love This Recipe

The combination of pineapple and pecans creates a unique taste that is both refreshing and satisfying. The moistness of the cake combined with the richness of the creamy frosting makes every bite a delightful experience. Whether you enjoy this cake after a meal or as a special treat with coffee, the flavor profile is sure to leave you craving more.

Preparation of the Southern Creamy Pineapple Pecan Cake is not overly complicated, making it accessible for home bakers. With simple ingredients that are widely available, you can whip up this dessert without needing fancy tools or hard-to-find components. The steps are straightforward and manageable, allowing you to focus on enjoying the baking process.

Nutritionally, incorporating pineapple adds a dose of vitamins while the pecans provide healthy fats, making this cake a slightly more wholesome option. This dessert doesn’t just satisfy your sweet tooth; it also contributes beneficial nutrients, particularly when enjoyed in moderation.

When entertaining guests, this cake is a wonderful conversation starter. Sharing this special Southern recipe creates a sense of community and brings people together, making your gathering all the more memorable. Plus, the compliments you receive will be icing on the cake—pun intended!

With its economical price point, you can treat your friends and family without breaking the bank. This Southern treat not only provides a delicious dessert option but also reinforces the notion that great food can be both affordable and satisfying.

Historical Background and Cultural Significance

Southern cakes like the Creamy Pineapple Pecan Cake often have rich history tied to local ingredients and culinary traditions. The combination of nuts and fruits showcases a prevalent Southern theme: using what the land provides. This cake exemplifies how ingredients like pineapple, commonly found in tropical regions, became popular in Southern kitchens due to trade.

In the South, desserts often serve as expressions of love and hospitality. Whether at family dinners or community picnics, cake is a staple that unites people over shared flavors and experiences. This cake, in particular, embodies the spirit of Southern cooking—hearty, sweet, and gathered around the table.

Over the years, this recipe has evolved, with many families adding their unique twists, reflecting personal stories and memories. Some may replace pecans with walnuts or alter the frosting, showcasing adaptability while upholding tradition. The evolution ensures this cake remains relevant and cherished amid changing tastes and preferences.

Regional variations of this cake abound, highlighting how different parts of the South put their unique spin on flavors and ingredients. From adding coconut for an extra layer of sweetness to incorporating spices like cinnamon, these variations stay true to the essence of using local produce and traditions.

Ingredient Deep Dive

Pineapple: Pineapple has a long-standing significance in Southern cuisine, often seen as a symbol of hospitality and warmth. It’s packed with vitamins and enzymatic properties that aid digestion. When choosing pineapples, opt for ones that are firm with a sweet scent. Properly store them at room temperature until ripe, then refrigerate for up to a week.

Pecans: Pecans are deeply rooted in Southern culture, often used in traditional dishes like pecan pie. Nutritionally, they are a source of healthy fats and can support heart health. When selecting pecans, look for ones that are plump and have a rich, nutty aroma. Store in a cool, dry place, and consider freezing them to prolong freshness.

Common Mistakes to Avoid

  • Not measuring ingredients properly can lead to an imbalanced batter. Always use measuring cups and spoons for accuracy.
  • Overmixing the batter may cause the cake to be dense. Mix just enough to combine the ingredients.
  • Baking at the wrong temperature can result in uneven cooking; always preheat the oven before baking.
  • Not allowing the cake to cool before frosting can cause the frosting to melt. Let the cake cool completely.
  • Using fresh pineapple without preparing it properly can lead to excess moisture; ensure it’s well-drained.
  • Skipping the toasting of pecans means missing out on their full flavor. Toast them lightly for the best taste.
  • Not checking for doneness can result in underbaked or overbaked cake. Use a toothpick to test; it should come out clean.
  • Ignoring the order of adding ingredients can affect the texture, so follow the recipe closely.
  • Rushing the cooling process may damage the cake. Allow ample cooling time on the rack.
  • Frosting a warm cake can lead to a melted mess; always ensure the cake layers are completely cool.

Essential Techniques

To achieve a moist and fluffy cake, creaming the butter and sugar properly is critical. This technique helps to incorporate air into the batter, which is essential for a light texture. Remember to whip until the mixture is pale and fluffy, being aware of the visual cue of a lightened color that’s typically achieved after several minutes.

Layering the cake is another key technique. Allowing each layer to cool completely before frosting prevents sliding or melting. Use an offset spatula to spread the frosting evenly, and consider placing the cake in the fridge for a short time to set the layers before adding more decorations or serving.

Pro Tips for Perfect Southern Creamy Pineapple Pecan Cake

1. For added moisture, consider adding a splash of pineapple juice to the frosting. This can enhance the pineapple flavor and keep the frosting creamy.
2. If you don’t have fresh pineapple, canned crushed pineapple works well—just be sure to drain it thoroughly to avoid excess liquid.
3. Experiment with different nuts; walnuts or almonds can create unique flavor profiles if you want to switch things up.
4. Make the cake a day in advance; it tastes even better after the flavors have melded overnight in the fridge.
5. When frosting, start with a crumb coat to hold any loose crumbs in place, which ensures a cleaner finish.
6. Use cream cheese in the frosting for a tangy flavor that pairs wonderfully with the sweetness of the pineapple.
7. For an added flavor kick, sprinkle some coconut flakes on top of the frosting for a tropical twist.
8. Decorate with mint leaves or edible flowers for an eye-catching presentation that’s perfect for parties.

Variations and Adaptations

There are numerous ways to put a spin on this cake. For those looking for a tropical flair, consider adding coconut for extra richness. Alternatively, adding spices like cinnamon or nutmeg can warm up the flavor profile, perfect for fall gatherings.

For a more health-conscious approach, you can substitute some of the all-purpose flour with almond flour for a nutty taste and gluten-free alternative. Additionally, using a sugar substitute will allow for a low-sugar version without sacrificing sweetness.

Texture modifications can also be fun; mixing in crushed pecans or flaked coconut in the batter will add a delightful crunch. Whether it’s through a different frosting or by incorporating layers of fruit preserves, each variation will give you a unique twist on the classic cake.

Presentation can also change the way a recipe feels. Consider serving the cake in a trifle as a layered dessert adorned with whipped cream, fresh fruits, and nuts, making it visually stunning for any special occasion.

Serving and Presentation Guide

When it comes to serving the Southern Creamy Pineapple Pecan Cake, focus on clean, even slices that reveal the beautiful layers inside. A serrated knife will help achieve smooth cuts without squishing the cake.

Garnishing is key—a sprinkle of toasted pecans on top not only adds crunch but also enhances the visual appeal. Fresh pineapple slices or edible flowers can elevate the dish for special occasions, and a dollop of whipped cream can make the presentation even more enticing.

Consider serving the cake slightly chilled to enhance its refreshing qualities. Pairing it with a scoop of vanilla ice cream can take this dessert to another level, contrasting the richness of the frosting with a creamy delight.

While portion sizes should be generous enough to satisfy, keep in mind that this cake is rich, so smaller pieces might be ideal for large gatherings. Encourage guests to savor each bite and enjoy the company around them.

Wine and Beverage Pairing

For the ultimate indulgence, pairing a glass of dessert wine like Moscato with the Southern Creamy Pineapple Pecan Cake enhances its fruity flavors. The wine’s sweetness complements the cake, allowing each bite to burst with flavor.

Non-alcoholic alternatives like a tropical fruit punch, with a hint of lime, will balance the sweetness while echoing the cake’s fruity elements. Consider serving iced tea infused with mint for a refreshing combination that nods to Southern traditions.

If your gathering calls for coffee, a light roast will provide a smooth contrast to the cake’s richness. For a comforting touch, a spiced chai tea can also harmonize beautifully, adding warmth to the dining experience.

Storage and Shelf Life

To store leftover Southern Creamy Pineapple Pecan Cake, cover it with plastic wrap or place it in an airtight container at room temperature for up to three days. For extended shelf life, refrigerate for up to a week.

If you wish to freeze the cake, ensure it’s completely cooled. Wrap it tightly in plastic wrap, then foil, and store it in the freezer for up to three months. When ready to eat, thaw it overnight in the refrigerator.

Watch for signs of spoilage, such as an off smell or a change in texture indicating that the cake has gone bad. To reheat, place individual slices in the microwave for quick enjoyment or leave it at room temperature until warm.

Make Ahead Strategies

Preparing the Southern Creamy Pineapple Pecan Cake in advance is a fantastic way to save time on the big day. You can bake the cake layers 1-2 days ahead and store them in the refrigerator wrapped tightly.

Frosting can also be made in advance; simply store it in an airtight container and refrigerate. Mix it again before frosting the cake to ensure a smooth consistency. Any fruit toppings can be prepared in advance, giving you more time to enjoy with guests on dessert day.

Consider doing the assembly on the day of serving to maintain the best texture and freshness. Place the cake on the serving platter after frosting to ensure it stays intact and visually appealing.

Always leave room for fresh elements when making ahead—adding fresh fruits or a sprinkle of nuts right before serving will keep the dessert looking vibrant and inviting.

Scaling Instructions

Should you wish to halve the recipe, simply divide all ingredients by two, ensuring that baking times remain consistent. For those doubling or tripling the recipe, ensure you use appropriately larger baking pans and adjust the baking times slightly, as larger cakes may need extra time.

Proper equipment adjustments are crucial; consider using several smaller pans instead of one large if you’re making multiple cakes. This helps with even baking and easier serving.

Timing modifications will depend on the size of your cake; larger cakes may require testing for doneness at the usual times and then checking every few minutes after to avoid overbaking.

When storing leftover portions from batch baking, make sure to cool completely before wrapping and freezing for future enjoyment.

Nutritional Deep Dive

Breaking down the macros of the Southern Creamy Pineapple Pecan Cake, each slice offers a balance of carbohydrates, fats, and proteins, primarily from the flour, pecans, and creamy frosting. The sugar content is higher but can be moderated depending on substitutions.

In terms of micronutrient analysis, the pineapple offers a boost of Vitamin C and antioxidants, while pecans contribute Vitamin E and healthy fats, which are beneficial for heart health. When assessing portion size, moderation is key; a small slice can satisfy a sweet craving while maintaining balance in your diet.

Dietary considerations should include allergies or specific health goals, ensuring that this dessert remains suitable for various lifestyles by offering gluten-free or lower-sugar options.

When managing weight, enjoy this cake as part of a well-rounded diet—pair with physical activity and mindfulness about portion sizes to include treats without derailment.

Dietary Adaptations

For gluten-free options, substitute all-purpose flour with a gluten-free blend, maintaining the delightful texture without gluten. Additionally, use almond flour to enhance the nutty flavor and maintain structure.

Dairy-free adaptations can easily be made by replacing butter with coconut oil and using non-dairy milk or vegan cream cheese for frosting. This ensures that everyone can enjoy the deliciousness of this Southern treat.

For a lower-carb version, consider using almond flour and a sugar substitute to create a keto-friendly variant while still preserving essential taste elements.

If you’re leaning towards vegan, replace eggs with flaxseed meal and adjust the frosting accordingly, making it just as creamy without using dairy products.

For those following a low-FODMAP diet or other specific dietary restrictions, be sure to check labels on all ingredients to avoid unwanted ingredients and adapt where necessary.

Troubleshooting Guide

If your cake turns out denser than expected, this may be due to overmixing or too much liquid in the batter. Take care to mix just until ingredients are combined.

For balancing flavors, if the cake is too sweet, consider reducing the sugar or pairing it with a tangy frosting to provide a contrasting taste that complements rather than overwhelms.

If baking temperature issues arise, ensure your oven is calibrated; an oven thermometer can help with accuracy.

In instances of ingredient substitutions, be aware that not all alternatives behave the same way. For example, using a different type of nut can alter the texture and flavor; stick to the recommended ingredients or test small batches.

If timing concerns surface, remember to keep an eye on your cake towards the end of baking. Start checking for doneness a few minutes before recommended times, adjusting as necessary for each unique oven.

Recipe Success Stories

Our community continues to delight in the Southern Creamy Pineapple Pecan Cake, sharing their variations and success stories. Readers report success with creative toppings, showcasing their personal twists that make the dessert even more special.

Some bakers have added different layers, expressing their love for the original recipe while adding a twist, from coconut cream to citrus accents, reflecting regional flavors and personal touch.

Many suggest using local or seasonal ingredients, enhancing the story behind the dish and connecting with the community through shared food experiences.

Photography tips include capturing the colorful layers, garnished beautifully with nuts and fruit, encouraging others to try their hand at recreating this beloved classic.

Frequently Asked Questions

Can I use canned pineapple instead of fresh?

Yes, canned pineapple can be a great alternative, especially if you drain it well to prevent excess moisture from affecting the cake’s texture. Just be mindful of the sweetness, as canned versions often have added sugar.

How do I store the leftovers?

Leftovers should be covered and stored in an airtight container at room temperature for up to three days. For longer preservation, refrigerate or freeze the cake wrapped tightly to maintain its freshness.

Can I make this cake in advance?

Absolutely! You can bake the cake a day ahead, store it in the refrigerator, and frost it before serving to ensure it’s fresh and flavorful.

Is this cake suitable for a gluten-free diet?

Yes, by using a gluten-free flour blend instead of all-purpose flour, this cake can be adapted for gluten-free diets. Just ensure all other ingredients are also gluten-free.

What can I substitute for pecans?

Walnuts or almonds serve as excellent substitutes for pecans, offering a different flavor while maintaining a similar texture. You can also omit nuts altogether if necessary.

Can I freeze this cake?

Yes, this cake freezes well. After baking and cooling completely, wrap it tightly in plastic wrap and store it in an airtight container for up to three months.

What is the best way to frost the cake?

Start with a crumb coat to seal in any loose crumbs, then apply the final layer of frosting smoothly using an offset spatula for an even finish.

How long does it take to bake?

The cake generally takes about 45 minutes to bake, but it’s always best to check with a toothpick to ensure it’s baked all the way through.

Is this recipe kid-friendly?

Certainly! Kids love the sweet flavors of pineapple, and they can help with mixing and decorating the cake, making it a fun family activity.

What drinks pair well with this cake?

Dessert wines like Moscato or sweet iced tea are perfect pairings. Non-alcoholic options like fruit juices and smoothies also complement its fruity taste wonderfully.

Can I add frosting in the middle of the layers?

Yes! For added richness, feel free to add a layer of frosting between each cake layer before stacking them. This creates a lovely surprise of flavor.

Additional Resources

Learn how to enhance your baking skills with our recipe guides and technique articles. Explore more tropical dessert recipes that embrace flavors from sunny locales. Ingredients are vital; discover guides on how to select and use seasonal produce for flavorful results. Equip yourself with kitchen essential recommendations, making the baking process smoother to achieve perfect results every time.

Join the Conversation

We love hearing from our readers! Share your experiences on social media, showing off photographs of your Southern Creamy Pineapple Pecan Cake creations. Join our community by leaving reviews and feedback to help us continue improving our recipes. Engage with others, sharing unique variations or successful tips you have mastered along the way.

The Recipe

Southern Creamy Pineapple Pecan Cake

Serves: 12

Prep Time: 30 mins

Cook Time: 45 mins

Total Time: 1 hr 15 mins

Kitchen Equipment Needed

  • 9-inch round cake pans
  • Mixing bowls
  • Measuring cups and spoons
  • Electric mixer
  • Spatula
  • Cooling rack

Ingredients

  • 2 cups all-purpose flour
  • 1 ½ cups sugar
  • 1 teaspoon baking soda
  • ½ teaspoon salt
  • 1 cup buttermilk
  • ¾ cup unsalted butter, softened
  • 4 large eggs
  • 1 can (8 oz) crushed pineapple, drained
  • 1 cup chopped pecans
  • For frosting: 8 oz cream cheese, softened; ½ cup butter; 4 cups powdered sugar; 1 teaspoon vanilla extract

Directions

  1. Preheat the oven to 350°F (175°C) and prepare the pans with non-stick spray.
  2. In a mixing bowl, combine flour, sugar, baking soda, and salt.
  3. In another bowl, beat the butter and sugar until creamy. Add eggs, one at a time, mixing well.
  4. Gradually add the dry mixture and buttermilk, alternating until well combined.
  5. Fold in the crushed pineapple and pecans gently.
  6. Pour the batter equally into prepared pans and smooth the tops.
  7. Bake for 40-45 minutes or until a toothpick comes out clean. Cool on racks for 10 minutes before removing from pans.
  8. For the frosting, beat together cream cheese and butter until creamy. Gradually add in powdered sugar and vanilla until smooth.
  9. Once the cakes are completely cool, frost between the layers and on top, finishing with a sprinkle of pecans.

Recipe Notes

  • You can substitute crushed pineapple with fresh pineapple if preferred; just chop finely and drain excess moisture.
  • For a richer frosting, consider adding a splash of pineapple juice to enhance flavor.
  • Decorate with additional chopped pecans or fresh pineapple chunks for presentation.

Delicious Creamy Texas Roadhouse Smothered Chicken Recipe to Try

Creamy Texas Roadhouse Smothered Chicken Recipe: A Comfort Food Delight

⚖️
Difficulty
Easy

⏲️
Prep Time
15 mins

🕒
Cook Time
25 mins

⏱️
Total Time
40 mins

🍽️
Servings
4

Creamy Texas Roadhouse Smothered Chicken is a dish that truly embodies comfort and indulgence. Picture tender grilled chicken breasts smothered in a rich, creamy sauce, topped with melted cheese and crispy bacon. Not only is this recipe approachable for home cooks of all levels, but it also delivers incredible flavors that can easily rival any restaurant fare. The savory notes of the sauce perfectly blend with the juicy chicken, creating a delightful harmony that will have your taste buds dancing.

This dish is ideal for any gathering—from family dinners to special occasions. The creamy cheese sauce is the star that brings everyone together, making each bite something to savor. Whether you serve it with rice, mashed potatoes, or a fresh salad, it’s guaranteed to impress your guests and leave them asking for seconds.

Quick Recipe Highlights

  • Flavor Profile: This dish features a rich umami flavor enhanced by the creaminess of the cheese and the smokiness of bacon.
  • Texture: The tender grilled chicken contrasts beautifully with the creamy sauce and crispy bacon, providing a satisfying mouthfeel.
  • Aroma: The inviting aroma of melted cheese and herbs wafting through your kitchen will draw everyone in.
  • Visual Appeal: With its vibrant layers of cheese, bacon, and perfectly cooked chicken, this dish is as stunning to look at as it is to eat.
  • Skill Level Needed: Even novice cooks can master this dish, making it a perfect entry point into the world of cooking.
  • Special Equipment: A skillet and an oven-safe baking dish are the key tools you need to create this delicious recipe.

Recipe Overview

  • Difficulty Level: This creamy chicken dish is easy to prepare, making it suitable for both beginner cooks and seasoned chefs alike.
  • Category: Main Course, ideal for family dinners or potlucks, this dish stands out as a comforting centerpiece.
  • Cuisine: This recipe pulls influences from Southern comfort food, particularly American classics that highlight rich flavors.
  • Cost: With simple ingredients, this dish is budget-friendly, making it accessible for most home cooks.
  • Season: Perfect for any season, especially comforting during colder months when warmth and hearty flavors are most appreciated.
  • Occasion: Serve this dish during family gatherings, parties, or any time you want to impress loved ones with minimal effort.

Why You’ll Love This Recipe

The taste and texture appeal of Creamy Texas Roadhouse Smothered Chicken cannot be overstated. The combination of tender grilled chicken, creamy cheese, and crispy bacon creates a comforting symphony of flavors that satisfies any craving. Each bite provides a delightful contrast between the smooth sauce and succulent chicken, making it a favorite among comfort food lovers.

Convenience and preparation benefits make this recipe a go-to for busy weeknights. With minimal prep and cook time, you can whip up a delicious meal without spending hours in the kitchen. It’s also a dish that absorbs flavors beautifully, meaning you can make it ahead and reheat without losing that heavenly richness.

Nutritionally, this dish offers a great source of protein thanks to the chicken, and when paired with vegetables or whole grains, it can fit into a balanced meal plan. Furthermore, the use of quality ingredients means you’re not compromising on health for flavor.

For social and entertaining value, Creamy Texas Roadhouse Smothered Chicken is sure to be a crowd-pleaser. Friends and family will rave about the flavor, making it a perfect choice for gatherings and special occasions. Plus, it pairs wonderfully with a variety of sides, making meal planning easy and enjoyable.

Cost-effectiveness and accessibility are noteworthy features of this dish. Using readily available ingredients means you can prepare a delicious meal without breaking the bank. This versatility ensures that everyone can enjoy this flavorful comfort, regardless of dietary preferences or budgets.

Historical Background and Cultural Significance

The origin of smothered chicken is deeply rooted in Southern cooking traditions. This approach to cooking showcases the culture of comfort food that is prevalent in many American households. Historically, smothering techniques were employed to enhance the tenderness and flavor of meats, making tough cuts more enjoyable and flavorful.

Culturally, smothered chicken holds a significant place in family meals and gatherings. It represents not only sustenance but also the love and care put into cooking for those we cherish. It enriches the dining experience by fostering connections around the table and celebrating togetherness.

The evolution of this recipe has seen adjustments and adaptations over the years to suit contemporary tastes. While traditional recipes may focus solely on classic seasonings and methods, this version incorporates modern creaminess and flavor pairings that appeal to today’s palates.

Regional variations of smothered chicken highlight the diverse culinary influences across the United States. From Cajun spices in Louisiana to creamy sauces in Texas, each region has crafted its take, showcasing the adaptability and appeal of this timeless dish.

Ingredient Deep Dive

The primary ingredient, chicken, has a long-standing history as a staple protein in diets worldwide. It is not only versatile in culinary applications but also easy to prepare. Selection should focus on fresh, high-quality cuts, and it’s essential to store chicken correctly to minimize spoilage. For substitutions, turkey or plant-based proteins can provide alternatives for different diets.

Creamy sauces, often made with cheese and heavy cream, add a rich texture and flavor. These ingredients contribute to the dish’s comfort food status. When choosing cheese, it’s best to opt for varieties that melt well, and leftovers can typically be stored in an airtight container in the fridge. Alternative options can include low-fat cream or dairy-free variants for those with dietary restrictions.

Bacon adds a delightful crunch and smoky flavor to this dish. The cultural significance of bacon in Southern cooking cannot be understated, often seen as a flavor enhancer in various recipes. When selecting, look for high-quality, natural options, and store in a cool, dry place for optimal freshness. For a healthier take, turkey bacon serves as a suitable substitute without losing too much flavor.

Common Mistakes to Avoid

  • Overcooking the chicken, leading to dry meat. Aim for an internal temperature of 165°F to ensure juiciness.
  • Not allowing the sauce to simmer to let flavors meld properly; a brief simmer adds depth.
  • Using low-quality cheese that doesn’t melt well, which can result in a grainy texture unexpectedly.
  • Skipping the seasoning on the chicken, which can leave the dish flat in flavor; always season generously.
  • Pouring sauce over unseasoned chicken, which may not let the flavors penetrate effectively.
  • Inadequate monitoring of bacon crispness, as burning can create unwanted bitterness.
  • Cooking in too small a pan can cause overcrowding which leads to uneven cooking of the chicken.
  • Not letting the dish rest after cooking which helps all the flavors settle before serving.

Essential Techniques

Mastering the art of sautéing is crucial in this recipe. It allows chicken to develop a beautiful golden-brown color and enhances its flavor. To achieve this, preheat the pan properly and avoid overcrowding. Visual cues for success include a sizzle upon contact with the pan and a crisp exterior.

Creating a creamy sauce requires careful attention to heat and timing. By gradually adding ingredients and allowing them to meld, you can achieve the perfect consistency without curdling. The key is to stir frequently and monitor the temperature, looking for a smooth, velvety texture before serving.

Pro Tips for Perfect Creamy Texas Roadhouse Smothered Chicken

1. Always use fresh herbs for garnish, as they elevate the dish’s presentation and flavor.
2. Ensure your chicken is at room temperature before cooking to promote even cooking.
3. Experiment with different cheeses to find your favorite combination for the sauce.
4. For a spicy kick, consider adding jalapeños to the sauce, enhancing both flavor and heat.
5. Let your chicken rest after cooking; this retains moisture and enhances taste.
6. Use kitchen shears to cut crispy bacon into pieces easily; this minimizes crumbling.
7. Serve with a side of sautéed vegetables for a complete, healthy meal.
8. Don’t hesitate to personalize the recipe with your own spices and ingredients for a unique spin.

Variations and Adaptations

This dish can easily be adapted for different regional flavors. For instance, a barbecue smothered chicken variation incorporates barbecue sauce, which adds a tangy edge along with a smoky depth that offers an exciting twist on the traditional recipe.

Seasonal variations can also enhance your experience. In the fall, consider adding pumpkin or butternut squash to the sauce for a seasonal touch that adds sweetness and depth.

If dietary restrictions are a concern, use gluten-free breadcrumbs in the breading process. For a low-carb option, you could serve the chicken atop a bed of cauliflower rice instead of traditional sides.

Flavor variations could include incorporating different spices such as Cajun seasoning for a more pronounced kick or using sun-dried tomatoes for a Mediterranean flair.

For texture modifications, consider adding chopped nuts to the coating for added crunch or thickening the sauce with a cornstarch slurry for a different mouthfeel.

Presentation alternatives could involve serving on a slate platter or in a cast-iron skillet, both of which provide rustic charm and keep the dish warm longer.

Serving and Presentation Guide

Plating techniques can transform your smothered chicken into a restaurant-style presentation. Use large plates and create a bed with mashed potatoes first, then place the chicken on top and drizzle the sauce generously over it.

Garnishing with fresh herbs, such as parsley or chives, adds a pop of color and freshness. You can also sprinkle crispy bacon bits over the top, bringing texture to each bite.

Traditional accompaniments might include buttery rolls or cornbread, soaking up the creamy sauce perfectly. For modern serving suggestions, consider serving the dish with a colorful salad or seasonal roasted vegetables for a balanced meal.

Ensure the dish is served hot, straight from the oven, to enhance flavor and texture. Understanding portion control can help in serving sizes; generally, a chicken breast per person accompanied by appropriate sides suffices.

Wine and Beverage Pairing

For wine pairings, opt for a full-bodied Chardonnay that complements the creaminess of the sauce while enhancing the flavors of the chicken. Alternatively, a light Pinot Noir could also work well, bringing balance to the dish with its fruity notes.

For non-alcoholic alternatives, consider sparkling water with a splash of lime, which refreshes the palate. Another delightful option could be a homemade lemonade, providing a tangy contrast against the richness.

If the meal calls for something warm, a light herbal tea or a smooth coffee could be the perfect accompaniment, especially for those who enjoy a comforting ending to their meal.

Storage and Shelf Life

To properly store leftovers, cool the dish to room temperature and transfer it into an airtight container. This will help maintain freshness for up to 3-4 days in the refrigerator.

It’s essential to keep the storage area at a consistent temperature; refrigerate within two hours of cooking to prevent spoilage. Use glass or BPA-free plastic containers that allow for easy reheating in the microwave or oven.

Signs of spoilage can include an off smell or changes in texture; when in doubt, it’s best to err on the side of caution. When reheating, ensure the dish reaches a minimum internal temperature of 165°F to maintain safety.

If you’re looking to extend shelf life, freezing the chicken with the sauce can preserve it for up to three months. When ready to eat, thaw overnight in the refrigerator before reheating.

Make Ahead Strategies

Planning ahead can significantly simplify your cooking process. Prepare the creamy sauce in advance and store it in the refrigerator; this allows flavors to develop, enhancing the final outcome.

You can also season and grill the chicken ahead of time; store it separately in the fridge until ready to combine with the sauce. This division not only helps in meal prep but also ensures freshness during cooking.

To maintain quality, avoid mixing sauce and chicken until just before serving. This ensures optimal texture and flavor for the dish. If you’re making ahead for a gathering, assembly tips include choosing a larger baking dish for efficient heating and serving.

Reheating properly is crucial. A slow reheat in the oven can preserve the moistness of the chicken while keeping the sauce creamy. Just a few minutes at a low temperature will rejuvenate the dish beautifully.

Consider fresh element additions when serving—garnish with freshly chopped herbs or add a squeeze of lemon juice for a vibrant finish before serving.

Scaling Instructions

Halving the recipe is straightforward, allowing the flavors to remain intact without any substantial adjustments. Simply divide all ingredients accordingly and follow the same cooking instructions for smaller portions.

When doubling or tripling, make sure to use larger cooking vessels. The cooking time may also vary slightly; always check for doneness to ensure the chicken is fully cooked throughout, especially with larger quantities.

If you need to adjust for larger events, consider timing modifications. Cooking in batches might be necessary to maintain the right texture and consistency across all servings.

Store any leftovers from a larger batch similarly; make sure to label containers with the date to monitor freshness effectively. Avoid letting cooked chicken sit at room temperature for longer than necessary to ensure food safety.

Nutritional Deep Dive

Examining the macro breakdown of this dish reveals a robust source of protein from the chicken, making it a filling option. Additionally, the fats from the creamy sauce contribute significantly to the overall calorie count, providing energy alongside flavor.

In terms of micronutrient analysis, the dish offers calcium from the cheese and various vitamins from the added herbs and spices. Understanding these elements helps with dietary planning and meal considerations for personal goals.

Health benefits include the satiety offered by protein and fat combinations. Portion analysis dictates moderation for balanced nutrition—pairing the dish with vegetables can enhance the fiber content and overall dietary value.

Weight management tips may advise on serving sizes. Keeping portions in check while enjoying the rich flavors can help ensure you savor this dish responsibly.

Dietary Adaptations

For gluten-free adaptations, use gluten-free breadcrumbs in your coating or skip the breading process entirely to maintain flavor while catering to dietary restrictions.

If someone is dairy-free, consider using nutritional yeast and coconut milk as alternatives for a creamy texture without the cheese. Vegan adaptations can include swapping out chicken for chickpeas or mushrooms, creating a satisfying plant-based equivalent.

Low-carb and keto modifications lean toward cauliflower rice instead of traditional sides; this retains the comfort while aligning with specific dietary preferences.

Paleo enthusiasts can omit dairy altogether, enhancing flavors with natural ingredients like avocado and coconut. Low-FODMAP options might focus on using lactose-free cream and avoiding garlic.

For each adaptation, always conduct a taste test, ensuring flavor depth remains intact despite dietary changes.

Troubleshooting Guide

For texture issues, if the sauce is too thick, thin it with a splash of chicken broth or milk until the desired consistency is achieved. Conversely, if it’s too thin, allow it to simmer a bit longer to evaporate excess liquid.

If the flavor balance feels off, a dash of salt or acid from lemon juice can brighten the dish beautifully. Ensure to adjust seasoning gradually to avoid overpowering flavors.

Temperature problems during cooking can arise; always preheat your pan to help achieve that beautiful sear on the chicken. Additionally, using a meat thermometer ensures chicken is cooked through safely.

For equipment challenges, be aware of the materials of your cookware; certain pans retain heat better than others, affecting cooking times.

Ingredient substitutions can alter the final taste; always note the flavor profiles of alternatives to prevent unwanted surprises. When time is limited, look for ready-made sauces that can replicate the final flavor more easily than crafting from scratch.

Timing concerns often arise with meal prep; start with the item that takes the longest to cook first to streamline the process effectively.

Recipe Success Stories

The community feedback for the Creamy Texas Roadhouse Smothered Chicken has been overwhelmingly positive, with many home cooks sharing their successful adaptations. Readers have noted how they swapped ingredients to fit their family’s preferences, resulting in equally delicious variations.

Variation successes have emerged from using different sauces and cheeses, with many claiming that experimenting has produced remarkable results. Such user-submitted stories enforce the flexibility of the recipe and encourage others to explore new flavor bounds.

Adaptation stories often highlight the ease of transforming this dish into a healthier option without compromising flavor, which demonstrates the recipe’s versatility for different diets.

Readers also suggest taking stunning photos to capture the visual appeal of the dish, encouraging others to recreate similar beautiful presentations at home.

Photography tips shared among the community indicate that natural lighting and simple plating techniques can enhance the visual stories of wonderful home-cooked meals.

Frequently Asked Questions

Q: Can I prepare the creamy sauce ahead of time?
A: Yes! Preparing the sauce ahead of time can deepen the flavors. Just reheat it gently before serving.

Q: What sides go well with this dish?
A: Popular sides include mashed potatoes, rice pilaf, or a fresh green salad to balance the richness of the chicken.

Q: How can I store leftovers?
A: Store leftovers in an airtight container in the fridge for 3-4 days, ensuring quick reheats while maintaining quality.

Q: Can I make this recipe spicy?
A: Absolutely! Add sliced jalapeños or a pinch of cayenne pepper to the sauce for an exciting kick.

Q: What cheese works best in the sauce?
A: Cheese options like cheddar or Monterey Jack melt beautifully into the creamy sauce, enhancing flavor and texture.

Q: Is this dish kid-friendly?
A: Yes! The creamy cheese and tender chicken are generally very appealing to children and can be adapted to their liking.

Q: How do I prevent the chicken from drying out?
A: Cooking at medium heat and avoiding overcooking helps retain the chicken’s juicy texture, ensuring it remains delicious.

Q: Can I freeze the cooked dish?
A: Yes, this dish freezes well! Ensure it’s cooled and stored in airtight containers for up to three months.

Q: What can I substitute for chicken?
A: To substitute chicken, consider using turkey, plant-based substitutes, or even hearty vegetables for a vegetarian option.

Q: Is it possible to make a healthier version of this recipe?
A: Yes! Use lean chicken breasts, low-fat dairy options, and increase the vegetable content to make it lighter while keeping it satisfying.

Additional Resources

Explore related recipes that feature Mexican, Italian, or even Asian-inspired flavor profiles that resonate well with the comforting elements of smothered chicken.

Technique guides that detail grilling methods, sauce-making, or cheese melting can deepen your cooking skills and improve the outcomes of various dishes.

Ingredient information on herbs, spices, or proteins allows for a broader understanding of what each adds to your meals.

Recommendations for kitchen equipment that can enhance cooking experiences are valuable, particularly for first-time cooks venturing into engaging appetizers or main courses.

Seasonal variations of dishes provide opportunities to explore fresh flavors and ingredients throughout the year, making meals diverse and exciting.

Join the Conversation

Engagement on social media platforms can build a culinary community around this recipe. Share your creations and modifications, inspiring others to try and enjoy this delightful dish.

Photography tips and techniques can enhance shares, making your posts stand out and inviting others to recreate similar meals at home.

Encourage recipe reviews where readers share their experiences, tips, and favorite pairings. This interaction can enrich the cooking process and encourage recipe adaptations.

Discussion around variations can generate new recipe ideas, encouraging a creative cooking atmosphere for all involved.

Lastly, community engagement fosters a supportive environment where home cooks of all levels can flourish, sharing their love for creating delicious meals.

The Recipe

Creamy Texas Roadhouse Smothered Chicken

Serves: 4

Prep Time: 15 mins

Cook Time: 25 mins

Total Time: 40 mins

Kitchen Equipment Needed

  • Skillet
  • Baking Dish
  • Meat Thermometer
  • Cutting Board
  • Knife

Ingredients

  • 4 boneless, skinless chicken breasts
  • 1 cup heavy cream
  • 1 cup shredded cheddar cheese
  • 1/2 cup cooked bacon, crumbled
  • 1 tablespoon garlic powder
  • 1 tablespoon paprika
  • Salt and pepper to taste
  • 2 tablespoons olive oil
  • Fresh parsley for garnish

Directions

  1. Preheat your oven to 375°F (190°C).
  2. Season the chicken breasts with garlic powder, paprika, salt, and pepper.
  3. Heat olive oil in a skillet over medium-high heat and sear the chicken for 5-7 minutes on each side until golden brown.
  4. Transfer the chicken to a baking dish and set aside.
  5. In the same skillet, reduce heat and add the heavy cream, stirring continuously until it begins to thicken.
  6. Stir in shredded cheddar cheese until melted and creamy.
  7. Pour the cheese sauce over the chicken breasts and sprinkle crumbled bacon on top.
  8. Bake in the oven for 20-25 minutes until the chicken is cooked through.
  9. Garnish with fresh parsley and serve hot.

Recipe Notes

  • For a lighter version, you can substitute heavy cream with half-and-half or a dairy-free alternative.
  • Feel free to experiment with spices; cayenne pepper or Italian seasoning can add another layer of flavor.
  • This dish can be prepared ahead of time; simply reheat the sauce and chicken before serving.

Delicious Slow Cooker Pineapple Pork Loin Recipe for Dinner

Slow Cooker Pineapple Pork Loin: A Tropical Twist on a Classic

⚖️
Difficulty
Easy

⏲️
Prep Time
15 mins

🕒
Cook Time
6 hours

⏱️
Total Time
6 hours 15 mins

🍽️
Servings
6

If you’re looking for a comforting dish that brings a taste of the tropics to your dining table, look no further than this Slow Cooker Pineapple Pork Loin. This recipe balances the savory flavors of tender pork with the sweetness of pineapple, creating a deliciously satisfying meal. The slow cooker does all the work, infusing the meat with the rich and juicy pineapple flavor that makes each bite a memorable experience.

This Slow Cooker Pineapple Pork Loin is not just easy to make; it also fills your home with an irresistible aroma that will have everyone eagerly anticipating dinner. Imagine succulent slices of pork loin sprinkled with a tangy pineapple glaze, served alongside fluffy rice or crunchy vegetables. This dish is perfect for family gatherings or a cozy dinner for two, combining convenience with delightful taste.

Quick Recipe Highlights

  • Flavor Profile: A captivating combination of savory and sweet, the pork loin is beautifully complemented by pineapple and a tangy sauce.
  • Texture: The pork is melt-in-your-mouth tender, paired with juicy pineapple pieces that create a delightful contrast.
  • Aroma: The dish is aromatic with hints of garlic and ginger, harmonizing perfectly with the tropical scent of the pineapple.
  • Visual Appeal: The bright yellow and golden hues from the pineapple create an inviting presentation on the plate, making it visually appealing.
  • Skill Level Needed: This recipe is simple enough for beginners, requiring minimal prep skills while yielding impressive results.
  • Special Equipment: You’ll need a slow cooker for this recipe, which makes hands-free cooking a breeze.

Recipe Overview

  • Difficulty Level: This recipe is rated easy, making it accessible for home cooks of all skill levels. With only a few ingredients and simple instructions, you’ll be able to create a delicious meal.
  • Category: This dish fits perfectly in the “Main Course” category, suitable for any dinner setting from family meals to friendly get-togethers.
  • Cuisine: Influenced by Asian flavors, this recipe highlights how pineapple can enhance savory meats, a technique commonly found in Hawaiian and tropical cuisines.
  • Cost: The ingredients are budget-friendly, costing approximately $15-$20 for a delicious meal that serves six people!
  • Season: This dish shines in both summer and winter, providing a warm, comforting meal in colder months while offering a fresh, tropical taste in the warmer months.
  • Occasion: Great for weeknight dinners, holiday meals, or social gatherings, this recipe elevates any occasion with its delightful flavors.

Why You’ll Love This Recipe

There’s so much to adore about Slow Cooker Pineapple Pork Loin! Firstly, the harmonious blend of sweet and savory creates an explosion of flavors that tantalizes your taste buds. The succulent pork, glistening with the pineapple glaze, promises a taste experience that is both comforting and exciting. This dish delivers an impressive feast with minimal effort, making it a perfect choice for busy weeknights or when hosting guests.

In addition to its flavor, the convenience factor of using a slow cooker can’t be overstated. Simply toss the ingredients in at the start of your day, and return to a home infused with delicious scents! The ultra-tender pork loin practically falls apart, ensuring that every bite is juicy and flavorful. This ease of preparation allows you to spend more time enjoying dinner and less time in the kitchen.

Nutritionally, this dish is a winner! The pineapple not only adds sweetness and flavor but also packs a punch of vitamin C and other essential nutrients. Pork loin is a lean cut of meat that provides ample protein without excessive fat. This balance makes it a healthier option for a satisfying meal, perfect for those mindful of their dietary choices.

Sharing meals is one of life’s simple joys, and this recipe enhances your social and entertaining moments. The vibrant colors and tantalizing aromas will spark conversations and compliments, providing an atmosphere of warmth and hospitality. It’s a great dish to serve at gatherings where you want to impress without the stress, leaving you free to connect with your loved ones.

Lastly, cost-effectiveness is a major benefit of this recipe. With affordable ingredients and the ability to prepare a meal that serves multiple people, it’s an excellent value for both frequent family dinners and special occasions. Savoring a dish that feels indulgent without breaking the bank is undeniably rewarding.

Historical Background and Cultural Significance

The use of pineapple in savory dishes can be traced back to Polynesian and Hawaiian cuisine, where the fruit’s natural sweetness was often combined with proteins. This approach has heavily influenced contemporary tropical-style cooking. The Slow Cooker Pineapple Pork Loin captures this tradition, showcasing how pineapple can elevate a simple dish to new heights.

Culturally, pork has a significant role in various culinary traditions, often associated with celebration and feasting. From luaus to family gatherings, pork is a favored meat for occasions that bring people together. This recipe embraces that spirit, providing a festive meal that’s bound to be appreciated.

Over time, recipes like this one have evolved, integrating with various culinary influences and techniques. The slow cooking method specifically allows the flavors to deepen and meld beautifully, transforming the dish into something comforting and rich. Pineapple’s versatility in both sweet and savory contexts plays a key role in the dish’s widespread appeal.

Regional variations abound, with different parts of the world offering their unique takes on pork and pineapple dishes. Countries like the Philippines have their own versions, often featuring vinegar and soy sauce, while Hawaiian cuisine leans more into sweet marinades. Each adaptation introduces new flavors, echoing the culinary creativity that surrounds this classic pairing.

Ingredient Deep Dive

Pork loin is a lean cut that is prized for its tenderness and versatility, making it a popular choice in many dishes. Historically, pork has been a staple in various cultures due to its availability and flavorful qualities. Nutritionally, it provides a great source of protein and essential vitamins. When selecting pork loin, look for a fresh piece with a light pink color, avoiding any with dark spots. For best practices, store it in the refrigerator and cook within 3-5 days.

Pineapple, a tropical fruit, is not just delicious but also packed with health benefits. Rich in vitamin C and antioxidants, it supports immune health and digestion. When choosing a pineapple, pick one that feels slightly soft at the stem and has a fragrant aroma. Fresh pineapple can be stored in the fridge for a few days, while uncut ones can sit at room temperature until ripe. For substitutions, canned pineapple can provide a similar flavor but may have added sugars.

Common Mistakes to Avoid

  • **Overcooking the pork:** Slow cooker times can vary, so check the pork for doneness. Overcooked pork can become dry and less enjoyable.
  • **Not seasoning adequately:** While the pineapple adds sweetness, it also needs a balance of salt and spices to enhance the flavor.
  • **Using canned pineapple in syrup:** Opt for natural juice or fresh pineapple to prevent excessive sweetness and improve flavor balance.
  • **Skipping the browning step:** Searing the pork before slow cooking adds depth of flavor through caramelization.
  • **Not allowing the meat to rest:** Let your pork rest before slicing to retain juices, ensuring each bite is tender and moist.
  • **Inadequate liquid in the slow cooker:** Always ensure your cooker has enough liquid to maintain moisture during cooking.
  • **Choosing the wrong cut of meat:** Ensure you use pork loin or similar cuts, as fatty cuts can produce grease rather than tender meat.
  • **Ignoring the slow cooker size:** Ensure your cooker is large enough to accommodate the size of your pork loin for proper cooking.

Essential Techniques

Browning your pork loin before slow cooking is crucial for achieving a rich, complex flavor. Heat a bit of oil in a skillet until shimmering, then sear each side of the meat until golden brown. This step helps develop a depth of flavor that will infuse your final dish. Watch for a nice caramelized crust, which indicates you’re on the right track.

Maintaining the right slow cooking temperature is also vital. Cooking on low allows the pork to become ultra-tender as it slowly breaks down the connective tissues. Make sure to cover the slow cooker during cooking to keep moisture in, and avoid lifting the lid too often, as this can extend the cooking time significantly.

Pro Tips for Perfect Slow Cooker Pineapple Pork Loin

1. **Use fresh pineapple:** Fresh fruit provides a burst of flavor and better texture than canned options.
2. **Don’t skip the searing:** Searing the pork before slow cooking enhances depth and flavor, creating a robust base for your dish.
3. **Let flavors meld:** For best results, let your crock pot meal sit for at least 10 minutes after cooking, allowing the flavors to deepen.
4. **Pair with rice or quinoa:** Serving with starch absorbs the flavorful juices and rounds out the meal.
5. **Customize with spices:** Get creative with spices such as ginger, cayenne, or cilantro to elevate the flavor profile.
6. **Consider adding vegetables:** Add sliced bell peppers or carrots in the slow cooker for added nutrition and flavor.
7. **Avoid overcooking:** Always monitor your cook time, checking near the end to ensure perfect tenderness without drying out.
8. **Serve with a fresh garnish:** Fresh cilantro or green onions as a garnish brighten the flavors and add visual appeal.

Variations and Adaptations

For a regional twist, consider incorporating teriyaki sauce instead of the standard glaze for an Asian-inspired flavor. Seasonal adaptations can include adding sliced apples or pears in the fall for a cozy touch. If you’re looking for dietary modifications, swap the pork loin for a vegan protein such as jackfruit for a similar sweet and savory experience.

Flavor variations can include experimenting with different marinades, such as barbecue for a smoky touch, while texture modifications could involve adding the fruit towards the end of the cooking process for a firmer bite. When it comes to presentation alternatives, serve the pork on a bed of sautéed greens for a healthy visual twist.

Serving and Presentation Guide

Presentation is key in elevating your dish. Start by slicing the pork loin into medallions and arranging them on a colorful platter. Drizzle the pineapple sauce over the top and garnish with fresh cilantro or parsley to bring in a pop of color. Consider using a rustic wooden board for a farm-to-table feel, or a white plate for a clean, sophisticated touch.

Pair the dish with a grain like jasmine rice or a bed of quinoa to enhance tenderness, aligning with the tropical theme. Serve alongside colorful vegetables like roasted bell peppers or a green salad for added texture and freshness. Remember, temperature matters—serve the pork warm to ensure the best flavor and tenderness.

Wine and Beverage Pairing

When it comes to selecting the best wines to complement your Slow Cooker Pineapple Pork Loin, consider a light-bodied white wine such as Sauvignon Blanc or a semi-sweet Riesling. The acidity in these wines balances the sweetness of the pineapple, enhancing the overall dining experience.

For non-alcoholic alternatives, consider a fresh, tropical fruit punch or lightly flavored sparkling water with lime for a refreshing accompaniment. If the dish includes spicy elements, a smooth, creamy iced tea can also provide relief and enhance the meal.

Storage and Shelf Life

To preserve the quality of your Slow Cooker Pineapple Pork Loin, store it in an airtight container in the refrigerator for up to 3-4 days. Ensure that it cools completely before sealing to avoid moisture build-up, which can lead to spoilage. If you want to extend its lifespan, freeze leftovers in labeled containers for up to 3 months.

When reheating, do so slowly to maintain texture and flavor. For best results, use an oven or stovetop rather than a microwave, which can dry out the meat. If you notice signs of spoilage such as an off odor or discoloration, it’s best to discard the dish.

Make Ahead Strategies

For those busy days, consider prepping your Slow Cooker Pineapple Pork Loin ahead of time. You can marinate the pork overnight in advance, allowing the flavors to really develop. Store the marinated pork in the refrigerator, and simply transfer it to the slow cooker in the morning.

If you’re preparing for a gathering, consider cooking the dish a day ahead and letting the flavors meld overnight in the fridge. Just reheat it gently before serving, adding a splash of water or broth to maintain moisture. Freshly diced herbs or a squeeze of lime can bring a refreshing note when you serve it.

Scaling Instructions

If you want to halve the recipe, simply divide the ingredient amounts by two. Adjust the cook time accordingly, checking for doneness earlier. For doubling the recipe, ensure your slow cooker is large enough to accommodate the increased volume, and you may need to increase the cook time slightly to ensure even cooking.

When scaling up, keep an eye on the temperature of the meat to prevent it from overcooking. Furthermore, consider fractionating the method, cooking in batches if necessary to maintain optimal flavor and texture.

Nutritional Deep Dive

Analyzing the nutritional profile of your Slow Cooker Pineapple Pork Loin reveals a well-balanced meal. Each serving provides a solid source of protein—essential for muscle growth and repair—while the pineapple adds essential vitamins and antioxidants that enhance overall health.

It’s also moderate in calories, making it suitable for weight management. The presence of dietary fiber from added vegetables helps promote digestion and satiety. For those watching their sodium intake, consider reducing the amount of soy sauce or other salty ingredients.

Dietary Adaptations

For gluten-free options, swap soy sauce for tamari, a gluten-free alternative. Dairy-free individuals will find this recipe friendly, as it naturally contains no dairy ingredients. If promoting a vegan lifestyle, consider using meat substitutes such as jackfruit, which mimics the texture of pulled pork.

Those following a low-carb or keto diet may use cauliflower rice as an alternative instead of regular rice, while paleo enthusiasts can enjoy this recipe as it uses all-natural ingredients. Always check labels for additives that may conflict with specific dietary regulations.

Troubleshooting Guide

If you encounter texture issues, such as tough pork, it may be an indication of overcooking or improper cut choice. Always use pork loin for tender results and adjust cook times. If the dish is too sweet, balance the flavor with a splash of vinegar or lime juice to cut through the sugar.

Flavor balance can be adjusted post-cooking with additional spices or herbs to deepen the profile. Temperature issues often arrive from inconsistent slow cooker settings; always monitor and adjust accordingly.

Ingredient substitutions can lead to variations in final taste and texture, so plan carefully when switching out components. Finally, timing errors can happen; ensure you always check for doneness periodically, especially if you’re unfamiliar with your slow cooker’s idiosyncrasies.

Recipe Success Stories

Readers of this recipe have shared numerous accolades for the wonderful flavor and simplicity of this dish. Many have highlighted the joy of sharing the meal with family, with children particularly enjoying the sweetness of the pineapple. Adaptations such as substituting pork with chicken or turkey have also proven successful among those looking for alternatives.

Community feedback showcases the dish’s reliability during potlucks and gatherings, as attendees frequently request the recipe. Photography tips shared by readers suggest focusing on plating to highlight the juicy slices of pork alongside the bright, colorful pineapple, enhancing the overall presentation for social media sharing.

Frequently Asked Questions

Can I use a different cut of pork?

Absolutely! Cuts like pork shoulder or tenderloin can be used, though cooking times may vary. Ensure they are cooked until tender for the best results.

What if I don’t have a slow cooker?

You can adapt the recipe for an oven. Sear the pork, then place it in a covered baking dish with pineapple and sauce in a low oven (around 300°F) for several hours.

Can I prepare this dish in advance?

Yes! You can prepare and marinate the pork ahead of time. Allow it to sit in the marinade overnight before cooking for enhanced flavor.

Is this dish freezer-friendly?

Yes! Leftovers can be frozen for up to 3 months. Just make sure it’s fully cooled before storing in airtight containers.

How can I make this recipe spicier?

Add red pepper flakes or jalapeños to the slow cooker for an extra kick; adjust according to your preferred spice level.

What can I serve with this dish?

Jasmine rice, quinoa, steamed vegetables, or a fresh salad make excellent sides that complement the sweet and savory flavors of the pork.

Can I use frozen pork loin?

It’s best to thaw the pork loin completely before cooking to ensure even cooking and proper flavor absorption.

What other fruits can I use?

Try substituting with peaches, mangoes, or apricots for different flavor profiles that will still pair wonderfully with pork.

How do I know when the pork is done cooking?

The pork should reach an internal temperature of 145°F. Use a meat thermometer for the most accurate reading.

Can I modify this recipe for different diets?

Certainly! This recipe can be made gluten-free, dairy-free, or paleo-friendly by substituting specific ingredients as needed.

How long can I keep leftovers?

Store leftovers in the fridge for up to 3-4 days. Monitor for any off smells or changes in appearance before consuming.

Additional Resources

If you’re excited to further explore the world of slow cooker recipes, consider trying related dishes like Slow Cooker BBQ Ribs or Slow Cooker Teriyaki Chicken. These recipes utilize similar techniques and showcase how versatile slow cooking can be.

For more ingredient information, check out our guide on various types of pork cuts or explore ways to select the freshest produce at your local market. If you’re interested in mastering more slow cooker techniques, our technique section covers everything from searing to simmering, ensuring you enjoy the best results every time.

Join the Conversation

Engaging with our recipe community is a delightful experience! We invite you to share your photography tips and unique adaptations on social media using the hashtag #PineapplePorkLoin. We’d love to hear your experiences, suggestions, and what variations you’ve created.

By sharing your successes and tips, you contribute to a community of culinary enthusiasts who share a passion for delicious food. Don’t forget to leave your feedback on this recipe and inspire others with your own twists on this delightful dish!

The Recipe

Slow Cooker Pineapple Pork Loin

Serves: 6

Prep Time: 15 mins

Cook Time: 6 hours

Total Time: 6 hours 15 mins

Kitchen Equipment Needed

  • Slow cooker
  • Skillet (for searing)
  • Meat thermometer
  • Chopping board
  • Knife

Ingredients

  • 2 lbs pork loin
  • 1 cup fresh pineapple chunks (or canned pineapple in juice)
  • ½ cup soy sauce
  • ¼ cup brown sugar
  • 3 cloves garlic, minced
  • 1 tablespoon ginger, grated
  • 1 tablespoon cornstarch (optional for thickening)
  • 1 tablespoon water (optional for cornstarch)

Directions

  1. Heat a skillet over medium-high heat and add a tablespoon of oil. Sear the pork loin on all sides until browned.
  2. Combine soy sauce, brown sugar, minced garlic, and ginger in a bowl. Mix well.
  3. Place the seared pork loin in the slow cooker and pour the soy sauce mixture over it. Add the pineapple on top.
  4. Cover and cook on low for 6 hours or until the pork is tender and the internal temperature reaches 145°F.
  5. If you prefer a thicker sauce, mix cornstarch with water and add it to the slow cooker during the last hour of cooking.
  6. Remove the pork from the slow cooker, slice, and serve with the sauce and pineapple over rice or quinoa.

Recipe Notes

  • For extra flavor, marinate the pork overnight in the soy sauce mixture.
  • Feel free to add vegetables like bell peppers or carrots for additional nutrition.
  • This dish pairs beautifully with a side of jasmine rice or steamed vegetables for a complete meal.