Delicious Creamy Italian Sausage Bow Tie Pasta Recipe

Creamy Italian Sausage with Bow Tie Pasta: A Comforting Delight

⚖️
Difficulty
Easy

⏲️
Prep Time
10 mins

🕒
Cook Time
20 mins

⏱️
Total Time
30 mins

🍽️
Servings
4 servings

Creamy Italian Sausage with Bow Tie Pasta is a dish that promises comfort and satisfaction in every bite. This delightful recipe brings together flavorful Italian sausage, perfectly cooked bow tie pasta, and a rich, creamy sauce that makes it an instant favorite among families and friends. Imagine sitting down to a plate of tender pasta enveloped in a velvety sauce, with the aromatic spices of Italian sausage warming your taste buds. This meal is perfect for weeknight dinners, yet special enough to serve during gatherings.

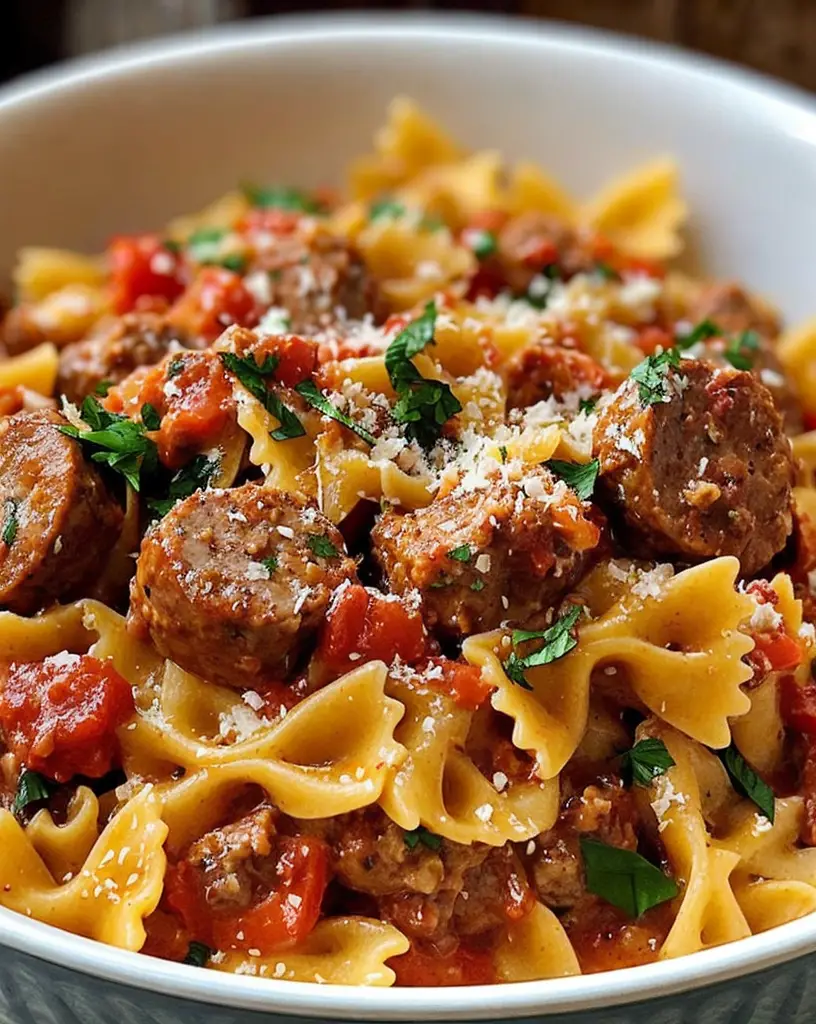
The star of this dish is undoubtedly the sausage, with its savory, robust flavors complemented by the creamy sauce. Each bow tie pasta piece cradles the sauce perfectly, delivering a delightful texture that balances the heartiness of the sausage. The combined fragrance of garlic and herbs wafts through the kitchen, creating an inviting atmosphere that beckons everyone to the dinner table. Whether you are trying to impress guests or simply want a nourishing meal after a long day, this recipe delivers both flavor and ease.

Quick Recipe Highlights

  • Flavor Profile: The dish boasts a delightful blend of savory Italian sausage, rich cream, and aromatic spices that make every bite a flavor explosion.
  • Texture: The bow tie pasta’s unique shape provides a satisfying chew, while the creamy sauce adds a smooth finish that coats each piece perfectly.
  • Aroma: The combination of garlic, herbs, and sausage creates an irresistible aroma that fills the kitchen as it cooks.
  • Visual Appeal: This dish features vibrant colors from the pasta and a creamy white sauce that invites you to dig in.
  • Skill Level Needed: This recipe is straightforward, making it perfect for novice cooks and busy families alike.
  • Special Equipment: A large pot for cooking pasta and a skillet for the sauce are the only required tools.

Recipe Overview

  • Difficulty Level: Preparing Creamy Italian Sausage with Bow Tie Pasta is relatively easy, making it accessible for cooks at all experience levels.
  • Category: This dish falls under comfort food and pasta meals, perfect for lunches or cozy dinners.
  • Cuisine: Inspired by traditional Italian cooking, this recipe captures the essence of Italian flavors through simple yet rich ingredients.
  • Cost: The recipe is budget-friendly, with ingredients that can usually be found at any grocery store at reasonable prices.
  • Season: Ideal for any season, this recipe warms you up during colder months while remaining satisfying year-round.
  • Occasion: Great for family dinners, casual gatherings, or special occasions when you want to impress without much fuss.

Why You’ll Love This Recipe

Creamy Italian Sausage with Bow Tie Pasta is a feast for the senses. The uniqueness of the bow tie pasta adds an element of fun to the dish, making it visually appealing and enjoyable to eat. Each bite combines the rich, savory flavors of Italian sausage with a smooth, creamy sauce that clings perfectly to the pasta. This comforting dish is an instant crowd-pleaser, offering familiar flavors that evoke warmth and happiness, ideal for sharing with family and friends.

What makes this recipe even more appealing is its convenience. With minimal prep time and easy cooking steps, you can prepare this meal in just 30 minutes. This means you can quickly whip it up on busy weeknights when you may not have time for elaborate meals, yet still want something hearty. The leftovers are just as delicious, allowing you to enjoy this dish multiple times throughout the week, saving both time and effort.

Nutritionally, the dish provides a satisfying balance of carbohydrates and protein. The pasta gives you the necessary energy, while the sausage adds a good source of protein, and the creamy sauce ensures a filling meal that can keep you and your family satisfied. This dish can also be adapted with fresh vegetables, making it easy to incorporate some greens for an extra nutrient boost.

Socially, Creamy Italian Sausage with Bow Tie Pasta holds great value as a dish for gatherings. Its shareable nature makes it perfect for potlucks, and its deliciousness often leads to compliments from guests. You can serve it with a simple salad and bread, turning this recipe into a delightful meal that everyone will remember long after the plates are cleared.

Furthermore, this recipe is incredibly cost-effective. The ingredients are easily accessible and inexpensive, providing an affordable way to prepare a delicious meal. This makes it a great choice for families looking to enjoy a heartwarming dish without breaking the bank, establishing it as a staple in your weekly meal planning.

Historical Background and Cultural Significance

Creamy Italian Sausage with Bow Tie Pasta has roots in Italian culinary traditions, where pasta and hearty dishes have been central to family meals for centuries. While the exact origin of this particular preparation is hard to pinpoint, it draws inspiration from classic Italian pasta recipes that use local ingredients. The use of sausage in this dish highlights the historic significance of regional meats in Italian cooking, where every family might have their variation.

The dish showcases Italian comfort food principles, focusing on simplicity, flavor, and nourishment. In Italy, pasta is more than just a meal; it represents a cultural pillar where families gather at the dinner table, sharing love and conversation. Creamy sauces often accompany pasta dishes, enhancing the overall eating experience and evoking the satiety associated with authentic Italian home cooking.

As recipes evolved, adaptations emerged based on the availability of ingredients and regional preferences. This dish combines traditional Italian sausage with creamy sauces that became popular in various adaptations of Italian cuisine outside of Italy. Over the years, it has transformed into a beloved favorite in home kitchens across the globe, demonstrating why Italian cuisine resonates so well with diverse cultures.

Some regional variations might incorporate local vegetables, cheeses, or spices, emphasizing the adaptability of this dish. In many homes, especially in the U.S., variations of Italian sausage recipes are popular and often adjusted with items on hand, reflecting not only individual tastes but also the community’s culinary landscape, showing the blend of tradition and innovation still at play today.

Ingredient Deep Dive

Italian Sausage: Italian sausage is a flavorful addition to many pasta dishes. This versatile meat is seasoned with a medley of spices, including fennel, which adds a distinctive taste. The use of pork sausage reflects Italy’s agricultural history, where pig farming is a predominant practice. Nutritionally, it’s a great source of protein; however, one should opt for leaner varieties to keep fat content in check. When selecting sausage, look for high-quality brands with natural ingredients, and store them in the refrigerator. For those looking for alternatives, turkey or chicken sausage works as a lighter option.

Bow Tie Pasta: Bow tie pasta, or farfalle, is not only adorable in shape but also holds sauce remarkably well. This pasta type has roots in Northern Italy and is often used in salads and creamy dishes alike. Its unique shape allows it to trap the creamy sauce, ensuring each mouthful is packed with flavor. When choosing pasta, look for durum wheat varieties for better texture. They can be stored in a cool, dry place, and cooked al dente for the best results. For gluten-free options, there are excellent alternatives made from rice or chickpea flour available.

Cream: Cream is the key ingredient that provides a luxurious, velvety texture to the sauce. While heavy cream is traditionally used, it can be substituted with half-and-half or even Greek yogurt for a healthier twist. Its history in Italian cooking dates back centuries when dairy products were readily available. Cream is a good source of fat-soluble vitamins, though it’s best to consume it in moderation. Always keep cream refrigerated and use it before the expiration date. Non-dairy alternatives, such as coconut cream or cashew cream, can also be used for a lighter dish.

Common Mistakes to Avoid

  • Overcooking Pasta: It’s important to cook the pasta al dente. Overcooking will lead to mushy pasta that won’t hold the creamy sauce well.
  • Skimping on Seasoning: Proper seasoning is crucial. Don’t shy away from adding salt and pepper to both the sausage and the sauce for full flavor.
  • Using Cold Ingredients: For best results, let cream and other refrigerated ingredients come to room temperature before adding them to the pan to achieve a smooth sauce.
  • Not Draining Pasta Well: It’s essential to reserve some pasta water when draining, just in case you need to thin out the sauce later.
  • Skipping the Sauté: Always sauté garlic and onions before adding it to the sauce for depth of flavor; this step shouldn’t be rushed.
  • Adding Cream Too Early: Wait until just before serving to add the cream to prevent curdling and maintain a nice consistency.
  • Neglecting to Taste: Always taste your sauce before serving. Adjust seasonings as needed to enhance the dish’s flavors.
  • Not Incorporating Pasta Water: Use reserved pasta water to adjust the sauce’s consistency if it becomes too thick, ensuring it adheres well to the pasta.
  • Overcrowding the Pan: Give the sausage room to brown properly. Crowding it can lead to steaming instead of browning.
  • Focusing Solely on Recipe: Feel free to adjust the recipe based on personal preferences; cooking should be enjoyable and open to interpretation!

Essential Techniques

Cooking Pasta: Cooking pasta correctly is essential for achieving the desired texture. Always use ample water, allowing it to come to a rolling boil before adding the pasta. Stirring occasionally and tasting for doneness are crucial steps that prevent overcooking. A visual cue for perfectly cooked pasta is a slight bite to the texture when chewed, known as al dente.

Sautéing Aromatics: Sautéing garlic and onion is key to building flavor in your sauce. Start with a hot pan to ensure the aromatics don’t get soggy. Monitor the cooking process, as garlic can quickly burn; you want it fragrant and slightly golden, leading to a beautifully layered flavor profile.

Making a Cream Sauce: Crafting a creamy sauce can elevate your dish. Begin by melting butter and adding heavy cream while stirring continuously. A gentle heat prevents curdling and allows the sauce to emulsify. To master this technique, look for a smooth, consistency as the sauce thickens to coat the back of a spoon.

Pro Tips for Perfect Creamy Italian Sausage with Bow Tie Pasta

1. For an extra depth of flavor, consider adding a splash of white wine to deglaze the pan after browning the sausage before mixing in the cream.

2. If you enjoy a touch of heat, add crushed red pepper flakes to the sausage as it cooks, infusing a spicy kick to the dish.

3. Fresh herbs, such as basil or parsley, can enhance the freshness of the creamy sauce. Add them just before serving for a vibrant finish.

4. Incorporate spinach or other leafy greens into your dish to boost its nutritional value while adding a pop of color.

5. For a nuttier flavor, consider grating some Parmigiano-Reggiano cheese into your sauce, enriching its creamy texture.

6. Experiment with different shapes of pasta; while bow tie is delightful, other varieties enhance the dish’s presentation and texture.

7. Always reserve a little bit of pasta water to help adjust the sauce’s thickness and achieve the perfect consistency.

8. Allow the dish to rest for a few minutes after plating. This allows the flavors to meld together beautifully.

Variations and Adaptations

This dish can be personalized in numerous ways, making it versatile for any palate. For those who prefer a lighter option, substituting light cream or Greek yogurt can cut down on calories while maintaining a deliciously creamy sauce. When preparing for a hearty meal, consider adding vegetables like bell peppers, zucchini, or mushrooms, melding beautifully with the existing flavors and boosting nutritional content.

If you want to explore different regional variations, try using chorizo in place of Italian sausage for a robust flavor blend reminiscent of Spanish flair. Incorporating seasonal vegetables allows the recipe to adapt throughout the year; for example, use asparagus in the spring or pumpkin in the fall for a unique twist.

For those with dietary restrictions, modifying the ingredients to fit gluten-free or dairy-free diets becomes straightforward. Zucchini noodles can serve as a great alternative to pasta, while coconut cream can replace heavy cream for a satisfying vegan-friendly version that doesn’t compromise on taste.

When it comes to presentation, consider serving the dish in a family-style presentation in an attractive baking dish, or plating individual servings with a sprinkle of fresh herbs for a restaurant-style touch.

Serving and Presentation Guide

Plating is an essential part of the dining experience. For Creamy Italian Sausage with Bow Tie Pasta, consider using a wide, shallow bowl that allows the dish to shine. Twirl the pasta into a mound, placing the sausage and sauce generously atop without overwhelming the presentation.

Garnishing suggestions include a sprinkle of freshly grated Parmesan cheese or cracked black pepper to enhance the visual appeal. You can also add a sprig of fresh basil or parsley to bring a fresh color contrast.

Traditional accompaniments involve a simple side salad or garlic bread, inviting a balance to the meal without overshadowing the flavors of the main dish. For modern serving, consider pairing the pasta with a light, crisp white wine or a refreshing sparkling water with a wedge of lemon for a delightful contrast.

Serving temperature is also critical; this dish is best enjoyed hot, so consider warming plates before serving. Furthermore, portion control can be managed by using smaller bowls to ensure guests can enjoy multiple courses without feeling overwhelmed.

Wine and Beverage Pairing

Pairing wine with Creamy Italian Sausage with Bow Tie Pasta adds a delightful dimension to your meal. A crisp Chardonnay complements the richness of the creamy sauce without overpowering it. Alternatively, a light Pinot Grigio works beautifully, enhancing the dish’s flavors while cleansing the palate.

For non-alcoholic alternatives, consider serving sparkling water infused with lemon or cucumber that offers a refreshing contrast to the savory flavors. This not only quenches thirst but adds a sophisticated touch to your dinner table.

If you prefer coffee or tea, a light herbal tea like chamomile might pair well for those who enjoy a caffeine-free option after dinner, providing a soothing finish to the meal.

Temperature considerations are vital in wine pairing; serve white wines chilled to accentuate their crisp notes, while warming slightly in the glass enhances their aromatic qualities.

Storage and Shelf Life

Proper storage of Creamy Italian Sausage with Bow Tie Pasta can significantly extend its shelf life. Store leftovers in airtight containers in the refrigerator for up to 3 days, ensuring they retain their flavor and freshness. Always allow the dish to cool before sealing to prevent condensation, which could lead to spoilage.

When freezing, ensure the dish is cooled, then transfer it to freezer-safe containers or bags. It can be safely frozen for up to 3 months. For thawing, place the container in the refrigerator overnight before reheating.

Signs of spoilage include an off smell, visible discoloration, or an unusual texture. To reheat, warm gently on the stove over low heat, adding a splash of cream or reserved pasta water to revive its creamy consistency. For a quick option, microwave the dish in short intervals, stirring frequently to avoid overheating.

Make Ahead Strategies

To streamline dinner preparation, consider making Creamy Italian Sausage with Bow Tie Pasta ahead of time. Start by preparing the sausage and cream sauce; once cool, store them separately in airtight containers in the refrigerator. This allows you to whip up the pasta just before serving, ensuring it’s freshly cooked and warm.

A good prep timeline involves cooking the sausage mixture the night before, allowing the flavors to meld even better. During mealtime, simply cook the bow tie pasta and combine everything for a delightful dish ready in minutes.

Storage between steps is key; sauce can last up to 3 days in the fridge, while the pasta can be made fresh just before serving. Quality impact is minimal when reheating the sausage mixture, as it retains much of its original flavor profile.

To maintain freshness, allow it to come to room temperature before reheating gently. For the final touch, consider throwing in fresh herbs just before serving to brighten up the flavors and add a touch of vibrancy.

Scaling Instructions

If you’re looking to adjust the recipe for larger gatherings, scaling up is straightforward. Halve or double the quantities of ingredients to suit your needs; each ingredient will generally scale proportionally.

When doubling or tripling, ensure you have appropriate-sized pots and pans to accommodate the increased quantity without overcrowding, which can lead to uneven cooking.

Timing modifications become important; as quantities increase, you may need to extend cooking times slightly, allowing each component ample time to reach the desired temperature and flavor profile.

When storing leftovers, consider separating them out into smaller containers to make reheating easier. Adjustments in sauce ingredient proportions might also be necessary to maintain the intended flavor balance.

Nutritional Deep Dive

Though Creamy Italian Sausage with Bow Tie Pasta is undeniably delicious, understanding its nutritional content ensures you enjoy it responsibly. A typical serving may provide substantial carbohydrates from pasta, a good protein dose from sausage, and fats from the cream.

Analyzing macronutrients reveals that a serving might contain around 25-30 grams of carbs, 15-20 grams of protein, and roughly 20-25 grams of fat, depending on your specific ingredient choices.

Micronutrient analysis is equally vital; the dish contains vitamins A, B6, and C, alongside important minerals like iron and calcium. Awareness of dietary considerations should help in making better choices; for instance, opting for whole grain pasta increases fiber intake.

It’s important to practice moderation, especially with creamy sauces which can be rich in calories. For those looking to manage their weight, controlling portion sizes while enjoying this dish can align with healthy eating habits, allowing for indulgence without guilt.

Dietary Adaptations

For those following a gluten-free diet, consider swapping out traditional pasta for gluten-free options such as chickpea or quinoa pasta. These keep the integrity of the dish while catering to dietary needs.

Dairy-free adaptations can be achieved by substituting heavy cream with coconut cream or cashew cream. These alternatives maintain the creamy texture while accommodating those with lactose intolerance or dairy allergies.

Vegan versions are also achievable by utilizing plant-based sausage alternatives and dairy-free creams. This allows everyone to enjoy the delicious flavors without compromising dietary choices.

Low-carb variations can involve spiralizing zucchini or using cauliflower rice; both provide a substantial base without the carbs of traditional pasta.

Keto and paleo enthusiasts can transform this recipe further by enhancing it with additional non-starchy vegetables and maintaining a focus on whole, unprocessed ingredients.

Troubleshooting Guide

In cooking, issues may arise; you may encounter texture problems, such as sauce being too thick or thin. To resolve thick sauces, add reserved pasta water to adjust consistency. For a thin sauce, gently simmer to reduce excess liquid.

Flavor balance can also be tricky; if the dish is too salty or bland, adjusting seasoning just before serving can revitalize the flavor profile. Adding a touch of acidity, like lemon juice or vinegar, can cut through richness and enhance overall taste.

Temperature problems, whether undercooked or overly hot, can arise; ensure you monitor the cooking process, adjusting heat as needed and using a thermometer for precision.

Equipment challenges may occur, especially when using unfamiliar tools; always read manufacturer instructions first, and ensure proper practices are followed.

Ingredient substitutions may lead to unpredictable outcomes. For best results, stick to suggested replacements and understand how they impact dish dynamics.

Timing concerns often arise when preparing meals for large groups; be sure to prep ingredients well in advance and allow for more cooking time as needed.

Recipe Success Stories

Our readers have shared their enthusiasm for Creamy Italian Sausage with Bow Tie Pasta, highlighting its ability to impress dinner guests effortlessly. Many have noted how simple adjustments transform the dish into unique family favorites with personal twists.

Several cooking enthusiasts have shared their success in adapting the recipe for vegetarian diets, using lentils and mushrooms to mimic the heartiness of sausage without sacrificing flavor. Community feedback emphasizes the importance of balance between tradition and modern adaptations in today’s kitchens.

Photography tips from readers showcase this pasta dish’s visual appeal. They recommend plating it in a rustic bowl, garnished with bright herbs and colorful vegetables to elevate the aesthetic appeal for social media sharing.

Amidst the love for full cream versions, several readers have successfully reduced fat content while maintaining taste, revealing the dish’s flexibility and how it can cater to diverse nutritional goals.

Frequently Asked Questions

Can I make this dish ahead of time?
Yes, the sausage and cream sauce can be prepared in advance and stored separately in airtight containers. Cook the pasta just before serving to ensure the best texture.

What can I use instead of Italian sausage?
If you prefer a milder flavor, ground turkey or chicken sausage can be great substitutes. For a vegetarian version, sautéed mushrooms and lentils can work well.

Can I freeze leftovers?
Yes, Creamy Italian Sausage with Bow Tie Pasta can be frozen for up to three months. Ensure to cool it down before storing it in airtight containers.

How can I adjust the spice level?
You can control the spice by adding crushed red pepper flakes while cooking the sausage or serve some hot sauce on the side for those who prefer a kick.

Is there a gluten-free option?
Absolutely! You can substitute bow tie pasta with gluten-free pasta alternatives such as chickpea or quinoa pasta.

How do I store leftovers?
Leftovers should be stored in airtight containers in the refrigerator for up to three days. Reheat gently on the stove or in the microwave, adding a splash of cream or pasta water.

Can I add vegetables?
Yes! Consider adding zuchinni, bell peppers, or spinach in your creamy sauce for added nutrition and flavor.

Is this dish suitable for meal prep?
Yes, this dish is great for meal prep. Prepare the sauce and sausage in advance and simply cook the pasta when needed.

What wine pairs well with this dish?
A light, crisp Chardonnay or a Pinot Grigio pairs exceptionally well, complementing the creamy flavors without being overpowering.

How do I reheat the dish without losing quality?
Reheat gently over low heat, adding reserved pasta water or additional cream to restore the creamy consistency. Stir occasionally to prevent burning.

Additional Resources

If you’re looking to expand your pasta repertoire, explore other related recipes for ly pasta dishes, sauces, and creative ingredient uses. Technique guides on sautéing, boiling pasta, and making cream sauces can bolster your confidence in the kitchen.

For ingredient information, delve into the world of Italian sausages and discover different types and their unique flavor profiles. Keeping suggestions on equipment recommendations handy can save you time and enhance your cooking experience.

Feel free to experiment with seasonal variations, highlighting fresh ingredients that pair well with creamy sauces, bringing delightful changes to this classic recipe.

Join the Conversation

We’d love to hear from you! Share your Creamy Italian Sausage with Bow Tie Pasta experiences on social media using our hashtag. Include your photos, tips, and variations, inspiring others to try this delightful dish.

Feedback from recipe reviews helps us improve! What did you enjoy most? Were there any adaptations you made? Community engagement builds a vibrant cooking culture, and we encourage sharing your stories as we all strive to create delicious meals together.

The Recipe

Creamy Italian Sausage with Bow Tie Pasta

Serves: 4 servings

Prep Time: 10 mins

Cook Time: 20 mins

Total Time: 30 mins

Kitchen Equipment Needed

  • Large pot for boiling pasta
  • Skillet for cooking sausage and sauce
  • Measuring cups and spoons
  • Wooden spoon for stirring
  • Airtight containers for storage

Ingredients

  • 12 oz bow tie pasta
  • 1 lb Italian sausage
  • 1 cup heavy cream
  • 1 onion, chopped
  • 3 cloves garlic, minced
  • 2 tbsp olive oil
  • Salt and pepper to taste
  • Fresh basil for garnish

Directions

  1. Cook the bow tie pasta according to package directions in a large pot of salted boiling water. Drain and set aside.
  2. In a skillet, heat olive oil over medium heat. Add chopped onion and sauté until translucent, about 5 minutes.
  3. Add minced garlic and cook for an additional minute until fragrant, being careful not to burn.
  4. Add Italian sausage to the skillet, breaking it apart as it cooks. Brown until fully cooked.
  5. Reduce heat and stir in the heavy cream; let simmer for 5-7 minutes until slightly thickened.
  6. Combine the cooked pasta with the sauce and mix to coat evenly. Season with salt and pepper to taste.
  7. Serve immediately, garnished with fresh basil.

Recipe Notes

  • Feel free to add vegetables like spinach or bell peppers for added nutrition.
  • This dish can be made ahead and stored in the refrigerator for up to 3 days.
  • Leftovers can be frozen for up to 3 months; simply reheat before serving.

Savory Slow Cooker Beef and Mushroom Stew Recipe to Try

Slow Cooker Beef and Mushroom Stew: A Comforting Delight

⚖️
Difficulty
Easy

⏲️
Prep Time
15 mins

🕒
Cook Time
6 hours

⏱️
Total Time
6 hours 15 mins

🍽️
Servings
4

Slow Cooker Beef and Mushroom Stew is a hearty dish that you’ll come to crave as the weather turns cooler. This recipe is a perfect blend of tender beef, earthy mushrooms, and rich gravy, creating a symphony of flavors in your mouth. The beauty of this stew lies in its simplicity, requiring minimal effort while making a meal that warms your heart and fills your belly. Each bite is imbued with a deep umami flavor, thanks to the combined taste of beef and mushrooms simmered for hours. It’s the ultimate comfort food that can be enjoyed on a cold winter day or shared with family and friends at any occasion.

The slow cooking process ensures that every ingredient melds perfectly, resulting in succulent meat and mouthwatering vegetables enriched by an aromatic broth. You’ll love the appearance of this dish as much as its flavor; the vibrant colors of the vegetables contrast beautifully with the dark, savory gravy. Perfectly paired with crusty bread or steamed rice, this stew is not only comforting but elegant enough for dinner guests.

Quick Recipe Highlights

  • Flavor Profile: A robust blend of tender beef, earthy mushrooms, and aromatic herbs creates a rich and savory experience.
  • Texture: The stew features melt-in-your-mouth beef combined with soft vegetables, making every bite a comforting delight.
  • Aroma: The enticing scent of simmering beef mixed with fresh herbs and spices fills your kitchen, drawing everyone to the dinner table.
  • Visual Appeal: Rich brown gravy envelops the colorful carrots and mushrooms, ensuring that this dish is a feast for the eyes.
  • Skill Level Needed: This recipe is easy to master, making it perfect for novice cooks and seasoned chefs alike.
  • Special Equipment: A reliable slow cooker or crockpot is essential for ensuring optimal flavor and tenderness.

Recipe Overview

  • Difficulty Level: This recipe is classified as easy, accommodating cooks of all skill levels as it doesn’t require precise techniques and allows for plenty of flexibility.
  • Category: It falls under the stew category, making it an ideal choice for hearty main dishes.
  • Cuisine: With influences from classic comfort food traditions, this stew hails from various cultural backgrounds, including Irish and American cuisines.
  • Cost: The recipe is budget-friendly, with common, accessible ingredients that won’t break the bank.
  • Season: Perfect for fall and winter, when the heartiness of the stew offers significant warmth and sustenance.
  • Occasion: Ideal for cozy family dinners or gatherings with friends, making it a versatile choice for numerous occasions.

Why You’ll Love This Recipe

Slow Cooker Beef and Mushroom Stew captures the essence of comfort food. The combination of tender beef and flavorful mushrooms creates an irresistible dish that comforts the soul. Each spoonful transports you to a cozy moment, whether on a chilly evening or bustling family gathering.

The simplicity of preparation is another reason to love this recipe. Just toss all ingredients into your slow cooker, set it, and forget it while you go about your day. When you return, you’ll be greeted by a delightful aroma and a meal that’s practically ready to serve.

Not only is this dish mouthwatering, but it’s also packed with nutritional value. Beef is a great source of protein and essential nutrients, while mushrooms provide additional benefits like antioxidants and vitamins. This dish offers a blend of flavors and nutrition that caters to almost any dietary preference.

For social gatherings, Slow Cooker Beef and Mushroom Stew shines. It encourages communal dining, where everyone ladles their portion from the slow cooker, fostering connections and conversation. It’s perfect for potlucks, holidays, or just a cozy dinner with loved ones.

Finally, the effort-to-reward ratio of this recipe is hard to beat. You can feed a family for a fraction of what you’d pay for takeout, and the ingredient list is both simple and adaptable, ensuring accessibility and affordability for everyone.

Historical Background and Cultural Significance

The origins of beef stew can be traced back centuries, with roots in various global cuisines. Traditionally, stews have served as an efficient way to prepare and preserve meat while extracting flavors from various ingredients and spices. This Slow Cooker Beef and Mushroom Stew draws inspiration from hearty recipes that prioritize comfort and nourishment.

Culturally, stews symbolize togetherness and family. They often represent a communal meal, bringing people together around the table to share conversation and warmth. In many cultures, beef stew is often reserved for colder months or special occasions, reflecting its role as a dish that provides sustenance and comfort.

As times have evolved, so have recipes. While the original beef stew recipes might have featured simpler ingredients, contemporary variations often embrace a mix of exotic spices, vegetables, and cooking techniques. Our Slow Cooker Beef and Mushroom Stew blends these evolving influences, creating a comforting classic.

Regional variations abound as well, with every region adapting the traditional beef stew to reflect local ingredients and flavors. For example, in some European countries, root vegetables feature prominently, while in others, herbs and spices unique to the area lend their character to the dish.

Ingredient Deep Dive

Beef: Beef has been a staple protein in human diets for centuries, rich in protein, iron, and essential B vitamins. When selecting beef for stew, look for braising cuts such as chuck or brisket for their flavor and tenderness when slow-cooked. It’s best stored in the refrigerator and used within a few days to ensure freshness.

Mushrooms: Mushrooms are as versatile as they are nutritious, that can provide various flavors from earthy to meaty. Nutritionally, mushrooms are low in calories, high in fiber, and an excellent source of antioxidants. When purchasing, select firm, unblemished mushrooms, and store them in a paper bag in the fridge to maintain freshness.

Carrots: Carrots contribute sweetness and texture to the stew while adding significant vitamins A and K, which are essential for a balanced diet. Choose firm, bright orange carrots, ensuring they are free of blemishes. Store them in a cool, dark place to extend their shelf life, and consider cutting them into uniform pieces for even cooking.

Onions: Onions play a vital role in enhancing the stew’s flavor profile, imparting sweetness and depth. Nutritionally, onions contain antioxidants and vitamins that may contribute to better heart health. Always opt for firm onions without sprouting, and store them in a cool, dark space to preserve their quality.

Common Mistakes to Avoid

  • Using lean cuts: Opt for tougher cuts like chuck, which become tender when slow-cooked; lean cuts dry out and can be tough.
  • Not browning meat: Skipping browning can lead to a less flavorful stew, as it caramelizes sugars and enhances taste.
  • Overfilling the slow cooker: Max out at about two-thirds full to avoid uneven cooking.
  • Inadequate seasoning: Season layers throughout the cooking process to build complexity in flavor.
  • Adding too much liquid: Reduce initial liquids to allow for evaporation during cooking; adjust as necessary toward the end.
  • Ignoring cook times: Ensure you adhere to recommended cooking times for optimal tenderness and flavor development.
  • Not letting it rest: Allow the stew to rest briefly before serving; flavors meld and improve upon standing.
  • Insufficient vegetable chopping: Cut vegetables uniformly for even cooking and texture.

Essential Techniques

Browning meat is crucial because it enhances flavor through the Maillard reaction, resulting in a richer taste. Ensure your pan is hot and do not overcrowd, allowing for proper browning; this creates a complex flavor base. Watch for a deep brown color, which indicates you’re on the right track.

Layering flavors means adding ingredients at different stages to build complexity; start with aromatics before adding vegetables and broth. This technique allows flavors to develop and infuse throughout the stew, creating depth. Be aware of overcooking any single component that could lose its texture or flavor.

Make sure to taste periodically throughout the process. Adjust seasoning as needed, incorporating salt and spices to suit your preference. A well-seasoned stew is a balanced stew that will please all palates.

Pro Tips for Perfect Slow Cooker Beef and Mushroom Stew

Use high-quality ingredients; the better the quality, the richer the flavor. Select fresh vegetables and well-marbled beef for optimal results.

Consider adding wine or broth instead of water to elevate the flavor base. A splash of red wine introduces acidity and complexity, rounding out the flavor profile.

If you prefer a thicker stew, remove some liquid near the end of cooking and mix it with cornstarch before returning it to the pot. This helps you achieve your desired consistency swiftly.

Experiment with herbs like thyme or bay leaves during cooking; they infuse your broth with distinct flavors as they simmer.

For added richness, finish your stew with a pat of butter or a dollop of cream; both can enhance the mouthfeel and overall taste.

Allowing the stew to cool before refrigerating enhances the flavors. The longer it sits, the better it gets as flavors meld and develop.

Experiment with serving options, adding sides like crusty bread or mashed potatoes to round out the meal and enhance satisfaction.

Variations and Adaptations

This recipe is incredibly versatile, inviting you to explore regional variations. For instance, adding parsnips or potatoes can create a heartier dish with different textures.

Seasonal adaptations can include adding squash in the fall or spinach in spring for a fresh twist, adapting to what’s in season and available locally.

For dietary modifications, try substituting beef with plant-based proteins like mushrooms or hearty lentils for a vegetarian-friendly version.

You can also explore flavor variations by adding spices such as smoked paprika or a splash of balsamic vinegar for an unexpected zing or experimenting with different herbs.

Texture modifications could involve adding barley or quinoa for a more wholesome texture, creating a unique experience while keeping the dish nourishing.

For presentation alternatives, serve the stew in charming individual ramekins or rustic bowls, enhancing the dining experience with a personal touch.

Serving and Presentation Guide

Plating is essential when serving your Slow Cooker Beef and Mushroom Stew. Use shallow bowls to showcase the stew’s vibrant ingredients. A drizzle of the rich gravy over the top enhances visual appeal.

Garnish with fresh herbs, such as parsley or thyme, to add color and freshness, elevating the dish’s presentation. Pair with fresh crusty bread or garlic bread to balance the meal and provide an excellent contrast to the stew.

Serving temperature is integral; ensure your stew is piping hot. A warmed plate also enhances the meal experience, allowing the flavors to resonate fully.

Portion control is essential when serving. Consider using a ladle to ensure even servings, allowing guests to return for more if desired, promoting a community spirit at the table.

Wine and Beverage Pairing

When selecting wine to enjoy with your Slow Cooker Beef and Mushroom Stew, opt for a hearty red wine like Cabernet Sauvignon or Merlot. These wines complement the richness of the beef and enhance the stew’s deep flavors.

Non-alcoholic alternatives can include a robust herbal tea or sparkling water with fresh lemon, offering a refreshing contrast to the meal.

If you prefer coffee or tea, consider serving a rich black coffee or a mild herbal tea that won’t overpower the flavors present in the stew, enhancing the dining experience.

Serving suggestions should include temperatures; keep wine at a cool room temperature for optimal taste enhancement.

Storage and Shelf Life

Store any leftover Slow Cooker Beef and Mushroom Stew in an airtight container in the refrigerator. It typically lasts 3-4 days, allowing you to enjoy the leftovers for a quick meal.

For longer preservation, consider freezing the stew in portion-sized containers. It can retain quality for up to 3 months in the freezer.

When reheating, ensure you gradually warm the stew either on a stovetop or in a microwave, adding a splash of water or broth to adjust consistency while maintaining moisture.

Be on the lookout for signs of spoilage; if the stew develops an off smell, color changes, or unusual texture, it’s best to discard it.

Make Ahead Strategies

To save time, you can make this stew in advance. Prepare your ingredients the day before and store everything in the fridge, ready to toss into the slow cooker after your busy day begins.

After cooking, let the stew cool completely before storing it; this helps keep it fresh and reduces the risk of bacterial growth during refrigeration.

Consider the quality of ingredients; if possible, purchase fresher items the day prior to make the dish that much more appealing.

For quick assembly, store prepared vegetables and meats separately so they are easy to combine in the slow cooker when you’re ready to cook.

Reheating the stew’s flavors can improve with the addition of fresh herbs just before serving. You’ll be astonished at how simple adjustments can elevate a meal!

Scaling Instructions

If you need to halve the recipe, simply reduce the ingredients accordingly while maintaining the same cooking times in your slow cooker for best results.

Doubling or tripling the recipe is incredibly simple; ensure to batch-cook in larger slow cookers, keeping in mind the increased cooking time due to volume.

Adjust your equipment as needed; when increasing the recipe, consider using two slow cookers to avoid overcrowding and achieve even cooking.

You may want to increase the overall cook time slightly when scaling up; monitor the doneness of the beef and vegetables for best results.

In terms of storage, be mindful that larger batches will take longer to cool down; ensure that leftovers are stored in smaller, manageable portions.

Nutritional Deep Dive

Slow Cooker Beef and Mushroom Stew is not only satisfying but also a nutritious choice. The dish’s primary macros include protein from beef, fiber from vegetables, and healthy fats if beef is well-marbled.

Carrots and mushrooms contribute vitamins A, D, and B12, essential for maintaining good health. This dish is a great way to ensure a well-rounded intake of these nutrients.

For those mindful of dietary considerations, the portion sizes can help with weight management while still providing a filling meal that doesn’t skimp on flavor.

By focusing on ingredient quality, this dish can maintain a balanced macro and micronutrient profile, suitable for a nourishing lifestyle choice.

Bang for your buck ratio is high here; this dish is rich in nutrients, flavor, and comfort, giving you a better meal for your efforts.

Dietary Adaptations

For gluten-free eaters, ensure to use gluten-free broth and check packaged ingredients for hidden gluten sources.

Dairy-free adaptations can be achieved by avoiding cream toppings; enjoy the richness from cooking alone as all ingredients blend well during the simmering process.

Vegans can substitute beef with hearty mushrooms and legumes, using vegetable broth to enhance flavors while keeping the dish entirely plant-based.

Low-carb options can come from using cauliflower in place of potatoes, adjusting cooking times slightly to allow for optimal tenderness without becoming too soft.

For a keto approach, the heavy use of mushrooms and vegetables creates a filling meal that fits within low-carb guidelines while providing richness from the fats.

Paleo enthusiasts can enjoy this stew by focusing on wholesome, unprocessed ingredients and omitting grains or dairy from the dish entirely.

Troubleshooting Guide

Texture issues may arise if beef isn’t cooked long enough; always monitor tenderness for perfect results. Adding more broth mid-way can salvage a dish that appears too thick or dry.

Flavor balance becomes crucial, especially with seasoning; increments of salt, pepper, or acid must be made throughout the cooking process, checking against desired taste preferences.

Temperature problems arise when the slow cooker isn’t properly regulated; ensure the settings are as intended and keep monitoring with a reliable thermometer.

Ingredient challenges can include substitutions not working out; always consider how each ingredient interacts and integrate based on cooking times and flavors.

Timing concerns are typical; if your stew is undercooked, increase the time needed, but check towards the end to avoid meat becoming dry and tougher than intended.

Recipe Success Stories

This recipe has garnered community feedback praising its hearty nature and comforting flavors, proving an instant favorite for family gatherings. Many readers share their personal spins, from adding different vegetables to incorporating a hint of heat with spices.

Variation successes often include personal twists based on community input; layers of flavor become even richer with reader recommendations incorporated into the cooking process.

Adaptation stories from readers tell inspiring usage of leftovers, transforming them into creative new dishes, showcasing the flexibility of this stew.

Readers often share photography tips when presenting their versions, celebrating not only the meal but also the aesthetic experience on social media, further sharing the love.

Engagement in the comments encourages others to try variations, fostering a community of sharing ideas and successes around this comforting classic.

Frequently Asked Questions

Can I use frozen beef for this recipe? Yes, you can use frozen beef. Just ensure it’s fully thawed before cooking to achieve even seasoning and cooking times.

What can I substitute for mushrooms? If you’re not a fan of mushrooms, consider using other vegetables such as zucchini or bell peppers for a different flavor profile.

Can I cook this stew on high for a shorter time? While it’s recommended to cook on low for max tenderness, you can cook on high for 3-4 hours instead.

Is it possible to add beans to this stew? Definitely! Adding beans can provide extra protein and fiber; be sure to use canned beans for easier cooking.

What should I serve with this stew? This dish pairs perfectly with crusty bread, over rice, or mashed potatoes to soak up the delightful gravy.

Can I add cream to this stew? Yes, for a richer stew, a touch of cream can elevate the dish right before serving, giving it a velvety finish.

How do I store leftovers? Store leftovers in an airtight container in the refrigerator for up to 4 days or freeze for longer use.

Can I make this stew in advance? Yes, the flavors deepen with time, making it ideal for making ahead; just refrigerate or freeze and reheat before serving.

Are there any recommended substitutions for the spices? Absolutely. Feel free to use dried herbs or spices that you enjoy, such as rosemary or oregano, based on your taste preferences.

How can I make this dish spicier? If you prefer a kick, add crushed red pepper or a diced jalapeño during cooking for welcomed heat that complements the flavors well.

Additional Resources

Explore the world of comfort food by diving into related recipes that celebrate slow cooking and hearty flavors. Other comforting classics, like chicken and dumplings or beef stroganoff, would make excellent addition to your repertoire.

For those looking to improve their technique, consider ingredient guides focusing on seasonal vegetables or proper meat handling techniques to boost your kitchen skills further.

Engage with equipment recommendations that help optimize your slow cooking experience, guiding you toward the best slow cooker options and maintenance tips.

For seasonal variations, explore inspiration for warm dishes as autumn and winter set in, reflecting on warm meals that satisfy the soul during colder months.

Join the Conversation

Your culinary adventures with Slow Cooker Beef and Mushroom Stew don’t have to end here! Share your experiences on social media to spark engagement with fellow cooking enthusiasts.

Capture mouthwatering photography of your stew, showcasing its goodness, and encourage your friends to join in and test the recipe for themselves.

We love reading recipe reviews, so consider sharing your adaptations and successes in the comments section to build community engagement.

Encourage your variations to spread amongst friends and family; communal cooking inspires creativity and connection surrounding the love for food.

The Recipe

Slow Cooker Beef and Mushroom Stew

Serves: 4

Prep Time: 15 mins

Cook Time: 6 hours

Total Time: 6 hours 15 mins

Kitchen Equipment Needed

  • Slow cooker
  • Large skillet (for browning)
  • Cutting board
  • Sharp knife

Ingredients

  • 2 lbs beef chuck, cut into 1-inch cubes
  • 8 oz mushrooms, sliced
  • 4 carrots, sliced
  • 1 onion, chopped
  • 4 cloves garlic, minced
  • 2 cups beef broth
  • 1 cup red wine (optional)
  • 2 tbsp tomato paste
  • 1 tsp dried thyme
  • 2 bay leaves
  • Salt and pepper to taste
  • 3 tablespoons olive oil (for browning)

Directions

  1. In a large skillet, heat olive oil over medium-high heat.
  2. Brown the beef cubes on all sides; do this in batches if necessary to avoid overcrowding.
  3. Transfer the browned beef to the slow cooker, followed by mushrooms, carrots, onion, and garlic.
  4. Add beef broth, wine, tomato paste, thyme, bay leaves, salt, and pepper to the slow cooker and stir gently.
  5. Set the slow cooker to low and cook for 6-8 hours or until beef is tender.
  6. Remove bay leaves before serving and adjust seasoning if necessary.

Recipe Notes

  • For thicker stew, add cornstarch mixed with water during the last hour of cooking.
  • Leftovers can be refrigerated for up to 4 days or frozen for 3 months.
  • Experiment with other vegetables such as potatoes or parsnips for added variety.

Deliciously Easy Crock Pot Crack Potato Soup Recipe

Crock Pot Crack Potato Soup: The Ultimate Comfort in a Bowl

⚖️
Difficulty
Easy

⏲️
Prep Time
15 mins

🕒
Cook Time
6 hours

⏱️
Total Time
6 hours 15 mins

🍽️
Servings
6

Crock Pot Crack Potato Soup is the epitome of comfort food, perfect for those chilly evenings. This creamy soup combines the rich flavors of potatoes, cheese, and bacon, creating a dish that tantalizes your taste buds. With every spoonful, you’ll be met with velvety textures and delightful seasonings that give a warm, welcoming feeling. It is simple to prepare in your slow cooker, making it an ideal option for busy weeknights or cozy family dinners.

The best part? This Crock Pot Crack Potato Soup not only satisfies your hunger but also brings a delightful aroma that fills your kitchen. As the ingredients meld together, the savory notes of garlic and onion dance through your space, tempting everyone nearby. The vibrant, inviting color nature of the soup beckons you to dig in, making it as visually appealing as it is delicious.

Quick Recipe Highlights

  • Flavor Profile: A delightful mix of creamy potatoes, sharp cheddar cheese, smoky bacon, and herbs.
  • Texture: Smooth and creamy with tender potato chunks that provide a satisfying mouthfeel.
  • Aroma: Inviting scents of garlic, onion, and bacon that will make your mouth water.
  • Visual Appeal: A luscious golden-yellow soup adorned with crispy bacon bits and fresh herbs.
  • Skill Level Needed: Perfect for novice cooks, with simple steps and minimal fuss.
  • Special Equipment: All you need is a slow cooker and a few basic kitchen tools.

Recipe Overview

  • Difficulty Level: This Crock Pot Crack Potato Soup is easy to prepare and requires minimal chopping and cleanup, making it accessible for all skill levels.
  • Category: It fits perfectly as a hearty dinner or a comforting lunch option, especially perfect as a starter for family gatherings.
  • Cuisine: This soup draws inspiration from classic American diners, where hearty comfort food reigns supreme.
  • Cost: The ingredients are budget-friendly, typically costing under $20 for a large pot, serving multiple people.
  • Season: This recipe shines especially during the fall and winter months when warm, comforting meals are sought after.
  • Occasion: Ideal for weeknight dinners, potlucks, or as a satisfying dish to serve during casual gatherings with friends.

Why You’ll Love This Recipe

This Crock Pot Crack Potato Soup is not only delicious but also an experience to behold. Imagine a meal that perfectly combines rich, creamy textures with the crispy bite of bacon and the melt-in-your-mouth feeling of evenly cooked potatoes. You’ll undoubtedly relish every spoonful of this comforting dish.

Beyond the taste, the convenience of making this soup in a crock pot is a game-changer. Simply throw all the ingredients into your slow cooker in the morning, and when you come home, a wholesome meal awaits you, allowing you to spend more quality time with loved ones.

The nutritional benefits of this soup make it even more appealing. Packed with carbohydrates from the potatoes and protein from the bacon and cheese, it provides energy and satisfaction, making it a balanced comfort meal.

This dish is fantastic for entertaining. Its creamy goodness and hearty composition draw guests in, making it a focal point for discussions during dinner parties. Plus, everyone can customize their servings with additional toppings like sour cream and chives, making it interactive.

Cost-effectiveness is another reason to love this recipe. With accessible ingredients that stretch a long way, this soup can feed a family or crowd without breaking the bank, allowing everyone to enjoy a warm, hearty meal.

Historical Background and Cultural Significance

The origins of potato soup date back centuries, incorporating humble ingredients that reflect times of scarcity. In various cultures, potatoes served as a staple, nutritious food. The evolution of this recipe into a crock pot version offers an homage to traditional cooking methods while embracing modern conveniences.

Culturally, potato soup is celebrated across many kitchens, adapting to local tastes and available ingredients. This flexibility has contributed to its charm, allowing home cooks to tailor the soup to regional preferences and seasonal availability.

As recipes evolved, the addition of cheese and bacon became popular, providing richer flavors and enhancing the soup’s comfort factor. Such adaptations showcase how comfort food can evolve over time while remaining steadfast as a family favorite.

You will also find regional variations, such as loaded potato soup and stepping towards more gourmet interpretations. These adaptations further reflect the creativity of home chefs in blending traditional recipes with contemporary trends.

Ingredient Deep Dive

– **Potatoes:** A staple food with origins tracing back thousands of years. They are nutritious, high in vitamins, and inexpensive. When selecting potatoes for your soup, opt for starchy ones like Russets for optimal creaminess. Store in a cool, dark place to keep them fresh. Substitute with sweet potatoes for a sweeter flavor profile.

– **Cheddar Cheese:** A beloved cheese with rich history in the UK. Cheddar is an excellent source of protein and calcium. Choose sharp cheddar for a desirable depth of flavor. Keep cheese wrapped in plastic in the fridge to maintain freshness. For a twist, try using gouda or pepper jack cheese.

– **Bacon:** Traditionally used for flavor enhancement in many cuisines. Bacon offers rich taste and protein but can be high in fats. Choose high-quality bacon for the best flavor, and look for lean cuts. Store in the fridge, cooked or uncooked, and consider turkey bacon as a healthier option.

– **Onion and Garlic:** Essential aromatics in countless recipes, offering flavor and health benefits. Onions add sweetness when caramelized, while garlic provides a rich aroma and potential health benefits like immune support. For convenience, store in a cool, dry place. Shallots can be a lovely alternative for a milder flavor.

Common Mistakes to Avoid

  • Using the wrong type of potatoes: Starchy potatoes yield a creamier soup while waxy varieties can make it gummy.
  • Overcooking the potatoes: They may become mushy and lose their delightful texture; follow the recommended cooking time closely.
  • Not seasoning enough: A lack of seasoning can lead to blandness; taste and adjust as needed throughout cooking.
  • Skipping the sauté step: Sautéing onions and garlic enhances their flavor before adding them to the slow cooker.
  • Using pre-shredded cheese: Pre-packaged shredded cheese often contains anti-caking agents that can affect melting; opt for block cheese instead.
  • Neglecting to chop ingredients uniformly: Unevenly cut ingredients can cook at different rates, leading to an inconsistent texture.
  • Not letting soup cool before storage: If leftovers are stored while still hot, they can develop condensation and spoil more quickly.
  • Adding too much liquid: Too much broth can dilute flavors; follow the recipe to ensure optimal consistency.

Essential Techniques

– **Sautéing Aromatics:** Sautéing onions and garlic before adding them to the crock pot enhances their flavors and depth in your dish. To master this technique, heat a bit of oil in a skillet, add your aromatics, and stir until they’re translucent and fragrant. Watch carefully to avoid burning; the goal is golden, not brown.

– **Mashing Potatoes:** Properly mashing potatoes ensures a creamy consistency. Use a potato masher or ricer while the potatoes are warm for the best results. Avoid over-mixing as this can result in a gummy texture. Leave some chunks for a heartier feel if you prefer.

– **Layering Ingredients:** For even cooking in a crock pot, begin with denser ingredients at the bottom (like potatoes) and remain mindful of ingredient placement. This technique allows heat and moisture to circulate optimally, enhancing flavor extraction and texture.

– **Taste Testing:** Throughout the cooking process, taste your dish periodically. This ensures the seasoning is on point and allows you to adjust flavors based on your preferences. Keep notes of what you adjust for future reference.

Pro Tips for Perfect Crock Pot Crack Potato Soup

– Choose Russet potatoes for the best texture; their starchiness yields a creamy soup.
– Always sauté your onions and garlic to enhance their flavor before adding them to the crock pot.
– For an added kick, include your favorite hot sauce or spices.
– Substitute chicken or vegetable broth for even more flavor instead of water.
– Garnish with fresh chives or parsley at the end for a pop of color and freshness.
– Use a combination of cheeses for different flavor profiles—cheddar, gouda, or even cream cheese.
– If you want a thicker soup, mash more potatoes or add a slurry of cornstarch and water during the last hour of cooking.
– Serve with crusty bread for soaking up every last drop of this delicious soup.

Variations and Adaptations

– **Regional Variations:** In some regions, adding green chilies or peppers enhances the flavor profile of potato soup. Explore these variations to add a local twist.
– **Seasonal Adaptations:** During fall, consider incorporating roasted pumpkin or squash puree for added depth and seasonal flair.
– **Dietary Modifications:** To cut calories, use turkey bacon instead of regular bacon or opt for a dairy-free cheese substitute for a lighter version.
– **Flavor Variations:** Infuse flavors by using different herbs such as thyme, rosemary, or smoked paprika for a deliciously unique twist on a classic.
– **Texture Modifications:** For a smoother soup, blend all or a portion of the soup after cooking. Keep some chunks for a rustic touch.
– **Presentation Alternatives:** Serve with crispy bacon bits, shredded cheese, and a dollop of sour cream or Greek yogurt for a restaurant-style finish.

Serving and Presentation Guide

– **Plating Techniques:** Use shallow bowls to showcase the vibrant color of the soup, and allow toppings to sit neatly on top.
– **Garnishing Ideas:** Fresh herbs like parsley or chives add a splash of color and freshness that elevates the dish.
– **Traditional Accompaniments:** Serve with warm crusty bread, cornbread, or grilled cheese sandwiches for a complete meal experience.
– **Modern Serving Suggestions:** Consider serving individual portions in mason jars for a trendy touch during gatherings.
– **Temperature Considerations:** Serve the soup hot, as temperatures enhance the flavors and aromas.
– **Portion Control Tips:** Use a ladle to ensure even servings, helping with portion management during large gatherings.

Wine and Beverage Pairing

– **Wine Pairings:** Pair with a light, fruity white wine like Sauvignon Blanc to accentuate the creamy flavors of the soup.
– **Non-alcoholic Alternatives:** Sparkling water with a slice of lemon can provide a refreshing counterpart to the richness of potato soup.
– **Coffee/Tea Pairings:** A robust black tea or a latte can balance the soup’s creaminess with complementary warmth.
– **Temperature Considerations:** Ensure your beverages are served chilled or at the right temperature to complement the hot soup.
– **Serving Suggestions:** Create a cozy meal experience by serving the soup and beverages in unique glassware for an inviting table setting.

Storage and Shelf Life

– **Storage Methods:** Cool the soup completely before transferring it to airtight containers for best results.
– **Temperature Requirements:** Keep the soup in the refrigerator within two hours of cooking to ensure food safety.
– **Container Recommendations:** Glass containers or heavy-duty zip-top bags are ideal for maintaining freshness.
– **Signs of Spoilage:** Look for sour smells, changes in texture, or mold to determine if the soup has spoiled.
– **Reheating Instructions:** Gently reheat the soup on the stove over medium heat, stirring frequently, or microwave in shorter intervals.
– **Freezing Guidelines:** For longer storage, soup can be frozen for up to three months. Thaw overnight in the refrigerator before reheating.

Make Ahead Strategies

– **Prep Timeline:** Wash and chop the ingredients the night before, allowing for a faster assembly in the morning.
– **Storage Between Steps:** Pre-cook bacon and garlic, then store in the fridge to save you time in the morning.
– **Quality Impact Assessment:** Avoid adding dairy or fresh toppings until serving to ensure freshness and optimal texture.
– **Assembly Tips:** Layer ingredients in the crock pot for a beautiful presentation and to keep flavors distinct.
– **Reheating Guidelines:** If preparing ahead, keep soup base (potatoes and broth) separate from dairy and toppings until you’re ready to serve.
– **Fresh Element Additions:** Incorporate fresh herbs or greens right before serving to add brightness and freshness to the dish.

Scaling Instructions

– **Halving the Recipe:** For smaller servings, simply halve ingredient amounts while keeping cooking times similar for best results.
– **Doubling or Tripling:** For larger gatherings, increase ingredient quantities but anticipate longer cooking times.
– **Equipment Adjustments:** Ensure your crock pot has enough capacity when scaling recipes up to avoid overflow or uneven cooking.
– **Timing Modifications:** Note that larger batches may require additional cooking time; opt to check for doneness as you scale.
– **Storage Considerations:** When scaling, add extra containers for storage, as larger yields can lead to overflow and spoilage if not managed properly.

Nutritional Deep Dive

– **Macro Breakdown:** Each serving of crock pot crack potato soup provides a hearty balance of carbohydrates, proteins, and fats, making it a filling choice.
– **Micronutrient Analysis:** The soup is rich in vitamins and minerals, particularly potassium and vitamin C from potatoes and essential nutrients from added vegetables.
– **Health Benefits:** Potatoes provide dietary fiber, aiding digestion, while bacon contributes protein and fat content for energy.
– **Dietary Considerations:** Consider the nutritional density if modifying the recipe, maintaining balance by incorporating leafy greens or legumes.
– **Portion Analysis:** Each serving provides substantial energy, making it ideal for breakfast, lunch, or dinner and perfect for those with active lifestyles.
– **Weight Management Tips:** Monitor portion sizes, as creamy soups can be calorie-dense; enjoy with a side salad for additional nutrients and volume.

Dietary Adaptations

– **Gluten-free:** Naturally gluten-free, this soup requires no adjustments, making it safe for those with gluten sensitivities.
– **Dairy-free:** For a dairy-free option, substitute regular cheese with vegan alternatives and use coconut milk for creaminess.
– **Vegan:** Replace bacon with renewable plant-based protein such as mushrooms for a umami flavor, utilizing nutritional yeast for cheesy notes.
– **Low-carb:** Use cauliflower in place of potatoes for a low-carb-friendly alternative while still maintaining richness.
– **Keto:** Replace potatoes with diced zucchini and cream cheese for depth while adhering to keto guidelines.
– **Paleo:** Utilize sweet potatoes and coconut milk in lieu of dairy and any processed ingredients to align with paleo diets.
– **Low-FODMAP:** Select lactose-free dairy products and limit quantities for a low-FODMAP adaptation of this dish.
– **Other specific diets:** Consider swapping in other ingredients to align with personal dietary preferences, ensuring flavors remain delightful!

Troubleshooting Guide

– **Texture Issues:** If the soup is too thin, blend a portion smooth and mix it back for a creamier, richer consistency.
– **Flavor Balance:** If it tastes bland, try enhancing with salt or acid, like lemon juice, to brighten the flavor profile.
– **Temperature Problems:** If the soup cooks too slowly, check your crock pot’s settings and ensure it’s on the correct temperature.
– **Equipment Challenges:** If using a different slow cooker, temperatures may vary; adjust cooking times according to your appliance’s performance.
– **Ingredient Substitutions:** Ensure that replacements are comparable to maintain texture and flavor if substituting key ingredients.
– **Timing Concerns:** Unpredictable cooking times can occur; ensure to check for doneness by testing potatoes with a fork before serving.

Recipe Success Stories

– **Community Feedback:** Many readers rave about this recipe, claiming it quickly became a family favorite, especially during the cooler months.
– **Variation Successes:** Home chefs share adaptations that led to unique flavors—adding smoked paprika or curry powder for exciting twists.
– **Adaptation Stories:** Several readers have enjoyed sharing their family versions, leading to a community of creativity around this classic dish.
– **Reader Suggestions:** Many suggest serving with a side salad, enhancing the meal’s nutrient density while complementing the creamy soup.
– **Photography Tips:** Visually appealing photos can be captured with fresh garnishes and vibrant bowls, making this soup irresistibly shareable on social media.

Frequently Asked Questions

Can I freeze Crock Pot Crack Potato Soup?

Yes, you can freeze this soup. For best results, freeze it before adding dairy or toppings. Store in airtight containers for up to three months.

How long does this soup take to cook in a slow cooker?

It typically takes about 6 hours on low or 3–4 hours on high, but always check for doneness as cooking times can vary by crock pot.

Can I use instant potatoes for this recipe?

While instant potatoes can work in a pinch, they won’t provide the same texture and flavor as fresh potatoes. For best results, use whole potatoes.

What can I add for a vegetarian version?

For a vegetarian version, omit bacon and add in more vegetables like carrots, celery, and bell peppers for a nutrition boost.

Can I make this soup in a stovetop pot instead?

Absolutely! You can make it on the stovetop by simmering all ingredients together for about 30–45 minutes until potatoes are tender.

How do I thicken the soup?

If the soup is too thin, blend a portion to incorporate more starch, or add a cornstarch slurry made with equal parts water and cornstarch.

Can I add other types of cheese?

Yes! Feel free to mix cheeses to find your perfect combination. Cream cheese can also enhance creaminess and flavor.

How spicy is the soup?

This recipe is not inherently spicy, but you can adjust heat levels by adding chili powder, cayenne pepper, or fresh jalapeños as desired.

What sides pair well with this soup?

This soup pairs beautifully with crusty bread, fresh salads, or even grilled cheese sandwiches for a comforting meal.

Can I cook it overnight?

For safety, it’s best not to leave your crock pot unattended for more than 8 hours, so if cooking overnight, adjust to a timer or programmable crock pot.

Will this soup last in the refrigerator?

Yes, leftovers can be stored in an airtight container in the refrigerator for up to 3-4 days, making it perfect for meal prepping.

Additional Resources

Explore other delightful recipes like our classic chili, flavorful tomato soup, or cheesy broccoli cheddar soup to find what suits your family’s preferences. Keep learning about slow cooking techniques that enhance the flavor and texture of your meals, making the most of your crock pot!

Join the Conversation

We love hearing your thoughts! Share your own versions or adaptations of our Crock Pot Crack Potato Soup on social media. Tag us with your culinary creations or tips for making the dish even better! Whether you took a stunning picture or have feedback on the recipe, we appreciate your involvement in our cooking community.

The Recipe

Crock Pot Crack Potato Soup

Serves: 6

Prep Time: 15 mins

Cook Time: 6 hours

Total Time: 6 hours 15 mins

Kitchen Equipment Needed

  • Crock pot or slow cooker
  • Skillet for sautéing
  • Potato masher or ricer
  • Measuring cups and spoons
  • Cutting board and knife

Ingredients

  • 4 large Russet potatoes, peeled and diced
  • 1 small onion, diced
  • 3 cloves garlic, minced
  • 4 cups chicken or vegetable broth
  • 1 cup shredded sharp cheddar cheese
  • 1 cup heavy cream
  • 8 strips cooked bacon, crumbled
  • Salt and pepper to taste
  • Optional toppings: chives, sour cream, additional cheese

Directions

  1. In a skillet, sauté the onion and garlic until translucent.
  2. Add the diced potatoes to your slow cooker, followed by the sautéed onion and garlic.
  3. Pour in the broth, and season with salt and pepper.
  4. Cook on low for 6 hours or until the potatoes are fork-tender.
  5. When finished, mash some of the potatoes with a potato masher for desired creaminess.
  6. Stir in the cheese and heavy cream until melted and fully incorporated.
  7. Garnish with crumbled bacon and desired toppings before serving.

Recipe Notes

  • For a thicker soup, blend some of the mixture before adding cream and cheese.
  • Leftovers can be refrigerated for up to 4 days or frozen for up to 3 months.
  • Feel free to experiment with different cheeses for unique flavors.

Indulge in a Luxurious Triple Chocolate Mousse Cake Recipe

Luxurious Triple Chocolate Mousse Cake: Indulge in Decadent Layers of Chocolate Bliss

⚖️
Difficulty
Intermediate

⏲️
Prep Time
30 mins

🕒
Cook Time
15 mins

⏱️
Total Time
5 hours (chill time)

🍽️
Servings
8 servings

The Luxurious Triple Chocolate Mousse Cake is an exquisite dessert that showcases the magic of chocolate in three delightful forms: dark chocolate, milk chocolate, and white chocolate. This cake is a true indulgence for chocolate lovers, making it a perfect centerpiece for special occasions, dinner parties, or simply to satisfy a rich chocolate craving. Each layer is light and airy, offering a tantalizing contrast to the creamy mousse textures, creating a sensational experience for your palate.

What makes this cake even more enticing is the way it plays with flavor profiles and textures. The dark chocolate mousse provides a rich, robust foundation; the milk chocolate mousse adds a hint of sweetness; while the white chocolate mousse delivers a creamy, velvety finish. Topped with a glossy chocolate ganache, every slice of this cake feels like a luxurious treat that melts beautifully in your mouth, leaving a lingering taste that beckons for more.

Quick Recipe Highlights

  • Flavor Profile: A harmonious blend of rich dark, sweet milk, and creamy white chocolate, this cake offers a symphony of chocolatey goodness that delights the senses.
  • Texture: The cake features a light and fluffy mousse texture that contrasts with the smooth, glossy ganache, creating a pleasurable mouthfeel.
  • Aroma: The rich chocolate aroma fills the kitchen, inviting you to indulge in this decadent dessert from the moment it’s prepared.
  • Visual Appeal: The triple layers of chocolate create a stunning visual delight, topped with a shiny ganache that makes it an eye-catching centerpiece.
  • Skill Level Needed: This recipe is suited for those with intermediate baking skills, but the detailed instructions make it achievable for dedicated bakers.
  • Special Equipment: A springform pan and an electric mixer are essential for achieving the right texture and presentation of this luxurious cake.

Recipe Overview

  • Difficulty Level: This Luxurious Triple Chocolate Mousse Cake is classified as intermediate due to the meticulous layering and chilling required for the mousse to set properly, but detailed step-by-step instructions will guide you through each stage.
  • Category: This dessert fits within the sweet treats category, perfect for a special occasion like birthday parties, anniversaries, or holidays.
  • Cuisine: This cake draws from classic French pastry techniques, where mousses are often celebrated for their lightness and delicate flavors, showcasing the hallmark of patisserie expertise.
  • Cost: The approximate cost for ingredients is moderate, with high-quality chocolates and whipped cream being the most significant expenses, but the result is worth every penny.
  • Season: Although this cake can be enjoyed year-round, it particularly shines during festive seasons when chocolate desserts are highly sought after.
  • Occasion: This cake is ideal for celebrations, gatherings, or romantic dinners, making it a show-stopper that impresses guests.

Why You’ll Love This Recipe

The Luxurious Triple Chocolate Mousse Cake is a chocolate lover’s dream, combining different chocolate types to create a multi-layered experience. Each bite reveals a new dimension of flavor and texture, making any occasion special. It’s not just about taste; the mere visual impact of this cake can turn a simple gathering into a celebratory feast, encouraging everyone to dig in and indulge. The combination of lightness from the mousse and decadence from the chocolate creates a perfect harmony that is both satisfying and unforgettable.

Preparation and convenience are key benefits of this recipe. Most of the work involves preparing the different layers of mousse, which can be made a day ahead. This makes it an excellent choice for busy bakers who like to plan ahead. Assembling the cake is straightforward, allowing you to enjoy your time with guests rather than being stuck in the kitchen last minute.

Not only does this cake satiate a sweet tooth, but it also brings positive emotional experiences. The act of sharing a beautifully presented dessert not only enhances the dining experience but also fosters a sense of community among friends and family. Plus, it’s an excellent conversation starter, bringing everyone together over a shared love for chocolate.

Nutritionally, while it’s rich in calories, using high-quality chocolates can bring some antioxidants to the table. Moreover, portion control ensures that you can enjoy a slice without overindulging. With a balanced meal, this dessert can fit into an overall healthy dietary approach.

Cost-effectiveness plays into your decision to bake this cake. With careful ingredient selection, you can create a show-stopping dessert that rivals what you might find in a premium bakery, all while saving money. The effort you invest in crafting this cake will surely impress and delight your guests.

Historical Background and Cultural Significance

The origins of mousse date back to 18th century France, where the technique of whisking air into chocolate and cream created a light dessert that was favored by the French aristocracy. Over the years, it has evolved, with various interpretations emerging, including fruit mousses and savory versions. The idea of layering different types of chocolate also reflects the French’s flair for visual presentation and texture contrast.

Culturally, chocolate holds a significant place in many societies, often viewed as a luxury item that symbolizes love and celebration. Desserts like the Luxurious Triple Chocolate Mousse Cake are served during significant events, reinforcing bonds among people as they share in its indulgence.

As the recipe has evolved, variations have emerged from different regions, each adding a personal touch. The triple chocolate variant may draw influences from various chocolate-producing countries, utilizing local chocolates to enhance flavor and depth.

Today, interpretations of the mousse cake can be found worldwide, making it a beloved dessert that transcends borders while retaining its French roots, allowing for various cultural takes on what it means to indulge in this delectable treat.

Ingredient Deep Dive

Dark Chocolate:
Dark chocolate, often hailed for its rich flavor and potential health benefits, contains higher cocoa content compared to other chocolate types. This ingredient is celebrated not just for its taste but also for its antioxidant properties. When selecting dark chocolate for mousse, look for a cocoa percentage of 70% or higher to ensure maximum depth and richness in flavor. Store your chocolate in a cool, dry place, away from strong odors, to maintain its integrity. If you’re in a pinch, semi-sweet chocolate can be substituted, though it may alter the flavor profile slightly.

Milk Chocolate:
Milk chocolate provides a creamy sweetness that balances the more intense dark chocolate layers in the mousse cake. It’s less bitter and contains added milk solids, resulting in a softer mouthfeel. Choosing a high-quality milk chocolate can contribute to the overall taste of the dessert. Store in an airtight container to prevent it from absorbing moisture and odors. If you prefer a richer cake, consider using a combination of milk and dark chocolate as a substitute.

White Chocolate:
While technically not chocolate because it lacks cocoa solids, white chocolate adds a luxurious creaminess that complements the other layers. Its sweetness can help soften the richness of dark chocolate, creating a well-rounded flavor. Like the other chocolates, choose a high-quality product with cocoa butter for the best results. White chocolate should be stored similarly, in a cool, dry place, and can be replaced with yogurt or cream if you want a less sweet option, though this will influence the texture and taste.

Common Mistakes to Avoid

  • Overheating chocolate: When melting chocolate, do so gently to prevent burning. Use a double boiler for better control over heat.
  • Not cooling the chocolate: Allow melted chocolate to cool slightly before mixing into the mousse to avoid cooking the eggs in the batter.
  • Skipping the chilling step: Allow each layer to chill adequately before adding the next one; this is crucial for structural integrity.
  • Not whipping cream correctly: Ensure the cream is chilled before whipping to achieve the desired texture—overwhipped cream can turn into butter.
  • Using low-quality chocolate: Cheaper chocolates can lead to a poorer taste and texture. Invest in quality chocolates for the best results.
  • Ignoring measurements: Precision is key; ensure each ingredient is accurately measured for the balance of flavors.
  • Not letting the cake set long enough: After assembly, give the cake ample time to set in the fridge, ideally overnight for optimal flavor and texture.
  • Skipping taste testing: Always taste each layer as you prepare them to ensure the flavors are balanced before assembling.
  • Rushing the process: This recipe requires patience; rushing could compromise the final product.
  • Improper storage: Keep the mousse cake covered in the refrigerator before serving to prevent it from absorbing other odors.

Essential Techniques

Melting Chocolate:
Melting chocolate is crucial for this recipe, as it forms the base for each mousse layer. Gently melt chocolate over a double boiler or in short bursts in the microwave, stirring frequently to avoid burning. Mastering this technique requires patience; watch for visual cues such as a smooth, glossy texture, signaling it’s perfectly melted.

Whipping Cream:
Whipping cream to the right consistency is essential for a light and airy mousse. Start with chilled cream and whisk until soft peaks form; this indicates that it’s ready. Avoid overwhipping, which can turn cream into butter, leading to an undesirable texture in your mousse. Aim for fluffy, stable peaks that hold their shape without becoming grainy.

Incorporating Ingredients:
Carefully fold in your whipped cream into the chocolate mixture will ensure a light texture while minimizing the loss of air. Use a gentle motion to avoid deflating your whipped cream. Mastering this technique is key to achieving the desired fluffy consistency in your mousse layers.

Chilling Properly:
Proper chilling is vital to the success of the Luxurious Triple Chocolate Mousse Cake, as it allows each layer to set. After each layer is added, ensure it chills for at least 30 minutes before adding the next one. Visual cues include firming up the mousse without being overly solid, indicating it’s ready for the next addition.

Pro Tips for Perfect Luxurious Triple Chocolate Mousse Cake

Use high-quality chocolates for richer flavors that enhance the overall taste experience.
Ensure all ingredients, especially cream, are chilled for optimal whipping consistency.
Experiment with different chocolate percentages to adjust the richness of each mousse layer to your liking.
Let each mousse layer chill thoroughly before adding the next for a well-defined layer effect.
Use a knife warmed in hot water to slice the cake for a clean cut and beautiful presentation.
Allow the cake to set in the refrigerator overnight for the best flavor and texture;
Use a food processor for fine chocolate shavings to create an attractive garnish.
Consider using coffee or espresso to enhance the chocolate flavor, if desired.

Variations and Adaptations

For a regional twist, consider incorporating local chocolates or flavors unique to your area, such as adding spices for a warm undertone. Seasonal adaptations can include pumpkin spice mousse for fall or berry-infused mousse layers for a refreshing summer treat. Dietary modifications are also possible; for a vegan version, use dairy-free chocolate and plant-based cream alternatives. To personalize flavor further, try adding extracts like orange or almond to your mousse mixtures.

Texture modifications can enhance the cake’s appeal, such as adding a layer of crunchy cookie crumbs between mousse layers. Presentation alternatives, like using individual serving cups, can make this cake more accessible for gatherings. When serving, consider a drizzle of fruit coulis or a sprinkle of sea salt on top to enhance the flavors and visual impact.

Serving and Presentation Guide

Plating the Luxurious Triple Chocolate Mousse Cake can elevate its appeal, starting with a clean, smooth surface when serving. Consider using a large serrated knife to ensure clean cuts between layers. Garnish with chocolate shavings, fresh berries, or a dollop of whipped cream to enhance the aesthetic profile. Serve with a side of fresh fruit or chocolate sauce for an added layer of indulgence, and consider the appropriate temperature for serving, as chilled mousse offers a pleasant contrast to the warm environment often found at gatherings.

Portions can be controlled easily with a well-defined slicing technique; use a warmed knife to maintain the integrity of the mousse. Serving this cake on elegant platters adds to the overall dining experience, making it even more memorable for your guests.

Wine and Beverage Pairing

When pairing wine with the Luxurious Triple Chocolate Mousse Cake, consider rich reds like Cabernet Sauvignon or a smooth Merlot, which complement the dark chocolate layers beautifully. A port wine can also enhance the cake’s richness, creating a delightful harmony with the dessert.

For non-alcoholic options, a thick hot chocolate or a rich coffee can elevate the chocolate experience. Pairing this cake with a dark roast coffee brings out the deep flavors of the chocolate, while herbal teas like chamomile can provide a calming contrast.

When serving hot beverages, ensure they’re at a comfortable temperature to savor alongside the chilled mousse, allowing the flavors to interlace perfectly.

Storage and Shelf Life

To store the Luxurious Triple Chocolate Mousse Cake, keep it in a covered container in the refrigerator to prevent it from absorbing odors from other foods. It’s best consumed within 3-4 days for optimal freshness and flavor, with each slice retaining its structure when kept chilled.

Signs of spoilage include changes in texture or an off smell, indicating it’s best to discard it. If you need to store it longer, consider freezing individual slices; wrap them tightly in plastic wrap and store in an airtight container. This way, you can enjoy a piece of indulgence whenever a craving strikes.

When reheating, allow the frozen slices to thaw in the refrigerator overnight for the best taste, ensuring you don’t compromise the integrity of the mousse.

Make Ahead Strategies

This Luxurious Triple Chocolate Mousse Cake is perfect for making ahead. Prepare the mousse layers a day or two before the occasion, allowing them to set properly in the refrigerator. Store each layer in separate containers before assembling to preserve texture and flavor.

Refrigerating between steps keeps everything fresh while allowing the flavors to meld beautifully. Quality remains intact with proper storage; avoid assembling the cake until the day of serving to keep the layers pristine.

For the assembly process, consider leaving the ganache off until the day of serving as well. This allows it to remain glossy and fresh, enhancing the cake’s appeal when presented to guests.

Scaling Instructions

Scaling the Luxurious Triple Chocolate Mousse Cake is straightforward; for halving, simply divide all ingredient amounts and adjust the baking time accordingly, particularly if baking alterations are necessary for smaller pans.

Doubling or tripling the recipe requires ensuring that you have adequate space in your mixing bowls and preparation area. One tip is to work in batches for whipping cream or melting chocolate to maintain efficiency.

If you scale, be mindful of cooking times for the mousse, particularly in freezing or cooling stages, as larger quantities may require additional chilling time. When storing, consider portioning into smaller containers for easier access during serving.

Nutritional Deep Dive

In terms of macro breakdown, the Luxurious Triple Chocolate Mousse Cake is rich in sugars and fats due to the chocolate and cream. However, portion control is key; enjoying a small slice provides satisfaction without excessive calorie intake.

From a micronutrient perspective, dark chocolate contributes antioxidants and minerals, enhancing the nutritional profile. This cake can offer some health benefits when enjoyed in moderation, particularly the potential cardiovascular benefits from high-quality dark chocolate.

Dietary considerations should include balancing the cake with a nutritious meal to manage calorie intake effectively. Portion analysis can guide you on enjoying desserts without compromising dietary goals, allowing this indulgence to fit into a balanced lifestyle.

Dietary Adaptations

For gluten-free adaptations, use gluten-free chocolate and make sure all ingredients are certified. For dairy-free options, vegan chocolate and coconut cream can substitute traditional ingredients effectively.

If you’re looking for a vegan version, opt for aquafaba instead of eggs and dairy-free whipped cream to create a fluffy texture. For those following low-carb or keto diets, sugar alternatives can keep the dessert low in carbohydrates while still satisfying a sweet craving.

With paleo, focus on using raw cacao and nut milks, replacing traditional sugars where applicable. Low-FODMAP options could include specific chocolate brands; however, check with a dietary specialist to ensure compliance with dietary needs.

Troubleshooting Guide

If you encounter texture issues such as a grainy mousse, it may be due to overheating the chocolate or not adequately incorporating the ingredients. To avoid this, always monitor your melting process and fold gently.

Flavor balance can be adjusted by adding a pinch of salt or a splash of vanilla extract during preparation to elevate sweetness. If there are temperature problems, ensure that your ingredients are at the correct temperature before mixing; both chocolate and cream should generally be at room temperature or slightly warm.

Equipping yourself with proper kitchen tools can minimize equipment challenges. Having the right mixer for whipping cream can make a significant difference in the final texture.

Timing concerns may arise if layers don’t set properly; chilling with ample time is essential. If you find the mousse still too runny, give it an additional hour in the fridge to firm up before assembly.

Recipe Success Stories

Readers celebrate the Luxurious Triple Chocolate Mousse Cake for its stunning presentation and delightful taste, making it a favorite for birthdays and special occasions. Many have shared adjustments, like incorporating berry layers, enhancing the cake with seasonal flavors.

Community feedback highlights the ease with which this cake can impress guests, leading to feedback of “Wow, did you really make this?” Adaptation stories include utilizing alternative brands of chocolate, allowing beginners to find their preferred ingredients without compromising taste.

Successful photography tips recommend displaying the layered structure of the cake prominently, capturing its rich colors. Various slice presentations have also showcased the mousse’s textures, enhancing the overall appeal while driving engagement with readers.

Frequently Asked Questions

Can I make this cake ahead of time?
Yes, this cake can be prepared in advance. You can make the mousse layers a day or two prior to serving, ensuring they are well-chilled before assembly.

What type of chocolate is best for this recipe?
High-quality dark chocolate with a higher cocoa percentage is recommended for the richest flavor. Milk and white chocolate should also be of good quality to maintain the cake’s luxury feel.

Can I freeze the mousse cake?
Yes, individual slices can be frozen. Wrap them tightly in plastic wrap and store them in an airtight container for optimal freshness.

How do I achieve the perfect mousse texture?
Successful mousse relies on properly whipped cream and gently folding it into the chocolate mixture. Avoid overwhipping the cream to prevent graininess.

How can I modify the recipe for allergies?
For gluten-free needs, ensure all ingredients are certified. For dairy-free or vegan adaptations, substitute dairy with coconut cream or almond milk.

What if my mousse isn’t setting properly?
If the mousse is runny, ensure all components were cooled properly and chilled adequately. Allow it additional chilling time until it firms up before assembly.

Can I use other flavors besides chocolate?
Absolutely! You can incorporate fruit purees or other flavored extracts to create a different variant of this dessert.

Is there a way to lower calories in this cake?
Yes, you could use lighter whipped creams, incorporate alternative sweeteners, and be mindful of portion sizes to enjoy the cake without excessive calorie intake.

How should I cut the cake for the best presentation?
Use a warm, serrated knife to slice through the mousse, ensuring clean cuts that showcase the layered structure beautifully.

What should I serve with this cake?
Pair this decadent dessert with a rich coffee, hot chocolate, or even fresh fruits to balance the sweetness and enhance the overall experience.

Additional Resources

For those inspired to continue their baking journey, check out other chocolate recipes, such as chocolate lava cakes and brownies, which can complement this trio of chocolate flavors.

Technique guides on perfecting mousse and chocolate melting can enhance your skills while bringing additional variation to your dessert table. Additionally, incorporate ingredient information for suggestions on high-quality chocolates or cream alternatives.

Consider equipment recommendations, like effective mixers and baking pans, to aid in achieving luxurious desserts in your culinary adventures. Seasonal variations also recommend emphasizing fruits or flavors that align with upcoming holidays or events.

Join the Conversation

We invite you to share your twists on the Luxurious Triple Chocolate Mousse Cake! Post your photos, variations, and stories on social media using our hashtag. Let’s engage in discussions about favorite flavors and celebrate this beautiful dessert together.

Additionally, reader feedback offers invaluable insight—share your success stories as well as any adaptations you’ve tried. The more we connect, the richer our recipe community becomes!

The Recipe

Luxurious Triple Chocolate Mousse Cake

Serves: 8 servings

Prep Time: 30 mins

Cook Time: 15 mins

Total Time: 5 hours (chill time)

Kitchen Equipment Needed

  • Springform pan
  • Electric mixer
  • Double boiler or microwave-safe bowl
  • Mixing bowls
  • Spatula
  • Measuring cups and spoons

Ingredients

  • 6 oz dark chocolate, chopped
  • 6 oz milk chocolate, chopped
  • 6 oz white chocolate, chopped
  • 2 cups heavy cream, divided
  • 3 large eggs, separated
  • 1/2 cup granulated sugar, divided
  • 1 teaspoon vanilla extract
  • Pinch of salt

Directions

  1. Begin by melting dark chocolate in a double boiler or microwave, then set aside to cool slightly.
  2. In a bowl, whip 1 cup of heavy cream until soft peaks form, then gently fold in the melted dark chocolate.
  3. In another bowl, beat egg yolks with 1/4 cup sugar and vanilla extract until thick and pale. Fold this into the chocolate mixture.
  4. In another bowl, whip egg whites with a pinch of salt until soft peaks form. Gradually add remaining sugar and whisk until glossy. Gently fold into the chocolate mixture.
  5. Pour the dark chocolate mousse into the base of the springform pan and chill for at least 1 hour.
  6. Repeat the process for the milk chocolate, then white chocolate, allowing each layer to set in the fridge before adding the next.
  7. Once all layers are complete and set, prepare a ganache by melting remaining chocolate and mixing with 1 cup of cream. Pour over the top of the cake.
  8. Chill the assembled cake for at least 2 hours before serving to ensure all layers are firm and flavors meld.

Recipe Notes

  • For a decorative finish, top with chocolate shavings or fresh fruit.
  • Consider adding flavored extracts to enhance the profile of each mousse layer.
  • Ensure each mousse layer is fully set before proceeding to the next step for optimal results.

Irresistible Chocolate Chip Cheesecake Recipe You Must Try Today

Decadent Chocolate Chip Cheesecake Recipe: A Creamy Indulgence

⚖️
Difficulty
Moderate

⏲️
Prep Time
25 mins

🕒
Cook Time
1 hour

⏱️
Total Time
1 hour 25 mins

🍽️
Servings
8 slices

If you’re looking for an exquisite dessert that will leave everyone craving more, this Chocolate Chip Cheesecake Recipe is your answer! Imagine a rich, creamy cheesecake base studded with delightful chocolate chips, all nestled in a buttery graham cracker crust. This cheesecake is not only a feast for the eyes but also a party for your taste buds, with its perfect balance of sweetness and chocolatey goodness. Trust me, one slice will never be enough!

What makes this recipe even more special is its versatility. You can serve it at family gatherings, celebrations, or even as a sweet treat after dinner. The smooth texture of the cheesecake combined with the semi-sweet chocolate chips creates a delightful mouthfeel, ensuring each bite is just as indulgent as the last. Plus, the aroma wafting through your kitchen as it bakes will have everyone eagerly anticipating dessert!

Quick Recipe Highlights

  • Flavor Profile: This cheesecake delivers a beautiful balance of sweet and creamy flavors, with rich chocolate notes that beautifully complement the cheesecake.
  • Texture: Expect a velvety cheesecake filled with gooey chocolate chips, all encased in a crunchy graham cracker crust that adds a satisfying crunch.
  • Aroma: The enticing scent of baking chocolate and the warm notes of vanilla will fill your kitchen, making it an irresistible treat.
  • Visual Appeal: This cheesecake boasts a stunning layered appearance, crowned with a sprinkle of chocolate chips that make it look as good as it tastes.
  • Skill Level Needed: While it requires some attention to detail, anyone with moderate baking experience can master this recipe with ease.
  • Special Equipment: A springform pan is essential for achieving that classic cheesecake structure, ensuring easy removal and presentation.

Recipe Overview

  • Difficulty Level: This cheesecake recipe is classified as moderate due to the precision needed in blending and baking, but it’s manageable for home bakers.
  • Category: This dessert fits perfectly into the cake and pastry categories, making it suitable for any sweet course.
  • Cuisine: Rooted in classic American cuisine, cheesecake has European influences, particularly from Italian ricotta cheesecakes.
  • Cost: Ingredients for this cheesecake are generally budget-friendly, making it an accessible treat without breaking the bank.
  • Season: This Chocolate Chip Cheesecake is a year-round delight, perfect for all occasions—holidays, birthdays, or simple celebrations.
  • Occasion: Serve this cheesecake at birthdays, potlucks, and holiday gatherings for a guaranteed crowd-pleaser.

Why You’ll Love This Recipe

This Chocolate Chip Cheesecake Recipe is a testament to how simple ingredients can create extraordinary flavors. The delightful blend of cream cheese, sugar, and vanilla creates a luscious filling, while the chocolate chips add an unexpected burst of chocolatey goodness that elevates this dessert to another level.

Convenience is another reason to love this recipe. With an easy-to-follow baking process and readily available ingredients, you can whip up this cheesecake with minimal hassle. Plus, it can be prepared ahead of the time, making it an excellent choice for busy bakers or last-minute dessert options.

This cheesecake not only satisfies a sweet tooth but also has nutritional benefits due to the dairy content, which provides calcium and protein. When enjoyed in moderation, it can fit into a balanced diet, offering both pleasure and nutrition.

It’s also a social dessert; its presence at gatherings brings people together, encouraging sharing and conversation around a deliciously crafted treat. The joy of slicing into a beautiful cheesecake is unparalleled, and sharing it with loved ones makes it all the better.

Finally, it’s cost-effective. With affordable ingredients and the ability to make several servings at once, this dessert offers great value, making it an ideal choice for both family dinners and larger gatherings.

Historical Background and Cultural Significance

The origins of cheesecake date back to ancient Greece, where it was enjoyed at the first Olympic Games as a source of energy. Over centuries, cheesecake recipes evolved, crossing borders and cultures until it landed firmly in American kitchens, where the cream cheese variant became a beloved favorite.

In the United States, cheesecake gained immense popularity in the 19th and 20th centuries, evolving to incorporate various flavors and textures. This Chocolate Chip Cheesecake is a modern twist on the classic, showcasing the versatility of the cheesecake format, allowing for indulgences like chocolate chips and flavored crusts.

Culturally, cheesecake represents celebration and indulgence, often served at significant events, from weddings to birthdays. It has become a symbol of culinary achievement within the baking community, with home bakers often eager to showcase their masterpieces.

Regional variations abound, with New York-style cheesecake known for its dense and creamy texture, while the Chicago-style offers a lighter option. This Chocolate Chip Cheesecake marries these traditions together, adding chocolate as a universally loved ingredient, making it a versatile option embraced by all.

Ingredient Deep Dive

Cream Cheese: Essential for that smooth, creamy filling, cream cheese is a staple in many desserts. It’s rich in nutrients and provides a tangy flavor that balances the sweetness in cheesecakes. When selecting cream cheese, choose blocks instead of tub varieties for a firmer texture.

Graham Crackers: The foundation of the cheesecake crust, graham crackers add sweetness and crunch to every bite. Look for brands that use whole grains for additional nutritional benefits, and always store them in an airtight container to maintain freshness. If gluten-free, options like almond flour crusts work well.

Sugar: Sugar adds sweetness and aids in the baking process, ensuring the cheesecake sets properly. It’s important not to skip any sugar to maintain a balanced flavor. For alternatives, consider coconut sugar or honey, but note that it may alter texture and baking time slightly.

Chocolate Chips: The star ingredient that transforms a traditional cheesecake into a chocolate lover’s dream. They provide bursts of chocolate richness, enhancing flavor and texture. Use semi-sweet or dark chocolate chips based on your preference, and store them in a cool place to prevent melting.

Common Mistakes to Avoid

  • Overmixing the batter can lead to air bubbles, which may crack the cheesecake. Always mix until just combined.
  • Not allowing the cream cheese to soften to room temperature can result in lumps. Always let it sit out beforehand.
  • Skipping the water bath can dry out your cheesecake. Always use a water bath to ensure even cooking.
  • Opening the oven door during baking can cause fluctuations in temperature, resulting in cracks. Avoid peeking!
  • Overbaking will yield a dry cheesecake. Aim for a slight jiggle in the center; it will firm up as it cools.
  • Not chilling the cheesecake long enough can alter its texture. Refrigerate for at least 4 hours, preferably overnight.
  • Skipping proper storage can lead to spoilage. Use airtight containers to keep your cheesecake fresh.
  • Using a dull knife to slice can lead to messy edges. Always use a sharp, warm knife for clean cuts.

Essential Techniques

Mixing: Mixing the ingredients just until combined is key to a creamy texture. Overmixing incorporates too much air, resulting in cracks. Aim for smoothness without overdoing it.

Baking in a Water Bath: This technique prevents the cheesecake from baking unevenly. Wrap your springform pan tightly in foil to avoid water intrusion, and place it in a larger pan filled with hot water. This ensures a gentle, consistent heat.

Chilling: Proper chilling is crucial for cheesecake setting correctly. After baking, let it cool on the counter before transferring it to the fridge to avoid condensation. A well-chilled cheesecake enhances flavor and texture.

Pro Tips for Perfect Chocolate Chip Cheesecake

1. Use room-temperature ingredients for a smoother batter.

2. Incorporate mini chocolate chips for a more evenly distributed chocolate flavor.

3. Add a bit of vanilla extract to the batter for enhanced flavor.

4. Adjust baking time according to your oven; every oven bakes differently.

5. Let the cheesecake cool completely before removing it from the springform pan.

6. For a richer flavor, experiment with flavored extracts like almond or hazelnut.

7. Try topping with whipped cream and extra chocolate chips for a stunning presentation.

8. Consider using a food processor for a hassle-free crust preparation.

Variations and Adaptations

Regional variations can include adding different extracts or infusions, such as orange or peppermint. Seasonal adaptations might involve incorporating pumpkin puree for a festive fall twist.

Dietary modifications can be made with gluten-free graham crackers or dairy-free cream cheese options for those with restrictions. Flavor variations can include caramel swirls or nut additions for extra crunch.

For texture modifications, consider a denser cheesecake by reducing the amount of cream cheese, or a lighter version using whipped cream folded in at the end.

Presentation alternatives can feature a fruit topping such as raspberry or strawberry, which adds a lovely contrast of color and flavor.

Serving and Presentation Guide

Plate this cheesecake on a decorative cake stand for an elegant presentation. Garnishing with mint leaves or chocolate shavings can add sophistication. For modern servings, individual portions in mason jars can create a fun twist.

Consider serving with a scoop of vanilla ice cream or drizzling chocolate sauce over each slice for extra indulgence. The ideal serving temperature is chilled, which complements its creamy texture and enhances flavor.

Maintain portion control by cutting the cheesecake into small slices; this way, guests can savor more than one slice without overindulging. Each slice should reflect the beauty of your baking skills.

Wine and Beverage Pairing

An elegant dessert wine, such as Riesling or Moscato, pairs excellently with the Chocolate Chip Cheesecake. The sweetness of these wines complements the richness of the cheesecake.

If you prefer non-alcoholic beverages, a creamy chai latte or freshly brewed coffee can enhance the dessert experience, offering warm and aromatic contrasts.

For a refreshing alternative, serve with iced tea infused with citrus notes, which can help cleanse the palate between bites.

Storage and Shelf Life

Store your Chocolate Chip Cheesecake in an airtight container in the refrigerator for up to 5 days. If you plan on long-term storage, wrap it tightly in plastic wrap, then foil, and freeze for up to 3 months.

To thaw, transfer it to the refrigerator overnight before serving. Always check for signs of spoilage, such as off-odors or discoloration. When reheating, do so gently; the microwave can alter the texture if overheated.

Make Ahead Strategies

This cheesecake can be prepared up to two days in advance, allowing flavors to meld beautifully. Simply follow the recipe, cooling and chilling it completely before serving.

For step-by-step prep, make the crust a day ahead and store it at room temperature. The filling can be made in advance, but avoid adding chocolate chips until ready to bake to maintain texture.

Scaling Instructions

If you plan to half the recipe, use a smaller springform pan and adjust baking time accordingly. For larger gatherings, doubling or tripling the recipe works well, but make sure you have a large enough mixer and baking dish.

When scaling, consider the overall cooking time as well; larger cheesecakes will require longer to bake. Keep an eye on doneness, using a toothpick to check the center. Store leftovers appropriately, keeping in mind the adjustments made when scaling.

Nutritional Deep Dive

This Chocolate Chip Cheesecake boasts about 350 calories per slice, with significant protein derived from the cream cheese. Nutritionally, it provides essential vitamins and calcium, particularly beneficial in a balanced diet.

When enjoying dessert pathways, portion analysis becomes crucial; an appropriate slice size allows for indulgence without overconsumption. For weight management, it’s wise to enjoy this treat in moderation.

Dietary Adaptations

For a gluten-free version, substitute regular graham crackers for gluten-free alternatives. This ensures that those with celiac disease can enjoy this delightful dessert.

Dairy-free adaptations include using cashew cream or coconut cream to replace cream cheese while maintaining a creamy consistency. A vegan interpretation can utilize firm tofu blended until smooth instead of cream cheese.

Low-carb options can use almond flour crusts mixed with butter, creating a satisfying vehicle for the filling without the added carbs. Adjusting for keto diets may involve incorporating sugar alternatives like erythritol.

Troubleshooting Guide

If your cheesecake is too dense, ensure you’re not overmixing and have the right ingredient measurements, especially the eggs.

In cases of flavor imbalance, consider adding a pinch of salt or more vanilla to elevate the overall taste profile.

Commonly faced temperature issues can be resolved by verifying oven calibration to ensure accurate cooking temperatures.

Recipe Success Stories

Community members often share their excitement for how this Chocolate Chip Cheesecake recipe has become a family favorite. Many have reported positive feedback from guests who couldn’t believe it was homemade!

Readers enjoy creating variations such as swirls of caramel or infusions of coffee to personalize the classic recipe, heightening its success as a versatile option.

Photographs shared by the community showcase delightful presentations, highlighting how every baker can make this cheesecake a showstopper for special occasions.

Frequently Asked Questions

1. Can I use a different crust? Absolutely! You can substitute the graham cracker crust for a chocolate cookie crust or even a nut-based crust for added flavor and texture.
2. How do I know when my cheesecake is done? A perfect cheesecake will have a slight jiggle in the center when you gently shake the pan. It will set further as it cools.
3. Can I freeze cheesecake? Yes, cheesecake freezes well. Wrap it securely and store it in the freezer for up to 3 months.
4. What’s the best way to slice cheesecake? Use a sharp knife and warm it under hot water before slicing for clean edges.
5. How long should cheesecake cool before refrigerating? Let it cool at room temperature for at least an hour before transferring to the fridge.
6. Can I use flavored chocolate chips? Yes! Flavored chocolate chips can add an extra layer of flavor to your cheesecake.
7. What’s the difference between regular cheesecake and chocolate chip cheesecake? Chocolate chip cheesecake incorporates chocolate chips for added flavor and texture, making it a richer dessert.
8. Is it necessary to use a water bath? While not mandatory, using a water bath helps prevent cracks by providing even cooking conditions.
9. Can I make this recipe ahead of time? Yes! This cheesecake actually tastes better after chilling for a day or two as the flavors meld.
10. What toppings are suggested for serving? Whipped cream, chocolate ganache, or fresh berries make great toppings that enhance presentation and taste.

Additional Resources

For those looking for more delightful dessert options, check out our other cheesecake recipes that explore unique flavors like pumpkin spice or berry bliss. Consider reading up on essential baking techniques to master your cheesecake skills.

Ingredient guides can provide helpful insights into selecting the freshest products, as well as understanding the right tools and equipment needed for a successful bake. Always stay tuned for seasonal variations that keep your desserts exciting!

Join the Conversation

Share your baking successes on social media using our hashtags, and join our community in sharing photography tips and modifications for this Chocolate Chip Cheesecake. We love hearing feedback from our bakers and your variations might inspire others!

The Recipe

Chocolate Chip Cheesecake

Serves: 8 slices

Prep Time: 25 mins

Cook Time: 1 hour

Total Time: 1 hour 25 mins

Kitchen Equipment Needed

  • Springform pan
  • Mixer (hand or stand)
  • Mixing bowls
  • Spoon or rubber spatula
  • Baking sheet (for the water bath)

Ingredients

  • 1 ½ cups graham cracker crumbs
  • ⅓ cup sugar
  • ½ cup unsalted butter, melted
  • 4 (8 oz) packages cream cheese, softened
  • 1 cup sugar
  • 4 large eggs
  • 2 teaspoons vanilla extract
  • 1 cup semi-sweet chocolate chips

Directions

  1. Preheat your oven to 325°F (163°C).
  2. In a mixing bowl, combine graham cracker crumbs, sugar, and melted butter. Press mixture firmly into the bottom of a greased springform pan to form a crust.
  3. In another bowl, beat the softened cream cheese until smooth. Gradually add sugar and mix until well combined.
  4. Add the eggs one at a time, mixing on low speed. Incorporate vanilla extract and fold in chocolate chips.
  5. Pour the filling over the crust and smooth the top with a spatula.
  6. Place the springform pan in a larger baking dish and fill the outer dish with water (about halfway up the sides of the pan).
  7. Bake for about 60 minutes or until the center is set with a slight jiggle. Turn off the oven and leave the cheesecake in with the door ajar for another hour.
  8. Remove from the oven, cool at room temperature, and then refrigerate for at least 4 hours before serving.

Recipe Notes

  • For added flavor, consider mixing in different chips like butterscotch or white chocolate.
  • Store leftover cheesecake in the refrigerator for up to 5 days, or freeze for longer storage.