Crunchy Southwestern Chicken Wrap: A Quick and Flavorful Meal
Crunchy Southwestern Chicken Wrap: A Bold and Flavorful Recipe
Introduction
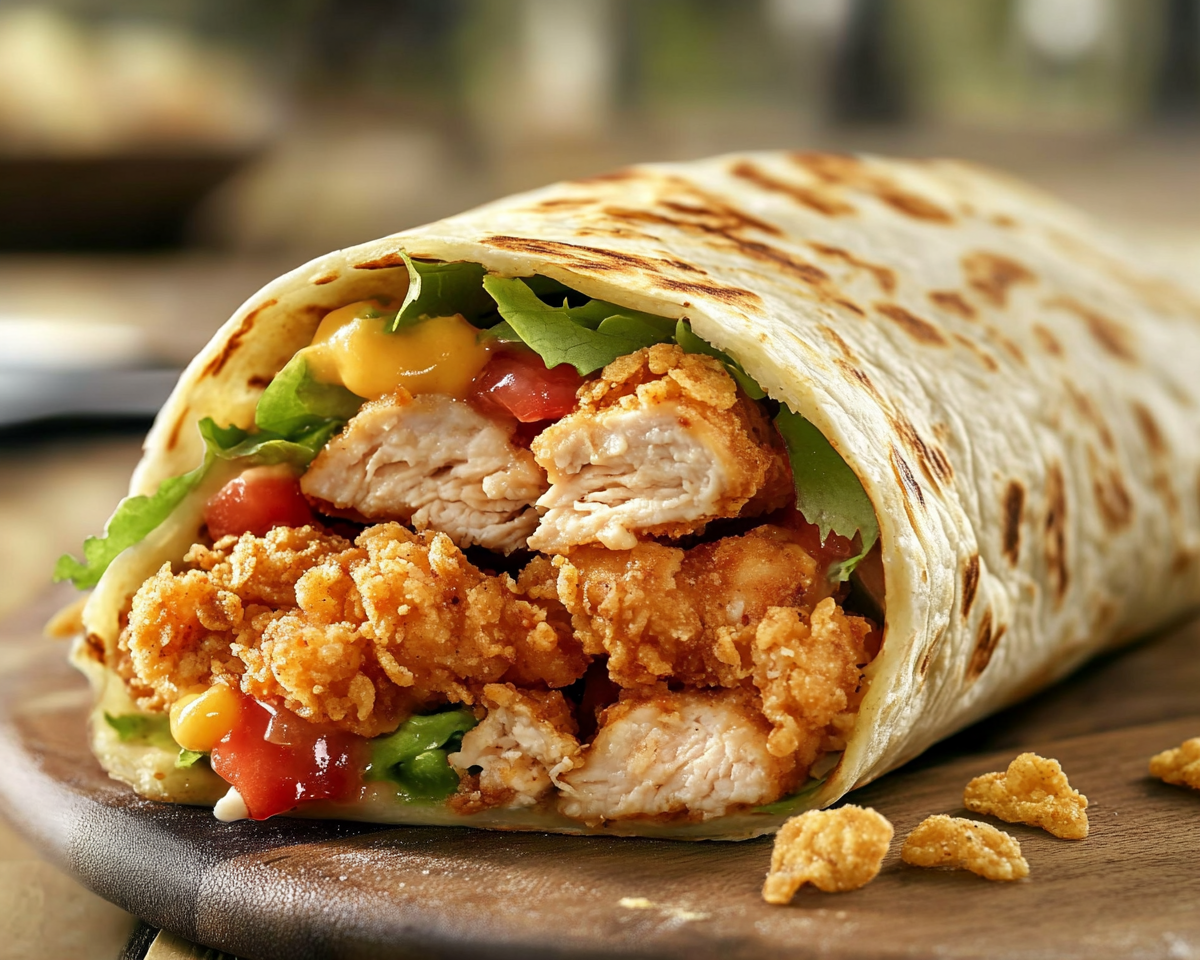
The Crunchy Southwestern Chicken Wrap is a versatile and bold dish that balances the crunch of fresh vegetables and tortilla strips with the tang of a Southwestern sauce. Perfect for a quick lunch, dinner, or even a party snack, this wrap brings together the best flavors of the Southwest in a portable format.
Can I make these wraps ahead of time?
Yes, but store the sauce and crunchy toppings separately to maintain freshness.
What’s the best tortilla type for this recipe?
Large flour tortillas work best for easy wrapping and folding.
How can I customize this recipe for kids?
Use mild sauce and skip the jalapeños for a kid-friendly version.
Conclusion
The Crunchy Southwestern Chicken Wrap is a meal that combines flavor, convenience, and versatility. Its ability to cater to various dietary preferences while delivering a satisfying crunch makes it a must-try recipe. Pair it with sides like Guacamole or Sweet and Sour Cocktail Meatballs for a complete feast!
Meatball Sub Cupcakes: The Perfect Party Snack
Meatball Sub Cupcakes: A Creative Party Snack
Introduction
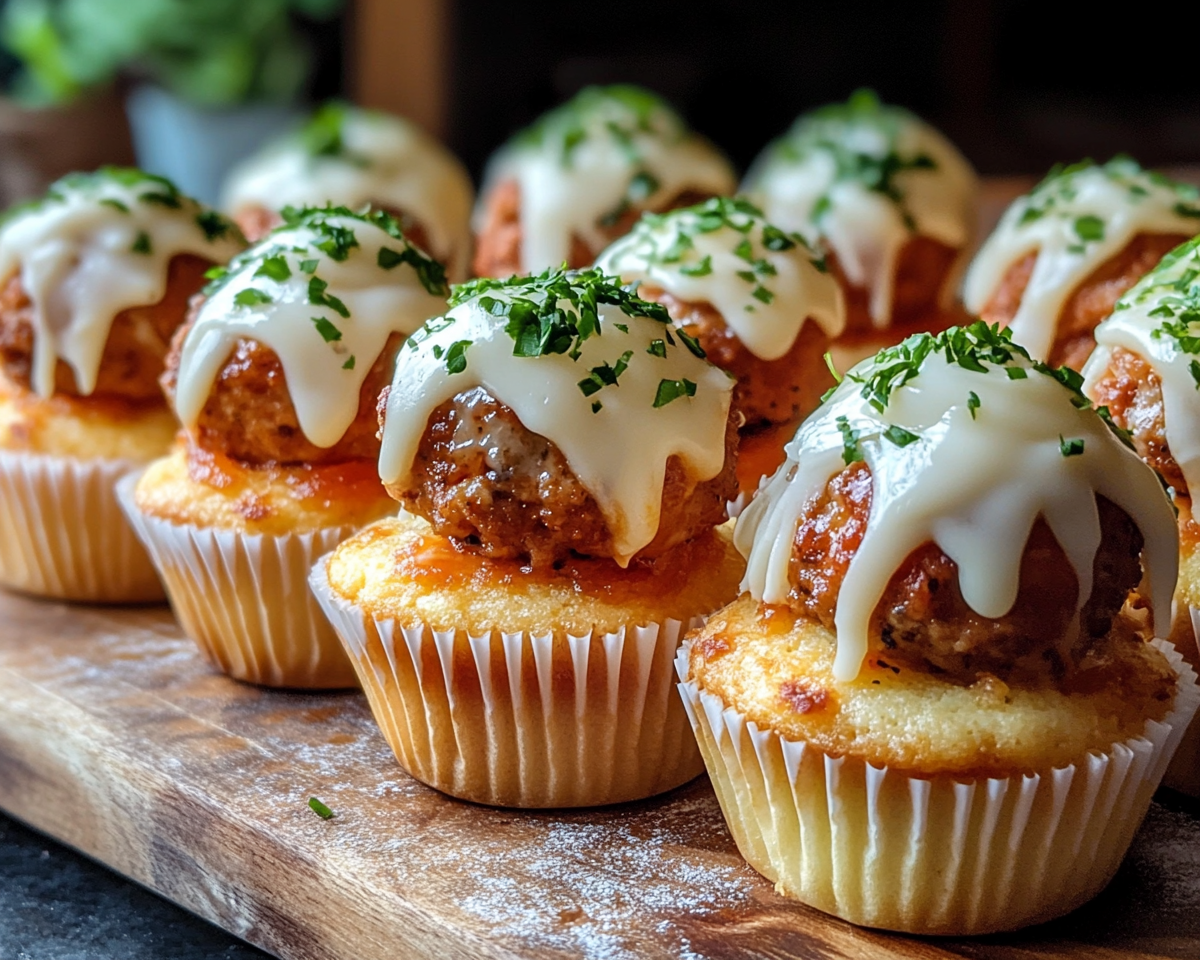
Meatball Sub Cupcakes are a delightful twist on a classic favorite. These mini treats pack the flavors of a traditional meatball sub into a compact, handheld bite. Perfect for parties, game days, or family dinners, they’re both convenient and full of rich, hearty flavors.
Meatball Sub Cupcakes are a fun and versatile recipe that combines the best of comfort food and party snacks. With simple ingredients and endless customization options, they’re sure to become a family favorite. Try them out at your next event!
Cranberry Punch: A Festive and Refreshing Holiday Drink
Cranberry Punch: A Festive and Refreshing Beverage
Introduction
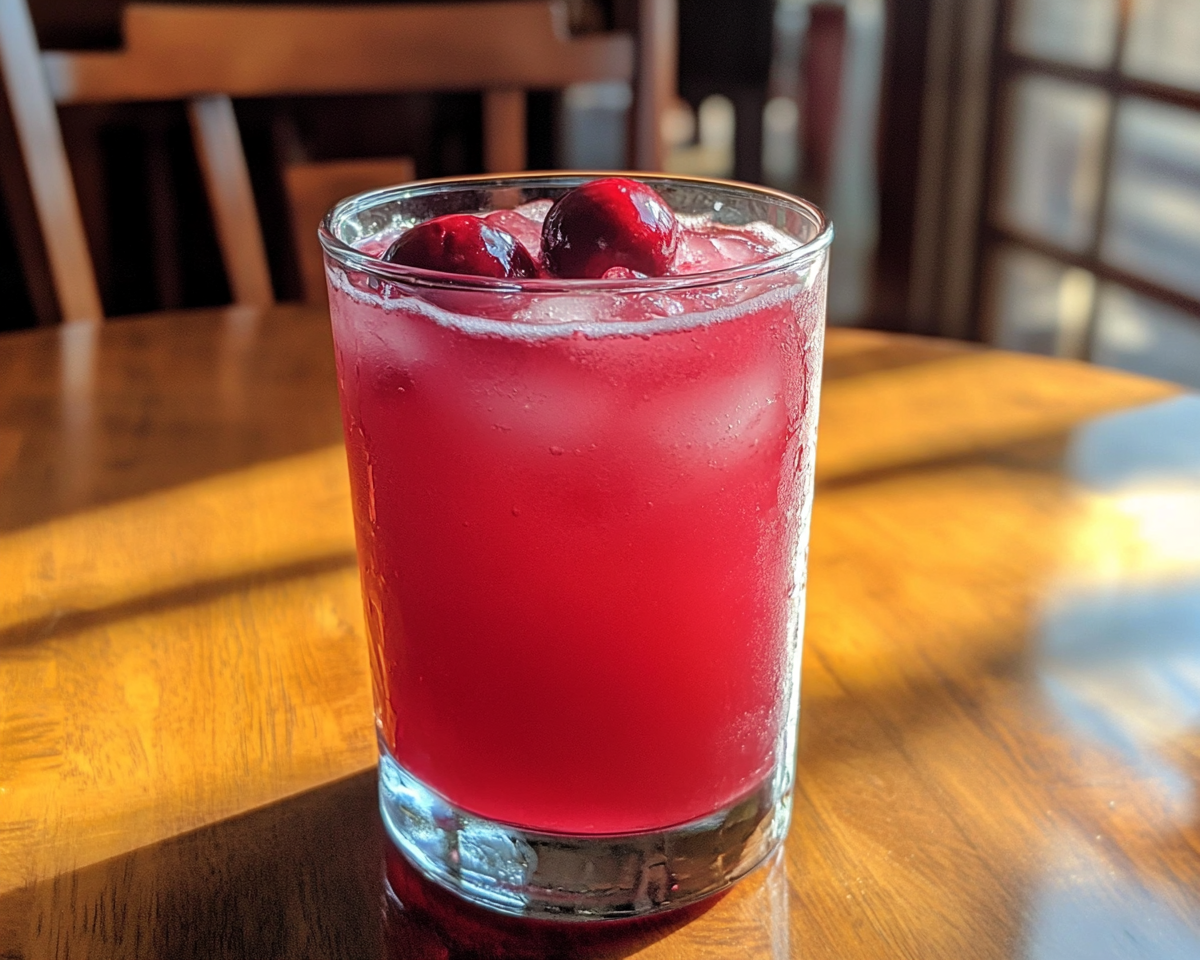
Cranberry Punch is a vibrant, refreshing beverage perfect for holidays, parties, or casual gatherings. With its beautiful red hue and tangy flavor, it complements any occasion and can be customized with alcoholic or non-alcoholic variations. This drink combines the tartness of cranberry juice with the effervescence of sparkling water or ginger ale, making it an irresistible favorite.
Cranberry Punch is a versatile, crowd-pleasing drink that can elevate any celebration. Whether served sparkling, spiced, or warm, its bright flavors and festive presentation make it a standout choice. Try it with different variations and garnishes for a unique touch at your next gathering!
No-Bake Ferrero Rocher Cheesecake Recipe for Chocolate Lovers
No-Bake Ferrero Rocher Cheesecake: Indulge in a Decadent Delight
⚖️
Difficulty
Easy
⏲️
Prep Time
20 mins
🕒
Cook Time
0 mins
⏱️
Total Time
4 hours
🍽️
Servings
8 slices
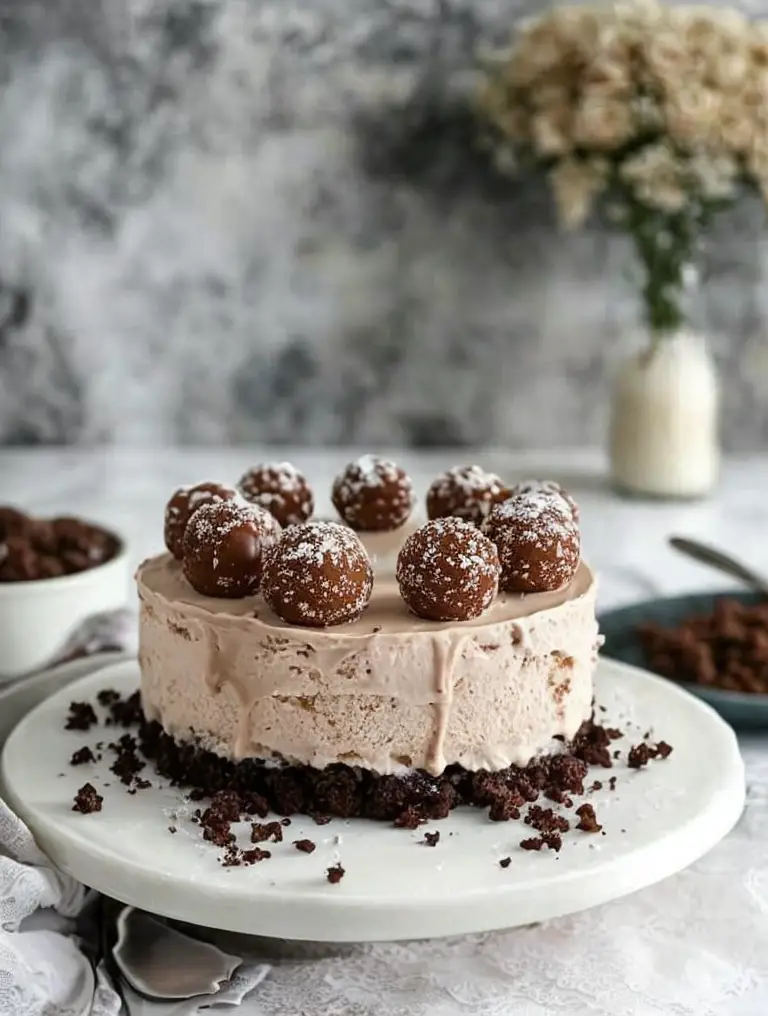
Indulge your senses with our No-Bake Ferrero Rocher Cheesecake, a dessert that masterfully combines the rich flavors of chocolate, hazelnut, and cream cheese. Perfect for any occasion, this cheesecake is not only simple to make but also incredibly satisfying to eat. The layers of creamy filling and crunchy base create a delightful contrast, making each bite an experience to savor. Imagine treating your family and friends to a slice that tastes like candy. With this recipe, you will be their hero!
This cheesecake is ideal for those who love the unique taste of Ferrero Rocher chocolates. No baking is required; simply blend, mix, and chill! It’s perfect for hot summer days or any gathering where you want to impress your guests with a show-stopping dessert. A beautiful presentation featuring full Ferrero Rocher chocolates on top guarantees to make your cheesecake stand out on any dessert table.
Quick Recipe Highlights
Flavor Profile: This cheesecake features a harmonious blend of chocolate and hazelnut flavors complemented by the creaminess of the cheesecake.
Texture: Enjoy a smooth and creamy filling alongside a crunchy, nutty biscuit base.
Aroma: The delightful scent of chocolate mingles with the nutty aroma of hazelnuts, creating an irresistible allure.
Visual Appeal: The cheesecake is adorned with whole Ferrero Rocher chocolates, making it visually stunning with an elegant touch.
Skill Level Needed: Perfect for beginner bakers; no special techniques are required!
Special Equipment: A 9-inch springform pan and an electric mixer make preparation a breeze.
Recipe Overview
Difficulty Level: Easy enough for beginners, this no-bake cheesecake allows you to focus more on flavors rather than complex techniques.
Category: This dessert falls perfectly into the cheesecake category, loved by many for its creamy and rich texture.
Cuisine: Infused with Australian and European chocolate cultures, this dessert offers a luxurious touch often seen in café-style recipes.
Cost: Inexpensive ingredients mean you can whip this cheesecake up without breaking the bank.
Season: Great for summer since it doesn’t require an oven, but also fantastic for winter holiday celebrations!
Occasion: Perfect for birthday parties, potlucks, and festive seasons where dessert takes center stage.
Why You’ll Love This Recipe
There’s a lot to love about this No-Bake Ferrero Rocher Cheesecake. Its taste and texture are a stunning combination of sweetness and creaminess, with a rich chocolate flavor that pairs perfectly with the crunchy hazelnut-infused base. Each slice delivers a luxurious mouthfeel that makes every occasion feel extra special.
The convenience of this cheesecake cannot be overstated. With a prep time of just 20 minutes, it allows you to focus on other aspects of your celebration without worrying about baking times or oven space. Simply whip together the ingredients, pour them into the prepared crust, and let it chill in the refrigerator until set.
Nutritionally, this cheesecake can be a more moderate dessert choice if you keep portion sizes in mind. The combination of cream cheese, chocolate, and hazelnuts brings along some essential nutrients, making it a sweeter treat that isn’t completely devoid of benefits.
Socially, this cheesecake is a great conversation starter at gatherings. Sharing slices while discussing flavors and techniques creates a delightful atmosphere, making it not only a treat for the taste buds but also a way to connect with others. It’s an experience that’s perfect for sharing!
Lastly, the cost-effectiveness of this No-Bake Ferrero Rocher Cheesecake makes it an accessible treat for anyone looking to impress guests without spending a fortune. In fact, you might already have some of the ingredients at home, making it an optimal choice for spontaneous dessert making!
Historical Background and Cultural Significance
The Ferrero Rocher chocolate originated in Italy in 1982 and has since gained global recognition as a luxurious treat. The unique blend of chocolate and hazelnut is central to this iconic confection, inspiring many dessert recipes that celebrate its deliciousness. The brand, known for its sophisticated packaging, emphasizes the quality and artisan craftsmanship behind each chocolate.
Culturally, Ferrero Rocher chocolates are often associated with gift-giving, especially during holidays and special occasions. Their popularity has made them a staple in many countries, often appearing in festive boxes during celebrations. This influence has led to a rise in similar dessert recipes, capturing the essence of Ferrero while allowing for creativity in the kitchen.
The evolution of the no-bake cheesecake reflects modern culinary trends that favor convenience and flavor without sacrificing quality. The classic cheesecake recipe has been adapted over time, allowing for creative ingredients like Ferrero Rocher to shine. As a result, dessert enthusiasts have embraced this fruity, chocolatey delight that blends traditional cheesecake with contemporary tastes.
Regional variations of cheesecake can be seen across the world, with each region incorporating its local flavors and styles. In places like the United States, creamy varieties prevail, while in Italy, lighter ricotta-based versions are more common. The No-Bake Ferrero Rocher Cheesecake combines these global influences, making it accessible and loved in various cultures today.
Ingredient Deep Dive
Cream Cheese
Cream cheese is the cornerstone of any cheesecake. Its smooth texture and neutral flavor create the creamy base, essential for desserts like our No-Bake Ferrero Rocher Cheesecake. It is rich in fat, which helps build the luscious mouthfeel that is so enjoyable in desserts. When selecting cream cheese, look for a high-fat variety to achieve the best results. Always store it in the refrigerator and use it within the ‘best by’ date for optimal freshness.
Chocolate Hazelnut Spread
Chocolate hazelnut spread, the star ingredient, provides a rich, sweet flavor reminiscent of Ferrero Rocher chocolates. This indulgent spread contains sugar, vegetable oils, hazelnuts, cocoa, and milk that combine to create a unique taste sensation. These ingredients provide not only a delightful flavor but also essential nutrients like vitamin E and healthy fats from the hazelnuts. Look for spreads that contain natural or high-quality ingredients, and keep them sealed in a cool, dry place.
Digestive Biscuits
Digestive biscuits form the crunch base layer of our cheesecake, delivering both texture and flavor. Traditionally made with whole wheat flour, these biscuits are slightly sweet and crumbly, making them perfect for desserts. They are economical and widely available, so selecting good quality will make a significant difference in your cheesecake’s taste. Store in an airtight container to maintain freshness. If unavailable, graham crackers or other similar cookies can be used as a substitute.
Common Mistakes to Avoid
Using low-fat cream cheese: This can lead to a watery cheesecake. Always use full-fat cream cheese for the best texture.
Not allowing the cheesecake to set long enough in the refrigerator: A proper chilling time is essential for achieving that luscious texture.
Forgetting to finely crush the biscuits: Coarse crumbs won’t hold together properly. Aim for a sand-like consistency.
Overmixing the cream cheese: Be sure not to overwhip, which can incorporate too much air and spoil the smooth texture.
Skipping the refrigeration step after assembly: This is crucial for firming up the cheesecake before serving.
Not using a springform pan: A springform pan makes it far easier to remove the cheesecake without damaging it.
Using imitation chocolate: Real chocolate significantly enhances flavor, so opt for a good quality chocolate or spread.
Not tasting the filling: Always check the flavor of your filling before setting it; adjusting sweetness can make all the difference!
Neglecting to let ingredients reach room temperature: Ensure cream cheese and other ingredients are at room temperature for better blending.
Not storing correctly: Keep the cheesecake sealed in the refrigerator to maintain freshness for longer.
Essential Techniques
Mixing the Cheesecake Filling
Mixing the cheesecake filling is a critical step that determines the overall texture and consistency of your dessert. Proper mixing integrates all ingredients smoothly, resulting in a creamy filling. Use an electric mixer and avoid overmixing, as this can introduce too much air, making it fluffy instead of dense. A smooth and homogenous mixture should be your visual cue for success.
Prepping the Biscuit Base
The biscuit base requires fine crushing for optimal texture. A food processor saves time and ensures uniform crumbs. After mixing with melted butter, press them firmly into the bottom of your pan. This step is important as it creates a solid base that holds together well once chilled. Look for a firm foundation that doesn’t crumble easily, indicating it’s pressed correctly.
Pro Tips for Perfect No-Bake Ferrero Rocher Cheesecake
– Always use full-fat cream cheese and fresh ingredients for the best flavor and texture.
– Chill your mixing bowl and beaters before mixing to maintain a cold temperature for the cream cheese.
– Drizzle melted chocolate over the top before serving for additional richness.
– For extra crunch, chop additional hazelnuts and sprinkle them on top.
– Allow the cheesecake to come to room temperature for about 15 minutes before slicing for cleaner cuts.
– Use dental floss or a hot knife to slice the cheesecake neatly without crumbling.
– Decorate with whipped cream and Ferrero Rocher chocolates for a beautiful presentation.
– Ensure the cheesecake has set for at least 4 hours or overnight for the best results.
Variations and Adaptations
You can explore many variations of the Ferrero Rocher cheesecake to cater to different tastes and dietary needs. For those who prefer a different flavor, consider swapping the chocolate hazelnut spread with a peanut butter alternative to create a delicious peanut butter cheesecake.
If you’re looking for seasonal adaptations, adding a hint of peppermint extract during the holiday season will give your cheesecake a festive twist that evokes the spirit of winter. For a gluten-free version, substitute the digestive biscuits with gluten-free graham crackers.
Vegetarian fans can easily enjoy this treat; however, vegans can adjust by using plant-based cream cheese and a nut-based crust. Texture modifications can also create unique experiences – try blending in a layer of caramel or fresh fruit to enhance the dessert further.
Presentation alternatives include using individual dessert cups for serving, making them fun and easy for parties.
Serving and Presentation Guide
For plating your No-Bake Ferrero Rocher Cheesecake, carefully release it from the springform pan and place it on a decorative cake stand or platter. Use a sharp knife to cut neat slices and consider garnishing each slice with a dollop of whipped cream for added elegance.
Traditional accompaniments include drizzling chocolate sauce or caramel over slices for an even richer dessert experience. Modern serving suggestions suggest pairing this cheesecake with a scoop of vanilla ice cream on the side.
Temperature plays an essential role; serving it slightly chilled creates a refreshing experience. As for portion control, a generous slice is ideal for gatherings, but remember to check that guests can easily indulge without feeling overwhelmed.
Wine and Beverage Pairing
For pairing, a rich dessert wine or Port complements the chocolate notes in the cheesecake beautifully. Alternatively, an espresso or dark roast coffee works in harmony with the chocolate flavor, creating a delightful contrast with the creaminess of the dessert.
For non-alcoholic options, consider serving a chocolate chai tea that parallels the richness of the cheesecake without competing. Always serve drinks chilled if necessary and offer small servings to create an elegant, balanced finishing touch.
Storage and Shelf Life
To keep your No-Bake Ferrero Rocher Cheesecake fresh, store it in the refrigerator in an airtight container. Proper storage can preserve its flavor and texture for up to 5-7 days.
If you notice condensation forming when removing it from the fridge, allow it to rest for a few minutes before cutting into it. Signs of spoilage include an off odor or visible mold. Should you need to freeze it, wrap it tightly in plastic wrap and aluminum foil, ensuring it lasts for up to 3 months.
When reheating, thaw it overnight in the refrigerator before serving or allow it to sit out for about 30 minutes at room temperature.
Make Ahead Strategies
For those planning in advance, this No-Bake Ferrero Rocher Cheesecake is a perfect choice. You can prepare the cheesecake a day ahead of your event, allowing it time to set overnight for optimal flavor.
A prep timeline can include making the crust and filling a day before assembly, then allowing full refrigeration after that. Store the crust and filling separately if making components ahead, and assemble just before serving for the freshest taste.
Always assure key elements like toppings and sauces can be added right before serving to maintain their quality and presentation.
Scaling Instructions
If you wish to adjust the recipe yields, simply halve or double the amounts of each ingredient used, ensuring you modify the cream cheese and chocolate hazelnut spread equally to maintain flavor.
For larger gatherings, a triple batch works well; just ensure you have an appropriately sized springform pan or divide into multiple smaller pans. Watch for slight timing adjustments in setting based on the depth of your cheesecake layer.
Remember, storage considerations will also change, as larger quantities might need to be split into smaller containers.
Nutritional Deep Dive
This No-Bake Ferrero Rocher Cheesecake contains several nutritious elements; while balanced, it’s essential to check the macro breakdown per slice to manage a healthy diet.
Typical servings will yield around 300 calories, depending on ingredient quality. You can further analyze the micronutrient content, particularly appreciating the calcium from cream cheese and healthy fats from hazelnuts.
For health benefits, the antioxidant properties of chocolate give an added boost, just balance with portion control for lifestyle management efforts.
Dietary Adaptations
For those on gluten-free diets, simply replace the digestive biscuits with gluten-free alternatives. These options offer the same delicious results without the gluten.
Dairy-free adaptations can explore plant-based cream cheese varieties that hold well in dessert recipes. Vegan switches call for non-dairy chocolate spreads and alternative sweeteners to ensure everyone can enjoy this treat.
Similarly, for low-carb or keto dieters, consider substituting the crust for ground nuts mixed with low-carb sweeteners for an equally satisfying dessert. Always explore these variations thoughtfully to meet dietary restrictions while preserving flavor.
Troubleshooting Guide
If your cheesecake turns out too soft or runny, ensure your cream cheese is well combined and adequately chilled for longer periods. A firm texture comes from allowing sufficient setting time in the refrigerator.
For flavor balance issues, you can adjust sweetness levels by incorporating more melted chocolate or a touch of vanilla extract.
Temperature-related problems may arise, especially if your ingredients are cold. Allow items to reach room temperature before mixing to achieve a smoother consistency.
In case of equipment challenges, like a springform pan that isn’t sealing well, utilize parchment paper around the edges. In terms of ingredient substitutions, ensure similar components in flavors to maintain a cohesive taste profile.
Timing concerns can occur when guests arrive earlier than planned. A quick chill in the freezer can help firm up the dessert rapidly, extending its overall appeal.
Recipe Success Stories
Community feedback on the No-Bake Ferrero Rocher Cheesecake has been overwhelmingly positive, with many praising its ease of preparation and delightful taste. Readers have shared variations that include using different toppings and flavor infusions, such as raspberries or even matcha powder for an unexpected twist.
Adaptation stories reveal that some have swapped white chocolate for an extra layer of richness, while others have shared their experiences hosting gatherings where this cheesecake was the fan-favorite.
Photography tips from our community emphasize capturing the layers of this dessert, focusing on its glossy top and crunchy base to entice readers to try making their version.
Frequently Asked Questions
Can I use a different type of chocolate spread?
Yes, you can substitute chocolate hazelnut spread with other flavors like peanut butter or almond butter; however, this will alter the overall taste of your cheesecake.
How do I make this cheesecake gluten-free?
To create a gluten-free version, just replace the digestive biscuits with a gluten-free biscuit alternative while maintaining the same amount to achieve the right crust texture.
Can I use low-fat cream cheese?
While you may use low-fat cream cheese, it might affect the texture and creaminess of your cheesecake, leading to a less luscious filling.
How long does this cheesecake need to set?
It is recommended that the cheesecake sets in the refrigerator for at least 4 hours, or overnight for the best texture and flavor development.
Can I freeze leftovers?
Yes, you can freeze slices of your cheesecake; just ensure they are wrapped tightly in plastic wrap or placed in an airtight container for up to 3 months.
How do I get a clean slice of cheesecake?
For cleaner slices, dip your knife in hot water before cutting, then wipe it clean between cuts to maintain a neat appearance for serving.
What are some good accompaniments for this cheesecake?
A dollop of whipped cream, chocolate sauce, or fresh berries can be great accompaniments to enhance both flavor and presentation when serving.
How do I ensure my biscuit base holds together?
Ensure you mix the biscuit crumbs with melted butter thoroughly and press the mixture firmly into your pan to form a solid crust.
Can I add extra ingredients to the filling?
Feel free to experiment with flavors; you can incorporate melted chocolate, chopped hazelnuts, or extracts to personalize your cheesecake further.
How do I adjust for altitude when making this recipe?
At higher altitudes, desserts may require slight temperature adjustments in chilling times and baking. Opt for longer refrigeration periods here.
Additional Resources
For more scrumptious ideas, check out our collection of related recipes that explore delightful no-bake desserts, classic cheesecakes, and innovative flavor pairings. Our technique guides offer valuable advice on mastering the art of cheesecakes, which is a staple in many dessert recipes. Don’t forget to explore our ingredient information database, ensuring you choose the finest products for your culinary creations.
Lastly, look for equipment recommendations that can assist you in creating desserts and baked goods, ensuring you’re satisfied with every creation in your kitchen.
Join the Conversation
We encourage you to share your thoughts or stories about making this No-Bake Ferrero Rocher Cheesecake on social media. Use our hashtag and share your stunning photos to inspire others in their culinary endeavors. The joy of cooking and baking is often magnified with community engagement, and your reviews play a part in shaping this experience.
We love to hear how you’ve personalized this recipe! Share your variations or suggestions in the comments, sparking creativity and cooperation among fellow baking enthusiasts.
The Recipe
No-Bake Ferrero Rocher Cheesecake
Serves: 8 slices
Prep Time: 20 mins
Cook Time: 0 mins
Total Time: 4 hours (including chilling time)
Kitchen Equipment Needed
9-inch springform pan
Mixing bowl
Electric mixer
Food processor (optional)
Spatula
Ingredients
200g digestive biscuits
100g unsalted butter, melted
500g cream cheese, softened
300g chocolate hazelnut spread
100g powdered sugar
200ml heavy cream
12 Ferrero Rocher chocolates, halved for topping
Directions
In a food processor, finely crush the digestive biscuits until sandy.
Mix the crushed biscuits with the melted butter and press firmly into the base of a springform pan.
In a mixing bowl, combine cream cheese, chocolate hazelnut spread, and powdered sugar; mix until smooth.
In a separate bowl, whip the heavy cream until stiff peaks form and gently fold into the cheesecake mixture.
Spread the filling over the biscuit base evenly and smooth the top.
Chill in the refrigerator for at least 4 hours or until set.
Once set, remove from the springform pan and decorate with halved Ferrero Rocher chocolates on top.
Slice and serve chilled, enjoying this delightful dessert!
Recipe Notes
For added texture, consider mixing in chopped hazelnuts into the filling.
Feel free to customize the topping with your favorite chocolate sauce or berries for a fresh twist.
This cheesecake holds well in the fridge for up to 5-7 days.
Ultimate Cheese-Stuffed Chicken Recipe for Irresistible Flavor Delight
Ultimate Cheese-Stuffed Chicken Recipe: A Cheesy Delight
⚖️
Difficulty
Moderate
⏲️
Prep Time
20 mins
🕒
Cook Time
30 mins
⏱️
Total Time
50 mins
🍽️
Servings
4
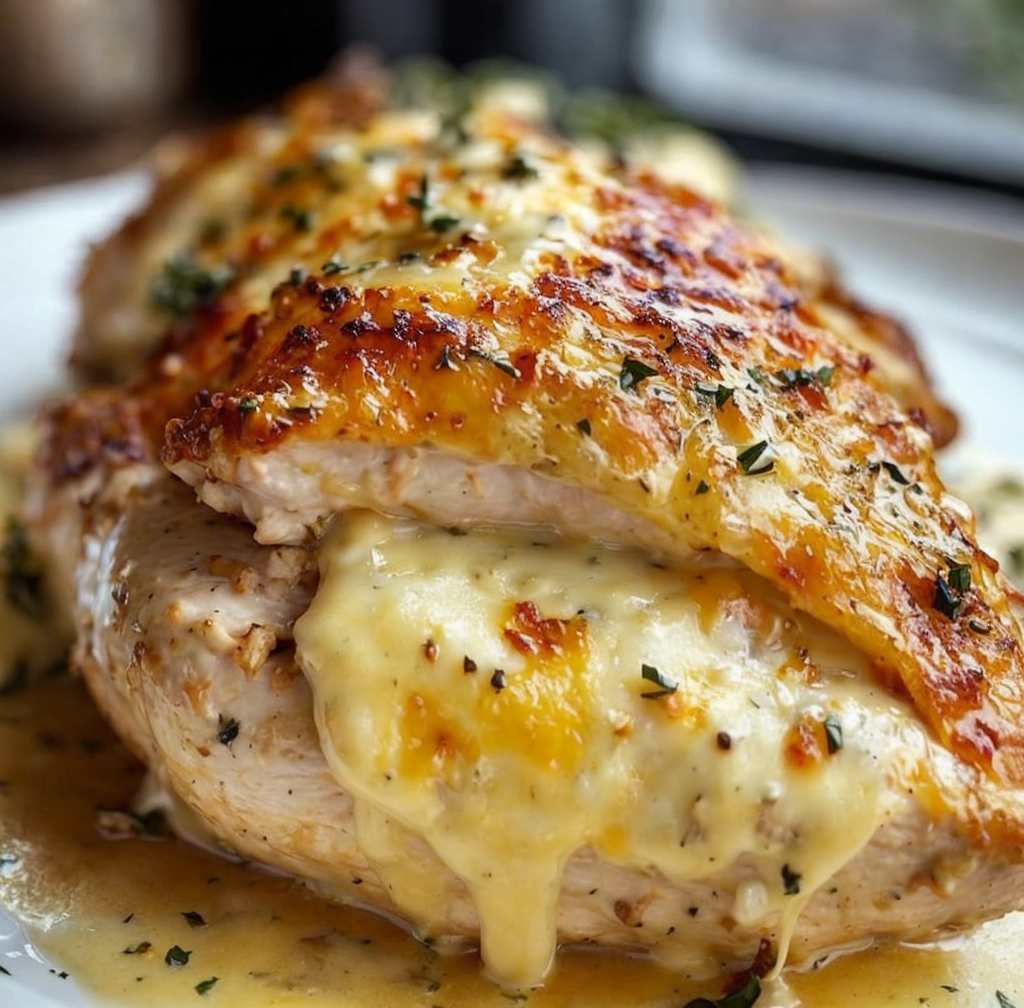
The Ultimate Cheese-Stuffed Chicken Recipe is a culinary masterpiece that promises to please cheese lovers and chicken enthusiasts alike. Imagine tender chicken breasts, expertly filled with a gooey blend of cheeses that melts beautifully as it bakes, creating an extraordinary dish that is as comforting as it is impressive. Each bite offers a delightful contrast of flavors—with the savory chicken perfectly complementing the rich, creamy cheese filling. This recipe is not just a meal; it’s an experience that brings joy to the table.
This cheese-stuffed chicken is elevated by its cohesive blend of herbs and spices, adding depth to the overall taste profile. The aroma wafting from the kitchen as it cooks is nothing short of intoxicating, enveloping your home in a warm, inviting fragrance that will have everyone flocking to the dinner table. With simple ingredients and an easy preparation method, this recipe allows you to showcase your culinary skills without overwhelming you. Perfect for a weeknight dinner or a special occasion, it strikes the ideal balance between elegance and comfort food.
Quick Recipe Highlights
Flavor Profile: This dish features a delightful combination of savory chicken with a rich and creamy cheese filling, enhanced by aromatic herbs and spices.
Texture: Expect a crispy exterior that leads to a succulent, juicy interior with a smooth, melting cheese center.
Aroma: The combination of garlic, herbs, and melting cheese creates a mouthwatering scent that fills the kitchen.
Visual Appeal: The golden-brown chicken breasts stuffed with colorful cheeses peek through, enticing anyone’s appetite.
Skill Level Needed: Though it requires a bit of technique, the recipe is approachable for both novice cooks and seasoned chefs.
Special Equipment: A meat mallet and toothpicks or kitchen twine are recommended for easy stuffing and securing.
Recipe Overview
Difficulty Level: The dish requires moderate skill, particularly in handling and stuffing the chicken, but the techniques are straightforward and easy to follow.
Category: This cheese-stuffed chicken fits seamlessly into dinner or main course categories, making it versatile for various meal types.
Cuisine: While inspired by classic comfort food, this dish draws on various culinary influences, resulting in a heartfelt blend of tastes.
Cost: The primary ingredients are budget-friendly, making the dish attainable without compromising quality.
Season: Ideal for all seasons, this recipe stands out in fall and winter when comfort food is highly sought after.
Occasion: Perfect for family dinners, gatherings, or even as a meal prep hero for lunch throughout the week.
Why You’ll Love This Recipe
This cheese-stuffed chicken dish not only excels in taste and texture but also delivers a satisfying experience that brings warmth to your dining table. The combination of juicy chicken and luxurious cheesy filling offers a delightful sensory experience, making it a hit with family and friends. A well-executed flavor balance of herbs and seasonings accentuates the dish, nourishing both body and soul.
The preparation process is convenient, as it can be done in less than an hour. With accessible ingredients and straightforward techniques, you can master this dish without the stress of complicated cooking. It’s an excellent choice for novice cooks or anyone looking to impress without extensive culinary experience.
Nutritionally, this recipe provides plenty of protein from the chicken, along with essential nutrients from the herbs and cheeses. Overall, you are served a well-rounded meal without sacrificing flavor or indulgence, making it an attractive choice for health-conscious eaters.
This recipe shines for social occasions; imagine presenting this stunning dish at your next gathering. The creamy filling and beautiful presentation are both inviting and impressive, creating a perfect conversation piece while allowing you to enjoy your time with loved ones.
Given its cost-effectiveness, this ultimate cheese-stuffed chicken is accessible to everyone. With common pantry ingredients and a few fresh produce items, you can whip up a meal that feels gourmet while keeping the budget intact.
Historical Background and Cultural Significance
Cheese-filled dishes have a long history dating back centuries, celebrated in various cultures for their ability to combine the richness of dairy with savory elements. This particular cheese-stuffed chicken sees influences from classic European cuisine, often featuring poultry paired with cheese and herbs.
In many cultures, stuffed dishes represent care and tradition, passed down through generations. The delight in showcasing one’s cooking abilities through an intricate filling presents itself uniquely in gatherings and family dinners, making it a significant culinary tradition.
Over time, the evolution of this dish has seen variations adapting to local tastes and ingredient availability, making it a versatile option for many households. Various regions have developed their own unique takes on stuffed meats, with cheese often being a celebrated ingredient, showing its importance across different culinary traditions.
You’ll find regional variations of stuffed chicken, some incorporating local spices or specific types of cheese indigenous to certain areas. This flexibility ensures that the dish remains both classic yet adaptable, giving it a rich source of cultural significance in global cuisine.
Ingredient Deep Dive
Chicken Breast
Historically, chicken has been a staple protein source in many cultures due to its accessibility and versatility. Low in fat and high in protein, chicken breast is an excellent choice for a healthy diet. When selecting chicken, look for breasts that are plump and have a pinkish hue; this ensures freshness. Store chicken in the refrigerator, but it can be frozen for longer shelf life.
Cheese
Cheese, a beloved ingredient in various cuisines, has been enjoyed since ancient times. It brings flavors together while adding creaminess to dishes. Nutritionally, cheese provides calcium and protein but should be consumed in moderation due to higher fat content. When choosing cheese, opt for fresh cheeses like mozzarella or creamy cheeses like cream cheese, depending on the desired final flavor. Store cheese in airtight containers to keep its freshness, and consider substitutions like vegan cheese for dietary preferences.
Common Mistakes to Avoid
Not pounding the chicken evenly can lead to uneven cooking.
Overstuffing the chicken may cause it to burst during cooking.
Skipping the resting period after cooking may result in dry chicken.
Using cold cheese can make it hard to stuff the chicken smoothly.
Overcooking the chicken can make it rubbery and dry.
Neglecting to season the filling can result in bland flavors.
Choosing the wrong cheese type may affect the melting quality.
Forgetting to secure the filling can lead to cheese spilling out.
Not allowing the chicken to come to room temperature before cooking might affect cooking time.
Skipping the sauce or drizzling glaze can make the dish less appealing visually and flavor-wise.
Essential Techniques
Pounding Chicken
Pounding the chicken creates an even thickness, promoting uniform cooking. Use a meat mallet, and start from the center, working outward. Avoid excessive force to prevent tearing. Aim for about half an inch thickness.
Stuffing Chicken
Properly stuffing the chicken requires an even scoop of filling, leaving space to secure the edges. Do not overstuff; a heaping tablespoon per breast is sufficient. Secure with toothpicks or kitchen twine to avoid leaks.
Pro Tips for Perfect Ultimate Cheese-Stuffed Chicken
Prepare your filling a day in advance for deeper flavors. Use freshly grated cheese for better melting quality. Allow chicken to sit at room temperature for 15 minutes before cooking to ensure even cooking. Season the outside of the chicken well for enhanced flavor. Invest in a good meat thermometer to check the internal temperature accurately. Let the stuffed chicken rest for at least 5 minutes before slicing, ensuring juiciness. Optionally, serve with a light salad to balance the richness.
Variations and Adaptations
Explore regional variations by incorporating local herbs or spices. Seasonal adaptations might include using squash in the filling during fall. For dietary restrictions, consider vegan cheese or poultry substitutes like tofu or tempeh. Flavor variations could include sautéed vegetables or different garlic notes. Texture modifications might involve adding cooked grains to the filling for additional bulk. Presentation alternatives could focus on enticing garnishes or cooking in a sauce instead of baking.
Serving and Presentation Guide
Present the dish beautifully by slicing through one piece to showcase the cheese oozing out. A drizzle of rich balsamic reduction adds a gourmet touch. Garnish with freshly chopped herbs, such as parsley or basil, for a pop of color and flavor. Pair with seasonal vegetables on the side and make sure to serve warm for the best flavor experience. Aim for appropriate portion sizes, allowing guests to enjoy the flavors without being overwhelmed.
Wine and Beverage Pairing
Opt for a crisp white wine, such as Chardonnay or a light Sauvignon Blanc, that complements the richness of the cheese. Non-alcoholic alternatives like sparkling water with a splash of lemon can refresh the palate. If coffee or tea is desired, a lightly roasted coffee can provide a wonderful contrast to the savory flavors. Serve beverages chilled or at room temperature, ensuring that they enhance the dish without overpowering it.
Storage and Shelf Life
Leftover cheese-stuffed chicken should be stored in an airtight container in the refrigerator, where it will last up to 3 days. To freeze, wrap it tightly in plastic wrap and store in a freezer-safe container for up to 3 months. Always check for signs of spoilage, such as off-smells or changes in texture, before reheating. To reheat, use the oven to maintain the texture and ensure it warms evenly, at about 350°F until heated through.
Make Ahead Strategies
To save time, prepare the stuffed chicken a day in advance, allowing flavors to meld. When storing, wrap it tightly to prevent drying out. Consider cooking it partially, then finishing it just before serving for optimal flavor. Avoid adding fresh elements, like herbs or sauces, until right before serving to maintain quality.
Scaling Instructions
For halving the recipe, use a single chicken breast and adjust filling ingredients accordingly. Doubling or tripling requires extra attention to cooking time, typically adding about 10-15 minutes per additional piece. Always use a thermometer to ensure even doneness throughout. Keep storage needs in mind, as larger quantities will require more space in your kitchen.
Nutritional Deep Dive
This recipe offers an appealing macro breakdown with high protein from chicken and cheese. Understand contributing micronutrients, including calcium from cheese and iron from chicken. Health benefits are prominent, catering to active lifestyles while offering wholesome ingredients. Be mindful of portions to maintain balance, particularly when making dietary choices focused on weight management or specific nutritional needs.
Dietary Adaptations
Modify the dish for gluten-free diets by using corn starch for breading. Consider a dairy-free option with plant-based cheeses for lactose intolerance. Vegan adaptations could utilize chickpea or lentil-based fillings to replace chicken. Low-carb and keto-friendly adjustments could focus on skipping breadcrumbs and increasing cheese filling. Always ensure substitutions maintain flavor and texture for the best cooking results.
Troubleshooting Guide
If the stuffed chicken is too dry, double-check cooking times and temperatures. Ensure that ingredients are fresh and not past their prime, as this can affect flavor quality. If flavors aren’t well-rounded, re-season after stuffing for better balance. Equipment struggles might arise from mismatched tools; ensure you have the right sizes for your chicken breasts and ingredients.
Recipe Success Stories
Feedback from the community has always emphasized the versatility of this recipe, with many sharing successful variations incorporating unique cheese blends. Adaptation stories feature creative spins like buffalo chicken flavors or vegetarian versions using eggplant. Photography tips often revolve around capturing the melty cheese in action, encouraging readers to document and share their successes.
Frequently Asked Questions
Can I make this recipe ahead of time? Yes! You can prepare the chicken and stuffing a day in advance and store it in the fridge until ready to cook.
What type of cheese works best? For a gooey filling, opt for mozzarella or a blend of cream cheese with your favorites like cheddar or parmesan.
Can I grill this instead of baking? Absolutely! Grilling adds a smoky flavor to the chicken, just be sure to secure the stuffing well.
How long does leftovers last? Leftover cheese-stuffed chicken can be safely stored in the refrigerator for up to 3 days.
What sides pair well with this dish? Consider serving with a fresh salad, roasted veggies, or creamy mashed potatoes for a complete meal.
How do I ensure my chicken is cooked through? Use a meat thermometer to check the internal temperature; it should read 165°F (75°C).
Can I freeze the stuffed chicken? Yes, wrap them tightly to prevent freezer burn and store for up to 3 months.
What if I don’t have a meat mallet? A heavy pan or rolling pin can work just as effectively for pounding the chicken.
Is it easy to adapt for dietary restrictions? Yes! This recipe can easily be adjusted for gluten-free, dairy-free, and vegan diets.
What herbs can I include? Fresh herbs like basil, thyme, or parsley can enhance flavor; incorporate them into the cheese filling.
Additional Resources
Explore related recipes such as stuffed pork chops or cheesy pasta bakes for variations on similar themes. Look into technique guides that offer insight into making perfect stuffed dishes. Investigate information about seasonal ingredients to better adapt the recipes to local availability and customer preferences. Equipment recommendations for kitchen tools can elevate your cooking experience significantly.
Join the Conversation
We want to hear your thoughts! Share your experience preparing the Ultimate Cheese-Stuffed Chicken on social media with your own unique twists. Post your photos, engage with other cooking enthusiasts, and leave reviews to spark discussions about the best adaptations or techniques you’ve discovered. Let’s create a fantastic community around delicious cooking!
The Recipe
Ultimate Cheese-Stuffed Chicken
Serves: 4
Prep Time: 20 mins
Cook Time: 30 mins
Total Time: 50 mins
Kitchen Equipment Needed
Meat mallet
Toothpicks or kitchen twine
Oven-safe dish
Meat thermometer
Mixing bowl
Ingredients
4 chicken breasts
1 cup shredded mozzarella cheese
½ cup cream cheese, softened
1 teaspoon garlic powder
1 tablespoon chopped fresh parsley
Salt and pepper to taste
1 cup breadcrumbs
Directions
Preheat the oven to 375°F (190°C).
Begin by pounding the chicken breasts to an even thickness for uniform cooking.
In a mixing bowl, combine mozzarella, cream cheese, garlic powder, parsley, salt, and pepper to form the filling.
Scoop the filling into the center of each chicken breast, folding the sides over, and securing with toothpicks or twine.
Coat each stuffed chicken breast in breadcrumbs.
Place the chicken in an oven-safe dish and bake for 30 minutes or until the internal temperature reaches 165°F (75°C).
Remove from the oven, allow to rest for 5 minutes, then serve warm.
Recipe Notes
Feel free to customize the cheese blend based on your preference.