Irresistible Chocolate Peanut Butter Chip Cookies for Deliciously Sweet Moments

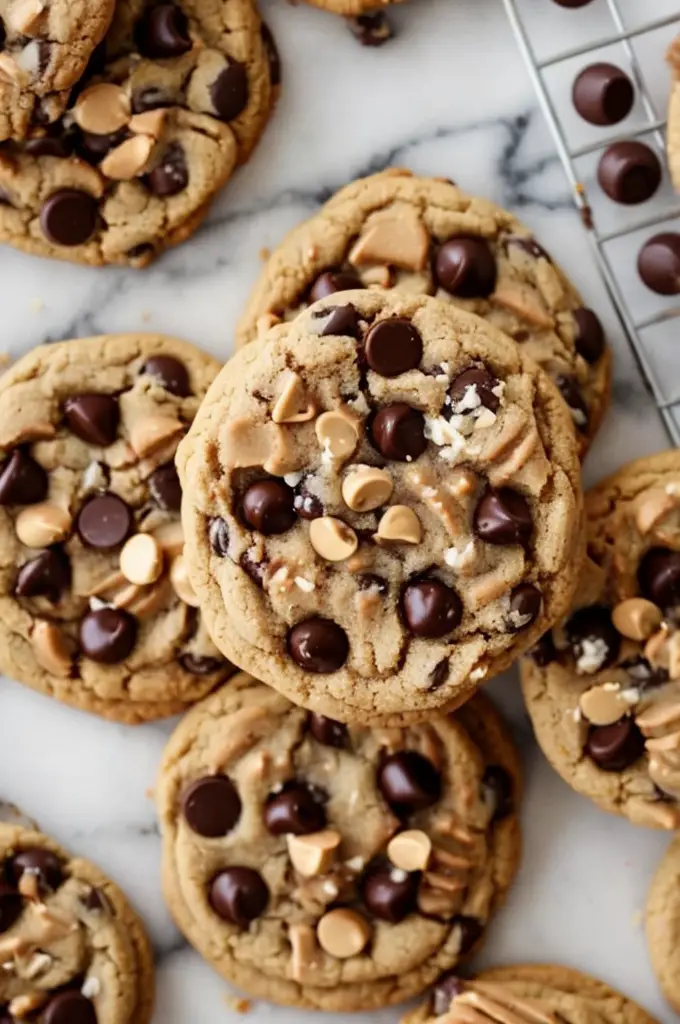
Chocolate Peanut Butter Chip Cookies: A Decadent Delight

⚖️
Difficulty
Easy

⏲️
Prep Time
10 mins

🕒
Cook Time
12 mins

⏱️
Total Time
22 mins

🍽️
Servings
24 cookies

Indulge your sweet tooth with these irresistible Chocolate Peanut Butter Chip Cookies. Rich and fudgy chocolate paired with creamy peanut butter chips create a heavenly combination that will have you reaching for another. These cookies are perfect for every occasion, from casual snacking to holiday gatherings. Experience the ultimate flavor sensation with each delicious bite.

The beauty of Chocolate Peanut Butter Chip Cookies lies in the way the chocolate melts in your mouth while the peanut butter chips add a delightful crunch. The interplay of textures enhances the overall sensory experience, making every cookie a moment of pure joy. Serve these tasty treats warm, fresh from the oven, for the best cookie experience.

Quick Recipe Highlights

  • Flavor Profile: The cookies boast a perfect balance of rich chocolate and creamy, sweet peanut butter that tantalizes your taste buds.
  • Texture: Soft, chewy, and slightly crisp edges contrast with the creaminess of melty peanut butter chips.
  • Aroma: The intoxicating smell of freshly baked chocolate and roasted peanuts fills your kitchen as these cookies bake.
  • Visual Appeal: Deep, dark chocolate cookies flecked with golden peanut butter chips make for a stunning presentation.
  • Skill Level Needed: Simple techniques such as mixing and baking make this recipe suitable for beginners and experts alike.
  • Special Equipment: No fancy gadgets required, just basic baking tools you likely already own.

Recipe Overview

  • Difficulty Level: Rated easy since it involves simple steps of mixing, scooping, and baking, perfect for all bakers.
  • Category: Classified as a dessert due to its sweet nature, ideal for after-meal treats.
  • Cuisine: American-inspired, drawing on the classic chocolate and peanut butter pairing loved universally.
  • Cost: With affordable ingredients like flour, sugar, and chips, this is a budget-friendly recipe.
  • Season: Best enjoyed year-round, thanks to the perennial popularity of chocolate and peanut butter.
  • Occasion: Perfect for everything from midday snacks to party desserts, or even gift-giving during holidays.

Why You’ll Love This Recipe


Chocolate Peanut Butter Chip Cookies offer a tempting mix of flavors, combining the richness of chocolate with the nutty sweetness of peanut butter chips. They are the perfect treat for any chocolate lover, offering a chewy texture that keeps them soft in the center while slightly crisp on the edges.

Preparing these cookies is a breeze. With minimal prep time and quick baking, they are a convenient choice when you’re in need of last-minute dessert ideas. Their quick turnaround time means you can have them ready for an unexpected guest or just a cozy afternoon at home.

The cookies provide a satisfying energy boost, thanks to the peanut butter’s protein content. They are a preferable option over store-bought varieties, allowing you control over ingredients and portion sizes—ideal for mindful eaters.

Socially, Chocolate Peanut Butter Chip Cookies are a hit at any gathering, sparking joy and conversation. Their universally appealing flavors make them a popular choice, ensuring there’s something sweet for everyone to enjoy.

Cost-effectiveness is another advantage. Using pantry staples, you can whip up a batch of these cookies without straining your grocery budget. Even the most gourmet-sounding chocolate and peanut butter combination is affordable to make from scratch at home.

Historical Background and Cultural Significance


The delicious bond between chocolate and peanut butter originated in the United States. With Reese’s creation in the early 20th century, the flavor combination quickly became iconic, paving the way for baked goods like Chocolate Peanut Butter Chip Cookies.

Culturally, these cookies epitomize comfort food, cherished in American households for their nostalgic charm. They bring back fond memories of childhood cookie-baking sessions or family holiday gatherings. These cookies have become a timeless dessert, adored by generations.

The fusion of chocolate and peanut butter within cookies has evolved over the years, with countless variations appearing in cookbooks and online. Yet, the core concept remains—simple, delicious, and undeniably comforting.

Regional variations have emerged, too. Some recipes incorporate oats for texture, while others add spices like cinnamon or cayenne for an extra kick. Each iteration reflects the creator’s personal taste, making these cookies a versatile canvas for culinary creativity.

Ingredient Deep Dive


Chocolate chips are a pivotal ingredient, providing the rich cocoa flavor that accentuates the cookie’s overall taste profile. Originating from fermented cacao, chocolate has been appreciated globally for its bitter-sweet richness. In baking, semisweet chips offer a balance of cocoa intensity and sugar.

Nutritionally, chocolate contains antioxidants like flavonoids, contributing to various health benefits. When selecting chocolate chips, opt for those high in cocoa content for maximum flavor. Store them in a cool, dry place to prevent melting or blooming.

Peanut butter chips add the creamy, nutty contrast that makes these cookies special. Peanuts, a staple in South American diets for centuries, were transformed into peanut butter in the early 1900s. Peanut butter’s popularity soared, eventually influencing desserts like these cookies.

The chips offer a convenient way to incorporate peanut butter flavor without the added moisture of traditional spread. Rich in protein and healthy fats, they provide nutritional value. Store them in their original packaging or an airtight container to keep them fresh and flavorful.

Common Mistakes to Avoid

  • Overmixing the dough can lead to tough cookies. Mix just until ingredients are combined for the best texture.
  • Using baking soda instead of baking powder might affect the cookie’s rise, leading to flat cookies. Ensure you use the correct leavening agent.
  • Skipping the chilling step can cause cookies to spread too much. Allow dough to firm up in the fridge before baking.
  • Baking on a hot baking sheet might cause uneven cooking. Use a cool sheet for each batch to maintain consistency.
  • Ignoring ingredient temperatures can alter the dough’s outcome. Ensure eggs and butter are at room temperature for even mixing.
  • Inaccurate measurements can ruin ratios. For the best results, use a kitchen scale or proper measuring cups and spoons.
  • Forget to preheat the oven. Starting with a cold oven can extend baking time and alter cookie texture.
  • Insufficient space between cookies can cause them to merge during baking, making them lose their shape.

Essential Techniques


Creaming butter and sugar is a foundational technique for these cookies. It incorporates air, leading to a light and fluffy texture when baked. Use room temperature butter and beat with sugar until pale and creamy before adding other ingredients.

Proper dough chilling is critical for cookie shape and texture. Cold dough ensures the butter is solid, minimizing spread during baking. Chill dough for at least 30 minutes before scooping onto baking sheets for consistent results every time.

Baking chocolate peanut butter chip cookies to the right level of doneness is key. Look for slightly golden edges with a soft center. Remember that cookies firm up on the cooling rack, so remove them from the oven when just set.

Pro Tips for Perfect Chocolate Peanut Butter Chip Cookies


Use a cookie scoop for uniform-sized cookies ensuring even baking and professional presentation. This helps maintain consistency across batches and satisfies both aesthetic and functional baking goals.

Experiment with high-quality ingredients; the better the chocolate, the richer the cookie flavor. Investing in superior chips or bars can elevate your cookies from delightful to gourmet.

Consider adding a pinch of salt to balance the cookie’s sweetness and intensify flavors. Salt enhances the chocolate’s cocoa notes and contrasts with peanut butter’s richness.

Rotate baking sheets halfway through cooking for even baking, since oven hotspots can lead to uneven textures. Turning the sheet helps achieve cookies with consistent golden edges.

Ensuring butter’s room temperature is crucial. Too cold, and it won’t cream properly. Too warm, and the dough might spread too much. Properly conditioned butter makes all the difference.

Strong flour can make denser cookies. Stick to all-purpose flour for the soft, chewy appeal that these cookies are known for. It keeps the texture balanced and the dough pliable.

Variations and Adaptations


To create a holiday twist, consider adding a teaspoon of cinnamon or nutmeg for a seasonal flair. These spices pair beautifully with chocolate and peanut butter, creating festive flavors.

For a summer-friendly version, incorporate dried fruit like cranberries or raisins. The fruity sweetness complements the peanut butter, adding complexity to the cookies.

Dietary adaptations are simple—use gluten-free flour for a gluten-free version or substitute vegan butter and plant-based chips for a vegan-friendly batch. These alternatives ensure everyone can enjoy these cookies.

Try altering the flavor by substiting dark chocolate chips for a bolder, more intense cocoa taste or milk chocolate chips for sweetness. Each choice offers a unique variation while retaining the essential cookie structure.

For those desiring a crunchier texture, consider incorporating chopped nuts like walnuts or almonds. They add a satisfying crunch that enhances the cookie’s mouthfeel.

Present these cookies beautifully by drizzling melted chocolate over the top once baked. It adds a touch of elegance and extra chocolatey goodness upon setting.

Serving and Presentation Guide


Artfully plate cookies on a rustic serving board lined with parchment paper for a cozy, inviting display. The paper adds texture and highlights the cookie’s artisan nature.

Garnish with a light dusting of powdered sugar or cocoa powder to enhance visual appeal. The fine coating elevates presentation while complementing the cookie’s flavors.

Traditionally, cookies are served with a glass of cold milk, but consider pairing with a warm beverage like hot cocoa or coffee for a comforting experience, especially during colder months.

Present cookies in a jar or tin with a colorful ribbon for a delightful homemade gift idea. It’s a thoughtful, personal touch that conveys care and creativity.

Serve at room temperature for optimal texture. Push traditional boundaries by offering these cookies slightly warmed, allowing the chocolate to melt slightly, creating an indulgent treat.

When serving as part of a larger dessert spread, consider smaller portion sizes to allow guests to sample a variety without overwhelming their palate.

Wine and Beverage Pairing


Pair cookies with a glass of Malbec or Merlot; their fruity notes and low tannins will accentuate the chocolate, enhancing the dessert’s overall richness and complexity.

For non-alcoholic options, pair with a creamy vanilla or chocolate milkshake. The creaminess compliments the peanut butter, creating a harmonious flavor profile.

For coffee lovers, a robust espresso or a milky latte complements these cookies perfectly. The coffee’s bitterness balances the sweetness of the chocolate, providing a lovely contrast.

When choosing tea pairings, opt for a nutty Rooibos or a gentle herbal blend like chamomile to complement and not overpower the cookie’s flavors, providing a soothing finish.

Ensure beverages are served at the appropriate temperature—red wines slightly chilled, milkshakes frosty, and coffee teas piping hot — to enhance each sip and bite.

Serve in thoughtful glassware; a clear mug for lattes or a traditional wine glass for red wines enhances the tasting experience visually and functionally.

Storage and Shelf Life


Store cookies in an airtight container at room temperature to maintain freshness and prevent them from becoming stale. This method keeps them chewy and delicious for up to a week.

Consider storing individual layers separated by parchment paper to avoid sticking. This ensures each cookie stays intact and presentation-ready.

Avoid refrigeration as it can dry out cookies, affecting texture and flavor. If refrigeration is necessary, rewarm cookies in a low oven before serving to restore their softness.

Signs of spoilage include excessive softness, an off-smell, or unpleasant taste. If noticed, it is best to discard the cookies for safety reasons.

Reheat cookies briefly in the microwave, wrapped in a paper towel, for a just-baked softness. This step can minimize the staling effect of prolonged storage, ensuring a fresh-tasting cookie.

For longer storage, cookies can be frozen. Place in a sealable bag, remove air, and freeze for up to three months. Thaw at room temperature when ready to enjoy.

Make Ahead Strategies


You can prepare cookie dough up to 48 hours in advance and store it in the refrigerator until ready to bake. Chilling infuses flavors and helps cookie shape.

If preparing in parts, mix dry ingredients and wet ingredients separately, storing them in airtight containers. Combine just before baking for maximum freshness.

Consider baking a batch and freezing for last-minute cravings or unexpected guests; simply reheat for a fresh-from-the-oven experience without the prep time.

Quality remains consistent when refrigerated dough is used. However, monitor baking time as chilled dough may need a minute or two more in the oven.

Assemble ingredients before starting, ensuring ease throughout the baking process. Having everything pre-measured and ready streamlines the cooking experience.

For a fresh taste, add a sprinkling of sea salt or extra peanut butter chips right after baking. This enhances flavor and appearance without requiring additional efforts.

Scaling Instructions


To halve the recipe, measure ingredients accurately and use smaller mixing bowls for efficiency. Evaluate baking time since smaller batches may cook faster.

Doubling or tripling the recipe involves measuring capacity to ensure proper blending; a stand mixer can help accommodate larger dough volumes.

Adjust bakeware sizes and, if necessary, use multiple trays for larger batches. Ensure trays fit comfortably in the oven to avoid uneven baking.

Timing may need adjustment, particularly in larger or smaller ovens. Monitor cookie color and aroma as indicators of doneness, accompanied by toothpick tests.

Consider storage for larger amounts; have multiple containers ready. Options like mason jars or decorative tins work well for both storage and gifting purposes.

Nutritional Deep Dive


Each cookie contains a balanced mix of macronutrients—carbohydrates from flour, fats from butter, and proteins from peanut butter—providing energy and satiation.

Chocolate offers essential minerals, including iron and magnesium, supporting bodily functions like energy production and muscle function.

Moderate consumption of cookies fits well within a balanced diet, offering the pleasure of sweets without excessive sugar overload; mindful portions maintain this balance.

Peanut butter chips contribute additional nutrients, such as potassium and vitamin E, which support heart health and antioxidant protection.

Evaluate portion size based on dietary needs to manage caloric intake; a smaller cookie can satisfy cravings while fitting nutritional goals.

Cookies should be part of a broader lifestyle incorporating diverse foods and physical activity for overall health. Enjoy them as a delightful treat that complements nutritious meals.

Dietary Adaptations


For gluten-free adaptations, replace all-purpose flour with a suitable gluten-free blend. Ensure it’s specifically formulated for baking to retain the cookie’s structure.

Replace dairy-based butter with a plant-based alternative to craft a dairy-free version that’s equally delicious. Consider coconut oil or vegetable shortening as possible substitutes.

To create a vegan variation, use flax or chia seeds mixed with water as an egg substitute and ensure vegan-certified chocolate and peanut butter chips.

Low-carb enthusiasts can modify ingredients by using almond flour and sugar alternatives like erythritol or stevia. Consult ratios for the best texture adaptation.

Keto recipes rely on replacing sugars entirely; use dark chocolate keto chips alongside nut-based flour to keep carb levels within keto-friendly thresholds.

Paleo followers can adjust by omitting peanut butter chips in favor of chopped nuts, and using coconut sugar offers a natural sweetener aligning with Paleo principles.

For low-FODMAP adjustments, ensure the use of low-FODMAP flours and solid sweeteners, while omitting allergy triggers to maintain digestive comfort.

Troubleshooting Guide


If cookies come out flat, consider chilling dough longer or adjusting leavener quantity to promote proper rise and form.

Overly sweet cookies can be balanced by tweaking the sugar amount relative to other ingredients or incorporating additional salt to offset sweetness.

Inconsistent cookie texture may be due to uneven ingredient mixing or improper measurements. Ensure thorough blending and accurate portioning for uniformity.

Burnt bottoms indicate incorrect baking time or tray height in the oven; adjusting rack placement or reducing baking time slightly helps avoid this issue.

If equipment poses a challenge, consider investing in essential tools like a reliable mixer or sturdy baking sheets, aiding the overall process consistency.

Ingredient substitutions that lack structural support such as egg replacements may require additional binders like xanthan gum to maintain cohesive dough.

Paying close attention to timing prevents overbaking. Set a timer and observe cookies’ visual cues for optimal results in every batch.

Recipe Success Stories


After incorporating user feedback, many home bakers report the addition of walnuts provides an excellent crunch reminiscent of homestyle baked goods.

Community members have successfully adapted the recipe for air fryers, noting the convenience and texture improvement without altering core ingredients.

Readers often share modifications like swapping peanut butter chips for caramel bits, creating a delightful twist that revamps the traditional flavor profile.

Photography enthusiasts in the community recommend softening cookie edges with melted chocolate for attractive photographs showcasing appealing contrast.

Positive responses frequently mention the ease of following the recipe, leading to successful results even for beginner bakers excited for experiments.

Frequently Asked Questions

Can I freeze the unbaked cookie dough?

Freezing unbaked dough is a convenient option. Scoop dough onto trays, freeze until firm, then store in bags or containers for up to three months for future baking.

What alternatives work for peanut butter chips?

Substitute with other flavored chips like butterscotch or white chocolate, or try chopped nuts for textural variation and taste diversification.

How can I tell if my cookies are done?

Cookies are ready when edges are golden and centers are set yet soft when touched. Time and temperature adjustments cater to personal preference.

Do I need to line baking sheets?

Yes, use parchment paper or silicone mats to prevent sticking and promote even browning while aiding in effortless removal from trays.

Can I make them gluten-free?

Absolutely! Ensure all-purpose flour is swapped for a gluten-free alternative optimized for baking, preserving structural integrity while excluding gluten.

Why did my cookies spread too much?

Potential spreading indicates butter may have been too warm or flour insufficient; chilling dough further or adjusting flour resolves this problem.

Why are my cookies crumbly?

Overbaking or excessive flour can cause crumbliness. Ensuring precise ingredient amounts and monitoring bake times helps maintain optimal texture.

How to add flavor complexity?

Introducing spices like cinnamon or espresso powder broadens your flavor range; incorporating vanilla extract or varied chocolate elevates complexity.

How should I store leftovers?

Keep baked cookies in airtight containers at room temperature, ensuring lasting freshness with periodically checked conditions to avoid spoilage.

Can I use margarine instead of butter?

Margarine may replace butter; expect differences in flavor and texture. Conduct small-test batches first to gauge results satisfying personal taste.

Are there health benefits to these cookies?

While considered a treat, cookies provide energy-boosting carbohydrates and small amounts of protein, balanced enjoyment within meals is recommended.

Can I make them without a mixer?

Certainly, mix by hand using a sturdy spoon or silicone spatula, ensuring uniform dough consistency and even ingredients for successful cookies.

Additional Resources


Explore other cookie recipes like classic chocolate chip or oatmeal varieties, testing your skills across multiple styles while expanding your dessert repertoire.

Learn more about baking techniques to enhance your understanding of ingredient interactions and achieve precision transforming basic recipes into masterpieces.

Investigate primary ingredients such as chocolate and flour to solidify vendor preferences, optimizing flavor selection and texture outcomes.

Recommended equipment such as non-stick baking sheets or reliable dough mixers can greatly streamline your cookie creation process, improving your kitchen efficiency.

Explore seasonal adaptations, integrating harvest-fresh ingredients or festive flavors to connect your baking with the joy of seasonal dining occasions.

Join the Conversation


Interact with our baking community by sharing social media snaps of your cookies at #CookieCreations, showcasing your unique interpretations of this beloved recipe.

Explore photography tips and fire off your questions for capturing the perfect cookie shot. Community photographers are eager to share their expertise and inspire newcomers.

Rate and review our Chocolate Peanut Butter Chip Cookies recipe. Your insights help others decide if this delectable dessert is the right choice for their next baking adventure.

Converse with fellow bakers over recipe amendments, successful modifications, and personal twists. Hearing diverse perspectives enriches everyone’s culinary experience.

Engage through comments, suggesting variations or leave feedback for adaptation tips that could guide your fellow enthusiasts towards cookie success.

The Recipe

Chocolate Peanut Butter Chip Cookies

Serves: 24 cookies

Prep Time: 10 mins

Cook Time: 12 mins

Total Time: 22 mins

Kitchen Equipment Needed

  • Baking sheets
  • Parchment paper
  • Mixing bowls
  • Electric mixer or spoon
  • Cookie scoop
  • Cooling rack

Ingredients

  • 1 cup (2 sticks) unsalted butter, softened
  • 1 cup granulated sugar
  • 1 cup packed light brown sugar
  • 2 large eggs
  • 2 teaspoons vanilla extract
  • 2 1/4 cups all-purpose flour
  • 3/4 cup unsweetened cocoa powder
  • 1 teaspoon baking soda
  • 1/2 teaspoon salt
  • 2 cups peanut butter chips

Directions

  1. Preheat oven to 350°F (175°C) and line baking sheets with parchment paper.
  2. In a large bowl, beat softened butter, granulated sugar, and brown sugar until light and fluffy.
  3. Add eggs one at a time, mixing after each addition. Stir in vanilla extract.
  4. In a separate bowl, combine flour, cocoa powder, baking soda, and salt.
  5. Gradually add dry ingredients to the butter mixture, mixing until just combined.
  6. Fold in peanut butter chips gently, distributing evenly through the dough.
  7. Using a cookie scoop, drop dough onto prepared baking sheets, spacing cookies about 2 inches apart.
  8. Bake for 10-12 minutes until edges are set and centers appear slightly underdone.
  9. Remove from oven and allow cookies to cool on baking sheets for 5 minutes before transferring to a cooling rack.

Recipe Notes

  • Ensure butter is at room temperature for easy mixing.
  • For extra flair, sprinkle a pinch of sea salt on top before baking.
  • Store cookies in an airtight container to maintain freshness.

Irresistible Stuffed Seafood Soup Bread Bowl for Ultimate Comfort Food

Stuffed Seafood Soup Bread Bowl: Your Irresistible Comfort Meal

⚖️
Difficulty
Medium

⏲️
Prep Time
20 mins

🕒
Cook Time
40 mins

⏱️
Total Time
60 mins

🍽️
Servings
4

Imagine diving into a warm, cozy seafood delight nestled perfectly inside a freshly baked bread bowl. Our Stuffed Seafood Soup Bread Bowl brings together a medley of savory seafood flavors, combined with the comforting crunch of artisan bread. This culinary masterpiece isn’t just a treat for your taste buds; it’s an experience for all your senses. The lush aroma of the sea infuses the air, as the vibrant colors of shrimp, mussels, and herbs captivate your eyes, laying the groundwork for an unforgettable meal. Perfect for a family dinner or an impressive dinner party appetizer, you’ll find this dish strikes the perfect balance between warmth and sophistication.

The texture is everything you could hope for – the soft bread bowl perfectly soaks up the rich, creamy base, while the seafood contributes just the right amount of chewiness. It’s a symphony of flavors and sensory pleasures you won’t want to miss. And if you’ve never tried making a bread bowl soup before, rest assured that this recipe will guide you through every step with ease and confidence.

Quick Recipe Highlights

  • Flavor Profile: A wonderful blend of creamy richness and oceanic brine, enhanced with aromatic herbs and gentle hints of garlic and onion.
  • Texture: The bread bowl absorbs the soup, offering a combination of crisp crust, soft interior, and tender yet toothsome seafood.
  • Aroma: Savory notes of the sea intermingled with the deep, earthy scents of sautéed garlic, onion, and fresh herbs.
  • Visual Appeal: Bright seafood colors against the earthy canvas of the bread bowl add a touch of gourmet flair to your table.
  • Skill Level Needed: Intermediate cooks will find this recipe inviting, with just enough complexity to satisfy culinary adventurousness.
  • Special Equipment: You’ll need a large pot, baking sheet, and a sturdy bread knife if you plan to bake your own bread bowls.

Recipe Overview

  • Difficulty Level: Classified as medium due to the need to balance flavors, cook seafood to perfection, and craft the bread bowl.
  • Category: Ideal as a main dish or a standout appetizer for seafood lovers looking to indulge in something unique and satisfying.
  • Cuisine: A fusion of coastal culinary traditions, drawing inspiration from both Mediterranean and American comfort cuisines.
  • Cost: Moderately priced, accounting for quality seafood. All other ingredients are pantry staples, making this dish quite accessible.
  • Season: Best enjoyed in colder months when hearty comfort foods are most appreciated, but delightful year-round for seafood fans.
  • Occasion: Perfect for intimate family dinners, festive gatherings, or any event where you want to showcase a remarkable seafood creation.

Why You’ll Love This Recipe

The taste and texture of Stuffed Seafood Soup Bread Bowl will elevate your dining experience. The comforting richness of the soup combined with the seafood’s fresh pop and the bread’s soothing crunch creates a dish that is both hearty and elegant. The preparation is easier than it seems, making this an approachable realm of decadence for home cooks. Nutritionally, seafood brings omega-3s and lean protein, adding a healthy edge to this indulgent meal.

This recipe’s adaptability means you can impress guests or create a memorable family meal with ease. Serve it at a social gathering or during a cozy evening at home for a truly satisfying experience. Plus, utilizing accessible ingredients ensures this gourmet delight remains budget-friendly. Share this delectable creation with loved ones, experiencing the magic of quality seafood and inventive presentation in every spoonful.

Historical Background and Cultural Significance

The alluring Stuffed Seafood Soup Bread Bowl has origins steeped in coastal traditions where fresh seafood was king. Born from the necessity of utilizing available oceanic resources, such soups became a symbol of culinary ingenuity in coastal regions across the world. The evolution of bread bowls from plain bread to artistic servings has roots in French and Italian rustic kitchens, where practicality met aesthetic appeal.

As seafood remains a staple in many culinary traditions, the combination with bread emerges as a universal homage to the sea’s bounty and artisanal baking. Throughout history, regional variations have highlighted local seafood varieties, bringing a world of flavors to this timeless concept. From the shores of the Mediterranean to the Atlantic coasts, this dish resonates with the stories of fishermen and bakers who fused their crafts to create a culinary masterpiece.

Ingredient Deep Dive

Seafood, the star ingredient, has been a dietary cornerstone for coastal communities for centuries. Rich in omega-3 fatty acids and lean protein, it supports heart health and offers an abundant source of essential nutrients. Selection is crucial: choose fresh or sustainably sourced seafood to ensure quality and flavor. Stored correctly in the coldest part of your fridge, seafood maintains freshness for this delectable soup.

The bread bowl adds another layer of history and culture. Often homemade where local grains are milled into flour, its creation is a delightful nod to the artisanal skills still cherished in many cultures. Choose rustic, dense breads like sourdough to hold and absorb the soup without becoming soggy. Fresh bread complements the savory flavors, while stale bread offers depth.

Common Mistakes to Avoid

  • Overcooking seafood can lead to a rubbery texture; keep an eye on them for tenderness.
  • Not letting the soup simmer long enough can result in a thin flavor profile; give it time to develop depth.
  • Adding bread to hot soup immediately can cause it to disintegrate; let soup cool slightly before serving.
  • Using low-quality bread can result in a soggy bowl; opt for artisan breads with a thick crust.
  • Skipping on seasoning will leave the soup bland; taste and adjust herbs and spices as needed.
  • Failing to clean seafood properly can introduce grit into the soup; rinse thoroughly before cooking.
  • Neglecting to preheat the bread bowl might lead to uneven soup absorption; warm it before serving.
  • Ignoring the balance of flavors can make soup too rich or bland; adjust seasonings gradually.

Essential Techniques

Mastering seafood cooking techniques is crucial for this recipe. The delicate timing ensures your shrimp, mussels, and fish stay tender and flavorful. Sautéing aromatics like garlic and onions first releases their flavors, creating the soup’s aromatic base. Cooking with a gentle simmer allows the seafood to infuse sweetness without overcooking.

Creating the bread bowl involves gently cutting the top off the loaf and hollowing it out. Practice careful, steady hand movements to retain as much structure as possible, leaving a thick enough wall to support the soup. A pre-warmed bowl can enhance soup absorption, complementing its rich, hearty flavors.

Pro Tips for Perfect Stuffed Seafood Soup Bread Bowl

– Always use fresh seafood to ensure the best flavors and avoid the risk of off-tasting ingredients.
– Keep your bread crusty to handle the soup well without falling apart.
– Experiment with herbs like dill or thyme, which pair beautifully with seafood.
– Gently toast the hollowed bread under a broiler for an extra crisp experience.
– Make sure your soup isn’t too thin; it should be creamy enough to hold its own inside the bread.
– Add cream just before serving for a luscious finish that won’t overextend cooking times.

Variations and Adaptations

Regional variations introduce a vibrant array of possibilities. In a New England twist, include clams and potatoes for a chowder-like bounty. During summer, swap out heavy cream for a broth base with fresh corn and tomatoes. Consider a low-carb adaptation by using gluten-free bread or hollowed-out vegetables as vessels.

Amp up the heat with spices like cayenne or smoked paprika to provide depth and warmth, making it ideal for winter adaptation. Transform textures by blending part of the soup before adding seafood, creating a creamy, bisque-style experience. Opt for modern serving suggestions, plating seafood artistically atop soup for gourmet presentation.

Serving and Presentation Guide

Enhance your dish by presenting it on a slate or wooden board, which highlights its rustic charm. Garnish using fresh herbs or a lemon wedge for color and an aromatic boost. Pair with a light salad or roasted veggies as traditional sides for a well-rounded meal.

For modern flair, consider serving soup bowls on individual platters with small garnishes laid out separately. Experiment with temperatures: lightly chilled seafood within a hot soup creates a refreshing contrast. Remember to keep servings moderate, ensuring the bread structure holds up throughout the meal.

Wine and Beverage Pairing

Pair this Seafood Soup Bread Bowl with a crisp, chilled Sauvignon Blanc to enhance the dish’s freshness and acidity. A light-bodied Chardonnay also works wonderfully, adding a buttery complement to the creaminess. For non-alcoholic alternatives, consider a ginger-infused iced tea or a lemon-thyme soda.

If you prefer hot beverages, lightly steeped green tea provides a cleansing finish, balancing the meal. Choose beverage temperatures that won’t overpower the delicate seafood notes, maintaining a balance on your palate and enhancing your dining experience.

Storage and Shelf Life

Store cooled seafood soup separately in airtight containers in the refrigerator to help retain freshness for up to three days. Bread bowls are best stored separately, wrapped tightly in foil or plastic wrap to maintain crust integrity. Signs of spoilage include a sour odor or off coloration; discard if noted.

To reheat, gently warm soup on the stovetop over medium heat, stirring frequently to preserve seafood texture. Bread bowls can be lightly reheated in the oven for a refreshed crust. Freezing is possible but impacts seafood texture; if necessary, freeze soup components separately from bread.

Make Ahead Strategies

Divide your prep work by preparing the soup base a day in advance, allowing flavors to meld overnight for complexity. Store in the fridge and gently reheat before adding seafood. This prep doesn’t affect quality negatively and lets you focus on final assembly.

Ensure elements like bread bowls stay fresh by keeping them airtight. During assembly, introduce freshly sautéed seafood into the pre-warmed bowls to maintain textural integrity and visual appeal. Following these guidelines ensures a seamlessly executed meal without the stress of last-minute cooking.

Scaling Instructions

Halving this recipe is straightforward: reduce all ingredient quantities by half and adjust seasoning to taste. Doubling or tripling requires careful attention to cooking vessel sizes to ensure even heat distribution and maintain the right texture without compromising quality. Larger pots are essential for upscaling soup.

Cooking time may increase with larger quantities, so allow for these adjustments in your schedule. With leftovers, consider smaller storage containers for portioning which yields optimal freshness retention through the week. This flexibility makes the recipe suitable for any gathering size or preference.

Nutritional Deep Dive

Rich in lean protein from seafood, this soup integrates healthy fats and essential vitamins into your diet. With omega-3 fatty acids, shrimp, and mussels offer cardiovascular benefits. Vitamin-rich, they contribute to immune health whilst providing antioxidants.

Balancing protein with carbohydrates from the bread bowl, the dish presents an energetic meal choice. Its complex flavors require mindful eating, promoting satiety and assisting with weight management. Moderating portions allows for an indulgence that fits within nutritious eating frameworks.

Dietary Adaptations

For a gluten-free adaptation, replace regular bread bowls with gluten-free equivalents or consider using bell peppers as nature’s soup vessel. Dairy-free versions follow easily by substituting cream with coconut milk, adding a slight tropical twist to traditional flavors.

Vegan players opt for plant-based seafood alternatives, like faux shrimp, paired with vegetable broth. Low-carb followers find hollowed zucchinis offer a suitable soup vessel, introducing a different flavor layer. This diversity demonstrates the recipe’s versatility within dietary preferences.

Troubleshooting Guide

Struggling with texture issues? Ensure seafood isn’t overcooked; this keeps the dish tender. For flavor balance, gradually introduce seasonings and taste throughout to hit the mark. If temperature problems arise, a gentle reheating on the stovetop avoids overcooking.

Lacking specialized equipment? Consider equipment alternatives like a regular pot for Dutch ovens or sharp knives in bread removal. Ingredient substitutions may present challenges; always aim for the closest taste profiles.

Recipe Success Stories

Our community raves about the Stuffed Seafood Soup Bread Bowl for its restaurant-quality elegance at home. Success stories frequently highlight personal touches that customize flavors: adding favorite spices or attempting low-carb versions by reader request.

Photos from home chefs show these bowls as centerpiece items, bringing joy through both taste and presentation. Stepping into this recipe presents opportunities to showcase creativity, inviting fans to share their individual adaptations with our growing culinary community.

Frequently Asked Questions

Can I make this recipe dairy-free? Absolutely, replace the cream with a thick coconut milk or alternative non-dairy cream to maintain the soup’s richness and depth.

What bread should I use for the bowl? Select a dense, crusty bread like sourdough or pumpernickel. They provide structural integrity and delightful textures when paired with the soup.

Can I freeze leftovers? Yes, but separate the soup and bread bowl. Freeze soup in tight containers, keeping seafood palatable on thawing, though textural changes may occur.

Are there low-carb options available? Utilize hollow vegetables such as zucchini or bell peppers. They hold soup effectively while contributing minimal carbohydrates.

What can I use instead of seafood? Vegetarian eaters can replace seafood with protein-rich vegetables, like mushrooms or legumes, for a hearty alternative.

Can this soup be spicy? Definitely, incorporate chili flakes or hot sauces according to your spice preference for an added kick.

How can I stabilize the bread bowl? Cut a thin bottom slice for stability, or serve bowls in shallow dishes to catch potential overflow while eating.

How should I store leftovers? Keep soup in airtight containers inside the refrigerator, consuming within three days to retain freshness and flavor.

Is substituting fresh herbs for dried ones suitable? Fresh herbs provide bright notes, but dried versions work in a pinch. Use half the amount if substituting.

What’s a good non-seafood soup option for these bread bowls? Consider a hearty vegetable or bean soup, which complements the bread’s earthiness effectively.

Additional Resources

For those eager to explore further, find related recipes bringing together seafood and bread, dive into techniques for perfecting bread making, or gain deeper knowledge on ingredient choices specific to hearty, comforting soups. Reference seasonal variations that guide how to adapt other beloved recipes to changing produce availability.

Join the Conversation

Share your Stuffed Seafood Soup Bread Bowl adventures on social media, tagging us to join the ever-growing community of home chefs perfecting this dish. Share photography tips or food styling techniques that enhance your plating and photo capturing, inspiring fellow cooks to innovate.

Whether you’re sharing a tried-and-true adaptation or seeking feedback, engaging with fellow foodies enriches your recipe experience, contributing to sustaining this tradition. Display your unique spin, from ingredient swaps to artistic presentations, adding your personal touch to a globally loved recipe.

The Recipe

Stuffed Seafood Soup Bread Bowl

Serves: 4

Prep Time: 20 mins

Cook Time: 40 mins

Total Time: 60 mins

Kitchen Equipment Needed

  • Large pot
  • Baking sheet
  • Sturdy bread knife

Ingredients

  • 4 medium-sized sourdough bread bowls
  • 1 lb mixed seafood (shrimp, mussels, fish)
  • 2 cups seafood broth
  • 1 cup heavy cream
  • 2 tbsp olive oil
  • 1 onion, finely chopped
  • 2 cloves garlic, minced
  • Salt and pepper, to taste
  • 1 tsp fresh dill, chopped
  • Lemon wedges, for garnish

Directions

  1. Preheat the oven to 350°F (180°C). Gently cut the tops off the bread bowls and hollow out enough of the center to hold the soup.
  2. Heat olive oil in a large pot over medium heat. Sauté the onion and garlic until translucent and aromatic.
  3. Add the mixed seafood, cooking gently until just opaque and tender.
  4. Pour in the seafood broth, bringing the mixture to a simmer. Stir occasionally as flavors meld.
  5. Lower the heat, add heavy cream, and season with salt, pepper, and dill. Simmer until the soup thickens slightly.
  6. Warm the bread bowls in the oven for 5-10 minutes, ensuring they’re crisp.
  7. Fill each bread bowl with the seafood soup, garnishing with lemon wedges and extra dill if desired.

Recipe Notes

  • Substitute cream with a non-dairy alternative for a dairy-free version.
  • Experiment with different seafood varieties based on availability.
  • Adjust the quantity of heavy cream to achieve desired soup consistency.

Irresistible Honey Garlic Chicken Skewers: A Flavorful Grilling Delight

Honey Garlic Chicken Skewers Recipe: The Perfect Grilled Delicacy

⚖️
Difficulty
Easy

⏲️
Prep Time
20 mins

🕒
Cook Time
15 mins

⏱️
Total Time
35 mins

🍽️
Servings
4

Experience the mouthwatering delight of Honey Garlic Chicken Skewers, a perfect fusion of sweetness and savory flavors. Whether you’re planning a summer barbecue or an indoor grilling session, these chicken skewers offer a delightful combination of honey’s natural sweetness and garlic’s aromatic punch. The dish is a symphony of taste and texture, thanks to the succulent chicken marinated in a heavenly sauce that brings depth and freshness to every bite. Your senses will be captivated by the enticing aroma and the beautiful golden brown color of perfectly grilled skewers that invite everyone to feast upon them.

Quick Recipe Highlights

  • Flavor Profile: These skewers offer a balanced sweetness and savory depth, highlighting the honey and garlic beautifully.
  • Texture: Juicy chicken pieces glide off the skewers, offering a tender bite that melts in your mouth.
  • Aroma: Enjoy the aromatic infusion of garlic, combined with the irresistible scent of cooked honey.
  • Visual Appeal: Each skewer showcases a glossy, golden brown hue, making them an appealing centerpiece.
  • Skill Level Needed: Perfect for novice to experienced cooks, requiring basic grilling techniques.
  • Special Equipment: A grill or grill pan, skewers, and a brush for basting.

Recipe Overview

  • Difficulty Level: This recipe is categorized as easy, making it accessible for all skill levels. The key steps include simple marinating and grilling, error-free even for beginners.
  • Category: Enjoy this dish as a main course or appetizer, versatile for various meal settings.
  • Cuisine: Rooted in a fusion of Asian and Western influences, this dish brings the best of both culinary worlds.
  • Cost: This recipe remains budget-friendly, primarily using chicken and pantry staples.
  • Season: Ideal for summer grilling, but equally enjoyable year-round when you crave a taste of grill-season food.
  • Occasion: Perfect for casual dinners, parties, or special occasions when you want to impress guests with minimal effort.

Why You’ll Love This Recipe

Honey Garlic Chicken Skewers are loved for their perfect marriage of sweet and savory elements, attributed to the honey and garlic marinade that flavors every juicy bite. The ease of preparation allows you to create a gourmet dish with minimal effort, making it convenient for weekdays and impressive for weekend parties. Nutritionally, the lean protein of the chicken breast combined with garlic’s benefits makes this a wholesome meal choice that doesn’t compromise on flavor.

This recipe shines in social settings, providing a delightful dish for gatherings or casual get-togethers. Its cost-effectiveness is another reason for its popularity; with simple ingredients, you can create a feast that won’t break the bank. Bring warmth to your palette and joy to your table with this inviting recipe that promises deliciousness and satisfaction.

Historical Background and Cultural Significance

Honey Garlic Chicken Skewers trace their origin to the marriage of Asian culinary practices and Western barbecue culture. The sweet and savory profile is a hallmark of Asian cuisine, particularly Chinese and Japanese, known for balancing these flavors harmoniously. Over time, Western influences introduced grilling techniques, creating a fusion dish adored across continents.

Their cultural importance is seen in their popularity at family gatherings and festive occasions, symbolizing joy and togetherness around a shared meal. As the recipe evolved, variations emerged across regions, with some adding a spicy element for extra zing or substituting chicken with other proteins. The skewer format enables versatility, mirroring techniques found in satay and kebabs from various cultures.

Ingredient Deep Dive

Chicken is the star of this recipe, bringing lean protein to the table. Culturally, chicken is a versatile staple worldwide, known for absorbing flavors while maintaining its own subtle taste. It’s important to choose fresh, skinless chicken breasts or thighs for their tenderness and ability to soak up marinades efficiently. Nutritionally, chicken is rich in lean protein, essential for muscle growth and repair, and low in fats compared to other meats.

Honey, with its historical significance as a natural sweetener, provides a unique taste, balancing the savory garlic. Its antibacterial properties also offer health benefits. Garlic, a culinary favorite known for its bold flavor, also packs numerous health benefits, including heart health promotions. Fresh garlic cloves should be firm and tightly packed, and they can be stored in a cool, dry place for longevity. Substitutions like maple syrup for honey or green onions for garlic add different flavor twists.

Common Mistakes to Avoid

  • Over-Marinating: Ensure chicken is marinated for just the right time, around 2-4 hours, to avoid a mushy texture.
  • Uneven Skewer Sizes: Keep chicken pieces uniform to ensure even cooking and perfect doneness.
  • High Grill Temperature: Avoid overly high heat to prevent burning the exterior before the chicken cooks through.
  • Skipping Basting: Baste the chicken during grilling to keep it moist and flavorful.
  • Improper Skewer Soaking: If using wooden skewers, soak them in water for at least 30 mins to avoid burning.
  • Ignoring Resting Time: Allow skewers to rest for a few minutes post-cooking for juicier results.
  • Overloading Flavors: Balance marinade ingredients to complement, not overpower, the chicken’s natural taste.
  • Skipping Preheat: Ensure the grill is preheated to ensure the chicken sears beautifully.

Essential Techniques

Mastering marination is crucial for the Honey Garlic Chicken Skewers recipe. Marination allows the spices and juices to infuse thoroughly into the chicken. It is important to combine the marinade ingredients in a sealable plastic bag or container for easy storage and maximum contact with the chicken. Pay attention to the marination time; too short won’t impart much flavor, and too long can affect the texture.

Grilling is another vital technique, where you aim for a steady, medium heat to ensure cooked-through, tender chicken. Patience is key; avoid flipping the skewers too frequently. Look for a golden brown char as the perfect cue. Practice basting mid-cook for an additional layer of sauce, increasing flavor and juiciness.

Pro Tips for Perfect Honey Garlic Chicken Skewers

Ensure that your marinade penetrates effectively by slightly scoring the chicken before marinating. Opt for thigh meat if you desire a richer flavor, as it withstands longer cooking times better. To keep skewers juicy, maintain a small space between chicken pieces, allowing heat to circulate freely. Stay attentive to the grill’s temperature, adjusting as needed to prevent burning.

Complement your skewers with fresh herbs such as chopped parsley or cilantro for an aromatic boost. Consider a final drizzle of fresh lemon juice post-grilling to enhance flavors and balance sweetness. Use reserved marinade as a dipping sauce by heating it gently to ensure it’s safe for consumption. Lastly, brush a bit of oil on the grates before grilling to reduce sticking.

Variations and Adaptations

Regional variations can involve adding spices like dried chili flakes for a hint of heat. For seasonal adaptations, pair the skewers with grilled seasonal vegetables, such as zucchini or bell peppers, offering a refreshing crunch. Dietary modifications include using tofu instead of chicken for a plant-based version, ensuring the marinade includes soy sauce for flavor depth.

Flavor variations might involve infusing the marinade with a splash of citrus for brightness or ginger for warmth. For texture modifications, try grilling bacon-wrapped chicken pieces for an additional savory layer. Presentation alternatives include serving the skewers atop a bed of fluffy jasmine rice or alongside a crisp garden salad for a complete meal.

Serving and Presentation Guide

To create a stunning presentation, arrange the skewers on a large platter garnished with sprigs of fresh herbs, such as cilantro or parsley. Consider plating them on a rustic wooden board for a casual, earthy approach. Add bold color with a side of vibrant vegetable slaw or roasted peppers.

Traditional accompaniments like a simple vegetable side or steamed rice work well, balancing flavors with the skewer’s richness. For a modern twist, serve with a creamy yogurt cucumber dip. Temperature considerations include serving the skewers hot off the grill, while portion control ensures guests enjoy 2-3 skewers per person, leaving room for other dishes.

Wine and Beverage Pairing

These skewers pair beautifully with a crisp white wine, such as Sauvignon Blanc, complementing the dish’s sweetness and garlic undertones. For non-alcoholic alternatives, consider serving iced tea with a hint of lemon or a sparkling lemon water to refresh the palate.

If tea or coffee is fitting, opt for a mild, floral green tea echoing the skewer’s aromatic elements. Ensure beverages are served at an optimal temperature to enhance flavors. Top off with fresh mint leaves for a sophisticated touch, elevating the overall dining experience.

Storage and Shelf Life

Store leftover skewers in an airtight container in the refrigerator, where they will remain fresh for up to three days. To prevent drying out, ensure pieces aren’t stacked too tightly. Look for containers that provide an airtight seal to maintain moisture.

Watch for signs of spoilage, such as off smells or color changes, and discard any questionable leftovers. For reheating, opt for the microwave or sauté them in a pan over low heat to prevent drying. Freezing is not recommended, as it may affect texture and flavor, but if necessary, ensure to reheat thoroughly.

Make Ahead Strategies

Preparation in advance can involve marinating the chicken a day ahead, which intensifies flavor without altering texture, ensuring you save time on cooking day. After marinating, store the skewers in the fridge until ready to grill. This helps in balancing the household or hosting activities better.

Avoid skewering too early, as wooden skewers may degrade in moisture. Once grilled, keep the skewers warm in the oven until serving. Consider adding a sprinkle of fresh herbs just before serving to introduce a fresh element and enhance visual appeal.

Scaling Instructions

When halving the recipe, minimize ingredient portions evenly to maintain flavor balance while adjusting cooking times slightly if using fewer skewers. For doubling or tripling, ensure a grill pan size increase for uniform cooking, and consider batch cooking to control temperature.

Equipment adjustments might include using metal skewers for stability with larger batches. Timing modifications should monitor skewer crowding, adjusting space accordingly on the grill. Keep storage in mind for larger recipes, ensuring refrigeration space is adequate.

Nutritional Deep Dive

The macro breakdown for Honey Garlic Chicken Skewers highlights lean protein from chicken with balanced carbohydrate sources from honey. Micronutrients such as vitamins B6 and C are present, alongside garlic’s immune-boosting properties. Health benefits include lean meat consumption, benefiting muscle growth and energy levels.

Portion analysis ensures adequate caloric intake, maintaining dietary goals without overindulgence. Suitable for weight management, the dish’s high protein-to-calorie ratio ensures satisfaction while aiding muscle preservation.

Dietary Adaptations

To make the recipe gluten-free, check soy sauce labels or use tamari as an alternative. For dairy-free solutions, simply avoid yogurt-based sauces or substitutes with dairy-free options. To create a vegan dish, swap chicken with tofu or mushrooms, enhancing flavor with the same marinade.

Low-carb alternatives might limit honey quantity or use a sugar-free substitute. For keto, focus on protein-rich, high-fat marinades, utilizing oils like olive or avocado. Paleo enthusiasts can savor this meal using organically sourced chicken and natural sweeteners.

Troubleshooting Guide

For texture issues like dry chicken, consider reducing grilling time, ensuring constant basting to introduce moisture. Should flavor imbalances arise, adjust marinade ingredients, emphasizing a balanced ratio between sweet and savory components. If temperature problems occur, regulate grill heat, maintaining moderate temperatures to avoid burning.

Equipment challenges involve ensuring proper grilling tools, such as reliable skewers and a grill pan. Ingredient substitutions might necessitate testing variations before full implementation. Timing concerns help precision in grilling, resulting in tender, well-cooked dishes.

Recipe Success Stories

Reader feedback highlights how accessible and delightful these chicken skewers have become. Many share success in adding spicy elements for a kick, doubling the marinade for extra saucy finishes. Some enjoy these skewers accompanied by family-favorite sides or incorporating them into creative wraps.

Others showcase stunning photography, capturing the skewers’ radiant colors and inviting presentation. Community members frequently share adaptations, inspiring creativity, and inviting positivity, illustrating the recipe’s versatility and home-cooked appeal.

Frequently Asked Questions

1. Can I use a different protein? Yes, pork or tofu can be excellent substitutes, but adjust cooking time accordingly.
2. How should I store leftovers? Place them in an airtight container in the fridge for up to three days.
3. Are there bitter taste risks? If garlic is burnt, it might give a bitter bite, so watch closely as it cooks.
4. Can I use metal skewers? Absolutely! Metal skewers eliminate the need for soaking, providing heat stability.
5. Is the marinade suitable as a sauce? Yes, heat to a safe temperature if used as a dip or finish.
6. What’s a good side dish? Rice, veggie skewers, or a fresh garden salad complement the flavors well.
7. How do different honeys affect taste? Floral honey varieties add distinct notes, while clover honey provides balance.
8. Any wine recommendations? A crisp Sauvignon Blanc or a refreshing Riesling complements the savory-sweet profile.
9. How do I prevent skewers from spinning? Double-prong skewers or skewer forks provide stability during grilling.
10. What’s the best grill temperature? Medium heat around 350° F ensures an even cooking process without burning.
11. What if I lack grilling equipment? An oven or stovetop grill pan can be effective substitutes, adjusting for broiling settings.
12. How to make it spicier? Add chili flakes or sriracha to the marinade for an elevated spice level.

Additional Resources

Delve into related recipes like teriyaki chicken or grilled shrimp skewers for a similarly delicious experience. Technique guides offer insight into precise grilling methods, ensuring perfect execution. Engage with ingredient information for choosing and storing honey and garlic effectively.

Equipment recommendations have been discussed, essential for cooking success. Consider exploring seasonal variations to make use of fresh, local produce, elevating your dish with original flavors and ingredients.

Join the Conversation

Connect with fellow food lovers by sharing your own versions of Honey Garlic Chicken Skewers on social media. Capture stunning photos using natural light, emphasizing the skewers’ glistening finish. Leave a review and let us know your thoughts, modifications, or tips to enhance this beloved recipe.

Join our community, exchanging ideas and inspiring each other with fresh twists on this timeless dish. Together, let’s celebrate the joys of cooking, experimenting, and savoring these delicious skewers, perfect for any occasion you envision.

The Recipe

Honey Garlic Chicken Skewers

Serves: 4

Prep Time: 20 mins

Cook Time: 15 mins

Total Time: 35 mins

Kitchen Equipment Needed

  • Grill or grill pan
  • Skewers (bamboo or metal)
  • Mixing bowls
  • Brush for basting

Ingredients

  • 1 lb chicken breast, cubed
  • ¼ cup honey
  • 2 tablespoons soy sauce
  • 2 garlic cloves, minced
  • 1 tablespoon vegetable oil
  • Salt and pepper to taste

Directions

  1. In a mixing bowl, combine honey, soy sauce, minced garlic, and oil. Season with salt and pepper.
  2. Add chicken cubes to the marinade, tossing to coat. Refrigerate for 2-4 hours.
  3. If using bamboo skewers, soak in water for 30 minutes.
  4. Preheat the grill to medium heat.
  5. Skewer marinated chicken cubes evenly onto skewers.
  6. Grill skewers for 12-15 minutes, turning periodically, until fully cooked.
  7. Baste occasionally with leftover marinade for additional flavor.

Recipe Notes

  • For spicier skewers, add a pinch of chili flakes to the marinade.
  • Ensure chicken pieces are similar in size for even cooking.
  • Leftover marinade can be reduced over heat and used as a sauce.

Irresistible Homemade Carrot Cake Cheesecake Cookies for Perfect Indulgence

Homemade Carrot Cake Cheesecake Cookies: The Ultimate Treat

⚖️
Difficulty
Medium

⏲️
Prep Time
20 mins

🕒
Cook Time
12 mins

⏱️
Total Time
32 mins

🍽️
Servings
24 cookies

Imagine biting into a cookie that combines the rich flavors of carrot cake and creamy cheesecake—this is exactly what homemade carrot cake cheesecake cookies offer. Perfect for those who savor the combination of spiced carrot and creamy cheese, these cookies present a delightful treat that marries nostalgia with indulgence. Whether you’re hosting a party or simply enjoying a cozy afternoon with a hot beverage, these cookies are designed to impress.

Quick Recipe Highlights

  • Flavor Profile: A beautifully balanced combination of warm spices, sweet carrots, and tangy cheesecake filling.
  • Texture: These cookies feature a soft and chewy base with a creamy center that melts in your mouth.
  • Aroma: Experience enticing notes of cinnamon and nutmeg wafting through the kitchen.
  • Visual Appeal: The rustic golden hue of these cookies is complemented by the occasional cream cheese swirl.
  • Skill Level Needed: Intermediate skills are required for making cheesecake filling and cookie dough from scratch.
  • Special Equipment: A mixer for the cheesecake filling and a grater for the carrots are essential.

Recipe Overview

  • Difficulty Level: With various components such as dough and filling, this recipe requires an intermediate skill level.
  • Category: These cookies fall under the dessert and snack categories, ideal for any time of day.
  • Cuisine: Influenced by American baking traditions with its cheesecake ingredient.
  • Cost: Moderate cost, as most of the ingredients are common household staples.
  • Season: Best enjoyed in spring when fresh carrots are abundant, but delightful year-round.
  • Occasion: Suitable for Easter celebrations, afternoon teas, or any festive gatherings.

Why You’ll Love This Recipe


The combination of carrot cake and cheesecake offers a tantalizing blend that caters to diverse taste preferences. The cookie’s interior bursts with a creamy filling that pairs excellently with the mildly spiced dough. Preparation is straightforward, thanks to readily available ingredients, and the process is a joy for baking enthusiasts.

The nutritional benefits of ingredients like carrots add a wholesome touch. Carrot cake cheesecake cookies also serve as a wonderful centerpiece for social gatherings, inviting compliments and conversations alike. Despite their sophisticated taste, these cookies are accessible to bake, making them a cost-effective luxury.

Historical Background and Cultural Significance


The beloved carrot cake traces its origins back to medieval times when carrots were used as sweeteners. Over the years, it became a staple in various cultures, particularly in England and the United States.

Cheesecake, with its ancient Greek roots, eventually gained popularity in American cuisine and blends seamlessly with carrot cake to design these cookies. Regional variations can be seen where seasonal or local ingredients give these cookies a unique twist.

Ingredient Deep Dive


Carrots bring a natural sweetness enriched with beta carotene and vitamin A, beneficial for eye health and skin. Opt for firm, fresh carrots for this recipe, and store them in a cool, dry place.

Cream cheese lends the quintessential cheesecake flavor and is packed with calcium. Ensure it’s softened before use, and consider full-fat versions for the creamiest results. Keep it refrigerated, and check for any off smells before use.

Common Mistakes to Avoid

  • Overmixing the dough can result in tough cookies. Mix just until ingredients are combined.
  • Skipping the chilling process can lead to flat cookies; ensure adequate chilling.
  • Using wet carrots will make the dough too moist, so finely grate and lightly squeeze excess moisture.
  • Baking at the wrong temperature causes uneven baking; always pre-heat the oven.
  • Using old, dry spices will not impart full flavors, so opt for fresh spices.
  • Failing to adjust bake times for cookie size can lead to over or undercooked cookies.
  • Not using softened cream cheese will result in lumpy filling; ensure even consistency.
  • Incorrect storage after baking can cause staleness; store in an airtight container.

Essential Techniques


Creating the perfect dough consistency is crucial. Mix carefully to incorporate air without overworking, ensuring tender cookies. The cheesecake filling should be smooth; beat cream cheese until lump-free before adding other ingredients.

Proper baking techniques are vital. Monitor cookie bottoms for golden edges as a visual cue for doneness. Lastly, allow cookies to cool completely to set flavors and avoid breakage during transfer.

Pro Tips for Perfect Homemade Carrot Cake Cheesecake Cookies


Chill the dough to maintain shape and prevent excess spreading. Ensure uniform cookie size by using a cookie scoop, ensuring even baking.

For enhanced flavor, let the cookie dough rest overnight to allow spices to develop. Add chopped nuts or raisins for extra texture and flavor. Always bake a test cookie to adjust time and temperature before the full batch.

Variations and Adaptations


Regional adaptations may include locally sourced nuts or spices. Seasonal adjustments can swap out spices for other flavors like cardamom in winter. For dietary changes, use gluten-free flour mixes.

Flavor enhancements include additional spices, such as ginger or allspice, for a spicy twist. Modify textures with coconut flakes or oats, and present uniquely with cream cheese frosting drizzles.

Serving and Presentation Guide


For an elegant presentation, dust cookies with powdered sugar. Garnishes of slivered almonds or a drizzle of white chocolate elevate their aesthetic.

Traditional accompaniment ideas include a cup of hot tea or freshly brewed coffee. Modern serving suggestions play with assorted fruit jams or compotes. Serve slightly warmed or at room temperature for the best experience.

Wine and Beverage Pairing


These cookies pair beautifully with a dessert wine such as a late harvest Riesling, complementing their sweetness. Non-alcoholic options like chai tea or hot apple cider harmonize well with the spices.

Robust coffee highlights their rich flavors, while serving them chilled or slightly warm maintains optimal texture.

Storage and Shelf Life


Store cookies in an airtight container at room temperature for up to three days. Refrigerate to extend shelf life to a week, ensuring they remain fresh and moist.

Spot signs of spoilage, such as an off smell, and freeze any surplus for several months, reheating briefly before serving to revive moisture and softness.

Make Ahead Strategies


Prepare the cookie dough in advance, storing it refrigerated until ready to bake. After baking, cookies maintain quality well if sealed properly. Fresh elements like garnishes can be added before serving.

Reheat pre-baked cookies slightly in the oven for a fresh-baked feel, but assemble cheesecake filling closer to baking for the best texture.

Scaling Instructions


Both halving and doubling this recipe are feasible. Adjust ingredient proportions accordingly and adapt cooking times as larger batches may require additional baking time.

Use larger baking sheets for increased recipes and freeze any extra dough if necessary. Provide ample storage for scaled quantities.

Nutritional Deep Dive


These cookies balance carbohydrates with moderate fats and proteins. Carrots offer fiber and essential vitamins, while cream cheese adds calcium and riboflavin.

Mind portion sizes to maintain a balanced diet, indulging responsibly during special occasions.

Dietary Adaptations


For gluten-free alterations, substitute with certified flour blends, ensuring binding agents like xanthan gum are included.

Dairy-free transformations involve using vegan cream cheese alternatives. A keto-friendly adaptation could involve almond flour instead of traditional flour.

Troubleshooting Guide


Address spreading issues by ensuring dough is cold before baking. If overly spiced, balance with additional cream cheese. Modify oven rack placement for uneven baking.

Adapt ingredient substitutions carefully to maintain taste profiles, paying attention to timing for different cookie thicknesses or ingredient variations.

Recipe Success Stories


Bakers rave about the allure of these cookies at parties, noting how the familiar flavors greet guests with nostalgia. Variations incorporating nutmeg exclusively provide a holiday touch, while readers attest to successful vegan adaptations.

Photographers praise their vibrant appeal in pictures, helping capture memories with delightful aesthetic impressions.

Frequently Asked Questions

Can I make these cookies without nuts? Absolutely, the recipe is flexible and can be nut-free without compromising flavor.

What is the best way to soften cream cheese? Leave it at room temperature for about an hour or microwave it in short bursts to retain consistency.

How do I prevent the cookies from spreading too much? Chill the dough thoroughly and use parchment paper to help maintain cookie shape.

Can I use pre-shredded carrots? While fresh carrots yield better moisture control, pre-shredded options work in a pinch.

What’s the best way to grate carrots? A box grater or food processor provides the right texture without excess moisture.

Can I freeze the dough? Yes, freeze in small batches and thaw in the refrigerator before baking for optimal results.

What substitutes can I use for cream cheese? Mascarpone cheese or vegan cream cheese are suitable alternatives depending on dietary preferences.

How do I know when the cookies are done? Look for golden-brown edges and a firm, but still soft, center.

Can I replace the spices with a pre-made blend? Yes, pumpkin spice or similar blends can simplify the process while providing similar effects.

What if I don’t have a cookie scoop? Use a spoon to ensure even sizes, adjusting shapes by hand if necessary.

How can I achieve a chewier texture? For chewier cookies, slightly underbake and allow them to set on the baking sheet post-baking.

Is it okay to use dried spices? Freshly ground spices are best for flavor, but dried ones can suffice if fresh aren’t available.

Additional Resources


Explore related recipes such as our classic carrot cake or easy cheesecake bars for inspiration. Equip your kitchen with quality baking tools to enhance your cooking experiences.

Visit ingredient spotlights to learn more about utilizing fresh produce or turning your pantry into a treasure trove of flavor.

Join the Conversation


Share your own cookie creations with us on social media, tag #CarrotCakeCookies, and discover innovative photography ideas to capture their beauty.

Review others’ feedback and inspiration within our community, sparking conversations about unique variations and cherished memories shared over your delicious carrot cake cheesecake cookies.

The Recipe

Homemade Carrot Cake Cheesecake Cookies

Serves: 24 cookies

Prep Time: 20 mins

Cook Time: 12 mins

Total Time: 32 mins

Kitchen Equipment Needed

  • Mixer
  • Box grater
  • Baking sheets
  • Parchment paper

Ingredients

  • 1 cup unsalted butter, softened
  • 1 cup brown sugar
  • 1/2 cup granulated sugar
  • 2 large eggs
  • 1 tsp vanilla extract
  • 2 1/2 cups all-purpose flour
  • 1 tsp baking soda
  • 1 tsp ground cinnamon
  • 1/2 tsp ground nutmeg
  • 1 cup grated carrots
  • 8 oz cream cheese, softened
  • 1 cup confectioners’ sugar

Directions

  1. Preheat your oven to 350°F (175°C) and line baking sheets with parchment paper.
  2. In a large bowl, cream together the butter, brown sugar, and granulated sugar until light and fluffy.
  3. Beat in the eggs and vanilla extract until well combined.
  4. Gradually add in the flour, baking soda, cinnamon, and nutmeg, mixing until just combined.
  5. Stir in the grated carrots, ensuring they’re evenly distributed.
  6. In another bowl, mix the softened cream cheese and confectioners’ sugar until smooth to create the cheesecake filling.
  7. Using a cookie scoop, form dough balls and make an indentation for the filling.
  8. Spoon cheesecake filling into the center of each dough ball and pinch edges to seal.
  9. Place cookies on prepared baking sheets and bake for 10-12 minutes, or until edges are golden.
  10. Allow to cool on the baking sheet for a few minutes before transferring them to a wire rack.

Recipe Notes

  • For added texture, incorporate chopped walnuts or pecans into the dough.
  • Ensure cream cheese is fully softened for the smoothest filling.
  • Store in an airtight container to maintain freshness.

Delicious Honey Garlic Butter Roasted Carrots for Perfect Side Dish

Honey Garlic Butter Roasted Carrots: A Deliciously Sweet and Savory Side Dish

⚖️
Difficulty
Easy

⏲️
Prep Time
10 mins

🕒
Cook Time
25 mins

⏱️
Total Time
35 mins

🍽️
Servings
4

Transform humble carrots into a gourmet delight with this Honey Garlic Butter Roasted Carrots recipe. The natural sweetness of the carrots is enhanced with a luscious glaze of honey and butter, balanced with the aromatic depth of garlic. This dish not only appeals to the taste buds but is a visual feast with its vibrant color, delivering a delightful culinary experience.

These roasted carrots are perfect for any occasion, whether you’re looking for a simple weeknight side dish or a standout accompaniment for a holiday feast. The combination of honey and garlic creates a caramelized exterior with a tender, melt-in-your-mouth interior. Plus, they are incredibly easy to prepare, making them an ideal choice even for beginner cooks who want to impress their guests.

Quick Recipe Highlights

  • Flavor Profile: Sweet and savory with a hint of butteriness and garlic undertones that make it an irresistible combination.
  • Texture: The carrots are tender on the inside with a slightly crispy, caramelized coating on the outside.
  • Aroma: Earthy notes from the roasted carrots paired with fragrant garlic and the subtle sweetness of honey waft through your kitchen.
  • Visual Appeal: Bright, glossy carrots sure to add a pop of color to your table.
  • Skill Level Needed: Simple enough for novices, involving basic roasting techniques with minimal preparation.
  • Special Equipment: All you need is a baking tray and some foil or parchment paper for easy clean-up.

Recipe Overview

  • Difficulty Level: Easy. This recipe is straightforward with minimal steps, suitable for both novice and experienced cooks.
  • Category: Side Dish. These carrots complement a wide variety of main dishes, from roasted meats to plant-based meals.
  • Cuisine: This dish fits into traditional American comfort food with a global twist using honey and garlic.
  • Cost: Budget-friendly, relying on inexpensive ingredients commonly found in most kitchens. Expect to spend around $5 for four servings.
  • Season: Best during spring and fall when carrots are in peak season, ensuring the sweetest flavor.
  • Occasion: Suitable for family dinners, potlucks, and festive gatherings where a simple yet elegant dish is desired.

Why You’ll Love This Recipe


The Honey Garlic Butter Roasted Carrots offer a perfect blend of taste and texture that’s hard to resist. The interplay of sweetness from the honey and the richness of the butter is perfectly offset by the garlic’s savory notes. The roasting process enhances the carrots’ natural sugars, offering a rich, caramelized flavor that transforms simple ingredients into a gourmet delight.

Convenience is another draw; with just a few minutes of prep and a quick roasting time, this recipe is perfect for busy weeknights or last-minute side dish needs. All the ingredients are likely already in your pantry, making this recipe not only easy but also economical and accessible.

Nutritionally, carrots are a powerhouse of vitamins and antioxidants, notably beta-carotene, vital for maintaining eye health and boosting your immune system. Combined with honey’s natural sugars and the healthy fats of butter, this dish provides not only a flavor punch but also a nutritious addition to your meal.

Entertaining is a breeze with this dish. Its vibrant presentation and complex flavors make it a fitting choice for impressing guests or adding a special touch to family dinners. The simplicity of the process ensures that you can spend more time enjoying your company rather than tending to the kitchen.

Cost-effectiveness doesn’t mean sacrificing flavor or quality. This recipe proves that you can create a dish that’s both luxurious and budget-friendly. The ingredients are affordable, yet the end result feels indulgent and restaurant-worthy, providing luxury dining at home.

Historical Background and Cultural Significance


Carrots have a rich history, originating from Central Asia, where they were first cultivated for their seeds and leaves rather than their roots. It wasn’t until much later that the root became the primary focus. Historically, carrots were initially purple or yellow; the sweet orange variety we know today was developed by the Dutch in the 17th century.

The carrot has played a significant role in various cuisines worldwide, often used as a primary ingredient for their natural sweetness and vibrant color. In American cuisine, carrots’ versatility allows them to be incorporated into both sweet and savory dishes, making them a staple in countless kitchens.

With the evolution of culinary techniques and global influences, recipes incorporating honey and garlic have become popular for their flavorful depth. The combination of roasting with sweet honey and aromatic garlic not only enhances the carroty sweetness but introduces a delightful fusion of flavors revered in both Eastern and Western cuisines.

Regional variations showcase diverse influences and adaptations. In Mediterranean areas, carrots are frequently paired with harissa or cumin, while Asian cuisines might infuse them with ginger or sesame oil. Despite the variation, the underlying appeal of carrots remains their delightful balance of flavor, nutrition, and versatility.

Ingredient Deep Dive


Carrots, a staple in kitchens worldwide, are known for their vibrant color and natural sweetness. Rich in beta-carotene, they are essential for maintaining good vision and immune health. When choosing carrots, look for firm, bright orange ones with no visible cracks. Store them in a cool, dark place to preserve their freshness and nutritional value.

Honey, a natural sweetener beloved for its unique flavor profiles, adds a glossy shine and sweetness to the dish. Select raw honey when possible to enjoy its full health benefits. It’s best stored at room temperature, away from direct sunlight to ensure it maintains its liquid form.

Garlic, with its pungent aroma and savory flavor, complements the sweetness of the honey and the earthiness of the carrots. Opt for fresh garlic cloves for the most robust flavor. Store them in a dry, cool place with good ventilation to prolong their shelf life.

Common Mistakes to Avoid

  • Overcrowding the baking tray can hinder caramelization. Ensure the carrots are spread out in a single layer for even roasting.
  • Using low-quality honey can affect the final flavor. Select a pure, high-quality honey for the best results.
  • Neglecting to stir the carrots halfway through roasting can result in uneven cooking. Stir them to ensure an even glaze and texture.
  • Skipping garlic can lead to a lack of depth in flavor. Fresh garlic is vital for the savory balance.
  • Not preheating the oven can result in soggy carrots. Ensure your oven is fully preheated before adding the tray.
  • Discarding carrot tops can be wasteful. Consider using them in broths or vegetable stock for added flavor.
  • Ignoring seasoning can lead to a bland dish. Salt and pepper are crucial to enhance the natural flavors.
  • Failing to monitor the cooking time can lead to burnt carrots. Keep an eye on them during the last few minutes of roasting.

Essential Techniques


Roasting is a fundamental technique in this recipe, crucial for flavor and texture. It brings out the natural sweetness of the carrots and facilitates the caramelization of the honey glaze. Mastering this technique involves evenly spreading the carrots on the baking sheet, ensuring each piece is in contact with the surface for uniform browning.

Deglazing with the garlic butter mixture adds layers to the flavor profile. After roasting, drizzle the hot carrots with the mixture, allowing them to soak up the flavors as they cool. This step enhances the savory notes and ensures the carrots are perfectly coated with the silky, flavorful sauce.

Pro Tips for Perfect Honey Garlic Butter Roasted Carrots


Cut the carrots uniformly to ensure they cook evenly. This will prevent some pieces from being over or under-cooked compared to others.

For extra caramelization, opt for a high oven temperature, around 425°F (220°C). The higher heat encourages the honey to caramelize quickly, giving the carrots a more robust flavor.

Toss the carrots halfway through roasting to ensure each piece is well-coated with the honey garlic sauce and acquires a nice golden-brown color.

Use parchment paper to line your baking tray, allowing for an easy clean-up and preventing any sticking during the roasting process.

For a deeper honey flavor, choose a variety with a rich, darker hue, such as buckwheat honey, which complements the earthiness of the carrots.

If serving as part of a larger meal, prepare ahead and reheat gently before serving to save time without sacrificing flavor.

Add a touch of fresh herbs like thyme or parsley before serving for an added layer of flavor and visual appeal.

Variations and Adaptations


To adapt this recipe for seasonal availability, consider incorporating root vegetables like parsnips or sweet potatoes during winter months, providing both texture and flavor complexity.

For those looking to lower sugar content, reduce the honey slightly and introduce maple syrup for its lower glycemic index and added flavor depth.

If you desire a spicier kick, add a pinch of red pepper flakes or a drizzle of sriracha before serving, making the flavors more dynamic.

For a Mediterranean twist, sprinkle with feta cheese and fresh mint post-roast, enhancing both taste and presentation with these vibrant additions.

Texture modifications can involve leaving the carrots slightly al dente for a crunchier bite, perfect for those who enjoy more texture contrast.

In terms of presentation, consider slicing the carrots into coin shapes or diagonals, heightening visual appeal when arranged uniformly on a serving platter.

Serving and Presentation Guide


Plating techniques should emphasize the dish’s vibrant color. Use a white or light-colored platter to make the orange of the carrots pop, arranging them in a single layer for a sleek presentation.

Garnishing ideas can elevate the aesthetics and flavor; fresh parsley or chives not only add a touch of green but also a hint of freshness, balancing the flavors.

Traditional accompaniments such as a simple roast chicken or a savory beef roast highlight the carrots’ sweet and savory profile, making for a well-rounded meal.

Modern serving suggestions might involve pairing the carrots with a grain salad or quinoa, making use of contrasts in both color and texture.

Temperature considerations involve serving the carrots warm, as cooling will cause the glaze to harden, altering both texture and flavor.

Portion control tips suggest allowing ½ cup of carrots per person, adjusted based on other components in the meal, ensuring a balanced plate.

Wine and Beverage Pairing


For wine pairings, opt for a light, acidic white such as a Sauvignon Blanc or a dry Riesling. These wines complement the carrots’ sweetness and cut through the buttery glaze.

Non-alcoholic alternatives could include a crisp apple cider or a sparkling water infused with lemon or lime, providing a refreshing contrast to the dish’s sweetness.

Coffee or tea pairings aren’t typically suggested, but a mild herbal tea like chamomile could work as a calming post-meal option, balancing the savory elements.

Temperature considerations ensure all beverages are served appropriately chilled for whites and ciders, or at a soothing warm temperature for herbal teas.

Serving suggestions might include a delicate stemmed wine glass for whites and chilled sparkling water in a tall glass garnished with a slice of citrus.

Storage and Shelf Life


For storage methods, place any leftover carrots in an airtight container. This ensures they remain fresh and retain their flavors when refrigerated.

Proper temperature requirements suggest keeping the carrots in the refrigerator; avoid leaving them out at room temperature for extended periods to prevent spoilage.

Container recommendations involve using a shallow, airtight container that allows the carrots to be spread in a single layer, maintaining their texture.

Signs of spoilage include a sour smell or slippery texture, indicating that the carrots are no longer safe to consume.

Reheating instructions recommend using the oven set to a low heat to gently warm the carrots, preserving their texture and flavor without drying them out.

If freezing, allow the cooked carrots to cool completely, then store them in a freezer-safe container or bag, making sure to remove excess air to prevent freezer burn.

Make Ahead Strategies


Prepare the carrots by peeling and cutting them a day in advance, storing them covered in water in the refrigerator to maintain freshness.

Storage between steps includes storing the prepped carrots in water, delaying the honey garlic butter preparation until just before roasting to ensure flavor integrity.

A quality impact assessment of making ahead highlights that while flavors benefit from marinating, the carrots should be roasted close to serving time for optimal texture.

Assembly tips involve combining the carrots with the glaze right before serving, ensuring the flavors meld and the dish remains visually appealing.

Reheating guidelines suggest a low oven temperature to gently warm the carrots without altering their caramelized surface or flavor profile.

To keep the dish fresh, add a sprinkle of fresh herbs just before serving, enhancing both taste and aesthetic appeal.

Scaling Instructions


For halving the recipe, simply reduce all ingredient measurements by half, maintaining the cooking time since the quantity will still cook evenly.

Doubling or tripling the recipe may require a larger baking sheet or splitting the batch between two trays. Ensure even distribution for consistent cooking.

Equipment adjustments for larger batches might include using a convection oven setting if available, promoting faster, more even heat distribution.

Timing modifications are minimal, but if cooking in multiple batches, keep each tray closer to the oven’s top for optimal caramelization.

Storage considerations for larger batches involve dividing the leftover carrots into smaller containers to facilitate quick and even reheating.

Nutritional Deep Dive


The macro breakdown of this recipe reveals a balanced combination of carbohydrates from the carrots and honey, healthy fats from the butter, and a moderate protein content.

Micronutrient analysis highlights significant contributions from vitamin A and potassium, crucial for eye health and maintaining electrolyte balance.

Health benefits are numerous, with carrots offering a strong antioxidant profile, supporting immune function and reducing inflammation.

Dietary considerations can accommodate various needs, with possibilities for substitution and adaptation to suit different health goals and preferences.

Portion analysis ensures balanced nutrient intake, providing essential vitamins and minerals while maintaining a moderate caloric profile.

Weight management tips encourage enjoying this dish as part of a balanced meal, emphasizing its nutrient density rather than caloric value.

Dietary Adaptations


For a gluten-free version, verify that all ingredients, especially any sauces or spices used, are certified gluten-free to avoid contamination.

A dairy-free adaptation might include replacing butter with a plant-based margarine or coconut oil, preserving the glaze’s richness without dairy.

Vegan variations require substituting honey with maple syrup or agave nectar, paired with a plant-based butter alternative for the same sweet-savory profile.

To accommodate a low-carb diet, consider reducing the honey and supplementing with a low-carb sweetener if needed, while maintaining the recipe’s essence.

Keto modifications may involve decreasing the carrot ratio and substituting with lower-carb vegetables while maintaining the rich glaze as a dynamic flavor agent.

Paleo adherence can be ensured by using grass-fed butter and raw honey, aligning with the diet’s emphasis on whole, unprocessed ingredients.

Low-FODMAP considerations involve reducing garlic to tolerated levels or substituting with garlic-infused oil for flavor without triggering symptoms.

Troubleshooting Guide


Address texture issues by ensuring even cutting and consistent oven temperature; failure to do so may result in unevenly cooked carrots.

Balance flavor by tasting the sauce before baking, adjusting honey and garlic according to personal preference to avoid an overly sweet or pungent dish.

For temperature problems, keep a reliable oven thermometer on hand, ensuring accurate heat levels for optimal roasting and caramelization.

If facing equipment challenges, invest in a high-quality baking sheet and parchment paper to avoid sticking and ensure a clean roasting process.

Ingredient substitutions should be mindful of flavor impacts, testing new options in small batches to ensure desired taste and consistency are maintained.

Timing concerns can be alleviated through batch preparation and cooking practice, honing efficiency and ensuring each component is perfectly timed.

Recipe Success Stories


Join the ranks of readers who have enjoyed this Honey Garlic Butter Roasted Carrots recipe, each sharing unique twists and personal experiences.

Community feedback often praises the recipe’s simplicity and crowd-pleasing flavors, making it a go-to for various dining occasions.

Variation successes include incorporating additional herbs or spices, enhancing the flavor while maintaining the original recipe’s core appeal.

Adaptation stories sometimes involve substituting ingredients for dietary preferences, with many still achieving the same tantalizing outcome.

Reader suggestions often highlight creative serving ideas, like mixing with salads or pairing alongside different main entrees for varied experiences.

Photography tips from the community suggest capturing the dish in natural light, emphasizing the carrots’ vibrant color and lustrous glaze.

Frequently Asked Questions

How can I make the carrots more flavorful?

Enhancing flavor can be achieved by adding extra garlic or incorporating herbs like thyme or rosemary for added aroma and taste.

Can I use baby carrots for this recipe?

Yes, baby carrots can be a convenient alternative, but be sure to adjust the roasting time as they tend to cook faster than larger carrots.

How do I prevent the honey from burning?

Ensure the oven is at the correct temperature, and complete the cooking in preheated conditions to allow the carrots to roast evenly without burning.

What’s the best way to reheat leftovers?

Reheat gently in the oven on low heat to preserve the glaze and texture, preventing the carrots from drying out or becoming overly crisp.

Can I add other vegetables?

Absolutely! Root vegetables like parsnips or sweet potatoes complement the carrots well and can be roasted together for a harmonious blend.

How do I store leftovers?

Store in an airtight container in the refrigerator for up to three days, ensuring freshness and flavor retention for subsequent meals.

Is there an alternative to butter?

Coconut oil or a good quality vegan margarine can substitute butter, maintaining the glaze’s richness while accommodating dietary preferences.

What can I do if my carrots turn out soggy?

Ensure they are evenly spaced on the baking tray and not overcrowded to promote even caramelization and crispy exteriors.

How do I enhance the visual presentation?

For a beautiful finish, garnish with fresh herbs just before serving and plate on a contrasting background to highlight the vibrant colors.

What’s the secret to even roasting?

Uniformly cut carrots and consistent oven temperature are key, ensuring even exposure to heat and thorough cooking results.

Additional Resources


Explore related recipes like roasted root vegetables with similar honey and garlic profiles to enrich your repertoire of vibrant side dishes.

Technique guides for perfect roasting techniques offer valuable tips for achieving ideal caramelization and texture in various vegetables.

Dive into ingredient information, providing a deeper understanding of the nutritional benefits each component offers within your culinary creations.

Equipment recommendations can elevate your process efficiency, highlighting the best tools for roasting and kitchen preparation.

Seasonal variations emphasize adapting recipes to ensure ingredient availability and peak freshness, enhancing both taste and texture.

Join the Conversation


Engage with fellow food enthusiasts on social media by sharing your own twist on the Honey Garlic Butter Roasted Carrots, sparking creative conversations.

Photography tips can help you capture the perfect shot, showcasing the vibrant color and enticing glaze, inviting others to try the recipe themselves.

Contribute your thoughts in the recipe reviews section, offering valuable insights and feedback for the community’s collective culinary journey.

Embrace community engagement by sharing your results, encouraging others to explore various versions and modifications that fit their tastes.

Discuss different recipe variations, fostering an environment of sharing and experimentation where food enthusiasts can learn and grow together.

The Recipe

Honey Garlic Butter Roasted Carrots

Serves: 4

Prep Time: 10 mins

Cook Time: 25 mins

Total Time: 35 mins

Kitchen Equipment Needed

  • Baking tray
  • Parchment paper or aluminum foil
  • Mixing bowl
  • Knife
  • Spoon or spatula

Ingredients

  • 1 lb carrots, peeled and cut into sticks
  • 2 tbsp honey
  • 3 tbsp butter, melted
  • 2 cloves garlic, minced
  • Salt and pepper to taste
  • Fresh parsley, chopped (optional for garnish)

Directions

  1. Preheat your oven to 425°F (220°C) and line a baking tray with parchment paper or foil.
  2. In a mixing bowl, combine melted butter, honey, and minced garlic. Stir to blend them together.
  3. Place peeled and cut carrots on the lined baking tray; season with salt and pepper.
  4. Pour the honey garlic butter mixture over the carrots, ensuring each is evenly coated.
  5. Roast in the preheated oven for about 25 minutes or until the carrots are tender and slightly caramelized, stirring halfway through.
  6. Remove from the oven and let them cool slightly. Add parsley for garnish if desired.
  7. Serve warm, enjoying the delightful blend of flavors in this versatile side dish.

Recipe Notes

  • Feel free to use baby carrots for an easier prep, reducing the cooking time accordingly.
  • For a spicier version, add a pinch of chili flakes to the butter mixture.
  • This recipe can easily be doubled or tripled for larger gatherings.