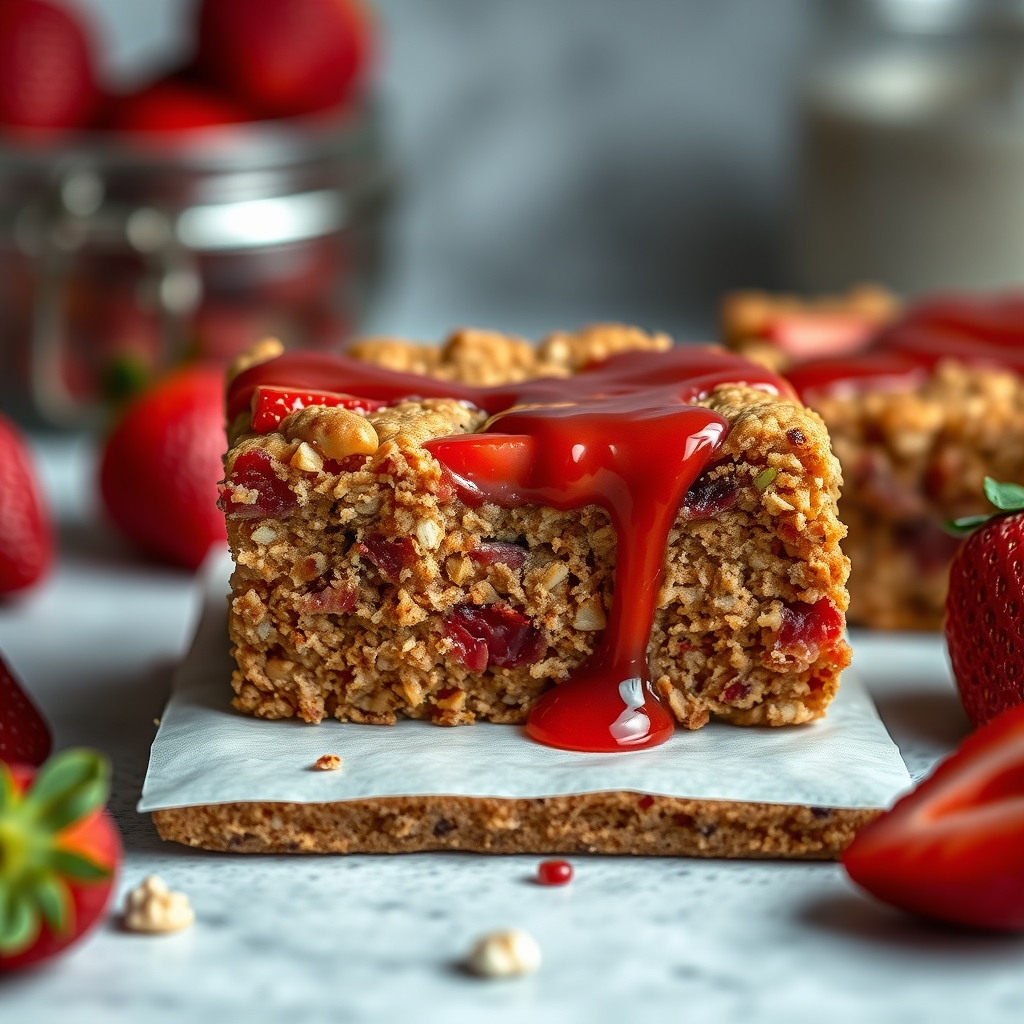
Healthy Strawberry Oatmeal Bars (Vegan + Gluten Free)
There’s something undeniably comforting about a homemade oatmeal bar—especially when it’s packed with juicy strawberries, wholesome oats, and just the right amount of sweetness. These Healthy Strawberry Oatmeal Bars are not only vegan and gluten-free but also bursting with flavor and texture that will make them a staple in your kitchen. Whether you’re meal prepping for the week, packing a lunchbox treat, or craving a guilt-free dessert, this recipe delivers on all fronts. Let’s dive into why these bars are a must-try and how you can make them perfectly every time.
Why You’ll Love This Recipe
First, let’s talk about what makes these strawberry oatmeal bars so irresistible. Here are just a few reasons why you’ll find yourself making them again and again:
- Nutrient-packed goodness: These bars are loaded with fiber from oats, antioxidants from fresh strawberries, and healthy fats from coconut oil or almond butter, making them a balanced snack or breakfast option.
- Easy to make: With just a handful of simple ingredients and minimal prep time, this recipe is perfect for busy mornings or last-minute cravings.
- Perfect texture: The combination of a slightly crisp oat crust and a soft, jammy strawberry filling creates a delightful contrast in every bite.
- Dietary-friendly: Whether you follow a vegan, gluten-free, or dairy-free diet, these bars cater to a wide range of dietary needs without compromising on taste.
- Kid-approved: The natural sweetness of strawberries makes these bars a hit with kids, offering a healthier alternative to store-bought snacks.
Ingredients Breakdown
Understanding the role of each ingredient helps you appreciate the magic behind these strawberry oatmeal bars. Here’s what you’ll need and why each component matters:
- Rolled oats: The base of the crust and topping, rolled oats provide a chewy texture and fiber-rich goodness. Make sure to use certified gluten-free oats if needed.
- Almond flour: Adds a nutty flavor and helps bind the crust while keeping it gluten-free. You can also use oat flour for a nut-free version.
- Coconut oil or almond butter: These healthy fats keep the bars moist and hold the crust together. Coconut oil adds a subtle tropical note, while almond butter enhances richness.
- Maple syrup or agave: A natural sweetener that complements the tartness of strawberries without refined sugar.
- Fresh strawberries: The star of the show, strawberries bring natural sweetness, vibrant color, and a juicy burst of flavor. Frozen strawberries work too, but fresh is ideal for the best texture.
- Chia seeds or flaxseeds: These act as a binding agent in the strawberry filling, replacing traditional pectin or gelatin.
- Vanilla extract and cinnamon: Warm spices that elevate the overall flavor profile, adding depth and aroma.
How to Make Healthy Strawberry Oatmeal Bars (Vegan + Gluten Free)
Now, let’s walk through the step-by-step process to create these delicious bars. Follow these instructions for foolproof results:
- Prepare the strawberry filling: In a saucepan, combine chopped strawberries, a tablespoon of chia seeds, and a drizzle of maple syrup. Cook over medium heat until the strawberries break down and the mixture thickens (about 8–10 minutes). Set aside to cool slightly.
- Make the oat crust: In a large bowl, mix rolled oats, almond flour, melted coconut oil (or almond butter), maple syrup, vanilla extract, and a pinch of cinnamon. Stir until the mixture resembles coarse crumbs.
- Press the crust: Reserve about ⅓ of the oat mixture for the topping. Press the remaining mixture firmly into a lined or greased 8×8-inch baking dish, creating an even layer.
- Layer the filling: Spread the slightly cooled strawberry filling over the crust, ensuring it reaches the edges.
- Add the topping: Sprinkle the reserved oat mixture evenly over the strawberry layer, gently pressing it down to adhere.
- Bake: Place the dish in a preheated oven at 350°F (175°C) for 25–30 minutes, or until the top is golden brown.
- Cool and slice: Allow the bars to cool completely in the dish before slicing into squares. This step is crucial for clean cuts!
Pro Tips for the Best Results
To ensure your strawberry oatmeal bars turn out perfectly every time, keep these expert tips in mind:
- Use ripe strawberries: The sweeter the berries, the more flavorful your filling will be. If your strawberries are tart, adjust the sweetness with a bit more maple syrup.
- Don’t skip the cooling step: Letting the bars cool completely ensures they hold their shape when sliced. For even cleaner cuts, chill them in the fridge for an hour.
- Customize the texture: For a crunchier topping, bake the oat mixture separately for 5 minutes before adding it to the bars.
- Line your baking dish: Parchment paper makes it easy to lift the bars out of the pan for slicing and serving.
Variations and Substitutions
One of the best things about this recipe is its versatility. Here are some delicious ways to mix it up:
- Berry swap: Try blueberries, raspberries, or a mix of berries instead of strawberries for a different flavor profile.
- Nut-free option: Replace almond flour with oat flour and use sunflower seed butter instead of almond butter.
- Add-ins: Stir in dark chocolate chips, shredded coconut, or chopped nuts into the oat mixture for extra texture.
- Spice it up: Add a pinch of cardamom or ginger to the crust for a warm, aromatic twist.
What to Serve With It
These strawberry oatmeal bars are delicious on their own, but here are a few pairing ideas to make them even more special:
- Dairy-free yogurt: Serve with a dollop of coconut or almond yogurt for a creamy contrast.
- Fresh fruit: A side of sliced bananas or extra strawberries adds freshness.
- Tea or coffee: Enjoy with a cup of herbal tea or cold brew for a relaxing snack.
- Ice cream: For a decadent dessert, warm a bar slightly and top with vegan vanilla ice cream.
How to Store and Reheat
To keep your strawberry oatmeal bars fresh and tasty, follow these storage tips:
- Room temperature: Store in an airtight container for up to 2 days (ideal if you prefer a softer texture).
- Refrigerator: For longer storage, keep them in the fridge for up to 5 days.
- Freezer: Wrap individual bars in parchment paper and freeze for up to 3 months. Thaw at room temperature or reheat in a toaster oven.
- Reheating: Warm in a 300°F (150°C) oven for 5–10 minutes to revive the crispness.
Frequently Asked Questions (FAQs)
Here are answers to some common questions about this recipe:
- Can I use frozen strawberries? Yes, but thaw and drain them first to avoid excess moisture in the filling.
- How do I make these bars nut-free? Substitute almond flour with oat flour and use sunflower seed butter instead of almond butter.
- Why are my bars crumbly? This usually happens if the crust isn’t pressed firmly enough or if the bars are sliced before cooling completely.
- Can I reduce the sweetness? Absolutely! Adjust the maple syrup to taste or use unsweetened applesauce as a partial substitute.
Final Thoughts
These Healthy Strawberry Oatmeal Bars are proof that wholesome ingredients can create something truly delicious. Whether you enjoy them as a quick breakfast, an afternoon pick-me-up, or a light dessert, they’re sure to become a favorite in your recipe collection. The best part? You can feel good about sharing them with loved ones, knowing they’re packed with nutrition and free from refined sugars or processed additives. Give this recipe a try, and don’t forget to experiment with your own twists—after all, the kitchen is the perfect place to get creative. Happy baking!
Print
Healthy Strawberry Oatmeal Bars (Vegan + Gluten Free)
Description
These delicious strawberry oatmeal bars are vegan, gluten-free, and packed with wholesome ingredients. Perfect for breakfast or a healthy snack!
Ingredients
For the Crust:
- For the base and topping:
- 2 cups gluten-free rolled oats
- 1 cup almond flour
- 1/4 cup coconut sugar
- 1/4 tsp salt
- 1/2 tsp cinnamon
- 1/3 cup coconut oil (melted)
- 2 tbsp maple syrup
- For the strawberry filling:
- 2 cups fresh strawberries (diced)
- 2 tbsp chia seeds
- 1 tbsp maple syrup
- 1 tsp lemon juice
Instructions
1. Prepare the Crust:
- 1. Preheat oven to 350°F (175°C) and line an 8×8 inch baking pan with parchment paper.
- 2. In a large bowl, mix together oats, almond flour, coconut sugar, salt, and cinnamon for the base/topping.
- 3. Add melted coconut oil and maple syrup, stirring until well combined. Set aside 1/2 cup of this mixture for topping.
- 4. Press the remaining mixture firmly into the prepared baking pan to form the base.
- 5. In a separate bowl, combine strawberries, chia seeds, maple syrup, and lemon juice for the filling. Let sit for 5 minutes.
- 6. Spread the strawberry filling evenly over the base, then sprinkle the reserved topping mixture over it.
- 7. Bake for 30-35 minutes until golden brown. Let cool completely before cutting into bars.
Notes
Store in an airtight container in the refrigerator for up to 5 days. For firmer bars, chill before serving. Can substitute strawberries with other berries if preferred.