Indulge in Decadent Buttered Rum Fudge Perfect for Holiday Treats

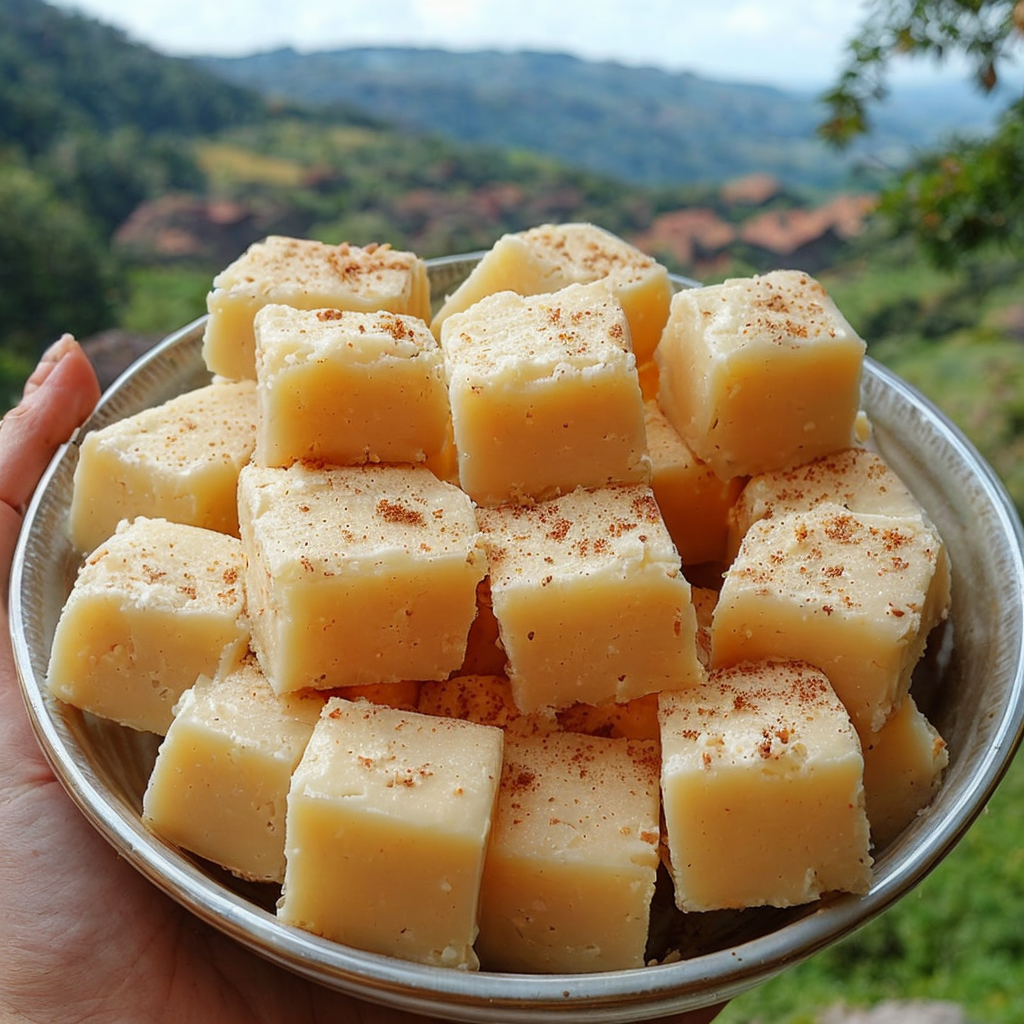
Buttered Rum Fudge: A Decadent Indulgence

⚖️
Difficulty
Easy

⏲️
Prep Time
10 mins

🕒
Cook Time
10 mins

⏱️
Total Time
20 mins

🍽️
Servings
24 pieces

Immerse yourself in the rich, creamy delight of Buttered Rum Fudge. This scrumptious treat is perfect for those with a sweet tooth, combining the smoothness of fudge with the warm, comforting flavors of buttered rum. Whether you’re indulging alone or sharing with friends, this fudge is a must-try for its decadent blend of flavors and textures. Prepare to be captivated by its velvety feel and the subtle hint of rum that dances on your palate, making each bite a luxurious experience.

Quick Recipe Highlights

  • Flavor Profile: Enjoy the creamy sweetness with a hint of spiced buttered rum.
  • Texture: Experience the melt-in-your-mouth softness combined with a subtle firmness.
  • Aroma: The rich, buttery scent mingled with warm rum notes creates an inviting aroma.
  • Visual Appeal: The fudge has a lustrous sheen, with a rich, caramel color that’s enticing.
  • Skill Level Needed: Simple and straightforward, suitable for both beginners and seasoned cooks.
  • Special Equipment: A candy thermometer is recommended for precision.

Recipe Overview

  • Difficulty Level: Chosen as easy due to its straightforward ingredients and steps, ensuring even novice cooks can achieve perfection.
  • Category: A delightful dessert or festive snack to elevate any occasion.
  • Cuisine: Inspired by the traditional confectionary practices, with a unique blend of American and Caribbean influences.
  • Cost: Budget-friendly, with most ingredients likely already in your pantry.
  • Season: Best enjoyed in fall and winter for its warming qualities, but delightful year-round.
  • Occasion: Ideal for holiday gatherings, gifting, or as a cozy treat during colder months.

Why You’ll Love This Recipe


Delve into the luscious world of Buttered Rum Fudge, where taste and texture collide to satisfy your dessert cravings. The buttery richness is perfectly balanced with the subtle kick of rum, creating a harmony of flavors that is both nostalgic and enticing. Whether you’re looking for a quick and gratifying dessert solution or a treat to impress guests, this fudge ticks all the boxes with its ease of preparation and flawless presentation. Its relatively low cost and readily available ingredients make it an accessible indulgence that doesn’t compromise on taste.

Beyond the taste, this fudge is a nutritional powerhouse of pleasure, offering a rich source of energy with each piece. The social element of sharing homemade fudge adds a personal touch to gatherings, making it a wonderful gift or a highlight at parties. Its simplicity and depth of flavor ensure that it leaves a lasting impression on anyone who dares to savor its creamy goodness.

Historical Background and Cultural Significance


Buttered Rum Fudge has its roots in the rich tradition of fudge-making that dates back to the late 19th century, a time when confectionary exploration was at its peak. Originating in the United States, fudge quickly became a beloved treat, offering confectioners a canvas for creativity with flavors and textures. The inclusion of rum in this fudge harks back to Caribbean influences, where rum is a staple ingredient, resulting in a truly cross-cultural confection that marries the warmth of the tropics with the comforting fudge nostalgia.

As fudge gained popularity, variations like Buttered Rum Fudge emerged, becoming a festive favorite, particularly during the holiday season. The combination of butter and rum brings a sophisticated twist to the classic fudge, evoking the cozy comforts of a well-loved winter beverage in confection form. Today, it stands as a testament to the innovation and adaptability inherent in culinary traditions, cherished by many who celebrate its blend of flavors and heritage.

Ingredient Deep Dive


Sugar is the cornerstone of any great fudge, providing the essential sweetness and structure. Its cultural significance as an ancient sweetener is undeniable, having been cherished across many traditions for centuries. When selecting sugar, opt for high-quality granulated varieties to ensure smooth texture and consistency. Store sugar in a cool, dry place to keep it from clumping and crystallizing. In the event you need a substitute, consider using light corn syrup or honey for a different flavor profile.

Butter plays a critical role, infusing the fudge with its rich and creamy mouthfeel. It brings both flavor and moisture, creating a smooth, melt-in-your-mouth texture. For best results, choose unsalted butter, which allows control over the overall saltiness of the dish. Store butter in its original wrapper, in the fridge, to preserve its freshness. If necessary, margarine or vegan butter can serve as substitutes, though some flavor nuances might vary.

Common Mistakes to Avoid

  • Overcooking: Monitor the temperature closely with a candy thermometer to avoid grainy texture.
  • Under-beating: Ensure a smooth consistency by beating the fudge thoroughly until it loses its shine.
  • Using cold ingredients: Allow all ingredients to reach room temperature before combining.
  • Skipping the thermometer: Ensure precise heat management to achieve the correct texture.
  • Poor storage: Store the fudge in an airtight container to prevent it from drying out.
  • Humidity issues: Avoid making fudge on humid days, which can affect texture.
  • Wrong butter: Use unsalted butter to control flavor balance.
  • Forgetting to stir: Consistent stirring prevents the mixture from scorching.

Essential Techniques


The delicate art of fudge-making is all about managing the temperature and consistency of your ingredients. Mastery begins with using a candy thermometer to reach the exact soft-ball stage (235-245°F), which ensures that your fudge sets correctly without becoming too hard or too soft. Consistent stirring is paramount, as it helps prevent the mixture from burning and ensures smoothness. Finally, practice patience during the cooling and beating process, allowing the fudge to lose its gloss while becoming creamy and luscious.

Pro Tips for Perfect Buttered Rum Fudge


Enhance your fudge by toasting any nuts or additional mix-ins before adding them, deepening their flavor and texture. Consider adding a pinch of salt to amplify the buttered rum nuances, giving the fudge a sophisticated balance. Be sure to pour the mixture into a prepared pan lined with parchment paper for easy removal. If experimenting with flavors, remember that less is more; a few drops of vanilla extract can elevate the rum flavors beautifully. When cutting the fudge, use a sharp knife, cleaned and warmed, for clean slices. Lastly, allow the fudge to cool slowly at room temperature to achieve the ideal texture.

Variations and Adaptations


Regional variations of Buttered Rum Fudge may introduce local ingredients, such as Caribbean spices that enhance the rum flavors or the addition of coconut for a tropical twist. Seasonal adaptations are equally intriguing; during the colder months, infuse the fudge with warming spices like cinnamon or nutmeg for a festive flair. For those seeking dietary modifications, swapping dairy butter for plant-based alternatives can create a vegan-friendly version. Experimentation with flavor variations is encouraged, from white chocolate swirls to a hint of espresso, adding depth and complexity.

Serving and Presentation Guide


Present your Buttered Rum Fudge with flair, using elegant plating techniques that include separating pieces with parchment paper for ease. Consider garnishing with a dusting of powdered sugar or edible gold flakes for a luxurious touch. Traditional accompaniments like fresh berries or compotes provide a contrast of flavors and textures. Modern serving suggestions might include offering fudge squares with mini forks for a sophisticated, bite-sized treat. Pay attention to temperature; serving the fudge slightly chilled ensures it holds its shape whilst melting smoothly in the mouth.

Wine and Beverage Pairing


Pairing Buttered Rum Fudge with the right beverage enhances the overall experience. Opt for a sweet, rich wine such as a late-harvest Riesling, which complements the fudge’s sweetness with floral notes. Non-alcoholic options like a warm spiced tea or rich hot chocolate make delightful companions, enhancing the dessert’s warm, comforting qualities. If coffee or tea is your preference, choose a robust roast or chai blend to balance the sweetness with a hint of bitterness, ensuring a well-rounded flavor experience.

Storage and Shelf Life


Proper storage of your Buttered Rum Fudge brightens its longevity and flavor, keeping it fresh and delicious. Seal it tightly in an airtight container at room temperature for up to two weeks to maintain its ideal texture. If refrigerating, wrap each piece in parchment to prevent moisture absorption—a necessity for extended freshness. Should you choose to freeze, ensure the fudge is well-wrapped, defrosting overnight in the refrigerator before serving. Watch for changes in texture or moisture levels as signs of spoilage.

Make Ahead Strategies


Creating Buttered Rum Fudge ahead of an event underscores your culinary planning prowess. Begin by prepping all ingredients and measuring tools in advance for a smooth, efficient process. During assembly, store partially-made fudge tightly covered at room temperature if resting overnight. Quality is maintained when allowed to set at its own pace, ensuring perfect texture. When it’s time to serve, gently warm any reserved portions in a microwave for a few seconds, enhancing flavor and texture before adding fresh garnishes for flair.

Scaling Instructions


Scaling Buttered Rum Fudge to serve a variety of occasions takes careful consideration. When halving or doubling the recipe, maintain proportional ingredient ratios for consistent results. Specialized equipment may be necessary for larger batches, including larger saucepans to accommodate increased volume. Adjustments in cooking time are crucial, with larger quantities possibly requiring extended heating. Proper storage becomes critical with larger batches, ensuring freshness across multiple servings by utilizing appropriate containers and conditions.

Nutritional Deep Dive


A nutritional overview of Buttered Rum Fudge offers insights into its pleasurable consumption. The fudge primarily comprises carbohydrates from sugar, with moderate amounts of fat from butter contributing to its creamy texture. Dietary considerations should note the high-calorie content per serving, balancing enjoyment with mindful consumption. It’s advisable to enjoy this fudge as an occasional treat, acknowledging its richly indulgent profile. Portion sizes matter, with a standard piece providing enough sweetness without overpowering dietary goals.

Dietary Adaptations


Crafting dietary adaptations for Buttered Rum Fudge allows inclusivity across various eating practices. A gluten-free version is straightforward, with naturally gluten-free ingredients. For dairy-free needs, replace butter with a high-quality plant-based alternative, ensuring similar texture and taste. Vegan adaptations align with dairy-free practices, requiring careful selection of other supplements like condensed coconut milk. Adapting the fudge to fit low-carb or keto diets may involve natural sweeteners and alternate thickening agents, ensuring the flavor remains rich and satisfying.

Troubleshooting Guide


Overcome common challenges with Buttered Rum Fudge by consulting these troubleshooting tips. If texture issues arise, review candy thermometer calibration, ensuring temperatures are accurate. Flavor balance can be fine-tuned, adding vanilla or salt when necessary to enhance the inherent sweetness. Address temperature problems by adjusting cooking surfaces, maintaining a steady heat during preparation. Recognize potential equipment challenges early, selecting a pot that accommodates your batch size comfortably. Ingredient substitutions should maintain original ratios, ensuring consistent taste and texture. Evaluate timing concerns, allowing adequate cooling to guarantee ideal consistency.

Recipe Success Stories


Community successes in crafting Buttered Rum Fudge inspire others to engage with its delicious possibilities. Readers frequently share innovative variations, enhancing the traditional with unique spins like nuts or flavored extracts. Feedback celebrates the fudge’s ease of preparation despite its impressive results. Home adaptations include adjusting sweetness levels to suit personal preferences or incorporating seasonal touches like peppermint for festive gatherings. Rising popularity underscores its value as a flexible, shareable treat perfect for gift-giving during the holiday season.

Frequently Asked Questions

Can I use dark rum instead of light rum?
Yes, dark rum can be used for a deeper, more complex flavor profile. Adjust the quantity to taste.

What if I don’t have a candy thermometer?
Test by dropping a small amount of mixture into cold water — it should form a soft ball.

Can this fudge be made into shapes?
Absolutely. Pour into silicone molds for fun, creative designs.

How do I prevent my fudge from being grainy?
Make sure sugar is dissolved completely before boiling, and avoid stirring it until after it’s cooled slightly.

What is the best way to cut the fudge?
Use a warm, sharp knife, and clean it between cuts for smooth slices.

Can I add nuts or dried fruit?
Definitely! Fold in chopped nuts or dried fruit after the fudge has cooled slightly but before it sets.

Is it possible to make it without alcohol?
Yes, replace rum with rum extract or a similar flavored syrup for a non-alcoholic version.

What should I do if my fudge doesn’t set?
Reheat gently and try again, ensuring accurate temperature management with your thermometer.

Can I make fudge without butter?
Substitute with margarine or vegan spread for a similar richness, though flavor may vary.

How long can I store fudge?
Properly stored, it lasts up to two weeks at room temperature and several months frozen.

Additional Resources


Explore further into fudge perfection with related recipes and techniques. Dive into a guide on mastering candy-making basics, essential for building a good foundation. Find ingredient studies exploring variations in sugar and fat that influence fudge characteristics. Discover equipment recommendations tailored for perfect fudge consistency, highlighting must-have thermometers and pans. Embrace seasonal adaptations through an exploration of ingredient pairings that celebrate diverse culinary traditions.

Join the Conversation


Engage with our community by sharing your Buttered Rum Fudge creations on social media with hashtags like #RumFudgeDelight. Show off your unique presentation styles and inspire others with your innovative adaptions. Leave a review or comment on our blog post to connect with fellow dessert enthusiasts. Consider joining recipe exchange forums to broaden your culinary repertoire, sharing tips and tricks to perfecting the art of fudge-making. Embrace the joy of sharing this delectable treat with a network of passionate food lovers.

The Recipe

Buttered Rum Fudge

Serves: 24 pieces

Prep Time: 10 mins

Cook Time: 10 mins

Total Time: 20 mins

Kitchen Equipment Needed

  • Medium saucepan
  • Candy thermometer
  • Whisk
  • 8×8 inch baking dish
  • Parchment paper

Ingredients

  • 2 cups granulated sugar
  • 1/2 cup heavy cream
  • 1/2 cup unsalted butter
  • 1/4 cup light rum
  • 1 teaspoon vanilla extract
  • 1/4 teaspoon salt

Directions

  1. Line an 8×8 inch baking dish with parchment paper, leaving excess hanging over the edges for easy removal.
  2. In a medium saucepan over medium heat, combine sugar, heavy cream, and butter. Stir until the sugar is dissolved.
  3. Attach a candy thermometer and bring the mixture to a boil. Allow it to reach the soft-ball stage (235-245°F), stirring occasionally.
  4. Remove from heat and stir in rum, vanilla extract, and salt until well combined.
  5. Let the mixture cool for about 15 minutes, then beat it until it loses its shine and thickens.
  6. Pour the fudge into the prepared dish, spreading it evenly. Let it set at room temperature until firm.
  7. Remove from dish using parchment overhang, cut into 24 squares, and serve.

Recipe Notes

  • Adjust the amount of rum to taste, or replace it with rum extract for a non-alcoholic version.
  • Fudge can be stored at room temperature for up to two weeks.
  • For a nutty twist, stir in 1/2 cup of toasted chopped pecans after removing from heat.

Indulge in the Ultimate Heavenly Cherry Chocolate Dream Cake Recipe

Heavenly Cherry Chocolate Dream Cake Recipe: A Divine Dessert Experience

⚖️
Difficulty
Moderate

⏲️
Prep Time
30 mins

🕒
Cook Time
45 mins

⏱️
Total Time
75 mins

🍽️
Servings
8

Indulge your senses with the Heavenly Cherry Chocolate Dream Cake – a luscious combination of rich chocolate and vibrant cherry flavors. This cake is perfect for celebrations or simply when you need a decadent treat. Chocolaty layers are paired with a sweet and tart cherry filling, topped with creamy ganache. It’s a dessert worth savoring.

Its soft, moist texture melts in your mouth, enhanced by the perfect balance of sweetness and a hint of sour from the cherries. The aroma of fresh cherries and chocolate wafting through your kitchen will delight and excite your senses as you prepare this irresistible dessert.

The icing on top is the visual appeal, with deep brown cake layers contrasted by the vibrant red of cherries and a glossy ganache finish. Whether you’re an experienced baker or a curious learner, creating this dreamy cake is a rewarding culinary adventure!

Quick Recipe Highlights

  • Flavor Profile: The blend of sweet chocolate and tart cherries offers a harmonious mix that is rich and indulgent.
  • Texture: Each bite provides a balance of dense moist cake and soft fruit pieces, complemented by a smooth ganache.
  • Aroma: The intoxicating scent of chocolate mingled with fruity cherry tones fills your kitchen.
  • Visual Appeal: The cake’s contrasting colors promise a feast for the eyes, setting the stage for a delightful dessert experience.
  • Skill Level Needed: While some baking experience is helpful, following the detailed instructions will guide even novices to success.
  • Special Equipment: A stand mixer, a couple of round cake pans, and a baking spatula will make the process smoother.

Recipe Overview

  • Difficulty Level: This recipe involves various steps like making ganache and fruit filling, which requires some baking experience, but absolute beginners can learn as they go.
  • Category: It falls under desserts and is perfect for cozy home gatherings or special occasions.
  • Cuisine: Drawing on European influences, especially French patisserie traditions, this cake offers a sophisticated touch.
  • Cost: While the use of quality chocolate and fresh cherries may be a bit pricier, the overall ingredients’ cost makes this a valuable splurge.
  • Season: Best enjoyed during late spring when cherries are in season, but can be made year-round with preserved fruit.
  • Occasion: Ideal for birthdays, anniversaries, or any celebratory event calling for a luxurious cake.

Why You’ll Love This Recipe


The combination of taste and texture in our Heavenly Cherry Chocolate Dream Cake is unmatched. The deep chocolate flavor is perfectly balanced by the brightness of cherries, creating a taste sensation that is both rich and refreshing. The texture is soft yet substantial, making each bite a pleasure to savor.

Convenience is another key benefit. This cake can be prepared in advance, making it perfect for hosting dinner parties or celebrations without the last-minute rush. Its impressive appearance means you’ll impress guests effortlessly.

From a nutritional standpoint, using fresh cherries provides antioxidants and nutrients, adding a healthy twist to your dessert. You get to enjoy the pleasures of a scrumptious treat with the added benefit of wholesome ingredients.

Socially, this cake is a conversation starter. Its elegance and exquisite taste will make you proud to share it with family and friends. Whether it’s a quiet afternoon with tea or an elaborate dinner party, this dessert suits any occasion and elevates social gatherings.

Despite its grandeur, the cake is cost-effective when compared to purchasing a similar dessert from a bakery. All ingredients are widely available, making this an accessible recipe for any aspiring baker.

Historical Background and Cultural Significance


Chocolate and cherries have a rich history that dates back to European culinary traditions. Originally, chocolate was considered a luxury item enjoyed by the elite, while cherries have always been cherished for their unique taste and versatility in desserts.

Culturally, fruit and chocolate pairings have been celebrated in desserts across the globe, from Black Forest cakes in Germany to cherry-studded chocolates in Italy. This combination symbolizes love and passion, often seen in romantic settings and sweet gestures.

The recipe for Heavenly Cherry Chocolate Dream Cake has evolved from these rich traditions, taking the principles of these beloved pairings and modernizing them for more refined palates. This cake, with its layered structure and complex flavors, reflects the evolution of dessert-making, honoring classic elements while embracing contemporary techniques.

Regionally, variations of chocolate and cherry desserts exist across different cuisines, each bringing new dimensions to the classic pairing. From French cherry clafoutis to American chocolate cherry pies, this cake continues a tradition of delicious innovation.

Ingredient Deep Dive


The key to our cake’s success lies in its ingredients. Fresh cherries are a vital component, offering a burst of fresh flavor and nutrients. Historically, cherries have been used in European desserts for centuries, known for their vibrant color and health benefits, including antioxidants and vitamin C.

Selecting top-quality chocolate is equally important. The richness and depth it brings to the cake’s flavor profile cannot be overstated. Nutrition-wise, dark chocolate is praised for its cardiovascular benefits and mood-enhancing properties.

When buying cherries, look for plump, firm fruit with a deep red hue. Always store them in the refrigerator to keep them fresh. If fresh cherries are out of season, you can use preserved or frozen ones, though the flavor intensity might differ slightly.

Substituting chocolate with a different type can be an option, though the flavor profile may change. Dark chocolate offers the best contrast to cherries, but for those preferring a milder flavor, milk chocolate could be considered.

Common Mistakes to Avoid

  • Overbaking the cake results in a dry texture. Always check doneness with a toothpick.
  • Using low-quality chocolate will compromise flavor. Invest in high-quality chocolate for the best results.
  • Skipping the cooling step can cause the ganache to melt. Allow the cake to cool completely before assembly.
  • Under-beating the batter might lead to a dense cake. Ensure ingredients are well-mixed for an airy texture.
  • Incorrect measurement of flour can throw off the texture. Use a kitchen scale for accuracy.
  • Failing to properly pit cherries can leave unwanted seeds. Use a cherry pitter for efficiency.
  • Not checking the temperature of melted chocolate can lead to separation. Avoid overheating.
  • Ignoring ganache consistency can affect icing. Aim for a glossy yet spreadable texture.

Essential Techniques


Understanding essential baking techniques is crucial to achieving a perfect Heavenly Cherry Chocolate Dream Cake. Proper measuring is an art and science that demands precision to balance flavors and textures. Use measured scoops and scales to ensure quantities are exact.

Learning how to properly melt chocolate can dramatically affect your cake’s outcome. It’s essential to melt it slowly over a double boiler, continually stirring to avoid burning and maintain a smooth consistency.

Another technique is folding in dry ingredients, which requires gentle motions to keep the batter light and airy. This skill helps retain the cake’s desired texture, crucial for impressive results.

The ganache-making process is about achieving the right temperature and consistency. Using heavy cream and quality chocolate ensures it’s both rich and glossy. Stir until smooth, and let it sit until it’s the right texture for spreading or drizzling over the cake.

Pro Tips for Perfect Heavenly Cherry Chocolate Dream Cake


Achieving a stunning cake involves several pro tips. Always bring your ingredients to room temperature before beginning; cold ingredients can affect texture and mixing efficiency.

Use parchment paper in the cake pans to prevent sticking and achieve clean, smooth edges.

When incorporating cherries within the batter, lightly coat them in flour to prevent sinking, ensuring even distribution.

Chill the ganache until it reaches a spreadable consistency, which helps when applying it between layers.

Consider using a turntable when icing the cake to gain a smoother, more professional finish.

Be aware of the chocolate type; bittersweet chocolate offers a deep flavor suitable for sophisticated palates, while milk chocolate provides a sweeter alternative for mass appeal.

Variations and Adaptations


Exploring variations adds excitement to the recipe. For a regional twist, try adding a layer of hazelnut spread to mimic an Italian influence, reminiscent of gianduja.

Incorporate seasonal flavors such as zest from winter oranges or the aromatic spice of spring cardamom for adaptations suiting different times of the year.

For dietary needs, substitute gluten-free flour blend to make the cake more accessible. Adjust the sweetness to match alternative sugars, such as coconut sugar, offering a healthier touch.

Enhance flavor by experimenting with flavored liqueurs – Amaretto or Kirsch can add delightful complexity, enhancing both cherry and chocolate notes.

To transform the texture, experiment with a crunchy element, like toasted almond slivers atop the ganache, offering a delightful contrast to the cake’s softness.

Consider deconstructing the cake for creative presentation, serving smaller pieces with a side of cherry compote and drizzling ganache for artistic flair.

Serving and Presentation Guide


Plating is an art form that elevates the dining experience. For dramatic effect, slice the cake to reveal the cherry-studded interior, showcasing its rich layers.

Garnish with a sprinkle of cocoa powder or powdered sugar—it enhances the cake’s visual allure and adds a subtle flavor. Add fresh cherries or a sprig of mint for color contrast.

To modernize its presentation, serve the cake on rustic wooden boards or elegant charger plates, helping it stand out against contrasting backgrounds.

Traditional accompaniments might include lightly whipped cream, or for a fresco-inspired setting, consider a scoop of artisanal vanilla gelato.

Ensure it’s served at room temperature to maximize flavors and maintain its smooth texture. Pay attention to portion control by using a sharp knife warmed under hot water—it provides clean slices, minimizing cake crumbs.

Wine and Beverage Pairing


Pairing Heavenly Cherry Chocolate Dream Cake enhances its flavors. Opt for a rich red wine, like a Cabernet Sauvignon or a deep, complex Merlot, which harmonizes with the richness of chocolate.

As non-alcoholic alternatives, brew a robust French press coffee to bring out the cake’s chocolate notes or serve a tart cherry-infused iced tea for a complementary refreshment.

For an Italian flair, accompany with an espresso shot. Its bitterness balances sweetness, complementing the cake’s richness beautifully.

Ensure all beverages are served fresh and at optimal temperatures. Red wines shine at room temperature, while iced teas and coffees suit cooler settings, providing a contrast to each luscious bite.

Keep glassware simple yet elegant; thin-stemmed wine glasses or classic ceramic coffee cups contribute to overall presentation sophistication.

Storage and Shelf Life


Storing this cake properly ensures it maintains its taste and texture. After cooling, cover it tightly with plastic wrap or place it in a cake dome to prevent drying.

Refrigerate sliced pieces in an airtight container, extending freshness for up to three days. Use parchment paper to separate slices if stacking is necessary, avoiding sticking.

Signs of spoilage include off-putting odor or changes in texture, like excessive dryness. Practice safe food storage by monitoring these indicators.

When reheating, opt for gentle warming to preserve moisture. Briefly microwave individual slices or allow them to reach room temperature naturally.

Freezing is an option—wrap individual slices in plastic wrap, followed by aluminum foil, maintaining quality for up to two months. Thaw overnight in the refrigerator before serving.

Make Ahead Strategies


Efficiently plan by preparing cake layers up to two days in advance, storing each in freezer-friendly bags until needed. This advance preparation simplifies assembly on the day of serving.

Storing the ganache separately in an airtight container in the refrigerator maintains its structure. Rewarm on low heat while stirring, to regain smoothness before applying.

The results of prepping these elements lead to a seamless assembly, reducing stress. Add fresh garnishes like cherries or mint leaves only when serving to preserve their vibrant appearance.

Reheating whole cake slices is best done gently, avoiding melting accompanying elements or fillings. Finally, fresh fruits or edible flowers provide a last-minute touch of elegance and liveliness.

Scaling Instructions


Adapting the recipe to fit your needs means adjusting both ingredient quantities and preparation considerations. Halving the recipe reduces both the serving size and cook time, perfect for intimate gatherings or smaller storage needs.

Doubling requires larger mixing equipment to manage increased quantities without compromising quality. Attention to oven space and extended baking time is necessary for uniform cooking.

Consider storing leftovers with care; larger cakes slice better with a substantial, sharp knife. Time management involves multitasking across preparation steps, balancing cooling and assembly seamlessly.

Flavor intensity may vary with adjustments in scale. Ensure spices and flavorings remain consistent to maintain the cake’s intended profile, regardless of size.

Nutritional Deep Dive


Exploring the nutritional aspects of this cake allows for informed indulgence. It offers a rich macro profile, with carbohydrates from flour and sugars from both the cake and fruit.

Micronutrients vary, as cherries provide vitamin C and dark chocolate boasts iron and magnesium. Enjoying the dessert in moderation allows benefits without excessive caloric intake.

The chocolate’s antioxidants support heart health, while cherries contribute to anti-inflammatory properties. Adaptations include reducing sugar or choosing lighter creams for frosting layers.

For those mindful of portion sizes, smaller slices allow enjoyment without excess. Weight management involves balancing consumption around other dietary intake for harmony.

Dietary Adaptations


To accommodate dietary preferences, various adaptations are possible. For gluten-free needs, select flour blends designed for baking, preserving flavor and texture integrity.

Dairy-free options involve substituting plant-based creams for ganache and butter alternatives for softening effects without traditional dairy ingredients.

Vegan recipes benefit from egg replacements like chia or flax seeds, and additional plant-based milk choices seamlessly integrate into the batter.

Low-carb adaptations focus on almond flour bases and sugar substitutes like erythritol or stevia, maintaining sweetness without increasing net carbs.

Keto enthusiasts may incorporate coconut flour, enhancing both richness and nostalgia, alongside high-fat creams for ganache gains.

Paleo options emphasize nut flours and natural sweeteners, aligning with natural eating trends while allowing a luxurious dessert experience.

Finally, low-FODMAP diets can replace certain cherries with simultaneously flavorful yet mild alternatives, keeping dietary discomforts at bay.

Troubleshooting Guide


Achieving perfection is possible regardless of setbacks. If texture lacks desired moisture, ensure egg and liquid measures reflect recipe standards. Missed steps may alter expected outcomes.

Off-balance flavor profiles benefit from slight ingredient adjustments; insufficient chocolate richness may require higher cocoa content for proper equilibrium.

Temperature concerns affect structure; cakes removing from ovens prematurely tend to collapse. Confirm ingredients like butter are suitably softened, preventing mixing inconsistencies.

Equipment malfunction involves maintaining standard settings. An imbalanced mixture via overheated mixers can lead to uneven baking; regularly monitor tools to preserve their efficiency.

Ingredient substitutions need timely awareness. If challenges arise, reseek original item purposes by identifying suitable leads. Adhering closely guides desired success ratios.

Lastly, time discrepancies reflect planning requirements. Keep ongoing recipes vibrant through meticulous calculation and convenient setup to preserve final product authenticity.

Recipe Success Stories


Our readers have shared incredible success stories when making the Heavenly Cherry Chocolate Dream Cake. Some have introduced flavor twists like adding almond extracts or crushed nuts to make the dessert more personal.

Individuals who were intimidated at first found detailed instructions boosting their confidence to attempt the recipe, with photos demonstrating impressive results.

Variations such as layering with whipped cream or incorporating other berries like raspberries showcase creativity and adaptability, proving this versatile cake consistently wins hearts.

As photographers, they capture stunning stills showcasing their artistic abilities and cake care, demonstrating effortless dedication to plating beauty.

Experiences recount the cake bringing joy to gatherings and solaces at work, highlighting home-made desserts remain irreplaceable amidst pre-packaged rivals.

Frequently Asked Questions

How can I make the cake less sweet?
Reducing sugar within the batter and frosting helps achieve a subtler sweetness. Adding coffee can also reduce perceived sweetness while enhancing chocolate depth.

Can I use canned cherries?
Yes, canned cherries work well, but ensure thorough draining and patting dry to prevent excess moisture, impacting structure.

Do I need to refrigerate the cake?
Yes, refrigeration extends its fresh state, although bringing to room temperature enhances flavors before serving.

What if I don’t have a stand mixer?
A handheld electric mixer works efficiently, though dedication with manual tools achieves similar outcomes, requiring additional effort.

Can I make this cake gluten-free?
Indeed, adapting to gluten-free flours is possible with specific batter consistency awareness to maintain softness.

Is there an alternative to heavy cream for ganache?
Full-fat coconut cream offers a non-dairy substitution, though flavor may differ slightly.

Avoiding chocolate clumping?
When melting, continually stir over low heat, ensuring no droplets or splashes touch melted chocolate, guarding from clumps.

Can this cake be frozen?
Yes, tightly wrap slices in layers of plastic wrap followed by foil ensures quality, perfectly thawing to retain preferred flavor.

Accommodations for nut allergies?
Utilizing non-nut alternatives like seeds or allergy-safe toppings facilitates delightful decoration without risk.

Why does my cake keep cracking?
Overmixing batter leads to excess air possibly causing fractures; moderate ingredient folding guarantees smoother outcomes.

Can I skip cherries if unavailable?
Opting for raspberry or berry preserves remedies cherry shortages, offering delightful yet comparable substitutes.

How to prevent the ganache from splitting?
Mixing ganache gently avoids incorporating air, which may cause splitting otherwise; adjust cream temperatures for smooth blending.

Additional Resources


For continued culinary growth, peruse related articles guiding you through artistic cake designs and foolproof baking theories solidifying professional outputs in each attempt.

Access genuine ingredient recommendations, exploring options yielding distinct recipe styles, catering globally-inspired palettes while retaining consistent authenticity.

Explore seasonal guides reflecting best purchases aligning to recipes accommodating climate shifts, merging your efforts with nutritiously valuable produce.

Bookmark these inspiring technique tutorials incorporating articulate focus on innovative methodologies elevating cake creations into unparalleled realms.

Culinary tool catalogs offer comprehensive gear selections bringing creativity alive, allowing precision flourishes without compromise across artistry aspects.

Enhance your understanding of festive dessert transformations, demonstrating styling brilliance through diverse approaches illuminating gathering moments with pure joy.

Join the Conversation


Dive into our engaging community where connections flourish beyond initial curiosity. Contribute impressions, sparking lively exchanges centered around adventurous culinary journeys, uniting through shared favorite moments.

Share photos capturing visual progressions within our social feeds, fostering inspiration as one image sets creative sparks ablaze, reenacting prideful celebrations.

Review extensive recipe trials, exploring each technique discussed, exhibiting your magnificent masterpieces unencumbered by ordinary norms. Enable others to blossom under shining success.

Seek out group interactions online designed to maximize recipe satisfaction, acting upon personal discovery quests immersing participants within broader circles spirited by common pursuits.

Connect with innovative culinary workshops designed to expose perspective-reaching twists, nourishing a perpetual cycle of food appreciation and wisdom succession.

Engage socially, collaborate through genuine feedback environ conducive to culinary excellence guaranteed to reshape global kitchen explorations while enhancing enjoyment.

The Recipe

Heavenly Cherry Chocolate Dream Cake

Serves: 8

Prep Time: 30 mins

Cook Time: 45 mins

Total Time: 75 mins

Kitchen Equipment Needed

  • Stand mixer or electric hand mixer
  • Two round cake pans (9-inch)
  • Baking spatula
  • Cooling rack
  • Double boiler or microwave

Ingredients

  • 1 and 3/4 cups all-purpose flour
  • 1 and 1/2 cups sugar
  • 3/4 cup unsweetened cocoa powder
  • 1 and 1/2 teaspoons baking powder
  • 1 and 1/2 teaspoons baking soda
  • 1 teaspoon salt
  • 2 large eggs
  • 1 cup whole milk
  • 1/2 cup vegetable oil
  • 2 teaspoons vanilla extract
  • 1 cup boiling water
  • 2 cups fresh cherries, pitted and halved
  • 10 ounces semisweet chocolate, chopped
  • 1 cup heavy cream

Directions

  1. Preheat your oven to 350°F (175°C). Grease and flour two 9-inch round cake pans.
  2. In a large bowl, mix together the flour, sugar, cocoa powder, baking powder, baking soda, and salt.
  3. Add the eggs, milk, oil, and vanilla. Beat on medium speed for 2 minutes. Stir in the boiling water until the batter is well combined and smooth.
  4. Pour the batter evenly into the prepared pans. Bake for 30-35 minutes, or until a toothpick inserted into the center comes out clean.
  5. Allow cakes to cool in the pans for 10 minutes, then transfer to wire racks to cool completely.
  6. To make the ganache, heat the heavy cream until simmering. Pour over the chopped chocolate in a medium bowl. Let sit for a minute, then stir until smooth. Cool to thicken.
  7. Place one cake layer on a serving plate. Spread a layer of ganache on top, followed by a layer of cherries. Top with the second cake layer.
  8. Spread ganache over the top and sides of the cake. Decorate with remaining cherries.

Recipe Notes

  • Consider using a serrated knife to cut clean layers.
  • For added flavor, infuse the ganache with orange zest or cherry liqueur.
  • Store leftover cake in the refrigerator for up to three days.

Indulge in the Ultimate Shrimp Grilled Cheese Garlic Bread Delight

Ultimate Shrimp Grilled Cheese with Garlic Bread: A Melty Delight

⚖️
Difficulty
Medium

⏲️
Prep Time
15 mins

🕒
Cook Time
10 mins

⏱️
Total Time
25 mins

🍽️
Servings
4

Dive into the luxurious world of melted cheese and succulent shrimp with our Ultimate Shrimp Grilled Cheese with Garlic Bread. This comforting recipe takes the classic grilled cheese to a whole new level by adding tender shrimp and the irresistible flavor of garlic bread. Whether you’re looking for a quick lunch or a delightful dinner, this dish is a perfect choice to satisfy your taste buds.

The combination of freshly baked garlic bread and savory shrimp enveloped in gooey cheese is nothing short of culinary magic. Each bite offers a harmonious blend of flavors and textures that will leave you craving more. This recipe is not only a treat for your senses but also a testament to the versatility of grilled cheese sandwiches.

Quick Recipe Highlights

  • Flavor Profile: Expect a delightful medley of savory shrimp mingling with melty cheese, enhanced by the aromatic freshness of garlic.
  • Texture: Enjoy the perfect balance of crispy garlic bread and the creamy, soft interior filled with cheese and shrimp.
  • Aroma: The enticing aroma of garlic coupled with melting cheese and grilled bread will fill your kitchen with warmth and coziness.
  • Visual Appeal: This sandwich is a feast for the eyes with its golden crust, vibrant pink shrimp, and molten cheese oozing out.
  • Skill Level Needed: Intermediate cooking skills are required to properly manage the shrimp and achieve the desired grilled bread texture.
  • Special Equipment: Griddle or frying pan, spatula, and a good non-stick surface are essential to perfect this recipe.

Recipe Overview

  • Difficulty Level: Best suited for those comfortable with basic cooking techniques. The challenge lies in perfectly grilling the bread without overcooking the shrimp.
  • Category: This dish is versatile, fitting comfortably under sandwiches or casual dining, making it perfect for any meal of the day.
  • Cuisine: Inspired by Italian and American culinary traditions, this recipe brings a delicious cross-cultural experience to your table.
  • Cost: Economical and budget-friendly, especially if shrimp is already in your pantry staples or if you’re using leftover cheese and bread.
  • Season: While perfect all year round, this dish is particularly comforting during the cooler months when hearty meals are most appreciated.
  • Occasion: Ideal for lunch gatherings, quick weeknight dinners, or game night munchies.

Why You’ll Love This Recipe


The Ultimate Shrimp Grilled Cheese with Garlic Bread combines traditional flavors with a modern twist. The inclusion of shrimp adds a luxurious texture and a pop of flavor that perfectly complements the creamy cheese. You’re not just making a sandwich; you’re crafting a flavor experience. Quick to prepare, this recipe offers simplicity without sacrificing taste. Perfect for those days when you need a comforting meal without putting in significant effort.

This dish can easily become a go-to meal in your household due to its simplicity and family-friendly flavor profile. The nutritional benefits of shrimp, high in protein and omega-3 fatty acids, make this a relatively healthy indulgence, especially when paired with the right whole-grain or artisan bread.

Hosting a casual gathering? Impress your guests with these gourmet-style sandwiches that require minimal preparation. Pair them with a variety of sides to cater to different palates. The cost-effectiveness of this dish allows for entertaining on a budget without compromising on flavor or presentation.

Historical Background and Cultural Significance


Grilled cheese sandwiches have a storied history, beloved in many cultures for their simplicity and comfort. Originating from the United States, the classic grilled cheese has seen various adaptations over the decades. Shrimp, on the other hand, has been a culinary staple in coastal cuisines around the world, valued for its versatility and delicate flavor.

This recipe reflects the evolution of traditional dishes by marrying the no-frills comfort of grilled cheese with the rich, umami taste of shrimp, presenting a unique take on a classic favorite. The inclusion of garlic bread elevates this combination, creating a flavor fusion that pays homage to Mediterranean influences and American innovation.

Variations on grilled cheese have appeared throughout history, but the addition of shrimp is a relatively modern twist, offering a nod to the gourmet trend of incorporating seafood into everyday recipes. This blend of flavors showcases regional variations and the adaptability of comfort foods in a global culinary landscape.

Ingredient Deep Dive


Shrimp, the star ingredient of this recipe, is cherished worldwide for its sweet flavor and nutritional value. Rich in protein, shrimp contribute to heart health when included in a balanced diet. When selecting shrimp, fresh or frozen options work equally well; just ensure they are deveined and cleaned thoroughly.

Cheese, an indispensable component of this recipe, provides richness and depth to the grilled cheese. Opt for varieties like cheddar or mozzarella, known for their melting quality. Choosing the right cheese is crucial—an aged cheddar adds sharpness, while mozzarella gives a gooey texture without overwhelming the shrimp.

Garlic bread serves as the flavorful base for this sandwich. Quality artisan bread enhances the overall experience, delivering a crispy exterior and a soft center. Infusing the bread with garlic butter or oil intensifies the savory notes, creating a perfect vehicle for the shrimp and cheese.

Common Mistakes to Avoid

  • Overcooking the shrimp is a common pitfall. Ensure shrimp are just cooked until pink for optimal texture and flavor.
  • Using overly thick bread can lead to an unbalanced sandwich. Opt for bread slices that are thick enough to provide structure but thin enough to allow the filling flavors to shine.
  • Skipping the preheat step for your pan can result in uneven cooking. Always ensure your cooking surface is properly heated before grilling.
  • Lack of seasoning can make or break the dish. Make sure each component has enough seasoning to elevate the distinct flavors.
  • Overstuffing the sandwich can lead to messy cooking. Avoid adding too much of the filling, which can result in spilling during grilling.
  • Failing to use butter or oil when grilling can lead to a dry and unevenly toasted sandwich. A thin layer of butter on the outside of the bread ensures a golden, crispy finish.
  • Navigating the cheese-shrimp balance is crucial. Achieving a harmonious balance ensures no one ingredient overpowers the others.
  • Avoiding pre-cooked shrimp could lead to mishaps. If using pre-cooked shrimp, mind your grilling time to prevent chewing overcooked results.

Essential Techniques


Mastering the art of grilling bread is crucial. Ensure your pan is at the right temperature; a medium heat allows the cheese to melt without the bread burning. Keep an eye on color change—when the bread reaches a deep golden brown, it’s ready.

Shrimp cooking requires finesse, ensuring they turn a beautiful pink without becoming rubbery. Watch for a slight curl to the shrimp, indicating they are perfectly cooked. Practice flipping with a gentle, even motion to prevent ingredients from spilling out of the sandwich.

Consider cheese melting as a crucial step. To achieve the ideal melt, cover the pan briefly, trapping heat inside to assist the cheese in achieving a luxuriously gooey texture. Avoid high heat, which could scorch the bread while leaving cheese unmelted.

Pro Tips for Perfect Ultimate Shrimp Grilled Cheese


Sauté shrimp in garlic-infused oil before adding them to the sandwich to enhance the flavor profile. This technique infuses the shrimp with a delightful aromatic that complements the garlic bread.

Use a combination of cheeses—consider mixing sharp cheddar with creamy mozzarella for a balanced flavor and superior melt quality.

Season every layer. Lightly season the shrimp with pepper and a pinch of salt to highlight their natural taste and balance the creaminess of the cheese.

Butter the outside of the bread slices for the ultimate crispiness. This step ensures a perfect golden crust that complements the soft and rich interior.

Avoid skimping on cheese. Use shredded cheese instead of sliced to achieve even melting that envelops the shrimp.

Utilize a cast iron skillet for the best results; it retains heat effectively for even cooking, providing perfect color and texture to the grilled cheese.

Variations and Adaptations


Explore regional variations by incorporating local ingredients. In a coastal setting, consider adding crab or lobster for a seafood extravaganza. Alternatively, substitute the shrimp with sautéed mushrooms for a vegetarian delight.

Seasonal adaptations make this dish a year-round favorite. In summer, add fresh basil or arugula post-cooking for a vibrant touch. During colder months, incorporate sun-dried tomatoes or roasted peppers for warmth.

Dietary modifications are possible by using gluten-free bread or dairy-free cheese for specific dietary needs while retaining flavor integrity.

Experiment with flavor variations by adding spices or herbs, such as dill or smoked paprika, to the shrimp before assembling the sandwich. A splash of lemon juice post-cooking enhances freshness and adds brightness.

For texture modifications, a layer of thin, fresh cucumber slices adds crunch, while avocado introduces a creamy component that elevates the dish.

Presentation is key: cut sandwiches diagonally and serve on a wooden board with sprinkled fresh herbs for rustic charm. Use colorful serving dishes to enhance the visual appeal and highlight the vibrant sandwich elements.

Serving and Presentation Guide


Perfect plating can transform a simple sandwich meal into a gourmet experience. Serve on a contrasting plate to bring out the golden hues of the grilled cheese.

Garnishing with a sprinkle of freshly chopped parsley or basil adds a touch of color and flavor. Pair the sandwich with a light side salad or fries for a complete meal feel. Consider serving with a small bowl of marinara sauce for dipping – enhancing both presentation and taste.

Temperature is an important consideration; serve immediately after cooking for the best taste and texture, ensuring the cheese remains melted and the bread retains its crispness.

For portion control tips, consider serving half-sized sandwiches for appetizers. This option allows guests to enjoy other dishes while savoring the delightful flavors of this ultimate grilled cheese.

Wine and Beverage Pairing


A crisp white wine, such as a Sauvignon Blanc or a Chardonnay, pairs beautifully with the rich flavors of this shrimp grilled cheese, highlighting the seafood element and cutting through the cheese’s creaminess.

Non-alcoholic alternatives like a chilled lemon-infused sparkling water provide a refreshing balance to the dish’s richness. If you prefer tea, a light green tea pairs well without overpowering the sandwich flavors.

Temperature considerations are crucial for beverage serving; chilled options work best to complement the hot, gooey texture of the grilled cheese, providing a harmonious culinary experience.

Storage and Shelf Life


Proper storage is key to enjoying leftovers without sacrificing quality. Allow sandwiches to cool, and place them in airtight containers. Refrigeration is suitable for up to three days.

Reheat using an oven or toaster oven to retain texture, avoiding microwaves that can lead to soggy bread. Freezing is possible, but wrap sandwiches tightly in aluminum foil and store in freezer-safe bags to prevent freezer burn.

Make Ahead Strategies


For busy schedules, consider preparing the garlic bread and shrimp portions ahead of time. Store these components separately and assemble just before grilling for maximum freshness.

Assessing quality, the bread may lose some texture if left with butter for too long. Fresh assembly ensures the best eating experience.

Reheating sandwiches should prioritize a crisp crust and gooey interior. Avoid microwaves, opting for stovetop reheating instead.

Scaling Instructions


To halve the recipe, simply adjust the ingredients proportionally without affecting the overall flavor. Scaling up requires minimal adjustment, though a larger griddle may speed up the cooking process when preparing multiple servings simultaneously.

Consider cooking time modifications when scaling; smaller batches cook faster, whereas large quantities may require more even distribution on the griddle to maintain quality and consistency.

Nutritional Deep Dive


This sandwich provides a balanced macronutrient approach, combining protein-rich shrimp with carbohydrates from the bread. The dish offers crucial vitamins and minerals, such as calcium from the cheese and vitamin D from shrimp.

Dietary considerations should include monitoring portion size to manage caloric intake while ensuring essential nutrients are consumed.

Examining weight management benefits, this flavorful dish satisfies hunger while providing energy, supporting a balanced diet when paired with a side of fresh vegetables.

Dietary Adaptations


For gluten-free options, select gluten-free bread varieties and ensure all other ingredients are verified as gluten-free to avoid cross-contamination.

Dairy-free options can be achieved by substituting cheese with plant-based alternatives that offer similar melting characteristics.

Create a vegan version by replacing shrimp with tofu or tempeh, and use vegan cheese products alongside garlic-infused oil.

Those following a low-carb or keto diet can opt for bread alternatives such as cauliflower bread without sacrificing the classic grilled cheese experience.

Troubleshooting Guide


To remedy texture issues, ensure appropriate butter or oil usage on the bread ensures a crunchy finish while optimizing heat level for even cooking.

Balancing flavors involves assessing seasoning levels, particularly for shrimp. Consider a squeeze of lemon post-cooking for an added zest.

Preventing temperature problems means managing grill time and ensuring the cheese is allowed to melt fully in a covered pan to avoid cheese that remains chunked or unmelted.

Recipe Success Stories


Readers have shared successful attempts at customizing this recipe, illustrating adaptability. One popular suggestion includes adding Mediterranean spices for an exciting twist on the original.

Community feedback emphasizes the sandwich’s nostalgic comfort and modern taste, making it a household favorite for adults and children alike.

Photography enthusiasts appreciate the vibrant colors and desires to capture each gloriously melted cheese stretch for social media sharing.

Frequently Asked Questions

Can I use pre-cooked shrimp? Yes, using pre-cooked shrimp can save time. Just ensure they are thawed and add them during the last steps to avoid overcooking.

What types of cheese work best? Cheddar, mozzarella, or a blend of the two works well for this recipe, providing a balance of flavor and melt quality.

Can I make this recipe dairy-free? Certainly, by substituting with dairy-free cheeses which offer good meltability, and managing your oil-butter spread accordingly.

How can I make this gluten-free? Select gluten-free bread options, ensuring packaging states it’s certified gluten-free to avoid any gluten remnants.

Can I use frozen shrimp? Absolutely, frozen shrimp work in this recipe as long as they are thawed and properly drained before cooking.

What’s the best way to reheat leftovers? Use an oven or toaster to achieve crispy bread and warm filling without making the sandwich soggy.

Can I substitute tofu for shrimp? You can opt for tofu to create a vegetarian version, slicing it thinly and seasoning before use.

How do I prevent melty cheese from spilling? Maintain moderate filling amounts to avoid overfilling and spilling during grilling, and use a spatula for gentle sandwich flips.

Should garlic bread be homemade? It enhances the experience, although store-bought options suffice; consider adding extra garlic butter for a personal touch.

What’s an ideal side dish? A fresh salad or crunchy coleslaw pairs well, adding texture contrast and complementing the rich flavors of the main dish.

Additional Resources


Related recipes could include a range of seafood dishes or complementary comfort foods that align with the flavor profile of this grilled cheese.

Technique guides to improve grilling bread and cooking shrimp efficiently can further supplement this recipe’s success.

Ingredient information analyzing shrimp and cheese variations expands readers’ understanding of ideal selections for optimal results.

Join the Conversation


Share your creation on social media to engage with a community of fellow food lovers, using hashtags to find variations and inspiration.

Review your experience, highlighting any personal twists or additional recipes that successfully pair with the Ultimate Shrimp Grilled Cheese with Garlic Bread.

Exchange photography tips with a community of food photography enthusiasts, discussing techniques to capture the melting cheese and vibrant ingredients.

The Recipe

Ultimate Shrimp Grilled Cheese with Garlic Bread

Serves: 4

Prep Time: 15 mins

Cook Time: 10 mins

Total Time: 25 mins

Kitchen Equipment Needed

  • Griddle or frying pan
  • Spatula
  • Cheese grater (for shredding)

Ingredients

  • 8 slices of garlic bread
  • 1 pound of shrimp, peeled and deveined
  • 1 cup shredded cheddar cheese
  • 1 cup shredded mozzarella cheese
  • 2 tablespoons of butter
  • Salt and pepper to taste

Directions

  1. Melt 1 tablespoon of butter in a skillet over medium heat. Add shrimp, season with salt and pepper, and cook until pink, about 2 minutes per side. Remove from skillet.
  2. Preheat a griddle over medium heat and butter one side of each bread slice.
  3. Place 4 slices, buttered side down, on the griddle. Top each with a mix of cheeses and cooked shrimp. Cover with remaining bread slices, buttered side up.
  4. Cook until bread is golden brown and cheese is melted, about 3-4 minutes per side. Use a spatula to press down gently and ensure even cooking.
  5. Remove from heat and let cool slightly before cutting and serving.

Recipe Notes

  • Feel free to add a dash of lemon juice to the shrimp post-cooking for added freshness.
  • Adjust cheese ratios based on personal preference for either sharper or creamier flavors.

Delicious Pineapple Glazed Ham: A Perfect Holiday Feast Recipe

Pineapple Glazed Ham: A Festive Delight for Every Occasion

⚖️
Difficulty
Medium

⏲️
Prep Time
30 mins

🕒
Cook Time
2 hours

⏱️
Total Time
2 hours 30 mins

🍽️
Servings
8-10

Pineapple glazed ham is a timeless classic, known for its mouthwatering sweet and savory flavors that always satisfy. This delightful treat is a must-have for festive gatherings or any special occasion. The caramelized pineapple glaze enhances the juicy and tender ham, providing a delectable experience with each bite. Aromas of spiced pineapple and honey will fill your kitchen, inviting friends and family to share in this culinary delight.

Though it may seem daunting, preparing a pineapple glazed ham can be an enjoyable endeavor, as it merges traditional cooking methods with delicious modern flavors. With a few key ingredients and a bit of patience, you will craft a centerpiece worthy of any holiday table. Indulge in the harmonious blend of sweet fruitiness and savory goodness, creating a dish that dances on the palate while pleasing the eye.

Quick Recipe Highlights

  • Flavor Profile: Sweet and savory with notes of pineapple, honey, and cloves that balance the saltiness of the ham.
  • Texture: Juicy, tender ham encased in a sticky, caramelized glaze that adds a satisfying chew.
  • Aroma: A delightful fusion of fruity pineapple and aromatic spices like cloves and ginger, creating a fragrant ambiance.
  • Visual Appeal: A shiny, golden-brown ham garnished with star-like pineapple rings and cherries, offering a feast for the eyes.
  • Skill Level Needed: Some experience with glazing techniques and a patient eye for timing and temperature.
  • Special Equipment: Roasting pan, basting brush, and carving knife for optimal results.

Recipe Overview

  • Difficulty Level: This recipe is considered medium difficulty, ideal for those with some basic cooking experience, as it involves proper glazing techniques and monitoring cook times.
  • Category: A main course dish, perfect for dinner gatherings and festive meals where a hearty entree is required.
  • Cuisine: While rooted in American culinary traditions, pineapple glazed ham draws influence from Polynesian and Southern cuisines through its use of tropical fruit and sticky glazes.
  • Cost: Moderate, as quality ham can be a bit pricey, but the remaining ingredients are generally economical.
  • Season: Best suited for colder months like autumn and winter, when rich, warming meals are in demand.
  • Occasion: Ideal for holiday feasts such as Christmas, Easter, and Thanksgiving, but also perfect for celebratory family dinners and potlucks.

Why You’ll Love This Recipe


Pineapple glazed ham strikes the perfect balance between sweet and savory, making it a favorite for taste enthusiasts. The succulent ham absorbs the rich, fruity glaze, resulting in flavors that are both complex and comforting. You’ll appreciate not only the delicious outcome but also the satisfying process of layering flavors carefully.

This recipe offers convenience too, as much of the preparation is hands-off, allowing you to manage other tasks while the ham roasts. With simple preparation and easily accessible ingredients, creating this classic dish is achievable for cooks of varying skill levels. Its forgiving nature means minor adjustments won’t compromise the end result.

In terms of nutrition, ham provides a good source of protein, while pineapple contributes essential vitamins like vitamin C. This combination ensures a balanced meal when served with appropriate sides. Furthermore, the glaze’s sweetness is countered by savory flavors, helping to maintain moderate sugar levels.

The social aspect of pineapple glazed ham cannot be overstated—it is a dish meant for sharing. Whether at a holiday table or a weekend gathering, its appeal is universal, fostering communal dining experiences. The presentation alone invites conversation and admiration.

Cost-wise, this dish can be quite accessible. While quality hams are an investment, serving them with inexpensive sides like mashed potatoes or salads balances out the meal’s cost, making it suitable for hosts on a budget.

Historical Background and Cultural Significance


The origin of pineapple glazed ham is deeply intertwined with holiday traditions. Traditionally served during festive occasions, its roots can be traced back to early American holiday feasts where preservation of ham was punctual. The practice of adding pineapple likely emerged in the mid-20th century, when canned fruits became a popular addition to meats.

Culturally, this dish has earned a spot on many family tables as a symbol of celebration and abundance. Particularly in the United States, pineapple glazed ham is synonymous with Easter and Christmas dinners. It brings together family traditions, merging diverse culinary histories into shared experiences.

Over the years, the recipe has evolved, integrating more modern flavors and glaze techniques, reflecting personal taste and regional availability. Cooks have added their twists, with variations including mustard or bourbon glazes.

Regionally, there are adaptations of the pineapple glazed ham, particularly in areas where pineapple is indigenous or easily cultivated. In parts of the Pacific Islands, for instance, freshly grilled pineapple may replace canned products, enhancing the tropical flavor profile while maintaining the core tradition of the recipe.

Ingredient Deep Dive


The star ingredient, ham, is a staple known for its savory, satisfying qualities. Historically used as a method for preserving meat, ham’s role in cuisine has expanded significantly, becoming an essential protein choice in many cultural traditions. When selecting ham, choose one with a consistent marbling of fat, as this ensures moisture and flavor during cooking.

Pineapple, the tropical fruit that lends its name to this dish, adds a distinct sweetness that complements the ham’s richness. Rich in vitamin C and bromelain, pineapple is not only a nutritional powerhouse but also aids in digestion. Fresh or canned pineapple both work in this recipe, but the key is to ensure ripeness to maximize its aromatic compounds.

Coarse brown sugar or honey is used in the glaze for its caramelizing properties, creating a sticky sheen on the ham’s exterior. They add depth and complexity to the sweetness, marrying beautifully with the pineapple’s tartness. Store these ingredients in airtight containers in a cool, dry place to avoid crystallization or hardening.

Spices like cloves and ginger impart warmth and aromatic complexity to the glaze. These spices have cultural significance and have been used for centuries for their potential health benefits. When fresh spice options aren’t available, ground versions can be substituted, though they should be fresh to retain potency.

Common Mistakes to Avoid

  • Not properly scoring the ham before glazing can lead to uneven caramelization and glaze distribution.
  • Using a ham that is too lean can result in dryness; always select a ham with good marbling.
  • Overcooking the glaze may cause it to become bitter; ensure you’re continuously stirring and monitoring the temperature.
  • Neglecting to wrap the ham in foil can lead to excessive drying; always cover it during the initial baking phase.
  • Skipping resting time before carving leads to loss of juices; allow the ham to rest post cooking.
  • Forgetting to baste periodically will hinder the infused flavors—set a timer for intervals.
  • If using a fresh pineapple, using an unripe one will impart less sweetness and balance.
  • Using low-quality cloves will not achieve the desired aromatic profile, always source fresh spices.

Essential Techniques


Scoring the ham deeply but not too aggressively is crucial, as it allows the glaze to penetrate and form a flavorful crust. This technique enhances texture and visual appeal. The key is to cut in a diamond pattern, no more than half an inch deep, without cutting into the flesh too far.

Glazing periodically keeps the ham moist and evenly coated, preventing the glaze from burning or becoming overly sticky. Start glazing in the last hour of cooking, reheating as necessary to maintain a fluid consistency. Proper timing ensures a glossy finish without overwhelming the ham.

Monitoring internal temperature with a meat thermometer ensures safety and perfect doneness. Ideally, the ham should reach an internal temperature of 145°F. Regular checks prevent overcooking, which can lead to dryness.

Pro Tips for Perfect Pineapple Glazed Ham


Ensuring even cooking begins with bringing the ham to room temperature before baking. This allows it to cook evenly, preventing the outer layer from drying out while the inside remains undercooked.

To enhance the pineapple flavor, consider basting with freshly juiced pineapple for the final glaze layer. This adds a nuanced depth and vibrant citrusy note to the finished dish.

For a deeper, more complex glaze, consider incorporating a dash of dark rum or bourbon, but be sure to cook off the alcohol content.

When serving, carve the ham thinly to allow guests to fully enjoy the glaze-to-meat ratio. Thin slices also make for easier portion control in larger gatherings.

Using a roasting pan with a rack ensures that the ham cooks evenly and avoids contact with any juices, which can cause sogginess at the base.

If you desire a more intense smoky flavor, smoking the ham moderately before glazing will infuse it with additional complexity and savory depth.

Variations and Adaptations


Pineapple glazed ham can be adapted to different regions by incorporating local spices or ingredients. For instance, the addition of coconut milk or tamarind paste can enrich the glaze, tailoring it to certain tropical palates.

Seasonality plays a role in favor adaptations as well. During the fall, you might incorporate cinnamon and nutmeg for a more autumnally spiced approach, or choose to add chili flakes for a hint of heat in warmer months.

Dietary modifications are simple with this dish. For a lower-sodium version, opt for an unsalted ham and use a low-sodium fruit juice in the glaze.

For those avoiding sugar, utilize unsweetened pineapple juice and reduce the quantity of sugar or honey in the glaze, supplementing with stevia or another sugar substitute if needed.

Presentation-wise, using whole fresh pineapples as a serving tray, hollowing them out and placing diced servings inside, creates a vibrant and inviting presentation.

Serving and Presentation Guide


Plating the ham by arranging slices in a fan around the central carving board creates a stunning visual effect, allowing the glaze’s shine to captivate. For garnishing, consider scattering pomegranate seeds or fresh herbs like mint or parsley for contrasting color.

Traditional accompaniments such as buttery mashed potatoes or roasted vegetables complement the ham’s richness, while a fresh salad provides a light, refreshing counterpart.

For a modern twist, pair the ham with a spicy mango salsa or a tangy cranberry sauce, as their acidity will cut through the sweetness of the glaze, enhancing every bite.

Serve the dish warm but not hot. Ideal serving temperature will bring out the glaze’s full flavor without overpowering the palate with heat.

Portion control can be maintained by pre-scoring slices, ensuring guests can easily help themselves without pre-carving. This also minimises waste if leftovers are undesired.

Wine and Beverage Pairing


Pairing the pineapple glazed ham with a light to medium-bodied white wine like a Riesling or Gewürztraminer will accentuate the dish’s sweet and savory notes. These wines’ slight sweetness and acidity balance the glaze’s flavors.

For non-alcoholic options, try a sparkling water with hints of citrus or a ginger-infused iced tea, which provides a refreshing counterbalance.

In cooler months, consider serving with warm, spiced apple cider, thus mirroring the dish’s warm, fruity notes.

For coffee, a medium roast with bright, citrusy or fruity flavors pairs well, while a green tea with a hint of lemon or ginger enhances the overall dining experience.

Temperature considerations for beverages should lean towards chilled or room temperature to complement the warm ham without cooling it too rapidly.

Storage and Shelf Life


Store leftover ham by wrapping it tightly in aluminum foil or placing it in an airtight container to prevent drying out. Refrigerate promptly, keeping the ham at a consistent, cold temperature.

For longer storage, freezing is effective. Ensure slices are separated with parchment paper to avoid clumping, and use freezer-safe bags or containers for up to two months.

Signs of spoilage include an off odor, discoloration, or a slimy texture—discard immediately if these are present.

Reheating should be approached gently to maintain moisture, using a low oven temperature, covered, with a splash of water or pineapple juice to reintroduce moisture.

Avoid microwaving large pieces, as uneven heating can lead to dryness; opt instead for the oven method or stovetop for smaller portions.

Make Ahead Strategies


Consider preparing components ahead of time by making the glaze a day in advance. Store it covered in the refrigerator, then bring it to room temperature before applying.

The ham can be scored and prepped for cooking a few hours before baking. Assemble trays and utensils prior to cooking to streamline the process.

Although the major steps can be prearranged, avoid assembling the final dish too early. The freshest glaze should be applied as close to service as possible to maintain its sheen.

Reheating should be done gently and entirely, to preserve quality and prevent drying out. When reheating, always add a fresh layer of glaze to restore its glossy appearance.

Scaling Instructions


Halving the recipe involves using a smaller ham, reducing cooking time proportionately, but keeping glaze quantities relatively the same for adequate coverage.

Doubling or tripling necessitates monitoring batch sizes and oven space. Ensure hams are equally basted when scaled, adjusting time accordingly for larger quantities.

Investing in additional roasting racks may be necessary for even cooking when scaling larger recipes, and consider staggering cook times to manage kitchen space effectively.

Storage considerations should involve planning for increased leftovers, which can be shared or preserved through proper freezing techniques.

Nutritional Deep Dive


The macro breakdown for pineapple glazed ham typically favors protein, with the ham itself being rich in essential amino acids necessary for body maintenance and repair.

Micronutrient analysis pinpoints the pineapple as a source of vitamin C, aiding immune system function, while the ham supplies B vitamins, crucial for energy metabolism.

Health benefits exist through the potential for this dish to be low-carb, especially when paired with vegetable-based sides, though moderation is advisable due to sodium content in the ham.

Dietary considerations are essential for those managing salt intake or preferring lower sugar, and portion analysis helps keep servings balanced within dietary guidelines to avoid excess.

Weight management tips include accompanying the ham with high-fiber sides such as salads, ensuring a fuller feeling while controlling caloric intake.

Dietary Adaptations


For those needing gluten-free options, ensure any store-bought glaze ingredients or sauces used are gluten-free certified, focusing on naturally gluten-free whole ingredients.

Dairy-free preparation is standard, as there are no dairy elements in the traditional recipe, but ensure any accompaniments adhere to this guideline.

Vegan adaptations are possible with meat substitutes such as seitan or jackfruit, which can mimic the ham’s texture when cooked correctly and glazed.

Low-carb choices include focusing on pure meats without sugars added to the glaze, or utilizing sugar substitutes that do not alter taste dramatically.

Keto or Paleo adherents can modify the recipe using acceptable sweeteners and healthy fats without grains or refined sugars to align with their diet plans.

Low-FODMAP variations could exclude high fructose alternatives or replace them with suitable FODMAP-friendly options.

Troubleshooting Guide


Texture issues often arise from overcooking, leading to dryness. Maintain constant temperature checks and adjust cooks times if necessary, to minimize this risk.

Flavor balance can sometimes be skewed towards sweetness. Gradually introduce savory elements like mustard or pepper to the glaze, exercising caution to prevent over addition.

Temperature problems stem from improper oven calibration. Always confirm oven temperature with a thermometer before cooking to ensure consistent results.

Equipment challenges frequently arise from inadequate roasting pans. Select larger pans to accommodate proper glazing and roasting without overcrowding.

Ingredient substitutions must retain proportions. When altering sugar or spices, measure equivalent quantities to maintain balance, experimenting in small increments when uncertain.

Timing concerns relate to preemptive carving. Wait the prescribed rest period after cooking to lock in juices, ensuring moistness within the ham.

Recipe Success Stories


The community’s response to making pineapple glazed ham has been overwhelmingly positive, with many mentioning the ease of preparation and impressive flavor profile achievable.

Variation successes include the addition of diverse spices or local ingredients, from star anise in Asia to maple syrup in Canada, each bringing unique notes to the broth.

Some readers have adapted the basic glaze with creative substitutions like thawed frozen raspberries for added color and burst of tartness, receiving rave reviews.

Reader suggestions often feature the inclusion of fresh pineapple in the final presentation. This visual touch not only enhances the dish but keeps flavors traditional and enticing.

Photography tips from this community emphasize bright, natural lighting for showcasing the ham’s glistening glaze, ensuring rich colors come through vibrantly.

Frequently Asked Questions

What is the best way to glaze ham?

Glazing should be done in layers. Start applying the glaze during the last hour of baking, reheating it as necessary. Periodically baste every 15-20 minutes to achieve a glossy finish that caramelizes without burning.

Can I use fresh pineapple instead of canned?

Absolutely, fresh pineapple adds a vibrantly fresh and mildly tart flavor to the glaze. Be sure it’s ripe to ensure sweetness and consider juicing some as a base for enhancing the glaze.

What type of ham should I use?

A bone-in or boneless, half or whole ham works well, with bone-in generally offering more flavor. Opt for a moderately sweet or plain cured ham to allow the glaze to shine.

Is it necessary to score the ham?

Yes, scoring allows the glaze to penetrate deeply into the meat, creating a flavorful crust while preventing the fat from shrinking unevenly during cooking.

What’s the ideal internal temperature for cooked ham?

Aim for an internal temperature of 145°F for properly cooked ham, measured by a food thermometer inserted into the thickest part of the meat, ensuring it’s both safe and juicy.

How should I store leftovers?

Leftover ham should be wrapped tightly in aluminum foil or stored in an airtight container. Refrigerate and consume within five days or freeze for longer storage, ensuring slices are separated for easy defrosting.

Can I prepare the glaze in advance?

Yes, preparing the glaze in advance allows flavors to meld, saving time during final preparation. Store it in the refrigerator and bring it to room temperature before use on cooking day.

How do you reheat glazed ham without drying it out?

Reheat the ham in a covered dish at a low oven temperature, adding a splash of water or juice for moisture. Apply fresh glaze sparingly to restore its sheen and enhance flavors.

Should I cover ham with foil while baking?

Covering the ham with foil during the initial phase of baking helps retain moisture. Remove the foil later to promote browning and allow the glaze to set without burning.

Can I use a different sweetener in the glaze?

Substituting brown sugar with honey, maple syrup, or agave is possible but adjust quantities to taste. Sugar substitutes can also be used for lower-calorie versions, as long as they withstand high temperatures.

Additional Resources


Explore additional resources to deepen your understanding and improve your technique. Our guide on how to select and slice ham ensures precise portioning, while articles on regional spices offer unique ways to adapt traditional recipes.

For enthusiasts, related recipes such as honey baked ham, or herb-glazed turkey, showcase similar glazing techniques with distinctive flavor profiles.

Seasonal variations, such as our Autumnal Spice Glazed Ham, reveal the richness of cinnamon and nutmeg mixed with the classic pineapple base, perfect for fall fiestas.

Equipment recommendations streamline the process, with reviews on the most reliable roasting pans and carving knives, providing guidance in achieving professional results.

Join the Conversation


We encourage you to share your pineapple glazed ham creations on social media with our community, exchanging tips and presentation ideas to elevate this classic dish together.

Photography tips are provided to highlight your ham’s best angles, using natural daylight and minimal props for an optically enticing image.

Your feedback through recipe reviews helps us refine techniques and address common concerns, fostering an open dialogue about various cooking methods and ingredient experiments.

Spotlight reader contributions by sharing variations or adaptations brings fresh perspectives, enriching others’ culinary repertoires and showcasing international flavors.

Get involved in our community forums where conversations about family traditions, cooking hacks, and modern adaptations bring pineapple glazed ham into an era of shared culinary innovation.

The Recipe

Pineapple Glazed Ham

Serves: 8-10

Prep Time: 30 mins

Cook Time: 2 hours

Total Time: 2 hours 30 mins

Kitchen Equipment Needed

  • Roasting pan
  • Basting brush
  • Carving knife
  • Meat thermometer

Ingredients

  • 1 fully cooked boneless ham (4-5 pounds)
  • 1 cup crushed pineapple, unsweetened
  • 1 cup brown sugar
  • 1/4 cup honey
  • 1/4 cup pineapple juice
  • 1/2 tsp ground cloves
  • 1/2 tsp ground ginger
  • Maraschino cherries for garnish (optional)
  • Pineapple slices for garnish (optional)

Directions

  1. Preheat your oven to 325°F (163°C). Place the ham in a roasting pan.
  2. In a saucepan, combine crushed pineapple, brown sugar, honey, pineapple juice, cloves, and ginger. Bring to a gentle simmer over medium heat.
  3. Continue to stir, simmering until the mixture is slightly thickened, about 10 minutes. Remove from heat and let it cool slightly.
  4. Score the surface of the ham in a diamond pattern, about 1/4 inch deep, before pouring half of the glaze over it.
  5. Cover the ham with aluminum foil and bake for 1 1/2 hours, basting every 20 minutes with remaining glaze.
  6. For the last 30 minutes, remove foil and continue basting every 10 minutes, ensuring the glaze caramelizes to a golden brown.
  7. Once done, let the ham rest for 15 minutes before garnishing with pineapple slices and cherries.
  8. Slice and serve the ham warm, allowing guests to enjoy the full range of flavors from the succulent meat to the caramelized glaze.

Recipe Notes

  • For a less sweet glaze, reduce the sugar to half a cup and add a splash of apple cider vinegar for a tangy note.
  • Leftover ham can be diced and used in sandwiches, omelets, or as a pizza topping.
  • For a festive touch, replace maraschino cherries with fresh cranberries for garnish.

Irresistible Fried Strawberry Cheesecake Sandwiches: Perfect Dessert Delight

Fried Strawberry Cheesecake Sandwiches: A Delicious Twist on Classic Cheesecake

⚖️
Difficulty
Medium

⏲️
Prep Time
15 mins

🕒
Cook Time
10 mins

⏱️
Total Time
25 mins

🍽️
Servings
4

Indulge in the sumptuous delight of Fried Strawberry Cheesecake Sandwiches, a perfect fusion of creamy cheesecake with the refreshing sweetness of ripe strawberries, all encased in a crispy, golden exterior. This innovative take on the traditional cheesecake will elevate your dessert game, offering not only a rich flavor profile but also a delightful texture contrast between the smooth filling and the fry’s crunch. These sandwiches exemplify a culinary adventure that marries classic American treats with the appeal of gourmet pastry, enticing both the eyes and palate.

Sink your teeth into the delicate balance of flavors where each bite delivers a luscious burst of creamy cheesecake paired harmoniously with the tangy sweetness of fresh strawberries. This fried dessert exudes a fragrance of cooked cream cheese with hints of vanilla, inviting you to savor the luscious aroma. Perfect for special gatherings or a lavish family treat, these sandwiches are surprisingly easy to make yet look impressive enough to steal the show at any event.

Quick Recipe Highlights

  • Flavor Profile: Experience the delightful combination of cheesecake richness and strawberry tang, enhanced by a touch of vanilla.
  • Texture: Enjoy the contrast between the smooth, creamy cheesecake interior and crispy, fried bread exterior.
  • Aroma: The warm scent of fried cheesecake with sweet, fruity hints fills the kitchen, making everyone eager for dessert.
  • Visual Appeal: Each sandwich boasts a golden-brown crust, filled with vibrant red strawberry pieces, offering an eye-catching presentation.
  • Skill Level Needed: Designed for intermediate cooks, comfortable with frying techniques to achieve a perfect golden layer.
  • Special Equipment: A reliable skillet or deep fryer is recommended for best results along with kitchen essentials for mixing and blending.

Recipe Overview

  • Difficulty Level: Classified as medium, this recipe requires intermediate skills, including frying and precise temperature control to avoid burning.
  • Category: This dessert falls under sweet, indulgent categories, perfect for dessert or a special celebratory treat.
  • Cuisine: Reflects American dessert innovation with potential influences from bakery delicacies found globally.
  • Cost: With ingredients like strawberries, cream cheese, and bread, it’s moderately priced, making it accessible for most kitchens.
  • Season: Best enjoyed in the strawberry season for peak freshness, yet strawberries are often available year-round in supermarkets.
  • Occasion: Ideal for family gatherings, birthdays, or as a unique offering at potlucks and dessert parties.

Why You’ll Love This Recipe

The taste of these Fried Strawberry Cheesecake Sandwiches is unparalleled, offering layers of sweetness balanced with a savory, buttery crust. The convenience lies in the simplicity of preparation, needing only basic cooking tools and common ingredients found in most pantries. Nutritionally, the presence of fresh strawberries adds a dose of Vitamin C and fiber, providing a slight offset to the sweet indulgence. This recipe stands as a unique crowd-pleasure, easy to dress up or down depending on the occasion, from intimate dinners to large parties. Its cost-effectiveness ensures you don’t have to break the bank for a dessert that feels luxurious.

Historical Background and Cultural Significance

Exploring Fried Strawberry Cheesecake Sandwiches reveals an interesting history where taste innovation meets cultural adaptation. Cheesecake’s origins trace back to ancient Greece, where it was served to athletes as energy food. The recipe has evolved significantly over centuries, adapting to various cultural palates. In the United States, cheesecake became a popular dessert choice, representing indulgence and culinary creativity. Regional variations abound, with each area adding its distinct touch to the recipe. This fried variation adds a modern twist to the age-old classic, highlighting the versatility and enduring appeal of cheesecake.

Ingredient Deep Dive

Strawberries, the recipe’s star ingredient, are not only rich in vibrant color and juicy texture but have been prized for centuries for their sweetness and nutritional value. High in Vitamin C, they add a refreshing note to desserts. Cream cheese, another key component, offers a smooth, luscious base that merges well with sugars and fruits. Its origins lie in the farming practices of European cheese-makers, eventually leading to the widespread availability of this ingredient in various dishes, especially desserts. Storing both ingredients correctly ensures longevity and peak flavor; strawberries need refrigeration in a breathable container, while cream cheese should be kept sealed and cool.

Common Mistakes to Avoid

  • Overcrowding the frying pan can lead to uneven cooking and a soggy crust.
  • Frying at too high a temperature can cause the crust to burn before the filling is warmed through.
  • Using cold ingredients may impede blending, leading to a lumpy filling.
  • Neglecting to drain excess oil can result in greasy sandwiches.
  • Forgetting to seal the sandwiches properly might cause filling leakage during frying.
  • Underestimating the absorption properties of the bread could result in a dry center.
  • Omitting the chilling step may cause the sandwiches to fall apart.
  • Overfilling with strawberries can overwhelm the cheesecake flavor.
  • Skipping parchment or wax paper lining when chilling may lead to sticking and tearing.
  • Using stale bread may defeat the intended texture contrast.

Essential Techniques

Mastering frying techniques is crucial for achieving the perfect Fried Strawberry Cheesecake Sandwiches. Maintaining consistent oil temperature ensures even cooking without burning. Attentive sealing prevents filling spills, while chilling pre-fried sandwiches improves structure. Additionally, balancing the cream cheese’s smoothness with the sugar’s granulation ensures a uniformly luscious filling. Tasting the mixture for sweetness before assembly can prevent overly sweet results, and cutting the sandwiches with a sharp knife keeps the crust intact.

Pro Tips for Perfect Fried Strawberry Cheesecake Sandwiches

For optimal results, ensure the oil is neither too hot nor too cold; maintain a steady medium-high heat for even browning. Use fresh, ripe strawberries for peak flavor impact and creaminess in your cheesecake mixture by blending until ultra-smooth. Pre-chill the sandwiches to enhance their structural integrity during frying. Test oil temperature using a small bread piece; if it sizzles and rises, it’s ready. Seal the edges of the sandwiches well to prevent leaks and downtime in the pan. Consider using a thermometer to monitor oil, avoiding over-browning. Cut sandwiches uniformly for consistent frying.

Variations and Adaptations

Regional variations can include alternative fillings, such as sliced seasonal fruits or different berry mixtures. For a seasonal adaptation, try pumpkin puree in autumn, adjusting spices like cinnamon and nutmeg. Dietary modifications might involve using gluten-free bread or vegan cream cheese for alternatives. For a unique flavor twist, consider adding lemon zest or a sprinkle of cinnamon sugar before serving. To change texture, roll in crushed nuts before frying or drizzle with warm chocolate sauce for extra flavor. Flatten the sandwiches slightly before frying for a modern, compact presentation style.

Serving and Presentation Guide

Serve these sandwiches by slicing them diagonally, presenting a brilliant cross-section of colors. Garnish with a sprinkle of powdered sugar or a light drizzle of strawberry sauce for added flair. Traditional accompaniments could include a dollop of whipped cream or a scoop of vanilla ice cream. For modern flair, pair with a coulis of mixed berries or a dusting of cocoa powder. Serve chilled or at room temperature for the best texture experience, and ensure portions are manageable and inviting, keeping the dessert elegantly enticing.

Wine and Beverage Pairing

Fried Strawberry Cheesecake Sandwiches pairs beautifully with a light, fruity wine such as a Moscatel or a Rosé, offering an elegant balance between acidity and sweetness. Non-alcoholic options like sparkling lemonade or a fruit-infused iced tea complement the dessert’s textures without clashing. Coffee lovers can enhance the indulgence with a soft espresso while tea enthusiasts might prefer a delicate green tea. Serving the beverage chilled aids in cleansing the palate between rich bites, heightening appreciation of the cheesecake’s creaminess.

Storage and Shelf Life

Store any leftover Fried Strawberry Cheesecake Sandwiches refrigerated in an airtight container to maintain freshness. Best-consumed fresh, their lifespan extends for up to three days when properly stored. Use parchment paper to separate layers, preventing sticking. Observe any signs of spoilage like an off smell or color changes, which indicate they’ve passed their prime. To reheat, use an oven (not microwave) to ensure the crust re-crisps while fillings remain warm. Freezing is not recommended due to potential texture compromise upon thawing.

Make Ahead Strategies

Prepare sandwiches a day ahead, but fry just before serving for utmost freshness and crunch. Store prepped components separately; keep filling and strawberries refrigerated. Assembling shortly before frying ensures optimal texture and taste. Assembled, chilled sandwiches – covered – hold their shape and facilitate smooth frying transitions. Reheat fried sandwiches using a low oven setting for even warming, avoiding sogginess or loss of crispness. Add fresh strawberry slices or whipped cream upon serving to brighten flavors and preserve delightful presentations.

Scaling Instructions

This recipe easily scales to fit your needs. For halving, reduce ingredient quantities accordingly and monitor frying batches for accuracy in time. Double or triple the recipe for larger gatherings, noting potential extension of overall frying time. Adjust equipment size, ensuring pan size accommodates all sandwiches flatly for uniform browning. For reduced leftovers, refrigerate the components separately and assemble as necessary, maintaining quality. Scaling impacts storage space and steamed results, which might call for slight adjustment on temperature or materials used.

Nutritional Deep Dive

Each sandwich offers a macronutrient balance aimed at satisfying sugar cravings while delivering essential fats. The nutritional profile gains a boost from strawberries rich in antioxidants and fiber. Enjoying this dessert in moderation is key to maintaining diet-friendly enjoyment. Adjusting sugar levels reduces calories without compromising flavor. The cream cheese offers beneficial calcium, supporting bone health. Attention to portion size helps manage caloric intake efficiently. Additionally, embracing berry alternatives aligns with broader dietary goals and personal preferences.

Dietary Adaptations

For a gluten-free rendition, choose suitable bread alternatives like almond or gluten-free wheat. Dairy-free seekers can replace cream cheese with plant-based options that maintain the creamy texture. Vegan adaptations are possible via dairy substitutes, smoothing textures of coconut or nut-based cheeses. Low-carb versions favor almond flour-based breads for those avoiding gluten or carb-heavy diets. Keto followers might explore sugar-free strawberry variations, maintaining sweetness through natural or artificial sweeteners. Each dietary take requires ingredient verification to ensure compliance.

Troubleshooting Guide

Should the texture fail, perhaps because it’s soggy, reassess frying temperatures or batter thickness. Unbalanced flavor profiles might hint at disproportionate component ratios or filling inconsistencies. Burned edges generally result from excessive frying oil heat – temp checks could avert recurrence. Equipment like the wrong pan size can lead to uneven cooking. Substitute components like cream cheese or strawberries sparingly to retain intended taste. Timing concerns link to varied stove power, demanding adjustments to achieve perfect results.

Recipe Success Stories

Many community members delight in sharing their recipe triumphs, like adding a touch of mint to perfect the flavor balance. Readers found success in techniques yielding perfect fried edges and gooey centers. Flourishing adaptations emerged from using season-specific berries like raspberries or blackberries. Honoring the recipe’s spirit, photographs grace social feeds showcasing diverse culinary flair and garnishing creativity. Engaged cooks value the flexible framework allowing for personal tweaks to suit dietary preferences or executable vision.

Frequently Asked Questions

Can I use frozen strawberries? Yes, but thaw them fully and drain excess liquid to avoid watery filling.

How should I store leftovers? Refrigerate in a sealed container, separating layers with parchment paper to prevent sticking.

What oil is best for frying? Neutral oils like canola or vegetable oil are recommended for subtle flavor.

Can I use pre-sliced bread? Absolutely, as long as it holds up to frying—consider thickness when selecting.

How can I reduce sweetness? Lower sugar content or use less sugary strawberries, or consider a sugar alternative.

How do I ensure even frying? Maintain steady oil temperature and avoid overcrowding to ensure even contact.

What if my cheesecake filling is runny? Ensure cream cheese softens at room temp and blend thoroughly until smooth.

Can I freeze the sandwiches? Freezing isn’t recommended since thawing might alter texture.

Can I make them ahead? Assemble components separately, frying before serving for best results.

What’s the best bread to use? A thick, sturdy bread like brioche or challah holds well when fried.

Additional Resources

Embark on complementary culinary explorations with related recipes like our Strawberry Cheesecake Bites or Cheesecake-Stuffed French Toast. Access in-depth technique guides to refine frying skills or effective presentation styles. Delve into ingredient insights detailing optimal choices and suitable substitutes. Implement recommended equipment for consistent results and explore seasonal variations, unlocking diverse culinary potentials.

Join the Conversation

Engage with our vibrant cooking community via social media, sharing your Fried Strawberry Cheesecake Sandwiches experiences and unique takes. Discover photography insights for capturing stunning images of your creations, or review this recipe alongside fellow enthusiasts. Participate in lively exchanges on customization possibilities, ensuring every culinary adventure remains fresh, exciting, and utterly delicious. Your feedback inspires continual improvements and new content sharing aligned with your interests.

The Recipe

Fried Strawberry Cheesecake Sandwiches

Serves: 4

Prep Time: 15 mins

Cook Time: 10 mins

Total Time: 25 mins

Kitchen Equipment Needed

  • Skillet or deep fryer
  • Mixing bowl
  • Spatula
  • Sharp knife
  • Paper towels

Ingredients

  • 8 slices of bread (such as brioche or challah)
  • 1 cup strawberries, sliced
  • 8 oz cream cheese, softened
  • 1/4 cup sugar
  • 1 tsp vanilla extract
  • 1/2 cup flour
  • Oil for frying

Directions

  1. In a bowl, blend cream cheese, sugar, and vanilla until smooth.
  2. Spread the mixture evenly on one side of each bread slice.
  3. Layer strawberry slices over the cream cheese on half of the slices, then top with remaining bread slices.
  4. Press gently to seal edges.
  5. Heat oil in a skillet over medium heat.
  6. Dust sandwiches lightly with flour on both sides.
  7. Fry sandwiches until golden brown on each side, about 2-3 minutes per side.
  8. Remove from oil and drain on paper towels.
  9. Serve warm with your choice of garnish.

Recipe Notes

  • Chill sandwiches before frying for best results.
  • Substitute seasonal fruits if strawberries aren’t available.
  • For an added twist, sprinkle cinnamon-sugar mix before serving.