Cinnamon Roll Breakfast Smoothie

Cinnamon Roll Breakfast Smoothie

Imagine waking up to the warm, comforting aroma of freshly baked cinnamon rolls—but instead of waiting for the oven to preheat, you can blend up that same cozy flavor in minutes. This Cinnamon Roll Breakfast Smoothie is a game-changer for busy mornings, offering all the nostalgic sweetness of a classic cinnamon roll in a creamy, drinkable form. Whether you need a quick breakfast on the go or a satisfying afternoon pick-me-up, this smoothie delivers indulgence without the guilt. Let’s dive into why this recipe deserves a permanent spot in your rotation.

Why You’ll Love This Recipe

First, this smoothie captures the essence of a cinnamon roll without the refined sugar and heavy dough. It’s a healthier twist on a beloved treat, packed with protein and fiber to keep you full for hours. Second, it’s incredibly versatile—you can customize it to fit dietary preferences like vegan, dairy-free, or low-carb. Third, the preparation is effortless. No baking, no waiting, just a few minutes in the blender. Fourth, the flavor is downright irresistible, with warm cinnamon, creamy vanilla, and a hint of maple sweetness. And finally, it’s a crowd-pleaser. Kids, adults, and even picky eaters will adore this drinkable dessert-for-breakfast.

Ingredients Breakdown

The magic of this smoothie lies in its carefully chosen ingredients, each playing a vital role in creating that iconic cinnamon roll taste and texture.

  • Frozen bananas – These act as the base, providing natural sweetness and a thick, creamy consistency. Freezing them beforehand ensures a frosty, milkshake-like texture.
  • Rolled oats – Uncooked oats add body and fiber, mimicking the heartiness of a cinnamon roll’s dough while keeping the smoothie filling.
  • Greek yogurt – For protein and tangy richness, Greek yogurt replicates the cream cheese frosting note. Dairy-free? Swap in coconut yogurt.
  • Almond milk – This keeps the smoothie light and blendable. Adjust the amount for a thicker or thinner consistency.
  • Cinnamon and vanilla extract – The dynamic duo behind the signature cinnamon roll flavor. Don’t skimp—these are the stars of the show.
  • Maple syrup – A touch of natural sweetness ties everything together. For a sugar-free version, use a dash of monk fruit or stevia.

How to Make Cinnamon Roll Breakfast Smoothie

Ready to blend up this morning masterpiece? Follow these simple steps for a flawless smoothie every time.

  1. Prep your ingredients – Peel and freeze ripe bananas in advance. Measure out the oats, yogurt, and spices so everything is ready to go.
  2. Add liquids first – Pour the almond milk into the blender first to prevent sticking. This helps the other ingredients blend smoothly.
  3. Layer the dry and frozen ingredients – Add the oats, frozen banana chunks, cinnamon, and vanilla extract next. The frozen fruit will chill the mixture instantly.
  4. Blend until creamy – Start on low speed to break down the oats, then increase to high for 30-45 seconds until velvety smooth. Pause to scrape down the sides if needed.
  5. Sweeten to taste – Add maple syrup gradually, blending and tasting as you go. Adjust cinnamon or vanilla if desired.
  6. Serve immediately – Pour into a tall glass and enjoy right away for the best texture. Garnish with a sprinkle of cinnamon or a drizzle of yogurt for extra flair.

Pro Tips for the Best Results

Want to take your cinnamon roll smoothie from good to extraordinary? Try these expert tricks.

  • For an ultra-creamy texture, soak the oats in almond milk for 10 minutes before blending. This softens them and prevents graininess.
  • Use very ripe bananas—the ones with brown spots. They’re sweeter and blend more easily, eliminating the need for extra sweeteners.
  • Add a pinch of nutmeg or cardamom alongside the cinnamon for a deeper, more complex spice profile.
  • If you prefer a colder, thicker smoothie, toss in a handful of ice cubes during blending. Just be sure to adjust the milk accordingly.
  • For a protein boost, mix in a scoop of vanilla or cinnamon-flavored protein powder. It enhances the flavor while keeping you satisfied longer.

Variations and Substitutions

This recipe is wonderfully adaptable. Here are some delicious ways to mix it up.

  • Vegan version – Replace Greek yogurt with coconut or almond yogurt, and use agave instead of maple syrup.
  • Lower carb – Omit the banana and add ¼ cup of cauliflower rice (trust us, you won’t taste it) plus a splash of sugar-free syrup.
  • Nut-free – Swap almond milk for oat milk or coconut milk beverage.
  • Extra decadent – Blend in a tablespoon of cashew butter or a shot of cold brew coffee for a mocha twist.
  • For kids – Top with whipped cream and a sprinkle of cinnamon sugar for a fun, dessert-like treat.

What to Serve With It

While this smoothie is satisfying on its own, pairing it with complementary foods can turn it into a full meal.

  • Serve alongside a slice of whole-grain toast with almond butter for added crunch and protein.
  • Pair with a handful of roasted nuts or a hard-boiled egg for a balanced, savory contrast.
  • For a brunch spread, offer it with avocado toast or a veggie-packed omelet.
  • Drizzle extra yogurt on top and garnish with granola for a parfait-like experience.
  • Enjoy with a hot cup of chai tea or black coffee to enhance the warm spices.

How to Store and Reheat

While this smoothie is best enjoyed fresh, you can prep components ahead for convenience.

  • Refrigeration – Store leftovers in an airtight container for up to 24 hours. Stir well before drinking, as separation may occur.
  • Freezing – Pour into ice cube trays and freeze for up to 1 month. Blend frozen cubes with a splash of milk when ready to enjoy.
  • Meal prep – Pre-portion dry ingredients (oats, cinnamon, protein powder) in jars. Add frozen banana and milk when blending.
  • Reheating – Not recommended, as the texture will change. If you prefer a warmer drink, blend with warmed almond milk instead of cold.

Frequently Asked Questions (FAQs)

Here are answers to common questions about this cinnamon roll breakfast smoothie.

  • Can I make this without a blender? Unfortunately, no. A high-powered blender is essential for breaking down the oats and frozen fruit. A food processor may work in a pinch, but the texture won’t be as smooth.
  • Is this smoothie gluten-free? Yes, if you use certified gluten-free oats. Regular oats are often cross-contaminated with gluten during processing.
  • Why is my smoothie too thick? Add more liquid, one tablespoon at a time, until it reaches your desired consistency. Remember, it will thicken slightly as it sits.
  • Can I use fresh banana instead of frozen? Frozen bananas are key for thickness and chill. If using fresh, add ice cubes to compensate, but expect a slightly less creamy result.
  • How can I reduce the sugar content? Omit the maple syrup and rely on the banana’s natural sweetness. You can also use unsweetened yogurt and milk alternatives.

Final Thoughts

This Cinnamon Roll Breakfast Smoothie is more than just a drink—it’s a morning ritual that feels like a hug in a glass. Whether you’re rushing out the door or savoring a slow weekend, it brings comfort and nourishment in every sip. I love serving it in a mason jar with a reusable straw for an Instagram-worthy presentation, or sneaking in a handful of spinach for an extra nutrient boost (the cinnamon masks it perfectly). Once you try this recipe, you’ll understand why it’s become a staple in my kitchen. Here’s to delicious mornings that taste like dessert—without any of the guilt.

Print
clock clock iconcutlery cutlery iconflag flag iconfolder folder iconinstagram instagram iconpinterest pinterest iconfacebook facebook iconprint print iconsquares squares iconheart heart iconheart solid heart solid icon

Cinnamon Roll Breakfast Smoothie

  • Author: SmoothieLover42

Description

A creamy, indulgent smoothie that tastes just like a cinnamon roll but is packed with wholesome ingredients to kickstart your morning. Perfect for busy days when you crave something sweet yet nutritious.


Ingredients

Scale

For the Crust:

  • For the smoothie base:
  • 1 cup unsweetened almond milk (or milk of choice)
  • 1 frozen banana (sliced before freezing)
  • 1/2 cup rolled oats
  • 1/4 cup Greek yogurt (vanilla or plain)
  • 1 tbsp almond butter
  • 1 tsp vanilla extract
  • 1/2 tsp ground cinnamon
  • 1/8 tsp ground nutmeg
  • For the topping:
  • 1 tbsp cream cheese (softened)
  • 1 tsp maple syrup
  • 1/2 tsp cinnamon
  • 1 tbsp chopped walnuts (optional)

Instructions

1. Prepare the Crust:

  1. 1. Blend all smoothie base ingredients in a high-speed blender until completely smooth (about 1-2 minutes).
  2. 2. In a small bowl, whisk together softened cream cheese, maple syrup, and cinnamon until smooth.
  3. 3. Pour smoothie into a glass, then drizzle the cream cheese mixture on top.
  4. 4. Sprinkle with chopped walnuts if using.
  5. 5. Serve immediately with a reusable straw for best texture.

Notes

For a vegan version: Use coconut yogurt and omit cream cheese topping (replace with coconut whipped cream). Freeze leftover smoothie in popsicle molds for a later treat!

Greek Yogurt Blueberry Muffins (High Protein & Low Sugar)

Greek Yogurt Blueberry Muffins (High Protein & Low Sugar)

There’s something undeniably comforting about biting into a warm, fluffy blueberry muffin—especially when it’s packed with protein and light on sugar. These Greek Yogurt Blueberry Muffins are a game-changer for breakfast, snacks, or even a guilt-free dessert. Moist, tender, and bursting with juicy blueberries, they’re proof that healthy baking doesn’t have to sacrifice flavor. Whether you’re meal-prepping for the week or hosting a brunch, this recipe is a must-try.

Why You’ll Love This Recipe

If you’re looking for a muffin recipe that’s both nutritious and delicious, here’s why these Greek Yogurt Blueberry Muffins will become a staple in your kitchen:

  • High-protein power: Greek yogurt and eggs provide a protein boost, making these muffins a satisfying snack that keeps you full longer.
  • Low in sugar: Sweetened naturally with a touch of honey or maple syrup, these muffins avoid the sugar crash of traditional bakery-style versions.
  • Perfect texture: The Greek yogurt ensures a moist, tender crumb while keeping the muffins light and fluffy.
  • Versatile and foolproof: Easy to customize with different fruits, nuts, or spices, and simple enough for beginner bakers.
  • Meal-prep friendly: They freeze beautifully, so you can enjoy a wholesome treat anytime.

Ingredients Breakdown

Every ingredient in these Greek Yogurt Blueberry Muffins plays a crucial role in creating the perfect balance of flavor and nutrition:

  • Greek yogurt: Adds protein, moisture, and a slight tang while reducing the need for excess oil or butter.
  • Fresh or frozen blueberries: Packed with antioxidants and natural sweetness. Frozen berries work just as well—no thawing needed.
  • Whole wheat flour or almond flour: For a fiber-rich base. Almond flour keeps it gluten-free and adds a nutty depth.
  • Eggs: Bind the ingredients and contribute to the protein content.
  • Honey or maple syrup: A natural sweetener that complements the tartness of the yogurt and blueberries.
  • Baking essentials: Baking powder and soda ensure a good rise, while vanilla extract and a pinch of salt enhance the overall flavor.

How to Make Greek Yogurt Blueberry Muffins (High Protein & Low Sugar)

Follow these simple steps for bakery-worthy muffins right at home:

  1. Prep your tools: Preheat the oven to 375°F and line a muffin tin with liners or lightly grease it.
  2. Mix dry ingredients: In a large bowl, whisk together the flour, baking powder, baking soda, and salt.
  3. Combine wet ingredients: In another bowl, beat the eggs, then stir in the Greek yogurt, honey (or maple syrup), and vanilla until smooth.
  4. Fold together: Gently mix the wet ingredients into the dry ingredients until just combined. Avoid overmixing to keep the muffins tender.
  5. Add blueberries: Toss the blueberries with a teaspoon of flour (to prevent sinking), then fold them into the batter.
  6. Bake: Divide the batter evenly among the muffin cups, filling each about ¾ full. Bake for 18–22 minutes, or until a toothpick comes out clean.
  7. Cool and enjoy: Let the muffins cool in the pan for 5 minutes before transferring to a wire rack. Serve warm or at room temperature.

Pro Tips for the Best Results

  • Room-temperature ingredients: Let the eggs and yogurt sit out for 20–30 minutes before baking for a smoother batter.
  • Don’t overmix: Stir until just combined to avoid dense muffins.
  • Even baking: Rotate the muffin tin halfway through baking for uniform browning.
  • Boost flavor: Add a sprinkle of lemon zest or cinnamon for an extra layer of taste.

Variations and Substitutions

These muffins are incredibly adaptable to suit different tastes and dietary needs:

  • Flour swaps: Use all-purpose, whole wheat, or gluten-free flour blends. Almond flour works for a low-carb option.
  • Fruit alternatives: Swap blueberries for raspberries, diced apples, or even dark chocolate chips.
  • Dairy-free: Substitute Greek yogurt with coconut yogurt and use a flax egg for a vegan version.
  • Extra crunch: Stir in chopped walnuts or pecans for added texture.

What to Serve With It

Pair these muffins with:

  • A dollop of Greek yogurt and fresh berries for a protein-packed breakfast.
  • A warm cup of herbal tea or black coffee for a cozy afternoon snack.
  • A drizzle of almond butter for extra richness.

How to Store and Reheat

  • Room temperature: Keep in an airtight container for up to 2 days.
  • Refrigerate: Store for up to 5 days; reheat in the microwave for 10–15 seconds.
  • Freeze: Wrap individually and freeze for up to 3 months. Thaw at room temperature or warm in a 300°F oven for 5–10 minutes.

Frequently Asked Questions (FAQs)

Can I use frozen blueberries?

Absolutely. Frozen blueberries work well—just toss them in flour before folding into the batter to prevent bleeding.

How can I make these muffins sweeter without adding sugar?

Try adding mashed ripe banana or a touch more honey. Alternatively, sprinkle the tops with a light dusting of cinnamon before baking.

Can I make these muffins dairy-free?

Yes. Substitute Greek yogurt with an equal amount of coconut yogurt and use a plant-based milk if needed.

Why did my muffins turn out dense?

Overmixing the batter or using cold ingredients can lead to dense muffins. Mix gently and ensure ingredients are at room temperature.

Can I make mini muffins with this recipe?

Yes. Reduce the baking time to 10–12 minutes for mini muffins.

Final Thoughts

These Greek Yogurt Blueberry Muffins are proof that healthy eating doesn’t mean missing out on life’s little pleasures. They’re soft, flavorful, and packed with goodness—perfect for busy mornings, post-workout snacks, or even a midnight treat. Once you try them, you’ll wonder how you ever settled for store-bought muffins. Happy baking!

Print
clock clock iconcutlery cutlery iconflag flag iconfolder folder iconinstagram instagram iconpinterest pinterest iconfacebook facebook iconprint print iconsquares squares iconheart heart iconheart solid heart solid icon

Greek Yogurt Blueberry Muffins (High Protein & Low Sugar)

  • Author: Healthy Baking Co.

Description

These moist and fluffy Greek yogurt blueberry muffins are packed with protein and naturally sweetened with minimal sugar. Perfect for a healthy breakfast or snack!


Ingredients

Scale

For the Crust:

  • For Dry Ingredients:
  • 1 1/2 cups whole wheat flour
  • 1/2 cup vanilla protein powder (whey or plant-based)
  • 1 tsp baking powder
  • 1/2 tsp baking soda
  • 1/4 tsp salt
  • For Wet Ingredients:
  • 1 cup plain non-fat Greek yogurt
  • 1/4 cup honey or maple syrup
  • 1 large egg
  • 1 tsp vanilla extract
  • 1/4 cup unsweetened almond milk
  • For Mix-ins:
  • 1 cup fresh or frozen blueberries
  • 1 tbsp flour (to coat blueberries)

Instructions

1. Prepare the Crust:

  1. 1. Preheat oven to 375°F (190°C) and line a muffin tin with liners or grease well.
  2. 2. In a large bowl, whisk together all dry ingredients (flour, protein powder, baking powder, baking soda, salt).
  3. 3. In another bowl, mix Greek yogurt, honey/maple syrup, egg, vanilla, and almond milk until smooth.
  4. 4. Gently fold wet ingredients into dry ingredients until just combined (do not overmix).
  5. 5. Toss blueberries with 1 tbsp flour, then fold into batter.
  6. 6. Divide batter evenly into 12 muffin cups (about 3/4 full).
  7. 7. Bake for 18-22 minutes until tops spring back when touched.
  8. 8. Cool in pan for 5 minutes, then transfer to wire rack.

Notes

For extra protein, use Greek yogurt with higher protein content. Frozen blueberries work well but may slightly increase baking time. Store in airtight container for up to 4 days or freeze for longer storage.

Healthy Oatmeal Protein Cookies | Perfect Healthy Breakfast Recipe

Healthy Oatmeal Protein Cookies | Perfect Healthy Breakfast Recipe

There’s something undeniably comforting about biting into a warm, chewy oatmeal cookie—especially when you know it’s packed with protein and wholesome ingredients. These Healthy Oatmeal Protein Cookies are not just a treat; they’re a nutritious breakfast option that keeps you energized all morning. Whether you’re rushing out the door or savoring a slow weekend, these cookies are the perfect way to start your day. Let’s dive into why this recipe is a must-try and how you can make it your own.

Why You’ll Love This Recipe

If you’re looking for a breakfast cookie that’s both satisfying and good for you, this recipe checks all the boxes. Here’s why it’s a winner:

  • Nutrient-packed: Loaded with oats, protein powder, and natural sweeteners, these cookies provide a balanced mix of fiber, protein, and complex carbs to fuel your day.
  • Quick and easy: With just one bowl and minimal prep time, you can whip up a batch in under 30 minutes—perfect for busy mornings.
  • Customizable: Add your favorite mix-ins like nuts, dried fruit, or dark chocolate to tailor the flavor to your liking.
  • Meal-prep friendly: These cookies store beautifully, making them an ideal grab-and-go breakfast or snack throughout the week.
  • Kid-approved: Even picky eaters will love the sweet, hearty taste, and you’ll love that they’re eating something wholesome.

Ingredients Breakdown

Every ingredient in these Healthy Oatmeal Protein Cookies serves a purpose, ensuring a delicious and nutritious result. Here’s what you’ll need:

  • Rolled oats: The base of the recipe, providing fiber and a chewy texture. Opt for old-fashioned oats for the best consistency.
  • Protein powder: Adds a protein boost to keep you full longer. Vanilla or unflavored varieties work best.
  • Banana or applesauce: Natural sweeteners that also bind the dough together, reducing the need for refined sugar.
  • Nut butter: Almond or peanut butter adds healthy fats and richness while helping the cookies hold their shape.
  • Maple syrup or honey: A touch of natural sweetness to balance the flavors.
  • Chia or flax seeds: For an extra dose of omega-3s and fiber.
  • Cinnamon and vanilla extract: Warm spices that enhance the cookie’s cozy flavor profile.

How to Make Healthy Oatmeal Protein Cookies | Perfect Healthy Breakfast Recipe

Making these cookies is as simple as mixing, scooping, and baking. Follow these steps for perfect results every time:

  1. Preheat your oven to 350°F (175°C) and line a baking sheet with parchment paper.
  2. Mash the banana in a large mixing bowl until smooth. Stir in the nut butter, maple syrup, and vanilla extract until well combined.
  3. Add dry ingredients: Sprinkle in the protein powder, oats, chia seeds, cinnamon, and a pinch of salt. Mix until a thick dough forms.
  4. Fold in extras: If using add-ins like chocolate chips or dried cranberries, gently stir them in now.
  5. Scoop the dough: Use a cookie scoop or tablespoon to portion the dough onto the baking sheet. Flatten slightly with your fingers or the back of a spoon.
  6. Bake for 12-15 minutes until the edges are golden. Let them cool on the sheet for 5 minutes before transferring to a wire rack.

Tip: For extra chewy cookies, slightly underbake them by removing them from the oven at the 12-minute mark.

Pro Tips for the Best Results

Want to take your Healthy Oatmeal Protein Cookies to the next level? Try these expert tricks:

  • If the dough feels too sticky, refrigerate it for 10-15 minutes before scooping. This makes it easier to handle.
  • For a crispier texture, bake the cookies a few minutes longer, but keep an eye on them to prevent over-browning.
  • Use a high-quality protein powder without artificial sweeteners for the best flavor.
  • If you prefer a nut-free version, swap the nut butter for sunflower seed butter.

Variations and Substitutions

This recipe is incredibly versatile. Here are some delicious ways to switch it up:

  • Chocolate chip: Stir in dark chocolate chips for a classic twist.
  • Nutty crunch: Add chopped walnuts or pecans for extra texture.
  • Fruit-filled: Mix in dried blueberries, raisins, or chopped dates.
  • Spiced: Add a pinch of nutmeg or ginger for a warm, autumnal flavor.
  • Gluten-free: Ensure your oats are certified gluten-free if needed.

What to Serve With It

These cookies are fantastic on their own, but they also pair wonderfully with:

  • A glass of almond milk or cold brew coffee for a quick breakfast.
  • Greek yogurt and fresh berries for a protein-packed parfait.
  • A smoothie bowl topped with granola and nut butter.

How to Store and Reheat

To keep your Healthy Oatmeal Protein Cookies fresh:

  • Room temperature: Store in an airtight container for up to 5 days.
  • Freezer: Wrap individually and freeze for up to 3 months. Thaw at room temperature or warm in the microwave for 10-15 seconds.
  • Reheating: For a freshly baked taste, pop them in a 300°F oven for 5 minutes.

Frequently Asked Questions (FAQs)

Can I make these cookies without protein powder?
Yes! Simply replace the protein powder with an equal amount of oat flour or almond flour.

Are these cookies vegan-friendly?
Absolutely. Use maple syrup instead of honey and ensure your protein powder is plant-based.

Why are my cookies too dry?
This can happen if the banana or nut butter measurements are off. Add a splash of plant-based milk to adjust the consistency.

Can I use quick oats instead of rolled oats?
Quick oats will work but may result in a denser texture. Stick to rolled oats for the best chew.

Final Thoughts

These Healthy Oatmeal Protein Cookies are proof that breakfast can be both nutritious and indulgent. Whether you’re meal-prepping for the week or treating yourself to a wholesome snack, this recipe delivers on flavor and function. I’d love to hear how you customize yours—tag me on social media if you give them a try. Happy baking!

Print
clock clock iconcutlery cutlery iconflag flag iconfolder folder iconinstagram instagram iconpinterest pinterest iconfacebook facebook iconprint print iconsquares squares iconheart heart iconheart solid heart solid icon

Healthy Oatmeal Protein Cookies | Perfect Healthy Breakfast Recipe

  • Author: Healthy Eats Kitchen

Description

These healthy oatmeal protein cookies are packed with nutrients, fiber, and plant-based protein, making them the perfect grab-and-go breakfast or snack. They’re naturally sweetened, gluten-free, and easy to customize with your favorite add-ins.


Ingredients

Scale

For the Crust:

  • For dry ingredients:
  • 1 1/2 cups rolled oats (gluten-free if needed)
  • 1/2 cup almond flour
  • 1/4 cup vanilla protein powder (plant-based or whey)
  • 1 tsp cinnamon
  • 1/2 tsp baking soda
  • 1/4 tsp salt
  • For wet ingredients:
  • 1 ripe banana, mashed
  • 1/4 cup almond butter (or peanut butter)
  • 2 tbsp maple syrup
  • 1 tsp vanilla extract
  • For mix-ins:
  • 1/4 cup dark chocolate chips
  • 2 tbsp chopped walnuts (optional)

Instructions

1. Prepare the Crust:

  1. 1. Preheat oven to 350°F (175°C) and line a baking sheet with parchment paper.
  2. 2. In a large bowl, mix all dry ingredients (oats, almond flour, protein powder, cinnamon, baking soda, and salt).
  3. 3. In a separate bowl, mash the banana and mix with almond butter, maple syrup, and vanilla extract until smooth.
  4. 4. Combine wet and dry ingredients, stirring until a thick dough forms. Fold in chocolate chips and walnuts if using.
  5. 5. Scoop 2-tablespoon portions of dough onto the prepared baking sheet. Flatten slightly into cookie shapes (they won’t spread much).
  6. 6. Bake for 12-15 minutes until edges are golden. Let cool on the baking sheet for 5 minutes before transferring to a wire rack.

Notes

Store in an airtight container for up to 5 days or freeze for longer storage. For variation, try adding raisins, shredded coconut, or pumpkin seeds. If dough is too sticky, refrigerate for 30 minutes before shaping.

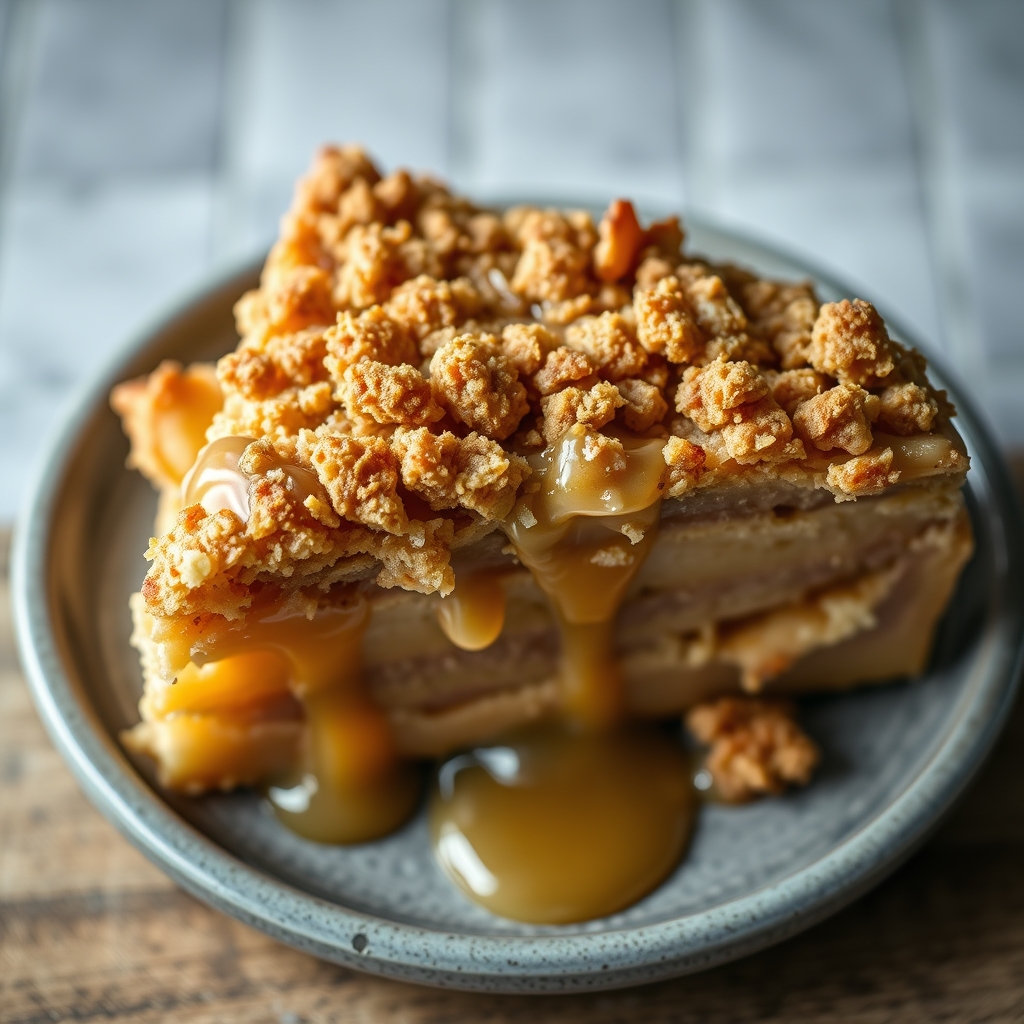
Healthy Breakfast Apple Crumble – Her Highness, Hungry Me

Healthy Breakfast Apple Crumble – Her Highness, Hungry Me

There’s something undeniably comforting about waking up to the aroma of warm apples and cinnamon wafting through the kitchen. This Healthy Breakfast Apple Crumble is the perfect way to start your day—nourishing, flavorful, and just sweet enough to feel like a treat without the guilt. Inspired by the beloved flavors of classic apple crumble, this version is designed for breakfast, with wholesome ingredients that keep you energized. Whether you’re meal prepping for the week or hosting a cozy brunch, this recipe is a guaranteed crowd-pleaser.

Why You’ll Love This Recipe

This Healthy Breakfast Apple Crumble stands out for so many reasons. Here’s why it’s about to become your new morning staple:

  • Nutrient-packed and balanced: Made with oats, nuts, and fresh apples, this crumble delivers fiber, healthy fats, and natural sweetness to keep you full and satisfied.
  • Quick and easy: With minimal prep and simple steps, you can have this dish ready in under 30 minutes—perfect for busy mornings.
  • Meal-prep friendly: Make a big batch ahead of time and reheat portions throughout the week for a hassle-free breakfast.
  • Customizable: Swap in your favorite fruits, nuts, or spices to make it your own.
  • Kid-approved: Even picky eaters will love the warm, cinnamon-spiced apples and crunchy oat topping.

Ingredients Breakdown

Every ingredient in this Healthy Breakfast Apple Crumble plays a crucial role in creating the perfect balance of flavor and texture. Here’s what you’ll need:

  • Apples: The star of the dish, apples provide natural sweetness and a soft, tender texture when baked. Opt for firm varieties like Honeycrisp or Granny Smith for the best results.
  • Rolled oats: These form the base of the crumble topping, adding chewiness and fiber.
  • Almond flour: A gluten-free alternative to traditional flour, almond flour adds richness and helps bind the topping.
  • Maple syrup: A natural sweetener that enhances the caramelized notes of the baked apples.
  • Cinnamon and nutmeg: Warm spices that elevate the cozy, autumnal flavors.
  • Coconut oil: Adds moisture to the crumble while keeping it dairy-free.
  • Chopped nuts: Walnuts or pecans bring a satisfying crunch and healthy fats.

How to Make Healthy Breakfast Apple Crumble – Her Highness, Hungry Me

Follow these simple steps to create a delicious, wholesome breakfast crumble that will make your mornings brighter.

  1. Preheat your oven to 375°F (190°C) and lightly grease a baking dish with coconut oil.
  2. Prepare the apples: Peel and thinly slice 3-4 medium apples. Toss them in a bowl with a teaspoon of cinnamon, a pinch of nutmeg, and a tablespoon of maple syrup.
  3. Make the crumble topping: In another bowl, combine 1 cup rolled oats, ½ cup almond flour, ¼ cup chopped nuts, 2 tablespoons maple syrup, 2 tablespoons melted coconut oil, and a pinch of salt. Mix until crumbly.
  4. Assemble the crumble: Spread the spiced apples evenly in the baking dish, then sprinkle the oat mixture on top, pressing lightly to form a crust.
  5. Bake: Place in the oven for 20-25 minutes, or until the topping is golden and the apples are bubbling.
  6. Cool slightly: Let it sit for 5 minutes before serving to allow the flavors to meld.

Pro Tips for the Best Results

  • Use cold coconut oil for the crumble topping to achieve a more textured, crispy finish.
  • Slice apples uniformly to ensure even cooking—no one wants a mix of mushy and undercooked pieces.
  • Toast the nuts beforehand for an extra layer of nutty depth.
  • Add a splash of lemon juice to the apples to brighten the flavors and prevent browning.

Variations and Substitutions

This recipe is wonderfully adaptable. Here are some ways to switch it up:

  • Fruit swaps: Try pears, peaches, or mixed berries instead of apples.
  • Nut-free: Replace nuts with sunflower seeds or omit them entirely.
  • Vegan: Ensure your maple syrup is 100% pure and use a plant-based oil.
  • Extra protein: Stir a scoop of vanilla protein powder into the crumble topping.

What to Serve With It

This Healthy Breakfast Apple Crumble is delicious on its own, but here are some perfect pairings:

  • A dollop of Greek yogurt or coconut yogurt for creaminess.
  • A drizzle of almond butter for extra richness.
  • A side of scrambled eggs or turkey sausage for a protein-packed breakfast.
  • A warm cup of chai tea or cold brew coffee to complement the spices.

How to Store and Reheat

Leftovers can be stored in an airtight container in the fridge for up to 4 days. For longer storage, freeze individual portions for up to 2 months. To reheat, warm in the oven at 350°F (175°C) for 10 minutes or microwave for 1-2 minutes until heated through.

Frequently Asked Questions (FAQs)

Can I make this recipe gluten-free?

Yes! This recipe is naturally gluten-free as long as you use certified gluten-free oats.

Can I use steel-cut oats instead of rolled oats?

Rolled oats work best for texture, but steel-cut oats can be pulsed in a food processor for a similar effect.

How can I reduce the sugar content?

You can omit the maple syrup in the apple mixture and rely on the natural sweetness of the fruit.

Can I make this in an air fryer?

Absolutely! Bake in an air fryer at 350°F (175°C) for 12-15 minutes, checking frequently.

Final Thoughts

This Healthy Breakfast Apple Crumble is proof that mornings can be both nourishing and indulgent. Whether you’re enjoying it solo with a spoon straight from the dish or serving it to guests with a side of yogurt, it’s a recipe that brings warmth and joy to the table. Give it a try, and let the sweet, spiced aroma become a part of your morning ritual. Happy baking!

Print
clock clock iconcutlery cutlery iconflag flag iconfolder folder iconinstagram instagram iconpinterest pinterest iconfacebook facebook iconprint print iconsquares squares iconheart heart iconheart solid heart solid icon

Healthy Breakfast Apple Crumble – Her Highness, Hungry Me

  • Author: Her Highness, Hungry Me

Description

A wholesome and delicious apple crumble perfect for breakfast, made with nutritious ingredients and naturally sweetened. This recipe is gluten-free, refined sugar-free, and packed with fiber to keep you full all morning.


Ingredients

Scale

For the Crust:

  • For the apple filling:
  • 3 medium apples, peeled and diced
  • 1 tablespoon lemon juice
  • 1 teaspoon cinnamon
  • 1/2 teaspoon nutmeg
  • 1 tablespoon maple syrup
  • 1 teaspoon vanilla extract
  • For the crumble topping:
  • 1 cup rolled oats (gluten-free if needed)
  • 1/4 cup almond flour
  • 1/4 cup chopped walnuts
  • 1 tablespoon chia seeds
  • 1 teaspoon cinnamon
  • 2 tablespoons coconut oil, melted
  • 1 tablespoon maple syrup
  • Pinch of salt

Instructions

1. Prepare the Crust:

  1. Preheat your oven to 350°F (175°C) and lightly grease a small baking dish.
  2. In a bowl, combine the diced apples, lemon juice, cinnamon, nutmeg, maple syrup, and vanilla extract. Mix well and transfer to the prepared baking dish.
  3. In another bowl, mix the rolled oats, almond flour, chopped walnuts, chia seeds, cinnamon, melted coconut oil, maple syrup, and salt until well combined.
  4. Sprinkle the crumble topping evenly over the apple mixture.
  5. Bake for 25-30 minutes, or until the topping is golden brown and the apples are tender.
  6. Let it cool slightly before serving. Enjoy warm, optionally with a dollop of yogurt or a splash of milk.

Notes

For a nut-free version, replace almond flour with oat flour and omit walnuts. You can also add raisins or dried cranberries to the apple filling for extra sweetness. Store leftovers in the fridge for up to 3 days and reheat before serving.

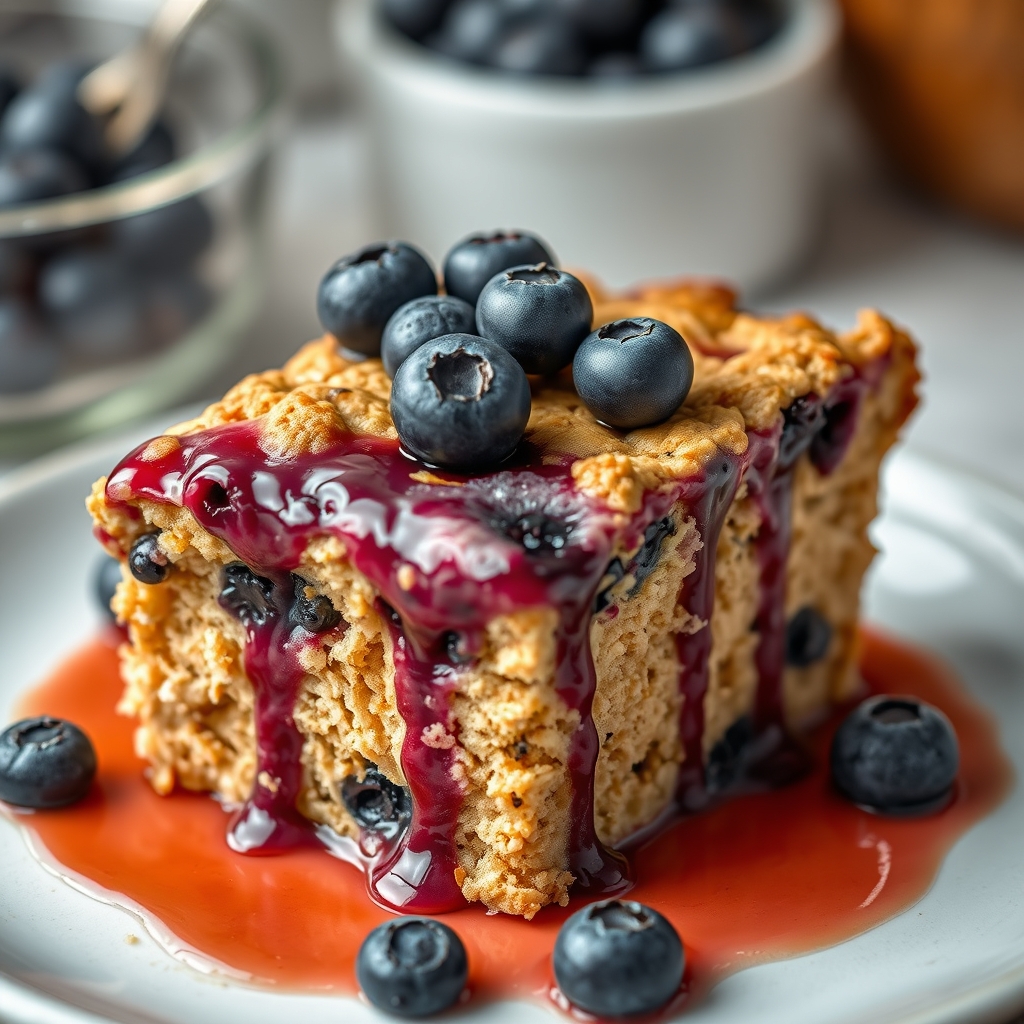
Overnight Blueberry Baked Oatmeal

Overnight Blueberry Baked Oatmeal

There’s something magical about waking up to the aroma of warm, cinnamon-spiced blueberries and creamy baked oatmeal filling your kitchen. This Overnight Blueberry Baked Oatmeal is the perfect make-ahead breakfast that’s as nourishing as it is delicious. Whether you’re meal prepping for busy mornings or hosting a cozy brunch, this recipe delivers comfort in every bite. With juicy blueberries, hearty oats, and a touch of maple sweetness, it’s a breakfast that feels indulgent yet wholesome. Let’s dive into why this dish deserves a spot in your recipe rotation.

Why You’ll Love This Recipe

First, this Overnight Blueberry Baked Oatmeal is a time-saver. By preparing it the night before, you eliminate morning chaos—just pop it in the oven while you sip your coffee. Second, it’s versatile enough to please everyone, from kids to adults, and it easily adapts to dietary preferences like gluten-free or dairy-free. Third, the combination of tender oats, bursts of blueberry, and warm spices creates a comforting texture and flavor that’s hard to resist. Finally, it’s packed with fiber and protein, making it a nutritious way to start your day without sacrificing taste.

Ingredients Breakdown

Understanding the ingredients helps you appreciate how each one contributes to the final dish. Here’s what makes this baked oatmeal so irresistible:

  • Rolled oats: The backbone of the recipe, providing a chewy texture and fiber-rich base. Avoid quick oats—they turn mushy.
  • Fresh or frozen blueberries: These add juicy sweetness and antioxidants. Frozen berries work just as well and prevent the dish from drying out.
  • Milk: Use dairy or plant-based milk for creaminess. Almond milk adds a nutty undertone, while whole milk makes it richer.
  • Eggs: They bind the mixture and give it a custard-like consistency.
  • Maple syrup: A natural sweetener that enhances the blueberries’ flavor without overpowering them.
  • Cinnamon and vanilla: These warm spices deepen the flavor profile, making each bite aromatic and cozy.

How to Make Overnight Blueberry Baked Oatmeal

Follow these steps for a foolproof, delicious result:

  1. Mix the dry ingredients: In a large bowl, combine rolled oats, cinnamon, baking powder, and a pinch of salt.
  2. Whisk the wet ingredients: In another bowl, beat the eggs, then add milk, maple syrup, melted butter (or oil), and vanilla extract.
  3. Combine: Pour the wet mixture into the dry ingredients and stir until fully incorporated. Gently fold in the blueberries.
  4. Prep for overnight rest: Transfer the mixture to a greased baking dish, cover with plastic wrap, and refrigerate overnight (or at least 4 hours).
  5. Bake: In the morning, preheat your oven to 375°F. Remove the plastic wrap and bake for 35–40 minutes, until the top is golden and the center is set.
  6. Serve: Let it cool slightly before slicing. Drizzle with extra maple syrup or yogurt if desired.

Pro Tips for the Best Results

  • For extra crunch, sprinkle chopped nuts or seeds (like almonds or pepitas) on top before baking.
  • If using frozen blueberries, toss them in a bit of flour to prevent sinking to the bottom.
  • Let the baked oatmeal rest for 10 minutes after baking—this helps it firm up for cleaner slices.
  • Double the recipe and freeze half for future breakfasts—it reheats beautifully.

Variations and Substitutions

This recipe is wonderfully adaptable. Try these twists:

  • Vegan: Swap eggs for flax eggs and use coconut oil instead of butter.
  • Nut-free: Skip the nuts and add sunflower seeds for crunch.
  • Different fruits: Substitute blueberries with diced apples, raspberries, or peaches.
  • Protein boost: Stir in a scoop of vanilla protein powder or Greek yogurt for extra staying power.

What to Serve With It

This baked oatmeal shines on its own, but pairing it with the right sides elevates the meal. Try:

  • A dollop of Greek yogurt or whipped cream for added creaminess.
  • Fresh fruit salad for a refreshing contrast.
  • Crispy bacon or sausage links if you prefer a savory-sweet balance.
  • A hot cup of chai tea or cold brew coffee to complement the spices.

How to Store and Reheat

Leftovers? No problem. Here’s how to keep them tasting fresh:

  • Refrigerate: Store in an airtight container for up to 4 days.
  • Freeze: Slice into portions, wrap tightly, and freeze for up to 3 months. Thaw overnight in the fridge before reheating.
  • Reheat: Warm individual servings in the microwave for 1–2 minutes or in a 350°F oven for 10–15 minutes. Add a splash of milk to restore moisture if needed.

Frequently Asked Questions (FAQs)

Can I use steel-cut oats instead?
No, steel-cut oats won’t soften enough in this recipe. Stick with rolled oats for the best texture.

Can I bake it immediately without refrigerating overnight?
Yes, but the oats won’t absorb as much liquid, resulting in a slightly less creamy texture. If short on time, let it sit for at least 30 minutes before baking.

How do I prevent the top from over-browning?
Cover the dish with foil halfway through baking if the edges darken too quickly.

Is this recipe gluten-free?
Yes, if you use certified gluten-free oats, this dish is naturally gluten-free.

Final Thoughts

This Overnight Blueberry Baked Oatmeal is more than just a breakfast—it’s a warm hug in dish form. Whether you’re serving it for a lazy weekend brunch or prepping it for hectic weekdays, it’s a recipe that delivers joy and nourishment in equal measure. Play with flavors, make it your own, and savor the simplicity of a meal that loves you back. Happy baking!

Print
clock clock iconcutlery cutlery iconflag flag iconfolder folder iconinstagram instagram iconpinterest pinterest iconfacebook facebook iconprint print iconsquares squares iconheart heart iconheart solid heart solid icon

Overnight Blueberry Baked Oatmeal

  • Author: The Cozy Kitchen

Description

A delicious and healthy make-ahead breakfast with juicy blueberries, hearty oats, and warm cinnamon flavors. Perfect for meal prep!


Ingredients

Scale

For the Crust:

  • For the oatmeal base:
  • 2 cups old-fashioned rolled oats
  • 1 tsp baking powder
  • 1 tsp ground cinnamon
  • 1/4 tsp salt
  • 1 large egg
  • 1/4 cup maple syrup
  • 1 tsp vanilla extract
  • 1 1/2 cups milk (dairy or plant-based)
  • For the blueberry layer:
  • 1 1/2 cups fresh or frozen blueberries
  • 1 tbsp lemon juice
  • 1 tbsp cornstarch
  • For topping (optional):
  • 2 tbsp brown sugar
  • 1/4 cup chopped walnuts

Instructions

1. Prepare the Crust:

  1. 1. Grease an 8×8-inch baking dish and preheat oven to 375°F (190°C).
  2. 2. In a large bowl, mix oats, baking powder, cinnamon, and salt.
  3. 3. In another bowl, whisk egg, maple syrup, vanilla, and milk until combined.
  4. 4. Pour wet ingredients into dry ingredients and stir until fully incorporated.
  5. 5. In a separate bowl, toss blueberries with lemon juice and cornstarch.
  6. 6. Spread half the oat mixture in the prepared dish, top with blueberry mixture, then remaining oats.
  7. 7. Sprinkle with brown sugar and walnuts if using.
  8. 8. Cover and refrigerate overnight (or at least 4 hours).
  9. 9. Bake uncovered for 35-40 minutes until golden and set.
  10. 10. Let cool 5 minutes before serving.

Notes

For vegan version: Use flax egg and plant-based milk. Can substitute other berries. Stores well refrigerated for 4 days.