Spice Up Your BBQ with Mexican-Style Corn Coleslaw Recipe

Mexican-Style Corn Coleslaw: A Fusion of Fresh Flavors

⚖️
Difficulty
Easy

⏲️
Prep Time
20 mins

🕒
Cook Time
10 mins

⏱️
Total Time
30 mins

🍽️
Servings
6

Get ready to transform your summer gatherings with a vibrant, zesty Mexican-Style Corn Coleslaw that will steal the spotlight at any meal. This dish combines the savory sweetness of fresh corn with the tangy crunch of coleslaw, creating an irresistible blend of flavors and textures. A sprinkle of cilantro and a kick from jalapeños take this dish to a new level, ensuring your taste buds are in for a treat.

Picture this: sun-soaked backyard barbecues or lazy Sunday brunches. That’s the perfect setting for this refreshing Mexican-Style Corn Coleslaw. The colors alone will make your eyes dance, while the aroma will draw everyone to the table before you even have a chance to call them. Whether you’re serving it beside juicy grilled chicken or piling it high in a taco, this coleslaw is the perfect companion.

Quick Recipe Highlights

  • Flavor Profile: The coleslaw combines sweetness from the corn, tanginess from lime, and a hint of heat from jalapeños.
  • Texture: A crisp bite from the cabbage pairs beautifully with the tender crunch of fresh corn.
  • Aroma: The fresh scent of cilantro mingles with the earthy, roasted corn notes.
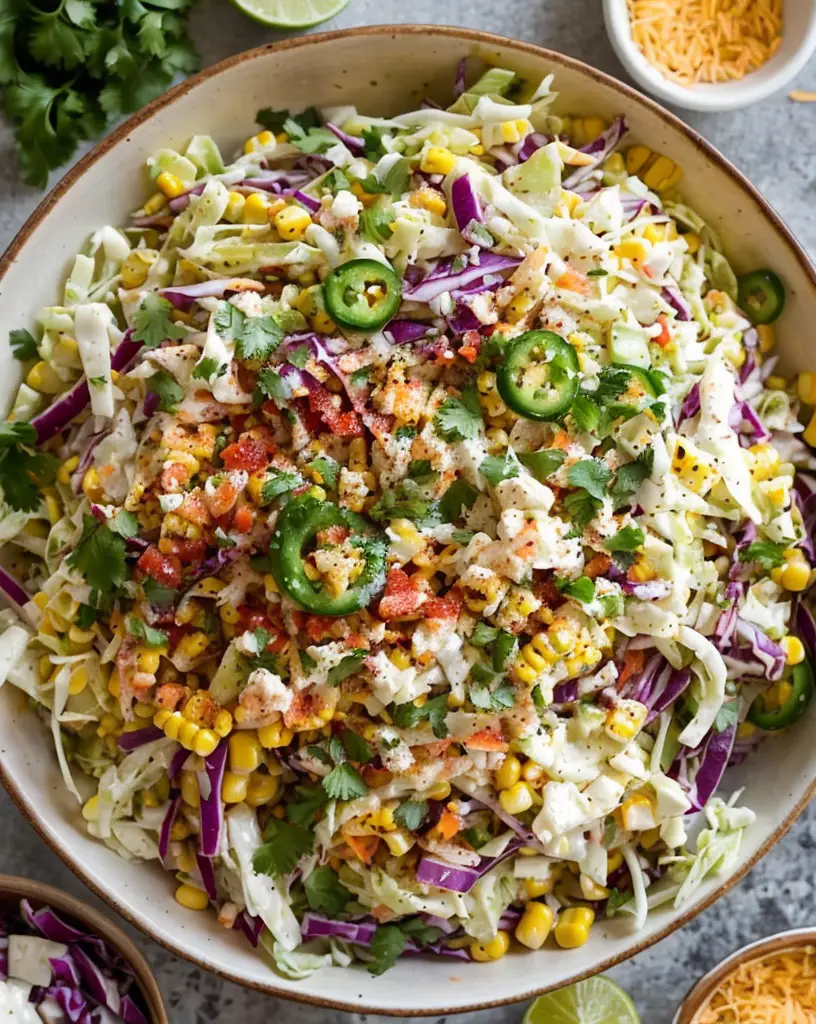
  • Visual Appeal: Bright yellow corn, purple cabbage, and green jalapeños create a fiesta of colors.
  • Skill Level Needed: Simple chopping skills and basic mixing are all you need.
  • Special Equipment: A sharp knife, cutting board, and a large mixing bowl are essential.

Recipe Overview

  • Difficulty Level: This easy-to-follow recipe is suitable for beginners and seasoned cooks alike, requiring only basic culinary skills.
  • Category: Versatile as both a side dish and a standalone meal component.
  • Cuisine: Mexican-inspired, bringing traditional flavors in a contemporary form.
  • Cost: Budget-friendly as it utilizes cost-effective, readily available ingredients.
  • Season: Ideal for summer when corn is freshest, but enjoyable year-round with canned versions.
  • Occasion: Perfect for casual get-togethers or picnics, offering a refreshing complement to various dishes.

Why You’ll Love This Recipe


Indulge in the taste and texture of Mexican-Style Corn Coleslaw, where each bite brings a delightful mix of sweet, savory, and spicy elements. The corn provides a natural sweetness that contrasts beautifully with the tangy cabbage and lime, creating a symphony of flavors. The crispness of the cabbage provides a satisfying crunch, and the silkiness of the mayo-based dressing coats your palate in the most pleasant way.

Convenience is another reason to love this recipe. With just a few ingredients and minimal prep time, this coleslaw is quick to prepare, making it an ideal choice for those busy weeknight dinners or spontaneous summer parties. It’s easy to scale the recipe up or down based on your serving needs, allowing it to adapt to any occasion effortlessly.

Nutritionally, this dish offers fiber and vitamins from the fresh vegetables, while being low in carbohydrates and saturated fats. It’s an excellent way to incorporate more plant-based ingredients into your diet while treating your taste buds. The colors and textures alone make it appealing, even to those who typically shy away from vegetables.

From a social standpoint, serving this coleslaw will elevate any gathering. Whether you are a host or a guest, its universal appeal and crowd-pleasing qualities ensure it will be a hit. Pair it with grilled fish, use it as a topping for tacos, or enjoy it as a standalone dish. It brings people together with its bold flavors and vibrant presentation.

Finally, this recipe is incredibly cost-effective, using seasonal ingredients that won’t break the bank. It makes healthful, homemade dishes accessible to all, without sacrificing taste or satisfaction. The simplicity and versatility of the dish mean you’re sure to get many requests for the recipe from delighted diners.

Historical Background and Cultural Significance


The root of this flavorful coleslaw can be traced back to Mexico’s rich culinary traditions, where corn holds a pivotal role. Traditionally, corn, or “maíz,” has been a staple in Mexican cuisine for centuries, revered as a vital ingredient in daily meals. This version marries the popular Mexican street food, “elote,” with the classic coleslaw, integrating cultural culinary elements into one dish.

Throughout history, corn was seen as a divine gift by ancient Mesoamericans, and it continues to be hailed as a symbol of sustenance and prosperity. This cultural importance extends to today, where elote can be found in many Mexican street markets and is celebrated for its simplicity and flavor. It’s this cultural authenticity that enriches the Mexican-Style Corn Coleslaw with a sense of heritage and tradition.

Over time, as culinary traditions expanded beyond borders, corn-based dishes evolved to incorporate diverse ingredients. This coleslaw is one such example of cultural fusion, integrating traditional flavors with modern appeal. The addition of mayonnaise and lime juice represents a global touch, enhancing the dish’s universal palate.

Different variations of coleslaw are enjoyed in every corner of the world, from tangy and sweet in the southern United States to spicy and piquant iterations in Asia. Each variation reflects the regional palate and ingredient availability, showcasing how this dish has woven itself into global culinary frameworks while maintaining its cultural roots.

Ingredient Deep Dive


One of the stars of this coleslaw is fresh corn, a staple of Mexican cuisine known for its sweetness and versatility. Nutritionally, corn is packed with fiber and essential vitamins such as B vitamins and minerals like phosphate and magnesium. When selecting corn, opt for bright green husks and slightly sticky silks to ensure peak freshness. Fresh, cooked corn should be refrigerated if pre-cooked or used immediately after cooking to preserve flavor and texture. Canned corn can be a handy substitute when fresh isn’t available, though the flavor profile will differ slightly.

Another key ingredient, the cabbage, adds texture and nutrition to the coleslaw. Known for its low-calorie content yet high vitamin K, C, and B6, cabbage enhances the health benefits of this dish. You can keep cabbage crisp in the refrigerator by wrapping it tightly in plastic. Should you wish, you might swap for kale or savoy cabbage for a different texture and flavor balance. Remember to finely shred or chop the cabbage to allow for even distribution of flavors in the mix.

Common Mistakes to Avoid

  • Overcooking the corn can lead to a mushy texture. Aim for a slight crunch for the best results.
  • Using too much dressing might overpower the ingredients. Start with less, adding more to taste.
  • Not allowing the coleslaw to sit before serving can result in flavors not melding as intended. Let it rest.
  • Failing to season the mixture properly can cause a bland taste; don’t skip the salt and lime.
  • Ignoring ingredient freshness will profoundly impact flavor, particularly the corn and cabbage.
  • Improper slicing of vegetables can affect texture. Ensure veggies are cut uniformly.
  • Over mixing may bruise the vegetables, leading to a less desirable texture.
  • Skipping the lime juice will leave the dish tasting flat and missing its characteristic tanginess.

Essential Techniques


Roasting corn brings out a natural sweetness and imparts a subtle smokiness, an essential step in developing deep flavors. To master this, grill corn over high heat until golden brown but retain some bite. Avoid over-charring to prevent bitterness and keep the kernels tender yet crispy.

For shredding cabbage, ensure a consistent slice for even texture throughout the dish. Use a mandoline or very sharp knife to create thin slices. This ensures the cabbage absorbs dressing properly and creates the desired crunch.

Pro Tips for Perfect Mexican-Style Corn Coleslaw


For the most vibrant flavors, use freshly squeezed lime juice rather than bottled; its zest and aroma are unmatched. Include a pinch of lime zest for an extra citrus kick.

Experiment with different types of corn, such as white or multicolored. While each variety will add a unique taste, all enhance the visual appeal of the salad.

Consider roasting or grilling corn on the cob, then slicing kernels off instead of using pre-cooked kernels for added depth in flavor.

Don’t skimp on cilantro. It brings a fresh, herby note that balances the creaminess of the dressing.

To add a touch of sweetness, a dash of honey in the dressing can counterbalance the tartness of the lime juice and spiciness of jalapeños.

Prior to serving, allow the coleslaw to chill. This resting period enhances the melding of flavors and achieves the best texture.

Variations and Adaptations


Regional variations can include adding black beans for a more robust and protein-rich salad, reminiscent of certain Mexican salads. For a seasonal adaptation, substitute canned or frozen corn during off-season months for freshness year-round.

For those with dietary restrictions, swap standard mayo for vegan or egg-free versions to satisfy dietary needs without compromising on creaminess. Increase the lime and jalapeños for a spicier flavor profile or dial back pepper for a milder taste.

Opt for purple or red cabbage to add a slight sweetness and richer pigmentation to the coleslaw, enhancing both flavor and visual appeal. For a unique presentation, serve the coleslaw inside roasted pepper halves or alongside grilled vegetables to highlight its adaptability.

Serving and Presentation Guide


For an appealing presentation, serve the coleslaw in a vibrant ceramic or wooden bowl, highlighting its colorful payoff. Garnish with sprigs of cilantro and slices of lime to enhance visual aesthetics.

Pair with traditional Mexican dishes like tacos or enchiladas for a complementary blend of textures or alongside barbecued meats for a complete meal.

Ensure it is served chilled, crucial for maintaining its refreshing appeal and crisp texture. A light garnish of queso fresco can add a pleasing finishing touch, adding creaminess without overpowering the dish.

Wine and Beverage Pairing


For wine pairings, a Sauvignon Blanc or light Pinot Gris with their citrus notes will complement the zest in the salad. Non-alcoholic options like sparkling water with lime or a lightly sweetened iced tea enhance the flavors without clouding them.

If considering coffee or tea pairings, go for a floral or citrus-driven white tea or chilled green tea that correlates with the salad’s freshness. Always serve chilled beverages alongside the coleslaw to enhance the dish’s refreshing qualities.

Storage and Shelf Life


Store any leftover coleslaw in an airtight container to prevent unwanted odors and tastes mingling. Refrigerate promptly to maintain fresh, crisp flavors.

To identify spoilage, look for soggy or discolored vegetables, unusual odors, or an overly tangy dressing. For reheating, which is not typically recommended, refresh with additional lime and a sprinkle of fresh cabbage for revived crunch if necessary.

While not ideal, freezing the dish can be done; however, expect a change in texture upon thawing, making it less crisp.

Make Ahead Strategies


Prepare the dressing up to two days ahead, storing it separately. This method allows you to throw the coleslaw together at a moment’s notice while ensuring peak freshness of the vegetables.

Mix the salad ingredients in advance and add the dressing only just before serving to prevent sogginess. During assembly, maintain ingredient room temperature with pre-chopped ingredients chilled separately for best results.

Scaling Instructions


To halve this recipe, reduce each ingredient proportionally while maintaining flavor integrity.

If doubling or tripling, use a larger mixing bowl to allow even mixing. Consider adjusting seasoning to taste and verify that cooking times for corn remain consistent.

For storage, use multiple containers to avoid compressing the coleslaw, ensuring its crispness and freshness.

Nutritional Deep Dive


This coleslaw’s macro breakdowns are as follows: low in fats due to the minimal mayo proportion, with ample dietary fiber and vitamins from vegetables. Enjoy multiple health benefits without the guilt, as it enhances any meal nutritionally.

Explore micronutrients like calcium in cabbage and corn, delivering a healthy dose of antioxidants and vitamin C. Keep portions in check to allow its health-enhancing qualities to shine through.

Dietary Adaptations


For a gluten-free adaptation, verify that any mayo additions have no gluten contamination.

Dairy-free enthusiasts can enjoy the recipe as-is, omitting any queso toppings. Opt for vegan mayonnaise for those following plant-based diets, maintaining the creamy texture with ethical considerations in mind.

Those on a low-carb regimen, including keto fans, can adjust the dressing by using olive oil and lime juice instead of mayo. Experiment with various dietary tweaks to align with personal health goals seamlessly.

Troubleshooting Guide


If the texture is mushy, check the overcooking steps or avoid excess moisture from wet salad ingredients.

Should flavor fall flat, re-evaluate the amount of lime juice or seasoning ratio for balance.

For temperature-related issues, ensure ingredients aren’t kept too long before serving or away from cooling ingredients. Not enough time to chill? Consider speeding tactics like ice baths to achieve optimal freshness.

Recipe Success Stories


From tastes shared online to family gatherings, positive feedback continues to flourish. With variations allowing personal touches, this recipe receives adaptations to suit every palate, bearing witness to the shared love for Mexican-inspired dishes.

Readers boast about unique add-ins like roasted pepitas or avocado, personalizing each version. Even amateur cooks find success, thanks to step-by-step guides shared in culinary communities.

Frequently Asked Questions

Can I prepare the coleslaw ahead of time?

Yes, you can prepare the dressing and chop vegetables in advance but combine them just before serving to preserve the salad’s crispness.

Is there a substitute for cilantro?

Parsley can be used for those who are not fond of cilantro. It provides a fresh taste without overpowering the dish.

How do I tame the heat from jalapeños?

To reduce heat, remove the seeds and membranes from the jalapeños before chopping or use a milder chili pepper variety.

Can I use canned corn instead?

Yes, while fresh corn is preferred for flavor and texture, canned corn is a good substitute when fresh is not available.

How long will the coleslaw stay fresh?

This coleslaw will remain fresh for up to 3 days when stored properly in an airtight container in the refrigerator.

What can I add for extra protein?

Add black beans or grilled chicken for a protein boost, turning it into a complete meal.

Is there a way to make it vegan?

Absolutely. Use a vegan mayo or a blend of olive oil and lime juice for the dressing without sacrificing flavor.

What kind of cabbage works best?

Green and red cabbage both work well, offering a crisp texture and mild flavor that complements the other ingredients.

Can I freeze the coleslaw?

Freezing is not recommended as it can affect texture; fresh ingredients are best consumed without freezing.

How can I make it more tangy?

Increasing lime juice or adding a splash of vinegar will heighten the tanginess effectively.

Additional Resources


For more adventurous flavors, check out our related recipes like Grilled Street Corn Salad and Lime-Cilantro Dressing. These complement the Mexican-Style Corn Coleslaw perfectly, adding variety to your dishes.

Explore technique guides on perfecting grilling corn or the art of dressing vegetables for insight beyond basic preparation. For aficionados, ingredient maps provide detailed understanding on corn and cabbage varieties.

Join the Conversation


We invite you to recreate this recipe and share your takes using #MexicanCornColeslaw on social media. Try snapping photos and tag us for a chance to be featured in our gallery.

Share your variations, offer feedback, and explore new possibilities in flavor. Read community reviews and engage in dialogues about creativity in the kitchen. Embrace sharing as an integral aspect of our culinary family.

The Recipe

Mexican-Style Corn Coleslaw

Serves: 6

Prep Time: 20 mins

Cook Time: 10 mins

Total Time: 30 mins

Kitchen Equipment Needed

  • Sharp knife
  • Cutting board
  • Mixing bowl
  • Grill or skillet (optional for roasting corn)

Ingredients

  • 3 cups shredded cabbage
  • 2 cups fresh corn kernels (or canned)
  • 1/2 cup finely chopped cilantro
  • 1/2 cup mayonnaise
  • 2 tablespoons lime juice
  • 1 medium jalapeño, diced
  • Salt and pepper to taste

Directions

  1. If roasting corn, grill over high heat until slightly charred, then cut kernels from the cob.
  2. In a large mixing bowl, combine the cabbage, corn, cilantro, and jalapeño.
  3. In a separate small bowl, whisk together the mayonnaise and lime juice; season with salt and pepper.
  4. Pour dressing over the cabbage mixture, tossing to coat evenly.
  5. Chill in the refrigerator for at least 20 minutes before serving.
  6. Taste and adjust seasoning if necessary. Serve cold.

Recipe Notes

  • For added flavor, try adding diced avocado or roasted red peppers.
  • Use dairy-free mayo for a vegan-friendly version.

Decadent Chocolate Banana Bread Recipe: Sweet, Moist, and Easy to Make

Chocolate Banana Bread: A Decadent Delight

⚖️
Difficulty
Easy

⏲️
Prep Time
15 mins

🕒
Cook Time
60 mins

⏱️
Total Time
75 mins

🍽️
Servings
8

Indulge in the rich, mouth-watering combination of chocolate and banana with this Chocolate Banana Bread recipe, a perfect blend of sweetness and texture that satisfies any dessert craving. It’s moist, flavorful, and topped with melted chocolate chips that create a lush, decadent finish. Whether you’re a banana lover or a chocolate enthusiast, this delectable banana bread will quickly become your favorite go-to treat. The inviting aroma of freshly baked banana bread mingling with rich chocolate scents is irresistible, making this the ultimate comfort food to enjoy anytime.

Quick Recipe Highlights

  • Flavor Profile: A perfect combination of ripe bananas and rich chocolate, offering a blend of sweet, fruity, and deep cocoa flavors.
  • Texture: Incredibly moist and tender crumb with a slightly crisp exterior, enriched with melted chocolate chips.
  • Aroma: A tantalizing mix of banana and chocolate harmoniously combining into an inviting aroma.
  • Visual Appeal: A beautifully browned crust with an enticing, chocolaty interior.
  • Skill Level Needed: Ideal for beginners, as it requires simple mixing techniques and common baking procedures.
  • Special Equipment: Basic baking tools like a mixing bowl, loaf pan, and oven.

Recipe Overview

  • Difficulty Level: Classified as easy, this recipe saves you from complex techniques, relying on standard mixing and baking processes that ensure a delicious outcome.
  • Category: This versatile treat falls under dessert or snack categories, suitable for both morning and afternoon indulgences.
  • Cuisine: Although bananas are native to tropical regions, banana bread has become a staple in various cuisines, merging American dessert tradition with a global love for bananas.
  • Cost: Banana bread is economical, leveraging ripe bananas you might already have, making it a cost-effective yet luscious treat.
  • Season: Enjoyable year-round, but particularly comforting in fall and winter when its warm flavors provide welcome coziness.
  • Occasion: Perfect for any gathering, from casual family breakfasts to more formal brunches, or simply as a delightful personal treat.

Why You’ll Love This Chocolate Banana Bread Recipe


Unlock the delightful taste and texture of Chocolate Banana Bread, with its moist crumb and rich, chocolaty notes enhanced by naturally sweet, ripe bananas. Each bite tantalizes the palate with its harmonious blend of fruitiness and chocolate decadence. Beyond its irresistible taste, the recipe’s simplicity offers convenience—whip it up in mere minutes and enjoy the aroma as it bakes to perfection. Its nutritious balance, blending essential vitamins from bananas with satiating cocoa elements, can transform this into a guilt-free indulgence. This treat is not just a personal delight but a social magnet, impressing guests at brunches or tea times with its inviting aroma and impeccable flavor. Experience cost-effectiveness and easy accessibility—utilizing pantry staples, creating an everyday luxury without extensive trips to specialty stores.

Historical Background and Cultural Significance


The evolution of banana bread dates back to the early 20th century when baking powder gained popularity as a leavening agent. Its origins are rooted in the United States, where home bakers looked for creative ways to use overripe bananas rather than discarding them. This treat has since grown into a cultural phenomenon, with countless variations reflecting regional and familial traditions. Originally a means of reducing waste, banana bread has been elevated to a beloved dessert that showcases cultural ingenuity. It embodies a meaningful shift toward sustainability and resourcefulness—a testament to adaptive culinary creativity across generations.

Ingredient Deep Dive


Bananas: Rich in potassium and vitamins, bananas add natural sweetness and moistness. Select fully ripe bananas with brown spots for the best flavor elevation while enhancing the structural integrity of the bread. Store at room temperature until ready for use or freeze for later. Should bananas be unavailable, pureed apples or pumpkins serve as potential substitutes.

Common Mistakes to Avoid

  • Overmixing the Batter: Stir gently, as overmixing leads to dense bread. Mix only until ingredients are combined.
  • Using Unripe Bananas: The sweetness of ripe bananas is key; use those that are soft and browned for premium flavor.
  • Incorrect Baking Temperature: Always preheat your oven to ensure even baking, resulting in a perfect rise and texture.
  • Skipping Pan Preparation: Ensure the loaf pan is well-greased or lined to prevent sticking.
  • Ignoring Cooling Time: Allow the bread to cool before slicing to maintain structure and flavor.
  • Refrigerating Banana Bread: Store at room temperature to keep the crumb tender and the taste fresh.
  • Forgetting to Measure Ingredients: Accurate measurements can’t be ignored as they impact the moisture level and sweetness.
  • Substituting Ingredients Without Adjustments: Be cautious if altering the recipe; consider texture and flavor impacts.

Essential Techniques


Correct Banana Mashing: Thoroughly mash bananas to break down all chunks, ensuring a smooth batter integration that prevents inconsistency in the loaf.

Pro Tips for Perfect Chocolate Banana Bread


– Toasted Nuts: Incorporate lightly toasted walnuts or pecans for a delightful crunch that complements the soft crumb.
– Chocolate Chip Layering: Sprinkle chocolate chips on top just before baking for a rich, gooey top layer.
– Banana Bundles: Pre-measure mashed bananas and freeze them in ready-to-use portions for easy access.
– Spice it Up: Add warm spices like cinnamon or nutmeg for a comforting aroma.
– Nutty Swirls: Consider swirling peanut butter into the batter for an additional flavor layer.
– Experiment with Sugars: Swap white sugar with brown sugar to introduce a caramel note to the bread.

Variations and Adaptations


Incorporating unique ingredients such as coconut flakes or dried fruits can enhance and personalize your Chocolate Banana Bread, maintaining its adaptability across various cuisines, dietary needs, and flavor preferences. Experiment with seasonal fruits or chocolate variants, such as white or dark chocolate, to bring new dimensions to the classic recipe. For a gluten-free version, use almond flour or gluten-free all-purpose flour.

Serving and Presentation Guide


Slice thickly and present on a wooden board for a rustic charm, serving with a dollop of cream or a scoop of vanilla ice cream for an elegant touch. Create a cozy atmosphere by accompanying this serving suggestion with a steaming cup of coffee, enhancing the bread’s naturally rich flavors.

Wine and Beverage Pairing


Pair this Chocolate Banana Bread with a robust red wine that complements its chocolatey undertones. For a non-alcoholic counterpart, a strong brew of espresso or a sweet, creamy chai tea latte accentuates the dessert’s warm and rich flavors without overpowering its subtleties.

Storage and Shelf Life


Store baked banana bread at room temperature by wrapping it in airtight plastic wrap or foil for 2-3 days to maintain freshness and moisture. To extend shelf life, freeze individual slices and thaw at room temperature before serving. Remain observant for spoilage indicators like mold or unpleasant odors.

Make Ahead Strategies


Prepare the banana bread batter in advance, refrigerate for up to 24 hours before baking, allowing the flavors to meld and intensify. Assemble wet and dry ingredients separately and combine just before baking, preserving freshness and flavor integrity.

Scaling Instructions


When scaling up this recipe, maintain proper proportions by multiplying the ingredient list accordingly, ensuring consistent results. Monitor baking time closely for larger or multiple batches, adjusting as necessary but keeping within standard temperature guidelines to guarantee even cooking.

Nutritional Deep Dive


This recipe yields a nutritious blend with balanced macros—carbohydrates from fruit sugars, healthy fats from optional nuts, and fibers promoting digestive health. Consider portion adjustments to manage calorie intake as part of a balanced diet.

Dietary Adaptations


For a vegan-friendly version, replace eggs with flaxseed meal and opt for plant-based milk alternatives. Use sugar substitutes and almond flour for a keto variation, ensuring the bread responds well to these ingredient changes.

Troubleshooting Guide


– Dense Texture: Confirm baking soda freshness and ensure minimal mixing.
– Uneven Baking: Rotate the loaf midway through to ensure even heat distribution.
– Dry Outcome: Recheck ingredient ratios or baking time and introduce moisture-retaining elements like applesauce if necessary.

Recipe Success Stories


Engage with our community of bakers who have experimented with different nuts and spices, sharing vibrant variations and personal touches that redefine the classic recipe. Learn from their insights and consider sharing your creative twists.

Frequently Asked Questions

How do I know when the banana bread is done baking?
Insert a toothpick in the center—if it comes out clean or with a few crumbs, it’s ready.

Can I use frozen bananas?
Yes, ensure they’re thawed and excess moisture is drained before use to maintain batter consistency.

Why is my bread gummy?
This may result from excess banana or overmixing—measure ingredients precisely and mix minimally.

Is it necessary to use chocolate chips?
Chocolate chips are optional but add a rich layer. Substitute with nuts or dried fruit for variation.

How can I avoid sticking?
Line the pan with parchment paper or ensure even greasing—this prevents adherence.

Can I make muffins instead of a loaf?
Absolutely—adjust the baking time accordingly, as muffins will bake faster.

Does the type of chocolate matter?
Use your preferred chocolate, but remember that different cacao contents impact sweetness and texture.

Should I mash bananas manually?
While manual mashing is adequate, a mixer yields a smoother puree if preferred.

What other mix-ins work well?
Incorporate nuts, dried fruits, or coconut as delightful additions enhancing flavor and texture.

What’s the best way to soften butter quickly?
Room temperature softening is ideal, but grating cold butter accelerates the process without melting.

Additional Resources


Explore our expansive collection of related recipes, technique guides, and thoughtful variations that cater to all taste buds and dietary preferences. Our rich archives feature complete guides on ingredient usage, offering insights into their backgrounds, best uses, and substitutions.

Join the Conversation


Connect with the larger community of banana bread aficionados by sharing your experiences, tips, and photographs on social media. Encourage others by writing a review, showcasing your unique adaptations, and learning from the community’s shared feedback.

The Recipe

Chocolate Banana Bread

Serves: 8

Prep Time: 15 mins

Cook Time: 60 mins

Total Time: 75 mins

Kitchen Equipment Needed

  • Mixing bowl
  • Loaf pan
  • Spoon or mixer
  • Whisk
  • Oven

Ingredients

  • 3 ripe bananas, mashed
  • 1/2 cup melted butter
  • 1 tsp baking soda
  • Pinch of salt
  • 3/4 cup sugar
  • 1 large egg, beaten
  • 1 tsp vanilla extract
  • 1 1/2 cups all-purpose flour
  • 1/2 cup chocolate chips

Directions

  1. Preheat your oven to 350°F (175°C), and grease a 4×8-inch loaf pan.
  2. In a mixing bowl, mash ripe bananas with a fork until smooth.
  3. Stir melted butter into the mashed bananas.
  4. Add baking soda and salt to the mixture. Stir well.
  5. Mix in sugar, beaten egg, and vanilla extract.
  6. Add flour gradually and mix until fully incorporated. Avoid overmixing.
  7. Fold in chocolate chips, and pour the batter into the prepared loaf pan.
  8. Bake for 60 minutes or until a toothpick inserted into the center comes out clean.
  9. Allow to cool in the pan for 10 minutes, then turn out onto a wire rack to cool completely.

Recipe Notes

  • Store banana bread at room temperature for up to three days or freeze for later.
  • Consider adding chopped nuts for a crunchy texture.
  • For sweeter bread, increase chocolate chips to 3/4 cup.

Delicious Chicken Broccoli Rice Casserole Recipe for Cozy Family Dinners

Chicken Broccoli Rice Casserole: A Comforting Delight

⚖️
Difficulty
Easy

⏲️
Prep Time
15 mins

🕒
Cook Time
35 mins

⏱️
Total Time
50 mins

🍽️
Servings
6

There’s nothing quite like the warmth of a homemade Chicken Broccoli Rice Casserole. With its creamy texture and comforting flavors, this dish is sure to become a family favorite. Perfect for busy weeknights or satisfying a craving for something hearty, this casserole combines tender chicken, fresh broccoli, and fluffy rice, all enveloped in a rich, cheesy sauce. Its delightful blend of flavors and ease of preparation make it an appealing choice any time of the year.

Rich in nutrients and flavor, this Chicken Broccoli Rice Casserole presents a medley of textures and tastes. The savory sauce brings together the freshness of broccoli and the fulfilling nature of chicken and rice. Its golden-brown topping adds a crunchy contrast that balances its creamy base. This dish does more than just satiate hunger; it evokes nostalgia and warmth in every bite.

Quick Recipe Highlights

  • Flavor Profile: A harmonious blend of creamy cheese, savory chicken, and fresh broccoli with a hint of garlic and onion.
  • Texture: Creamy sauce envelops tender chicken, with slightly crunchy broccoli and soft, fluffy rice completing the mouthfeel.
  • Aroma: A comforting aroma of cheese and baked chicken wafts beautifully from the oven.
  • Visual Appeal: The cheesy top offers a golden hue, contrasting with the vibrant green of broccoli peeking through.
  • Skill Level Needed: Simple techniques suitable for beginners; minimal chopping and one-bowl mixing are the main tasks.
  • Special Equipment: A 9×13 inch baking dish and a medium saucepan for an efficient, one-pan meal preparation.

Recipe Overview

  • Difficulty Level: Rated easy, as this recipe requires no special skills, making it accessible to cooks of all levels.
  • Category: A hearty main dish that serves as an entire meal, suited for both lunch and dinner.
  • Cuisine: An American classic, drawing inspiration from comforting casseroles that trace back to 20th-century home cooking traditions.
  • Cost: Budget-friendly, utilizing simple, easily-sourced ingredients that are staples in most kitchens.
  • Season: Suitable for all seasons, this dish offers warmth in winter and uses fresh ingredients available year-round.
  • Occasion: Perfect for family dinners, potlucks, or casual gatherings. Its straightforward preparation makes it ideal for entertaining.

Why You’ll Love This Recipe


The Chicken Broccoli Rice Casserole is a symphony of tastes and textures, combining creamy, cheesy goodness with tender chicken and bright broccoli. It’s the ultimate comfort food, offering a satisfying, warm hug in every bite. Made with simple ingredients, it can transform ordinary pantry staples into a delightful meal, making it an invaluable addition to your recipe repertoire.

Aside from its flavor, this dish shines for its convenience. It’s a one-dish wonder that saves you time both in preparation and cleanup. The ingredients are straightforward, and the majority of the cooking happens unattended in the oven, freeing you to unwind post-prep.

Nutritionally, the Chicken Broccoli Rice Casserole finds success with its balanced elements. Chicken provides a good source of protein, broccoli offers fiber and vitamins, and rice delivers necessary carbohydrates, making it hearty and nourishing.

When entertaining, this casserole serves as a crowd-pleaser without the necessity of complex preparation. Its straightforward method means you can focus on enjoying time with guests rather than worrying about tricky techniques or extended kitchen time.

Cost-effective and accessible, the components of this recipe are affordable and available. With minimal investment yielding maximum satisfaction, this casserole is an excellent choice for feeding a group with ease.

Historical Background and Cultural Significance


The origins of casseroles like this one are rooted in traditional American home cooking, where hearty and comforting dishes became the cornerstone of family meals. During the mid-20th century, the humble casserole received widespread attention for its ability to feed a crowd economically, making it a staple in suburban homes.

This dish follows the tradition of combining meat, vegetables, and a starchy binder into a single, harmonious meal. Casseroles reflect the adaptability and resourcefulness of home cooks who sought to create variety in meals while adhering to budget constraints.

The Chicken Broccoli Rice Casserole, specifically, found its place in American culture as an extension of this tradition, incorporating popular modern ingredients like broccoli and chicken to suit contemporary palates.

Throughout its evolution, this casserole has seen regional adaptations, incorporating local ingredients or spices to give it a bespoke flavor for each home. Its adaptability showcases the essence of communal dining and familial sharing in American culinary customs.

Ingredient Deep Dive


Chicken, the star of this dish, brings versatility and nutrition to the table. Used historically across cultures for its rich protein content and mild flavor, chicken continues to be a preferred protein for many.

Paired with broccoli, this superfood adds a nutritious punch. Celebrated for its dietary fiber, vitamin C, and potential health benefits, broccoli not only complements the dish but also elevates its nutritional profile.

Rice, the backbone of many global cuisines, offers structure and fullness to the casserole. Its ability to absorb flavors makes it a versatile ingredient, harmonizing with the recipe’s other components.

For the sauce, cheese unifies the ingredients, creating a creamy, luscious texture. Incorporating it brings a comforting, rich quality to the dish, enhancing its appeal without overwhelming the natural flavors of the core ingredients.

Common Mistakes to Avoid

  • Not cooking the rice fully before assembling can result in a undercooked texture. Ensure rice is just tender before baking.
  • Overcooking chicken beforehand might lead to dryness. Opt for precooked but still moist chicken pieces.
  • Failing to blanch broccoli can cause it to remain too firm. A quick blanch will tenderize the vegetable without losing its bright color.
  • Adding too much cheese can overpower the dish. Stick to the recommended amount to balance flavors correctly.
  • Forgetting to season the mixture leaves it bland. Proper seasoning ensures the flavor is consistent throughout the casserole.
  • Using a dish that’s too small can lead to spillage. Ensure your casserole dish has enough room for expansion while baking.
  • Skipping a resting period post-bake results in a runny casserole. Allowing it to sit for a few minutes helps the components set.
  • Serving immediately after removal from the oven might burn the mouth. Allow the casserole to cool slightly for better enjoyment.

Essential Techniques


Mastering the art of making a Chicken Broccoli Rice Casserole ensures a perfectly cooked dish every time. Start by knowing how to correctly prepare each component. Precooking the rice to just tender, blanching the broccoli to maintain its bright hue, and ensuring the chicken remains moist are crucial steps.

Balancing the sauce is another important technique. Achieving the right thickness means letting the sauce simmer until it coats the back of a spoon without being too heavy. This prevents a watery or overly thick casserole.

Layering is key to successful assembly. Ensure even distribution of ingredients to provide a balanced bite every time. Lastly, watch for visual cues, such as a golden crust, to signal completion.

A successful Chicken Broccoli Rice Casserole depends on understanding and applying these techniques, ensuring a delicious dish every time.

Pro Tips for Perfect Chicken Broccoli Rice Casserole


For added depth, consider incorporating a sprinkle of toasted breadcrumbs over the top before baking. This creates a delightful crunch, contrasting the creamy filling. A touch of nutmeg or smoked paprika adds an unexpected layer of warmth and flavor.

Use a flavorful cheese blend to elevate the dish. Cheddar combined with Gruyere or smoked mozzarella can result in a sophisticated taste profile. For a healthier twist, substitute half of the rice with quinoa for added protein and texture variation.

Always let the casserole rest once it’s out of the oven, allowing flavors to meld and firm up for neat service. If creaminess is desired, add a dollop of sour cream to the mix before baking for a richer texture.

Variations and Adaptations


This casserole’s adaptability is one of its greatest features. For regional variations, consider adding a southwest twist with cumin and chili powder and topping with cilantro and lime. For a seasonal adaptation, incorporate roasted squash or sweet potatoes.

Dietary modifications are easy; swap regular rice for cauliflower rice for a low-carb option, or use dairy-free cheese and milk substitutes for a lactose-free version. Vegetarians can replace chicken with chickpeas or cubed tofu.

Explore flavor variations by experimenting with different cheese blends, and for texture modifications, try adding nuts or seeds. Alter presentation by using individual ramekins for a more formal or upscale dining experience.

Serving and Presentation Guide


When serving Chicken Broccoli Rice Casserole, consider garnishing with freshly chopped parsley or chives for added color and a refreshing twist. Plating in a deep, wide-brimmed dish can help keep the ingredients neatly contained, while allowing the golden crust to shine.

Traditionally served with a side salad or crusty bread, modern accompaniments might include a zesty coleslaw or grilled asparagus for balance. Ensure the dish is served warm, allowing flavors to meld and offer comfort. Control portions by using a sharp, flat spatula to neatly lift servings without breaking.

Wine and Beverage Pairing


Pair this rich casserole with a crisp, refreshing white wine, such as Sauvignon Blanc, which complements the creamy sauce and chicken without overpowering its subtleties. Non-alcoholic alternatives include a sparkling elderflower or apple drink for a fresh contrast.

For colder days, consider serving with hot herbal teas like chamomile or mint to enhance the casserole’s comforting quality. When serving, suggest keeping wines chilled and teas warm to maintain the best complement to the dish’s temperature.

Storage and Shelf Life


To store leftovers, transfer the casserole to an airtight container and refrigerate for up to three days. Ensure the casserole is completely cooled before sealing to maintain moisture and flavor.

For freezing, slice the casserole into portions and wrap in foil or airtight bags, then freeze for up to a month. Thaw in the fridge before reheating to maintain texture. Reheat in the oven at a low temperature to gradually warm through, or microwave on medium setting to prevent drying.

Make Ahead Strategies


Prepare components like rice, chicken, and broccoli ahead of time, storing them in the fridge until assembly. The sauce can be prepared in advance and stored separately to maintain freshness.

Assemble the casserole without baking up to a day in advance, ensuring it is wrapped tightly before refrigerating. Simply bake fresh on the day of serving, slightly increasing cooking time to account for its chilly start. Add a fresh garnish post-baking for renewed vibrancy.

Scaling Instructions


Halving the recipe is straightforward and requires minimal adjustments in cooking times, while doubling or tripling is equally feasible. Ensure enough oven space and adjust the baking time slightly for larger batches, checking readiness visually and with a fork.

Consider equipment adjustments, such as using larger baking dishes or multiple smaller ones, to accommodate the increased volume. Be mindful of the increased quantity when storing leftovers, using multiple containers if necessary.

Nutritional Deep Dive


This casserole presents a balanced macro profile, offering protein from chicken, carbohydrates from rice, and fats from cheese. Micronutrients from broccoli include vitamins C and K, which support immune health and bone strength.

The casserole offers a combination that supports dietary needs and health goals. Portion control supports weight management while maintaining satiety. Consider pairing with a light side salad for added fiber and nutrient variety.

Dietary Adaptations


For gluten-free needs, ensure all sauce components are free from gluten, checking labels carefully or using alternatives like cornstarch for thickening. Dairy-free cheese and milk alternatives provide easy adaptation options for lactose-intolerant individuals.

A completely vegan version can be achieved by substituting chicken with plant-based proteins and ensuring cheese and milk used are non-dairy. Low-carb enthusiasts can use cauliflower rice instead of traditional rice to significantly reduce carbohydrate content.

Troubleshooting Guide


Texture issues such as runny sauce can be resolved by ensuring proper thickening of the sauce before baking. If rice becomes mushy, reduce pre-cooking time to prevent over-softening after baking.

Prevent flavor imbalances by adjusting seasoning through taste tests during preparation. Address temperature problems by allowing full cooking time and checking internal heat with a thermometer.

Equipment challenges can be tackled by maintaining proper sizing of baking dishes to accommodate the full mixture without overcrowding. If substitutions alter the taste, gradually introduce and adjust alternatives to maintain flavor integrity.

Recipe Success Stories


Join our community, where readers share their successes and variations of this beloved casserole. Some have added exotic spices or swapped protein sources, showcasing endless creativity. They’ve shared images of richly colored servings that evoke appetite and delight.

Experimentation has brought unexpected praises, with many appreciating the nutritional balance and affordability of the recipe. Your stories and critiques continue to inspire adaptations and improvements, proving cooking is a shared journey.

Frequently Asked Questions

Q: Can I use frozen broccoli instead of fresh?

A: Yes, you can use frozen broccoli. Just make sure to thaw and drain it well before adding it to the casserole to prevent excess moisture which can make the dish runny.

Q: How can I make the sauce thicker?

A: If you like a thicker sauce, you can whisk in a little more flour or use cornstarch as a thickening agent when preparing the sauce. Ensure it’s well incorporated to prevent clumps.

Q: Can I prepare this dish in advance?

A: Absolutely! You can assemble the casserole and store it in the fridge for up to a day before baking. Add a few extra minutes to the cooking time if you bake it straight from the fridge.

Q: Is it possible to make this casserole spicy?

A: For a spicy kick, add diced jalapeños or a pinch of red chili flakes to the sauce. Adjust according to your spice preference for desired heat.

Additional Resources


Explore our related recipes, where you’ll find dishes complementing the Chicken Broccoli Rice Casserole. Our guides offer tips for ingredient selection, and discover equipment recommendations to optimize preparation. Seasonal variation ideas ensure your meals remain as fresh and delightful as possible across changing climates.

Join the Conversation


Engage with us on social media by sharing your renditions of this classic casserole. Utilize our photography tips to capture the deliciousness of your creations. We value your recipe reviews and encourage your interaction with our community to inspire all levels of cooks to share their passion. Share your unique twists on this recipe and help inspire new favorites!

The Recipe

Chicken Broccoli Rice Casserole

Serves: 6

Prep Time: 15 mins

Cook Time: 35 mins

Total Time: 50 mins

Kitchen Equipment Needed

  • 9×13 inch baking dish
  • Medium saucepan
  • Mixing bowls
  • Slotted spoon
  • Whisk
  • Measuring cups and spoons

Ingredients

  • 3 cups cooked chicken, cubed
  • 2 cups broccoli florets
  • 2 cups cooked rice
  • 1 cup shredded cheddar cheese
  • 1 can (10.5 oz) cream of chicken soup
  • 1 cup milk
  • 1/2 cup onion, finely chopped
  • 2 cloves garlic, minced
  • 1 tablespoon olive oil
  • Salt and pepper to taste

Directions

  1. Preheat your oven to 350°F (175°C) and lightly grease the baking dish.
  2. In a large bowl, combine cooked chicken, rice, and broccoli.
  3. In a medium saucepan over medium heat, sauté onion and garlic in olive oil until soft and fragrant.
  4. Add cream of chicken soup and milk to the pan, whisking until smooth and heated through.
  5. Stir in cheese, allowing it to melt completely. Season the sauce with salt and pepper.
  6. Pour the creamy sauce over the chicken, rice, and broccoli mixture, stirring until evenly coated.
  7. Transfer the mixture to the prepared baking dish, spreading it evenly. Top with additional cheese if desired.
  8. Bake for 35 minutes or until the top is golden and bubbling. Let it rest for a few minutes before serving.

Recipe Notes

  • Feel free to use other vegetables such as peas or bell peppers for a different flavor.
  • For a spicier version, add a dash of hot sauce or cayenne pepper to the sauce.
  • Ensure the casserole cools slightly before cutting to retain shape when serving.

Delicious Seared Tuna Salad with Radish and Zesty Citrus Vinaigrette

Seared Tuna Salad with Radish, Finger Lime, and Citrus Vinaigrette: A Refreshing Meal

⚖️
Difficulty
Medium

⏲️
Prep Time
20 mins

🕒
Cook Time
10 mins

⏱️
Total Time
30 mins

🍽️
Servings
2

Embrace a burst of flavors with our Seared Tuna Salad, featuring crisp radishes, tangy finger limes, and a zesty citrus vinaigrette. This balanced, healthy meal combines succulent seared tuna with refreshing salad greens, creating a perfect partnership of texture and taste. Whether you’re planning a weeknight dinner or a weekend lunch, this recipe brings a touch of gourmet to your table without demanding rare culinary skills.

The Seared Tuna Salad is not only a feast for the senses but also a fantastic way to incorporate a protein-rich dish into your dining repertoire. The radishes add a satisfying crunch, while the finger lime pearls provide bursts of citrusy delight, elevating the seared tuna to a whole new level. Every bite is an explosion of fresh and vibrant flavors, reminding you just how simple yet rewarding cooking at home can be.

Quick Recipe Highlights

  • Flavor Profile: A harmonious blend of umami-rich tuna with a vibrant mix of citrus and peppery greens. Each mouthful offers a perfect balance between savory, tart, and refreshing notes.
  • Texture: A delightful contrast between the tender, melt-in-your-mouth tuna, the crispness of radishes, and the unique caviar-like texture of finger lime.
  • Aroma: Inviting scents of fresh lime and aromatic greens with a hint of the ocean from perfectly seared tuna.
  • Visual Appeal: A colorful presentation that delights the eyes with its vibrant green, red, and delicate pink hues.
  • Skill Level Needed: Moderate expertise in searing and preparing a homemade vinaigrette is needed, making it an enjoyable challenge for burgeoning home chefs.
  • Special Equipment: A well-seasoned cast iron skillet, and a sharp knife for precise vegetable slicing and a perfect sear on the tuna.

Recipe Overview

  • Difficulty Level: This dish strikes a balance between simplicity and complexity, making it accessible for intermediate cooks who are comfortable with quick, high-heat cooking methods.
  • Category: Perfect as a light entrée or a wholesome lunch option, balancing luxury with familiarity.
  • Cuisine: Rooted in modern fusion, this dish draws inspiration from both Asian and Mediterranean influences, offering a unique, globally inspired taste.
  • Cost: Moderate, with tuna being the main investment. Fresh produce and a few pantry staples complete the ingredient list without breaking the bank.
  • Season: Best enjoyed in spring and summer when fresh produce like radishes and limes are at their peak, providing the freshest flavors.
  • Occasion: Ideal for dinner parties or date nights with its sophisticated appearance and flavors, yet simple enough for an elevated weeknight meal.

Why You’ll Love This Recipe

Dive into the delightful taste and texture appeal of our Seared Tuna Salad with Radish, Finger Lime, and Citrus Vinaigrette. The expertly seared tuna brings a rich umami flavor that’s beautifully complemented by the refreshing zing of the citrus vinaigrette. The salad is more than just a meal; it’s a tapestry of flavors and textures that dance on the palate, from the tender fish to the crunchy radishes and the delightful pop of finger lime pearls. The combination ensures that each bite is a unique experience, full of life and zest.

Convenience and preparation benefits are a hallmark of this recipe. With a prep and cook time of just 30 minutes, it exemplifies efficiency without sacrificing quality. The simplicity of the ingredients speaks volumes, allowing their native flavors to shine without the need for complex preparation methods. The recipe encourages taking pride in fresh produce and high-quality seafood, making it a staple for busy individuals who prioritize healthful, delicious meals.

Nutritional advantages are abundant in this dish. Tuna is an excellent source of lean protein and omega-3 fatty acids, supporting heart health and muscle maintenance. Meanwhile, radishes add a dose of fiber and essential vitamins, and the citrus elements contribute antioxidants essential for maintaining a robust immune system. This meal is not only about treating your taste buds but also nurturing your body with nutritious ingredients.

The social and entertaining value of the Seared Tuna Salad makes it a hit at gatherings. Its impressive presentation and fresh, inviting flavors create an ideal setting for conversation and enjoyment. Whether hosting a dinner party or having a quiet meal with loved ones, the dish’s elegance and taste leave a lasting impression, making dining experiences memorable and joy-filled.

Cost-effectiveness and accessibility add another layer of appeal to this recipe. While quality tuna may be an investment, the remaining ingredients are budget-friendly and readily available at local markets. This combination ensures that you’re investing wisely in a healthful and luxurious meal, perfect for treating yourself without extravagant expense.

Historical Background and Cultural Significance

The origin story of seared tuna dishes can be traced back to Japanese cuisine, where sashimi and sushi have celebrated raw fish’s purity for centuries. This culturally significant dish represents a fusion of traditional Japanese cooking methods with Western culinary innovations, where the art of searing tuna meets a refreshing salad.

Cultural importance lies in the way the dish bridges two culinary worlds, valuing the purity of the fish while introducing a burst of global flavors. The incorporation of radish and citrus nods to Western influences, while the reverence for high-quality tuna echoes the meticulous standards of Japanese cuisine, symbolizing a harmonious blend of cultures.

The evolution of the recipe reflects the changing tastes of modern diners, favoring light, health-conscious meals. The traditional searing techniques used for the tuna denote a respect for Japanese cooking methods, while adaptations in salad ingredients and vinaigrettes show flexibility and creativity, making the dish versatile and timeless.

Regional variations exist across different cuisines, with the Mediterranean version incorporating olives and sun-dried tomatoes. Each adaptation pays homage to the original concept while showcasing regional flavors and ingredients, offering a fresh perspective on a classic idea and underscoring its adaptable nature.

Ingredient Deep Dive

Tuna, the star of this dish, holds both cultural significance and a rich history. Revered in Japanese cuisine for its delicate flavor and texture, tuna is essential in sushi and sashimi dishes and prized for its uniqueness. Nutritionally, tuna is a powerhouse of lean protein and omega-3 fatty acids, promoting heart health and muscle maintenance.

Selecting the right cut of tuna is crucial for achieving perfect sear and flavor. Opt for sashimi-grade tuna, ensuring a fresh, vibrant color and minimal odor. Storing tuna correctly involves keeping it chilled and consuming it shortly after purchase to maintain its freshness. If substituting, consider salmon or mahi-mahi for different flavors while adhering to recommended cooking times.

Radishes, often seen as humble root vegetables, bring brightness and crunch to our salad. Historically, they have been enjoyed for their peppery flavor and have roots in both European and Asian cuisines. Nutritionally, radishes provide dietary fiber and vitamin C, contributing to overall health and digestion.

When selecting radishes, look for firm, vibrant bulbs with fresh green leaves, indicating freshness. Store them in the refrigerator in a sealed container to retain moisture and crispness. If a substitute is needed, consider using jicama or sliced cucumbers to maintain the refreshing crunch in the salad.

Common Mistakes to Avoid

  • Overcooking the tuna leads to dryness and a loss of flavor. Aim for a quick sear to retain moisture and achieve a pleasing texture.
  • Using low-quality ingredients compromises the dish’s potential. Select fresh, sashimi-grade tuna and vibrant produce for the best results.
  • Neglecting to let the tuna rest before slicing leads to uneven texture and flavor distribution. Allow a brief resting period post-searing.
  • Improper slicing of tuna or radishes affects presentation and texture. Use a sharp knife and practice careful, even slices for optimal aesthetics and mouthfeel.
  • Failing to balance vinaigrette flavors results in overpowering or weak tastes. Taste and adjust the seasoning before dressing to achieve the perfect balance.
  • Ignoring presentation diminishes the dish’s visual appeal. Carefully plate with an eye for color arrangement and garnish thoughtfully.
  • Overdressing the salad can lead to sogginess. Dress lightly and serve vinaigrette on the side if needed for additional flavor.
  • Not prepping ingredients ahead of time can disrupt the cooking flow. Have all elements ready before starting to ensure a smooth cooking process.

Essential Techniques

Mastering the art of searing tuna is critical for this dish. Seared tuna achieves a perfect balance of cooked outer layer and rare center, offering richness in every bite. Ensure your pan is sufficiently hot to create a flavorful crust while maintaining a tender interior. Avoid overcooking by timing the sear accurately and observing visual cues like color and texture change.

Creating the perfect vinaigrette requires an understanding of balance between acid, oil, and seasoning. Start with fresh citrus juice for brightness and carefully emulsify the oil for smoothness. Taste frequently to ensure an ideal harmony between tartness and sweetness, adjusting ingredients through trial and error to enhance the salad’s overall flavor profile.

Pro Tips for Perfect Seared Tuna Salad

– Ensure tuna steaks are dry before searing to achieve a crisp outer layer. Pat with paper towels to remove excess moisture for the best texture.
– Season the tuna generously with salt and pepper before cooking. This enhances flavor and contributes to a savory crust when seared.
– Choose a high smoke point oil, like canola or grapeseed, for searing, to prevent burning and maintain flavor integrity.
– If finger limes are unavailable, use a blend of lime zest and juice to replicate the acidic burst.
– Directly plate just before serving so the greens stay crisp and vibrant, preserving the salad’s appealing freshness.
– For added umami, consider incorporating a touch of soy sauce or miso in the vinaigrette for depth and complexity.

Variations and Adaptations

Regional variations can introduce exciting flavor profiles to this dish. Consider a Mediterranean twist with olives, oregano, and feta cheese for a savory alternative. Each element adds cultural richness while maintaining the core principles of the original salad.

Seasonal adaptations are straightforward, allowing for ingredient swaps to suit the weather. In colder months, roasted winter vegetables make a hearty base for the seared tuna, while summer calls for fresher, crisp textures from garden-fresh produce.

Dietary modifications such as a low-carb version keep the salad vibrant. Replace certain carbohydrate-heavy components with nutrient-rich greens, and explore keto or paleo variations by adjusting the type of oil and seeds used in the dressing.

Flavor variations introduce exciting new dimensions. Experiment with Asian-inspired elements like sesame oil or ginger in the vinaigrette, enhancing the global flair.

Texture modifications can involve chopping nuts for added crunch or integrating avocado for creaminess, transforming the dish’s mouthfeel while keeping the core flavors intact.

Presentation alternatives can include serving the tuna sliced over the salad for a visual spectacle or creating bite-sized appetizers by rolling salad components in thin tuna slices, ideal for entertaining guests.

Serving and Presentation Guide

Plating techniques can elevate the dish’s appearance and experience. Arrange the tuna slices on a generous bed of greens, letting their vibrant hues capture attention. Consider a minimalist approach for an elegant look, highlighting the simplicity of each ingredient.

Garnishing ideas include sprinkling toasted sesame seeds or edible flowers for pops of color and texture. These additions can enliven the plate and offer subtle flavor enhancements.

Traditional accompaniments such as steamed rice or crusty bread can make the meal more substantial, fitting the dining occasion and personal preferences. Pairing simple sides with this flavorful salad provides balance without overshadowing the salad’s central role.

Modern serving suggestions focus on single-serving bowls or plates, allowing each diner a personalized portion. This approach encourages self-paced enjoyment and ensures that presentation remains consistent throughout the dining experience.

Temperature considerations are essential, particularly when serving fish. Ensure the salad is immediately served post-preparation to maintain ideal temperature and taste.

Portion control tips involve dividing the tuna into equal servings before slicing, ensuring each plate receives a consistent portion of protein and greens. This thoughtful approach contributes to balanced nutrition and presentation.

Wine and Beverage Pairing

For an exquisite dining experience, pair with a crisp Sauvignon Blanc or Pinot Gris, offering citrus notes that marry seamlessly with the salad’s flavors. These wines complement the vinaigrette’s tang while highlighting the tuna’s richness, offering balance to the meal.

Non-alcoholic alternatives are diverse, with sparkling water infused with fresh lime or a light herbal iced tea providing refreshing contrast and flavor mirroring the citrus elements of the dish.

If applicable, coffee or tea pairings consider the tuna’s savory nature. A mild green tea can complement, offering subtle earthiness without overpowering the dish’s primary flavors. Temperature considerations involve serving these beverages chilled or warm, according to season and personal preference.

Serve suggestions include using fine glassware to elevate the setting and create an atmosphere of culinary sophistication, aligning with the dish’s gourmet appeal.

Storage and Shelf Life

Store leftovers promptly to ensure freshness. Use airtight containers to keep flavors intact, refrigerating within two hours of preparation. The salad can last up to two days in the fridge, though it’s best consumed fresh for optimal taste and texture.

Temperature requirements stress maintaining a cold environment to prevent spoilage, especially for seafood components. Ensure refrigerators are set at proper cooling levels to sustain food safety and quality.

Container recommendations involve using glass or BPA-free plastic for secure sealing and minimal odor transfer. These containers safeguard the integrity of each component, retaining their distinct flavors and textures.

Signs of spoilage include unpleasant odors and discoloration, indicating that the food should not be consumed. Always check for freshness before enjoying leftovers, erring on the side of caution.

Reheating instructions advise against microwaving this salad to preserve its integrity. Instead, allow it to reach room temperature naturally for best results, particularly the seared tuna.

Freezing guidelines suggest against freezing for optimal flavor retention, as the radishes and greens lose their texture post-thaw. Enjoying the salad fresh ensures every bite remains vibrant and enjoyable.

Make Ahead Strategies

Adopt make-ahead strategies by preparing certain components in advance. The vinaigrette can be made up to two days prior, stored in the fridge for quick access. This allows for infusing flavors while reducing day-of preparation time.

Storage between steps helps maintain ingredient quality. Keep sliced radishes submersed in cold water to preserve crunch, and wrap greens in damp paper towels to prolong freshness in the refrigerator.

Quality impact assessment suggests assembling the salad just before serving to ensure optimal texture and taste. Maintaining separate elements until the last moment keeps each component as fresh as possible.

Assembly tips involve arranging greens first, followed by artful positioning of tuna slices for visual appeal. Serving dressing on the side allows guests to season to taste, providing control over flavor intensity.

Reheating guidelines recommend avoiding heat, preserving the salad’s intended chilled nature. Instead, focus on other assembly components that might involve slight cooking, like toasting nuts or seeds.

Fresh element additions involve incorporating ingredients such as fresh herbs or edible flowers last minute, ensuring their vibrancy and enhancing the dish’s overall presentation.

Scaling Instructions

Scaling the recipe for larger gatherings is simple with mindful adjustments. Doubling or tripling ingredients while checking seasoning maintains consistency across multiple servings, ensuring each dish receives the same flavor balance.

Equipment adjustments include using larger pans or multiple cooking devices for simultaneous searing if needed, maintaining efficiency even in scaled settings.

Timing modifications suggest cooking tuna in batches to prevent overloading pans, ensuring quality sear and texture. Allow time between batches to keep cooking processes precise and focused.

Storage considerations remind anticipating storage space for extra prepared ingredients, using labeled containers to organize multiple components effectively.

Nutritional Deep Dive

The macro breakdown of this tuna salad highlights its balanced nutrition. With high protein from tuna, healthy fats from the vinaigrette, and low carbohydrates from fresh produce, it supports a variety of dietary goals, ensuring a fulfilling meal without excessive calorie intake.

Micronutrient analysis focuses on the vitamin-rich profile, with radishes and citrus aiding immune function, while healthy fats support brain and joint health. This blend of nutrients makes it an excellent option for health-conscious individuals.

Health benefits are abundant, with ingredients promoting cardiovascular support, improved digestion, and overall nutritional well-being. The meal’s clean ingredient list allows customization while retaining health advantages.

Dietary considerations account for gluten and dairy-free lifestyles—using simple, whole ingredients which naturally align with these dietary requirements without need for significant alteration.

Portion analysis helps maintain balanced intake. Serving recommendations echo the balance, ensuring meals are fulfilling and enjoyable without culinary excess.

Weight management tips highlight the meal’s low-carb nature, offering support for weight-conscious diners aiming to maintain or reduce caloric intake while still enjoying a flavorful satisfying meal.

Dietary Adaptations

For a gluten-free version, ensure preparations adhere to celiac-friendly standards. Use gluten-free oils and avoid cross-contamination with other grain-based dishes, maintaining purity and safety for all diners.

Dairy-free adaptations are inherently included in the recipe, alleviating concerns for those with lactose intolerance or dairy sensitivities, as no animal milk products are required.

Vegan transformations are possible with substitutions like marinated tofu replacing tuna, recreating a similar texture with plant-based ingredients. This version respects ethical choices while delivering delightful flavors.

Low-carb variations naturally occur within the core recipe, focusing on high protein and fiber without carbohydrate-heavy elements. This makes it an ideal dish for those observing a low-carb lifestyle.

Keto modifications complement the original recipe by adhering to low carbohydrate limits. Tailoring serving sizes and component selections encourages healthy adherence to ketogenic guidelines.

Paleo choices align comfortably with this salad’s focus on fresh produce and quality protein. Using unprocessed ingredients respects these dietary philosophies, offering a satisfying meal.

Low-FODMAP adaptations consider ingredient sensitivity, emphasizing radishes for their minimal FODMAP content and assessing the vinaigrette for compliant ingredients, maintaining digestive comfort.

Troubleshooting Guide

Tackling texture issues involves proper tuna searing techniques. Keep heat control consistent and select the right pan to achieve a tender interior and flavorful crust.

Flavor balance problems can be resolved by adjusting vinaigrette acidity, sweetness, and seasoning, ensuring the tuna remains the focal point by balancing salty, acidic, and aromatic elements in your dressing.

Temperature problems often stem from uneven ingredient temperatures. Allow ingredients to reach room temp before serving, especially the tuna, for an integrated experience of flavors.

Equipment challenges require preheating cast iron skillets thoroughly before searing and having appropriate utensils ready for each step. Ensure knives are sharp for clean slices and vibrant presentation.

Ingredient substitutions facilitate adjusting the menu to personal taste while respecting flavor balance. Carefully choose similar flavor profile alternatives ensuring dish integrity remains intact.

Timing concerns frequently revolve around prep interruptions. Prepare all components in advance, dividing tasks into manageable stages, keeping each step measured and efficiently executed.

Recipe Success Stories

Explore community feedback revealing heartfelt connections with the Seared Tuna Salad recipe. Readers have praised its refreshing taste and elegant presentation, highlighting their satisfaction and sharing stories of family meals elevated by its flavors.

Variation successes include creative additions such as avocado or basil, offering unique interpretations that surprise and delight the palette, maintaining central tenets while exploring new dimensions.

Adaptation stories inspire with innovative dietary changes like vegan or keto versions, demonstrating flexibility and highlighting the recipe’s capacity for personal tailoring to align with diverse lifestyle needs.

Reader suggestions provide an ongoing dialogue of shared culinary exploration. Suggestions have encompassed small adjustments, like enhancing citrus profiles or introducing spices, enriching future versions of the dish.

Photography tips encourage capturing each dish’s aesthetic appeal, leveraging natural lighting, and thoughtful composition to portray ingredients fresh vibrancy. These snapshots invite others to experience the dish’s artistry.

Frequently Asked Questions

Q: Can I use a different protein besides tuna?
A: Certainly! While tuna is recommended for its texture and flavor, salmon or mahi-mahi are great alternatives. They provide similar benefits and can be seared similarly for a delightful result.

Q: How can I store leftover salad?
A: Store any leftover salad in an airtight container in the refrigerator to maintain freshness and flavor. Consume within two days to ensure optimal quality.

Q: Are finger limes essential to the salad?
A: Finger limes add unique citrus bursts, though they aren’t essential. Replacing them with lime zest and juice achieves similar acidity, retaining balance in the dish.

Q: What’s a good wine pairing for seared tuna salad?
A: A crisp Sauvignon Blanc pairs excellently with seared tuna salad, complementing the citrus vinaigrette and enhancing the dish’s overall freshness and flavor.

Q: Can this salad be made vegan?
A: Yes! Replace tuna with marinated tofu or a similar plant-based protein to make the salad entirely vegan while retaining the intended flavors and freshness.

Q: Is this dish suitable for meal prep?
A: Absolutely. Prepare certain elements like the vinaigrette and radishes in advance. Assemble just before serving for the best texture and flavor, ensuring quick meal prep.

Q: What makes tuna the focal ingredient?
A: Tuna’s rich protein content, delicate flavor, and texture make it the ideal base for our salad. Its subtle taste encourages vibrant salad and vinaigrette elements to shine without overpowering its inherent quality.

Q: Can I serve this salad warm?
A: While typically served at room temperature, the salad elements can be slightly warmed to maintain balance. Avoid heating components too much to preserve their integral freshness and crunch.

Q: What cutting techniques optimize presentation?
A: Using a sharp knife, uniformly slice the tuna and radishes to maintain visual consistency. Practice focusing on even, symmetrical cuts, ensuring aesthetic appeal.

Q: How can allergies be accommodated?
A: Customize elements to align with allergy needs. Substitute ingredients appropriately, using allergy-safe oils and alternatives that adhere to dietary restrictions, remaining attentive to cross-contamination risks.

Additional Resources

Discover related recipes utilizing similar ingredients for diverse culinary exploration. Exchange flavors and techniques with other main courses, focusing on fresh produce and lean proteins.

Technique guides provide clarity in mastering essential skills like searing fish and emulsion vinaigrettes, empowering home cooks with knowledge to attain professional-grade results.

Delve into ingredient information detailing unique components like finger limes and their applications in broader culinary contexts. This foundation inspires curiosity and innovation.

Equipment recommendations highlight essential tools for efficient cooking experiences, suggesting reliable brands and products enhancing everyday kitchen practices and culinary exploration.

Seasonal variations encourage embracing local produce offerings, adapting recipes to reflect regional accessibility, and sustaining environmentally conscious dining choices.

Join the Conversation

Engage in recipe sharing by posting your Seared Tuna Salad experiences on social media. Tag our page to inspire others and showcase your culinary creativity, building an engaging food-loving community.

Photography tips offer guidance on achieving stunning visuals, leveraging natural lighting and composition techniques to capture each dish’s inherent beauty. Share your images to inspire fellow food enthusiasts.

Recipe reviews offer constructive insights and suggestions to improve timing, technique, and modifications, offering collaborative exchanges among passionate home cooks.

Community engagement thrives on sharing variations tried and tested by diverse perspectives, allowing for a living, evolving recipe experience that embraces all users.

Recipe variations shared globally reflect the beauty of diverse cultural engagement, encouraging exploration and adaptation in the spirit of culinary unity.

The Recipe

Seared Tuna Salad with Radish, Finger Lime, and Citrus Vinaigrette

Serves: 2

Prep Time: 20 mins

Cook Time: 10 mins

Total Time: 30 mins

Kitchen Equipment Needed

  • Cast iron skillet
  • Sharp chef’s knife
  • Citrus juicer
  • Mixing bowls
  • Salad spinner

Ingredients

  • 2 tuna steaks (approximately 6 oz each)
  • 2 tablespoons olive oil
  • Salt and pepper to taste
  • 4 radishes, thinly sliced
  • 1 finger lime (or substitute with lime zest and juice)
  • Mix of salad greens (1 cup)
  • 1 tablespoon lemon juice
  • 1 tablespoon orange juice
  • 1 tablespoon honey
  • 1/3 cup olive oil (for vinaigrette)
  • Salt and black pepper to taste (for vinaigrette)

Directions

  1. Pat the tuna steaks dry with paper towels. Season generously with salt and pepper on both sides.
  2. Heat a cast iron skillet over medium-high heat. Add olive oil, ensuring coating across the surface.
  3. Place tuna in the skillet. Sear each side for approximately 1-2 minutes until a crust forms, maintaining a rare center. Remove and let rest.
  4. In a small bowl, mix lemon juice, orange juice, honey, olive oil, salt, and pepper to create the vinaigrette. Adjust seasoning as desired.
  5. Toss salad greens with thinly sliced radishes. Add vinaigrette, reserving a portion for finishing.
  6. Slice seared tuna into thin strips. Lay over dressed greens and radishes.
  7. Garnish with finger lime pulp or zest across the top. Serve immediately.

Recipe Notes

  • Ensure tuna is of high quality, preferably sashimi-grade for the best texture and flavor.
  • For a bolder vinaigrette, experiment by adding Dijon mustard or minced garlic.
  • Additional garnishes could include sesame seeds or thinly sliced scallions for an Asian twist.

Deliciously Simple White Chicken Chili Recipe for Busy Cooks

Easy White Chicken Chili Recipe: A Comforting Bowl of Flavor

⚖️
Difficulty
Easy

⏲️
Prep Time
15 mins

🕒
Cook Time
30 mins

⏱️
Total Time
45 mins

🍽️
Servings
6

Transform your everyday dinner into a delightful affair with this Easy White Chicken Chili Recipe. Incorporating tender chicken, creamy beans, and a blend of robust spices, this chili brings comfort food to a whole new level. Its rich and creamy texture paired with a mild heat makes it a perfect family favorite. Whether you’re looking for a quick weeknight dinner or an impressively flavorful dish to please a crowd, this white chicken chili is a winner. So warm up with a bowl of heartiness and drift into a food paradise.

Quick Recipe Highlights

  • Flavor Profile: Featuring a mix of savory spices, this chili provides a mild heat balanced with creamy textures from the beans.
  • Texture: The combination of tender chicken and smooth, creamy beans gives it a satisfying mouthfeel.
  • Aroma: A delightful aroma of spices and the earthiness of beans fills your kitchen as it simmers.
  • Visual Appeal: The creamy white color combined with colorful garnishes makes it visually appealing.
  • Skill Level Needed: This recipe is simple enough for even beginner cooks to master, thanks to its straightforward steps.
  • Special Equipment: A large pot or Dutch oven is needed to bring all the flavors together seamlessly.

Recipe Overview

  • Difficulty Level: Labeled as easy, the recipe calls for basic cooking techniques and familiar ingredients, ensuring a stress-free cooking experience.
  • Category: This dish fits comfortably in the category of soups and stews, offering a cozy meal option.
  • Cuisine: While it’s rooted in American cuisine, the spices give it a hint of Southwestern flair.
  • Cost: With most ingredients being pantry staples, this chili is budget-friendly, making it accessible for all.
  • Season: It shines especially in cooler months when you’re in need of a hearty and warming dish.
  • Occasion: Perfect for casual dinners, potlucks, or game-day gatherings, this versatile recipe never disappoints.

Why You’ll Love This Recipe


Indulge your taste buds with the delightful texture and robust flavors of this Easy White Chicken Chili Recipe. The tender shreds of chicken absorb the aromatic spices impeccably, creating a symphony of flavors in every spoonful. This dish is not only a sensory delight but also a convenience-driven meal that comes together swiftly, making it ideal for busy schedules. Nutritionally, it’s a powerhouse, rich in proteins and essential nutrients from the beans and chicken. Moreover, its sociable nature makes it a charming addition to any gathering, allowing your guests to bask in its comforting warmth.

The cost-effectiveness of this recipe is another reason to cherish it. Utilizing pantry staples such as canned beans and basic spices means whipping up a satisfying meal without stretching your budget. Its universal appeal allows it to cater to various palates, ensuring everyone relishes their dining experience. Whether you savor it alone on a cozy evening or share it with loved ones, this white chicken chili promises an enjoyable, flavor-packed feast each time.

Historical Background and Cultural Significance


Originating as a popular alternative to traditional tomato-based chili, the white chicken variety has carved a niche for itself in modern American cuisine. Its roots can be traced back to Tex-Mex cooking traditions, where cooks sought to create a dish that combined creamy textures with the piquancy of chili peppers. Surprisingly, its rise to fame in culinary circles is relatively recent, prompted by the quest for inventive comfort food alternatives.

Culturally, white chicken chili has become an embodiment of culinary fusion, blending regional flavors and techniques. It represents the adaptability and creativity inherent in American cuisine, embracing diversity while catering to evolving tastes. Over time, this dish has undergone numerous adaptations, with variations popping up in different regions, each with its own twist. These continue to showcase its versatility and ability to bring comfort across cultural boundaries.

Ingredient Deep Dive


Chicken: As the star of this chili, chicken adds a rich protein source to the dish. Whole pieces or shredded, it absorbs the spices impeccably. Selecting bone-in, skin-on chicken can add depth of flavor, though boneless varieties streamline preparation.

Beans: Providing creaminess and texture, white beans are a nutritional boon. Packed with fiber and vitamins, they enhance both the taste and health benefits of the chili. Canned beans offer convenience, but dried beans can be used if time permits for even greater flavor depth. Always store beans in a cool, dry place to retain their freshness and substitute with other varieties, such as cannellini or navy beans, if desired.

Common Mistakes to Avoid

  • Overcooking the chicken: This can lead to dry, tough pieces. Monitor closely, removing the chicken once it reaches internal doneness.
  • Skipping the bean rinse: Rinsing canned beans removes excess sodium and starchy liquid, leading to a cleaner flavor profile.
  • Not adjusting seasoning: Taste test during cooking and adjust spices to suit your preference, ensuring an optimal flavor balance.
  • Forgetting to simmer: Allow the chili to simmer, meld flavors, and develop richness.
  • Using old spices: Fresh spices ensure robust flavors. If in doubt, replace them.
  • Neglecting aromatics: Starting with sautéed aromatics like onions and garlic enhances depth of flavor.
  • Using low-quality broth: A good quality chicken broth forms the backbone of this chili’s flavor.
  • Over-thickening: Add thickeners slowly and only if necessary to avoid a gluey texture.
  • Improperly storing leftovers: Cool chili completely before refrigerating to maintain its quality.
  • Not adding citrus: A squeeze of lime can enliven the flavors beautifully, balancing out richness.

Essential Techniques


Simmering: This technique allows the flavors to merge beautifully while keeping the chicken tender and juicy. Maintain a gentle simmer, avoiding vigorous boiling, to ensure even cooking without drying.

Layering aromatics: Begin with onions and garlic to create a flavorful base. This initial step enhances overall taste, providing an aromatic foundation ideal for the chili.

Using a slurry: If you prefer a thicker consistency, create a slurry with cornstarch and water, adding gradually. Stay vigilant to avoid over-thickening, aiming for a pleasantly creamy texture.

Pro Tips for Perfect Easy White Chicken Chili


Marinate chicken before cooking to impart additional layers of flavor. Aim for at least 30 minutes of marination for best results.

Use a mix of beans for varied texture and flavor depth. This can bring additional nutritional benefits as well.

Incorporate fresh herbs like cilantro or parsley as garnishes for a refreshing finish to the dish.

Introduce a bit of heat by adding diced jalapeños or a dash of hot sauce for those who prefer a spicier kick.

For a richer consistency, blend a portion of the beans before adding, creating a creamy base without additional thickeners.

Allow the chili to rest for a few minutes before serving; this enables the flavors to settle and harmonize.

Variations and Adaptations


Regional variations: Depending on local preferences, you can incorporate regional chiles or spice blends to give the dish a unique twist.

Seasonal Adaptations: In summer, add fresh corn kernels for a sweet, vibrant touch. In winter, root vegetables like sweet potatoes can add heartiness.

Dietary Modifications: Make it dairy-free by skipping any optional cheese toppings, or transform it into a vegan meal by replacing chicken with tofu or tempeh.

Flavor Variations: Smoke it up by adding roasted poblano peppers or experimenting with spices like smoked paprika for depth.

Texture modifications: Boost creaminess by stirring in a dollop of sour cream or Greek yogurt, enhancing smoothness without overpowering flavor.

Presentation alternatives: Serve in bread bowls for a rustic approach or garnish with colorful vegetables and herbs for an elevated presentation.

Serving and Presentation Guide


Plating techniques: Ladle the chili into wide, shallow bowls for better visibility of its colorful elements. For a more vibrant presentation, arrange toppings neatly on the surface.

Garnishing ideas: Fresh herbs, sliced avocados, shredded cheese, or even a handful of tortilla chips can make beautiful, contrasting garnishes.

Traditional accompaniments: Serve alongside cornbread or crusty bread to sop up every drop of goodness.

Modern serving suggestions: Try pairing it with a fresh, tangy salad or a side of roasted vegetables for a balanced meal.

Temperature considerations: Serve hot for maximum enjoyment, but offer chilled garnishes such as sour cream for contrast.

Portion control tips: One generous ladleful per person is often sufficient, but allow for easy seconds on particularly chilly days or for hungrier guests.

Wine and Beverage Pairing


Wine pairings: A crisp white wine like Sauvignon Blanc or a lightly oaked Chardonnay complements the chili’s creamy base beautifully.

Non-alcoholic alternatives: Lemon water or citrus-infused iced tea cleanse the palate while enhancing the meal.

Coffee/tea pairings: An earthy mint tea or a bold black tea can pair nicely, providing warmth and a refreshing counterpoint.

Temperature considerations: Opt for chilled drinks to contrast the chili’s warmth or enjoy a hot beverage for uniform comfort.

Serving suggestions: Accompany beverages with lime wedges or fresh mint for added aromatic delight.

Storage and Shelf Life


Storage methods: Store leftover chili in an airtight container to maintain freshness. Allow it to cool completely before refrigerating.

Temperature requirements: Keep it chilled in the refrigerator and consume within 3-4 days for optimal flavor and safety.

Container recommendations: Glass containers are ideal as they don’t absorb flavors or odors and allow easy reheating.

Signs of spoilage: Discard if there’s any unusual odor, discoloration, or mold development.

Reheating instructions: Heat gently on the stovetop, stirring occasionally until uniformly warmed. Add a splash of broth or water if needed to adjust consistency.

Freezing guidelines: Freeze in portioned containers for up to 3 months. Thaw overnight in the fridge before reheating.

Make Ahead Strategies


Prep timeline: Prepare the chicken and chop the vegetables in advance to save time on the day of cooking.

Storage between steps: If pausing partway, refrigerate cooked chicken and other prepared components separately.

Quality impact assessment: Assembled components can lose freshness over extended periods, so complete the cooking process within a day or two of prep stages.

Assembly tips: Ensure beans are added at the end to maintain their integrity and texture.

Reheating guidelines: Avoid high heat during reheating to prevent textural changes in the beans and chicken.

Fresh element additions: Stir in fresh ingredients like cilantro or lime juice just before serving to brighten and rejuvenate flavors.

Scaling Instructions


Halving the recipe: Maintain ingredient ratios, slightly reducing liquid additions to retain consistency. Adjust seasoning to taste.

Doubling or tripling: Larger batches may require more significant adjustments in seasoning. Taste frequently to ensure flavor harmony.

Equipment adjustments: Opt for a larger pot or switch to a slow cooker for convenience when scaling up.

Timing modifications: Larger volumes may extend cooking times slightly, especially in achieving desirable textures.

Storage considerations: Divide oversized batches into emergency-friendly portions before storing, for easy, later access.

Nutritional Deep Dive


Macro breakdown: Rich in protein from the chicken and beans, the dish balances carbohydrates with dietary fiber for fullness and energy.

Micronutrient analysis: White beans provide essential minerals like magnesium and potassium, while chicken contributes necessary B vitamins.

Health benefits: The high protein content supports muscle maintenance, and fiber aids digestion, making it an overall health-conscious choice.

Dietary considerations: Naturally gluten-free, this dish can easily be adapted to meet various dietary needs while providing hearty sustenance.

Portion analysis: A single serving delivers a balanced nutritional profile, but mindful portioning helps in managing caloric intake.

Weight management tips: Pair the chili with ample vegetables or salads to add volume without excess calories, complementing weight control efforts.

Dietary Adaptations


Gluten-free: Naturally compliant, but confirm all packaged ingredients like broth are certified gluten-free.

Dairy-free: Simply skip cheese garnishing to keep the meal compliant. Nutritional yeast can offer a cheesy taste sans dairy.

Vegan: Replace chicken with plant-based alternatives such as jackfruit or chickpeas and use vegetable broth.

Low-carb: Use less beans or replace them with extra vegetables, enhancing the low-carb aspect while retaining satisfaction.

Keto: Opt for fatty chicken cuts and reduce carb-heavy ingredients like beans, focusing on nutritious fats.

Paleo: Adapt by using whole, unprocessed ingredients, focusing on high-quality protein and ample vegetables.

Low-FODMAP: Adjust components to suit FODMAP guidelines, ensuring the inclusion of suitable stock and bean alternatives.

Troubleshooting Guide


Texture issues: If the chili feels too thin, mash a portion of beans to add natural creaminess or cautiously incorporate a thickener.

Flavor balance: Adjust acidity with lime or lemon juice if it tastes flat, experimenting slightly and gradually adjusting seasoning.

Temperature problems: Overheating during cooking can toughen chicken. Be vigilant and lower heat back to a gentle simmer.

Equipment challenges: Use stable pots with good heat distribution and ensure proper coverage to prevent moisture loss and even cooking.

Ingredient substitutions: Ensure taste parity when swapping ingredients, understanding flavor dynamics, and seasoning needs.

Timing concerns: Adequately prepare ingredients to streamline cooking efficiency and prevent rushed preparation chaos in the kitchen.

Recipe Success Stories


Community feedback: Enthusiastic home cooks often rave about the simplicity and irresistible taste of this recipe, finding it a staple in weekly meal plans.

Variation successes: Artisanal adaptations using local spices have delighted audiences, adding unique touches to the already dependable flavor base.

Adaptation stories: Readers embrace opportunities to tailor this dish to varied family preferences, resulting in shared creations and engaging recipe conversations.

Reader suggestions: Creative additions like caramelized onions and diverse pepper types frequently surface, encouraging culinary exploration.

Photography tips: Capture enticing photos by garnishing well and choosing vibrant, natural lighting to accentuate the chili’s inviting warmth.

Frequently Asked Questions

What beans are best for white chicken chili?
Cannellini beans are a popular choice due to their creaminess and mild flavor, but other white beans like navy or great northern beans work well.

Can this be cooked in a slow cooker?
Yes, after sautéing aromatics, add all ingredients to a slow cooker and cook on low for 6-8 hours, or until the chicken is tender.

Is there a vegetarian version of this recipe?
Absolutely! Replace chicken with hearty vegetables or plant-based proteins and substitute chicken broth with vegetable stock.

How do I avoid making the chili too spicy?
Adjust the amount of chili powder and omit spice-heavy ingredients like jalapeños if a milder result is preferred.

What garnishes pair well with this dish?
Try topping with fresh cilantro, diced avocado, shredded cheese, or a dollop of sour cream for an enhanced experience.

Can leftovers be frozen?
Certainly, ensure the chili cools fully before transferring to airtight containers for freezing and plan to consume within 3 months.

Is fresh chicken better than canned?
Fresh is recommended for texture and flavor, though canned chicken can offer a quicker, comparable alternative when time is limited.

Can corn be added to white chicken chili?
Indeed, corn adds a subtle sweetness and extra layer of texture that complements the chili well.

What can I use instead of a Dutch oven?
A large saucepan or stockpot serves as a suitable substitute, maintaining adequate heat distribution for successful chili preparation.

How can I thicken the chili without flour?
Consider pureeing some beans or using a cornstarch slurry for gentle thickening without altering the chili’s flavor.

Additional Resources


Explore related recipes like Classic Beef Chili or Vegetarian Bean Stew for further comfort food inspiration. Investigate technique guides on spice blending for enhancement mastery and learn more about the nutritional virtues of beans through detailed ingredient information. For a seamless cooking experience, consider recommended cookware that can handle everything from slow simmering to spectacular serving.

Join the Conversation


Join fellow home cooks in celebrating this Easy White Chicken Chili Recipe’s versatility by sharing your versions on social media. Picking up photography tips can elevate your presentation skills, while reviewing the recipe allows participation in the broader cooking community. Engaging with enthusiastic culinary peers and discovering diverse recipe variations adds a sociable dimension to the cooking adventure.

The Recipe

Easy White Chicken Chili

Serves: 6

Prep Time: 15 mins

Cook Time: 30 mins

Total Time: 45 mins

Kitchen Equipment Needed

  • Large pot or Dutch oven
  • Cutting board
  • Chef’s knife
  • Wooden spoon
  • Measuring cups and spoons

Ingredients

  • 2 boneless, skinless chicken breasts
  • 1 tablespoon olive oil
  • 1 onion, chopped
  • 2 cloves garlic, minced
  • 2 cans (15 oz each) white beans, drained and rinsed
  • 2 cups chicken broth
  • 1 can (4 oz) green chilies
  • 1 teaspoon cumin
  • 1 teaspoon chili powder
  • Salt and pepper to taste
  • Optional garnishes: shredded cheese, cilantro, lime wedges

Directions

  1. Heat olive oil in a large pot over medium heat. Add the chopped onion and garlic, sautéing until the onion is translucent.
  2. Add the chicken breasts, cooking them until browned on both sides. Remove and set aside.
  3. Pour in the chicken broth, beans, green chilies, cumin, and chili powder. Stir to combine.
  4. Return the chicken to the pot, cover, and simmer for about 20 minutes, until the chicken is cooked through.
  5. Take out the chicken and shred it with two forks.
  6. Return the shredded chicken to the pot, stirring into the chili. Adjust seasoning with salt and pepper.
  7. Serve hot, garnishing with cheese, cilantro, or lime as desired.

Recipe Notes

  • For added spice, include diced jalapeños in step 2.
  • Substitute vegetable broth and replace chicken with tofu for a vegetarian version.
  • Store leftovers in a sealed container, preserving flavor for up to 4 days.