Delicious Baked Breakfast Potatoes Recipe for a Hearty Morning

Baked Breakfast Potatoes: A Hearty Morning Delight

⚖️
Difficulty
Easy

⏲️
Prep Time
15 mins

🕒
Cook Time
45 mins

⏱️
Total Time
60 mins

🍽️
Servings
4

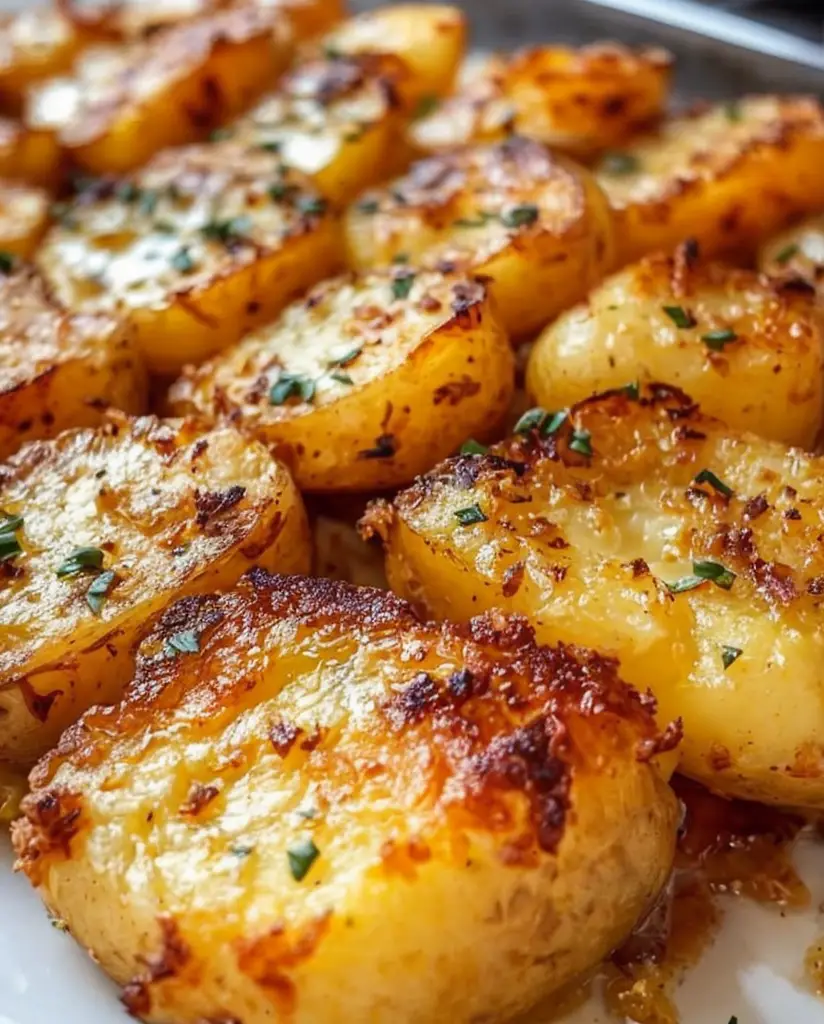
Baked Breakfast Potatoes are a wonderful way to start your day with a warm and hearty meal. These potatoes are seasoned to perfection, giving you a crunchy exterior that gives way to a fluffy and tender inside. Whether you’re serving them with eggs, bacon, or simply drizzling them with hot sauce, they offer a burst of flavor that tantalizes your taste buds. Ideal for weekend brunches or busy weekday mornings, this dish is both comforting and satisfying.

Imagine walking into your kitchen as the aroma of roasted potatoes fills the air, mingling with hints of garlic and fresh herbs. As you take your first bite, the flavors explode in your mouth, leaving you craving more. The simplicity of baked potatoes is enhanced by their versatility, making them a blank canvas for your favorite toppings. Whether you like them spicy, cheesy, or loaded with veggies, Baked Breakfast Potatoes can be modified to fit your cravings.

Quick Recipe Highlights

  • Flavor Profile: These Baked Breakfast Potatoes offer a delightful mix of savory herb flavors, complemented by the natural smokiness from roasting.
  • Texture: The contrast between the crispy exterior and the fluffy interior creates a satisfying mouthfeel that will leave you wanting more.
  • Aroma: The enticing aroma of garlic, onion, and herbs wafting through your kitchen will make your mouth water.
  • Visual Appeal: A medley of golden-brown potatoes garnished with green herbs makes for a visually appealing dish, inviting you to dig in.
  • Skill Level Needed: This recipe is beginner-friendly, requiring basic prep skills and easy-to-follow cooking instructions.
  • Special Equipment: Only a baking sheet or dish is needed, making this an accessible recipe even for novice cooks.

Recipe Overview

  • Difficulty Level: Baked Breakfast Potatoes are easy to prepare, perfect for cooks of any skill level. The straightforward method ensures delicious results every time.
  • Category: This versatile dish fits perfectly into breakfast, brunch, or as a side for lunch and dinner, making it a staple meal option.
  • Cuisine: While rooted in classic home cooking, baked potatoes can take inspiration from various cuisines, incorporating spices and toppings from around the world.
  • Cost: Inexpensive and readily available ingredients make this recipe budget-friendly, perfect for families or anyone looking to save.
  • Season: While perfect any time of year, the best seasons for making Baked Breakfast Potatoes are fall and winter when comfort foods are most desired.
  • Occasion: Serve these potatoes at casual family gatherings, festive brunches, or even as a simple weeknight dinner side dish.

Why You’ll Love This Recipe

Baked Breakfast Potatoes are beloved not just for their delightful taste and texture, but for their ability to serve as a comfort food you can savor. The crispy exterior creates a contrast with the soft, fluffy middle, awakening your senses and providing a satisfying bite. Topped with fresh herbs or spicy salsa, every forkful is a culinary experience filled with bold flavors.

Convenience is another reason to love this dish. With only 15 minutes of prep time and minimal hands-on cooking, you can whip up a satisfying breakfast without much effort. Toss the potatoes in the oven, and while they bake, you can prepare the rest of your breakfast or relax with a cup of coffee. This makes it perfect for busy mornings or leisurely weekends.

From a nutritional standpoint, potatoes are a rich source of vitamins and minerals, including vitamin C and potassium. Baking them rather than frying keeps the calorie count low while preserving their nutrient content. You can enjoy a delicious meal without the guilt, making them a great addition to a balanced diet.

Socially, Baked Breakfast Potatoes shine as an excellent dish for sharing. Perfect for brunch gatherings, they can be served family-style, allowing guests to customize their plates with assorted toppings. This turns your meal into a fun, interactive experience that brings everyone together over a shared love of good food.

Lastly, these baked potatoes stand out for their accessibility and cost-effectiveness. With simple ingredients that you likely already have in your pantry, you can create a filling meal without breaking the bank. It’s a recipe that supports not only your taste buds but your budget as well, proving that comfort food doesn’t have to be fancy or expensive.

Historical Background and Cultural Significance

Baked potatoes have a long and storied history, dating back to ancient civilizations that first cultivated and embraced this versatile tuber. Originally originating from the Andes region of Peru and Bolivia, the potato gradually made its way to Europe in the 16th century, where it became a staple in various cuisines. Its adaptability to different cooking techniques, including baking, boiling, and frying, secured its place in household kitchens around the globe.

Culturally, baked potatoes symbolize comfort and sustenance, especially in colder climates. In many cultures, they are considered a staple food due to their affordability and nutritional value, providing necessary energy for hard-working families. In the United Kingdom, baked potatoes are often enjoyed with various toppings, showcasing regional flavors and preferences, which enrich their culinary significance.

Over the years, the evolution of the baked potato recipe has seen countless variations. From the simple Russian “jacket potatoes” filled with cheese and butter to the loaded American baked potato topped with chili, cheese, and sour cream, these adaptations reflect the local ingredients and creative ingenuity of different cultures. Each version tells a story and conveys the flavors of its region, keeping the core of the dish alive.

Today, baked potatoes are enjoyed worldwide in numerous forms, from fast-food establishments to gourmet restaurants, highlighting their enduring appeal. Whether served as a side dish or the main attraction, they continue to adapt to the tastes of modern diners, celebrating both tradition and innovation in the culinary landscape.

Ingredient Deep Dive

  • Potatoes: A staple food worldwide, potatoes have rich historical significance. Nutritionally, they provide complex carbohydrates, fiber, and essential vitamins. When selecting potatoes, look for firm ones free from blemishes, and store them in a cool, dark place. They can be substituted with sweet potatoes for a different flavor or nutritional profile.
  • Olive Oil: A key ingredient that adds flavor and aids in crisping the potatoes, olive oil is rich in healthy fats and antioxidants. Opt for extra virgin olive oil for the best taste and quality. It should be stored in a cool, dark place to preserve its freshness. For a unique twist, substitute with avocado oil or melted coconut oil.
  • Seasonings (Salt, Pepper, Garlic Powder): Essential for elevating the flavor of your baked potatoes, these seasonings bring out the natural taste of the potatoes. Garlic powder provides a hint of savory flavor, enriching the dish. Always choose high-quality sea salt for seasoning. Store these in airtight containers to keep them fresh, and feel free to experiment with other herbs and spices.
  • Fresh Herbs (Optional): Fresh herbs such as rosemary and parsley add a vibrant flavor and visual appeal. They are packed with nutrients and can enhance the dish’s aroma. When selecting herbs, look for bright, green leaves without browning edges. For storage, keep them in a glass of water in the fridge. Alternatively, dried herbs can be used, though they won’t provide the same freshness.

Common Mistakes to Avoid

  • Not Preheating the Oven: Preheating is essential for achieving that crispy texture. If the oven isn’t hot enough, the potatoes will steam instead of roast.
  • Using the Wrong Potato Variety: Not all potatoes are created equal! Starchy potatoes like Russets are ideal for baking, while waxy types may not yield the same texture.
  • Skipping the Seasoning: Don’t overlook the importance of seasoning! Properly salting your potatoes enhances their natural flavor dramatically.
  • Cutting Potatoes Too Small: If you cut them too small, they may cook unevenly or dry out before they are done. Aim for 1 inch pieces for even cooking.
  • Overcrowding the Baking Sheet: Give your potatoes space on the sheet to ensure they roast evenly. Too many potatoes can lead to steaming instead of roasting.
  • Not Drying the Potatoes: Make sure to pat the potatoes dry before oiling and seasoning them. Excess moisture prevents them from becoming crispy.
  • Using Old Oil: Ensure your olive oil is fresh and within its expiration date; old oil can produce undesirable flavors and results.
  • Not Checking for Doneness: Always test your potatoes with a fork for doneness. They should be tender inside when fully cooked.
  • Ignoring Cooling Times: Allow your baked potatoes to cool slightly after baking before serving. This helps preserve heat and improve flavor.
  • Neglecting to Rotate the Pan: Rotating the baking sheet halfway through cooking ensures even browning and prevents uneven cooking.

Essential Techniques

Selecting the Right Potatoes: Choosing the right potato variety is crucial for achieving the desired texture and flavor in your Baked Breakfast Potatoes. Russets are the best option for their starchy quality, which lends a fluffy center upon baking. Always select firm potatoes free from blemishes for the best results.

Prepping Your Potatoes: Properly washing and drying your potatoes is essential for a crispy skin. After washing, thoroughly dry them with a kitchen towel before coating them with oil and seasonings. This step helps avoid steaming and contributes to a deliciously crisp exterior.

Seasoning Evenly: When seasoning your potatoes, mix oil and spices in a bowl before tossing the potatoes in. This ensures an even coating, which leads to consistently flavored potatoes throughout. Make sure you cover every surface for optimal flavor.

Roasting for the Perfect Texture: Baking at a high temperature is key to achieving that perfect crispy texture. Roasting typically should be around 425°F (220°C). Experiment with various times to master the perfect bake for your preference.

Oven Management: Be mindful of your oven’s hot spots. If it runs hotter or cooler in specific areas, rotate your baking tray to ensure equal cooking. Using an oven thermometer helps get an accurate temperature reading to perfect your method.

Pro Tips for Perfect Baked Breakfast Potatoes

1. Prioritize uniform potato sizes for even cooking to enhance texture and flavor throughout.
2. Allow the potatoes to rest after baking to retain heat and maintain optimal texture.
3. Consider adding a sprinkle of cheese or bacon for a delicious twist on your classic recipe.
4. Experiment with various seasonings, including smoked paprika or chili powder, to elevate your flavor profile.
5. For a nice presentation, garnish your baked potatoes with chopped fresh herbs before serving.
6. Use a convection oven if available; this helps achieve a crispier result due to better air circulation.
7. Pre-cook the potatoes in the microwave for a few minutes to reduce baking time if you are short on time.
8. Line your baking tray with parchment paper for easier cleanup and a non-stick surface.

Variations and Adaptations

*Regional variations:* Across various cultures, baked potatoes are adapted in diverse ways, from the classic British jacket potato to Mexican-style stuffed potatoes with beans, cheese, and salsa, showcasing local flavors. Each variation invites exploration of different toppings to suit regional palates.

*Seasonal adaptations:* As seasons change, feel free to incorporate seasonal vegetables or toppings into your baked potatoes. In fall, add roasted pumpkins or squash; in summer, top with fresh tomatoes and herbs for a vibrant look and taste.

*Dietary modifications:* For specific dietary needs, consider making the dish vegan by omitting dairy toppings, or opt for low-carb variations by using cauliflower instead of potatoes.

*Flavor variations:* Enhance the flavor of your baked potatoes with herbs and spices. Try rosemary, thyme, or Italian seasoning for an aromatic twist. Cheese lovers can integrate different cheeses for a rich melty taste.

*Texture modifications:* If you crave a creamier bite, experiment with mashing some of the baked potatoes and adding butter or sour cream for richness, while keeping some whole for variety.

*Presentation alternatives:* Amp up your presentation by serving baked potatoes on a platter, garnished with edible flowers, or in individual bowls for a more rustic feel.

Serving and Presentation Guide

When serving Baked Breakfast Potatoes, consider plating techniques that highlight their texture and vibrant colors. Stack the potatoes in a pyramid shape on a shallow dish, or line them up in individual serving bowls. Garnish with fresh herbs like parsley or chives for a pop of color.

A sprinkle of cheese just before serving can add a lovely melty touch, while dollops of sour cream or salsa can complement their flavor beautifully. Consider traditional accompaniments like crispy bacon or fried eggs for added satisfaction.

To ensure an enjoyable experience, serve the potatoes hot right out of the oven. For those who enjoy a bit of heat, offer hot sauce or chili flakes on the side, allowing guests to customize their flavors. It’s always good to provide portion control options, whether serving family-style or in individual portions to accommodate different appetites.

Wine and Beverage Pairing

Pairing wine with Baked Breakfast Potatoes can enhance your dining experience. For a classic pairing, opt for a Chardonnay; its creamy texture complements the starchy nature of the potatoes elegantly.

For non-alcoholic alternatives, a refreshing iced herbal tea or homemade lemonade can balance the savory notes of the dish nicely. If breakfast is served early, a robust coffee or chai tea option can be ideal to enjoy alongside.

Also, consider pairing with light sparkling wines such as Prosecco, which can elevate the brunch experience. Make sure to serve beverages chilled, enhancing the overall enjoyment of the meal.

Storage and Shelf Life

Proper storage is key to maintaining the quality of your Baked Breakfast Potatoes. Store leftovers in an airtight container in the refrigerator, where they can last for 3-5 days. Ensure that they cool completely before placing them in the container to preserve freshness.

For longer-term storage, consider freezing baked potatoes. Allow them to cool, then place them in freezer-safe bags with as much air removed as possible. When reheating, they can safely stay in the freezer for up to three months.

When reheating, consider using an oven or toaster oven to preserve the texture; a microwave may result in a soggy exterior. To check for spoilage, inspect for any off-smells or discoloration, which indicates they’re no longer fresh.

Make Ahead Strategies

To save time on busy mornings, consider prepping Baked Breakfast Potatoes the night before. Wash and slice the potatoes, coating them with oil and seasonings, and store them in the refrigerator. This allows the flavors to meld overnight and can drastically reduce cooking time in the morning.

If time permits, you can also bake the potatoes ahead of time and then reheat them in the oven just before serving. Allow for assembly of any toppings you plan to use to be prepped as well.

When storing between steps, ensure that your prepped potatoes are tightly wrapped or sealed to avoid oxidation. Adding fresh elements like chopped herbs right before serving will enhance flavor and freshness upon serving.

Scaling Instructions

When scaling your Baked Breakfast Potatoes, consider the quantity of ingredients for halving or doubling the recipe. Adjust cooking times as necessary; smaller batches may cook faster while larger batches could require a bit longer.

For doubling or tripling, be mindful of the size of your baking sheet to ensure even cooking. You may need to bake in batches if your oven cannot accommodate the entire quantity at once.

The technique and process remain the same, but ensure that you monitor the potatoes during baking, as timing may vary with quantity adjustments. Adjust seasoning amounts accordingly to maintain flavor consistency across larger servings.

Nutritional Deep Dive

In exploring the nutritional content of Baked Breakfast Potatoes, a standard serving offers a balanced macro breakdown, yielding significant carbohydrates for energy. Potatoes are a source of essential vitamins like vitamin C, B6, and potassium.

On a micronutrient level, they boost fiber content which aids in digestion and promotes fullness, making them a great option for maintaining a healthy weight. Consider portion size, especially if aiming for a weight-management goal, to maintain balance in your overall diet.

Baked Breakfast Potatoes offer a low-calorie, high-nutrient meal when prepared with minimal added fats and wholesome toppings, presenting an excellent choice for anyone looking to enjoy filling and nutritious foods in their diet.

Dietary Adaptations

*Gluten-free:* Baked Breakfast Potatoes are naturally gluten-free, making them an excellent option for anyone with gluten sensitivities or celiac disease. Serve them with gluten-free toppings for added flavor.

*Dairy-free:* Omit cheese and butter or substitute with plant-based alternatives like nutritional yeast for a cheesy flavor without the dairy. Creamy avocado can also be used for a rich topping.

*Vegan:* Whole baked potatoes are inherently vegan. Utilize a range of vegetables and plant-based toppings to enhance the meal, providing a healthy, cruelty-free option.

*Low-carb and Keto-friendly:* For a low-carb variation, substitute traditional potatoes with cauliflower, preparing them in the same way for a satisfying dish that fits a keto diet.

*Paleo and Whole30 options:* Stay true to paleo diets by using only primary ingredients without processed additives. Opt for fresh herbs or spices to add flavor while remaining compliant.

*Low-FODMAP:* For those on a low-FODMAP diet, potatoes can be enjoyed in moderation. Pair them with suitable low-FODMAP toppings like olive oil and hard cheeses to enhance flavor without triggering discomfort.

Troubleshooting Guide

If your Baked Breakfast Potatoes turn out mushy, it’s often due to overcrowding on the baking sheet or not drying them completely before seasoning. Ensure they have space and are patted dry for best results.

In cases where potatoes are undercooked, increase baking time and check periodically until they’re tender. For uneven cooking, use a baking sheet that promotes air circulation and evenly distribute potatoes.

Flavors that seem bland may require a sprinkle of salt or a dash of your favorite seasoning to elevate the dish. Always taste for adjustments during the cooking process.

If your potatoes are overly crispy or burnt, reduce the cooking temperature and keep an eye on them as they bake for optimal results. Baking times can vary based on sizes and oven calibration, so adjustments can make a big difference.

If you struggle with cooking timing due to multiple dishes, utilize timers for various cooking stages, aiding in precise management of your meal prep.

Recipe Success Stories

Community feedback surrounding Baked Breakfast Potatoes often highlights their versatility and ease of preparation. Many readers share stories about how they’ve customized their recipes, utilizing seasonal ingredients or unique toppings that reflect their personal tastes.

Cooks have reported fantastic results by incorporating their favorite spices, creating variations that cater to their family preferences. One reader noted their success with adding a kick by infusing spicy herbs, turning the dish into a family favorite.

Adaptation stories abound, with some utilizing leftovers creatively, transforming baked potatoes into hash, shepherd’s pie, or breakfast burritos, showcasing how these hearty spuds can serve more than one purpose.

For those documenting their culinary journey, tips on photography and plating emphasize the importance of presentation. Crisp, golden-brown skins combined with colorful toppings create a visually appealing dish that’s perfect for sharing on social media.

In sharing variations and personal success, a community of recipe enthusiasts continues to inspire creativity in making Baked Breakfast Potatoes a beloved staple in kitchens everywhere.

Frequently Asked Questions

How can I make my baked potatoes fluffier?

To achieve fluffier baked potatoes, ensure that you select starchy varieties like Russets, as they yield a lighter texture. Additionally, don’t skip the step of drying the potatoes thoroughly before coating them with oil, as this helps to enhance fluffiness during baking.

Can I prepare Baked Breakfast Potatoes in advance?

Absolutely! You can prep the potatoes and store them in the refrigerator for a few hours before baking. Alternatively, you can bake them ahead of time and reheat them just before serving, ensuring they remain delicious.

What toppings work best for Baked Breakfast Potatoes?

The possibilities are endless! Popular toppings include sour cream, chives, cheese, bacon bits, jalapeños, and fresh vegetables. Try customizing based on personal tastes or seasonal ingredients.

Why are my baked potatoes soggy?

Soggy baked potatoes typically result from excess moisture before baking or overcrowding the baking sheet. To avoid this, make sure to dry your potatoes thoroughly and space them apart on the tray.

How can I achieve crispy skin on my baked potatoes?

Crispy skin can be achieved by coating the potatoes evenly with oil and seasoning, along with ensuring the oven is preheated, and baking at a high temperature for optimal texture and crispiness.

Can I use sweet potatoes instead of regular potatoes?

Yes! Sweet potatoes can be used as a substitute. They will provide a slightly different flavor profile and cook time, but will yield similar satisfying results. Keep in mind they may require slightly less baking time.

How do I know when my potatoes are done?

Your potatoes are done when they are tender inside and can easily be pierced with a fork or knife. If they require further cooking, return them to the oven and check frequently.

Is it safe to eat leftover baked potatoes?

Yes, as long as they are stored properly in an airtight container in the fridge. Consume leftovers within 3-5 days for optimal safety and freshness.

Can I make Baked Breakfast Potatoes gluten-free?

Yes, Baked Breakfast Potatoes are naturally gluten-free. Ensure that any additional toppings or seasonings used are also gluten-free to maintain compliance with dietary restrictions.

I don’t have olive oil; what can I use instead?

If you don’t have olive oil, vegetable, canola, or avocado oil can be great substitutes. Each adds a different flavor, so feel free to experiment to discover your favorites.

Additional Resources

If you’re looking for more delicious recipes, be sure to check out our collection of side dishes, breakfast options, and hearty casseroles. Whether you’re interested in exploring new culinary techniques or ingredient information, these resources provide tools for enhancing your cooking skills.

For those who love experimenting with ingredients, our ingredient spotlights delve into nutritional benefits and versatile uses, helping elevate your regular cooking to new levels.

Don’t miss our recommended kitchen gadgets and tools for efficient meal preparation. Investing in the right equipment can make a world of difference in achieving successful, satisfying outcomes in your culinary ventures.

Join the Conversation

We’d love to hear about your experiences and variations with Baked Breakfast Potatoes! Share your cooking photos and tag us on social media using #[YourHashtag]. Join our community by leaving feedback and suggestions, and explore the countless adaptations you’ve developed.

Engage with fellow food lovers in discussions about recipe variations, share personal insights on preparation tips, and contribute stories about your culinary adventures. Whether you’re a seasoned chef or a novice, your voice adds flavor to our cooking community.

The Recipe

Baked Breakfast Potatoes

Serves: 4

Prep Time: 15 mins

Cook Time: 45 mins

Total Time: 60 mins

Kitchen Equipment Needed

  • Baking sheet
  • Parchment paper (optional)
  • Mixing bowl
  • Knife
  • Cutting board

Ingredients

  • 4 medium-sized russet potatoes
  • 3 tablespoons olive oil
  • 1 teaspoon salt
  • 1 teaspoon black pepper
  • 1 teaspoon garlic powder
  • Optional: Fresh herbs (rosemary, parsley)

Directions

  1. Preheat the oven to 425°F (220°C).
  2. Wash and dry the potatoes thoroughly. Cut into evenly-sized cubes.
  3. Toss the potato cubes in a mixing bowl with olive oil, salt, pepper, and garlic powder until fully coated.
  4. Spread the potatoes on a baking sheet in a single layer.
  5. Bake for 40-45 minutes, or until golden and crispy, stirring halfway through.
  6. Optional: Garnish with fresh herbs before serving for added flavor and presentation.

Recipe Notes

  • Feel free to adjust seasonings according to your taste preferences.
  • For extra flavor, try adding grated cheese in the last 5 minutes of baking.
  • Consider experimenting with different potato varieties for unique textures and flavors.

Delicious Slow Cooker Mongolian Beef Recipe for Easy Dinner

Slow Cooker Mongolian Beef: A Tender and Savory Delight

⚖️
Difficulty
Easy

⏲️
Prep Time
15 mins

🕒
Cook Time
6 hours

⏱️
Total Time
6 hours 15 mins

🍽️
Servings
4

Mongolian Beef made in a slow cooker is the perfect comfort food that delivers a bold blend of flavors with minimal effort. This dish typically features tender beef simmered in a savory sauce that boasts an enticing mix of soy sauce, garlic, and ginger. The slow cooking process ensures that the beef becomes incredibly tender, allowing the flavors to meld beautifully over hours. Each bite is a delightful experience, filled with rich, savory notes that warm your soul and satisfy your cravings.

This Slow Cooker Mongolian Beef is more than just a meal; it’s a culinary journey that transports you to the heart of Asian cuisine. The sweet and savory sauce is balanced perfectly with the crispness of bell peppers, making it not only delicious but also visually appealing. Serve it over a bed of fluffy rice or alongside steamed vegetables, and you have a complete, mouth-watering dish that will impress anyone at your dinner table.

Quick Recipe Highlights

  • Flavor Profile: Expect a perfect balance of sweet and savory from the soy sauce and brown sugar.
  • Texture: The beef becomes beautifully tender, while the vegetables retain a slight crunch.
  • Aroma: A fragrant mix of garlic and ginger fills your kitchen as it cooks.
  • Visual Appeal: The vibrant colors of the bell peppers meld with the rich brown sauce make it a feast for the eyes.
  • Skill Level Needed: An easy recipe that requires only basic skills, perfect for beginner cooks.
  • Special Equipment: You will need a slow cooker to achieve the ultimate tenderness.

Recipe Overview

  • Difficulty Level: This Slow Cooker Mongolian Beef is easy to prepare, making it an ideal choice for busy weeknights.
  • Category: A fantastic main course that fits perfectly into any dinner setting.
  • Cuisine: It is inspired by traditional Mongolian flavors, with a wonderful Asian twist.
  • Cost: Ingredients are generally affordable, working well for budget-conscious meals.
  • Season: This recipe is perfect for any season, especially comforting in colder months.
  • Occasion: Ideal for family dinners, gatherings, or even meal prep for the week.

Why You’ll Love This Recipe

The taste and texture of this Slow Cooker Mongolian Beef are simply irresistible. The combination of tender beef and sweet-savory sauce creates a harmony that tantalizes the palate with each bite. The additional crunch from bell peppers adds an enjoyable contrast, making for a well-rounded dish that you’ll look forward to enjoying time and again.

Convenience and preparation benefits are key aspects of this recipe. With minimal active cooking time, you can throw everything into the slow cooker in the morning and come home to a delicious dinner ready to be served. It’s perfect for busy lifestyles, as it allows you to prepare a hearty meal without sacrificing quality or flavor.

Nutritionally, Mongolian Beef can be a balanced option. The beef provides protein, while the vegetables add vitamins and minerals, creating a dish that’s fulfilling and nutritious. It’s a great way to incorporate healthy elements into a rich, satisfying meal.

This recipe also shines when it comes to social gatherings. Preparing this Slow Cooker Mongolian Beef allows you to create delightful flavors that impress friends and family while giving you more time to spend with them rather than cooking. It’s a dish that sparks conversation and brings excitement to the dinner table.

Cost-effectiveness plays a significant role in making Slow Cooker Mongolian Beef an excellent choice for budget-conscious home cooks. Most of the ingredients are pantry staples and affordable, making it easy to whip up without breaking the bank. Plus, leftovers can be stored for future meals, further enhancing its value.

Historical Background and Cultural Significance

The origin of Mongolian Beef is steeped in myth and culinary adaptation, often attributing its roots to the flavors of Mongolia but influenced heavily by Chinese cuisine. Historically, the dish showcases how flavors from various cultures can blend together, continually evolving with each cook’s touch.

Culturally, Mongolian Beef highlights the rich traditions of communal dining, where friends and family gather to share meals and create connections. The dish embodies what it means to come together over shared flavors, making it a staple in many households.

Over time, the recipe has transformed, using various cuts of beef and incorporating different vegetables. Though the classic version excels with beef and bell peppers, modern interpretations may employ variations that cater to personal preferences, enhancing its widespread appeal.

Regional variations can be seen in many Asian countries where similar sauce profiles are used. In fact, these adaptations reinforce the dish’s versatility and showcase how one meal can bridge cultural divides through shared love for flavor.

Ingredient Deep Dive

Beef: In Mongolian cuisine, beef is the star ingredient. It provides a robust source of protein and is versatile in preparation. Opt for flank steak or sirloin for this recipe, ensuring tender results. Properly selecting your beef ensures it will absorb the flavors of the sauce well, making it even more enjoyable.

When purchasing, look for cuts that are bright red with minimal marbling. Store your beef in the refrigerator but ensure it’s cooked within a couple of days for optimal freshness. If storing it longer, consider freezing for up to six months to maintain its quality.

Soy Sauce: A fundamental component that enhances umami flavor in dishes. Soy sauce has a rich history in Asian cooking, providing depth to many recipes, including this one. It balances the sweetness of sugar and adds savory complexity to each bite of beef.

Choosing a high-quality, low-sodium soy sauce can significantly impact the dish’s overall flavor. Store soy sauce in a cool, dark place, and once opened, keep it refrigerated for longevity. Light soy sauce is a great substitute if you prefer a less intense flavor.

Common Mistakes to Avoid

  • Using tough cuts of beef: Selecting a cut with adequate marbling will yield better tenderness during cooking.
  • Overcooking the beef: Exceeding cooking time can lead to dry results; monitor time closely.
  • Skipping the searing step: Browning the beef adds flavor; don’t skip this crucial part.
  • Piling too much in the slow cooker: Overcrowding inhibits proper cooking; ensure contents are spread out.
  • Not tasting the sauce: Adjust seasoning according to your palate before serving.
  • Using expired ingredients: Freshness affects flavor; check usage dates.
  • Not letting it cool before storing: Allow to cool before refrigerating to maintain food safety.
  • Not serving with rice: This dish shines with a side of rice; don’t overlook it!

Essential Techniques

Searing the meat is vital for flavor development. It locks in juices and enhances the dish’s overall richness. To master this technique, ensure your pan is hot and don’t overcrowd it, allowing a good crust to develop.

Slow cooking is crucial for achieving tender beef. This method slowly breaks down tough fibers in the meat. Monitor the cooking time; using a timer helps to ensure the beef doesn’t overcook.

Pro Tips for Perfect Slow Cooker Mongolian Beef

1. For extra flavor, marinate the beef for a few hours before cooking. This enhances the sauce’s overall depth.

2. Add the vegetables halfway through the cooking process to preserve their texture and color.

3. Experiment with different beef cuts, such as ribeye or sirloin, to discover your favorite flavor.

4. For a spice kick, add a dash of red pepper flakes to elevate the flavor profile.

5. Include additional vegetables like broccoli or snap peas for a nutrient boost.

6. Garnish with green onions and sesame seeds for added texture and flavor.

7. Serve with jasmine rice or cauliflower rice for a twist on serving options.

8. Adjust sweet and salty components to your liking based on personal preference.

Variations and Adaptations

Regional variations often involve different cuts of beef for local preferences. For example, in some Asian cultures, you might find lamb or chicken used instead. This adaptability showcases the dish’s universal appeal.

Seasonal adaptations might include adding fresh vegetables that are in peak season, enhancing flavor and nutritional value. Incorporating ingredients like asparagus during spring can freshen the dish.

For dietary modifications, consider swapping traditional beef for plant-based proteins for a vegan version. Tofu is a fantastic substitute and absorbs flavors well.

Flavor variations can be explored by changing up the sauce ingredients. Adding a splash of rice vinegar or a hint of hoisin sauce can provide new layers of taste.

Texture modifications could include topping the finished dish with crispy fried onions or slices of toasted almonds to create an exciting crunch.

Presentation alternatives involve serving it in lettuce cups for an innovative, bite-sized meal that’s great for gatherings.

Serving and Presentation Guide

When plating Slow Cooker Mongolian Beef, serve over a bed of fluffy steamed rice. A bowl with contrasting colors enhances visual appeal. Consider using a large serving dish for family-style meals.

Add vibrant garnishes like sliced green onions or sesame seeds to add color and flavor. Pairing it with contrasting-colored vegetables not only enhances appeal but also boosts nutritional content.

Traditional accompaniments include pickled vegetables or a simple salad with a light dressing, which balances the richness of the beef. For modern serving suggestions, consider offering it in taco-style wraps.

Temperature considerations are also important: ensure the dish is served warm, promoting an enjoyable dining experience.

Portion control tips recommend serving smaller plates to help guests manage their servings and encourage them to savor each bite.

Wine and Beverage Pairing

When pairing wine with Slow Cooker Mongolian Beef, consider a fruity red wine like a Pinot Noir or Zinfandel that complements the sweet-savory notes.

For non-alcoholic alternatives, a refreshing iced tea or a fruity mocktail pairs nicely, balancing the dish’s richness.

If coffee or tea is more your style, opt for a fragrant herbal tea that enhances the overall meal experience.

Temperature-wise, serve red wines slightly chilled, around 60°F, to keep them refreshing alongside warm dishes.

Always factor in serving suggestions; equipping your table with a selection of beverages ensures everyone finds an option they enjoy.

Storage and Shelf Life

When storing your Slow Cooker Mongolian Beef, transfer leftovers to an airtight container for optimal freshness. It can last in the fridge for 3-4 days when stored correctly.

Ensure to keep it at a proper temperature, ideally below 40°F to prevent spoilage. Signs of spoilage include off-odors or noticeable changes in color or texture.

Reheating instructions suggest gently warming the dish on the stove over low heat or in a microwave until it reaches 165°F to ensure food safety.

Freezing guidelines dictate that you can freeze leftovers for up to three months. Store them in freezer-safe containers, ensuring that you leave some space for expansion.

Make Ahead Strategies

For make-ahead strategies, prepare the sauce a day in advance, allowing flavors to blend perfectly before cooking. It can save time on busy days while enhancing taste.

Storage between steps involves prepping and cutting the vegetables per your recipe and storing them in the fridge until ready to use.

Assess quality impact by noting that some flavors may mellow when made ahead, which could work in your favor for a richer dish.

Assembly tips recommend layering the ingredients in your slow cooker in the order listed to maximize flavor infusion.

Reheating guidelines allow for quick setups; simply warm it back up before serving or enjoy it cold in salads!

Think about fresh element additions, like herbs or fresh vegetables, just before serving to provide a vibrant taste contrast and appeal.

Scaling Instructions

For halving the recipe, maintain the same cooking time, but keep an eye on texture and flavors for adjustments as needed.

Doubling or tripling requires larger equipment, such as a bigger slow cooker, to ensure everything cooks evenly.

Equipment adjustments may also involve cooking in batches if a larger slow cooker isn’t available, which can affect overall prep time.

Timing modifications should account for the increase in volume; larger batches may need a bit more time to reach tender perfection.

Lastly, consider storage considerations—ensure you have adequate containers on hand to preserve the freshness of leftovers.

Nutritional Deep Dive

A macro breakdown reveals that this Slow Cooker Mongolian Beef is an excellent source of protein due to the beef, while other ingredients add essential carbs and fats.

Micronutrient analysis shows that including vegetables enhances the vitamin and mineral content of every serving, contributing to a well-rounded meal.

Health benefits may include the protein-packed nature of the dish, perfect for maintaining energy levels throughout the day.

For dietary considerations, being mindful of sodium levels in soy sauce can help, especially with blood pressure management.

Portion analysis is crucial; serving sizes should generally be around one cup to maintain a balanced meal.

Weight management tips can suggest combining this dish with a side of vegetables to enhance fullness without overloading calories.

Dietary Adaptations

This Slow Cooker Mongolian Beef can easily be made gluten-free by opting for tamari sauce instead of soy sauce, making it suitable for gluten-sensitive diners.

Dairy-free is an inherent aspect of this dish, ensuring accessibility for those with lactose intolerance.

For a vegan version, replace beef with firm tofu or seitan, maintaining the savory sauce to keep the essence of the dish.

Low-carb options can involve serving with cauliflower rice instead of regular rice, perfect for keto or low-carb diets.

The paleo adaptation would also work, simply by avoiding soy sauce and choosing coconut aminos for a similar flavor profile.

Low-FODMAP adjustments suggest avoiding onion in the sauce or simply using green onion tops for a similar flavor without the digestive distress.

For those on other specific diets, keep in mind the balance of macronutrients, adjusting the ratios according to dietary needs.

Troubleshooting Guide

Texture issues often arise from overcooked beef, leading to dryness. To remedy, allow it to cook only until tender, checking for doneness periodically.

Flavor balance might be off if the dish is too salty or sweet. Adjusting soy sauce and sugar levels can help achieve the ideal taste.

Temperature problems can stem from inconsistent slow cooker settings. Using a thermometer ensures the dish reaches safe cooking temperatures.

Equipment challenges may occur if you lack the required slow cooker. In that case, consider using an oven-safe pot with a lid to mimic slow-cooking methods.

For ingredient substitutions, recognize that omitting key components could alter the flavor significantly, so make wise replacements.

Timing concerns should be addressed proactively by checking the cook time early on to ensure the dish comes together nicely without losing quality.

Recipe Success Stories

Community feedback on this dish has been overwhelmingly positive, with many finding it’s now a household favorite. Home cooks have shared how simple it is to prepare, yet the flavors impress guests.

Variation successes often highlight how experimented substitutions, like using chicken, yield equally delicious results, showcasing the adaptability of the recipe.

Adaptation stories abound, with many readers introducing their twists, such as additional spices or regional flavors, to make it their own.

Photography tips shared amongst our community showcase the beauty of the dish, often featuring vibrant garnishes like green onions that add visual appeal to the plated meals.

Frequently Asked Questions

Can I use chicken instead of beef?

Yes, both chicken thighs or breast can be used in place of beef! Just adjust the cooking time since chicken tends to cook faster.

How can I thicken the sauce?

If you prefer a thicker sauce, consider dissolving a tablespoon of cornstarch in cold water and adding it to the slow cooker for the last 30 minutes.

Can I cook this on high instead of low?

Cooking on high is possible; reduce the cooking time to about 3 hours, but keep an eye on it to avoid overcooking.

What should I serve it with?

This dish pairs beautifully with jasmine rice, steamed vegetables, or even cauliflower rice for a low-carb option.

Can I freeze leftovers?

Absolutely! Just store them in an airtight container and freeze for up to 3 months. Thaw in the fridge before reheating.

What if I don’t have a slow cooker?

You can make it on the stovetop by simmering over low heat in a Dutch oven or heavy pot, adjusting cooking times as needed.

How do I adapt this recipe for a low-sodium diet?

Use low-sodium soy sauce or tamari, and limit the amount of sugar added to help control sodium content in this dish.

Is this recipe spicy?

This dish is not spicy at all, but you can add red pepper flakes or Sriracha if you’d like a bit of heat!

Can I prepare this the night before?

Yes, you can prep all ingredients in advance and keep them in the fridge until it’s time to start cooking the next day.

How long should I cook the beef for maximum tenderness?

Cooking on low for 6-8 hours ensures the beef becomes tender and flavorful; check for doneness as slow cookers can vary.

Additional Resources

For more delightful recipes, check out our section on Asian-inspired dishes that highlight similar flavors and techniques. Additionally, our technique guides promote perfecting skills used in this Mongolian Beef recipe.

Explore ingredient information about soy sauce and its alternatives, ensuring you are well-equipped to personalize your dishes. Equipment recommendations for slow cooking are also available for those just starting out.

Don’t forget seasonal variations! Adjust your recipes based on fresh ingredients to keep your cooking exciting and inspired all year round.

Join the Conversation

We invite you to share your experiences with this Slow Cooker Mongolian Beef on social media! Your photography and feedback can inspire others to bring this delicious dish into their kitchens.

Leave reviews and comments below, sharing your unique twists or tips to help fellow cooks in their journey. We love hearing from our community and welcome any adaptations you’ve made to suit your tastes.

Participate in cooking challenges or themed nights to keep the creative juices flowing in the kitchen, showcasing your Mongolian Beef alongside your personal favorites!

The Recipe

Slow Cooker Mongolian Beef

Serves: 4

Prep Time: 15 mins

Cook Time: 6 hours

Total Time: 6 hours 15 mins

Kitchen Equipment Needed

  • Slow Cooker
  • Skillet (for searing)
  • Cutting board
  • Knife
  • Measuring cups and spoons

Ingredients

  • 1.5 lbs flank steak, sliced thinly
  • 1/2 cup soy sauce
  • 1/2 cup brown sugar
  • 1 tablespoon minced garlic
  • 1 tablespoon minced ginger
  • 1/2 cup beef broth
  • 1/2 teaspoon black pepper
  • 1 bell pepper, sliced
  • 2 green onions, sliced (for garnish)

Directions

  1. In a skillet, sear the sliced beef over medium-high heat until browned. Transfer to the slow cooker.
  2. In the same skillet, combine soy sauce, brown sugar, garlic, ginger, beef broth, and black pepper, stirring until sugar dissolves.
  3. Pour sauce over the seared beef in the slow cooker.
  4. Cook on low for 6 hours, then add bell pepper during the last 30 minutes of cooking.
  5. Serve over rice, garnished with green onions.

Recipe Notes

  • For extra flavor, consider marinating the beef overnight.
  • Feel free to substitute with different vegetables based on seasonal availability.
  • Store leftovers in an airtight container for up to 4 days in the refrigerator.
  • Thicken the sauce by adding cornstarch mixed in cold water during the last cooking hour.

Delicious Honey-Glazed Roasted Brussels Sprouts with Bacon Recipe

Delicious Honey-Glazed Roasted Brussels Sprouts with Bacon: A Perfect Side Dish!

⚖️
Difficulty
Easy

⏲️
Prep Time
10 mins

🕒
Cook Time
30 mins

⏱️
Total Time
40 mins

🍽️
Servings
4 servings

Indulge your taste buds with this delightful Honey-Glazed Roasted Brussels Sprouts with Bacon recipe! This dish is not only a feast for the eyes but also offers an irresistible flavor combination that will leave you craving more. The natural sweetness of honey beautifully complements the savory richness of crispy bacon, creating a perfect balance that enhances the earthy goodness of roasted Brussels sprouts. Whether you’re in need of a standout side for a holiday meal or simply a tasty addition to your weeknight dinner, these Brussels sprouts will surely impress.

Roasting Brussels sprouts caramelizes their natural sugars, intensifying their flavors, while the addition of honey and bacon elevates them to gourmet status. The crispy bits of bacon add a wonderful texture that contrasts perfectly with the tender sprouts, ensuring every bite is filled with savory satisfaction. Get ready to bring this delicious dish to your table; your guests and family will hit the repeat button, asking for seconds!

Quick Recipe Highlights

  • Flavor Profile: This dish bursts with a harmonious blend of sweet, savory, and slightly smoky flavors. The honey glaze adds a delightful touch of sweetness, while the crispy bacon provides a satisfying umami richness.
  • Texture: Experience a delightful contrast of textures; the outer leaves of the Brussels sprouts become beautifully crispy, while the insides remain tender. The bacon adds an additional layer of crispiness that complements the dish perfectly.
  • Aroma: As this dish roasts, your kitchen will fill with an enticing aroma of caramelized Brussels sprouts mingled with the rich scent of crispy bacon. The sweetness of honey melts into a heavenly fragrance.
  • Visual Appeal: The dish showcases vibrant, green Brussels sprouts highlighted by golden, crispy bacon bits, finished with a glossy honey glaze that makes it visually striking.
  • Skill Level Needed: This recipe is straightforward and perfect for cooks of all skill levels. Minimal preparation and simple techniques lead to an impressive outcome.
  • Special Equipment: You will need a baking sheet for roasting and a mixing bowl for combining ingredients, making it accessible for any home cook.

Recipe Overview

  • Difficulty Level: This recipe is categorized as easy, making it ideal for beginners who are learning to roast vegetables and understand flavor combinations.
  • Category: This dish falls under side dishes, suitable for various meals, including family dinners, holiday feasts, or potlucks.
  • Cuisine: Rooted in American cuisine, this recipe showcases the vibrant seasonal produce typical of autumn and winter while incorporating universal flavors of bacon and honey.
  • Cost: The ingredients for this recipe are relatively inexpensive, often totaling around $10-15, depending on your local prices for bacon and fresh Brussels sprouts.
  • Season: This dish is particularly appealing in the fall and winter seasons when Brussels sprouts are at their peak freshness, ensuring the best flavor and texture.
  • Occasion: Perfect for holiday gatherings, family meals, or even a weeknight dinner that needs a touch of elegance.

Why You’ll Love This Recipe

The taste and texture appeal of Honey-Glazed Roasted Brussels Sprouts with Bacon cannot be overstated. The combination of tender, caramelized Brussels sprouts with crispy bacon creates a mouthwatering experience. Each bite envelops your palate in contrasting textures that make every mouthful exciting. The sweetness from the honey glaze amplifies the natural flavors, ensuring this side dish is anything but ordinary.

In terms of convenience and preparation benefits, this recipe is quick and straightforward. With just a handful of ingredients and minimal prep work, you can whip up this stunning dish in under an hour. It’s an excellent option for busy weeknights when you want to serve something healthy and delicious without spending hours in the kitchen.

The nutritional advantages of Brussels sprouts are well-documented, being a powerhouse of vitamins, minerals, and antioxidants. They are low in calories yet high in fiber, which is a bonus for those looking to maintain a balanced diet. When combined with bacon, the dish not only satisfies your cravings but also nourishes your body, providing a good source of protein.

Socially, this dish serves as a fantastic conversation starter at any gathering. People love to share their favorite ways to prepare Brussels sprouts or discuss different culinary twists on this classic vegetable. It’s a fun way to connect with others over good food while catering to varying tastes.

Cost-effectiveness and accessibility make this recipe a winner. With ingredients that are easy to find and often on sale during the winter months, you can create a gourmet signature side without breaking the bank. It’s a dish that not only pleases your taste buds but also your wallet.

Historical Background and Cultural Significance

Brussels sprouts originated in ancient Rome but gained significant popularity in Belgium during the 16th century. Interestingly, these tiny cabbages were cultivated in the regions of Belgium that are now known for their rich culinary traditions. Their history paints a picture of a vegetable once thought to be a simple peasant food but transformed into a gourmet side during modern times.

In terms of cultural importance, Brussels sprouts are often associated with holiday meals across numerous cultures. They are a staple in many kitchens during Thanksgiving and Christmas dinners, symbolizing comfort and warmth. This recipe’s addition of honey and bacon represents a modern twist that speaks to the fusion of flavors and the evolution of traditional dishes.

The evolution of the recipe itself showcases how home cooks modify classic dishes to fit contemporary palates. The combination of honey, a sweet note not traditionally paired with Brussels sprouts, reflects the culinary innovation seen in today’s food landscape. Many now take pride in incorporating these kinds of creative twists into age-old recipes.

Regional variations also exist, where different countries adapt Brussels sprouts based on available ingredients and cultural preferences. For instance, in the UK, Brussels sprouts are often boiled, while in the US, roasting has made them a favorite due to the enhanced flavors that come from caramelization.

Ingredient Deep Dive

Brussels Sprouts: Brussels sprouts belong to the Brassica family and are known for their high nutritional value. They are rich in Vitamins K and C, fiber, and essential minerals, making them an excellent addition to a healthy diet. When selecting Brussels sprouts, look for firm, dark green heads, avoiding those that appear yellow or wilted. Store them in a cool, dry place, and keep them unwashed until you’re ready to use them.

Bacon: Bacon is beloved worldwide for its savory flavor and versatility. This ingredient brings a unique smokiness to the dish that complements the sweetness of honey. The key to selecting quality bacon is to choose thick-cut options for better texture when cooked. Store uncooked bacon in the refrigerator, and it can last for several weeks if properly sealed.

Honey: Honey is a natural sweetener known for its health benefits, including antioxidants and anti-inflammatory properties. It enhances the dish’s flavor profile, bringing a lovely glaze to the Brussels sprouts. Opt for raw or local honey for the best quality. Store honey in a cool, dry place, and it has a long shelf life.

Olive Oil: This heart-healthy fat is essential in enhancing the flavors while promoting crispiness during roasting. When selecting olive oil, extra virgin is typically the best choice for its added nutrients and superior flavor profile. Store olive oil in a dark, cool space, away from heat and light.

Common Mistakes to Avoid

  • Overcrowding the baking sheet can lead to uneven cooking. Ensure there is adequate space around each Brussels sprout to allow for proper roasting.
  • Not drying the Brussels sprouts before roasting can prevent them from crisping up. Pat them dry thoroughly after washing.
  • Skipping the preheating of the oven can change the cooking dynamics. Always preheat for optimal roasting results.
  • Using too much honey can overpower the dish’s flavors. Stick to the recommended amount to maintain balance.
  • Neglecting to season adequately can lead to bland sprouts. Don’t forget to add salt and pepper before roasting.
  • Using low-quality bacon can result in a dish that lacks flavor. Invest in good quality for the best results.
  • Not checking for doneness can leave sprouts undercooked. Aim for a nice golden-brown color and tender texture.
  • Opening the oven too often can interrupt the cooking process. Only open it when necessary to monitor the cooking.
  • Not letting the cooked dish rest before serving can affect the texture. Allow a few minutes for it to settle for the best experience.
  • Overcooking the bacon can lead to undesirable texture. Keep an eye on the bacon for optimal crispiness without burning.

Essential Techniques

Roasting vegetables is a critical technique that enhances flavor through caramelization. This method allows natural sugars to develop, giving Brussels sprouts a delicious brown crust while retaining moisture inside. To master roasting, slice the vegetables uniformly so they cook evenly, and ensure there’s enough space on the baking tray.

Preparing bacon properly also requires attention. For an even crisp, lay bacon strips flat on the sheet and cook them in a single layer. Monitor the bacon closely to prevent burning, as cooking times can vary depending on thickness.

Pro Tips for Perfect Honey-Glazed Roasted Brussels Sprouts with Bacon

Use fresh Brussels sprouts for the best taste and texture; they will be sweeter and less bitter than older, dried-out sprouts.

Ensure to cut larger Bruxelles in half to promote even cooking and enhance their caramelization.

Mix the honey with a bit of lemon juice to add an acidic contrast that brightens the sweet flavor.

Consider adding chopped nuts (like pecans or walnuts) for an extra crunchy texture that complements the dish.

Garnish with fresh herbs such as thyme or parsley to add a fresh, aromatic touch just before serving.

If you’re feeling adventurous, drizzle with balsamic vinegar after roasting for an additional layer of flavor.

Variations and Adaptations

For a more spicy kick, consider adding red pepper flakes to the honey mixture. This will create a sweet and spicy contrast that elevates the dish.

If you want to add a seasonal flair, try incorporating chopped apples or pears into the mix. Their sweetness complements honey and creates a delightful texture.

For those seeking a dietary modification, you can skip bacon altogether and utilize smoked paprika to create a similar flavor profile vegan-friendly.

You might also change the honey to maple syrup for a different kind of sweetness that pairs beautifully with Brussels sprouts.

Try using different types of nuts, such as almonds or hazelnuts, if you want to add another layer of flavor and crunch to your dish.

Finally, try experimenting with different glazes, such as a mustard glaze, for a tangy and fulfilling experience.

Serving and Presentation Guide

Plating is essential to making your dish visually appealing. Arrange the Brussels sprouts nicely on a large platter and sprinkle crispy bacon bits on top for emphasis.

Consider using garnishes such as freshly chopped parsley or a sprinkle of toasted nuts for a visually dynamic presentation.

Pair your honey-glazed Brussels sprouts with a complementary side, like mashed potatoes or a grain salad, to create a complete meal.

Serve at the ideal temperature, as Brussels sprouts are best enjoyed warm, where their flavors are most vibrant.

For portion control, consider using small bowls or cups, especially if serving at a buffet-style dinner or party.

Don’t hesitate to use colorful serving dishes that enhance the visual appeal of the green Brussels sprouts and crispy bacon.

Wine and Beverage Pairing

When it comes to wine pairings, a light-bodied white wine like Sauvignon Blanc complements the dish beautifully, enhancing the natural flavors of the Brussels sprouts.

For those preferring red, a Pinot Noir offers a nice contrast with its fruitiness and light tannins that won’t overpower the dish.

If you’re looking for a non-alcoholic alternative, crisp apple cider serves as a refreshing choice that echoes the sweetness of honey.

For coffee lovers, a light roast with notes of citrus can be an excellent way to elevate the meal, warming your palate after savoring the dish.

Always remember to serve your wine chilled or at optimal room temperature, allowing the complex flavors to shine.

Storage and Shelf Life

Once cooled, store leftover Honey-Glazed Roasted Brussels Sprouts with Bacon in an airtight container in the refrigerator for up to 3 days.

If you need longer storage, consider freezing the dish. Spread the cold Brussels sprouts and bacon on a baking sheet to flash freeze and then transfer to a freezer-safe container for up to 2 months.

To maintain texture, reheat by roasting in the oven rather than using a microwave, which can lead to a soggy result.

Always check for signs of spoilage when reheating leftovers, such as off odors, as a good practice to ensure food safety.

When reheating from frozen, allow them to thaw in the refrigerator overnight for better results, then reheat in the oven at 350°F (175°C) for 20-25 minutes.

Make Ahead Strategies

For busy occasions, you can prepare Honey-Glazed Roasted Brussels Sprouts by cleaning and trimming the sprouts the night before. Store them in water to keep them fresh until cooking.

Mix your honey glaze ahead of time and store it in the refrigerator, giving the flavors more time to meld and intensify.

Bacon can also be cooked in advance and reheated just before serving. This allows you to cut down on prep time on the day of the event without compromising flavor.

Consider assembling the Brussels sprouts and bacon on the baking sheet the night before, but remember to allow for some time for them to come to room temperature before roasting.

Avoid mixing the glaze in until you’re ready to cook to prevent the sprouts from getting soggy.

Scaling Instructions

If you want to halve the recipe, use half the number of Brussels sprouts and bacon, ensuring to adjust the honey and olive oil accordingly. The cook time will remain similar.

To double or triple the recipe, use multiple baking sheets, ensuring not to overcrowd for even roasting. Adjust cooking time if necessary, monitoring for doneness.

For larger quantities, consider using larger mixing bowls for combining ingredients and simplify the distribution onto baking sheets.

Re-check cooking times, as roasted Brussels sprouts may need a little extra time in the oven depending on the batch size and oven characteristics.

Store any leftovers based on the scaled recipe portions to avoid waste and enjoy delicious meals later.

Nutritional Deep Dive

This recipe is not only tasty but nutritious! Each serving of Honey-Glazed Roasted Brussels Sprouts with Bacon typically includes around 200 calories, highlighting the importance of portion control for managing caloric intake.

Brussels sprouts provide an excellent source of fiber and vitamins. One serving can offer nearly 50% of the daily recommended intake for Vitamin K and C, contributing to overall health and wellness.

Additionally, bacon adds protein to the dish while also being a source of fats, emphasizing moderation for those watching their dietary fat intake.

The combination of vegetables and protein makes this dish balanced, offering essential nutrients while satisfying cravings. Size servings carefully to manage both caloric intake and nutritional balance.

Lastly, enjoy the benefits of healthy fats from olive oil used in the recipe, which can contribute to heart health when consumed in moderation.

Dietary Adaptations

To adapt this recipe for gluten-free diets, simply ensure that any added seasonings, oils or sauces are certified gluten-free. The essential ingredients are gluten-free by nature.

For a dairy-free version, this dish already is free of dairy products, making it suitable for those with lactose intolerance.

If you want a vegan alternative, omit the bacon and consider using a smoked tofu or tempeh substitute for protein, enhancing the flavor with liquid smoke or smoked paprika.

Low-carb adaptations are straightforward. Since Brussels sprouts are naturally low in carbohydrates, this dish fits perfectly within a low-carb lifestyle.

If you follow a ketogenic diet, simply adjust portions and ensure that any added sweeteners like honey are used sparingly to keep net carbs low.

Paleo adherents can also enjoy this dish as is, just be mindful of honey intake and ensure quality ingredients are used for all components.

Troubleshooting Guide

Texture issues may arise if Brussels sprouts are not cooked enough. Ensure they are fork-tender and caramelized before serving; use the oven temperature as a guide for cooking time.

For flavor balance, if the dish seems too sweet, add a pinch more salt before serving. This can help even out sweetness from honey and enhance overall taste depth.

Temperature problems can occur if the oven is set too low. A high-temperature roast is crucial for generating the crispy texture characteristic of this recipe.

If using non-fresh Brussels sprouts yields a disappointing texture, remember to choose firm sprouts and ensure pottering time is not too long.

If ingredient substitutions are necessary, always test for flavor compatibility. Replacing honey with a different sweetener can create unanticipated results.

Timing concerns may arise during busy meals. Prepare Brussels sprouts and bacon ahead of time to simplify cooking during the main festivities.

Recipe Success Stories

Community feedback has been overwhelmingly positive for Honey-Glazed Roasted Brussels Sprouts with Bacon. Many readers rave about the simplicity and deliciousness of the recipe, making it a favorite for family gatherings.

Informal gatherings often see readers tweaked the original dish, incorporating personal touches like garlic or adding nuts for extra crunch, which were well-received.

Adaptation stories often involve adjustments made for dietary preferences, with readers sharing success in creating vegan or low-carb variations, proving the recipe’s versatility for all diets.

Photography tips frequently highlight the vibrant colors; readers recommend using natural light to catch the glistening honey glaze for social media sharing.

The recipe’s flexibility allows for continuous exploration, encouraging readers to personalize and innovate based on their tastes, leading to a rich tapestry of culinary creativity.

Frequently Asked Questions

Can I use frozen Brussels sprouts for this recipe?
Yes, frozen Brussels sprouts can be used, but fresh ones yield the best flavor and texture. If using frozen, be sure to thaw and pat dry before roasting.

How do I store leftovers?
Store any leftovers in an airtight container in the refrigerator for up to 3 days or freeze for longer storage.

What can I add for extra toppings?
Consider toppings such as roasted nuts, freshly grated cheese, or herbs to enhance the dish further.

Can I make this dish ahead of time?
Yes, you can prep the Brussels sprouts and glaze ahead and roast them just before you’re ready to serve.

What are other cooking methods besides roasting?
You can sauté, steam, or grill Brussels sprouts, though roasting provides the most flavor through caramelization.

How can I adjust the sweetness level?
You can reduce the honey to suit your taste or replace it with a less sweet option, like balsamic glaze, to balance the flavors.

Is it possible to grill these Brussels sprouts?
Absolutely! Use a grill basket for even cooking, but keep a close eye to avoid burning.

What type of bacon is best for this recipe?
Thick-cut bacon is preferred for its texture and flavor; however, any bacon of your choice will work well.

Can I substitute honey with another sweetener?
Yes, maple syrup or agave can be used as alternatives, though they will slightly alter the flavor profile of the dish.

Are there gluten-free options for the glaze?
Yes, honey is naturally gluten-free; just make sure any additional ingredients are also gluten-free.

Additional Resources

Explore more related recipes, like Roasted Garlic Mashed Potatoes or Sweet Potato Casserole, which pair excellently with Brussels sprouts, for full meal ideas.

Check out technique guides on roasting vegetables, where you can learn valuable tips and tricks for achieving perfectly caramelized results every time.

For ingredient information, delve into articles focusing on the nutritional benefits of Brussels sprouts or ways to incorporate seasonal vegetables into your cooking routine.

Equipment recommendations for the best tools can enhance your cooking experience. Consider investing in high-quality baking sheets and roasting pans for optimal results.

Lastly, embrace seasonal variations, researching recipes that highlight the best produce of autumn and winter months to keep your meals vibrant and delicious.

Join the Conversation

We invite you to share your experiences with this recipe on social media, tagging us in your culinary adventures.

Don’t forget to use vibrant food photography techniques, like natural light and colorful backdrops, to capture your delicious creations.

Your reviews and feedback are essential to us; please leave your comments so we can continue improving our recipes.

Engage with our community by discussing your own recipe variations or cooking tips, fostering a rich environment of learning and sharing.

Connect with fellow cooking enthusiasts as you try and adapt this recipe to suit your culinary style, making positive contributions to our delicious journey.

The Recipe

Honey-Glazed Roasted Brussels Sprouts with Bacon

Serves: 4 servings

Prep Time: 10 mins

Cook Time: 30 mins

Total Time: 40 mins

Kitchen Equipment Needed

  • Baking sheet
  • Mixing bowl
  • Sharp knife
  • Cutting board
  • Measuring spoons
  • Spatula

Ingredients

  • 1 lb Brussels sprouts, trimmed and halved
  • 4 slices thick-cut bacon, diced
  • 2 tablespoons honey
  • 2 tablespoons olive oil
  • Salt and pepper to taste

Directions

  1. Preheat your oven to 400°F (200°C).
  2. In a large mixing bowl, combine the halved Brussels sprouts, diced bacon, honey, olive oil, and season with salt and pepper.
  3. Toss everything together until the Brussels sprouts are evenly coated.
  4. Spread the mixture evenly on a baking sheet.
  5. Roast in the preheated oven for about 30 minutes, or until Brussels sprouts are golden brown and crispy, stirring halfway through.
  6. Remove from the oven and let it cool for a few minutes before serving.

Recipe Notes

  • Feel free to adjust the sweetness by adding more or less honey as desired.
  • This recipe can easily be doubled or halved based on your needs.
  • Consider using other types of bacon, like turkey bacon, for a healthier twist.
  • For additional flavor, try adding garlic or shallots to the mix before roasting.

Comforting Hearty Chicken and Vegetable Stew for Every Season

Hearty Chicken and Vegetable Stew: A Comforting Classic

⚖️
Difficulty
Easy

⏲️
Prep Time
15 mins

🕒
Cook Time
45 mins

⏱️
Total Time
60 mins

🍽️
Servings
4 servings

When the weather starts to cool down, there’s nothing more satisfying than a warm bowl of Hearty Chicken and Vegetable Stew. This recipe perfectly balances tender chicken with an array of vibrant vegetables, all simmered together in a rich and savory broth. The flavors meld beautifully over time, bringing warmth and comfort that feels like a hug on a chilly evening. Satisfying and nourishing, this stew not only satisfies hunger but also warms the soul, making it ideal for family dinners or cold-weather gatherings.

The aroma wafting through your kitchen as this stew cooks is truly irresistible. Imagine coming home after a long day to the rich, savory smell of chicken, herbs, and vegetables slowly bubbling away. Each spoonful provides a burst of flavor, texture, and heartiness that will leave you feeling satisfied and content. The best part? It’s adaptable and can easily incorporate whatever vegetables you have on hand, making it a great fridge-cleaning dish!

Quick Recipe Highlights

  • Flavor Profile: This stew boasts a comforting blend of savory chicken, earthy vegetables, and aromatic herbs, all simmered to perfection.
  • Texture: You’ll enjoy the tender chunks of chicken alongside soft yet slightly firm vegetables, creating a delightful mouthfeel.
  • Aroma: Expect a warm, hearty smell that combines the essence of roasted chicken with fragrant herbs like thyme and rosemary.
  • Visual Appeal: The vibrant colors of carrots, peas, and potatoes make for an inviting dish that’s as pleasing to the eyes as it is to the palate.
  • Skill Level Needed: This recipe is beginner-friendly and perfect for anyone wanting to try their hand at stew-making.
  • Special Equipment: A heavy-bottomed pot or Dutch oven is essential for even cooking and flavor development.

Recipe Overview

  • Difficulty Level: This dish is easy to prepare, making it suitable for cooks of all levels—perfect for those just starting out or seasoned home chefs.
  • Category: Hearty Chicken and Vegetable Stew is categorized as a main dish, ideal for lunch or dinner.
  • Cuisine: This recipe draws inspiration from classic comfort foods across various culinary traditions, showcasing the universal love for stews.
  • Cost: With affordable ingredients ranging from chicken to fresh vegetables, this dish is budget-friendly and accessible.
  • Season: Enjoy this stew year-round, but it is particularly satisfying in the fall and winter months when comfort food is in high demand.
  • Occasion: Perfect for family gatherings, cozy dinners, or meal prep for busy weekdays.

Why You’ll Love This Recipe

The Hearty Chicken and Vegetable Stew is not only delicious but also incredibly satisfying. It combines the tender taste of chicken with fresh vegetables like carrots, celery, and potatoes to create a balanced meal. Each bite offers a delightful interplay of flavors that warms your heart and nourishes your body.

This recipe also shines in its convenience—simply toss the ingredients into a pot, let them simmer, and come back to a flavorful dish. The one-pot nature of this recipe means less cleanup, allowing you to focus more on enjoying your meal and the company around you.

Moreover, this stew is packed with essential nutrients. It’s an excellent source of protein from the chicken, while the various vegetables provide vitamins, minerals, and dietary fiber, making it a wholesome choice for any meal. This combination supports overall health and adds vibrant colors to your diet!

Socially, serving this stew at gatherings is a sure way to impress family and friends with its home-cooked charm. It’s ideal for sharing, making it a perfect centerpiece for communal dining. Friends will appreciate the comforting flavors that evoke a sense of home and warmth.

Lastly, cost-effectiveness is another standout factor. The ingredients are often inexpensive and versatile, allowing for substitutions based on availability. This dish can be easily made in large quantities, making it a practical option for feeding a crowd without breaking the bank.

Historical Background and Cultural Significance

Stews have been a staple in culinary traditions around the world for centuries, known for their simplicity and nourishing qualities. The Hearty Chicken and Vegetable Stew draws from this rich history, embracing the essence of comfort food that has long brought families together.

In many cultures, stews were often created to make the most of leftover ingredients, showcasing the ingenuity of home cooks throughout history. As this dish evolved, it became a symbol of resourcefulness and sustenance, often enjoyed during communal and seasonal gatherings.

The recipe has regional influences, with each culture adding its own twist. For instance, French coq au vin, Italian chicken cacciatore, and Spanish pollo al chilindrón highlight the adaptability of chicken stew in various cuisines, showcasing unique spices and preparation techniques.

Today, the Hearty Chicken and Vegetable Stew has stood the test of time, remaining a beloved choice for its heartiness and practicality, resonating with those who seek comfort in their meals, regardless of culinary background.

Ingredient Deep Dive

Chicken serves as the primary protein in this stew. Historically, chicken has been a household staple due to its widespread availability and versatility in cooking. Nutritionally, chicken is a great source of lean protein, essential for muscle repair and overall health.

When purchasing chicken, it’s important to select fresh cuts that are free from blemishes and odors. Store your chicken properly in the refrigerator for up to two days or freeze it for longer storage. If chicken is not available, consider substituting with turkey or tofu for a vegetarian option.

Vegetables like carrots and potatoes add bulk and flavor to the stew. Carrots are a rich source of beta-carotene, fiber, and antioxidants, making them a healthful addition. They add sweetness, especially when sautéed, enhancing the overall taste.

Choose firm, vibrant carrots for the best flavor and nutritional value. They can be stored in the vegetable crisper of your fridge. For a seasonal twist, feel free to swap out with root vegetables or greens based on what is fresh and available.

Common Mistakes to Avoid

  • Skipping the browning process: Not browning the chicken or vegetables first can lead to a stew lacking depth of flavor. Browning caramelizes the sugars and creates a rich base.
  • Overcrowding the pot: Adding too many ingredients at once can lower the cooking temperature, leading to uneven cooking.
  • Not seasoning adequately: Stews require seasoning at multiple stages to build layers of flavor. Be sure to taste as you go.
  • Cooking on too high heat: Simmering allows flavors to blend harmoniously; cooking too quickly can make meat tough and vegetables mushy.
  • Neglecting the essential herbs: Fresh herbs can brighten the stew significantly; don’t forget to add them toward the end for optimal flavor.
  • Skipping the simmer: Allowing the stew to simmer sufficiently helps the flavors meld; rushing the process can result in a bland dish.
  • Using frozen vegetables: While convenient, using frozen vegetables can result in a watery stew. Fresh produce yields better textures and flavors.
  • Omitting acid: Adding a splash of lemon juice or vinegar at the end brightens the flavors and enhances the overall taste of the stew.
  • Neglecting storage instructions: Stews can spoil quickly if not stored properly. Always cool and refrigerate leftovers promptly.
  • Incorrectly storing leftovers: Stews are best kept in airtight containers in the fridge to retain flavor and avoid spoilage.

Essential Techniques

Browning chicken before stewing is vital for flavor development. This technique enhances the meat’s natural richness and creates a robust base for the stew. To master it, ensure your pot is hot and dry, and don’t overcrowd the pan—brown in batches for the best results. Watch for a golden color as a visual cue of success.

Chopping vegetables uniformly is important for even cooking. Taking the time to cut them into similar sizes ensures they cook at the same rate, providing a consistent texture throughout the dish. Common pitfalls include cutting them too large or too small, resulting in uneven doneness. Aim for a size that will hold its shape during the cooking process, generally about one-inch pieces.

Pro Tips for Perfect Hearty Chicken and Vegetable Stew

Always use high-quality chicken broth for maximum flavor—homemade broth is ideal, but low-sodium store-bought can work well, too. This ensures your stew has a rich, savory base without being overwhelmingly salty.

Consider adding a variety of vegetables for a burst of nutrients and color. Peas, green beans, and bell peppers can all complement the mixture beautifully and can be added near the end of cooking to retain their vibrant color.

Season your stew at multiple stages to build depth. Start with salt and pepper, and then adjust as it simmers, adding fresh herbs and spices tailored to your flavor preference.

If you prefer a thicker stew, consider adding a cornstarch slurry or mashing some of the vegetables towards the end of cooking. This will help create a heartier texture.

Don’t rush the simmering process. Letting the stew bubble gently allows flavors to meld, resulting in a tastier dish. An hour of low simmering is ideal.

Incorporate a splash of white wine for a boost of acidity and flavor balance—add it after browning the chicken and reduce it slightly before adding broth.

Make sure to taste frequently. This practice allows you to make adjustments as you go, ensuring well-balanced flavors and textures in the final dish.

Lastly, allow your stew to breathe! Letting it rest for a few minutes after cooking can help the flavors settle and develop further.

Variations and Adaptations

Regional variations of chicken stew can delight your palate. For instance, try making a Mexican-inspired version by incorporating cumin, chili powder, and corn for a southwestern twist.

Incorporate seasonal adaptations by using ingredients that are ripe and fresh during different times of the year. In the summer months, zucchini and squash can be introduced, while root vegetables shine in winter.

Dietary modifications are also simple; for a vegan version, swap the chicken for chickpeas and the broth for vegetable stock, maintaining similar vegetable selections for a hearty alternative.

If you’re looking to switch flavors, consider adding different types of stock or aromatics, such as using coconut milk for a Thai version or incorporating spices prevalent in Indian cuisine for a unique take.

Texture modifications can create intriguing variations; consider adding dumplings for a hearty twist or even serving with a crusty bread for dipping and bulk!

For presentation, consider garnishing with fresh herbs like chopped parsley or cilantro, which add color and brightness to your stew.

Serving and Presentation Guide

Plating is integral to the dining experience; serve your Hearty Chicken and Vegetable Stew in deep bowls that hold the warmth, allowing for easy scooping.

Add a splash of color with garnishes such as fresh parsley, thyme, or chives on top to enhance the visual appeal while providing a hint of freshness.

Traditional accompaniments include a crusty baguette or homemade biscuits for an extra layer of satisfaction and the perfect texture to soak up the flavorful broth.

Modern serving suggestions include pairing it with a simple green salad dressed with vinegar-based dressing to balance the richness of the stew.

Consider serving at a warm temperature to maintain the comforting feel. Stews are best enjoyed hot, so reheat gently on the stove if needed.

Portion control is also key; ensure each bowl has a good balance of chicken, vegetables, and broth to satisfy while avoiding excessive food waste.

Wine and Beverage Pairing

For a classic pairing, consider a medium-bodied white wine like Chardonnay or a light red like Pinot Noir, both of which complement the rich flavors of the chicken without overpowering it.

If you prefer non-alcoholic options, a sparkling water with lemon or a restorative herbal tea like chamomile or ginger pairs beautifully with the warm stew, cleansing the palate.

Coffee lovers might enjoy a rich brew served on the side; the flavors of dark roasted coffee can provide an interesting contrast to the stew’s sweetness.

When serving wine, be sure it’s chilled for whites and slightly cooler than room temperature for reds to enhance the tasting experience.

For optimal enjoyment, serve wine in appropriate glassware to enhance the aromas and flavors, ensuring that each sip complements your meal!

Storage and Shelf Life

To store your Hearty Chicken and Vegetable Stew, be sure to cool it to room temperature before transferring to airtight containers. It can be safely stored in the refrigerator for 3-4 days.

When freezing, portion the stew into freezer-safe containers or zip-top bags. It can last up to 3 months in the freezer. Label with the date for easy reference.

Signs of spoilage include an off smell, unusual color, or a change in texture. Always perform a sniff test before consuming leftovers.

When reheating, do so slowly on the stove or microwave, adding a splash of broth or water to avoid dryness. Ensure reheat thoroughly to a safe temperature of 165°F.

For best quality, consume leftover stew within the first few days and avoid refreezing thawed stew for safety reasons.

Make Ahead Strategies

Prep your Hearty Chicken and Vegetable Stew components a day ahead by chopping vegetables and marinating chicken in your seasoning for enhanced flavor. Store them separately in the fridge until you’re ready to cook.

Consider making a larger batch and freezing individual portions. This allows for a quick meal option on busy days, saving time while improving convenience.

If prepping ahead, cool the stew before storing; hot stews can cause condensation in the container, leading to an undesirable texture when reheating.

When it comes time to enjoy your stew, reheat slowly, adding fresh herbs or spices to rejuvenate flavors that may have mellowed during storage.

On serving day, consider adding fresh elements, such as a sprinkle of lemon juice or a dash of hot sauce to elevate flavor and excitement upon reheating.

Scaling Instructions

To halve the recipe, simply divide the ingredients by two, adjusting according to your family’s preferences in terms of seasoning for flavor balance.

For larger gatherings, doubling or tripling the ingredients is easy; however, be mindful of your equipment size. You may need a larger pot or split batches between two pots for even cooking.

When scaling up, also make note of timing modifications as larger quantities may require additional time for simmering to develop flavors adequately.

For best results, use a thermometer to ensure the chicken reaches 165°F regardless of scaling, ensuring a safe and thoroughly cooked dish.

Ultimately, adjustments should be made based on your pots and pans’ capacities, ensuring nothing gets overcrowded or overcooked during preparation.

Nutritional Deep Dive

Your Hearty Chicken and Vegetable Stew is filled with nourishing ingredients that contribute to a balanced meal. The protein from the chicken supports muscle health, while the variety of vegetables offers a wealth of vitamins and fiber.

A macro breakdown reveals the balance of protein, carbohydrates, and fats, allowing for guilt-free consumption. The chicken contributes primarily to protein, while the vegetables add healthy carbs and fibers, creating a fulfilling meal.

Micronutrient analysis shows the stew is rich in vitamins A, C, and several B vitamins, essential for maintaining energy levels and overall well-being.

Consider dietary guidelines and individual health goals when enjoying this stew, making adjustments to fit your nutritional needs without sacrificing flavor.

For weight management, serving this stew with a side salad or additional vegetables can provide bulk, helping to keep you full longer without excessive caloric intake.

Dietary Adaptations

For gluten-free diners, this stew is naturally gluten-free, offering a comforting choice for those with dietary restrictions without modifying any ingredients.

For dairy-free adjustments, simply ensure your broth is dairy-free and free from additives typically found in processed broths.

For vegan adaptations, replace chicken with chickpeas or tofu, and use vegetable broth to ensure a fulfilling meal with plant-based proteins.

Low-carb and keto options can be achieved by replacing starchy vegetables like potatoes with cauliflower or turnips, maintaining similar textures and flavors without the carbs.

Paleo eaters will likewise find this stew meets their needs; the ingredients align with whole foods, free from processed grains or sugars.

Lastly, those following a low-FODMAP diet can replace high-FODMAP vegetables with lower-FODMAP options like zucchini and green beans to keep the meal gut-friendly.

Troubleshooting Guide

If your stew lacks flavor, try adding salt gradually and tasting as you go; also consider a splash of acid, such as vinegar or lemon juice, to elevate the taste.

For texture issues, if the stew is too watery, a cornstarch slurry can thicken it up while quickly incorporating into the stew without compromising flavor.

If your stew is too salty, try diluting it with more vegetables and broth, allowing them to soak up excess salt while enhancing the overall number of servings.

Temperature problems can arise in cooking; ensure to keep it at a gentle simmer for the best results, preventing scorching and even cooking.

When substituting ingredients, pay attention to moisture levels. Ingredients like zucchini can release water, potentially changing the overall consistency of your dish.

For timing issues, remember that larger batches may require additional simmering time to ensure the chicken is thoroughly cooked and flavors meld properly.

Recipe Success Stories

Our community of home cooks has embraced this Hearty Chicken and Vegetable Stew, sharing their versions and adaptations, which reflect individual tastes and preferences across social media.

Many readers have celebrated the versatility of the recipe, sharing how they modified it based on local ingredients, showcasing the adaptability of this classic dish.

Some fans have shared thoughtful photography tips, recommending natural lighting and colorful garnishing for beautiful social media presentations of their culinary creations.

Recurring themes in feedback include the deep flavor and comfort this stew provides, making it a celebrated dish during family gatherings and personal celebrations.

Frequently Asked Questions

Q: Can I make this stew in a slow cooker?
A: Yes, you can! Simply brown the chicken and vegetables first, then transfer everything to the slow cooker with broth, and cook on low for about 6-8 hours or high for about 3-4 hours.

Q: How can I store leftovers?
A: Allow the stew to cool, then store it in an airtight container in the fridge for up to 4 days. You can also freeze it for up to 3 months.

Q: What’s the best way to reheat stew?
A: Reheat in a pot over medium heat, adding a bit of broth if it appears too thick. Ensure it reaches at least 165°F before serving.

Q: Can I use frozen vegetables in the stew?
A: While fresh vegetables are preferred for texture, you can use frozen vegetables, just be aware they may release more water and make the stew slightly less thick.

Q: Is this stew healthy?
A: Yes! It’s packed with protein from the chicken and vitamins from the vegetables, making it a nutritious choice when balanced with portion sizes.

Q: Can I make this stew ahead of time?
A: Absolutely! This stew can be made a day in advance; the flavors deepen and enhance as it rests in the fridge overnight.

Q: What can I use instead of chicken?
A: You can substitute chicken with turkey or for vegetarian versions, try chickpeas or a variety of beans.

Q: What spices can I add for extra flavor?
A: Consider adding paprika, bay leaves, or even a pinch of cayenne for a bit of extra heat to enhance the flavor profile.

Q: Can I add pasta or rice to this stew?
A: Yes! You can add a handful of uncooked pasta or rice towards the last 20 minutes of cooking for added texture and heartiness.

Q: How can I make it more visually appealing?
A: Garnishing with fresh herbs before serving adds color, and serving in a brightly colored bowl can enhance the visual experience.

Additional Resources

Explore related recipes such as Classic Beef Stew, Vegetable Barley Soup, or Creamy Mushroom Risotto for more hearty meal options during colder months.

For technique guides, check out resources on browning meat or the best methods for preserving the freshness of vegetables. Understanding these techniques can elevate your cooking skills.

Ingredient information can assist you in selecting fresh produce and protein, helping you understand what to look for when shopping to get the best quality available.

Equipment recommendations can help you find the right pots, pans, and kitchen tools to streamline your cooking process and replicate the best outcomes.

For seasonal variations, consider exploring summer variations with lighter ingredients, or seasonal casseroles that incorporate mushrooms, fresh peas, and herbs!

Join the Conversation

Engage with our community by sharing your versions of the Hearty Chicken and Vegetable Stew on social media! Use our hashtags to share photography of your culinary masterpiece.

Leave recipe reviews detailing what worked well for you and how you made the recipe your own! We love hearing about your experiences and encourage readers to share adaptation stories.

As home chefs, engaging with one another enhances the collective experience. Let’s celebrate cooking together, sharing tips and tricks in making this comforting recipe a regular part of your kitchen repertoire.

The Recipe

Hearty Chicken and Vegetable Stew

Serves: 4 servings

Prep Time: 15 mins

Cook Time: 45 mins

Total Time: 60 mins

Kitchen Equipment Needed

  • Heavy-bottomed pot or Dutch oven
  • Wooden spoon or spatula
  • Measuring cups and spoons
  • Knife and cutting board

Ingredients

  • 1 pound boneless, skinless chicken thighs
  • 2 carrots, diced
  • 2 celery stalks, diced
  • 1 onion, chopped
  • 2 potatoes, diced
  • 3 cloves garlic, minced
  • 4 cups chicken broth
  • 2 tablespoons olive oil
  • 1 teaspoon dried thyme
  • 1 teaspoon dried rosemary
  • Salt and pepper to taste

Directions

  1. Heat olive oil in a heavy-bottomed pot over medium heat.
  2. Add chicken thighs; season with salt and pepper and brown on all sides. Remove and set aside.
  3. Add onion and garlic to the pot, cooking until softened.
  4. Add carrots, celery, and potatoes, sautéing for an additional 5 minutes.
  5. Return chicken to the pot and pour in the chicken broth. Stir in thyme and rosemary.
  6. Bring to a boil, then reduce heat and let simmer for 45 minutes, until chicken is cooked through.
  7. Serve hot, garnished with fresh herbs if desired.

Recipe Notes

  • Feel free to adjust the vegetables based on what you have available.
  • This stew can be made ahead and tastes even better the next day.
  • Add dumplings for a heartier dish or serve with crusty bread.

Hearty Beef & Tomato Macaroni Soup for Comforting Meals

Beef & Tomato Macaroni Soup: A Hearty Comfort Food Delight

⚖️
Difficulty
Easy

⏲️
Prep Time
15 mins

🕒
Cook Time
30 mins

⏱️
Total Time
45 mins

🍽️
Servings
4

Beef & Tomato Macaroni Soup is the ultimate comfort food that warms not just the body but also the soul. This hearty soup combines tender beef, rich tomatoes, and comforting macaroni to create a dish that’s both filling and flavorful. The savory combination of spices, aromatics, and fresh ingredients creates a tantalizing aroma that beckons you to the kitchen.

Imagine a cold evening where a bowl of Beef & Tomato Macaroni Soup awaits. The vibrant colors of fresh tomatoes, the comforting texture of macaroni, and the distinct flavor of seasoned beef make this dish irresistible. It’s a perfect blend of heartiness and nostalgia, reminiscent of family dinners and comforting gatherings.

Quick Recipe Highlights

  • Flavor Profile: This soup features a robust combination of beef and tangy tomatoes, balanced by Italian herbs and spices that create a delightful taste experience.
  • Texture: The tender beef and soft macaroni in a rich tomato broth offer a soothing mouthfeel that’s both satisfying and comforting.
  • Aroma: The savory scent of simmering beef coupled with the sweet notes of fresh tomatoes fills the kitchen, inviting everyone to enjoy a warm bowl.
  • Visual Appeal: The dish boasts vibrant reds from tomatoes, golden pasta, and garnishes of fresh herbs that make it visually enticing.
  • Skill Level Needed: This recipe is beginner-friendly, requiring only basic culinary techniques that anyone can master.
  • Special Equipment: A large pot or Dutch oven is recommended for proper cooking and flavor development.

Recipe Overview

  • Difficulty Level: This recipe is rated easy, making it ideal for cooks of all skill levels. Combining a few simple steps ensures a delicious outcome.
  • Category: Perfect for a cozy dinner, this dish fits into both soups and pasta categories.
  • Cuisine: This dish draws inspiration from classic Italian-American cuisine, where flavors of beef and tomatoes shine.
  • Cost: The affordability of ingredients makes this recipe budget-friendly while delivering comfort and satisfaction.
  • Season: Enjoy this soup year-round, especially in the chilly months when hearty meals are most comforting.
  • Occasion: This is a great dish for family dinners, casual get-togethers, or meal prep for a busy week ahead.

Why You’ll Love This Recipe

This Beef & Tomato Macaroni Soup delivers on taste and texture. The satisfying bite of tender beef pairs perfectly with soft macaroni, creating a delightful contrast that keeps each spoonful interesting. The robust flavor from simmering tomatoes and seasonings rounds out the taste, ensuring every bowl is full of comforting goodness. This soup has a way of warming the heart and soul.

Convenience is a hallmark of this recipe. With an easy prep time, you can whip up a pot of Beef & Tomato Macaroni Soup in no time. Whether you’re looking for a quick weeknight meal or a delightful weekend treat, this recipe makes cooking straightforward and stress-free.

Nutritionally, this soup is a great choice as it’s packed with protein from beef, healthy carbohydrates from macaroni, and essential vitamins from tomatoes. It’s a delicious way to incorporate wholesome ingredients into your meals, ensuring you’re not only satisfied but also nourished.

Socially, this recipe holds immense value. There’s something about sharing a warm soup with family or friends that fosters connection. It’s a dish that invites conversation and brings people together around the dinner table, making it a staple for gatherings and celebrations.

Finally, the cost-effectiveness of this recipe makes it accessible for everyone. With affordable ingredients and a substantial yield, you can prepare a satisfying meal without breaking the bank, making it a go-to option for budget-conscious cooks.

Historical Background and Cultural Significance

The origins of Beef & Tomato Macaroni Soup can be traced back to the Italian-American immigrant experience, where simple ingredients were transformed into hearty meals. As families settled in urban areas, they blended their culinary traditions with local flavors, resulting in the comforting soup many enjoy today.

Culturally, this soup represents the heart of home cooking. It symbolizes warmth, comfort, and the joy of sharing meals with loved ones. In many Italian households, such dishes were often made as a way to use leftovers creatively, reflecting resourcefulness in family cooking.

Over time, the recipe has evolved, incorporating various regional ingredients and styles. Some families might add beans, while others prefer additional vegetables, showcasing the versatility of the dish.

Regional variations abound, with each community adding its unique touch. From spicy versions in the South to vegetarian takes in urban centers, Beef & Tomato Macaroni Soup continues to be a beloved dish in many kitchens across America.

Ingredient Deep Dive

Beef serves as the star ingredient in this soup, adding protein and depth to the flavor. Ground beef is most common, but cuts like chuck or stew meat can enhance the richness. Be sure to select lean cuts to reduce excess fat, and store your beef properly in the refrigerator or freezer for optimal freshness.

Tomatoes are essential for creating that deep, comforting broth. Using canned tomatoes can yield great results, but fresh tomatoes in season can elevate the flavor profile. Recognize the importance of selecting ripe tomatoes, as they bring freshness and natural sweetness to the soup. Store tomatoes at room temperature, and remember to use them promptly for the best taste.

Macaroni holds everything together, providing a soft texture that complements the other ingredients. Choosing high-quality pasta ensures it maintains its shape in the broth. Store dry macaroni in an airtight container, and be mindful of its expiration date for the best possible results.

Herbs and spices are crucial in enhancing the overall flavor. Fresh herbs, such as basil or parsley, add brightness, while dried spices like oregano and thyme bring warmth. Selecting and storing fresh herbs properly can extend their lifespan and flavor impact.

Broth or stock is often used as the base for the soup. Whether homemade or store-bought, it introduces additional flavor. If using store-bought options, opt for low-sodium varieties for better control over salt levels. Ensure proper storage to extend shelf life and always check for expiration dates.

Common Mistakes to Avoid

  • Overcooking the pasta: This can lead to mushy texture. Cook the pasta until it is just al dente, as it will continue cooking in the soup.
  • Using cold ingredients: Starting with room temperature ingredients helps achieve consistent cooking and better flavor development.
  • Not seasoning properly: Always taste your soup while cooking and adjust seasoning as needed to create a well-balanced flavor.
  • Skipping the browning step: Failing to brown the beef can lead to a less flavorful broth. Take the time to brown your meat for added depth.
  • Adding tomatoes too early: Introducing tomatoes prematurely without proper cooking can result in a raw taste. Add them later in the cooking process to build flavor.
  • Ignoring the simmer: A good simmer melds flavors—avoid boiling to keep the meat tender and the soup cohesive.
  • Not letting it rest: Allow the soup to sit for a few minutes before serving to enable the flavors to marry effectively.
  • Inadequate storage methods: Improper storage can affect freshness and flavor; ensure your soup is cooled properly before refrigerating.

Essential Techniques

Browning beef is a critical technique for developing flavor in your Beef & Tomato Macaroni Soup. Ensuring the meat is browned on all sides creates rich, caramelized bits that enhance the taste of the broth. Use medium-high heat and avoid overcrowding the pot to achieve the best results.

Simmering the soup gently is essential for melding the flavors together. A rolling boil can break down the ingredients too quickly, so keeping the heat slightly lowered allows a slower extraction of flavors, resulting in a smoother, rich broth. Aim for a gentle bubble, which indicates the soup is simmering correctly.

Stirring regularly helps to prevent the pasta from sticking to the bottom of the pot. Also, it ensures even cooking and helps the ingredients meld beautifully. Remember to scrape the bottom of the pot to release any delicious fond that may form as the soup cooks.

Pro Tips for Perfect Beef & Tomato Macaroni Soup

1. Start with cold beef and let it come to room temperature for better searing results, which enhances flavor.
2. Choose high-quality canned tomatoes for the best taste; San Marzano tomatoes are a great option.
3. Experiment with fresh herbs for garnish; they brighten up the dish and enhance the overall flavor.
4. If you enjoy spice, add a pinch of red pepper flakes for some heat without overwhelming the dish.
5. For added creaminess, stir in some grated Parmesan cheese just before serving.
6. Make it a one-pot meal by adding chopped vegetables like carrots or celery for extra nutrients and flavor.
7. Save leftover soup to enjoy for lunch the next day—soups often taste even better the second time around.
8. Adjust the thickness of the soup by adding more or less broth based on your personal preference.

Variations and Adaptations

Beef & Tomato Macaroni Soup is highly adaptable based on regional tastes and seasonal availability. In some regions, beans such as kidney or black beans can enhance the heartiness of the soup while adding fiber. These legumes can easily replace some of the beef for a meatless option.

For seasonal adaptations, consider adding fresh vegetables, such as zucchini or bell peppers, during the summer months, making the soup lighter and more vibrant. In the colder months, root vegetables like parsnips or carrots can be added to provide warmth and additional sweetness.

Dietary modifications can also be made by using whole grain or gluten-free pasta. Both options keep the heartiness while meeting dietary restrictions. Additionally, lean ground turkey or chicken can replace beef for a lighter version without sacrificing flavor.

Flavor variations can be introduced by adding smoked paprika for a smokier profile or experimenting with different herbs, such as thyme or rosemary, to create a distinctive taste.

For those wanting to elevate presentation, consider serving the soup in bread bowls for a rustic touch. It not only makes for an appealing presentation but also enhances the overall experience.

Serving and Presentation Guide

When plating your Beef & Tomato Macaroni Soup, use deep bowls that emphasize the abundance of ingredients. Garnish with a sprinkle of freshly chopped parsley or basil for a pop of color and freshness.

Consider serving alongside crusty bread or a light salad for a balanced meal. This not only adds texture but also rounds out the dining experience. For a modern twist, swirl some pesto into each bowl just before serving, adding both flavor and a striking appearance.

Serve the soup warm but ensure it’s not boiling hot, allowing your guests to enjoy it comfortably. Offer grated cheese on the side, letting individuals choose how much to add while enhancing their experience.

For portion control, consider smaller servings if accompanying the soup with larger main dishes or multiple courses. This keeps it light while still satisfying.

Wine and Beverage Pairing

Wine pairings can elevate the experience of enjoying your Beef & Tomato Macaroni Soup. A medium-bodied red wine, such as Chianti or Merlot, complements the richness of the beef and acidity of the tomatoes beautifully.

For those opting for non-alcoholic alternatives, a sparkling water with a slice of lemon or lime can provide a refreshing contrast to the warm soup. Alternatively, consider tea options such as a mild herbal tea to cleanse the palate.

If you enjoy coffee or tea with your meals, aim for light roast coffees or chamomile tea, which won’t overpower the flavors of the soup.

Temperature considerations are crucial; serve wine at optimal temperatures, around 60-65°F, to best appreciate the flavors and aromas of the chosen bottle.

When serving, place your wine and water options next to the soup for convenience, ensuring guests can easily refresh their drinks as they enjoy their meal.

Storage and Shelf Life

To store Beef & Tomato Macaroni Soup, place it in an airtight container in the refrigerator. It can generally be safely stored for 3-4 days. Ensure it cools completely before sealing to avoid condensation, which can alter texture and flavor.

For longer storage, consider freezing the soup. After cooling, transfer it into freezer-safe bags, making sure to remove excess air, allowing it to last up to three months. For best results, reheat frozen soup slowly to preserve the texture.

Signs of spoilage include an off smell or unusual color changes. If any freezer burn appears, it’s best to discard the soup to ensure quality upon reheating.

Reheating can be done in a saucepan over medium-low heat, stirring occasionally until heated through. For frozen soup, allow it to thaw overnight in the refrigerator for easier reheating.

Freezing guidelines suggest dividing the soup into smaller portions, making it easier to thaw only what you need, minimizing waste and enhancing convenience.

Make Ahead Strategies

To enjoy Beef & Tomato Macaroni Soup with minimal last-minute effort, consider preparing it a day in advance. Flavors develop beautifully overnight, resulting in a richer taste. Store it properly in the refrigerator after cooling it down.

While prepping, chop vegetables and measure spices in advance, allowing for a smoother cooking process. Store prepped ingredients in separate containers labeled with the date for easy access when ready to cook.

Quality does not significantly decrease when made ahead, especially when properly stored. As flavors meld, the soup often tastes even better the next day, making it a perfect option for meal planning.

For assembly, simply reheat the soup before adding fresh herbs or a dollop of cream to maintain freshness. Think about how to incorporate any fresh elements just before serving, like a sprinkle of cheese or a drizzle of olive oil.

Lastly, consider prepping extra pasta separately to prevent overcooking or mushiness when stored. Add the pasta just before serving to maintain its ideal texture.

Scaling Instructions

Scaling the Beef & Tomato Macaroni Soup recipe is easy. To halve the recipe, simply reduce all ingredient quantities by 50%, ensuring flavor remains balanced.

For larger gatherings, multiplying the recipe by two or three works well. Consider the size of your pot and adjust cooking times as necessary, allowing more time for simmering to ensure flavors are equally rich in larger batches.

Timing modifications may help; larger quantities may need extra simmering time to meld flavors thoroughly. Keep an eye on the consistency and adjust the broth as necessary to prevent it from becoming too thick.

When scaling, think about maximizing storage. Use larger containers for fractions of the batch you plan to store, ensuring the soup cools properly before refrigeration or freezing for future meals.

Lastly, for larger portions, ensuring adequate seasoning might require a taste test before finalizing quantities, as more may result in the flavors needing a tweak to maintain balance.

Nutritional Deep Dive

Nutritionally, each serving of Beef & Tomato Macaroni Soup offers a well-rounded profile. Breaking down the macros, expect a healthy serving of protein from the beef, complemented by carbohydrates from the pasta, essential for energy.

Micronutrient content is abundant due to the incorporation of tomatoes and any added vegetables. The Vitamin C from tomatoes supports immune function, while B vitamins from beef help energy metabolism, making it a beneficial addition to your diet.

Health benefits extend beyond macronutrients; a warm bowl of soup can be nurturing for the soul, aiding in hydration and comfort, especially during colder seasons. The balance of ingredients can contribute positively to overall diet quality.

For portion analysis, consider controlling servings to prevent excess calorie intake, especially if served as part of a multi-course meal. Keeping a watchful eye on portion sizes can also help with weight management strategies.

Dietary considerations are important; those managing dietary restrictions can easily alter ingredients, swapping macaroni for whole-wheat or gluten-free options without sacrificing taste or nutrition.

Dietary Adaptations

Making Beef & Tomato Macaroni Soup gluten-free is simple. Substitute traditional macaroni with gluten-free pasta options that maintain the soup’s hearty essence while accommodating gluten sensitivities.

For dairy-free variations, skip any added cheese, and consider enhancing the soup with coconut milk for creaminess or nutritional yeast for added flavor without dairy.

Vegetan adaptations allow for a meatless version by replacing beef with hearty mushrooms or lentils, creating a fulfilling meal that aligns with plant-based diets while retaining flavor and richness.

Low-carb adaptations can be achieved by substituting pasta with spiralized vegetables like zucchini or cauliflower rice, offering a lighter dish that’s still full of flavor without excess carbohydrates.

Keto modifications might include using grass-fed beef and full-fat broth, focusing on high-quality ingredients while keeping carbs low.

Other specific diets, like paleo or low-FODMAP, can be achieved through ingredient adjustments. Just ensure that all components align with dietary guidelines to guarantee compatibility.

Troubleshooting Guide

Texture issues can arise if pasta is overcooked; ensure it remains al dente by following cooking time precisely. If the pasta becomes mushy, consider reducing the amount next time or adding it closer to serving.

Flavor balance concerns can be addressed by tasting during the simmering process. If it’s too salty or bland, adjust by incorporating fresh herbs or additional broth to create harmony.

Temperature problems may result from cooking too quickly on high heat; always opt for a gentle simmer to ensure meat stays tender while thickening the soup gradually.

Equipment challenges may involve stuck-on bits; deglazing the pot with broth after browning beef can prevent this inconvenience while adding more flavor.

Ingredient substitutions can lead to unexpected results—if you’re swapping proteins or herbs, be prepared for variations in taste and texture.

Timing concerns can be mitigated by prep planning; if you find yourself pressed for time, consider simmering the soup longer on lower temperatures to achieve adequate flavor without rushing.

Recipe Success Stories

Many readers have embraced the comforting tradition of Beef & Tomato Macaroni Soup, sharing their variations and successes across social platforms. Community feedback often revolves around the heartwarming experience of family gatherings centered on this dish.

Several variations have emerged, with users incorporating different proteins and vibrant vegetables, showcasing personal touches that resonate with individual family traditions.

Adaptation stories reveal the recipe’s versatility—transformed to be gluten-free or vegan, still managing to retain its soul-warming essence.

Photography tips from readers help enhance the visual appeal of the dish. Beautifully styled bowls with garnishes catch the eye, leading to increased interest in sharing these comforting recipes.

Engagement grows as members share their unique modifications, contributing to an enriching experience that celebrates home cooking, friendship, and community.

Frequently Asked Questions

1. Can I use canned tomatoes instead of fresh?
Yes, using canned tomatoes is recommended as they’re often more concentrated in flavor and provide consistent results in overall taste.

2. How can I reduce salt in the recipe?
Opt for low-sodium broth and avoid adding extra salt until the end of the cooking process to control flavor levels better.

3. Can I freeze the leftovers?
Absolutely! Store leftover soup in airtight containers or freezer bags, ensuring it cools completely before freezing for optimal freshness.

4. What herbs can I use to enhance flavor?
Fresh or dried herbs like basil, oregano, and thyme work well and can be easily adjusted depending on your taste preferences.

5. Is this soup suitable for meal prep?
Yes! It stores well in the fridge and can be made ahead of time, improving in flavor as it sits.

6. Can I add vegetables to the soup?
Certainly! Carrots, celery, or bell peppers can be incorporated for added nutrition and color.

7. How do I store leftover macaroni from the soup?
It’s best to store the macaroni separately from the soup to maintain its texture. Combine them just before enjoying leftovers.

8. Is this soup kid-friendly?
Yes, the comforting flavors and hearty nature make it appealing to children, especially when served with their favorite bread.

9. Can I make this soup in a slow cooker?
Yes, you can adapt this recipe for a slow cooker by browning the beef first and then adding the remaining ingredients for slow simmering.

10. How long does it take to cook on the stovetop?
The overall cooking time is about 30 minutes once all ingredients are in the pot, offering a quick meal option.

Additional Resources

For those looking for related recipes, consider trying variations like Italian Wedding Soup or a classic Tomato Basil Soup to complement your meal rotation.

Explore technique guides on making homemade broth or mastering pasta cooking for a richer culinary experience, elevating your cooking skills alongside this recipe.

Ingredient information about beef types, pasta varieties, and seasonings can help you choose the best options for your personal taste and dietary needs.

Equipment recommendations, such as investing in a durable Dutch oven or quality knives, will aid in achieving optimal results as you prepare this and other dishes.

Additionally, seasonal variations can inspire fresh ingredient choices, allowing you to adapt this recipe to align with local, available produce across the year.

Join the Conversation

Engagement in social media sharing is encouraged—when you create your Beef & Tomato Macaroni Soup, snap a photo and share your stories! Provide tips and tricks from your cooking experience to inspire other home chefs.

Photography tips come in handy while capturing your dishes. Experiment with natural light and different angles for the most visually appealing representation of your savory soup.

Take the time to leave reviews, offering feedback on the recipe and sharing your experiences with family or restaurant-style touches to this beloved dish.

Community engagement around this recipe gives birth to new ideas, and we encourage you to share your favorite variations, inspiring others to step into their kitchens and create.

As you explore this recipe, remember there’s always something new to learn and share within the culinary community.

The Recipe

Beef & Tomato Macaroni Soup

Serves: 4

Prep Time: 15 mins

Cook Time: 30 mins

Total Time: 45 mins

Kitchen Equipment Needed

  • Large pot or Dutch oven
  • Wooden spoon
  • Measuring cups and spoons
  • Sharp knife and cutting board

Ingredients

  • 1 lb ground beef
  • 1 can (14.5 oz) diced tomatoes
  • 4 cups beef broth
  • 1 cup macaroni pasta
  • 1 medium onion, chopped
  • 2 cloves garlic, minced
  • 1 tsp oregano
  • 1 tsp basil
  • Salt & pepper to taste
  • Fresh parsley for garnish (optional)

Directions

  1. In a large pot or Dutch oven, brown the ground beef over medium-high heat until fully cooked. Drain excess fat.
  2. Add chopped onion and minced garlic, cooking until softened, about 3–4 minutes.
  3. Stir in the diced tomatoes, beef broth, oregano, basil, salt, and pepper. Bring to a simmer.
  4. Add macaroni and cook according to package instructions until al dente, about 8–10 minutes.
  5. Adjust seasoning if necessary, then remove from heat and let it sit for a few minutes to thicken.
  6. Serve hot, garnished with fresh parsley if desired.

Recipe Notes

  • Leftovers can be refrigerated for up to 4 days or frozen for longer storage.
  • For added richness, consider adding a splash of cream just before serving.
  • Experiment with different vegetables or proteins to personalize the recipe.