Delicious Cracker Barrel Homemade Chicken & Dumplings Recipe Unveiled

Cracker Barrel Homemade Chicken & Dumplings: A Comfort Food Classic

⚖️
Difficulty
Moderate

⏲️
Prep Time
30 mins

🕒
Cook Time
1 hr 15 mins

⏱️
Total Time
1 hr 45 mins

🍽️
Servings
6 servings

Cracker Barrel Homemade Chicken & Dumplings is the epitome of comfort food, bringing warmth and satisfaction with every bite. This dish features tender pieces of chicken simmered in a hearty broth, accompanied by fluffy dumplings that soak up all those amazing flavors. The nostalgic recipes reminiscent of Sunday dinners will remind you of family gatherings while filling your home with the delightful aroma of home-cooked goodness. Perfect for chilly nights or when you’re just craving something hearty, this dish will leave you feeling cozy and content.

Prepare yourself for a culinary adventure that embraces both simplicity and profound flavor. The luscious, rich chicken broth serves as a welcoming base, while each mouthful of dumpling creates a delightful experience of soft texture. One bite transports you to a place of warmth and comfort, making this Cracker Barrel recipe a beloved classic to cherish, share, and savor. Whether you’re serving it for a family dinner or a potluck, Cracker Barrel Homemade Chicken & Dumplings is sure to impress.

Quick Recipe Highlights

  • Flavor Profile: This dish boasts a savory blend of tender chicken offset by the richness of the broth, enhanced with herbs that add depth.
  • Texture: The fluffy, cloud-like dumplings contrast beautifully with the succulent chicken and smooth broth.
  • Aroma: Expect a comforting, homey scent with notes of chicken, herbs, and a hint of buttery goodness wafting through your kitchen.
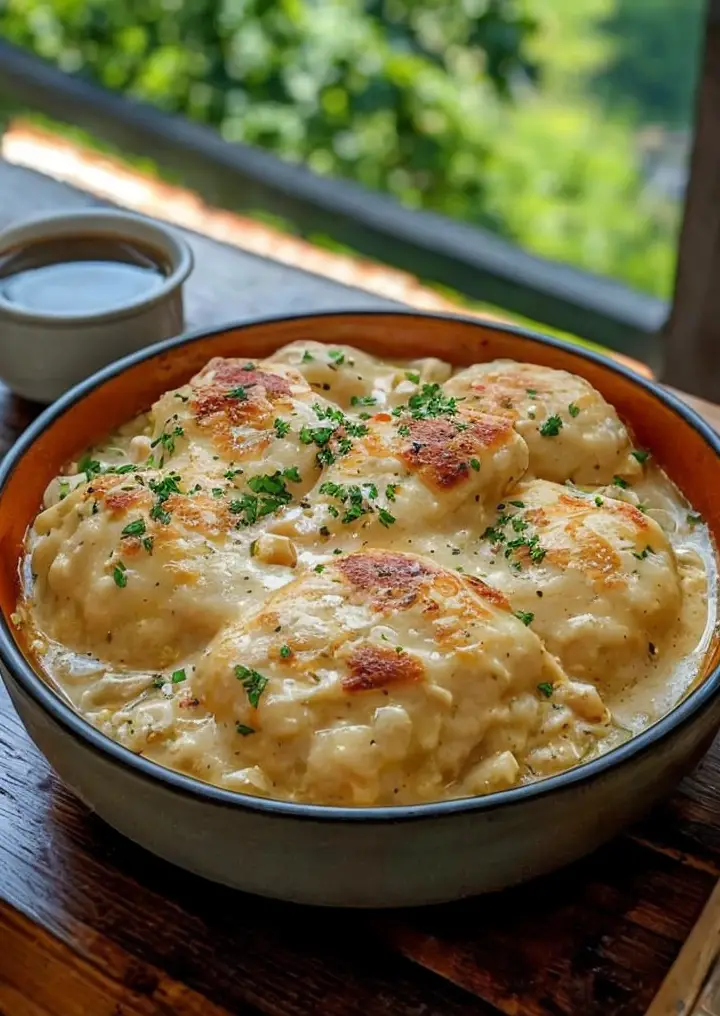
  • Visual Appeal: The warm, golden broth is dotted with pieces of chicken and floating dumplings, creating a mouthwatering presentation.
  • Skill Level Needed: This recipe requires some basic cooking skills, perfect for home cooks looking to elevate their skills.
  • Special Equipment: A large pot for simmering and a sturdy mixing bowl for making the dumplings are all you need.

Recipe Overview

  • Difficulty Level: This recipe is classified as moderate due to the need for timing and technique in dumpling preparation.
  • Category: Cracker Barrel Homemade Chicken & Dumplings falls under the category of main courses and comfort food.
  • Cuisine: This dish exemplifies Southern cuisine, highlighting traditional flavors and cooking methods rooted in American cultural heritage.
  • Cost: The ingredients are budget-friendly, making it a great choice for home cooks looking for economical yet delicious meals.
  • Season: Ideal for fall and winter when cravings for warm, hearty meals peak.
  • Occasion: Perfect for family gatherings, comforting sick days, or casual potluck dinners.

Why You’ll Love This Recipe

The delicate balance of flavors and textures in Cracker Barrel Homemade Chicken & Dumplings sets it apart from other hearty meals. Picture tender chicken simmered to perfection in a rich broth, surrounded by pillowy dumplings infused with savory goodness. This recipe is not only made to satisfy hunger but also designed to evoke a sense of nostalgia and warmth. It’s not just a meal; it’s an experience that can transport you back to cozy family evenings.

Another reason to love this dish is its convenience. While the chicken and dumplings can be simmered on the stovetop, the dish requires minimal hands-on time, allowing you to engage in other activities. It’s a great option for busy weekdays when you need to prepare a comforting dinner without fuss. The one-pot nature of this recipe also means fewer dishes to wash when you’re done!

In terms of nutrition, Cracker Barrel Homemade Chicken & Dumplings provides a meal that covers several food groups, delivering proteins from chicken and wholesome carbs from dumplings. The broth is a great source of hydration and warmth, making it ideal for boosting your mood on a dreary day. With careful ingredient selection, you can tailor this recipe to be even more nutritious without compromising the flavor.

This dish is also perfect for sharing during gatherings, whether it’s a backyard BBQ or a holiday feast. Its rich and comforting nature invites guests to join in and enjoy each other’s company. Bringing a pot of this homemade chicken and dumplings can spark conversations and create lasting memories.

Lastly, the cost-effectiveness of this meal can’t be overlooked. The main ingredients are affordable and often found in most kitchens. Plus, with a little creativity, leftovers can easily be transformed into a variety of other meals. Reimagining this dish not only helps minimize food waste but also maximizes your culinary creativity.

Historical Background and Cultural Significance

Homemade chicken and dumplings have origins rooted deeply within Southern cooking traditions. This culinary staple features humble beginnings, often made by families with ease and love during the harsh winters. It’s a recipe that, over generations, has evolved, showing the resilience and creativity typical of American home cooking.

The dish reflects cultural importance, as it symbolizes comfort and sustenance. Chicken and dumplings were prepared as a family meal, meant to nourish loved ones throughout the years. Grandmothers often passed down these recipes, embracing the notion of sharing food as a way to share love.

As cuisines blended through migration and influence, regional variations emerged. Some areas added vegetables or spices, enhancing flavors. Cracker Barrel’s rendition builds on traditional flavors while maintaining a sense of authenticity that resonates with home cooks across the nation.

Throughout the years, chicken and dumplings have seen adaptations to fit modern tastes while retaining their original heartiness. Whether served at family tables or featured on restaurant menus, the dish continues to hold its place as a beloved comfort food of choice.

Ingredient Deep Dive

Chicken: Chicken is the heart of this recipe. Historically, it has been a staple protein source in many cultures, providing essential amino acids. When selecting chicken, look for fresh, organic options for the best flavor. Store it in the refrigerator for up to two days or freeze for longer shelf life. For substitutions, consider using turkey or even plant-based protein.

Dumplings: Dumplings are the fluffy clouds that elevate this dish. Traditionally made with flour, they embody the comfort of home. The choice of flour can influence texture, so opt for all-purpose flour for traditional dumplings. They can be stored in an airtight container but are best made fresh. If needed, gluten-free flour blends can serve as substitutes.

Common Mistakes to Avoid

  • Using cold chicken can lead to uneven cooking; make sure to let it sit at room temperature for 30 mins prior to cooking.
  • Overmixing dumpling dough can result in dense dumplings rather than light and fluffy ones.
  • Cooking the dumplings on high heat can form a crust instead of allowing them to steam properly; keep the heat moderate.
  • Not allowing enough time for the chicken to become tender will result in chewy, tough meat; patience is key.
  • Neglecting to taste the broth before serving can lead to blandness; adjust seasoning as necessary.
  • Skipping the resting period before serving prevents flavors from fully developing; let the dish sit for a few minutes.
  • Not using enough liquid when cooking can lead to dryness; always ensure there’s ample broth for dumpling cooking.
  • Not covering the pot while simmering will evaporate the broth, drying the dish out; always cover to retain moisture.
  • Ignoring storage guidelines can affect the last day’s quality; understand how to store leftovers effectively.
  • Disregarding freshness when selecting ingredients can affect overall flavor; always choose high-quality ingredients.

Essential Techniques

Simmering: Simmering is crucial for developing flavor in the broth. Maintain a gentle bubble to extract maximum taste from the chicken. Mastering the simmer involves adjusting heat to remove boiling when necessary.

Dumpling Preparation: Mixing the dough just long enough is vital for the texture. Use your fingertips to combine the ingredients, ensuring not to overwork the mixture, which could lead to dense dumplings.

Pro Tips for Perfect Cracker Barrel Homemade Chicken & Dumplings

Start with quality, fresh ingredients for the best overall flavor. Experiment with different herbs and spices to customize the broth to your liking. Cook the chicken separately before adding to the broth to enhance tenderness. Allow the dumplings to float on top without overcrowding the pot for proper cooking. Use a lid while simmering to trap steam, creating a soft texture in the dumplings. Adjust salt and seasoning after adding dumplings to taste. Let the dish rest before serving to meld flavors. Finally, serve it with crusty bread for a complete meal.

Variations and Adaptations

Explore regional variations by adding vegetables like carrots and peas, which provide colors and nutrition. For seasonal adaptations, try using squash or sweet potatoes during fall. Modify the recipe for dietary needs by utilizing gluten-free flour for dumplings or opting for a vegan chicken substitute. Experiment with flavors by incorporating fresh herbs like thyme or rosemary for a fresh twist. Alter the texture by adjusting dumpling size—smaller for a more delicate bite or larger for a hearty feel. Consider alternative presentations, serving dumplings baked in the oven for a crispy texture.

Serving and Presentation Guide

For an inviting presentation, serve the chicken and dumplings in rustic bowls. Garnish with fresh herbs like parsley for a pop of color. Traditionally, this dish pairs well with cornbread, adding a country-style touch. Present the dish hot, making sure the dumplings float in the broth for visual appeal. Consider temperature, serving immediately after cooking for the best experience, ensuring warmth with every bite. Portion control involves serving larger amounts to family, while smaller bowls are perfect for guests.

Wine and Beverage Pairing

For wine, a light-bodied white like Chardonnay complements the richness of the chicken and dumplings without overpowering it. For non-alcoholic options, consider sweet tea or ginger ale for a refreshing contrast. Pairing this dish with a light-bodied red wine can also provide an interesting taste combination. Serve chilled drinks to enhance the comfort of warm dumplings. Offer hot tea or coffee post-meal to wind down the dining experience.

Storage and Shelf Life

To store leftovers, keep them in an airtight container in the refrigerator for up to three days. For longer preservation, freeze portions in ziplock bags, expelling as much air as possible. Always ensure the broth covers the dumplings for moisture retention. Signs of spoilage include sour smells and discoloration. For reheating, defrost overnight in the fridge, and then warm gently on the stovetop to prevent the dumplings from becoming mushy. Freezing dumplings separately can also maintain their texture.

Make Ahead Strategies

Preparing this dish can be simpler by cooking chicken and broth a day in advance; that allows flavors to marry beautifully overnight. Store cooked chicken separately until you’re ready to finish the dish. Dumpling preparation can also be done ahead, mixing the dry ingredients and storing them in an airtight container. During assembly, add fresh dumplings to the simmering broth, allowing them to absorb flavor without compromising quality. Consider adding fresh herbs or spices just before serving for a bright, vibrant finish.

Scaling Instructions

To halve the recipe, simply follow the ingredient proportions while ensuring the cooking time remains similar. For doubling or tripling, use a larger pot to accommodate increased quantities and keep a close eye on simmering times. Adjust equipment, ensuring you have enough space to simmer the broth efficiently. When scaling, remember to taste frequently, as the strength of flavors can change. Storage considerations include proportioning leftovers appropriately for meal prep conveniences.

Nutritional Deep Dive

This meal serves as a rich source of protein and carbohydrates. Chicken offers a high-quality protein that’s vital for muscle repair and growth. Dumplings, being primarily made of flour, provide energy necessary for daily activities. Nutritionally, consider adding vegetables to elevate the dish further. Each serving can shed light on the balance of dietary intake needed for optimal health. For those focused on weight management, adjusting portion sizes can help maintain desired goals without compromising flavor.

Dietary Adaptations

For gluten-free diners, swap traditional flour with a certified gluten-free blend. Dairy-free options can utilize coconut milk in the broth for creaminess while maintaining a light flavor. Vegan adaptations could replace chicken with chickpeas or a plant-based protein for a satisfying meal. Low-carb variations might forgo dumplings altogether, opting for cauliflower for a similar texture. For keto followers, utilize high-fat, low-carb options in dumpling recipes. Additionally, meal planning for paleo diets can embrace nature’s bounty by focusing on wholesome, unprocessed ingredients.

Troubleshooting Guide

If dumplings turn out too dense, check for overmixing and opt for a gentler touch next time. A lack of flavor in the broth can often be fixed with a quick taste test and adjustment of seasonings late in the cooking process. Temperature issues may arise if the pot is not covered; ensure to keep it sealed to allow for even cooking. If the chicken remains tough, consider extending simmer time to enhance tenderness. For substitutions, always verify ingredient compatibility for the best outcome.

Recipe Success Stories

Community feedback on this recipe frequently highlights its comforting nature, often citing nostalgic memories. People share personal adaptations and successes in making the dish their own, leading to unique family traditions. Many readers express gratitude for a recipe that transforms simple ingredients into a hearty feast that nourishes the body and soul. The photograph sharing aspect encourages budding cooks to share beautiful interpretations, further inspiring others to take on their culinary adventure.

Frequently Asked Questions

Q1: Can I make this recipe in advance?

A1: Yes, you can prepare the chicken and broth ahead of time, storing them separately in the refrigerator until you’re ready to add dumplings and serve. This can enhance the flavors further and make serving time easier.

Q2: How do I store leftovers?

A2: Leftovers can be stored in an airtight container in the fridge for up to three days. For longer storage, consider freezing portions, making sure they are covered with broth to maintain moisture.

Q3: Can I use frozen chicken for this dish?

A3: While you can use frozen chicken, it’s recommended to thaw it first for even cooking. You may need to adjust the cooking time accordingly if you start with frozen chicken directly in the broth.

Q4: Are the dumplings gluten-free?

A4: Traditional dumplings are not gluten-free, but you can substitute all-purpose flour with a gluten-free flour blend to create a similar texture without gluten.

Q5: Can I add vegetables to the recipe?

A5: Absolutely! Adding vegetables like peas, carrots, or celery can enhance nutrition and flavor, making the dish even more hearty and colorful.

Q6: How do I prevent the dumplings from becoming too hard?

A6: Ensure to mix the dumpling dough minimally, as overmixing can lead to tough dumplings. Also, cooking them on medium heat will help retain a light and fluffy texture.

Q7: Can this dish be made vegetarian?

A7: Yes, you can create a vegetarian version by using vegetable broth and replacing chicken with chickpeas or your favorite plant-based protein.

Q8: What is the best way to reheat chicken and dumplings?

A8: The best way to reheat is on the stovetop over low heat, adding a splash of broth if needed to get the mixture back to the desired consistency.

Q9: Can I use leftover rotisserie chicken?

A9: Using leftover rotisserie chicken is an excellent way to make this dish even quicker. Simply add the chicken towards the end of your cooking process.

Q10: What wine pairs well with this dish?

A10: A light-bodied white wine such as Chardonnay or Sauvignon Blanc works beautifully, complementing the flavors of the chicken and dumplings without overpowering them.

Additional Resources

Explore related recipes such as Slow Cooker Chicken Soup or Classic Chicken Pot Pie for more comforting meals. Technique guides on dumpling making provide extra tips for perfecting this comfort food staple. Ingredient information around chicken and flour can expand your cooking repertoire, while equipment recommendations ensure you’re well-equipped for creating delicious meals. Consider seasonal variations, exploring how to incorporate fresh ingredients for a delightful twist on the classic flavor.

Join the Conversation

We invite you to share your adaptations and experiences with this recipe on social media. Capture your dish with lovely photographs and tag us! Engaging with our community encourages sharing knowledge and learning from each other, providing tips that can benefit everyone. Review the recipe and suggest variations to inspire others looking to dive into this delicious journey of flavors.

The Recipe

Cracker Barrel Homemade Chicken & Dumplings

Serves: 6 servings

Prep Time: 30 mins

Cook Time: 1 hr 15 mins

Total Time: 1 hr 45 mins

Kitchen Equipment Needed

  • Large pot
  • Mixing bowl
  • Whisk
  • Slotted spoon
  • Measuring cups and spoons

Ingredients

  • 1 whole chicken (about 4 lbs)
  • 8 cups chicken broth
  • 2 cups all-purpose flour
  • 1 tsp baking powder
  • 1/2 tsp salt
  • 1/4 cup butter, melted
  • 1 cup milk
  • Fresh herbs (thyme, parsley) for seasoning
  • Salt and pepper to taste

Directions

  1. In a large pot, combine chicken and chicken broth; bring to a boil, then reduce to a simmer.
  2. Cook chicken for about 1 hour, or until fully cooked and tender. Remove chicken, shred, and set aside.
  3. In a mixing bowl, combine flour, baking powder, and salt. Add melted butter and milk; stir until just combined.
  4. Drop spoonfuls of dumpling dough into the boiling broth; cover and cook for about 15 minutes.
  5. Add in shredded chicken and season with herbs, salt, and pepper. Let simmer for an additional 10 minutes.
  6. Serve hot and enjoy!

Recipe Notes

  • For added nutrition, include vegetables like carrots or peas during the simmering process.
  • Substitute chicken with turkey if desired, especially for holiday leftovers.
  • Experiment with herbs for different taste profiles; rosemary adds a lovely flavor.

Sizzling Turkey Bacon Cheeseburger Queso Dip: The Ultimate Party Recipe

turkey bacon queso dip, cheeseburger queso dip, creamy bacon cheese dip, party queso dip, game day dip recipe, bacon and turkey cheese dip

Sizzling Turkey Bacon Cheeseburger Queso Dip: The Perfect Party Appetizer

Hosting a gathering or looking to elevate your snack game? Sizzling Turkey Bacon Cheeseburger Queso Dip is the ultimate choice to satisfy your cravings. This creamy, cheesy dip blends the savory goodness of turkey bacon and ground turkey with a velvety queso base, offering a flavor-packed experience that’s perfect for any occasion.

Enhance your next party spread with this crowd-pleasing dip. It’s easy to prepare, versatile, and pairs beautifully with an array of dippable options. Plus, it’s an excellent addition to your collection of go-to appetizer recipes.

For a sweet pairing, check out our Mini Pineapple Coconut Cheesecakes Recipe, which complements the bold flavors of this savory dish.


Why You’ll Love This Recipe

This turkey bacon queso dip has several standout qualities:

  • A Healthier Option: By using turkey bacon and ground turkey, this dip delivers a leaner, protein-packed alternative without sacrificing flavor.
  • Crowd-Pleasing Appeal: Perfect for game days, casual gatherings, or a family movie night.
  • Quick and Easy Prep: It requires minimal cooking skills and pantry-friendly ingredients.

For more comfort food ideas, explore Crockpot Comfort Meals for hearty options.


Ingredients

Main Ingredients

  • Ground Turkey: 1 lb, cooked and crumbled.
  • Turkey Bacon: 6 strips, cooked and chopped.
  • Cheddar Cheese: 2 cups, shredded.
  • Cream Cheese: 8 oz, softened.
  • Rotel Tomatoes: 1 can, drained.
  • Heavy Cream: ½ cup.

Spices and Seasonings

  • Garlic Powder: 1 tsp.
  • Onion Powder: 1 tsp.
  • Smoked Paprika: ½ tsp.
  • Salt and Black Pepper: To taste.

Step-by-Step Instructions

1. Cook the Meat

  • In a skillet over medium heat, cook the ground turkey until fully browned.
  • In a separate pan, fry the turkey bacon until crispy. Remove and chop into bite-sized pieces.

2. Prepare the Queso Base

  • Melt cream cheese and heavy cream in a saucepan over low heat.
  • Gradually stir in shredded cheddar until smooth and creamy.

3. Combine and Season

  • Add cooked turkey, turkey bacon, and Rotel tomatoes to the cheese mixture.
  • Season with garlic powder, onion powder, smoked paprika, salt, and pepper.

4. Serve and Enjoy

  • Transfer the dip to a serving dish or slow cooker on the “warm” setting.
  • Serve with tortilla chips, pretzels, or fresh vegetables.

Tips and Tricks for the Perfect Dip

  • Smooth Texture: To avoid clumps, shred cheese from a block rather than using pre-shredded cheese.
  • Spice it Up: Add jalapeños or chipotle powder for an extra kick.
  • Make Ahead: Prepare the dip up to a day in advance and reheat before serving.

Pair this dip with Bacon Ranch Chicken Quesadillas for a full snack table setup.


Serving Suggestions

  • Classic Pairings: Serve with tortilla chips, pretzels, or crackers.
  • Low-Carb Options: Pair with cucumber slices, bell pepper strips, or celery sticks.
  • Innovative Ideas: Use it as a filling for mini tacos or a topping for baked potatoes.

FAQs

Can I use pork bacon instead of turkey bacon?

Yes, pork bacon works perfectly if you prefer a richer flavor.

How do I make this dip spicier?

Add diced jalapeños, hot sauce, or a pinch of cayenne pepper to the mix.

Can I store leftovers?

Store in an airtight container in the refrigerator for up to 3 days. Reheat in a skillet or microwave, adding a splash of milk to restore creaminess.

Can I freeze the dip?

While freezing may alter the texture, it is possible. Thaw in the refrigerator and reheat gently.


Variations

  • Vegetarian: Replace turkey and bacon with plant-based crumbles and vegan cheese.
  • Low-Calorie: Use reduced-fat cheese and swap cream for Greek yogurt.
  • Extra Smoky: Add liquid smoke for a deeper, barbecue-like flavor.

Storage and Reheating Tips

  • Refrigeration: Store in an airtight container for up to 3 days.
  • Reheating: Warm in a microwave-safe dish or on the stove, stirring frequently. Add milk or cream to maintain consistency.

Internal Linking Opportunities

To enrich this article with relevant internal links, consider these options:

  1. Link to Desserts: Suggest Salted Caramel Apple Cheesecake as a dessert option.
  2. Game Day Recipes: Reference Slow Cooker Chicken and Gravy Over Noodles for a hearty pairing.
  3. Quick Snacks: Highlight Homemade Pizza Sticks as another crowd-pleaser.

Conclusion

Sizzling Turkey Bacon Cheeseburger Queso Dip is the ultimate comfort food. Its creamy texture, rich flavors, and versatility make it a favorite for any occasion. From game days to casual gatherings, this dip is sure to impress.

Golumpki Soup: A Hearty and Comforting Polish Classic

stuffed cabbage soup, Polish cabbage soup, cabbage roll soup, hearty soup recipe, comforting Polish dish

Golumpki Soup: A Hearty Bowl of Tradition

Introduction

Golumpki Soup is a delightful adaptation of traditional Polish stuffed cabbage rolls. This hearty, tomato-based soup combines tender cabbage, flavorful meat, and rice in a warm and comforting dish. It’s the perfect one-pot meal for cozy dinners or meal prep for the week.


Why Golumpki Soup is a Comfort Food Favorite

Polish cuisine is rich in tradition, and Golumpki Soup captures that heritage beautifully. By blending simple, affordable ingredients into a dish bursting with flavor, this recipe becomes a staple for home cooks who love easy, satisfying meals. You can explore more comforting recipes like this here.


Ingredients for Golumpki Soup

To make this savory soup, you’ll need:

  • Ground beef or pork (or both)
  • Green cabbage, chopped
  • Cooked rice
  • Tomato sauce or diced tomatoes
  • Onions, garlic, and basic spices (salt, pepper, paprika)

For more tips on creating hearty soups, see this recipe for Classic Beef Stew.


Step-by-Step Recipe

  1. Prepare the Meat: Sauté ground meat with onions and garlic.
  2. Combine Ingredients: Add cabbage, rice, and tomato sauce to a large pot.
  3. Simmer: Let everything cook together until the flavors meld beautifully.

Want more one-pot recipes? Check out this Slow Cooker Baked Ziti.


Variations

  • Vegetarian: Replace meat with lentils or chickpeas.
  • Spicy: Add red pepper flakes or cayenne for a kick.
  • Low-carb: Substitute rice with cauliflower rice.

Storing and Serving

  • Store leftovers in an airtight container for up to 4 days.
  • Freeze for up to 3 months. Thaw overnight and reheat gently.

Frequently Asked Questions (FAQs)

Can I make this in a slow cooker?

Yes, combine all ingredients in a slow cooker and cook on low for 6-8 hours.

How do I thicken the soup?

Add a slurry of cornstarch and water for a thicker consistency.

Can I use red cabbage?

While green cabbage is traditional, red cabbage can add a sweeter, more vibrant flavor.


Conclusion

Golumpki Soup offers a taste of Poland in every bowl. Its versatility, ease of preparation, and deep, comforting flavors make it a standout in any kitchen. Start your culinary journey today and enjoy the satisfaction of this homemade delight.

Texas Roadhouse Cinnamon Honey Butter Recipe: Sweet, Creamy, and Irresistible

cinnamon honey butter recipe, homemade cinnamon butter, Texas Roadhouse butter copycat, sweet honey butter, creamy cinnamon spread, easy butter recipe, flavored butter for bread

Article: Texas Roadhouse Cinnamon Honey Butter: The Perfect Copycat Recipe

Texas Roadhouse Cinnamon Honey Butter is a blend of sweet, creamy, and lightly spiced goodness that elevates any bread or roll it graces. Learn how to make this restaurant-quality spread at home with just a few ingredients and simple steps.


Why Everyone Loves Texas Roadhouse Cinnamon Honey Butter

The allure of Texas Roadhouse Cinnamon Honey Butter lies in its perfect combination of sweetness and spice, paired with the creamy richness of butter. This butter isn’t just a side dish—it’s an experience. Whether served on warm rolls, pancakes, or waffles, its versatility makes it a must-have in every kitchen.

For tips on achieving the perfect texture and flavor in your spreads, check out this guide to homemade flavored butters.


Ingredients You’ll Need

To create this Cinnamon Honey Butter recipe, you’ll need just four core ingredients:

  • Unsalted butter, softened
  • Powdered sugar
  • Honey
  • Ground cinnamon

Optional add-ins:

  • Vanilla extract for added depth
  • Nutmeg for a warm, aromatic twist

How to Make Cinnamon Honey Butter

  1. Prepare Your Ingredients
    Ensure your butter is softened for easy mixing. Combine the butter, powdered sugar, honey, and cinnamon in a mixing bowl.
  2. Blend to Perfection
    Using a hand mixer or spatula, mix the ingredients until smooth and fluffy. Add vanilla extract if desired for an extra layer of flavor.
  3. Store It Right
    Transfer the butter into an airtight container and refrigerate for up to two weeks. For a creamier consistency, bring it to room temperature before serving.

For pairing ideas, explore these bread recipes that perfectly complement this butter.


Serving Suggestions

This butter pairs beautifully with:

  • Warm dinner rolls
  • Pancakes or waffles
  • Toast or bagels
  • Roasted sweet potatoes

Tips for Success

  • Use high-quality butter and honey for the best flavor.
  • Adjust the cinnamon-to-honey ratio to suit your personal taste.
  • If you’re feeling adventurous, experiment with additional spices like nutmeg or cardamom.

Variations to Try

  • Sugar-Free Version: Swap powdered sugar with a sugar substitute like erythritol.
  • Savory Twist: Add a pinch of salt or fresh rosemary.
  • Spicy Kick: Sprinkle a dash of cayenne pepper for heat.

Frequently Asked Questions

1. Can I make this butter dairy-free?

Yes, use a plant-based butter alternative to make this spread vegan-friendly.

2. How long does it last?

Stored in an airtight container in the fridge, this butter can last up to two weeks.

3. What are some substitutes for honey?

You can use maple syrup, agave nectar, or even molasses for a unique twist.

4. Can I freeze it?

Yes, freeze it in a tightly sealed container for up to three months. Thaw in the refrigerator before use.

5. Is it only for bread?

Not at all! Use it as a topping for pancakes, sweet potatoes, or even popcorn.


Internal Linking Opportunities

Here are some related recipes from ExoRecipes to link to this article for enhanced SEO and user experience:


Conclusion

Creating Texas Roadhouse Cinnamon Honey Butter at home is simple, cost-effective, and endlessly satisfying. Whether you’re spreading it on warm rolls or experimenting with new pairings, this recipe guarantees a touch of restaurant magic in your kitchen.

Indulge in Luxurious Garlic Butter Lobster Tails at Home

Luxurious Garlic Butter Lobster Tails: Indulge in a Seafood Delight

⚖️
Difficulty
Intermediate

⏲️
Prep Time
15 mins

🕒
Cook Time
20 mins

⏱️
Total Time
35 mins

🍽️
Servings
2 servings

Indulge your taste buds in the exquisite flavors of Luxurious Garlic Butter Lobster Tails. This elegant seafood dish pairs perfectly with a glass of chilled white wine, making it ideal for romantic dinners or special occasions. The succulent lobster meat, infused with rich butter and aromatic garlic, melts in your mouth, delivering a taste sensation that is truly unforgettable.

Not only is this dish visually stunning, showcasing the vibrant red hues of the lobster against the golden butter sauce, but it also offers a sensory experience that entices with every bite. Whether you’re impressing guests or simply treating yourself, these lobster tails elevate any meal into a culinary celebration.

Quick Recipe Highlights

  • Flavor Profile: The combination of garlic and butter creates a savory richness that complements the natural sweetness of the lobster, making every bite a blend of paradise.
  • Texture: The lobster tails have a firm, yet tender texture that contrasts with the creamy butter sauce, creating a delightful mouthfeel.
  • Aroma: The fragrant aroma of freshly minced garlic combined with the buttery richness wafts through the kitchen, setting the stage for a truly appetizing meal.
  • Visual Appeal: The beautifully split lobster tails, glistening with a golden garlic butter glaze, make for an impressive presentation.
  • Skill Level Needed: This recipe is perfect for those with intermediate cooking skills, as it involves precise cooking techniques to achieve tasty results.
  • Special Equipment: You will need a sharp knife for splitting the lobster tails and a broiler for optimal cooking.

Recipe Overview

  • Difficulty Level: Intermediate, suitable for cooks who have some experience with seafood and broiling techniques.
  • Category: This dish falls under seafood meals and fine dining, perfect for special occasions.
  • Cuisine: A blend of American and French culinary traditions, this recipe highlights the luxurious nature of seafood dining.
  • Cost: Expect a moderate cost, with lobster tails typically costing around $20-$30 per pound.
  • Season: Ideal for summer gatherings and holiday celebrations, this dish showcases fresh seafood at its peak.
  • Occasion: Perfect for date nights, anniversaries, or celebratory dinners, providing a gourmet experience at home.

Why You’ll Love This Recipe

This recipe for Luxurious Garlic Butter Lobster Tails is more than just a meal; it’s an experience that tantalizes your taste buds. The rich, buttery flavors blend impeccably with the fresh lobster, creating a flavor profile that is completely irresistible. The depth of flavor combined with the tender texture of the lobster will have you savoring every bite. Each mouthful evokes feelings of oceanic freshness and culinary sophistication.

Preparing lobster tails at home is incredibly convenient, breaking the stereotype of needing to go to a fancy restaurant for this type of seafood indulgence. With easy-to-follow steps and a relatively short cook time, you can present restaurant-quality lobster tails on your dining table without much hassle. This dish is also great for impressing guests, as it showcases your culinary skills while being enjoyable to prepare.

From a nutritional perspective, lobster is a great source of protein and low in fat. Rich in omega-3 fatty acids, it also contributes to a healthy heart and brain. Including this dish in your meal repertoire not only supports a balanced diet but also enhances your gastronomic experiences.

There’s no denying the social aspect of indulging in gourmet dishes like garlic butter lobster tails. Sharing this delightful meal with friends or loved ones creates wonderful memories and opens up warm conversations. It’s an excellent dish to serve when entertaining, setting a lavish tone for the evening’s festivities.

Finally, preparing Luxurious Garlic Butter Lobster Tails at home can be quite cost-effective compared to dining out. While lobster can be pricey, creating this incredible dish allows you to enjoy gourmet flavors at a fraction of the price, especially during peak lobster season when prices may be more favorable.

Historical Background and Cultural Significance

Lobster has a storied history, once considered a food for the poor. In early American colonies, it was so abundant along the coasts that it often found its way into the diets of laborers. Over time, as the demand for gourmet seafood increased, lobster transformed into a luxurious delicacy that symbolizes affluence and premium dining experiences.

Garlic butter, a classic combination in culinary traditions worldwide, has roots in French cuisine. Its use with lobster tails effectively emphasizes the rich flavor of the seafood while enhancing the luxurious experience of dining. This pairing of garlic and butter has since become a staple in various seafood recipes, reflecting the adaptive nature of culinary practices over time.

The evolution of garlic butter lobster tails reflects changing tastes and dietary preferences. As luxury ingredients become more accessible, recipes featuring these indulgent flavors continue to adapt. Modern takes on the classic dish often introduce innovative ingredients and cooking techniques, promoting interest from new generations of home and professional chefs alike.

Regional variations of lobster dishes exist around the world, showcasing local flavors and ingredients that celebrate the bounty of the ocean. From butter-poached lobster in New England to Lobster Thermidor in France, these dishes exemplify how fundamental cooking techniques remain while being reinterpreted through different cultural lenses.

Ingredient Deep Dive

Lobster is the star of this recipe, celebrated for its luxurious taste and texture. Historically, lobster was considered a poor man’s food until the 19th century, when its reputation changed dramatically. Today, it is revered for its succulent meat and versatility in various cuisines.

In terms of nutritional benefits, lobster is an excellent source of high-quality protein, essential vitamins, and minerals, including zinc and vitamin B12. When selecting lobster tails, look for those that are firm, unblemished, and have a sea-fresh scent. To maximize freshness, store lobster in the coldest part of your refrigerator and use it within a day or two of purchase.

Butter is another key ingredient that adds richness to the dish. It has been used in cooking for centuries, valued for flavor and texture enhancement. While any quality butter can work here, opting for unsalted butter allows better control over the dish’s saltiness.

Garlic stands as the aromatic backbone, bringing warmth and depth to the flavor profile. Known for its numerous health benefits, garlic has a strong historical presence in many global cuisines. To select garlic, opt for firm, papery-skinned bulbs free from spots. Store in a cool, dry place for the best shelf life and reliability.

Fresh parsley serves as a vibrant garnish, adding a pop of color to your dish. This versatile herb has long been prized for its health benefits and culinary uses. When choosing parsley, look for vibrant green leaves and avoid any yellowing, as these indicate age. It’s best used fresh but can be stored in the fridge for several days.

Common Mistakes to Avoid

  • Overcooking the lobster: Cooking lobster for too long can lead to rubbery meat. Aim for an internal temperature of 145°F.
  • Skipping the broiler: Eyeballing the cooking process instead of using the broiler can result in uneven cooking and a lack of that beautiful char.
  • Insufficient garlic: Not using enough garlic can diminish the flavor. Make sure to use freshly minced garlic for maximum impact.
  • Ignoring quality: Using low-quality butter or stale garlic can lead to subpar results. Always opt for the best ingredients you can find.
  • Not preparing adequately: Lack of preparation can lead to chaos in the kitchen. Have all ingredients prepped before cooking.
  • Inconsistent butter distribution: Pouring butter unevenly over the tails can lead to flavor inconsistency. Ensure it’s well mixed and applied.
  • Forgetting to season: Failing to season properly can leave the lobster bland. Use salt and pepper to enhance the natural flavors.
  • Disregarding garnishes: Garnishes can elevate your dish’s presentation. Don’t skip fresh herbs like parsley for a finishing touch.
  • Improper storage: Storing opened lobster tails in warm places can lead to spoilage. Always refrigerate promptly.
  • Ill-prepared plating: Not considering your plating can leave a visually appealing dish looking messy. Take time for thoughtful presentation.

Essential Techniques

One of the most crucial techniques when making Luxurious Garlic Butter Lobster Tails is broiling. Broiling helps achieve the perfect char on the lobster, enhancing its natural sweetness and flavor. To master this technique, preheat your broiler to high and place the lobster under the heat, watching closely for doneness.

Splitting the lobster tails is another essential technique, allowing for faster cooking and better flavor absorption. To do this, use a sharp knife to carefully cut down the top of the tail, starting from the head to the end. Be cautious not to cut through completely; this technique is about exposing the meat while keeping the tail intact.

Pro Tips for Perfect Luxurious Garlic Butter Lobster Tails

To perfect your garlic butter lobster tails, make sure to use a meat thermometer to check doneness, ensuring the meat is cooked just right without becoming tough.

Consider using clarified butter instead of regular butter. Clarified butter can tolerate higher heat without burning, giving your lobster tails more flavor.

Infuse your butter with additional herbs like thyme or basil to elevate the dish to a new level of flavor complexity.

For a spicier kick, add a pinch of cayenne pepper to your butter mixture before brushing it on the lobster.

Experiment with additional toppings, such as breadcrumbs or Parmesan cheese, to create a delicious crust on the lobster tails during broiling.

If serving for a special occasion, pair your garlic butter lobster tails with a side of asparagus or a light salad to balance the richness of the dish.

Lastly, let the lobster rest for a few minutes after removing it from the broiler for optimal flavor melding and juiciness retention.

Variations and Adaptations

Regional variations of garlic butter lobster tails can enhance your experience. For a New England twist, incorporate Old Bay seasoning into your garlic butter for that classic coastal flavor.

For a Mediterranean variation, consider adding lemon zest and capers to your butter mixture for a zesty and vibrant finish.

Seasonal adaptations can also bring freshness to your dish. In spring, consider adding asparagus or peas to accompany your lobster tails, making the dish feel more light and refreshing.

If dietary restrictions require it, you can substitute dairy-free margarine for the butter while maintaining flavor integrity.

For varied textures, try grilling the lobster tails instead of broiling for a smokier taste, appealing to those who enjoy grill marks and caramelization.

Presentation alternatives include serving the lobster tails on a bed of saffron rice or alongside a homemade risotto to make the dish more substantial and visually appealing.

Serving and Presentation Guide

For an elegant presentation, consider using a crisp white plate to showcase the vibrant colors of your lobster tails. Arrange the tails symmetrically and pour the garlic butter sauce elegantly over the top.

Garnish the dish with finely chopped fresh parsley or chives to introduce a pop of green color and add aromatic freshness. A squeeze of lemon served aside will enhance flavor and freshness upon serving.

Consider pairing the garlic butter lobster tails with a light side salad or seasonal vegetables for a well-rounded meal, arranged artistically on the plate.

For temperature, serve the dish immediately after cooking while hot to ensure the flavors are vibrant and the textures are at their best.

Finally, portion control can be managed by carefully splitting the lobster tails at the table, allowing guests to enjoy their meal in an engaging and interactive manner.

Wine and Beverage Pairing

To complement the rich flavors of Luxurious Garlic Butter Lobster Tails, consider pairing them with a crisp Chardonnay. Its acidity balances the buttery richness of the dish, enhancing the overall dining experience.

For a more adventurous pairing, opt for a Sauvignon Blanc. Its bright citrus notes can cut through the dish’s richness, providing a refreshing contrast that enhances the meal.

If looking for non-alcoholic alternatives, a sparkling water with a splash of lemon can cleanse the palate and enhance the dining experience.

For those who enjoy coffee or tea, consider a light herbal tea that won’t overpower the main flavors of the garlic butter lobster; chamomile or a gentle green tea can be a delightful match.

Temperature is crucial for optimal pairings; white wines should be served chilled to further enhance the refreshing experience of the dish.

When serving, consider offering options to your guests and keeping the wine chilled for easy access during the meal.

Storage and Shelf Life

To store leftover garlic butter lobster tails, refrigerate them immediately in an airtight container. They can typically last in the fridge for up to 2-3 days.

Ensure proper temperature; the ideal fridge temperature should be below 40°F to inhibit bacterial growth.

When reheating, avoid using a microwave, as it can overcook lobster and impact texture. Instead, gently reheat in a preheated oven at a low temperature, covered to prevent drying out.

Signs of spoilage may include an off smell, slimy texture, or discoloration; if any of these signs are present, it’s best to discard the lobster.

Freezing is an option if longer storage is necessary, but be mindful that freezing can affect texture. If you freeze, wrap the lobster tails tightly in plastic wrap and then foil, storing them for up to 3 months.

When you’re ready to eat frozen lobster tails, thaw them in the refrigerator overnight before reheating to preserve their quality.

Make Ahead Strategies

For a stress-free cooking experience, consider preparing the garlic butter ahead of time. You can make the garlic butter and refrigerate it in an airtight container for up to a week.

When ready to cook, simply melt the garlic butter and brush it over the lobster tails before broiling. This can save you time during meal preparation.

Another strategy is to prep your lobster tails by splitting them and season them in advance. Store the tails in the refrigerator, ready for you to pop under the broiler when you’re ready to serve.

Quality can remain intact when properly stored; keep the lobster tails tightly covered to avoid exposure to air and moisture.

Consider doing any chopping or measuring of ingredients the day before, allowing you more time to focus on cooking and presentation the day of your meal.

Fresh elements, such as garnishes, should be prepared right before serving to maximize freshness and visual appeal.

Scaling Instructions

When halving the recipe, simply divide the ingredients in half, and the cooking time will remain approximately the same, but monitor the lobster’s doneness closely.

Doubling or tripling the recipe will also work well, especially if you have a large enough broiler for multiple lobster tails. Be aware that cooking times may slightly increase, so check for doneness in batches.

Equipment adjustments may be necessary; using multiple baking sheets or a larger broiler will ensure even cooking when scaling.

For timing modifications, plan to check on the lobster tails frequently if they are placed close together, as they may cook slightly unevenly if crowded.

Storing considerations include separating the lobster tails in different containers to prevent them from sticking together in larger batches.

Nutritional Deep Dive

Luxurious Garlic Butter Lobster Tails are a source of lean protein that is essential for muscle building and repair. Each serving provides around 20 grams of protein while being low in saturated fat, making it a heart-healthy choice.

In terms of micronutrients, lobster offers significant amounts of zinc and selenium, both of which support immune function and overall health. Additionally, lobster is rich in vitamin B12, which is crucial for energy metabolism.

Health benefits from lobster include its high omega-3 fatty acid content, which contributes to heart health and reduces inflammation in the body.

When considering dietary aspects, keep in mind the butter content, which does add calories and saturated fat. Opting for moderation is key, particularly for those watching their fat intake.

Portion analysis suggests that enjoying this dish occasionally in a balanced diet can contribute positively to overall nutrition, especially when paired with a variety of colorful vegetables for additional fiber and nutrients.

Weight management tips include mindful consumption, serving smaller portions alongside healthier sides, to create a satisfying meal without excess calories.

Dietary Adaptations

For gluten-free adaptations of Luxurious Garlic Butter Lobster Tails, ensure that all ingredients used remain gluten-free, particularly any sauces or additional seasonings.

Dairy-free needs can be addressed by using a high-quality vegan butter or olive oil as a substitute for traditional butter, ensuring the dish maintains its rich flavors.

For vegan options, consider utilizing a suitable plant-based seafood alternative with similar cooking times and methods, using plant-based butter to achieve comparable flavors.

Low-carb or keto enthusiasts will love this dish, as lobster is naturally low in carbohydrates, making it an excellent choice to enjoy without guilt.

If following a paleo diet, the recipe remains compliant when made with natural ingredients, avoiding processed items altogether.

Low-FODMAP diets can be accommodated by using garlic-infused oil instead of chopped garlic and ensuring all remaining ingredients fit within the diet’s parameters.

Troubleshooting Guide

In case of texture issues with your lobster tails, such as chewiness, it often results from overcooking. Always monitor the internal temperature closely during broiling to achieve that perfect tenderness.

Flavor balance is crucial; if the dish tastes overly garlicky, leverage acidity from lemon or fresh herbs to brighten the flavors.

For temperature problems, if the lobster tails are not cooking evenly, make sure they are spread apart adequately on the baking sheet to allow for proper heat distribution.

Equipment challenges may arise if your broiler is uneven. Rotate your cooking tray halfway through to ensure an even cook on all lobster tails.

Ingredient substitutions can affect the overall flavor profile, so use caution when altering the recipe. Always choose compatible flavors to preserve the dish’s integrity.

If timing concerns arise, particularly with side dishes, preparing those ahead of time can alleviate stress and allow you to focus on the lobster.

Recipe Success Stories

Many home cooks have shared their success stories after preparing Luxurious Garlic Butter Lobster Tails for the first time. Feedback often highlights how straightforward the recipe is, even for those who initially feared cooking seafood.

Variations suggested by readers often include exciting ingredient additions like chili flakes for heat, highlighting their creativity in adapting the dish to personal tastes.

Adaptation stories reveal how people have used this recipe during special events, impressing guests and creating lasting memories around the dinner table, emphasizing the communal aspect of good food.

Photography tips shared by enthusiasts emphasize capturing the vibrant colors and textures of the dish, suggesting natural lighting and simple plating techniques to enhance visual appeal.

Online comments reflect appreciation for how this luxurious dish can fit into manageable weeknight dinners while still feeling fancy, proving its versatility and accessibility.

Frequently Asked Questions

How do I know when my lobster tails are cooked?

Your lobster tails are cooked when the meat is opaque and the internal temperature reaches 145°F. The shells also turn bright red during cooking.

Can I use frozen lobster tails?

Yes, you can use frozen lobster tails. Just make sure to fully thaw them in the refrigerator before cooking to ensure even cooking.

What is the best way to reheat leftover lobster?

The best way to reheat lobster is by using a low-temperature oven. Wrap the lobster in foil and heat it for about 10 minutes at 350°F to prevent overcooking.

Is it necessary to split lobster tails before cooking?

While it’s not strictly necessary, splitting the tails allows for faster cooking and better flavor absorption of the butter and seasonings.

Can I make this dish ahead of time?

While it’s best to cook lobster fresh, you can prepare the garlic butter ahead of time and refrigerate it for up to a week for convenience.

What type of lobster is best for this recipe?

Sustainably sourced Maine or spiny lobster tails work excellently for this recipe, bringing both flavor and ethical considerations to the table.

What should I serve with lobster tails?

Consider serving lobster tails with a light salad, roasted vegetables, or a side of creamy risotto. These pairings complement the richness of the dish.

Can I use any kind of butter for this recipe?

Unsalted butter is often recommended to control the saltiness, but you can use any high-quality butter to enhance flavor.

How do I store leftover lobster tails?

Store leftover lobster tails in an airtight container in the fridge for up to 2-3 days. Always refrigerate promptly after cooking.

Can I make this recipe dairy-free?

Yes, you can substitute butter for vegan butter or olive oil to create a delicious, dairy-free version of the dish.

Additional Resources

For those interested in exploring more seafood recipes, check out our extensive collection that includes varied preparations and flavor profiles.

Technique guides on lobster preparation can enhance your confidence in cooking with this luxurious ingredient and teach you detailed techniques for preparing shellfish.

Ingredient information can help you choose the freshest seafood options available at your local market to ensure quality in every bite.

For equipment recommendations, consider investing in high-quality knives and cookware that will last through many culinary adventures.

Explore seasonal variations throughout the year to celebrate fresh seafood availability, providing a unique twist depending on the time of year.

Join the Conversation

We encourage readers to share their own experiences and adaptations of Luxurious Garlic Butter Lobster Tails. Engaging on social media platforms can introduce your creations to a broader audience and inspire others.

Don’t forget to take photos of your lobster dishes! Sharing beautiful images can spark interest and excitement in the recipe community and friends.

Look out for recipe reviews and feedback from other home cooks to learn from their successes and tips that can enhance your next cooking experience.

Connecting with fellow cooking enthusiasts can form a supportive community, where everyone shares ideas, variations, and enjoyment of culinary arts.

Lastly, feel free to participate in discussions about favorite seafood recipes, helping each other explore new ways to enjoy delicious and luxurious meals.

The Recipe

Luxurious Garlic Butter Lobster Tails

Serves: 2 servings

Prep Time: 15 mins

Cook Time: 20 mins

Total Time: 35 mins

Kitchen Equipment Needed

  • Sharp knife
  • Broiler
  • Meat thermometer
  • Baking sheet
  • Airtight containers

Ingredients

  • 2 lobster tails
  • 4 tablespoons unsalted butter
  • 4 cloves of garlic, minced
  • Salt and pepper to taste
  • Fresh parsley, chopped for garnish
  • Lemon wedges for serving

Directions

  1. Preheat your broiler to high.
  2. Using a sharp knife, carefully split the lobster tails in half lengthwise, exposing the meat.
  3. In a small saucepan, melt the butter over low heat and add the minced garlic. Cook for 2-3 minutes until fragrant.
  4. Brush the garlic butter generously over the lobster meat, and season with salt and pepper.
  5. Place the lobster tails on a baking sheet and broil for 10-12 minutes or until the meat is opaque and slightly charred.
  6. Remove from the oven and let rest for a couple of minutes.
  7. Garnish with chopped parsley and serve with lemon wedges for added zest.

Recipe Notes

  • For extra flavor, add a pinch of cayenne pepper to your butter mixture.
  • Do not overcook the lobster, as it can become tough and rubbery.
  • Feel free to experiment with toppings such as breadcrumbs or cheese for added texture.