Berry Oat Bars | Healthy One Bowl Recipe

Berry Oat Bars | Healthy One Bowl Recipe

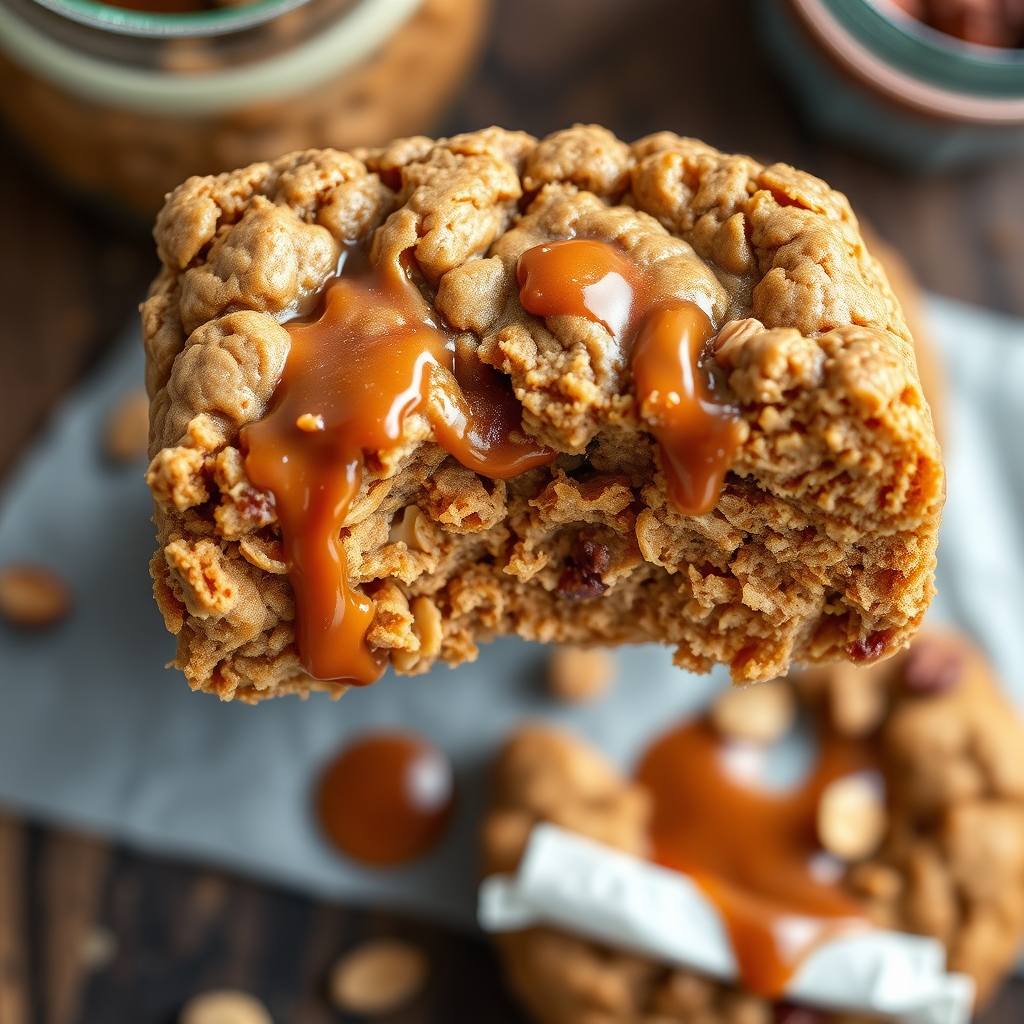
There’s something undeniably comforting about a homemade berry oat bar—warm, fruity, and just sweet enough to feel like a treat without the guilt. Whether you’re looking for a quick breakfast on the go, a wholesome snack, or a dessert that won’t derail your healthy eating habits, these berry oat bars are the answer. Made in just one bowl for minimal cleanup, this recipe is as easy as it is delicious. Let’s dive in and discover why these bars deserve a permanent spot in your recipe rotation.

Why You’ll Love This Recipe

First, let’s talk about what makes these berry oat bars so special. Here are a few reasons why you’ll fall in love with them:

  • Simple and Quick – With just one bowl and a handful of pantry staples, these bars come together in minutes. No complicated steps or hard-to-find ingredients.
  • Nutritious and Satisfying – Packed with fiber from oats and antioxidants from fresh berries, these bars keep you full and energized without refined sugars or artificial additives.
  • Perfect for Meal Prep – Bake a batch on Sunday, and you’ll have a grab-and-go breakfast or snack ready for the entire week.
  • Family-Friendly – Kids and adults alike adore the sweet-tart berry filling and the crumbly oat topping. It’s a crowd-pleaser in every bite.
  • Versatile – Swap the berries for whatever fruit you have on hand, adjust the sweetness to your liking, or add nuts for extra crunch. The possibilities are endless.

Ingredients Breakdown

Every ingredient in this berry oat bar recipe plays a crucial role in creating the perfect texture and flavor. Here’s what you’ll need:

  • Rolled Oats – The backbone of these bars, providing a chewy texture and heart-healthy fiber. Avoid quick oats, as they can make the bars too mushy.
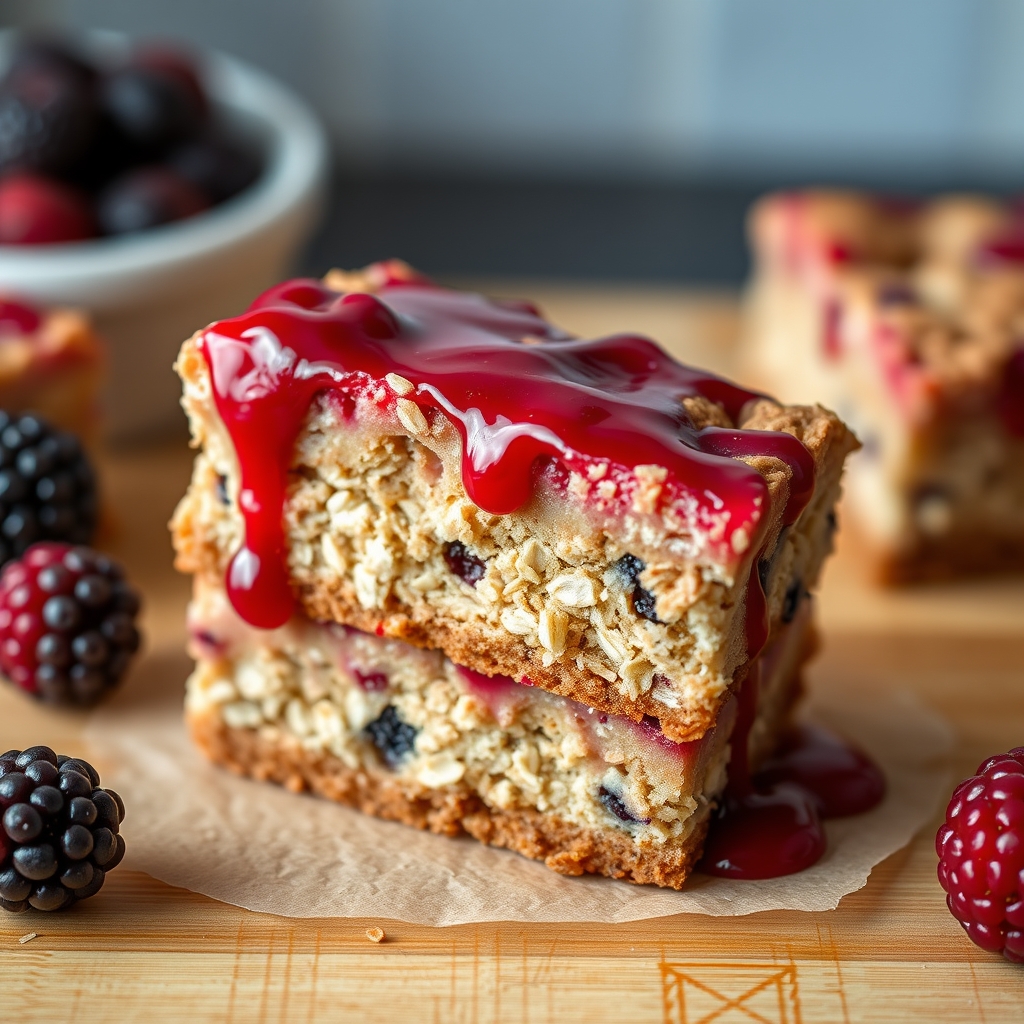
  • Fresh or Frozen Berries – Blueberries, raspberries, strawberries, or a mix all work beautifully. They add natural sweetness and a burst of juicy flavor.
  • Honey or Maple Syrup – A natural sweetener that binds the ingredients together while keeping the recipe refined sugar-free.
  • Almond Butter – Adds richness and helps hold the bars together. Peanut butter can be used as a substitute.
  • Chia Seeds – These tiny powerhouses thicken the berry filling and add a boost of omega-3s.
  • Vanilla Extract and Cinnamon – Warm, aromatic flavors that enhance the natural sweetness of the berries.
  • Salt – Just a pinch to balance the flavors and make the other ingredients shine.

How to Make Berry Oat Bars | Healthy One Bowl Recipe

Ready to bake? Follow these simple steps for perfect berry oat bars every time:

  1. Prep the Pan – Line an 8×8-inch baking dish with parchment paper, leaving some overhang for easy removal later. Lightly grease the paper to prevent sticking.
  2. Mix the Base – In a large bowl, combine the oats, almond butter, honey, vanilla, cinnamon, and salt. Stir until everything is well incorporated and the mixture resembles a crumbly dough.
  3. Press the Crust – Reserve about 1/3 of the oat mixture for the topping. Press the remaining mixture firmly into the bottom of the prepared pan to form an even layer.
  4. Prepare the Berry Filling – In the same bowl (no need to wash it!), gently toss the berries with chia seeds and a drizzle of honey. Let it sit for 5 minutes to allow the chia seeds to thicken the juices.
  5. Layer and Bake – Spread the berry mixture over the oat base, then sprinkle the reserved oat mixture on top. Bake at 350°F for 25-30 minutes, or until the top is golden and the berries are bubbly.
  6. Cool Completely – Let the bars cool in the pan for at least 30 minutes before slicing. This helps them set and hold their shape.

Pro Tips for the Best Results

Want to take your berry oat bars to the next level? Try these expert tips:

  • Toast the Oats – For a deeper, nuttier flavor, spread the oats on a baking sheet and toast them at 350°F for 5-7 minutes before mixing.
  • Use Frozen Berries – If fresh berries aren’t in season, frozen work just as well. No need to thaw—just toss them in straight from the freezer.
  • Add Lemon Zest – A little zest brightens the berry flavor and adds a refreshing twist.
  • Press Firmly – The more compact the oat base, the better the bars will hold together. Use the back of a measuring cup to press it down evenly.
  • Chill Before Slicing – For cleaner cuts, refrigerate the bars for an hour before slicing with a sharp knife.

Variations and Substitutions

This recipe is incredibly adaptable. Here are some delicious ways to customize it:

  • Gluten-Free – Use certified gluten-free oats to make this recipe celiac-friendly.
  • Vegan – Swap honey for maple syrup and use a plant-based nut butter.
  • Nut-Free – Replace almond butter with sunflower seed butter.
  • Add-Ins – Stir in shredded coconut, chopped nuts, or dark chocolate chips for extra texture.
  • Different Fruits – Try diced apples with cinnamon, peaches with ginger, or cherries with almond extract for seasonal variations.

What to Serve With It

These berry oat bars are delicious on their own, but they also pair wonderfully with:

  • A dollop of Greek yogurt or coconut whipped cream for a dessert-like treat.
  • A warm cup of herbal tea or cold almond milk for a satisfying snack.
  • Fresh berries and a drizzle of honey for an extra fruity presentation.

How to Store and Reheat

To keep your berry oat bars fresh:

  • Room Temperature – Store in an airtight container for up to 3 days.
  • Refrigerator – Keep them chilled for up to a week for longer freshness.
  • Freezer – Wrap individual bars in parchment paper and freeze for up to 3 months. Thaw at room temperature or warm in the microwave for 20 seconds.

Frequently Asked Questions (FAQs)

Can I use instant oats instead of rolled oats?
Instant oats will work, but the texture will be softer. Rolled oats provide the best chewiness and structure.

Can I make these bars sugar-free?
Yes! Omit the honey or use a sugar-free sweetener like monk fruit syrup. The berries provide natural sweetness.

Why do my bars fall apart when I cut them?
This usually happens if they’re not cooled completely. Let them set fully before slicing for clean edges.

Can I double this recipe?
Absolutely! Use a 9×13-inch pan and increase the baking time by 5-10 minutes if needed.

Are these bars good for breakfast?
Yes! They’re packed with fiber and protein, making them a balanced morning option.

Final Thoughts

There you have it—a simple, wholesome, and utterly delicious berry oat bar recipe that’s as easy to make as it is to love. Whether you enjoy them for breakfast, as an afternoon pick-me-up, or a light dessert, these bars are sure to become a staple in your kitchen. The best part? You can feel good about every bite, knowing you’re nourishing your body with real, wholesome ingredients. So grab that bowl, preheat your oven, and let the sweet aroma of baking berries and oats fill your home. Happy baking!

Print
clock clock iconcutlery cutlery iconflag flag iconfolder folder iconinstagram instagram iconpinterest pinterest iconfacebook facebook iconprint print iconsquares squares iconheart heart iconheart solid heart solid icon

Berry Oat Bars | Healthy One Bowl Recipe

  • Author: Healthy Eats Kitchen

Description

These Berry Oat Bars are a delicious and healthy treat made with simple ingredients in just one bowl. Packed with fresh berries and wholesome oats, they’re perfect for breakfast, snacks, or dessert. Gluten-free and refined sugar-free options available!


Ingredients

Scale

For the Crust:

  • For the base and topping:
  • 2 cups rolled oats (gluten-free if needed)
  • 1 cup almond flour
  • 1/4 cup maple syrup or honey
  • 1/4 cup melted coconut oil
  • 1 tsp vanilla extract
  • 1/2 tsp cinnamon
  • 1/4 tsp salt
  • For the berry filling:
  • 2 cups mixed berries (fresh or frozen)
  • 1 tbsp chia seeds
  • 1 tbsp lemon juice
  • 1 tbsp maple syrup (optional)

Instructions

1. Prepare the Crust:

  1. Preheat oven to 350°F (175°C) and line an 8×8 inch baking pan with parchment paper.
  2. In a large bowl, mix all base ingredients until well combined and crumbly.
  3. Press 2/3 of the mixture firmly into the prepared pan to form the crust.
  4. In another bowl, gently mix berries with chia seeds, lemon juice, and maple syrup (if using).
  5. Spread berry mixture evenly over the crust.
  6. Sprinkle remaining oat mixture over the berries, pressing lightly.
  7. Bake for 30-35 minutes until golden brown.
  8. Let cool completely before slicing into bars.

Notes

Store in an airtight container for up to 5 days. For firmer bars, refrigerate. Substitute any berries you prefer. For nut-free version, use sunflower seed flour instead of almond flour.

Healthy Gingerbread Oatmeal Breakfast Cookies

Healthy Gingerbread Oatmeal Breakfast Cookies

There’s something magical about the warm, spiced aroma of gingerbread wafting through the kitchen—especially when it comes in the form of a wholesome, grab-and-go breakfast cookie. These Healthy Gingerbread Oatmeal Breakfast Cookies are the perfect way to start your day with a cozy, festive twist. Packed with fiber, protein, and just the right amount of sweetness, they’re a guilt-free treat that feels indulgent. Whether you’re meal prepping for busy mornings or looking for a healthier holiday snack, these cookies are sure to become a staple in your recipe rotation.

Why You’ll Love This Recipe

If you’re on the fence about trying these gingerbread oatmeal cookies, let me give you a few reasons why they’re absolutely worth it.

  • Nutritious and Satisfying: Unlike traditional cookies, these are made with wholesome ingredients like oats, almond butter, and molasses, offering a balanced mix of fiber, protein, and complex carbs to keep you full and energized.
  • Meal Prep Friendly: Bake a batch on Sunday, and you’ve got breakfast sorted for the week. They store beautifully in the fridge or freezer, making hectic mornings a breeze.
  • Kid-Approved: Even picky eaters will love the sweet, spiced flavor of these cookies. They’re a sneaky way to get kids to enjoy a nutrient-packed breakfast.
  • Perfect for the Holidays: With warm ginger, cinnamon, and molasses, these cookies bring all the cozy flavors of the season—without the sugar crash.
  • Customizable: Whether you’re vegan, gluten-free, or nut-free, this recipe is easily adaptable to fit your dietary needs.

Ingredients Breakdown

Every ingredient in these Healthy Gingerbread Oatmeal Breakfast Cookies plays a specific role in creating the perfect texture and flavor. Here’s what you’ll need and why each one matters:

  • Rolled Oats: The base of the cookies, providing fiber and a chewy texture. Opt for gluten-free oats if needed.
  • Almond Butter: Adds healthy fats and binds the dough together. You can substitute with peanut butter or sunflower seed butter for a nut-free version.
  • Molasses: The star of any gingerbread recipe, molasses gives depth of flavor and a rich, caramel-like sweetness.
  • Ground Ginger and Cinnamon: These warming spices bring that classic gingerbread taste. Freshly grated ginger can also be used for extra zing.
  • Flaxseed Meal: Acts as an egg substitute, adding omega-3s and helping to hold the cookies together.
  • Maple Syrup: A natural sweetener that complements the molasses without overpowering it.
  • Dark Chocolate Chips (Optional): For a touch of indulgence. Use dairy-free chocolate if needed.

How to Make Healthy Gingerbread Oatmeal Breakfast Cookies

Making these cookies is simple, but a few key steps ensure they turn out perfectly every time. Follow this step-by-step guide for the best results.

  1. Preheat and Prep: Start by preheating your oven to 350°F and lining a baking sheet with parchment paper.
  2. Mix Wet Ingredients: In a large bowl, whisk together almond butter, molasses, maple syrup, and flaxseed meal until smooth.
  3. Add Dry Ingredients: Stir in the oats, ginger, cinnamon, baking soda, and a pinch of salt. Fold in chocolate chips if using.
  4. Form the Cookies: Scoop about 2 tablespoons of dough per cookie, roll into balls, and flatten slightly on the baking sheet. They won’t spread much, so shape them as desired.
  5. Bake: Pop them in the oven for 10-12 minutes, or until the edges are just golden. Let them cool on the sheet for 5 minutes before transferring to a wire rack.

Pro Tip: If the dough feels too sticky, chill it for 10 minutes before shaping. This makes handling much easier.

Pro Tips for the Best Results

Want to take these cookies from great to extraordinary? Here are a few insider secrets:

  • Toast the Oats: For a deeper, nuttier flavor, spread the oats on a baking sheet and toast them at 350°F for 5-7 minutes before mixing.
  • Use Blackstrap Molasses: It has a more robust flavor than regular molasses, giving the cookies an extra punch of gingerbread goodness.
  • Don’t Overbake: These cookies are best when slightly soft in the center. They firm up as they cool.
  • Add a Pinch of Cloves: For an even more complex spice profile, a tiny bit of ground cloves works wonders.

Variations and Substitutions

This recipe is wonderfully adaptable. Here are some ways to customize it:

  • Vegan: Ensure your chocolate chips are dairy-free, and the recipe is already egg-free.
  • Gluten-Free: Use certified gluten-free oats.
  • Nut-Free: Swap almond butter for sunflower seed butter.
  • Add-Ins: Try dried cranberries, chopped nuts, or even a sprinkle of shredded coconut for extra texture.

What to Serve With It

These cookies are delicious on their own, but pairing them with the right accompaniments can make them even better:

  • Greek Yogurt: A dollop of plain yogurt adds protein and a creamy contrast.
  • Warm Beverages: Enjoy with a cup of chai tea, coffee, or hot cocoa for a cozy breakfast.
  • Fresh Fruit: Sliced apples or pears complement the spices beautifully.

How to Store and Reheat

To keep your cookies fresh and tasty:

  • Room Temperature: Store in an airtight container for up to 3 days.
  • Refrigerator: They’ll last up to a week if kept chilled.
  • Freezer: Wrap individually and freeze for up to 3 months. Thaw at room temperature or warm in the microwave for 10-15 seconds.

Frequently Asked Questions (FAQs)

Can I use quick oats instead of rolled oats?
Yes, but the texture will be slightly softer. Rolled oats provide a chewier bite.

Can I omit the molasses?
Molasses is key for the gingerbread flavor, but in a pinch, you can use honey or more maple syrup—just expect a milder taste.

Why are my cookies too crumbly?
This usually means the dough was too dry. Add a splash of almond milk or water next time to help bind it.

Can I make these without a flax egg?
Yes, a regular egg or chia egg (1 tbsp chia seeds + 3 tbsp water) works too.

Final Thoughts

These Healthy Gingerbread Oatmeal Breakfast Cookies are proof that wholesome eating doesn’t have to be boring. They’re packed with flavor, easy to make, and perfect for busy mornings. Whether you’re enjoying them with your morning coffee or packing them for an afternoon snack, they’re sure to bring a little warmth to your day. Give them a try—I promise your taste buds (and your future self) will thank you.

Print
clock clock iconcutlery cutlery iconflag flag iconfolder folder iconinstagram instagram iconpinterest pinterest iconfacebook facebook iconprint print iconsquares squares iconheart heart iconheart solid heart solid icon

Healthy Gingerbread Oatmeal Breakfast Cookies

  • Author: The Wholesome Baker

Description

These soft and chewy gingerbread oatmeal cookies are packed with wholesome ingredients, making them a perfect grab-and-go breakfast or snack. Naturally sweetened with molasses and maple syrup, they’re vegan-friendly and full of warming spices.


Ingredients

Scale

For the Crust:

  • For dry ingredients:
  • 1 1/2 cups rolled oats
  • 1 cup whole wheat flour
  • 1 tsp baking powder
  • 1/2 tsp baking soda
  • 1 1/2 tsp ground ginger
  • 1 tsp cinnamon
  • 1/4 tsp nutmeg
  • 1/4 tsp cloves
  • 1/4 tsp salt
  • For wet ingredients:
  • 1/4 cup coconut oil, melted
  • 1/4 cup molasses
  • 1/4 cup maple syrup
  • 1 tsp vanilla extract
  • 1 flax egg (1 tbsp ground flax + 3 tbsp water)
  • For mix-ins:
  • 1/4 cup chopped walnuts
  • 1/4 cup raisins

Instructions

1. Prepare the Crust:

  1. 1. Preheat oven to 350°F (175°C) and line a baking sheet with parchment paper.
  2. 2. In a small bowl, prepare flax egg by mixing ground flax with water. Set aside to thicken for 5 minutes.
  3. 3. In a large bowl, whisk together all dry ingredients: oats, flour, baking powder, baking soda, spices, and salt.
  4. 4. In another bowl, mix melted coconut oil, molasses, maple syrup, vanilla, and prepared flax egg until well combined.
  5. 5. Pour wet ingredients into dry ingredients and stir until just combined. Fold in walnuts and raisins.
  6. 6. Scoop 2-tablespoon portions of dough onto prepared baking sheet, flattening slightly with damp fingers.
  7. 7. Bake for 10-12 minutes until edges are set but centers are still soft.
  8. 8. Let cool on baking sheet for 5 minutes before transferring to a wire rack.

Notes

Store in an airtight container for up to 5 days. For crispier cookies, bake an extra 1-2 minutes. Can substitute regular egg for flax egg if not vegan. Dough can be refrigerated for up to 3 days before baking.

5-Ingredient Peanut Butter Oatmeal Cookies

5-Ingredient Peanut Butter Oatmeal Cookies

There’s something magical about a cookie recipe that requires just five simple ingredients yet delivers big on flavor and texture. These 5-Ingredient Peanut Butter Oatmeal Cookies are a testament to the beauty of simplicity—chewy, nutty, and packed with wholesome goodness. Whether you’re a busy parent looking for a quick treat, a beginner baker wanting an easy win, or a peanut butter enthusiast craving a satisfying snack, these cookies are a guaranteed hit. Let’s dive into why this recipe deserves a permanent spot in your baking repertoire.

Why You’ll Love This Recipe

First, let’s talk about why these cookies are a must-try. Here are five compelling reasons to whip up a batch today:

  • Minimal ingredients, maximum flavor: With just five pantry staples, you can create cookies that taste like they took hours to make. No complicated steps or hard-to-find ingredients here.
  • Naturally gluten-free: If you use certified gluten-free oats, these cookies are a fantastic option for those avoiding gluten without sacrificing taste or texture.
  • Quick and easy: From mixing bowl to oven in under 10 minutes, this recipe is perfect for last-minute cravings or unexpected guests.
  • Kid-friendly and crowd-pleasing: The combination of peanut butter and oats is universally loved, making these cookies a hit with all ages.
  • Customizable: While the base recipe is perfect as-is, it’s also a fantastic canvas for add-ins like chocolate chips, dried fruit, or a sprinkle of sea salt.

Ingredients Breakdown

Let’s take a closer look at the five key ingredients that make these cookies so special:

  • Peanut butter: The star of the show, peanut butter provides richness, protein, and that irresistible nutty flavor. Opt for natural creamy peanut butter for the best texture, but any variety will work.
  • Rolled oats: These give the cookies their hearty chew and wholesome character. Old-fashioned rolled oats work best—avoid instant oats for the ideal texture.
  • Egg: Acts as the binding agent, holding everything together while adding moisture and structure.
  • Maple syrup or honey: A natural sweetener that enhances flavor without being overly sugary. Maple syrup adds a subtle depth, while honey offers floral notes.
  • Vanilla extract: A splash of vanilla elevates the other ingredients, adding warmth and complexity to each bite.

How to Make 5-Ingredient Peanut Butter Oatmeal Cookies

Ready to bake? Follow these simple steps for perfect cookies every time:

  1. Preheat your oven to 350°F (175°C) and line a baking sheet with parchment paper or a silicone mat.
  2. Mix wet ingredients: In a large bowl, combine 1 cup peanut butter, 1/3 cup maple syrup or honey, 1 large egg, and 1 teaspoon vanilla extract. Stir until smooth and well incorporated.
  3. Add oats: Fold in 1 1/2 cups rolled oats until fully combined. The dough will be thick but slightly sticky.
  4. Scoop and shape: Using a cookie scoop or tablespoon, portion out dough and roll into balls. Place on the prepared baking sheet, spacing them about 2 inches apart. Gently flatten each ball with your palm or the back of a fork for a classic crisscross pattern.
  5. Bake: Transfer to the oven and bake for 10–12 minutes, or until the edges are lightly golden. The centers may look soft—this is normal, as they’ll firm up while cooling.
  6. Cool: Let the cookies rest on the baking sheet for 5 minutes before transferring to a wire rack to cool completely.

Pro Tips for the Best Results

Want to take your cookies to the next level? Try these expert tips:

  • Chill the dough: If the dough feels too sticky, refrigerate it for 15–20 minutes before shaping. This makes handling easier and helps prevent overspreading.
  • Toast the oats: For an extra layer of nutty flavor, spread the oats on a baking sheet and toast at 350°F for 5–7 minutes before mixing them into the dough.
  • Don’t overbake: These cookies are best when slightly soft in the center. They’ll continue to set as they cool, so err on the side of underbaking.
  • Press with flair: Instead of a fork, try pressing a few chocolate chips or a light sprinkle of flaky salt onto each cookie before baking for a gourmet touch.

Variations and Substitutions

This recipe is wonderfully adaptable. Here are some delicious ways to mix it up:

  • Chocolate lovers: Stir in 1/2 cup chocolate chips or chunks for a decadent twist.
  • Crunchy texture: Add 1/4 cup chopped peanuts or almonds for extra crunch.
  • Dried fruit: Mix in 1/3 cup raisins, dried cranberries, or chopped dates for a fruity contrast.
  • Spiced version: Add 1/2 teaspoon cinnamon or a pinch of nutmeg to the dough for warm, cozy notes.
  • Nut-free option: Substitute sunflower seed butter for peanut butter and omit any nut toppings.
  • Vegan adaptation: Replace the egg with a flax egg (1 tablespoon ground flaxseed + 3 tablespoons water, let sit for 5 minutes).

What to Serve With It

While these cookies are fantastic on their own, here are some pairing ideas to make them part of a larger treat:

  • A cold glass of almond milk or a warm cup of chai tea for dunking.
  • Fresh fruit like sliced apples or bananas for a balanced snack.
  • A scoop of vanilla ice cream sandwiched between two cookies for an indulgent dessert.
  • Pack them in lunchboxes alongside yogurt and berries for a wholesome midday boost.

How to Store and Reheat

To keep your cookies tasting fresh:

  • Room temperature: Store in an airtight container at room temperature for up to 5 days.
  • Refrigerate: For longer storage, refrigerate for up to 2 weeks. Let come to room temperature before serving for the best texture.
  • Freeze: These cookies freeze beautifully. Place cooled cookies in a freezer-safe bag or container for up to 3 months. Thaw at room temperature or warm briefly in the microwave.
  • Reheating: For a just-baked feel, warm cookies in a 300°F oven for 3–5 minutes or microwave for 10–15 seconds.

Frequently Asked Questions (FAQs)

Here are answers to common questions about this recipe:

  • Can I use quick oats instead of rolled oats? Quick oats will work, but the texture will be slightly softer. For the best chew, stick with old-fashioned rolled oats.
  • Why are my cookies too crumbly? This usually means the dough needed more moisture. Try adding an extra tablespoon of peanut butter or maple syrup next time.
  • Can I make these without an egg? Yes, a flax egg or commercial egg replacer will work, though the cookies may be slightly more delicate.
  • How do I make these cookies sweeter? Increase the maple syrup to 1/2 cup or add 2–3 tablespoons of brown sugar to the dough.
  • Can I double the recipe? Absolutely! This recipe scales well—just be sure to bake in batches to avoid overcrowding the oven.

Final Thoughts

In a world of complicated recipes and endless ingredient lists, these 5-Ingredient Peanut Butter Oatmeal Cookies are a breath of fresh air. They prove that sometimes, the simplest things are the most satisfying. Whether you enjoy them as an afternoon pick-me-up, a lunchbox surprise, or a late-night treat with a glass of milk, these cookies are sure to become a regular in your baking rotation. So grab that jar of peanut butter and get ready to fall in love with a recipe that’s as easy to make as it is delicious to eat. Happy baking!

Print
clock clock iconcutlery cutlery iconflag flag iconfolder folder iconinstagram instagram iconpinterest pinterest iconfacebook facebook iconprint print iconsquares squares iconheart heart iconheart solid heart solid icon

5-Ingredient Peanut Butter Oatmeal Cookies

  • Author: Easy Baking Co.

Description

These simple, chewy peanut butter oatmeal cookies require just 5 ingredients and no flour. Perfect for quick snacks or lunchbox treats with natural sweetness from bananas and oats.


Ingredients

Scale

For the Crust:

  • For the cookies:
  • 2 ripe bananas, mashed (about 1 cup)
  • 1 cup creamy peanut butter (unsweetened)
  • 2 cups rolled oats
  • 1/4 cup honey or maple syrup
  • 1 tsp vanilla extract (optional)

Instructions

1. Prepare the Crust:

  1. 1. Preheat oven to 350°F (175°C) and line a baking sheet with parchment paper.
  2. 2. In a large bowl, mash bananas until smooth with few lumps remaining.
  3. 3. Add peanut butter, honey/maple syrup, and vanilla (if using). Mix until fully combined.
  4. 4. Stir in rolled oats until all ingredients are evenly incorporated.
  5. 5. Scoop tablespoon-sized portions onto baking sheet, flattening slightly with a fork.
  6. 6. Bake for 12-15 minutes until edges are golden. Cool completely before serving.

Notes

For crunchier cookies, bake an extra 2-3 minutes. Store in airtight container for up to 5 days. May substitute almond butter for peanut butter if needed.

Peanut Butter Oatmeal Chocolate Chip Banana Bread Bars

Peanut Butter Oatmeal Chocolate Chip Banana Bread Bars

There’s something magical about the combination of peanut butter, chocolate, and banana—especially when baked into soft, chewy bars with a hint of hearty oatmeal. These Peanut Butter Oatmeal Chocolate Chip Banana Bread Bars are the ultimate treat for breakfast, dessert, or an afternoon snack. Imagine the cozy aroma of banana bread filling your kitchen, but with an irresistible twist of nutty peanut butter and melty chocolate chips. Whether you’re a seasoned baker or a beginner, this recipe is foolproof and guaranteed to win over anyone who takes a bite.

Why You’ll Love This Recipe

If you need convincing to make these bars (though one bite will do the trick), here’s why they’re a must-try:

  • Perfect Texture – The oatmeal adds a satisfying chewiness, while the bananas keep the bars moist and tender.
  • Flavor Harmony – Peanut butter and chocolate are a classic duo, but the banana adds a natural sweetness that balances everything beautifully.
  • Easy to Make – No fancy equipment or complicated steps—just mix, bake, and enjoy.
  • Versatile – Enjoy them warm out of the oven, at room temperature, or even chilled for a different texture.
  • Crowd-Pleasing – These bars disappear fast at potlucks, bake sales, or family gatherings.

Ingredients Breakdown

Every ingredient in these Peanut Butter Oatmeal Chocolate Chip Banana Bread Bars plays a crucial role in creating the perfect bite. Here’s what you’ll need and why:

  • Ripe Bananas – The riper, the better. They add natural sweetness and moisture, reducing the need for excess sugar.
  • Peanut Butter – Use creamy or crunchy, depending on your preference. It adds richness and a nutty depth.
  • Rolled Oats – These provide structure and a slightly chewy texture. Quick oats can work in a pinch, but rolled oats are ideal.
  • Chocolate Chips – Semi-sweet or dark chocolate chips balance the sweetness, but milk chocolate works too for a sweeter bar.
  • Eggs – They bind everything together and contribute to the soft, cake-like texture.
  • Brown Sugar – Adds caramel-like sweetness and helps keep the bars moist.
  • Vanilla Extract – A splash enhances all the other flavors.
  • Baking Essentials – Flour, baking soda, and salt ensure the bars rise properly and have the right consistency.

How to Make Peanut Butter Oatmeal Chocolate Chip Banana Bread Bars

Follow these simple steps for bakery-worthy bars every time:

  1. Preheat and Prep – Preheat your oven to 350°F and line an 8×8 or 9×9 baking pan with parchment paper for easy removal.
  2. Mash the Bananas – In a large bowl, mash the bananas until smooth with only a few small lumps remaining.
  3. Mix Wet Ingredients – Add the peanut butter, eggs, brown sugar, and vanilla extract to the bananas. Stir until fully combined.
  4. Combine Dry Ingredients – In a separate bowl, whisk together the flour, oats, baking soda, and salt.
  5. Fold Together – Gradually add the dry ingredients to the wet mixture, stirring just until incorporated. Avoid overmixing to keep the bars tender.
  6. Add Chocolate Chips – Gently fold in the chocolate chips, reserving a handful to sprinkle on top.
  7. Bake – Pour the batter into the prepared pan, smooth the top, and sprinkle with the remaining chocolate chips. Bake for 25–30 minutes, or until a toothpick inserted in the center comes out clean.
  8. Cool and Slice – Let the bars cool in the pan for at least 15 minutes before lifting them out and slicing into squares.

Pro Tips for the Best Results

  • Use Overripe Bananas – The darker the bananas, the sweeter and more flavorful your bars will be.
  • Don’t Overmix – Stir just until the ingredients are combined to avoid dense bars.
  • Check Early – Ovens vary, so start checking for doneness around the 20-minute mark.
  • Let Them Cool – The bars firm up as they cool, making them easier to slice neatly.
  • Toast the Oats – For extra depth, toast the oats in a dry skillet for a few minutes before adding them to the batter.

Variations and Substitutions

Customize these bars to fit your taste or dietary needs:

  • Nut-Free – Swap peanut butter for sunflower seed butter or tahini.
  • Gluten-Free – Use certified gluten-free oats and a 1:1 gluten-free flour blend.
  • Vegan – Replace eggs with flax eggs and use dairy-free chocolate chips.
  • Add-Ins – Try walnuts, shredded coconut, or dried cranberries for extra texture.
  • Less Sweet – Reduce the brown sugar by a few tablespoons or use dark chocolate chips.

What to Serve With It

These bars are delicious on their own, but here are a few pairing ideas:

  • Morning Boost – Enjoy with a cup of coffee or a cold glass of almond milk.
  • Dessert Upgrade – Serve warm with a scoop of vanilla ice cream or a drizzle of caramel sauce.
  • Brunch Spread – Pair with fresh fruit and yogurt for a balanced breakfast.

How to Store and Reheat

Keep these bars fresh with these storage tips:

  • Room Temperature – Store in an airtight container for up to 3 days.
  • Refrigerate – For longer freshness, refrigerate for up to a week.
  • Freeze – Wrap individual bars in plastic wrap and freeze for up to 3 months. Thaw at room temperature or microwave briefly.
  • Reheat – Warm in the microwave for 10–15 seconds or in a 300°F oven for 5 minutes to revive the gooey texture.

Frequently Asked Questions (FAQs)

Can I use instant oats instead of rolled oats?
Instant oats will work, but the texture will be softer. Rolled oats provide a better chew.

Can I make these bars ahead of time?
Absolutely! They taste even better the next day as the flavors meld together.

Why did my bars turn out dry?
Overbaking or overmixing can cause dryness. Check for doneness early and avoid over-stirring the batter.

Can I double this recipe?
Yes, double the ingredients and bake in a 9×13 pan, adjusting the time as needed.

Is natural peanut butter okay to use?
Yes, but stir it well first. The bars may be slightly less dense due to the oil separation in natural peanut butter.

Final Thoughts

These Peanut Butter Oatmeal Chocolate Chip Banana Bread Bars are the kind of recipe you’ll return to again and again. They’re comforting, easy to make, and endlessly adaptable. Whether you’re baking them for a lazy weekend breakfast, packing them in lunchboxes, or sharing them with friends, they’re sure to bring smiles. Don’t be surprised if they become a household favorite—mine certainly did. Happy baking!

Print
clock clock iconcutlery cutlery iconflag flag iconfolder folder iconinstagram instagram iconpinterest pinterest iconfacebook facebook iconprint print iconsquares squares iconheart heart iconheart solid heart solid icon

Peanut Butter Oatmeal Chocolate Chip Banana Bread Bars

  • Author: Baking Enthusiast

Description

A deliciously moist and chewy hybrid between banana bread and oatmeal bars, packed with peanut butter, chocolate chips, and wholesome oats. Perfect for breakfast or as a snack!


Ingredients

Scale

For the Crust:

  • For the bars:
  • 3 ripe bananas, mashed
  • 1/2 cup creamy peanut butter
  • 1/4 cup honey or maple syrup
  • 1 large egg
  • 1 teaspoon vanilla extract
  • 1 1/2 cups old-fashioned rolled oats
  • 1/2 cup whole wheat flour
  • 1 teaspoon baking powder
  • 1/2 teaspoon cinnamon
  • 1/4 teaspoon salt
  • For the mix-ins:
  • 1/2 cup chocolate chips
  • 1/4 cup chopped walnuts (optional)

Instructions

1. Prepare the Crust:

  1. Preheat oven to 350°F (175°C). Line an 8×8-inch baking pan with parchment paper.
  2. In a large bowl, mash the bananas until smooth. Add peanut butter, honey, egg, and vanilla. Mix well.
  3. In a separate bowl, whisk together oats, flour, baking powder, cinnamon, and salt.
  4. Gradually add the dry ingredients to the wet ingredients, stirring until just combined.
  5. Fold in chocolate chips and walnuts (if using).
  6. Spread the batter evenly into the prepared pan.
  7. Bake for 25-30 minutes, or until the edges are golden and a toothpick inserted in the center comes out clean.
  8. Let cool completely in the pan before slicing into bars.

Notes

Store in an airtight container at room temperature for up to 3 days, or freeze for longer storage. For extra gooey bars, underbake slightly by 2-3 minutes.

Best Healthy Oatmeal Muffins {4 Easy Ways}

Best Healthy Oatmeal Muffins {4 Easy Ways}

There’s something undeniably comforting about a warm, freshly baked oatmeal muffin. Whether you’re looking for a quick breakfast on the go, a wholesome snack, or a guilt-free treat, these healthy oatmeal muffins deliver on flavor, texture, and nutrition. What makes them even better? You can customize them four different ways to suit your cravings or dietary needs. Let’s dive into why this recipe is a must-try and how you can make it your own.

Why You’ll Love This Recipe

If you’re still on the fence about whether to bake these muffins, here are a few reasons that might just convince you:

  • Nutrient-packed and filling: Oats are a fantastic source of fiber, and when combined with wholesome ingredients like Greek yogurt and honey, these muffins keep you satisfied for hours.
  • Perfect for meal prep: Bake a batch on Sunday, and you’ll have a grab-and-go breakfast or snack ready for the week ahead.
  • Kid-friendly and customizable: Whether you prefer classic cinnamon-spiced muffins or want to add chocolate chips or berries, this recipe adapts effortlessly.
  • No refined sugar: Sweetened naturally with honey or maple syrup, these muffins are a healthier alternative to store-bought versions.
  • Easy to make gluten-free or dairy-free: With simple swaps, you can tailor these muffins to fit dietary restrictions without sacrificing taste.

Ingredients Breakdown

Understanding the role of each ingredient helps you make the best possible muffins—and even experiment with confidence. Here’s what you’ll need:

  • Rolled oats: The star of the show, oats provide structure, fiber, and a hearty texture. Avoid instant oats for the best results.
  • Greek yogurt: Adds moisture and a slight tang while boosting the protein content. You can substitute with dairy-free yogurt if needed.
  • Eggs: Bind the ingredients together and contribute to the muffins’ light, fluffy texture.
  • Honey or maple syrup: Natural sweeteners that enhance flavor without refined sugar.
  • Baking powder and baking soda: Essential for lift and a tender crumb.
  • Cinnamon and vanilla extract: Warm spices that elevate the overall taste.
  • Milk (or plant-based milk): Adjusts the batter’s consistency. Almond milk or oat milk work beautifully.

How to Make Best Healthy Oatmeal Muffins {4 Easy Ways}

Follow these simple steps for perfect oatmeal muffins every time:

  1. Preheat and prepare: Start by preheating your oven to 375°F and lining a muffin tin with paper liners or lightly greasing it.
  2. Mix dry ingredients: In a large bowl, whisk together the oats, flour (or oat flour for gluten-free), baking powder, baking soda, cinnamon, and a pinch of salt.
  3. Combine wet ingredients: In another bowl, whisk the eggs, Greek yogurt, honey, vanilla, and milk until smooth.
  4. Blend and rest: Pour the wet ingredients into the dry ingredients and stir until just combined. Let the batter sit for 10 minutes—this allows the oats to soften slightly.
  5. Fold in extras: Now’s the time to add your mix-ins! Choose from blueberries, chocolate chips, chopped nuts, or shredded apple.
  6. Bake: Divide the batter evenly among the muffin cups and bake for 18–22 minutes, or until a toothpick inserted comes out clean.
  7. Cool and enjoy: Let the muffins cool in the pan for 5 minutes before transferring them to a wire rack.

Pro Tips for the Best Results

  • Don’t overmix: Stir the batter until just combined to avoid dense muffins.
  • Use room temperature ingredients: Cold eggs or yogurt can make the batter lumpy.
  • Experiment with textures: For extra crunch, sprinkle the tops with oats or chopped nuts before baking.
  • Check for doneness early: Ovens vary, so start checking at the 18-minute mark.

Variations and Substitutions

One of the best things about this recipe is its versatility. Here are four delicious ways to switch it up:

  • Blueberry Lemon: Fold in fresh blueberries and a teaspoon of lemon zest for a bright, fruity twist.
  • Chocolate Chip Banana: Add mashed banana and dark chocolate chips for a decadent yet wholesome treat.
  • Apple Cinnamon: Stir in finely diced apple and an extra teaspoon of cinnamon for a cozy fall flavor.
  • Nutty Cranberry: Mix in chopped walnuts and dried cranberries for a tart, crunchy bite.

For dietary adjustments:

  • Gluten-free: Use certified gluten-free oats and oat flour.
  • Vegan: Replace eggs with flax eggs and use maple syrup instead of honey.
  • Dairy-free: Swap Greek yogurt for coconut yogurt and use almond milk.

What to Serve With It

These muffins are delicious on their own, but here are a few pairing ideas:

  • Spread with almond butter or cream cheese for extra richness.
  • Serve alongside a fruit salad or smoothie for a balanced breakfast.
  • Enjoy with a cup of herbal tea or black coffee for a cozy snack.

How to Store and Reheat

To keep your muffins fresh:

  • Room temperature: Store in an airtight container for up to 3 days.
  • Refrigerator: They’ll last up to a week if refrigerated.
  • Freezer: Wrap individually and freeze for up to 3 months. Thaw at room temperature or reheat in the microwave for 20–30 seconds.

Frequently Asked Questions (FAQs)

Can I use quick oats instead of rolled oats?
Quick oats will work, but the texture will be softer. Rolled oats provide a heartier bite.

Why did my muffins turn out dry?
Overbaking or using too much flour can cause dryness. Measure flour carefully and check for doneness early.

Can I make these muffins without eggs?
Yes! Substitute each egg with a flax egg (1 tablespoon ground flaxseed + 3 tablespoons water).

How can I make these muffins sweeter?
Add an extra tablespoon of honey or a handful of chocolate chips for more sweetness.

Can I bake this as a loaf instead?
Absolutely! Pour the batter into a greased loaf pan and bake at 350°F for 45–55 minutes.

Final Thoughts

Whether you’re a seasoned baker or just starting out, these healthy oatmeal muffins are a foolproof way to enjoy a nutritious and delicious treat. With four easy variations, you’ll never get bored, and the recipe adapts seamlessly to your preferences. I’d love to hear which version you try first—leave a comment below and share your muffin adventures!

Print
clock clock iconcutlery cutlery iconflag flag iconfolder folder iconinstagram instagram iconpinterest pinterest iconfacebook facebook iconprint print iconsquares squares iconheart heart iconheart solid heart solid icon

Best Healthy Oatmeal Muffins {4 Easy Ways}

  • Author: Healthy Baking Enthusiast

Description

These wholesome oatmeal muffins are packed with fiber, protein, and customizable flavors. Choose from four delicious variations: classic cinnamon, blueberry almond, chocolate chip banana, or apple spice. Perfect for breakfast or snacks!


Ingredients

Scale

For the Crust:

  • For Base Recipe:
  • 1 1/2 cups rolled oats
  • 1 cup whole wheat flour
  • 1 tsp baking powder
  • 1/2 tsp baking soda
  • 1/2 tsp salt
  • 1 tsp cinnamon
  • 1 cup unsweetened applesauce
  • 1/2 cup milk (dairy or plant-based)
  • 1/4 cup honey or maple syrup
  • 1 large egg
  • 2 tbsp melted coconut oil
  • 1 tsp vanilla extract
  • For Cinnamon Variation:
  • 1 tsp additional cinnamon
  • 1/4 cup raisins
  • For Blueberry Almond:
  • 1 cup fresh blueberries
  • 1/4 cup sliced almonds
  • 1/2 tsp almond extract
  • For Chocolate Chip Banana:
  • 1 mashed ripe banana
  • 1/3 cup dark chocolate chips
  • For Apple Spice:
  • 1 cup grated apple
  • 1/2 tsp nutmeg
  • 1/4 tsp cloves

Instructions

1. Prepare the Crust:

  1. 1. Preheat oven to 375°F (190°C) and line a 12-cup muffin tin with liners or grease well.
  2. 2. In a large bowl, whisk together oats, flour, baking powder, baking soda, salt, and cinnamon.
  3. 3. In another bowl, mix applesauce, milk, honey, egg, coconut oil, and vanilla until smooth.
  4. 4. Pour wet ingredients into dry ingredients and stir until just combined (do not overmix).
  5. 5. For variations: Gently fold in your chosen add-ins (see ingredients list).
  6. 6. Divide batter evenly among muffin cups, filling about 3/4 full.
  7. 7. Bake for 18-22 minutes until tops spring back when lightly touched.
  8. 8. Cool in pan for 5 minutes, then transfer to wire rack.

Notes

Store in airtight container for 3 days or freeze for up to 3 months. For vegan version, use flax egg and maple syrup. Batter can be refrigerated overnight for easy morning baking.