Delicious Stuffed Chicken Breast Recipe for Flavorful Family Dinners

Delicious Stuffed Chicken Breast: A Flavorful Delight

⚖️
Difficulty
Medium

⏲️
Prep Time
15 mins

🕒
Cook Time
30 mins

⏱️
Total Time
45 mins

🍽️
Servings
4

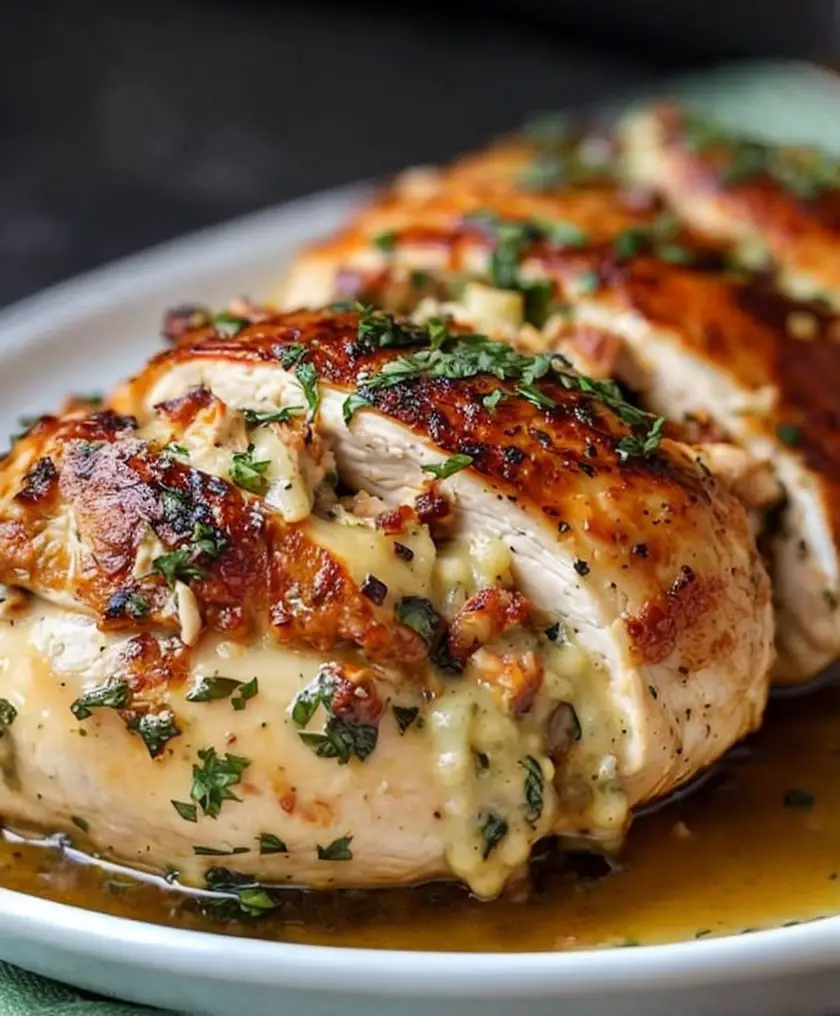
Stuffed chicken breast is a delightful dish that turns a standard chicken meal into an extraordinary culinary experience. This recipe features succulent chicken breasts filled with a savory mixture of ingredients that blend beautifully to create a flavor explosion in each bite. Imagine tender chicken, delicately seasoned and expertly opened to reveal a savory filling that oozes flavor. It’s a dish that not only tastes amazing but also looks impressive, making it perfect for a romantic dinner or a family gathering.

The versatility of stuffed chicken allows you to customize the filling to suit your tastes or dietary preferences. Whether you choose to stuff it with creamy cheeses, wholesome vegetables, or a mix of herbs and spices, each variation brings its own unique character and flair. The aromatic notes wafting from the oven will invite your guests to the table, eager to enjoy the feast. This recipe not only satisfies your hunger but also warms the heart, bonding everyone at the table over a shared love of delicious food.

Quick Recipe Highlights

  • Flavor Profile: This dish features a well-balanced taste, combining savory chicken with rich, creamy filling and a hint of fresh herbs.
  • Texture: Enjoy the contrast of tender chicken and a creamy, slightly crunchy filling that melds beautifully.
  • Aroma: The scent of roasted chicken mixed with fresh herbs and melted cheese creates an enticing aroma that fills the kitchen.
  • Visual Appeal: The golden-brown chicken presents beautifully, with a peek of green and white from the stuffing, garnished with fresh herbs.
  • Skill Level Needed: This medium-level recipe requires basic cooking skills, making it accessible to home cooks of all abilities.
  • Special Equipment: A sharp knife, kitchen twine, and an oven-safe dish are essential for perfecting this stuffed chicken breast recipe.

Recipe Overview

  • Difficulty Level: While it may seem complex, this stuffed chicken breast recipe is manageable with clear steps. The key is to ensure you don’t overstuff the chicken, which can lead to a messy outcome.
  • Category: This delicious dish can be served as a main course for lunch or dinner and is great for special occasions or weeknight meals.
  • Cuisine: Combining elements from Italian and Mediterranean cooking traditions, this recipe embraces fresh ingredients and bold flavors.
  • Cost: The recipe is cost-effective, utilizing affordable chicken breasts and pantry staples for the filling, making it budget-friendly for families.
  • Season: Ideal for any season, but especially enjoyable during spring and summer when fresh herbs and seasonal veggies are at their peak.
  • Occasion: This stuffed chicken breast is perfect for both casual family dinners and more formal gatherings, ensuring everyone at your table is satisfied.

Why You’ll Love This Recipe

The taste and texture of stuffed chicken breast are truly unmatched. It combines the tenderness of perfectly cooked chicken with a flavorful filling that melts in your mouth. Each bite delivers not just satisfaction but also a delightful surprise, making it a standout main dish. You’ll often find guests reminiscing about the meal long after it’s been served.

Convenience plays a significant role in the appeal of this dish. Stuffed chicken breast can be prepared in advance and stored, saving valuable time on busy weekdays. Preparing the filling can be done ahead of time, allowing you to assemble the dish right before cooking.

Packed with nutritional goodness, this recipe often includes vegetables, cheeses, or grains, making it a well-rounded meal. The chicken provides a lean source of protein, essential for maintaining a healthy diet, while the various fillings can introduce a wealth of vitamins and minerals.

Social interactions around this delicious meal only enhance its appeal. Stuffed chicken breast becomes the centerpiece of the table, inspiring conversation and connection with family and friends. It’s a dish that invites people to linger, share stories, and enjoy each other’s company.

Cost-effectiveness is another reason this recipe shines. With simple ingredients that can often be found at home or local markets, it’s an affordable option that doesn’t compromise on flavor. This recipe is not only delicious but also friendly on your wallet, making it a smart choice for everyday dining.

Historical Background and Cultural Significance

The origin of stuffed chicken can be traced back to traditional cooking practices in many cultures around the world. Various cultures have celebrated the art of stuffing meats with a variety of ingredients to enhance flavor and create hearty meals. From the Italian “pollo farcito” to Mediterranean dishes, the idea of stuffing poultry has stood the test of time.

In many culinary traditions, stuffing not only serves to enhance flavor but also allows for creative expression in the kitchen. Different regions have their unique touch on the stuffing, making it a symbol of culinary diversity. For example, in Italian cuisine, you might find a filling made of ricotta and spinach, while in the Middle East, spiced rice and nuts might take center stage.

Over the years, as culinary techniques have progressed, stuffed chicken breast recipes have evolved. Modern approaches celebrate both traditional flavors and contemporary dietary preferences, offering a wide array of filling options ranging from gluten-free to vegan alternatives. This adaptability has kept the dish relevant and enjoyable across generations.

Regional variations also contribute to the rich tapestry of stuffed chicken recipes. Countries from Europe to Asia adapt this dish to fit their regional tastes, using local herbs, spices, and seasonal vegetables, thus embracing global culinary influences and flavors.

Ingredient Deep Dive

Upon choosing chicken breast as the base for this dish, it’s essential to understand both its cultural significance and nutritional benefits. Chicken is historically a staple protein in many cultures representing nourishment, warmth, and comfort. Nutritionally, chicken breast is low in fat and high in protein, making it an excellent choice for health-conscious individuals.

When selecting chicken breasts, look for those that have a pinkish color and are firm to the touch, avoiding any that appear discolored or have an unpleasant smell. Properly storing chicken is key to maintaining freshness; it should be kept refrigerated and used within 1-2 days of purchase.

Cheese is another integral component of stuffed chicken breasts. Cheeses such as mozzarella, feta, or cream cheese add richness and creaminess to the filling. Each cheese offers its unique flavor profile and contributes to the overall mouthfeel of the dish. Cheese is also packed with calcium, essential for bone health, adding nutritional value.

For storage, cheese should be kept covered in the refrigerator and used within its use-by date for the freshest quality. When substituting cheese, consider nut-based options for a dairy-free alternative.

Fresh herbs and vegetables are common additions to stuffed chicken, enhancing flavor and introducing various vitamins and minerals. Basil, spinach, or sun-dried tomatoes offer unique spins on the filling. Selecting herbs should involve looking for vibrant, fragrant bunches—avoid any wilting or browning leaves. Fresh herbs should be stored in the refrigerator, either wrapped in a damp paper towel or in a glass of water, while vegetables should be used promptly for peak freshness.

Common Mistakes to Avoid

  • Overstuffing the chicken can lead to burst seams while cooking. Aim for a moderate amount of filling.
  • Not securing the chicken properly with twine or toothpicks may lead to an uneven cook and loss of filling.
  • Using undercooked chicken results in safety hazards; always utilize a meat thermometer.
  • Neglecting to season the chicken can result in blandness; a good amount of salt and pepper is essential.
  • Skipping marinating or pre-seasoning can cause the stuffing to overpower the chicken flavor.
  • Choosing low-quality or expired ingredients can lead to an unsatisfactory outcome.
  • Oven temperature mishaps can affect cooking time; always preheat your oven thoroughly.
  • Not allowing the chicken to rest after cooking can cause juices to escape, leading to dry meat.
  • Taking shortcuts on preparation time may lead to overcooked stuffing while waiting for the chicken to finish.
  • Forget to garnish or serve with a fresh side can miss the chance to elevate the dish visually and nutritionally.

Essential Techniques

When preparing stuffed chicken breast, properly seasoning the chicken is crucial. Seasoning adds depth to the flavor, ensuring every bite is enjoyable. Use a mix of salt, pepper, and herbs, and allow the chicken to marinate for at least 30 minutes for maximum flavor infusion.

Cutting the chicken breast to create the perfect pocket is essential for successful stuffing. Use a sharp knife to make a horizontal incision, being cautious not to cut all the way through. This method creates a spacious pocket for stuffing while keeping the breast intact.

Securing the chicken with twine or toothpicks prevents the filling from escaping during cooking. Tie the chicken breast snugly, ensuring it holds its shape while cooking, and remove the twine before serving for a clean presentation.

Monitoring an appropriate cooking temperature is vital to achieve a safe and moist outcome. Using a meat thermometer to check that the internal temperature of the chicken reaches 165°F ensures it is cooked through without drying out.

Pro Tips for Perfect Stuffed Chicken Breast

Begin by selecting the best-quality chicken. Fresh, organic chicken breasts yield better flavor and texture than processed options. Pairing them with high-quality gourmet cheeses or freshly herbs can elevate your dish significantly.

Consider preparing your stuffing a day in advance. Allowing the stuffing to rest enables flavors to meld, bringing out the essence of each ingredient when cooked. The advantage of prepping ahead also prepares you for a quick assembly on the day of cooking.

Experiment with different cheeses for varied flavor profiles. Cream cheese offers a tangy creaminess, while feta adds a salty kick. Mixing cheese varieties can create delicious depth in your filling.

Utilize an oven-safe skillet for cooking. By searing the chicken on the stovetop and then transferring it to the oven, you can create a beautifully golden crust while preserving the juiciness of the chicken.

Don’t forget about presentation! A sprinkle of fresh herbs or a drizzle of balsamic reduction can transform your dish into a gourmet experience, pleasing both the eye and the palate.

Resting the chicken after cooking allows the juices to redistribute evenly throughout the meat, ensuring that every slice is juicy and tender. A 5-10 minute rest makes a world of difference.

Consider serving your stuffed chicken with a complementary side dish. Seasonal vegetables or a fresh salad will balance the meal, enhancing the overall dining experience and aiding digestion.

Pay attention to cooking times based on size variations of chicken breasts. Larger breasts may take longer to cook properly, while smaller pieces might cook quicker—it’s important to adjust as necessary.

Variations and Adaptations

You can easily adapt stuffed chicken breast to fit regional tastes. For instance, a Mexican twist might incorporate jalapeños, cheddar cheese, and black beans into the filling, topped with avocado or salsa before serving.

Seasonal adaptations can elevate the dish according to what’s fresh and available. Spring might inspire a brighter filling of asparagus and lemon-infused cream cheese, while autumn could lead you to a stuffing with pumpkin and sage.

For those with dietary restrictions, substitute traditional ingredients with alternatives like gluten-free breadcrumbs or dairy-free cheeses. This provides inclusivity while maintaining delicious flavors.

Flavor variations could also enhance your stuffed chicken. Adding sun-dried tomatoes, olives, or roasted garlic would create Mediterranean vibes that everyone will enjoy.

Experiment with different textures in your stuffing. Incorporating nuts or grains like quinoa can add both crunch and heartiness, creating a more substantial meal and added nutritional benefits.

Lastly, consider presentation alternatives. Stuffed chicken breast can be sliced to reveal the filling or served whole. Serving may involve individual portions or sharing platters, all depending on the occasion and setting.

Serving and Presentation Guide

Effective plating techniques can make a huge impact when serving stuffed chicken breast. Begin by creating a clean base using sauces or purees for an elegant backdrop. Adding colorful vegetables around the plate offers a visual contrast that enhances appeal.

Garnishing ideas can range from freshly chopped herbs to drizzles of olive oil or sauces. A sprinkle of parmesan over the top just before serving creates an inviting look and additional flavor.

Traditional accompaniments to stuffed chicken might include homemade bread or a crisp green salad, which add both texture and flavor balance. More modern servings could involve a side of roasted vegetables or quinoa for a healthy touch.

Temperature considerations play an important role in serving. Stuffed chicken is best served warm, so consider letting it rest for a few minutes before presenting. This ensures all components shine at their best.

When it comes to portion control, consider the needs of your guests. For larger gatherings, serving smaller pieces can encourage sampling and increase overall enjoyment of the meal.

Wine and Beverage Pairing

When selecting wine pairings for stuffed chicken breast, consider a light-bodied white wine such as Chardonnay or Pinot Grigio, which complements the chicken without overpowering the dish. These wines enhance the creaminess of cheese-based fillings and the brightness of herbs present in the dish.

For red wine lovers, a medium-bodied Merlot or Pinot Noir can also pair nicely, providing a gentle contrast to the flavors without overwhelming the palate. Look for a wine that balances fruitiness with subtle acidity to match the dish.

For non-alcoholic alternatives, consider sparkling water infused with citrus, which invigorates the meal while cleansing the palate. Freshly brewed iced herbal tea can also provide a refreshing accompaniment.

If coffee or tea works better for your meal, follow with a light, herbal tea post-dinner to aid digestion. For those who prefer coffee, a mild roast can enhance the meal without a strong aftertaste.

Temperature is essential; ensure white wines are served chilled and reds at room temperature for optimal flavor. For coffee, a medium warmth will allow the full flavor profile to emerge without overwhelming the taste buds.

Storage and Shelf Life

When it comes to storing stuffed chicken breast, it’s essential to cool leftovers to room temperature before refrigerating. Place in an airtight container and store in the fridge for up to three days for optimal freshness.

If you need to freeze, wrap the stuffed chicken tightly in plastic and then in aluminum foil to prevent freezer burn. Properly stored, it can last for up to three months in the freezer, allowing for quick meal options on especially busy days.

Signs of spoilage include off smells or changes in color and texture. It’s essential to do a quick check before reheating to avoid unappetizing experiences.

To reheat, place stuffed chicken in the oven at 350°F until warmed through. Consider adding a splash of broth to maintain moisture, ensuring the chicken remains tender.

If needed, reduce the reheating time by cutting stuffed chicken into smaller pieces, allowing for quicker and even heating throughout.

Freezing cooked stuffing separately is also a practical idea to maintain the unique flavors when you’re ready to use it, ensuring any leftovers are just as delicious.

Make Ahead Strategies

Preparing stuffed chicken breast doesn’t have to be a last-minute affair. Creating the filling a day in advance allows flavors to meld, enhancing the taste when you cook. Store the filling in an airtight container in the refrigerator until you’re ready to use.

You can also prepare the chicken by creating the pocket and securing it with twine or toothpicks hours before cooking. Just keep the wrapped chicken in your refrigerator until it’s time to bake.

Quality should always be a priority; however, cooking chicken and then storing it in the fridge can affect flavor. Reheating properly is key to enjoying the dish fully.

Assembly tips include seasoning the chicken right before cooking to maintain flavor intensity. Additionally, consider freezing extra ingredients like herbs and cheese to have on hand for future meals.

Evaluate the quality impact by testing different stuffing types to see how they hold up after rain. Ingredients like cream cheese maintain their texture well even after freezing.

To elevate fresh elements, add a drizzle of fresh sauce or garnish right before serving to make the dish feel newly prepared, giving it a vibrant and appealing finish.

Scaling Instructions

Scaling stuffed chicken breast recipes requires careful adjustments. To halve the recipe, simply cut your ingredient measurements in half and adjust your cooking time based on size variations in chicken breasts.

When doubling or tripling, consider a larger baking dish and allow for additional time to ensure all pieces cook thoroughly while keeping an eye on internal temperature.

Equipment adjustments may be needed; for instance, larger batches may require multiple pans or preheating the oven longer to maintain ideal temperature for even cooking.

Keep timing modifications in mind while cooking; be prepared to check doneness regularly. Utilizing a meat thermometer can help ensure each piece achieves that perfect, juicy outcome.

Storage considerations should also be addressed; if cooking in larger amounts, be sure to allow enough cooling space to safely store leftovers without crowding.

Distributing the cooking process helps ensure a successful outcome. Allow your first batch to cook completely before beginning the next, maintaining consistent quality throughout your meal preparation.

Nutritional Deep Dive

Analyzing the macro breakdown of stuffed chicken breast shows a well-rounded meal. Chicken typically offers high protein content of approximately 26g per serving, essential for muscle repair and growth.

The inclusion of cheese and vegetables further contributes to micronutrient analysis. Spinach, for example, adds iron, vitamins A, C, and K, while cheese provides calcium for bone health.

Consider health benefits like the lean protein of chicken in combination with nutrient-rich veggies, which can support weight management and overall wellness when consumed in moderation.

Dietary considerations include assessing the sodium and fat content, primarily from added cheeses and sauces. Using low-fat cheese options or fresh herbs can enhance flavors while reducing unhealthy components.

Understanding portion analysis is crucial; an appropriate portion size can mitigate overeating. Aim for a balanced plate that includes vegetables or whole grains alongside the stuffed chicken.

Weight management tips suggest being mindful of ingredients used for stuffing, making subs when needed to lower calorie counts without losing flavor.

Dietary Adaptations

Creating a gluten-free version of stuffed chicken breast is simple. Substitute breadcrumbs with gluten-free alternatives like crushed nuts or gluten-free oatmeal to achieve the same texture without compromising flavor.

For a dairy-free option, use plant-based cheeses or tofu spread. This adaptation maintains creaminess while accommodating vegan diets, ensuring everyone can enjoy the dish.

Vegan stuffed chicken concepts can inspire creativity in the kitchen. Consider using lentils or mushrooms as primary stuffing ingredients, along with herbs and spices for flavorful profiles.

Low-carb enthusiasts can swap out starch-based fillers for vegetables like zucchini or cauliflower rice, thoroughly mixing them into a robust filling.

The keto diet can also thrive with a stuffed chicken approach. Utilizing cheese-heavy fillings and leafy vegetables allows for compatibility with low-carb lifestyles, providing satisfaction without excess carbs.

Embracing a Paleo diet can lead to stuffing with ingredients like nuts and dehydrated fruits, offering a sweet contrast to the savory chicken.

Finally, exploring low-FODMAP options may involve withholding onions or garlic from fillings; herbs like thyme or parsley can replace the complex flavors without causing discomfort.

Troubleshooting Guide

For texture issues, informing how to properly cook chicken ensures moistness. Avoid overcooking by checking internal temperatures to allow tender bites.

Flavor balance concerns can arise if the filling is too salty or bland. Adjustments during preparation may involve incorporating fresh herbs or spices for added punch right before stuffing.

Temperature problems may emerge from an unpreheated oven or inconsistent cooking times. An oven thermometer can help maintain proper settings for juicy chicken.

Equipment challenges like a malfunctioning oven can alter outcomes. Consider adapting with a stovetop method or slow cooker to ensure food safety while achieving desired results.

Ingredient substitutions can cause surprises in flavor and texture. Test any unfamiliar replacements beforehand to understand how they fit within the recipe framework.

Timing concerns arise when guests are on their way; always prepare ahead to mitigate stress. Utilize the freezer effectively or pre-prep ingredients for speedier assembly.

Recipe Success Stories

Community feedback regarding stuffed chicken showcases versatility in creativity. Tales of families gathering around the table to share this dish often surface, creating cherished memories filled with flavors and laughter.

Several variations, from sun-dried tomato fillings to Mediterranean-inspired versions, have gained popularity, giving readers fresh ideas for creating their exciting spins on the classic recipe.

Adaptation stories include substitutions catering to dietary preferences, inspiring inventive approaches towards healthier cooking that still satisfy cravings for indulgent-tasting meals.

Readers frequently suggest experimenting with different ingredients or local specialties to elevate their stuffed chicken experiences, encouraging collaboration and culinary exploration.

Inspiring readers to take captivating photographs of their culinary creations fosters a sense of community, welcoming all food enthusiasts to engage and connect surrounding delicious recipes.

Frequently Asked Questions

Can I use bone-in chicken breasts?

Absolutely! Using bone-in chicken can enhance flavor and moisture, but you may need to adjust cooking times to ensure the meat is thoroughly cooked.

Is it possible to grill stuffed chicken breasts?

Yes, grilling adds a smoky flavor. Just ensure to secure the stuffing well, and keep an eye on the heat to avoid burning the exterior before the inside is cooked.

How do I know when the chicken is done?

The internal temperature should reach 165°F. Using a meat thermometer is the most reliable method to check for doneness without cutting into the chicken.

Can I prepare the stuffing in advance?

Yes! The stuffing can be made ahead of time and refrigerated, letting flavors meld overnight, which can enhance the dish’s overall taste.

What can I do with leftovers?

Leftover stuffed chicken can be stored in an airtight container in the refrigerator for up to three days. It can be reheated in the oven or enjoyed cold in salads or sandwiches.

Can I make this recipe dairy-free?

Yes! Substitute with dairy-free cheese options or creamy hummus to achieve a similar texture and flavor without using dairy products.

What salads pair well with stuffed chicken?

A fresh garden salad, Mediterranean chickpea salad, or roasted vegetable salad complements the stuffed chicken beautifully, enhancing the meal experience.

Can I freeze the stuffed chicken?

Yes, you can freeze the stuffed chicken before cooking. Just make sure to wrap it tightly to prevent freezer burn. Thaw in the refrigerator before cooking.

Is there a substitute for chicken breast?

Yes, other poultry like turkey breasts or even thin cuts of pork can work well. Adjust cooking times according to the type and thickness of the meat.

Can I use pre-cooked ingredients in my stuffing?

Absolutely! Using pre-cooked ingredients can save time. Just ensure your stuffing is heated correctly to avoid any food safety issues.

Additional Resources

Looking for more delicious inspiration? Check out our collection of related recipes like herb-roasted vegetables or creamy garlic mashed potatoes, perfect complements to your stuffed chicken. Don’t forget to explore our technique guides that focus on chicken preparation and skillets tips to elevate your cooking skills.

Need ingredient information? Our seasonal produce guides provide insights on what veggies are in-season, enhancing your meals with freshness throughout the year. Equipment recommendations can also help, with suggestions for must-have kitchen tools to make your cooking experiences easier and more enjoyable.

Seasonal variations may inspire new ideas; think about incorporating summer zucchini or fall squash into your stuffing for a delightful twist on this classic dish.

Join the Conversation

We encourage you to share your experiences with this stuffed chicken recipe! Post photos on social media using our unique hashtag, connecting with fellow food enthusiasts who appreciate the art of good cooking.

Photography tips can further enhance the showcasing of your dishes, ensuring they look as delicious as they taste. Your feedback and reviews will not only inspire others but allow for continued community engagement.

Explore recipe variations! Share your ideas on innovative ingredients or methods for stuffed chicken, creating a collaborative space for everyone eager to elevate their culinary skills together.

The Recipe

Stuffed Chicken Breast

Serves: 4

Prep Time: 15 mins

Cook Time: 30 mins

Total Time: 45 mins

Kitchen Equipment Needed

  • Sharp knife
  • Kitchen twine or toothpicks
  • Oven-safe dish
  • Meat thermometer

Ingredients

  • 4 boneless, skinless chicken breasts
  • 1 cup cream cheese
  • 1/2 cup spinach, chopped
  • 1/4 cup sun-dried tomatoes, chopped
  • 1/2 cup shredded mozzarella cheese
  • 2 cloves garlic, minced
  • Salt and pepper, to taste
  • Olive oil, for drizzling

Directions

  1. Preheat the oven to 375°F (190°C).
  2. Using a sharp knife, create a pocket in each chicken breast without cutting all the way through.
  3. In a bowl, mix cream cheese, spinach, sun-dried tomatoes, mozzarella, garlic, salt, and pepper until well combined.
  4. Stuff the chicken breasts with the cheese mixture and secure with twine or toothpicks.
  5. Drizzle olive oil over the stuffed chicken and season with additional salt and pepper.
  6. Place in an oven-safe dish and bake for 30 minutes or until the chicken is cooked through.
  7. Allow to rest for 5 minutes, then slice and serve.

Recipe Notes

  • Feel free to customize the filling ingredients based on your preferences or dietary needs.
  • Ensure to monitor the chicken’s internal temperature to achieve the best results.
  • This dish can also be frozen before cooking for later use.

Indulge in Surf and Turf: Steak and Shrimp Delight

Surf and Turf: Indulge in Steak and Shrimp in Creamy Garlic Sauce

⚖️
Difficulty
Medium

⏲️
Prep Time
15 mins

🕒
Cook Time
30 mins

⏱️
Total Time
45 mins

🍽️
Servings
4

Surf and Turf is the perfect culinary masterpiece that combines the rich, tender flavors of steak with the succulent taste of shrimp, all enveloped in a luscious creamy garlic sauce. This dish is not only a feast for your taste buds but also a visual delight, making it an ideal centerpiece for any special occasion. Whether you’re celebrating a romantic dinner or hosting a festive gathering, this savory blend of land and sea will impress your guests and elevate your dining experience.

As the savory aroma of garlic fills the air while the steak sizzles on the grill and the shrimp reaches its perfect pink hue, you can’t help but feel your mouth water in anticipation. Each bite is an explosion of flavors: the steak offers a meaty depth balanced by the light sweetness of the shrimp. The creamy garlic sauce ties it all together with a smooth, velvety finish that leaves you craving more. This recipe is not only indulgent; it’s easy to prepare, allowing you to enjoy your time with loved ones without being tethered to the kitchen.

Quick Recipe Highlights

  • Flavor Profile: Rich, savory, and balanced with a hint of sweetness from the shrimp and a creamy garlic finish.
  • Texture: Tender steak paired with succulent shrimp creates a delightful contrast against the creamy sauce.
  • Aroma: An enticing blend of garlic and grilled meat wafts through the kitchen, captivating your senses.
  • Visual Appeal: Beautifully seared steak and pink shrimp arranged harmoniously in a creamy sauce makes this dish irresistible.
  • Skill Level Needed: Requires basic cooking techniques but results in a gourmet-style dish.
  • Special Equipment: Grill or skillet for steak, saucepan for sauce preparation.

Recipe Overview

  • Difficulty Level: This recipe is categorized as medium difficulty, suitable for home cooks with some experience. The combination of grilling steak and cooking shrimp requires attention, but with practice, it becomes a straightforward process.
  • Category: This dish falls into the main course category, perfect for dinner parties or date nights.
  • Cuisine: Surf and Turf is commonly found in American cuisine, influenced by coastal cooking techniques and hearty steakhouse fare.
  • Cost: The price can vary by region, but expect to spend around $30 for a high-quality steak and fresh shrimp.
  • Season: Ideal for any season, but especially during summer when grilling is popular and fresh seafood is abundant.
  • Occasion: This dish is perfect for anniversaries, holiday gatherings, or any special celebration.

Why You’ll Love This Recipe

This Surf and Turf dish offers a unique taste and texture appeal that is sure to wow your palate. The combination of juicy steak with tender shrimp creates a luxurious dining experience at home. Every bite delivers a savory flavor explosion, while the creamy garlic sauce adds a gourmet touch that feels indulgent. This recipe encourages you to savor the moment, making it perfect for celebrating with friends and family.

The convenience of this recipe cannot be understated. With a straightforward prep process and quick cooking time, you can have this delicious meal on the table in less than an hour. It allows you to spend less time in the kitchen and more time enjoying the company of your guests. The ingredients involved are also simple, making it accessible for most home cooks.

Nutritionally, steak provides a rich source of protein, essential for muscle growth and repair, while shrimp is low in calories yet high in nutrients like selenium and vitamin B12. This dish allows you to indulge without going overboard, as part of a balanced diet, making it an excellent choice for health-conscious diners.

For social and entertainment settings, Surf and Turf is a striking dish that serves as a conversation starter. The combination of flavors and the presentation creates a celebratory atmosphere, making it perfect for family dinners, summer barbecues, or formal events. This recipe is a crowd-pleaser and is sure to be brought up in conversations for days to come.

Finally, the cost-effectiveness of preparing Surf and Turf at home can be significant. When compared to dining out at a restaurant, you’ll save money while still enjoying a dish that feels upscale and luxurious. It also allows you to customize the meal according to personal taste preferences, making it a rewarding cooking experience.

Historical Background and Cultural Significance

Surf and Turf is believed to have originated in the United States in the early 1960s, gaining popularity as a restaurant dish that mirrored the boom in steakhouse dining. The union of land and sea food provides a nod to America’s expansive geography, emphasizing the incredible variety of ingredients available to home cooks.

Culturally, Surf and Turf resonates with the tradition of combining complementary flavors from different culinary worlds. It reflects the American ethos of versatility and innovation in dining, where the possibilities are endless. The dish is often associated with celebrations, embodying luxury and indulgence in modern kitchen environments.

The recipe has evolved over the years, with various adaptations across cuisines. While the quintessential version typically uses filet mignon and shrimp, creative variations incorporate numerous seasonings and sauces to enhance the core flavors. Each iteration maintains the essence of a hearty meal that balances flavors and textures beautifully.

Regional variations also exist, such as the Hawaiian “Loco Moco,” which combines hamburger steak, rice, and gravy. This reflects local preferences for combining various elements into one flavorful dish. Each adaptation maintains the core elements while presenting a unique twist that showcases regional ingredients and cooking techniques.

Ingredient Deep Dive

Steak: Steak has long been a staple in many cultures, serving as a symbol of wealth and indulgence. Rich in proteins and iron, this cut of meat provides substantial energy and building blocks for the body. When purchasing steak, look for cuts that have a deep red color with a marbled appearance for optimal flavor. It should be stored in the refrigerator and used within a few days to ensure freshness. For those looking for alternatives, chicken or non-meat substitutes can work, provided the cooking times are adjusted accordingly.

Shrimp: This seafood has historical significance, particularly in coastal towns across the U.S., where it has been a dietary staple for centuries. Shrimp is known for being low in calories and high in protein, making it a beloved choice among health-conscious eaters. When selecting shrimp, freshness is key; opt for fully cooked or raw shrimp that is firm to the touch. If you find yourself with leftover shrimp, it’s vital to store it properly in an airtight container. Substitutions such as scallops or fish can offer delightful variations as well.

Common Mistakes to Avoid

  • Overcooking the steak can lead to dry meat; use a meat thermometer to ensure doneness.
  • Using frozen shrimp without defrosting may affect texture; always thaw shrimp before cooking.
  • Not letting the steak rest after cooking can prevent juices from redistributing, leading to a less juicy steak.
  • Adding too much garlic may overwhelm other flavors; balance is key.
  • Neglecting the quality of ingredients can lead to a subpar dish; always choose fresh and high-quality items.
  • Skipping the seasoning can make the dish pale in flavor; properly season both the steak and shrimp.
  • Rushing the sauce preparation can result in uneven flavors; allow it to simmer for the best results.
  • Failing to use proper cooking oil can affect the dish’s richness; olive oil or butter work best for this recipe.

Essential Techniques

Grilling steak is crucial for developing flavor; the Maillard reaction creates a delicious crust. Use high heat to sear, then move to indirect heat to finish cooking. Watch for a dark crust as a visual cue that the steak is caramelizing perfectly.

Cooking shrimp quickly over medium heat ensures they stay tender. Avoid cooking them too long, as they can become rubbery. The ideal finished shrimp should be bright pink and opaque, signifying they are perfectly done.

Pro Tips for Perfect Surf and Turf

  • Choose the right cut of steak; ribeye and filet mignon work wonderfully for the perfect balance of flavor and tenderness.
  • Don’t skip the marinade; a simple mix of olive oil, garlic, and herbs enhances meat flavor and tenderness.
  • Cook shrimp last, as they take only a few minutes; add them to the pan for the last minute of cooking.
  • Using a cast-iron skillet can provide better heat retention when preparing the sauce.
  • Experiment with different herbs and spices to customize the cream sauce to your liking.
  • To enhance visual appeal, serve your dish with a sprinkle of freshly chopped parsley on top.
  • Always let your steak rest after grilling to ensure maximum juiciness.
  • Pair the meal with a light salad to freshen the palate and elevate the dining experience.

Variations and Adaptations

Exciting regional variations include adding a spicy Cajun twist by incorporating Cajun seasoning into the shrimp for a kick. Seasonal adaptations can feature grilled seasonal vegetables alongside the Surf and Turf for added color and nutrition.

Dietary modifications might include using plant-based steak and shrimp alternatives for those following vegan diets. For flavor variations, consider different sauces like chimichurri or teriyaki to introduce new tastes to the dish.

Texture modifications can be achieved by opting for sautéed vegetables instead of creamy sauce for a lighter dish. Presentation alternatives might feature the ingredients stacked on skewers for a fun, interactive dining experience.

Serving and Presentation Guide

For elegant plating, slice the steak against the grain and fan it out on the plate, with shrimp artfully arranged beside it. Drizzle the creamy garlic sauce generously over the top for a luxurious finish. Garnishing with fresh herbs or microgreens enhances visual interest and presentation.

Traditional accompaniments could include garlic bread or rice, making this meal hearty and filling. For modern serving suggestions, consider individual cast-iron skillets for a rustic appearance that resonates with guests.

Temperature considerations are crucial; serve the dish while warm to maintain the texture of the steak and shrimp. Be mindful of portion control, ensuring that servings are satisfying without being excessive.

Wine and Beverage Pairing

Pairing your Surf and Turf with a full-bodied red wine such as Cabernet Sauvignon complements the richness of the steak beautifully. Opting for a crisp white wine, like a Sauvignon Blanc, can enhance the fresh flavors of the shrimp.

For non-alcoholic alternatives, consider sparkling water with a splash of lemon to cleanse the palate between bites. If coffee or tea is your preference, a rich espresso can provide a delightful contrast to the meal.

Storage and Shelf Life

Store leftover Surf and Turf in airtight containers in the refrigerator. Properly stored, the dish will remain fresh for up to three days, although for best flavor and texture, it’s recommended to consume leftovers within 24 hours.

Reheating should be done gently; microwave on low heat or warm in a skillet over low flame to conserve moisture. Freezing the dish is an option for longer storage, although it may alter the texture of the shrimp; consume within two months for optimal quality.

Make Ahead Strategies

Prep your steak marinade ahead of time, allowing the meat to soak in the flavors for several hours or even overnight. You can also prepare the creamy sauce in advance, heating it just before serving.

Storing unseasoned steak and shrimp until ready to cook helps maintain freshness and quality. Assemble your Surf and Turf just before serving to preserve texture and flavor, with fresh herbs added at the last minute for vibrancy.

Scaling Instructions

For halving or doubling the recipe, adjust your cooking times accordingly, especially for the grilling steps. Ensure that you have enough cooking surface area to avoid overcrowding the pans, which affects even cooking.

Timing modifications may be necessary, as larger cuts will require more cooking time. Storing any extra portions in suitable containers will help maintain quality and flavor.

Nutritional Deep Dive

This Surf and Turf dish provides a macro breakdown that is impressive. The protein content from both the steak and shrimp supports muscle maintenance, while the fats from the cream sauce contribute to satiety.

Micronutrient analysis reveals that this dish is abundant in essential vitamins and minerals, including B vitamins from steak and selenium from shrimp, supporting overall health. For those managing their diets, be mindful of portion size to ensure calorie balance.

Dietary Adaptations

For gluten-free versions, ensure that any sauces used are also gluten-free. Dairy-free adaptations can replace heavy cream with coconut milk or a nut-based cream alternative.

Vegans can substitute traditional steak and shrimp with plant-based protein alternatives, exploring textures that mimic the original dish. Low-carb and keto adherents can enjoy the protein-rich components while forgoing starchy sides.

Troubleshooting Guide

If texture issues arise, ensure not to overcook the steak or shrimp. Adjusting cooking times based on thickness and size can significantly improve results.

Flavor balance can be fine-tuned with seasoning modifications. Adding a pinch of salt or a squeeze of lemon can elevate the taste profile and enhance overall enjoyment.

Recipe Success Stories

Community feedback on this Surf and Turf recipe has been overwhelmingly positive, with many sharing their unique adaptations and garnishing ideas. Readers often praise the dish for its luxurious flavor while also highlighting its easy preparation process.

Success stories often include tips for making the sauce creamier or seasoning tips that enhance the overall dish. The engaging nature of preparing this special meal has inspired families to create lasting memories around the dining table.

Frequently Asked Questions

Can I use frozen shrimp for this recipe?

Yes, but it’s essential to ensure they are fully thawed before cooking. This helps achieve the best texture.

What is the best steak cut to use?

Ribeye and filet mignon are excellent choices for their tenderness and flavor. Choosing high-quality meat will enhance the dish’s overall taste.

How can I make the sauce lighter?

You can replace heavy cream with a lighter alternative, such as half-and-half or a non-dairy version to reduce calorie content.

What sides pair well with Surf and Turf?

Garlic bread, a fresh salad, or grilled vegetables make excellent pairings that complement the rich flavors of the main dish.

Can I prepare it ahead of time?

You can marinate the steak and prepare the sauce in advance, but it is best to cook the shrimp and steak shortly before serving for optimal freshness.

How do I store leftovers?

Store any leftovers in an airtight container in the refrigerator for up to three days. Reheat gently to maintain quality.

What can replace the creamy sauce?

A chimichurri sauce or a light vinaigrette can provide a different flavor dimension if you’re looking to switch it up.

Is it necessary to marinate the steak?

While not necessary, marinating enhances the flavor and tenderness of the steak, making it a worthwhile step.

How can I tell when the steak is done?

Using a meat thermometer is the best way; medium-rare should be at about 130°F, while medium should be around 140°F.

Can I use different seafood?

Absolutely! Variations could include scallops or lobster tails, adapting cooking times accordingly based on the seafood used.

Additional Resources

To further enhance your cooking skills, explore related recipes like garlic butter shrimp pasta or steak fajitas. Additionally, technique guides on grilling meat and perfecting sauces can provide valuable insights for future culinary endeavors.

Ingredient information detailing the best cuts of meat and shrimp varieties will serve you well in your cooking journey. Equipment recommendations can also guide you in choosing the right tools for a flawless preparation experience.

Join the Conversation

We encourage you to share your photos and experiences on social media when trying this Surf and Turf recipe. Your feedback and variations inspire our cooking community. Don’t hesitate to leave a review or suggest new twists to the dish for others to try!

The Recipe

Surf and Turf: Steak and Shrimp in Creamy Garlic Sauce

Serves: 4

Prep Time: 15 mins

Cook Time: 30 mins

Total Time: 45 mins

Kitchen Equipment Needed

  • Grill or grill pan
  • Cast iron skillet or large frying pan
  • Meat thermometer
  • Mixing bowl for marinating

Ingredients

  • 2 ribeye steaks (1 inch thick)
  • 1 pound shrimp, peeled and deveined
  • 1 cup heavy cream
  • 4 cloves garlic, minced
  • 2 tablespoons olive oil
  • Salt and pepper to taste
  • 2 tablespoons fresh parsley, chopped (for garnish)

Directions

  1. Preheat the grill or grill pan over medium-high heat.
  2. Season the steaks with salt, pepper, and drizzled olive oil. Let them sit for about 10 minutes.
  3. In a skillet, heat olive oil and sauté minced garlic until fragrant.
  4. Add the shrimp to the skillet and cook until they turn pink, about 3-4 minutes. Remove and set aside.
  5. Reduce heat and whisk in heavy cream into the skillet with the remaining garlic, simmer for about 5 minutes.
  6. Grill the steaks for about 4-5 minutes on each side for medium-rare.
  7. Once the steaks are cooked, allow them to rest before slicing.
  8. Plate the steaks, top with shrimp, and drizzle the creamy garlic sauce over.
  9. Garnish with fresh parsley and serve immediately.

Recipe Notes

  • Adjust cooking times based on steak thickness for desired doneness.
  • Substitute shrimp for scallops or lobster as per preference.
  • Grating fresh parmesan into the sauce can enhance flavor.

Delicious Creamy Ricotta Beef Stuffed Shells Pasta Recipe

Creamy Ricotta Beef Stuffed Shells Pasta: A Comforting Delight

⚖️
Difficulty
Medium

⏲️
Prep Time
30 mins

🕒
Cook Time
45 mins

⏱️
Total Time
75 mins

🍽️
Servings
4

Indulge in the comforting flavors of Creamy Ricotta Beef Stuffed Shells Pasta, a dish that combines rich Italian roots and hearty ingredients. These oversized pasta shells are stuffed with a luscious blend of seasoned ground beef and creamy ricotta cheese, all enveloped in a tangy marinara sauce, and topped with melted mozzarella cheese. This meal not only comforts the soul but also satisfies the palate with its delightful flavors and textures. Perfect for family dinners or special occasions, this recipe promises to be a crowd-pleaser.

The detailed preparation and the aromatic blend of herbs and spices make this recipe a delightful experience. As you prepare the dish, the familiar scent of simmering marinara and fragrant basil fills your kitchen, inviting all to gather around the table. Every bite is a harmonious fusion of gooey cheese, savory beef, and a hint of garlic and onion, providing a truly satisfying meal experience. This dish is sure to leave a lasting impression, allowing you to savor every moment spent around the dinner table.

Quick Recipe Highlights

  • Flavor Profile: The rich and savory flavors of ground beef, creamy ricotta, and tangy marinara create a perfect balance.
  • Texture: The soft pasta shells provide a delightful contrast to the hearty filling and creamy cheese.
  • Aroma: The aromatic combination of garlic, basil, and simmering marinara creates an inviting atmosphere.
  • Visual Appeal: Vibrant red marinara sauce topped with melted mozzarella makes the dish irresistible.
  • Skill Level Needed: Intermediate skills are required for stuffing the shells and ensuring even cooking.
  • Special Equipment: A large baking dish and a mixing bowl are essential for this recipe.

Recipe Overview

  • Difficulty Level: Medium, due to the multiple steps involved in preparation and assembly.
  • Category: This dish falls into the categories of pasta, Italian cuisine, and comfort food, suitable for hearty meals.
  • Cuisine: Rooted in Italian tradition, this recipe celebrates the use of fresh ingredients and bold flavors.
  • Cost: Budget-friendly, with typical costs around $15-20 for ingredient shopping, depending on location.
  • Season: Ideal for any season, especially comforting during winter gatherings or holidays.
  • Occasion: Perfect for family dinners, holiday feasts, or inviting friends over for a cozy meal.

Why You’ll Love This Recipe

First and foremost, the taste and texture appeal of Creamy Ricotta Beef Stuffed Shells Pasta are undeniable. The combination of savory ground beef and fluffy ricotta provides a rich, satisfying punch, while gooey mozzarella and tangy marinara elevate this dish to new heights. Every bite is a delectable experience, making you look forward to the next one.

The convenience of this recipe lends to its charm. With meal preparation and cooking time totaling about an hour and fifteen minutes, you can serve a comforting family dinner without spending the entire day in the kitchen. The step-by-step directions ensure that even novice cooks can achieve impressive results, allowing you to enjoy the cooking process along the way.

From a nutritional standpoint, this dish combines proteins from both beef and ricotta, alongside essential carbohydrates from the pasta. It can easily be adapted to include more vegetables, providing a well-rounded meal that requires minimal effort. By adding spinach or zucchini, you can sneak in extra nutrients while still maintaining the dish’s deliciousness.

Making this recipe for gatherings not only satisfies individual cravings but also creates a warm, inviting atmosphere. Its vibrant colors and familiar comforting flavors make it an excellent choice for entertaining guests. You can serve it with a fresh salad or crusty bread, elevating the entire dining experience.

Lastly, the cost-effectiveness of Creamy Ricotta Beef Stuffed Shells Pasta cannot be overlooked. With accessible ingredients that will not break the bank, you can easily feed a family or a group of friends without compromising on flavor or quality. This recipe is one you’ll reach for again and again, making it an invaluable addition to your meal repertoire.

Historical Background and Cultural Significance

The origin of stuffed pasta can be traced back to regions in Italy, where culinary traditions honor the use of available ingredients. Stuffed shells, in particular, have gained popularity in the United States, where Italian-American communities embraced and modified traditional recipes. This dish reflects the melding of cultures and the joy of sharing hearty meals.

In Italian culture, family meals are sacred, and dishes like Creamy Ricotta Beef Stuffed Shells Pasta play a central role in gathering loved ones. The communal experience of sharing a meal fosters a strong sense of togetherness and connection, serving both nutritional and emotional needs. People create lasting memories around tables filled with comforting food.

As recipes evolved with time and regional influences, the variations of stuffed shells became abundant. Contemporary variations may incorporate different meats, cheeses, or spices, reflecting individual tastes and dietary preferences. The beauty of this dish lies in its adaptability and the ability to make it uniquely yours, while still paying homage to its roots.

Regional variations also highlight the influence of local ingredients, with some areas enhancing their stuffed shells with seasonal vegetables or different sauces. Despite these variations, the core essence of the dish remains the same: a satisfying and comforting meal that brings people together around a table.

Ingredient Deep Dive

Ground Beef: A staple in many cuisines, ground beef provides a hearty source of protein. When selecting ground beef, choose a blend with a bit of fat for flavor, typically around 80% lean. Store it in the coldest part of your fridge or freeze for longer preservation. Ground turkey or chicken can be substituted for a leaner option.

Ricotta Cheese: Known for its creamy texture, ricotta cheese’s history can be traced back to Italian shepherds. It’s rich in protein and calcium, making it a nutritious addition to many dishes. Opt for fresh ricotta for the best taste, and store it properly to maintain freshness. For dairy-free options, consider almond or tofu ricotta as alternatives.

Common Mistakes to Avoid

  • Overstuffing the shells can lead to a messy dish—ensure a generous yet manageable amount of filling.
  • Not cooking the pasta shells adequately beforehand can result in a hard texture—parboil them until just al dente.
  • Using a low-quality marinara sauce can diminish the dish’s overall flavor—opt for a reputable brand or homemade sauce.
  • Failing to properly season the beef mixture can lead to bland filling—taste and adjust seasoning as needed.
  • Inefficient layering in the baking dish can affect cooking time—ensure even distribution of sauce and shells.
  • Skipping the cover during the initial baking phase can yield dry shells—cover with foil for moisture retention.
  • Not letting the dish sit post-baking can affect texture—allow it to rest for easier serving.
  • Ignoring oven temperature settings can lead to uneven cooking—use an oven thermometer for accuracy.

Essential Techniques

Stuffing pasta shells is a vital technique that requires a bit of finesse. Why it’s important: Proper stuffing ensures that every shell is filled with a balanced meat and cheese mix, enhancing flavor in each bite. To master it, use a spoon or a piping bag for neat filling. Common pitfalls include overstuffing or tearing the shells—use care when handling.

Baking with foil is another essential technique that enhances the cooking process. Why it’s important: Covering the dish traps moisture, preventing the pasta from drying out. To master this, tightly cover the baking dish with foil for the first half of the cooking time, then remove for browning. Visual cues for success include bubbling sauce and melted cheese.

Pro Tips for Perfect Creamy Ricotta Beef Stuffed Shells Pasta

1. Use a mix of ground meats for depth of flavor—combining beef with sausage or turkey can elevate the dish.

2. Add fresh herbs like basil or parsley to the ricotta mixture for a burst of freshness and color.

3. Enhance the sauce by simmering it with onions and garlic before layering—this builds a robust base.

4. For a cheesier experience, feel free to mix mozzarella directly into the filling before stuffing.

5. Allow leftovers to cool before storing to prevent sogginess and maintain texture upon reheating.

6. Experiment with different types of pasta, like jumbo cannelloni, for an interesting twist on the classic.

7. Garnish with fresh herbs or parmesan before serving for an appealing finishing touch.

8. Serve alongside a simple side salad for a complete meal that balances flavors and textures.

Variations and Adaptations

Regional variations of stuffed shells can bring exciting twists to the classic recipe. For instance, a New Orleans-inspired version could include andouille sausage and spices for a kick. Seasonal adaptations allow for incorporation of fresh veggies such as zucchini or roasted red peppers, adding color and nutrition. For dietary modifications, consider substituting ground beef with plant-based meat for a vegan alternative, or use gluten-free pasta for those with dietary restrictions.

Flavor variations also enhance this dish; introducing spicy pepper flakes or herbs can elevate taste profiles. For a lighter version, swap out regular ricotta for a low-fat alternative. Presentation alternatives, such as using individual gratin dishes for individual servings, provide an elegant touch that elevates the meal for special occasions.

Serving and Presentation Guide

For plating, scoop a generous serving onto a plate, ensuring a balance of sauce and cheese topping. Garnishing with fresh basil and a sprinkle of parmesan enhances visual appeal. While traditional accompaniments include garlic bread or a Caesar salad, modern serving suggestions range from grilled vegetables to a fresh arugula salad. Temperature considerations are essential; serve the dish hot, with cheese bubbling at the edges, showcasing its homey charm. Portion control tips recommend serving one to two stuffed shells per person, depending on side dishes.

Wine and Beverage Pairing

Pairing wines with Creamy Ricotta Beef Stuffed Shells Pasta can elevate the dining experience. A medium-bodied red like Chianti complements the savory flavors perfectly, while a rich Italian red wine accentuates the dish’s depth. For a non-alcoholic option, consider a sparkling water with lemon for a refreshing palate cleanse. If incorporating coffee or tea, a mild chai can harmonize well, particularly after the meal, rounding out the comforting experience.

Storage and Shelf Life

Proper storage is crucial for maintaining the quality of Creamy Ricotta Beef Stuffed Shells Pasta. Store leftovers in an airtight container in the refrigerator, where they can last up to three days without compromising flavor and texture. Freezing is also an option; tightly wrap individual portions or the whole dish in plastic wrap and foil, extending shelf life up to three months. Signs of spoilage include off smells or changes in texture. When reheating, ensure even heating in the oven for optimal taste, or utilize a microwave with a cover to retain moisture.

Make Ahead Strategies

To streamline preparation, consider making the stuffed shells up to a day in advance. Assemble them halfway, storing uncooked in the fridge, and complete baking when ready to serve. When storing between steps, cover with plastic wrap or foil to prevent drying out. Quality impact assessment shows that flavors meld beautifully when left overnight, enhancing the overall taste. Stick with simple assembly tips: prepare sauce and filling the day before, then just stuff and bake. Adding fresh elements like herbs just before serving brightens up the dish.

Scaling Instructions

Scaling the recipe allows for flexibility, whether feeding a crowd or cooking for a few. For halving the recipe, divide all ingredient amounts appropriately and adjust cooking times slightly as necessary. Doubling or tripling the recipe requires a larger baking dish and potentially longer cooking times, so be mindful of oven capacity and check doneness regularly. Storage considerations for larger batches involve having appropriate containers ready, and it’s best to freeze portions separately for future meals.

Nutritional Deep Dive

The nutritional analysis of Creamy Ricotta Beef Stuffed Shells Pasta reveals a balanced composition, rich in both macros and micros. Each serving provides significant protein from beef and ricotta, alongside carbohydrates from pasta for sustained energy. While enjoying this dish, consider portion analysis; a single serving alongside ample vegetables maintains healthy weight management. Be mindful of dietary considerations, adapting as necessary to fit individual nutritional goals while still savoring this comforting meal option.

Dietary Adaptations

Finding dietary adaptations for Creamy Ricotta Beef Stuffed Shells Pasta ensures everyone can enjoy this dish. For gluten-free options, choose gluten-free pasta shells, while for dairy-free palates, plant-based ricotta or coconut cream can add a similar texture. Vegans can utilize soy or almond-based meat alternatives along with a non-dairy cheese substitute. Low-carb diets can implement zucchini noodles instead of shells, maintaining a delicious flavor. Each adaptation is a great opportunity to explore new ingredients while staying true to the dish’s essence.

Troubleshooting Guide

Addressing texture issues, such as overly watery filling, can be resolved by draining excess moisture from ricotta. Flavor balance problems may arise; keep tasting and adjusting seasoning until it feels just right. If temperature problems occur, an oven thermometer can prevent undercooked or overcooked results. Equipment challenges, such as inadequate baking dishes, can be solved by using multiple dishes instead of one larger dish. Ingredient substitutions should be approached carefully, ensuring complementary flavors rather than overpowering them. Timing concerns can be alleviated by preparing ingredients ahead to expedite the cooking duration.

Recipe Success Stories

Community feedback reflects the joy of creating Creamy Ricotta Beef Stuffed Shells Pasta. Many have commented on variations leading to unique successes, like adding spinach or mushroom for a veggie twist. Adaptation stories showcase how families have personalized the recipe to fit their traditions, creating cherished memories over homemade meals. Photographic tips include emphasizing the dish’s vibrant colors and gooey textures, making it irresistible to share among friends and followers.

Frequently Asked Questions

Q1: Can I make these stuffed shells ahead of time?

A: Yes! You can assemble the shells a day in advance and store them in the fridge before baking. This allows flavors to meld beautifully.

Q2: What if I don’t have ricotta cheese?

A: Cottage cheese or a dairy-free ricotta substitute can work as alternatives, but the texture will vary slightly.

Q3: How do I ensure the shells don’t break during cooking?

A: Be sure to cook the shells al dente before stuffing them, and handle them gently during the assembly process.

Q4: Can I freeze leftovers?

A: Absolutely! Just store leftovers in an airtight container for up to three months. Thaw in the fridge before reheating.

Q5: Is there a vegetarian version of this dish?

A: Yes! Substitute the beef with sautéed vegetables or lentils for a delicious vegetarian alternative that maintains flavor.

Q6: Can I use different types of pasta?

A: While jumbo shells are traditional, you can use manicotti or even lasagna sheets with slightly adjusted assembly techniques.

Q7: What side dishes pair well with stuffed shells?

A: A fresh arugula salad or garlic bread complements the dish beautifully, providing a crunchy contrast to the soft shells.

Q8: How do I know when the stuffed shells are fully cooked?

A: Look for bubbling sauce and melted cheese. If you’re unsure, a food thermometer should reach 165°F (74°C) in the center of the dish.

Q9: How can I make this dish spicier?

A: Add crushed red pepper flakes or spicy Italian sausage in addition to the ground beef for a flavorful kick.

Q10: Can I replace the beef with turkey or chicken?

A: Yes! Lean ground turkey or chicken are excellent substitutes that will still deliver a delicious flavor profile.

Additional Resources

For those looking to explore similar recipes, try our collection of pasta dishes, including creamy Alfredo and flavorful marinara options. Technique guides on how to properly stuff shells or make homemade marinara sauce can also enhance your cooking skills. Additionally, discover seasonal variations that highlight fresh summer vegetables or hearty winter greens, ensuring there’s something new for every occasion.

Join the Conversation

We would love for you to share your photos and experiences with Creamy Ricotta Beef Stuffed Shells Pasta on social media! Use the hashtag #CreamyStuffedShells to join the community. We are keen to hear about your variations and insights, making this recipe even richer. Your reviews and feedback not only inspire us but also guide others in their cooking journey!

The Recipe

Creamy Ricotta Beef Stuffed Shells Pasta

Serves: 4

Prep Time: 30 mins

Cook Time: 45 mins

Total Time: 75 mins

Kitchen Equipment Needed

  • Baking dish
  • Large pot
  • Mixing bowl
  • Spoon or piping bag
  • Foil

Ingredients

  • 12 jumbo pasta shells
  • 1 lb ground beef
  • 1 cup ricotta cheese
  • 1 cup marinara sauce
  • 1 cup mozzarella cheese, shredded
  • 1 onion, diced
  • 2 cloves garlic, minced
  • 1 tsp Italian seasoning
  • Salt and pepper to taste

Directions

  1. Preheat your oven to 375°F (190°C).
  2. Cook the pasta shells according to package instructions until al dente; drain and set aside.
  3. In a large skillet, sauté onion and garlic until soft. Add ground beef, cooking until browned; drain excess fat.
  4. Mix in ricotta cheese, Italian seasoning, salt, and pepper until well combined.
  5. Spread half of the marinara sauce in the bottom of a baking dish.
  6. Carefully fill each shell with the beef and ricotta mixture and place face up in the dish.
  7. Pour the remaining marinara sauce over the stuffed shells and sprinkle with mozzarella cheese.
  8. Cover with foil and bake for 25 minutes. Remove foil and bake an additional 15 minutes until cheese is bubbly and golden.
  9. Let stand for 5 minutes before serving. Enjoy your delicious creation!

Recipe Notes

  • Feel free to add spinach to the filling for extra nutrition.
  • Leftovers can be stored in an airtight container in the fridge for up to three days.
  • For a kick, add crushed red pepper flakes to the marinara sauce.

Succulent Rack of Lamb Recipe for Perfect Dinner Delight

Delicious Rack of Lamb: A Gourmet Experience at Home

⚖️
Difficulty
Intermediate

⏲️
Prep Time
30 mins

🕒
Cook Time
45 mins

⏱️
Total Time
75 mins

🍽️
Servings
4

The Rack of Lamb is more than just a meal; it’s a culinary masterpiece that brings a touch of elegance to any dining occasion. With its succulently tender meat and rich, gamey flavor, this dish captures the essence of gourmet cooking right in your own kitchen. As you sear the lamb to a perfect medium-rare, the aroma of herbed pan juices wafts through your space, tantalizing your taste buds. When paired with a delightful side of roasted vegetables or creamy mashed potatoes, this is a dish that promises to impress even the most discerning guests.

Cooking a Rack of Lamb is an experience that combines art and science. The careful balance of seasoning and technique results in a dish that is both visually stunning and mouthwateringly delicious. From the bold flavors of garlic and rosemary to the tender and juicy texture of the meat, each bite is a celebration of culinary craftsmanship. Whether it’s a festive gathering or a special dinner, this recipe is sure to elevate your meal with its gourmet appeal.

Quick Recipe Highlights

  • Flavor Profile: Rich, savory lamb enhanced by the aromatic notes of fresh herbs.
  • Texture: Succulent meat that is tender yet has a delightful crust from searing.
  • Aroma: Inviting scents of garlic, rosemary, and a hint of wine fill the air.
  • Visual Appeal: Beautifully golden-brown exterior with a juicy, pink center.
  • Skill Level Needed: Requires basic knowledge of searing and roasting techniques.
  • Special Equipment: A roasting pan and kitchen thermometer are essential for best results.

Recipe Overview

  • Difficulty Level: This recipe is classified as Intermediate due to the precise cooking times and techniques involved in achieving a perfectly cooked rack of lamb.
  • Category: A perfect main dish suitable for formal dinners, holiday gatherings, or special occasions.
  • Cuisine: This dish is rooted in classic French cooking, showcasing the elegance of lamb in European cuisine.
  • Cost: Depending on the quality of lamb purchased, this recipe can be considered a moderate investment, typically ranging from $30 to $60 total.
  • Season: Ideal for fall and winter months when hearty meals are preferable and festive occasions are plentiful.
  • Occasion: Perfect for celebrations such as Easter, Christmas, or anniversary dinners.

Why You’ll Love This Recipe

Preparing a Rack of Lamb at home is an indulgent experience and a wonderful way to showcase your culinary skills. The rich and savory taste of the lamb, combined with an aromatic herb crust, creates a delectable flavor sensation that is hard to resist. When roasted to perfection, the lamb remains juicy and tender, making every bite melt in your mouth. This dish not only impresses with its flavor but also with its aesthetic, presenting beautifully on a plate, inviting guests for a closer look.

The convenience of this recipe further enhances its appeal. While the initial preparation may require some effort, much of the cooking relies on simple techniques like searing and roasting. Once in the oven, you can focus on preparing side dishes or simply enjoying time with your guests. This versatility and ease make the Rack of Lamb a go-to for home cooks wanting to deliver a restaurant-quality dinner experience with minimal stress.

Nutritionally, lamb offers several health benefits. It is a great source of high-quality protein, essential vitamins, and minerals like zinc, iron, and B vitamins, which are crucial for energy metabolism and immune function. This makes your meal not just gourmet but also wholesome and nourishing—perfect for any dining occasion.

When it comes to social gatherings, nothing beats the value of a dish that brings people together. Sharing a beautifully prepared Rack of Lamb serves as a centerpiece that can spark conversation, enhance the dining experience, and create memorable moments. Its sophisticated presentation and unique flavors encourage guests to engage in the meal, ensuring everyone leaves the table satisfied.

Despite being a gourmet dish, preparing a Rack of Lamb can be cost-effective if you shop smart. Buying in bulk or during sales can significantly reduce expenses, making this luxury feel accessible. With the right approach, you can deliver an impressive meal without breaking the bank, showcasing your talent while treating loved ones to an unforgettable dining experience.

Historical Background and Cultural Significance

The Rack of Lamb has a rich history rooted in various cultures around the world, particularly in Mediterranean regions where lamb has been a staple for centuries. Historically, lamb has symbolized wealth and status, often reserved for special occasions and festive celebrations. Its role in cultural ceremonies showcases the meat’s importance in culinary traditions across Mediterranean cuisine, where it is often celebrated with various spice blends and cooking techniques.

In many cultures, including French and Mediterranean, the preparation of lamb is often a communal activity, bringing families and friends together. The tradition of cooking lamb during springtime rituals or religious celebrations underscores its significance in communal bonding and family gatherings. This recipe has evolved over centuries, embracing modern cooking techniques while retaining its original roots, thus maintaining its relevance in today’s culinary landscape.

The evolution of the Rack of Lamb from a rustic peasant dish to a sophisticated entrée can be traced through historical shifts and culinary trends. Well-known culinary figures and chefs have embraced the versatility of lamb, inspiring countless variations and adaptations of the original recipe. This adaptability is a testament to the dish’s enduring legacy, allowing it to integrate into various dining occasions and cultural traditions, making it a timeless favorite.

Regional variations of the Rack of Lamb can be found across the world, showcasing the diverse ways this dish can be interpreted. In Mediterranean countries, lamb is often marinated with a variety of herbs and spices, imparting distinct flavor profiles that reflect local traditions. In contrast, regions like the UK may feature a more straightforward preparation, highlighting the natural flavors of the meat. These variations not only enrich the culinary experience but also contribute to the global appreciation of this fantastic dish.

Ingredient Deep Dive

Lamb Rack

The lamb rack, a prized cut of meat, is known for its tender texture and rich flavor, making it one of the most sought-after cuts. Historically, lamb has been an essential part of agricultural societies, symbolizing sustenance and community. It is often enjoyed during significant events, connecting families and friends through shared meals.

Nutritionally, lamb is a powerhouse of protein, low in carbs, and packed with essential vitamins and minerals. It provides a substantial amount of iron and zinc, vital for body functions and immune health. When selecting a lamb rack, look for bright red meat with a good amount of marbling. Proper storage involves keeping it refrigerated and using it within a few days, or freezing it for longer shelf life. If lamb isn’t available, consider using a different cut of lamb or even beef for a twist.

Garlic

Garlic, a widely used ingredient, has a long history, believed to have originated in Central Asia and later spread throughout the world. It holds cultural significance in many cuisines, often regarded as a symbol of health and well-being. Rich in antioxidants and known for its disease-fighting properties, garlic is not just a flavor enhancer but also a health booster.

When selecting garlic, choose heads that are firm with tight skin and no visible sprouting. Fresh garlic should be stored in a cool, dry place to maintain its flavor and potency. If you’re out of fresh garlic, garlic powder or roasted garlic can serve as substitutes, although they may alter the intensity of flavor. The versatility of garlic allows it to easily enhance various dishes beyond the rack of lamb, making it a staple in many kitchens.

Common Mistakes to Avoid

  • Overcooking the lamb: Always use a meat thermometer to check for the desired doneness.
  • Skipping the marinating process: Allowing the lamb to marinate enhances flavor and tenderness.
  • Not resting the meat after cooking: This step is crucial for juices to redistribute properly.
  • Using low-quality meat: The flavor of the dish relies heavily on the quality of the lamb.
  • Cooking at excessively high heat: This can cause the exterior to char while the inside remains undercooked.
  • Ignoring the importance of seasoning: Don’t be shy with salt and pepper, as they enhance the dish significantly.
  • Piling too much on the serving plate: Leave space for sides; an overcrowded plate lacks visual appeal.
  • Neglecting side dish pairings: Balance your meal with complementary flavors to enhance the lamb’s taste.

Essential Techniques

Searing Meat

Searing is crucial for building flavor and developing a beautiful crust on the lamb. To master this technique, ensure your pan is hot before adding the meat. Watch for a deep brown color—this indicates that the Maillard reaction is occurring, creating complex flavors. Common pitfalls include overcrowding the pan, which can lead to steaming instead of searing.

Resting Meat

Resting allows juices to redistribute throughout the meat, enhancing moisture and flavor. For best results, cover the lamb loosely with foil and let it rest for 10-15 minutes after cooking. Skipping this step can result in dry meat, as the juices will run out once cut. Ideal cues for success are a lovely aroma and the meat slightly cooling after being removed from the heat.

Pro Tips for Perfect Rack of Lamb

1. Use a marinade infused with your favorite herbs for a flavor boost.
2. Always let your lamb come to room temperature before cooking for even doneness.
3. For an herbal crust, combine breadcrumbs with herbs and garlic for a topping.
4. Consider adding a splash of balsamic vinegar to the pan juices for extra depth.
5. Use kitchen twine to tie the lamb for even cooking and a better presentation.
6. Experiment with different spice blends to create your unique version of the dish.
7. Opt for a high-quality olive oil for drizzle before serving for an extra flavor kick.
8. Serve the lamb with a side of mint sauce or chutney for a classic pairing.

Variations and Adaptations

The Rack of Lamb can easily be adapted to include regional variations by incorporating local herbs, such as za’atar in Middle Eastern renditions for an exotic twist. Seasoning profiles can change with seasonal adaptations, depending on available produce and spices.

For dietary modifications, those following a gluten-free diet can use gluten-free breadcrumbs for the crust. If you’re seeking a lower-fat option, consider marinating the lamb with citrus juices and spices instead of oils. Additionally, feel free to experiment with different textures—like applying a yogurt marinade for added creaminess, enhancing both flavor and moisture in the meat.

For presentation alternatives, consider serving individual lamb chops on skewers or as part of a charcuterie board, bringing a contemporary twist to a traditional dish.

Serving and Presentation Guide

Plating your Rack of Lamb beautifully can elevate the dining experience. Consider using a large white plate to showcase the vibrant colors of the meat and accompanying side dishes. Garnishing with sprigs of fresh herbs adds elegance and freshness to the presentation. Traditional accompaniments may include sides like mint sauce, which adds a refreshing contrast, while modern suggestions could provide a vibrant beet salad or a creamy feta dip.

Temperature is key when serving; ensure the lamb is warm, but never hot, as this can affect the flavor. Portion control is essential for a multi-course meal; aim for a balanced serving that allows guests to enjoy other dishes without feeling overwhelmed. Adding a drizzle of sauce can enhance both flavor and visual appeal, inviting guests to dig in.

Wine and Beverage Pairing

For an exquisite dining experience, consider pairing your Rack of Lamb with a full-bodied red wine, such as Cabernet Sauvignon or Syrah. These wines complement the richness of the lamb while providing balancing acidity. For a white option, a robust Chardonnay can work effectively, bringing brightness and complexity.

Non-alcoholic alternatives may include sparkling water with a splash of lemon or an herbal iced tea, which would refresh the palate between bites. If coffee is your beverage of choice, a dark roast can pair wonderfully post-meal. Always serve wines at optimal temperatures; reds should be slightly cooler than room temperature, while whites can be chilled.

Storage and Shelf Life

Proper storage is vital for ensuring the quality of leftover Rack of Lamb. Store leftovers in an airtight container in the refrigerator to maintain freshness, where they will typically last for 3-4 days. Always cool the meat to room temperature before placing it in the fridge to avoid condensation that can spoil the flavor.

For longer storage, consider freezing portions of the lamb. Wrap in plastic wrap and place in a freezer-safe bag or container to protect against freezer burn. When reheating, utilize an oven set at a low temperature to gradually warm the meat while retaining moisture—avoid using a microwave, as it can create a rubbery texture.

Make Ahead Strategies

Planning ahead can significantly enhance your cooking experience with Rack of Lamb. Consider marinating the lamb rack the night before to allow the flavors to penetrate deeply. You can also prepare your side dishes ahead of time to reduce stress on the actual day of serving.

When marinating, store the rack in the refrigerator to preserve freshness. Once cooked, cool the lamb completely before storing in the fridge or freezer. Maintaining the quality of the leftovers is essential; defrost in the refrigerator overnight before reheating. Adding fresh herbs or a squeeze of lemon juice just before serving can revive the flavors after storing.

Scaling Instructions

Scaling your Rack of Lamb recipe can be straightforward. Halving the recipe is as simple as dividing the amount of lamb and other ingredients in half while maintaining the cooking time close to the original. Adjusting for larger gatherings, doubling or tripling the recipe may necessitate using larger pans or cooking in batches to ensure even cooking.

Consider timing modifications; larger racks may require a slight increase in cooking time to achieve the same internal temperature. Keep in mind that the resting phase is crucial, regardless of the size of the meal. Ensure storage containers are appropriately sized for leftover portions to make storage easy and effective.

Nutritional Deep Dive

Examining the macro nutritional breakdown of Rack of Lamb reveals that it is rich in protein, providing essential amino acids necessary for muscle repair and recovery. A typical serving contains approximately 25-30 grams of protein, making it an excellent choice for those pursuing fitness goals.

Micronutrient analysis shows that lamb is particularly high in iron—important for red blood cell formation—and zinc, which plays a critical role in immune health. A well-balanced portion of Rack of Lamb can support various dietary needs, though it’s essential to remain mindful of fat content, particularly saturated fats. For those managing weight, paying attention to portion sizes is key to enjoying this dish without overindulging.

Dietary Adaptations

Those on a gluten-free diet can rejoice; this recipe easily lends itself to modification by ensuring that no gluten-containing ingredients are used in the marinade or crust. For those avoiding dairy, a yogurt marinade can be swapped out for almond milk, providing a creamy texture without the dairy.

For vegan adaptations, using a plant-based protein or tofu as a substitute provides a similar texture while still satisfying the flavor profile. If following a low-carb or keto diet, replace high-carb sides with vegetables such as zucchini or cauliflower to remain within dietary restrictions, creating a wonderful meal that meets your needs.

Troubleshooting Guide

If you are facing texture issues with your lamb, undercooking can lead to a tough product. Always ensure your meat is sufficiently rested before slicing, allowing juices to redistribute. For flavor balance, if your lamb is too salty, serving with a side of sweet chutney can help mellow out the flavors.

Temperature problems can often arise, especially if you don’t have an accurate meat thermometer. Invest in a quality thermometer to prevent guesswork. Equipment challenges, such as inadequate pans, can lead to uneven cooking; opt for heavy-bottomed pans to achieve better heat distribution.

If you’re considering ingredient substitutions to match personal taste, ensure that flavor profiles are comparable. Timing concerns can arise with larger cuts of meat; be sure to adjust your prep and cooking times accordingly.

Recipe Success Stories

Community feedback about the Rack of Lamb recipe often praises its ability to impress guests and elevate family dinners. Many home cooks, excited by the prospect of expanding their culinary repertoire, share their successful adaptations such as switching up the marinade or experimenting with different cooking methods.

Readers have documented their journey of mastering the recipe, sharing tips that helped them avoid common pitfalls. Notable variations have become favorites, with individuals reporting back on how their unique twists were received by family and friends. Many also share aggregate photography tips that can enhance visual appeal, encouraging fellow cooks to showcase their creations.

Frequently Asked Questions

What is the best way to cook a Rack of Lamb?

The best way to cook a Rack of Lamb is through a combination of searing and roasting. Start by searing the lamb in a hot pan to create a flavorful crust, then finish cooking in the oven until the desired internal temperature is reached.

How do I know when my Rack of Lamb is done?

Using a meat thermometer is the most reliable way to check for doneness. For medium-rare, aim for an internal temperature of around 130°F (54°C) before resting. Always allow the meat to rest for 10-15 minutes before slicing.

Can Rack of Lamb be cooked ahead of time?

Yes, you can prepare the Rack of Lamb ahead of time. Cook it, then allow it to cool before refrigerating. When ready to serve, gently reheat it in a low oven to maintain the moisture and texture.

What sides pair well with Rack of Lamb?

Rack of Lamb pairs wonderfully with sides such as roasted vegetables, garlic mashed potatoes, or a fresh salad. Additionally, mint sauce or a red wine reduction can enhance the dish’s flavors.

How do I store leftover Rack of Lamb?

Store leftover Rack of Lamb in an airtight container in the refrigerator for up to 3-4 days. For longer storage, wrap it well and freeze it, ensuring no air can reach the meat.

Is Rack of Lamb healthy?

Yes, Rack of Lamb is healthy in moderation. It is a good source of high-quality protein, vitamins, and minerals, but keep portion control in mind to manage fat and calorie intake.

What kind of wine goes with Rack of Lamb?

Full-bodied red wines such as Cabernet Sauvignon or Syrah pair excellently with Rack of Lamb. They complement the meat’s richness and enhance the flavor profile of the dish.

Can I cook Rack of Lamb on the grill?

Absolutely! Grilling Rack of Lamb adds a unique smoky flavor. Just sear it on each side and then finish cooking over indirect heat to ensure it’s done without burning the outside.

What is the best way to reheat Rack of Lamb?

The best way to reheat Rack of Lamb is in an oven preheated to a low temperature (about 300°F/150°C) until warmed through. This method helps retain moisture and avoid drying out the meat.

Can I use herbs other than rosemary?

Yes, you can definitely use other herbs such as thyme, oregano, or even mint. Customize the seasoning to your preference to create a unique flavor for your Rack of Lamb.

Additional Resources

To enhance your culinary endeavors, check out related recipes such as roasted vegetables and garlic mashed potatoes that pair beautifully with Rack of Lamb. Additionally, explore technique guides for mastering the art of searing and roasting to achieve maximum flavor.

Seeking information about ingredients can benefit your cooking with insights into the specific nutritional profiles or how to choose the best cuts of lamb can elevate your meals. Investing in quality kitchen tools, such as a good meat thermometer and roasting pan, is also essential for success in gourmet cooking.

Join the Conversation

Engaging with others about your culinary experiences is just as important as the cooking itself. Share your Rack of Lamb pictures on social media, inviting friends and family to enjoy each other’s success in the kitchen. Feedback and suggestions from the community can enhance your approach to the recipe, while reviews can motivate others to take on the challenge of cooking a gourmet meal at home.

Explore variations proposed by your peers, implementing tips and tricks from fellow home cooks to perfect your Rack of Lamb. Your unique experiences pave the way for a lively discussion about food, culture, and the joy of cooking together.

The Recipe

Rack of Lamb with Herb Crust

Serves: 4

Prep Time: 30 mins

Cook Time: 45 mins

Total Time: 75 mins

Kitchen Equipment Needed

  • Roasting pan
  • Frying pan
  • Meat thermometer
  • Cutting board
  • Sharp knife

Ingredients

  • 1 rack of lamb (about 1.5-2 lbs)
  • 3 cloves of garlic, minced
  • 2 tablespoons fresh rosemary, chopped
  • 1 tablespoon fresh thyme, chopped
  • 2 tablespoons olive oil
  • Salt and pepper to taste

Directions

  1. Preheat your oven to 375°F (190°C).
  2. In a small bowl, mix the minced garlic, rosemary, thyme, olive oil, salt, and pepper to create a marinade.
  3. Rub the marinade all over the rack of lamb, ensuring it is well-coated.
  4. In a frying pan over high heat, sear the rack of lamb for 2-3 minutes on each side until golden brown.
  5. Transfer the seared lamb to a roasting pan and roast in the preheated oven for 25-30 minutes for medium-rare.
  6. Remove from the oven, cover loosely with aluminum foil, and let it rest for 10-15 minutes before slicing.

Recipe Notes

  • Feel free to customize the herbs used in the marinade based on your taste preferences.
  • Ensure you use a good quality rack of lamb for the best flavor and tenderness.
  • This recipe can easily be doubled for larger gatherings; just adjust the cooking time as necessary.

Delicious Cheesy Chicken Taco Rice Recipe for Easy Weeknight Dinners

Cheesy Chicken Taco Rice: A Delicious One-Pot Meal Anyone Can Make

⚖️
Difficulty
Easy

⏲️
Prep Time
10 mins

🕒
Cook Time
30 mins

⏱️
Total Time
40 mins

🍽️
Servings
4

Cheesy Chicken Taco Rice is a mouthwatering dish that brings together all your favorite taco flavors in a simple, one-pot meal. The combination of tender chicken, seasoned rice, and creamy cheese creates an explosion of flavor in every bite. Perfect for busy weeknights, this dish is not only quick to prepare but also incredibly satisfying, making it a family favorite that you’ll want to make time and time again.

Imagine coming home after a long day to the warm, inviting aroma of cheesy goodness wafting through your kitchen. As you scoop the vibrant mix of colors onto your plate, you’ll be greeted with layers of textures – from the succulent chicken to the fluffy rice, all topped with melted cheese. This dish is both comforting and exciting, ensuring that it pleases even the pickiest eaters.

Quick Recipe Highlights

  • Flavor Profile: Savory chicken is marinated in taco spices, bringing a zesty kick to the dish while creamy cheese adds richness.
  • Texture: The fluffy rice mixed with tender chunks of chicken and melted cheese creates a delightful mouthfeel.
  • Aroma: A blend of spices, combined with the scent of cooking chicken and melting cheese, fills your kitchen with an irresistible fragrance.
  • Visual Appeal: Bright colors from diced tomatoes, shredded cheese, and chopped vegetables make this dish visually tempting.
  • Skill Level Needed: This recipe is beginner-friendly, requiring only basic cooking techniques.
  • Special Equipment: A large pot or skillet is essential for cooking everything in one place.

Recipe Overview

  • Difficulty Level: This Cheesy Chicken Taco Rice recipe is easy to follow, making it perfect for novice cooks or anyone looking to whip up a quick meal.
  • Category: This dish falls under the main course category, suitable for lunch or dinner.
  • Cuisine: It’s inspired by Mexican cuisine, showcasing traditional taco flavors while merging with hearty rice.
  • Cost: The ingredients are budget-friendly, typically costing around $15 to make a meal serving four.
  • Season: This dish is perfect for any season, as its hearty nature warms you in the colder months, while being light enough for summer.
  • Occasion: Ideal for family dinners, potlucks, or casual get-togethers, it’s sure to be a crowd-pleaser.

Why You’ll Love This Recipe

One of the most appealing aspects of Cheesy Chicken Taco Rice is its incredible taste and texture. The seasoned chicken melds beautifully with the tender rice, while the melted cheese adds a rich layer. Each bite bursts with flavor, making this dish comforting yet exciting. Kids and adults alike will look forward to seconds!

Convenience is another attractive feature of this meal. With just one pot needed, cleanup is a breeze, allowing for more time spent enjoying the meal with loved ones. The prep time is minimal, and once it’s simmering on the stovetop, you can attend to other tasks without worry.

Nutritional advantages make this recipe even more appealing. Packed with protein from the chicken and plenty of vitamins from fresh vegetables, it’s a wholesome choice for busy families. It also allows for healthy substitutions, such as brown rice or leaner cuts of chicken, catering to various dietary needs.

Socially, this recipe offers a fantastic way to bond with friends and family. Preparing this meal together can be a fun experience, allowing everyone to tailor their taco rice with toppings and flavors.

Lastly, Cheesy Chicken Taco Rice is cost-effective and accessible. With easily available ingredients, you won’t have to hunt for anything special, and the dish is budget-friendly, making it attainable for anyone.

Historical Background and Cultural Significance

The origin of taco rice can be traced back to American adaptations of traditional Mexican cuisine. Initially, tacos were enjoyed in their classic form, filled with meats, beans, and veggies. However, as culinary experimentation evolved, home cooks began to create one-pot variations that simplified preparation while retaining those beloved flavors.

Culturally, taco rice highlights the beautiful merger of comfort food with vibrant spices. In many households, this dish represents family dinners, where everyone gathers around the table to enjoy a hearty meal and share laughter. It’s seen as a communal dish, bringing people together.

Over time, as the recipe has evolved, different regions in the United States and beyond have put their own spin on taco rice. Variations can include different proteins, reflective of local tastes and preferences, showcasing its versatile nature.

Regional versions have exploded in popularity, particularly in areas with a significant Mexican influence. California, for instance, boasts various interpretations that may include fresh avocado or unique spice mixes, demonstrating how adaptable this dish truly is.

Ingredient Deep Dive

  • Chicken: As a central ingredient, chicken offers high protein levels that are essential for a balanced diet. Its versatility allows for various cuts, from breasts to thighs, each having its distinct flavor profile. When selecting chicken, look for fresh, organic options to ensure quality. For storage, raw chicken should be kept in the refrigerator for up to 2 days and can be frozen for later use. If you prefer alternatives, turkey or plant-based proteins work well as substitutes.
  • Rice: This staple ingredient not only serves as the base of the dish but is also a great source of carbohydrates. Brown rice offers higher nutritional benefits, including fiber, making it a healthier option when compared to white rice. To select rice, opt for brands that store whole grains. For storage, keep rice in a cool, dry place, and it can last for months. If you want to switch it up, quinoa or cauliflower rice could serve as great alternatives.
  • Cheese: Using cheese adds an unparalleled creaminess and richness to the dish. Traditionally, a mix of cheddar and Monterey Jack provides a delicious melt. Cheese contains calcium and protein, beneficial to bone health. When selecting cheese, choose high-quality options free of additives for the best flavor. Store cheese in the refrigerator and consume it within a week after opening. If you’re looking to reduce dairy, consider using nutritional yeast for a cheesy flavor without the animal product.
  • Bell Peppers: These vibrant vegetables not only add a colorful aesthetic but also provide vitamins A and C. When selecting bell peppers, look for firm, shiny skin and bright colors. They can be stored in the fridge for about a week. For variety, consider adding diced zucchini or corn for added texture and flavor.
  • Taco Seasoning: This blend of spices is crucial for infusing flavor into the dish. It typically contains chili powder, cumin, garlic powder, and paprika. You can easily make your own seasoning to control the heat level and avoid preservatives. Store homemade seasoning in an airtight container. If you want a milder flavor, simply reduce the spice quantities or look for pre-made mild options.

Common Mistakes to Avoid

  • Using cold chicken: Always let your chicken come to room temperature before cooking to ensure it cooks evenly.
  • Overcooking the rice: Keep an eye on your rice, as overcooking can lead to a mushy texture.
  • Skipping the seasoning: Don’t forget to season each layer, as it enhances the overall flavor.
  • Using too much liquid: Adding excessive water can make the dish too soupy; balance is key.
  • Not letting it rest: Allow the dish to sit for a few minutes before serving to let the flavors meld.
  • Choosing low-quality cheese: Opt for block cheese as opposed to pre-shredded for a better melt.
  • Using stale spices: Check your spice cabinet and replace any expired spices for optimal flavor.
  • Ignoring ingredient temperatures: Different ingredients cook at varying rates, so coordinate their addition accordingly.

Essential Techniques

  • Sautéing: This technique is vital as it helps to create a flavor base by browning the chicken and vegetables. To master sautéing, ensure your pan is properly heated before adding ingredients; this creates a nice sear and avoids sticking. Look for golden-brown colors as a cue of doneness.
  • Simmering: Simmering helps blend flavors throughout the dish. To achieve a proper simmer, maintain a gentle bubbling that allows the rice to absorb flavors without boiling over. Overdoing the heat can lead to unevenly cooked rice.
  • Melt: When melting cheese, it’s essential to maintain a low temperature to prevent burning. Stir gently as it melts into a creamy texture. Watch for bubbling and a gooey consistency for success.

Pro Tips for Perfect Cheesy Chicken Taco Rice

  • For an extra layer of flavor, consider marinating the chicken in taco seasoning for an hour prior to cooking.
  • Feel free to add your favorite vegetables, like spinach or black beans, to boost the nutrition of the meal.
  • Use a combination of cheeses for more complexity; try mixing Monterey Jack with pepper jack for a spicy twist.
  • For a crisp topping, broil the dish for a few minutes after cooking to achieve a beautiful golden crust.
  • Ensure your rice is rinsed to remove excess starch, which can lead to sticky rice.
  • While serving, provide a variety of toppings like avocado, cilantro, or sour cream to elevate the dish.
  • You can easily make this recipe in advance for a quick meal. Just reheat it gently before serving.
  • Experiment with different grains, like quinoa or farro, for a nutritious twist.

Variations and Adaptations

  • Incorporate different proteins like ground turkey, beef, or pork for a varied flavor profile.
  • For a seasonal adaptation, add fall vegetables like butternut squash or mushrooms to embrace autumn flavors.
  • Make it vegan by substituting the chicken with a plant-based option and non-dairy cheese.
  • Spice things up with additional jalapeños or hot sauce for those who enjoy heat.
  • Experiment with different rice types; try wild rice or cauliflower rice for a unique twist.
  • Enhance presentation by serving in tortilla bowls or hollowed peppers for a fun serving option.

Serving and Presentation Guide

  • For an appealing plate, layer the rice, chicken, and cheese, finishing with a sprinkle of diced fresh herbs.
  • Serve with a wedge of lime on the side to add a zesty finish that brightens the dish.
  • Use colorful garnishes such as cherry tomatoes or chopped cilantro to visually entice your guests.
  • Serve the dish warm, as it enhances the textures and flavors of the melty cheese.
  • Consider portion control by using measuring cups or small bowls to serve consistent sizes.

Wine and Beverage Pairing

  • A chilled Sauvignon Blanc complements the richness of the cheese while cutting through its creaminess.
  • If you prefer red wine, a light-bodied Pinot Noir pairs harmoniously with the spices.
  • For non-alcoholic options, serve sparkling water infused with lime or flavored iced teas that enhance the flavors.
  • Coffee can also be a delightful accompaniment, especially if served with dessert afterward.

Storage and Shelf Life

  • Store leftovers in an airtight container in the refrigerator for up to 3 days for optimal freshness.
  • Label containers with a date to keep track of how long they’ve been stored.
  • Reheat leftovers gently on the stovetop over medium heat or in the microwave on a low setting to preserve texture.
  • For longer storage, freeze the dish in appropriate containers for up to 3 months, ensuring you label them with the date.
  • When reheating from frozen, allow to thaw overnight in the fridge for best results.

Make Ahead Strategies

  • Prep the chicken and chop all vegetables the night before to streamline cooking time.
  • Cook the rice ahead and store it sealed in the fridge to save time when it’s mealtime.
  • Assemble the ingredients in a single container for an easy grab-and-cook approach if you’re in a rush.
  • Consider preparing the dish in its entirety and reheating it when ready to serve, developing the flavors further.

Scaling Instructions

  • To halve the recipe, simply divide all ingredient quantities by two, ensuring you maintain cooking times.
  • If doubling or tripling the recipe, use a larger pot and consider cooking in batches to ensure even cooking.
  • Adjust cooking times accordingly; larger batches may take a bit longer to cook through properly.
  • Be mindful of the serving size when scaling; use portion methods to maintain consistency across servings.

Nutritional Deep Dive

  • This dish provides a balanced macro breakdown, with high protein from chicken, healthy carbs from rice, and fats from cheese.
  • In terms of micronutrients, expect a good dose of vitamins A and C from vegetables, contributing to overall health.
  • It’s important to monitor portion sizes; a reasonable serving promotes satiety without leading to excess calorie intake.
  • For those managing weight, consider substituting whole grain rice and lean proteins to lower calorie density.

Dietary Adaptations

  • For a gluten-free option, ensure that your seasonings and prepared ingredients are certified gluten-free.
  • Substitute dairy cheese with cashew cheese for a creamy, dairy-free option that maintains a cheesy flavor.
  • To make it vegan, replace chicken with a plant-based protein and use vegetable broth instead of water.
  • A low-carb version can be created by using cauliflower rice as a base instead of traditional rice.

Troubleshooting Guide

  • If your chicken turns out dry, ensure you’re cooking it properly by using a meat thermometer for accuracy.
  • Should your rice be mushy, avoid overcooking in future batches and check the rice-to-water ratio.
  • For flavor balance, taste as you cook, adding a pinch of salt or more seasoning until satisfied.
  • If you encounter lumps in melted cheese, consider using a whisk to smooth it out while heating.

Recipe Success Stories

  • Our community has shared numerous twists on this recipe, proving its versatility to suit various palates.
  • Photographers have successfully showcased the colorful components, making Cheesy Chicken Taco Rice visually enticing.
  • Family gatherings become lively events with this dish at the center, sparking joy and conversations around the table.

Frequently Asked Questions

Can I use brown rice for this recipe? Yes, brown rice works well, but keep in mind it will require a longer cooking time. Adjust your liquid amounts and cooking duration accordingly.

Is this dish freezer-friendly? Absolutely! You can freeze Cheesy Chicken Taco Rice in an airtight container for up to three months. Reheat thoroughly before serving.

Can I substitute the chicken with turkey? Yes, ground turkey is a great alternative! It pairs well with taco seasoning and maintains that delicious flavor.

What are some good toppings? Fresh toppings like avocado, sour cream, jalapeños, and chopped cilantro enhance the flavors beautifully.

Is Cheesy Chicken Taco Rice spicy? The spiciness will depend on the taco seasoning you use. Opt for a mild mix if you prefer less heat.

Can I make this dish vegetarian? Yes, use a combination of vegetables like beans and corn to replace the chicken while keeping the flavor profiles intact.

What cheese is best for melting? Cheddar and Monterey Jack are excellent choices for their melting properties and flavor.

How can I make the dish healthier? Consider using brown rice, reducing the amount of cheese, or adding more vegetables to enhance the nutritional value.

Can I make this recipe in a slow cooker? Yes! Layer the ingredients and cook on low for 4-6 hours for an easy, hands-free meal.

What are good side dishes with Cheesy Chicken Taco Rice? Consider serving a fresh salad or grilled vegetables to balance the richness of the main dish.

Additional Resources

  • Explore our collection of one-pot meals for more convenience in the kitchen.
  • Check out technique guides for mastering sautéing and simmering to enhance your cooking skills.
  • Find ingredient information for optimizing your use of spices in various recipes.
  • Look into recommended kitchen equipment that will ease your cooking process.
  • Discover seasonal variations that incorporate fresh produce as it comes into season.

Join the Conversation

  • Share your Cheesy Chicken Taco Rice creations on social media using our hashtag!
  • Upload your photos and let the community see how you plated this delicious dish.
  • Leave a review or comment about your experience, and offer suggestions for new variations!
  • Engage in discussions about ingredient substitutions and tips with fellow food lovers.

The Recipe

Cheesy Chicken Taco Rice

Serves: 4

Prep Time: 10 mins

Cook Time: 30 mins

Total Time: 40 mins

Kitchen Equipment Needed

  • Large pot or skillet
  • Measuring cups and spoons
  • Wooden spoon or spatula
  • Knife and chopping board

Ingredients

  • 1 lb chicken breast, diced
  • 1 cup uncooked white or brown rice
  • 1 cup chicken broth
  • 1 cup shredded cheddar cheese
  • 1 bell pepper, diced
  • 1 package taco seasoning
  • Salt and pepper to taste
  • Fresh cilantro and avocado for garnish

Directions

  1. In a large pot or skillet, sauté the diced chicken over medium heat until browned.
  2. Add the bell pepper and taco seasoning, cooking until the pepper is tender.
  3. Stir in the rice and chicken broth, bring to a boil, then reduce heat to low and simmer for 20 minutes.
  4. Once the rice is cooked, remove from heat and stir in the cheese until melted.
  5. Garnish with fresh cilantro and avocado before serving.

Recipe Notes

  • Feel free to adjust spice levels according to your preference.
  • For a creamier texture, mix in a dollop of sour cream before serving.