Delicious Cheesy Enchilada Chili Recipe for Cozy Nights

Cheesy Enchilada Chili: A Comforting Fusion Delight

⚖️
Difficulty
Easy

⏲️
Prep Time
15 mins

🕒
Cook Time
30 mins

⏱️
Total Time
45 mins

🍽️
Servings
6

Cheesy Enchilada Chili brings together the best of two worlds: the hearty comfort of chili and the zingy, cheesy flavor of enchiladas. Imagine a bowl of warm, robust chili simmered with spices, layered with gooey cheese, and filled with tender beans, meat, and vibrant vegetables. It’s enough to warm your soul and satisfy your cravings for both Mexican and American comfort food. This dish is perfect for chilly evenings or potlucks, providing a satisfying meal that everyone will love.

The enchanting aroma of spices wafts through the air as the chili cooks, setting the stage for a delightful dining experience. With each spoonful, you’ll encounter a delightful medley of textures – from the creamy cheese melting against tender meat and beans to the slight crunch of set vegetables. This Cheesy Enchilada Chili doesn’t just fill your belly; it’s a hearty dish that fuels your spirit.

Quick Recipe Highlights

  • Flavor Profile: This dish is a harmonious blend of smoky chili flavors with hints of cumin, topped with melted cheese for an irresistible creaminess.
  • Texture: The chili presents a combination of smoothness from the cheese and a satisfying bite from the beans and vegetables.
  • Aroma: The dish is fragrant with spices like chili powder and cumin, mingling with the warmth of the cheese as it bakes.
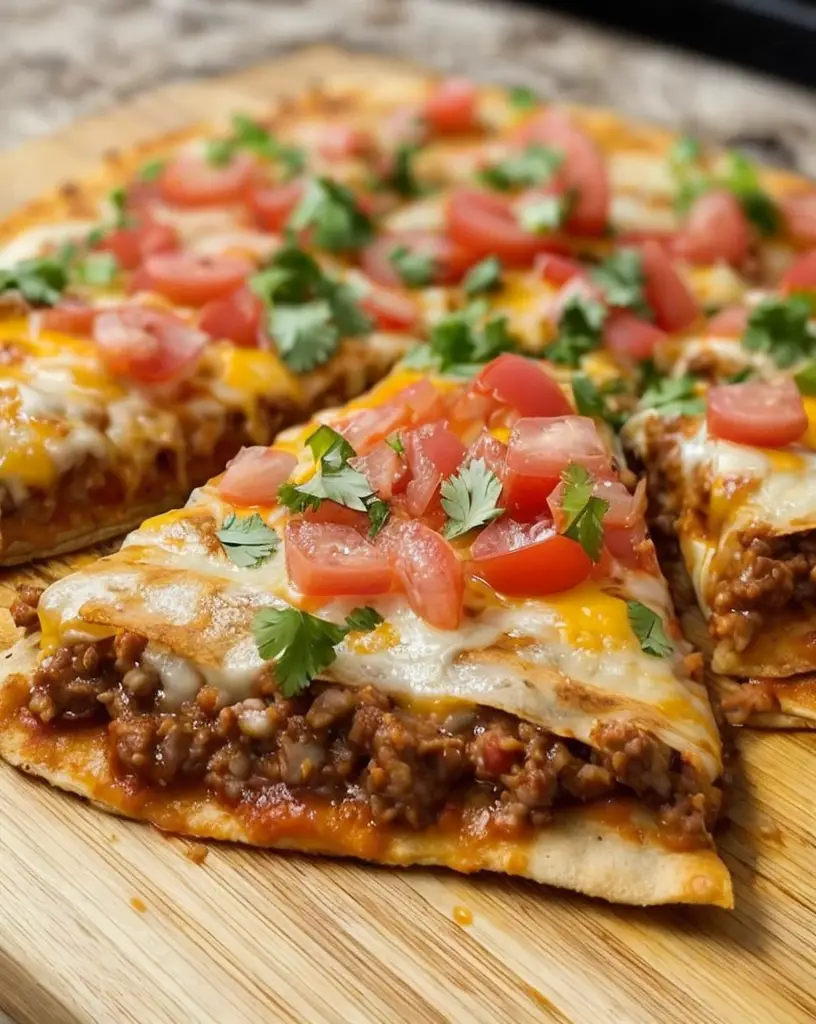
  • Visual Appeal: A vibrant mix of colors from the red tomatoes, green bell peppers, and golden cheese makes it as pleasing to the eye as it is to the palate.
  • Skill Level Needed: An easy recipe suitable for beginner cooks, allowing everyone to enjoy homemade comfort food.
  • Special Equipment: A large pot or Dutch oven is perfect for making this chili, alongside basic kitchen utensils.

Recipe Overview

  • Difficulty Level: This Cheesy Enchilada Chili is classified as easy, making it perfect for cooks of any skill level. You’ll find that it requires no special techniques, just basic chopping and stirring.
  • Category: This dish is suitable for a main course, especially on a cold day or a festive gathering like game day or family dinners.
  • Cuisine: With its roots in Mexican culinary traditions, this recipe draws on the rich flavors of enchiladas while incorporating an American-style chili twist.
  • Cost: This recipe is budget-friendly, with ingredients such as beans, tomatoes, and spices readily available and affordable.
  • Season: Ideal to make in fall and winter when you crave something warming, this chili also works beautifully for gatherings all year round.
  • Occasion: Perfect for casual get-togethers, family dinners, or as a comforting meal after a long day.

Why You’ll Love This Recipe

The rich, comforting taste and texture of the Cheesy Enchilada Chili make it an unforgettable dish. Each bite is packed with warmth, from the spices enveloping your palate to the creaminess of the melted cheese that ties everything together. The blend of flavors not only satisfies hunger but also delivers a burst of excitement, making it a dish worth sharing with loved ones.

Convenience is another key reason to embrace this recipe. With a prep time of just 15 minutes, you can have dinner cooking while you unwind after a busy day. This one-pot meal minimizes cleaning, offering maximum comfort with the least hassle, making it ideal for busy weeknights.

Nutritionally, Cheesy Enchilada Chili does not skimp on benefits. Rich in protein from the beans and any meat you may choose to include, it also packs plenty of fiber, vitamins, and minerals from the vegetables. This chili helps to sustain you through the day, providing energy without heaviness.

Socially, this dish is a true crowd-pleaser. Its emphasis on communal dining and sharing makes it perfect for parties and family gatherings. Set out some toppings, and let everyone customize their bowls; it’s an excellent way to encourage conversation and mingling.

Cost-effectively, Cheesy Enchilada Chili stands out with its simplicity and affordability. Staple ingredients make it accessible to anyone, allowing you to serve a hearty, delicious meal without breaking the bank. This balancing act of flavor, comfort, and convenience is why you’ll find this recipe becoming a staple in your cooking repertoire.

Historical Background and Cultural Significance

Cheesy Enchilada Chili embodies the gastronomic clash of cultures that occurs in many kitchens. Its roots may be traced back to the traditional Mexican enchilada, which consists of tortillas filled with various ingredients and covered with sauce. Chili itself has been treasured in American cuisine, particularly in the Southwest, making this recipe a delicious fusion that celebrates both heritages.

Culturally, chili holds a sentimental place in American homes, often being featured in family recipes passed down through generations. The enchilada, too, tells a story of rich flavors, showcasing the influence of indigenous ingredients and techniques. The combination of these two beloved dishes in Cheesy Enchilada Chili signifies a unifying aspect of food – bringing people together across borders over a shared love of hearty, flavor-packed meals.

The evolution of this recipe likely came about during casual family gatherings where both chili and enchiladas were favorites. Combining them saves time while maximizing the flavors that many of us love. Through these blends, new traditions and dishes are born, giving us yet another reason to celebrate diverse culinary heritages.

Regional variations abound, with modifications commonly made to suit local tastes and available ingredients. Whether one adds corn, changes up the spices, or plays with the level of heat, Cheesy Enchilada Chili is a canvas that allows for creativity, showcasing the innovative spirit of home cooks everywhere.

Ingredient Deep Dive

  • Beans: Beans are often considered a staple in many cultures, especially in Latin and American cuisines. They are a fantastic source of protein and dietary fiber, contributing to heart health and sustained energy. When choosing beans for Cheesy Enchilada Chili, look for varieties like black beans or pinto beans, and ensure they are stored in a cool, dry place for maximum freshness.
  • Chili Powder: Chili powder brings the heat and depth of flavor necessary for this recipe. It’s a blend of spices that often includes dried chilies, garlic powder, and cumin, each playing a role in savory complexity. When purchasing, choose high-quality chili powder for the best results and store it in an airtight container. Experimenting with homemade blends is a fantastic way to customize your spice level.

Common Mistakes to Avoid

  • Overcooking the chili: Cooking too long can lead to mushy beans and loss of texture. Aim for a balance where all ingredients are just tender.
  • Using too little seasoning: Chili requires robust seasoning. Under-seasoning can render it bland, so taste and adjust regularly.
  • Skipping the cheese: Cheese adds vital creaminess; don’t skip it! Choose a good melting cheese like cheddar.
  • Ignoring resting time: Allowing chili to sit for a few minutes after cooking can enhance flavor melding.
  • Not adjusting for spice: Adjust spices according to your taste preference before serving; add more chili powder or hot sauce if needed.
  • Using canned beans incorrectly: Rinsing and draining canned beans helps reduce sodium and improves texture.
  • Overloading on toppings: While toppings are fun, too much can overwhelm the chili’s flavors; add sparingly.
  • Choosing poor quality tomatoes: Opt for high-quality canned tomatoes, preferably San Marzano for balanced sweetness and acidity.
  • Forgetting prep steps: Failing to chop ingredients uniformly can cause uneven cooking; ensure similar sizes for even cooking.
  • Not checking for doneness: Always check the dish for final doneness before serving to ensure everything is cooked properly.

Essential Techniques

  • Sautéing: This technique helps to develop flavors by cooking aromatics like onions and garlic in oil. To master it, use medium heat until the onions are translucent and fragrant. Common pitfalls include overcrowding the pan, which can lead to steaming instead of browning; ensure you have enough space in the pan for even cooking.
  • Simmering: Simmering allows ingredients to meld beautifully while cooking slowly. Maintain a gentle simmer with small bubbles and avoid bringing your chili to a rolling boil as it can break down the ingredients too much. Visual cues for success include a lightly bubbling surface and a rich aroma.

Pro Tips for Perfect Cheesy Enchilada Chili

  • Use freshly grated cheese to ensure optimal melt and flavor; pre-shredded varieties often contain anti-caking agents that can affect the texture.
  • Blend in a tablespoon of tomato paste for added richness and depth of flavor that complements the spices.
  • Experiment with adding different types of protein like shredded chicken or ground turkey for variations.
  • Let the chili rest after cooking; this helps the flavors develop and taste even better when reheated.
  • Add a splash of hot sauce to the finished dish for a sudden burst of unexpected heat.
  • Serve with a variety of toppings like jalapeños, sour cream, or corn chips for texture contrast.
  • Consider adding turmeric for anti-inflammatory benefits and an extra layer of earthiness.
  • Use leftover chili as a customizable filling for burritos or enchiladas to withhold the essence of the chili in new forms.

Variations and Adaptations

Cheesy Enchilada Chili can be transformed to cater to seasonal ingredients, utilizing fresh vegetables during summer for a lighter take. For an autumn twist, incorporate roasted squash for sweetness, and in winter, consider adding hearty root vegetables.

Those with dietary modifications can easily adapt this recipe; replacing meat with lentils or cauliflower for a vegan option retains the flavors while accommodating dietary needs. For those seeking bolder flavors, try adding chili peppers or salsas with varied heat levels.

If you’re feeling creative, consider using different cheeses such as pepper jack for a spicy kick, or mixing in flavors with contrasting textures by experimenting with crunchy toppings like fried tortilla strips.

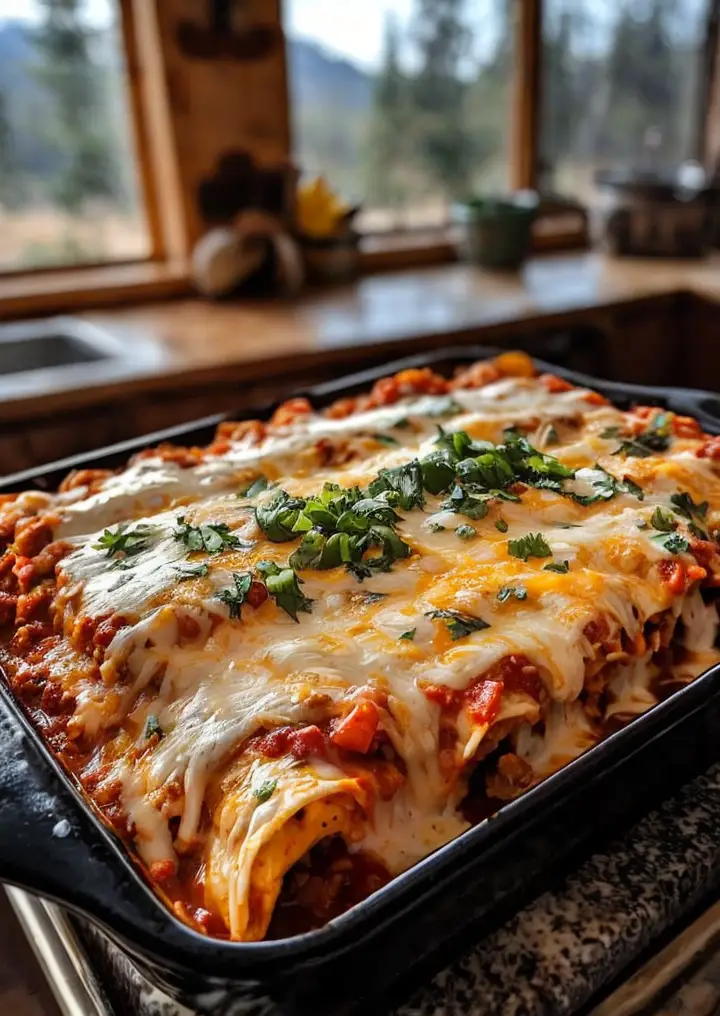
Lastly, presentation can be an artistic endeavor. Consider layering the chili with cheese and herbs in individual baking dishes for a rustic appeal or serving it in vibrant tortilla bowls for a fun and festive touch.

Serving and Presentation Guide

For an appealing presentation of Cheesy Enchilada Chili, consider using colorful bowls to highlight the vibrant ingredients. Creative garnishing options such as chopped cilantro, diced avocados, and finely grated cheese significantly enhance visual allure.

You might want to accompany the dish with sides of tortilla chips, sour cream, or fresh salads to provide a pop of color and flavor contrast on the plate.

Presenting the chili steaming in bowls will not only elevate its temperature but also enhance the aroma that guests will appreciate. Always serve the chili hot for the best texture and flavor experience.

When serving, consider using a ladle for portion control, ensuring everyone receives a balanced mix of beans, meat, and peppers. This promotes equitable sharing while keeping the servings manageable, especially during gatherings.

Wine and Beverage Pairing

Pair your Cheesy Enchilada Chili with wine that complements its flavors; a medium-bodied red, such as a Syrah or a Zinfandel, provides a delightful counterbalance to the spice. These wine flavors harmoniously mingle with the chili’s richness, enhancing your meal experience.

For non-alcoholic options, offer a chilled horchata or refreshing limeade to cleanse the palate between bites.

If coffee is your preference, serving a dark roast with light notes can add a beautiful but unexpected pairing, intensifying the chili’s flavors, while herbal tea provides a calming finish to the meal.

Be sure to consider the temperature of your beverages as well. Chilled drinks work wonderfully with the warm meal, providing a refreshing contrast that enhances the overall enjoyment.

Storage and Shelf Life

For proper storage of Cheesy Enchilada Chili, cool it completely before transferring it to an airtight container. Properly stored, it stays fresh in the fridge for up to four days, making it a great option for meal prepping.

When freezing, portion the chili in freezer-safe bags or containers. Ensure you leave some room for expansion, and it can last for up to three months in the freezer.

Before reheating, always check for signs of spoilage; if you notice any off-smells or changes in texture, it’s best to discard it. To reheat, gently warm it on the stove or microwave until heated through, stirring occasionally.

When ready to use, adding a splash of broth can enhance its initial flavor and prevent dryness from freezing.

Make Ahead Strategies

To prepare Cheesy Enchilada Chili ahead of time, chop the ingredients and store them separately in the fridge. The chili base can be made a day in advance and stored until needed.

For optimal flavor, consider letting the chili develop overnight, as flavors meld and mature beautifully. Reheat gently the next day, with the addition of fresh herbs or toppings to revitalize the dish.

If possible, pre-cook the proteins you wish to add and store them in the fridge or freezer to save time during the busy week.

When ready to serve, simply assemble ingredients in a single pot and cook until heated, ensuring minimal effort and impact on family time.

Scaling Instructions

To halve this recipe, simply cut all ingredients and cooking times in half, which is perfect for smaller households or when trying the dish for the first time.

If doubling or tripling, take care to use larger pots, as the increased contents may require bigger equipment.

Adjustments in timing might be necessary; larger volumes might take slightly more time to heat through, so ensure to monitor closely for doneness.

For any leftovers, consider storing portions separately or combining based on meals throughout the week to enhance meal diversity without unnecessary waste.

Nutritional Deep Dive

Cheesy Enchilada Chili is a well-balanced dish featuring macronutrients vital for energy. A single serving contains a good mix of proteins from beans and meat, carbohydrates from tomatoes and beans, and healthy fats from cheese.

On the micronutrient side, ingredients like bell peppers and tomatoes are excellent sources of vitamins A and C, supporting immune functions, while beans offer essential minerals such as iron and magnesium for bodily functions.

Evaluating dietary considerations, it’s suitable for many meal plans, especially when controlled for sodium and portion sizes. A balanced meal can contribute to weight management, providing satisfaction without excessive calories.

Portion analysis suggests that recognizing serving sizes can help maintain a healthy lifestyle while indulging in comfort food.

Dietary Adaptations

Cheesy Enchilada Chili can be made gluten-free by ensuring you use certified gluten-free spices and stock. For a dairy-free twist, replace traditional cheese with nut-based options or nutritional yeast for added flavor without the dairy.

Vegan adaptations are simple; just remove the meat and use lentils or mushrooms while keeping the dish flavorful with vegetables and spices.

For low-carb and keto diets, skip the beans and opt for grilled vegetables as a hearty replacement while tweaking spice levels to enhance flavors.

For those following a paleo diet, focus on using fresh, whole ingredients and avoiding canned products. With slight adjustments, anyone can nourish their preferences.

Troubleshooting Guide

If your Cheesy Enchilada Chili turns out too thick, consider adding a splash of broth or water to reach the desired consistency. Conversely, if it is too watery, let it simmer uncovered to reduce excess liquid.

In instances where the flavors seem unbalanced, taste and adjust seasoning as necessary. Adding salt or a hint of acidity, such as lime juice, can brighten the dish.

If the cheese does not melt correctly, shredded cheese ensures even melting. Be cautious not to cook at too high of a temperature, as it may cause the fat to separate.

Timing may be an issue; if the chili seems undercooked, give it more time while keeping an eye on flavor maturation.

Lastly, if ingredients are unfamiliar or unwanted, consider adjusting the flavor profile or textures to your palate with suitable substitutes that fit your liking.

Recipe Success Stories

Many readers often choose to customize their Cheesy Enchilada Chili, resulting in fantastic variations. One community member shared their success with a vegetarian version loaded with fresh zucchini and bell peppers, making it suitable for family gatherings without meat.

Others have praised its versatility, submitting feedback on using leftovers in burritos. The hearty recipe stands out in the kitchen, leading to a continuous flow of rave reviews and requests for meal-sharing.

A reader submitted a photo that showcased the chili garnished beautifully with fresh cilantro and avocado. This encourages aspiring cooks to elevate their presentation game while making the most out of simple ingredients.

Engagement in the community is essential as contributing ideas and photography tips can inspire others to explore their culinary creativity using this simple, adaptable recipe.

Frequently Asked Questions

Can I make Cheesy Enchilada Chili in advance?

Absolutely! Preparing this chili a day in advance allows flavors to meld beautifully. Store it in the fridge, and simply reheat it before serving. This ahead-of-time approach works wonders for busy evenings.

What can I use instead of cheese in this recipe?

You have several delicious alternatives! Nutritional yeast can provide a cheesy flavor without dairy, while cashew cream or dairy-free cheese options serve as excellent substitutions for richness.

Can I add more vegetables to the chili?

Definitely! Feel free to include any of your favorites such as corn, carrots, or diced sweet potatoes. Adjusting the recipe to include more vegetables can add both nutrition and flavor.

Is this chili spicy?

The spiciness depends on the type of chili powder and additional hot ingredients you choose to add. For milder versions, use less seasoning or mild varieties of chili pepper while adjusting to your desired heat level.

Can I freeze leftover chili?

Yes! Once cooled, portion the chili into airtight containers and freeze it for up to three months. For the best results, reheat gently after thawing, and you can even add a bit of broth to revive it.

What can I serve with Cheesy Enchilada Chili?

This hearty dish pairs wonderfully with tortilla chips, cornbread, or a fresh green salad. You can also add toppings like sour cream, avocado, or cilantro to enhance the experience.

How can I make my chili thicker?

If you find your chili too thin, let it simmer uncovered to allow excess liquid to evaporate, or add a teaspoon of cornstarch mixed with water for quick thickening without compromising flavor.

What kind of beans can I use in this recipe?

Both black beans and pinto beans work beautifully in Cheesy Enchilada Chili, but feel free to mix and match depending on your taste preferences or what’s available in your pantry.

Can this recipe be made in a slow cooker?

Yes! Combine all ingredients in a slow cooker, and cook on low for 6-8 hours. Just add cheese during the last 15-30 minutes to let it melt perfectly.

Is Cheesy Enchilada Chili suitable for meal prepping?

Absolutely! Make a large batch at the beginning of the week, and portion it out for lunches or dinners throughout the week. The flavors only grow better as it rests, making it perfect for meal prep!

Additional Resources

If you enjoyed making Cheesy Enchilada Chili, you may want to explore related recipes such as Mexican Street Corn or Slow Cooker Taco Soup that offer similar flavor profiles.

Consider reviewing technique guides focused on chopping skills or mastering different cooking methods for further culinary exploration. You can also dive deeper into ingredient knowledge, exploring nutritional profiles and benefits through various educational resources.

Incorporating seasonal variations into your cooking can elevate the experience, allowing you to adapt dishes according to availability and inspire creativity in the kitchen.

Join the Conversation

We love to hear from you! Share your photos and experiences of making Cheesy Enchilada Chili on social media platforms. Use the hashtag #EnchiladaChiliSuccess to connect with fellow food enthusiasts.

Feel free to leave a review or suggestions for variations that you’ve tried. Over time, community engagement enriches our cooking experiences and inspires creativity.

Dominating the conversation with both successes and learning moments helps maintain an active community where everyone can grow and share in the culinary adventure together.

The Recipe

Cheesy Enchilada Chili

Serves: 6

Prep Time: 15 mins

Cook Time: 30 mins

Total Time: 45 mins

Kitchen Equipment Needed

  • Large pot or Dutch oven
  • Wooden spoon or spatula
  • Cutting board
  • Chef’s knife
  • Measuring cups and spoons

Ingredients

  • 1 lb ground beef or turkey
  • 1 can (15 oz) black beans, drained and rinsed
  • 1 can (14.5 oz) diced tomatoes
  • 1 cup beef or vegetable broth
  • 1 onion, diced
  • 2 cloves garlic, minced
  • 1 green bell pepper, diced
  • 2 tablespoons chili powder
  • 1 teaspoon cumin
  • Salt and pepper to taste
  • 2 cups shredded cheddar cheese
  • Sour cream and cilantro for serving (optional)

Directions

  1. In a large pot, heat over medium heat. Add the ground beef or turkey and cook until browned. Drain any excess fat.
  2. Add the diced onion, garlic, and green bell pepper. Sauté for about 5 minutes until softened.
  3. Stir in the chili powder, cumin, salt, and pepper, cook for an additional minute.
  4. Add in the canned tomatoes, black beans, and broth. Bring to a simmer and reduce heat to low.
  5. Let the chili simmer for 20-25 minutes until all flavors meld together.
  6. Stir in 1 cup of cheese until melted and incorporated.
  7. Serve hot topped with remaining cheese, sour cream, and cilantro if desired.

Recipe Notes

  • Feel free to substitute the ground meat with a meat alternative for a vegetarian or vegan option.
  • Adjust the spice level by adding more chili powder or fresh jalapeños.
  • This recipe can be made ahead of time and stored in the fridge or frozen for later use.

Elegant Baked Stuffed Lobster Tail Recipe for Gourmet Dining

Elegant Baked Stuffed Lobster Tail Recipe: A Sophisticated Seafood Delight

⚖️
Difficulty
Intermediate

⏲️
Prep Time
15 mins

🕒
Cook Time
25 mins

⏱️
Total Time
40 mins

🍽️
Servings
2

The Elegant Baked Stuffed Lobster Tail Recipe captivates with its rich flavors and luxurious presentation. Perfect for special occasions or an indulgent evening at home, this dish transforms lobster tail into a gourmet masterpiece. Imagine tender, succulent lobster meat blended with zesty seasonings and breadcrumbs, all nestled in the tail’s shell and baked to perfection. This culinary creation not only tantalizes the palate but also elevates the entire dining experience. With the ocean’s bounty on your plate, this recipe is a true celebration of gourmet seafood!

As you prepare this elegant dish, your kitchen will fill with the enticing aromas of garlic, herbs, and melted butter, setting the stage for a magnificent meal. Each forkful reveals the delicate buttery texture of the lobster intertwined with the satisfying crunch of the stuffing. Whether you’re hosting a romantic dinner or a festive celebration, this elegant baked stuffed lobster tail is bound to impress your guests and create delightful memories around the table.

Quick Recipe Highlights

  • Flavor Profile: Sweet, succulent lobster meat harmonizes with buttery garlic and fresh herbs, delivering a savory burst in every bite.
  • Texture: The tender lobster contrasts beautifully with the crispy, crumbly stuffing, creating a delightful mouthfeel.
  • Aroma: This dish features vibrant notes of garlic and fresh herbs that make your kitchen inviting and warm.
  • Visual Appeal: The vibrant colors of the filling complemented by the glistening lobster tails make this dish stand out on any table.
  • Skill Level Needed: Suitable for intermediate cooks, this recipe requires basic knowledge of seafood preparation and baking techniques.
  • Special Equipment: A sharp knife for splitting the lobster tails and a baking dish to roast them in the oven are essential.

Recipe Overview

  • Difficulty Level: Preparing baked stuffed lobster tails is moderately challenging as it requires precision in cooking seafood; however, the instructions make it accessible for dedicated home cooks.
  • Category: This seafood dish fits perfectly in dinner party menus, romantic meals for two, or festive holiday feasts, showcasing sophistication and care.
  • Cuisine: Rooted in coastal culinary traditions, this recipe reflects influences from New England seafood dishes infused with French cooking techniques.
  • Cost: Lobster tails can be a luxurious ingredient; however, they are often available at reasonable prices, especially during peak seafood season.
  • Season: Best enjoyed during the warmer months, this dish highlights the flavors of spring and summer, especially when paired with refreshing salads or sides.
  • Occasion: Ideal for celebrations, special date nights, or family gatherings, this recipe makes every meal feel like a festivity.

Why You’ll Love This Recipe

This Elegant Baked Stuffed Lobster Tail recipe brings an extraordinary taste that will enchant your palate. The combination of tender lobster meat and savory stuffing makes every bite a heavenly experience. Complemented by a drizzle of melted butter, the balance of flavors speaks to gourmet cooking while being simple enough for home preparation. As you savor the dish, you’ll find the distinct sweetness of the lobster enhanced by aromatic herbs and spices, making it a standout dish in your culinary repertoire.

Convenience and ease of preparation are hallmarks of this recipe. With just a handful of ingredients and straightforward steps, it’s not only approachable for intermediate cooks but also allows for minimal cleanup. You can prepare the stuffing ahead of time and simply assemble and bake before serving, making it an excellent choice for entertaining when you want to impress without the stress.

Nutritionally, lobster is a lean protein source, packed with essential vitamins and minerals. It’s low in calories but high in flavor, making it a great option for those mindful of their dietary choices. This recipe not only satisfies your taste buds but also enhances your nutritional intake with its rich seafood content paired with wholesome ingredients.

Beyond its delicious components, serving this baked lobster tail has social and entertaining advantages. When you plate this dish, it elevates the meal’s atmosphere and encourages conviviality around the table. Guests will enjoy the communal aspect of sharing a beautiful dish and discussing the flavors, creating an unforgettable dining experience.

Lastly, this recipe offers cost-effectiveness given that it showcases a luxurious main course that can be prepared relatively affordably, especially if you shop for lobster during peak seasons or local seafood markets. By making this dish at home, you save on pricey restaurant bills while enjoying a gourmet experience in your own kitchen.

Historical Background and Cultural Significance

The history of lobster consumption dates back centuries, with Native Americans first introducing European settlers to the richness of this shellfish. The lobsters were abundant along the coasts of North America, leading to their prominent role in the diets of coastal communities. Early on, they were often viewed as food for the poor due to their abundance, but over time, they evolved into a symbol of luxury and gourmet dining, particularly in fine restaurants.

The development of recipes such as the Elegant Baked Stuffed Lobster Tail illustrates how culinary traditions have transformed with regional influences. Many classic lobster dishes emphasize buttery sauces, creamy fillings, and herbed breadcrumbs, showcasing the versatility of this delectable seafood. Cultural influences from French cuisine, primarily through the integration of butter and baking techniques, have also further refined the dish toward narrower definitions of sophistication.

In recent years, the popularity of dishes like baked stuffed lobster has surged, often featured in culinary shows and upscale dining establishments. This trend reflects the growing appreciation for seafood and an increased desire for unique dining experiences. The dish celebrates not only the lobster itself but the skill of the cook, emphasizing a blend of tradition and innovation.

Regionally, lobster tail recipes vary widely, with each area showcasing its culinary style through unique stuffing options and cooking methods. From creamy variations to Mediterranean-style hers, each recipe reflects a sense of local flavor that encourages exploration of this gourmet dish.

Ingredient Deep Dive

Lobster Tail

Lobster tails are prized not only for their delicate flavor but also for their nutritional benefits. They are rich in protein, omega-3 fatty acids, and essential vitamins such as B12 and key minerals like zinc, adding significant value to a meal. When selecting lobster tail, look for firm, translucent flesh and a fresh oceanic scent, as this indicates quality.

Storing lobster tail requires special attention. It is best kept in the coldest part of your refrigerator, ideally used within a day or two after purchase. If needed, lobster tails can also be frozen for longer-term storage; just ensure they are sealed well to prevent freezer burn. Should you wish to substitute, shrimp or crab can offer great alternatives, although they will provide different flavor profiles.

Breadcrumbs

Bread crumbs are frequently used to enhance texture in many baked dishes, especially when combined with rich fillings. This ingredient not only adds crunch but also acts as a vehicle for absorbing the tasty elements of the dish. When choosing breadcrumbs, opt for fresh or homemade varieties for the best flavor.

To store breadcrumbs, keep them in an airtight container in a cool, dry place. You can also make them at home from stale bread, ensuring you can minimize waste while maximizing flavor. Should you need a gluten-free option, crushed nuts, panko, or gluten-free breadcrumbs can serve as suitable substitutes.

Common Mistakes to Avoid

  • Overcooking the lobster: Lobster cooks quickly; overdoing it will result in tough, rubbery meat. Monitor closely and opt for a cooking time of 20-25 minutes at 350°F.
  • Under-seasoning: Don’t be shy with seasonings in your stuffing; a lack of flavor can make the dish bland and uninviting.
  • Not preheating the oven: Always preheat your oven to ensure even cooking and optimal texture, especially for baking seafood.
  • Ignoring the stuffing process: Ensure that you evenly distribute the stuffing throughout the lobster tails, which helps in delivering flavor in every bite.
  • Using frozen lobster without thawing: If using frozen lobster tails, thaw them properly in the refrigerator prior to cooking for the best results.
  • Overlooking freshness: Using fresh ingredients, particularly seafood items, plays an essential role in the taste; always choose high-quality lobster tails.
  • Neglecting to taste the stuffing: Always taste your stuffing mix before filling the tails to adjust seasonings according to your preference and ensure maximum flavor.
  • Not letting the dish rest: After removing the lobster from the oven, allow it to rest for a few minutes to preserve juiciness and enhance flavors.
  • Incorrectly preparing your baking dish: Grease your dish adequately to prevent sticking and retain moisture in the lobster tails throughout the baking process.
  • Forgetting to check for doneness: Use a meat thermometer to check if the internal temperature reaches 145°F for perfectly safe and delicious lobster.

Essential Techniques

Preparing Lobster Tails

Learning how to effectively prepare lobster tails is essential for creating this gourmet dish. Start by using kitchen scissors to cut through the top shell, taking care not to damage the meat underneath. Then, gently pull the meat up and out, leaving it attached at the tail end, and season adequately before stuffing. Master this technique, and you’ll ensure a beautiful presentation while maximizing flavor.

Making Stuffing

Creating a flavorful stuffing is key to elevating your lobster dish. Combine breadcrumbs with herbs, garlic, and any desired fillings like cheese or seafood to ensure depth of flavor. The stuffing should be moist but not overly wet, allowing for even baking. Practice gauging the right moisture balance in your stuffing so you can replicate success every time.

Pro Tips for Perfect Elegant Baked Stuffed Lobster Tail

For optimal flavor, marinate the lobster tails in lemon and garlic before cooking to infuse zest and depth.

Experiment with different stuffing variations, such as using crab meat or seasonal vegetables to customize the dish according to personal preferences.

Use fresh herbs instead of dried ones for a more vibrant flavor in your stuffing.

For added zing, drizzle a little lemon butter sauce over the baked lobster tails just before serving.

Incorporate a layer of grated cheese on top of the stuffing for a deliciously golden crust.

Ensure that you check the internal temperature periodically to avoid overcooking and maintain the lobster’s texture.

Pair this dish with light, refreshing wines like Chardonnay to enhance the flavor without overpowering it.

Accessorize the lobster tail with grilled vegetables or a fresh green salad to create a balanced meal.

Variations and Adaptations

Regional variations can often enhance the classic elegant baked stuffed lobster tail. In some coastal areas, lobster may be stuffed with local seafood or herbs, adding unique flavors that reflect the surrounding environment.

Seasonal adaptations encourage the inclusion of fresh produce during specific periods, such as adding asparagus in spring or tomatoes in summer for bursts of freshness.

If you’re looking for dietary modifications, consider gluten-free alternatives for breadcrumbs, ensuring everyone can enjoy this luxurious dish.

Flavor variations might include the addition of hot sauce or spices like paprika and Old Bay seasoning for a delightful twist on the traditional stuffing.

Texture modifications could incorporate finely chopped nuts into the stuffing for additional crunch and a nutty taste profile.

For a visually stunning presentation, consider garnishing with colorful microgreens or edible flowers to highlight the dish’s elegance.

Serving and Presentation Guide

For plating your elegant baked stuffed lobster tail, consider using large, shallow dishes to accentuate the beauty of your creation. Place the lobster tails in the center, and surround them with fresh herbs or colorful vegetables to create an inviting scene on the table.

Garnish your dish with lemon wedges to provide diners with a fresh bite and sprinkle freshly chopped parsley or dill for a touch of green that brightens the presentation.

Temperature is critical; serve lobster immediately after baking for peak flavor and texture, ensuring each bite is warm and satisfying.

For portion control, consider serving each lobster tail as an individual main dish accompanied by lighter sides like a crisp salad or sautéed vegetables.

Wine and Beverage Pairing

A great wine pairing enhances the experience with your elegant baked stuffed lobster tail. A chilled Chardonnay often complements the rich flavors of seafood beautifully, while a Sauvignon Blanc can provide a refreshing contrast with its crisp acidity.

For non-alcoholic alternatives, a sparkling water with lemon is a refreshing choice that cleanses the palate between bites.

If you’re an afternoon tea lover, pairing this dish with a light herbal tea could be considered to embrace a lighter flavor profile while enjoying an exciting meal.

Serving temperature is important; ensure your wines are chilled adequately and that food is served hot to maintain the best culinary experience.

Storage and Shelf Life

When storing leftover lobster tails, it’s important to place them in an airtight container in the refrigerator and consume them within 1-2 days for optimal freshness and flavor.

For longer storage, lobster can be frozen; just ensure it’s sealed properly in vacuum-sealed bags to prevent freezer burn. When cooked, it can be frozen for up to 3 months.

Signs of spoilage can include a sour smell or discoloration, so always inspect seafood before consuming. When reheating, do so gently in the oven at a low temperature to preserve texture and avoid overcooking.

Make Ahead Strategies

To save time on a busy cooking day, you can prepare the stuffing a day in advance and store it in the refrigerator. This allows flavors to meld and simplifies the final assembly process.

Consider prepping the lobsters, stuffing them, and placing them in the baking dish the night before. Cover them well to lock in moisture, and bake them fresh for your event.

When assembling your lobster, you can maintain quality by chilling the dish until you’re ready to bake, which helps retain its fresh flavors while simplifying your gaps between meal preparation and serving.

Scaling Instructions

If you need to halve the recipe, adjust the ingredients accordingly while maintaining the same ratios for seasoning to keep flavors consistent.

For larger gatherings, doubling or tripling the recipe is easily achievable; just ensure you have the appropriate-sized baking dish and adjust your oven time slightly longer for larger quantities, keeping an eye on doneness.

As for equipment, ensure that your oven is sizeable enough to accommodate multiple lobster tails if cooking in bulk, and consider using an extra baking tray if needed.

Nutritional Deep Dive

From a macro perspective, a typical stuffed lobster tail provides high protein content while remaining low in carbohydrates and fats, making it a nutrient-dense meal option for health enthusiasts.

In terms of micronutrient content, lobster is rich in vitamin B12, copper, and selenium, essential for cellular function and immune support, boosting its benefits for overall health.

Health benefits include muscle building due to its protein content and joint and bone health benefits owing to its omega-3 fatty acids. It’s suitable not only for a balanced diet but also for individuals looking to reduce calorie intake.

When considering portion analysis, aim for a serving size that equates to half a lobster tail per person if served with accompanying side dishes, ensuring a balanced meal without overindulgence.

Dietary Adaptations

This recipe can easily be customized to fit gluten-free diets by using gluten-free breadcrumbs or quinoa in place of traditional bread in your stuffing.

For those aiming for dairy-free options, substitute traditional butter with olive oil or a plant-based butter alternative, maintaining moisture and richness in the recipe.

If you are following a low-carb or keto lifestyle, consider using cauliflower rice mixed with spices instead of breadcrumbs in the stuffing.

For vegan adaptations, the recipe may be altered to include mushrooms or chickpeas for stuffing while using vegetables or plant-based seafood substitutes instead of lobster.

Troubleshooting Guide

If you find the texture of your lobster too tough, this often results from overcooking. Always keep a thermometer handy to achieve the perfect temperature of 145°F.

Flavor balance can be achieved through additional seasoning; should your stuffing taste bland, consider reheating and adjusting spices as necessary before serving.

If you encounter temperature problems, like an uneven bake, rotate your baking dish halfway through cooking to ensure even heat exposure.

Common equipment challenges may include choosing the right type of baking dish; opt for a glass or ceramic dish for better heat distribution throughout your cooking.

If you substitute for ingredients, always consider that flavor profiles may be altered, requiring further adjustments with seasoning to achieve the desired taste.

Timing concerns can be managed through preheating your oven well in advance of cooking and monitoring closely while the dish bakes.

Recipe Success Stories

Many home cooks have shared how this Elegant Baked Stuffed Lobster Tail recipe has turned their dinner parties into memorable occasions, often raving about the impressive outcomes.

Readers have opted to modify the recipe, incorporating local seafood variations or even vegetarian adaptations that have earned praises from their families and friends.

Photography tips have also emerged, with many showcasing their creations on social media, emphasizing the dish’s vibrant presentation and making it widely popular among food lovers.

Frequently Asked Questions

How do I know when lobster is fully cooked?

Lobster tails are done when the internal temperature reaches 145°F, and the meat becomes opaque and firm. Always check with a meat thermometer for the most accurate results.

Can I use frozen lobster tails?

Yes, but ensure they are thawed thoroughly in the refrigerator before cooking. Frozen lobster tails may require slightly longer cooking times to ensure even doneness.

What can I substitute for breadcrumbs?

A variety of options exist, such as crushed nuts, panko breadcrumbs, or gluten-free alternatives for mixed filling textures.

Is this recipe suitable for meal prep?

Absolutely! You can prepare the stuffing and lobster tails ahead of time, storing them in the fridge until you are ready to bake them before serving.

How should I serve this dish?

Plating garlic butter sauce and a mix of vegetables on the side complements the lobster tail nicely while enhancing the overall presentation.

Can I reheat leftovers?

Yes, reheat leftovers in a preheated oven at low temperature to maintain texture and prevent further cooking of the lobster. Cover with foil to avoid drying out.

How can I make the dish spicier?

Incorporate diced jalapeños or a dash of cayenne pepper into the stuffing for an added kick or garnish the dish with spicy aioli for serving.

What wine pairs well with baked stuffed lobster?

A dry white wine, such as a Chardonnay or Sauvignon Blanc, pairs beautifully, balancing the richness of the lobster with its acidity.

How long can I store leftovers?

Store leftovers in an airtight container in the fridge for up to two days, or freeze them for an extended shelf life of three months.

Is it possible to make this recipe dairy-free?

Yes, substitute traditional butter with a dairy-free alternative or olive oil in the stuffing and topping for a similar taste profile.

Additional Resources

If you’re interested in more seafood recipes, our blog features a range of dishes, from classic shrimp scampi to grilled salmon. Discover techniques for seafood preparation that can enhance your skills in the kitchen.

Equipment recommendations might include heavy-duty kitchen shears for cutting lobster tails and a quality baking dish for even cooking and presentation.

Don’t forget to check out seasonal variations in seafood to take advantage of what’s fresh and local, as well as tips on sustainable sourcing for the seafood lovers out there!

Join the Conversation

We love hearing about your cooking experiences! Share photos of your elegant baked stuffed lobster tails on social media, tag us, and join our vibrant community of seafood enthusiasts.

If you have any suggestions or modifications for the recipe, feel free to leave comments as we explore our culinary journey together!

Engage with us through recipe reviews and let us know how your dinner parties go when you showcase this masterpiece on your table.

The Recipe

Elegant Baked Stuffed Lobster Tail

Serves: 2

Prep Time: 15 mins

Cook Time: 25 mins

Total Time: 40 mins

Kitchen Equipment Needed

  • Kitchen shears
  • Baking dish
  • Mixing bowl
  • Meat thermometer

Ingredients

  • 2 lobster tails, halved lengthwise
  • 1 cup breadcrumbs
  • 3 tablespoons melted butter
  • 2 cloves garlic, minced
  • 1 tablespoon fresh parsley, chopped
  • 1 teaspoon lemon juice
  • Salt and pepper, to taste

Directions

  1. Preheat the oven to 350°F (175°C).
  2. Using kitchen shears, carefully cut the top shell of the lobster tails, pulling the meat up gently, leaving it attached at the tail end.
  3. In a mixing bowl, combine breadcrumbs, melted butter, garlic, parsley, lemon juice, salt, and pepper.
  4. Stuff the lobster tails with the breadcrumb mixture, pressing it down gently to mound it up.
  5. Place the stuffed lobster tails in a baking dish and cover loosely with foil.
  6. Bake for 20-25 minutes or until the lobster meat is opaque and firm, reaching an internal temperature of 145°F.
  7. Serve hot, garnished with additional parsley and lemon wedges.

Recipe Notes

  • For extra flavor, drizzle with melted garlic butter before serving.
  • Feel free to substitute breadcrumbs with crushed crackers or nuts for different textures.
  • Add some grated cheese to the stuffing for a richer taste.

Delicious Mexican Pizza Recipe: A Flavorful Twist on Taco Night

Delicious Mexican Pizza: A Flavorful Twist on a Classic

⚖️
Difficulty
Easy

⏲️
Prep Time
15 mins

🕒
Cook Time
20 mins

⏱️
Total Time
35 mins

🍽️
Servings
4

Mexican Pizza is a vibrant and delicious meal that brings together the best of both worlds: pizza and Mexican cuisine. Picture a crispy pizza base topped with seasoned ground beef, fresh vegetables, and an abundance of melted cheese. The balance of flavors is enhanced by traditional Mexican spices, creating a dish that not only satisfies your cravings but also excites your taste buds. This Mexican Pizza is perfect for family dinners or casual gatherings, offering a delightful experience that revolves around sharing and enjoying as a group.

Emotionally, this recipe embodies the warmth and vibrancy of Mexican culture. Each bite transports you to a festive atmosphere filled with laughter and joy. As you pull a slice apart, the cheesy stretch adds to the anticipation, and the fresh toppings provide a colorful, appetizing presentation. Easy to prepare, this recipe allows you to enjoy the rich tastes of Mexico from the comfort of your home, ensuring a satisfying meal that is sure to please everyone.

Quick Recipe Highlights

  • Flavor Profile: A delightful blend of spices combines the savory notes of cooked beef with the zesty freshness of tomatoes and jalapeños.
  • Texture: The crispy crust contrasts beautifully with the gooey cheese and crunchy toppings, offering an enjoyable bite each time.
  • Aroma: The enticing aroma of baking spices fills your kitchen, promising a mouth-watering meal that’s hard to resist.
  • Visual Appeal: The colorful toppings of red tomatoes, green peppers, and melted cheese create a feast for the eyes, making it even more desirable.
  • Skill Level Needed: This recipe requires basic cooking skills, making it accessible even for novice chefs.
  • Special Equipment: A baking sheet or pizza stone is essential for achieving that perfect crispiness.

Recipe Overview

  • Difficulty Level: The Mexican Pizza is categorized as easy, making it suitable for beginner cooks and ideal for quick family meals.
  • Category: This meal falls under the dinner category but can also serve as a hearty lunch option or a crowd-pleasing party dish.
  • Cuisine: Blending Italian and Mexican traditions, this dish showcases culinary flexibility and the fusion of different flavor profiles.
  • Cost: Economical to make, the ingredients are often readily available and can fit within most budgets, bringing great value to your table.
  • Season: This pizza is versatile and can be enjoyed year-round, but it’s especially perfect during casual get-togethers in warmer months.
  • Occasion: Serve it at family dinners, game days, or casual brunches; its fun and shareable format appeals to all occasions.

Why You’ll Love This Recipe

Mexican Pizza is revered for its unique taste and texture. The vibrant flavors, ranging from savory beef to tangy salsa, create an explosion of sensations. Each layer adds a remarkable diversity, ensuring that every bite is an adventurous experience. The crust offers a satisfying crunch, while the melted cheese delivers gooeyness that enhances the overall appeal.

Convenience plays a significant role in why this dish is a favorite. With minimal prep and cook time, Mexican Pizza is perfect for busy weeknights or unexpected guests. You can easily customize the toppings based on your preferences, allowing for a personal touch that saves time without sacrificing flavor.

Nutritionally, Mexican Pizza can be tailored to include a range of fresh vegetables, contributing to a healthy balance on your plate. You can opt for lean meats or even vegetarian alternatives, making it adaptable for various dietary needs while maintaining great taste.

When it comes to social gatherings, this dish shines as a centerpiece of interaction. It invites sharing, allowing guests to dig in and create their personalized slices. The fun presentation and variety of toppings make it an excellent conversation starter.

Cost-effectiveness is also a significant advantage. Ingredients are generally affordable and accessible, making this recipe an excellent choice for feeding a crowd without breaking the bank. You can prepare large batches without much extra effort, ensuring everyone has enough to enjoy.

Historical Background and Cultural Significance

The origins of Mexican Pizza can be traced back to a fusion of culinary cultures that emerged as various populations blended their cooking traditions. Initially, pizza gained popularity in Italy, while Mexican cuisines developed distinct identities rooted in native ingredients and regional techniques. The melding of these two culinary worlds illustrates how adaptable and innovative food can be across cultures.

Culturally, Mexican Pizza signifies the rich tapestry of Mexico’s cuisine, highlighting the use of bold flavors, fresh ingredients, and a spirit of sharing meals. It reflects the heart of Mexican hospitality, where meals are often a communal experience. The dish captures the essence of festive gatherings, bringing people together around a shared table.

The evolution of the recipe has seen various adaptations as chefs experiment with different toppings, crust types, and flavor profiles. Over time, you can find variations that cater to local tastes and preferences, contributing to its sustained relevance in modern dining.

Regional variations have emerged, showcasing the versatility of this dish. In some areas, you might find additional layers of flavor with regional ingredients, while others introduce unique spices that elevate the original concept. This adaptability helps keep the tradition alive, allowing each interpretation to capture its cultural essence.

Ingredient Deep Dive

Ground beef serves as the staple protein in this recipe, providing a hearty and flavorful base. Culturally significant, ground beef is often used in traditional Mexican dishes, showcasing its versatility. Nutritionally, it’s a great source of protein, iron, and essential fatty acids. When selecting ground beef, look for lean options to reduce fat content. Store any leftovers in an airtight container in the fridge for up to 2 days. For a healthier alternative, consider turkey or plant-based ground meat.

Taco seasoning is vital for infusing the beef with its characteristic flavors. Commonly made from spices like cumin, chili powder, and garlic powder, this blend elevates the overall taste profile. It’s widely used in Mexican cooking and can be purchased ready-made or prepared at home to control the ingredients. Store in a cool, dark place for optimal freshness. For a customized flavor, experiment with adding smoked paprika or cayenne pepper.

Tomatoes, whether fresh, diced, or as a sauce, add brightness and texture. They are rich in vitamins C and K, providing health benefits alongside flavor. Opt for ripe, in-season tomatoes for the best taste. When stored, place them at room temperature, and they will last a few days. For convenience, canned tomatoes work well as a substitute when fresh ones are unavailable.

Cheddar cheese brings a satisfying creaminess to the dish. Rich in calcium and protein, it enhances the Mexican Pizza’s flavor and texture. Choose high-quality cheese for better melting properties. Store in the refrigerator and use within a week or two for fresh taste. For lower-fat options, consider using part-skim mozzarella or a dairy-free cheese alternative.

Jalapeños add a kick of heat and are popular in many Mexican dishes. They offer vitamin C and contribute to the overall flavor complexity. Select firm, shiny jalapeños for the best quality, and store in the fridge for about a week. If you’re looking to tone down the heat, remove the seeds before adding them to your pizza.

Common Mistakes to Avoid

  • Not pre-baking the crust: This can result in a soggy bottom. Ensure your crust is cooked before adding toppings.
  • Overloading with toppings: Too many toppings can make the pizza difficult to handle. Stick to a few key ingredients for balance.
  • Using cold ingredients: Cold toppings can lead to uneven cooking. Ensure all ingredients are at room temperature before assembly.
  • Skipping the seasoning: Underselling flavor can make the dish bland. Be generous with spices and seasonings.
  • Neglecting cheese quality: Low-quality cheese may not melt well. Opt for fresh, good-quality cheese for the best texture.
  • Ignoring oven temperature: Cooking at too low a heat can yield a chewy crust. Preheat your oven to the recommended temperature.
  • Not letting the pizza rest: Slicing too soon can cause toppings to slide off. Allow it to rest for a few minutes before cutting.
  • Storing leftovers incorrectly: Failing to store properly can lead to sogginess. Ensure you wrap leftovers tightly and refrigerate them.
  • Using a dull knife for slicing: This can squish the pizza instead of slicing it evenly. Use a sharp pizza cutter for clean cuts.
  • Underestimating prep time: Budget extra time for chopping and preparation to avoid last-minute stress.

Essential Techniques

Mastering dough preparation is critical for creating that perfect crust. It’s the foundation of your pizza, and it’s essential to knead the dough well to develop gluten for a chewy texture. Roll it out evenly to achieve a consistent thickness, which helps with even baking. Look for dough that is soft and pliable without being sticky as a visual cue for success.

Topping application is another important technique to perfect. Layer tablespoons of sauce evenly across the crust, followed by cheese and toppings. Avoid crowding, as individual ingredients need space to cook properly. Balance the distribution of toppings for an aesthetically pleasing and flavorful pizza, and ensure visually appealing color contrast to entice eaters.

Pro Tips for Perfect Mexican Pizza

Use a pizza stone if possible for the best crispy base. Preheat the stone in the oven to ensure maximum heat transfer for a well-cooked crust.

Roll out your dough on a floured surface to prevent sticking and achieve a uniform thickness. This simple step can dramatically improve the texture of your crust.

Experiment with different types of cheese. Blending cheeses like mozzarella, cheddar, and pepper jack can create a delightful mix of flavors and textures.

Add fresh herbs just before serving. Sprinkling cilantro or green onions over the hot pizza adds a fresh touch that elevates the overall taste.

Make sure all your vegetable toppings are chopped uniformly. This helps in even cooking and ensures that every bite has a consistent flavor profile.

For extra flavor, grill your jalapeños ahead of time to bring out their sweetness and reduce some of the heat.

Don’t rush the cooking process. Allow the pizza to cook long enough for the cheese to melt beautifully and for the crust to turn golden brown.

Experiment with different sauces. Try using salsa or a spicy chipotle sauce as a base instead of traditional pizza sauce for added depth.

Variations and Adaptations

Explore regional variations by selecting local specialties like chorizo instead of ground beef or using traditional Mexican cheeses such as queso fresco. Each region can offer its culinary twist, keeping the dish fresh and exciting.

Consider seasonal adaptations, such as adding squash in the fall or fresh corn in the summer. Taking advantage of seasonal produce not only enhances flavor but ensures the pizza remains dynamic.

For dietary modifications, create a gluten-free crust if needed. Cauliflower crust is a popular alternative that caters to those with gluten sensitivities while maintaining great taste.

Feel free to add flavor variations by incorporating spices and herbs into your basic tomato sauce, creating distinct profiles like chipotle or a garlic-infused salsa.

Texture modifications can include using a thicker crust for a heartier meal or a more traditional flatbread-style version for a crispy finish.

In terms of presentation, try serving individual mini Mexican Pizzas for a fun appetizer or party snack, allowing guests to customize their toppings.

Serving and Presentation Guide

Plating techniques for Mexican Pizza can include cutting it into wedges and displaying it on a colorful serving board or platter. Use fresh herbs to garnish and add vibrant color contrast.

Garnishing with lime wedges and fresh cilantro can enhance the dish’s appeal, offering a burst of freshness and a pop of color.

Pairing traditional accompaniments like salsa, sour cream, or guacamole can create a stunning spread that elevates the dining experience.

Modern serving suggestions include presenting with an assortment of toppings on the side, allowing guests to build their Mexican Pizza as they like.

Temperature plays an essential role in serving. Ensure each slice is served warm to maintain that delightful cheesy goodness.

Portion control tips are crucial, especially when entertaining. Consider slicing in smaller pieces for guests to try multiple flavors without overindulging.

Wine and Beverage Pairing

For wine pairings, consider a chilled Sauvignon Blanc that complements the spice of the dish and balances the flavors well. The freshness of white wine also enhances the overall experience.

Non-alcoholic alternatives can include homemade aguas frescas or fresh limeade, both of which provide refreshing options that cut through the richness of the cheese and meat.

If applicable, consider coffee or tea pairings. A light herbal tea can refresh the palate, while coffee can be a comforting end to a hearty meal.

When serving beverages, temperature considerations are essential; keep wines chilled and non-alcoholic drinks refreshing to balance the meal’s warmth.

Finally, serving suggestions include providing a selection of complementary beverages, enabling guests to enjoy multiple options based on preferences and tastes.

Storage and Shelf Life

For proper storage methods, place leftovers in an airtight container once cooled. Store Mexican Pizza in the refrigerator to maintain its freshness for up to 3 days.

Maintain temperature requirements by ensuring the pizza is stored promptly, especially to avoid bacterial growth. Never leave cooked pizza at room temperature for more than two hours.

Container recommendations include using glass or plastic containers with tight-fitting lids to seal in moisture and flavor.

Be aware of signs of spoilage; if the cheese appears discolored or the crust is excessively soft, it’s time to discard the dish.

Reheating instructions can include using the oven or an air fryer to ensure the crust remains crispy, while microwave reheating might lead to a soggy texture.

Follow freezing guidelines by slicing the pizza into portions, wrapping them tightly, and storing them in the freezer for up to two months.

Make Ahead Strategies

To maximize efficiency, prepare the dough and toppings a day in advance. Store them separately in the fridge to keep ingredients fresh until ready to assemble.

Maintain quality impact by ensuring vegetables are chopped and prepped without losing freshness. Store in airtight containers to prevent wilting or contamination.

For assembly tips, layer all ingredients but leave the cheese for the last moment to ensure it melts beautifully without burning during initial bake time.

Reheating guidelines ensure that pizzas can be enjoyed without compromising the overall flavor. Warm the toppings lightly before baking the assembled pizza to revive its flavors.

Fresh element additions before serving can include toppings like fresh cilantro or avocado, which should be added after the pizza is reheated to maintain freshness and vibrancy.

Scaling Instructions

When halving the recipe, adjust ingredient quantities carefully to maintain flavor balance, particularly with spices and cheese.

Doubling or tripling the recipe simplifies meal prep for larger gatherings but requires attention to oven space—bake in batches as needed for perfect results.

Equipment adjustments may be necessary; consider using larger baking sheets or multiple shelves in the oven for larger recipes.

Timing modifications during cooking may also be necessary to account for larger quantities, ensuring that each batch receives equal attention and thorough cooking.

Storage considerations are crucial for larger quantities. Use proper layering and container methods that keep toppings fresh and food safe to enjoy later.

Nutritional Deep Dive

The macro breakdown of Mexican Pizza typically includes protein from the beef, carbohydrates from the crust, and fats from cheese. Balancing these macronutrients aids in maintaining energy levels and satiety.

Micronutrient analysis reveals plenty of vitamins and minerals from fresh toppings like tomatoes and peppers, which boost overall health and contribute to diet diversity.

Health benefits arise through careful ingredient choices—using lean meats and a wealth of vegetables can aid in weight management while promoting heart health.

Dietary considerations should focus on the variety of toppings used; choose whole grain crust or alternative flours for gluten-free adjustments, enhancing fiber content.

Portion analysis can help avoid overindulgence; serving smaller slices allows enjoyment without excess calories, keeping the dish within balanced meal plans.

Weight management tips include being mindful of high-calorie toppings; substitute with veggies or lower-fat cheeses to create a lighter pizza experience.

Dietary Adaptations

For those needing gluten-free options, consider using pre-made gluten-free crusts or creating your own with almond or coconut flour. These alternatives maintain the essence of pizza without compromising dietary needs.

Dairy-free options can be achieved using vegan cheese substitutes or entirely different toppings such as avocado or cashews, ensuring flavors remain rich without dairy protein.

This recipe can easily be made vegan by substituting the ground beef with lentils or black beans, pairing beautifully with fresh vegetables for a hearty dish.

Low-carb adaptations include using cauliflower crust to significantly reduce carbohydrate intake while still enjoying a delicious pizza experience.

Keto variations should focus on cheese-based crusts or flatbreads that maintain low carb counts while satisfying cravings and accommodating dietary restrictions.

For paleo diets, prioritize natural ingredients and avoid processed options. Use veggies as a crust foundation and fresh toppings to create a wholesome pizza.

When adhering to low-FODMAP diets, choose specific low-FODMAP vegetables, such as bell peppers, and adjust portion sizes to avoid digestive discomfort.

Troubleshooting Guide

In addressing texture issues, if the crust ends up chewy, it could be due to over-kneading or underbaking. For best results, follow the recommended baking time and ensure dough is kneaded only until combined.

Flavor balance can become problematic if not enough seasoning is added. Always taste the ground beef before assembling and adjust spices to match personal preferences.

If temperature problems arise, such as the crust burning or toppings not cooking through, check oven accuracy. An oven thermometer may assist in ensuring precision cooking.

Equipment challenges often arise with unfamiliar tools. Familiarize yourself with any equipment used in preparation to mitigate frustration during assembly and cooking.

For ingredient substitutions, if you find yourself without a key ingredient, seek out similar flavor profiles—like swapping beef for a mix of ground turkey and beans for a satisfying outcome.

Addressing timing concerns involves monitoring how long each step takes; utilizing a timer and planning out the stages ahead helps streamline the process.

Recipe Success Stories

Community feedback reveals that Mexican Pizza often becomes a family favorite, with many sharing their own playful twists on the recipe for fun and variety.

Variation successes often shine through creative toppings, giving readers ideas such as pineapple or barbecue sauce that transform their pizza into unique flavor journeys.

Adaptation stories highlight how families have leaned into dietary needs without losing deliciousness, creating vegan versions that retain the Mexican essence that inspired the original.

Reader suggestions frequently include specific spice blends that elevate the taste further, showcasing how home cooks successfully engage with their ingredients.

Photography tips shared among the community emphasize the importance of styling your finished product, attracting attention to the vibrant colors and ingredients that make Mexican Pizza appealing.

Frequently Asked Questions

What can I substitute for ground beef in Mexican Pizza?

You can use ground turkey, chicken, or plant-based meat alternatives like lentils or black beans. These options maintain the protein profile while catering to different dietary needs.

Can I use store-bought pizza dough?

Absolutely! Store-bought pizza dough is a convenient option that saves time. Always check the cooking instructions since different brands may have varying requirements for baking.

How do I ensure a crispy crust?

To achieve a crispy crust, preheat your oven and pizza stone, and par-bake the crust for a few minutes before adding toppings to avoid sogginess.

Can I make Mexican Pizza in advance?

Yes, you can prepare the dough and toppings in advance. Assemble everything right before baking to maintain texture and flavor integrity.

What is the best way to store leftovers?

Store leftovers in an airtight container in the fridge for up to three days. To reheat, use an oven or air fryer to keep the crust crispy.

Are there vegetarian options for this recipe?

Definitely! You can use black beans or roasted vegetables as a filling, and vegan cheese alternatives to cater to vegetarian diets.

How can I add more spice to my Mexican Pizza?

Add sliced jalapeños, a spicy sauce, or increase the amount of chili powder in the seasoning for a heat boost. Always taste and adjust to your preference.

Can I freeze Mexican Pizza?

Yes, you can freeze Mexican Pizza. Slice it into portions, wrap tightly, and store in the freezer for up to two months. Reheat in the oven for best results.

What toppings can I use?

The possibilities are endless! Use any combination of vegetables like peppers, onions, and olives, or try fruits like mango for a sweeter twist.

How can I make this dish more nutritious?

Add more vegetables as toppings, choose a whole-grain crust, and use lean meats to enhance health benefits without sacrificing flavor.

Is this recipe suitable for a crowd?

Yes, this recipe is excellent for serving groups. You can easily scale it up and serve a variety of toppings to appeal to diverse tastes.

Additional Resources

Expand your culinary repertoire with related recipes such as classic guacamole or homemade salsa, which perfectly complement your Mexican Pizza experience.

Delve into technique guides for dough-making or exploring various baking methods, which can ultimately enhance your pizza cooking skills over time.

Gather ingredient information that focuses on essential staples in Mexican cooking, expanding your understanding of flavors and cooking traditions.

Explore equipment recommendations for essential tools, such as pizza stones or cutters, that consistently yield better results in your kitchen.

Discover seasonal variations, using ingredients that are in season, ensuring that your meals are flavorful and vibrant throughout the year.

Join the Conversation

Engage with our community by sharing your experiences on social media. Post pictures of your Mexican Pizza creations and tag us to inspire fellow cooks!

Utilize photography tips to make your dishes shine; natural lighting and simple garnishes can elevate your food images, drawing attention during sharing.

Share your recipe reviews and insights, voicing what worked for you and what adaptations you made to inspire fellow enthusiasts and build community knowledge.

Participate in recipe variations by bringing your unique spin into the mix, sharing tips on what your friends and family loved about your adaptations.

Explore the comments section to discuss and engage with fellow readers, cultivating an interactive platform where everyone can learn and enjoy cooking together.

The Recipe

Mexican Pizza

Serves: 4

Prep Time: 15 mins

Cook Time: 20 mins

Total Time: 35 mins

Kitchen Equipment Needed

  • Baking sheet or pizza stone
  • Mixing bowl
  • Knife and cutting board
  • Rolling pin
  • Measuring cups and spoons

Ingredients

  • 1 pizza crust (store-bought or homemade)
  • 1 pound ground beef
  • 1 packet taco seasoning
  • 1 cup diced tomatoes
  • 1 cup shredded cheddar cheese
  • 1/2 cup sliced jalapeños
  • Fresh cilantro for garnish
  • Optional toppings: sour cream, salsa, avocado

Directions

  1. Preheat oven to 400°F (200°C).
  2. Cook ground beef in a skillet over medium heat until browned. Drain excess grease and stir in taco seasoning according to packet instructions.
  3. Roll out the pizza dough on a floured surface to your desired thickness.
  4. Place the rolled-out dough onto a baking sheet or preheated pizza stone.
  5. Spread a layer of diced tomatoes evenly over the crust.
  6. Add the seasoned ground beef over the tomatoes.
  7. Sprinkle the shredded cheddar cheese and add jalapeños on top.
  8. Bake in the oven for 15-20 minutes, or until the cheese is melted and bubbling, and the crust is golden brown.
  9. Remove from the oven, let cool for a few minutes, and then slice.
  10. Garnish with fresh cilantro and serve with optional toppings.

Recipe Notes

  • Feel free to customize with your favorite toppings!
  • Leftovers can be stored in the refrigerator in an airtight container for up to 3 days.
  • For a vegetarian option, replace beef with black beans and add roasted vegetables.

Ultimate Crockpot Barbecue Ribs Recipe for Easy Flavorful Meals

Crockpot Barbecue Ribs: Ultimate Comfort Food for Family Gatherings

⚖️
Difficulty
Easy

⏲️
Prep Time
15 mins

🕒
Cook Time
6 hours

⏱️
Total Time
6 hours 15 mins

🍽️
Servings
4-6

If you’re craving tender, juicy ribs that fall right off the bone, then this Crockpot Barbecue Ribs recipe is just what you need. Thanks to the slow cooker, achieving that rich, smoky flavor and deliciously sweet barbecue glaze has never been easier or more rewarding. Imagine coming home after a long day to the alluring aroma of marinated ribs, perfectly cooked and ready to devour. This recipe is perfect for family gatherings, game days, or any occasion that calls for mouthwatering comfort food.

The combination of spices and barbecue sauce creates a symphony of flavors, enhancing the delightful richness of the pork. Using the crockpot allows the flavors to intensify while keeping the meat super moist, making this dish a truly effortless indulgence. Each bite melts in your mouth, offering a sweet and tangy punch that will have everyone asking for seconds—and maybe even thirds!

Quick Recipe Highlights

  • Flavor Profile: These ribs are spiced to perfection with a blend of smoky, sweet, and tangy flavors, making them irresistible.
  • Texture: The slow cooking process results in exceptionally tender meat, while the barbecue glaze adds a sticky, flavorful crust.
  • Aroma: Expect your kitchen to fill with a warm, inviting aroma as the ribs cook low and slow, wafting hints of hickory and spices.
  • Visual Appeal: The brilliant caramelization and glossy finish of the barbecue sauce make these ribs visually stunning on any plate.
  • Skill Level Needed: Ideal for cooks of all levels, this recipe requires minimal preparation and supervision, making it incredibly accessible.
  • Special Equipment: All you need is a crockpot to create this delicious meal, keeping your kitchen mess-free.

Recipe Overview

  • Difficulty Level: This Crockpot Barbecue Ribs recipe is easy to follow and perfect for beginner cooks. The slow cooker does most of the work for you.
  • Category: Barbecue ribs fall into the comfort food category, ideal for casual family dinners or festive celebrations.
  • Cuisine: Rooted in Southern cuisine, barbecue ribs are often associated with cooking traditions that celebrate rich flavors and communal eating.
  • Cost: This recipe is budget-friendly, utilizing affordable cuts of pork that deliver big on flavor without breaking the bank.
  • Season: While ribs can be enjoyed year-round, they’re particularly popular in the summer months during barbecues and picnics.
  • Occasion: Perfect for casual gatherings, tailgating, and backyard barbecues, these ribs will steal the show at your next event.

Why You’ll Love This Recipe

The taste and texture of these ribs is simply unbeatable. Juicy and fall-off-the-bone tender, they are slathered in a homemade barbecue sauce that is sweet with a hint of spice, creating the ultimate balance of flavors. The convenience of using a crockpot means you can set it and forget it, allowing you to enjoy your day while the ribs cook to perfection.

From a nutritional standpoint, pork is a great source of protein, essential vitamins, and minerals. Paired with homemade barbecue sauce, you can control the sugars and additives, making this a healthier yet satisfying option. The social aspect of serving BBQ ribs makes them ideal for gatherings, inviting conversations and celebrations around good food.

Cost-effective and delicious, this recipe stands out as an accessible choice for anyone wanting to impress their guests without spending a fortune. You can easily double or triple the recipe without too much added effort, making it a great choice for larger crowds. Serve with sides such as coleslaw or cornbread for a complete meal!

Historical Background and Cultural Significance

The origins of barbecue date back centuries, with roots in various cultures around the world. In the Southern United States, barbecue has evolved into a revered culinary tradition. The slow cooking methods were developed as a way to make tough cuts of meat succulent and flavorful over time.

Barbecue ribs have become a staple dish at cookouts, family gatherings, and summer parties, reflecting the culture of sharing and community that Southern cooking emphasizes. Today, barbecue enthusiasts often experiment with various sauces and spice blends, leading to a dynamic evolution of traditional recipes as they adapt to regional preferences.

As this dish has traveled, various adaptations have occurred, incorporating local flavors and ingredients across the United States. Each region showcases its unique style, from Texas’ beef brisket to Memphis’ dry rubs, but tender, slow-cooked ribs remain a beloved classic in all variations.

Ingredient Deep Dive

Pork Ribs: Pork ribs are the primary ingredient in this dish, characterized by their tender meat and rich flavor. Historically, they have been a favorite cut for barbecuing due to their accessibility and taste. Nutritionally, ribs are high in protein and essential vitamins, but it’s important to enjoy them in moderation due to their fat content. When selecting ribs, look for a pinkish hue and a clean bone appearance. Store in the refrigerator if cooked, or freeze for longer storage. Substitutions can include chicken or beef ribs, but cooking times may vary.

Barbecue Sauce: The barbecue sauce is what brings this dish to life, typically made from a combination of ketchup, vinegar, sugar, and spices. Its cultural significance varies by region, with some preferring a vinegar-based sauce while others enjoy a sweeter, tomato-based sauce. Nutritionally, store-bought versions can contain added sugars and preservatives; consider making your own for more control. Always taste and adjust according to your preference. For storage, keep in a sealed container in the fridge for up to a week, and feel free to substitute with a sugar-free version for a healthier option.

Common Mistakes to Avoid

  • Overcooking: While using a crockpot is forgiving, leaving the ribs in for too long can result in mushy meat. Check them periodically.
  • Not seasoning properly: Failing to adequately season the meat can lead to bland ribs. Don’t skip the spice rub.
  • Using a poor quality sauce: Not all barbecue sauces are created equal. Opt for high-quality ingredients for a better flavor.
  • Skipping the browning step: For enhanced flavor, sear the ribs before placing them in the crockpot.
  • Not letting it rest: Allow the ribs to rest for a few minutes after cooking to let the juices redistribute.
  • Cooking on high: Cooking on high heat can lead to dry ribs. It’s best to cook them on low for optimal tenderness.
  • Ignoring the sauce layering: Apply sauce at different stages, not just at the end, for deeper flavor.
  • Not removing the membrane: Leaving the silver skin on can be tough and chewy; removing it helps the seasonings penetrate.

Essential Techniques

Slow Cooking: Slow cooking is crucial for achieving tender, juicy ribs. The low and slow method allows the connective tissues to break down, creating that desired fall-off-the-bone texture. To master this technique, keep the lid on your crockpot closed during cooking, and avoid peeking too often as it releases valuable heat.

Seasoning: Adequate seasoning makes a huge difference in flavor. A good spice rub should have a balance of sweet, spicy, and smoky elements. To get it right, apply the seasoning liberally and massage it into the meat, allowing it to mingle with the flavors, ideally letting it sit for a few hours or overnight for deeper flavor.

Pro Tips for Perfect Crockpot Barbecue Ribs

  • Choose the right cut: Baby back ribs are lean and tender, while spare ribs have more fat and flavor. Choose according to your preference.
  • Marinate overnight: For best results, marinate the ribs overnight to allow the flavors to penetrate deeply.
  • Use different sauces: Experiment with homemade barbecues, experimental flavors such as honey mustard, or spice things up with a spicy sauce for variety.
  • Serve with fresh sides: Brighten up your meal with a fresh salad or coleslaw to balance the richness of the ribs.
  • Keep it covered: Always keep the lid on the crockpot unless you’re adding ingredients to maintain the heat.
  • Layer the sauce: Apply sauce during the last hour of cooking for a charred, sticky finish—it’s all about that glaze!
  • Let them rest: Resting the ribs allows juices to redistribute, resulting in more tender meat.
  • Pair well: Consider pairing with baked beans or cornbread for a true Southern feast.

Variations and Adaptations

There are numerous regional variations of barbecue ribs. In Kansas City, for instance, they often feature a sweeter sauce, while in North Carolina, vinegar-based sauces take the stage. Seasonal adaptations might include adding fresh herbs in the summertime, or using apple cider during fall for a cider-infused glaze. Dietary modifications can accommodate varying preferences—try using turkey ribs for a leaner option or opt for a plant-based marinade for vegetarian-friendly flavors.

Serving and Presentation Guide

When plating your ribs, consider stacking them for a dramatic presentation. Garnish with fresh herbs like parsley or cilantro to add a pop of color. Classic accompaniments to serve alongside ribs include coleslaw and cornbread for that authentic barbecue experience. Serve warm, but know that leftovers can be delicious as well, making them perfect for meal prep. For portion control, aim for 2-3 ribs per serving, depending on side dishes.

Wine and Beverage Pairing

Pair your delicious crockpot barbecue ribs with a fruity red wine like Zinfandel or Merlot, which complements the richness of the pork. For a non-alcoholic option, try a light tea or sparkling water with a splash of lemon. If you’re in the mood for something a bit stronger, dark beers such as stouts or porters can also provide a delightful contrast to the sweetness of the barbecue sauce.

Storage and Shelf Life

Store leftover ribs in an airtight container in the refrigerator, where they will keep for up to 4 days. For longer storage, consider freezing them—wrap in plastic wrap and foil to prevent freezer burn, and they’ll last for up to 3 months. When reheating, use low heat to ensure they don’t dry out, and you can revive the flavor with a bit of added barbecue sauce.

Make Ahead Strategies

If you’re planning a gathering, you can easily prepare the ribs a day in advance. Simply cook them through in the crockpot, allow them to cool, and then store in the refrigerator. On the day of the event, reheat in the oven while covered with foil to keep them moist. You could also prepare your spice rub ahead of time, storing it in an airtight container for convenience.

Scaling Instructions

This crockpot barbecue ribs recipe can easily be scaled up or down. When halving the recipe, simply adjust the amount of ribs and sauce, ensuring your crockpot is not overcrowded. For larger groups, you can double the ingredients, but ensure that you have a crockpot that can accommodate the extra meat. Just be cautious of the cooking times; thicker layers may require a bit more time for even cooking.

Nutritional Deep Dive

These ribs are not only delicious but also offer nutritional benefits. Each serving is high in protein, providing essential amino acids for muscle growth and repair. They also contain vitamins and minerals such as iron and B vitamins, crucial for energy levels. However, considering cooking methods and sauces is essential, as they can add unnecessary sugars and fats. Enjoy in moderation and balance with plenty of fresh vegetables for a well-rounded meal.

Dietary Adaptations

For those needing dietary modifications, this recipe can be adapted in various ways. Substitute pork ribs with chicken or turkey for a leaner option. To create a vegan version, use plant-based “ribs” made from seitan or jackfruit, adjusting the cooking time accordingly. For gluten-free diets, ensure your barbecue sauce and spices do not contain gluten. If you’re watching your carbs, consider a lower-sugar barbecue sauce or seasoning blend.

Troubleshooting Guide

If your ribs come out tough, they may have cooked at too high a temperature or not long enough. Keep a close eye on cooking times and temperature settings. For flavor balance issues, taste as you go and adjust seasoning or sauces accordingly. Should you face challenges with thick sauce, feel free to add a splash of water or broth to achieve your desired consistency while reheating.

Recipe Success Stories

Many home cooks have shared their successful experiences with these crockpot barbecue ribs. Adaptations like adding personal spice mixes or unique sauces have yielded fantastic results, encouraging creativity among those who try it. People have noted how easy it is to impress dinner guests with the simple yet flavorful ribs, and many take it upon themselves to snap and share photos of their delicious creations on social media!

Frequently Asked Questions

Can I use a different type of meat? Absolutely! While this recipe is designed for pork ribs, feel free to experiment with chicken, beef, or even plant-based proteins for a unique twist.

How do I know when the ribs are done? The ribs are ready when the meat is tender and pulls away easily from the bone. Using a meat thermometer can help, aiming for an internal temperature of at least 190°F for pork.

Can I cook these ribs in an oven? Yes, if you don’t have a crockpot, you can bake them low and slow in an oven at around 225°F, wrapping them in foil to retain moisture.

What’s the best way to reheat leftovers? The best method to reheat ribs is to place them in the oven at a low temperature, adding a touch more barbecue sauce to keep them moist.

Is there a way to make this recipe spicier? Absolutely! You can add cayenne pepper to your seasoning mix or try using a spicier barbecue sauce for an extra kick.

Do I need to remove the membrane from the ribs? Yes, removing the silver skin on the back of the ribs helps the seasoning penetrate and keeps the ribs from being tough.

How can I make a low-sugar version? Opt for sugar-free or homemade barbecue sauce using natural sweeteners like honey or agave in moderation.

Can I cook frozen ribs in the crockpot? It’s recommended to thaw the ribs first for even cooking. However, if you need to, you can cook them from frozen but may need to extend the cooking time.

What should I serve with my ribs? Popular sides include coleslaw, baked beans, and cornbread, which perfectly complement the richness of barbecue ribs.

How long can I store leftovers? Properly stored in an airtight container, leftover ribs can last in the refrigerator for up to 4 days or in the freezer for up to 3 months.

Additional Resources

If you enjoyed this crockpot barbecue ribs recipe, explore other delicious barbecue and summer cookout recipes on our site. Check out guides on perfecting grilling techniques, as well as ingredient information to enhance your culinary adventures. For readers seeking more ideas, browse through seasonal variations that take advantage of fresh produce!

Join the Conversation

We love hearing your feedback! Share your successes and variations with us on social media, and tag us in your photos. Join the community in discussing tips, asking questions, and sharing your own culinary experiences. Your creativity can inspire others to try these delicious crockpot barbecue ribs!

The Recipe

Crockpot Barbecue Ribs

Serves: 4-6

Prep Time: 15 mins

Cook Time: 6 hours

Total Time: 6 hours 15 mins

Kitchen Equipment Needed

  • Crockpot/slow cooker
  • Meat thermometer
  • Mixing bowls
  • Measuring spoons and cups
  • Cooking brush

Ingredients

  • 3-4 pounds pork ribs (baby back or spare)
  • 1 cup barbecue sauce (homemade or store-bought)
  • 2 tablespoons brown sugar
  • 1 tablespoon smoked paprika
  • 1 tablespoon garlic powder
  • 1 tablespoon onion powder
  • 1 teaspoon salt
  • 1 teaspoon black pepper
  • 1/2 teaspoon cayenne pepper (optional)

Directions

  1. Prepare the ribs by removing the silver skin from the back and patting them dry with paper towels.
  2. In a mixing bowl, combine brown sugar, smoked paprika, garlic powder, onion powder, salt, black pepper, and cayenne pepper.
  3. Rub the spice mixture all over the ribs, ensuring an even coating.
  4. Place the ribs in the crockpot, standing them up if possible for best results.
  5. Pour half of the barbecue sauce over the ribs, reserving the rest for later.
  6. Cover and cook on low for 6 hours or until the ribs are tender and the meat pulls away from the bone easily.
  7. During the last hour of cooking, brush additional barbecue sauce on the ribs for added flavor.
  8. Once done, remove the ribs from the crockpot and let them rest for a few minutes before serving.

Recipe Notes

  • If you prefer a smokier flavor, add smoked wood chips to the crockpot.
  • Feel free to customize the barbecue sauce to your liking, adding ingredients such as honey or mustard.
  • To store leftovers, place in an airtight container in the refrigerator for up to 4 days or freeze for longer shelf life.

Deliciously Simple French Onion Soup Recipe for Home Cooks

Easy French Onion Soup: A Cozy Comfort Classic

⚖️
Difficulty
Easy

⏲️
Prep Time
10 mins

🕒
Cook Time
30 mins

⏱️
Total Time
40 mins

🍽️
Servings
4

French onion soup is a delightful dish that warms the heart and soul. This Easy French Onion Soup recipe is all about the rich, sweet flavor of caramelized onions combined with savory broth. Each spoonful envelops your taste buds in a blend of deep, hearty flavors that evoke memories of cozy kitchens and family gatherings. With its golden-brown hue and bubbly, melted cheese atop crusty bread, this soup presents a feast for the senses, making it a perfect choice for chilly evenings.

The allure of French onion soup lies not only in its taste but also in the simplicity of its preparation. Despite its gourmet appearance, this dish requires minimal ingredients and time, making it accessible for both novice cooks and experienced chefs. As the onions slowly caramelize, their natural sugars are released, transforming into a deep, savory base that elevates the broth to new heights. This soup is a true testament to the magic that occurs when a few humble ingredients are combined with patience and love.

Quick Recipe Highlights

  • Flavor Profile: Rich and hearty, with a balance of sweet caramelized onions and savory broth.
  • Texture: A comforting combination of smooth broth, soft onions, and crusty bread topped with gooey cheese.
  • Aroma: A mouthwatering blend of sweet onions slowly cooked to perfection, enhanced by herbs and cheese.
  • Visual Appeal: A golden, bubbling layer of melted cheese contrasting with soft onions in a warm, inviting broth.
  • Skill Level Needed: Perfectly suited for beginners and seasoned cooks alike, it’s easy to master.
  • Special Equipment: A sturdy pot or Dutch oven is recommended for even cooking and caramelization.

Recipe Overview

  • Difficulty Level: Easy, with simple steps focusing on sautéing and simmering, making it approachable for all skill levels.
  • Category: This dish serves as a hearty starter or a light main course, ideal for any meal setting.
  • Cuisine: Rooted in French culinary traditions, this dish showcases the French art of flavor development through cooking techniques.
  • Cost: Reasonably priced, with basic ingredients like onions and broth available year-round.
  • Season: Best enjoyed during fall and winter, when warm and comforting flavors are most craved.
  • Occasion: Perfect for casual gatherings, family dinners, or cozy nights in front of the fire.

Why You’ll Love This Recipe

This Easy French Onion Soup delivers a taste and texture that is comforting and satisfying. The sweet, complex flavor of the caramelized onions combines beautifully with the rich broth, creating an invitation to indulge in warmth and coziness. As you savor each sip, the gooey melted cheese paired with the crusty bread adds an indulgent twist, making it a perfect dish for the cold weather.

Convenience is another reason to love this recipe. With just a handful of ingredients and minimal prep time, you can create a gourmet soup in the comfort of your own kitchen. The simplicity of the process allows you to focus on developing flavor without worrying about complicated steps or techniques. It’s a great choice for busy weeknights when a nourishing meal is desired.

Nutritionally, French onion soup can be beneficial when prepared with wholesome ingredients such as low-sodium broth and moderate cheese. This combination provides essential nutrients while keeping the dish comforting and indulgent. You can easily adapt this recipe to include healthier options while preserving its signature taste.

Serving this soup elevates social occasions, whether it’s a dinner party or a night in with friends. The aroma of the cooking onions fills the home, captivating everyone who enters. Sharing a warm, cheesy bowl creates a sense of togetherness and warmth that’s perfect for any gathering, enhancing your hosting experience.

Finally, this Easy French Onion Soup is cost-effective. Made primarily with onions and broth, it doesn’t rely on expensive ingredients, making it an accessible dish for everyone. Moreover, once you master the basic recipe, you can confidently experiment with variations without breaking the bank.

Historical Background and Cultural Significance

French onion soup has its origins in the culinary traditions of France, dating back to Roman times when onions were considered a staple food due to their availability and nutritional properties. Over the centuries, this dish evolved, gaining popularity among French peasants who appreciated its rich flavors and nourishing qualities. It became a symbol of rustic French cuisine, enjoyed by many across different social classes.

Culturally, French onion soup plays a significant role in French gastronomy. It showcases the French technique of meticulously extracting flavors through slow cooking, emphasizing the importance of each ingredient. The soup transitioned from humble beginnings to a beloved classic often featured in bistros and fine dining establishments, cementing its place in French culinary history.

The evolution of French onion soup is fascinating, with various interpretations emerging across the globe. Originally, the soup was quite simple, but over the years, chefs began to refine the recipe. The addition of ingredients like white wine and Gruyère cheese elevated the dish, capturing the essence of French culinary artistry.

Regional variations of French onion soup exist, showcasing local ingredients and preferences. Some regions, particularly in Provence, highlight the use of herbs and garlic, further enhancing the flavor profile. These adaptations reflect the rich diversity of French cuisine and the evolving tastes of its culinary enthusiasts.

Ingredient Deep Dive

Onions: Central to any French onion soup, onions are celebrated for their sweetness and depth of flavor. They offer numerous health benefits, including high vitamin C content and antioxidants that support immune function. When selecting onions, look for firm, shiny skins and avoid those with soft spots. Store them in a cool, dark place, and they can last for several weeks. For substitutions, yellow onions are commonly used, but sweet varieties like Vidalia can enhance the sweetness.

Broth: The backbone of your soup is the broth, which provides depth and richness. Using high-quality homemade or low-sodium store-bought broth ensures a flavorful result without excessive salt. Broth typically contains protein and various beneficial nutrients, contributing to the overall health impact. When selecting broth, aim for clear, flavorful options, and consider using vegetable broth for a vegetarian variation. Store unused broth in the fridge and use it within a few days, or freeze for future use.

Common Mistakes to Avoid

  • Not caramelizing onions long enough: Patience is key to developing the sweet, rich flavor of onions.
  • Using low-quality broth: A poor-quality broth can lead to a lackluster soup; always choose well-flavored options.
  • Overcrowding the pot: This can prevent even cooking and caramelization of the onions.
  • Skipping salt during the caramelization: Salt helps draw out moisture and encourages onions to brown properly.
  • Not tasting throughout the cooking process: Regularly tasting ensures balanced flavors; adjust seasoning as necessary.
  • Neglecting to layer flavors: Incorporating wine or herbs can dramatically enhance the flavor; don’t skip this step.
  • Not using enough cheese for topping: A generous layer of cheese is essential for traditional French onion soup aesthetics.
  • Serving too hot: Give the soup a moment to cool slightly, allowing flavors to blend perfectly.

Essential Techniques

Caramelizing Onions: Mastering the art of caramelizing onions is pivotal. This technique involves cooking onions slowly over low heat, allowing their natural sugars to break down and develop a deep flavor. Avoid high heat, as this can scorch the onions. Look for a rich golden-brown color as a visual cue that they are perfectly caramelized.

Layering Flavors: Incorporating different ingredients at various stages is crucial for building depth. Start with the onions, then add broth and additional components like wine or herbs. This technique enhances the soup’s complexity and ensures a well-rounded dish. Be mindful of seasoning, adjusting salt and pepper as you go for maximum flavor integration.

Pro Tips for Perfect Easy French Onion Soup

To achieve the best results with your Easy French Onion Soup, consider these pro tips:

1. Opt for a combination of yellow and sweet onions for a balanced flavor profile.
2. Use a heavy-bottomed pot or Dutch oven, as these distribute heat evenly, preventing burning.
3. Allow the onions to cook slowly and be patient; rushing this step leads to less flavorful results.
4. Deglaze the pot with wine after caramelizing the onions, scraping up any browned bits for added depth.
5. Toast the bread slightly before adding it to the soup, which helps it maintain its texture instead of becoming too soggy.
6. Experiment with different cheeses like mozzarella or fontina for unique flavor outcomes.
7. Serve the soup in oven-safe bowls for easy broiling of the cheese on top.
8. Garnish with fresh herbs like thyme or parsley to brighten the dish just before serving.

Variations and Adaptations

French onion soup is versatile, allowing for countless variations. One popular adaptation is the addition of mushrooms, which introduce an earthy flavor and additional texture. Seasonal variations can include root vegetables like carrots or parsnips during the colder months, providing added nutrients and sweetness.

For dietary needs, consider making this soup gluten-free by using gluten-free bread and ensuring your broth is free from any gluten-containing additives. Vegan adaptations are also possible by using vegetable broth and omitting cheese, opting for a vegan cheese alternative or simply enjoying the soup without it.

Texture modifications can enhance the experience; for example, blending part of the soup for a creamier consistency while leaving some onions intact offers a delightful contrast. Presentation alternatives might involve serving the soup in elegant crocks topped with fresh herbs, elevating the visual appeal.

Serving and Presentation Guide

Presentation elevates your French onion soup experience. Start by ladling the soup into shallow, oven-safe bowls for an inviting serve. The traditional topping of toasted bread adds a rustic charm, and a generous amount of melted cheese creates a deliciously gooey finish.

For garnishing, consider adding fresh thyme sprigs or chives to introduce a pop of color and flavor. Pair your soup with a simple green salad or a classic French baguette for a complete meal. When serving, ensure the soup is hot but not scalding to enjoy the flavors fully without discomfort.

Portion control is key; typically, one bowl per person is sufficient, especially if served with sides. This allows guests to savor the soup without feeling overwhelmed, following a satisfying meal.

Wine and Beverage Pairing

Selecting the right beverage can enhance your Easy French Onion Soup experience. A traditional pairing includes a crisp white wine, such as Sauvignon Blanc or a lightly oaked Chardonnay, which complements the richness of the cheese and balances the soup’s savory notes.

For non-alcoholic options, consider serving sparkling water infused with citrus fruits like lemon or lime, offering refreshing contrast. If you’re a coffee or tea enthusiast, a light roasted tea can also align well with the soup’s flavors without overpowering them.

When pairing wines, remember to serve at the appropriate temperature; white wines are best enjoyed chilled, while red wines should be slightly cooler than room temperature to enhance their flavors without affecting the soup’s warmth.

Storage and Shelf Life

Proper storage is essential for maintaining the quality of your Easy French Onion Soup. Once cooled, transfer any leftovers into airtight containers, storing in the refrigerator for up to three days. Ensure that the soup is completely cooled before sealing to prevent condensation.

For long-term storage, consider freezing the soup without bread or cheese. Portion it into freezer-safe containers or bags, where it can be kept for up to three months. When reheating, allow for gradual warming in a saucepan or microwave to preserve the flavors and textures.

It’s important to look for signs of spoilage before consumption. If there are off odors or visible mold, discard the soup. When reheating, stir the soup to ensure even heating and prevent scorching.

Make Ahead Strategies

If you’re planning to prepare Easy French Onion Soup ahead of time, focus on preparation methods that enhance flavor without compromising quality. You can caramelize onions a day in advance; simply cool and store them in the refrigerator until you’re ready to make the soup.

Consider making the broth from scratch or using homemade stock for superior flavor, which can also be done ahead of time. This time-saving strategy elevates the dish effortlessly.

When it comes time to serve, simply combine the caramelized onions with broth, reheat, and proceed with serving. If using cheese, sprinkle it on right before broiling to ensure the best texture. For fresh additions, consider tossing in fresh herbs right before serving for maximum impact.

Scaling Instructions

Scaling your Easy French Onion Soup recipe is straightforward and allows you to adjust the servings based on your needs. For halving the recipe, simply divide all ingredients by two and cook as usual, ensuring you still achieve the desired flavor profile.

If doubling or tripling the recipe, consider the size of your cooking vessel, as this will influence the cooking time and the caramelization process of the onions. Using multiple pots can be beneficial to control cooking times effectively without skimping on flavor development.

Check the seasoning as you scale up; larger quantities can sometimes dilute flavors, so tasting during the cooking process is essential. Adjust accordingly to maintain a flavorful result in larger servings while considering additional storage options if needed.

Nutritional Deep Dive

When analyzing the nutrition of Easy French Onion Soup, consider its macro and micronutrient profile. Each serving typically provides a balanced amount of carbohydrates from the bread and natural sugars from onions, while broth adds protein and essential vitamins.

The presence of onions, rich in antioxidants and anti-inflammatory properties, offers substantial health benefits. The nutritional density can increase with the addition of high-quality cheeses, contributing calcium and protein.

Dietary considerations are important; adjust the recipe based on your needs, particularly if you’re focusing on weight management or increased collagen intake. By controlling portion sizes and carefully selecting ingredients, you can enjoy this classic dish healthfully.

Dietary Adaptations

Easy French Onion Soup can be tailored to accommodate various dietary needs. For a gluten-free version, opt for gluten-free bread, ensuring that all other ingredients are also free of gluten additives.

If you’re looking for a dairy-free option, utilize coconut or cashew-based cheeses, or simply enjoy the flavor-packed broth without any cheese. Vegan adaptations can either skip the cheese altogether or incorporate plant-based substitutes for that classic cheesy topping.

Low-carb variations may include using cauliflower bread or skipping the bread altogether while enhancing the broth with additional nutty flavors from nutritional yeast, which adds a cheesy, umami taste without the carbs.

Troubleshooting Guide

If you encounter challenges while making Easy French Onion Soup, here are some common issues and their solutions:

– **Texture Issues**: If your soup is too thin, allow it to simmer longer to reduce and thicken. For excess thickness, add more broth until the desired consistency is achieved.
– **Flavor Balance**: Adjusting the flavors is essential; if the soup is too salty, adding more water or low-sodium broth can soften the saltiness without sacrificing depth.
– **Temperature Problems**: When reheating, avoid scorching by cooking on low heat, stirring frequently. Always taste before serving to maintain flavor integrity.
– **Equipment Challenges**: If you’re working with a slow-cooking vessel, be prepared for longer cooking times and ensure you monitor the onions to avoid burning.
– **Ingredient Substitutions**: Using alternatives like vegetable broth instead of chicken broth may require additional seasoning adjustments to achieve a similar flavor.
– **Timing Concerns**: Always allow ample time for caramelizing onions; rushing this process can lead to a less flavorful outcome that detracts from the soup’s quality.

Recipe Success Stories

Community feedback on Easy French Onion Soup emphasizes its comforting flavors and straightforward preparation. Many home cooks have raved about their first-time success in mastering the caramelization technique, leading to beautiful, rich soup worthy of serving at dinner parties.

Readers have shared delightful variations, incorporating seasonal vegetables or using different types of cheese based on household dietary preferences, demonstrating the recipe’s versatility.

Adaptation stories abound, showcasing how cooks have embraced the traditional recipe while developing personalized versions that suit their tastes, like the addition of mushrooms or experimenting with spice.

Photography tips highlight the importance of capturing the texture of the soup with close-up shots, especially of the cheese bubbling beautifully over the crusty bread.

Frequently Asked Questions

1. Can I make this soup ahead of time? Yes, you can prepare the soup ahead of time by caramelizing the onions in advance. Store them in the refrigerator, and then combine with broth when you’re ready to enjoy the soup.

2. What type of cheese should I use? Gruyère cheese is traditional, but you can also use Swiss or mozzarella for a different flavor. The key is to choose a cheese that melts well.

3. Can I freeze French onion soup? Absolutely! Freeze without the bread and cheese for best results. Store in airtight containers for up to three months.

4. How do I know if my onions are caramelized? They should be a rich golden-brown color and have a sweet aroma. This process typically takes about 25-30 minutes on low heat.

5. Can I add other vegetables? Yes, adding other vegetables like mushrooms or even carrots can enhance the flavor and texture of your soup.

6. Is this soup gluten-free? You can make it gluten-free by using gluten-free bread and ensuring all other ingredients are free from gluten-containing additives.

7. What can I serve with French onion soup? A simple green salad or crusty French baguette complements the soup beautifully without overwhelming the flavors.

8. How can I make it more hearty? To make the soup heartier, consider adding shredded chicken or cooked lentils for additional protein and texture.

9. How do I reheat leftovers? Reheat on the stovetop over low heat, stirring occasionally, until warmed through to maintain flavors effectively.

10. Can I make a vegetarian version? Yes, just use vegetable broth and skip any meat products to maintain the soup’s depth of flavor.

Additional Resources

For those interested in broadening their culinary skills, consider exploring related recipes like creamy potato leek soup or hearty vegetable stew. These dishes share similar base techniques and flavor profiles, allowing for further practice and enjoyment.

Technique guides for caramelizing and sautéing can help enhance your cooking skills, ensuring you achieve the right flavors in future recipes.

It’s also useful to delve into ingredient information for onions and sweet wines that pair well with the soup. Understanding seasonal variations can inspire fresh takes on the classic soup, keeping your meals exciting year-round.

Join the Conversation

Engage with fellow food enthusiasts on social media by sharing your Easy French Onion Soup successes. Photography of your finished dish can inspire others and spark discussions on favorite adaptations.

Reader suggestions are welcome, encouraging everyone to share their unique twists on the traditional recipe. Invite community engagement by encouraging comments and stories about personal experiences with the dish.

For more recipe variations, connect with fellow home cooks and swap tips on how to enhance the flavors while maintaining the heart of this beloved classic.

The Recipe

Easy French Onion Soup

Serves: 4

Prep Time: 10 mins

Cook Time: 30 mins

Total Time: 40 mins

Kitchen Equipment Needed

  • Heavy-bottomed pot or Dutch oven
  • Wooden spoon
  • Oven-safe bowls for serving

Ingredients

  • 4 large onions, thinly sliced
  • 4 tablespoons unsalted butter
  • 1 tablespoon olive oil
  • 6 cups beef or vegetable broth
  • 1 cup dry white wine
  • Salt and pepper, to taste
  • 8 slices of crusty French bread
  • 2 cups shredded Gruyère cheese

Directions

  1. In a heavy-bottomed pot, melt the butter and olive oil over medium heat.
  2. Add the onions and salt; cook, stirring occasionally, for about 25 minutes until caramelized.
  3. Stir in the wine, scraping any browned bits from the pot, and cook until reduced by half.
  4. Add the broth and bring to a simmer. Adjust seasoning with salt and pepper.
  5. Preheat your oven to broil. Ladle soup into bowls and top each with a slice of bread and cheese.
  6. Broil in the oven until the cheese is bubbly and golden brown.
  7. Carefully remove from the oven and serve hot, garnished with fresh herbs if desired.

Recipe Notes

  • For a vegetarian option, substitute the beef broth with vegetable broth.
  • You can prepare the broth from scratch for richer flavor.
  • Feel free to experiment with different types of cheese for unique flavor profiles.