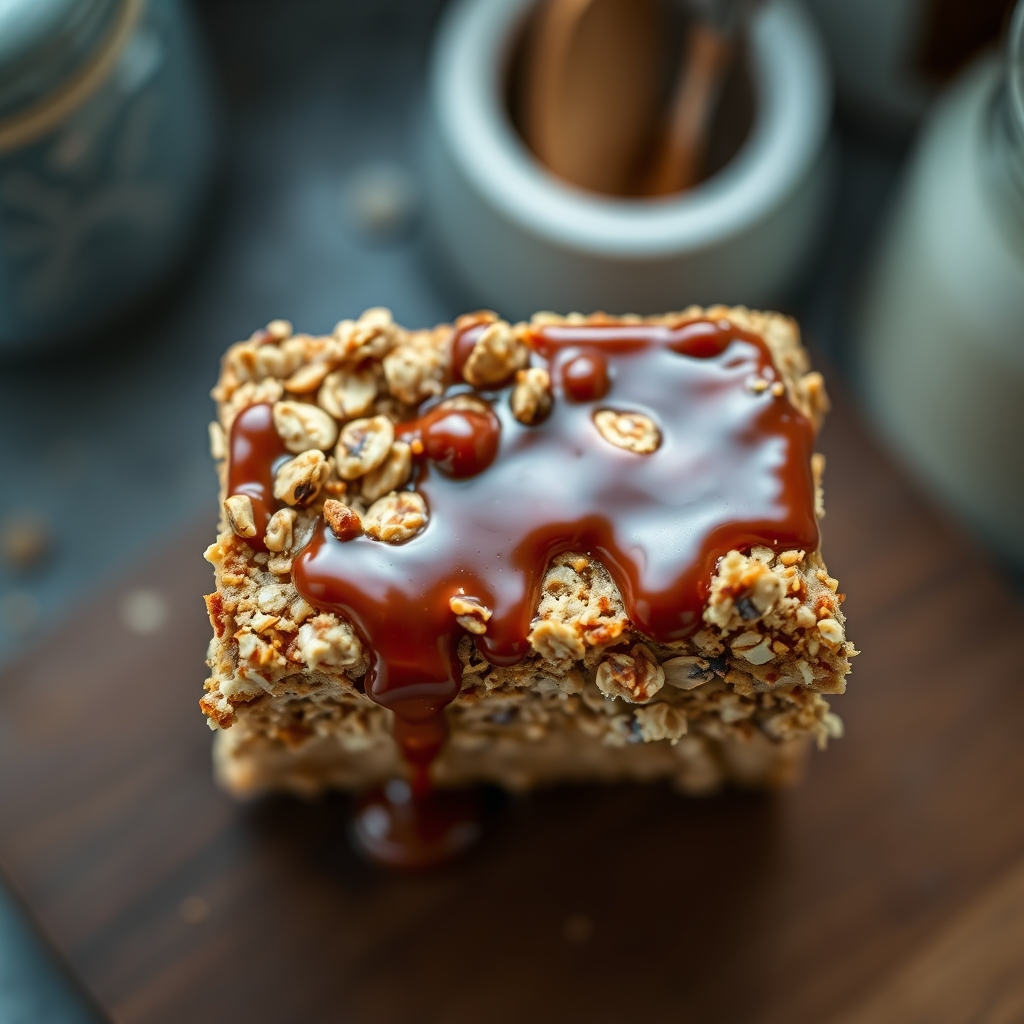
Starbucks Oat Bars

Starbucks Oat Bars

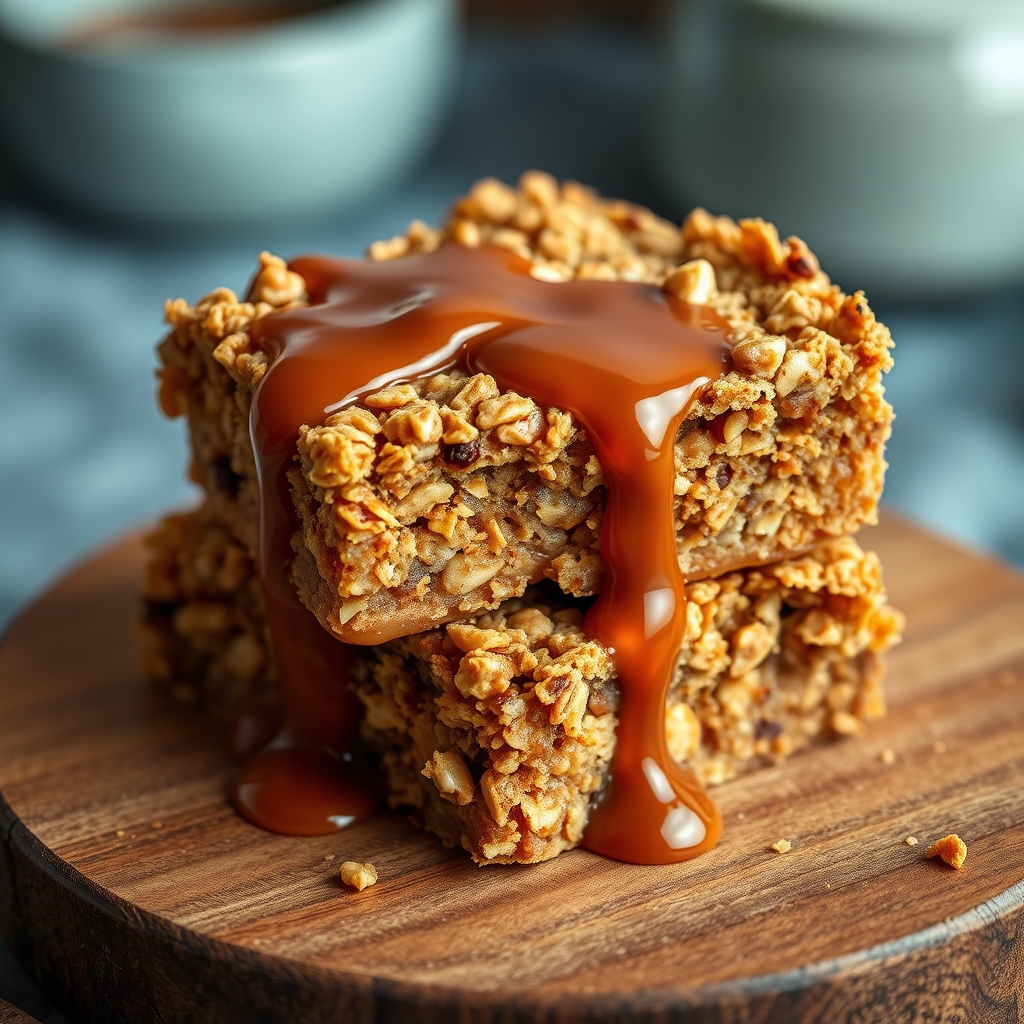
There’s something undeniably comforting about biting into a chewy, wholesome oat bar—especially when it tastes just like the ones from Starbucks. Whether you’re grabbing a quick breakfast, packing a lunchbox treat, or enjoying an afternoon snack with coffee, these homemade Starbucks oat bars are a game-changer. They’re packed with hearty oats, sweetened naturally, and customizable to your taste. Best of all, they come together in just one bowl with minimal effort. Let’s dive into why this recipe deserves a permanent spot in your baking rotation.

Why You’ll Love This Recipe

First, these oat bars are incredibly easy to make. No fancy equipment or complicated steps—just mix, press, and bake. Second, they’re versatile. Swap in your favorite nuts, dried fruits, or even chocolate chips to make them your own. Third, they’re perfect for meal prep. Bake a batch on Sunday, and you’ve got breakfast or snacks ready for the week. Fourth, they’re healthier than store-bought versions, with no artificial additives and control over sweetness. And finally, they taste just like the Starbucks classic, but fresher and more budget-friendly.

Ingredients Breakdown

Understanding the role of each ingredient helps you nail the texture and flavor of these oat bars:

  • Rolled oats: The star of the show, providing chewiness and structure. Avoid quick oats—they’ll make the bars too soft.
  • Brown sugar: Adds depth and caramel-like sweetness. You can reduce the amount if you prefer a less sweet bar.
  • Butter: Gives richness and helps bind the ingredients. For a dairy-free version, coconut oil works well.
  • Honey or maple syrup: Enhances moisture and acts as a natural binder. Maple syrup adds a lovely earthy note.
  • Vanilla extract: Elevates the overall flavor with warmth and aroma.
  • Cinnamon: A subtle spice that complements the oats beautifully.
  • Salt: Balances the sweetness and intensifies all the flavors.
  • Dried fruit or nuts: Optional but highly recommended for texture and flavor. Think cranberries, raisins, or chopped almonds.

How to Make Starbucks Oat Bars

Follow these simple steps for perfect oat bars every time:

  1. Preheat your oven to 350°F (175°C) and line an 8×8-inch baking pan with parchment paper, leaving an overhang for easy removal.
  2. Mix the dry ingredients: In a large bowl, combine 2 cups rolled oats, 1/2 cup brown sugar, 1/2 teaspoon cinnamon, and 1/4 teaspoon salt.
  3. Add the wet ingredients: Melt 1/2 cup butter and stir in 1/4 cup honey and 1 teaspoon vanilla extract. Pour this over the dry ingredients and mix until everything is evenly coated.
  4. Fold in extras: If using, add 1/2 cup dried fruit or nuts and gently incorporate.
  5. Press into the pan: Transfer the mixture to the prepared pan and press firmly with a spatula or your hands to create an even, compact layer.
  6. Bake for 20–25 minutes, or until the edges turn golden brown. The center may still look slightly soft—it will firm up as it cools.
  7. Cool completely before slicing into bars. This is crucial for clean cuts!

Pro Tips for the Best Results

  • For extra-chewy bars, lightly toast the oats in a dry skillet before mixing. This deepens their nutty flavor.
  • Press the mixture very firmly into the pan to prevent crumbly bars.
  • Let the bars cool for at least 1 hour before cutting. Rushing this step leads to messy edges.
  • If adding chocolate chips, sprinkle them on top after baking and let them melt slightly for a bakery-style finish.
  • For a gluten-free version, use certified gluten-free oats.

Variations and Substitutions

Customize these oat bars to suit your cravings or dietary needs:

  • Chocolate chip oat bars: Stir in 1/3 cup dark or semi-sweet chocolate chips.
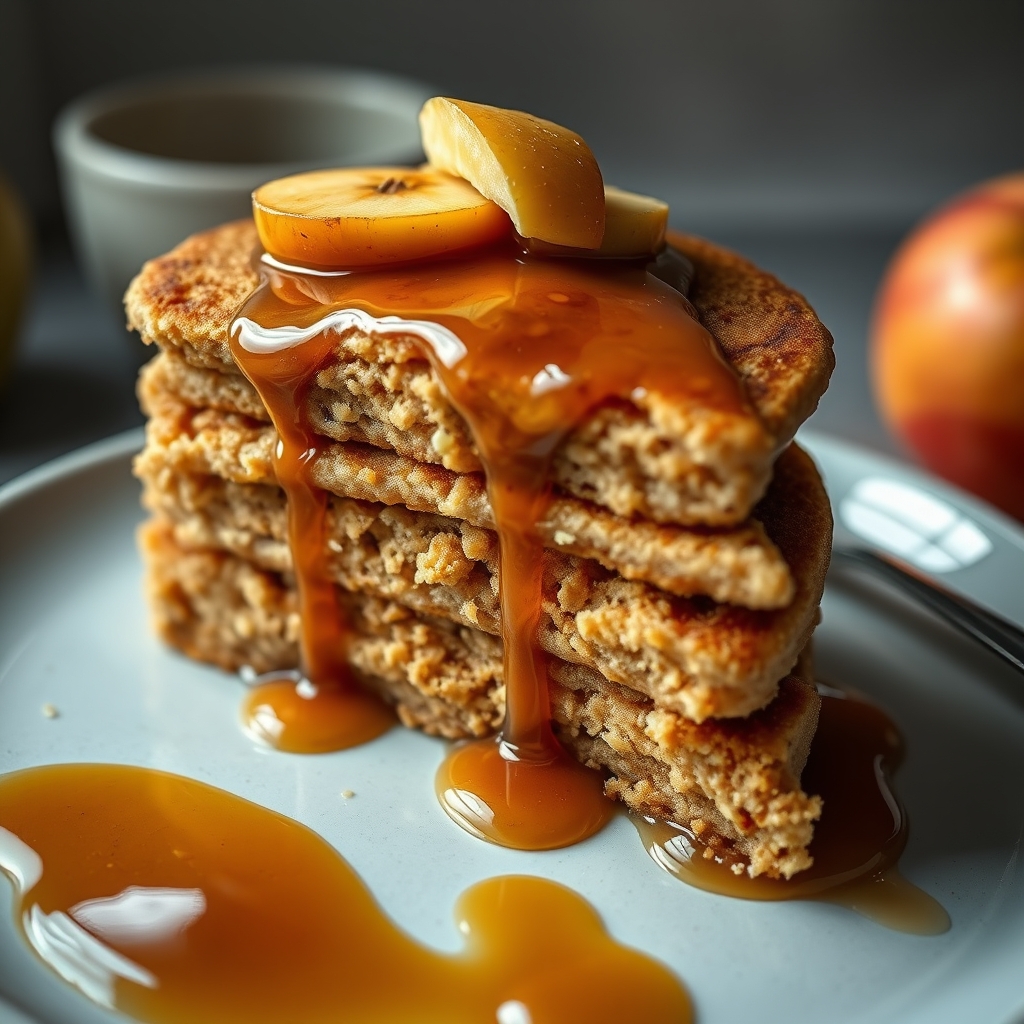
  • Apple cinnamon: Add 1/2 cup finely diced dried apples and an extra 1/2 teaspoon cinnamon.
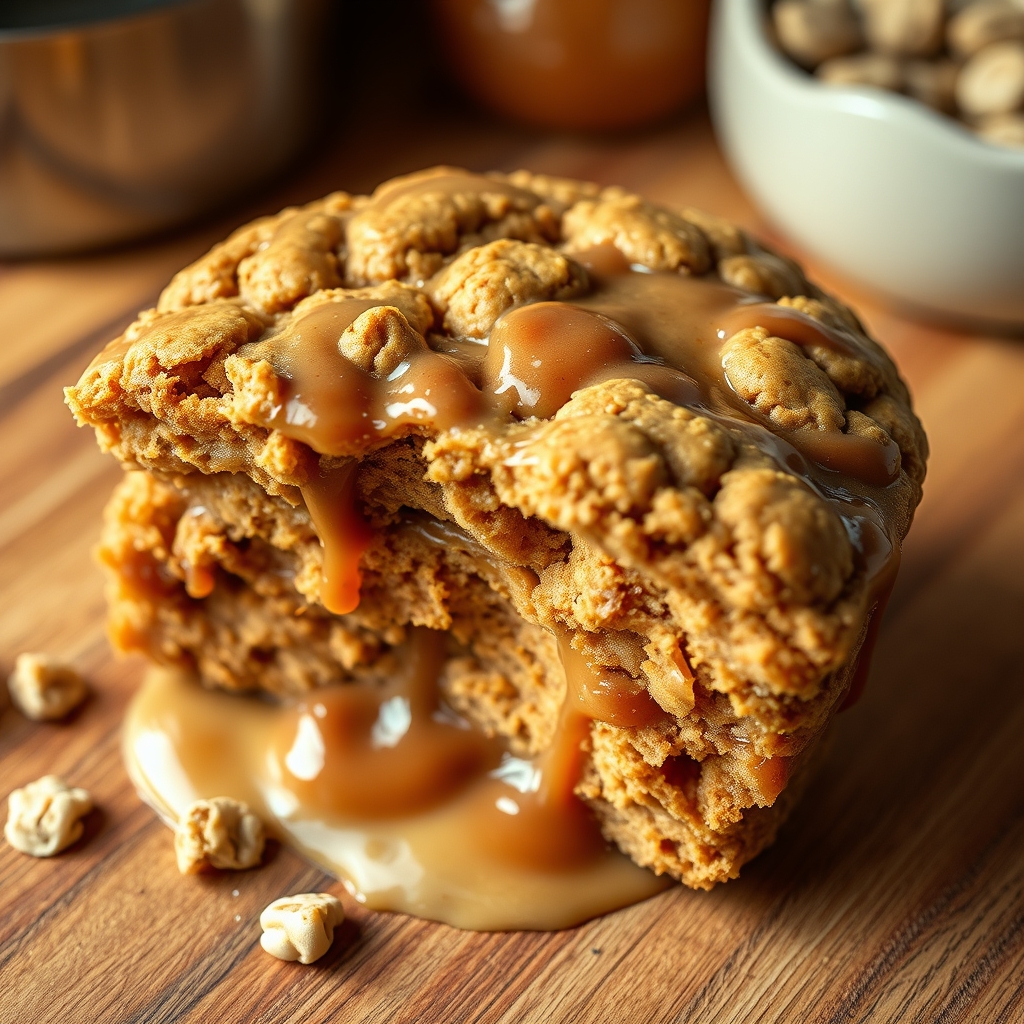
  • Peanut butter: Replace 2 tablespoons of butter with creamy peanut butter for a nutty twist.
  • Vegan option: Use coconut oil instead of butter and maple syrup instead of honey.
  • Protein-packed: Add 2 tablespoons of chia seeds or flaxseeds for an extra nutrient boost.

What to Serve With It

These oat bars are fantastic on their own, but here are a few pairing ideas:

  • A hot cup of coffee or chai tea for a cozy morning ritual.
  • Fresh fruit like sliced bananas or berries for a balanced breakfast.
  • A dollop of Greek yogurt for added protein and creaminess.
  • Drizzle with almond butter or a light honey glaze for extra indulgence.

How to Store and Reheat

To keep your oat bars fresh:

  • Room temperature: Store in an airtight container for up to 5 days.
  • Refrigerator: Extend freshness to 1 week by refrigerating them.
  • Freezer: Wrap individually in plastic wrap and freeze for up to 3 months. Thaw at room temperature or warm briefly in the microwave.
  • Reheating: For a just-baked feel, warm in a 300°F oven for 5 minutes or microwave for 10–15 seconds.

Frequently Asked Questions (FAQs)

Can I use quick oats instead of rolled oats?
Quick oats will work, but the texture will be softer and less chewy. Rolled oats provide the best structure.

Why did my bars turn out crumbly?
This usually happens if the mixture wasn’t pressed firmly enough into the pan or if the bars were cut before fully cooling.

Can I reduce the sugar?
Yes, you can cut the brown sugar to 1/4 cup, but the bars will be less sweet and slightly drier.

Are these oat bars gluten-free?
They can be if you use certified gluten-free oats and ensure all other ingredients are gluten-free.

Can I double the recipe?
Absolutely! Use a 9×13-inch pan and increase the baking time by 5–10 minutes.

Final Thoughts

Homemade Starbucks oat bars are proof that simple ingredients can create something truly special. Whether you’re a busy parent, a student needing a study snack, or just someone who loves a good oat bar, this recipe is a keeper. The aroma of cinnamon and toasted oats wafting through your kitchen is just an added bonus. Give them a try, play with flavors, and make them your own. Happy baking!

Print
clock clock iconcutlery cutlery iconflag flag iconfolder folder iconinstagram instagram iconpinterest pinterest iconfacebook facebook iconprint print iconsquares squares iconheart heart iconheart solid heart solid icon

Starbucks-Inspired Oat Bars

  • Author: Home Baker Extraordinaire

Description

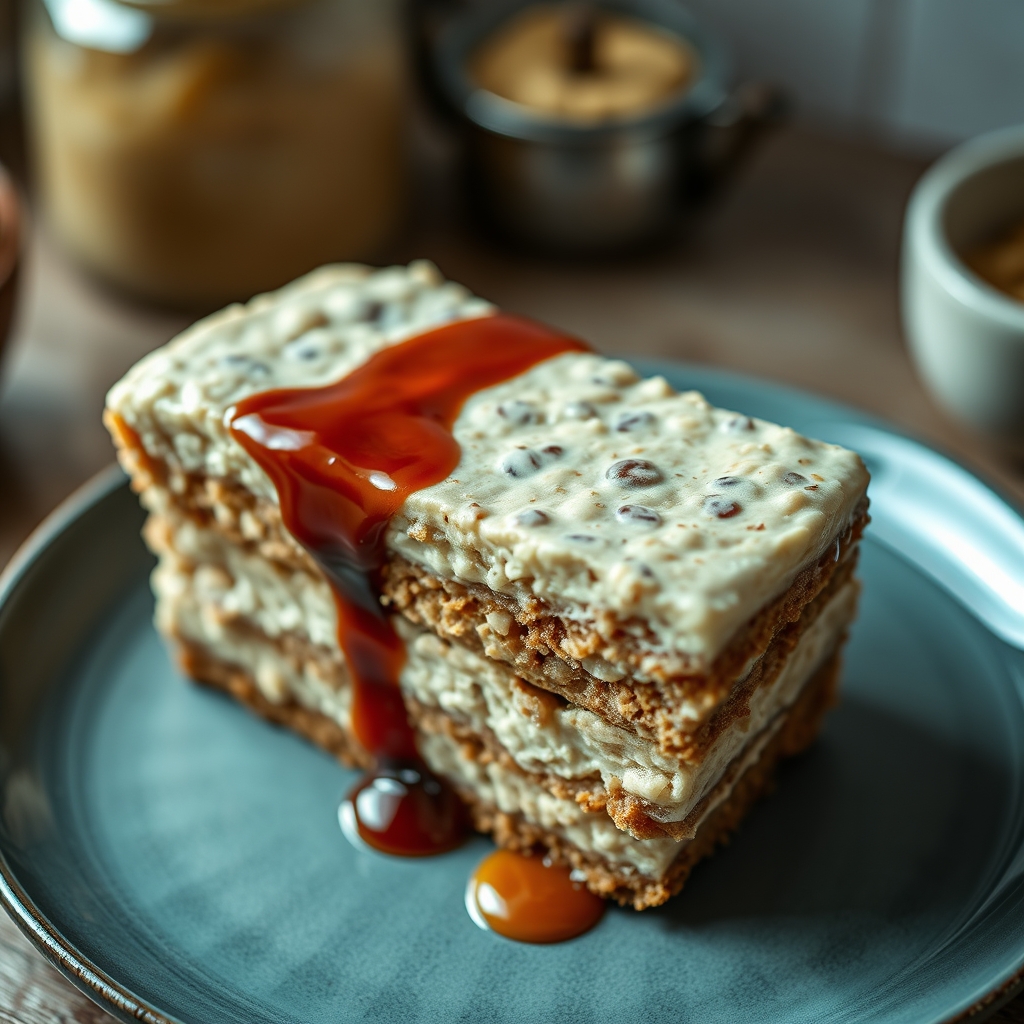
These chewy, wholesome oat bars mimic the famous Starbucks version with a perfect balance of sweetness and texture. Packed with oats, dried fruits, and a hint of cinnamon, they make for a satisfying breakfast or snack.


Ingredients

Scale

For the Crust:

  • For the base:
  • 2 cups old-fashioned rolled oats
  • 1 cup all-purpose flour
  • 1/2 cup brown sugar, packed
  • 1/2 teaspoon baking soda
  • 1/2 teaspoon salt
  • 1 teaspoon ground cinnamon
  • 1/2 cup unsalted butter, melted
  • 1/4 cup honey
  • 1 teaspoon vanilla extract
  • For the filling:
  • 1 cup dried cranberries or raisins
  • 1/2 cup chopped dried apricots
  • 1/4 cup orange juice
  • 1 tablespoon honey
  • 1/2 teaspoon ground cinnamon

Instructions

1. Prepare the Crust:

  1. Preheat oven to 350°F (175°C). Line an 8×8-inch baking pan with parchment paper, leaving overhang for easy removal.
  2. Make the filling: In a small saucepan, combine dried cranberries, apricots, orange juice, honey, and cinnamon. Cook over low heat for 5-7 minutes until fruits soften and liquid is absorbed. Set aside.
  3. In a large bowl, whisk together oats, flour, brown sugar, baking soda, salt, and cinnamon.
  4. Add melted butter, honey, and vanilla extract to the dry ingredients. Mix until crumbly but cohesive.
  5. Press 2/3 of the oat mixture firmly into the prepared pan to form the base.
  6. Spread the fruit filling evenly over the base.
  7. Sprinkle remaining oat mixture over the top and press lightly.
  8. Bake for 25-30 minutes until golden brown. Cool completely in pan before cutting into bars.

Notes

For a gluten-free version, substitute gluten-free flour. Bars keep well in an airtight container for up to 5 days or freeze for longer storage. Warm slightly before serving for extra softness.

Easy & Healthy Overnight Oats!

Easy & Healthy Overnight Oats!

If you’re looking for a breakfast that’s effortless, nutritious, and endlessly customizable, overnight oats are your new best friend. This no-cook method lets you prep a wholesome meal the night before, so you wake up to a creamy, satisfying bowl of goodness. Whether you’re a busy parent, a meal-prep enthusiast, or just someone who loves a delicious and healthy breakfast, this recipe is a game-changer. Let’s dive into why overnight oats deserve a permanent spot in your morning routine.

Why You’ll Love This Recipe

Overnight oats are more than just a trend—they’re a lifestyle upgrade. Here’s why this recipe will become a staple in your kitchen:

  • Effortless Preparation: No cooking required! Just mix the ingredients, let them sit overnight, and breakfast is ready when you are.
  • Nutrient-Packed: Loaded with fiber, protein, and healthy fats, these oats keep you full and energized all morning.
  • Endless Customization: From fruity to chocolatey, you can tweak the flavors to match your cravings.
  • Perfect for Meal Prep: Make multiple servings at once for a grab-and-go breakfast all week.
  • Kid-Friendly: A great way to sneak in superfoods like chia seeds or nut butter without complaints.

Ingredients Breakdown

Understanding each ingredient’s role helps you master the perfect texture and flavor. Here’s what goes into the base recipe:

  • Rolled Oats: The star of the show. Rolled oats soften perfectly overnight without turning mushy.
  • Milk: Use dairy or plant-based milk for creaminess. Almond, oat, or coconut milk work beautifully.
  • Greek Yogurt: Adds protein and a luscious, thick texture. Vegan yogurt can be substituted.
  • Chia Seeds: These tiny powerhouses thicken the mixture and provide omega-3s.
  • Sweetener: Maple syrup, honey, or agave add just the right touch of sweetness.
  • Vanilla Extract: A splash enhances all the flavors.

How to Make Easy & Healthy Overnight Oats!

Follow these simple steps for flawless overnight oats every time:

  1. Combine Dry Ingredients: In a mason jar or airtight container, mix ½ cup rolled oats and 1 tablespoon chia seeds.
  2. Add Wet Ingredients: Pour in ½ cup milk, ¼ cup Greek yogurt, 1 teaspoon vanilla extract, and 1 tablespoon sweetener.
  3. Stir Well: Seal the jar and shake or stir until everything is fully incorporated.
  4. Refrigerate: Let it sit in the fridge for at least 4 hours, but ideally overnight.
  5. Top and Enjoy: In the morning, give it a stir, add your favorite toppings, and dig in!

Tip: If the mixture seems too thick in the morning, stir in a splash of milk to loosen it up.

Pro Tips for the Best Results

Take your overnight oats from good to exceptional with these expert tricks:

  • Use a 1:1 ratio of oats to liquid for the perfect consistency.
  • Let the oats sit for at least 6 hours for maximum creaminess.
  • Layer toppings like fresh fruit or nuts in the morning to maintain crunch.
  • Add a pinch of salt to balance the sweetness.
  • Experiment with spices like cinnamon or nutmeg for extra warmth.

Variations and Substitutions

One of the best things about overnight oats is their versatility. Try these delicious twists:

  • Berry Bliss: Stir in mixed berries and a dollop of almond butter.
  • Tropical Vibes: Use coconut milk and top with mango, pineapple, and shredded coconut.
  • Chocolate Peanut Butter: Mix in cocoa powder and swirl with peanut butter.
  • Pumpkin Spice: Add pumpkin puree and pumpkin pie spice for a fall-inspired treat.
  • Savory Option: Skip the sweetener and top with avocado, cherry tomatoes, and a poached egg.

Dietary Swaps: For gluten-free, use certified gluten-free oats. For vegan, swap honey for maple syrup and use plant-based yogurt.

What to Serve With It

While overnight oats are satisfying on their own, pairing them with the right sides can make breakfast even more delightful:

  • A cup of hot coffee or herbal tea complements the creamy texture.
  • Freshly squeezed orange juice adds a bright contrast.
  • A side of scrambled eggs or turkey bacon balances the meal with extra protein.
  • For a brunch spread, serve alongside whole-grain toast and almond butter.

How to Store and Reheat

Overnight oats are a meal-prep dream. Here’s how to keep them fresh:

  • Refrigeration: Store in an airtight container for up to 5 days.
  • Freezing: Portion into freezer-safe jars for up to 3 months. Thaw overnight in the fridge before eating.
  • Reheating: Enjoy cold, or warm in the microwave for 30-60 seconds if preferred.

Note: If using fresh fruit, add it just before serving to prevent sogginess.

Frequently Asked Questions (FAQs)

Can I use quick oats instead of rolled oats?
Quick oats will work but may result in a softer texture. Rolled oats provide the best consistency.

Why are my overnight oats too runny?
This usually means too much liquid was added. Adjust the ratio next time or add extra chia seeds to thicken.

Can I make overnight oats without yogurt?
Absolutely! Just increase the milk slightly and consider adding mashed banana for creaminess.

Are overnight oats good for weight loss?
Yes! They’re high in fiber and protein, which help control hunger and prevent overeating.

Can I meal prep a week’s worth?
Yes, but for the best texture, aim to consume within 5 days.

Final Thoughts

Overnight oats are the ultimate breakfast hack—simple, nutritious, and endlessly adaptable. Whether you’re rushing out the door or savoring a slow morning, this recipe delivers deliciousness with minimal effort. Once you master the base, the flavor possibilities are limitless. So grab your favorite jar, mix up a batch tonight, and wake up to a breakfast that makes your mornings brighter. Happy soaking!

Print
clock clock iconcutlery cutlery iconflag flag iconfolder folder iconinstagram instagram iconpinterest pinterest iconfacebook facebook iconprint print iconsquares squares iconheart heart iconheart solid heart solid icon

Easy & Healthy Overnight Oats!

  • Author: The Healthy Eats Team

Description

A simple, no-cook breakfast that’s packed with fiber and protein. Customize with your favorite toppings for a delicious morning meal!


Ingredients

Scale

For the Crust:

  • For the base:
  • 1/2 cup rolled oats
  • 1/2 cup milk (dairy or plant-based)
  • 1/4 cup Greek yogurt
  • 1 tbsp chia seeds
  • 1 tbsp honey or maple syrup
  • For toppings (optional):
  • Fresh berries
  • Sliced banana
  • Almond butter
  • Chopped nuts
  • Dark chocolate chips

Instructions

1. Prepare the Crust:

  1. 1. In a mason jar or airtight container, combine oats, milk, yogurt, chia seeds, and sweetener.
  2. 2. Stir well until fully mixed. Seal the container.
  3. 3. Refrigerate overnight (or at least 4 hours).
  4. 4. In the morning, stir and add desired toppings.
  5. 5. Enjoy cold or microwave for 30 seconds if preferred warm.

Notes

• Keeps for up to 3 days in the fridge. • For vegan version, use plant-based yogurt and maple syrup. • Add protein powder for extra nutrition.

Healthy Oatmeal Apple Pancakes (Flourless & Easy) – Her Highness, Hungry Me

Healthy Oatmeal Apple Pancakes (Flourless & Easy) – Her Highness, Hungry Me

There’s something magical about waking up to the aroma of warm, spiced apple pancakes sizzling on the griddle. These Healthy Oatmeal Apple Pancakes are not just a breakfast treat—they’re a nourishing way to start your day without compromising on flavor or texture. Whether you’re looking for a flourless pancake recipe, a gluten-free alternative, or simply a wholesome twist on a classic, this recipe delivers. Inspired by the comforting flavors of autumn but perfect year-round, these pancakes are tender, naturally sweet, and packed with fiber. Let’s dive into why this recipe deserves a spot in your breakfast rotation.

Why You’ll Love This Recipe

First, these pancakes are flourless, making them a fantastic option for those avoiding refined grains or gluten. The oats provide a hearty, satisfying texture while keeping the recipe light and fluffy.

Second, they’re naturally sweetened with grated apple and a touch of maple syrup or honey, so you can indulge without the sugar crash. The apple adds moisture and a subtle fruity sweetness that pairs beautifully with warm spices like cinnamon and nutmeg.

Third, this recipe is incredibly easy to whip up—no fancy equipment needed. Just a blender or food processor to grind the oats, and you’re minutes away from batter-ready goodness.

Fourth, they’re versatile. Serve them stacked high with yogurt and nuts for a protein-packed breakfast, or drizzle with nut butter for an extra-decadent treat. Kids and adults alike will adore them.

Finally, they’re meal-prep friendly. Make a batch ahead and reheat throughout the week for a quick, nutritious breakfast that feels indulgent.

Ingredients Breakdown

Let’s take a closer look at the key ingredients that make these oatmeal apple pancakes so special:

Rolled oats: The base of these flourless pancakes, oats provide fiber, a mild nutty flavor, and a tender crumb. Be sure to use gluten-free oats if needed.

Apple: Grated apple adds natural sweetness and moisture. Opt for a crisp, slightly tart variety like Granny Smith or Honeycrisp for the best flavor.

Eggs: These act as a binder, giving the pancakes structure without flour. For a vegan version, flax eggs work well.

Milk: Any milk—dairy or plant-based—will do. Almond milk, oat milk, or even buttermilk add richness.

Cinnamon & nutmeg: These warm spices elevate the apple flavor, making every bite cozy and aromatic.

Baking powder: A little leavening ensures the pancakes rise beautifully, creating a light texture.

How to Make Healthy Oatmeal Apple Pancakes (Flourless & Easy) – Her Highness, Hungry Me

Follow these simple steps for perfect pancakes every time:

1. Blend the oats: Add rolled oats to a blender or food processor and pulse until a fine flour forms. This replaces traditional flour and ensures a smooth batter.

2. Combine wet ingredients: In a large bowl, whisk together eggs, milk, maple syrup, and vanilla extract until smooth.

3. Mix dry ingredients: In another bowl, stir the oat flour, baking powder, cinnamon, nutmeg, and a pinch of salt.

4. Grate the apple: Peel and grate a medium apple, then squeeze out excess moisture with a clean towel. This prevents soggy pancakes.

5. Bring it all together: Add the dry ingredients to the wet, mixing gently. Fold in the grated apple until just combined—don’t overmix.

6. Cook the pancakes: Heat a non-stick skillet over medium heat and lightly grease with butter or oil. Pour ¼ cup batter per pancake, cooking until bubbles form on the surface (about 2-3 minutes). Flip and cook another 1-2 minutes until golden.

7. Serve warm: Stack them high and top with fresh apple slices, a drizzle of maple syrup, or a dollop of Greek yogurt.

Pro Tips for the Best Results

For the fluffiest pancakes, let the batter rest for 5-10 minutes before cooking. This allows the oats to absorb the liquid and the baking powder to activate.

Use a non-stick skillet or griddle and maintain medium heat—too hot, and the outside will burn before the inside cooks.

If the batter thickens too much while resting, add a splash of milk to loosen it.

For extra flavor, toast the oats in a dry skillet for a few minutes before blending. This enhances their nuttiness.

Variations and Substitutions

These pancakes are wonderfully adaptable. Here are some delicious twists:

Vegan version: Replace eggs with flax eggs (1 tbsp ground flaxseed + 2.5 tbsp water per egg) and use plant-based milk.

Protein boost: Add a scoop of vanilla protein powder to the dry ingredients or serve with a side of almond butter.

Spice it up: Add a pinch of ginger or cardamom for extra warmth.

Berry delight: Fold in fresh blueberries or raspberries for a burst of color and tartness.

What to Serve With It

Pair these oatmeal apple pancakes with a side of crispy turkey bacon or scrambled eggs for a balanced breakfast. For a sweeter touch, top with:

– A dollop of whipped coconut cream

– A sprinkle of toasted walnuts or pecans

– Warm cinnamon applesauce

– A drizzle of almond butter or tahini

For drinks, a hot cup of chai tea or cold-pressed apple cider complements the flavors beautifully.

How to Store and Reheat

These pancakes store wonderfully for quick breakfasts throughout the week.

Refrigeration: Let pancakes cool completely, then store in an airtight container with parchment paper between layers. They’ll keep for up to 4 days.

Freezing: Freeze in a single layer on a baking sheet, then transfer to a freezer bag. They’ll last up to 3 months.

Reheating: Warm in a toaster, oven (300°F for 5-10 minutes), or microwave (20-30 seconds). For extra crispiness, reheat on a skillet with a bit of butter.

Frequently Asked Questions (FAQs)

Can I use steel-cut oats instead of rolled oats?

No, steel-cut oats are too dense and won’t blend into a fine flour. Stick with rolled oats for the best texture.

Can I make the batter the night before?

Yes, but the pancakes may be slightly denser. If prepping ahead, store the dry and wet ingredients separately and mix in the morning.

Why are my pancakes gummy?

This usually happens if the batter is overmixed or the apple wasn’t drained well. Gently fold ingredients and squeeze excess moisture from the grated apple.

Can I skip the egg?

Yes, use a flax egg or mashed banana as a binder, though the texture will be slightly different.

Final Thoughts

These Healthy Oatmeal Apple Pancakes prove that wholesome eating doesn’t mean sacrificing flavor or comfort. Whether you’re meal-prepping for busy mornings or treating yourself to a leisurely weekend brunch, this recipe is a winner. The aroma of cinnamon and apple wafting through your kitchen is just the bonus. Give them a try, and you might just find your new favorite breakfast. Happy cooking!

Print
clock clock iconcutlery cutlery iconflag flag iconfolder folder iconinstagram instagram iconpinterest pinterest iconfacebook facebook iconprint print iconsquares squares iconheart heart iconheart solid heart solid icon

Healthy Oatmeal Apple Pancakes (Flourless & Easy)

  • Author: Her Highness, Hungry Me

Description

These flourless oatmeal apple pancakes are a nutritious and delicious breakfast option. Made with wholesome ingredients like oats, apples, and eggs, they are naturally sweetened and packed with fiber. Perfect for a quick, healthy morning meal!


Ingredients

Scale

For the Crust:

  • For the pancakes:
  • 1 cup rolled oats
  • 1 medium apple, grated
  • 2 eggs
  • 1/2 cup milk (dairy or plant-based)
  • 1 tsp vanilla extract
  • 1 tsp cinnamon
  • 1/2 tsp baking powder
  • Pinch of salt
  • For toppings (optional):
  • Fresh apple slices
  • Maple syrup
  • Greek yogurt
  • Chopped nuts

Instructions

1. Prepare the Crust:

  1. 1. In a blender, blend the rolled oats until they form a fine flour-like consistency.
  2. 2. Transfer the oat flour to a mixing bowl and add the grated apple, eggs, milk, vanilla extract, cinnamon, baking powder, and salt. Mix well until combined.
  3. 3. Heat a non-stick skillet over medium heat and lightly grease with oil or butter.
  4. 4. Pour 1/4 cup of batter onto the skillet for each pancake. Cook for 2-3 minutes until bubbles form on the surface, then flip and cook for another 2 minutes until golden brown.
  5. 5. Repeat with the remaining batter.
  6. 6. Serve warm with optional toppings like fresh apple slices, maple syrup, Greek yogurt, or chopped nuts.

Notes

For a vegan version, substitute the eggs with flax eggs (1 tbsp ground flaxseed + 3 tbsp water per egg) and use plant-based milk. Store leftovers in an airtight container in the fridge for up to 2 days or freeze for longer storage.

How to Make the BEST Oatmeal Cookies

How to Make the BEST Oatmeal Cookies

There’s something undeniably comforting about a warm oatmeal cookie fresh from the oven—crispy edges, chewy centers, and that perfect balance of sweetness and spice. Whether you’re a seasoned baker or a beginner, this recipe for the best oatmeal cookies will become your new go-to. With simple ingredients and foolproof techniques, these cookies are guaranteed to impress. Let’s dive into what makes them so irresistible.

Why You’ll Love This Recipe

If you’re looking for a cookie recipe that delivers perfection every time, here’s why this one stands out:

  • Perfect Texture: These oatmeal cookies strike the ideal balance between crispy edges and soft, chewy centers, making them irresistible straight from the oven or days later.
  • Simple Ingredients: No fancy or hard-to-find ingredients here—just pantry staples that come together to create something extraordinary.
  • Customizable: Whether you love raisins, chocolate chips, or nuts, this recipe is a fantastic base for endless variations.
  • Crowd-Pleasing: Loved by kids and adults alike, these cookies are perfect for bake sales, holiday gatherings, or a cozy afternoon snack.
  • Easy to Make: No complicated steps or special equipment required—just mix, scoop, and bake for delicious results every time.

Ingredients Breakdown

Understanding the role of each ingredient helps you bake with confidence. Here’s what you’ll need and why:

  • Rolled Oats: The star of the show, rolled oats provide structure and chewiness. Avoid instant oats, as they won’t give the same hearty texture.
  • Butter: Unsalted butter adds richness and helps create that perfect crispy edge. Make sure it’s softened to room temperature for easy mixing.
  • Brown Sugar: Using both brown and white sugar ensures a deep caramel flavor while keeping the cookies moist. The molasses in brown sugar is key for chewiness.
  • Eggs: Eggs bind everything together and contribute to the soft, tender crumb.
  • Vanilla Extract: A splash of pure vanilla enhances the warm, comforting flavors of the oats and spices.
  • Cinnamon: A touch of cinnamon adds warmth and depth, complementing the sweetness perfectly.
  • Baking Soda: This leavening agent helps the cookies rise slightly, ensuring they’re not too dense.
  • Salt: A pinch of salt balances the sweetness and enhances all the other flavors.

How to Make the BEST Oatmeal Cookies

Follow these simple steps for oatmeal cookie perfection:

  1. Cream the Butter and Sugars: In a large mixing bowl, beat together softened butter, brown sugar, and granulated sugar until light and fluffy. This step incorporates air, which helps create a tender cookie.
  2. Add Eggs and Vanilla: Beat in the eggs one at a time, followed by the vanilla extract. Mix until fully combined, but avoid overmixing.
  3. Combine Dry Ingredients: In a separate bowl, whisk together flour, baking soda, cinnamon, and salt. Gradually add this mixture to the wet ingredients, mixing just until incorporated.
  4. Fold in the Oats: Stir in the rolled oats until evenly distributed. If adding mix-ins like raisins or chocolate chips, fold them in now.
  5. Chill the Dough: For best results, cover the dough and refrigerate for at least 30 minutes. This prevents the cookies from spreading too much while baking.
  6. Preheat and Scoop: Preheat your oven to 350°F (175°C). Line baking sheets with parchment paper and scoop tablespoon-sized portions of dough, spacing them about 2 inches apart.
  7. Bake to Perfection: Bake for 10–12 minutes, or until the edges are golden but the centers are still slightly soft. Let them cool on the baking sheet for 5 minutes before transferring to a wire rack.

Pro Tips for the Best Results

Want to take your oatmeal cookies to the next level? Try these expert tips:

  • Use Room Temperature Butter: Softened butter creams more easily with sugar, leading to a better texture. If you forget to take it out ahead of time, microwave it in 5-second bursts.
  • Don’t Skip the Chill Time: Chilling the dough solidifies the butter, preventing flat cookies. For even better flavor, let it rest overnight.
  • Measure Flour Correctly: Spoon flour into your measuring cup and level it off—packing it down can make the cookies dry and dense.
  • Underbake Slightly: The cookies will continue to cook on the hot baking sheet, so pull them out when they look just set for the perfect chewiness.
  • Add a Pinch of Nutmeg: For extra warmth, a tiny bit of nutmeg complements the cinnamon beautifully.

Variations and Substitutions

This recipe is wonderfully adaptable. Here are some delicious ways to mix it up:

  • Chocolate Chip Oatmeal Cookies: Swap raisins for semi-sweet or dark chocolate chips for a classic twist.
  • Nutty Delight: Add chopped walnuts, pecans, or almonds for extra crunch.
  • Gluten-Free Option: Use a 1:1 gluten-free flour blend and certified gluten-free oats.
  • Vegan Version: Replace butter with coconut oil and eggs with flax eggs (1 tbsp ground flaxseed + 3 tbsp water per egg).
  • Spiced Apple: Fold in finely diced dried apples and a dash of apple pie spice for a fall-inspired treat.

What to Serve With It

Oatmeal cookies are delicious on their own, but here are some perfect pairings:

  • Milk: A classic choice—dunk your cookies in cold milk for the ultimate nostalgic experience.
  • Coffee or Tea: Enjoy with a hot cup of coffee or spiced chai for a cozy afternoon break.
  • Ice Cream: Sandwich a scoop of vanilla ice cream between two cookies for an indulgent dessert.
  • Fruit Compote: Serve alongside warm cinnamon-spiced apples or berry compote for a dessert platter.

How to Store and Reheat

Keep your oatmeal cookies fresh with these storage tips:

  • Room Temperature: Store in an airtight container at room temperature for up to 5 days. A slice of bread can help maintain softness.
  • Freezing Dough: Scoop dough balls onto a baking sheet, freeze until solid, then transfer to a freezer bag. Bake straight from frozen, adding 1–2 extra minutes.
  • Freezing Baked Cookies: Layer cooled cookies between parchment paper in a freezer-safe container for up to 3 months. Thaw at room temperature or warm in a 300°F oven for 5 minutes.

Frequently Asked Questions (FAQs)

Here are answers to common oatmeal cookie questions:

Can I use quick oats instead of rolled oats?
Quick oats will work, but the texture will be softer and less chewy. For the best results, stick with old-fashioned rolled oats.

Why did my cookies spread too much?
This usually happens if the butter was too soft or the dough wasn’t chilled. Make sure to refrigerate the dough before baking.

Can I make these cookies without eggs?
Yes, substitute each egg with a flax egg (1 tbsp ground flaxseed + 3 tbsp water) for a vegan-friendly version.

How do I make my cookies extra soft?
Slightly underbake them and store them with a piece of bread in the container to retain moisture.

Can I double this recipe?
Absolutely! This recipe scales well—just make sure your mixing bowl is large enough to accommodate the extra ingredients.

Final Thoughts

There’s a reason oatmeal cookies are a timeless favorite—they’re simple, satisfying, and endlessly adaptable. Whether you stick to the classic recipe or experiment with add-ins, these cookies are sure to become a staple in your baking repertoire. The next time you’re craving something sweet and wholesome, whip up a batch and enjoy the comforting aroma filling your kitchen. Happy baking!

Print
clock clock iconcutlery cutlery iconflag flag iconfolder folder iconinstagram instagram iconpinterest pinterest iconfacebook facebook iconprint print iconsquares squares iconheart heart iconheart solid heart solid icon

How to Make the BEST Oatmeal Cookies

  • Author: Cookie Master

Description

These oatmeal cookies are soft, chewy, and packed with flavor. Perfect for breakfast or a sweet snack, they’re easy to make and loved by everyone!


Ingredients

Scale

For the Crust:

  • For the dry ingredients:
  • 1 1/2 cups all-purpose flour
  • 1 teaspoon baking soda
  • 1 teaspoon ground cinnamon
  • 1/2 teaspoon salt
  • For the wet ingredients:
  • 1 cup unsalted butter, softened
  • 1 cup packed brown sugar
  • 1/2 cup granulated sugar
  • 2 large eggs
  • 2 teaspoons vanilla extract
  • For the mix-ins:
  • 3 cups old-fashioned rolled oats
  • 1 cup raisins or chocolate chips (optional)

Instructions

1. Prepare the Crust:

  1. 1. Preheat oven to 350°F (175°C) and line baking sheets with parchment paper.
  2. 2. In a medium bowl, whisk together the flour, baking soda, cinnamon, and salt. Set aside.
  3. 3. In a large bowl, beat the butter, brown sugar, and granulated sugar until light and fluffy.
  4. 4. Add the eggs one at a time, beating well after each addition. Stir in the vanilla.
  5. 5. Gradually add the dry ingredients to the wet mixture, mixing until just combined.
  6. 6. Fold in the oats and raisins or chocolate chips (if using).
  7. 7. Drop rounded tablespoons of dough onto the prepared baking sheets, spacing them 2 inches apart.
  8. 8. Bake for 10-12 minutes, or until the edges are golden but the centers are still soft.
  9. 9. Let cool on the baking sheets for 5 minutes, then transfer to a wire rack to cool completely.

Notes

For extra chewy cookies, slightly underbake them. Store in an airtight container for up to 5 days or freeze for longer storage.

Peanut Butter Granola Bars – 3 Ingredient!

Peanut Butter Granola Bars – 3 Ingredient!

There’s something magical about a recipe that delivers big flavor with minimal effort. These Peanut Butter Granola Bars are proof that simplicity can be delicious. With just three ingredients and no baking required, they’re the perfect snack for busy mornings, post-workout fuel, or a quick energy boost anytime. Whether you’re a seasoned home cook or a beginner in the kitchen, this recipe is foolproof and endlessly adaptable. Let’s dive into why these bars are a must-try and how you can make them your own.

Why You’ll Love This Recipe

First, let’s talk about why these peanut butter granola bars deserve a permanent spot in your snack rotation.

  • Minimal Ingredients: With just three pantry staples, you can whip up a batch without a last-minute grocery run.
  • No-Bake Convenience: Skip the oven—these bars set in the fridge, making them perfect for hot summer days or when you’re short on time.
  • Customizable: Add-ins like chocolate chips, dried fruit, or seeds let you tailor the bars to your taste.
  • Kid-Friendly: A healthy snack that kids love? Yes, please! These bars are great for lunchboxes or after-school treats.
  • Meal Prep Dream: Make a big batch on Sunday, and you’ll have grab-and-go snacks all week.

Ingredients Breakdown

Let’s take a closer look at the three key ingredients that make these granola bars so irresistible.

  • Peanut Butter: The star of the show! Opt for natural peanut butter with no added sugars or oils for the best texture and flavor. Its creamy richness binds the bars together while adding protein and healthy fats.
  • Honey: This natural sweetener brings a touch of floral sweetness and helps the bars hold their shape. If you prefer, maple syrup works just as well for a vegan version.
  • Rolled Oats: The backbone of the recipe, oats provide fiber and a satisfying chew. Be sure to use old-fashioned rolled oats—quick oats can turn mushy, and steel-cut oats won’t soften enough.

How to Make Peanut Butter Granola Bars – 3 Ingredient!

Ready to make these easy peanut butter granola bars? Follow these simple steps for perfect results every time.

  1. Mix the Wet Ingredients: In a large bowl, combine 1 cup of creamy peanut butter and 1/2 cup of honey. Warm them slightly in the microwave for 20-30 seconds if they’re too thick to stir easily.
  2. Add the Oats: Stir in 2 cups of rolled oats until everything is evenly coated. The mixture should be thick but pliable—if it feels too dry, add a splash more honey or peanut butter.
  3. Press into a Pan: Line an 8×8-inch baking dish with parchment paper. Transfer the mixture to the pan and press it down firmly with a spatula or your hands to create an even layer.
  4. Chill to Set: Refrigerate for at least 2 hours, or until the bars are firm. This step is crucial for getting clean slices.
  5. Slice and Serve: Lift the bars out of the pan using the parchment paper. Cut into squares or rectangles and enjoy!

Pro Tips for the Best Results

Want to take your peanut butter granola bars to the next level? Try these expert tips.

  • Toast the Oats: For deeper flavor, spread the oats on a baking sheet and toast them at 350°F for 10 minutes before mixing.
  • Use a Warm Knife: Dip your knife in hot water before slicing to get cleaner edges.
  • Double the Batch: These bars freeze beautifully, so make extra for future snacking.
  • Press Firmly: The harder you press the mixture into the pan, the less likely the bars will crumble.

Variations and Substitutions

One of the best things about this recipe is how easily you can customize it. Here are some delicious twists to try.

  • Chocolate Lovers: Stir in 1/4 cup of mini chocolate chips or drizzle melted chocolate over the top.
  • Nut-Free: Swap peanut butter for sunflower seed butter and use maple syrup instead of honey.
  • Crunchy Texture: Add 1/4 cup of chopped nuts or seeds like almonds, pumpkin seeds, or chia seeds.
  • Fruity: Mix in dried cranberries, raisins, or chopped dates for a sweet-tart contrast.

What to Serve With It

These peanut butter granola bars are fantastic on their own, but they also pair well with other foods.

  • Yogurt Parfait: Crumble a bar over Greek yogurt and fresh berries for a protein-packed breakfast.
  • Smoothie Companion: Enjoy with a banana-almond smoothie for a balanced snack.
  • Ice Cream Topping: Warm a bar slightly and serve alongside vanilla ice cream for a decadent dessert.

How to Store and Reheat

To keep your granola bars fresh and delicious, follow these storage tips.

  • Room Temperature: Store in an airtight container for up to 5 days.
  • Refrigerator: They’ll last up to 2 weeks in the fridge—great for longer storage.
  • Freezer: Wrap individual bars in parchment paper and freeze for up to 3 months. Thaw at room temperature before eating.

Frequently Asked Questions (FAQs)

Here are answers to some common questions about this recipe.

  • Can I use instant oats instead of rolled oats? Instant oats will work, but the texture will be softer. Rolled oats provide the best chew.
  • Why are my bars falling apart? If the mixture isn’t pressed firmly enough or hasn’t chilled long enough, the bars may crumble. Press well and chill thoroughly.
  • Are these bars gluten-free? Yes, as long as you use certified gluten-free oats.
  • Can I reduce the sweetness? Absolutely! Cut the honey to 1/3 cup or use a sugar-free syrup alternative.

Final Thoughts

These 3-ingredient peanut butter granola bars are proof that great things come in simple packages. Whether you’re looking for a quick breakfast, a post-gym snack, or a lunchbox staple, they deliver on flavor, convenience, and nutrition. The best part? You can make them your own with endless variations. So grab your ingredients, mix up a batch, and enjoy the satisfaction of homemade goodness with minimal effort. Happy snacking!

Print
clock clock iconcutlery cutlery iconflag flag iconfolder folder iconinstagram instagram iconpinterest pinterest iconfacebook facebook iconprint print iconsquares squares iconheart heart iconheart solid heart solid icon

Peanut Butter Granola Bars – 3 Ingredient!

  • Author: Simple Eats Kitchen

Description

These easy 3-ingredient peanut butter granola bars are perfect for a quick snack or breakfast on the go. They’re naturally sweetened, gluten-free, and packed with protein for lasting energy.


Ingredients

Scale

For the Crust:

  • For the bars:
  • 1 cup natural peanut butter (creamy or crunchy)
  • 1/3 cup honey (or maple syrup for vegan option)
  • 2 cups rolled oats (gluten-free if needed)

Instructions

1. Prepare the Crust:

  1. 1. Line an 8×8 inch baking pan with parchment paper, leaving overhang on the sides for easy removal.
  2. 2. In a medium saucepan over low heat, warm the peanut butter and honey together, stirring until smooth and well combined (about 2-3 minutes).
  3. 3. Remove from heat and stir in the oats until fully coated.
  4. 4. Transfer the mixture to the prepared pan, pressing down firmly with the back of a spoon or spatula to create an even layer.
  5. 5. Refrigerate for at least 2 hours (or freeze for 30 minutes) until firm.
  6. 6. Lift the bars out using the parchment overhang and cut into 10-12 bars. Store in an airtight container in the refrigerator for up to 1 week.

Notes

For variations: add chocolate chips, dried fruit, or seeds. Bars will soften at room temperature – best served chilled.